This document explains how to configure the Amazon Security Lake v2.0.0 plugin in the Cloud Exchange platform. This plugin fetches Alerts (DLP, Malware, Policy, Compromised Credential, Malsite, Quarantine, Remediation, Security Assessment, Watchlist, UBA, CTEP, Device, and Content), Events (Page, Application, Audit, Infrastructure, Network, Incident, Endpoint and Client Status) and WebTx [via Netskope LogStreaming] logs. The data will be ingested in the Amazon Security Lake Custom Source bucket. This plugin does not support ingestion of data in raw JSON format.
Note
For IAM Roles Anywhere Authentication, we have validated this plugin with a single AWS Account.
Prerequisites
To complete this configuration, you need:
- A Netskope tenant (or multiple, for example, production and development/test instances).
- A Netskope Cloud Exchange tenant with the Tenant plugin and Log Shipper plugin already configured.
- A Netskope Cloud Exchange tenant with the AWS Netskope LogStreaming or Azure Netskope LogStreaming plugin already configured.
- An Amazon Security Lake enabled AWS account.
- Auto generated S3 bucket for Amazon Security Lake
- References:
https://docs.aws.amazon.com/security-lake/latest/userguide/
https://aws.amazon.com/security-lake
- Access for AWS Athena, AWS Glue, AWS Lake formation, Creating Policy and Role on AWS.
Amazon Security Lake Plugin Support
This plugin supports ingestion of Alerts, Events and WebTx logs. The data will be ingested in the Amazon Security Lake Custom Source bucket. This plugin does not support ingestion of data in raw JSON format.
| Data Type | Support |
|---|---|
| Events | Yes (Page, Application, Audit, Infrastructure, Network, Endpoint, Incident and Client Status) |
| Alerts | Yes (DLP, Malware, Policy, Compromised Credential, Malsite, Quarantine, Remediation, Security Assessment, Watchlist, UBA, CTEP, Device, and Content) |
| WebTx | Yes (via Netskope LogStreaming) |
Note:
- CLS WebTX based on Google Pub Sub Lite is deprecated. Please refer to Netskope Product EOL/EOS Announcements – Netskope Knowledge Portal
- For ingesting WebTX logs to your Log delivery destinations like SIEM, SOAR, XDR, Data Lake, use the AWS Netskope LogStreaming or Azure Netskope LogStreaming plugin.
Performance Matrix
This performance reading is for a Large Cloud Exchange Stack with these VM specifications.
| Description | Specification |
|---|---|
| Stack Size | Large
RAM: 32 GB Core: 16 |
| Alerts/Events | ~ 50k EPM |
Note: Each raw data has an average size of 2 KB.
Mappings
OCSF Class Mappings for Default Mapping file
The following table describes the OCSF class mappings for Default Mapping file applied to Netskope Alert, Event, and WebTx types when data is ingested from a Netskope tenant.
Note: Default Mapping file will be using OCSF v1.3.0
| Type | Netskope Alert/Event/Webtx Name | OCSF Class |
|---|---|---|
| Alert | Compromised Credential | Data Security Finding [2006] |
| Content | Data Security Finding [2006] | |
| CTEP | Detection Finding [2004] | |
| Device | Detection Finding [2004] | |
| DLP | Data Security Finding [2006] | |
| Malsite | Detection Finding [2004] | |
| Malware | Detection Finding [2004] | |
| Policy | Detection Finding [2004] | |
| Quarantine | Detection Finding [2004] | |
| Remediation | Detection Finding [2004] | |
| Security Assessment | Data Security Finding [2006] | |
| UBA | Detection Finding [2004] | |
| Watchlist | Detection Finding [2004] | |
| Event | Application | Application Lifecycle [6002] |
| Audit | Event Log Activity [1008] | |
| Client Status | Detection Finding [2004] with host profile | |
| Endpoint | Detection Finding [2004] | |
| Incident | Detection Finding [2004] | |
| Infrastructure | Application Lifecycle [6002] | |
| Network | Network Activity [4001] | |
| Page | Detection Finding [2004] | |
| Webtx | Transaction | Network Activity [4001] with Network Proxy profile |
Note
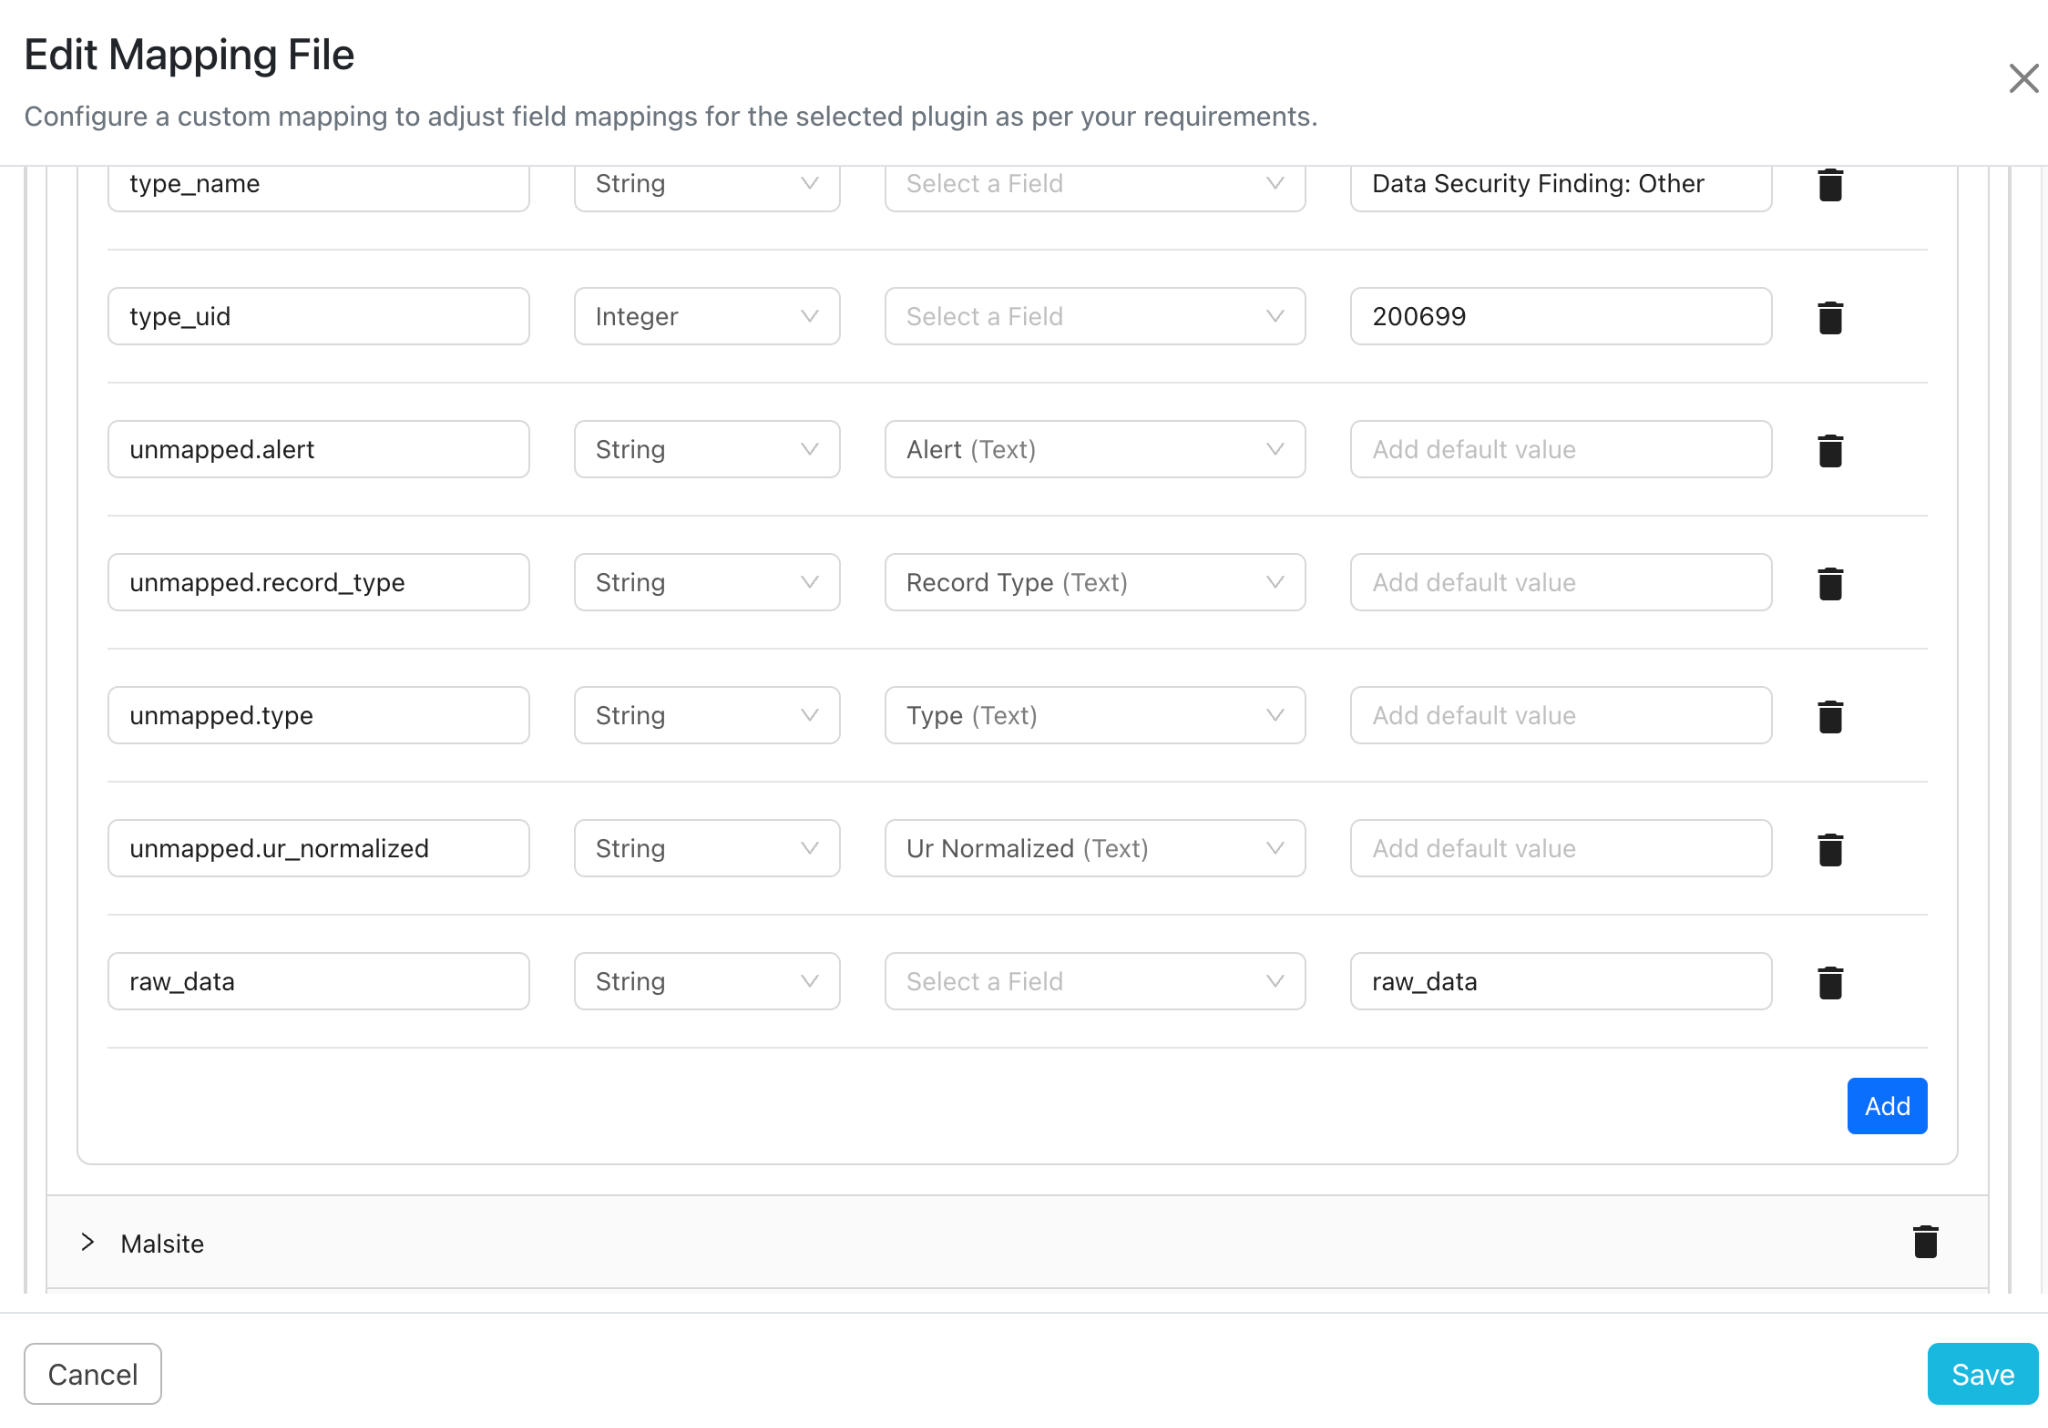
In the default mapping file, raw_data is not mapped for all alerts, events and webtx. If a user wants to send raw alert/event/webtx then they need to create a custom mapping with raw_data field mapped to default value as ‘raw_data’ for each alert/event/webtx type.
Below is the example where Compromised Credential has raw_data field mapped with ‘raw_data’ default value:
Data Type Mappings
Here is the methodology followed for mapping Netskope fields to OCSF fields, and the corresponding transformations used. If new fields need to be added, the same can be used for consistency.
| Example Netskope Fields | Transformation | Expected OCSF Field Type | Example Values |
|---|---|---|---|
| Values with Strings, For e.g. file paths, domain names, UUIDs,descriptions, comments and complex nested Objects | String | string_t | “\\printserver\\printer”,5182808a2a99fc688d4a8057,”{\”access_method\”: \”API Connector\”, \”AccountType\”: \”SAML\”}” |
| Values with Datetime, For e.g. src_time, last_event_timestamp, last_update_timestamp | Time Stamp | timestamp_t (Integer) | 1768804071000 |
| Values with Integers. For e.g. port, threshold, event counts or transaction ids | Integer | integer_t | 404, 27017 |
| Values requiring precision, For e.g. src_latitude, src_longitude | Floating Point | float_t | -3.6029212e+24,2.77645e+23 |
Configuration on AWS while using Custom Mappings
Security Lake expects a consistent parquet schema for all the files uploaded to S3. This ensures that the Glue Crawlers are able to infer the table schemas from the parquet files without errors.
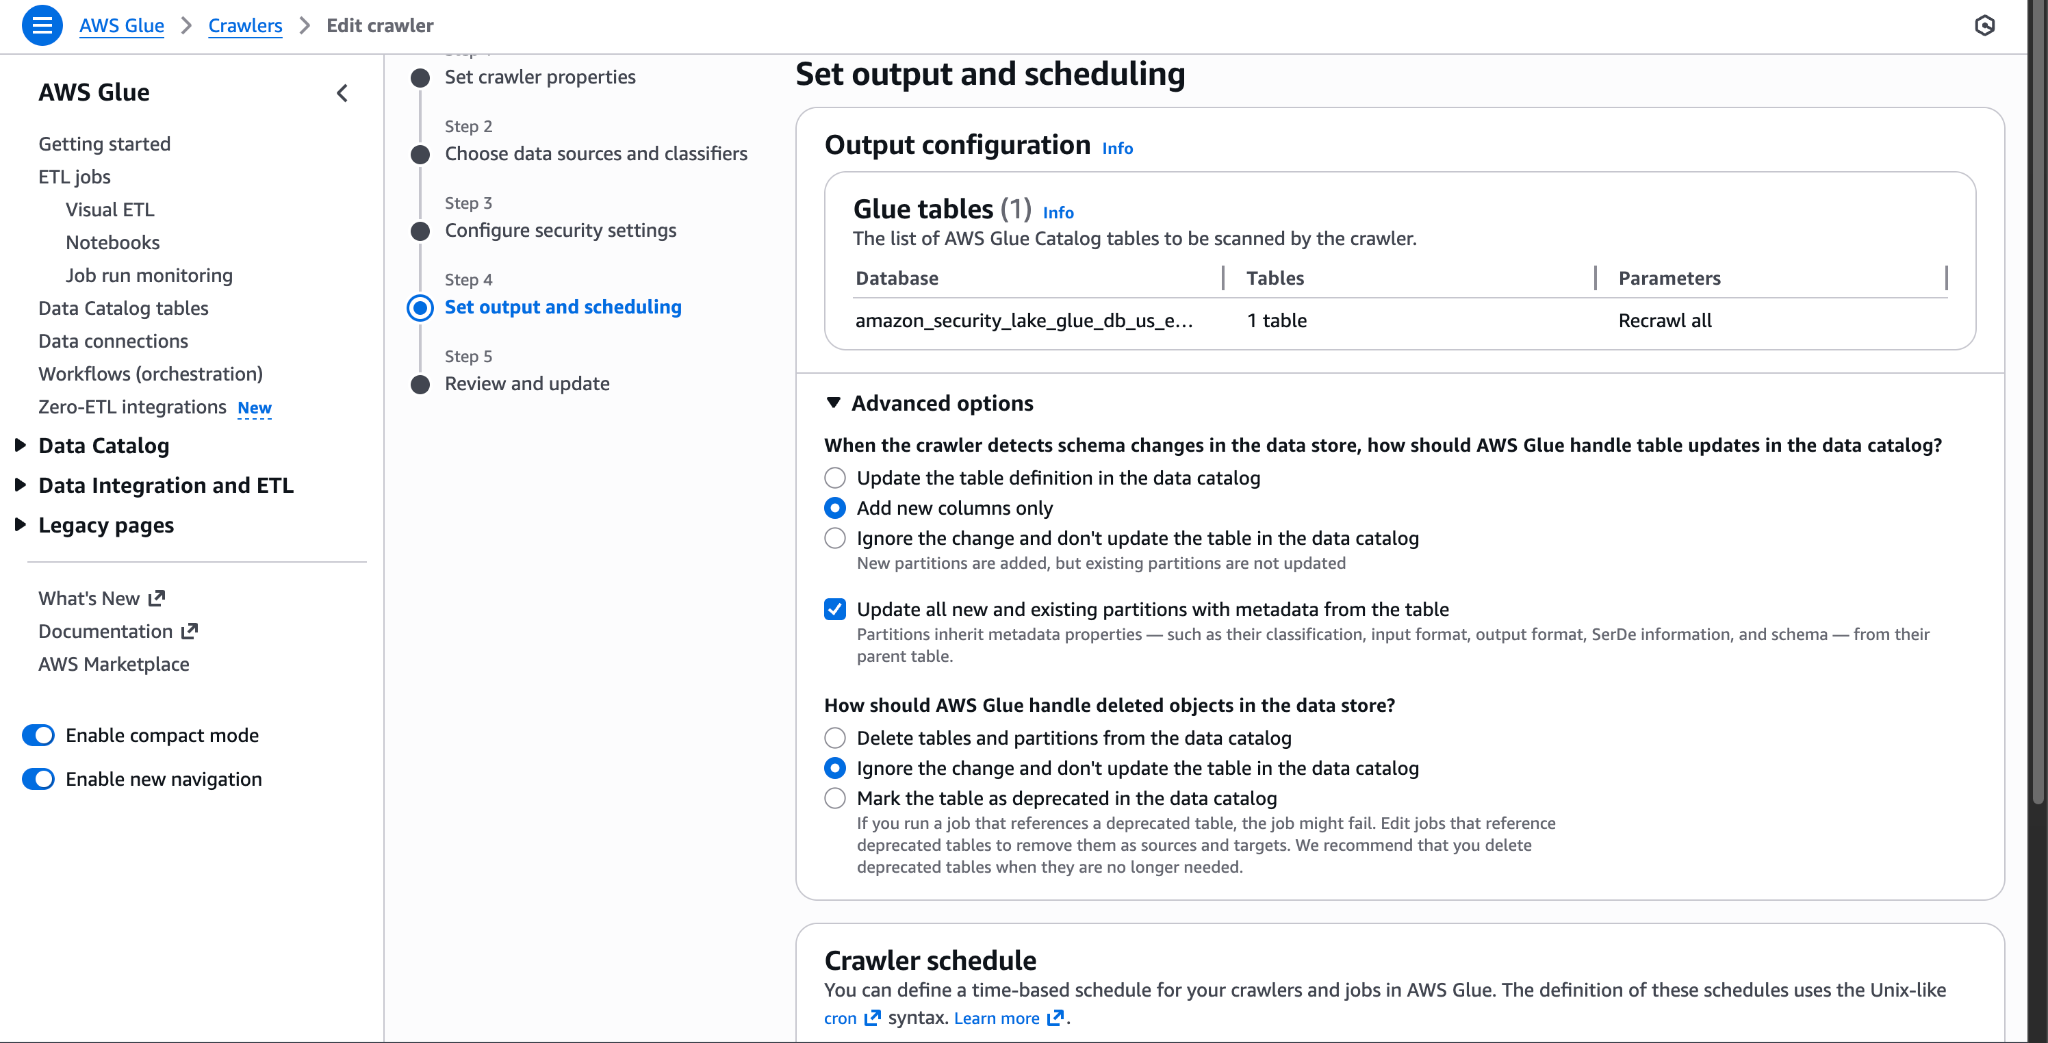
If using a custom mapping or updating the provided mapping schema while parquets have already been uploaded, there are chances that the schema of the files no longer stays consistent. Meaning, columns existing in some files do not exist in others, or some files contain extra columns. When querying such partitions in Athena there are chances of running into the HIVE_PARTITION_SCHEMA_MISMATCH errors. Please make sure to edit the Glue Crawlers before moving to a custom mapping so that these errors can be avoided. This update needs to be done for Crawlers of every event/alert/webtx type that has different schemas between parquet files:
- To edit the Crawler, go to Set Output and Scheduling > Advanced Options.
- For When the crawler detects schema changes in the data store, how should AWS Glue handle table updates in the data catalog?, select Add new columns only.
- Enable the toggle for Update all new and existing partitions with metadata from the table.
- Click Next > Update.
API Details
Library: The AWS SDK for Python (Boto3)
Usage: The AWS SDK for Python (Boto3) to create, configure, and manage AWS services, such as Amazon Security Lake, Amazon Simple Storage Service (Amazon S3) and Amazon Amazon Security Token Service (STS). The SDK provides an object-oriented API as well as low-level access to AWS services.
The plugin uses the SDK to perform actions such as Listing Custom Log Sources, Creating Custom Log Sources in Security Lake, Assuming Provider Role which enables uploading to S3, and then uploading parquet files to S3.
Creating a Security Lake Client
securitylake_client = boto3.client(
         "securitylake",
         aws_access_key_id=self.aws_public_key,
         aws_secret_access_key=self.aws_private_key,
         aws_session_token=self.aws_session_token,
         region_name=self.configuration.get("region_name").strip(),
         config=Config(
             proxies=self.proxy,
             user_agent=USER_AGENT,
             read_timeout=READ_TIMEOUT,
             retries={"max_attempts": MAX_RETRIES, "mode": "standard"},
         ),
    )
Using the Security Lake Client to list/create Custom Log Sources
securitylake_client.list_log_sources()
securitylake_client.create_custom_log_source(**request_params)
Creating an STS Client
sts_client = boto3.client(
         "sts",
         aws_access_key_id=self.aws_public_key,
         aws_secret_access_key=self.aws_private_key,
         aws_session_token=self.aws_session_token,
         region_name=self.configuration.get("region_name").strip(),
         config=Config(
             proxies=self.proxy,
             user_agent=USER_AGENT,
             read_timeout=READ_TIMEOUT,
             retries={"max_attempts": MAX_RETRIES, "mode": "standard"},
         ),
    )
Using the STS Client to Assume a Provider Role
response = sts_client.assume_role(
         RoleArn=role_arn,
         RoleSessionName=role_session_name,
         ExternalId=external_id,
         DurationSeconds=ASSUMED_ROLE_DURATION_SECONDS,
)
Creating an S3 Client
s3_client = boto3.client(
         "s3",
         aws_access_key_id=self.aws_public_key,
         aws_secret_access_key=self.aws_private_key,
         aws_session_token=self.aws_session_token,
         region_name=self.configuration.get("region_name").strip(),
         config=Config(
             proxies=self.proxy,
             user_agent=USER_AGENT,
             read_timeout=READ_TIMEOUT,
             retries={"max_attempts": MAX_RETRIES, "mode": "standard"},
         ),
    )
Using an S3 Client to Upload Files
s3_client.upload_file(file_path, bucket_name, s3_key)
Applicable only for IAM Roles Anywhere
Creating IAM Client
iam_client = boto3.client(
         "iam",
         aws_access_key_id=self.aws_public_key,
         aws_secret_access_key=self.aws_private_key,
         aws_session_token=self.aws_session_token,
         region_name=self.configuration.get("region_name").strip(),
         config=Config(
             proxies=self.proxy,
             user_agent=USER_AGENT,
             read_timeout=READ_TIMEOUT,
             retries={"max_attempts": MAX_RETRIES, "mode": "standard"},
         ),
    )
Updating the Provider Role’s trust policy
role = iam_client.get_role(RoleName=role_name)
iam_client.update_assume_role_policy(RoleName=role_name, PolicyDocument=json.dumps(trust_policy))
User Agent
APN/1.1 (ahq9d89xj9gspapczzdb59goq)
Workflow
- Configuration on AWS.
- Configure the CLS Amazon Security Lake Plugin.
- Configure a Business Rule for AWS Security Lake.
- Add a Log Delivery configuration for AWS Security Lake.
- Validate the AWS Security Lake plugin.
Watch a Video
Click play to watch a video.
Configure AWS
Using the AWS Plugin Authentication Method
Create a Policy
- Go to IAM > Policies and click Create policy.
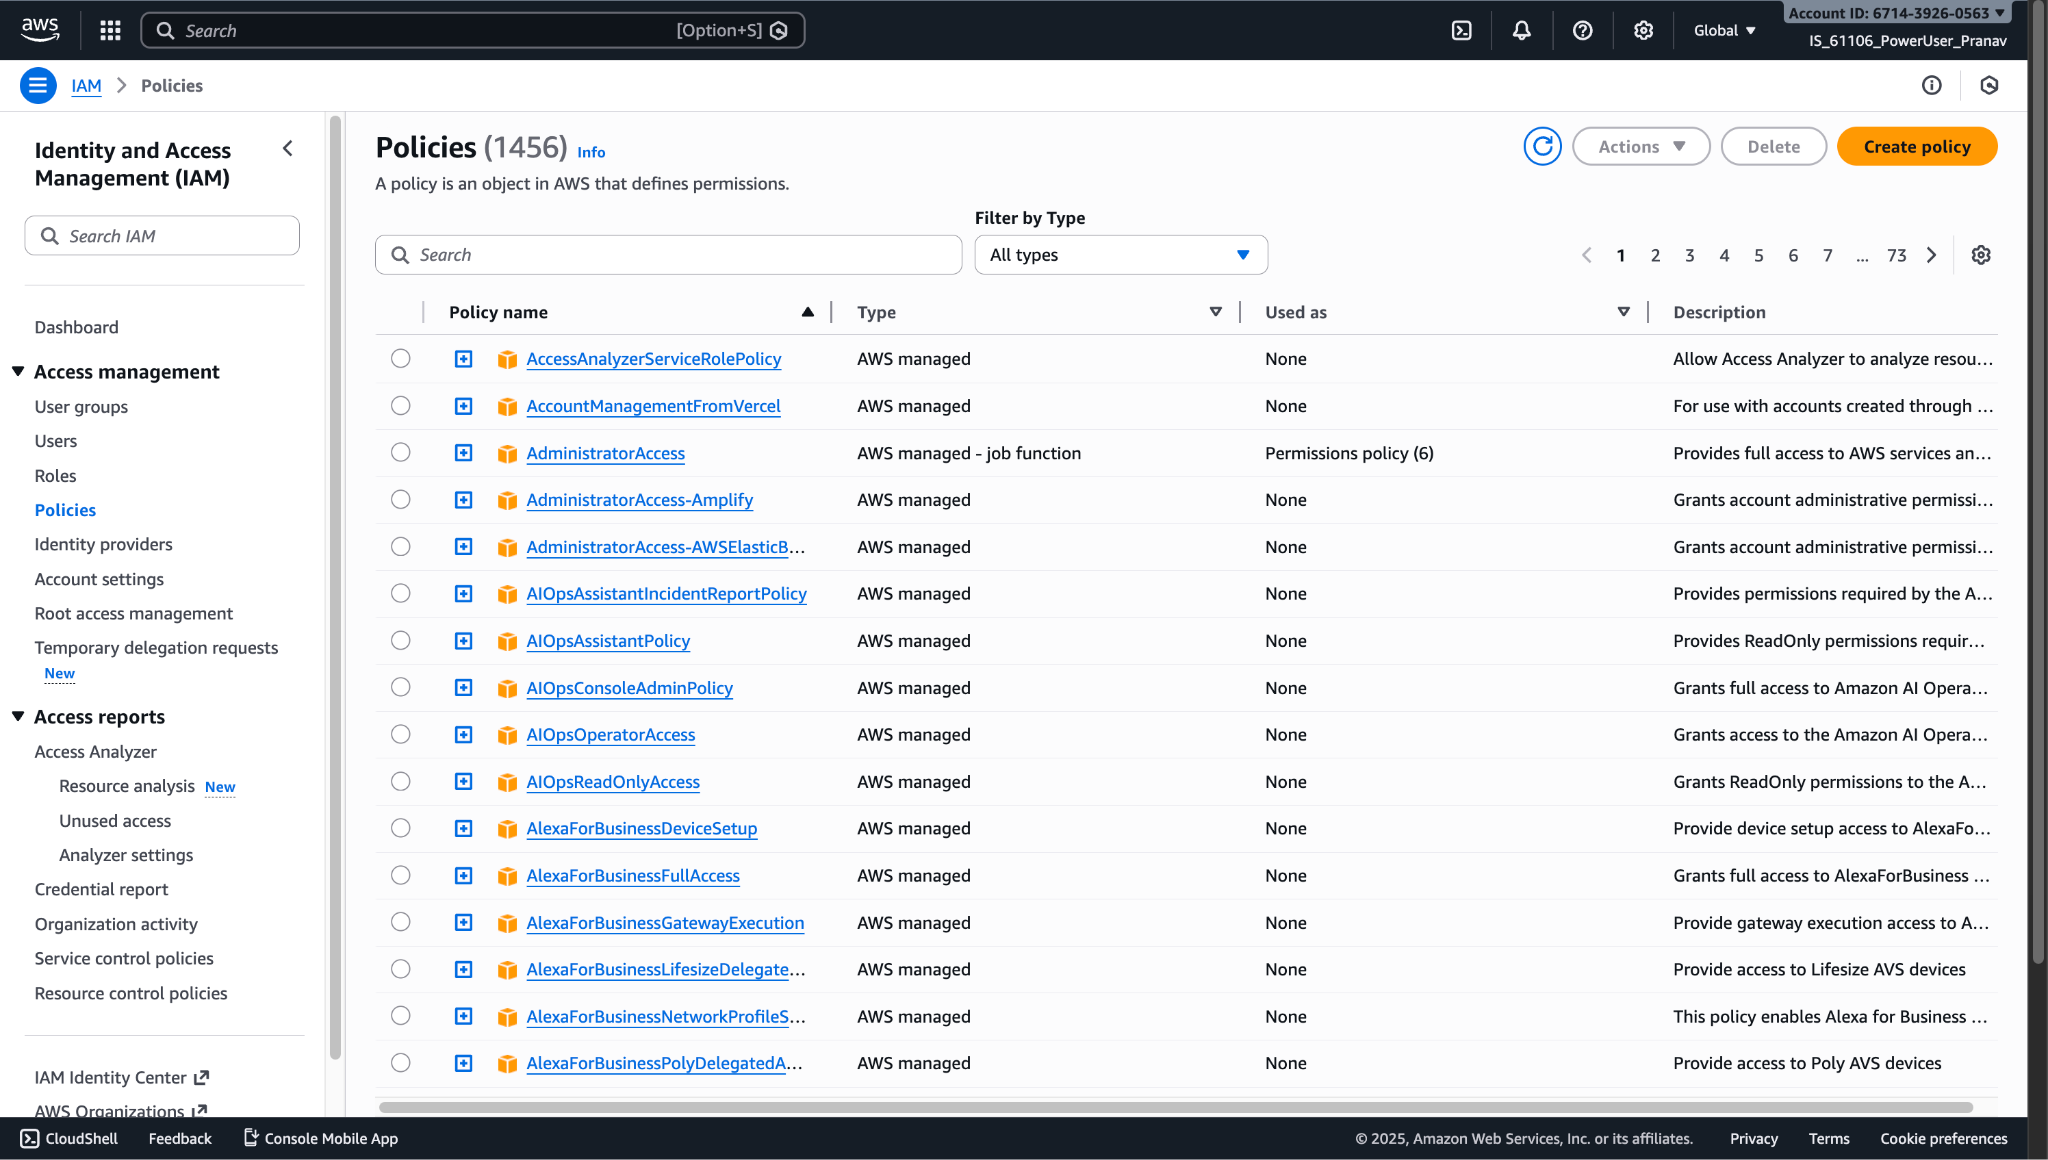
- Add these permissions as JSON.
{
    "Version": "2012-10-17",
    "Statement": [
        {
            "Sid": "SecurityLakePerms",
            "Effect": "Allow",
            "Action": [
                "securitylake:CreateCustomLogSource",
                "securitylake:ListLogSources",
                "securitylake:GetDataLakeSources",
                "securitylake:ListDataLakes"
            ],
            "Resource": "*"
        },
        {
            "Sid": "LakeFormationPerms",
            "Effect": "Allow",
            "Action": [
                "lakeformation:RegisterResource",
                "lakeformation:GrantPermissions",
                "lakeformation:GetDataLakeSettings"
            ],
            "Resource": "*"
        },
        {
            "Sid": "GluePerms",
            "Effect": "Allow",
            "Action": [
                "glue:CreateTable",
                "glue:CreateDatabase",
                "glue:CreateCrawler",
                "glue:UpdateCrawler",
                "glue:UpdateDatabase",
                "glue:UpdateTable",
                "glue:StartCrawlerSchedule",
                "glue:GetDatabase",
                "glue:GetDatabases",
                "glue:GetTable",
                "glue:GetTables",
                "glue:GetTableVersion",
                "glue:GetTableVersions",
                "glue:GetPartition",
                "glue:GetPartitions"
            ],
            "Resource": "*"
        },
        {
            "Sid": "AllowAssumeSecurityLakeProviderRole",
            "Effect": "Allow",
            "Action": [
                "sts:AssumeRole",
                "sts:SetSourceIdentity",
                "sts:TagSession"
            ],
            "Resource": [
                "arn:aws:iam::[aws-account-id]:role/AmazonSecurityLake-Provider-*"
            ]
        },
        {
            "Sid": "AllowPassAndReadRoleForCrawler",
            "Effect": "Allow",
            "Action": [
                "iam:PassRole",
                "iam:GetRole",
                "iam:CreateRole",
                "iam:PutRolePolicy",
                "iam:ListRolePolicies",
                "iam:DeleteRole",
                "iam:DeleteRolePolicy"
            ],
            "Resource": "*"
        },
        {
            "Sid": "S3Perms",
            "Effect": "Allow",
            "Action": [
                "s3:ListBucket",
                "s3:PutObject",
                "s3:CreateBucket",
                "s3:ListAllMyBuckets",
                "s3:GetBucketLocation",
                "s3:GetBucketPolicy"
            ],
            "Resource": "*"
        }
    ]
}
Note
Make sure you replace the AWS Account Id in the above policy before using it.
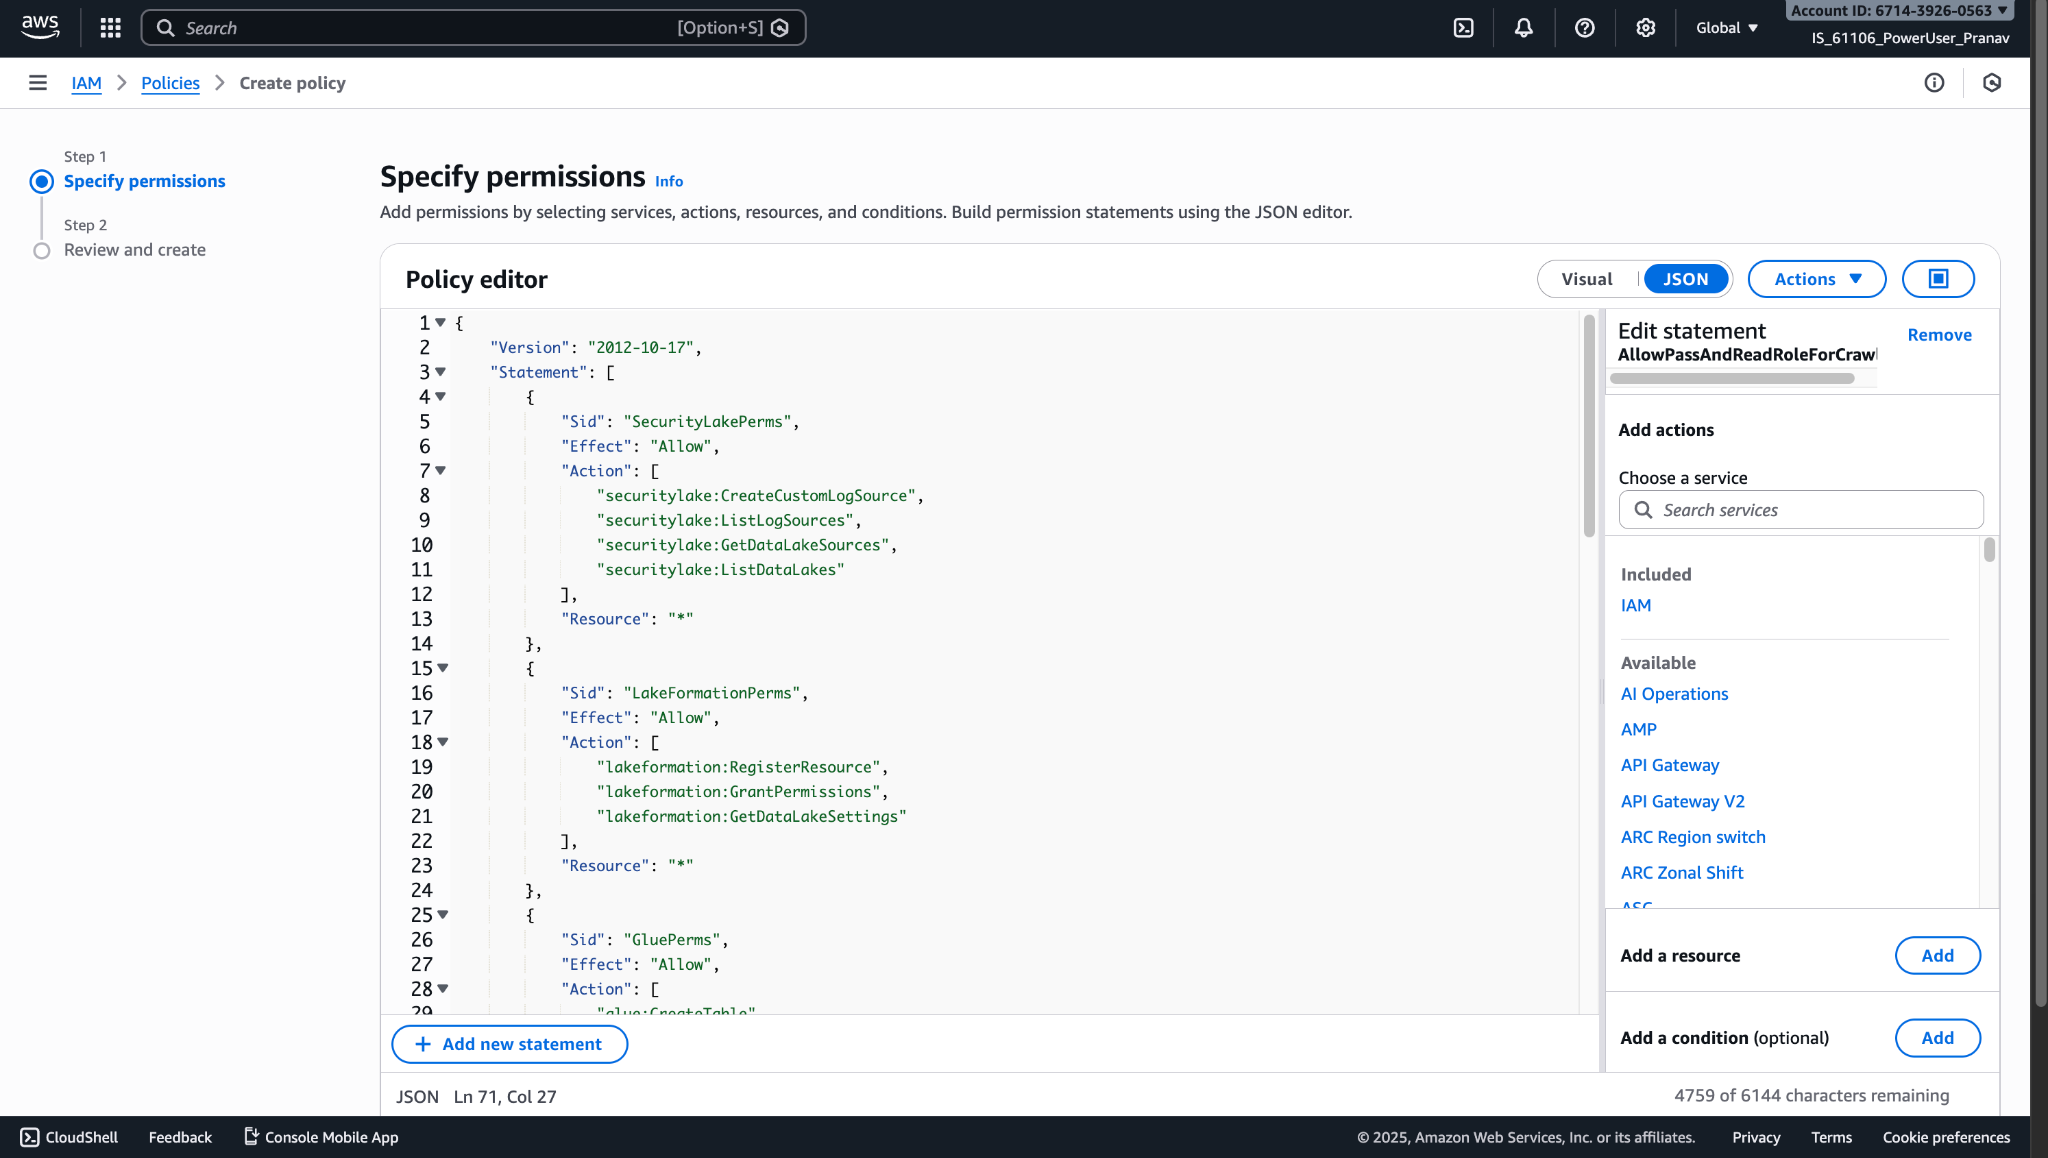
- Enter a policy name.
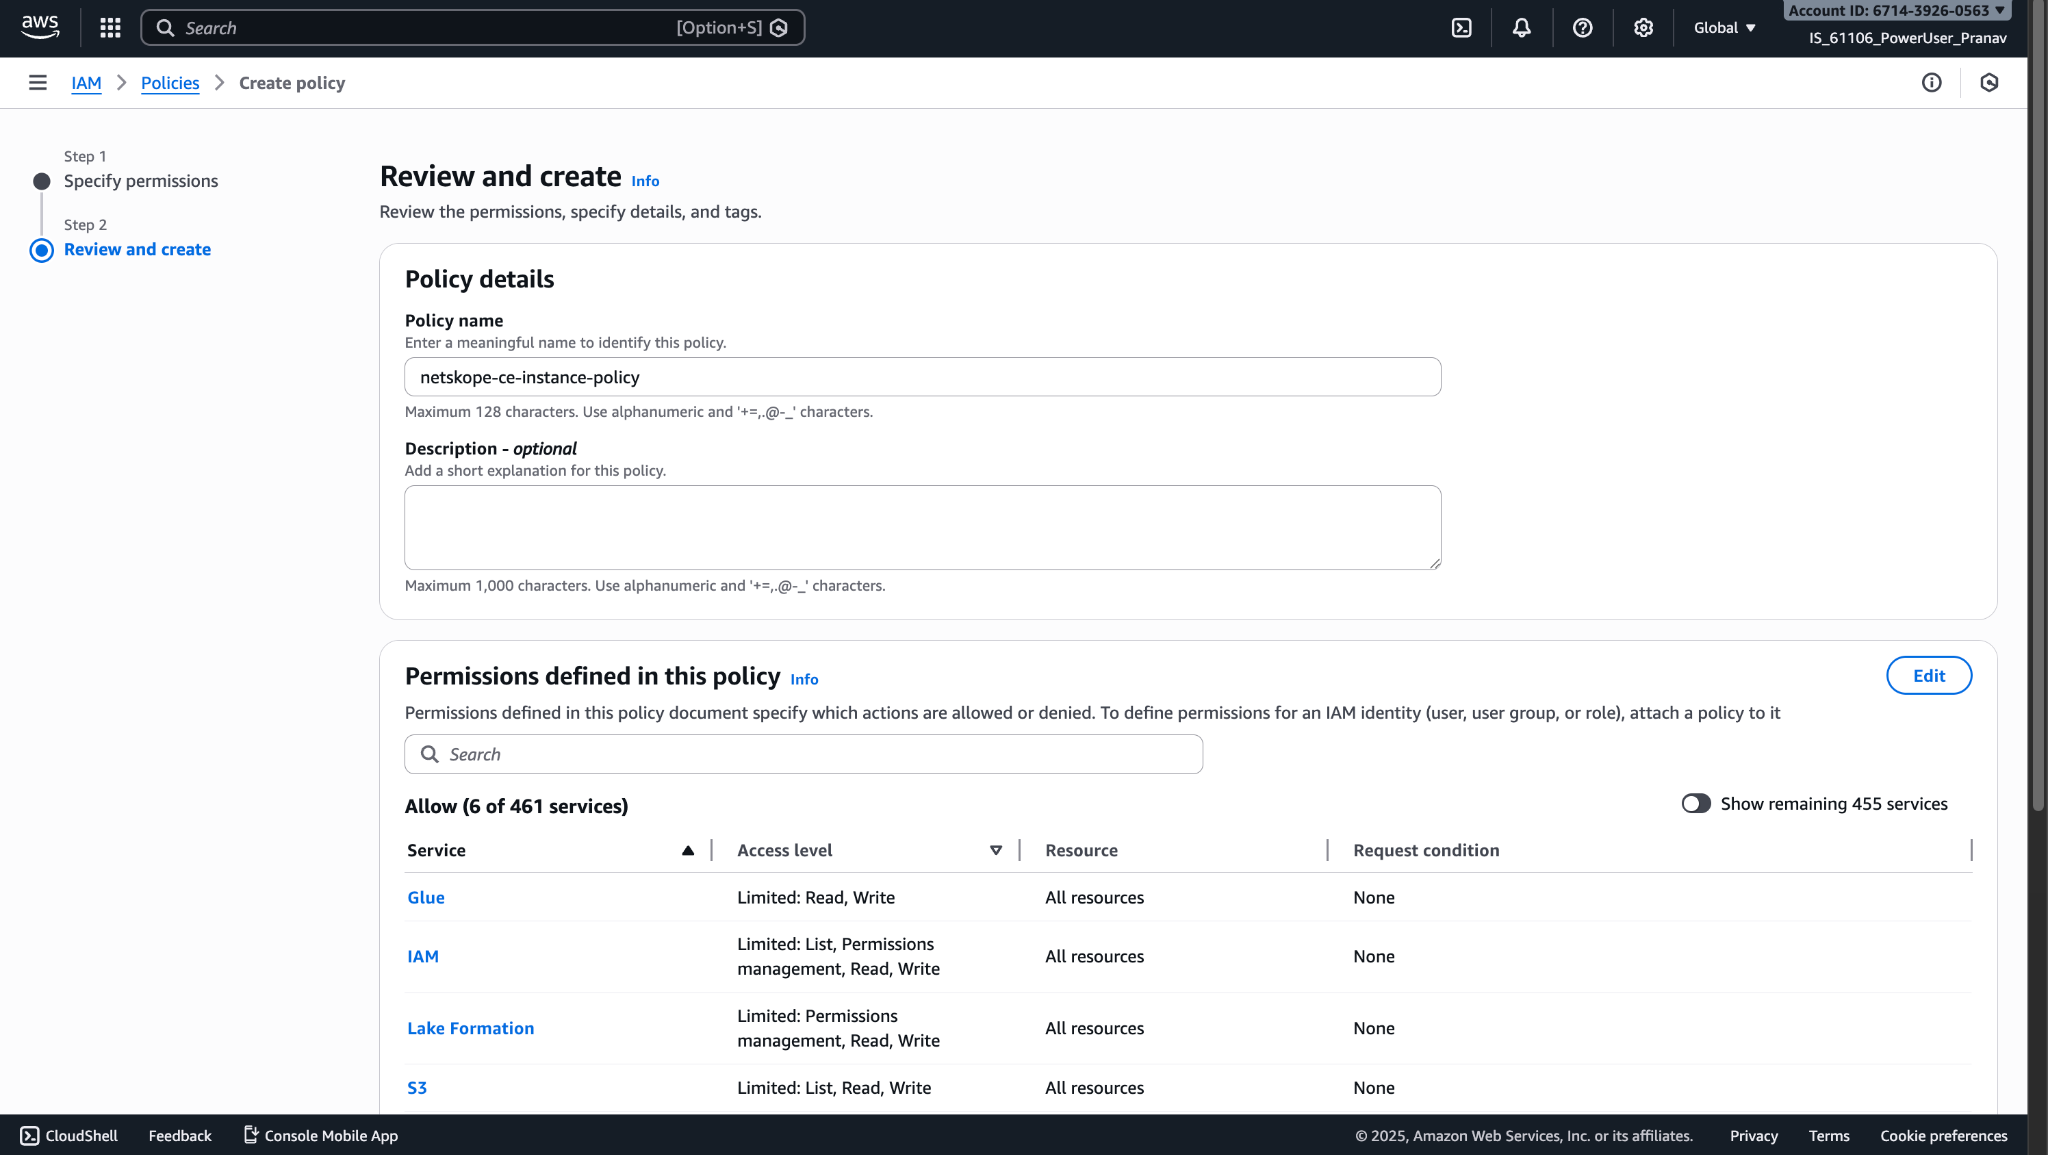
- Click Create Policy.
Create a Role
- Go to IAM > Roles and click Create role.
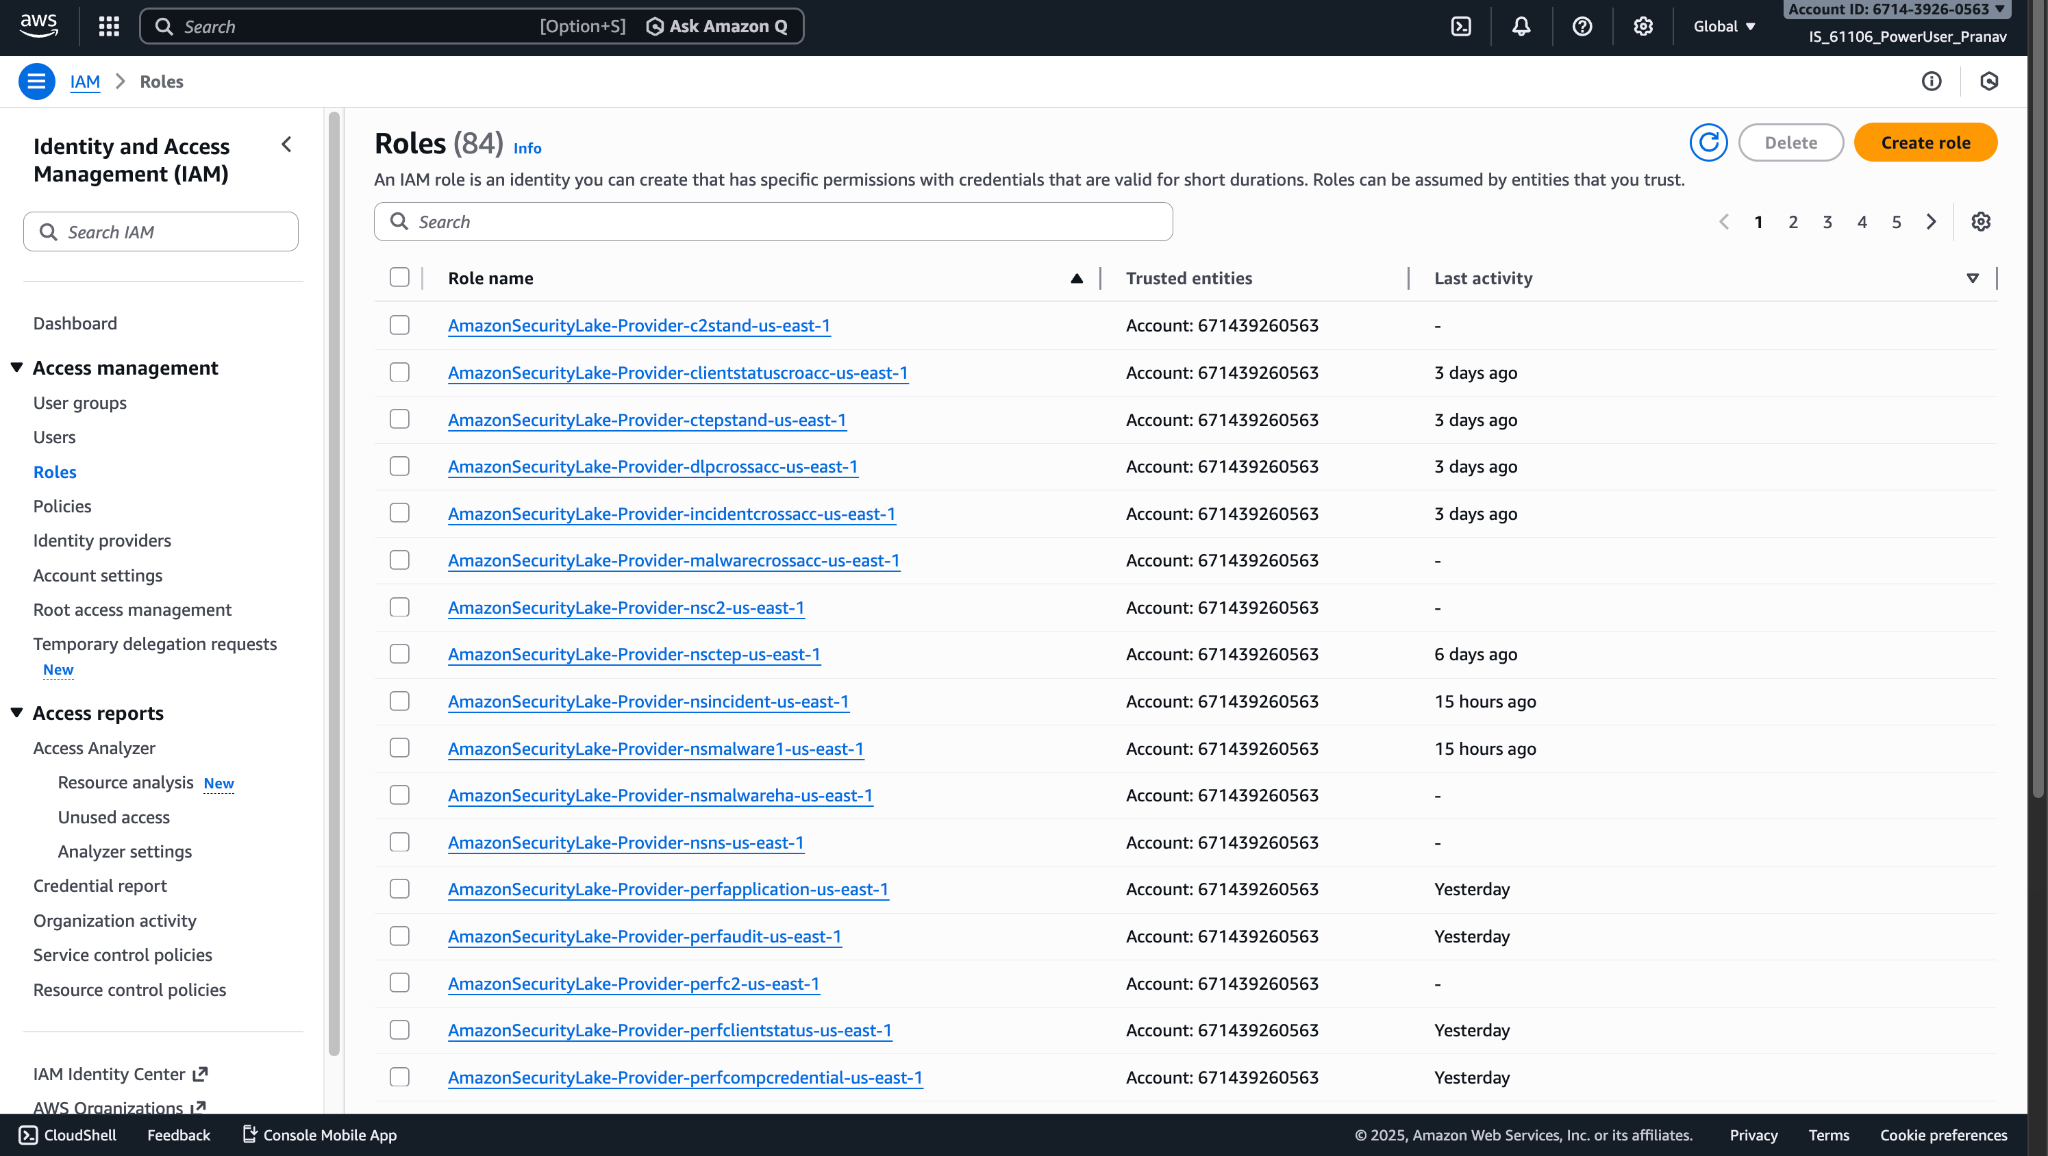
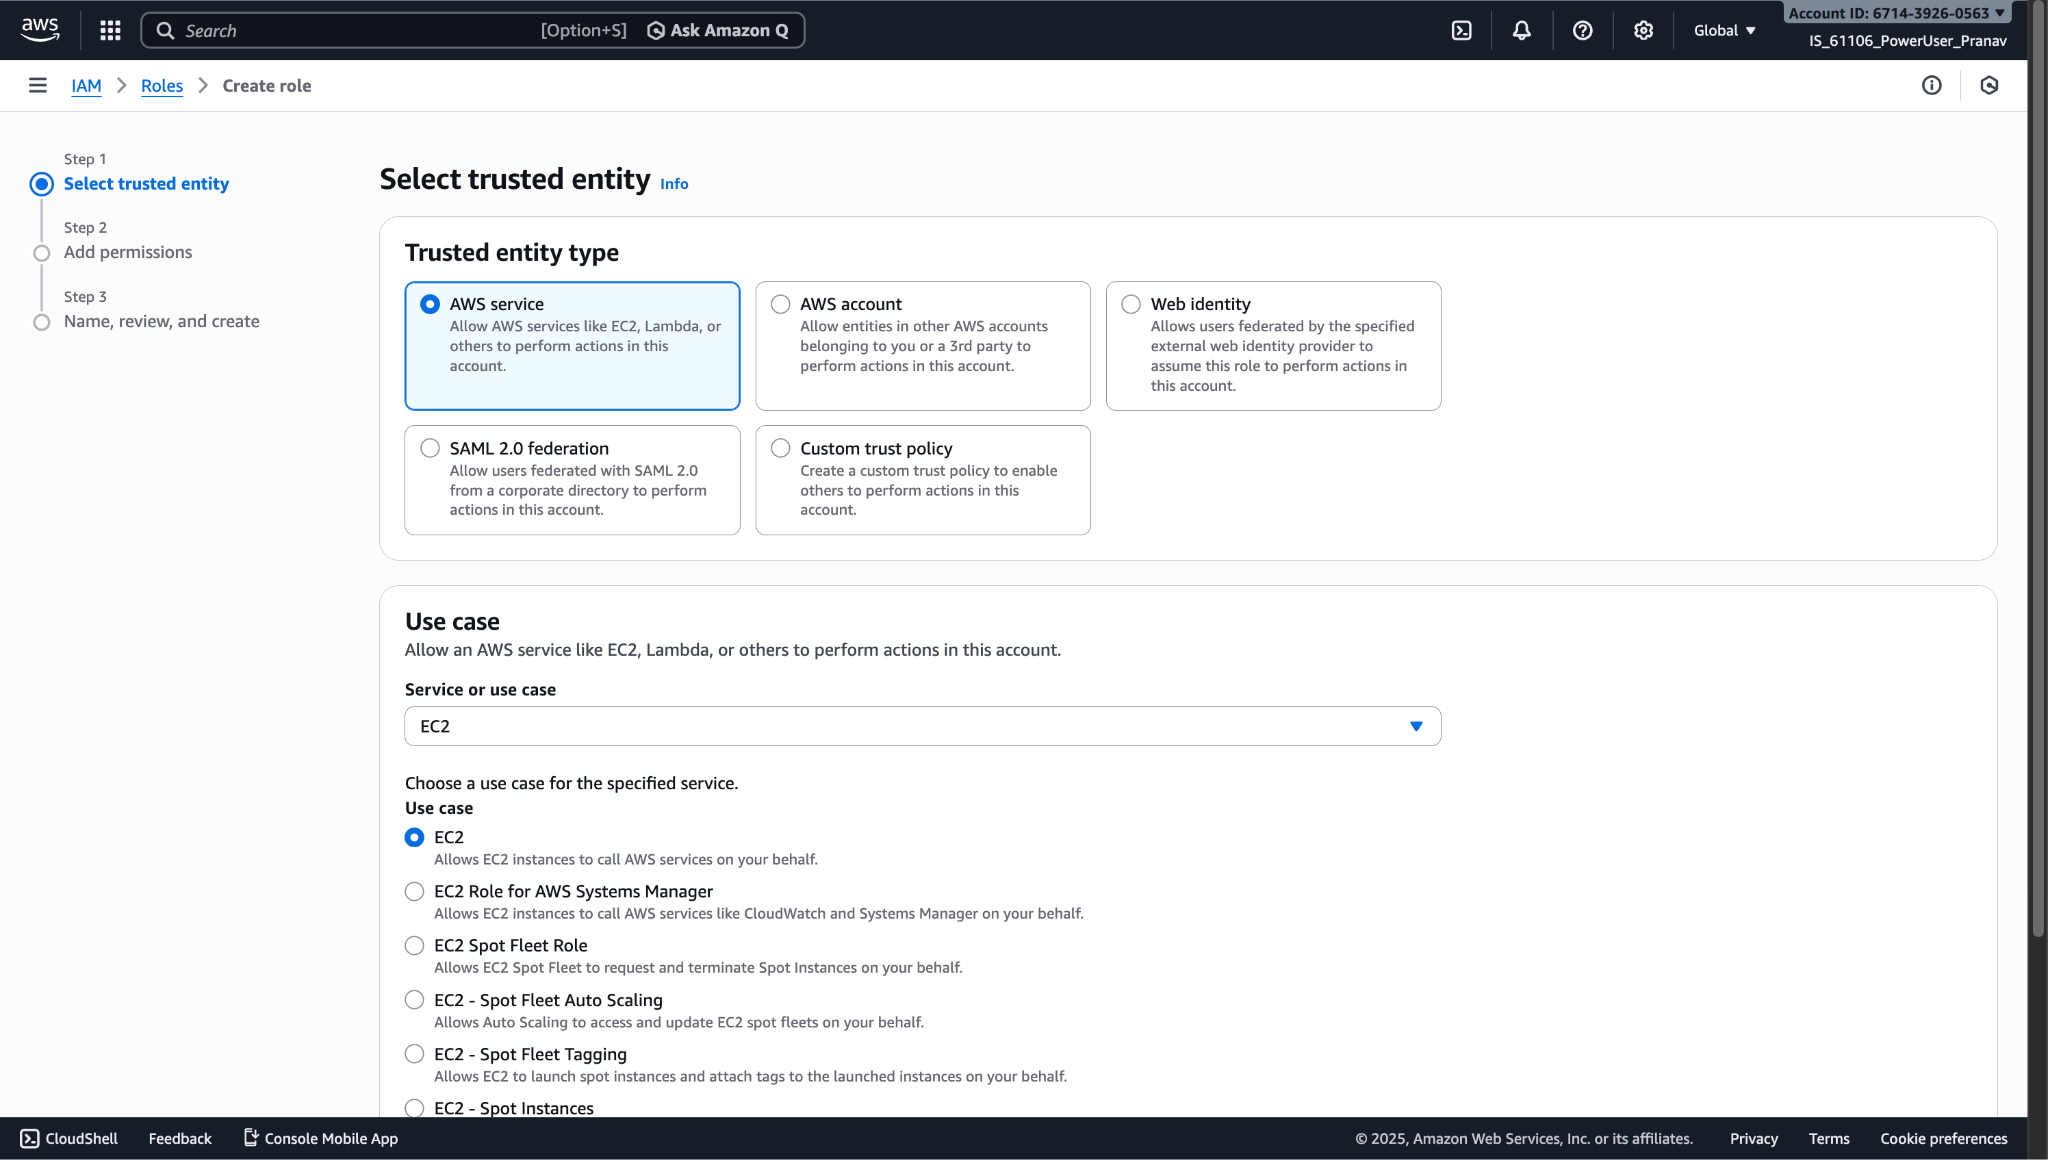
- Select the AWS Service.
- Under Use Case, select EC2.
- Click Next.
- Select the permission policy created in Create Policy.
- Click Next.
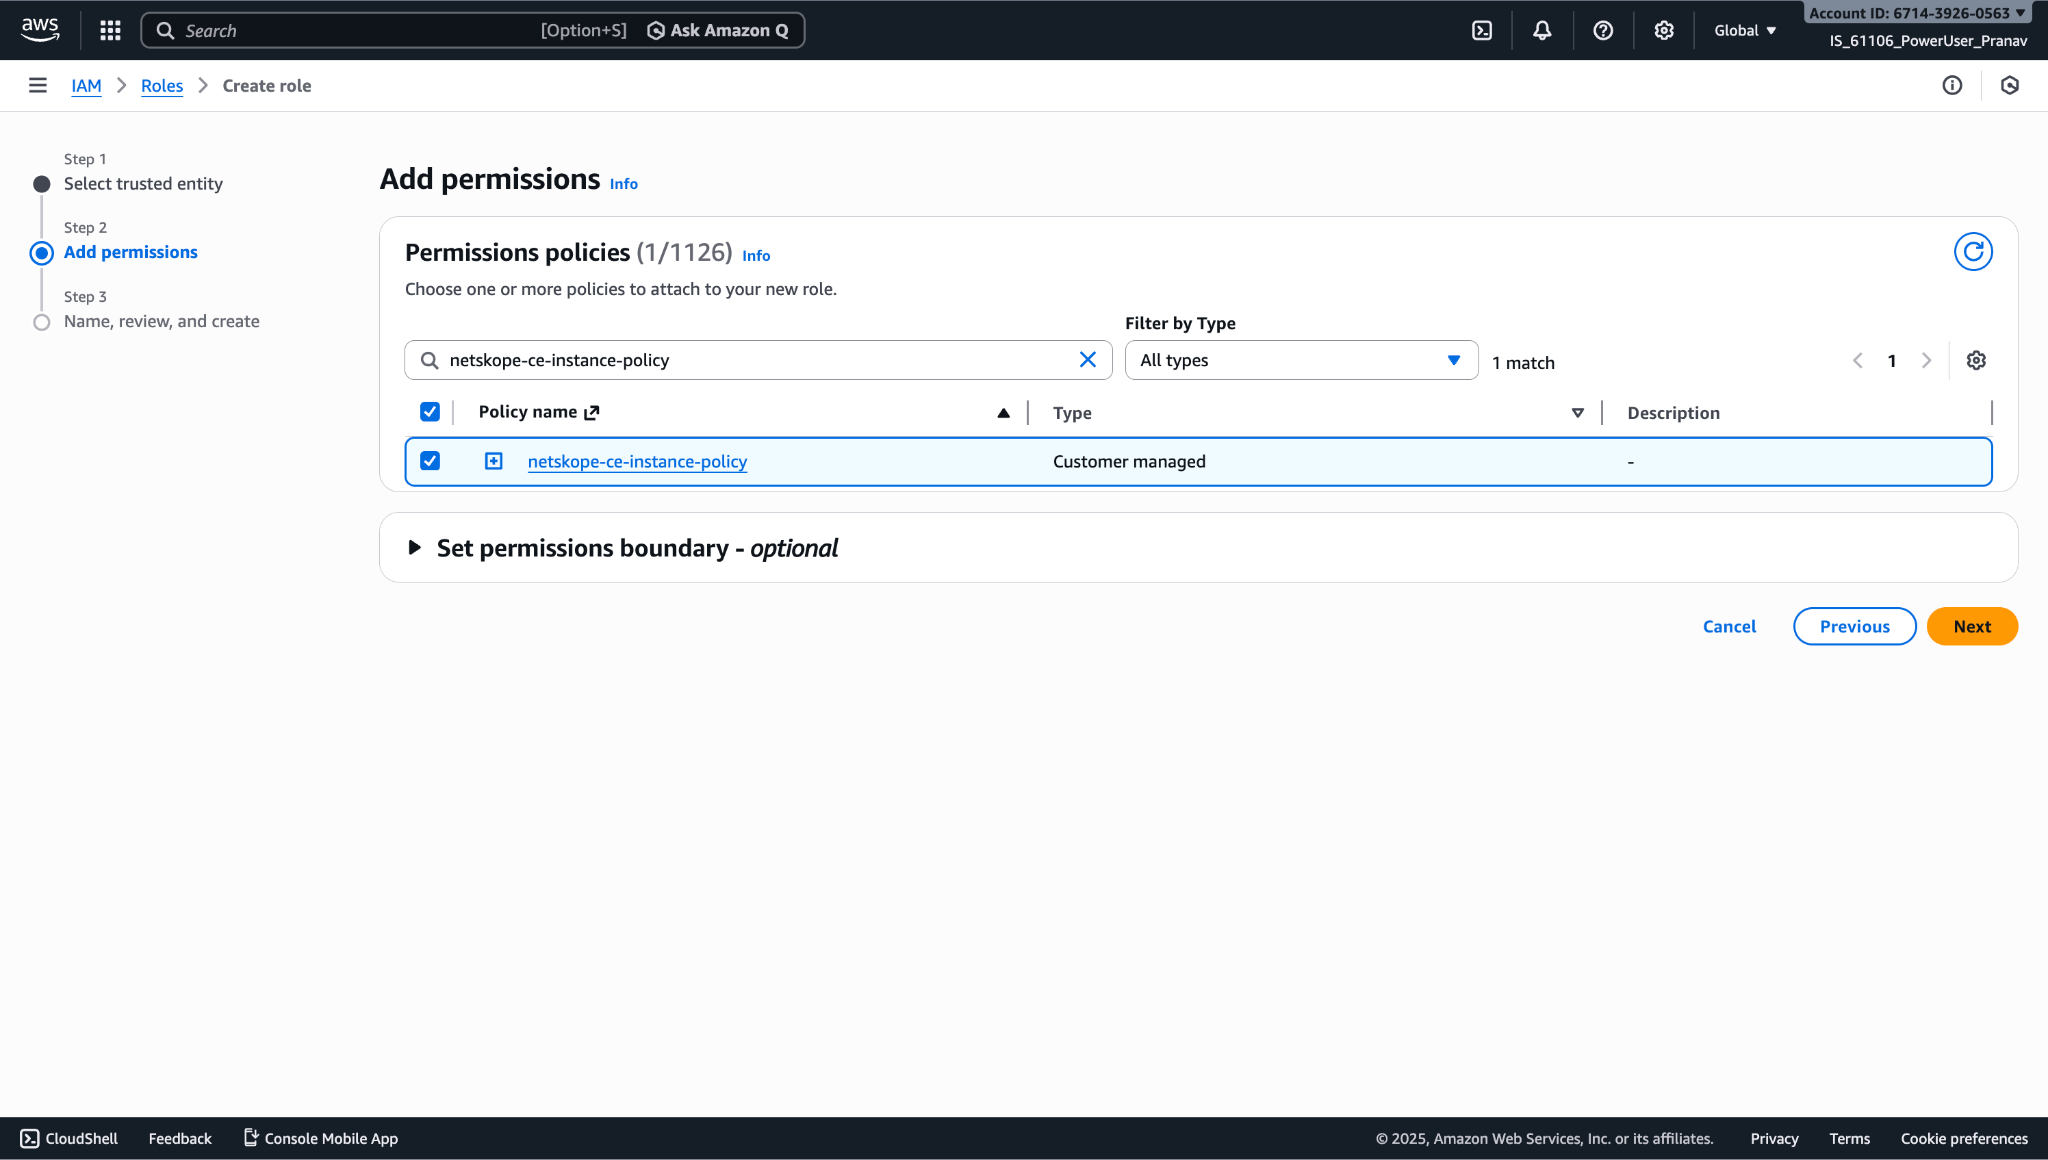
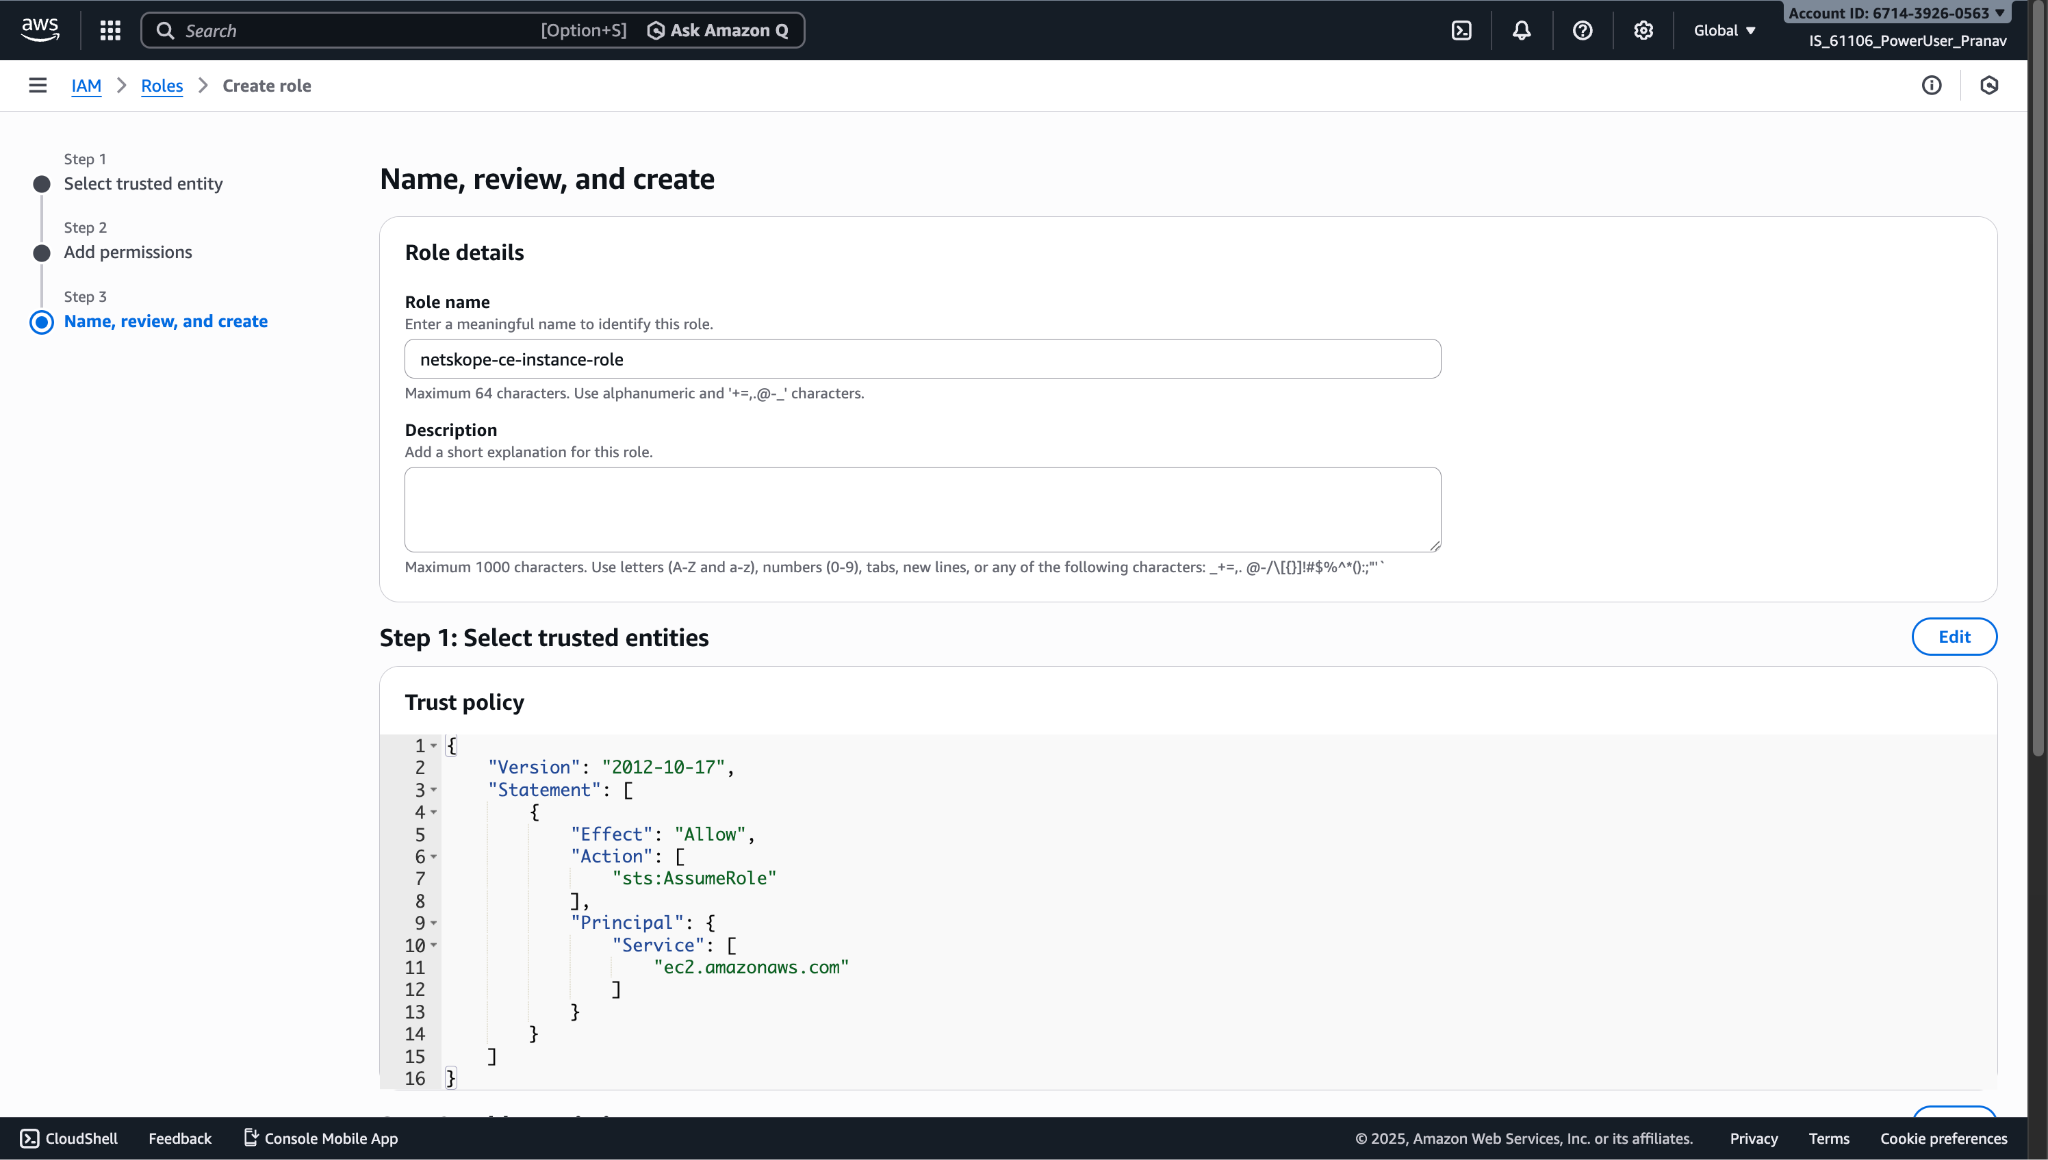
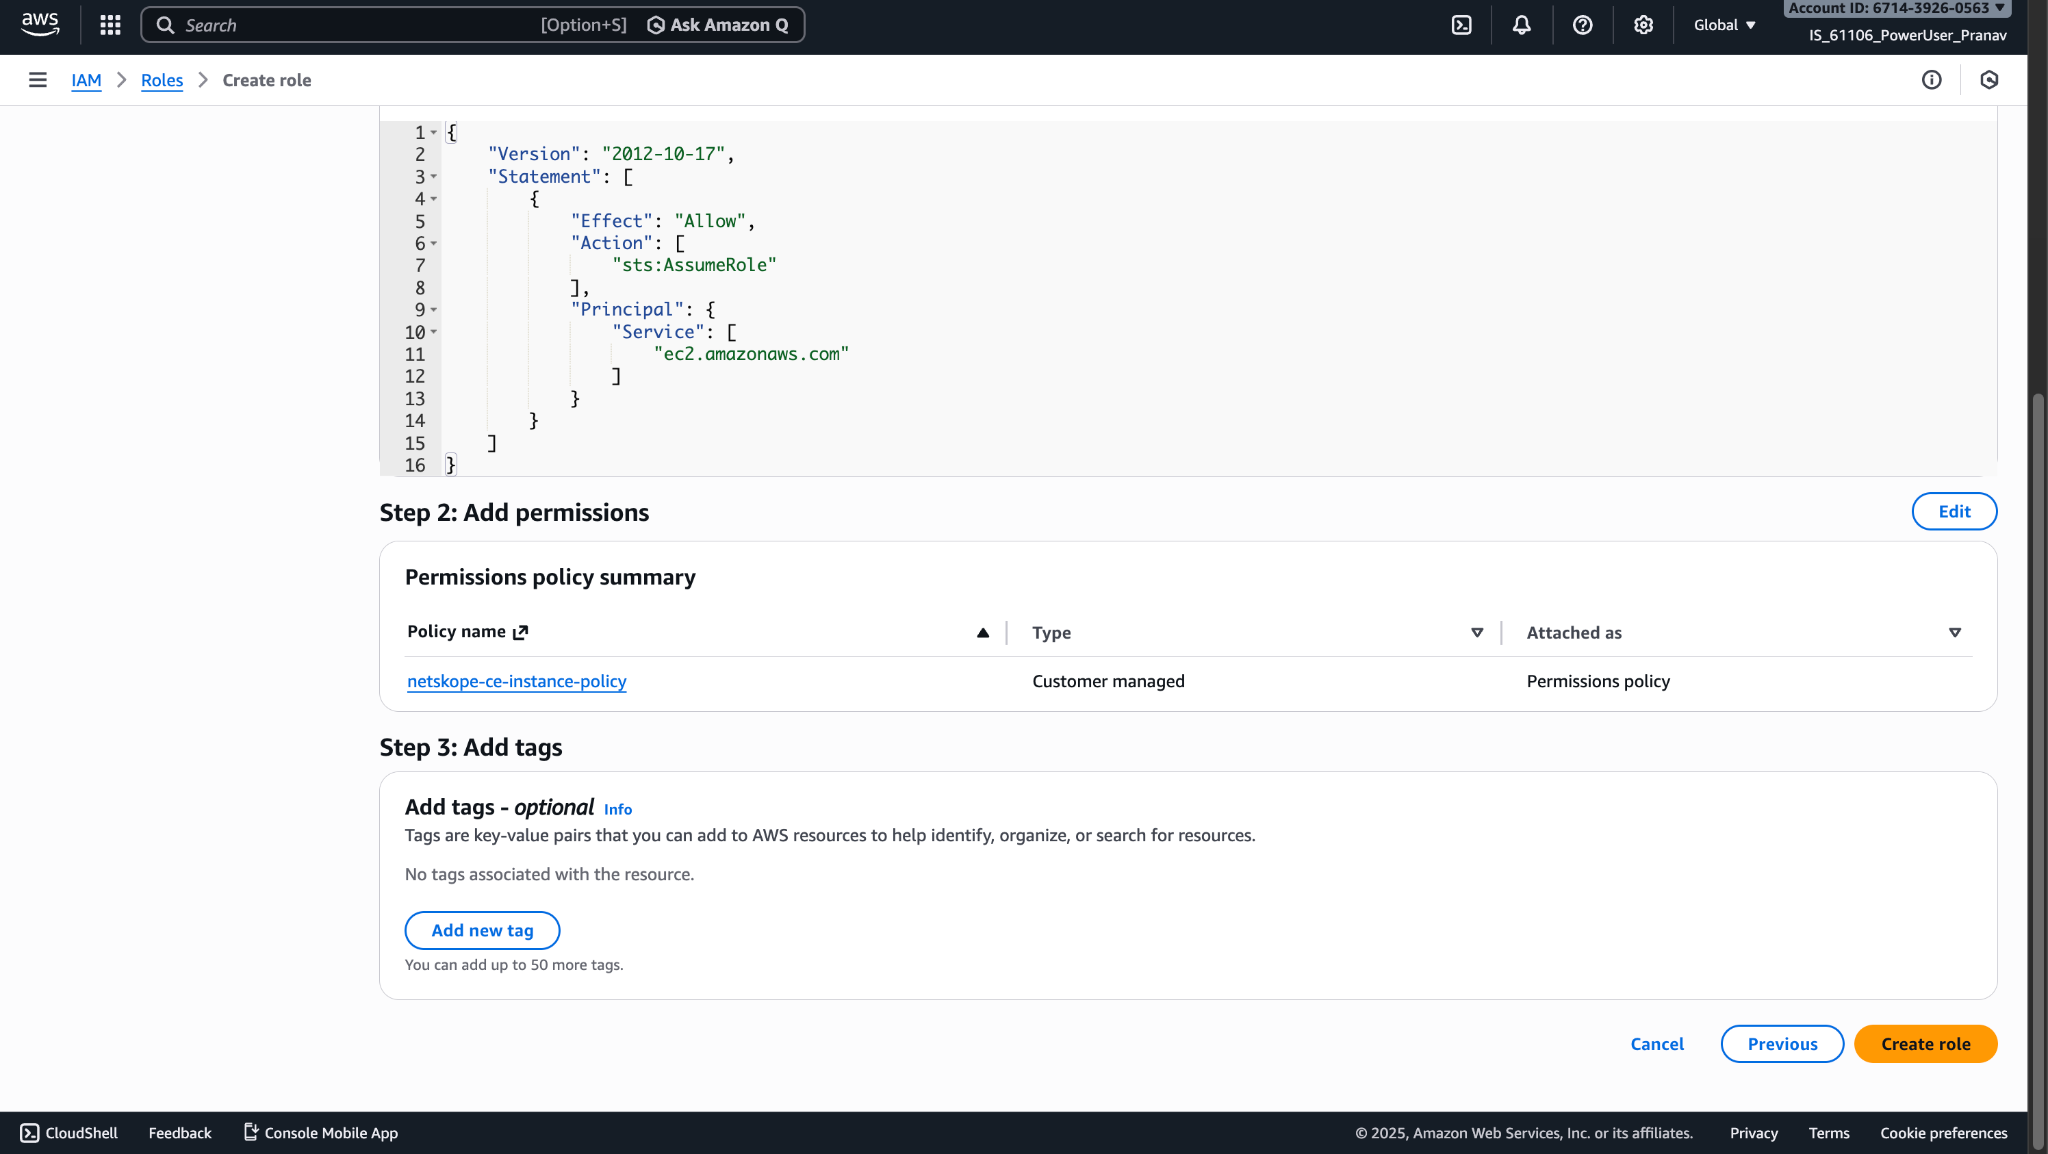
- Enter a Role Name and Description, like netskope-ce-instance-role.
- Click Create Role.
Assign a Role to the EC2 Instance
- Open your EC2 instance console.
- Click on Instances under Instances.
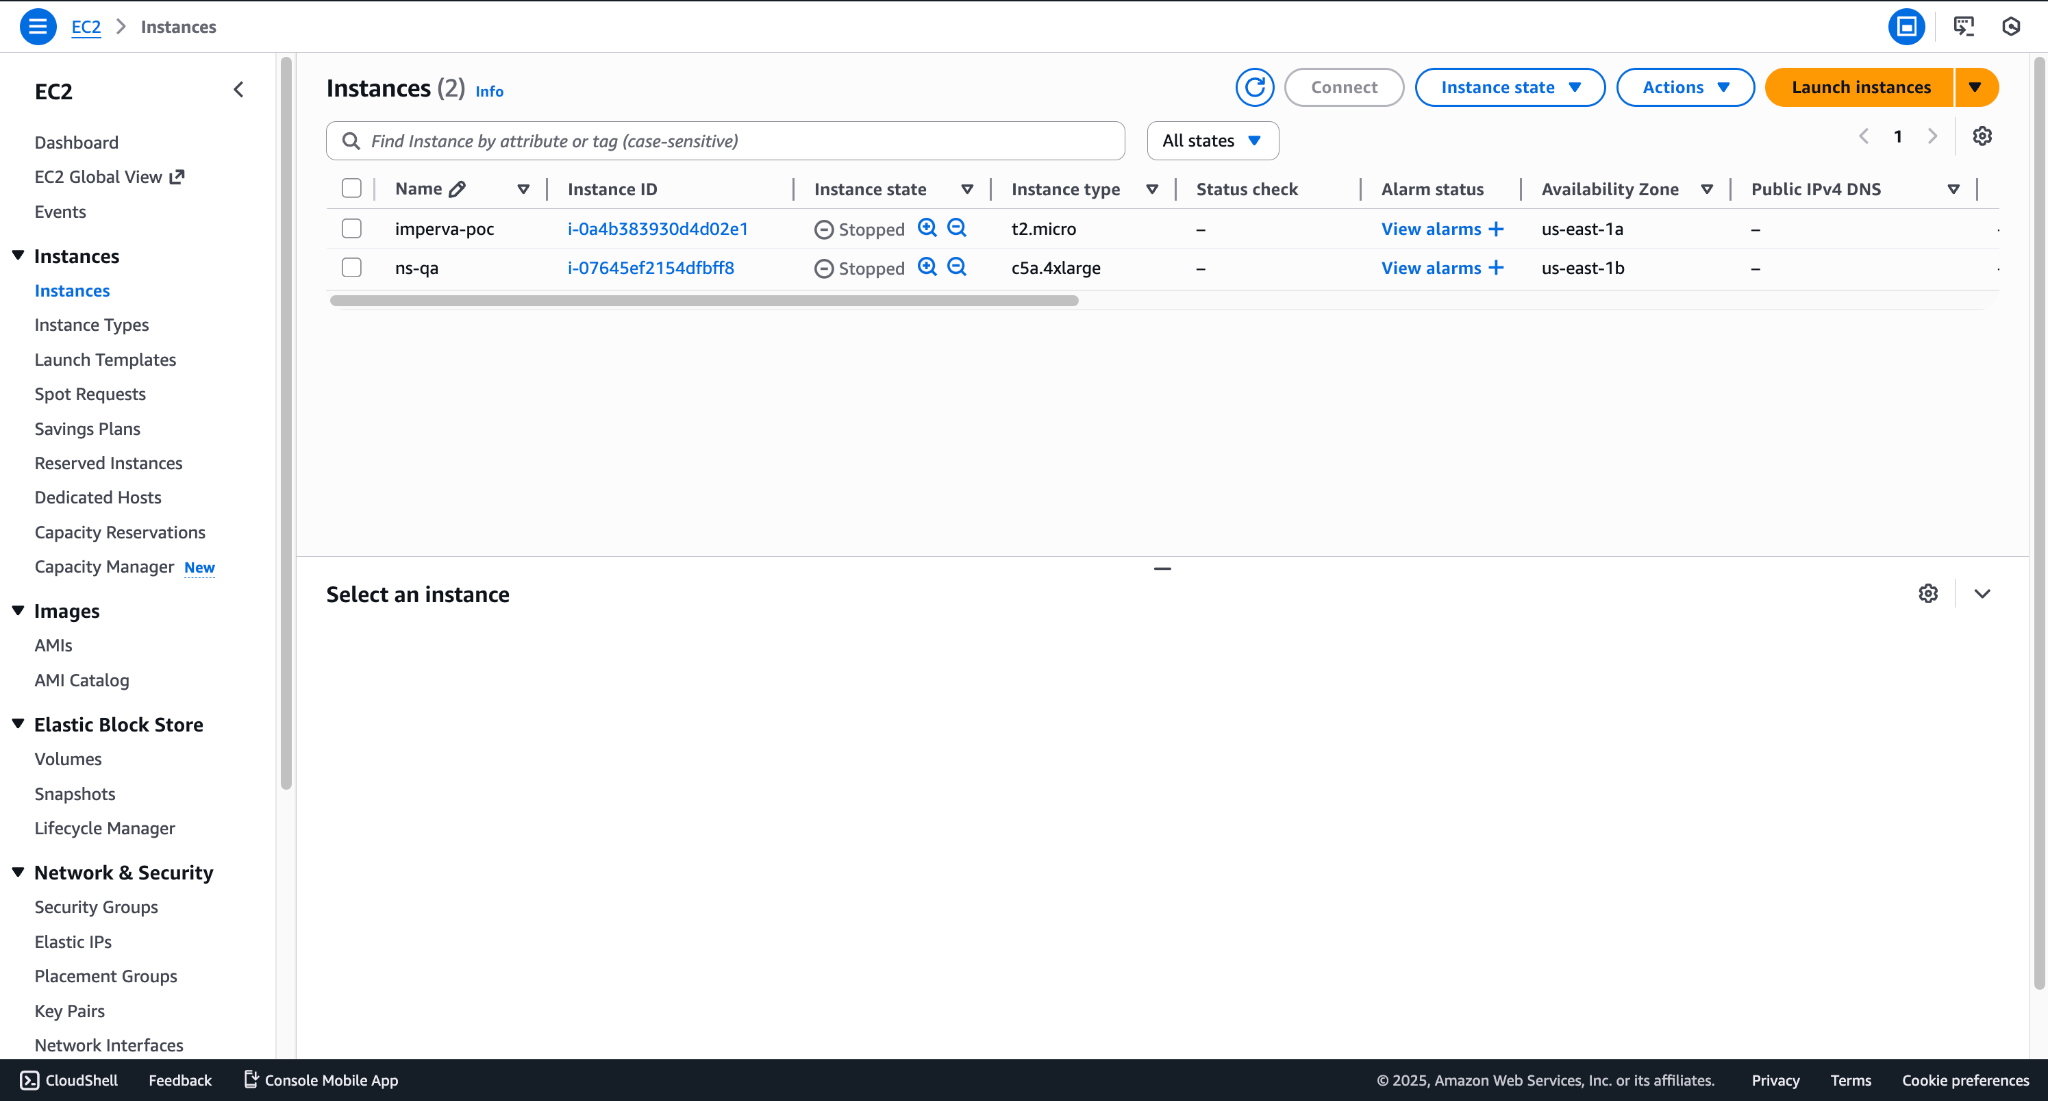
- For your EC2 instance (where Cloud Exchange is Deployed), Go to Action > Security > Modify IAM Role.
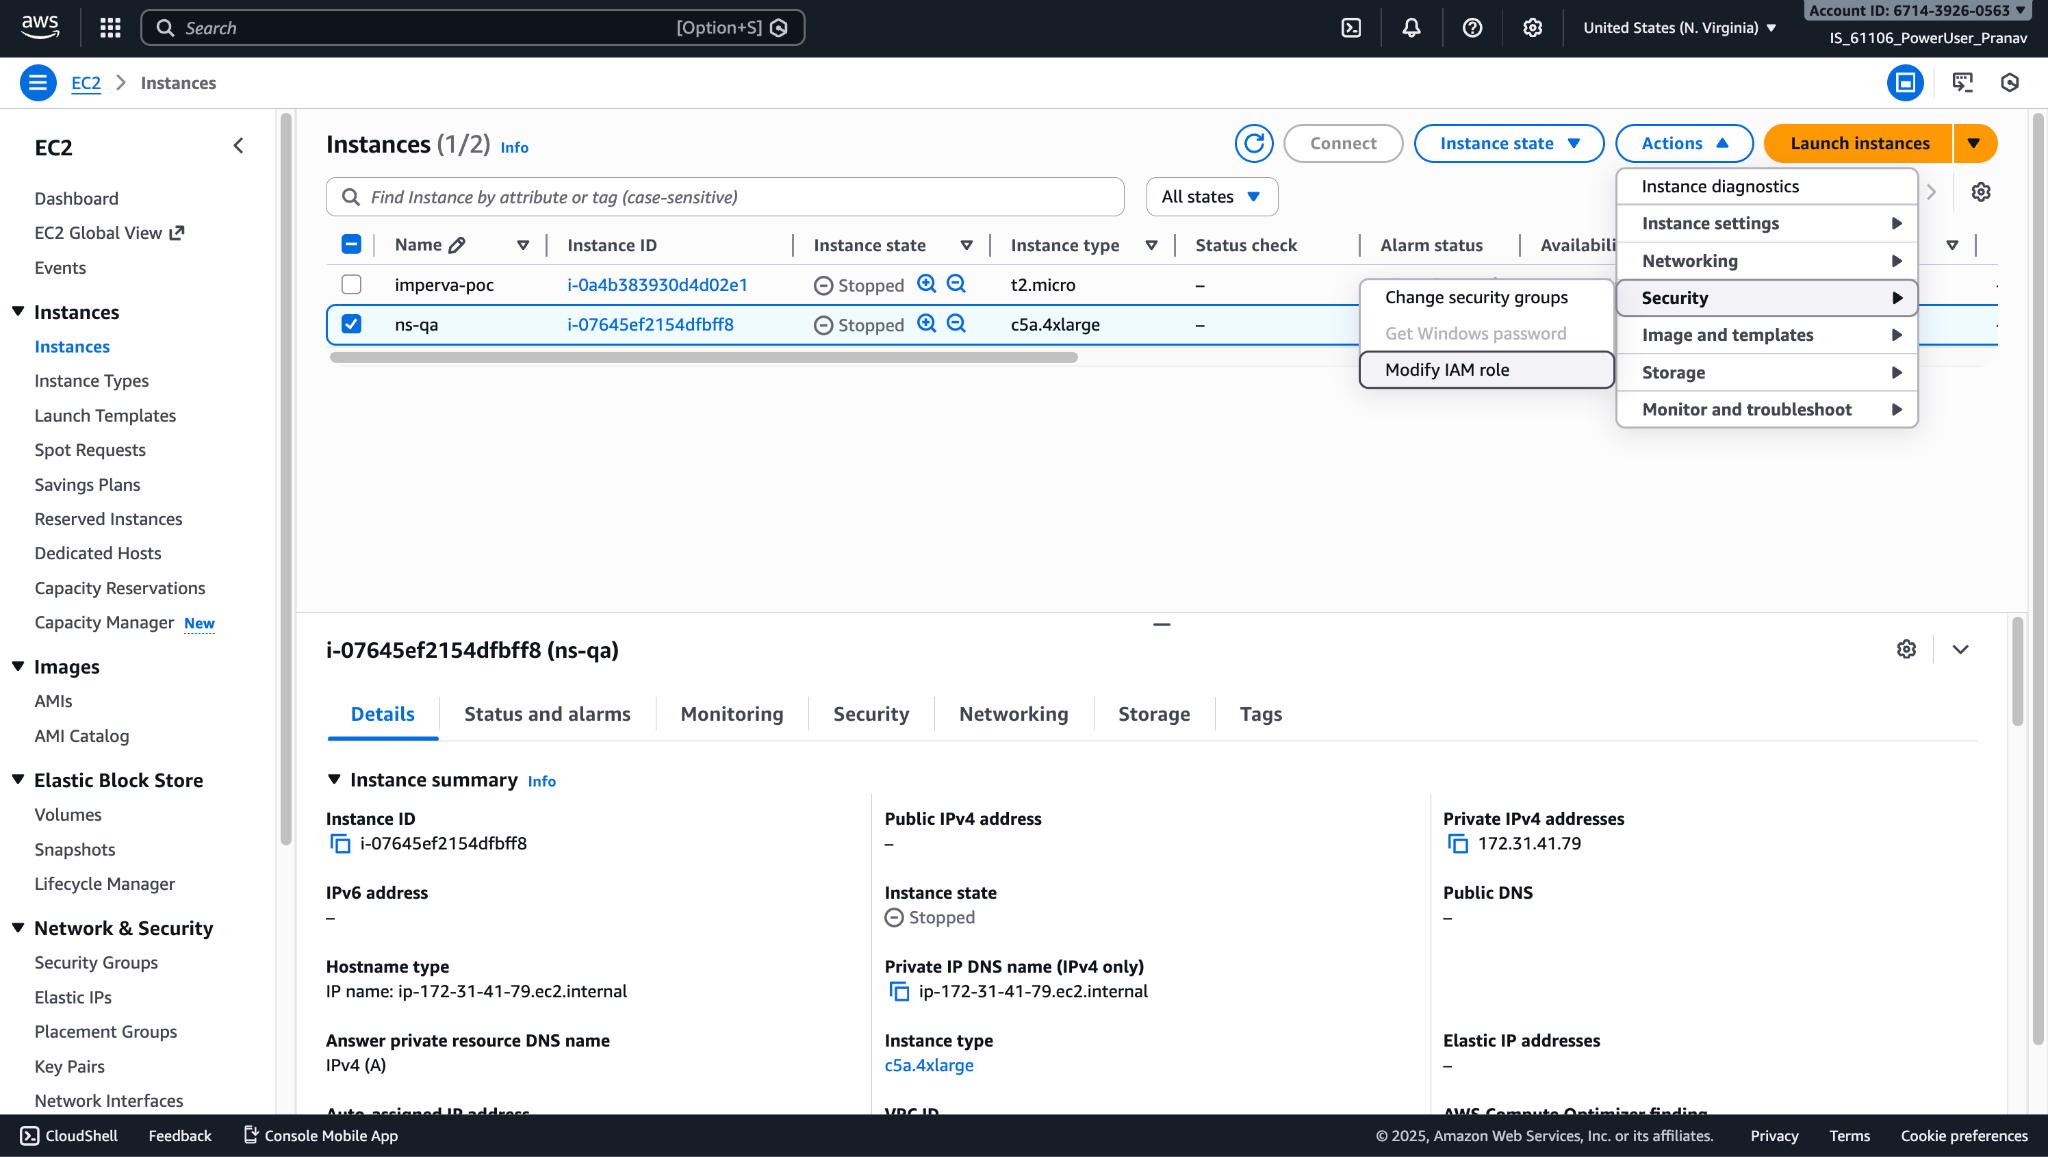
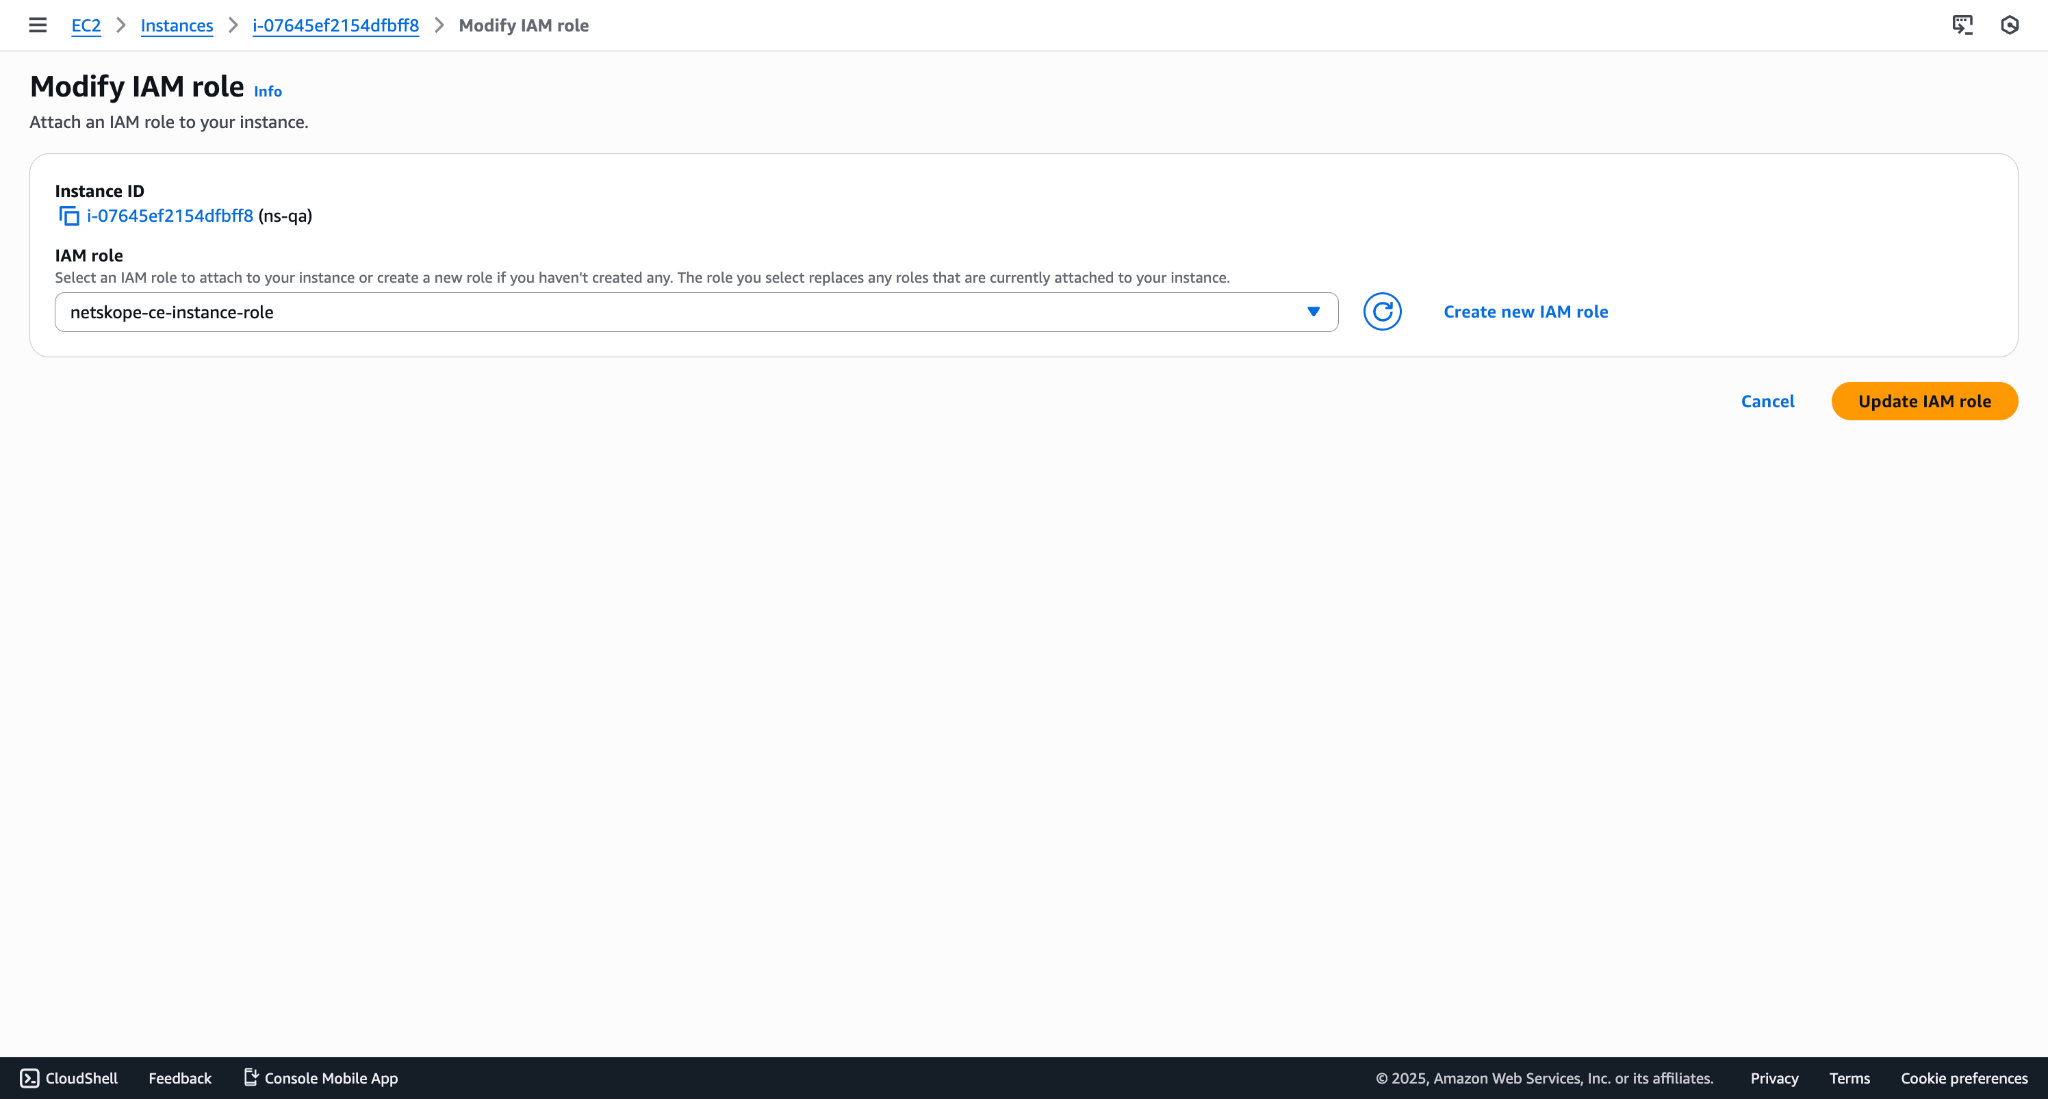
- Select the Role that you created above in Create a role (netskope-ce-instance-role).
- Click Add IAM role > Modify IAM Role and click Update IAM Role.
Create Crawler Role ARN
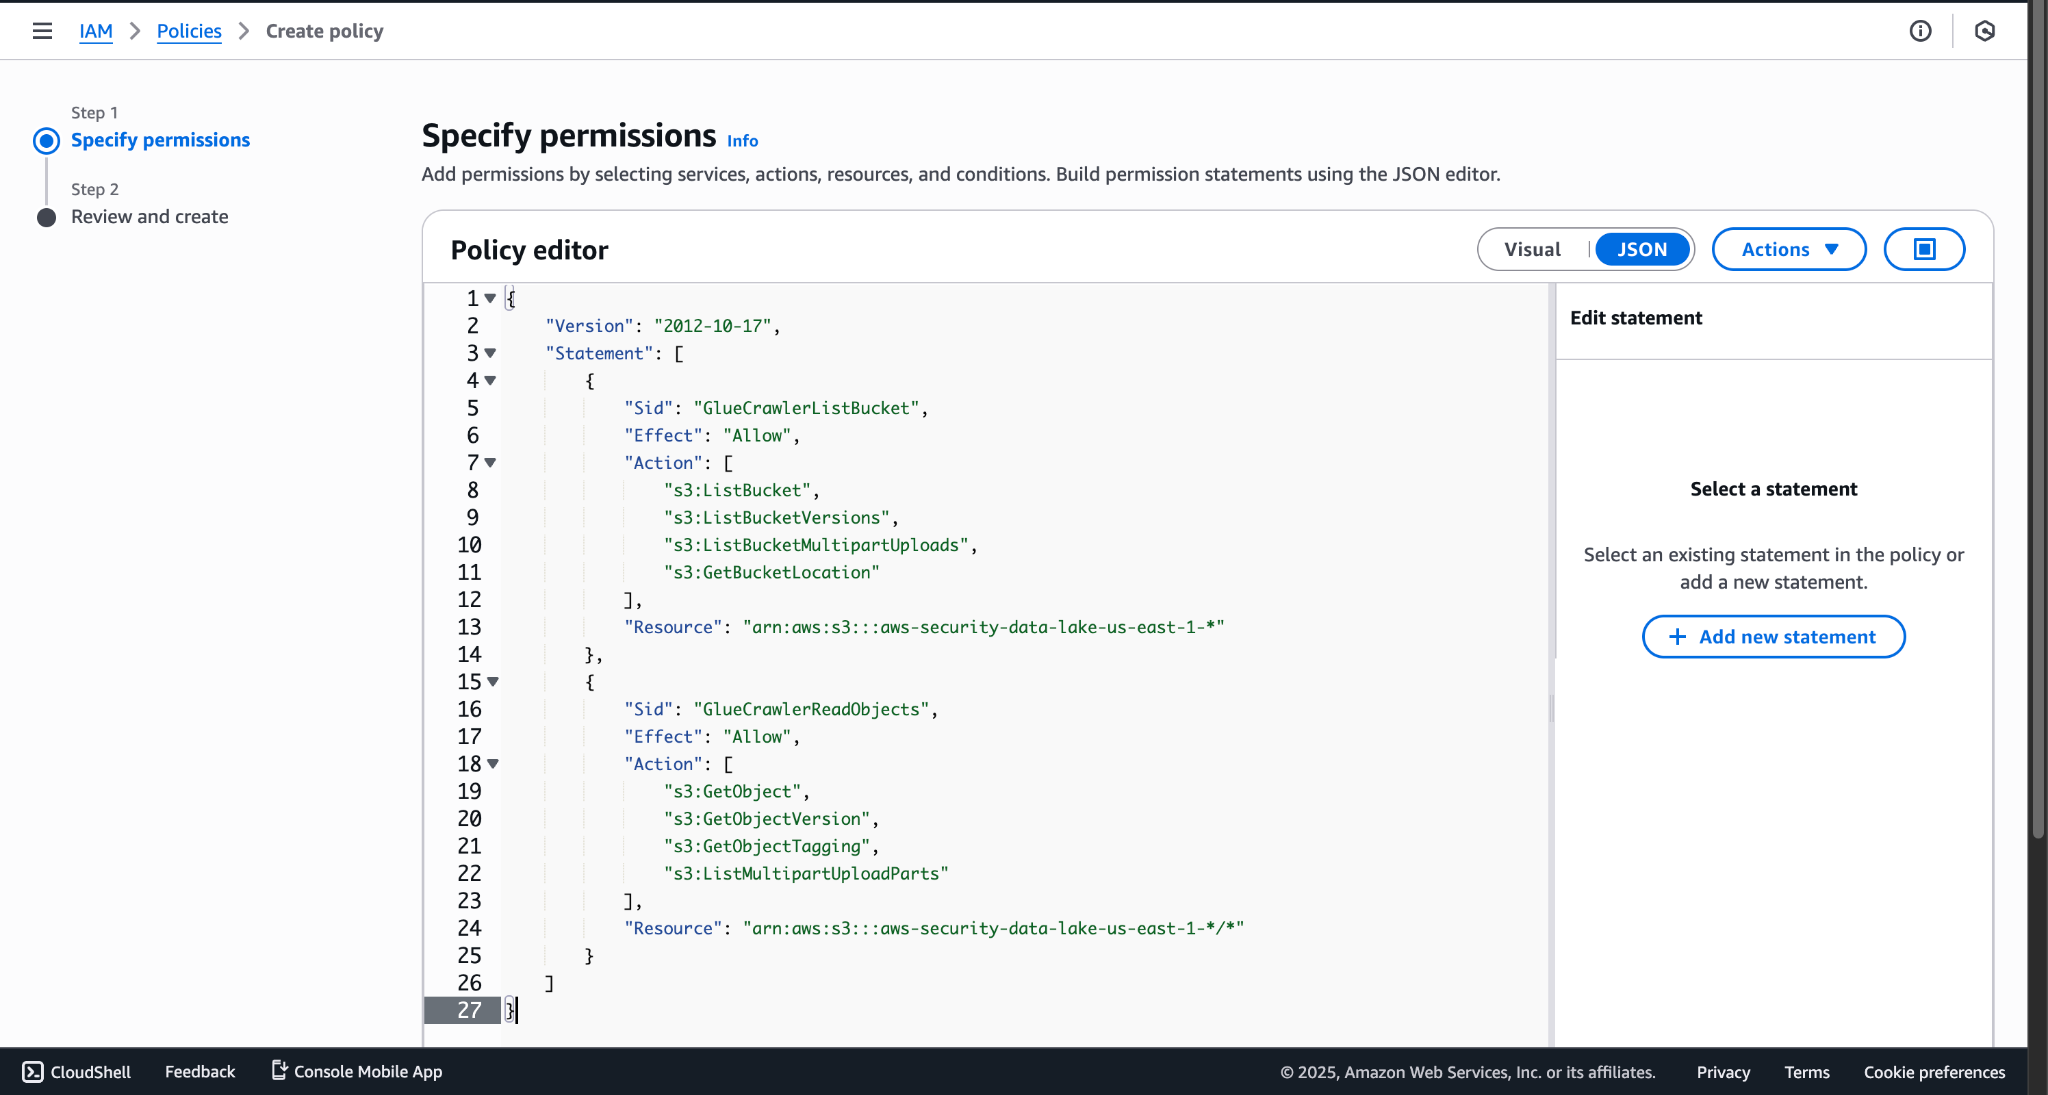
- Go to IAM > Policies and create a policy using these permissions:
{
    "Version": "2012-10-17",
    "Statement": [
        {
            "Sid": "GlueCrawlerListBucket",
            "Effect": "Allow",
            "Action": [
                "s3:ListBucket",
                "s3:ListBucketVersions",
                "s3:ListBucketMultipartUploads",
                "s3:GetBucketLocation"
            ],
            "Resource": "arn:aws:s3:::aws-security-data-lake-us-east-1-*"
        },
        {
            "Sid": "GlueCrawlerReadObjects",
            "Effect": "Allow",
            "Action": [
                "s3:GetObject",
                "s3:GetObjectVersion",
                "s3:GetObjectTagging",
                "s3:ListMultipartUploadParts"
            ],
            "Resource": "arn:aws:s3:::aws-security-data-lake-us-east-1-*/*"
        }
    ]
}
- Enter a policy name and click Create.
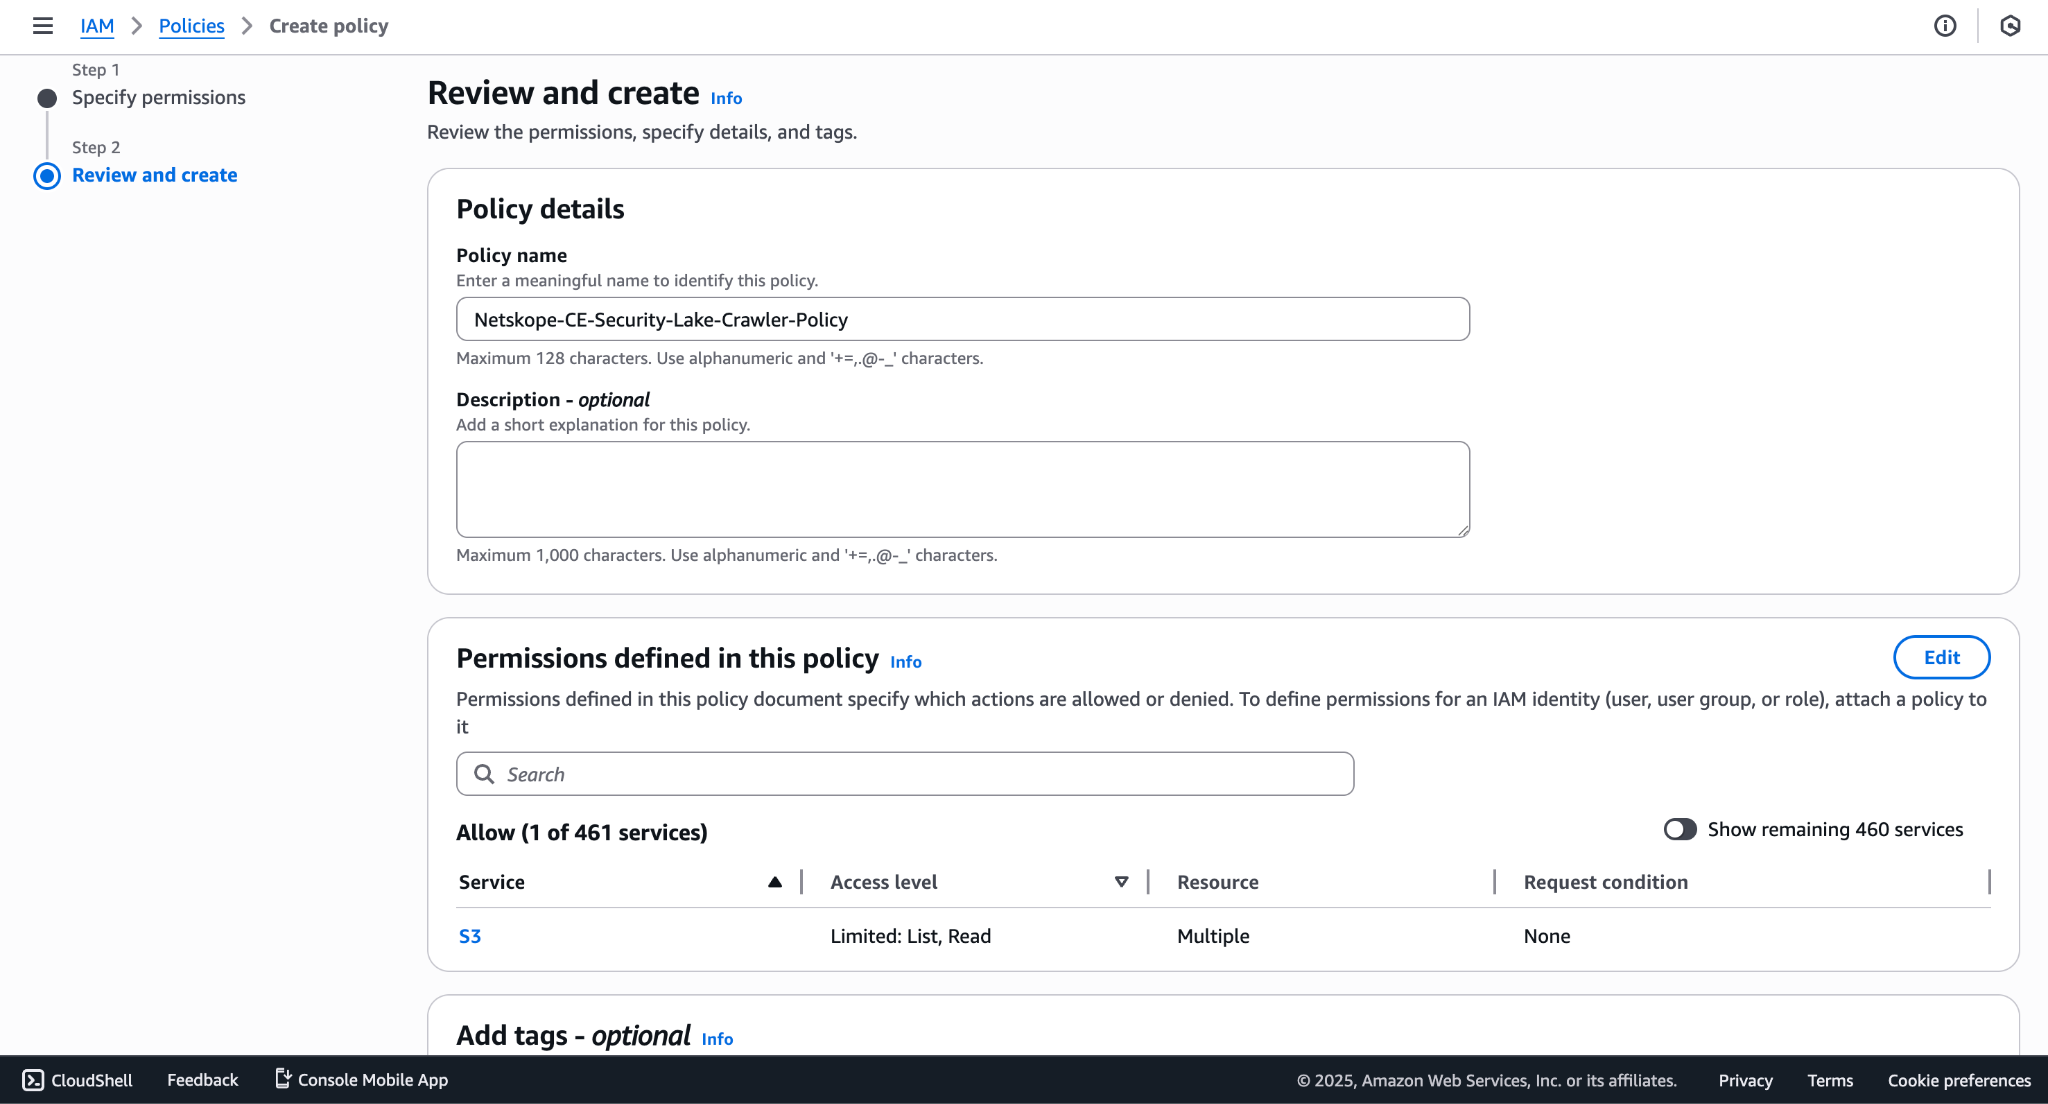
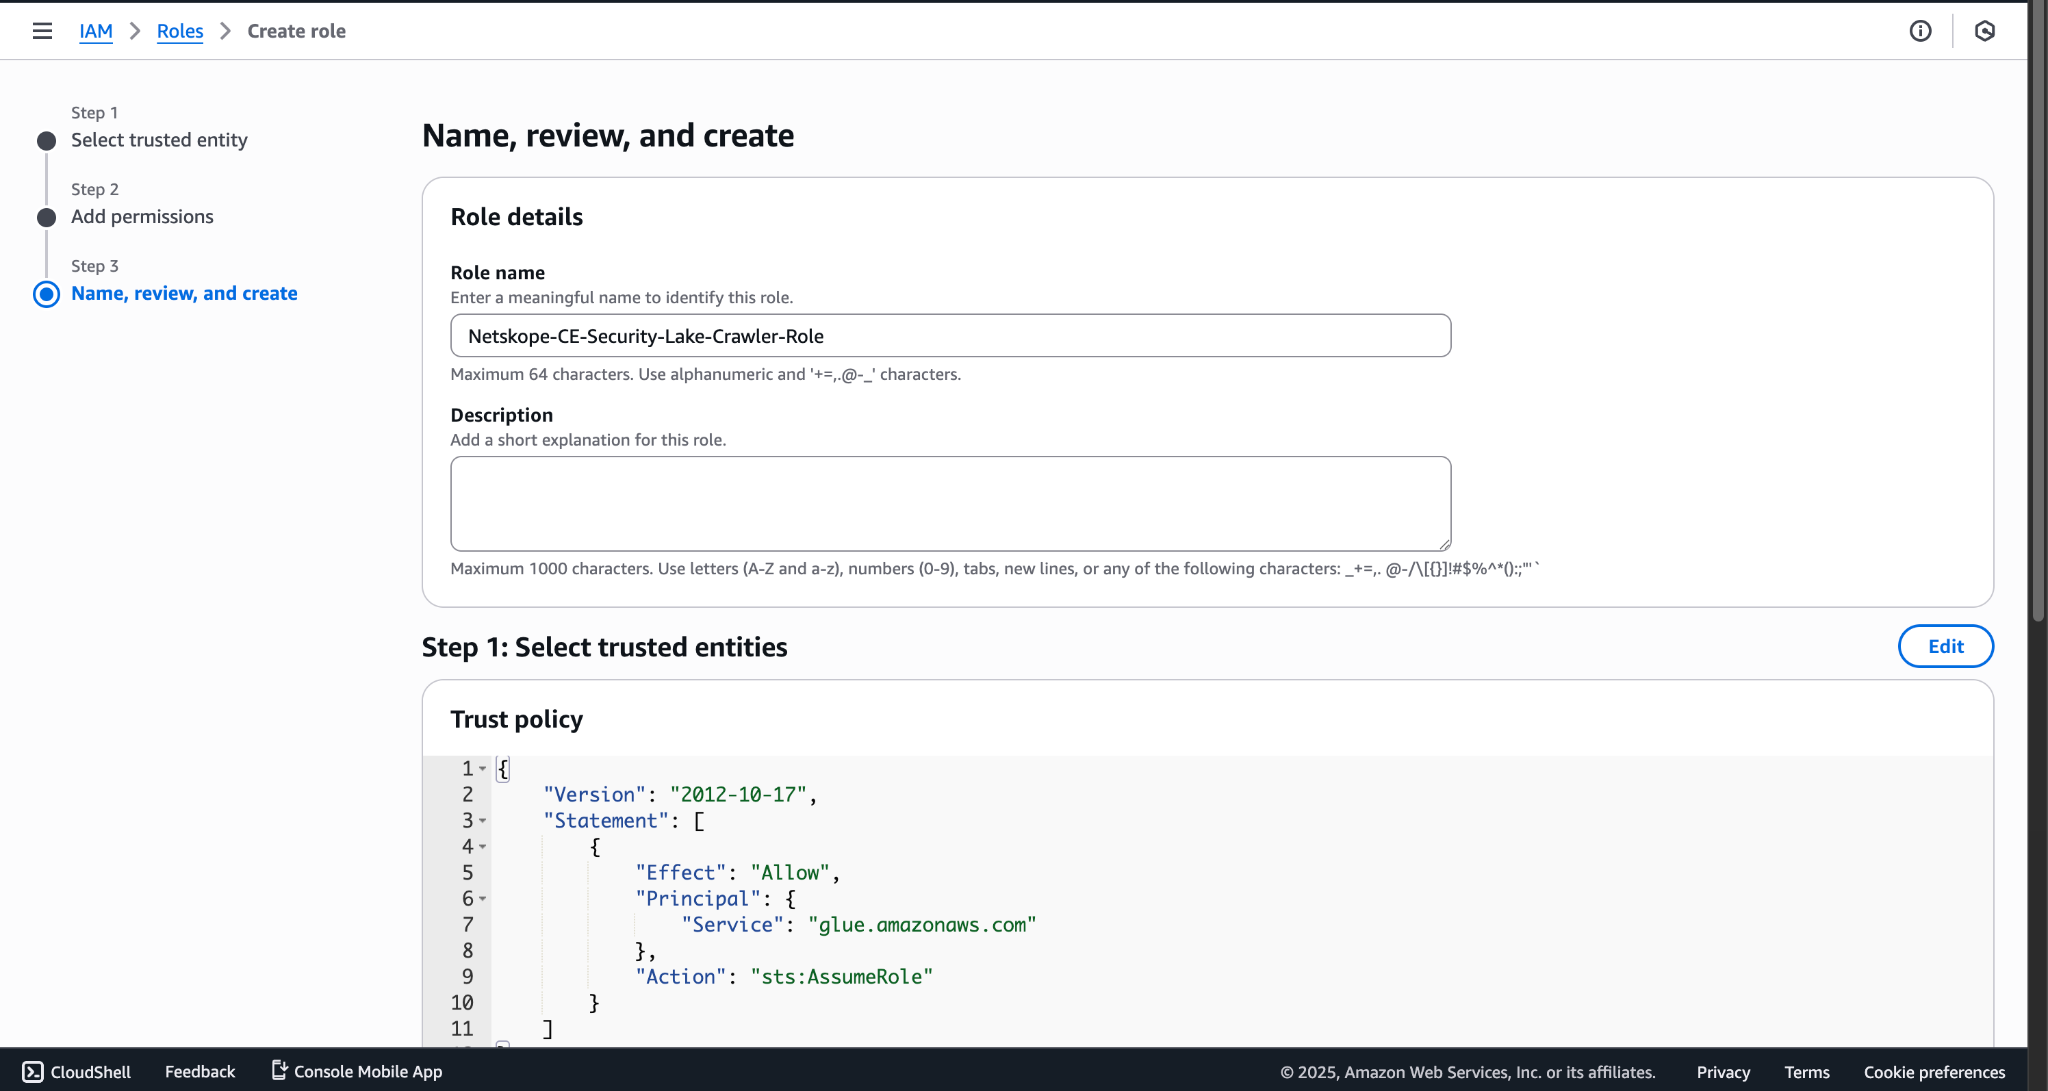
- Go to Role and click Create a Role. Go to Trusted Entity Type > Select AWS Service
Service > Select Glue.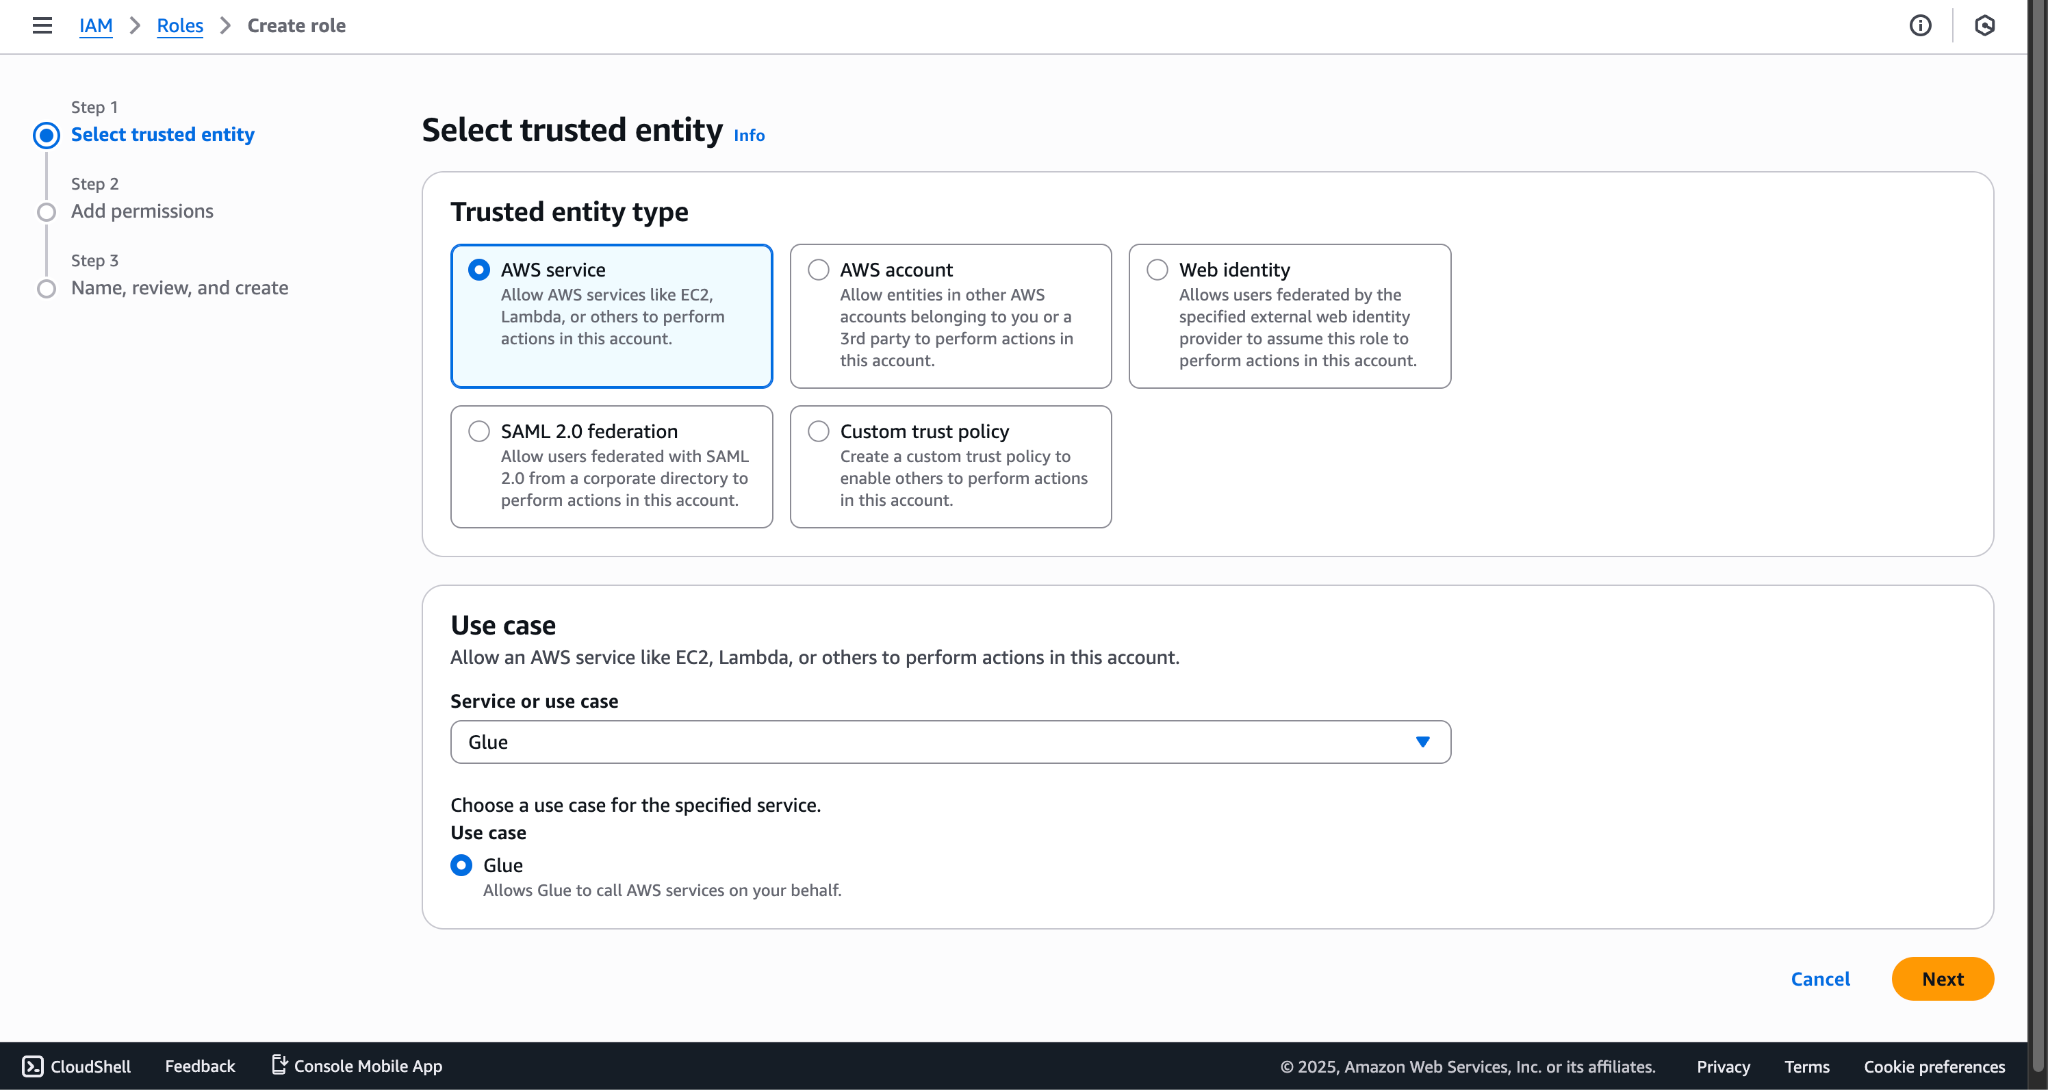
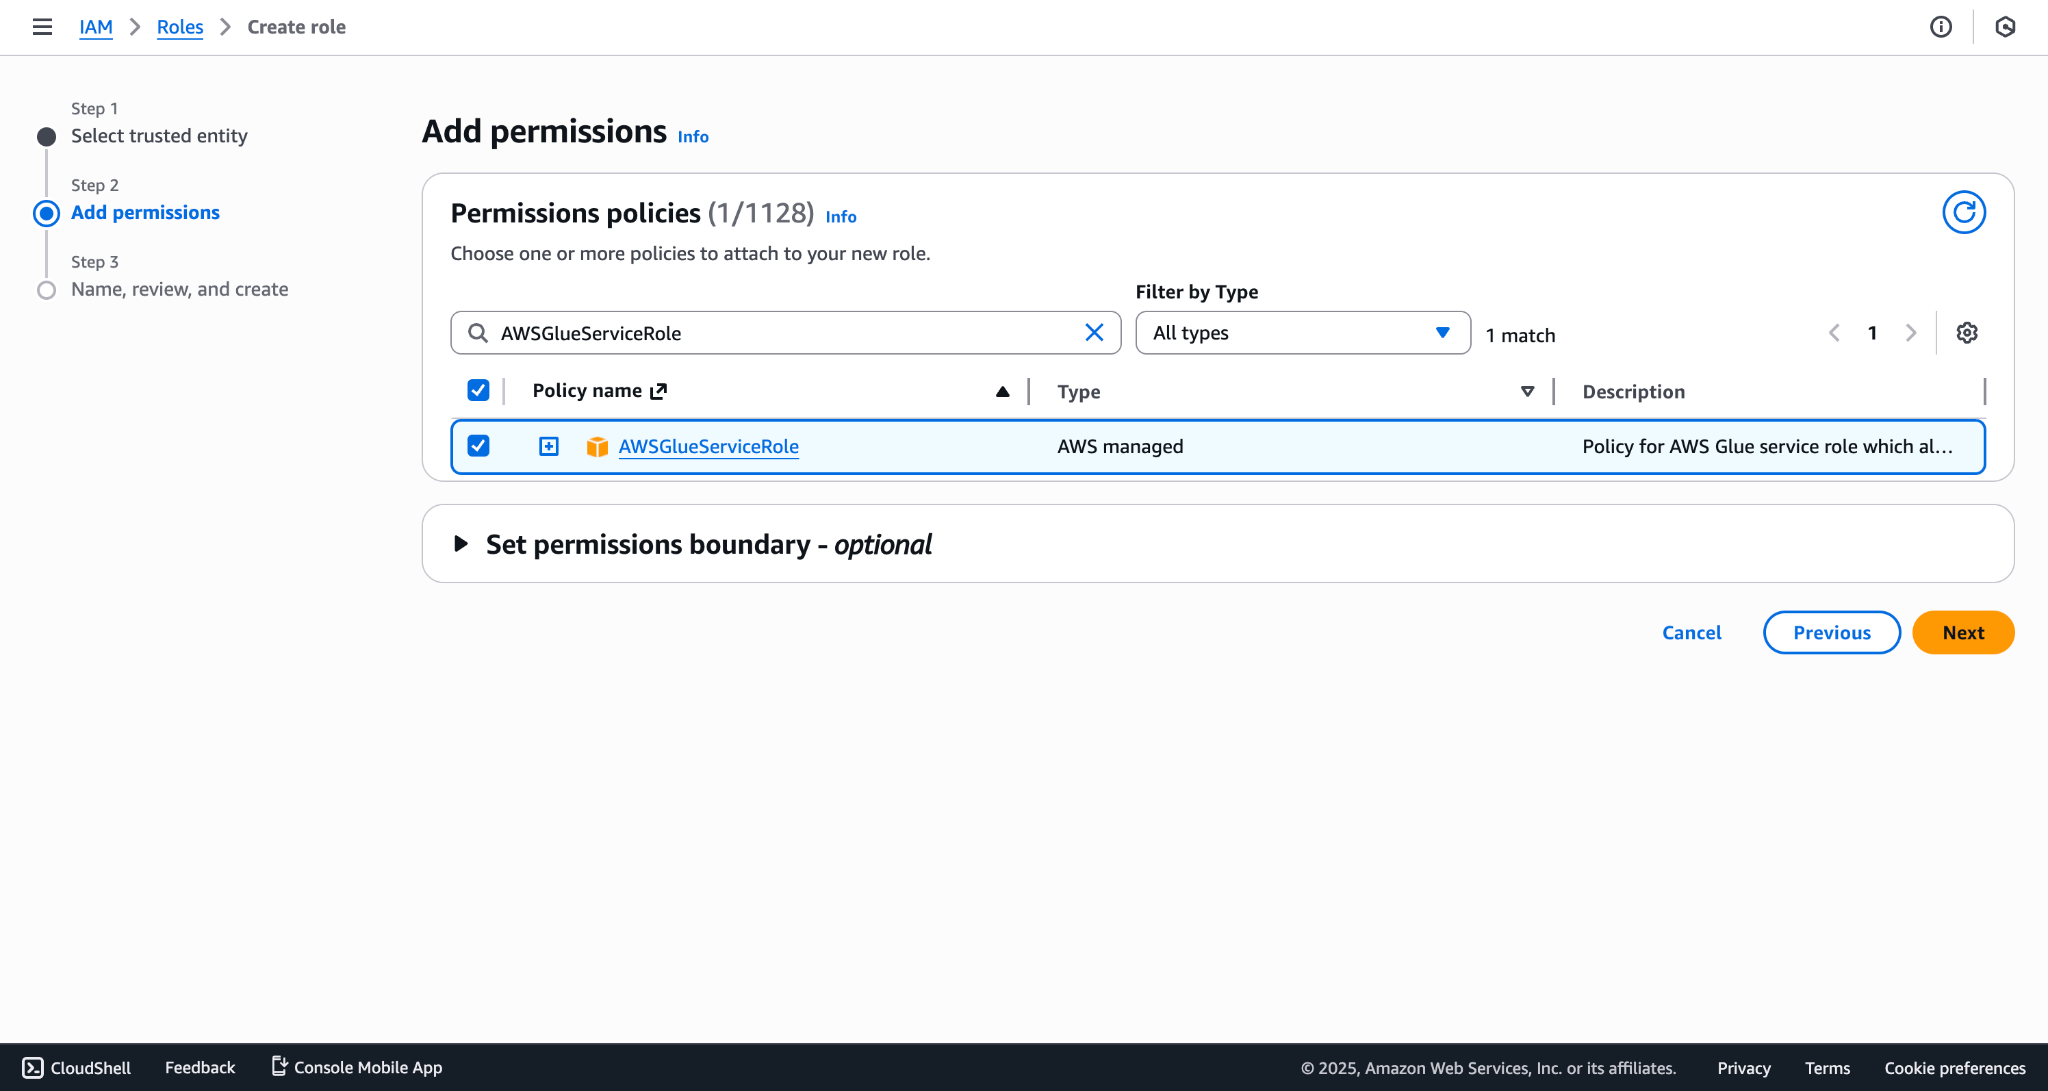
- Attach AWSGlueServiceRole and create the policy for this role.
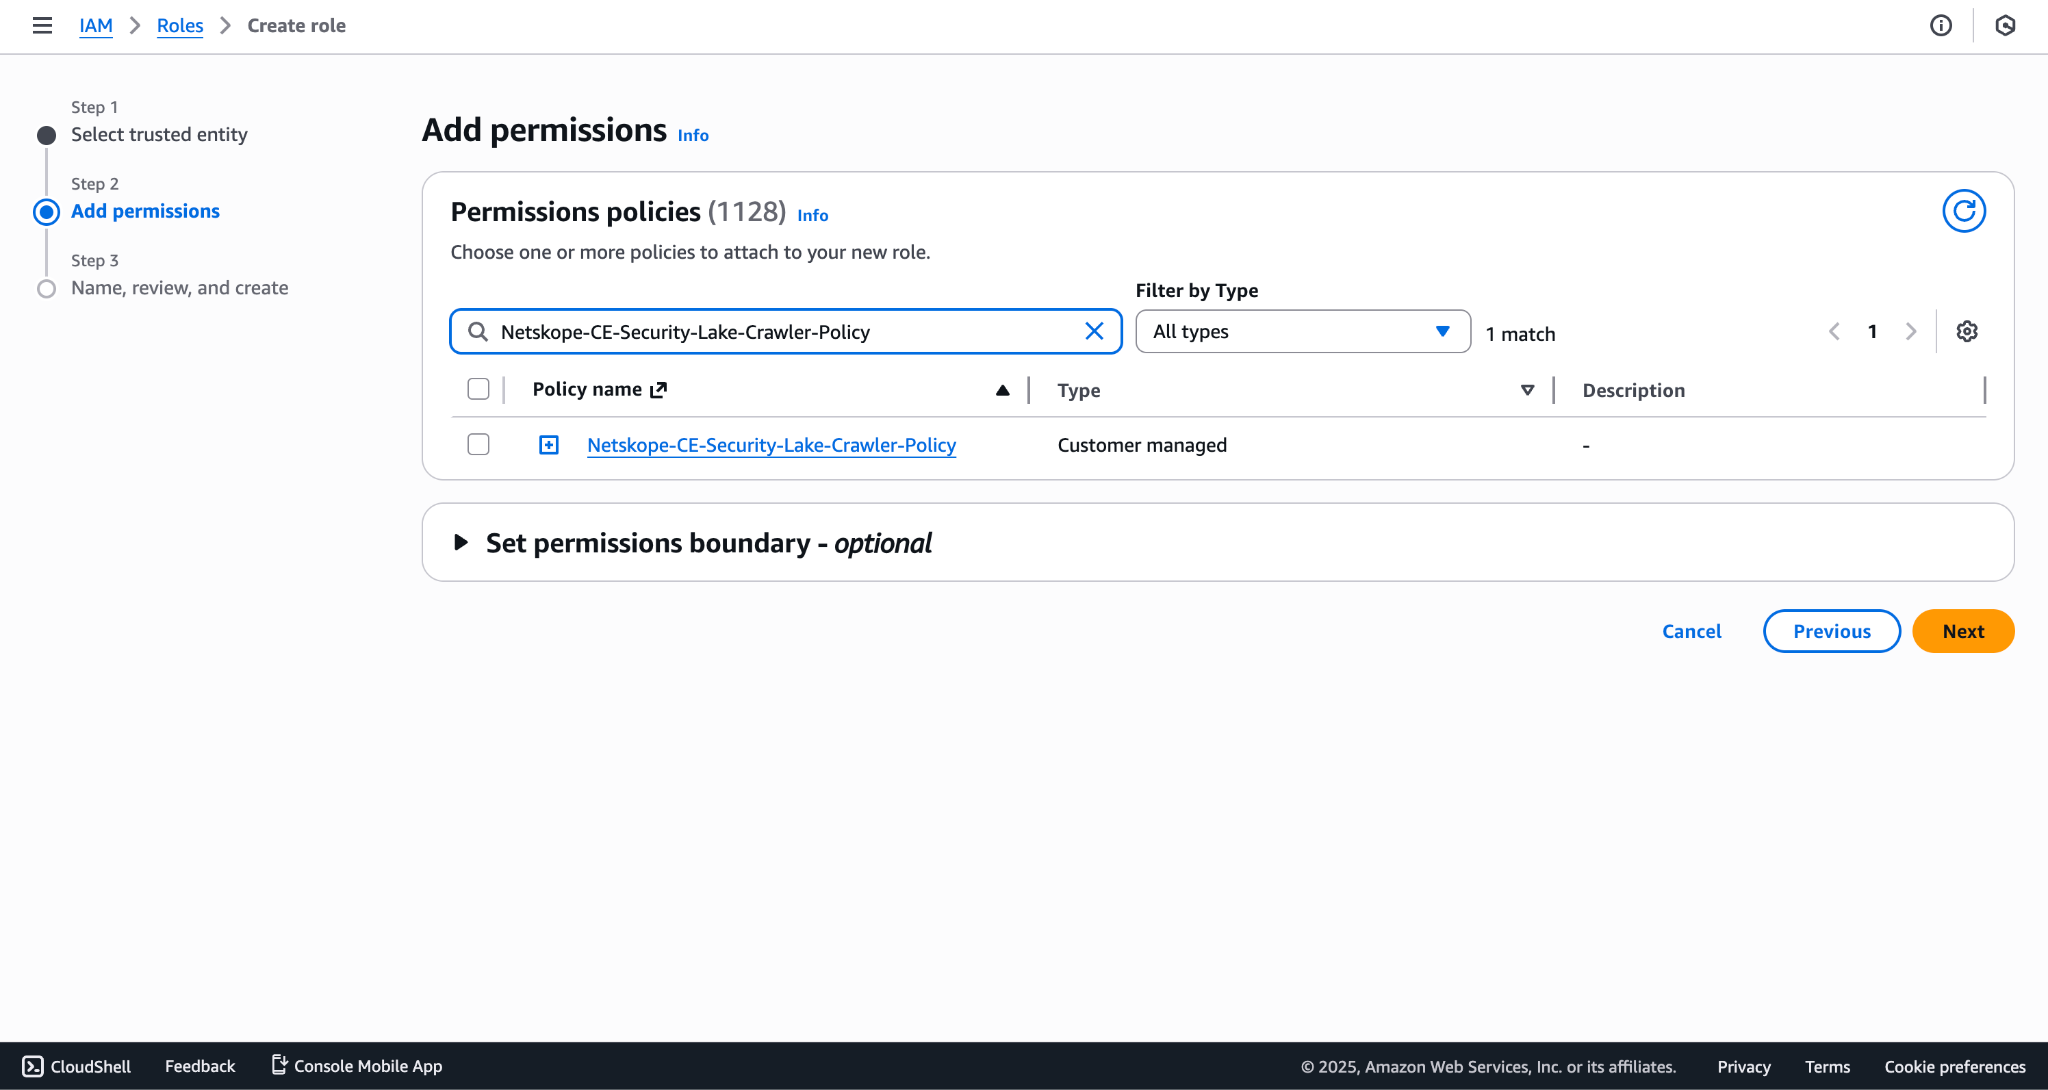
- Enter a Role Name and click Create role.
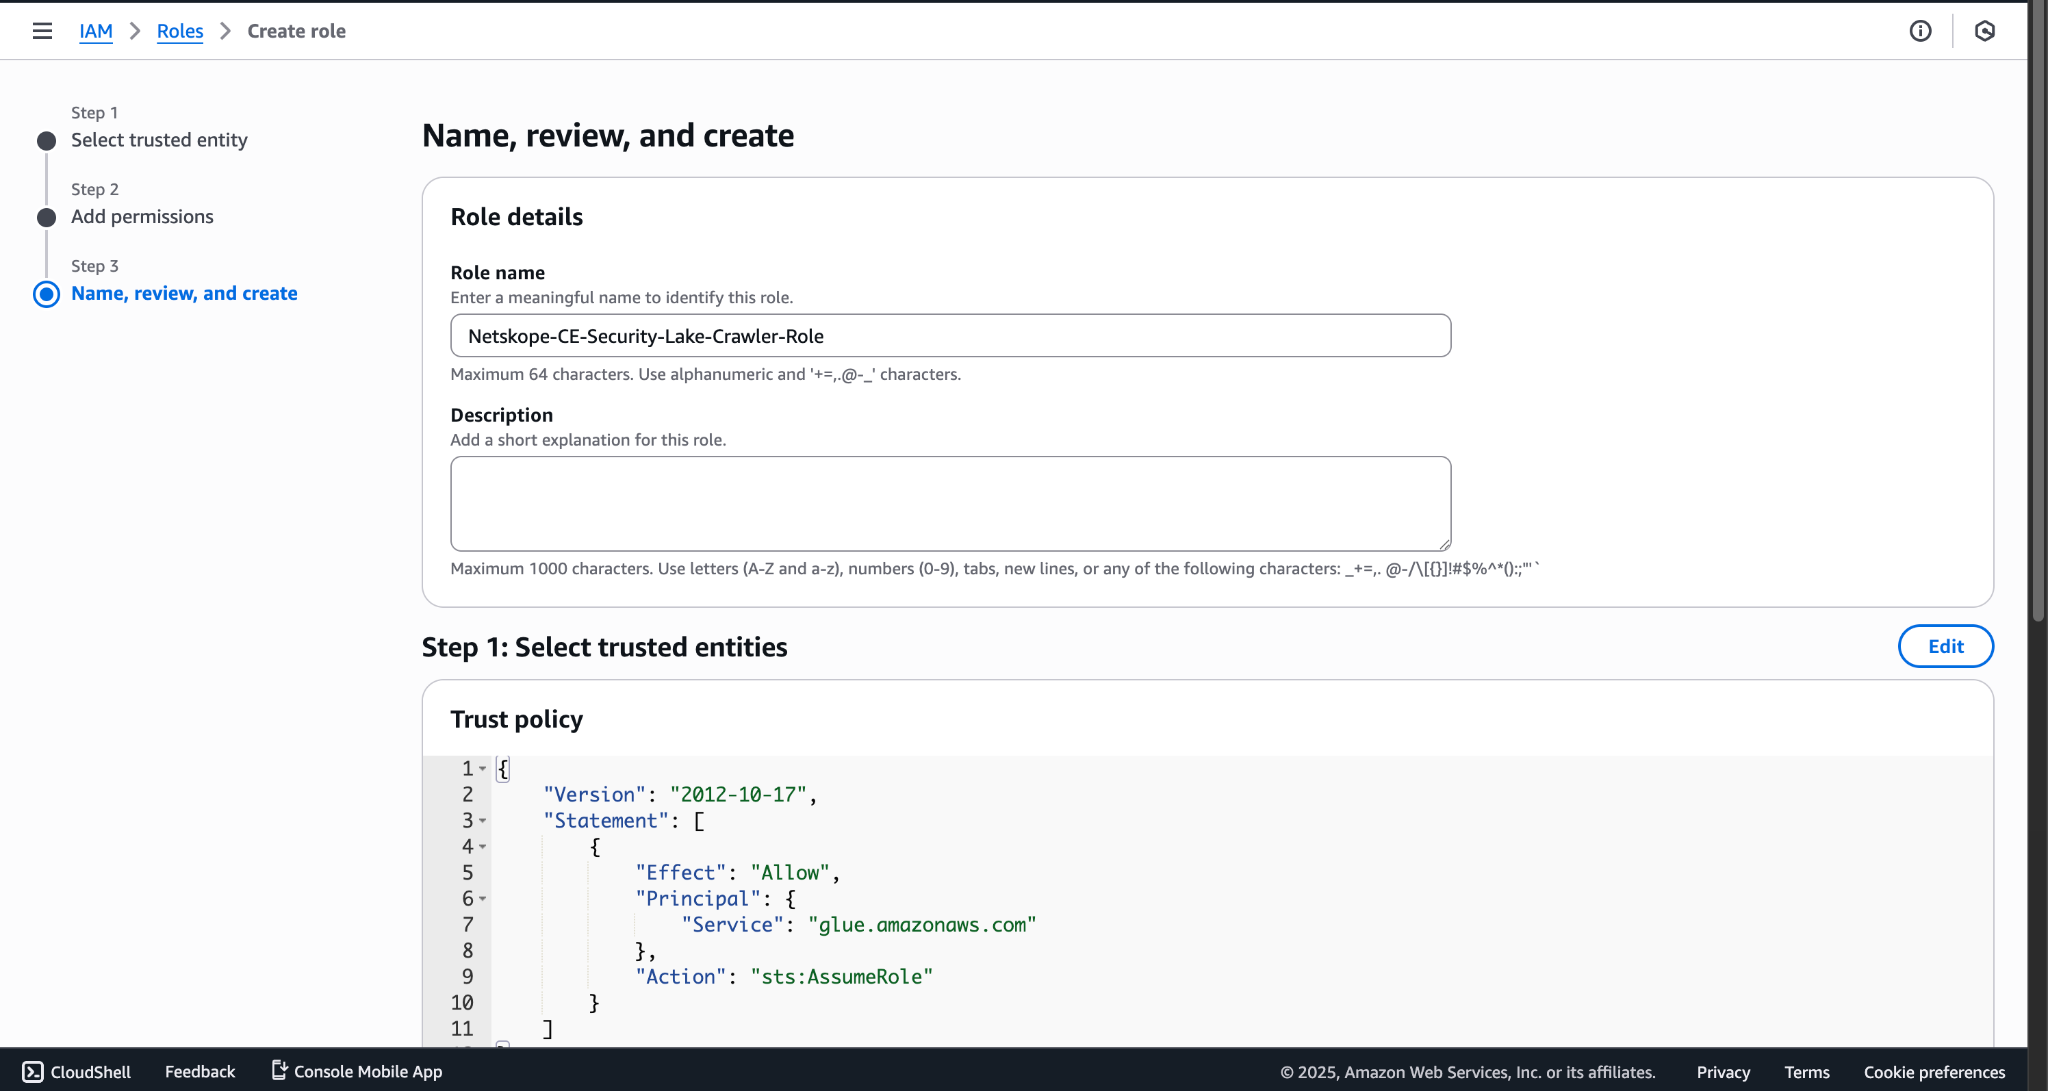
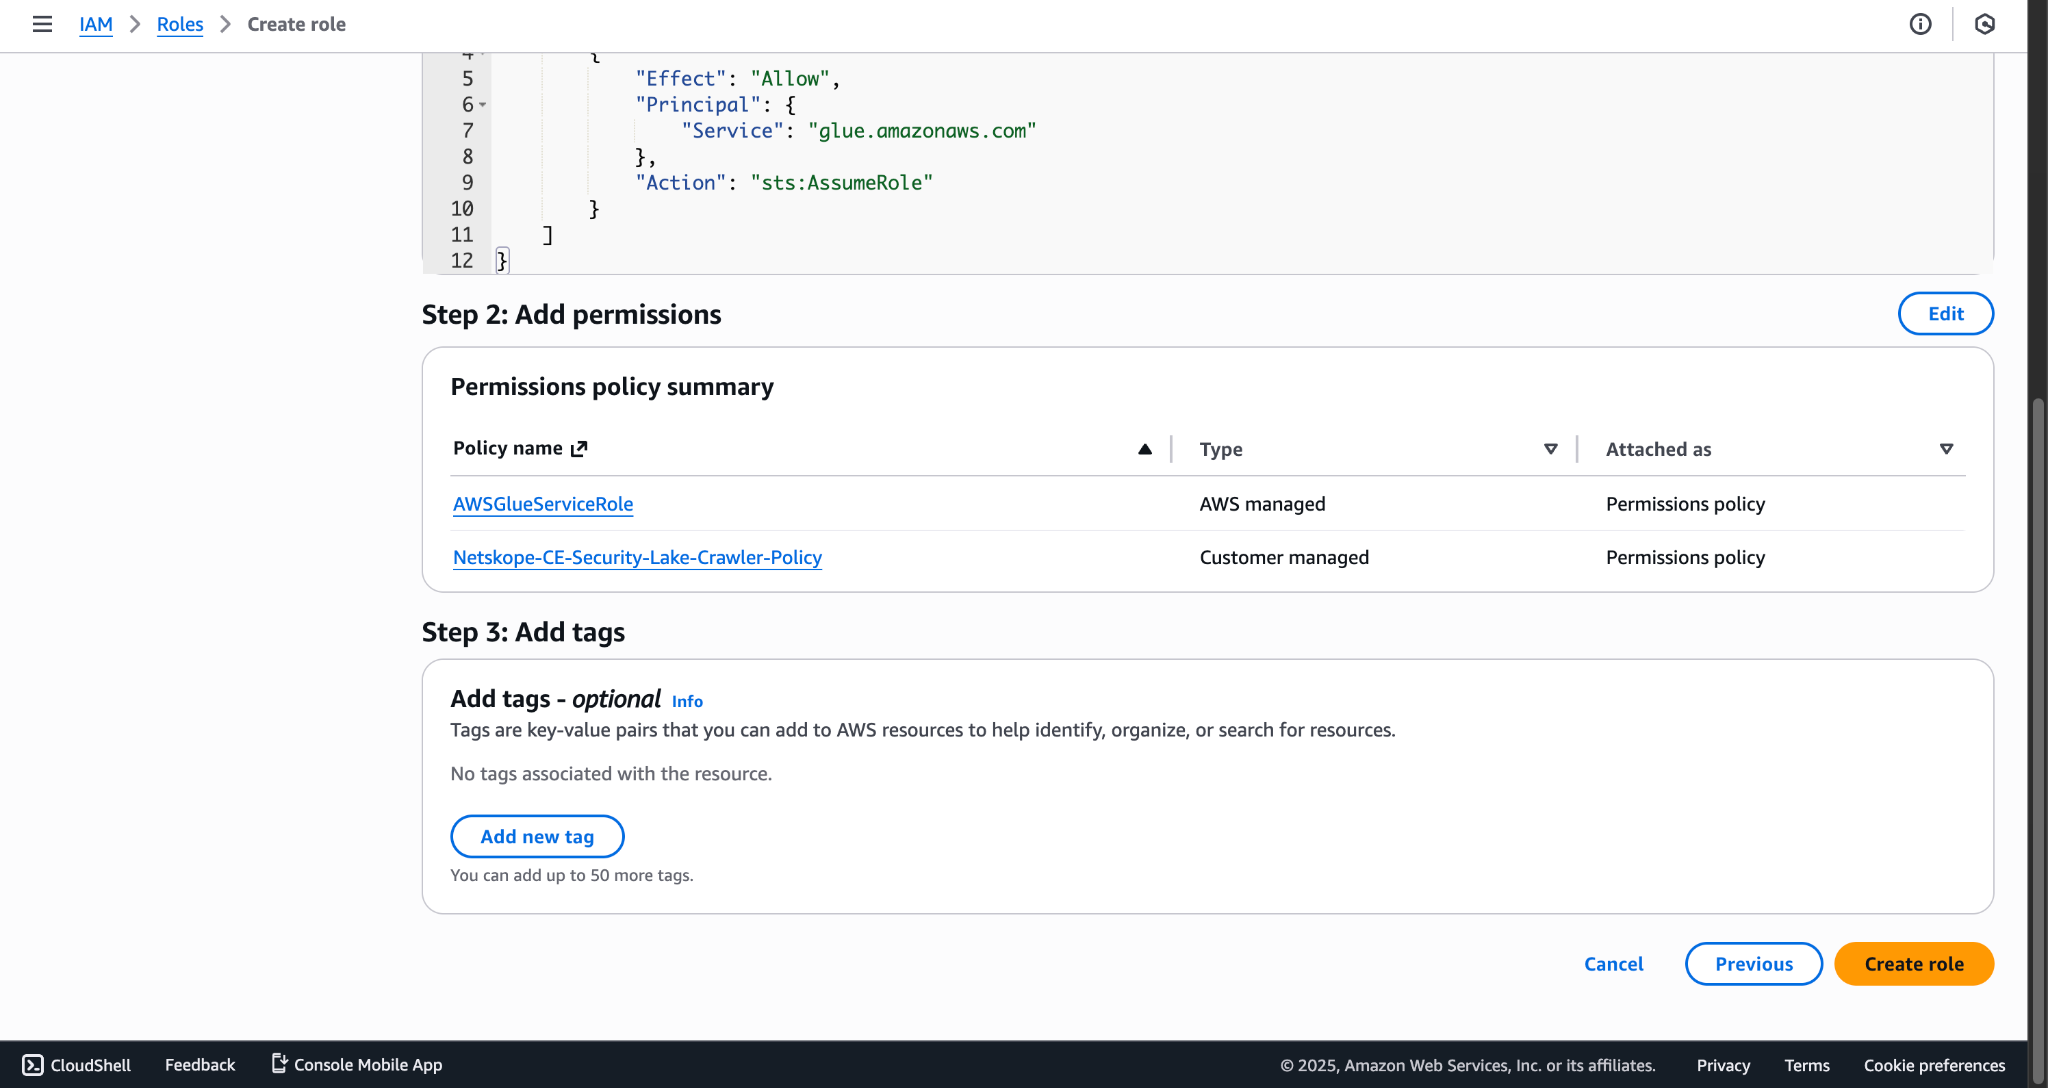
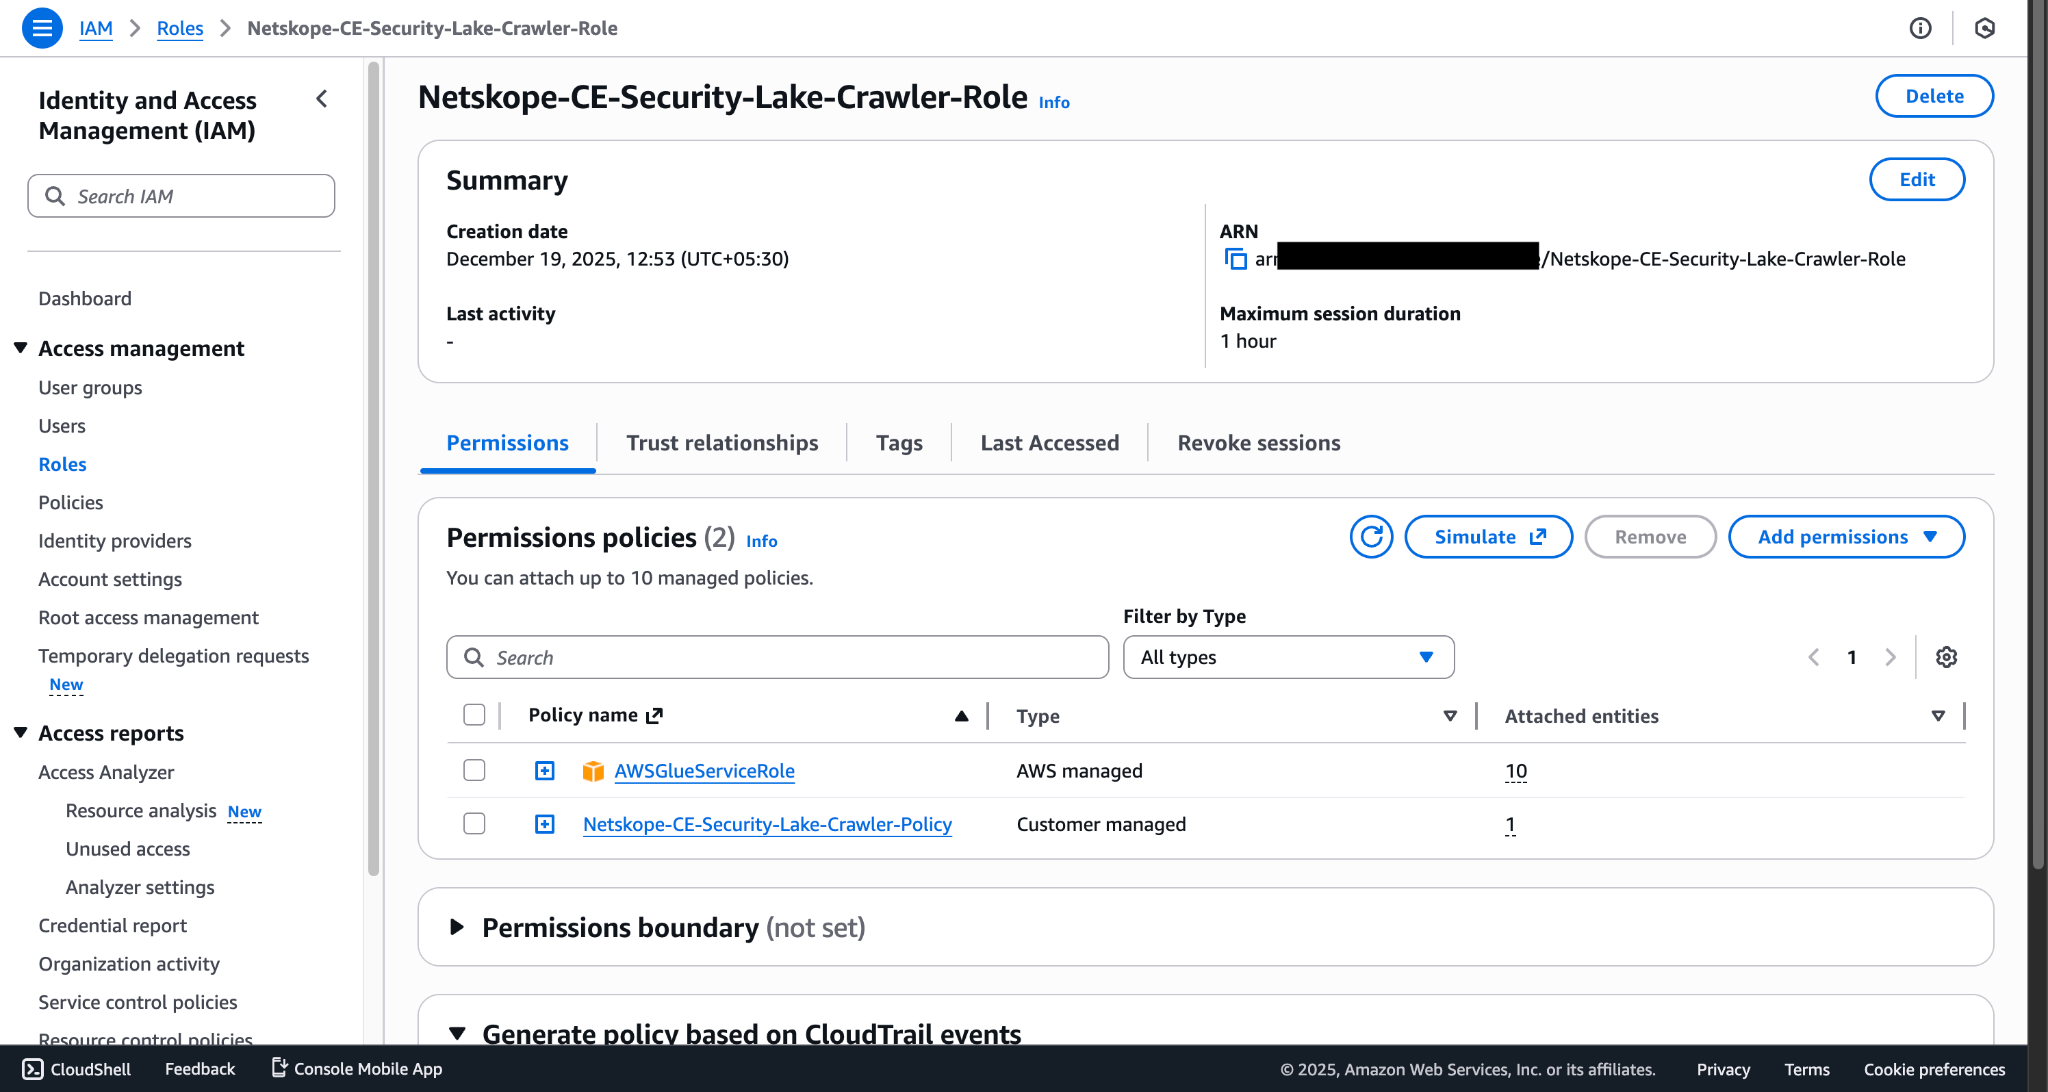
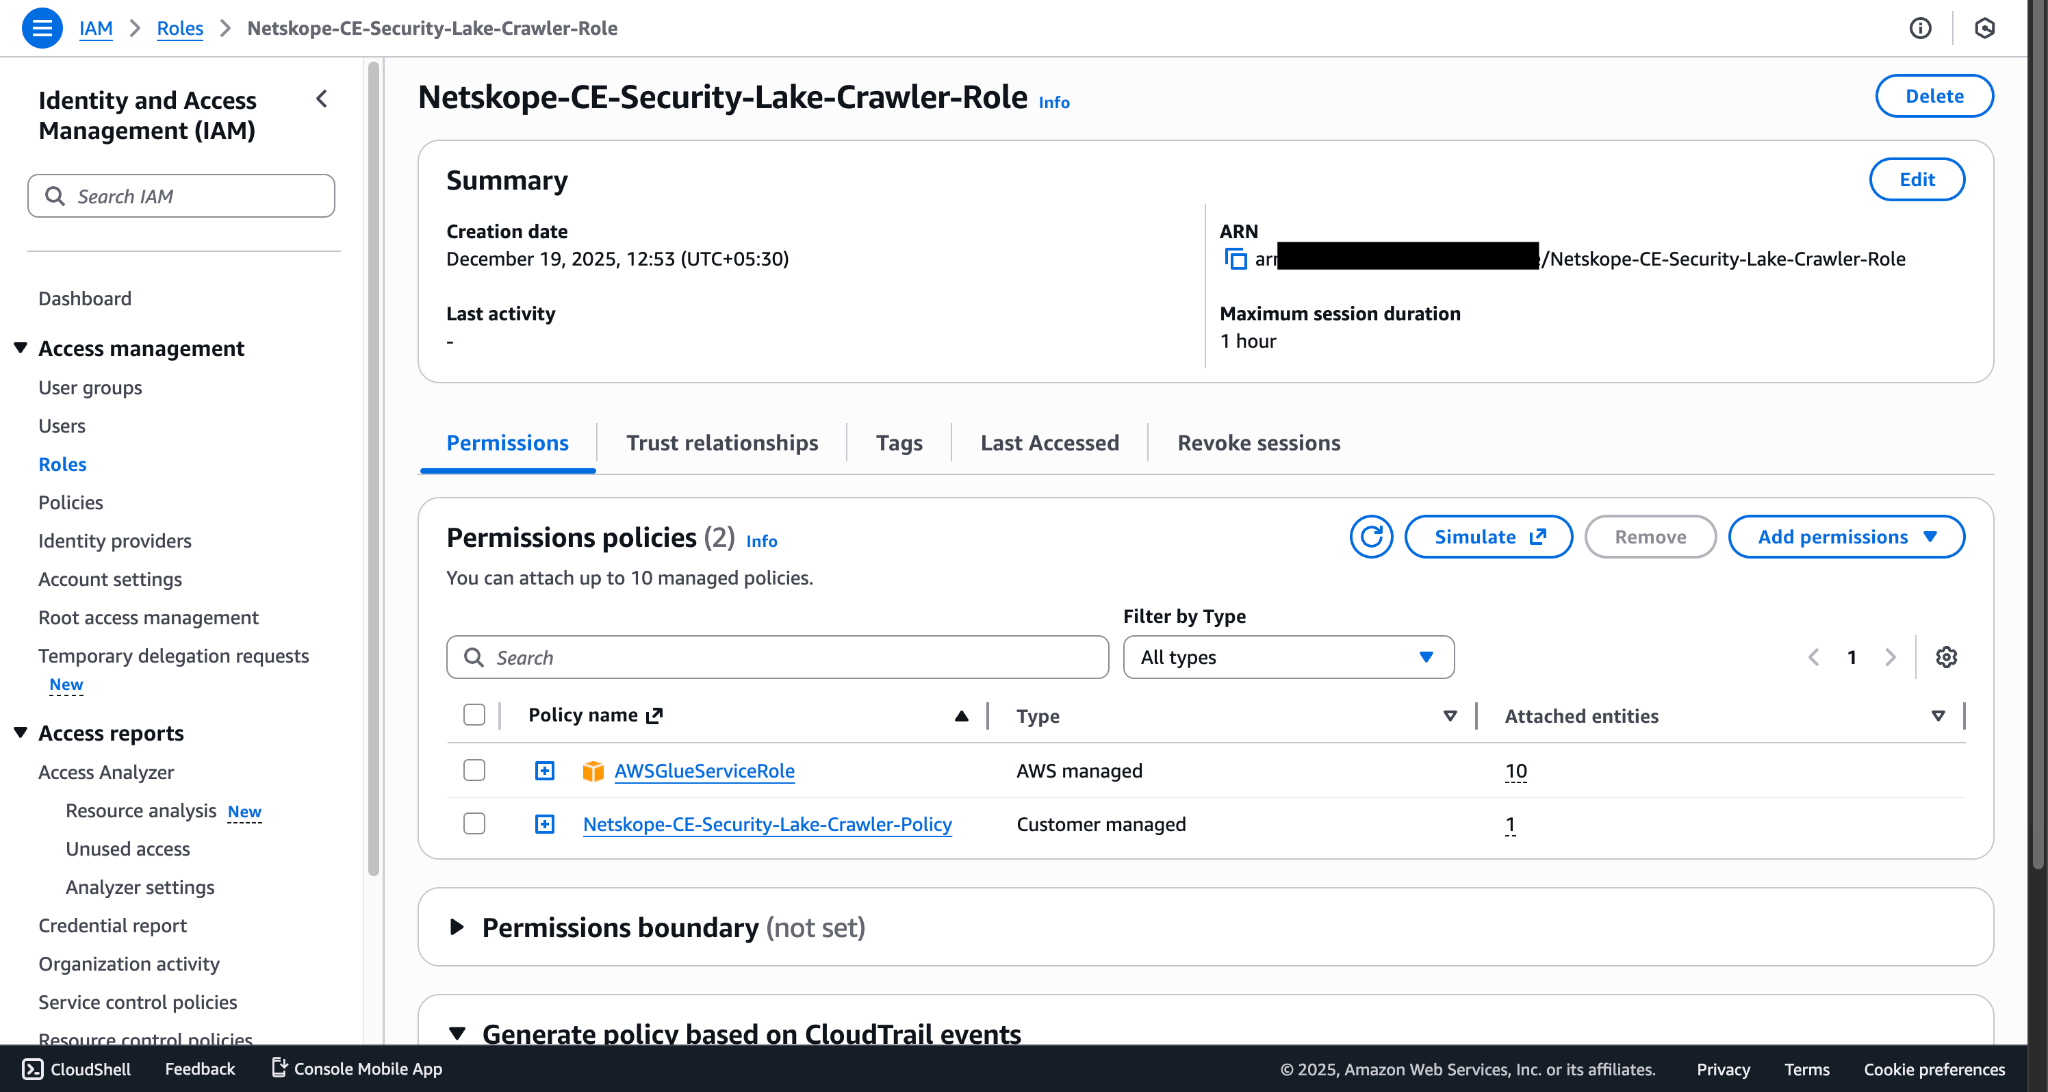
- Copy the Role ARN; it will be used as the Crawler Role ARN.
Provide Permissions in Lake Formation
- Go to AWS Lake formation> Administration > Administrative roles and tasks.
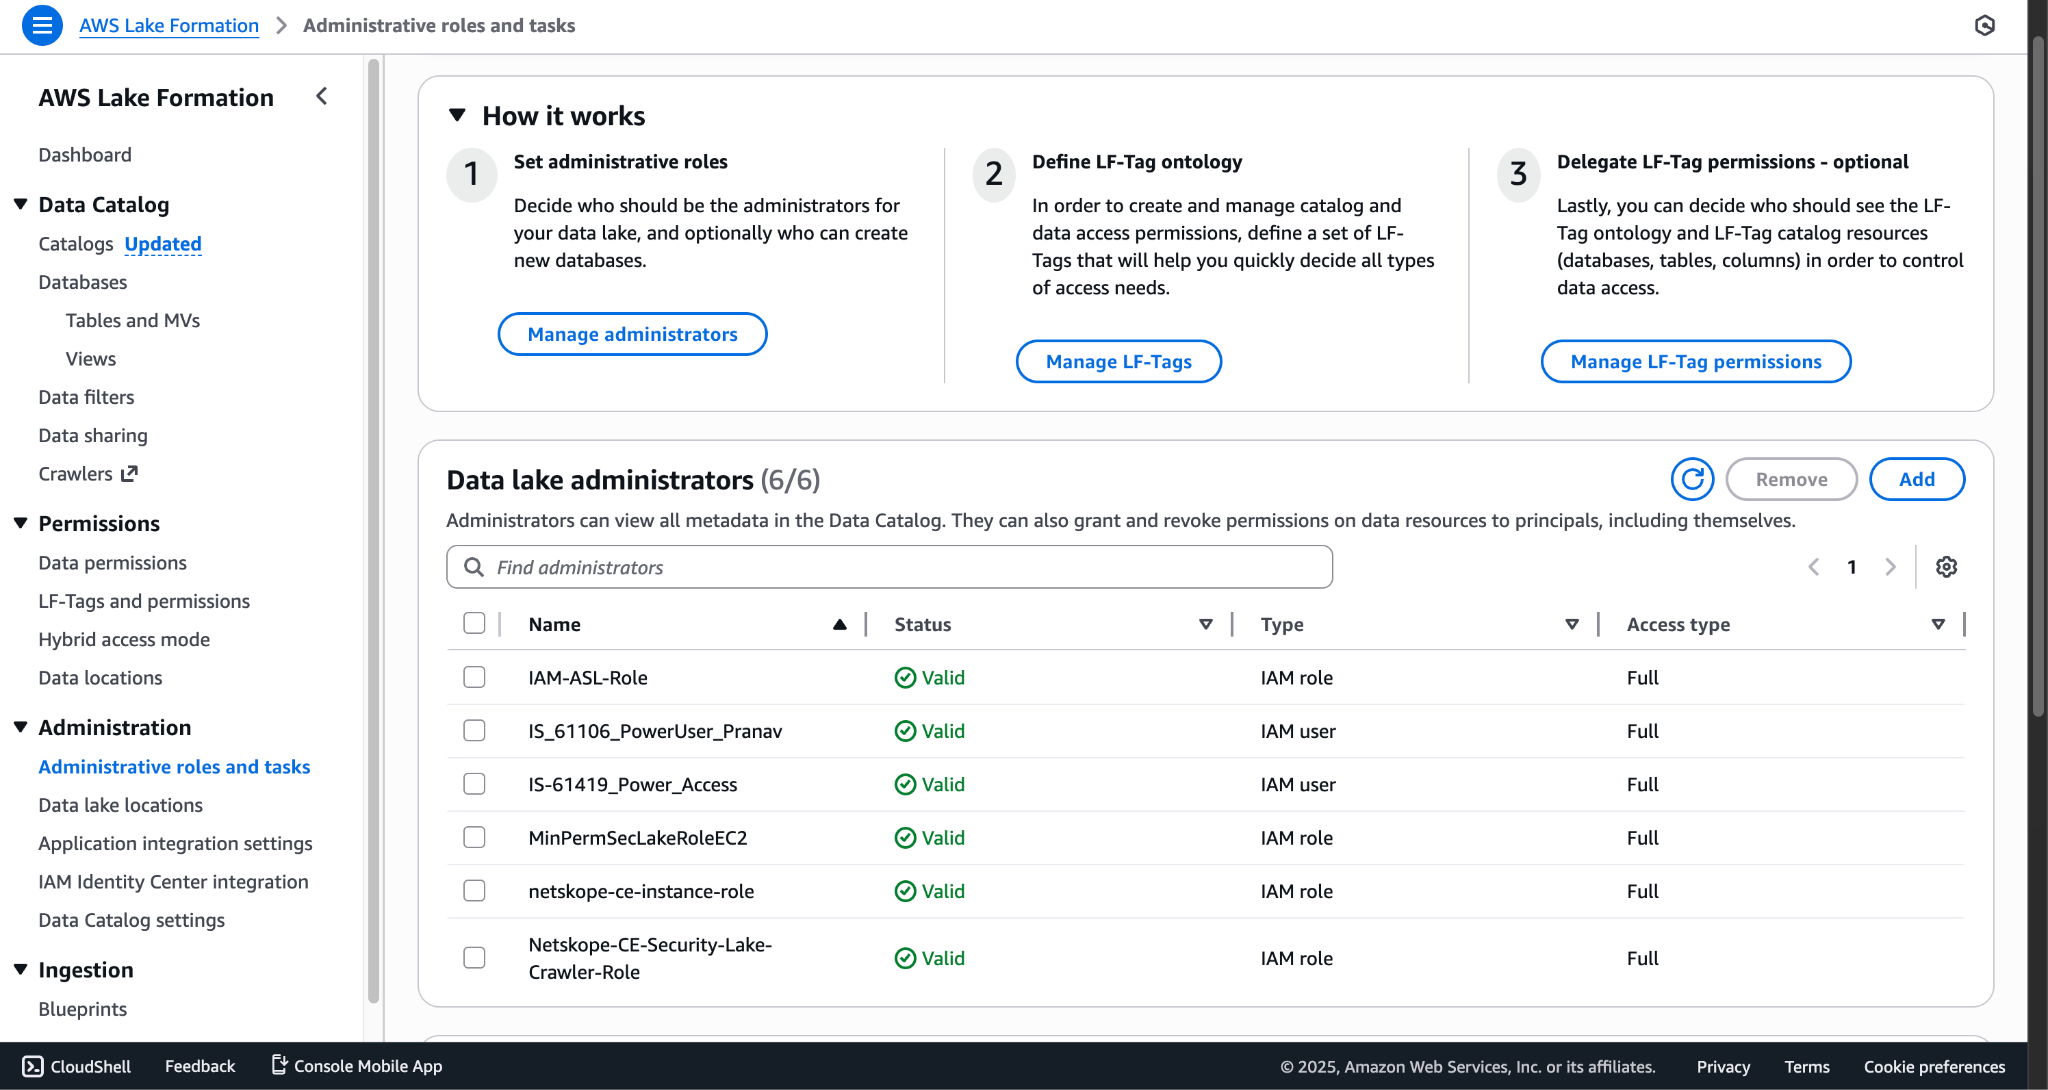
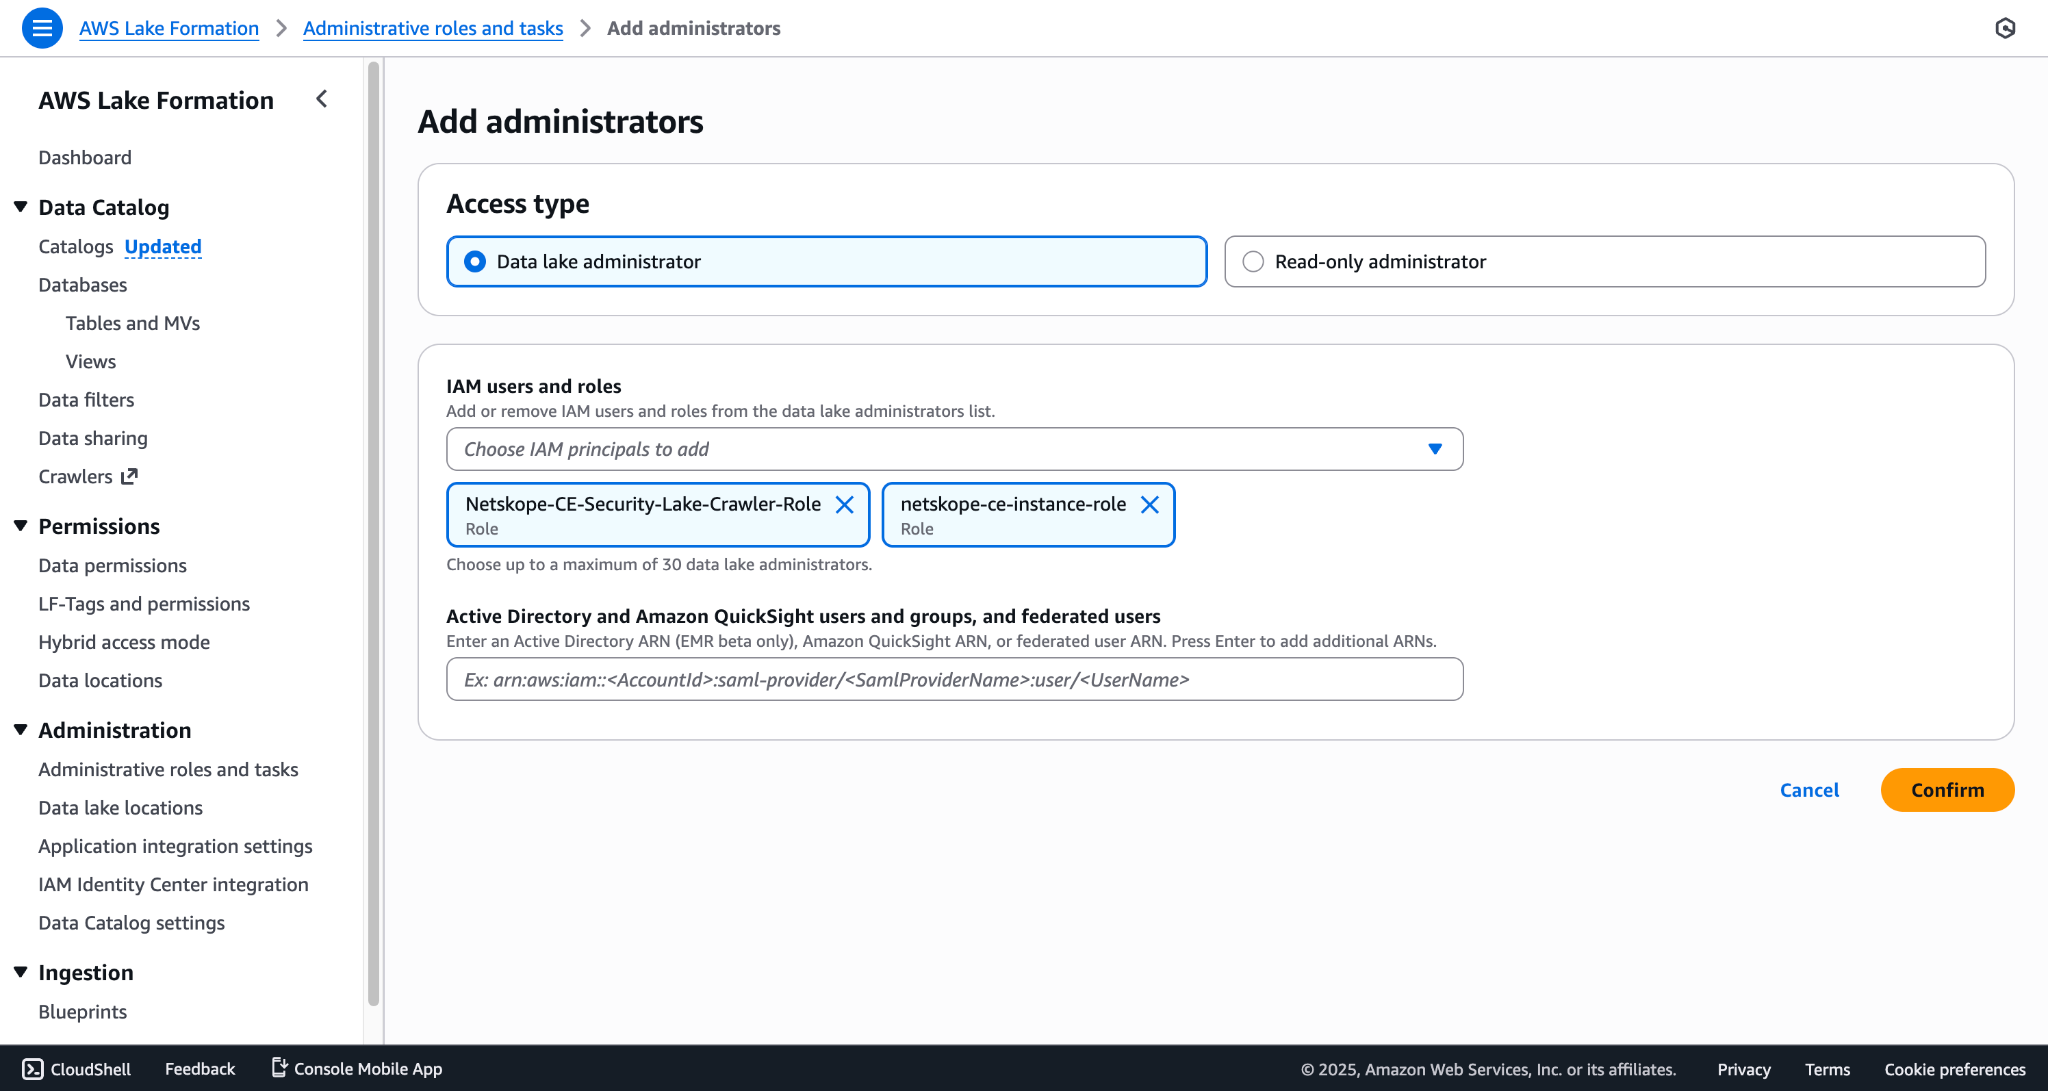
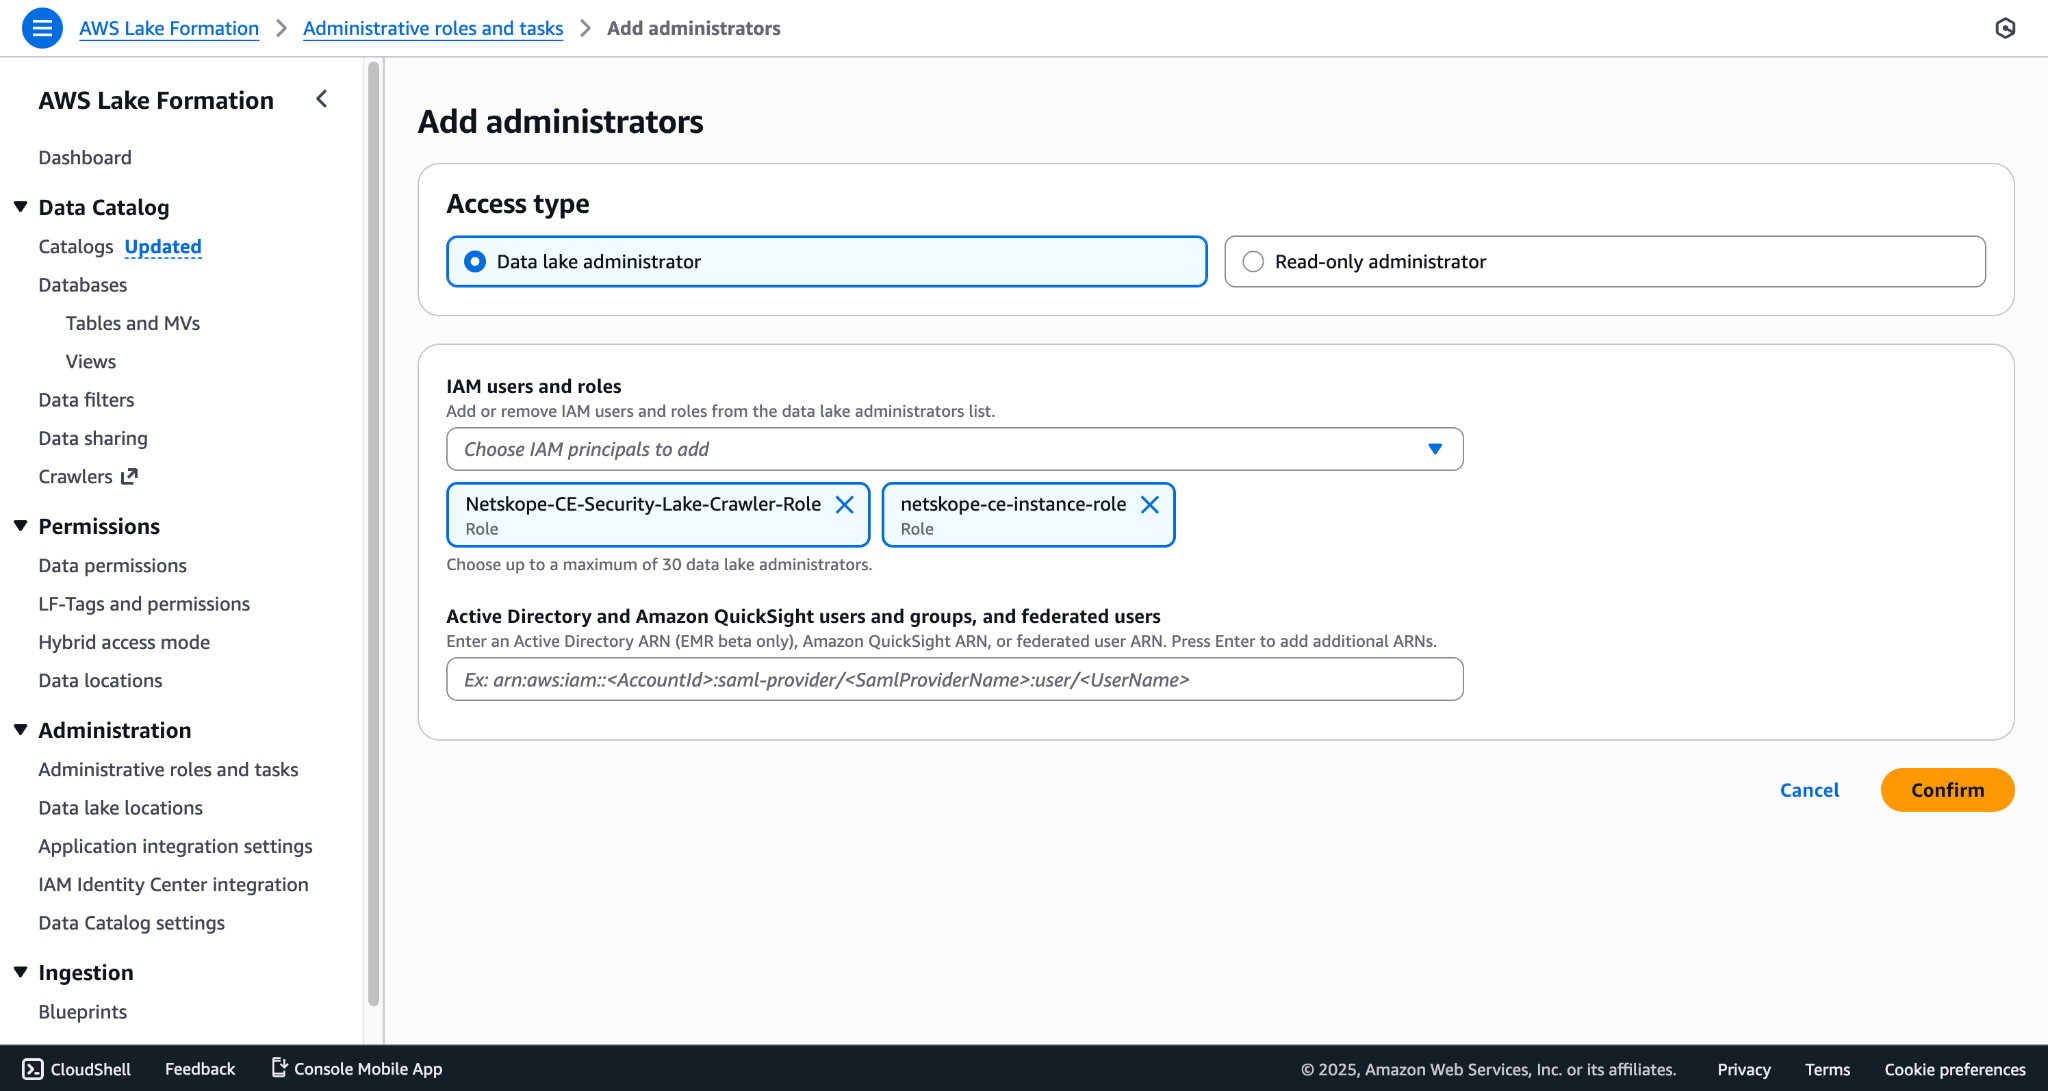
- Set the Access type as Data lake administrator, select the created roles, and click Confirm. Make sure it includes the Crawler role as well as the instance role.
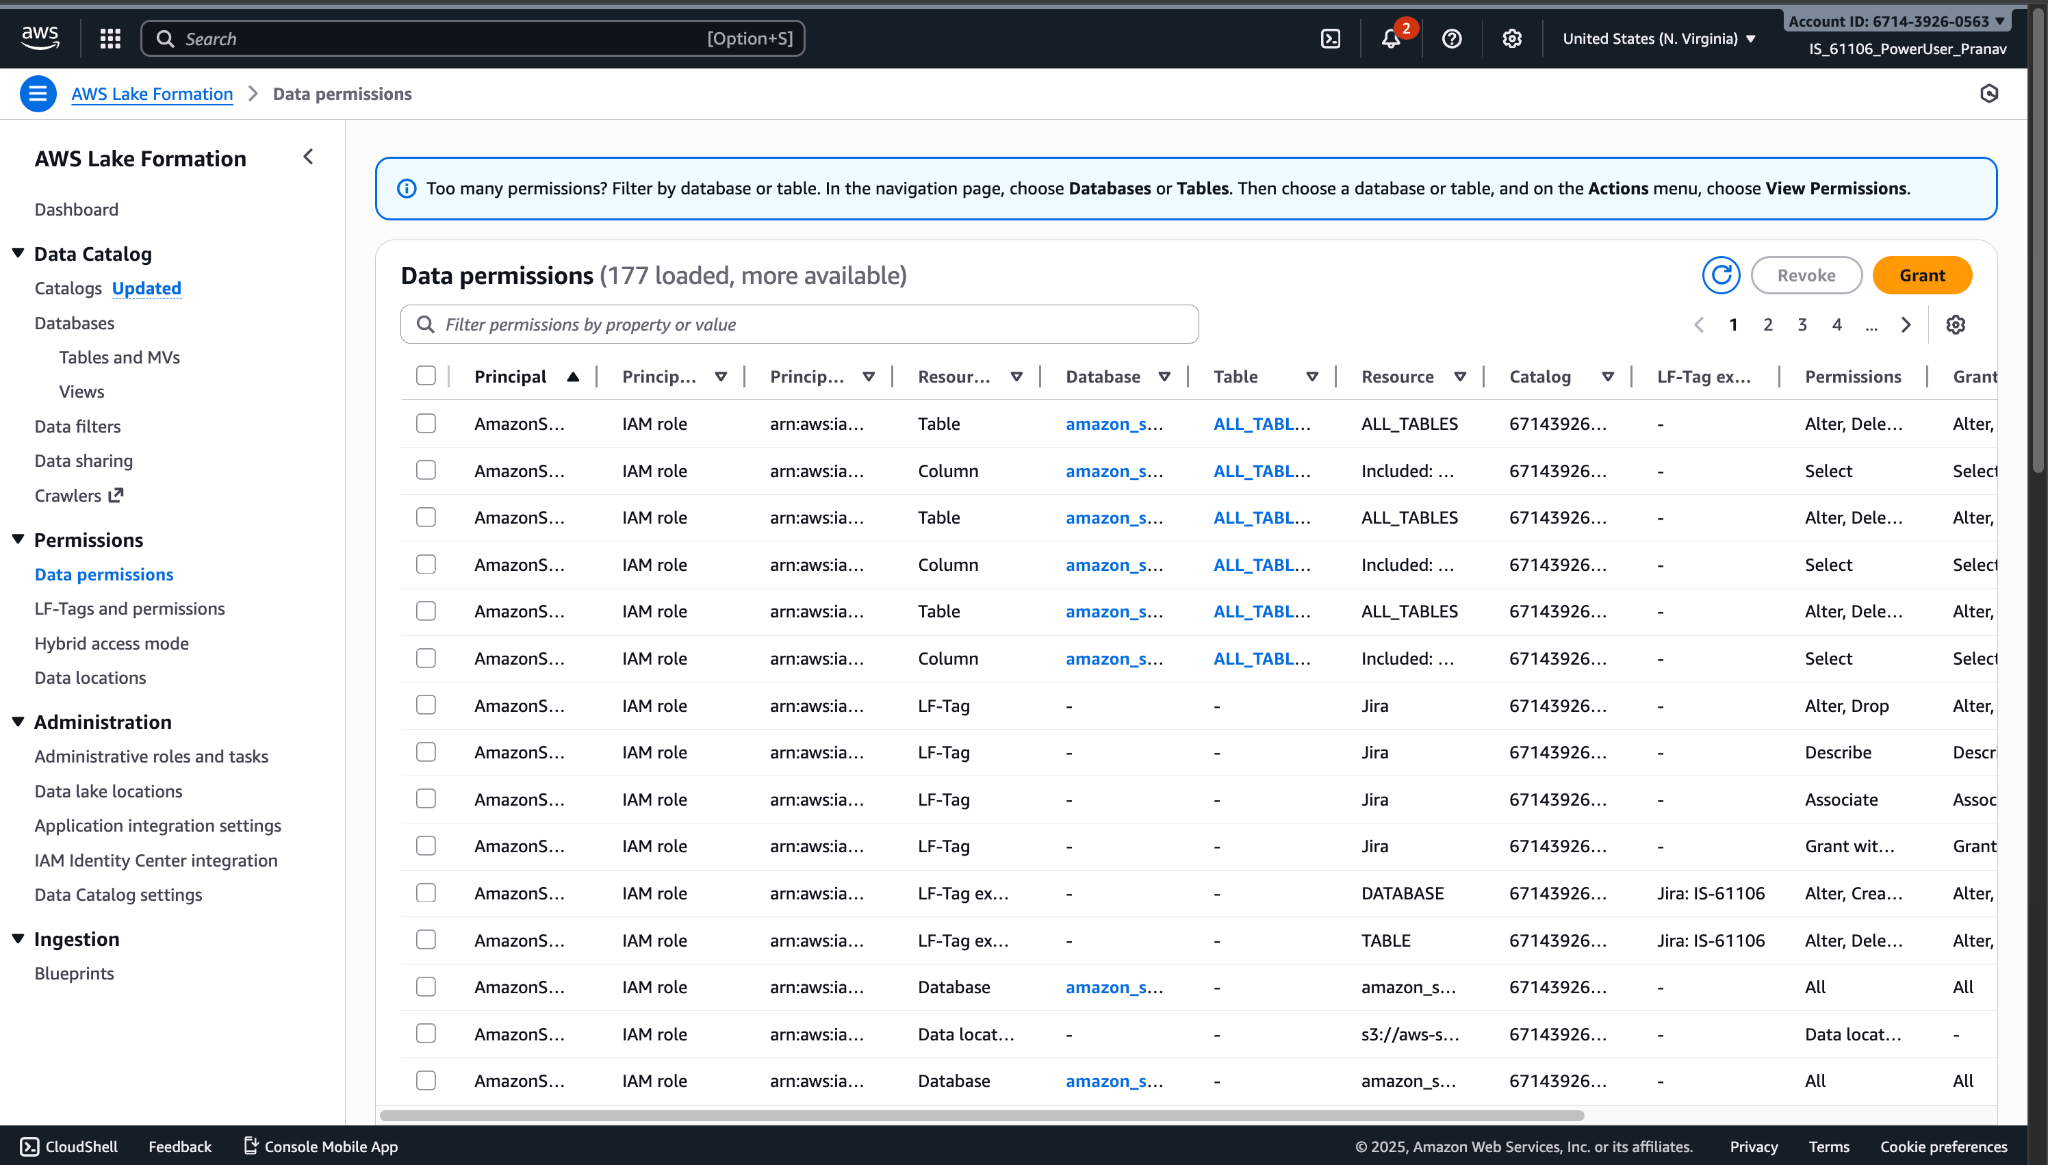
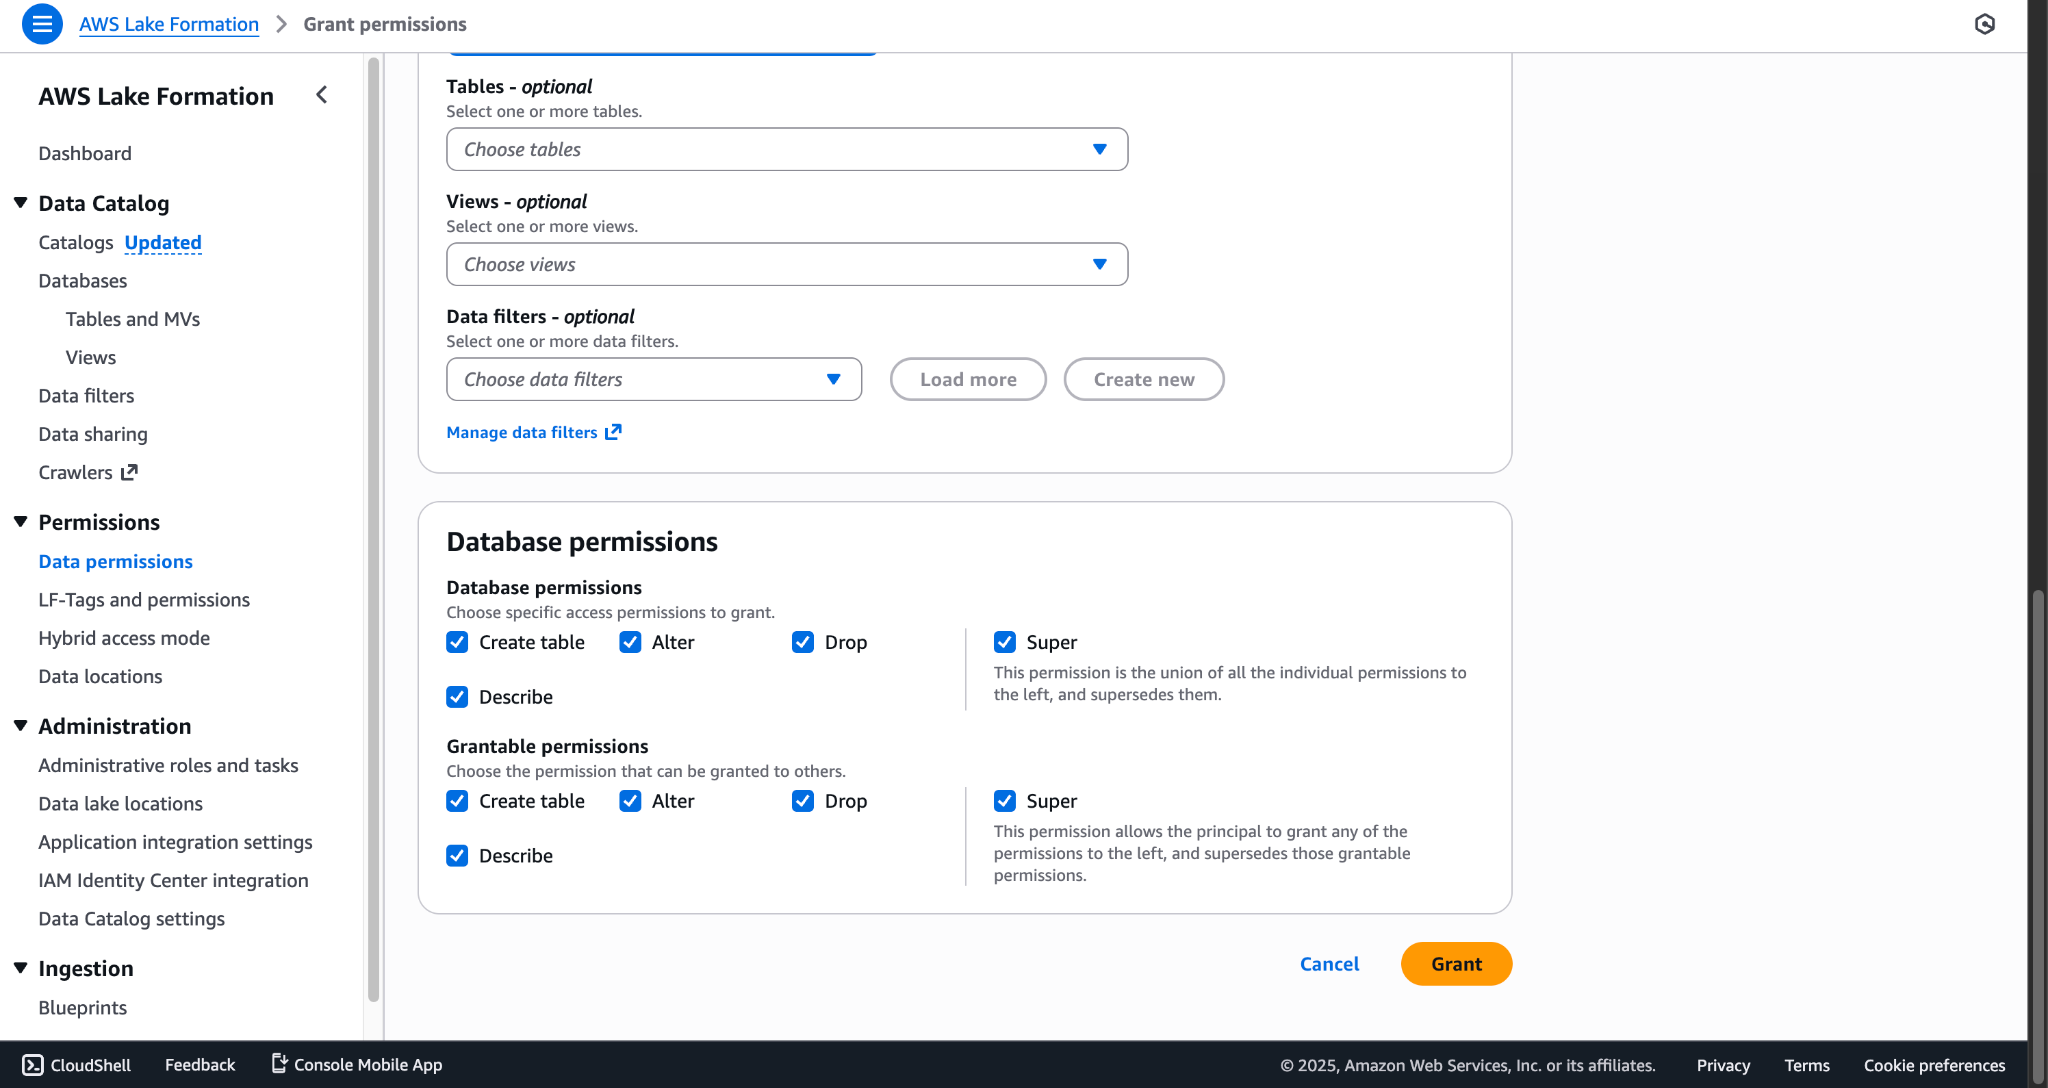
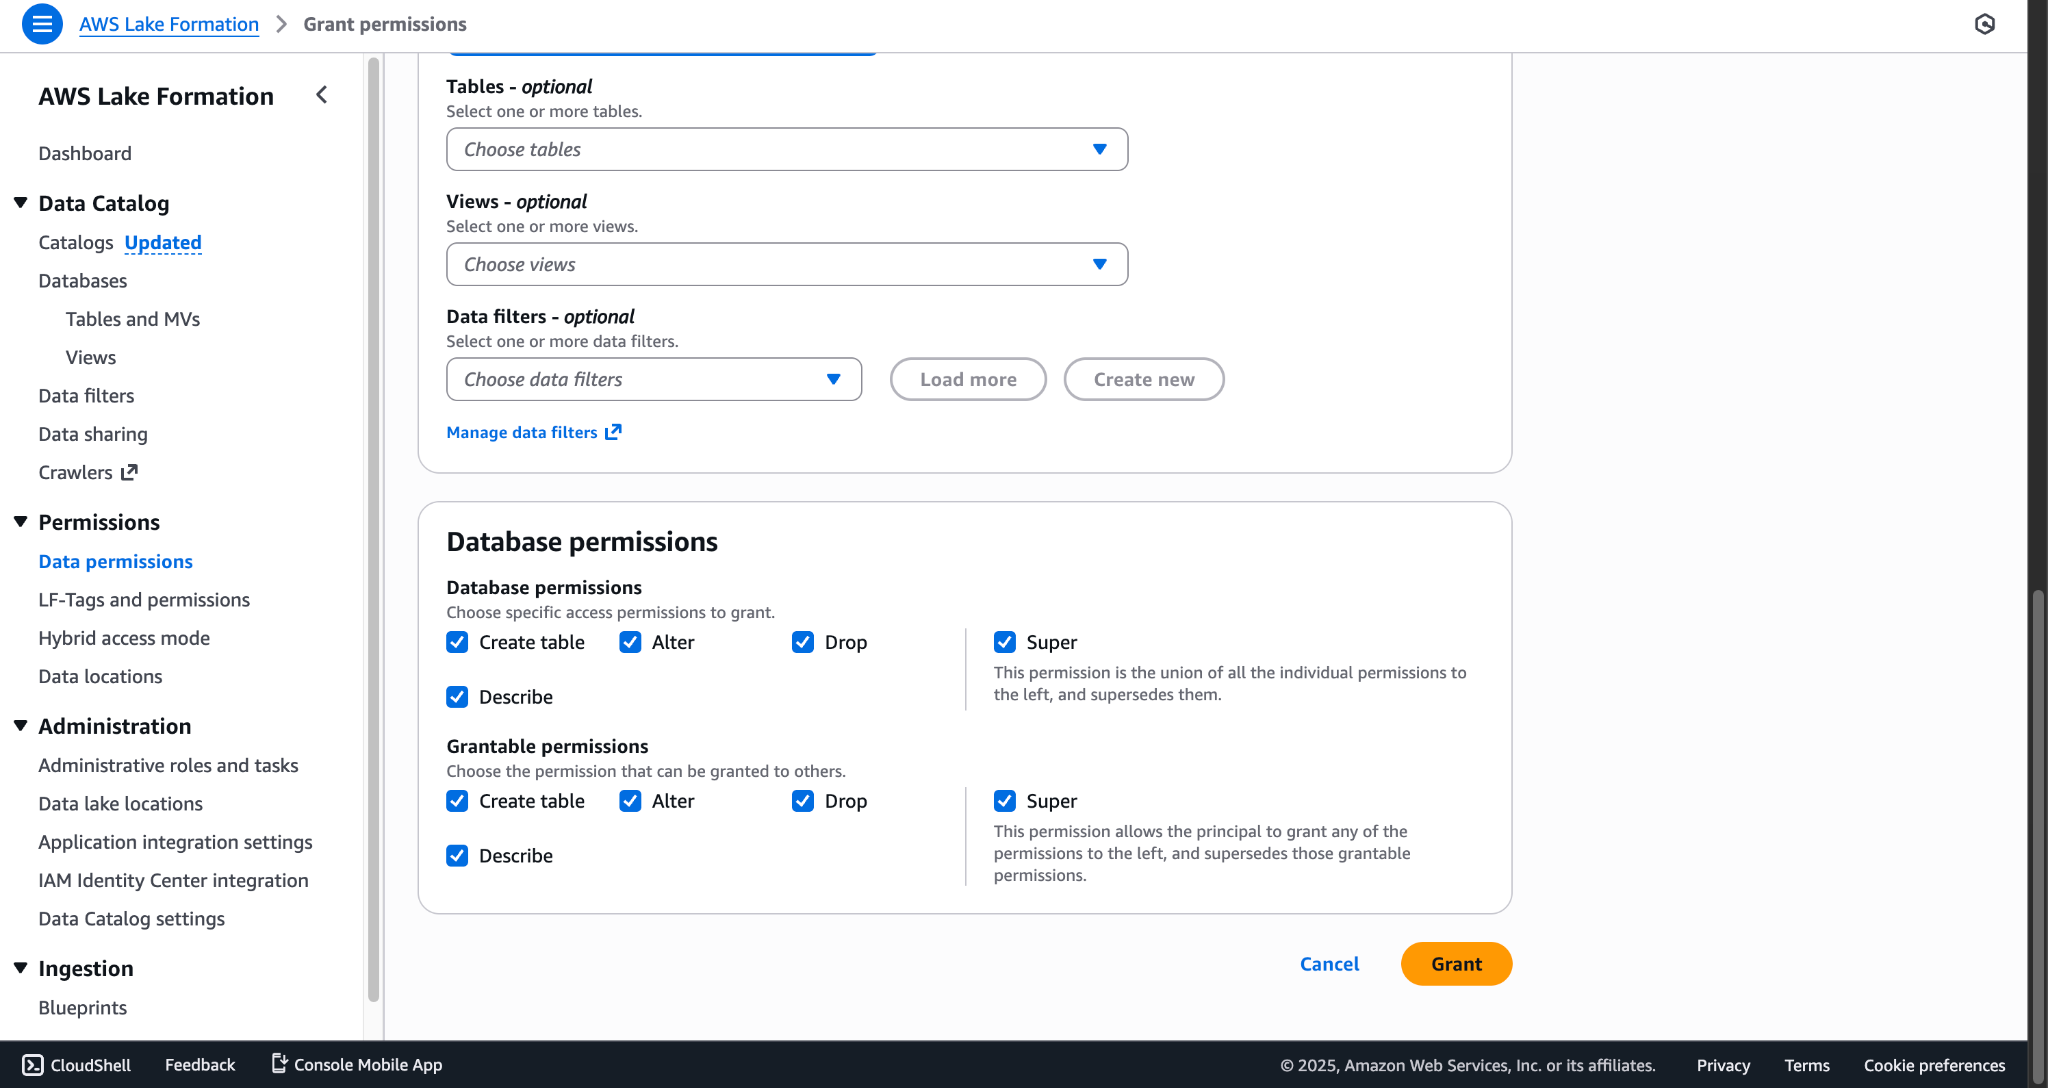
- Go to the Permissions > Data permissions and click Grant.
- Set the Principle type as Principals, and then select the roles. Make sure they include the Crawler role as well as the Instance role.
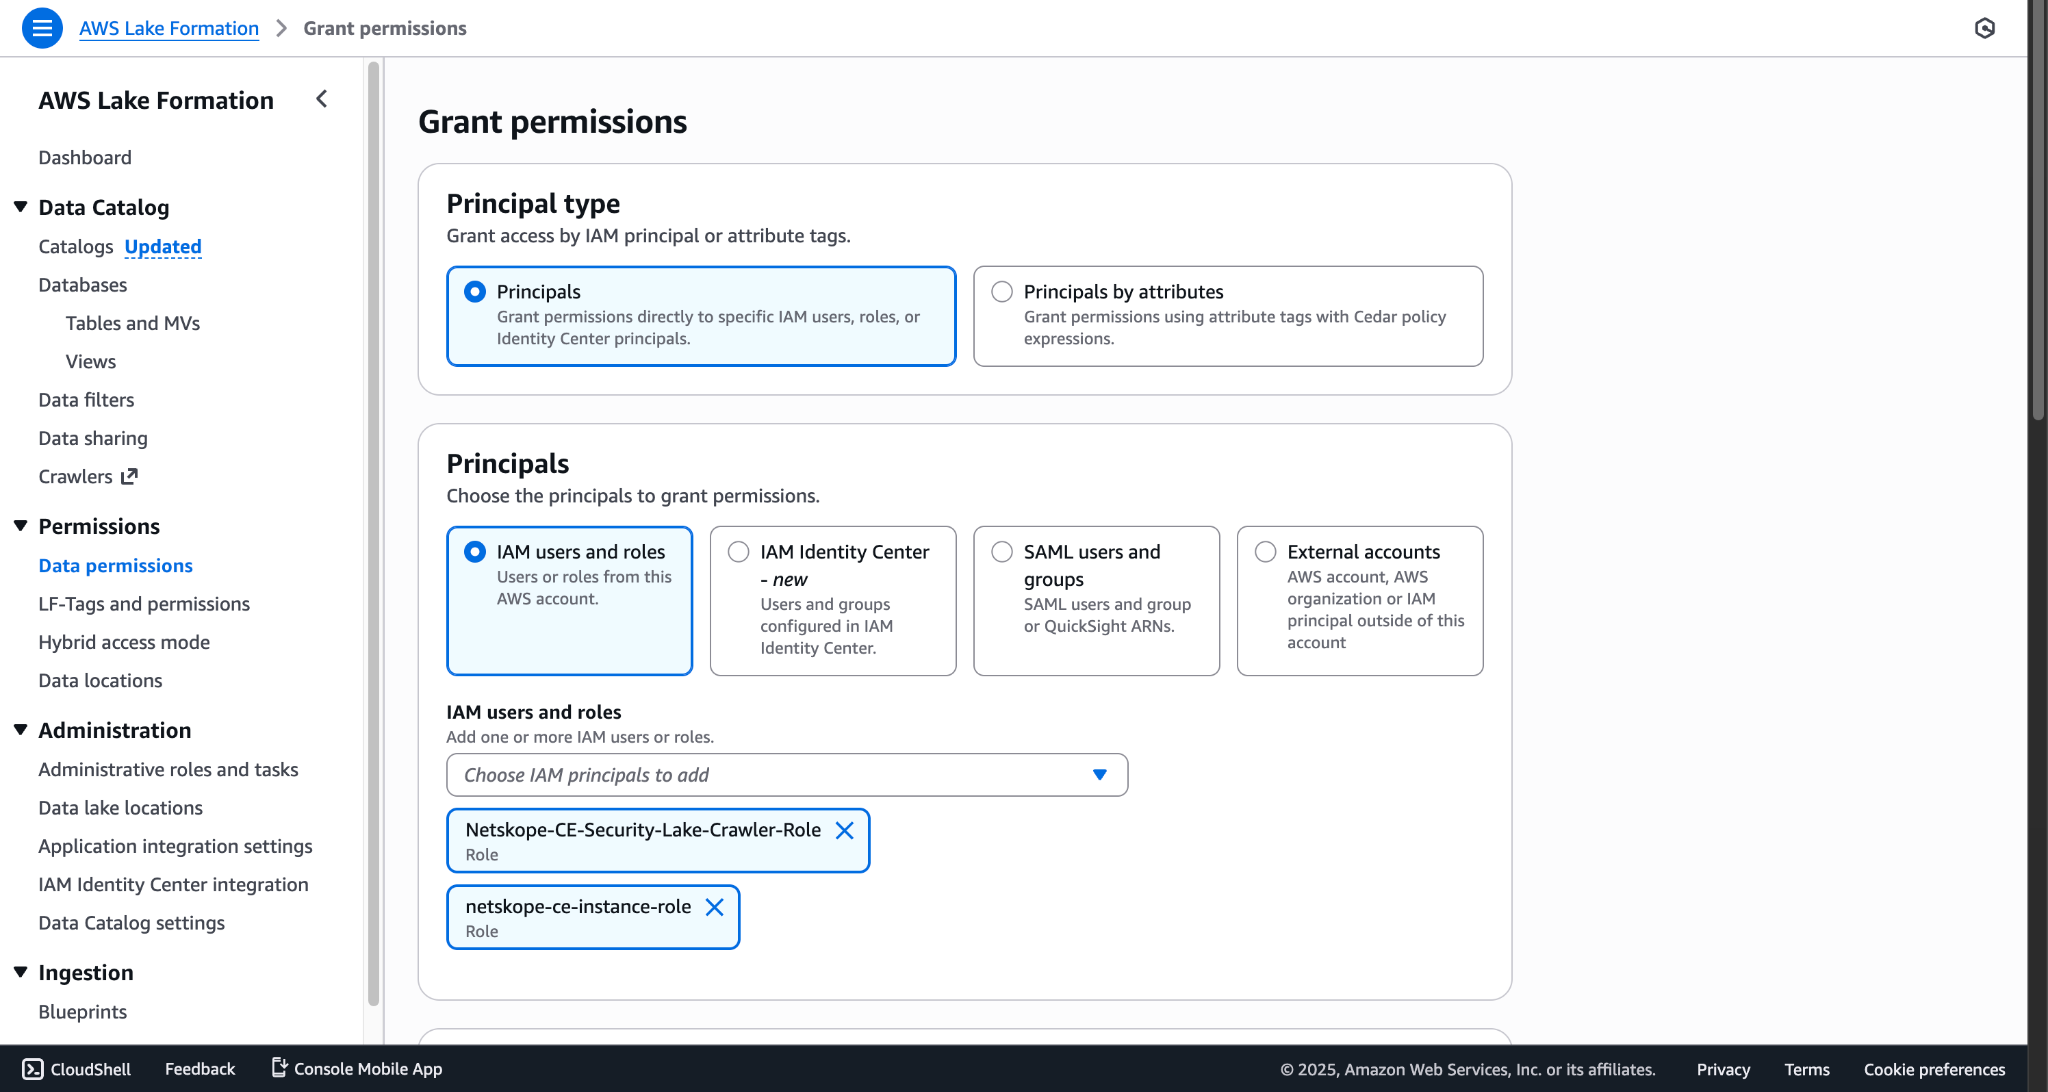
Note
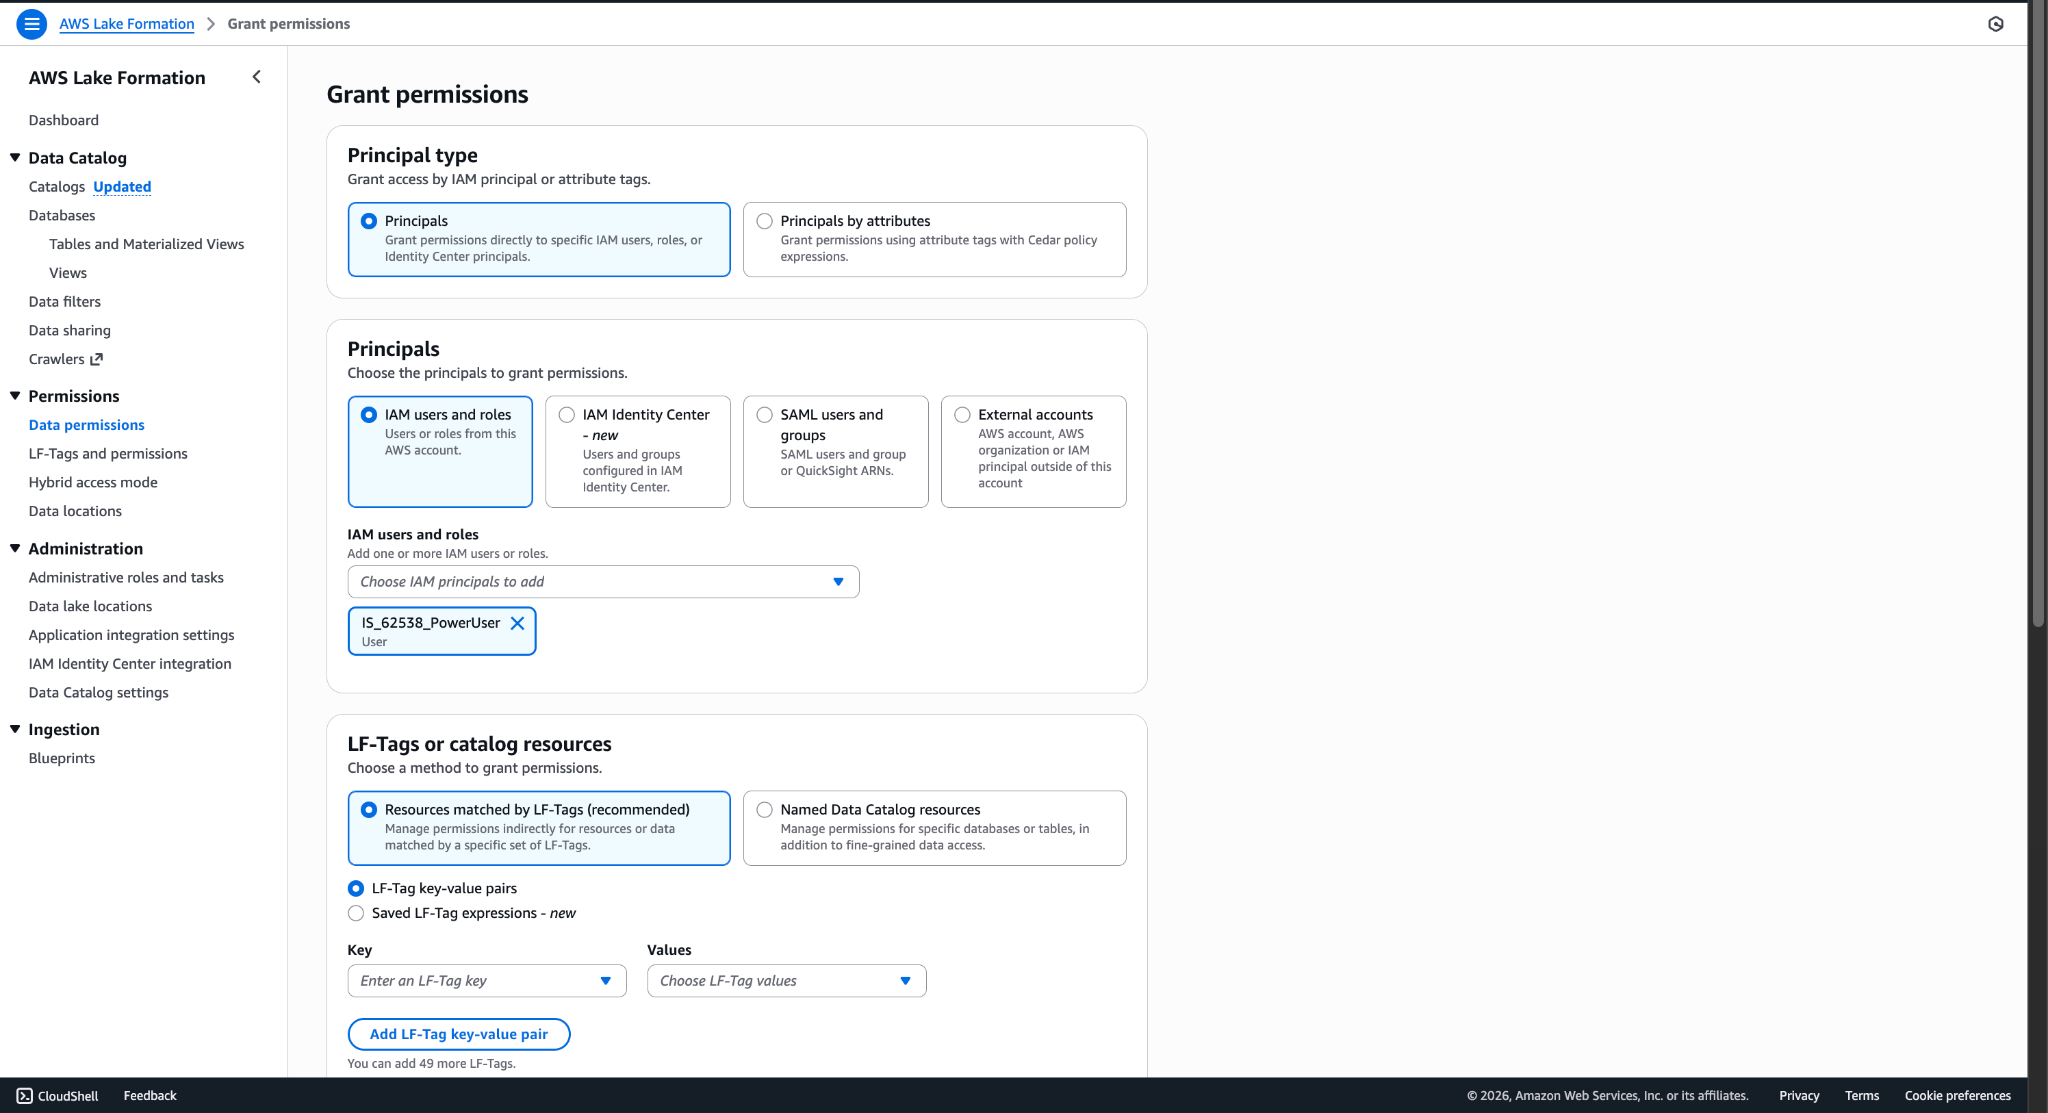
If you want to query data on Athena then also add the user’s role under IAM users and roles along with the Crawler Role and Instance role.
- Select the Named Data Catalog resources and enter the Catalogs and Databases where the data will be stored.
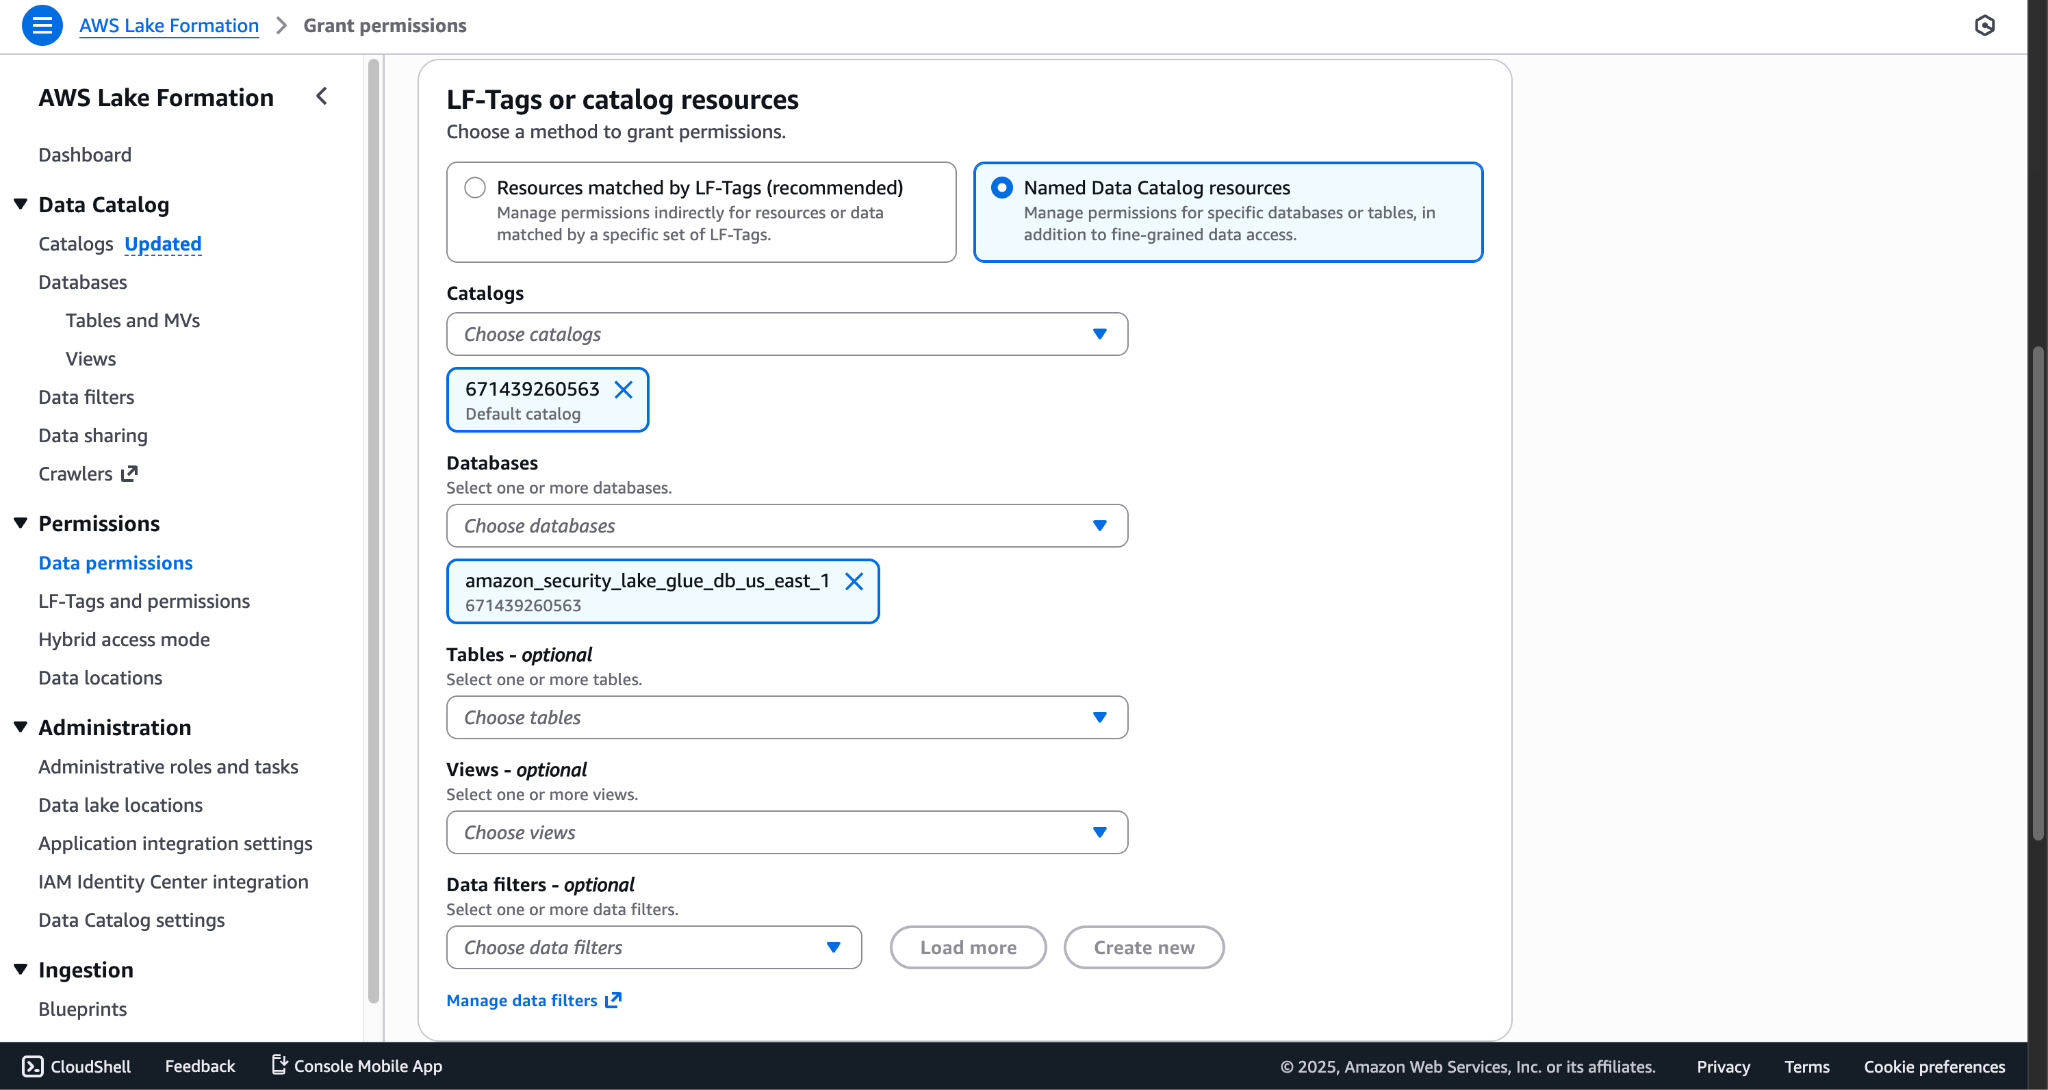
- Provide all the database permissions and click Grant.
Using the AWS IAM Roles Anywhere Authentication Method
Prerequisites
The AWS Certificate Manager service is required to be enabled to authenticate the plugin using the AWS IAM Roles Anywhere Authentication Method.
Note: Make sure you create the Private Certificate Authority, Trust Anchor and Profile in the same region in which your AWS S3 Source Bucket resides.
Create a Policy for a Private Certificate
This Policy contains the required permissions for creating Private CA Certificate (including Permissions for creating Trust Anchor and Profile) and using the IAM Roles Anywhere.
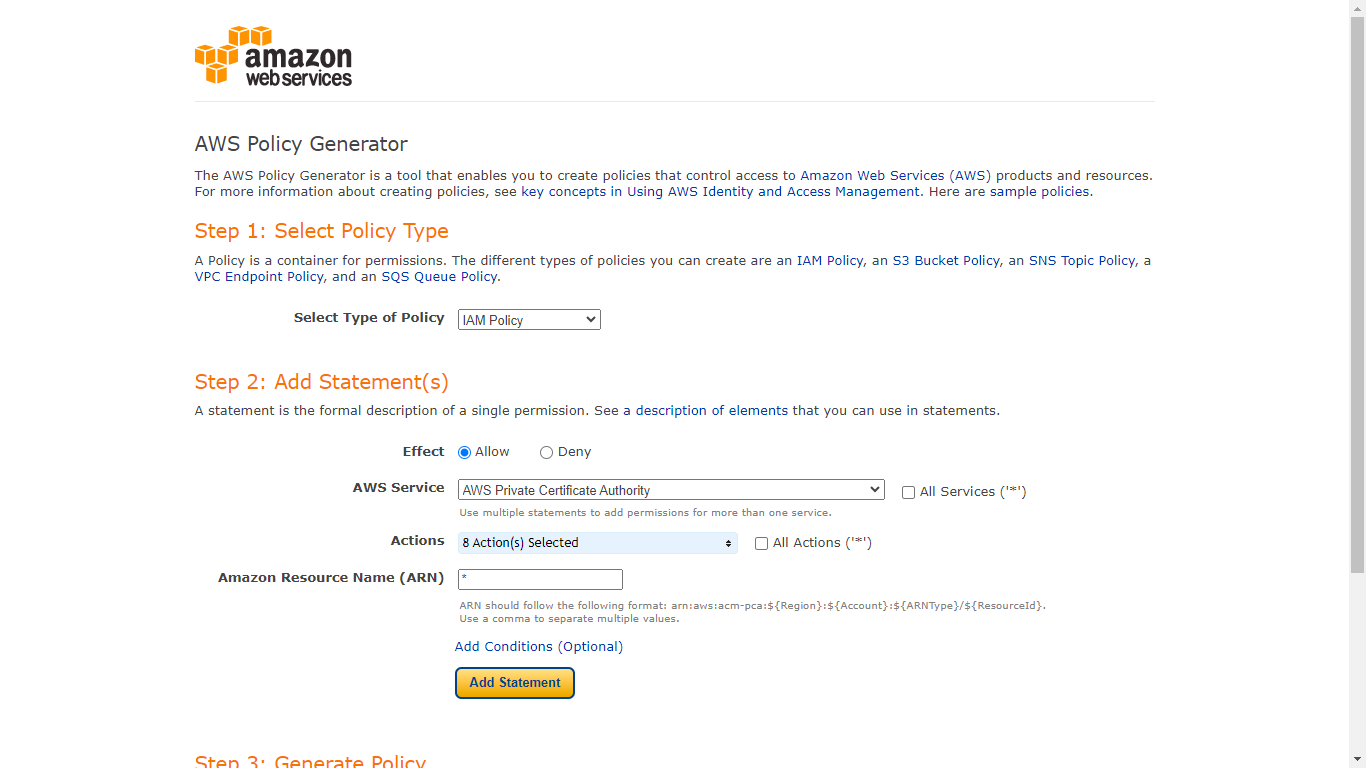
- Go to Policy Generator and Select IAM Policy as policy type and generate policy.
- Select Type of Policy: IAM Policy
- Effect: Allow
- AWS Service: AWS Private Certificate Authority
- Actions:
- CreateCertificateAuthority
- DescribeCertificateAuthority
- GetCertificate
- GetCertificateAuthorityCertificate
- GetCertificateAuthorityCsr
- ImportCertificateAuthorityCertificate
- IssueCertificate
- ListCertificateAuthorities
- ARN: *
- Click Add Statement.
- Select Type of Policy: IAM Policy
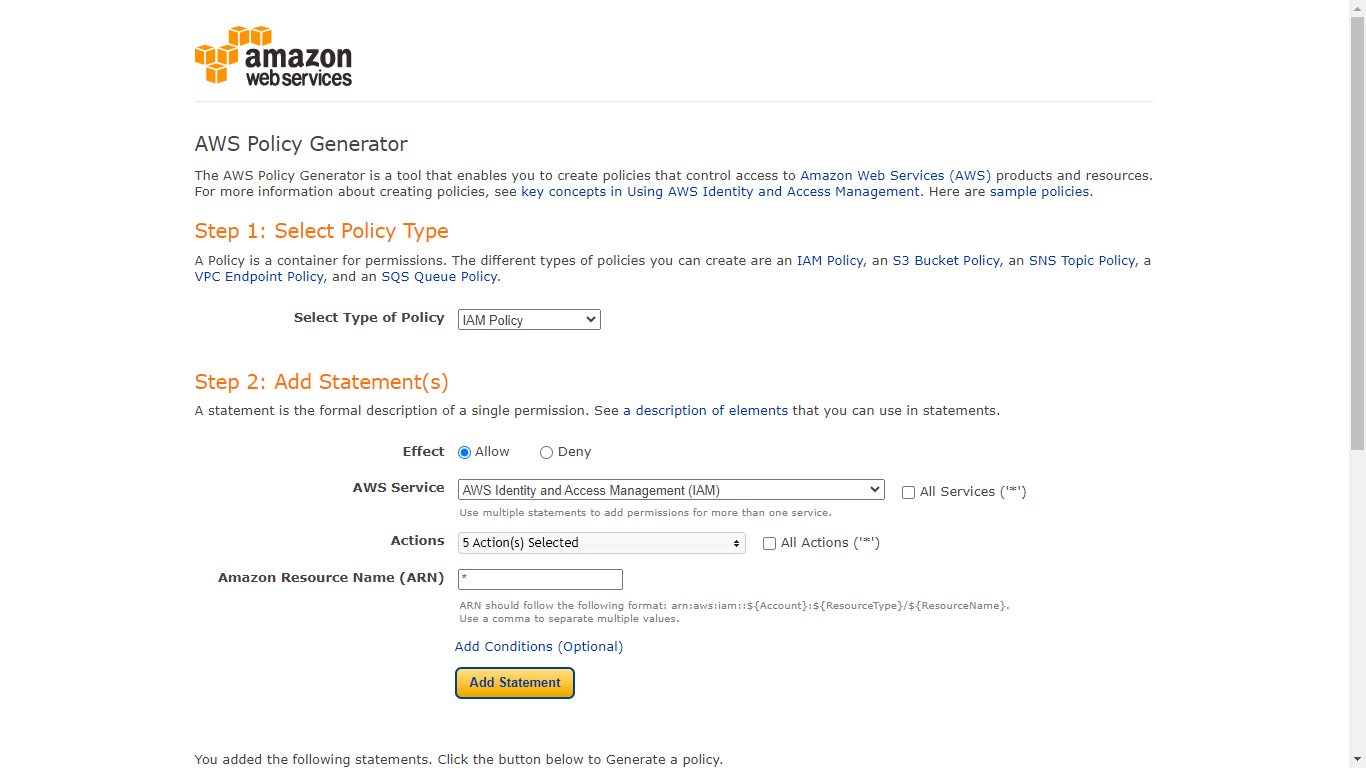
- Select Type of Policy: IAM Policy
- Effect: Allow
- AWS Service: AWS Identity and Access Management (IAM)
- Actions:
- AttachRolePolicy
- CreateAccessKey
- CreateRole
- DeleteRole
- PassRole
- ARN: *
- Click Add Statement.
- Select Type of Policy: IAM Policy
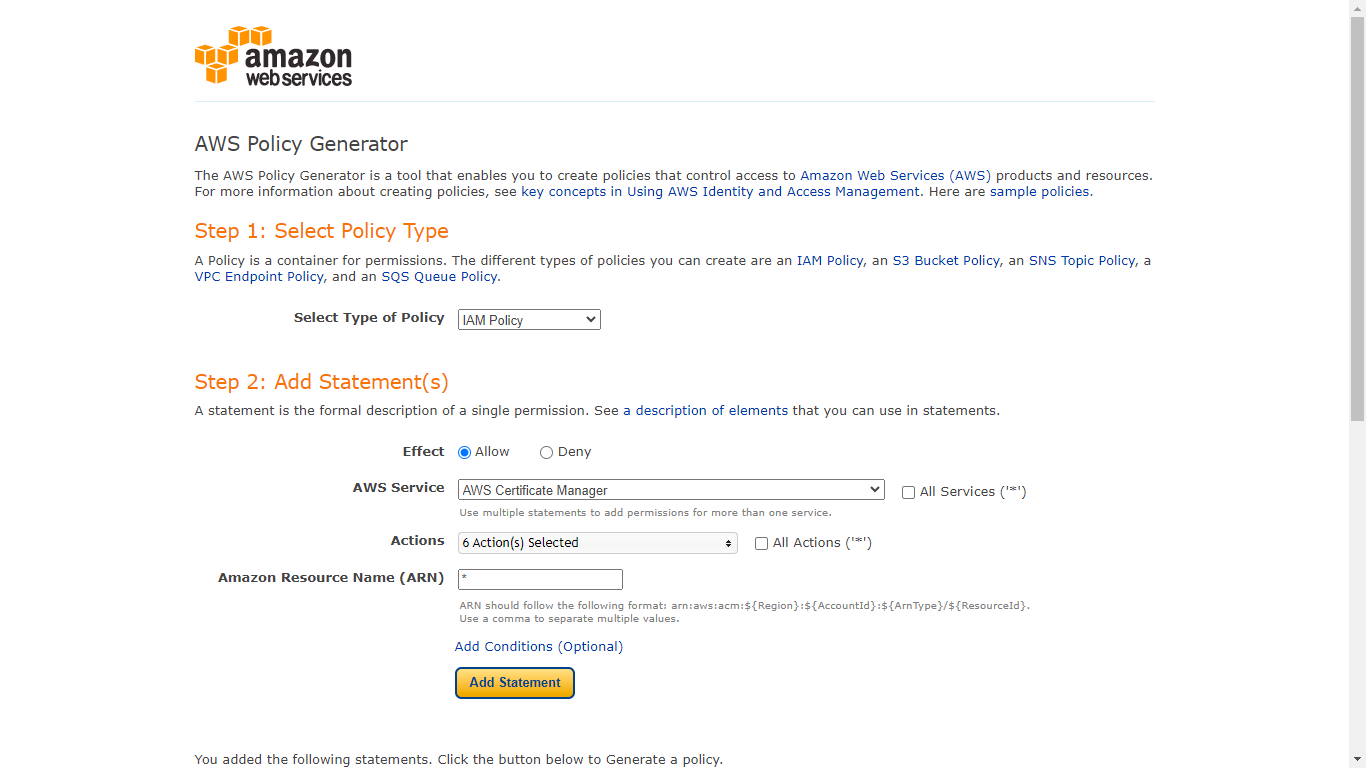
- Select Type of Policy: IAM Policy
- Effect: Allow
- AWS Service: AWS Certificate Manager
- Actions:
- DescribeCertificate
- ExportCertificate
- GetCertificate
- ListCertificates
- ListTagsForCertificate
- RequestCertificate
- ARN: *
- Click Add Statement.
- Select Type of Policy: IAM Policy
- Select Type of Policy: IAM Policy
- Effect: Allow
- AWS Service: AWS Identity and Access Management Roles Anywhere
- Actions:
- CreateProfile
- CreateTrustAnchor
- GetProfile
- GetTrustAnchor
- ListProfiles
- ListTrustAnchors
- ARN: *
- Click Add Statement.
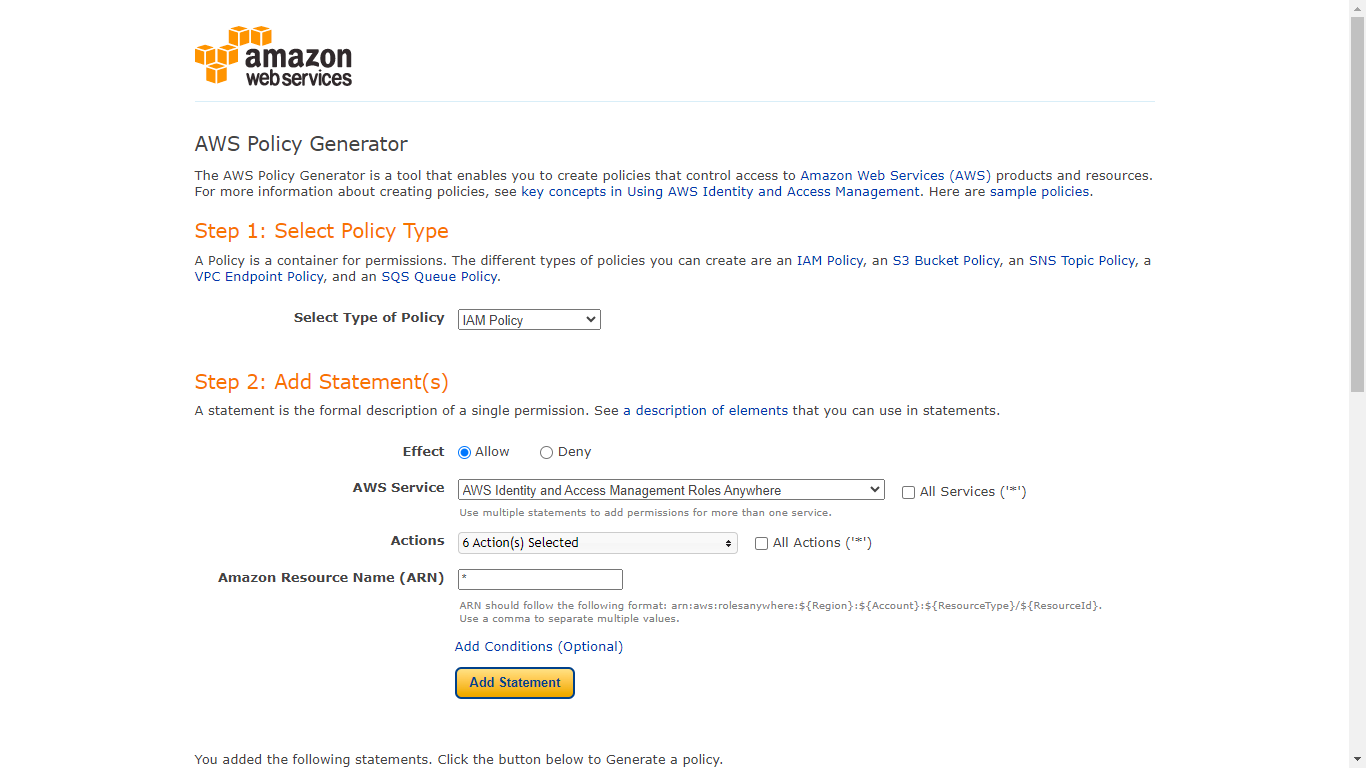
- Click Generate Policy.
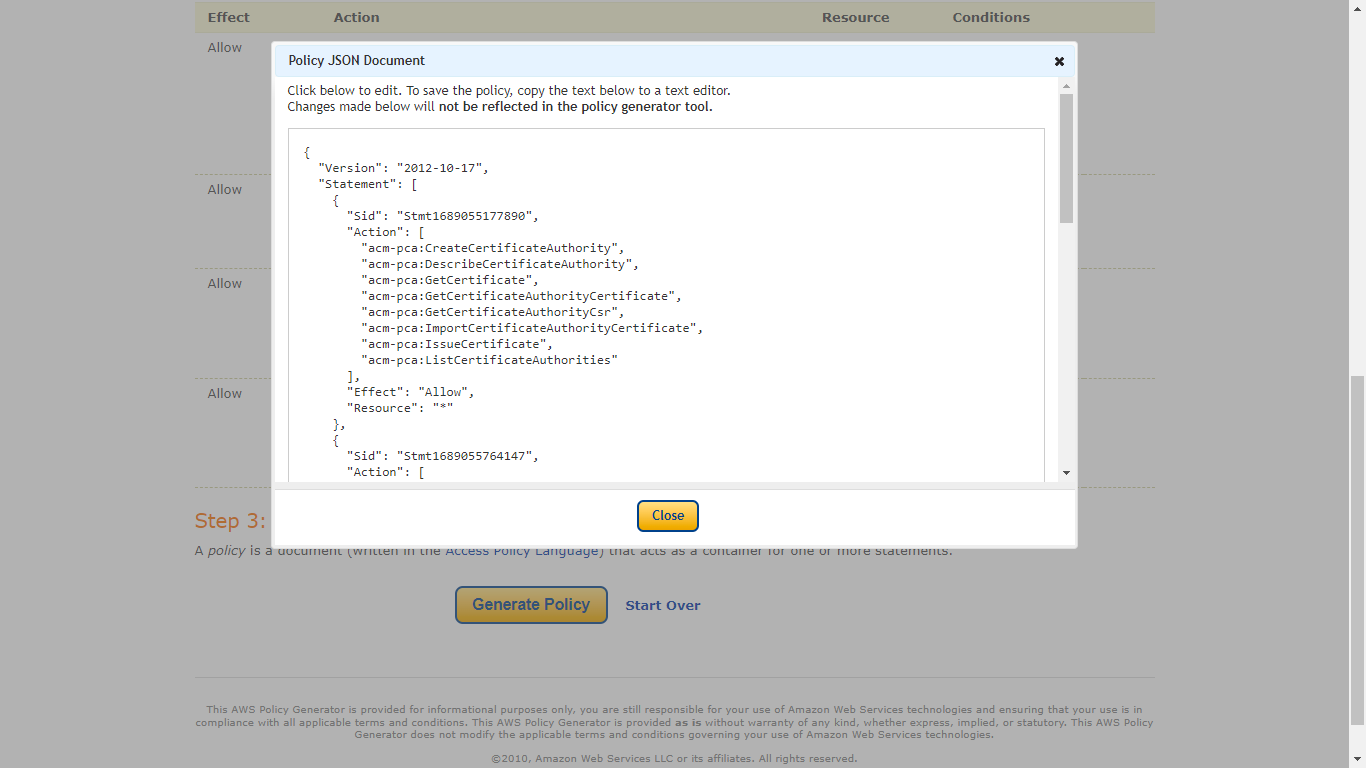
- Copy the Policy as it will be used in the next step for creating the policy required for creating the Private CA certificates.
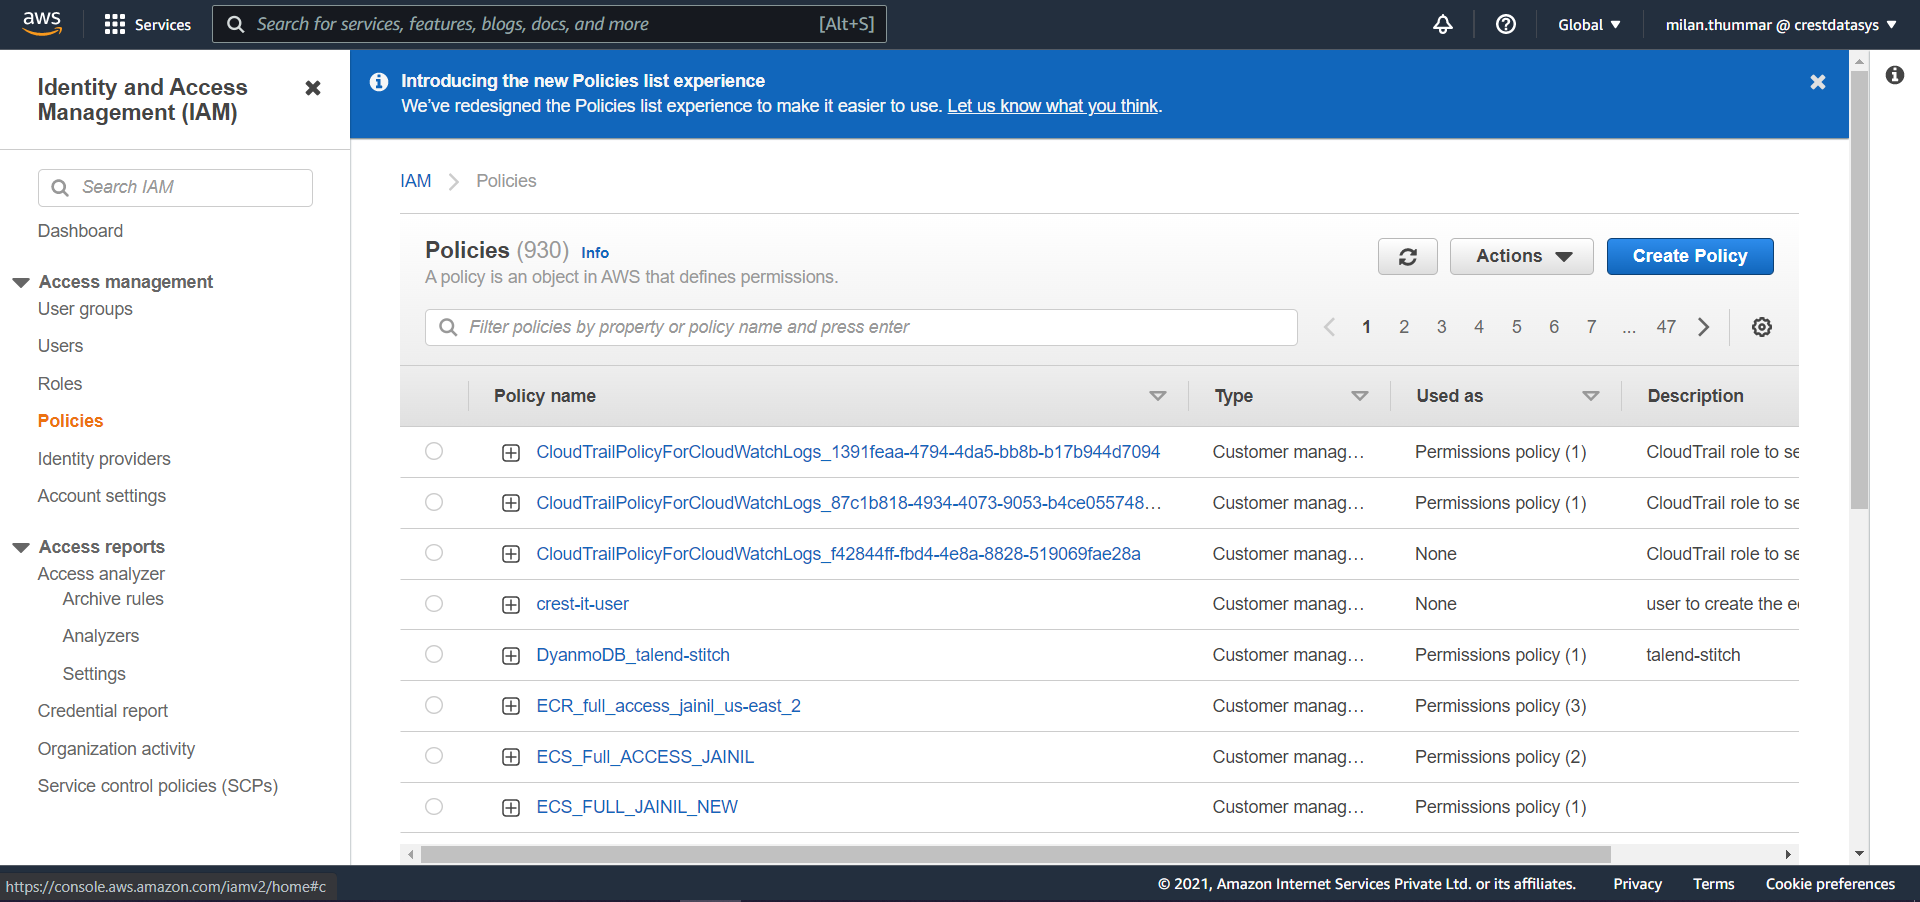
- Go to AWS Console and select IAM from All Services. Click Policies in the left panel and then click Create Policy.
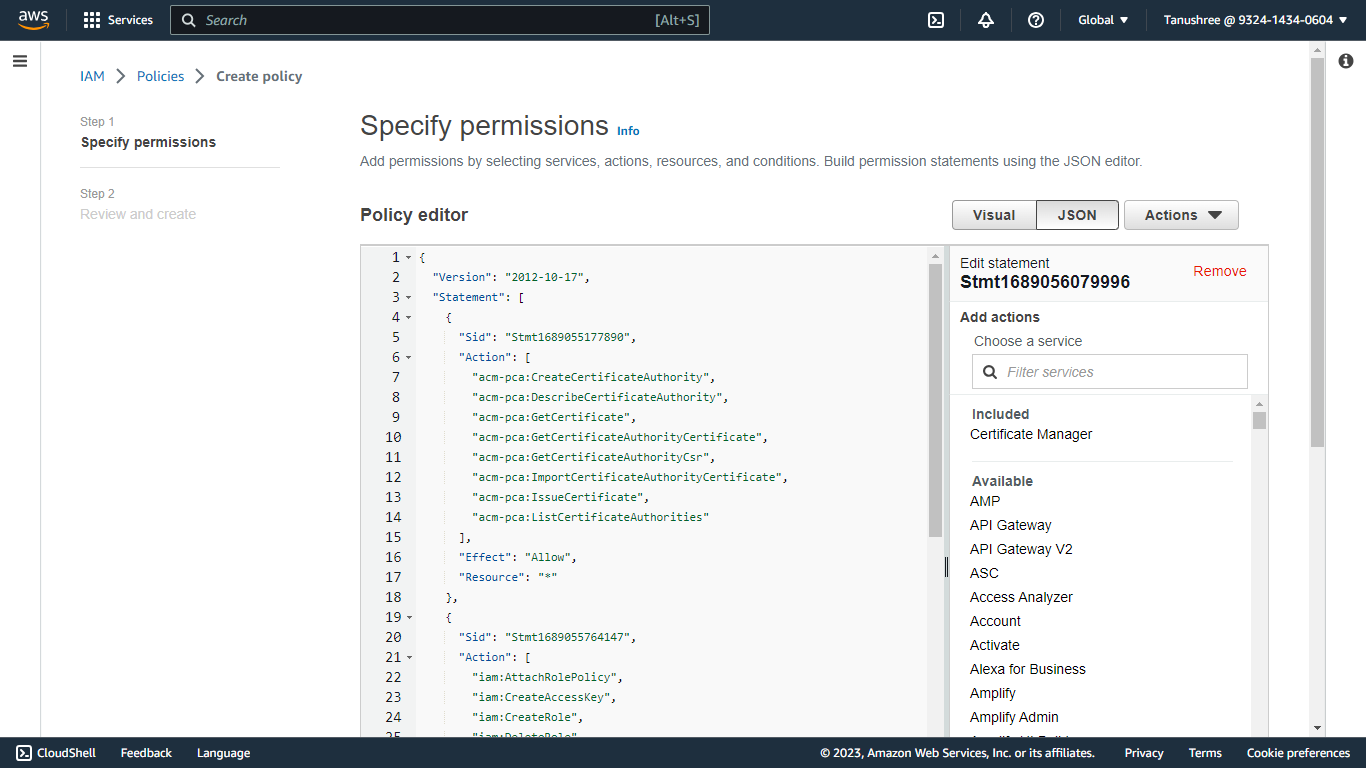
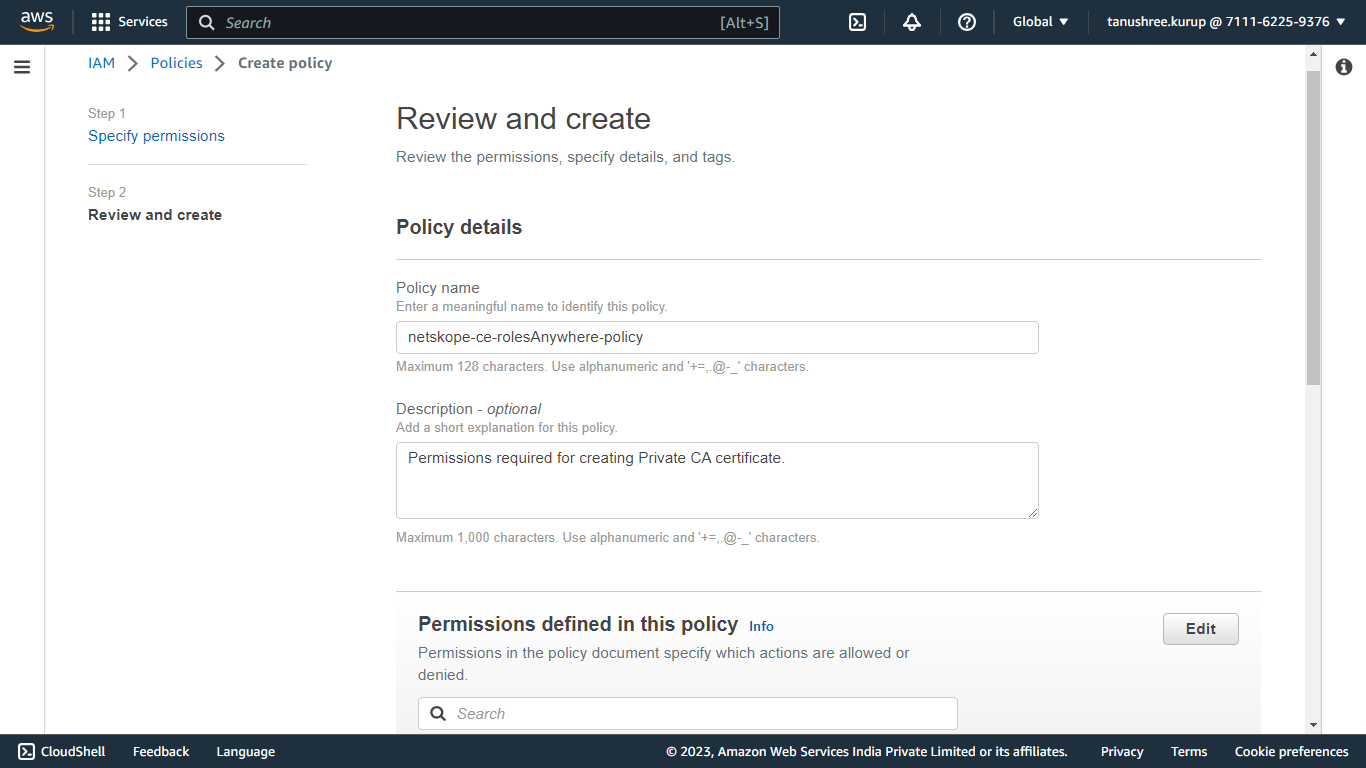
- Copy the policy to the JSON tab. and Click on Next:Tags, Click on Next:Review..
- Enter Name and Click on Save Changes, like netskope-ce-rolesAnywhere-policy.
Create Private Certificate Authority
- Log in to the AWS Console
- Search for Certificate Manager.
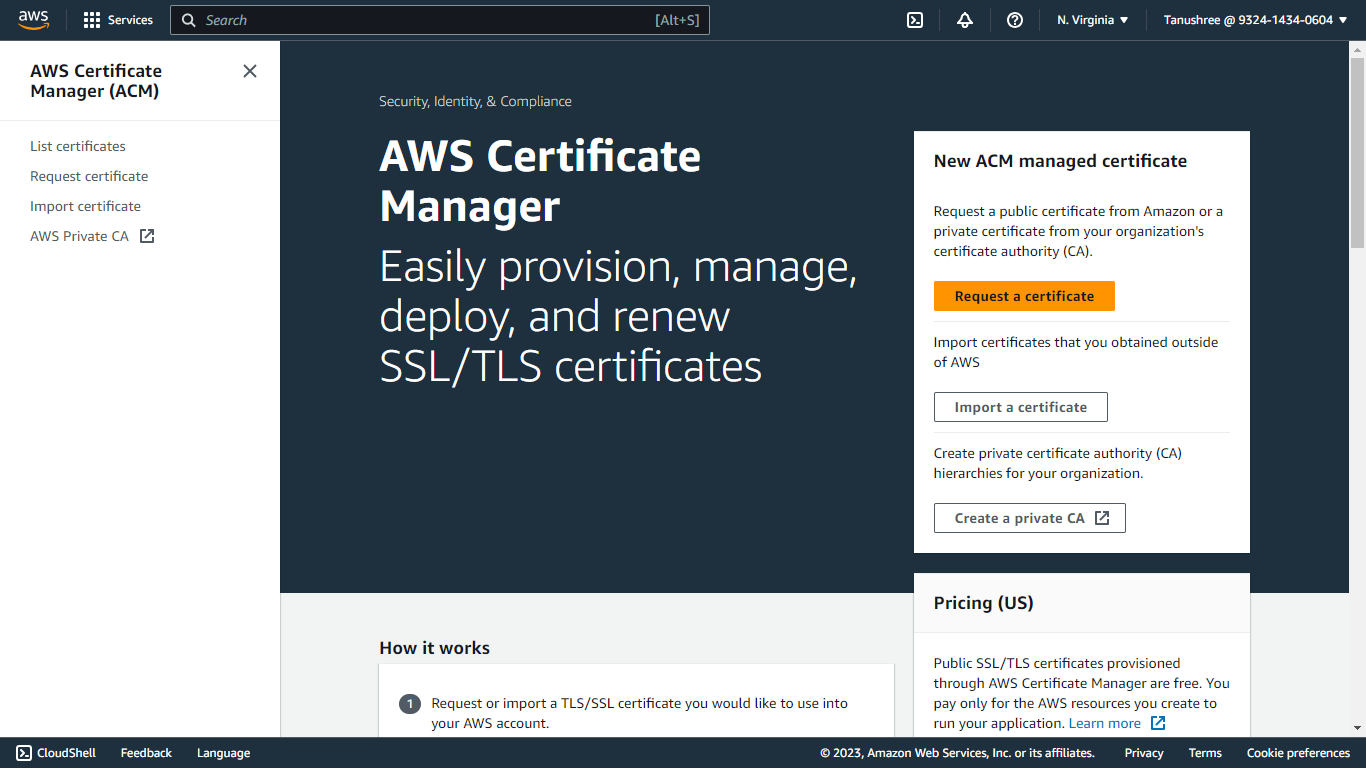
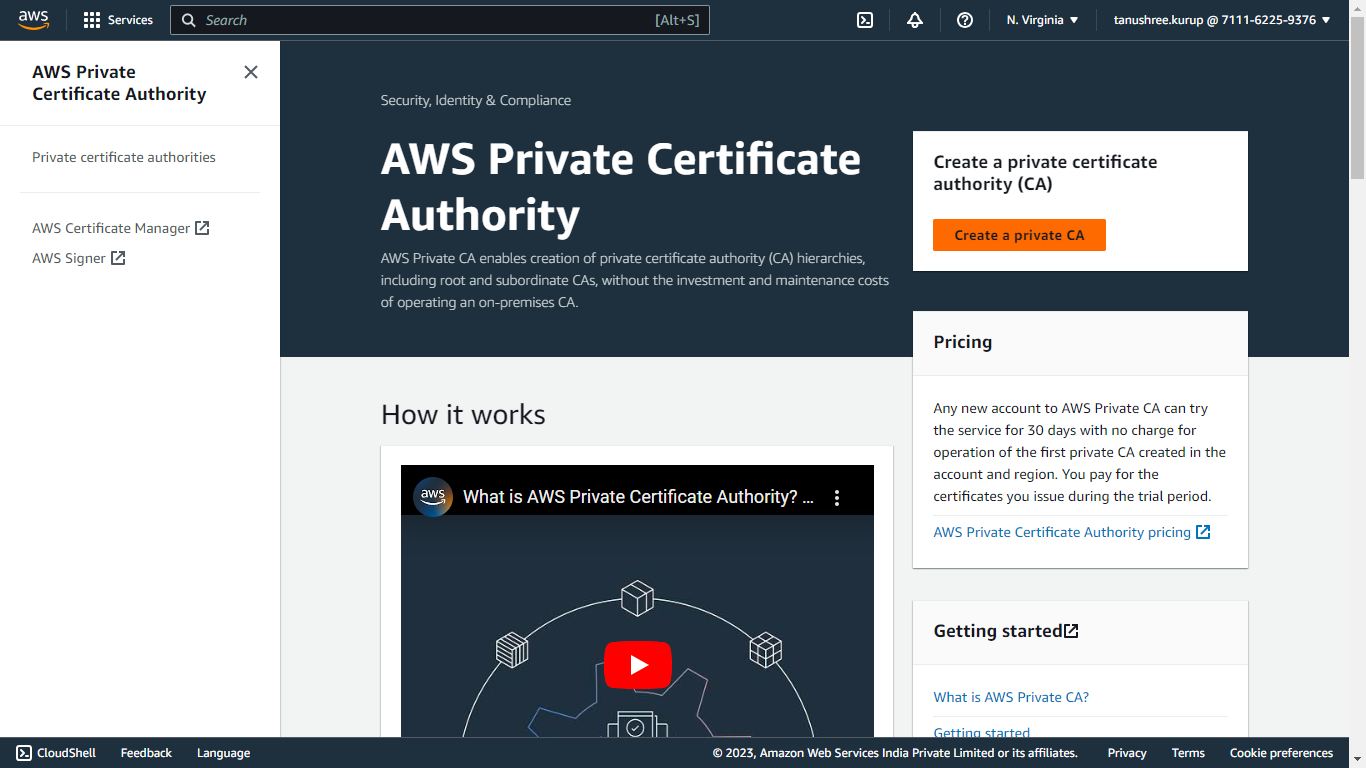
- Click AWS Private CA.
- Click Create a private CA.
- Select General-purpose for Mode options.
- Select Root for CA type options.
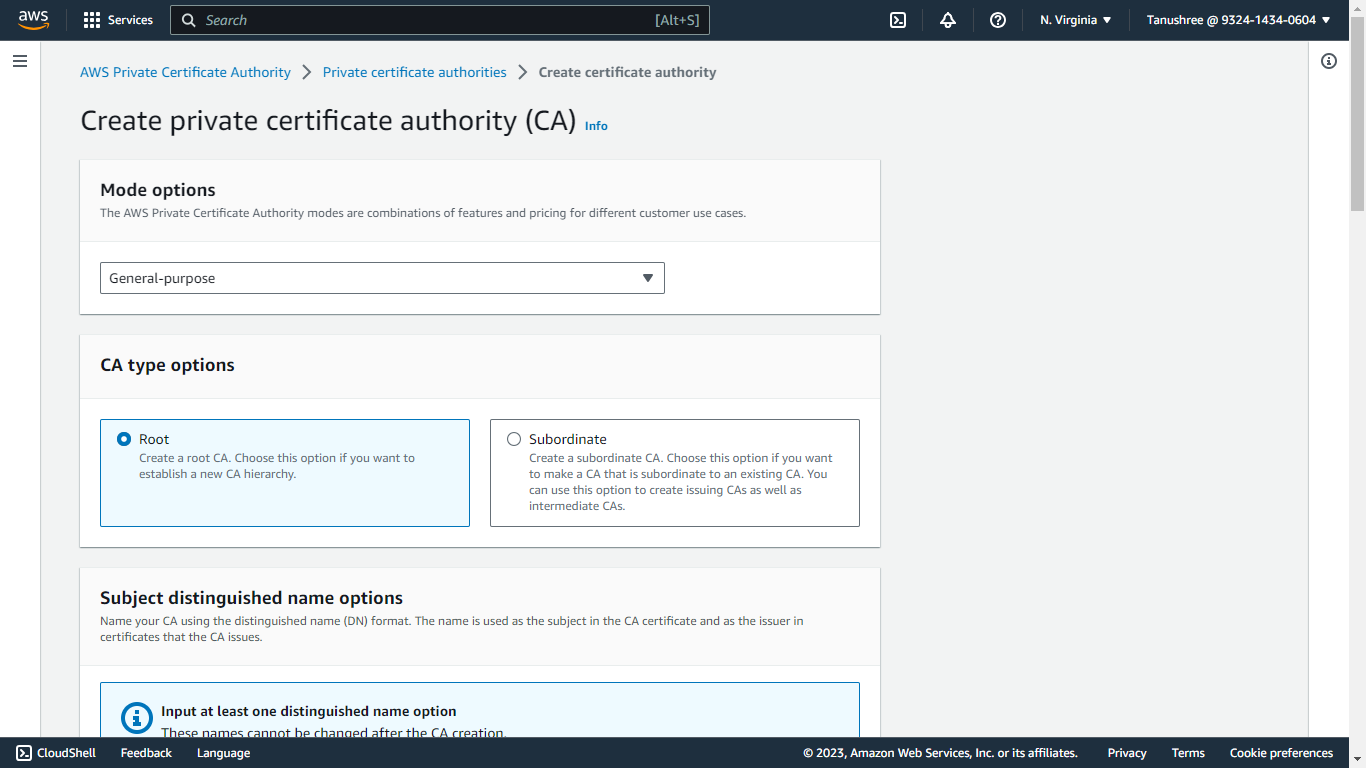
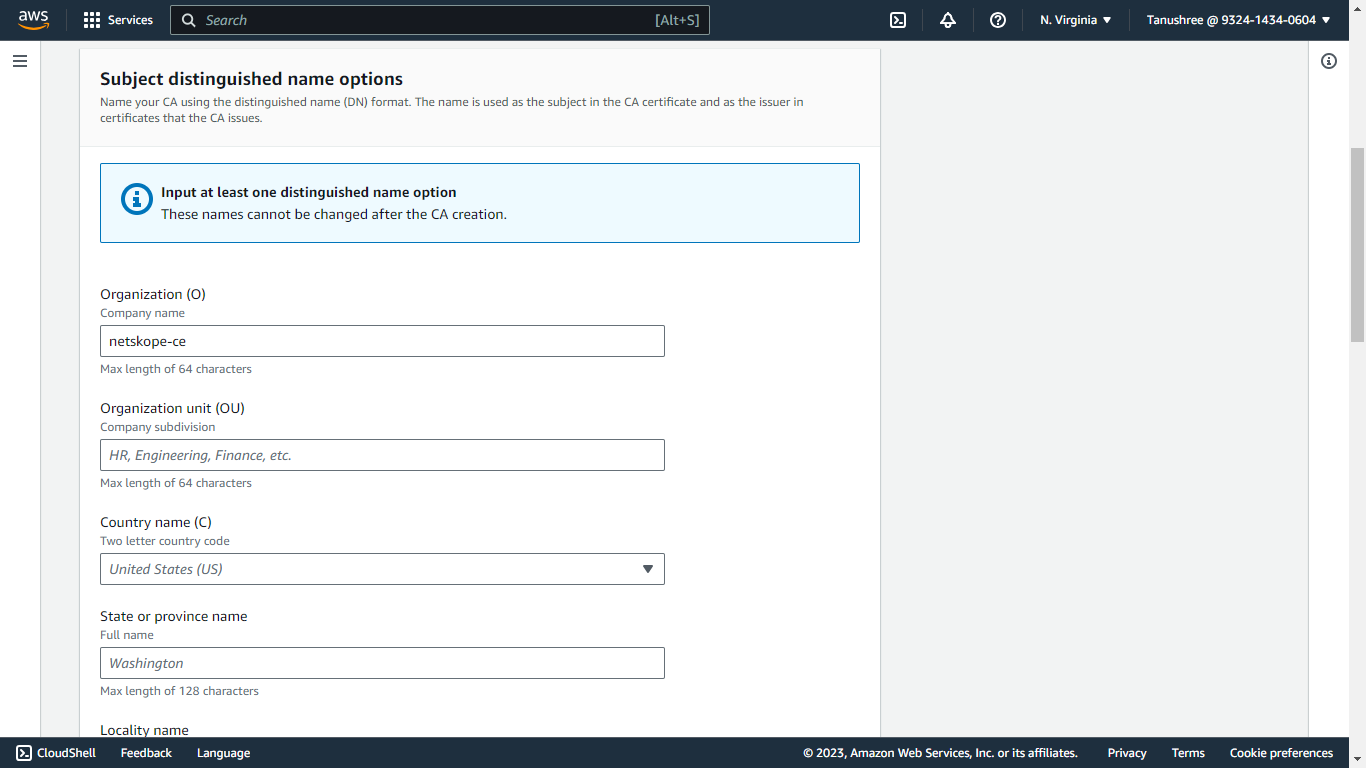
- Enter an Organization (O).
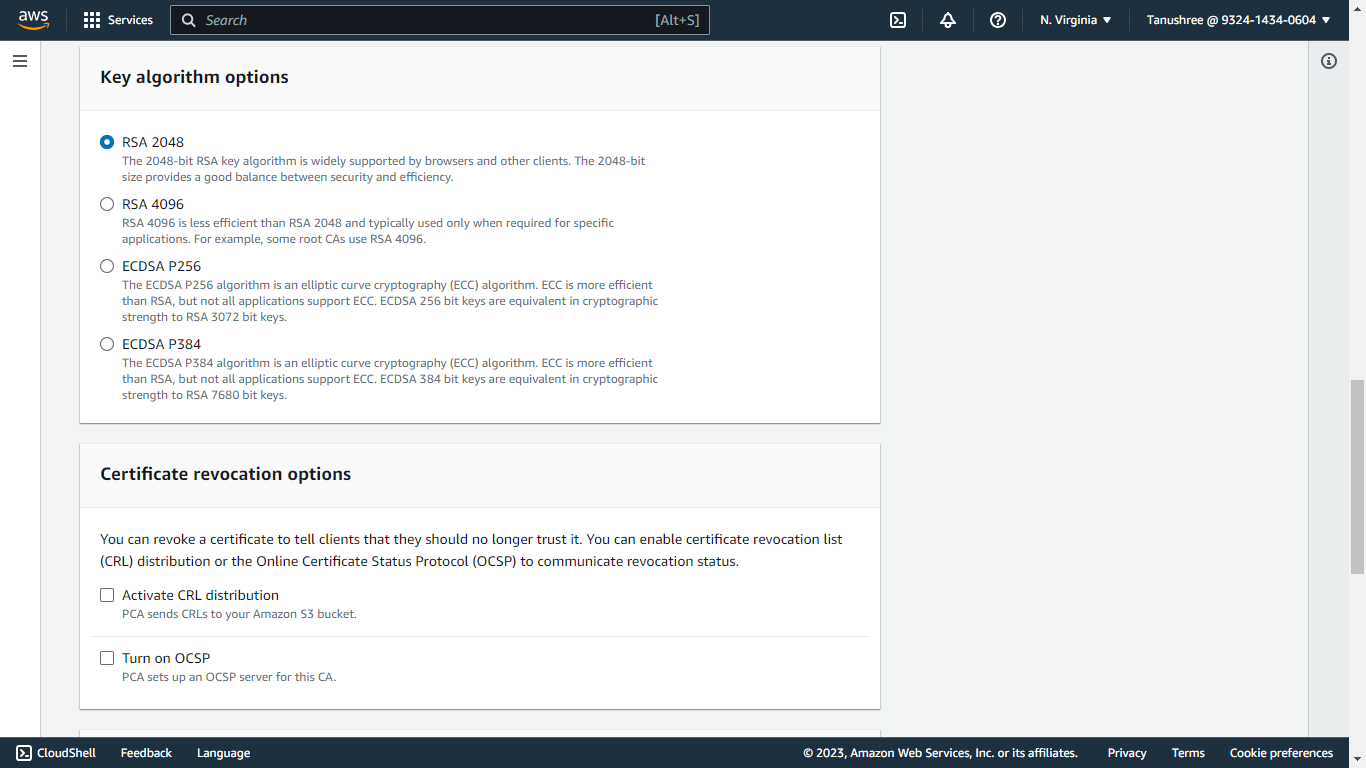
- Select RSA 2048 for Key algorithm options.
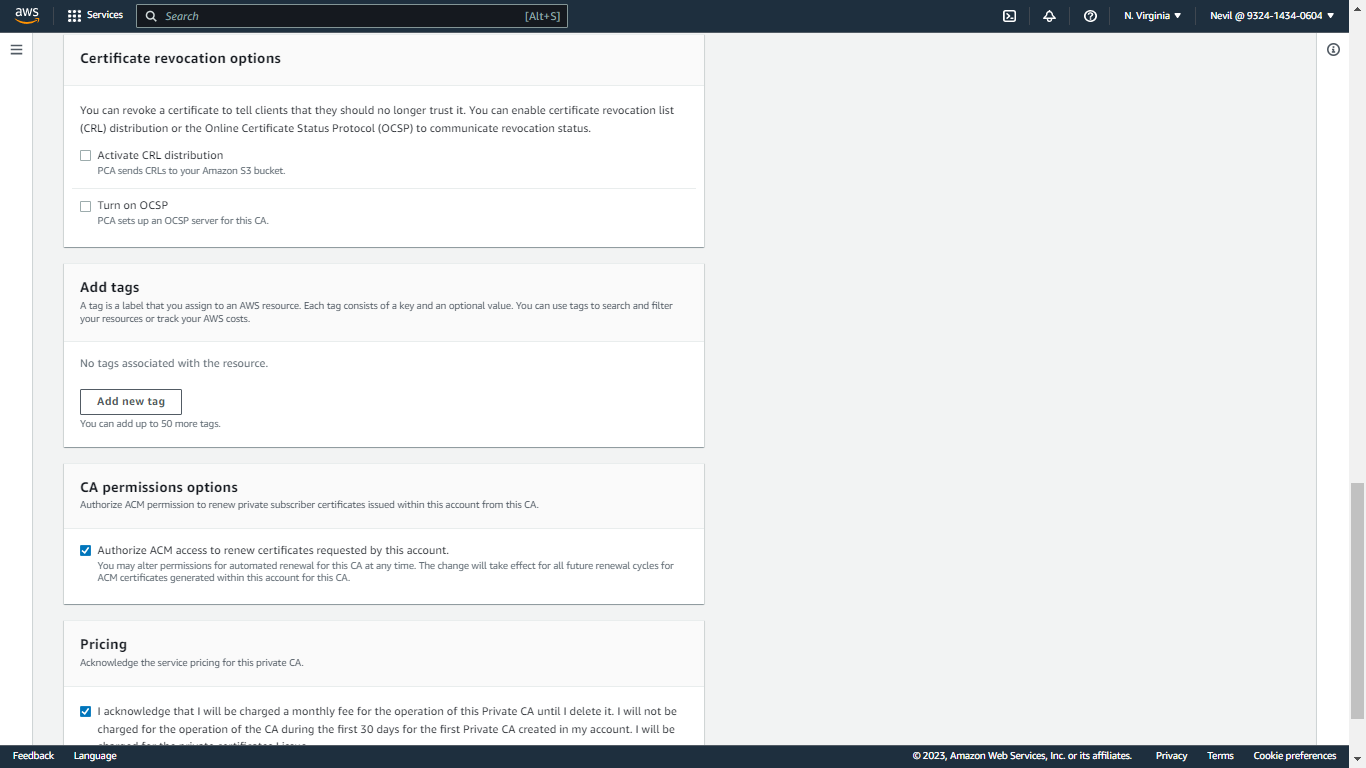
- Add tags if any (optional).
- Click the checkbox in the CA permissions options section.
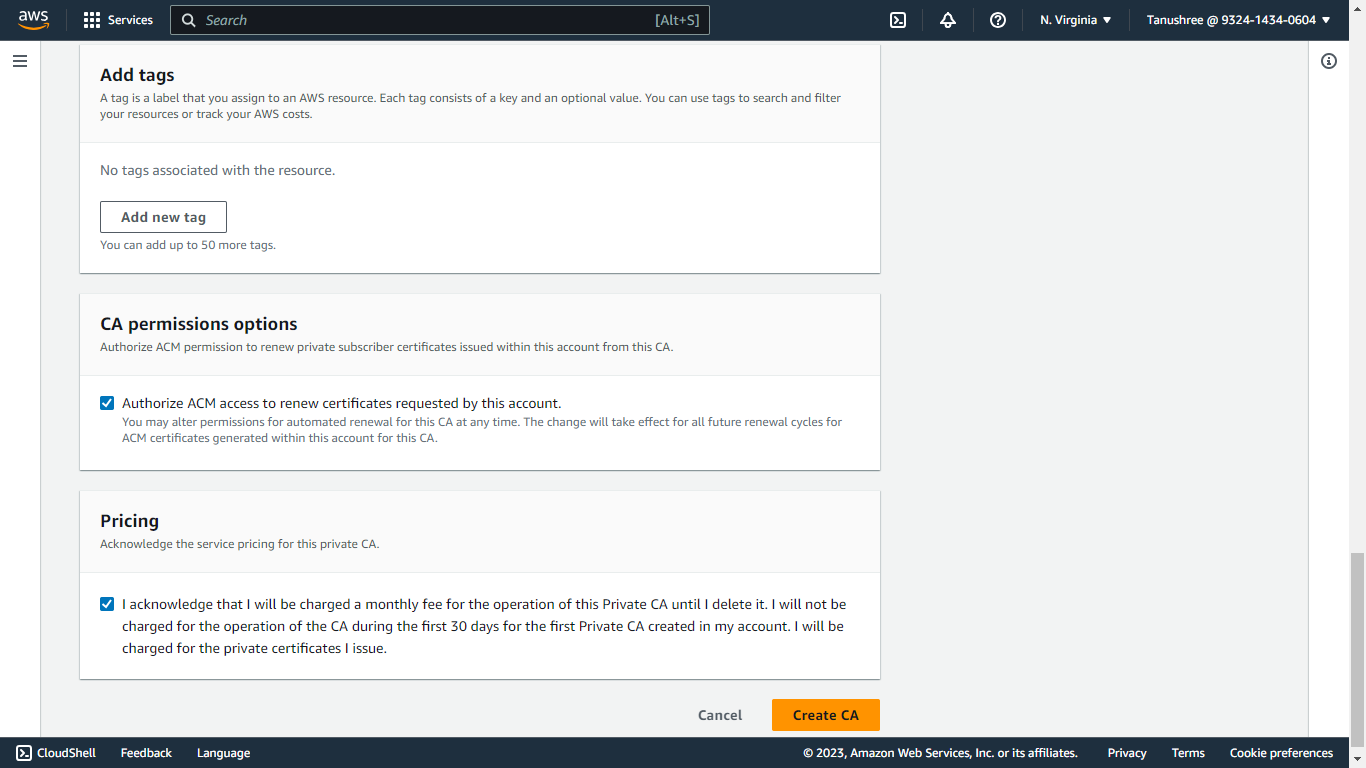
- Click the checkbox in the Pricing section
- Click Create to create the CA certificate.
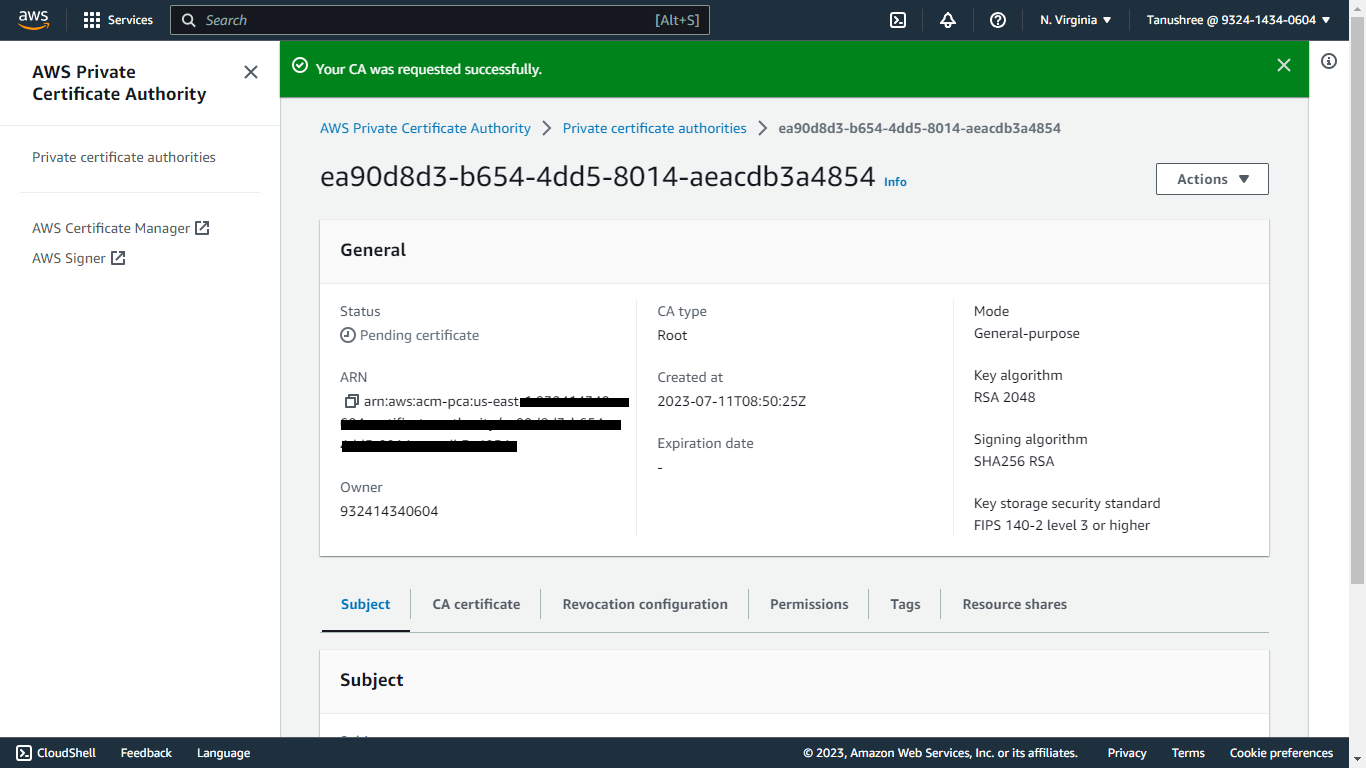
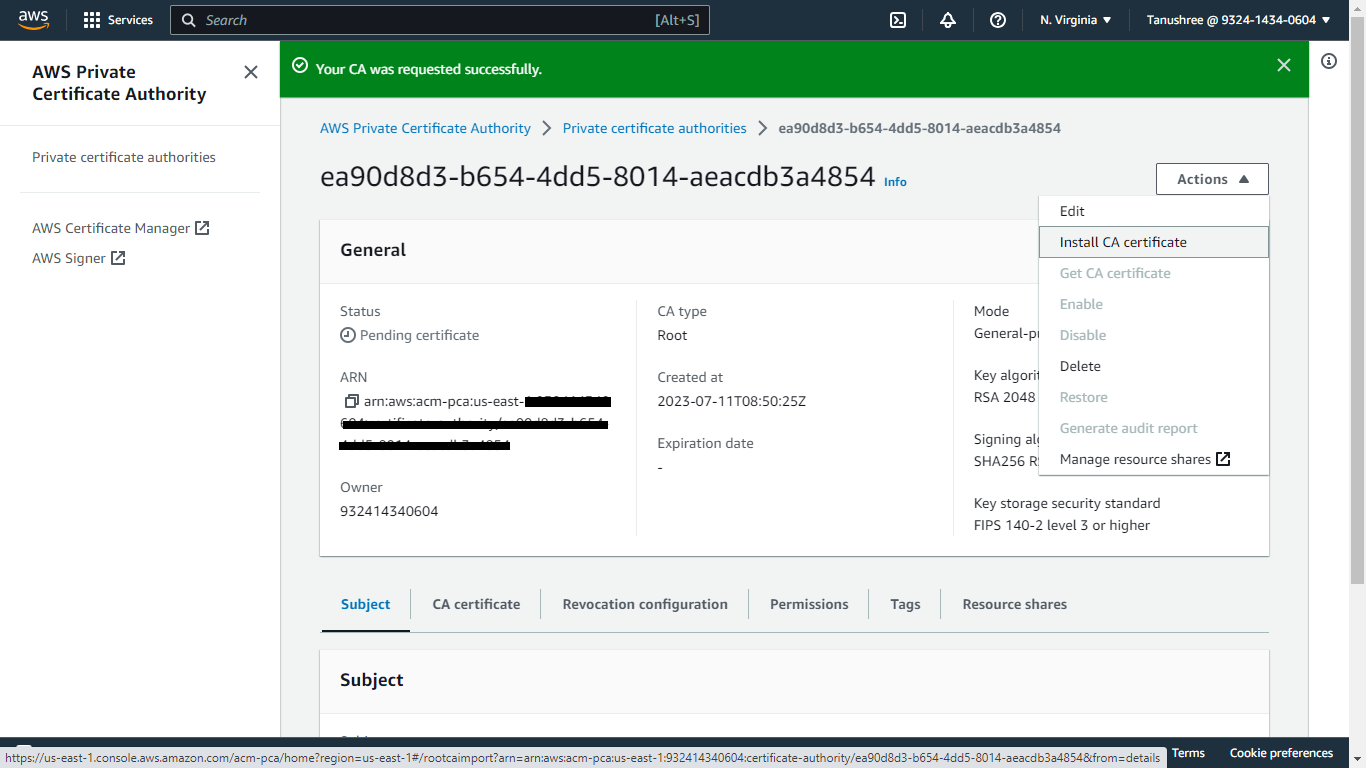
- From Actions select Install CA Certificate.
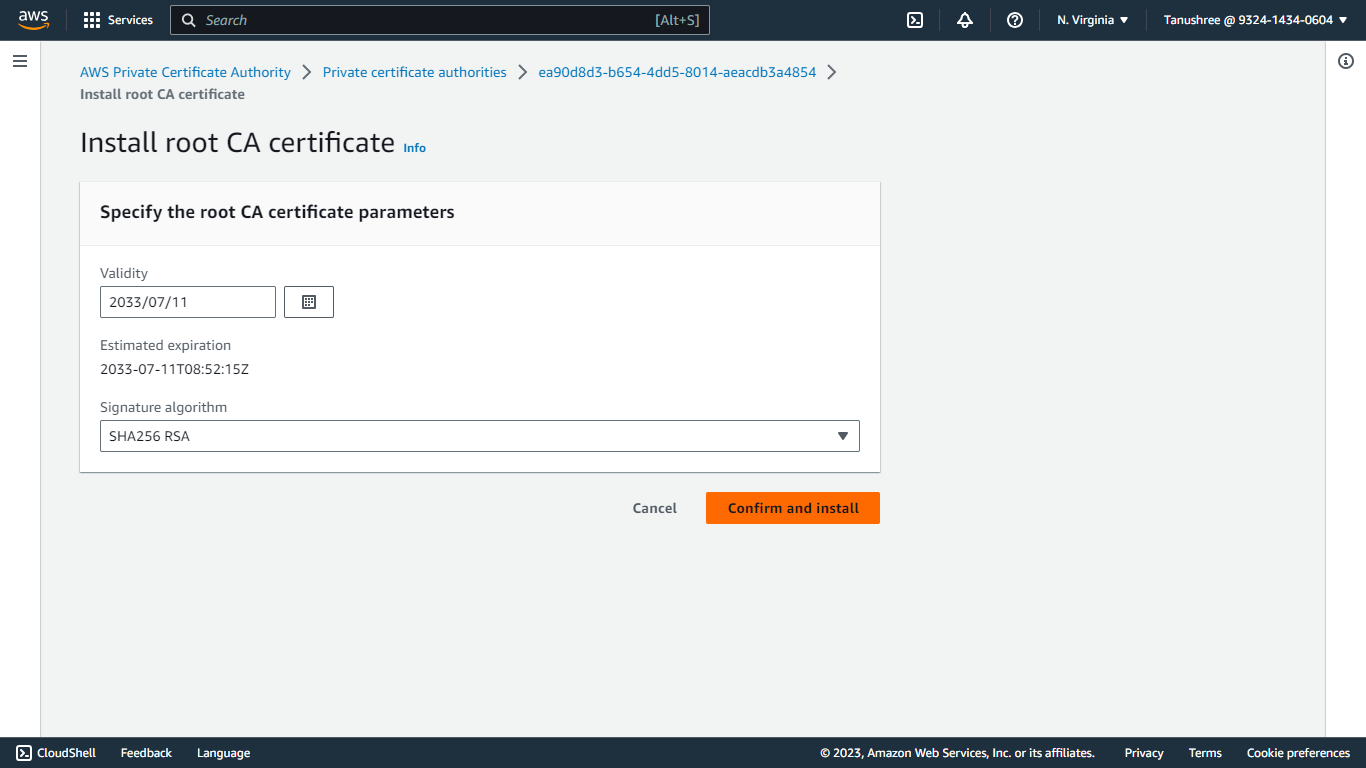
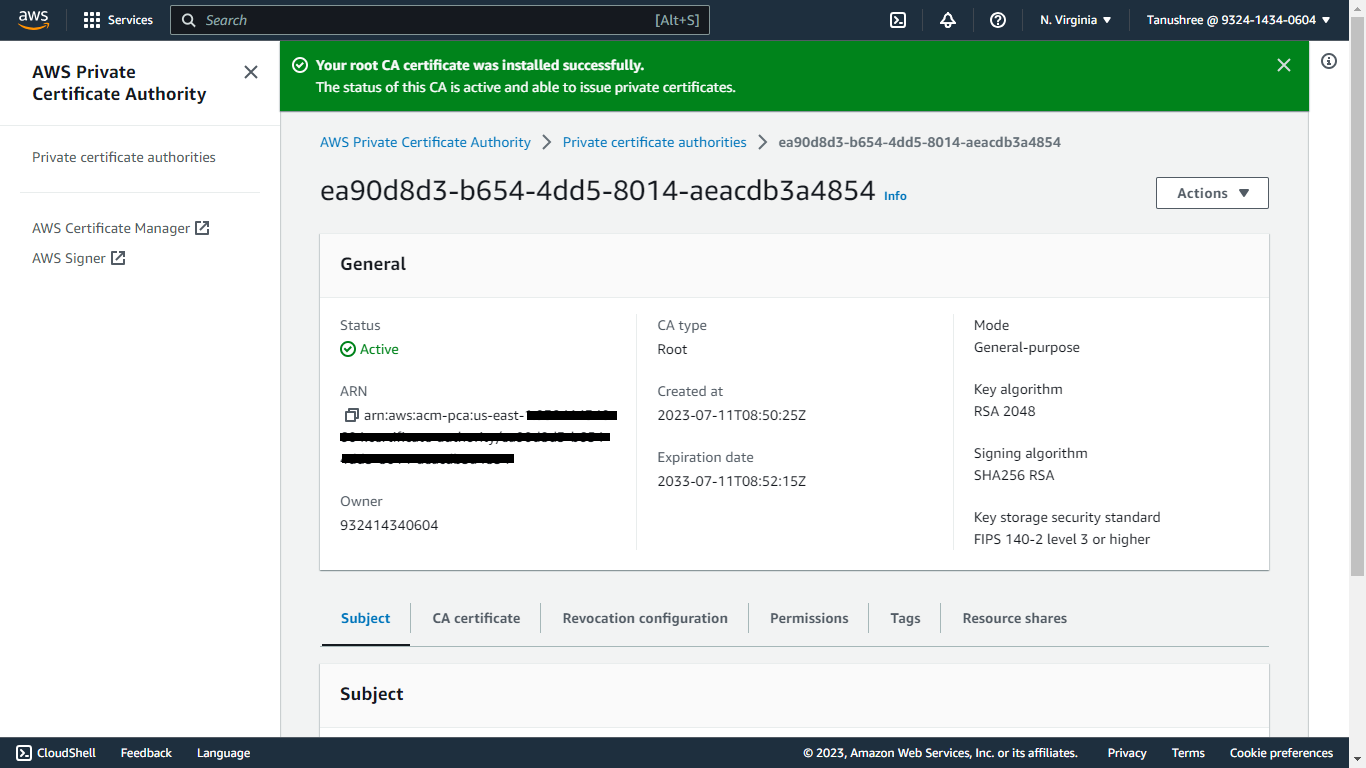
- Click Confirm and Install.
Create Trust Anchor for Private Certificate
- Search for the IAM service and go to Roles under Access management. Scroll down to Roles Anywhere and select Manage.
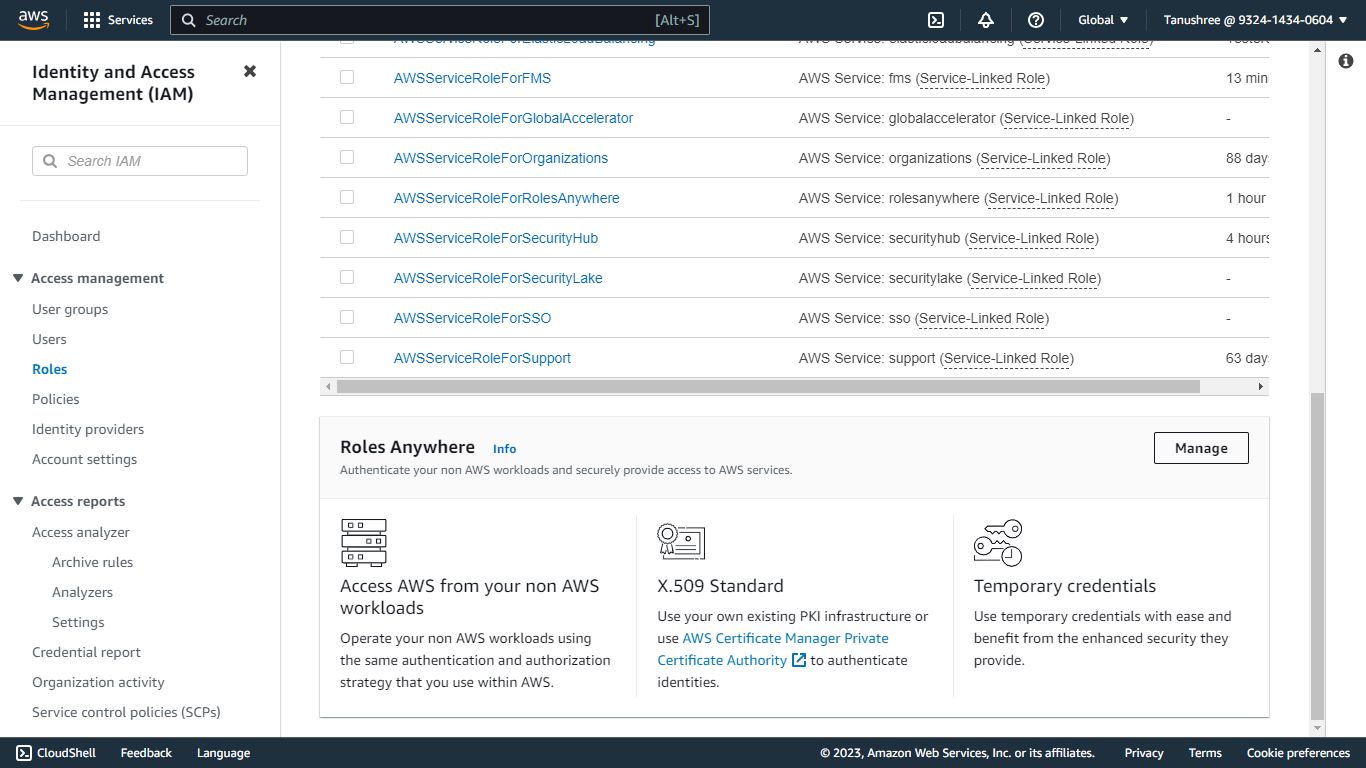
- Click Create a Trust anchor.
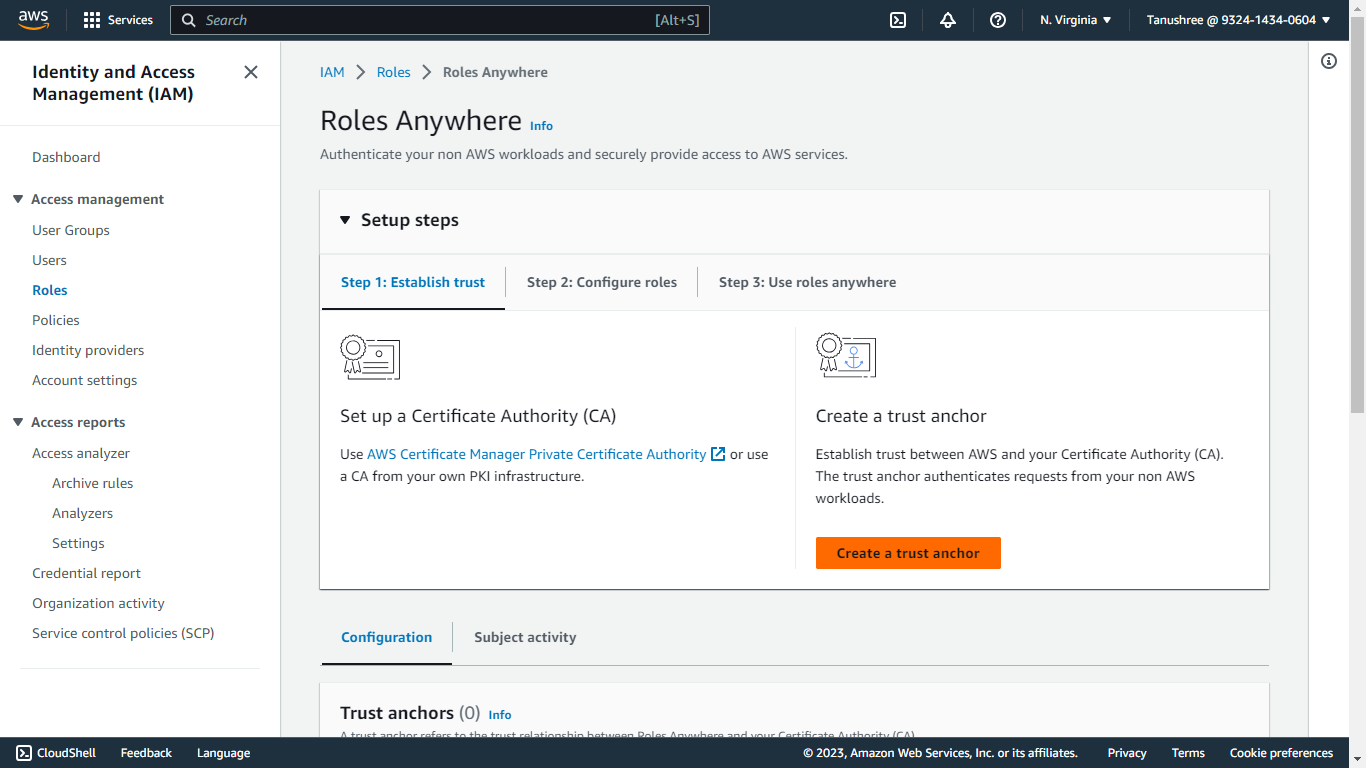
- Enter a Trust anchor name, like netskope-ce-trust-anchor.
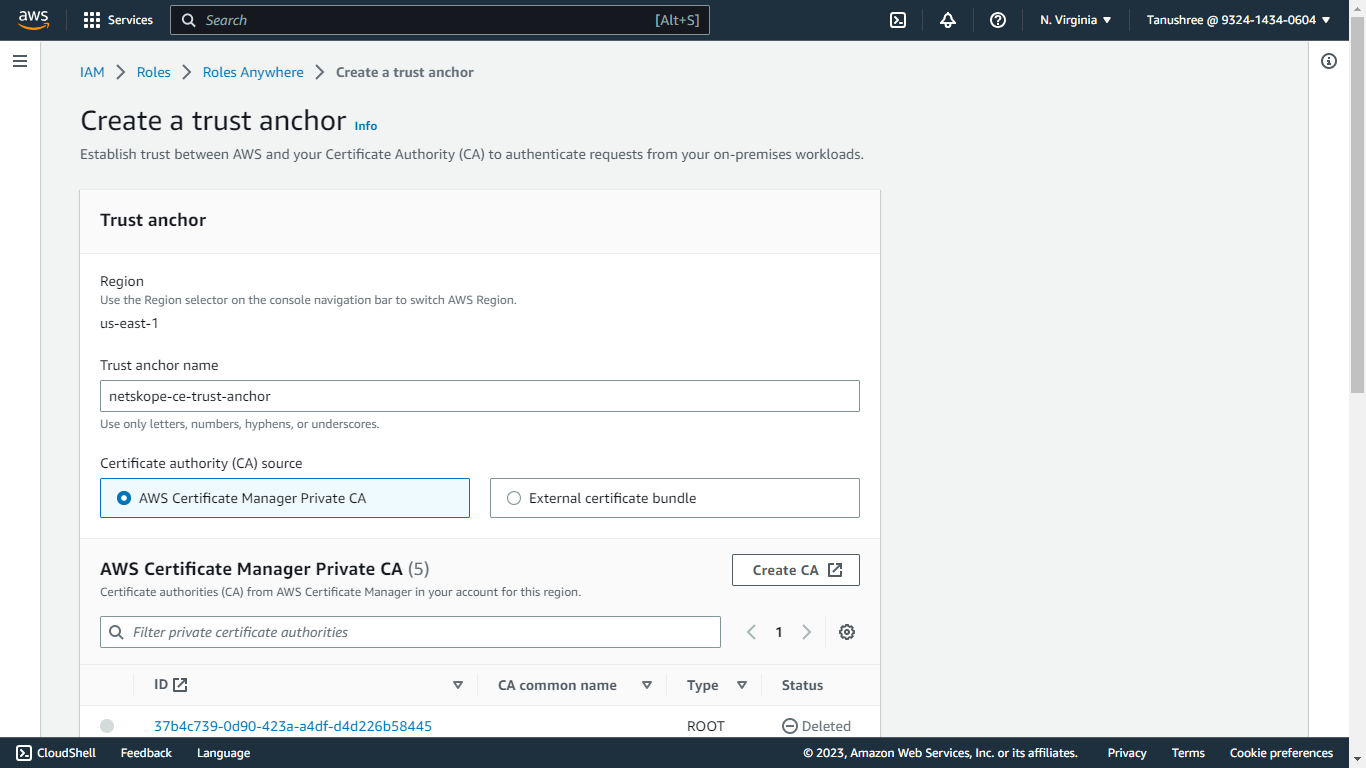
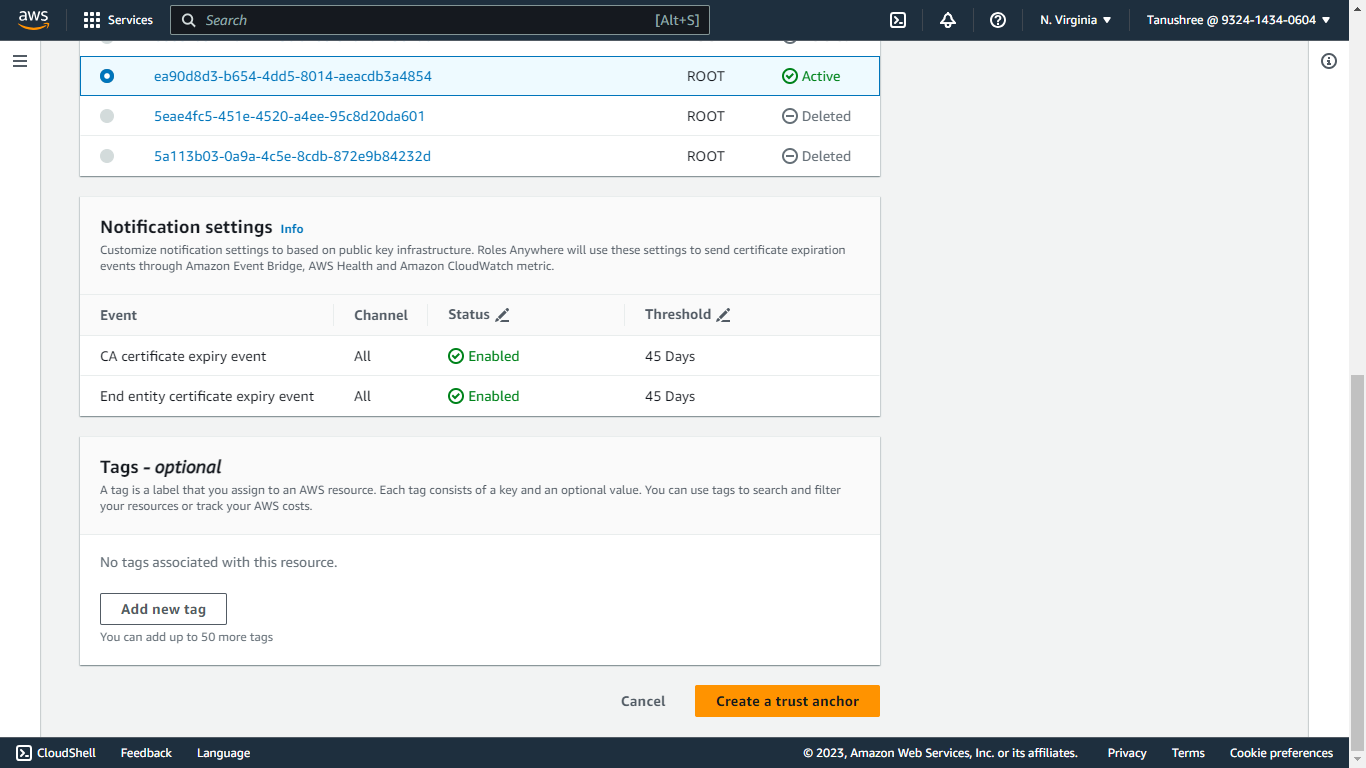
- Select your AWS Certificate Manager Private CA (created in the previous steps) as the Certificate authority (CA) source.
- Add tags if required.
- Click Create a trust anchor.
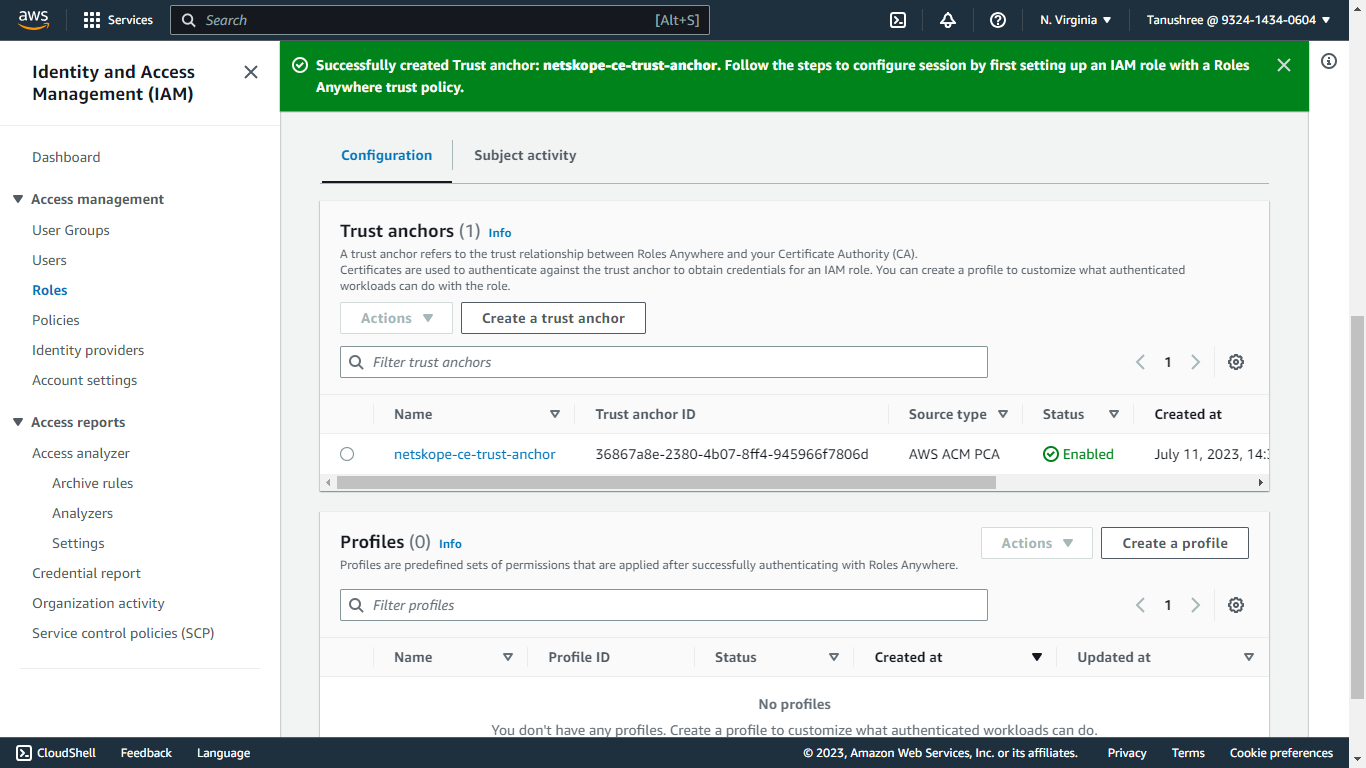
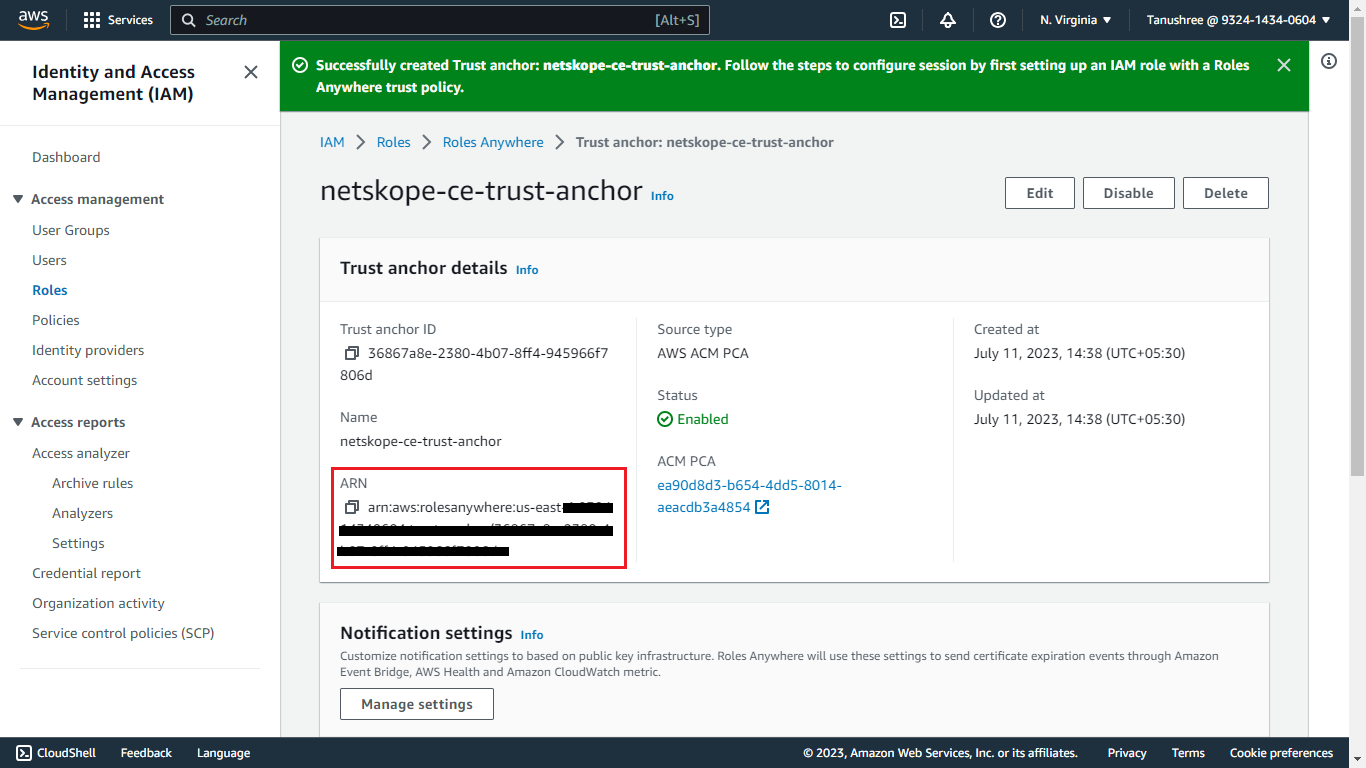
- Click the created Trust Anchor and copy the Trust Anchor ARN.
Create a Policy for Plugin Configuration
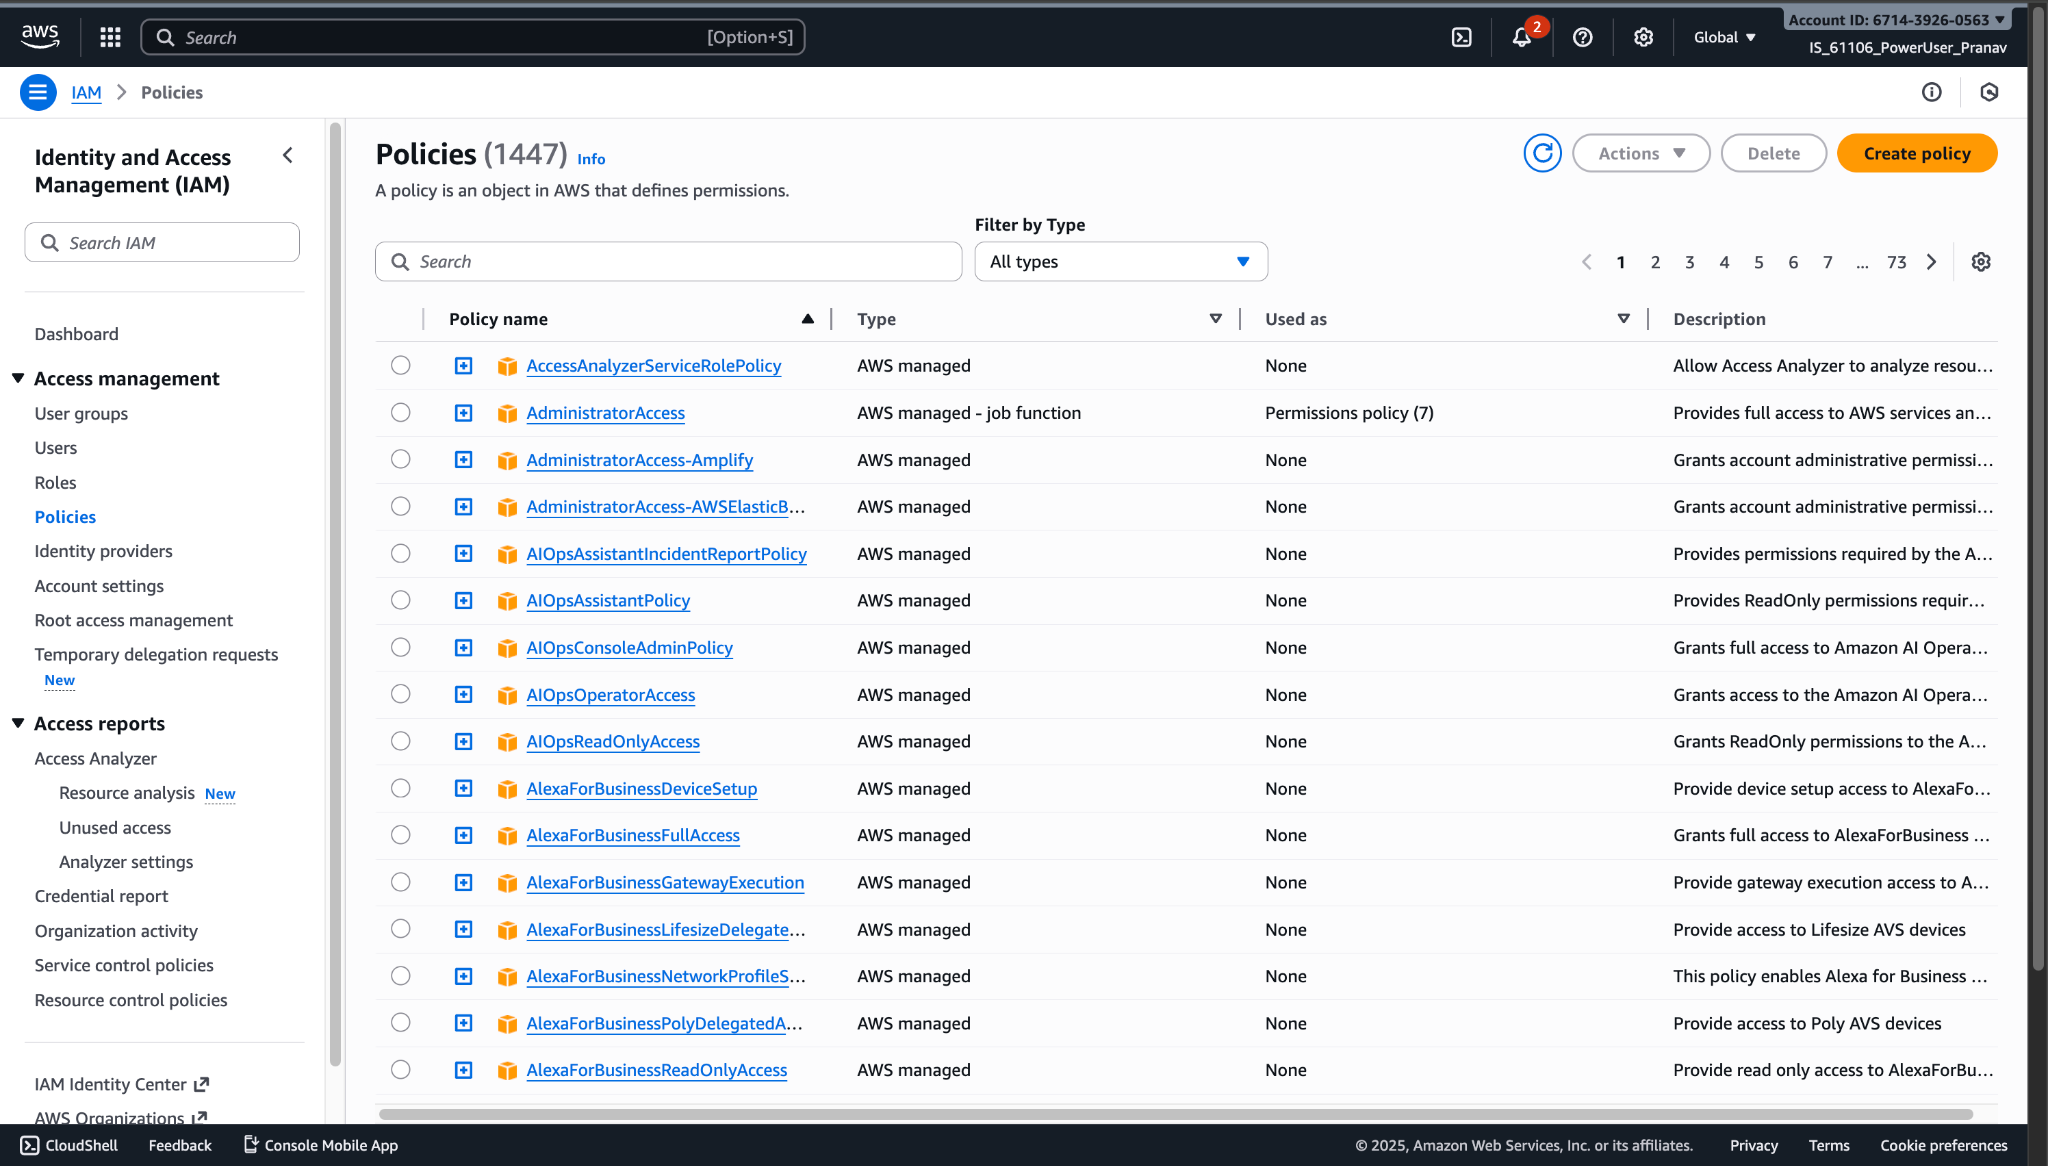
- Go to IAM > Policies and click Create Policy.
- Select Json, paste this policy, and then scroll down and click Next.
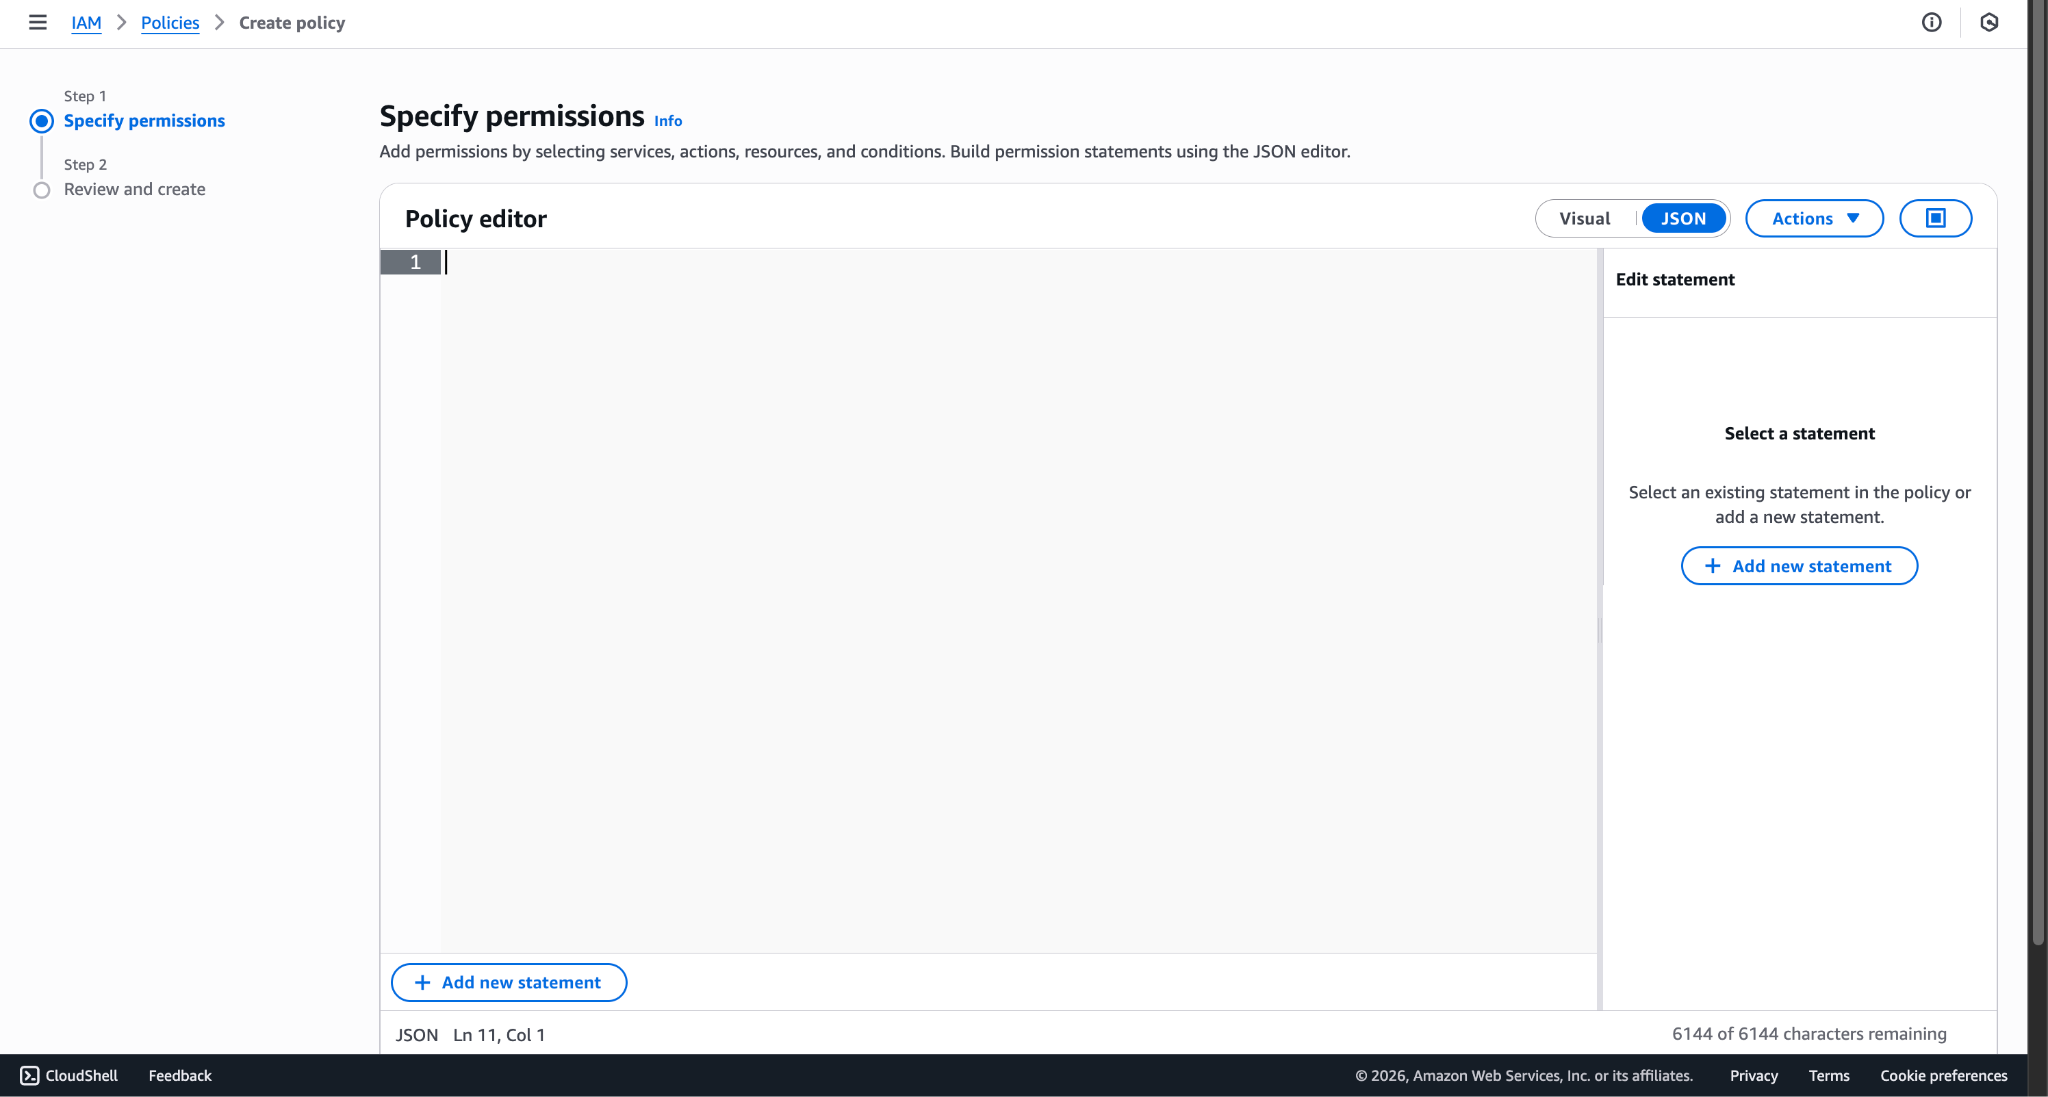
Policy:
{
	"Version": "2012-10-17",
	"Statement": [
		{
			"Sid": "SecurityLakePerms",
			"Effect": "Allow",
			"Action": [
				"securitylake:CreateCustomLogSource",
				"securitylake:ListLogSources",
				"securitylake:GetDataLakeSources",
				"securitylake:ListDataLakes"
			],
			"Resource": "*"
		},
		{
			"Sid": "LakeFormationPerms",
			"Effect": "Allow",
			"Action": [
				"lakeformation:RegisterResource",
				"lakeformation:GrantPermissions",
				"lakeformation:GetDataLakeSettings"
			],
			"Resource": "*"
		},
		{
			"Sid": "GluePerms",
			"Effect": "Allow",
			"Action": [
				"glue:CreateTable",
				"glue:CreateDatabase",
				"glue:CreateCrawler",
				"glue:UpdateCrawler",
				"glue:UpdateDatabase",
				"glue:UpdateTable",
				"glue:StartCrawlerSchedule",
				"glue:GetDatabase",
				"glue:GetDatabases",
				"glue:GetTable",
				"glue:GetTables",
				"glue:GetTableVersion",
				"glue:GetTableVersions",
				"glue:GetPartition",
				"glue:GetPartitions"
			],
			"Resource": "*"
		},
		{
			"Sid": "AllowAssumeSecurityLakeProviderRole",
			"Effect": "Allow",
			"Action": [
				"sts:AssumeRole",
				"sts:SetSourceIdentity",
				"sts:TagSession"
			],
			"Resource": [
				"arn:aws:iam::[aws-account-id]:role/AmazonSecurityLake-Provider-*"
			]
		},
		{
			"Sid": "AllowPassAndReadRoleForCrawler",
			"Effect": "Allow",
			"Action": [
				"iam:PassRole",
				"iam:GetRole",
				"iam:CreateRole",
				"iam:PutRolePolicy",
				"iam:ListRolePolicies",
				"iam:DeleteRole",
				"iam:DeleteRolePolicy"
			],
			"Resource": "*"
		},
		{
			"Sid": "AllowUpdateProviderRoleTrustPolicy",
			"Effect": "Allow",
			"Action": [
				"iam:UpdateAssumeRolePolicy",
				"iam:GetRole"
			],
			"Resource": "arn:aws:iam:::role/AmazonSecurityLake-Provider-*"
		},
		{
			"Sid": "S3Perms",
			"Effect": "Allow",
			"Action": [
				"s3:ListBucket",
				"s3:PutObject",
				"s3:CreateBucket",
				"s3:ListAllMyBuckets",
				"s3:GetBucketLocation",
				"s3:GetBucketPolicy"
			],
			"Resource": "*"
		}
	]
}
Note
Make sure to replace AWS Account ID in the policy.
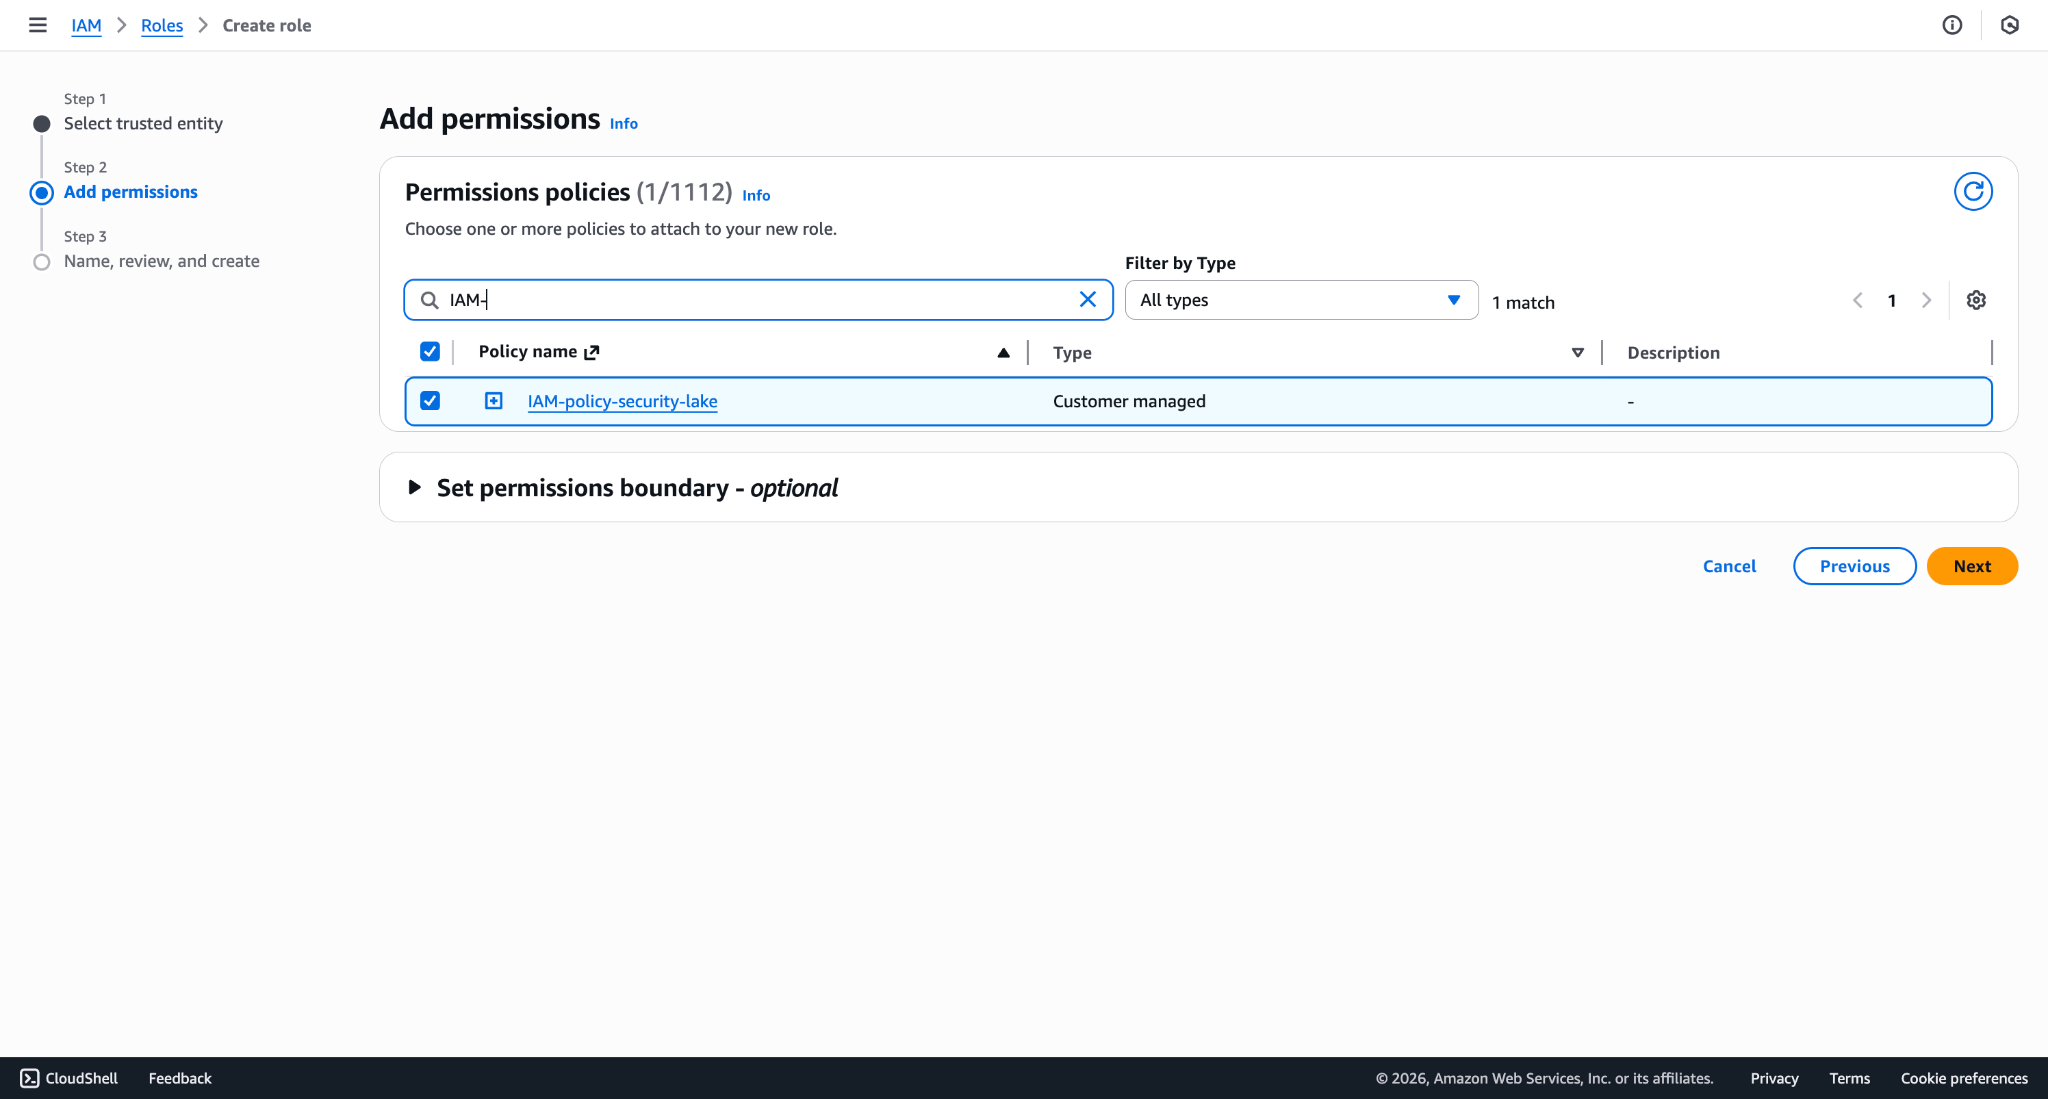
- Enter a Policy Name and Description, like IAM-policy-security-lake.
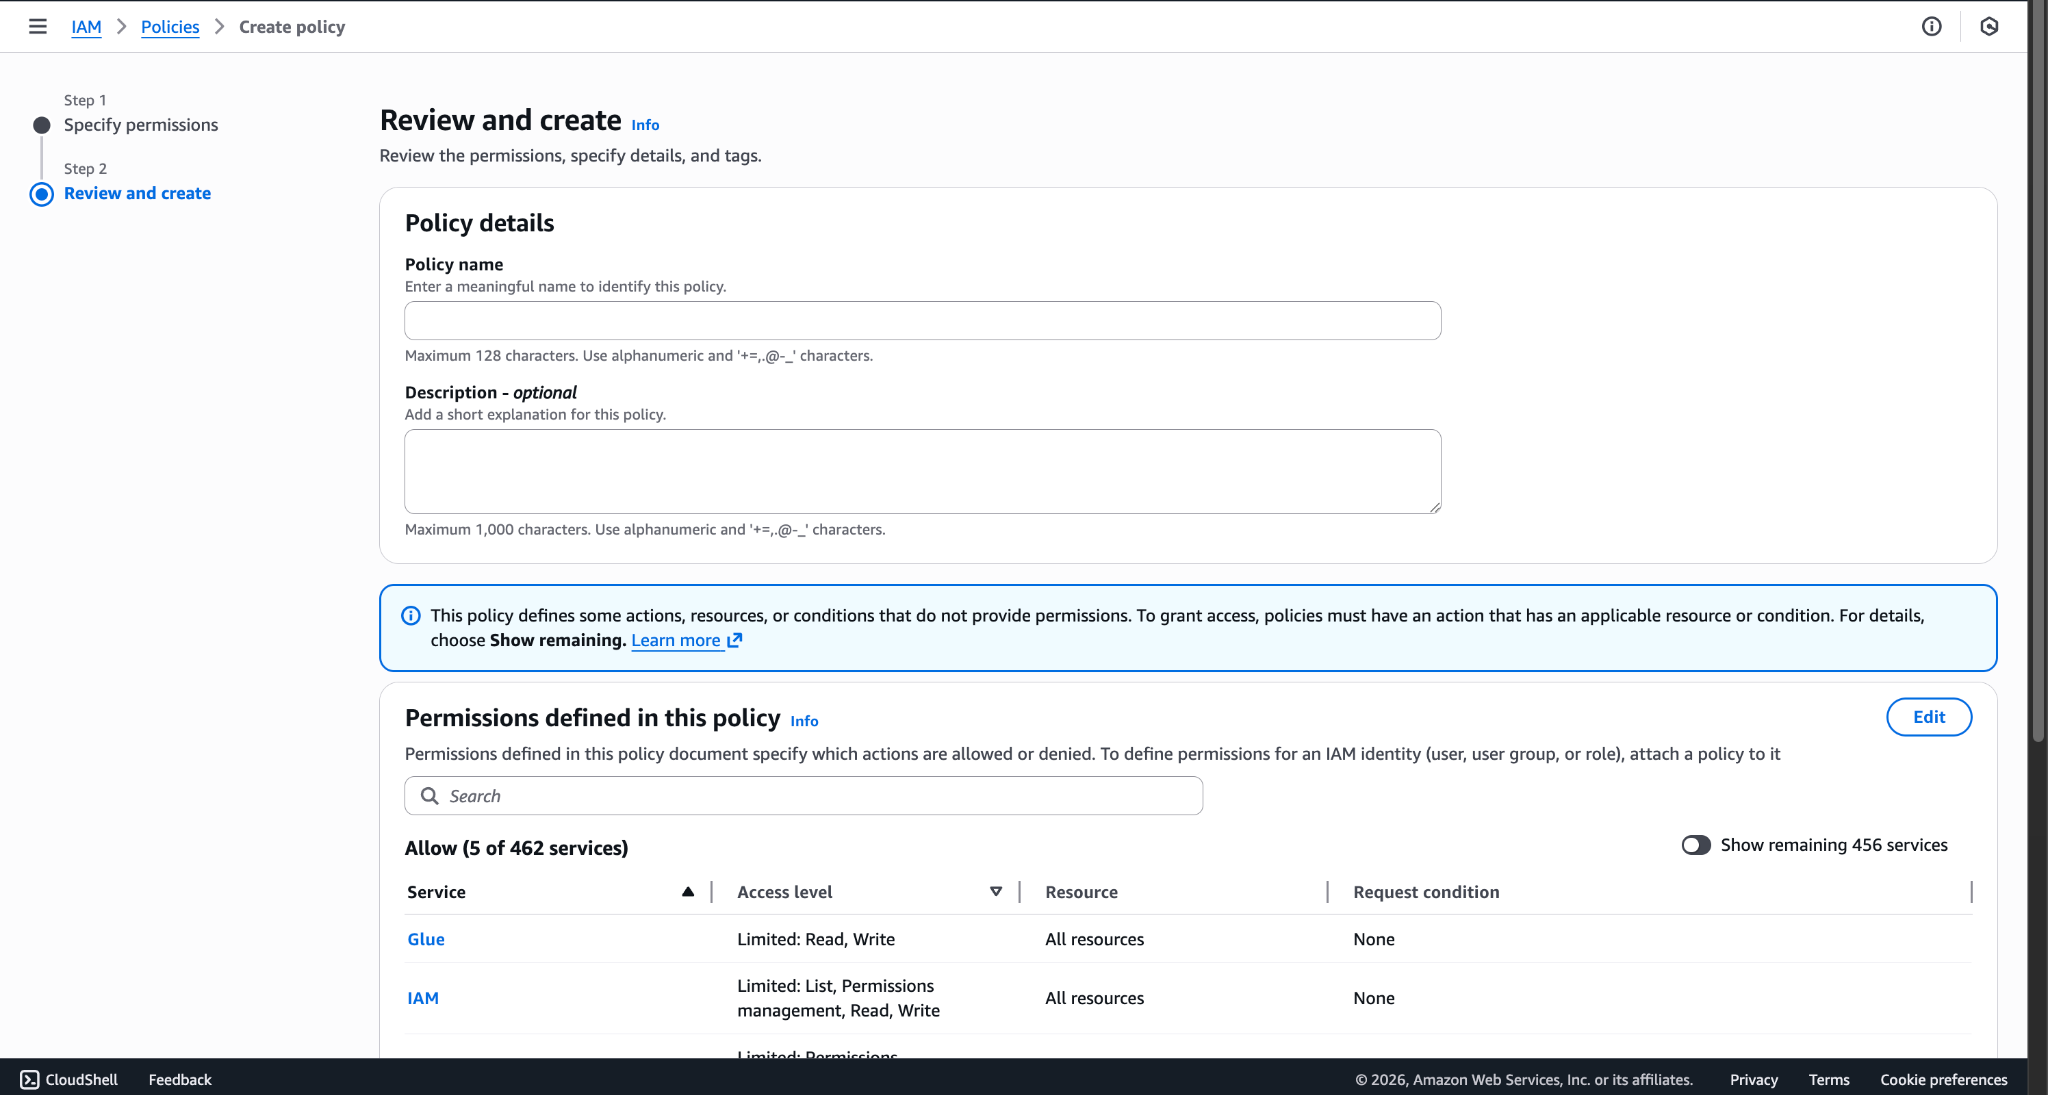
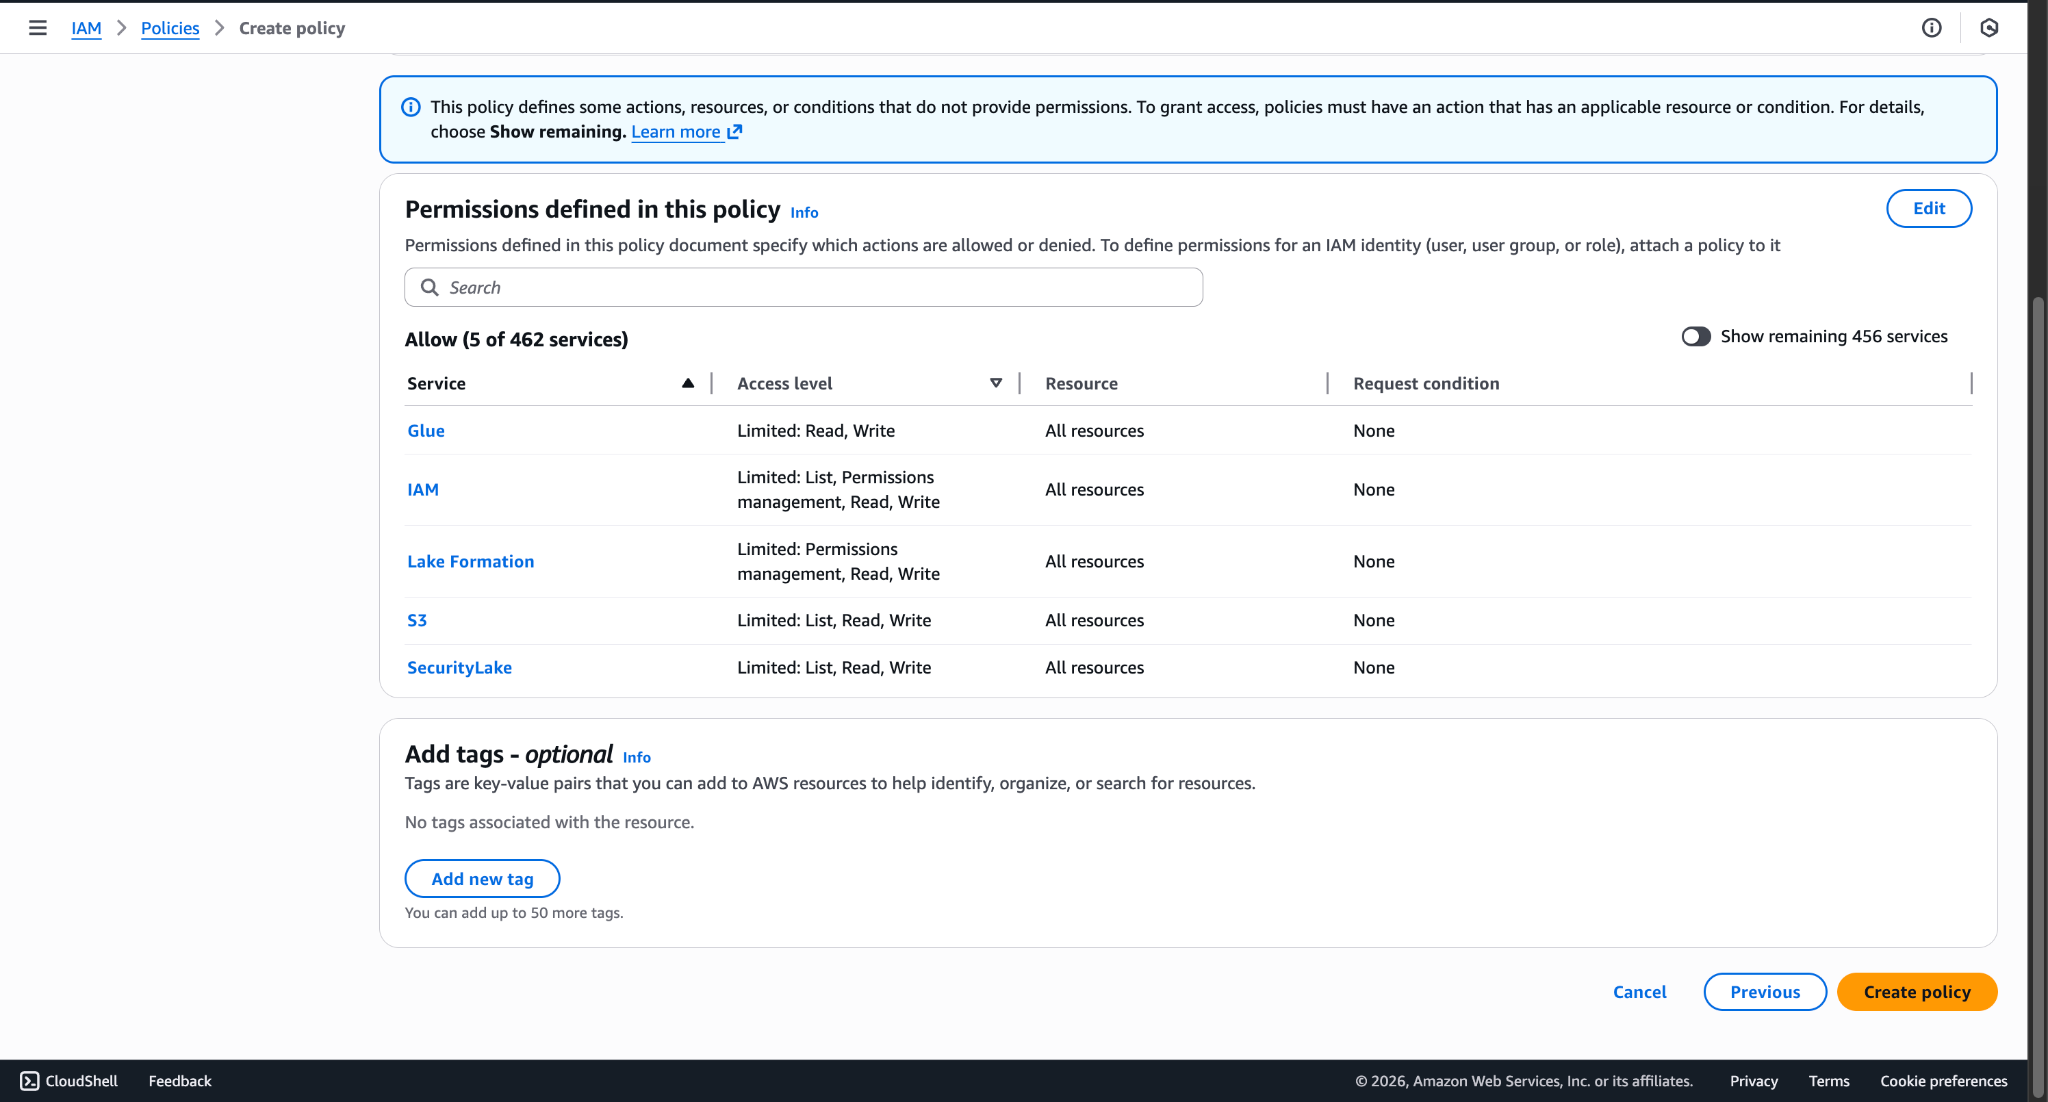
- Click Create Policy.
Create Role for Plugin Configuration
- Go to IAM > Roles and click Create Role.
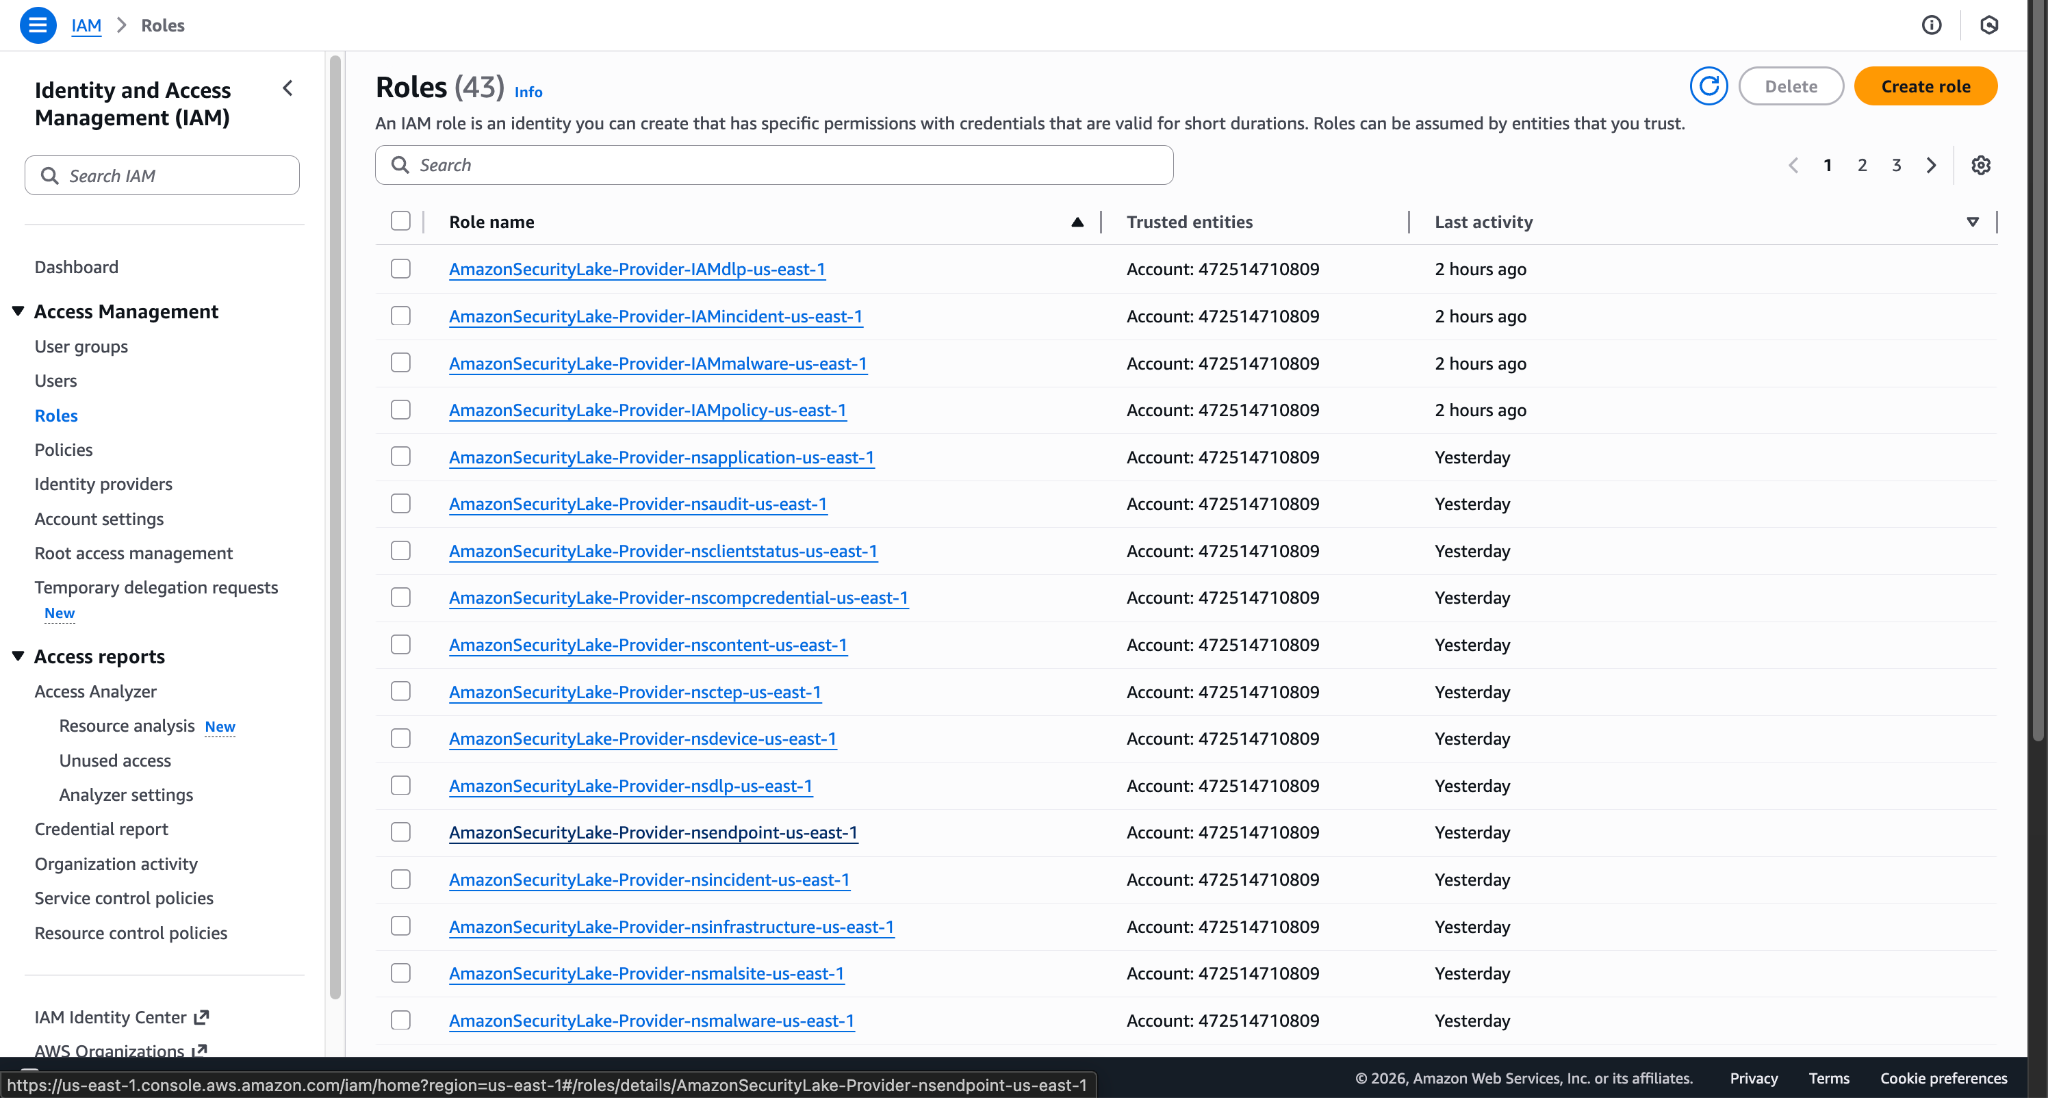
- Select Custom trust policy as Trusted entity type, paste the Custom Trust policy shown below, and then click Next.
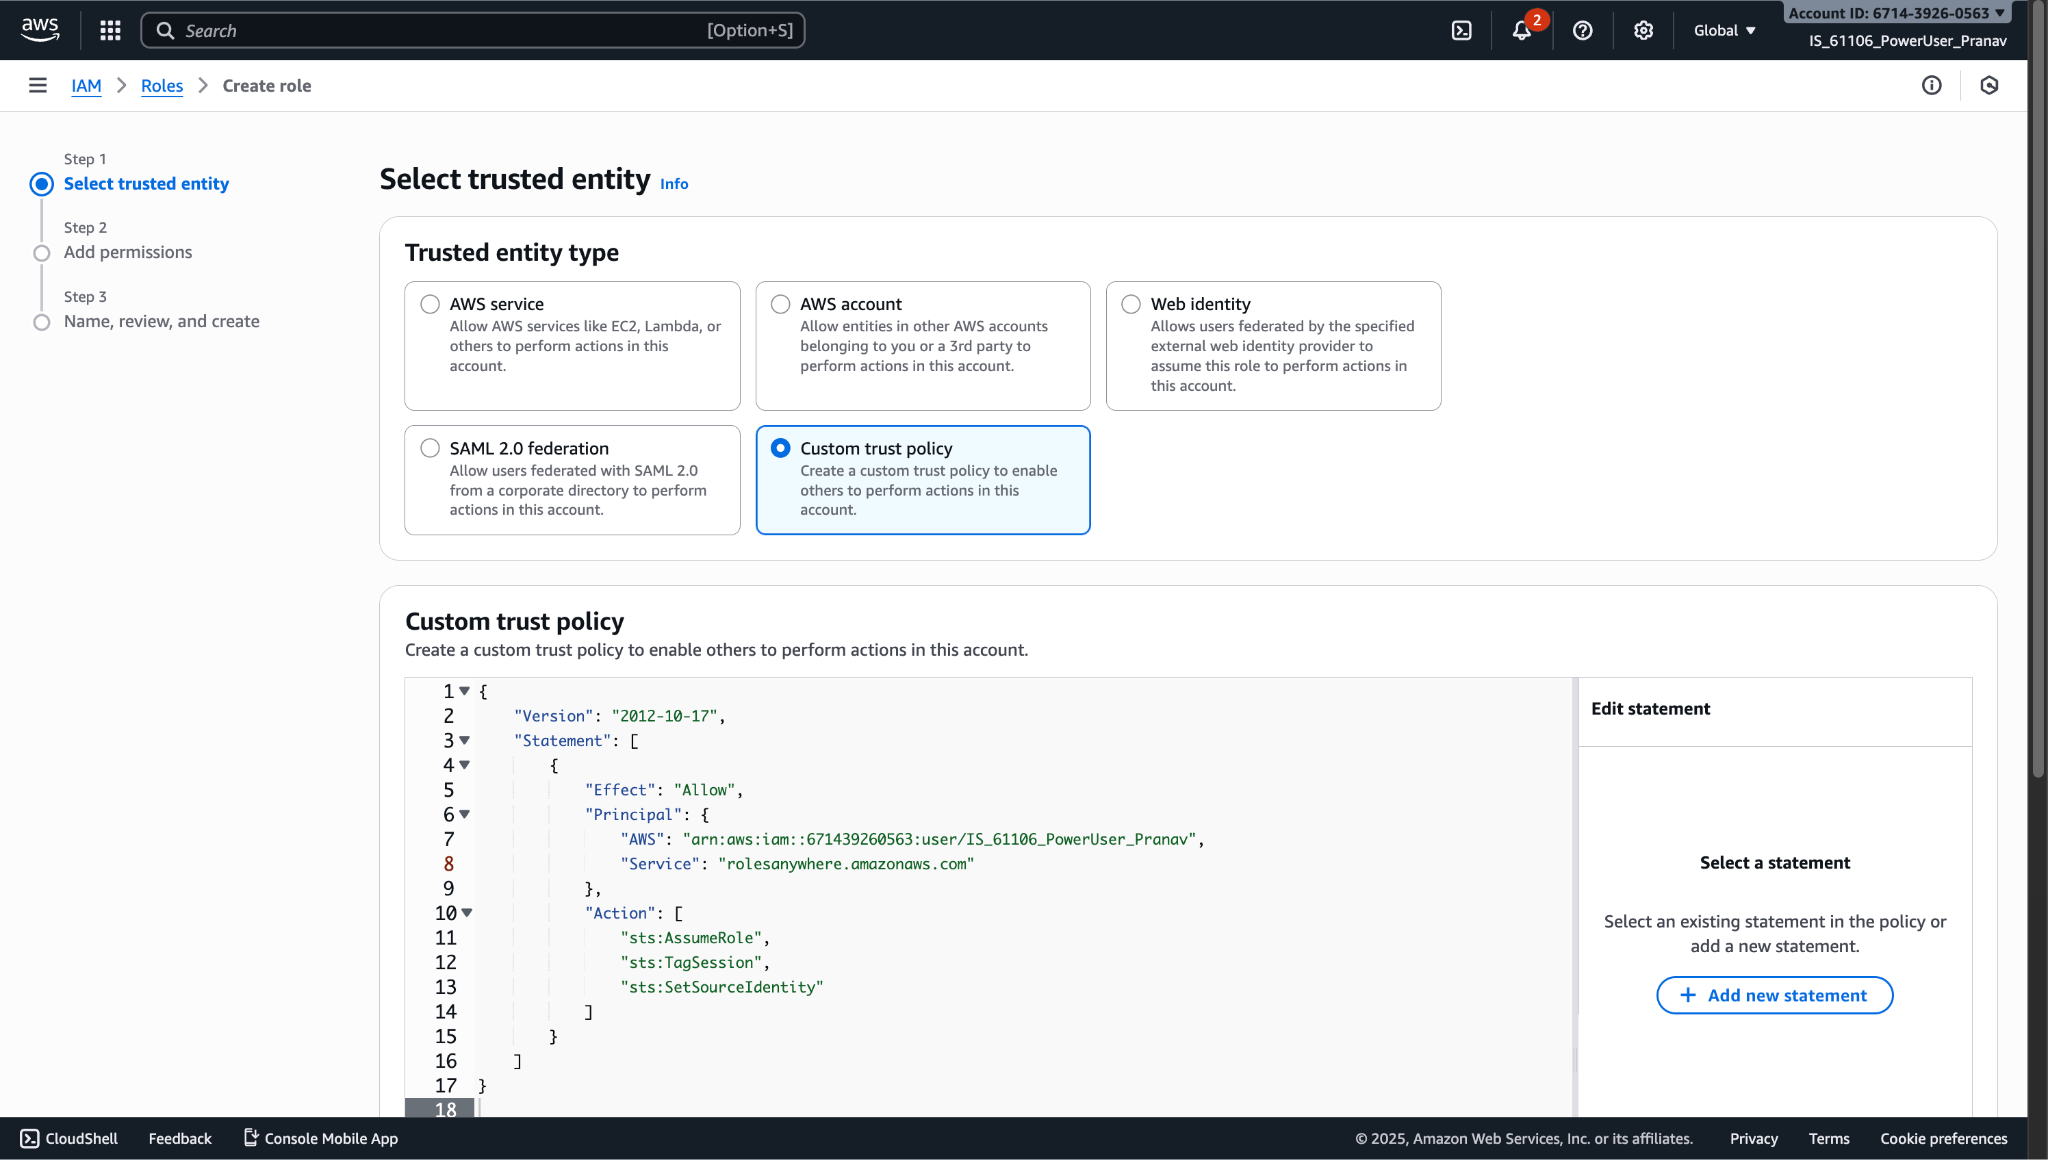
Custom Trust Policy:
{ "Version": "2012-10-17", "Statement": [ { "Effect": "Allow", "Principal": { "Service": "rolesanywhere.amazonaws.com" }, "Action": [ "sts:AssumeRole", "sts:TagSession", "sts:SetSourceIdentity" ] } ] } - Attach the policy previously created to this role and click Next.
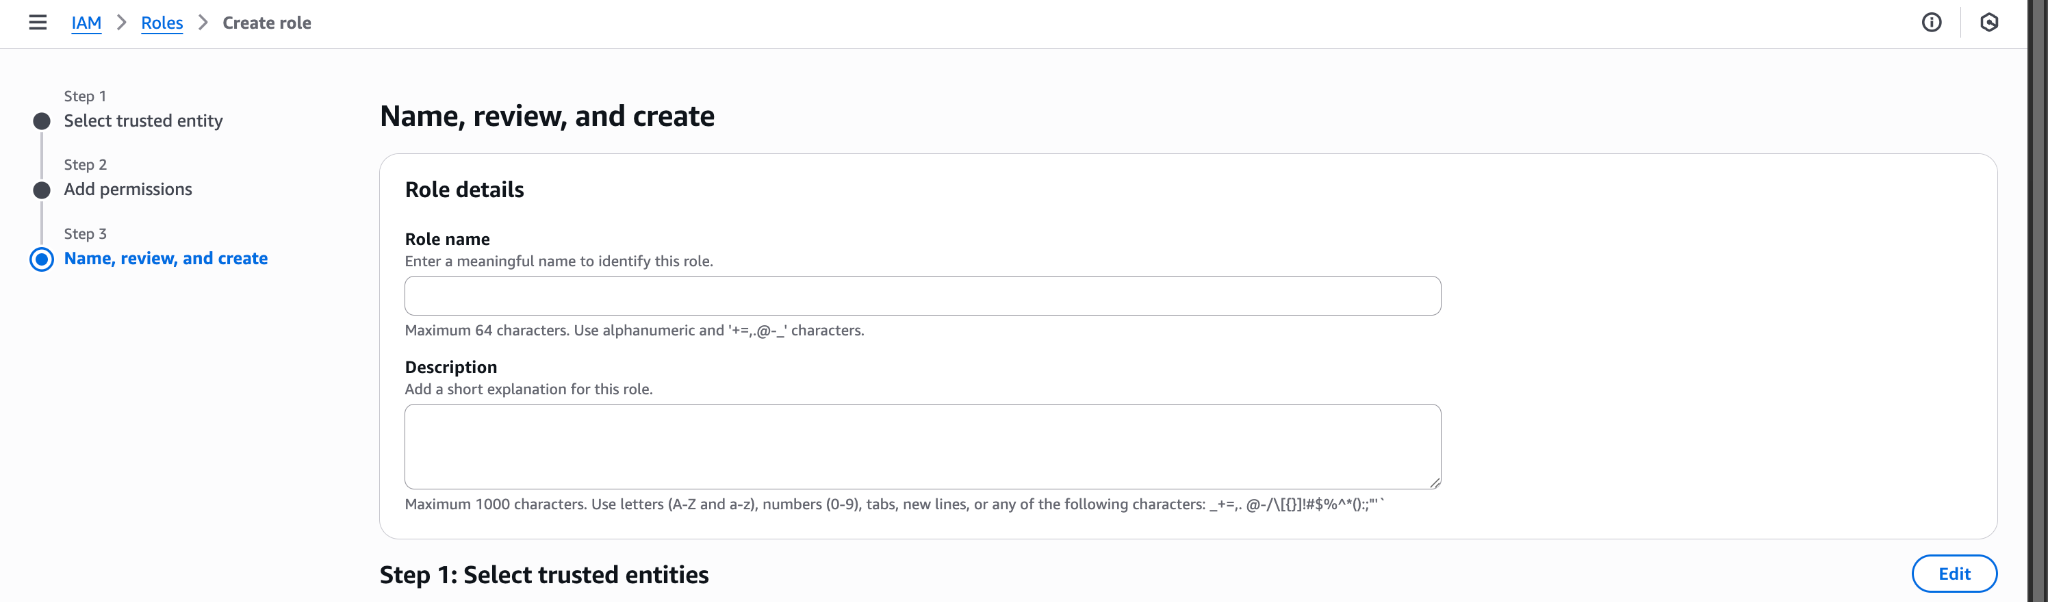
- Enter a Role Name, scroll down, and click Create role.
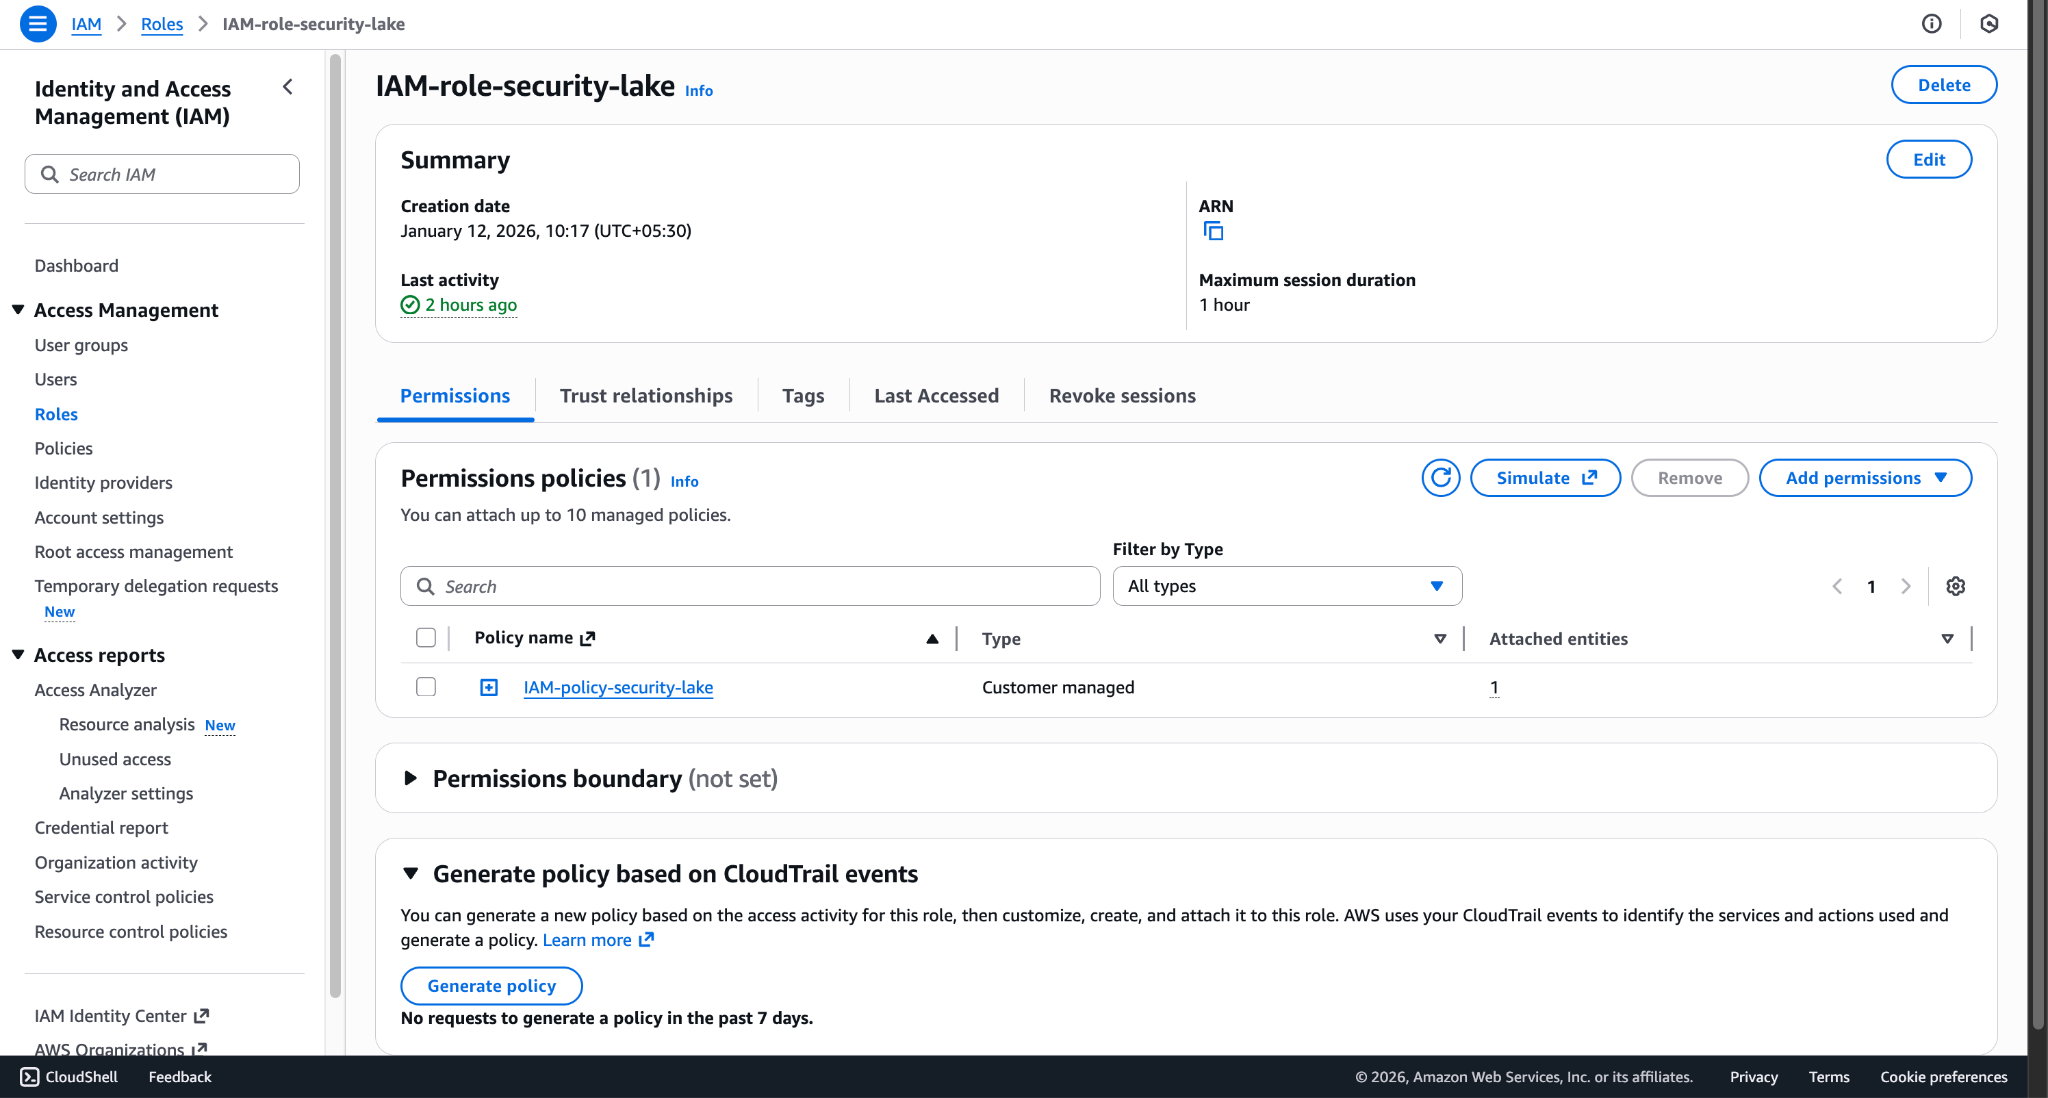
- After the role is created, open that role and copy its ARN, as it will be used as the Role ARN while configuring the Amazon Security Lake plugin.
Create a Profile
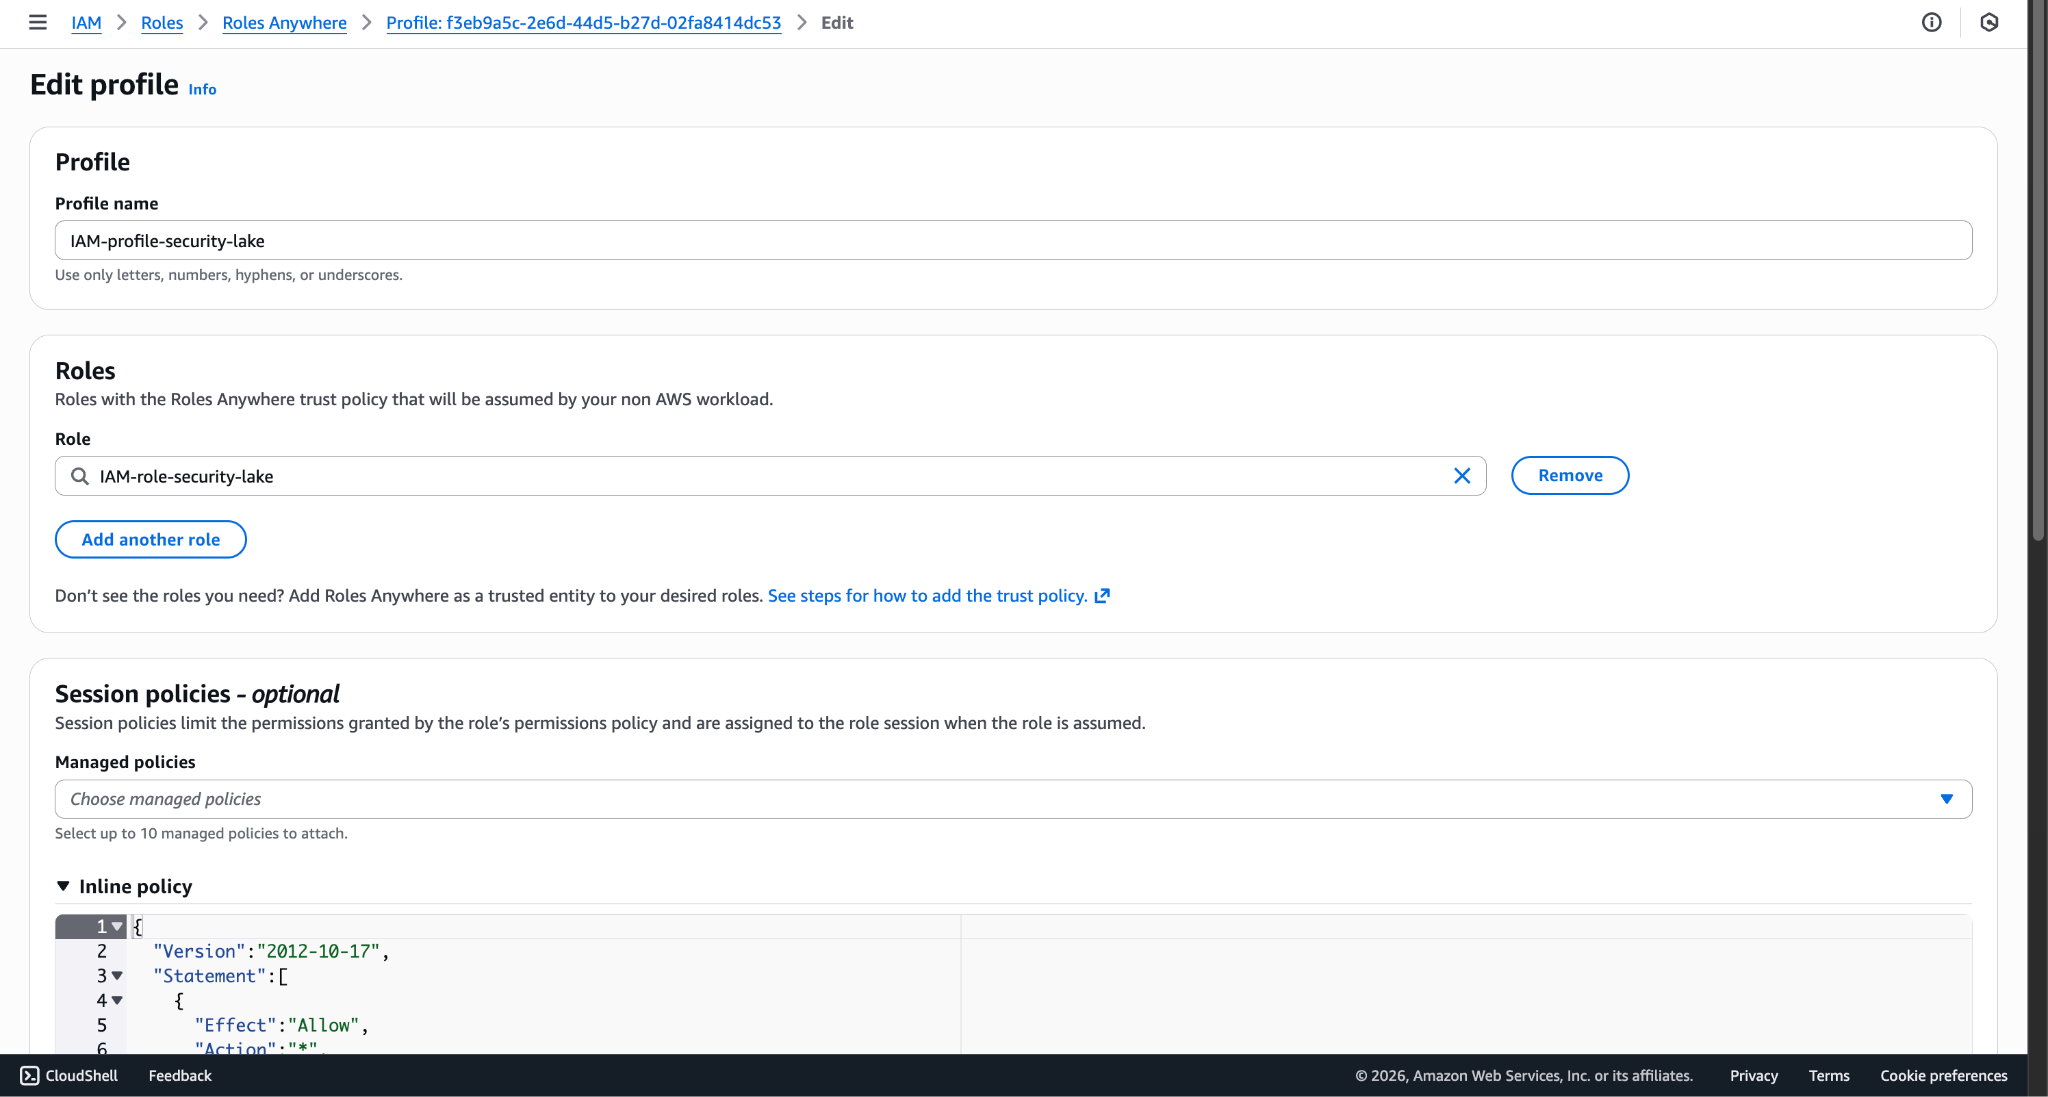
- Go to Roles Anywhere > Create a Profile.
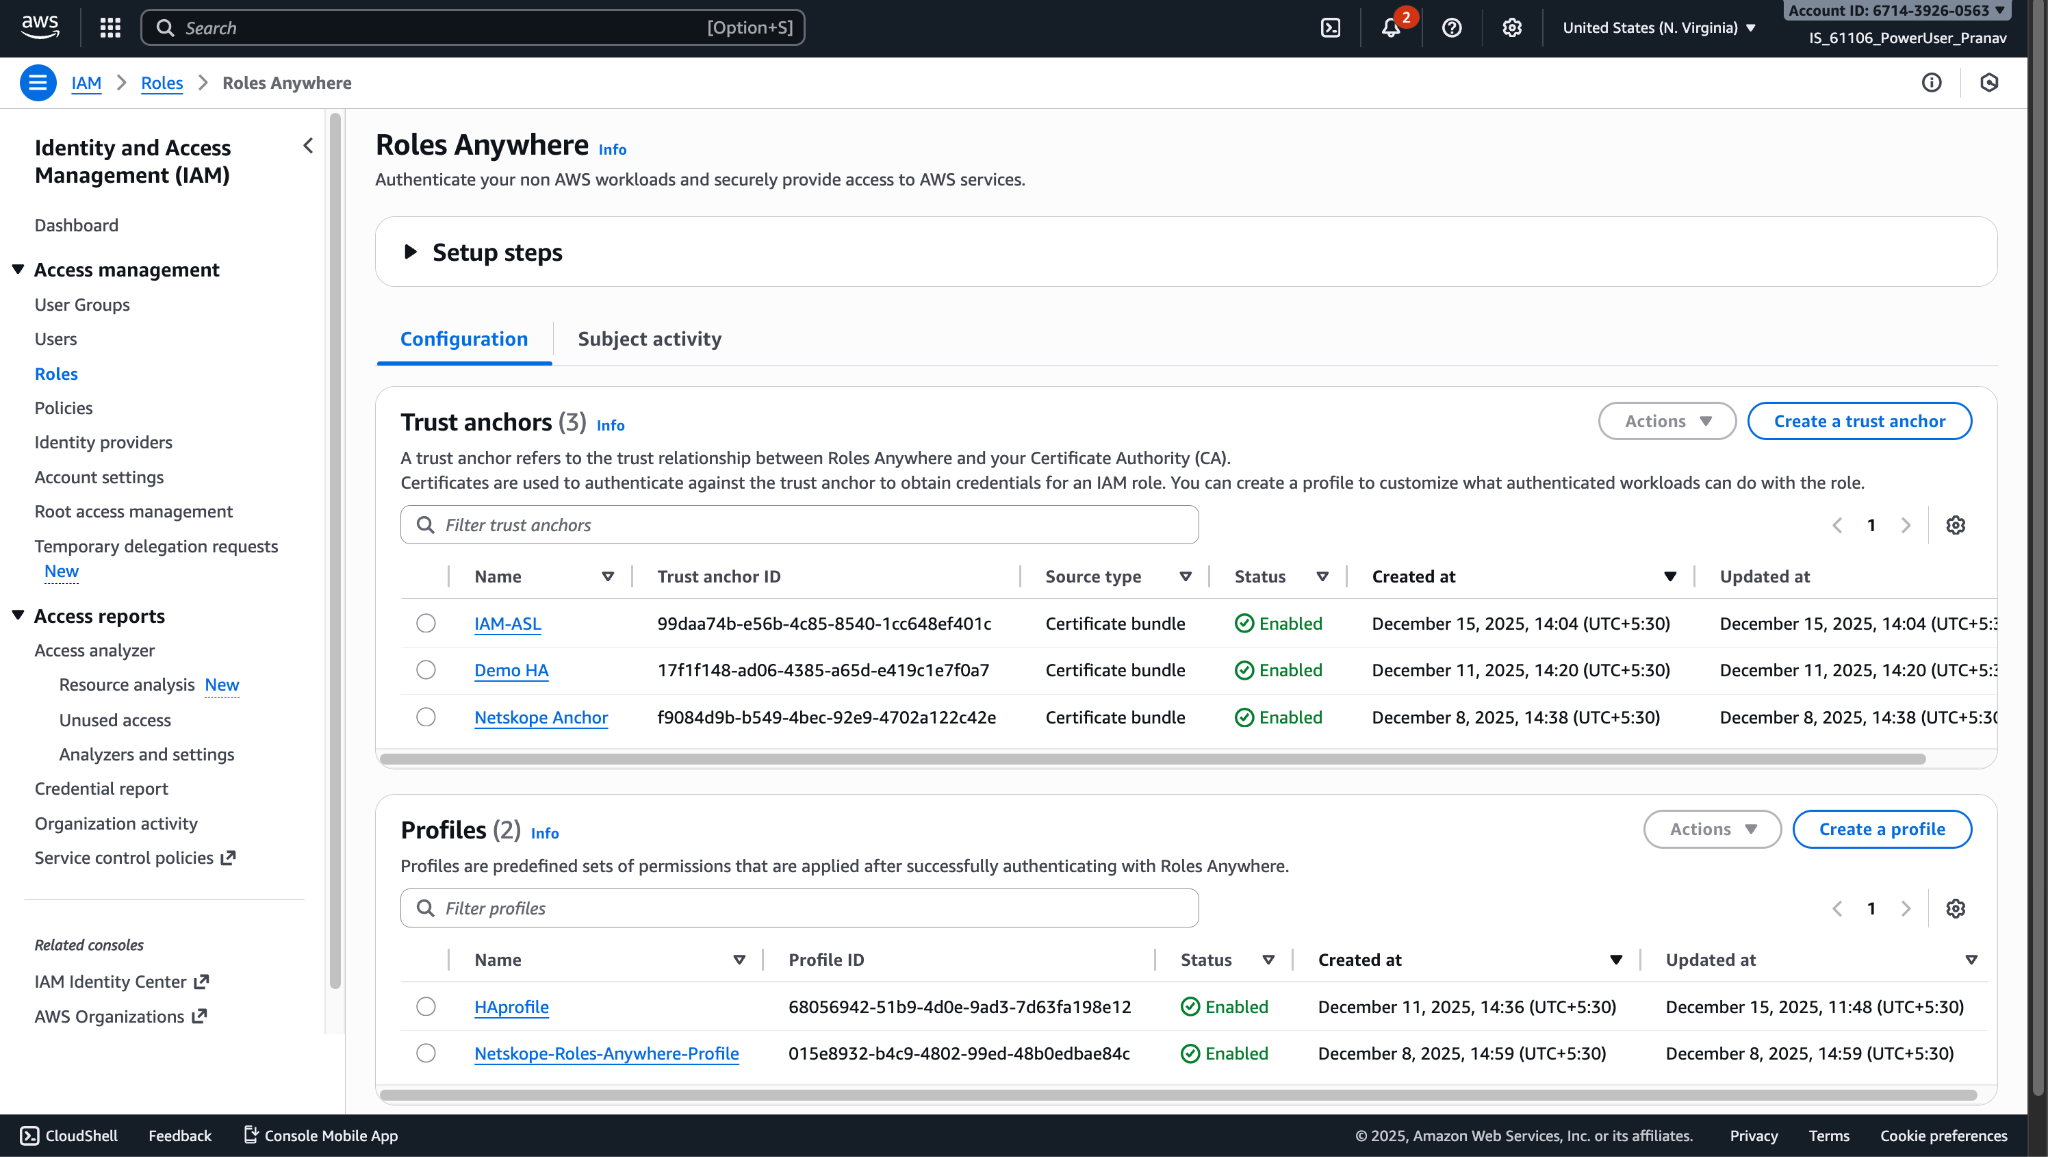
- Enter a profile name and add the role that you just created in the Create Role section.
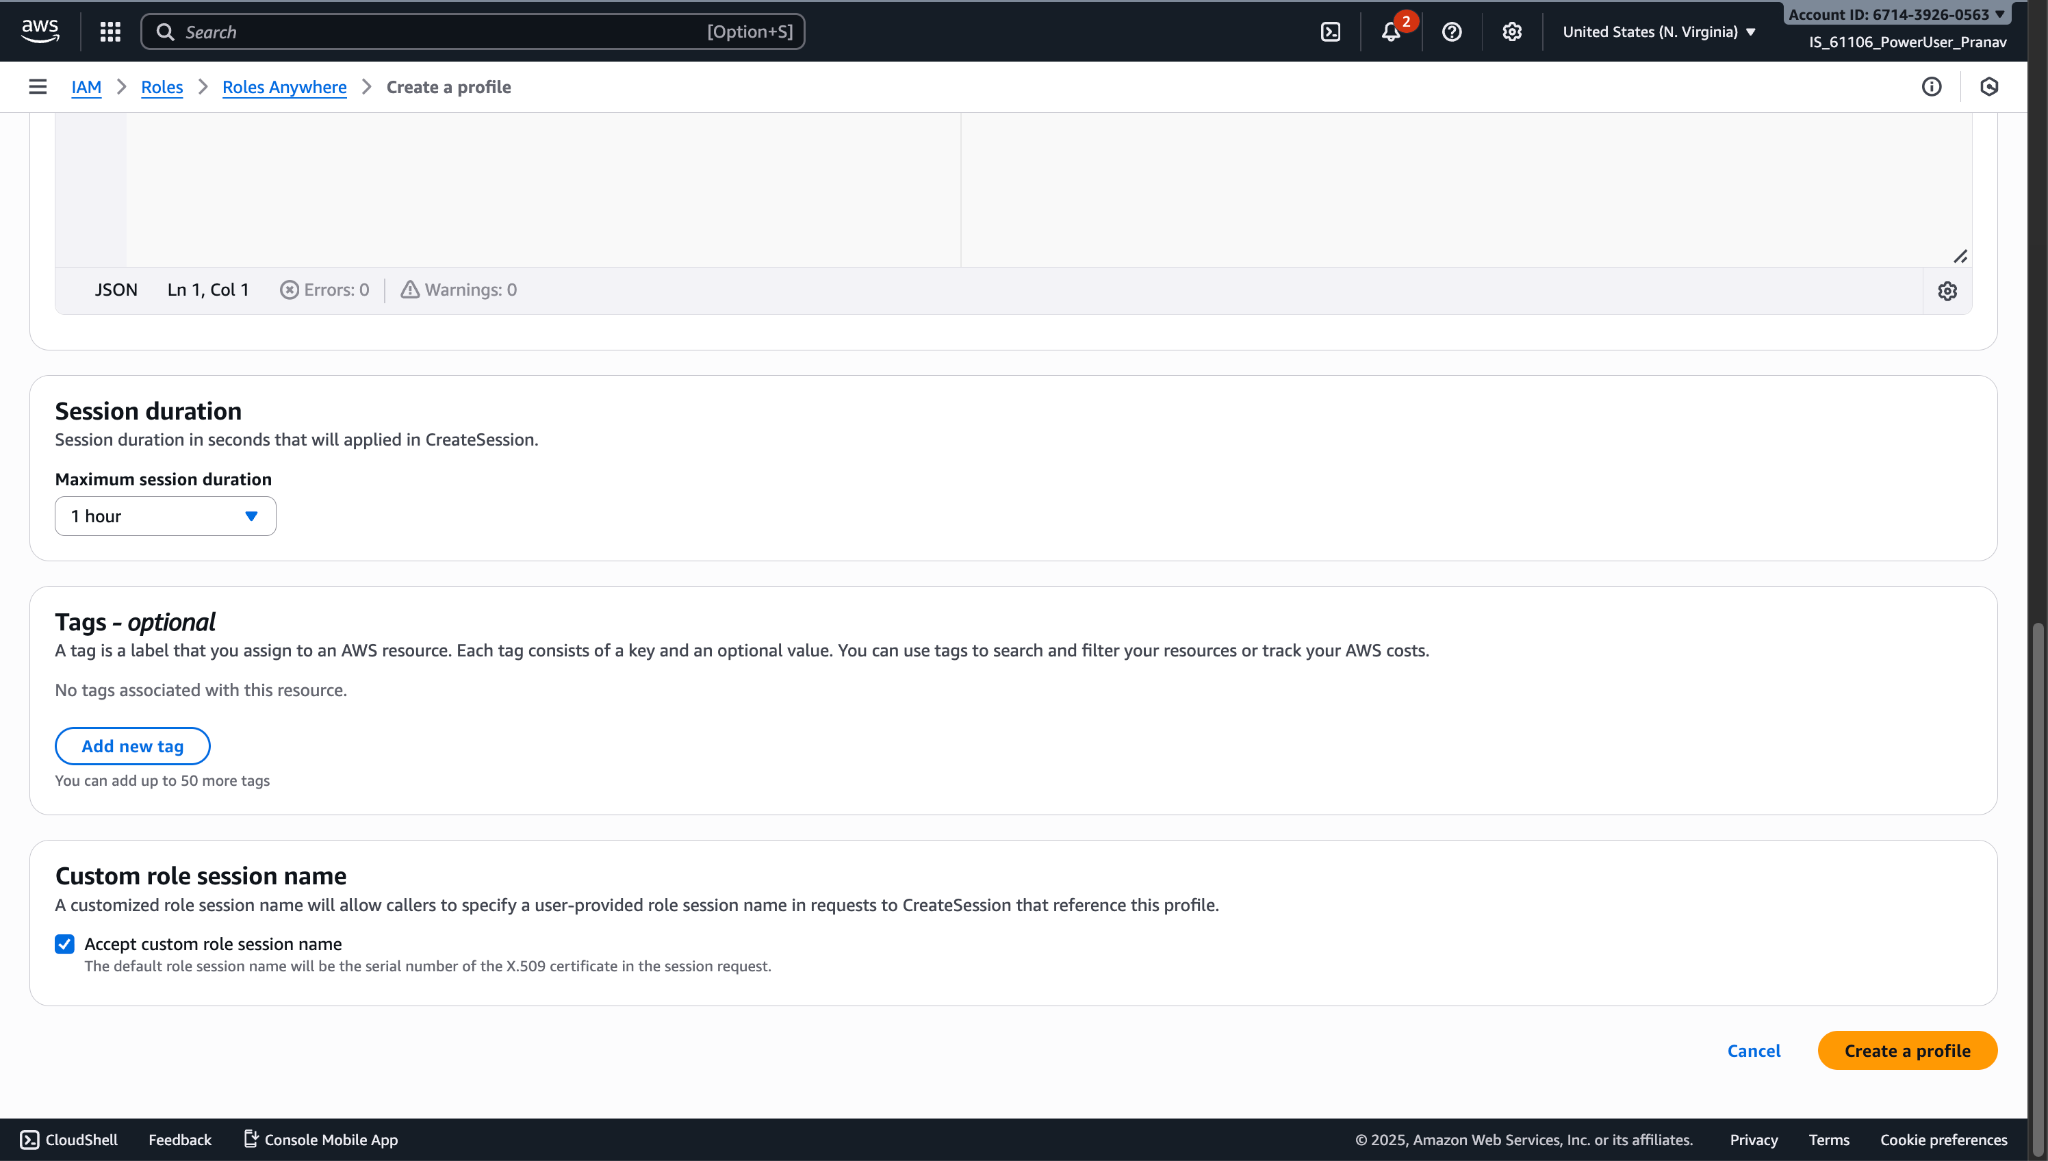
- Scroll Down, click the check box in the Custom role session name section, and then click Create a Profile.
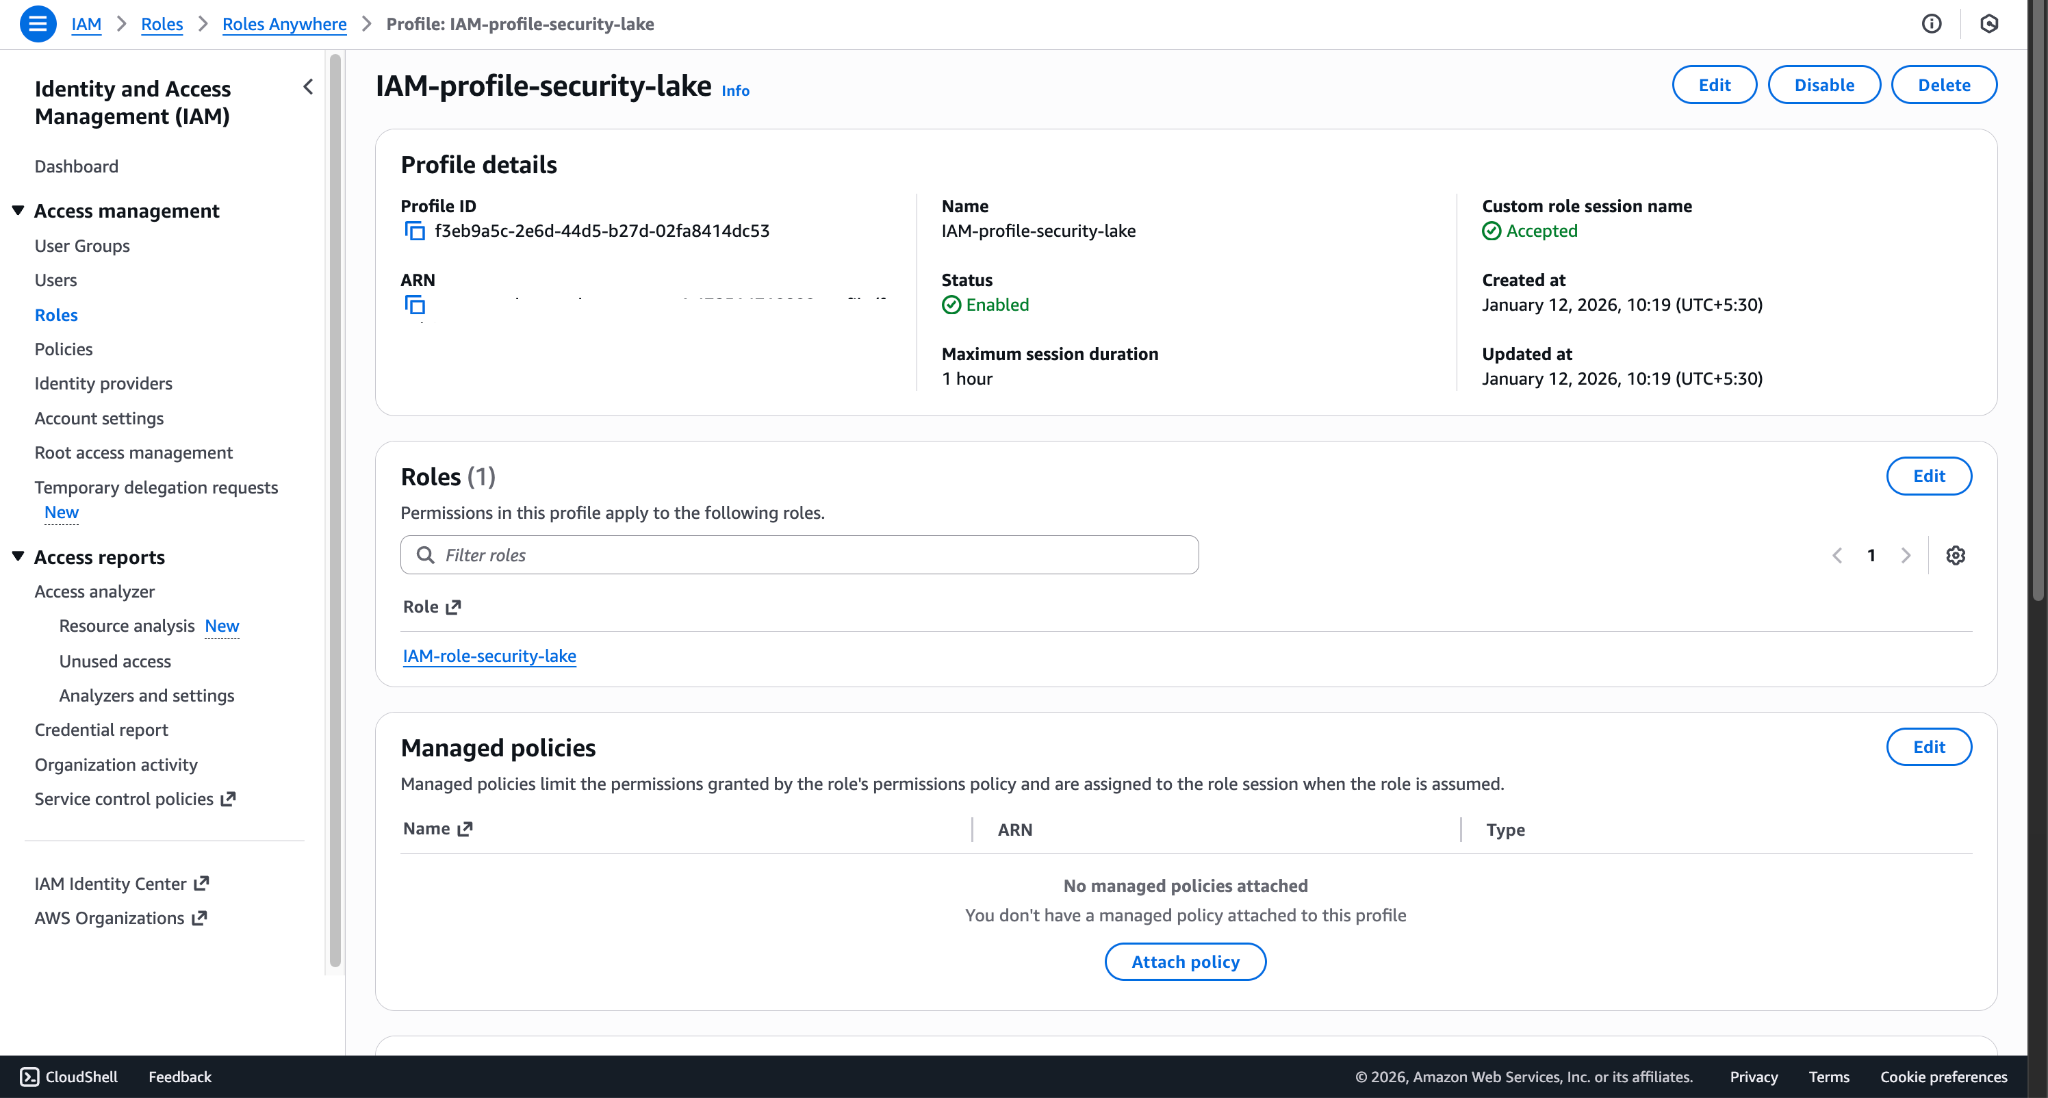
- Open the created profile and copy the Profile ARN. This will be used while configuring the Amazon Security Lake plugin.
Request a Private Certificate
- Go to AWS Certificate Manager > Request certificate.
- Select Request a private certificate.
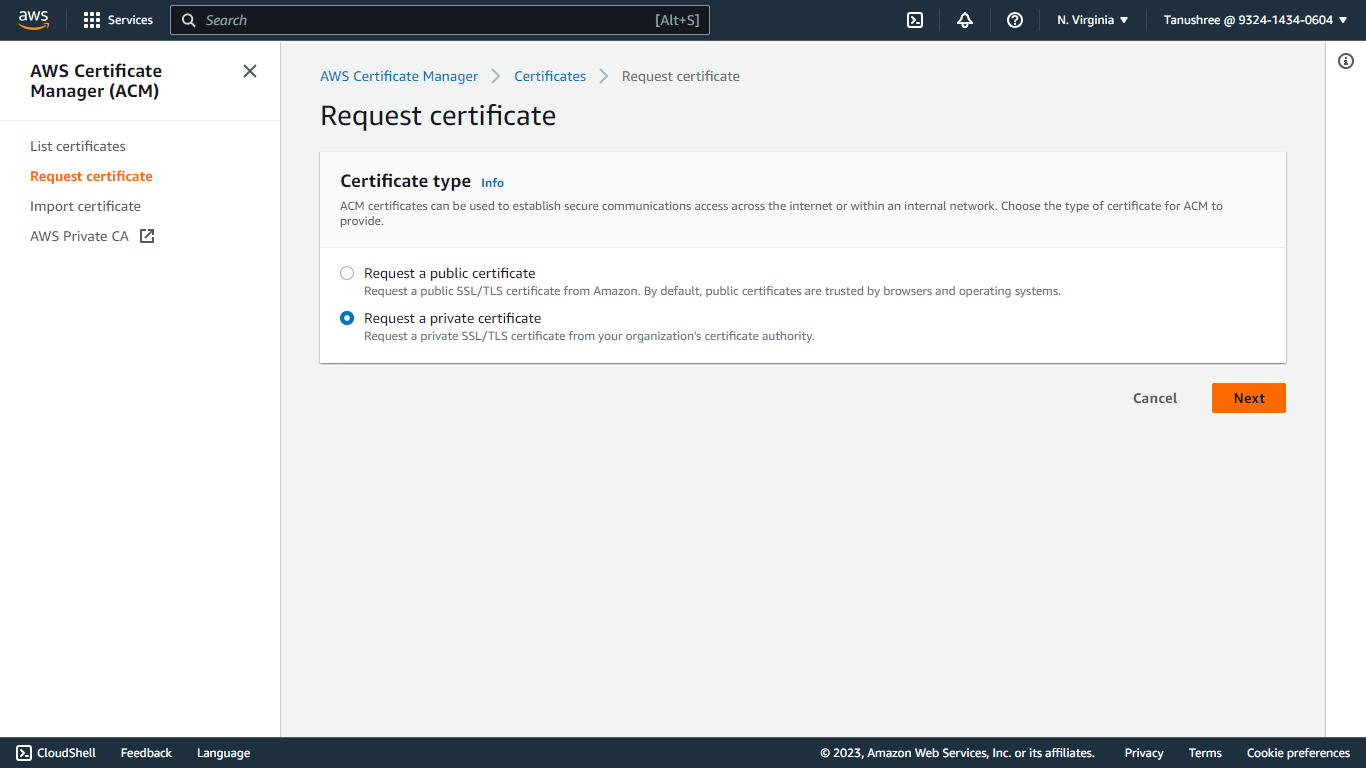
- Click Next.
- Select the Certificate authority created in the previous steps.
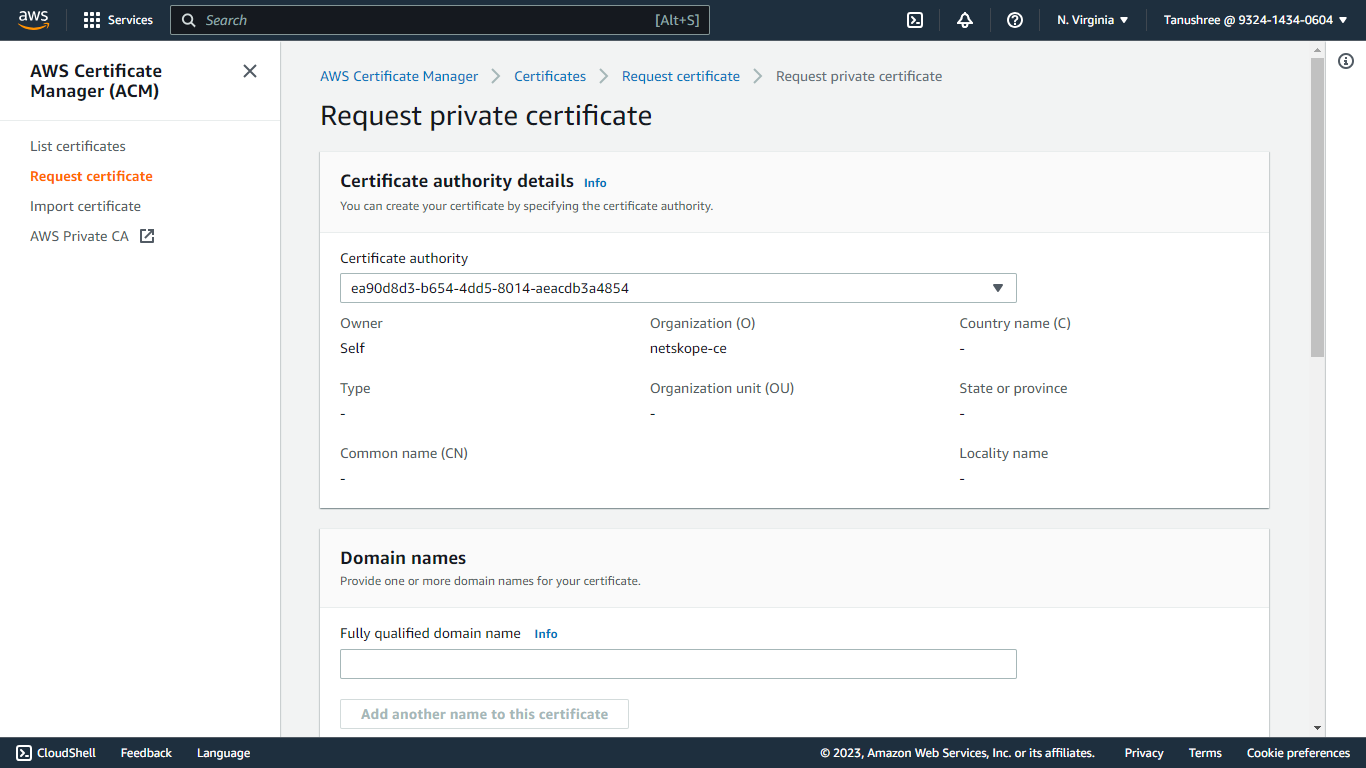
- Provide a domain name in the Fully qualified domain name field (like netskope-ce.com).
- Select RSA 2048 as the Key algorithm.
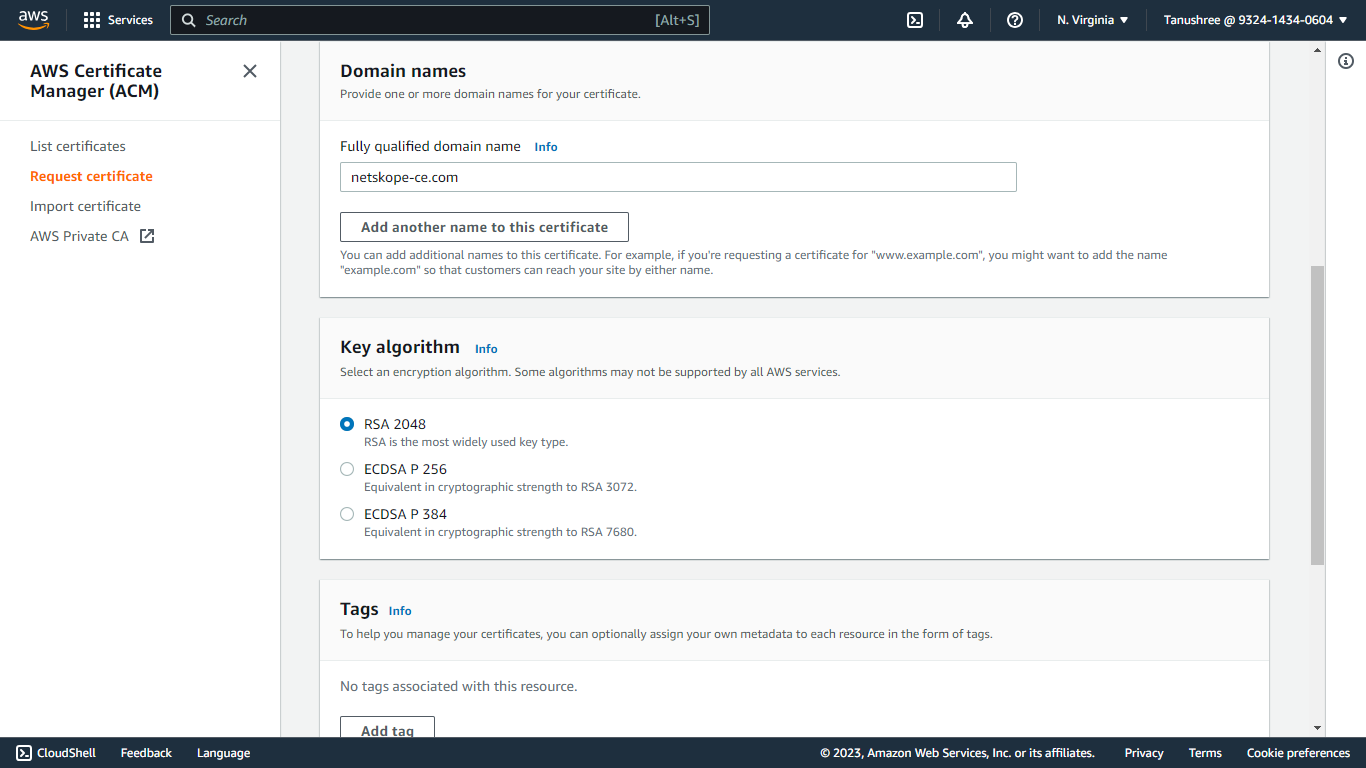
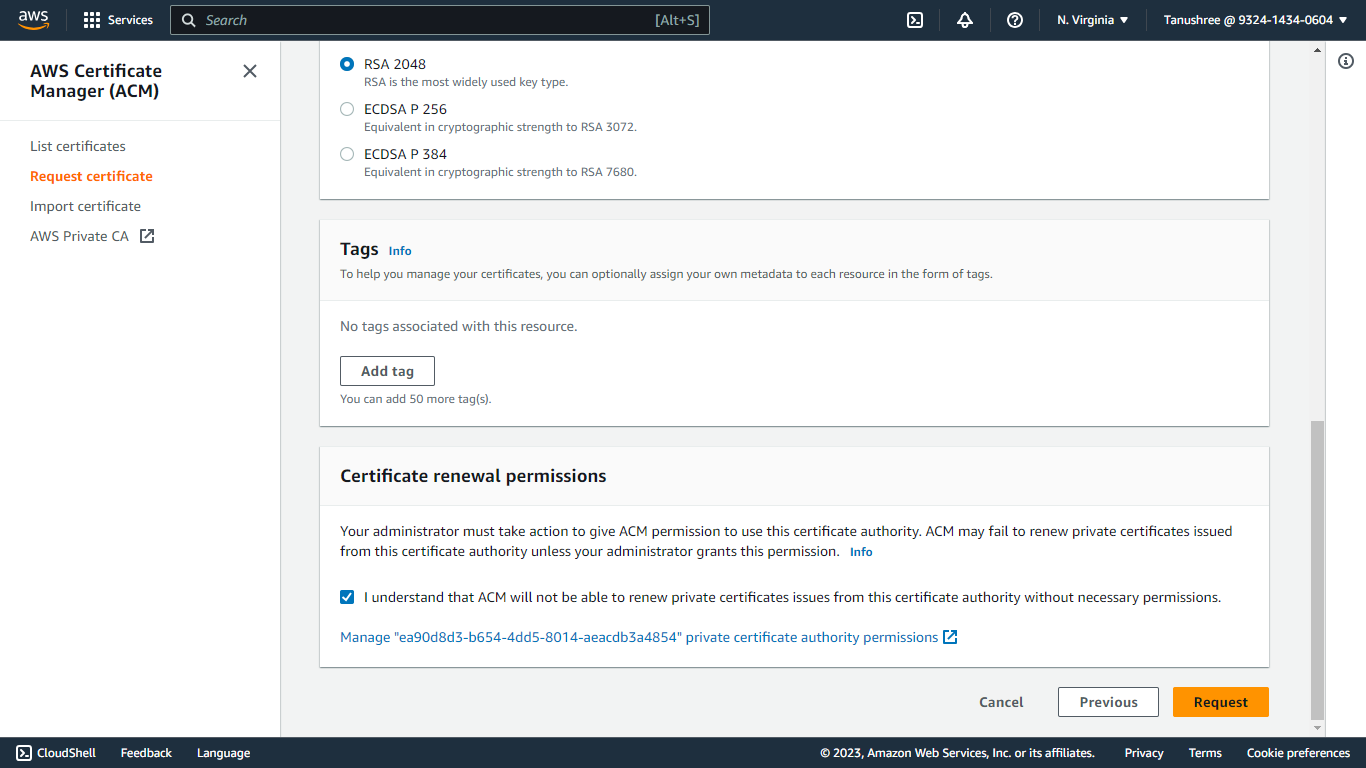
- Add tags if required.
- Acknowledge the Certificate renewal permissions.
- Click Request.
- Go to List certificates on the navigation panel of AWS Certificate Manager.
- Select the certificate created previously.
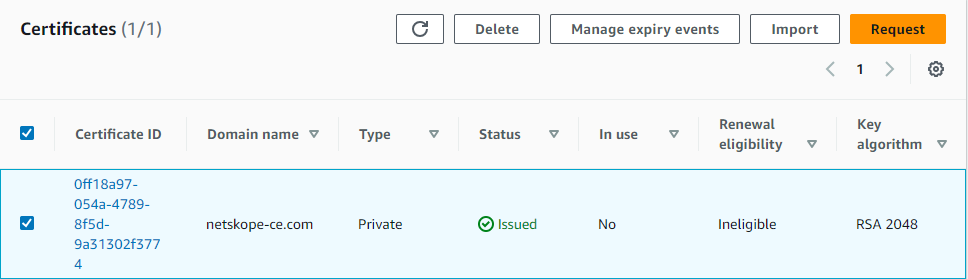
- Click Export.
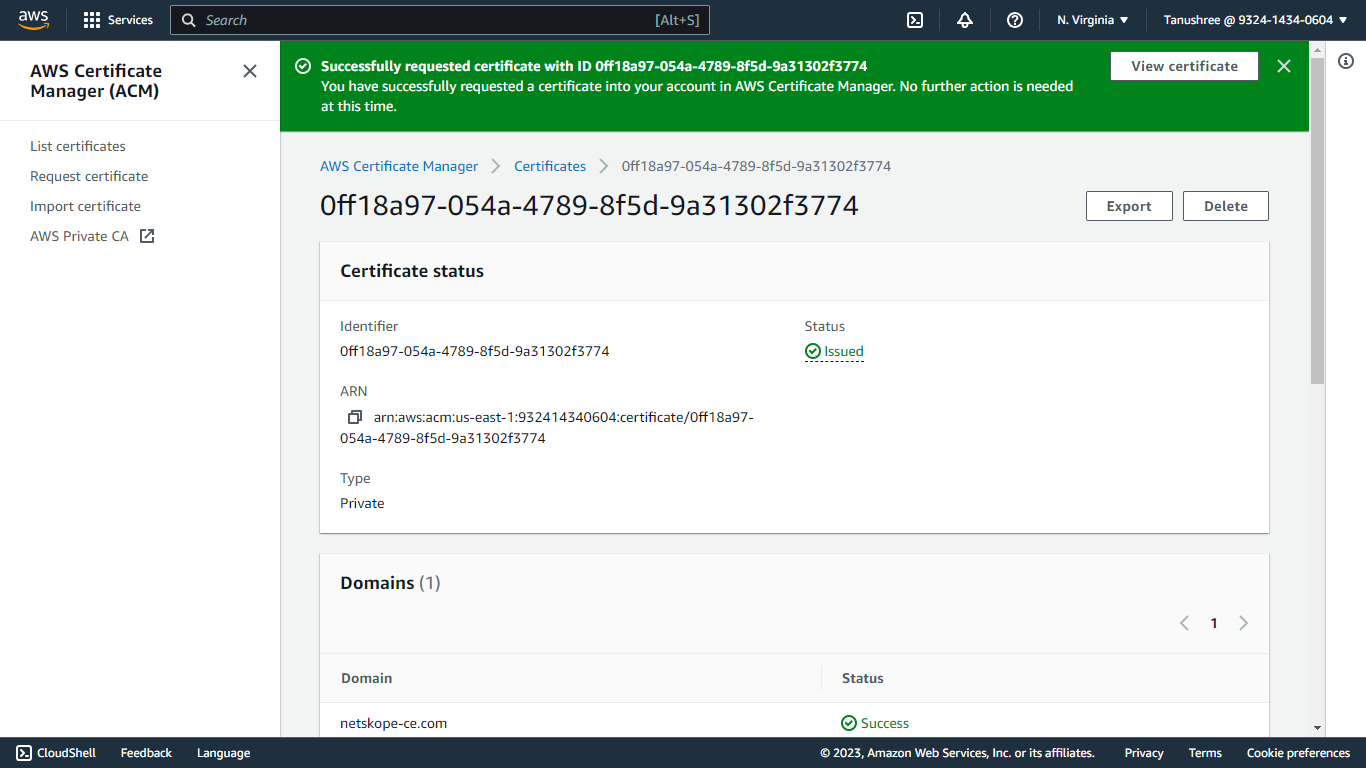
- Enter the passphrase. Make a note of the passphrase as it will be required to configure the AWS Security Lake plugin using the AWS IAM Roles Anywhere Authentication method.
- Click Generate PEM Encoding.
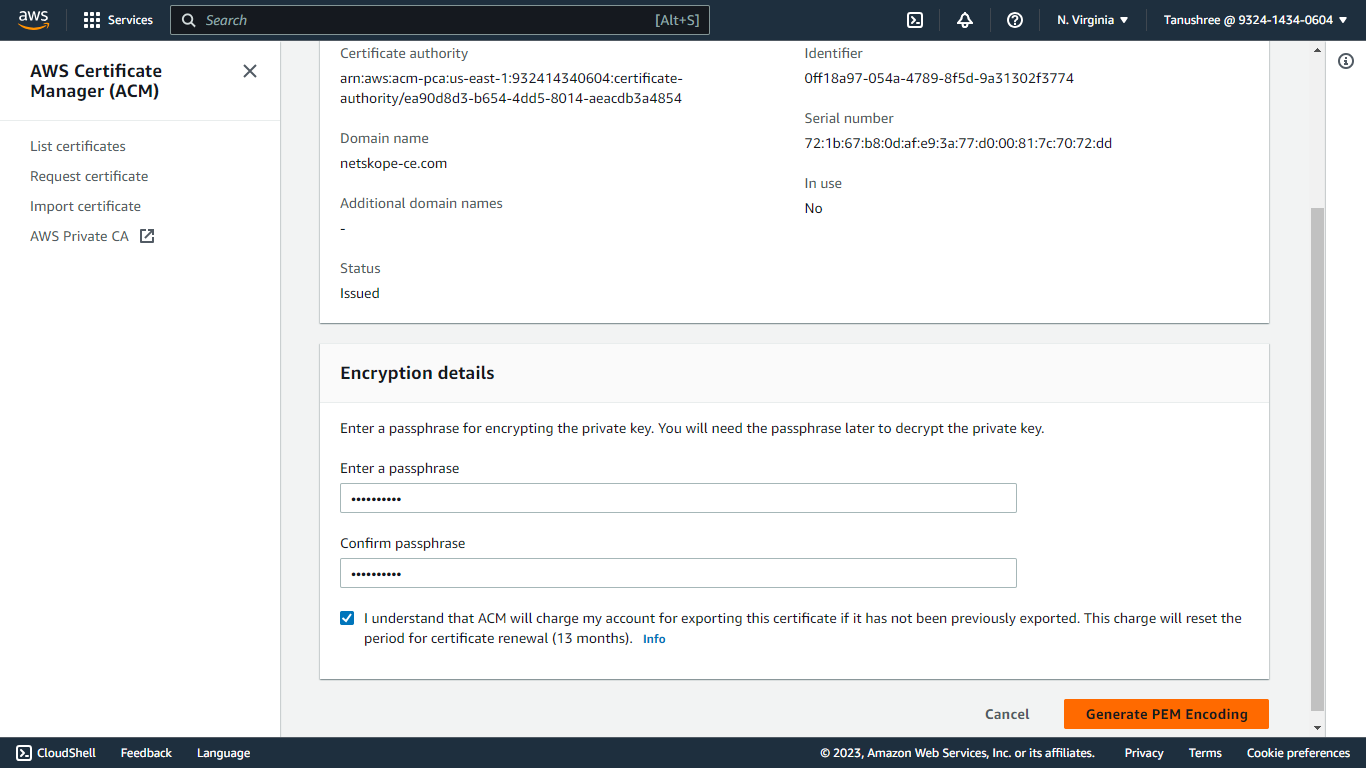
- Download all the Certificates because they won’t be visible again. For new certificates, you will need to Export it again.
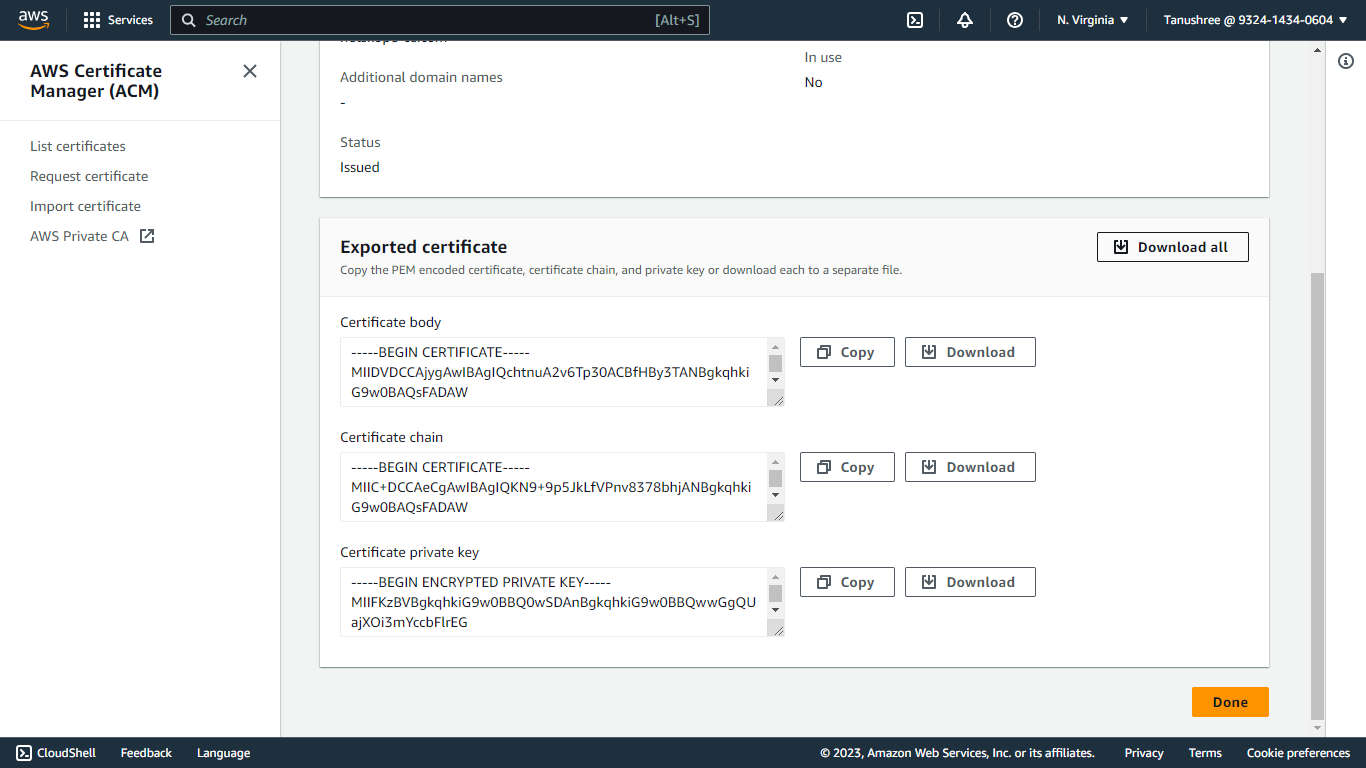
For More Info visit AWS IAM Role Anywhere
Create a Crawler Role ARN
- Create policy at IAM > Policies using the below permissions.
{
    "Version": "2012-10-17",
    "Statement": [
        {
            "Sid": "GlueCrawlerListBucket",
            "Effect": "Allow",
            "Action": [
                "s3:ListBucket",
                "s3:ListBucketVersions",
                "s3:ListBucketMultipartUploads",
                "s3:GetBucketLocation"
            ],
            "Resource": "arn:aws:s3:::aws-security-data-lake-us-east-1-*"
        },
        {
            "Sid": "GlueCrawlerReadObjects",
            "Effect": "Allow",
            "Action": [
                "s3:GetObject",
                "s3:GetObjectVersion",
                "s3:GetObjectTagging",
                "s3:ListMultipartUploadParts"
            ],
            "Resource": "arn:aws:s3:::aws-security-data-lake-us-east-1-*/*"
        }
    ]
}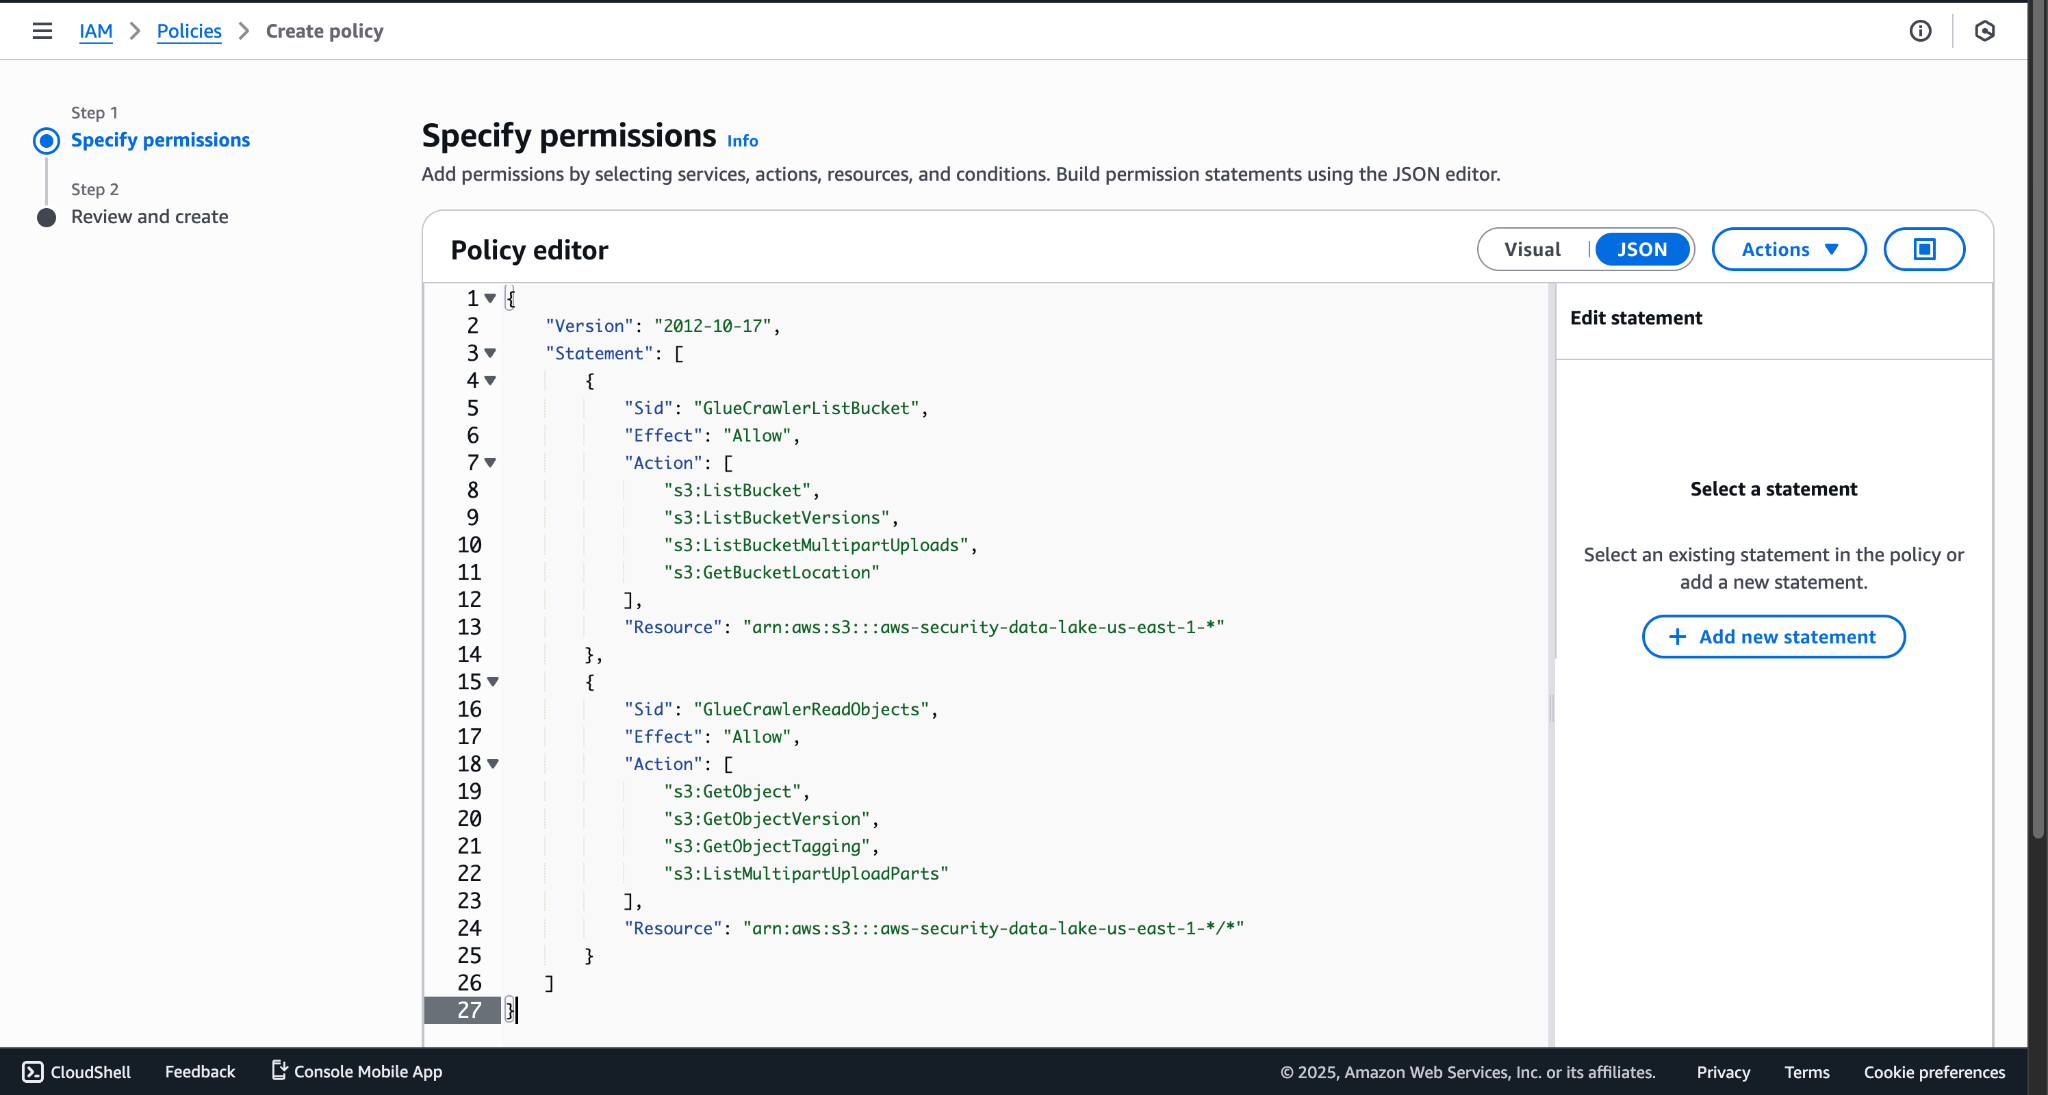
- Enter a policy name and click Create.
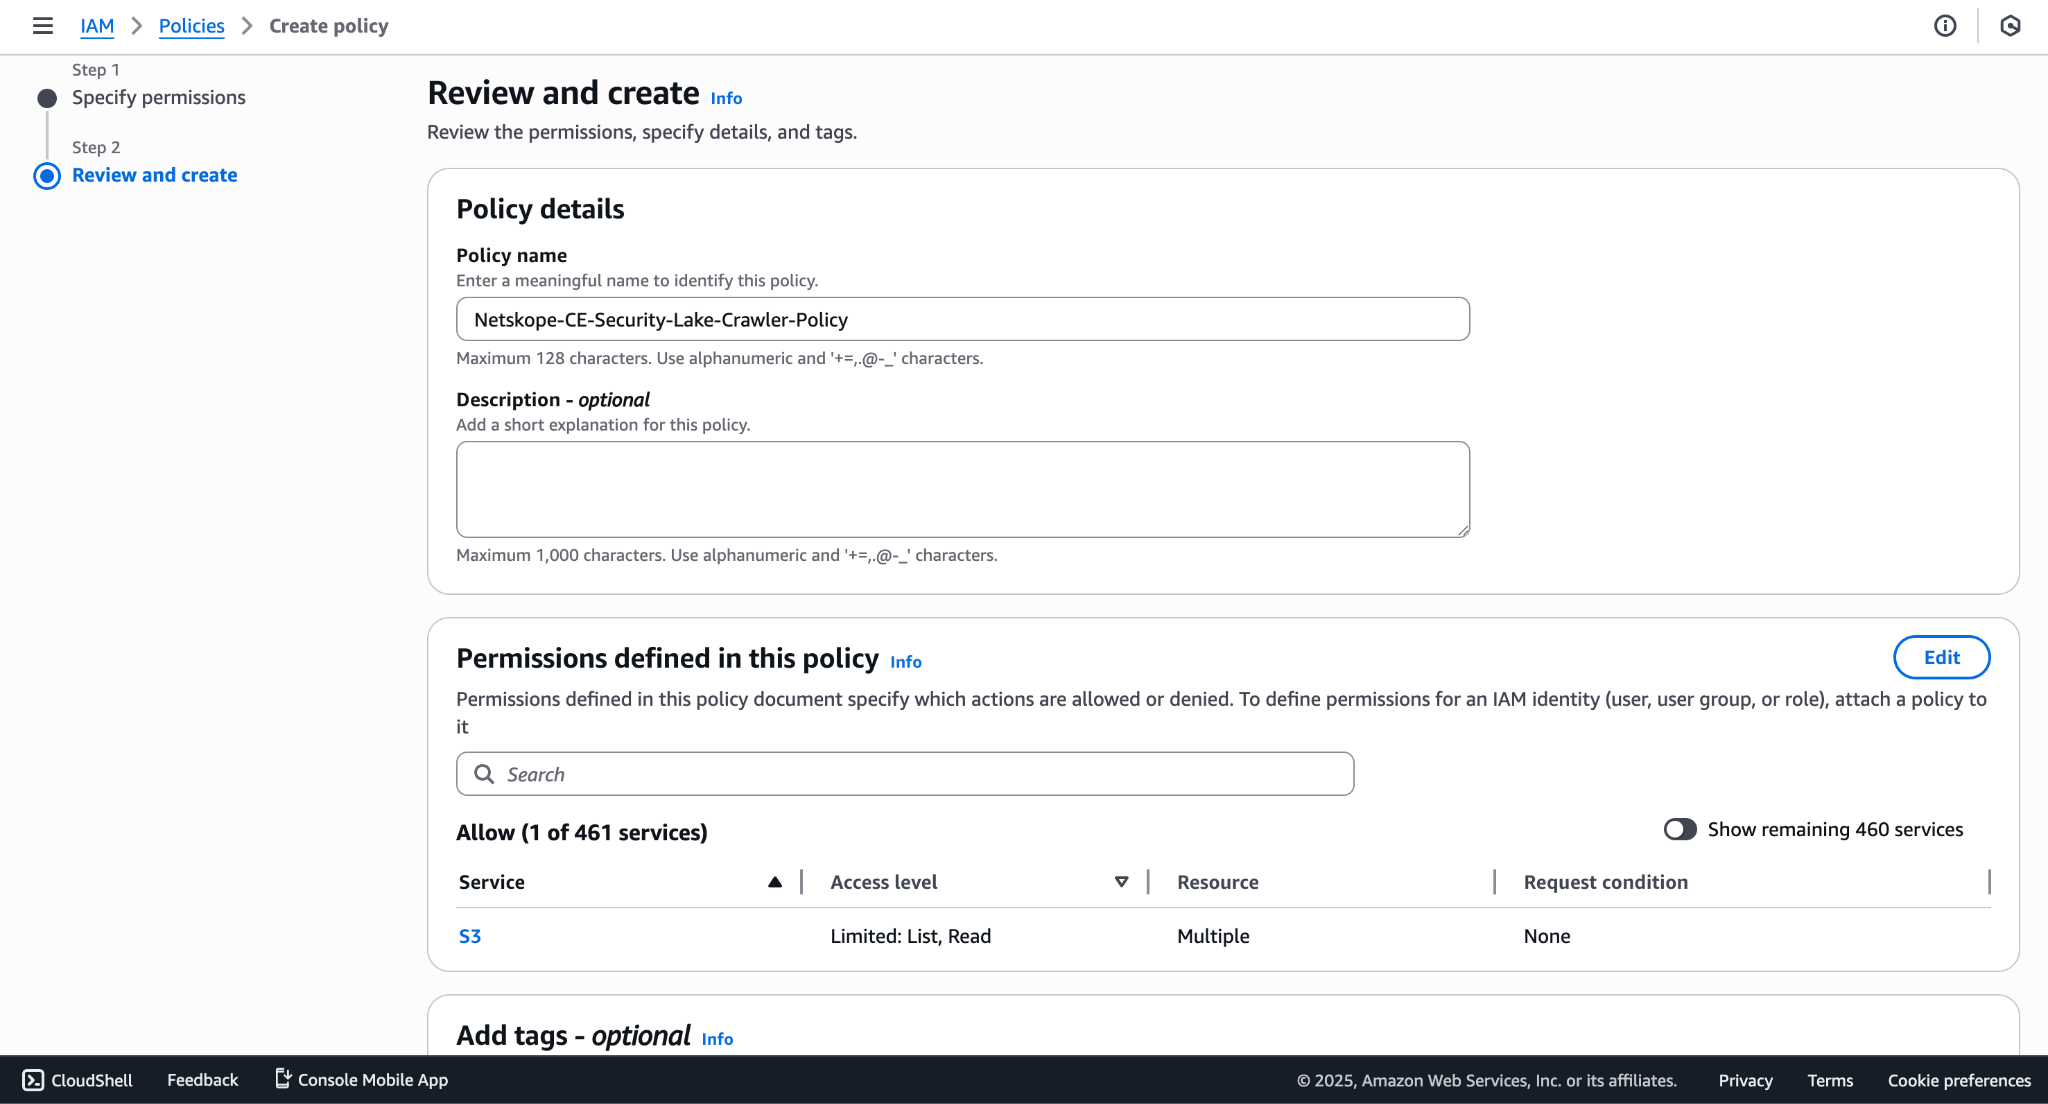
- Go to Roles and click Create a Role. Click Trusted Entity Type > Select AWS Service
Service > Select Glue.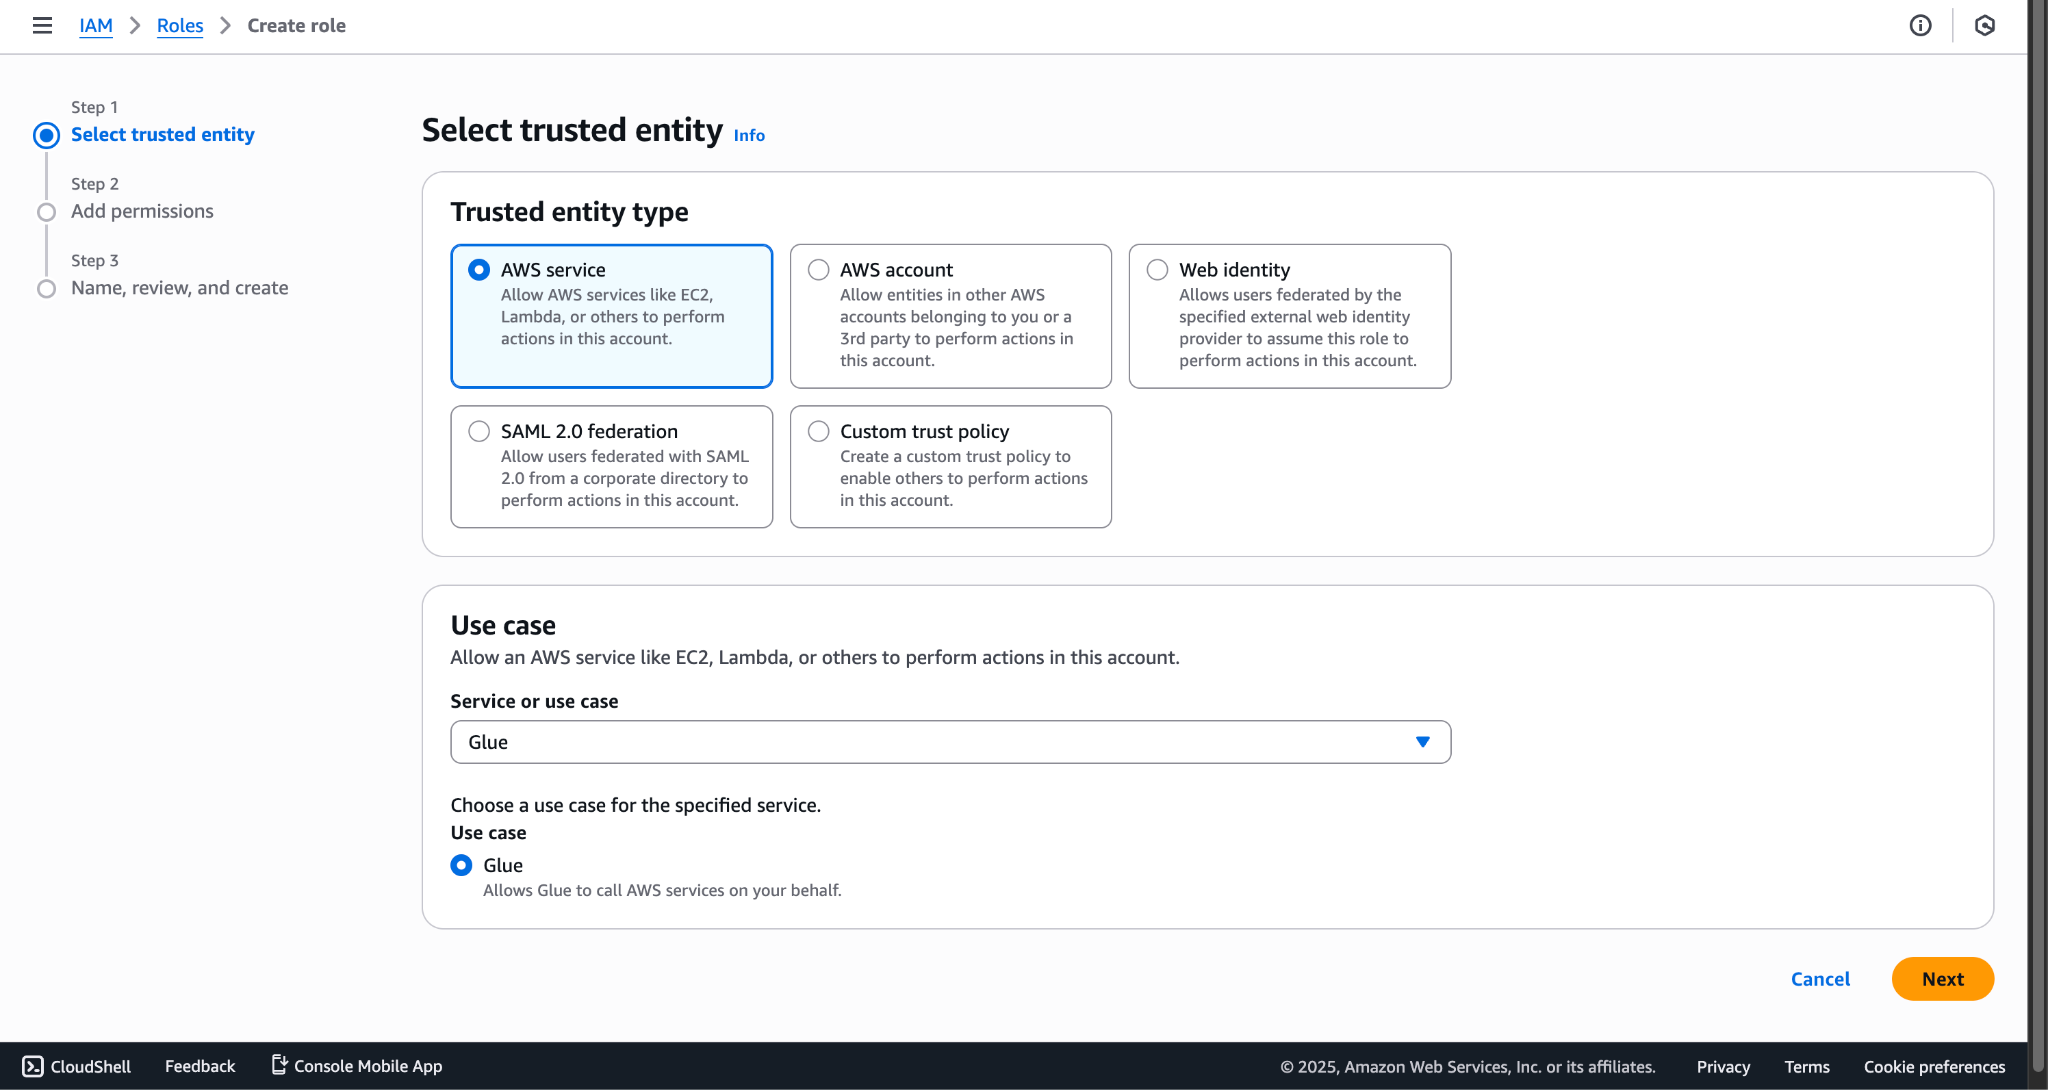
- Attach AWSGlueServiceRole to the policy created previously for this role.
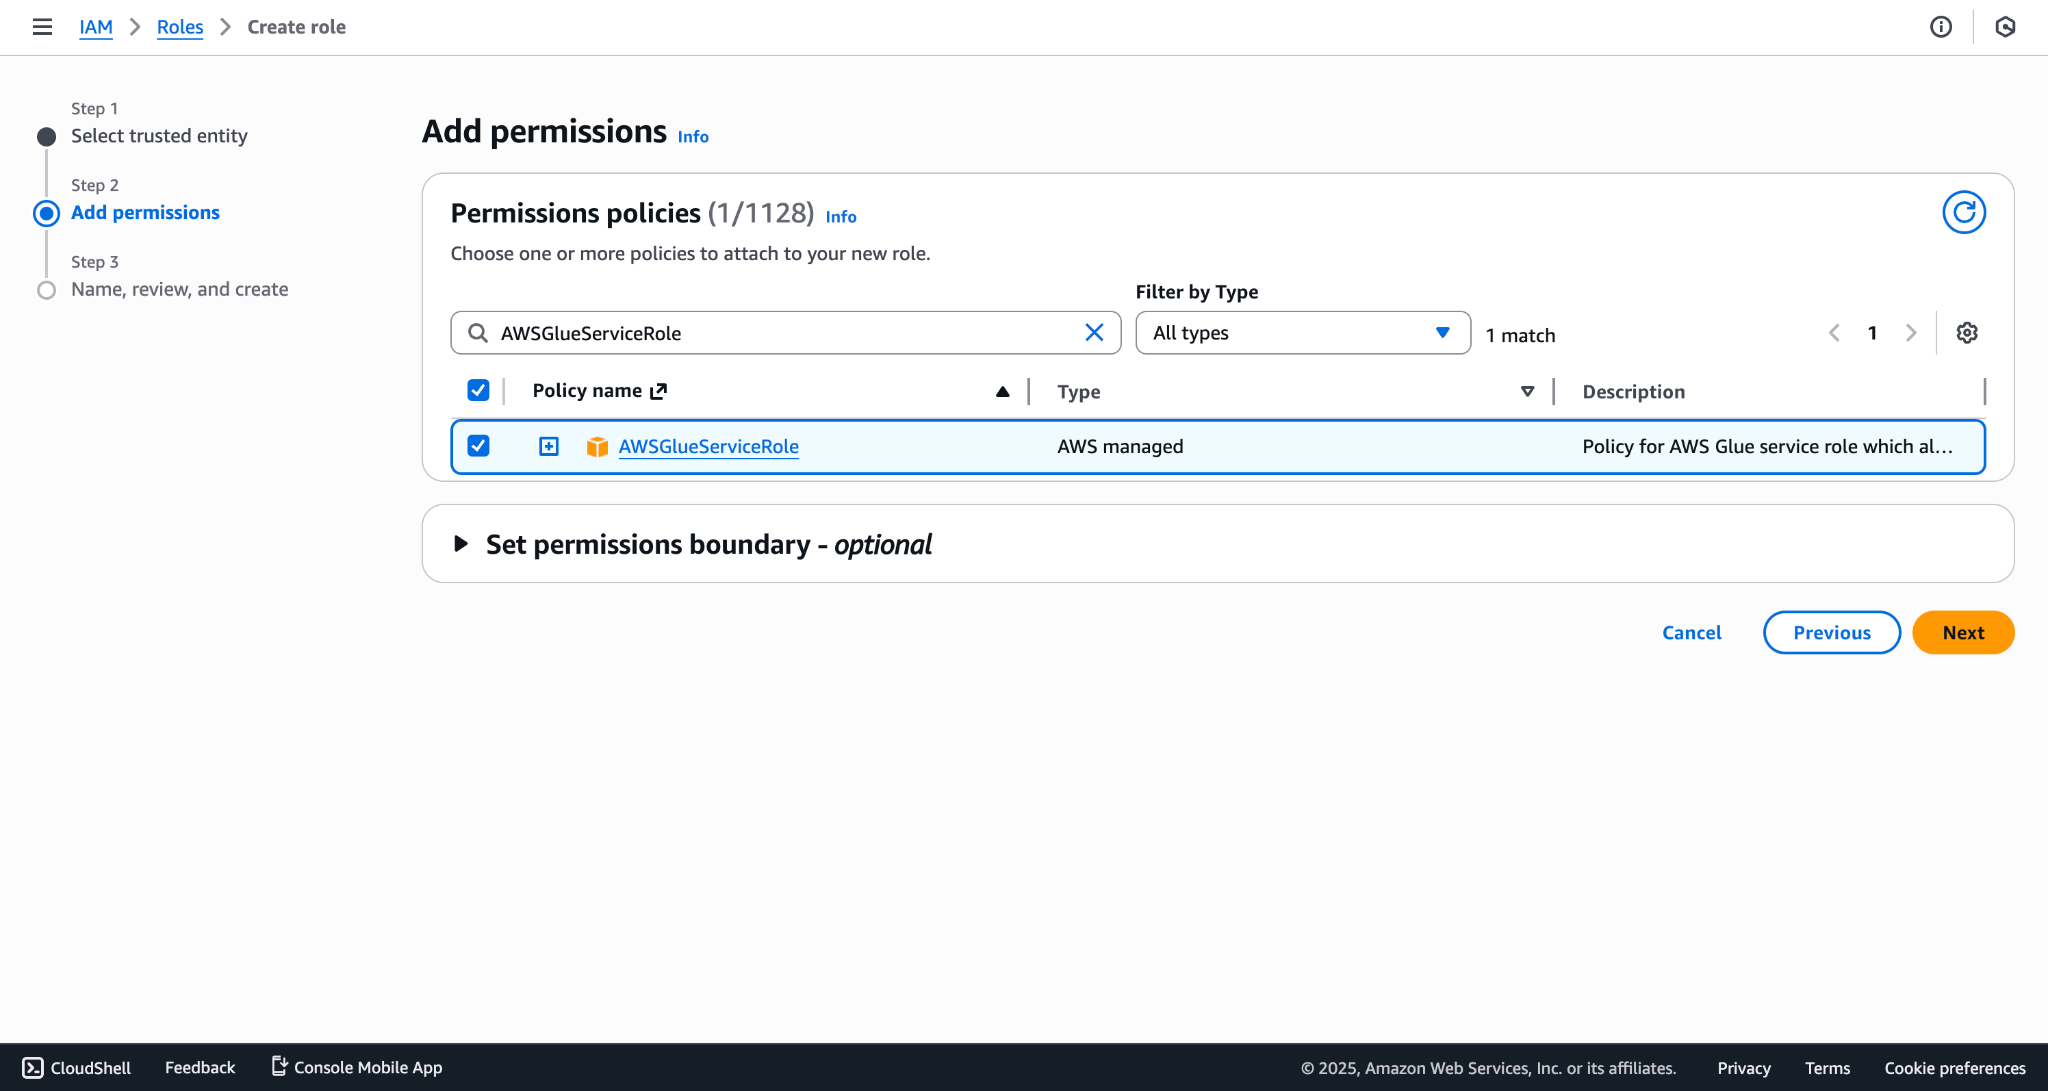
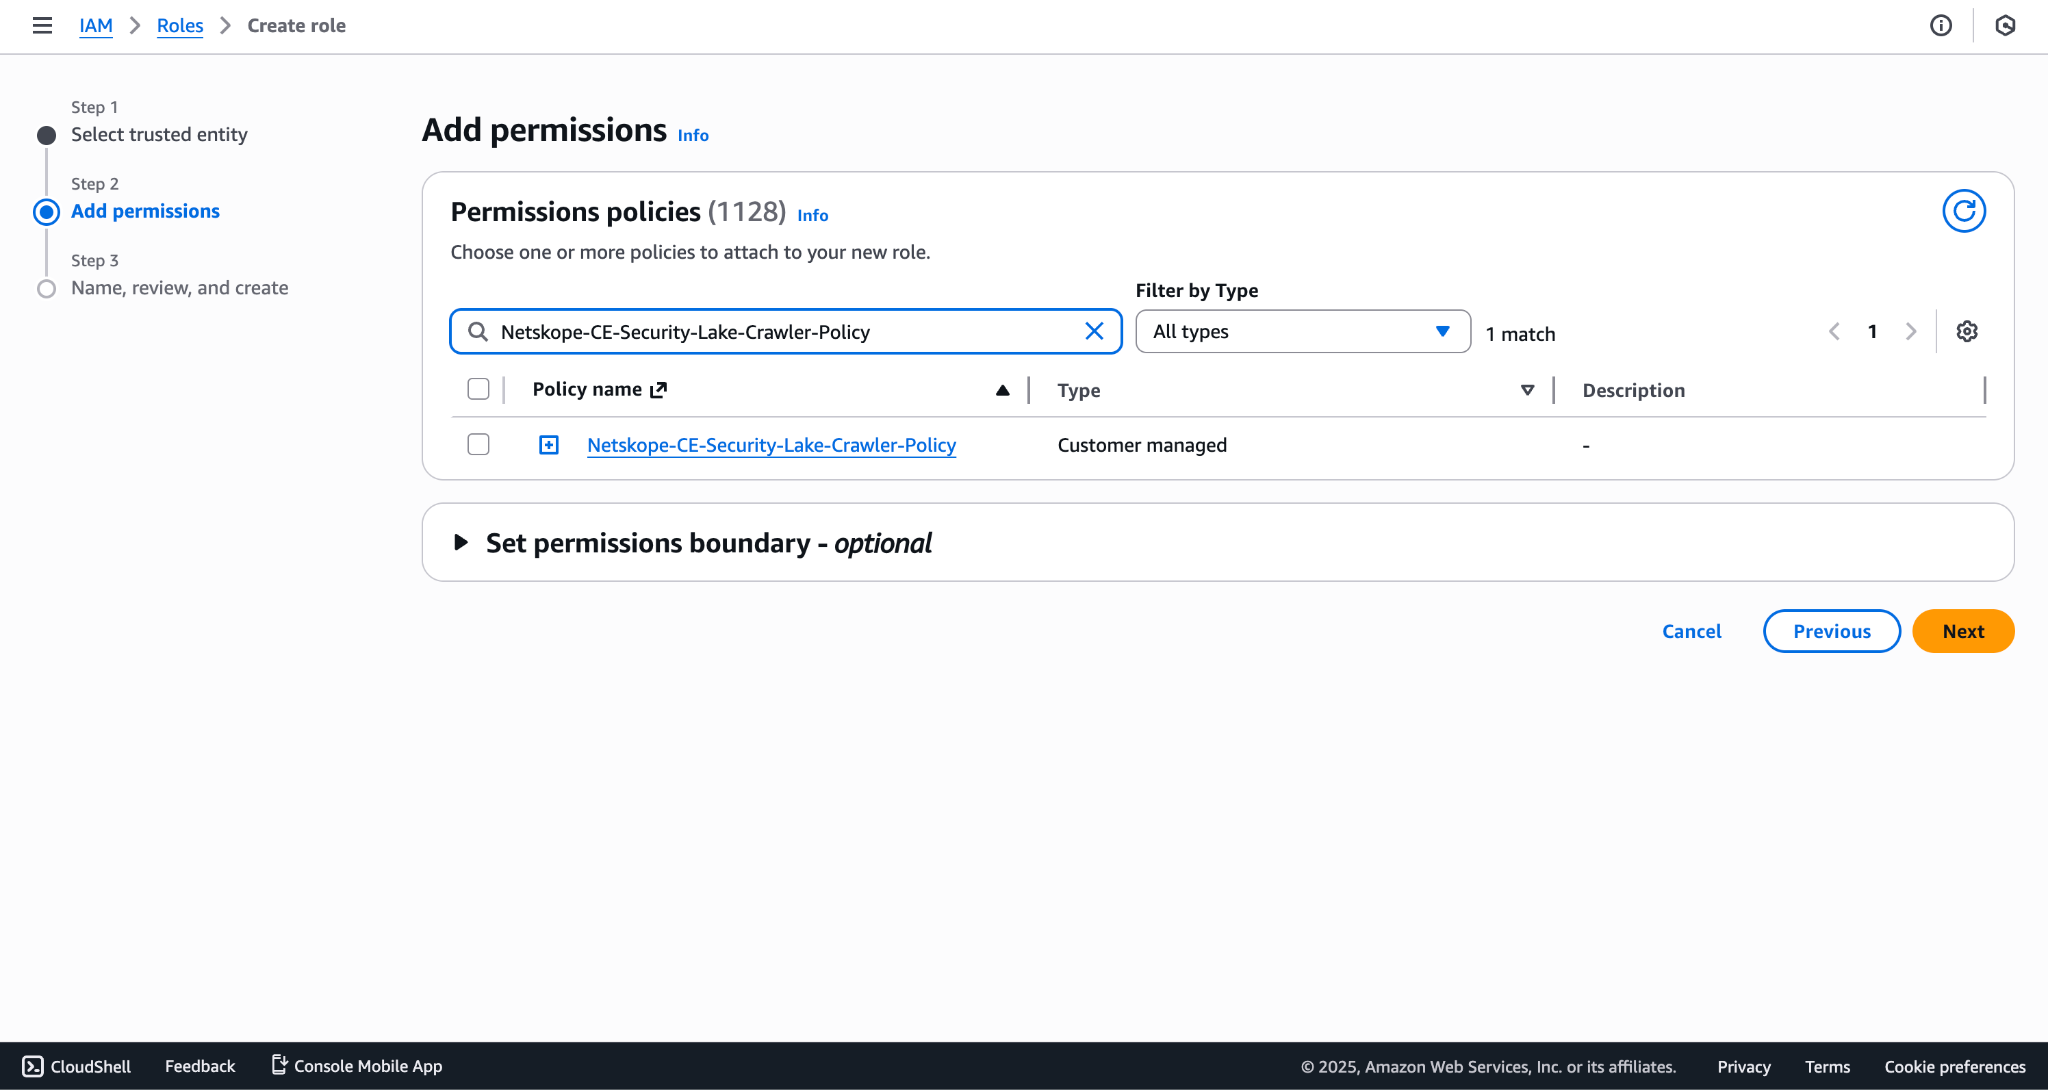
- Enter a Role Name and click Create role.
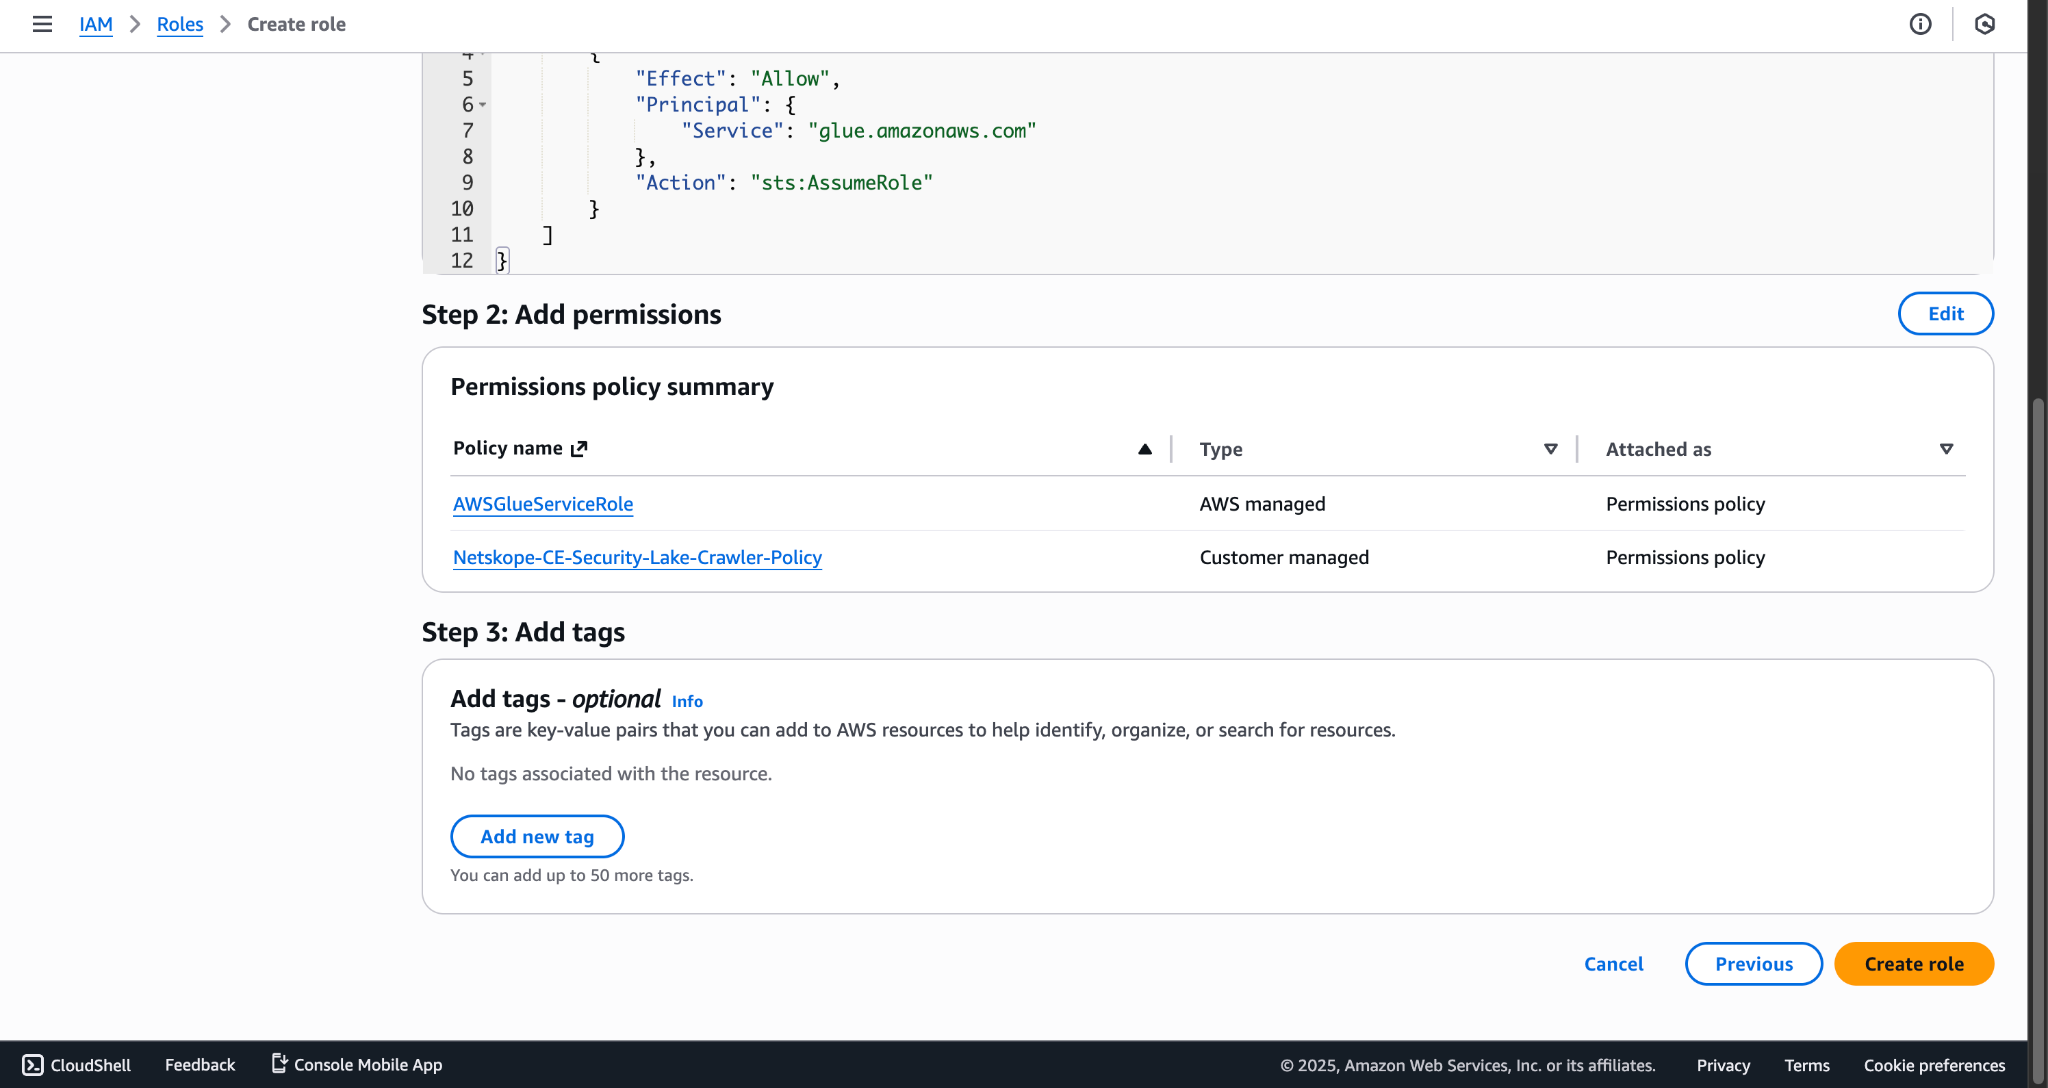
- Copy the Role ARN; it will be used as the Crawler Role ARN.
Provide Permissions in Lake Formation
- Set Access type as Data lake administrator, select the created roles, and click Confirm. Make sure it includes the Crawler role as well as the Instance role.
- Go to the Permissions > Data permissions and click Grant.
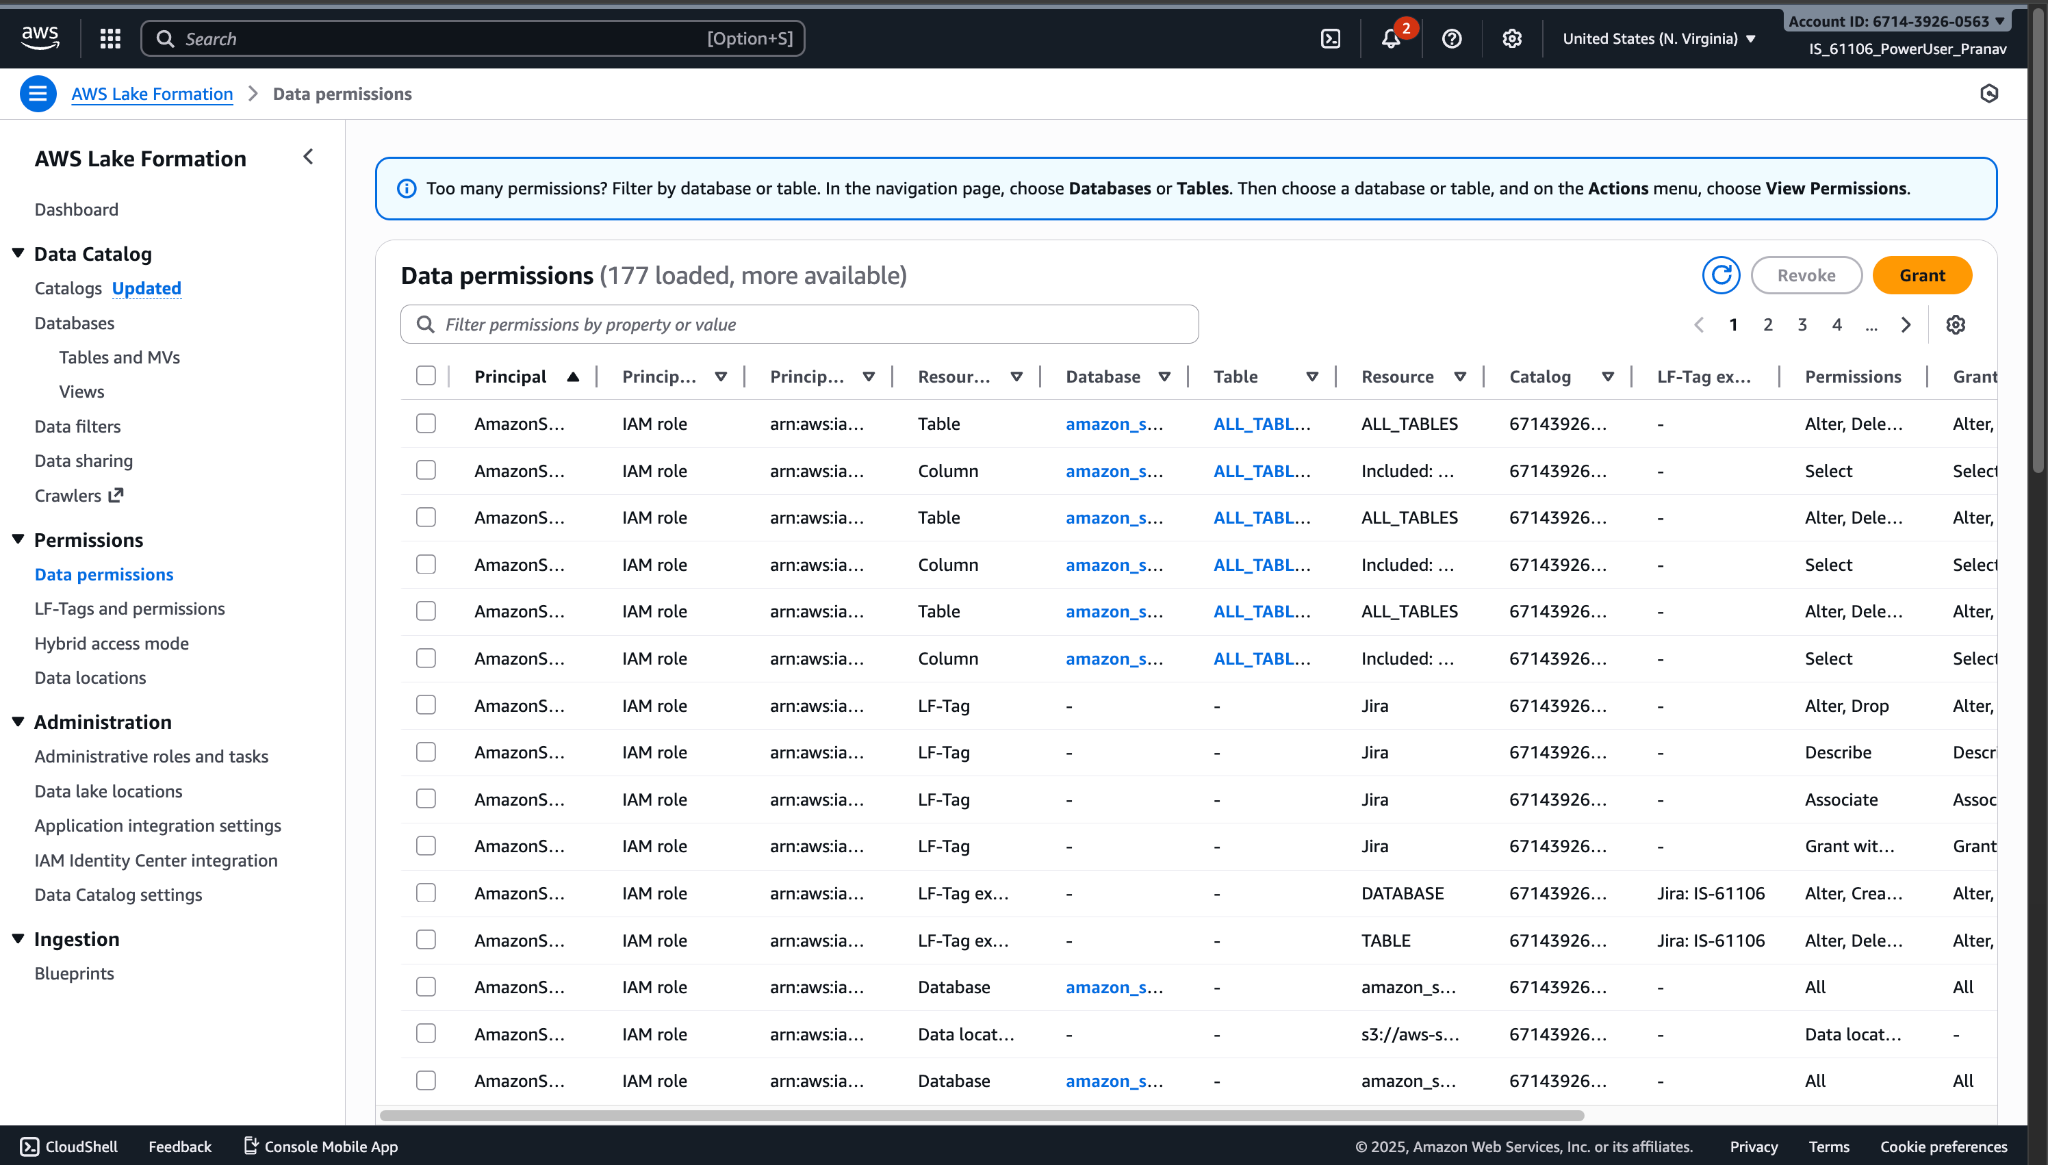
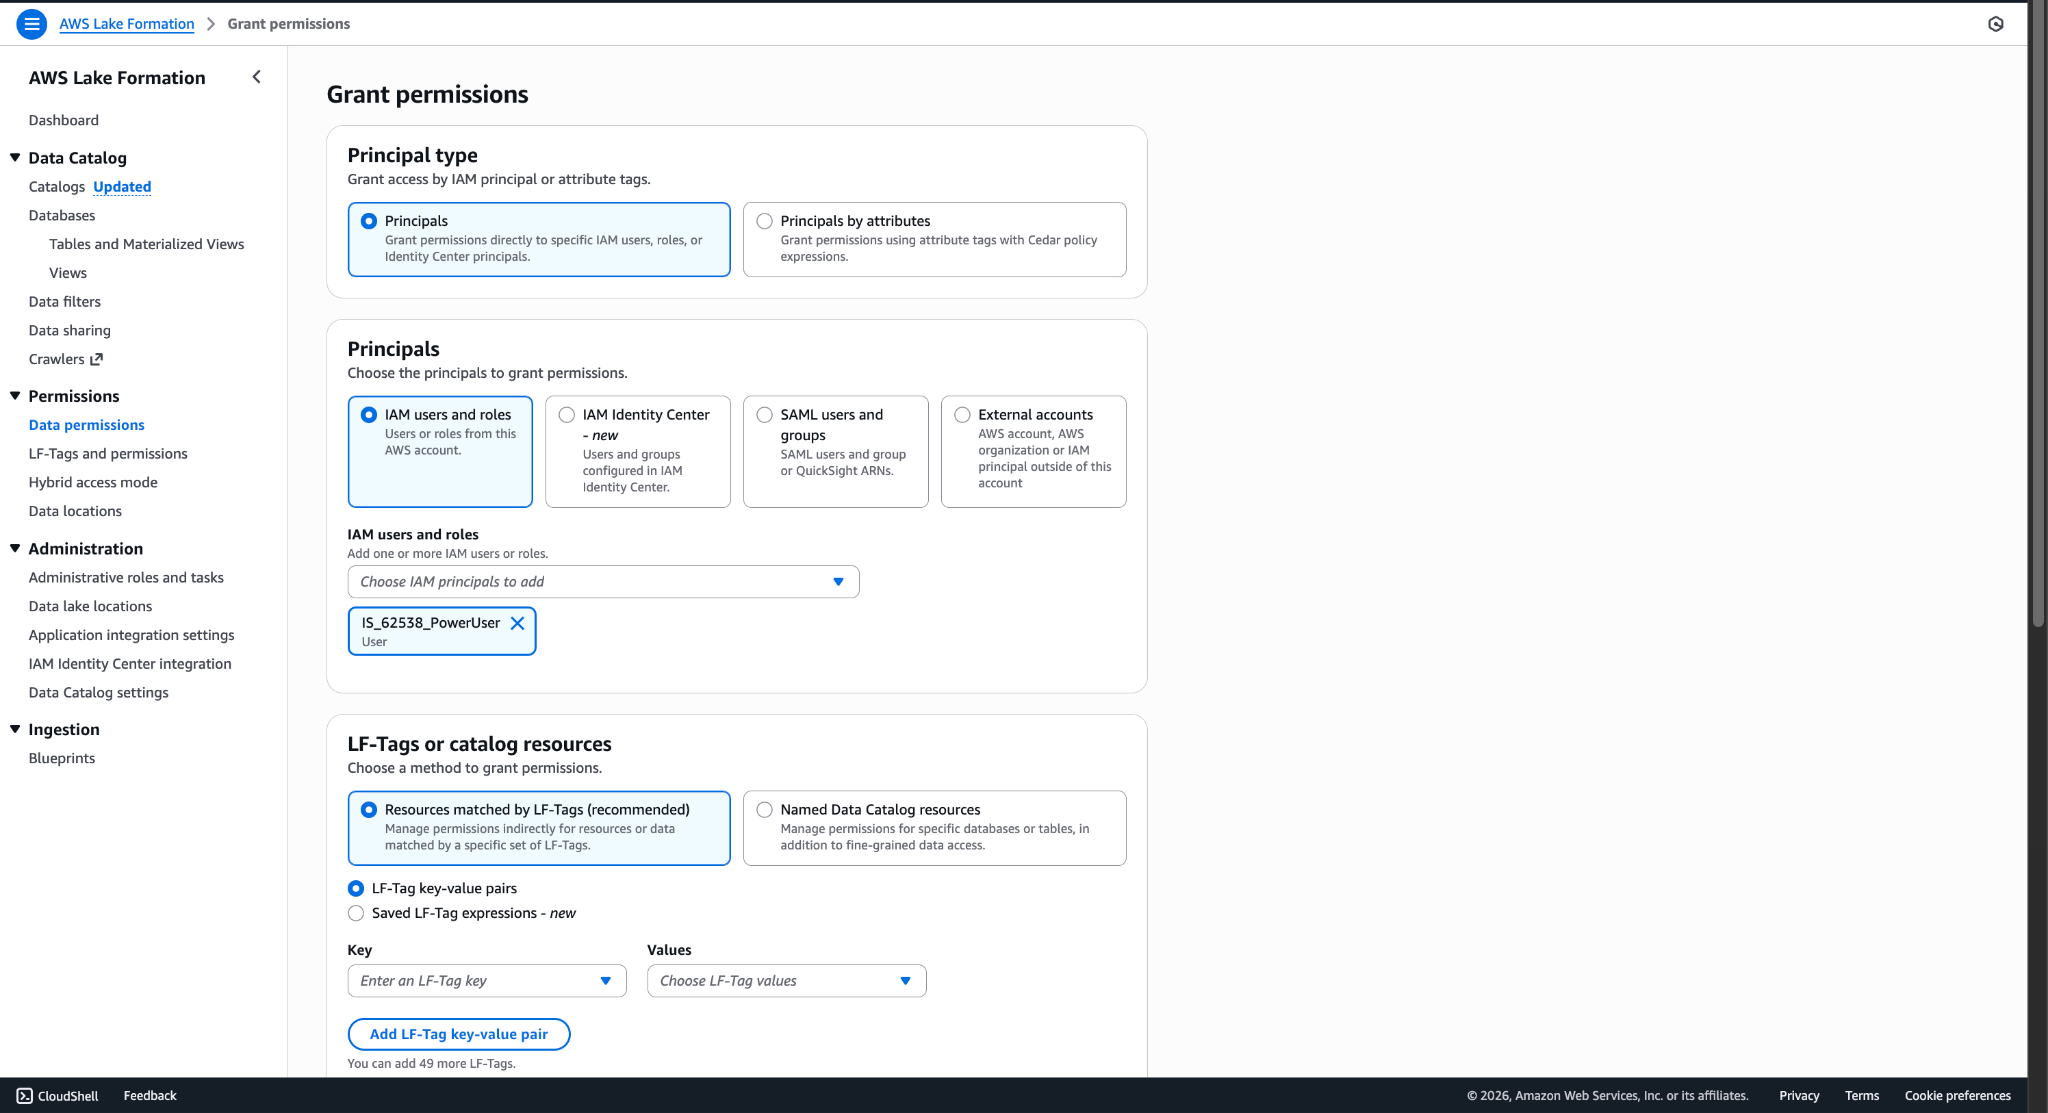
- Select Principals as the Principle type,and select the roles. Make sure to include the Crawler role as well as the Instance role.
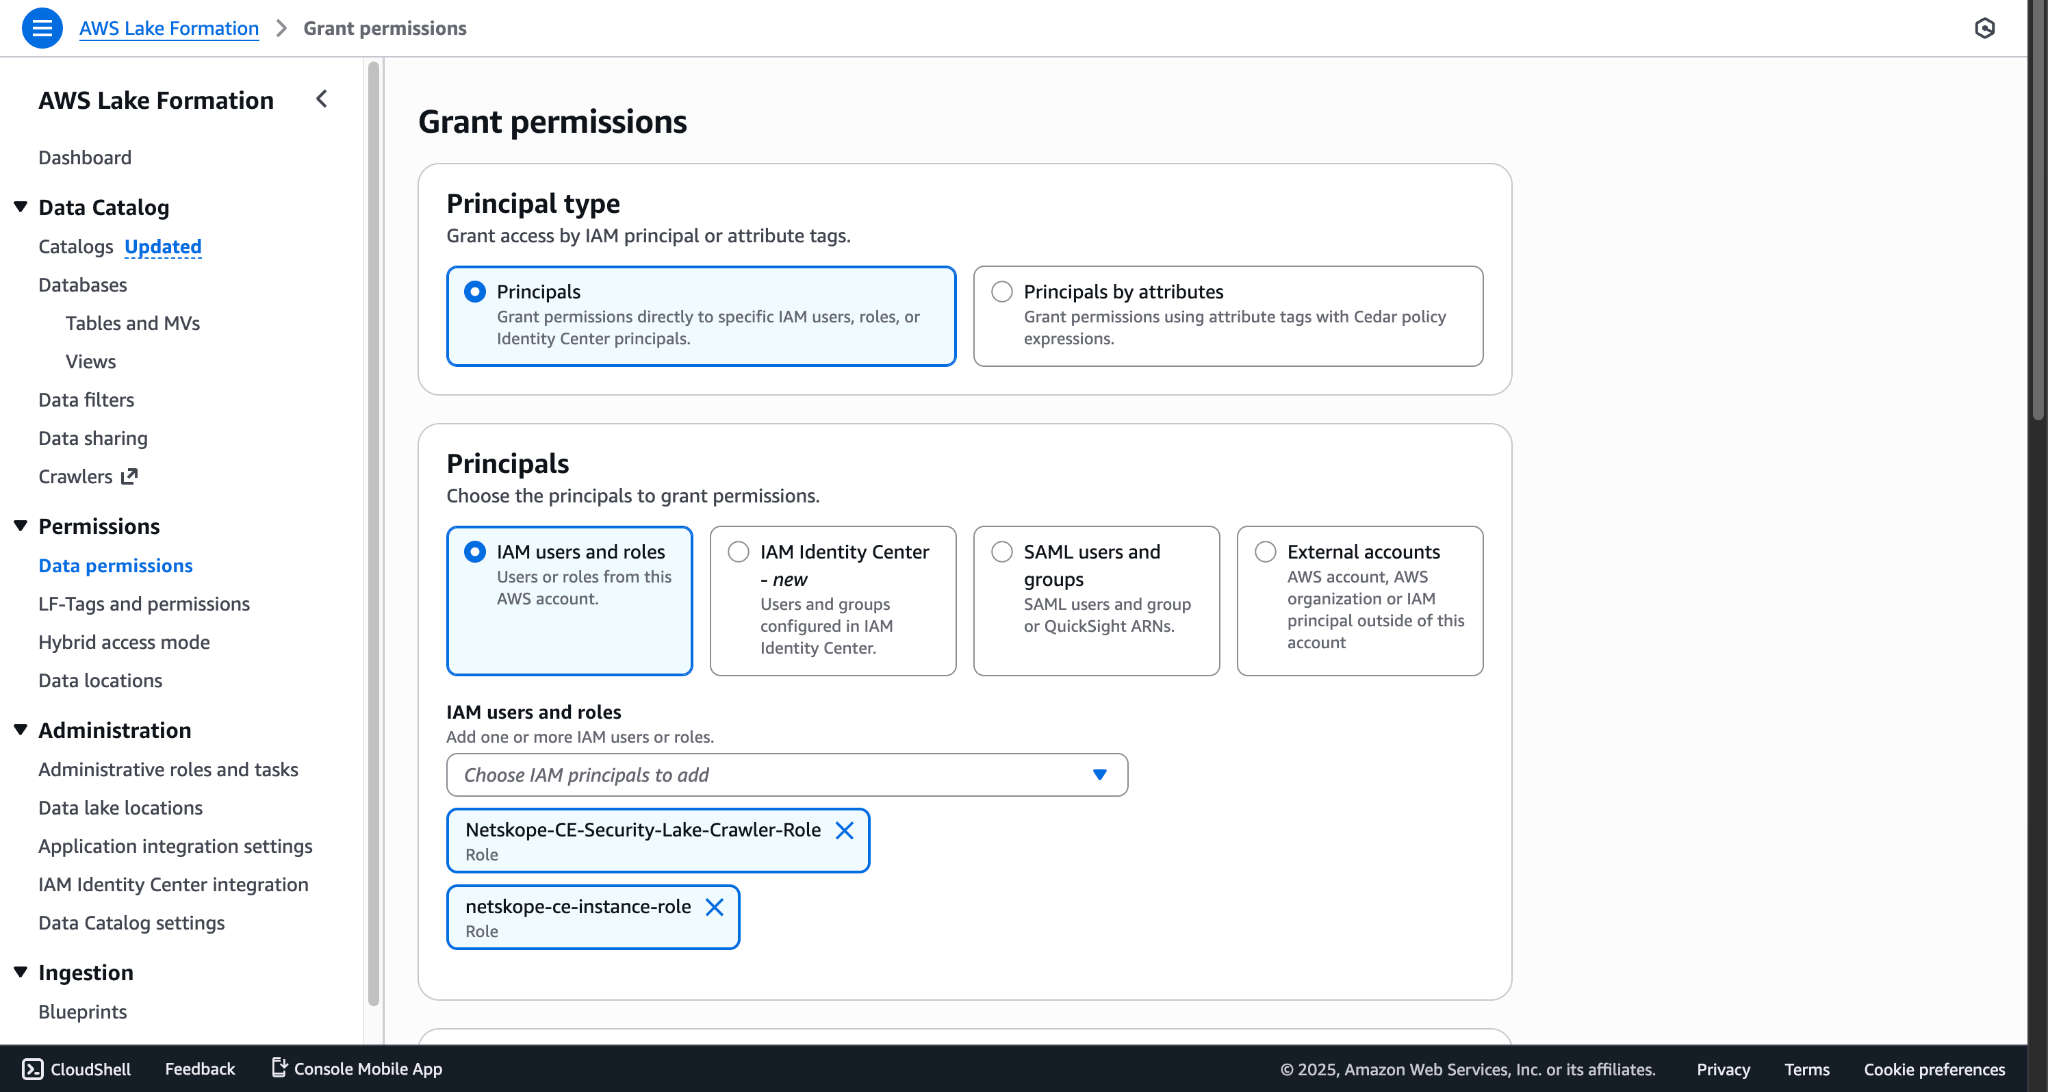
Note
If you want to query data on Athena, then also add the user’s role under IAM users and roles along with the Crawler Role and Instance role.
- Select the Named Data Catalog resources and enter the Catalogs and Databases where the data will be stored.
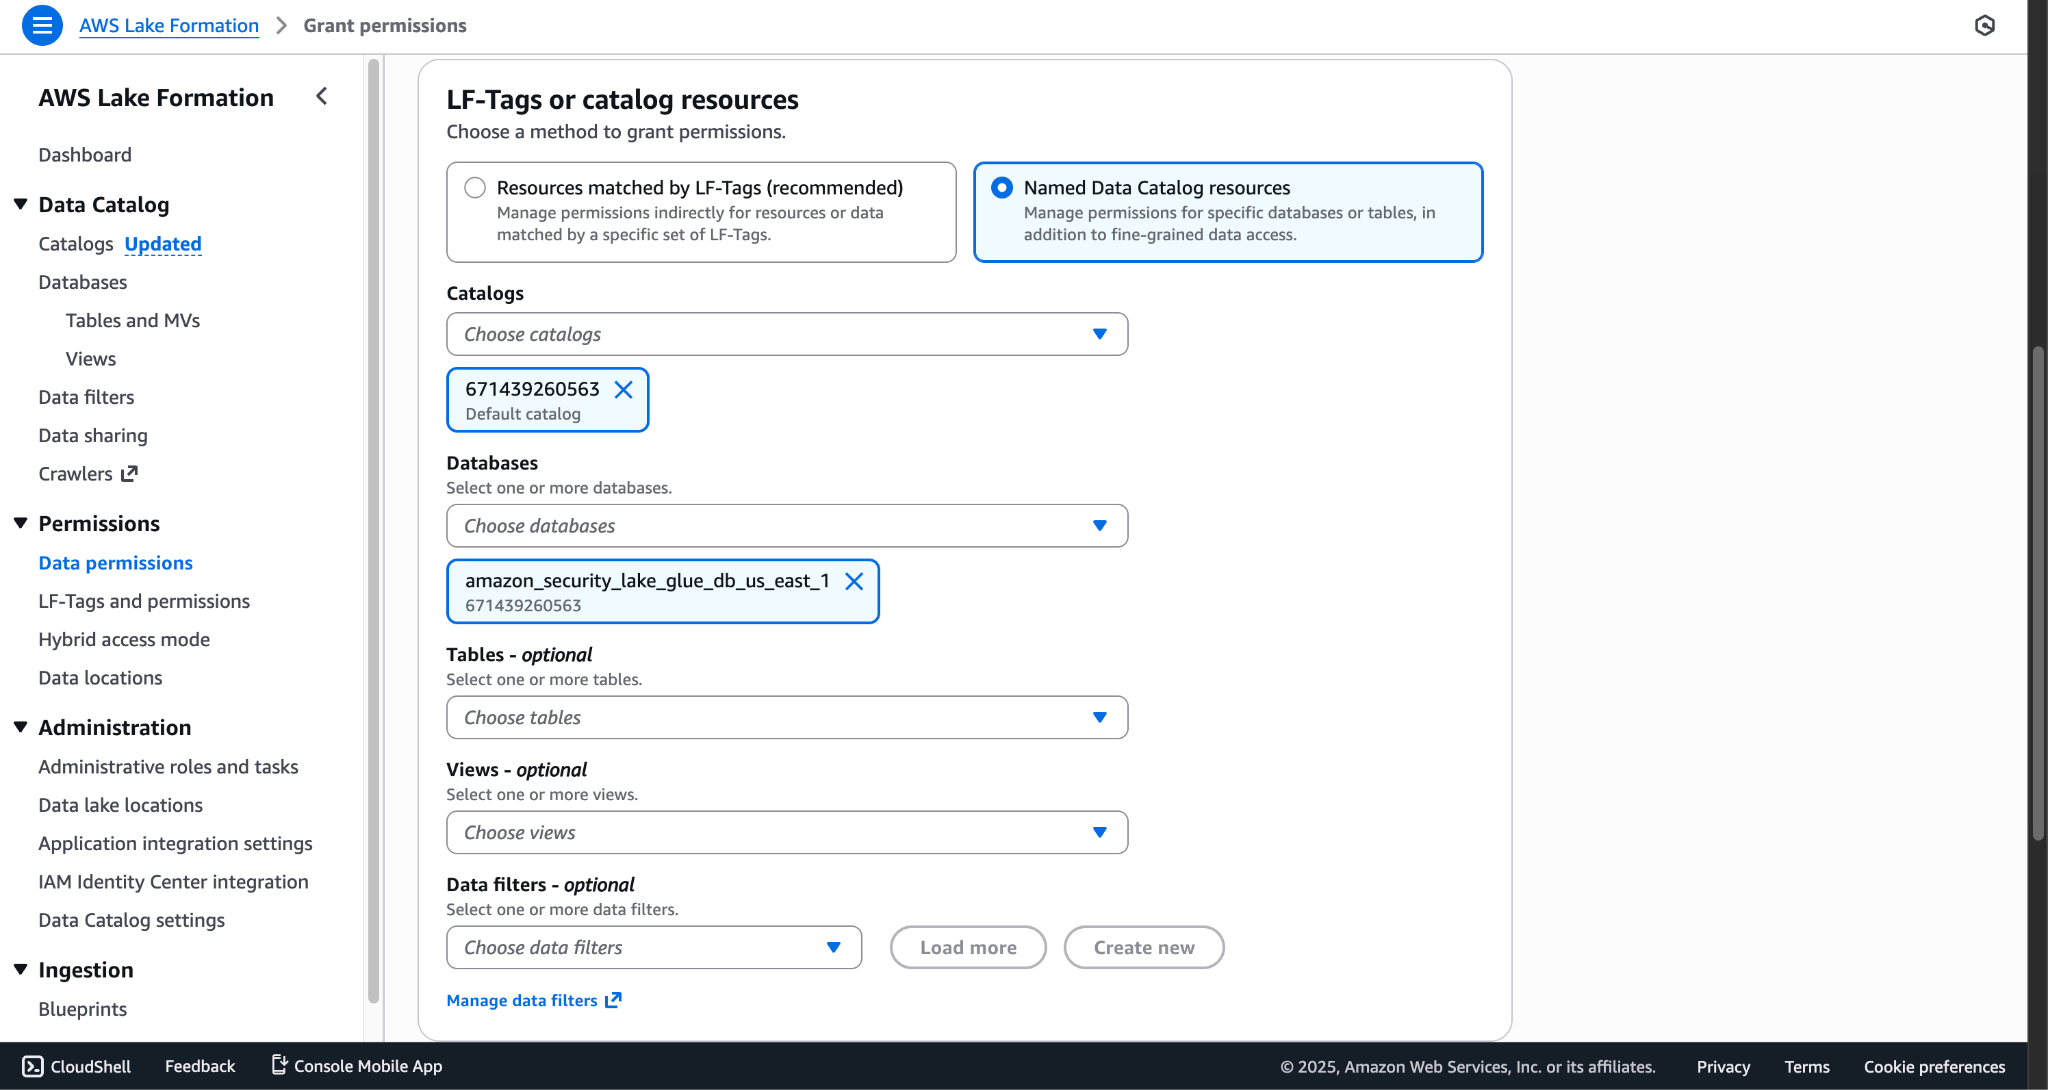
- Provide all the database permissions required and click Grant.
Steps after the plugin is configured with Auto-update Provider Role Trust Policy as No
- Manually create the Custom Data Source for each type of alerts, events, and WebTx on your AWS instance. Use the OCSF Class Mappings for Default Mapping file to map the alerts/events with the OCSF Class.
- After custom data sources are created, you’ll need to manually update the Trust Policy for each provider role. Here is the example for the clientstatus event type.
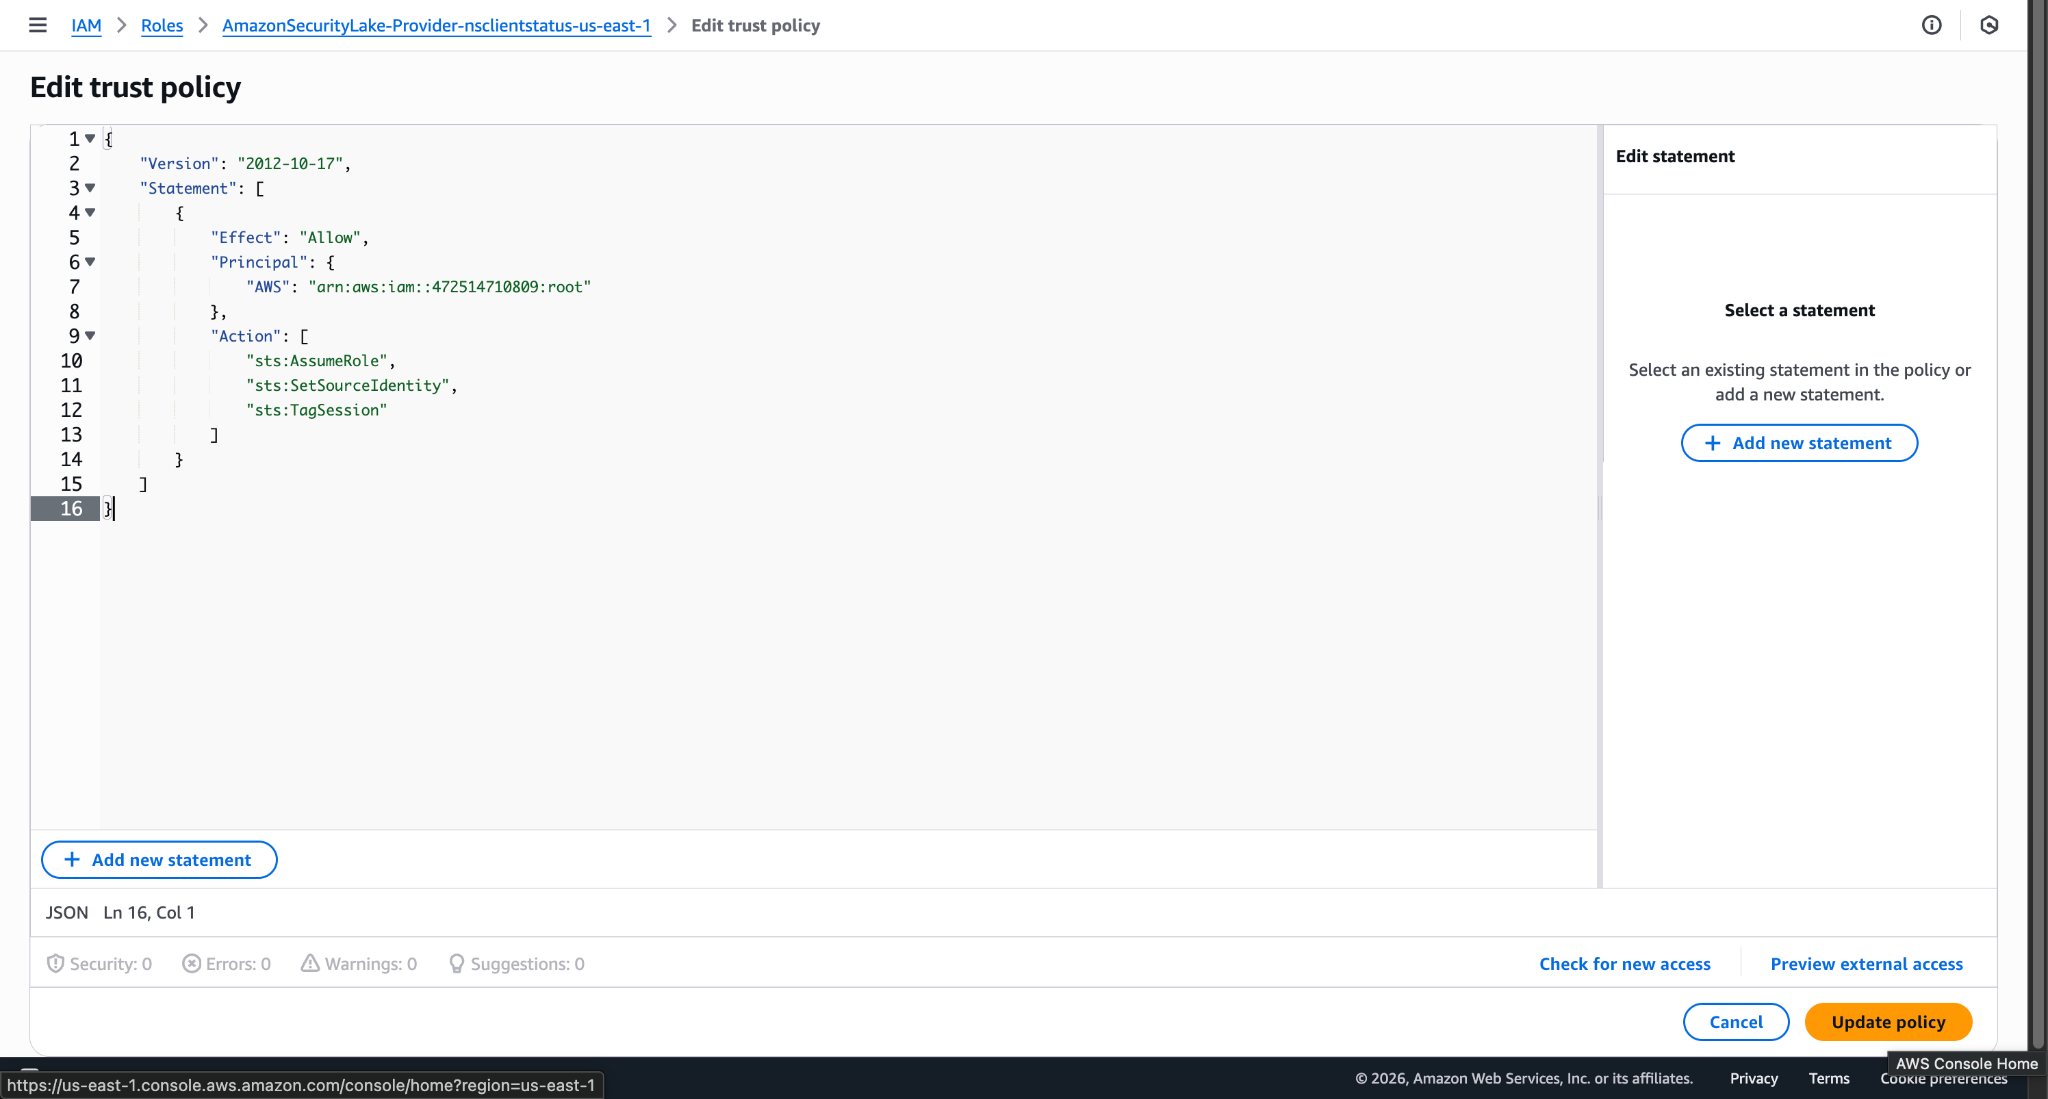
Trust Policy:
{ "Version": "2012-10-17", "Statement": [ { "Effect": "Allow", "Principal": { "AWS": "arn:aws:iam::[aws-account-id]:root" }, "Action": [ "sts:AssumeRole", "sts:SetSourceIdentity", "sts:TagSession" ] } ] } - Configure the plugin using the manually created data sources.
Configure the Amazon Security Lake Plugin
1. In Cloud Exchange, go to Settings > Plugin Store.
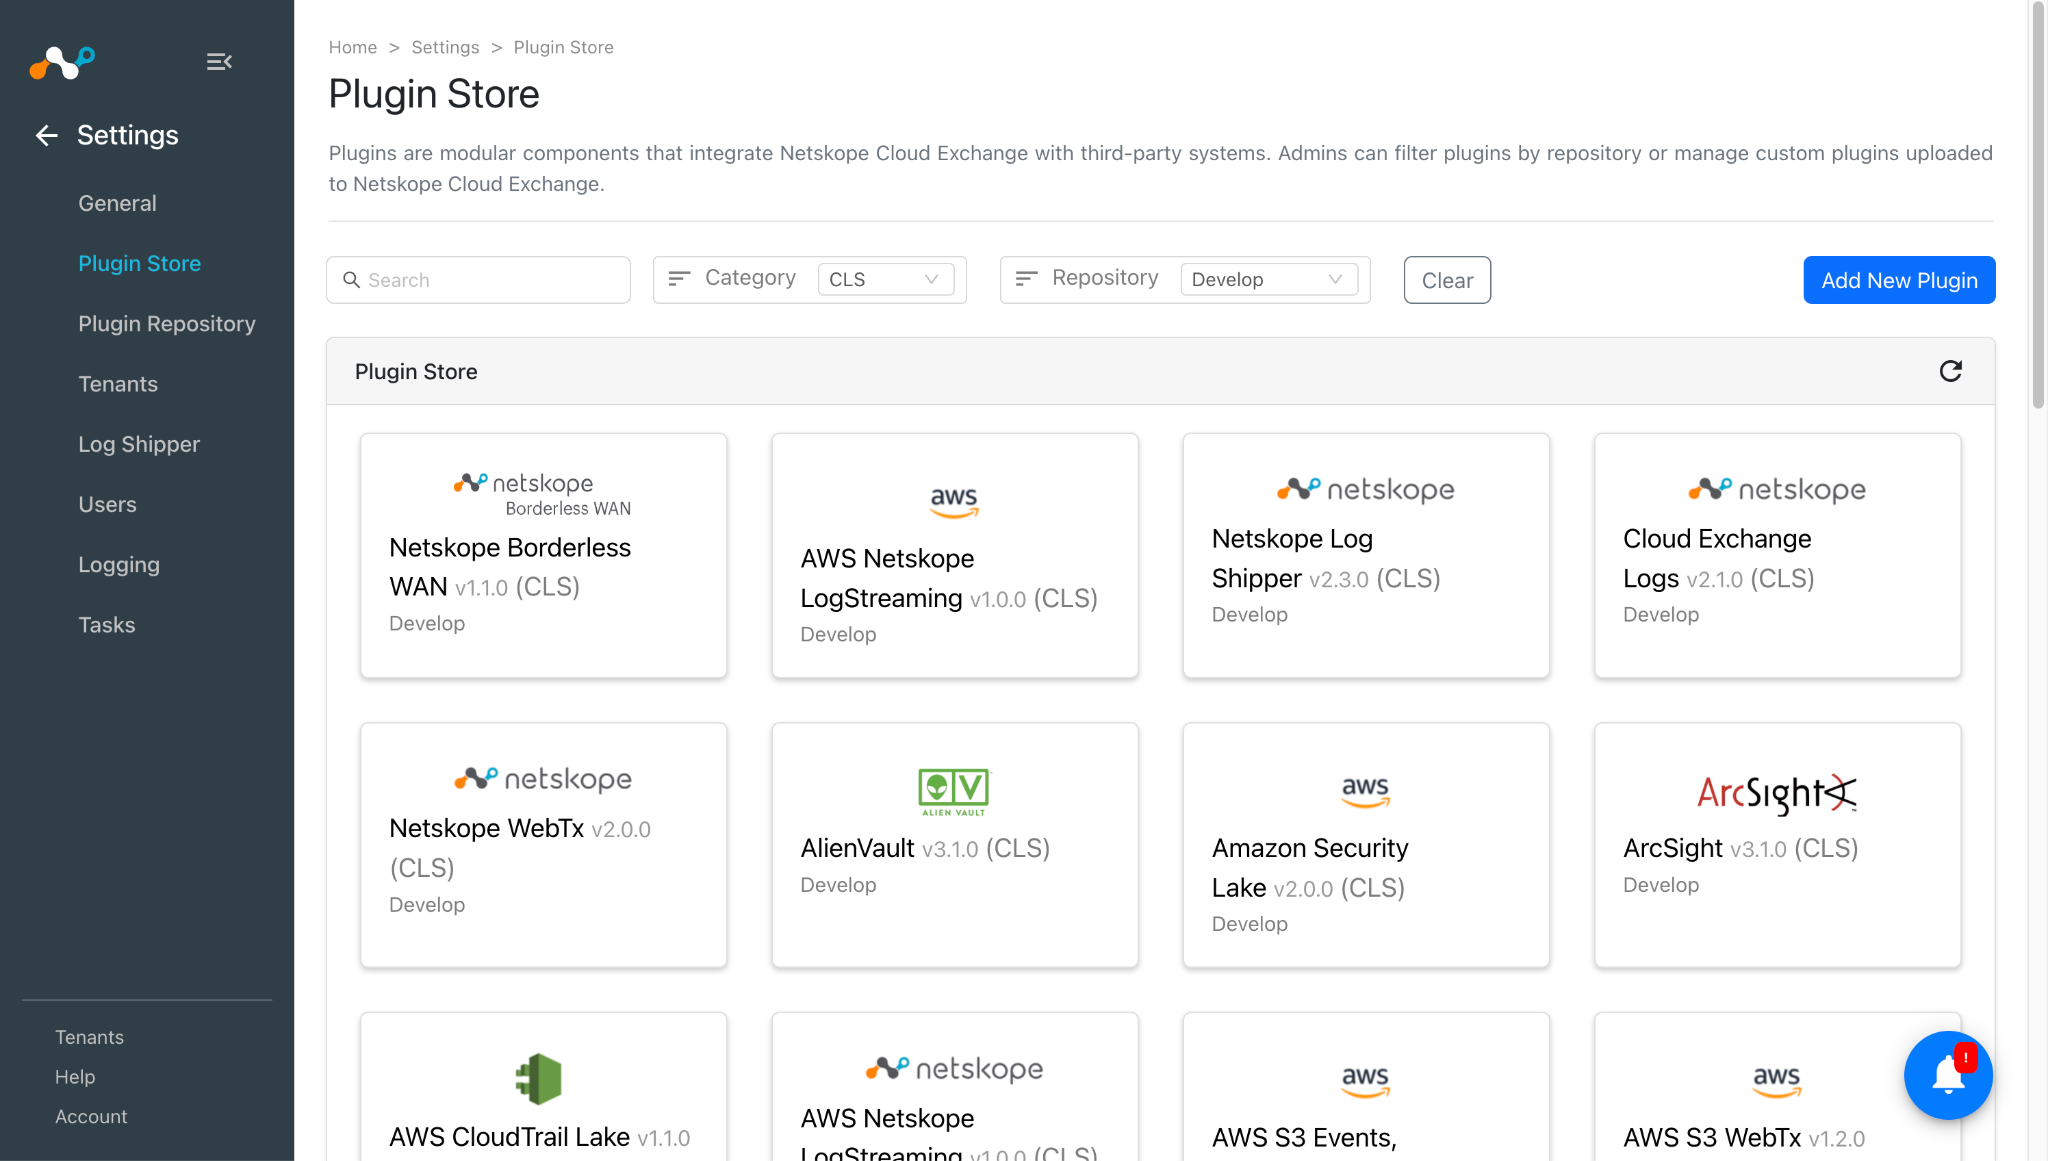
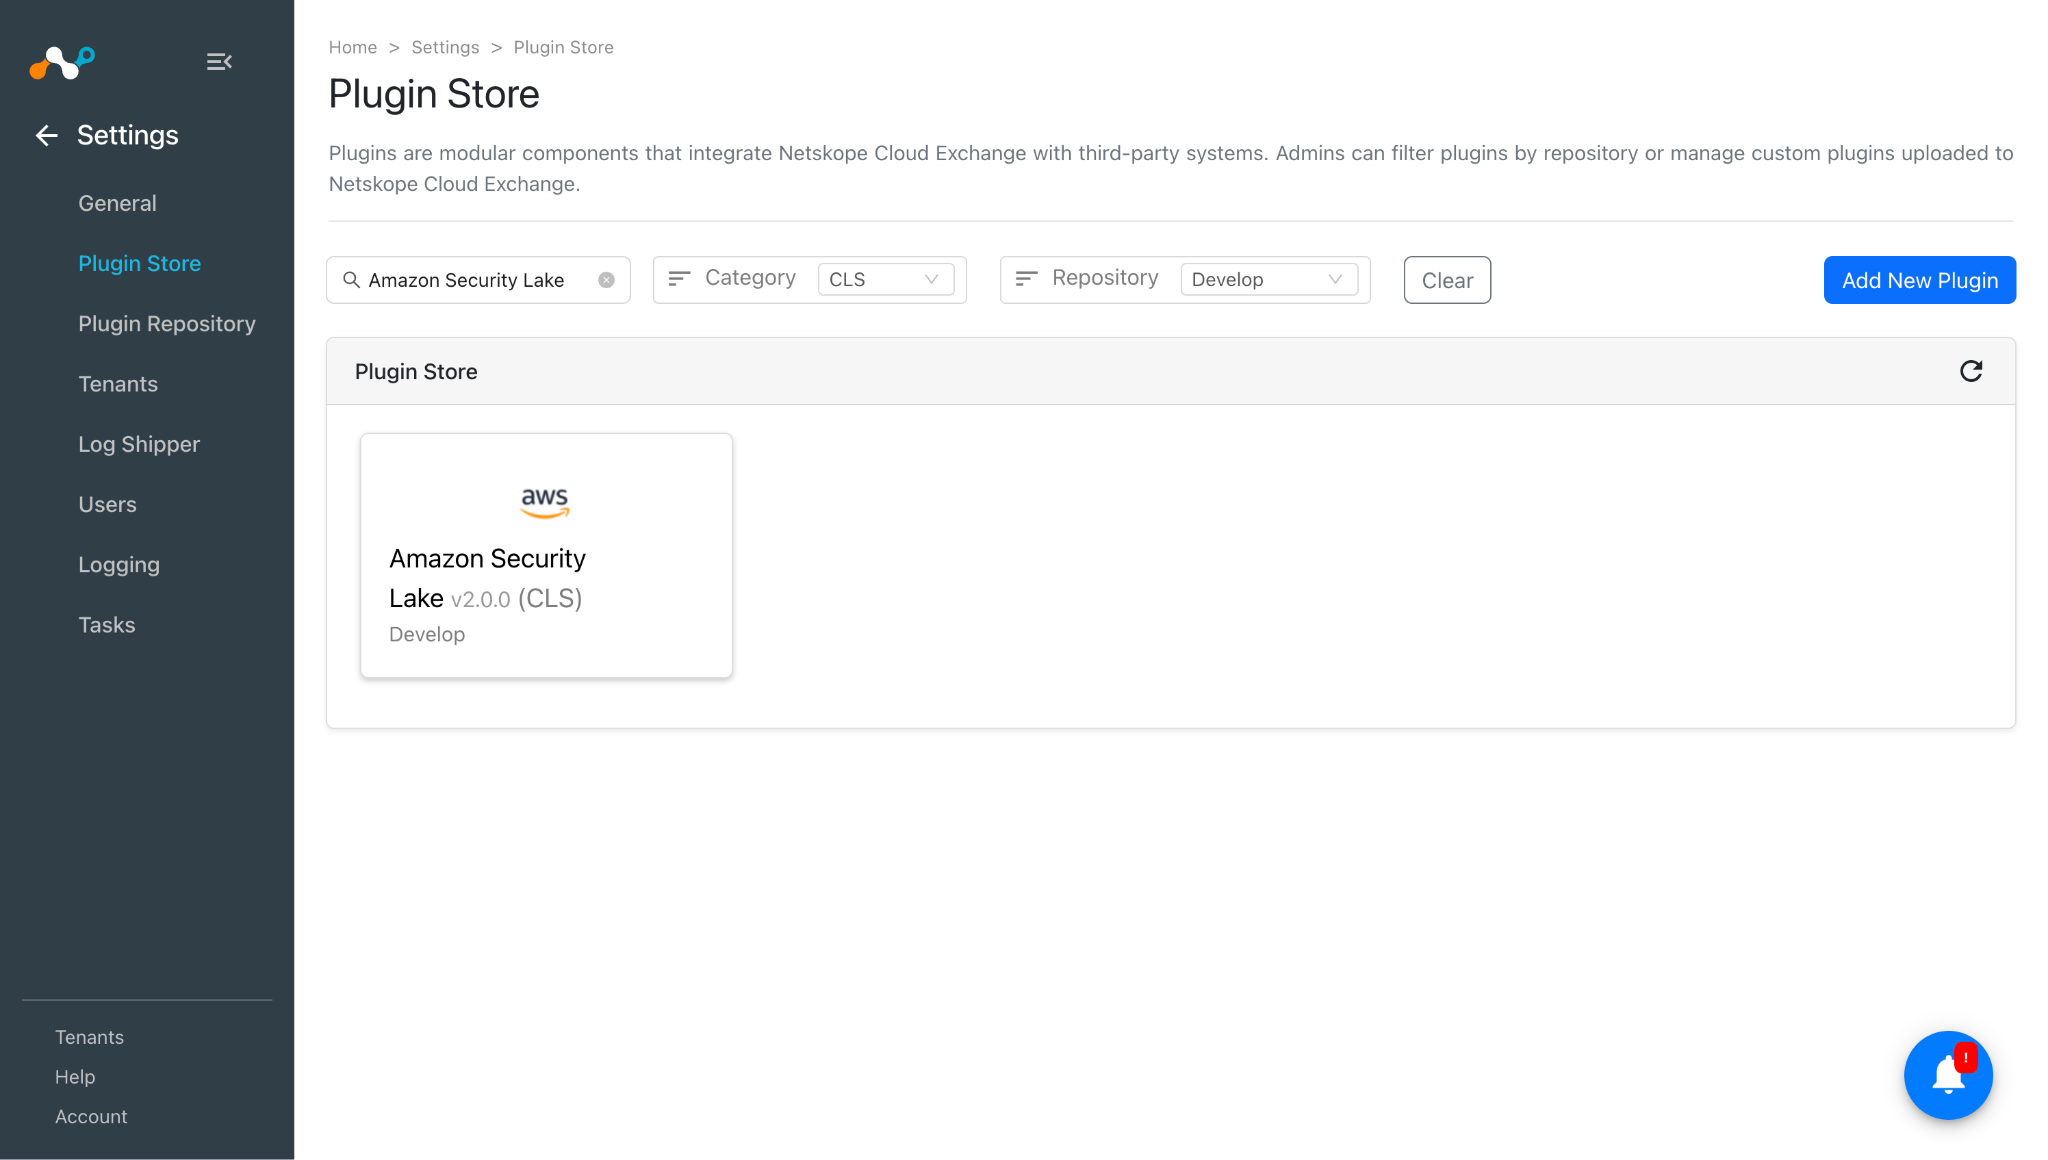
2. Search for and select the Amazon Security Lake v2.0.0 (CLS) plugin.
3. Enter the Configuration Name (like Amazon Security Lake), select the mapping file per your requirements.
Note
With the default mappings, raw_data field will be reflected as null on AWS (Athena). To send raw_data users need to update the mapping and set the default value of raw_data field as raw_data for each alert/event/webtx. For example:

This plugin only supports OCSF format.
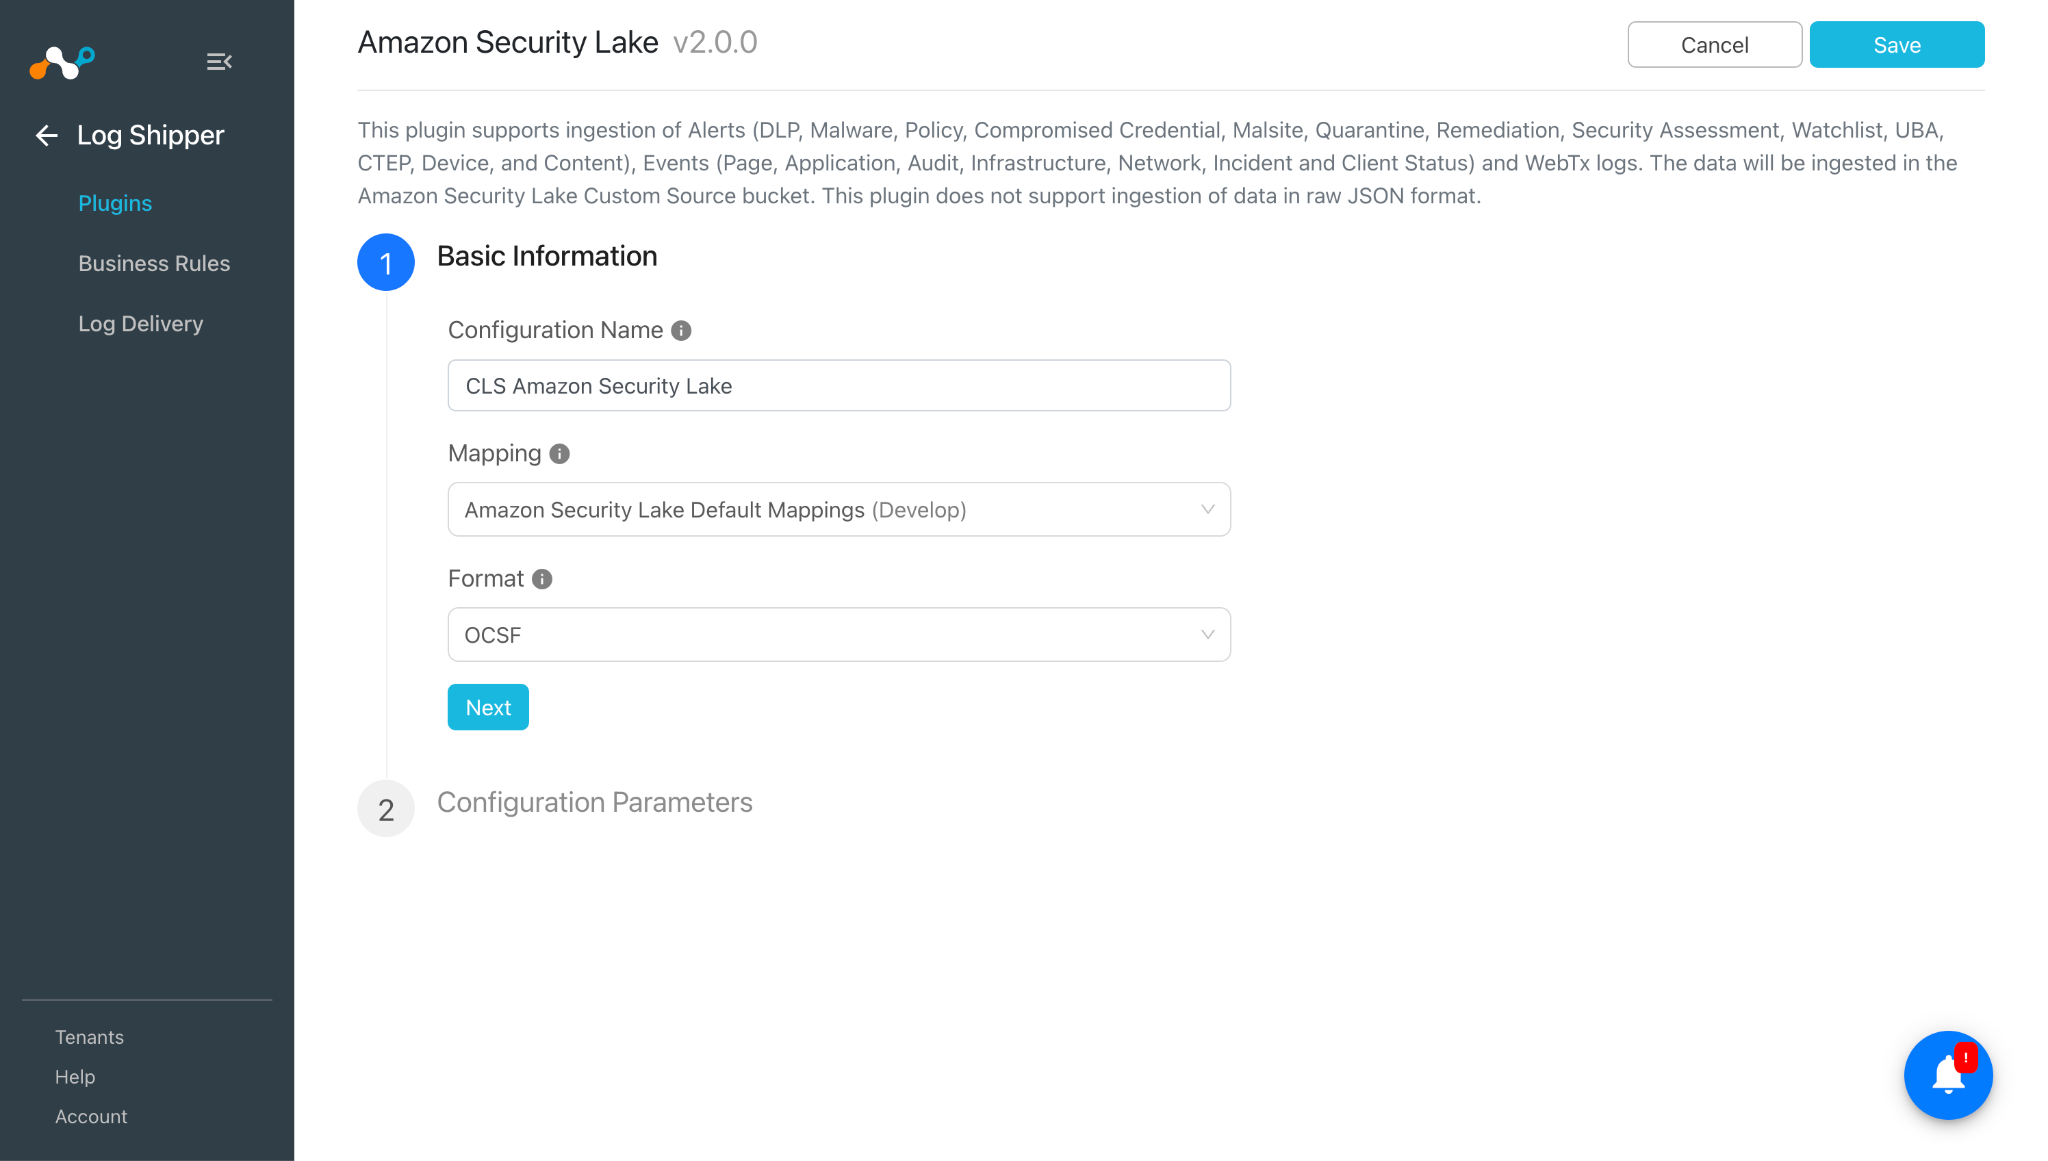
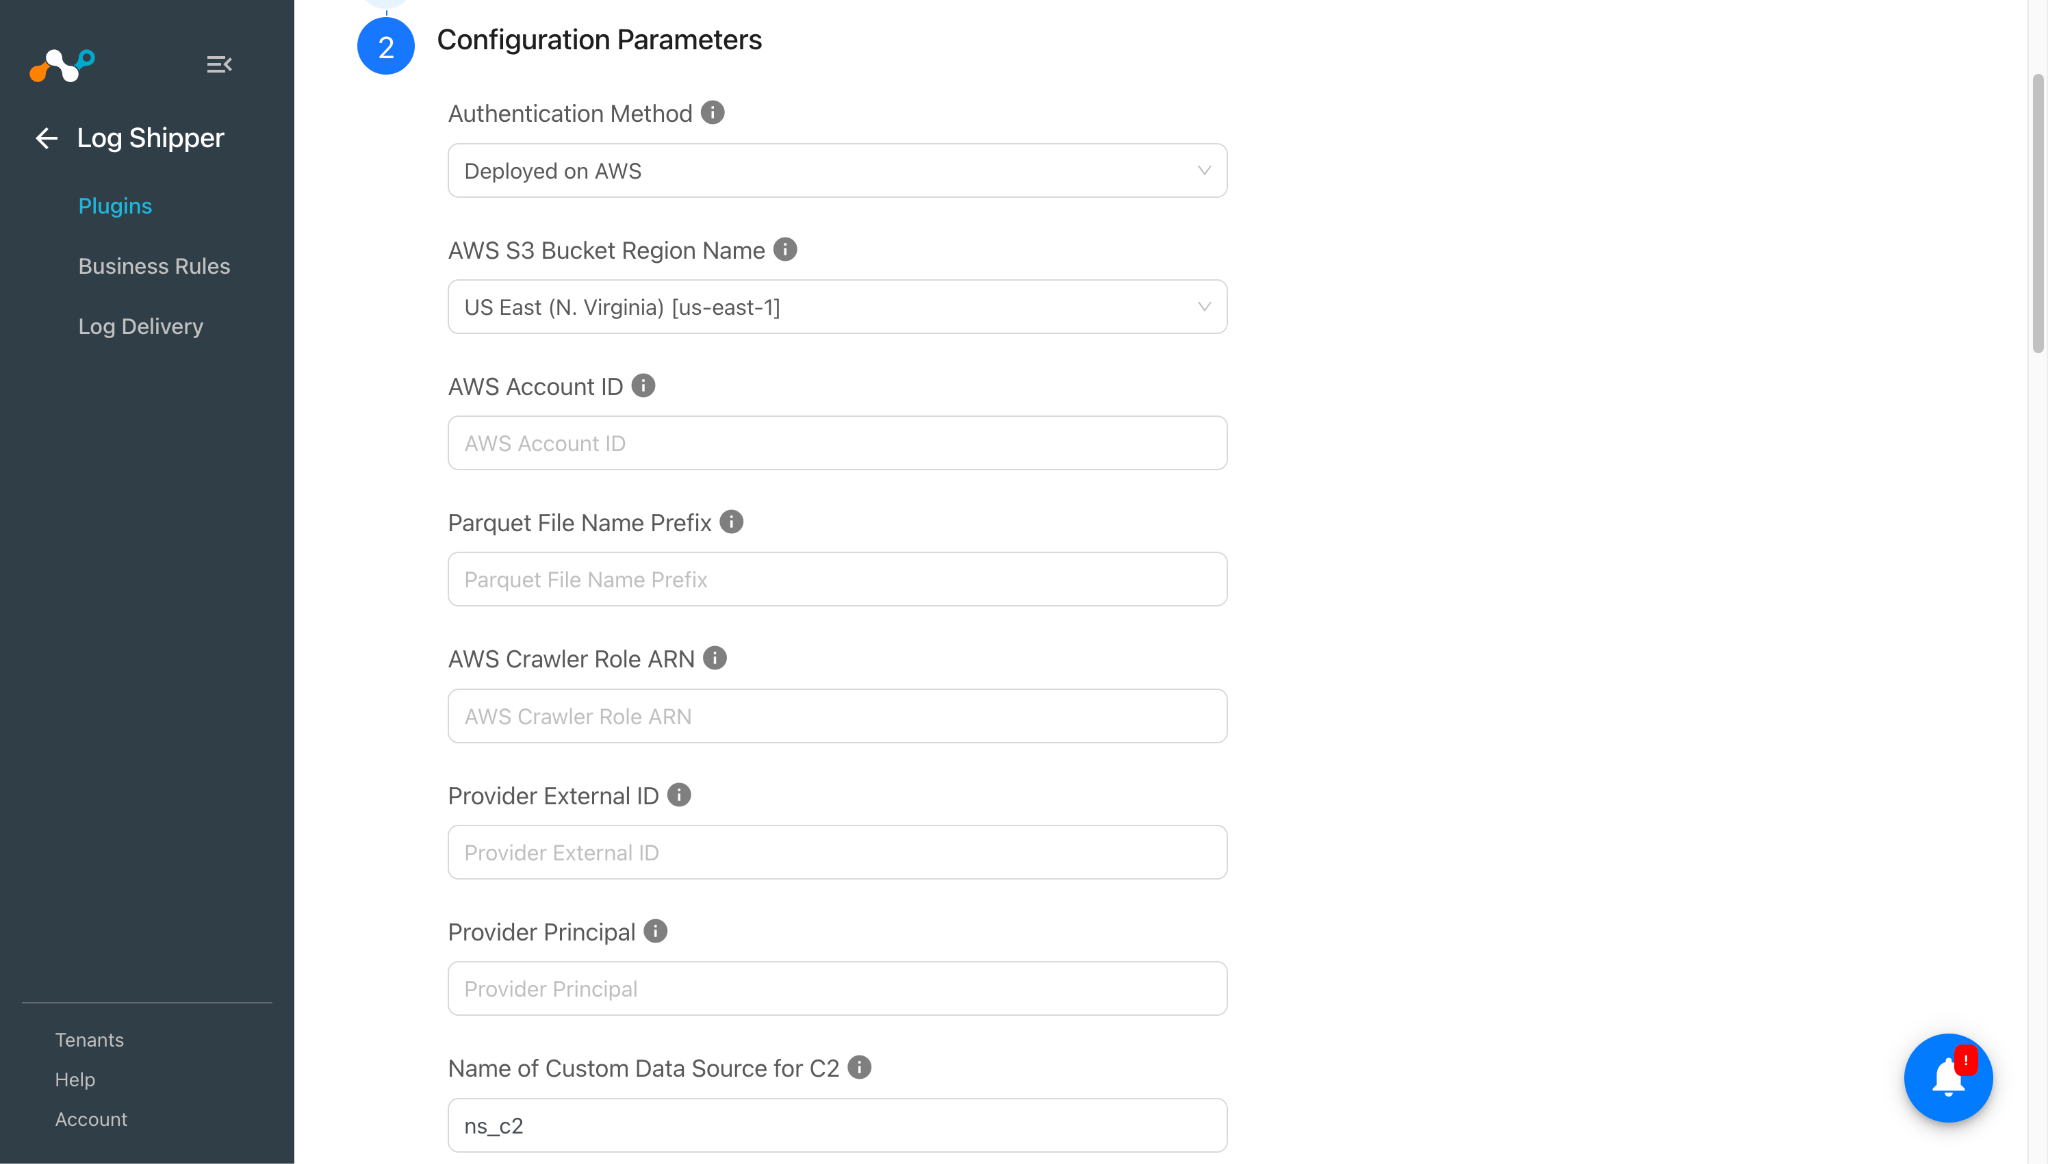
4. Click Next and enter the Configuration Parameters accordingly:
Authentication Method
Deploy with AWS
Enter these parameters:
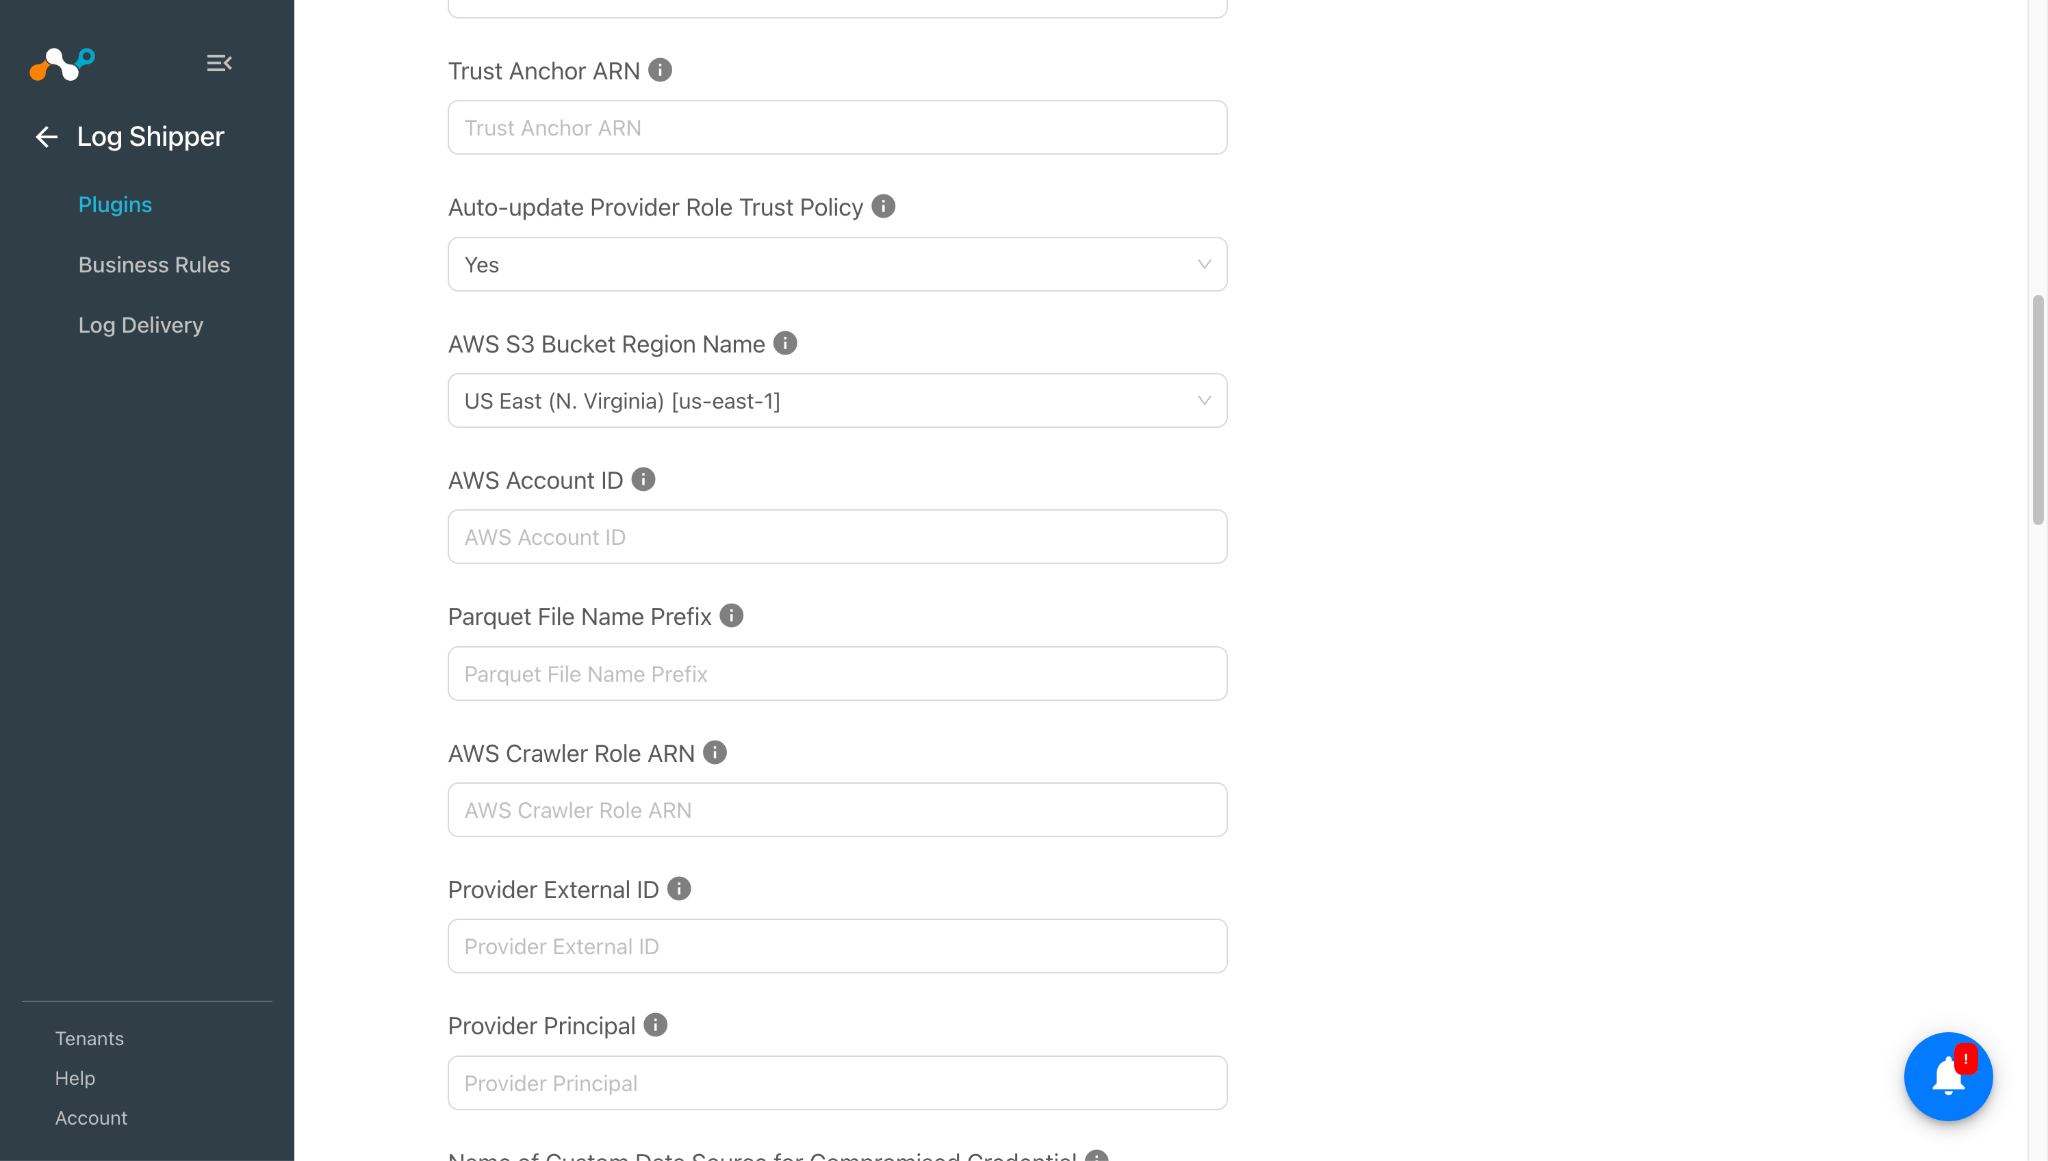
- AWS S3 Bucket Region Name: AWS S3 Bucket Region Name from where to get the AWS S3 Bucket. Make sure that the region name matches the region in the Profile ARN and Trust Anchor ARN.
- AWS Account ID: AWS Account ID in which the AWS Security Lake Custom Source Bucket is created.
- Parquet File Name Prefix: Parquet File Name Prefix for the AWS Security Lake Custom Source Bucket. This is an optional field.
- AWS Crawler Role ARN: The Amazon Resource Name (ARN) of the IAM role that the AWS Glue crawler will use to access your data. This role must have permissions for accessing Security Lake, S3 buckets, Glue Data Catalog and Lake Formation. Please refer to the guide for detailed steps on configuring the Glue Crawler role.
- Provider External ID: An external ID used to establish a trust relationship with the log provider (for security best practices against ‘confused deputy’ attacks).
- Provider Principal: The AWS principal (usually an IAM Role ARN or Account ID) of the entity that will be writing logs to the S3 bucket.
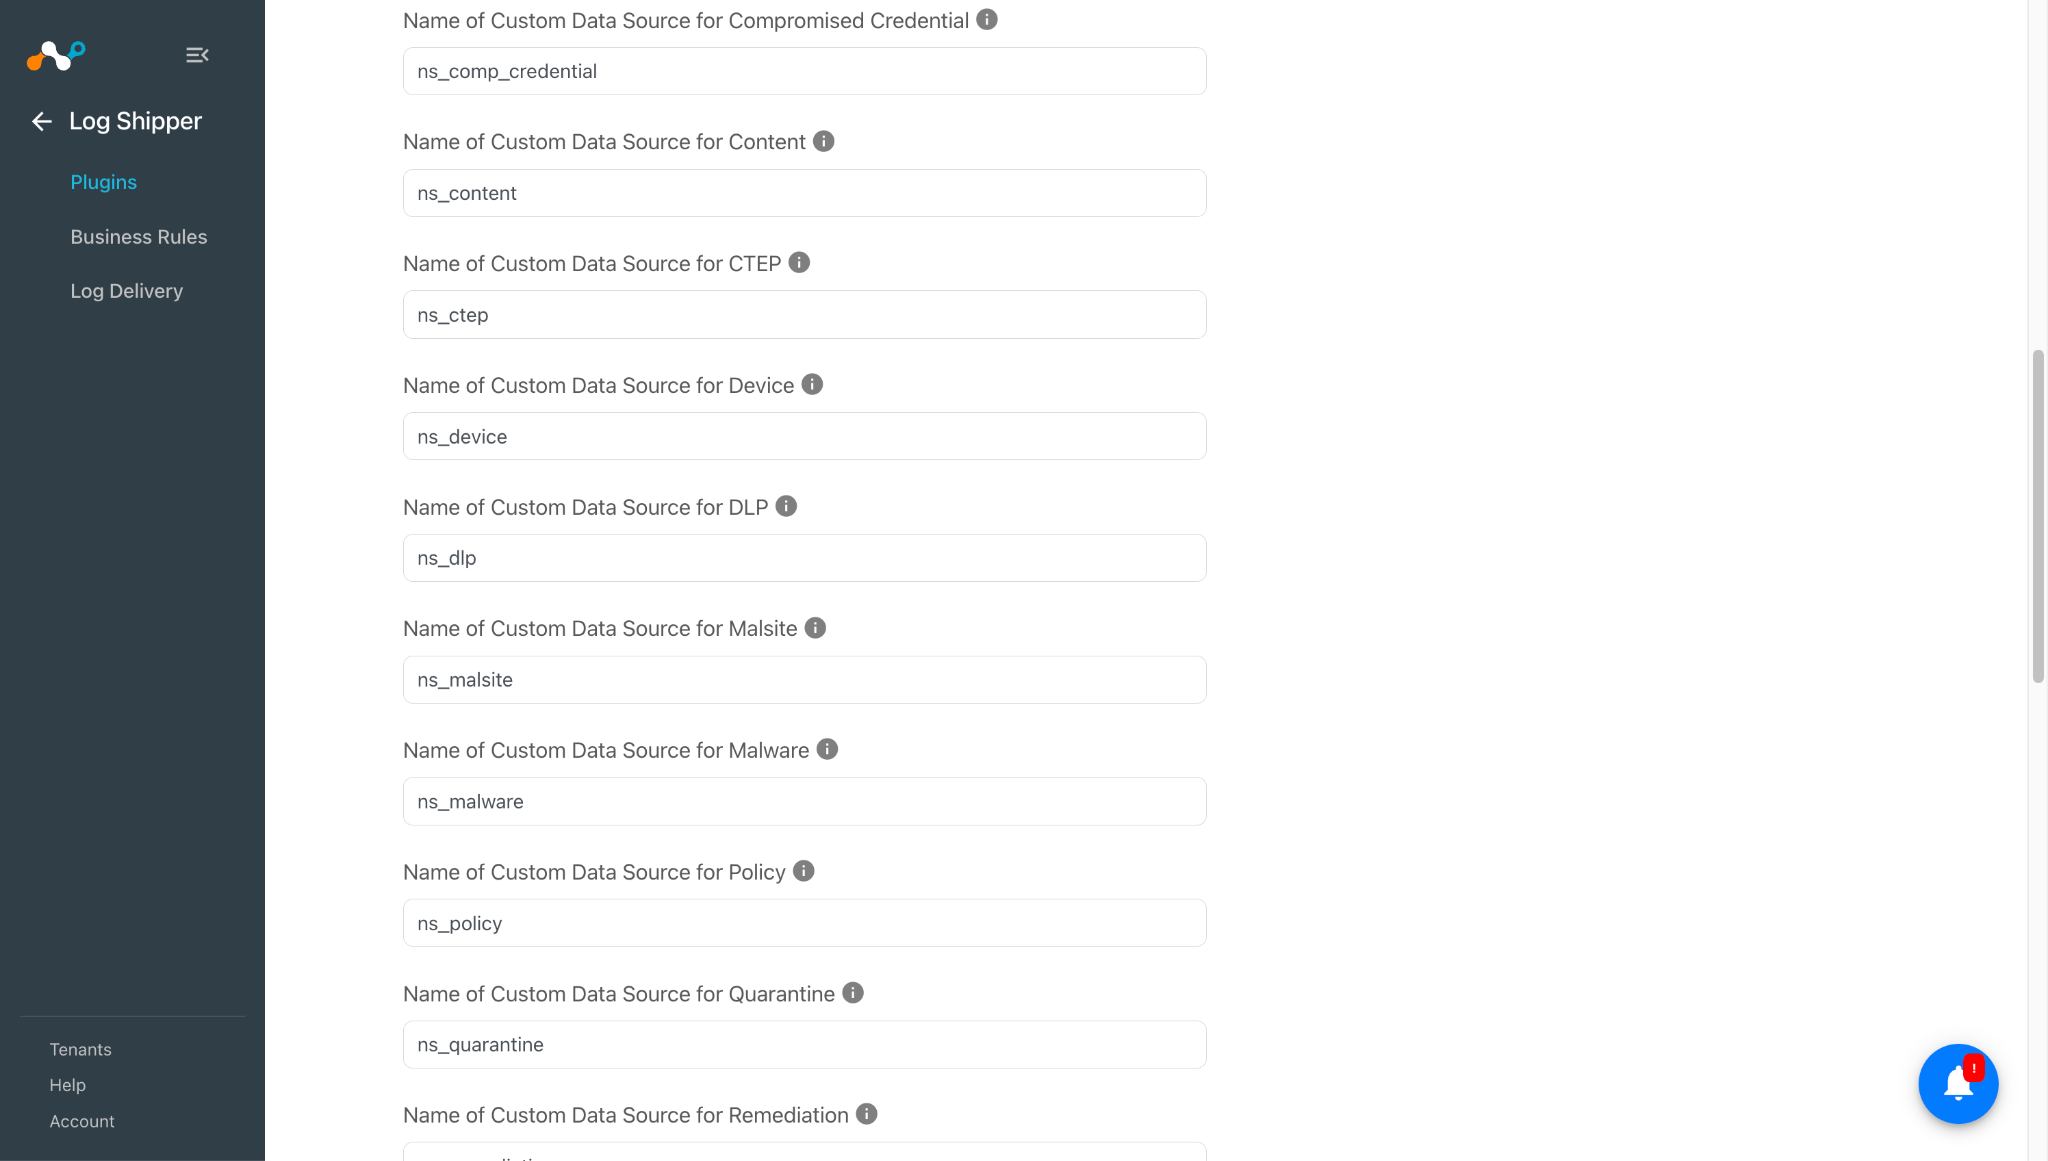
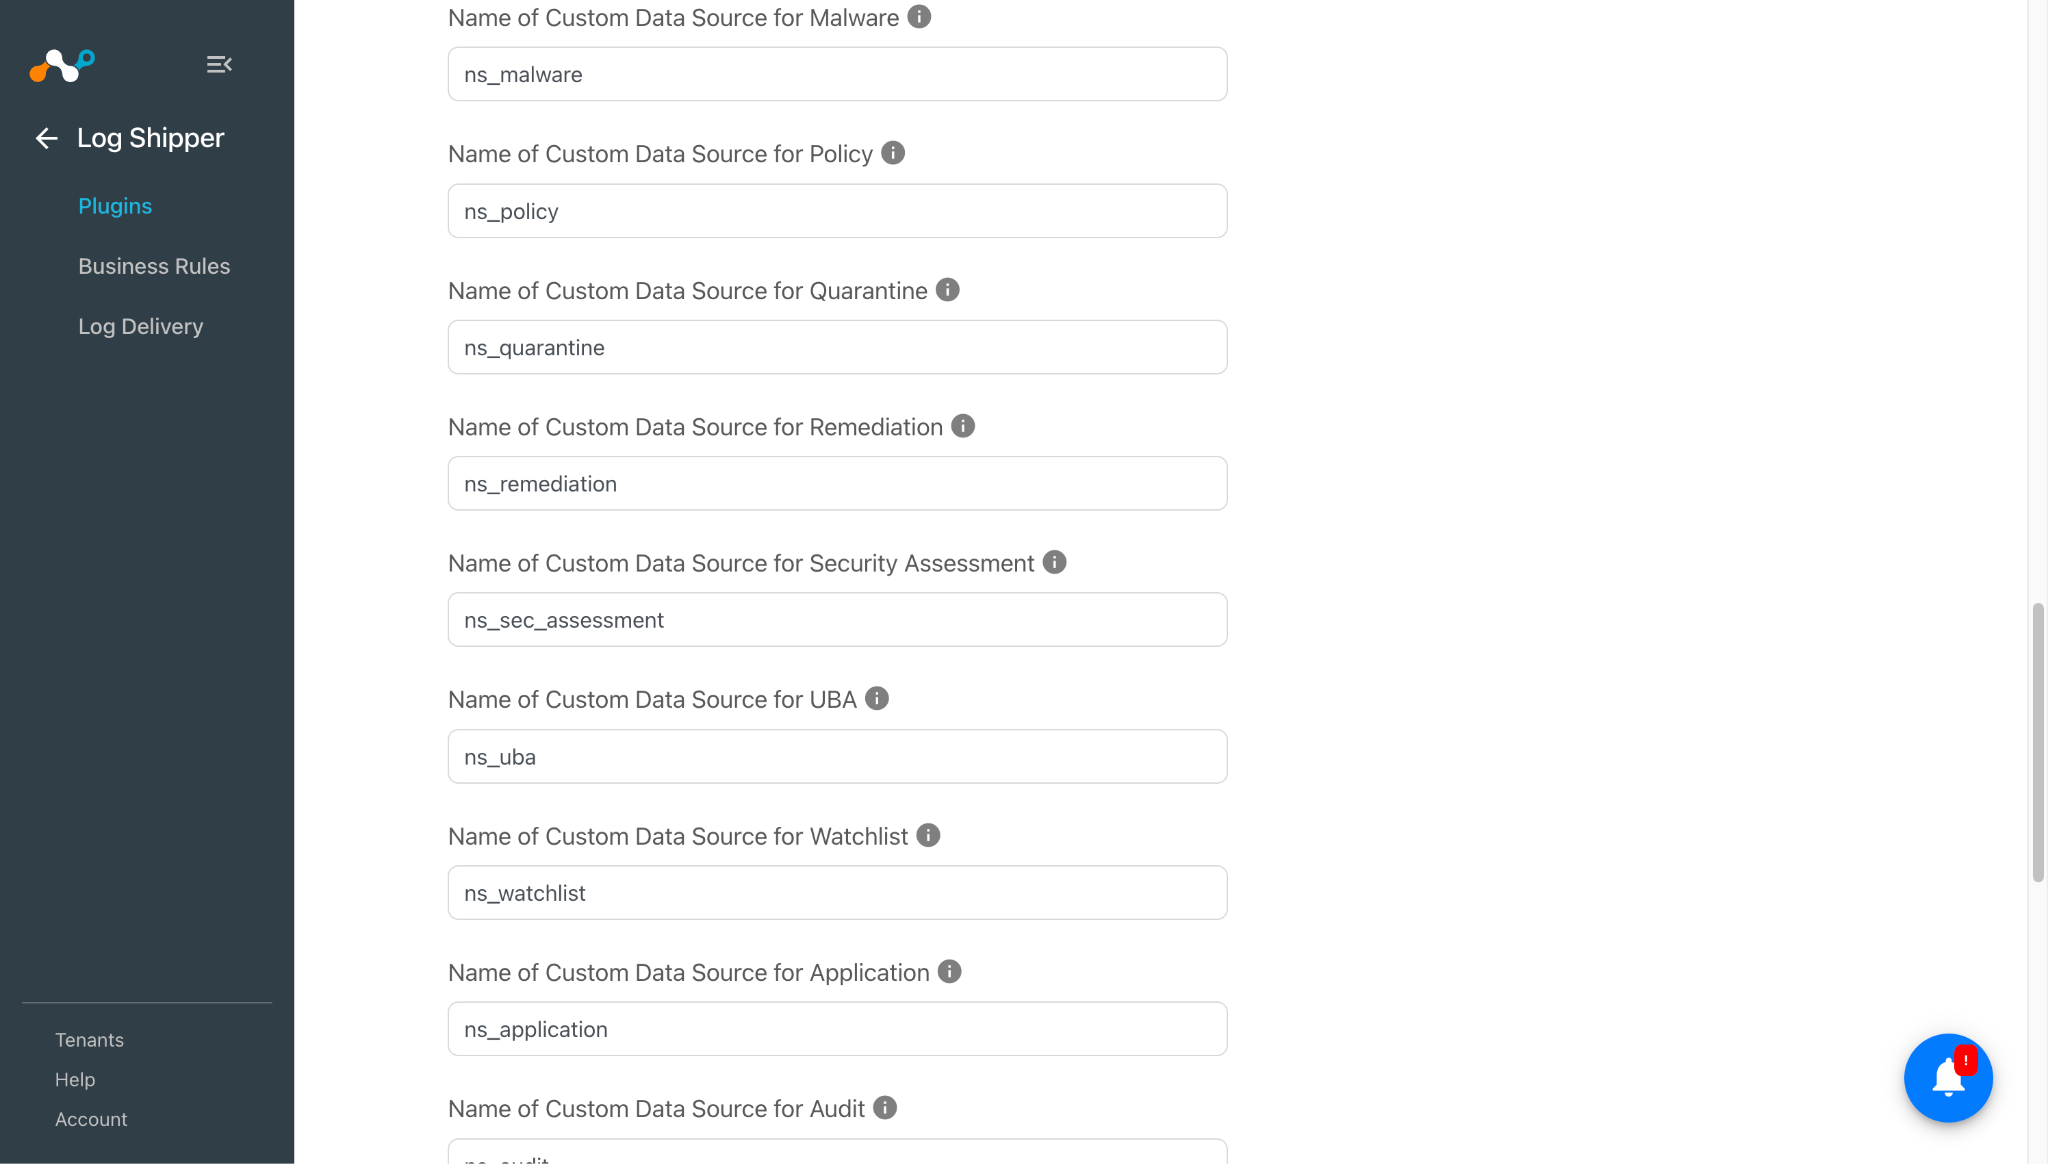
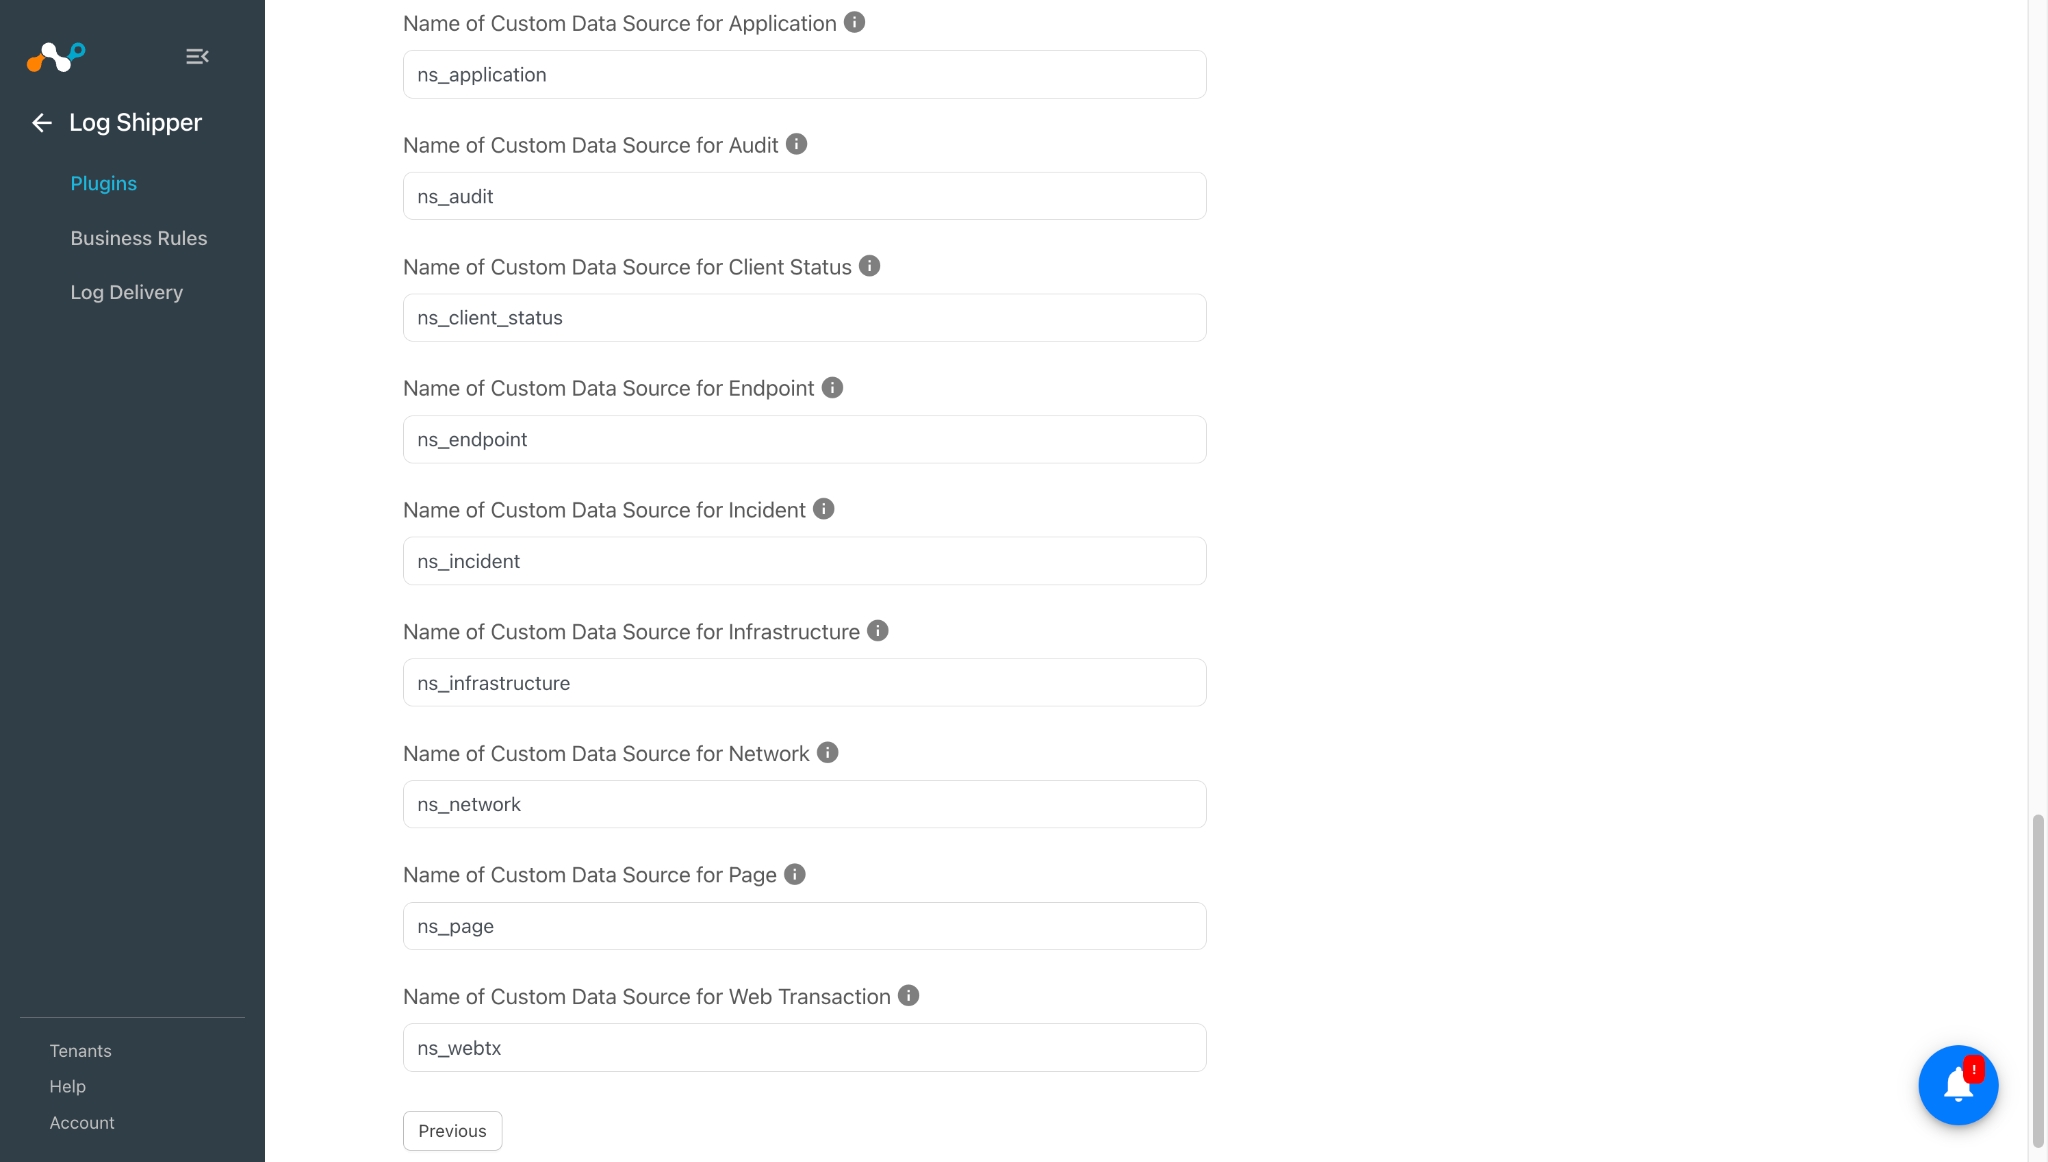
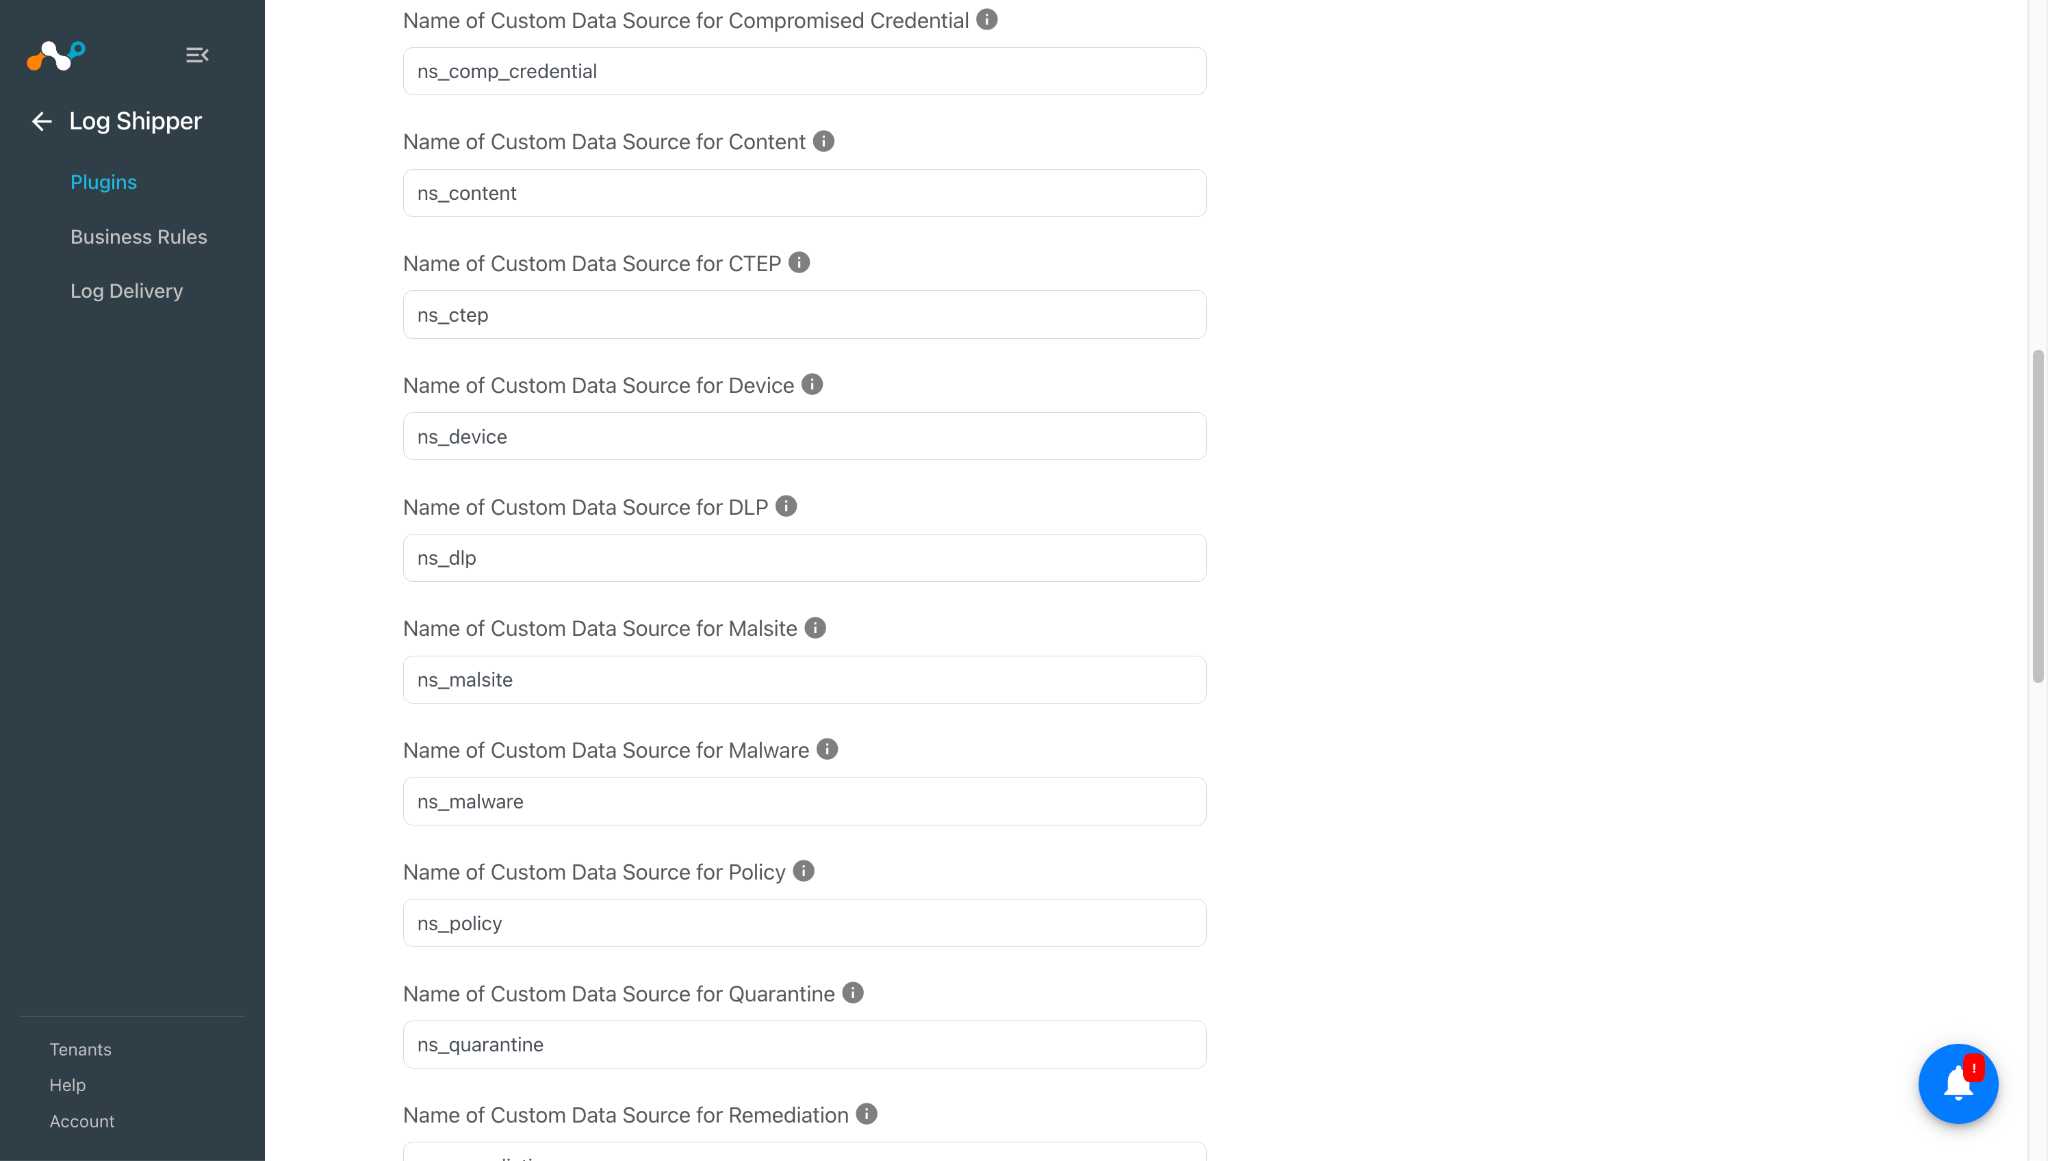
- Name of Custom Data Source for alert/event/webtx: Custom Source Bucket of this name will be created in AWS Security Lake for the particular Alert/Event type or Webtx. Also, the folder name in the S3 bucket will be based on these values.
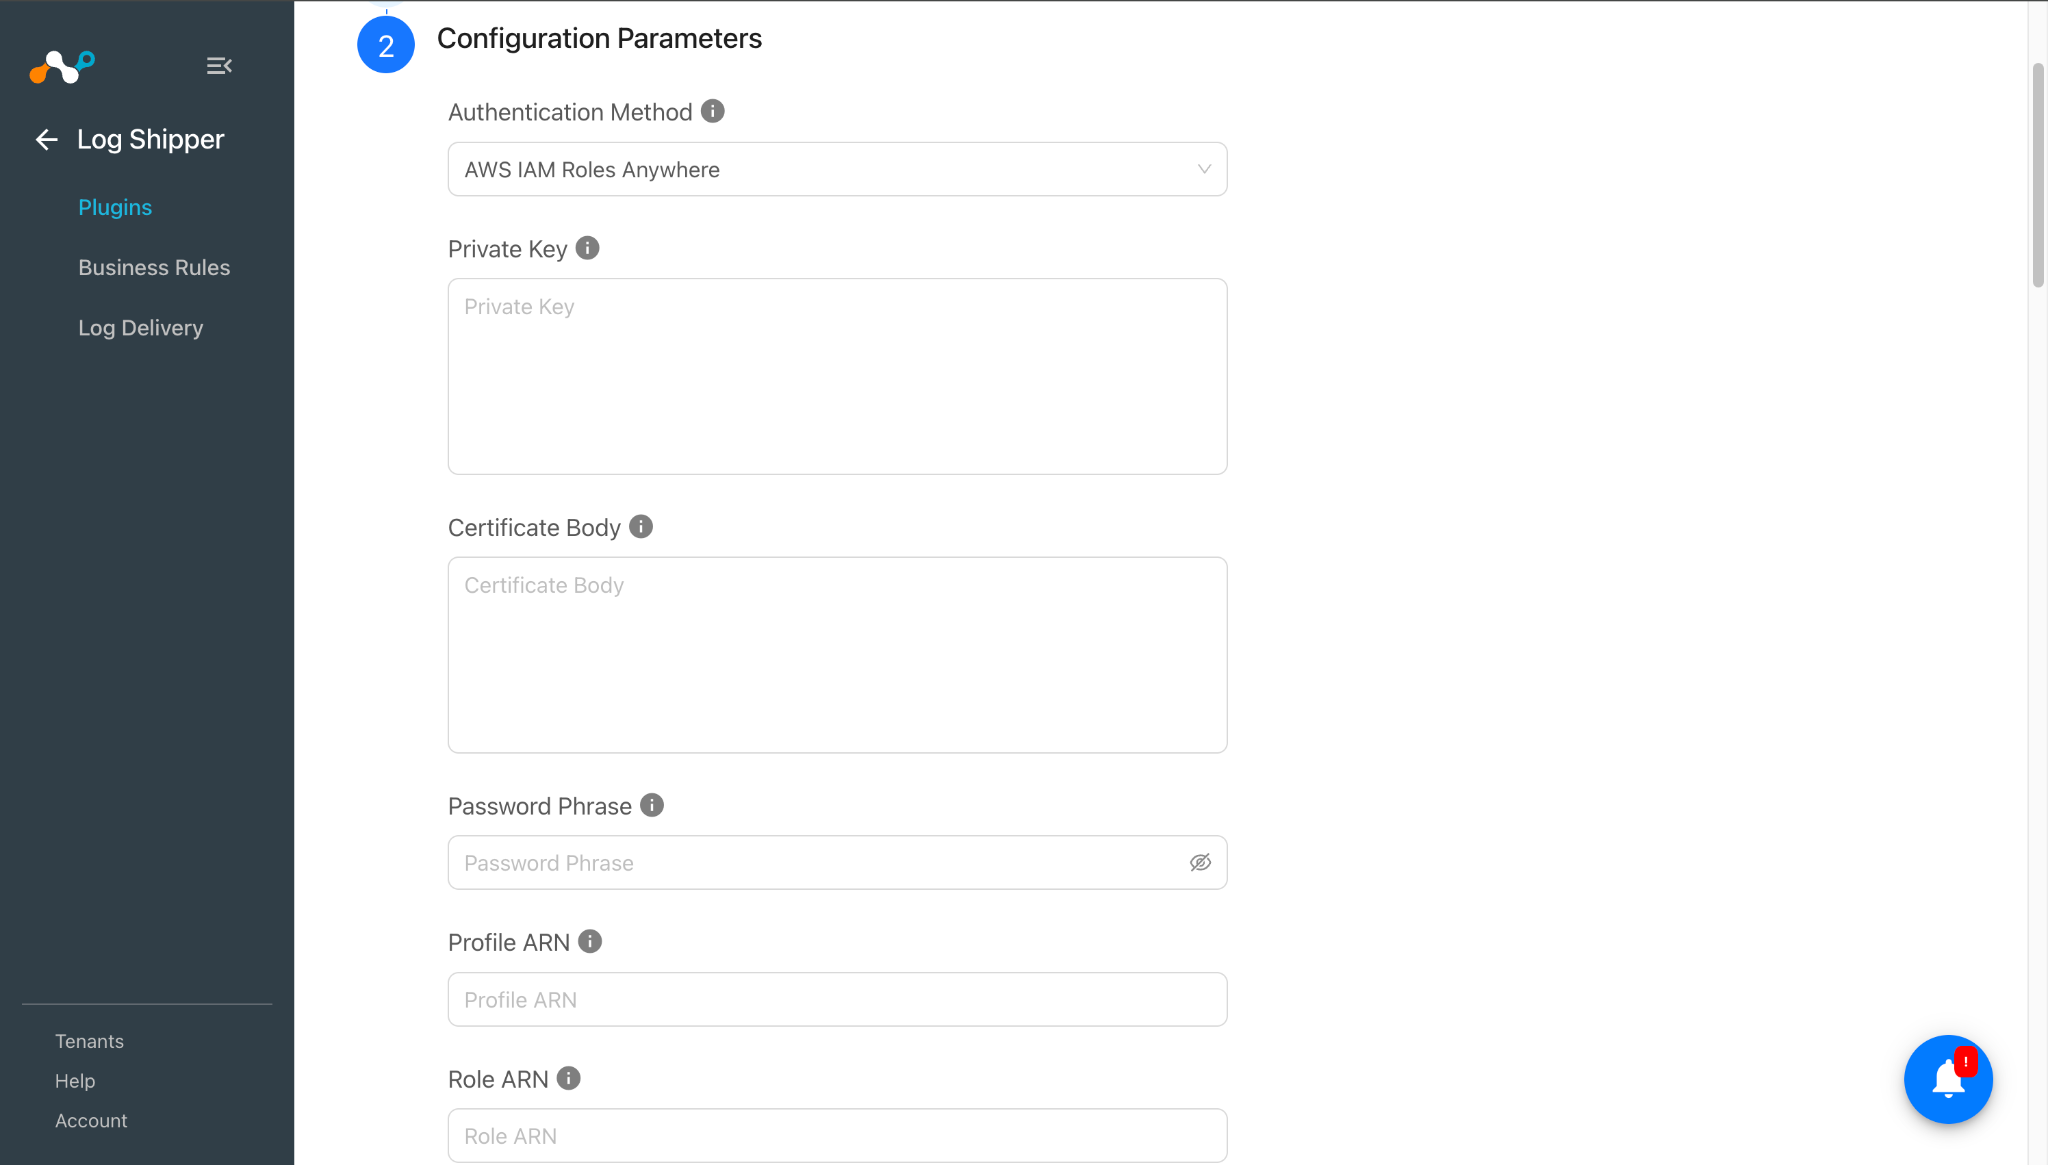
Deploy with AWS IAM Roles Anywhere
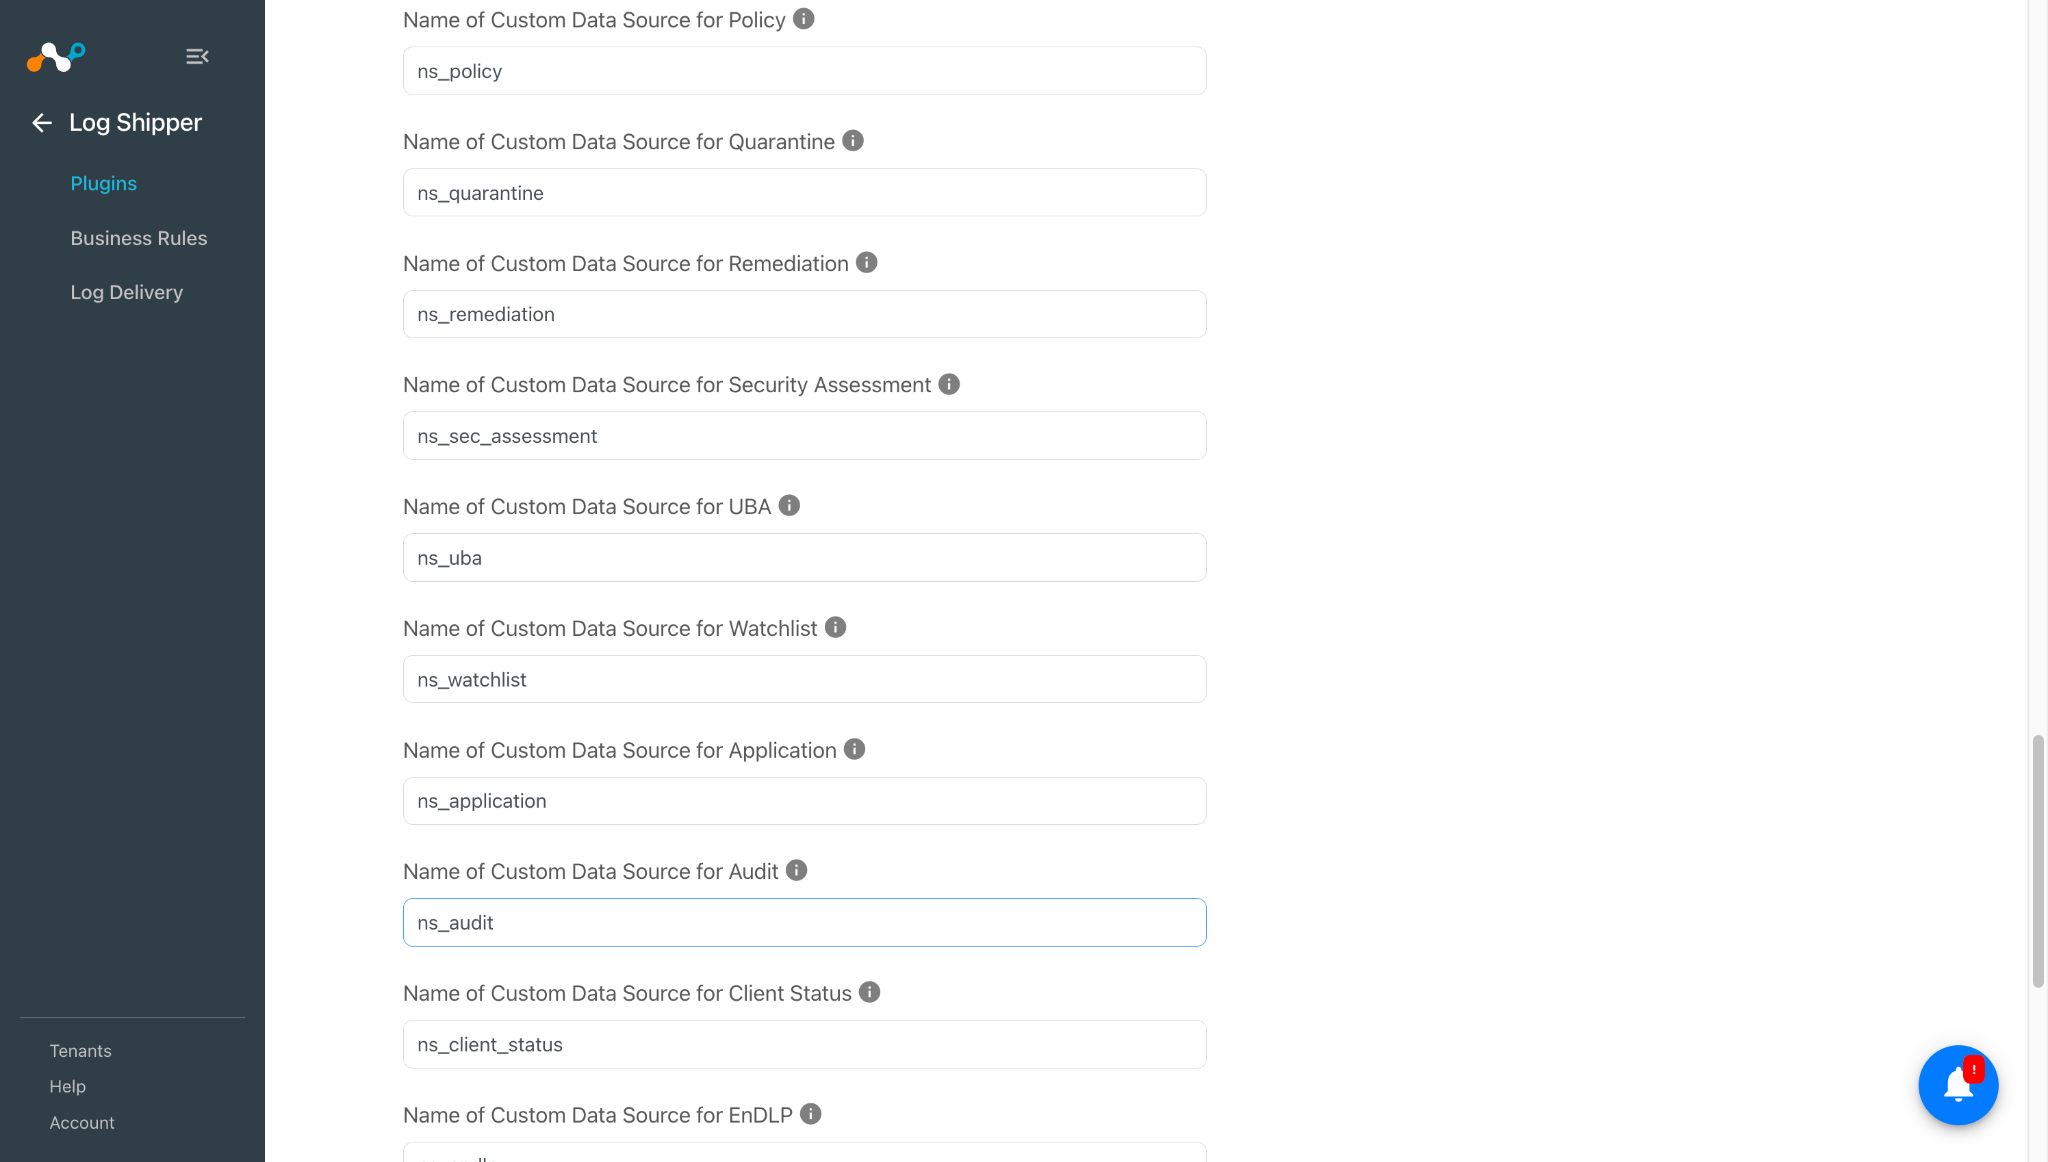
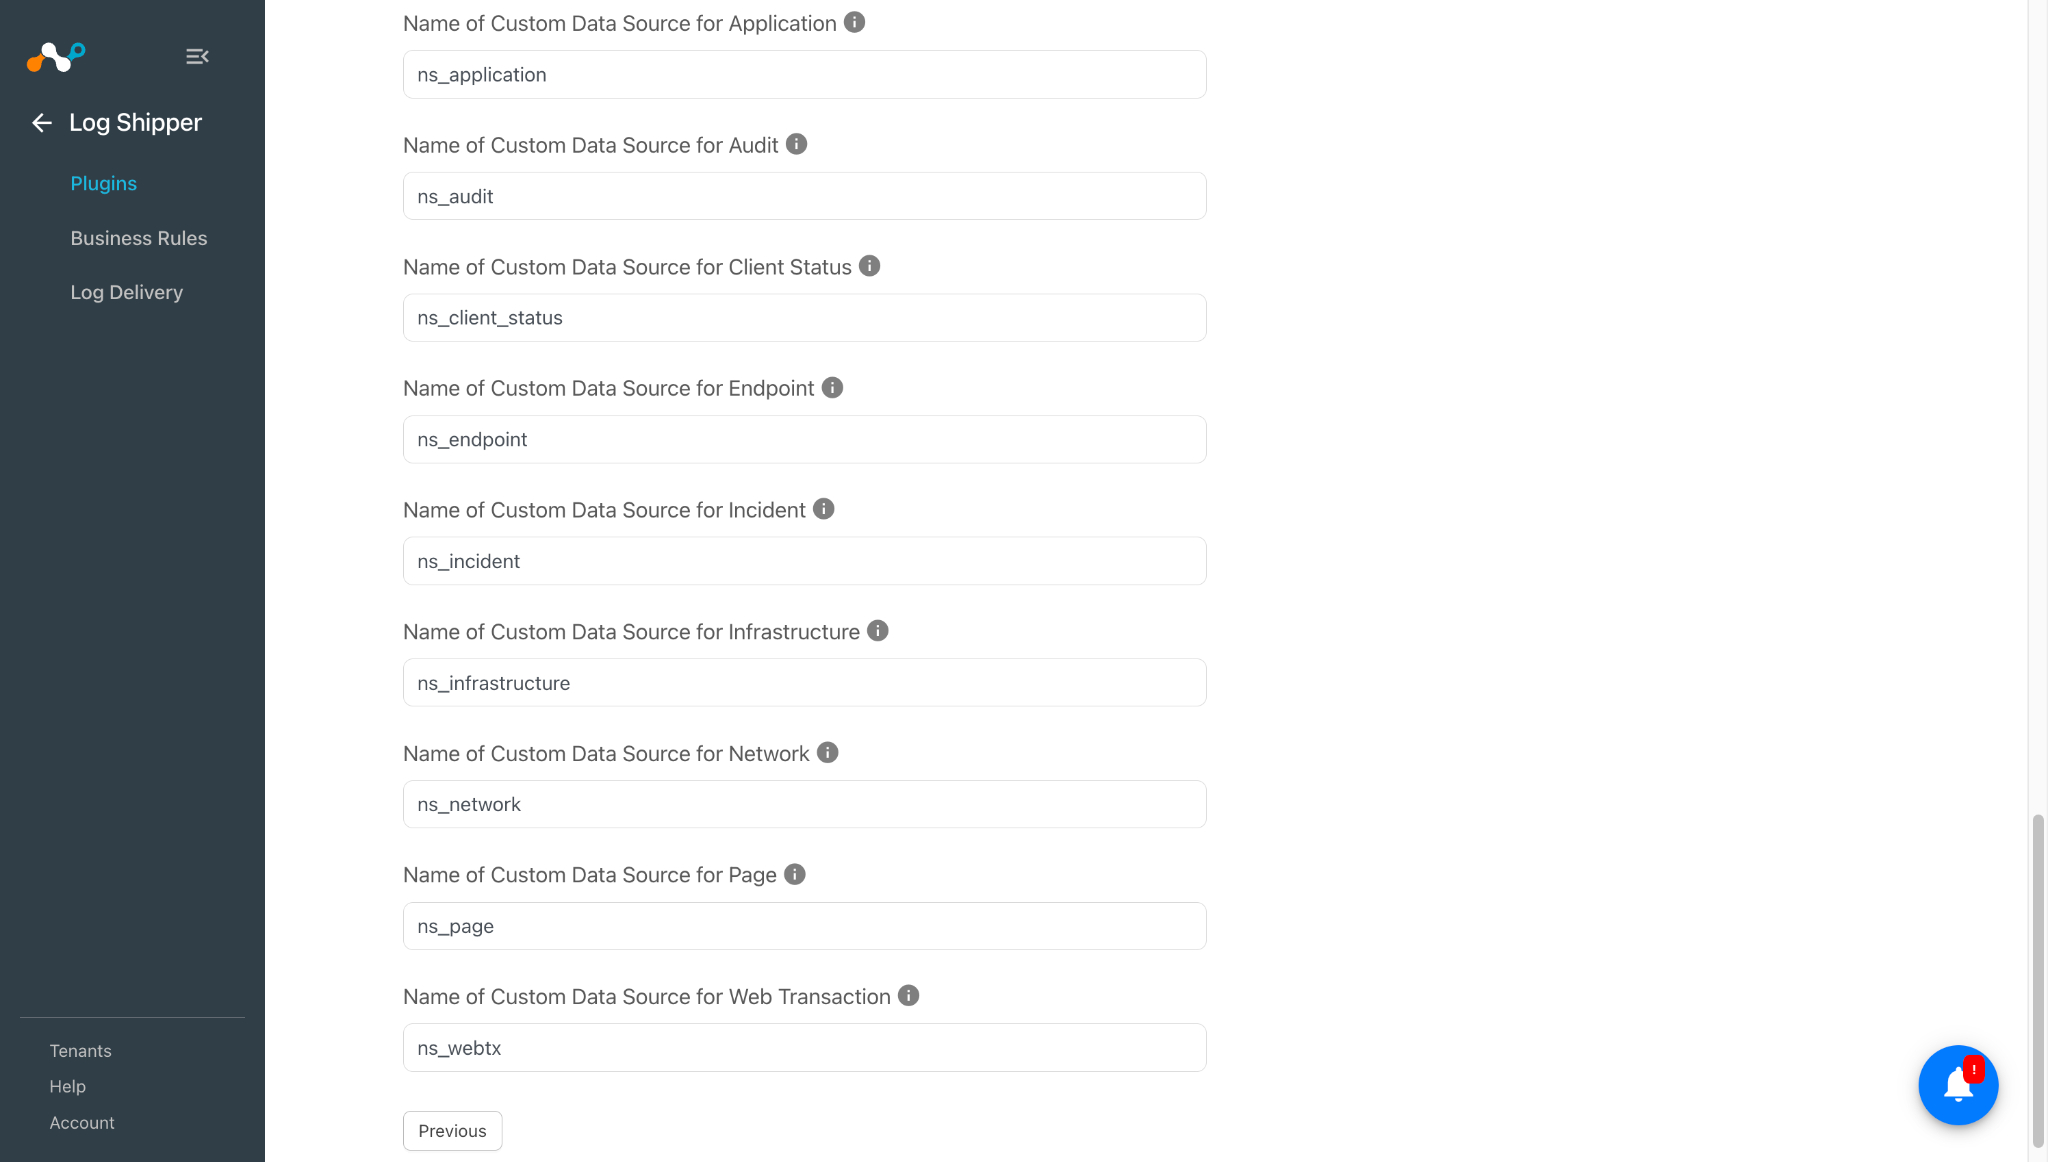
Scroll up and click Save.
Configure a Log Shipper Business Rule for Amazon Security Lake
- In Log Shipper, click Business Rules.
- Click Create New Rule.
- Enter a Rule Name and configure the Filter per your requirements. Enter a Folder Name, if any.
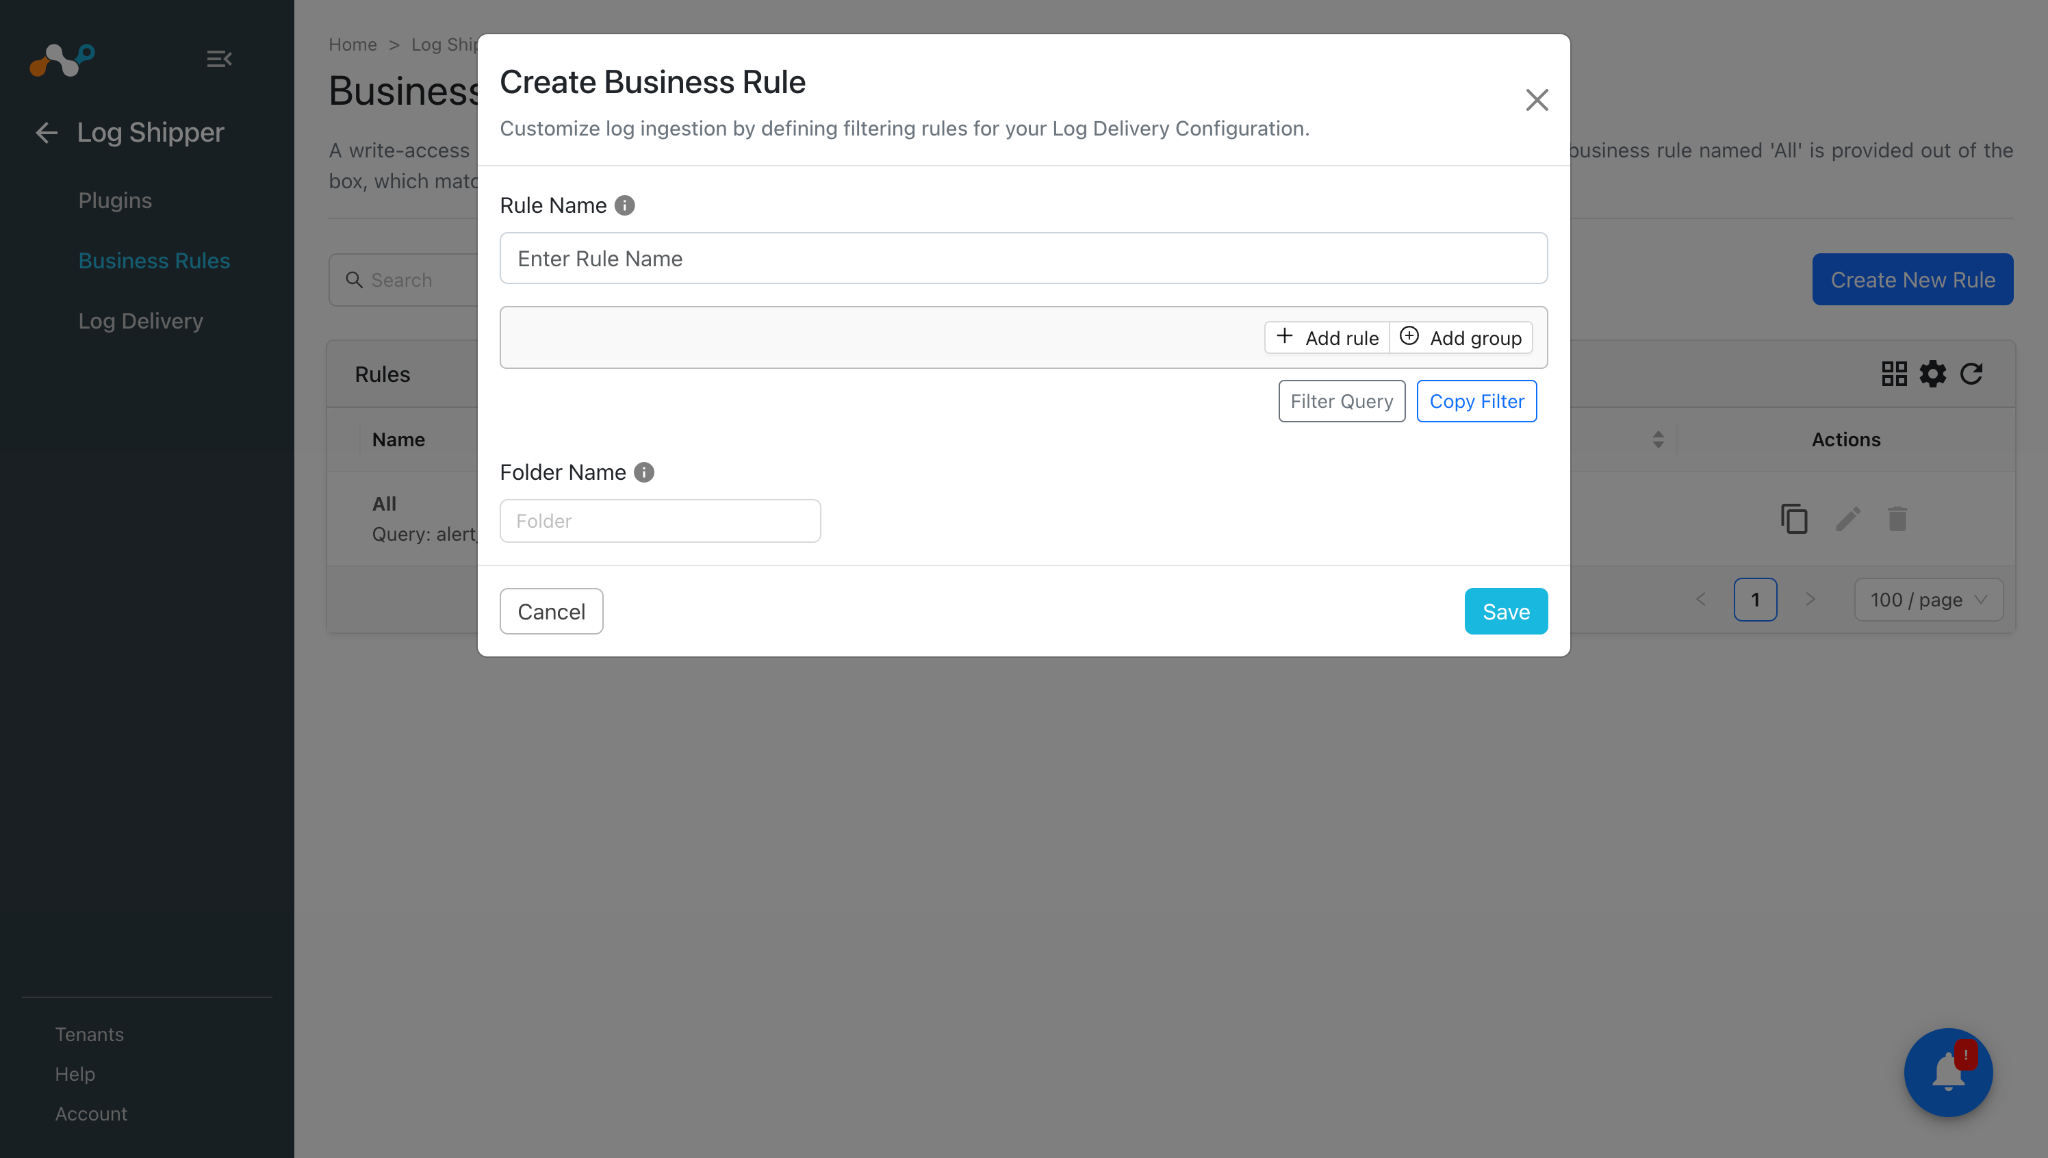
- Click Save.
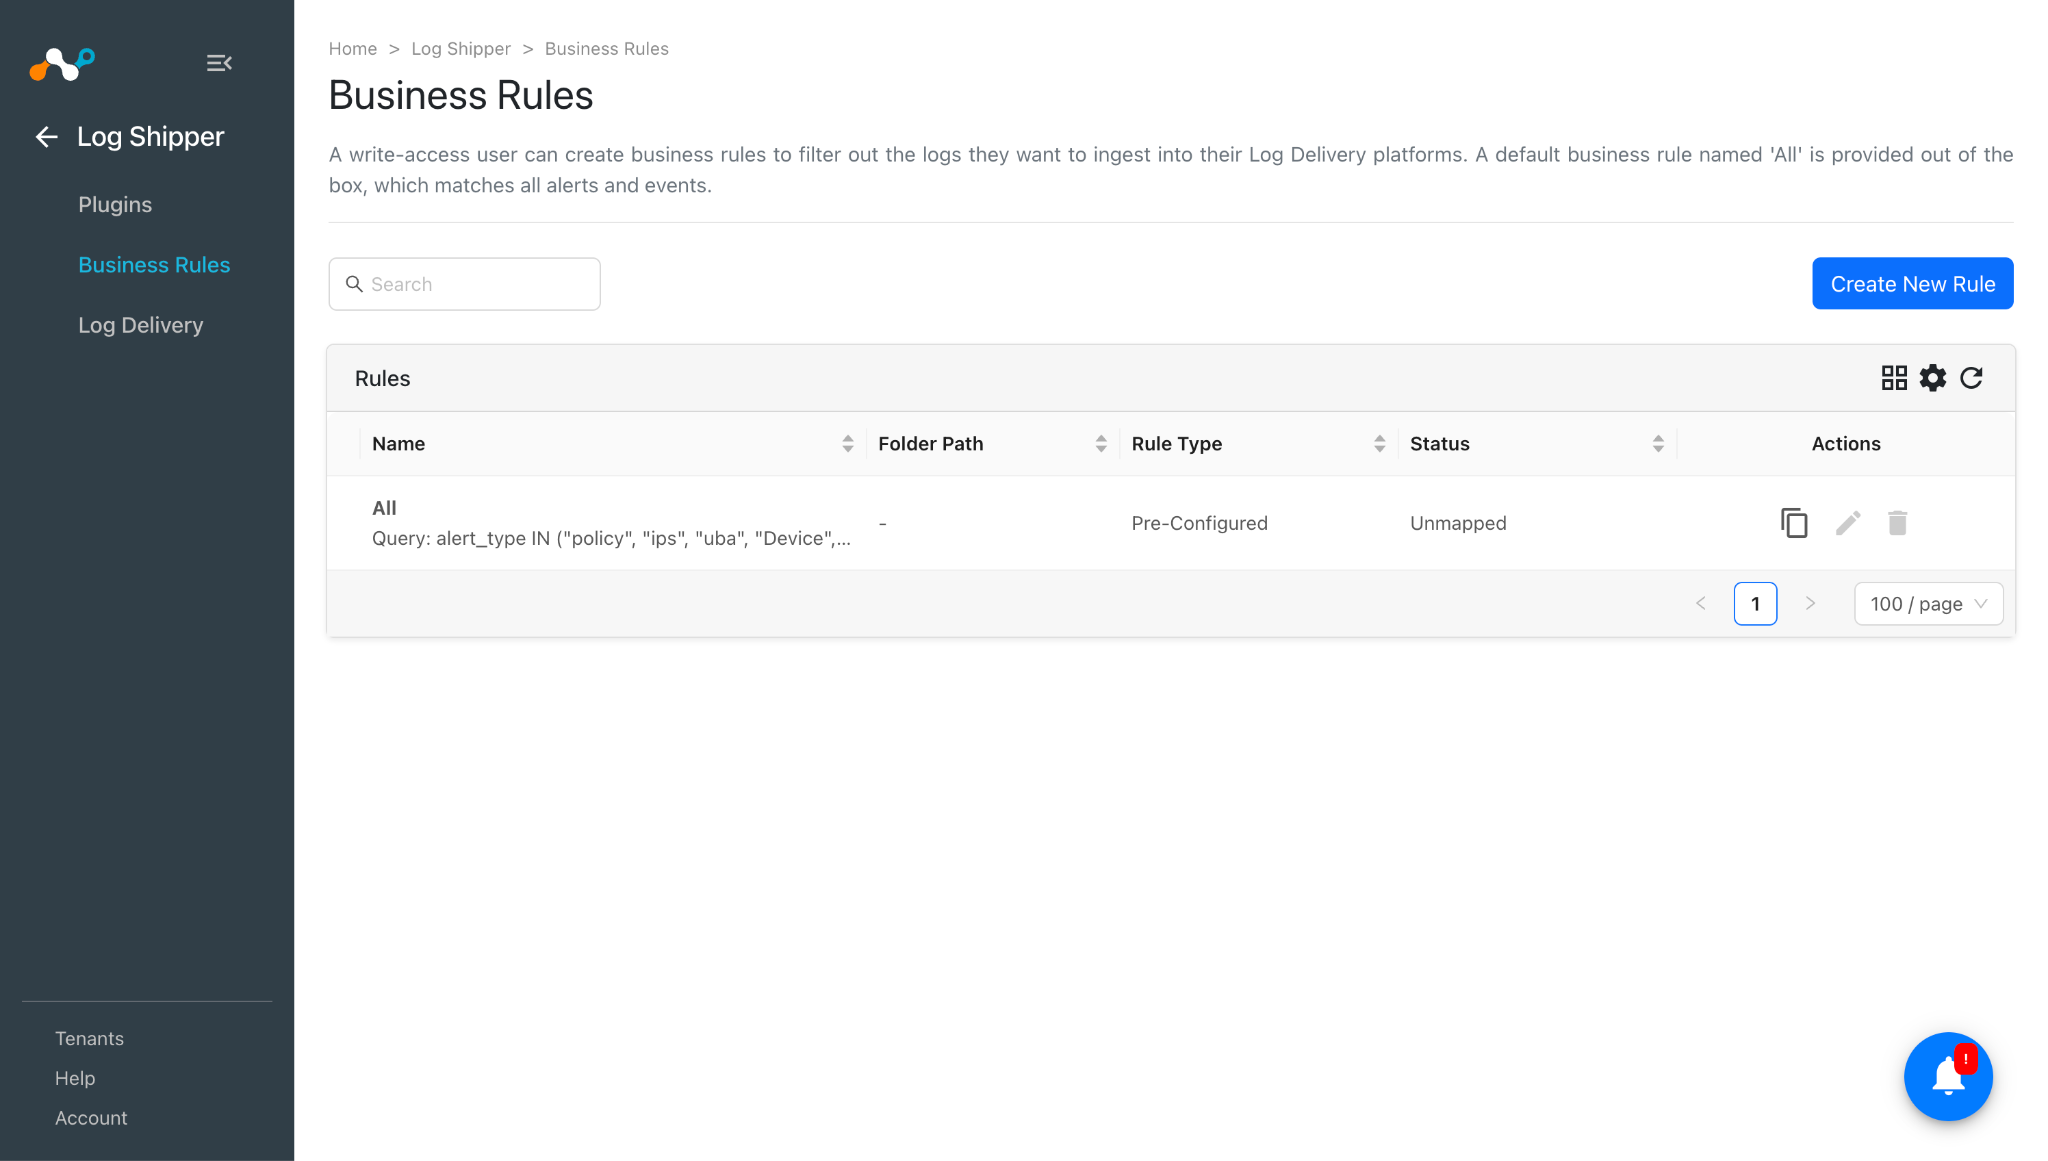
Configure Log Shipper Log Delivery for Amazon Security Lake
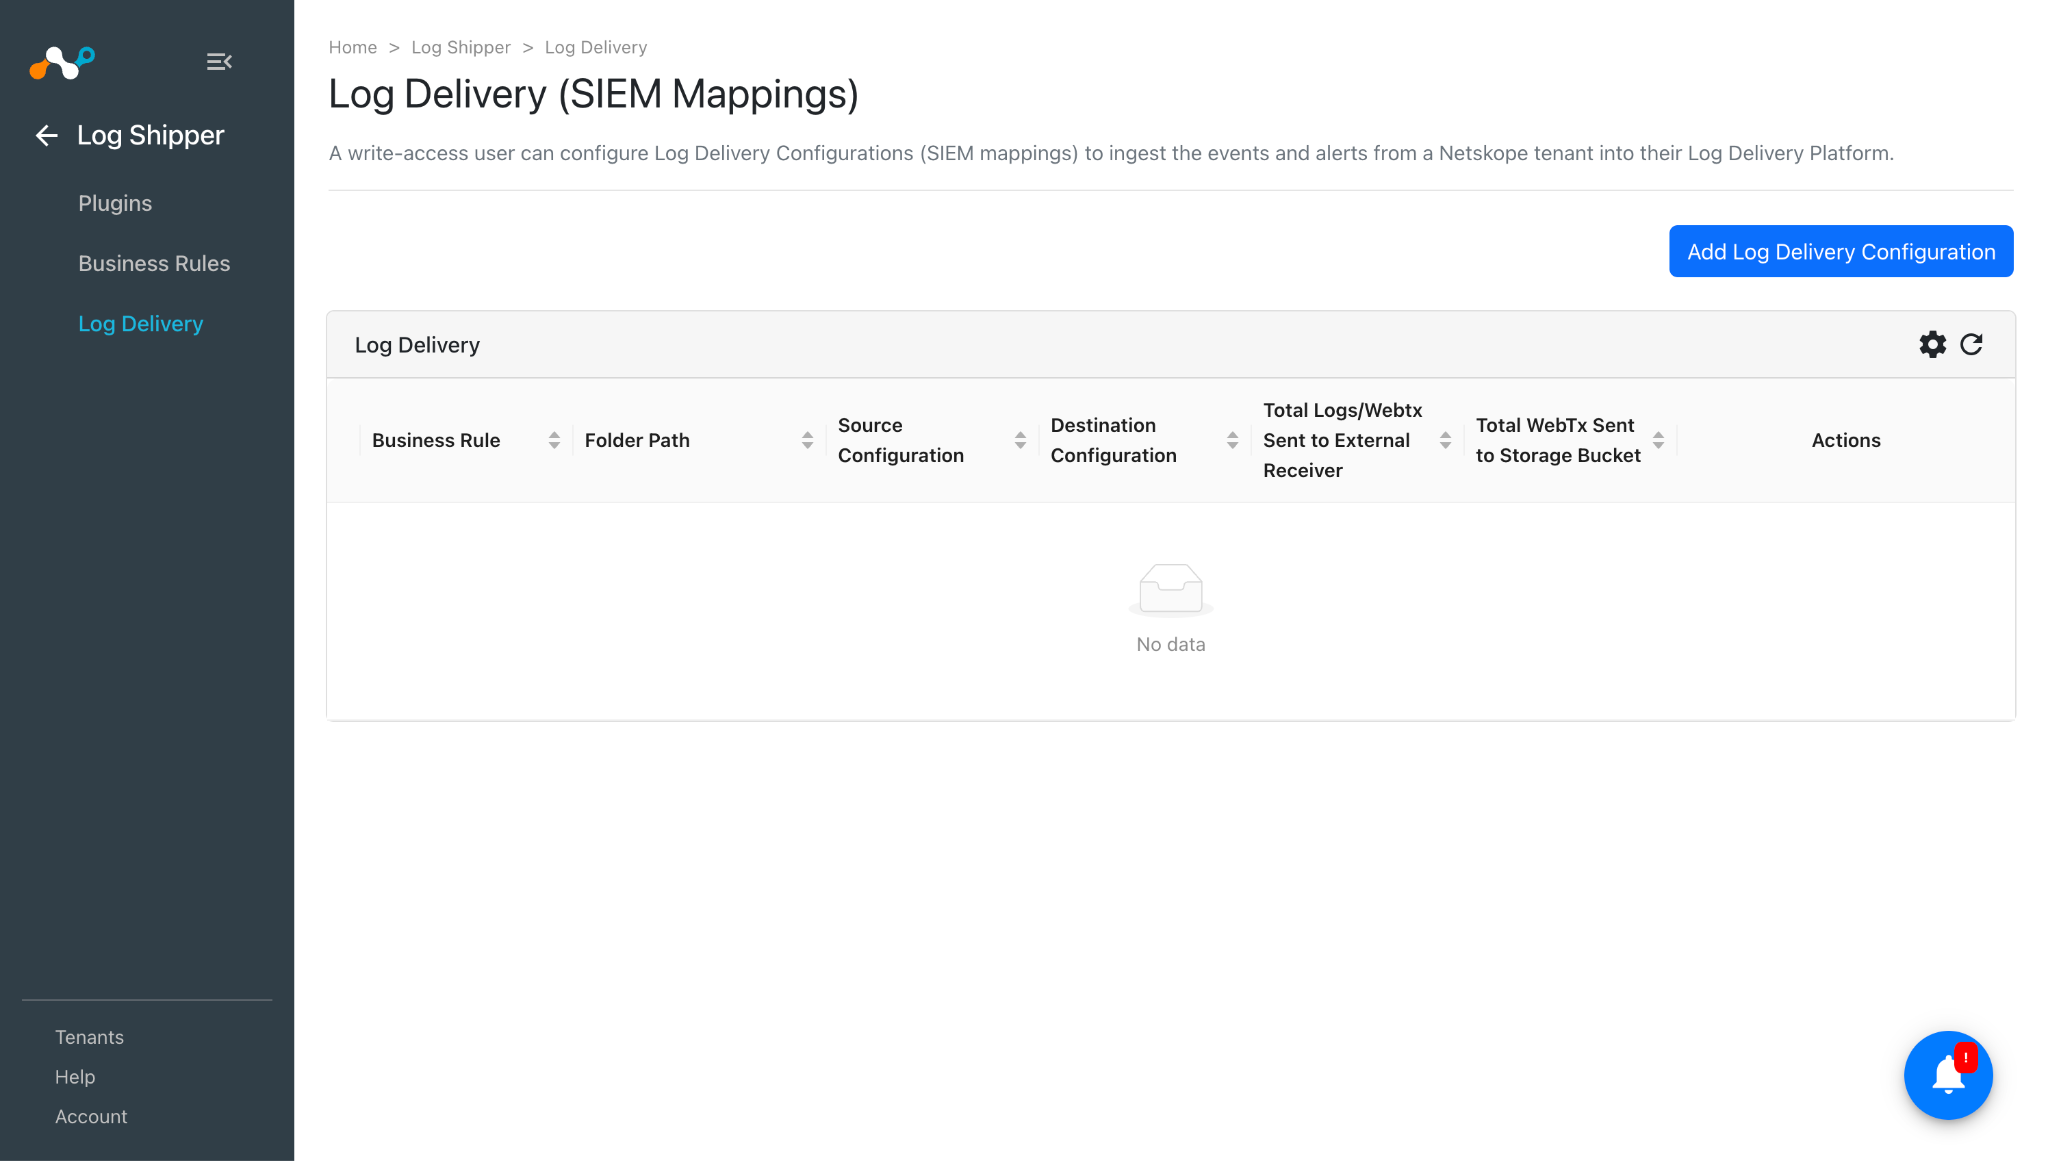
- Go to Log Shipper > Log Delivery and click Add Log Delivery Configuration.
- Select a Source Configuration, Destination Configuration, and Business Rule.
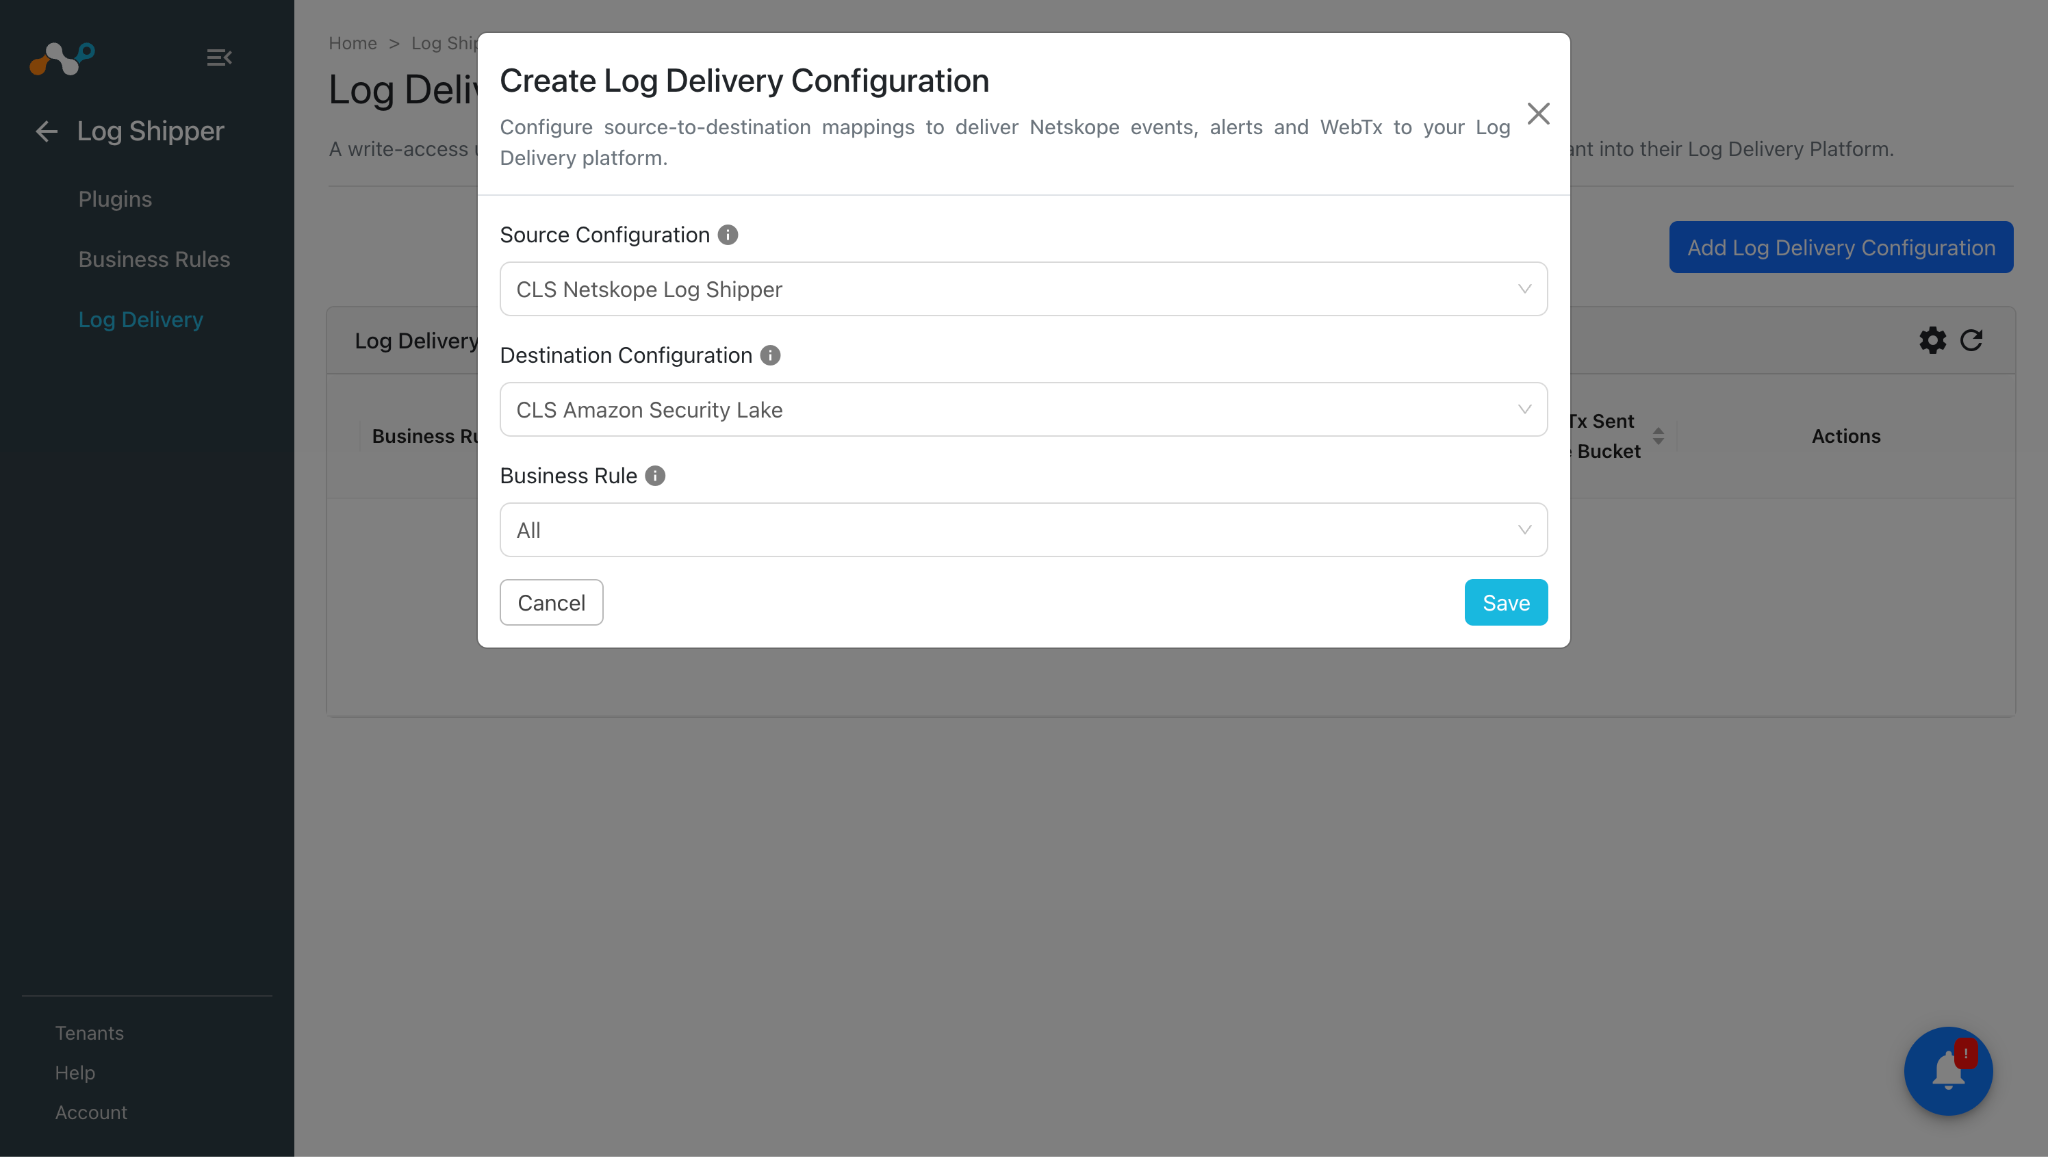
- Click Save.
Note/p>
For Amazon Security Lake, the total Logs/Webtx Sent to External Receiver count will not represent the count of ingested data. This count represents the number of Logs/Alerts/Events/Webtx pulled and stored in the file on Cloud Exchange and later on it will be uploaded to the Security Lake S3 bucket on AWS. Data will not be ingested to the destination if the pulled alert/event/webtx is less than 265 MB size, and then no same type of alert/event is pulled again after 5 minutes.
Validate the Amazon Security Lake Plugin
In order to validate the plugin workflow, you can check from Netskope Cloud Exchange and from AWS.
Validate the Pull
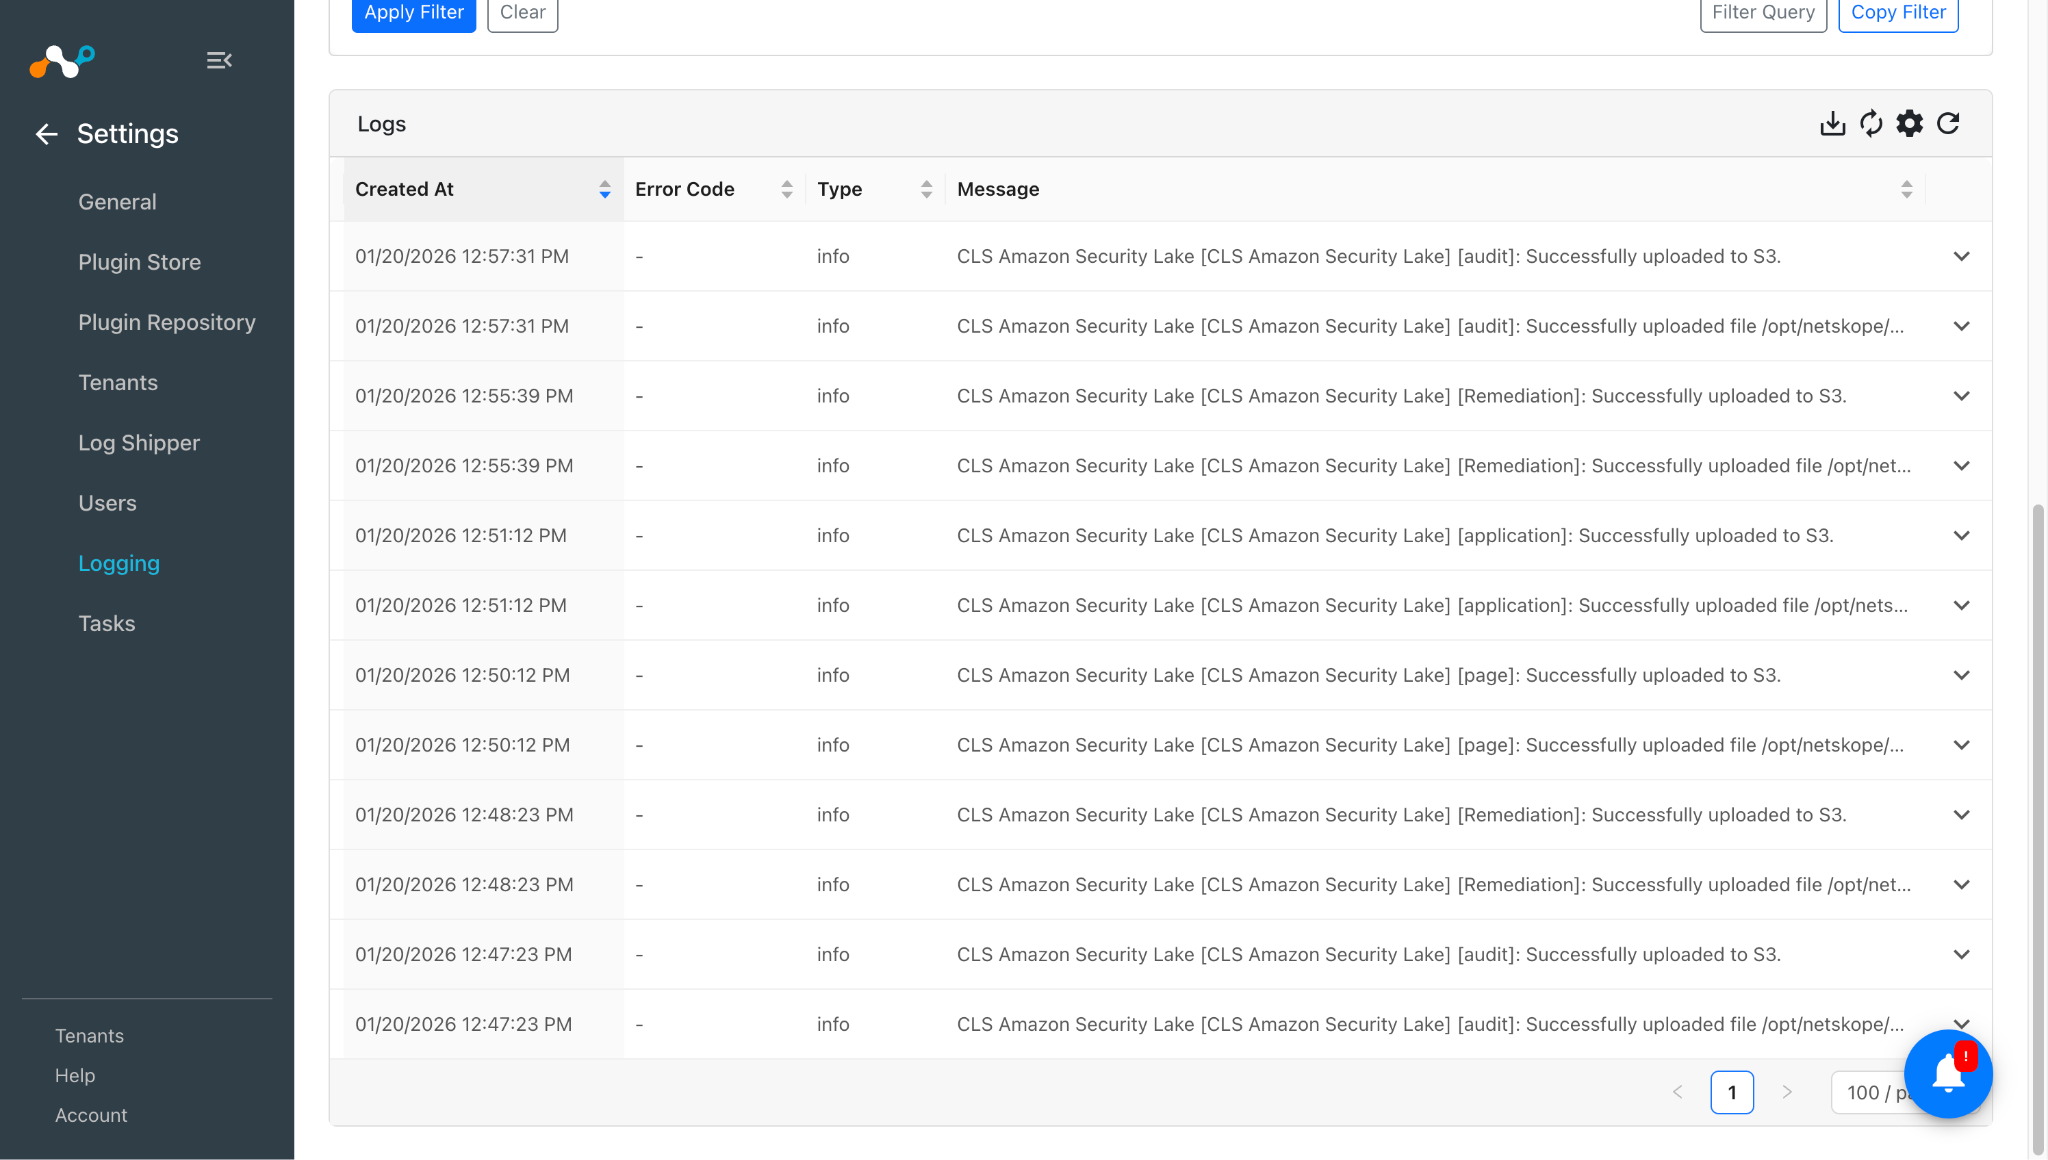
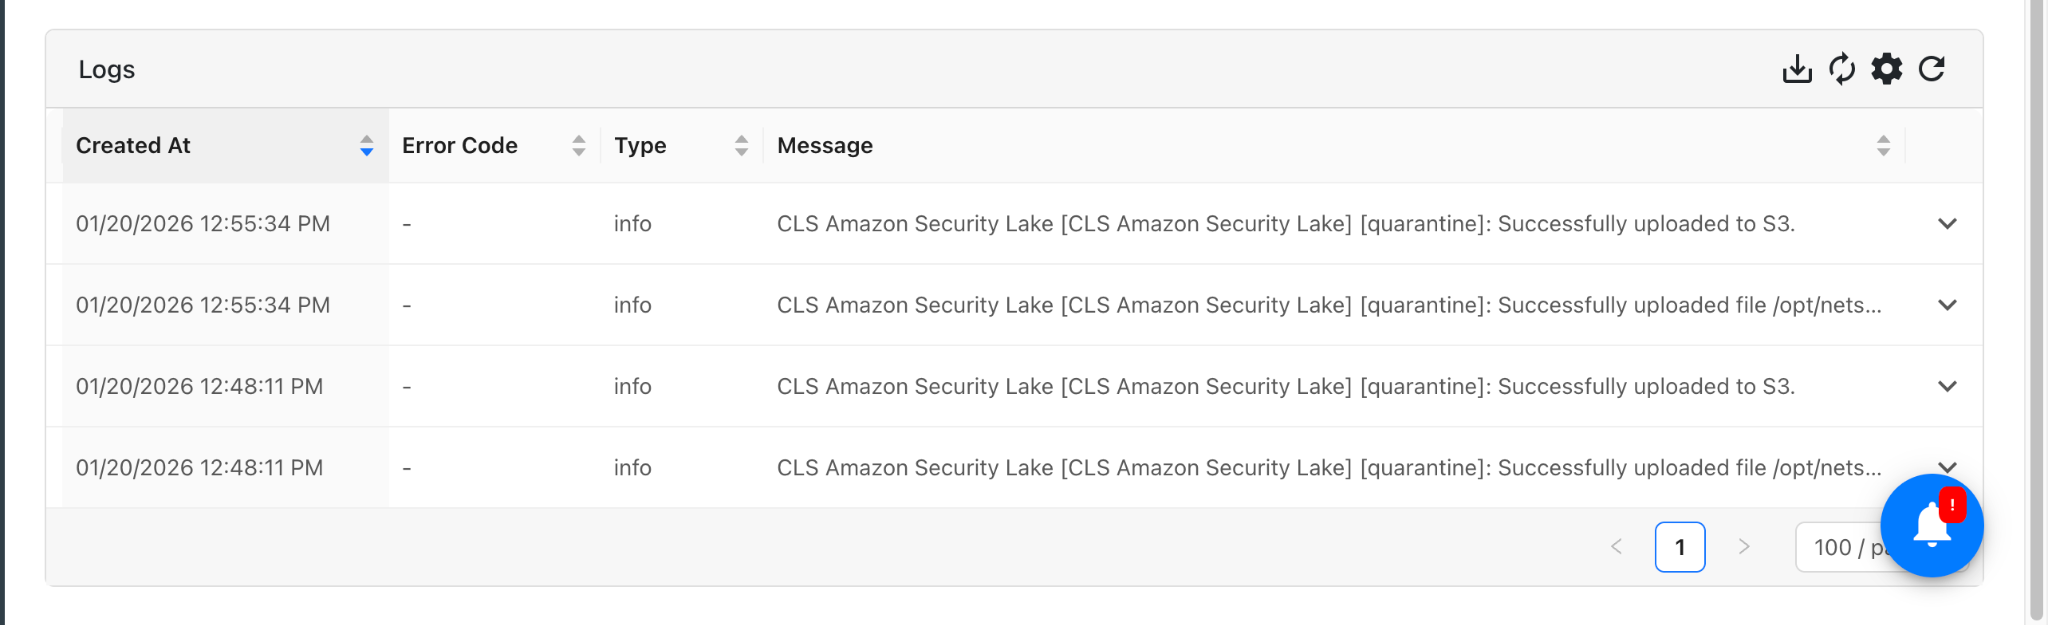
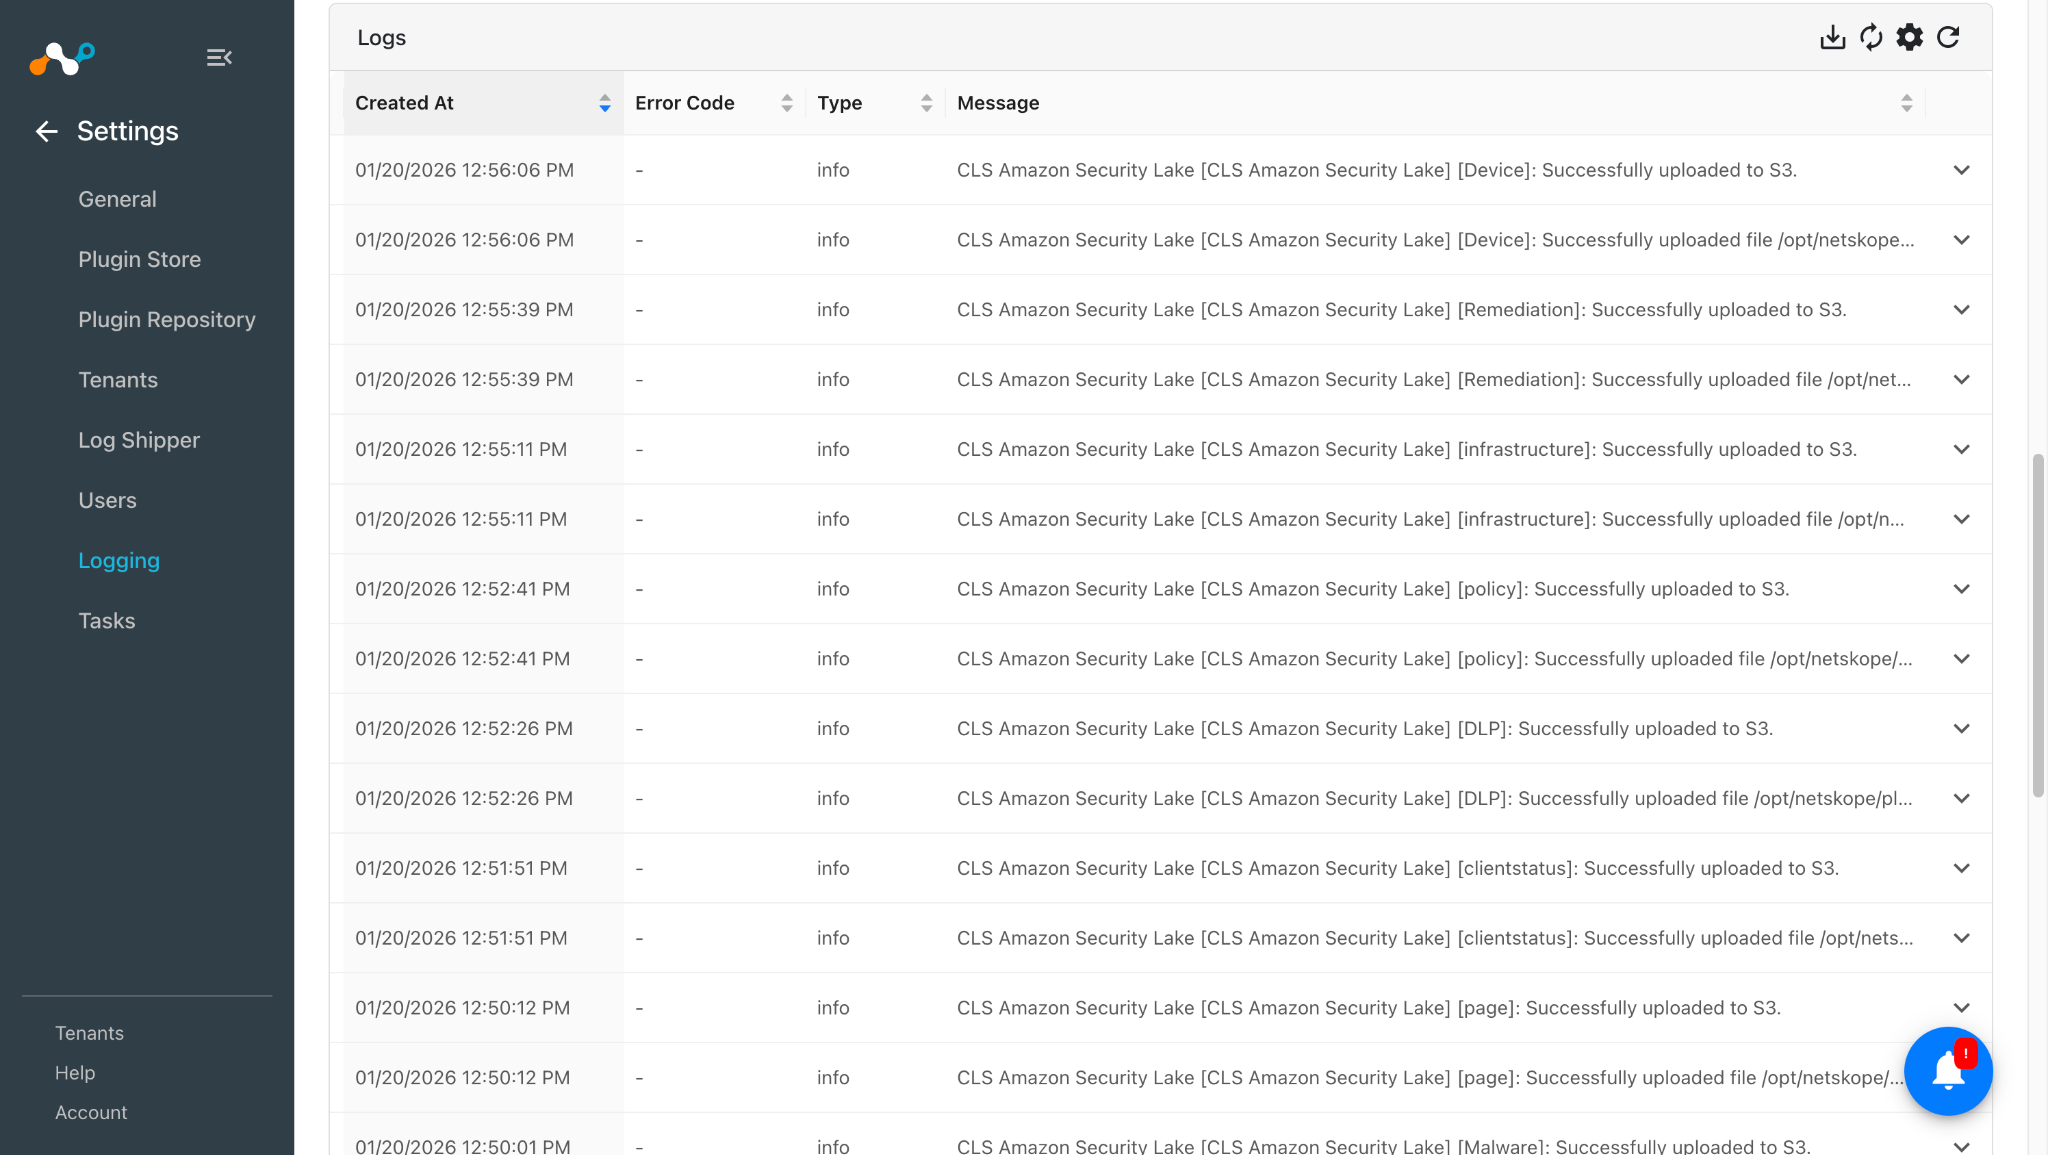
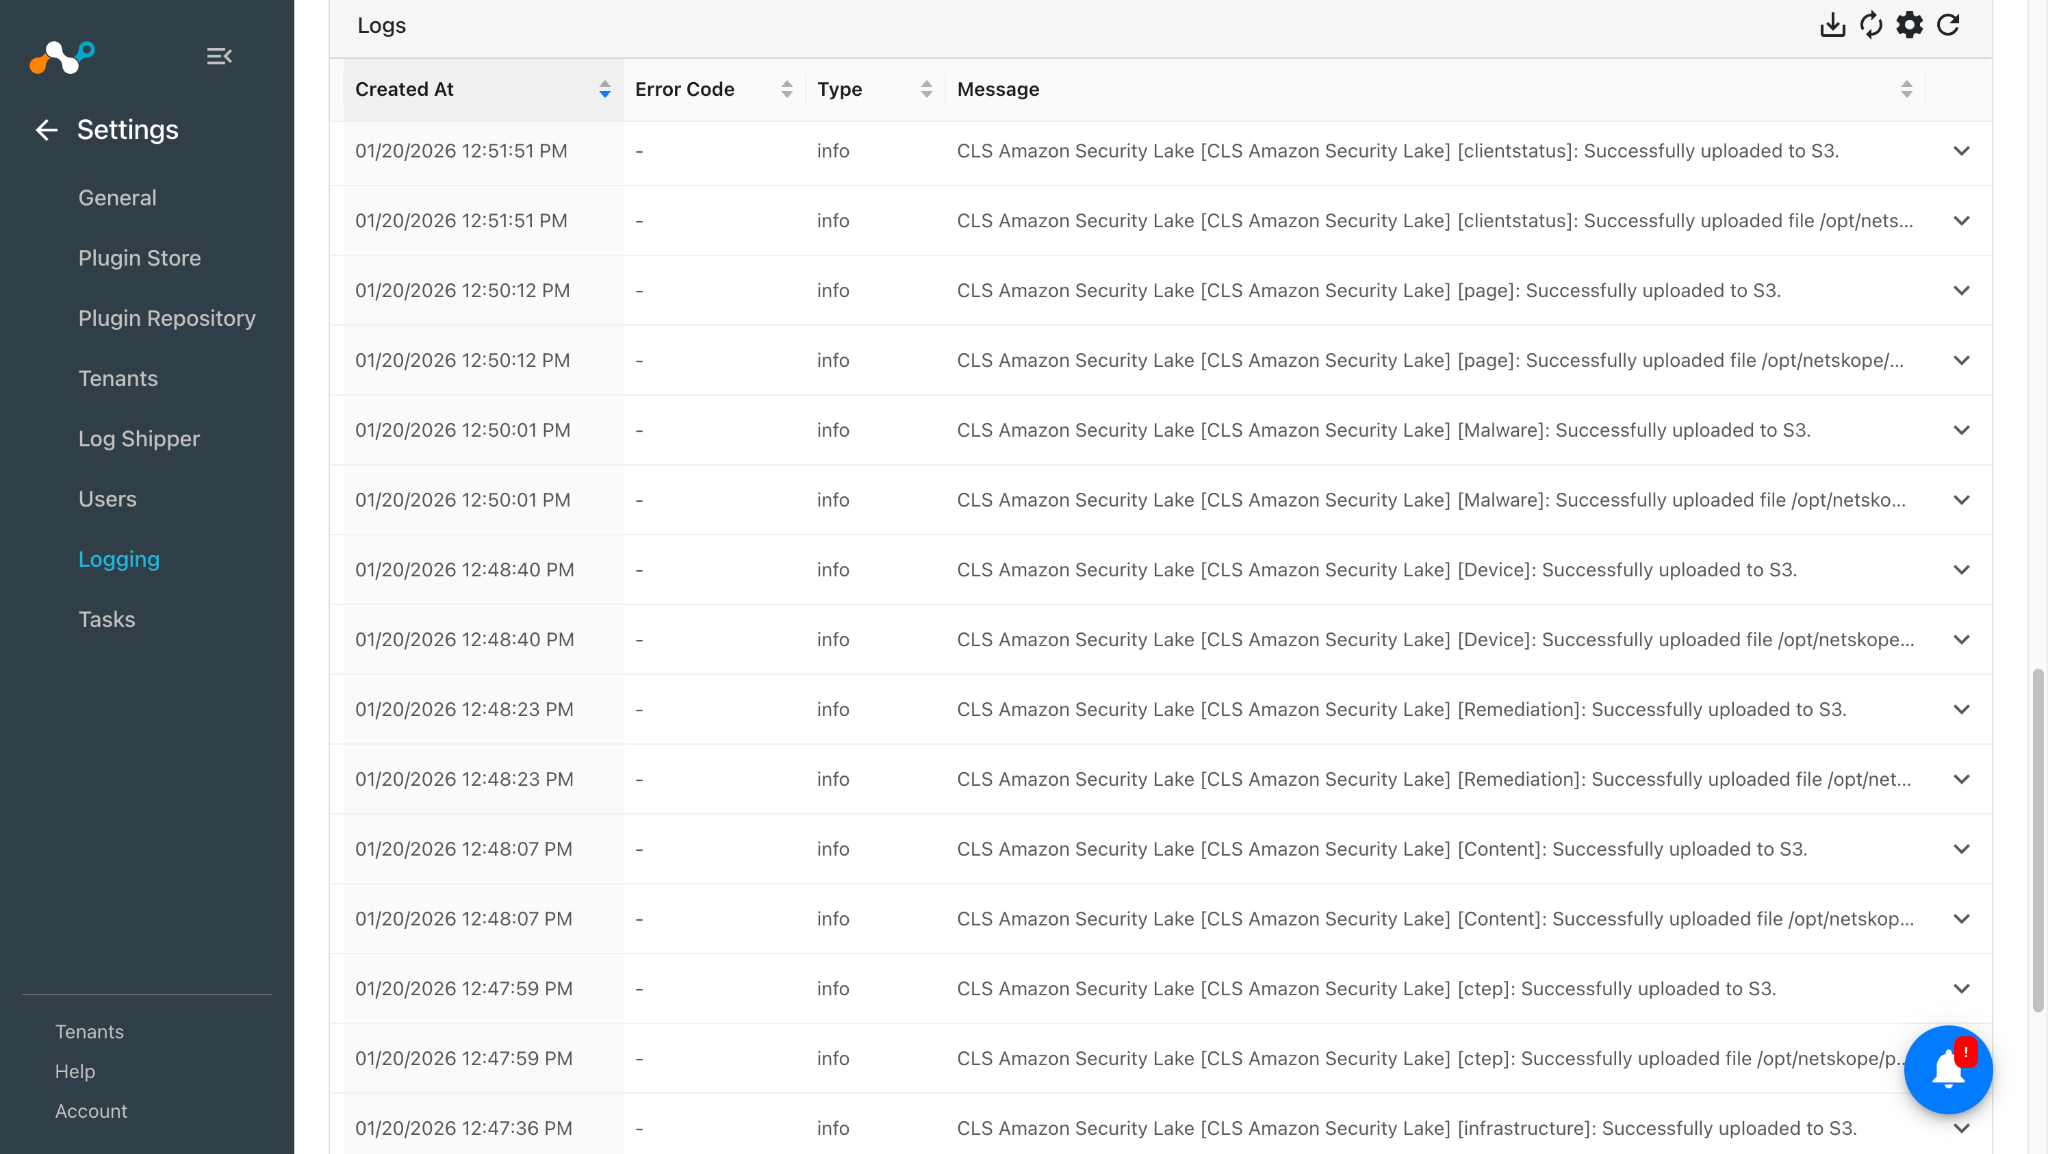
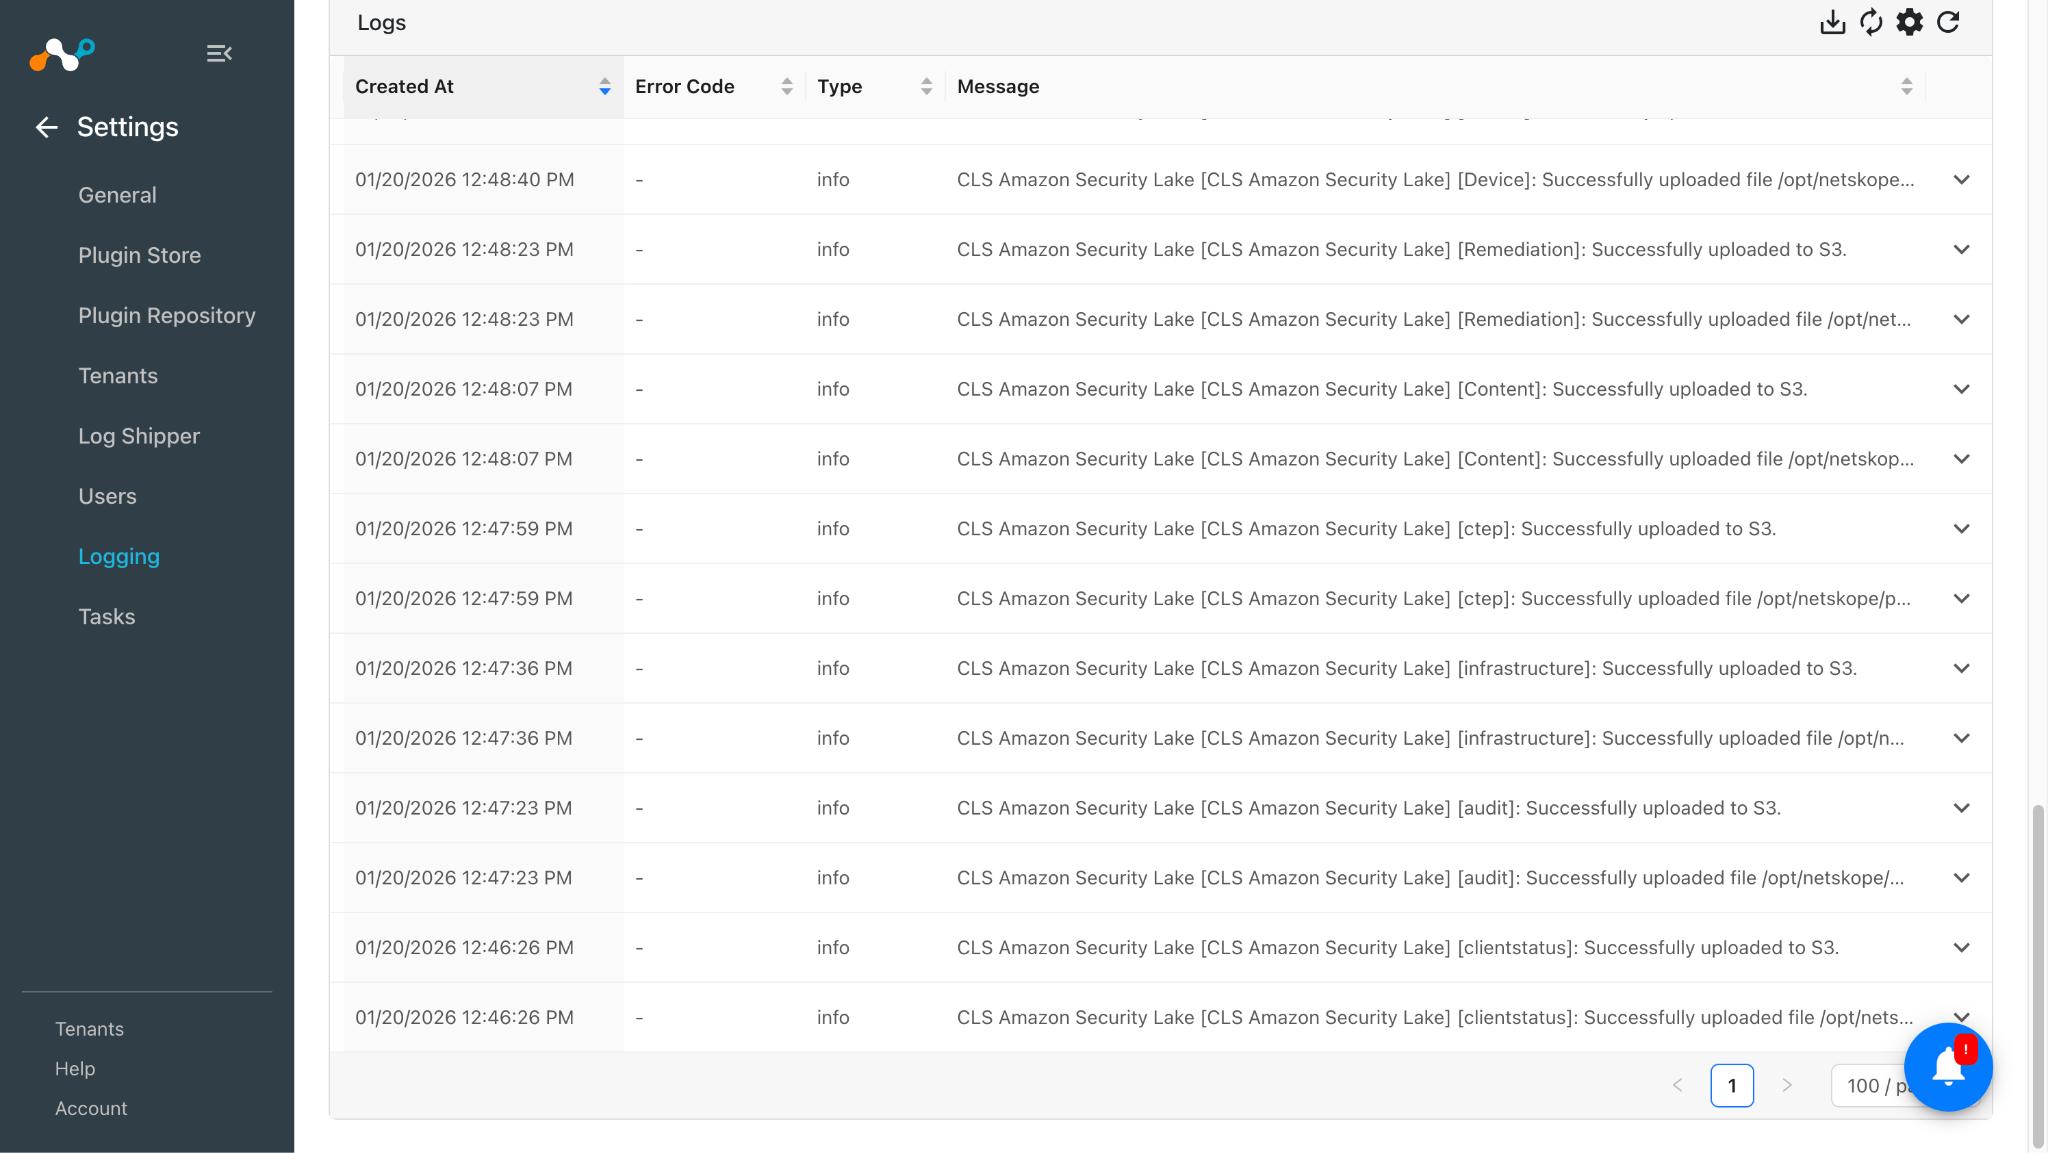
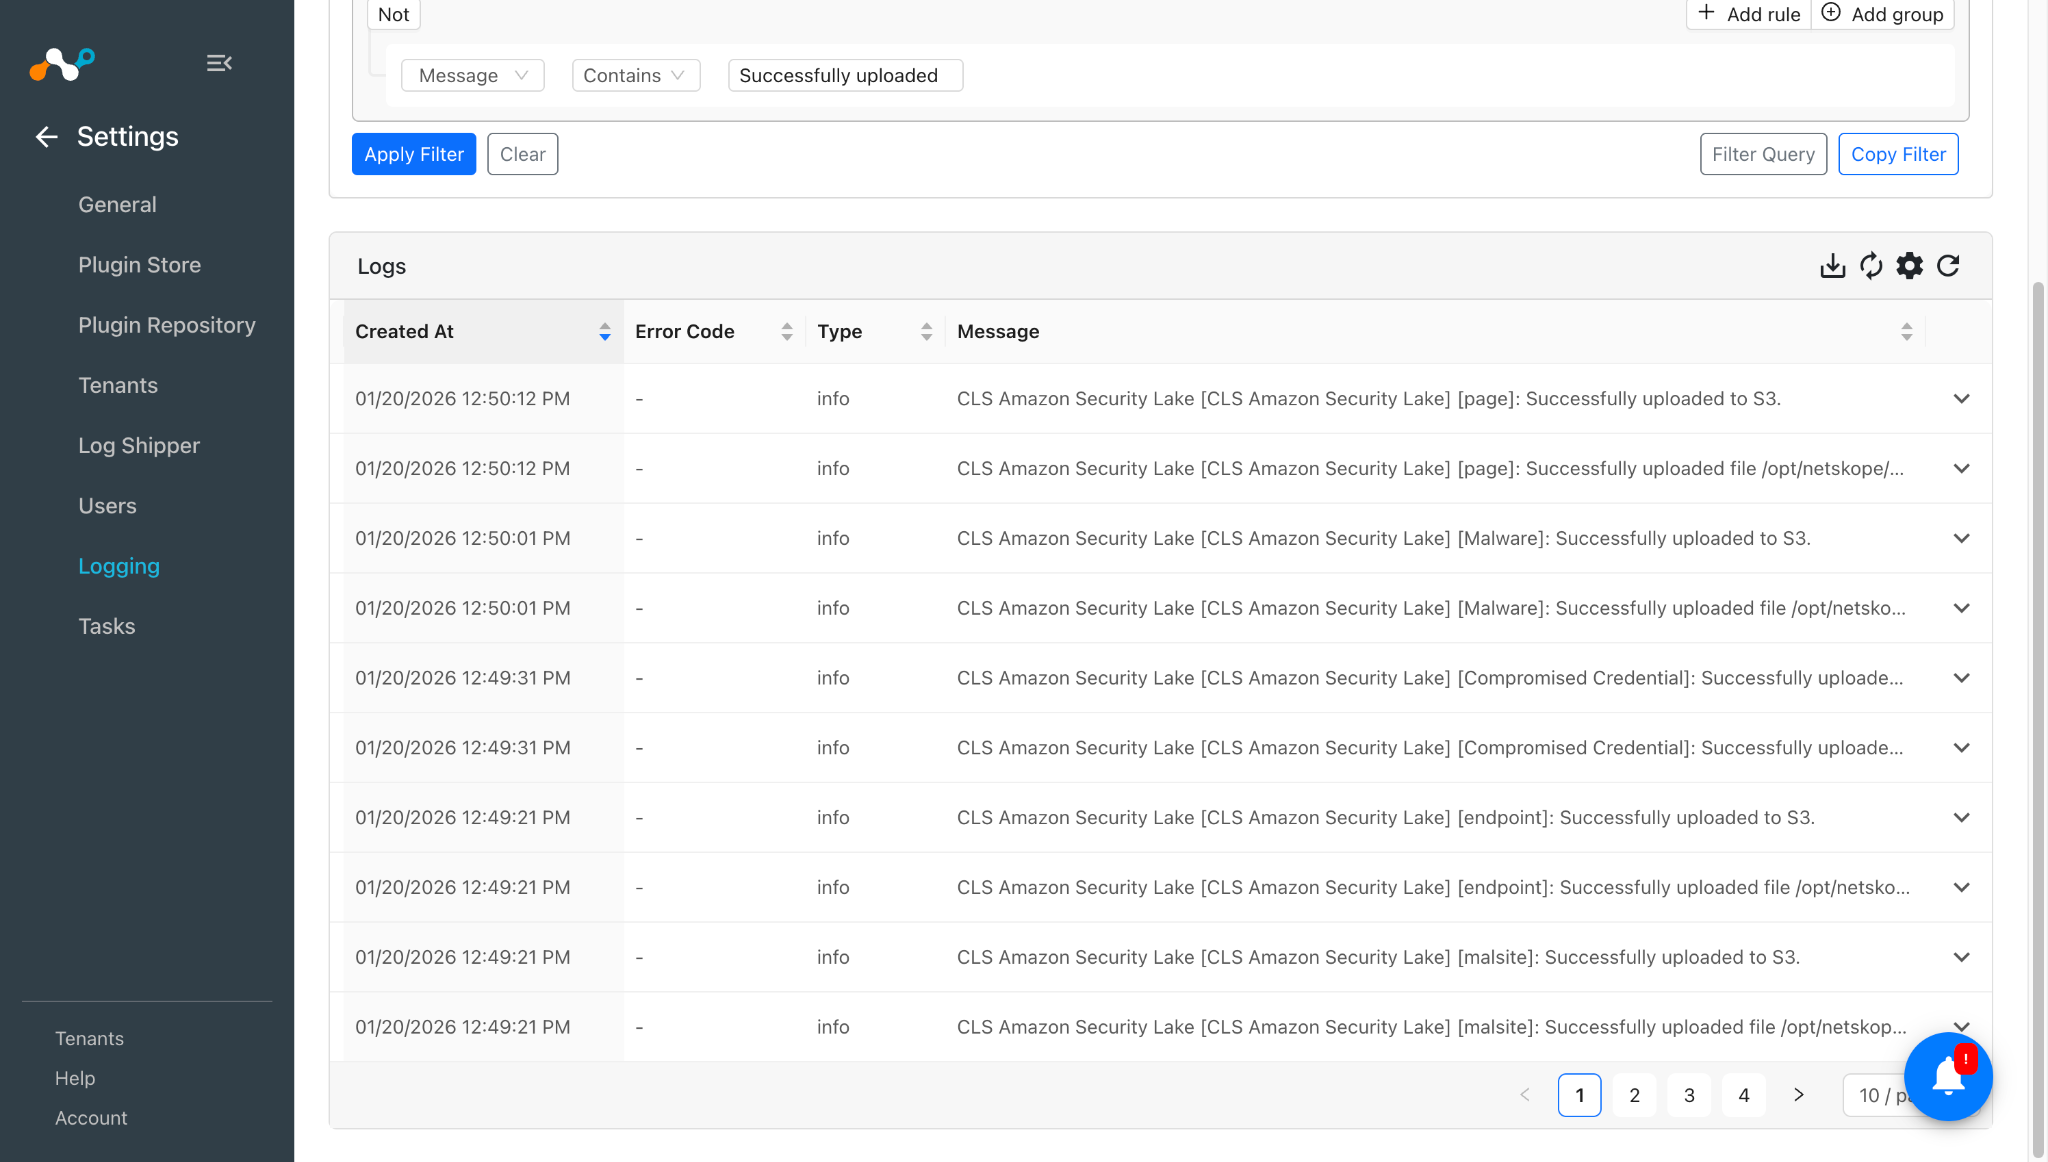
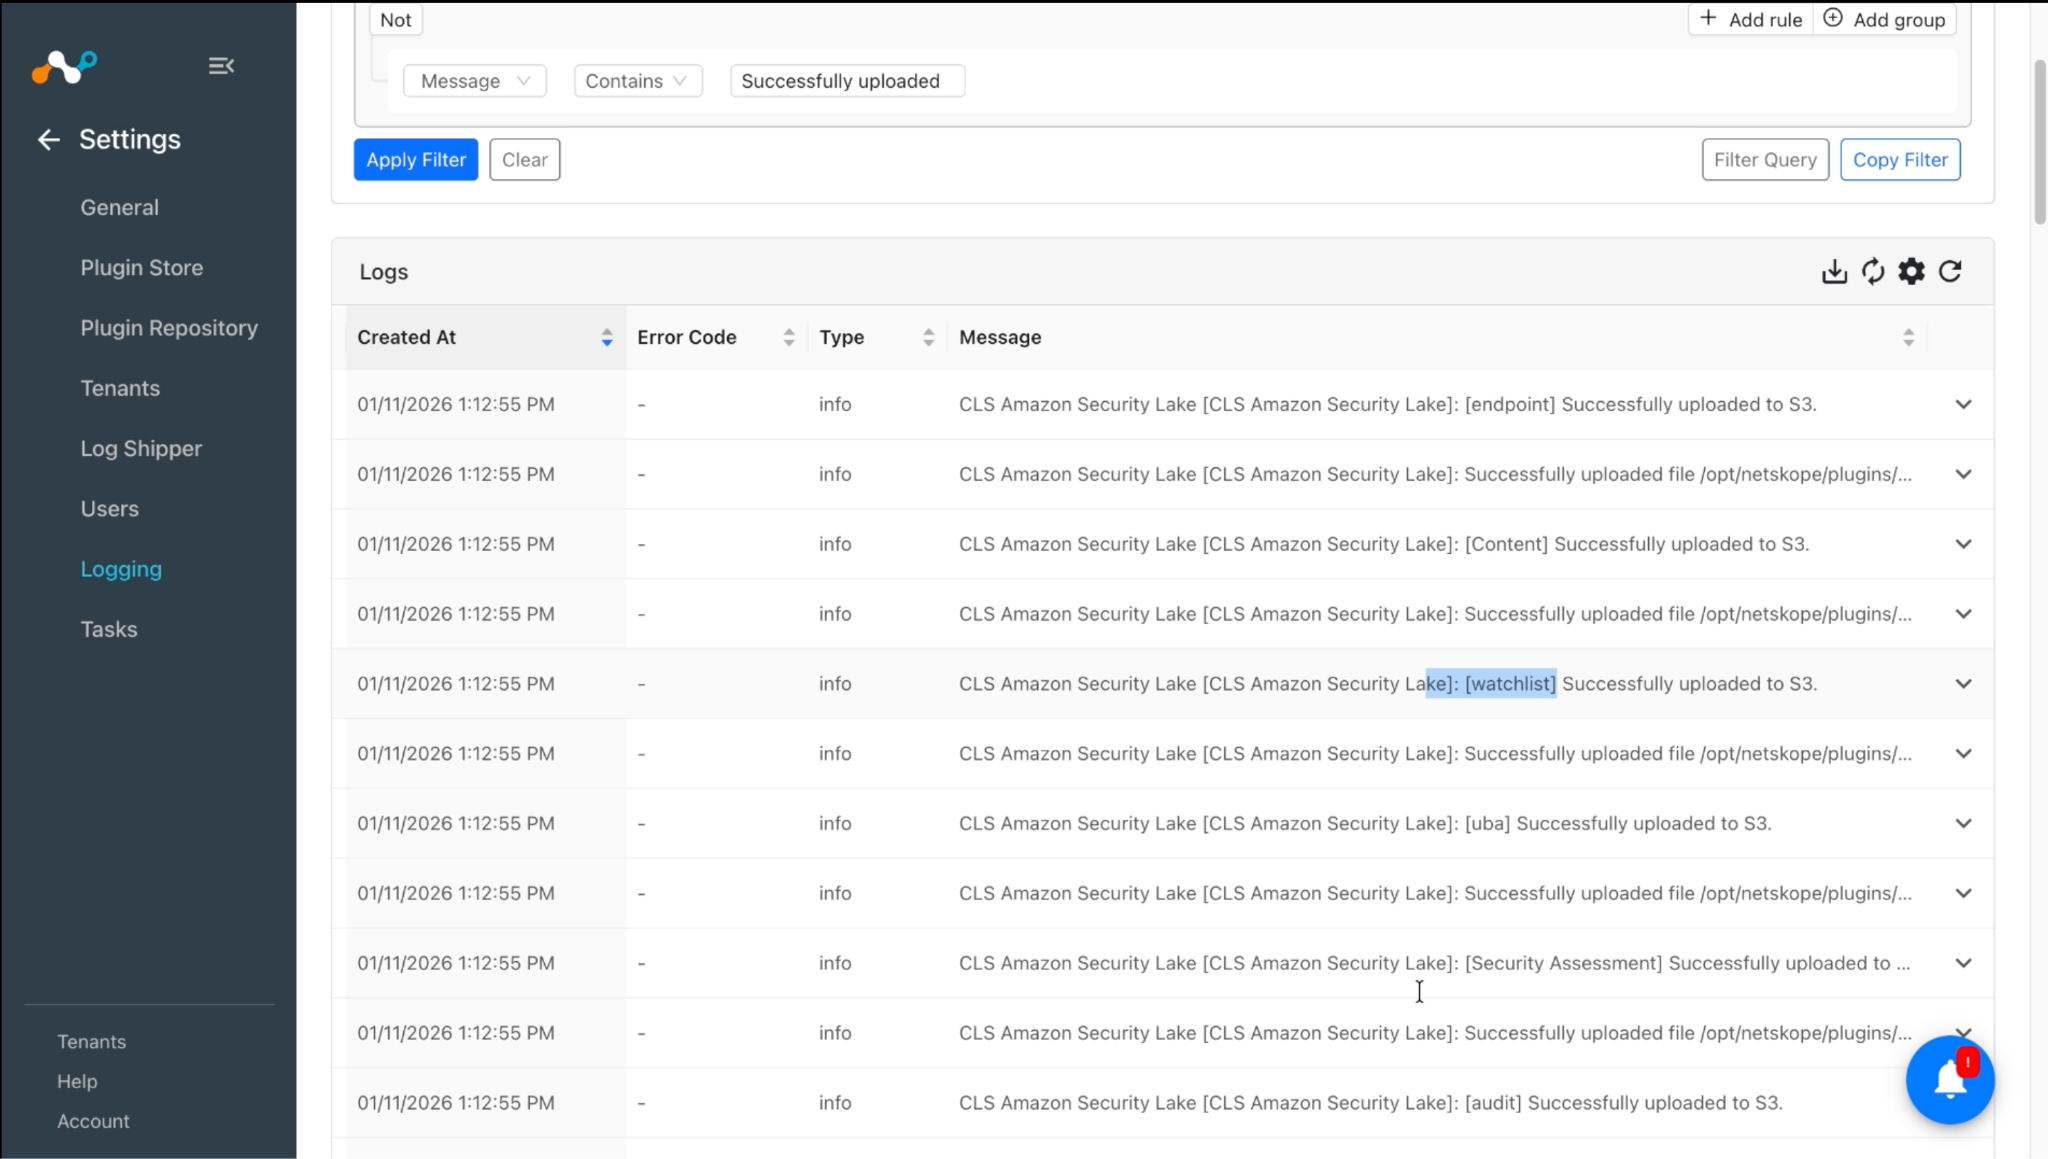
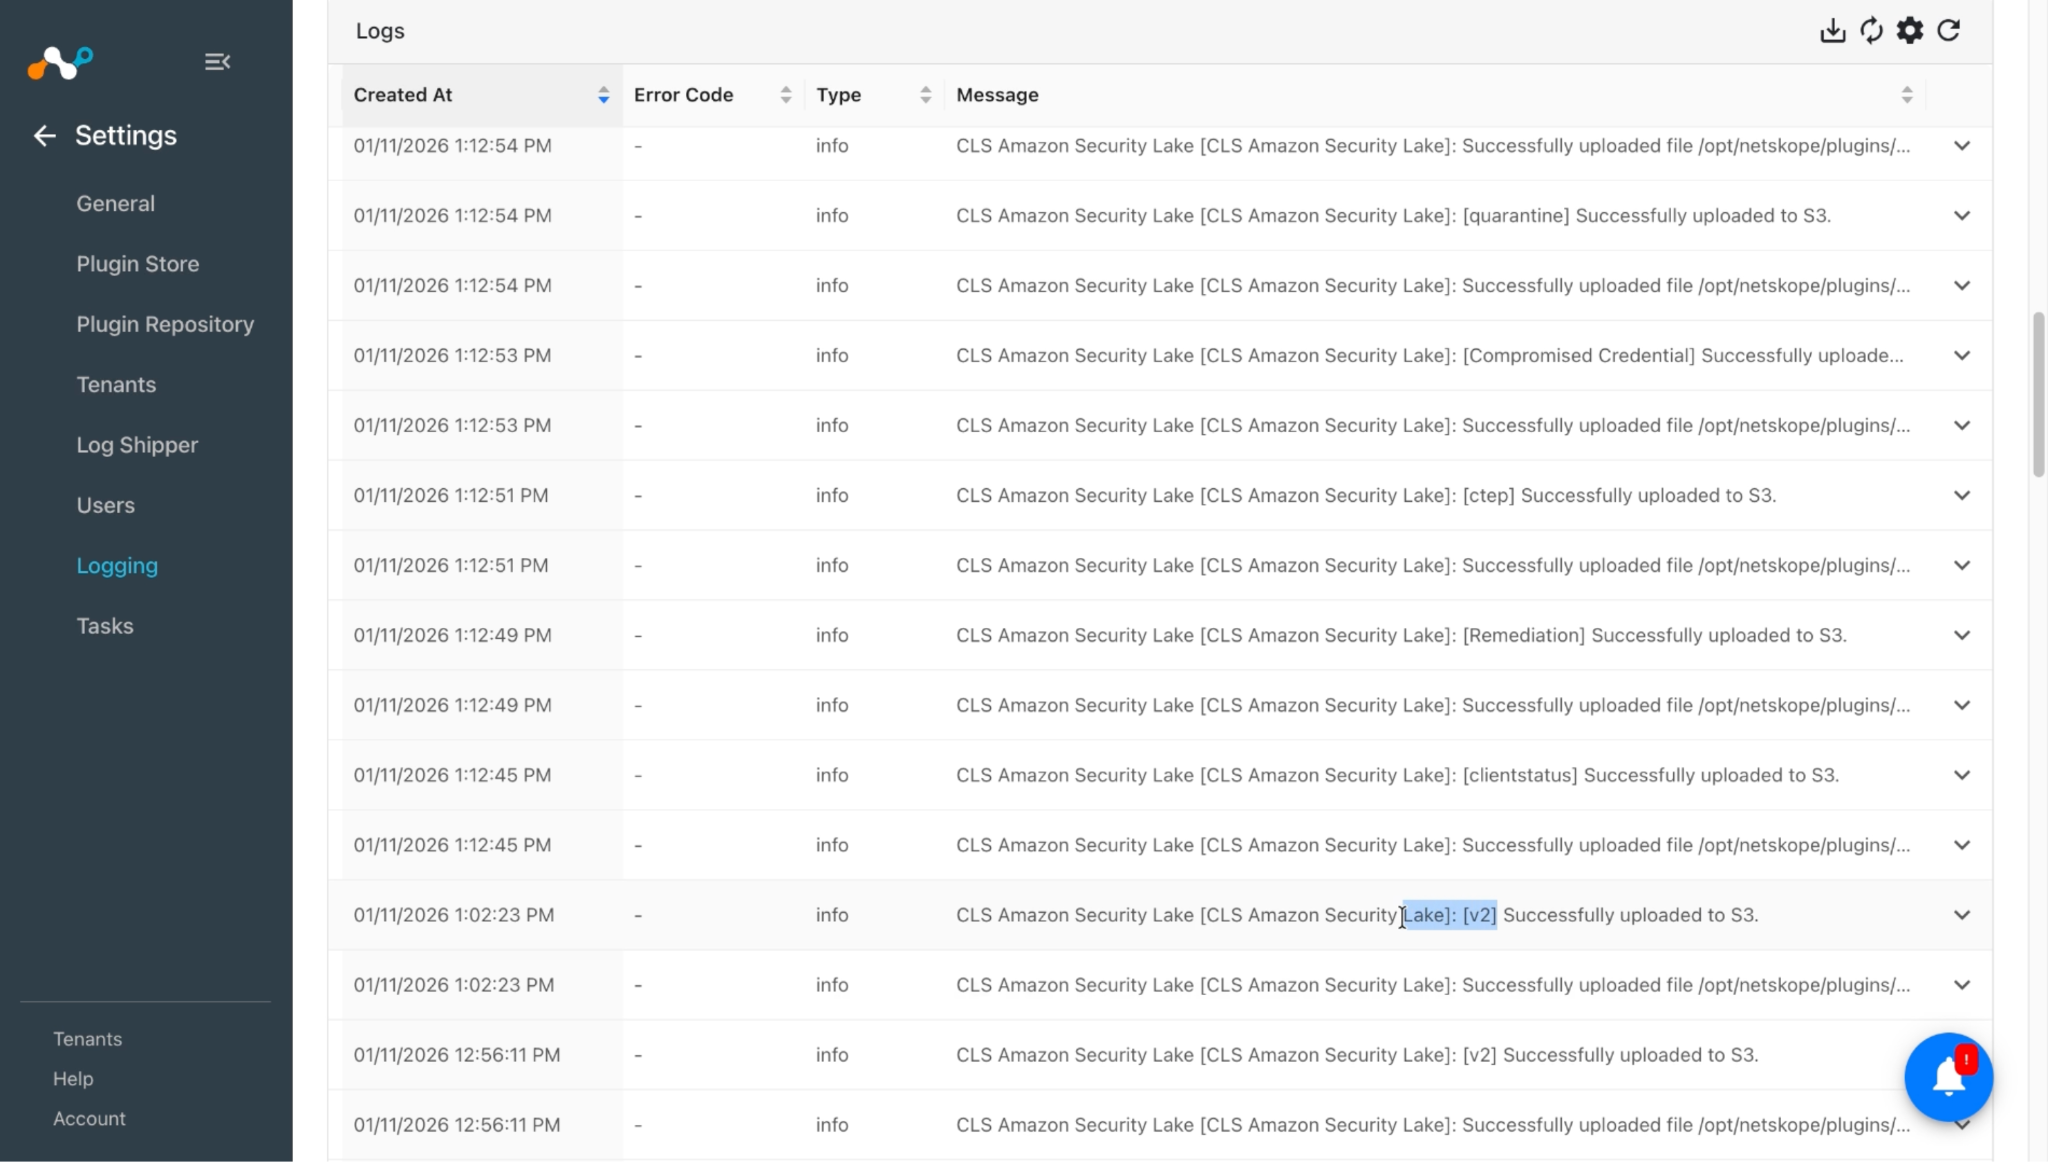
Go to Settings > Logging. Apply the filter as per your requirement. Here are some samples of pulling logs for events, alerts and Webtx log.
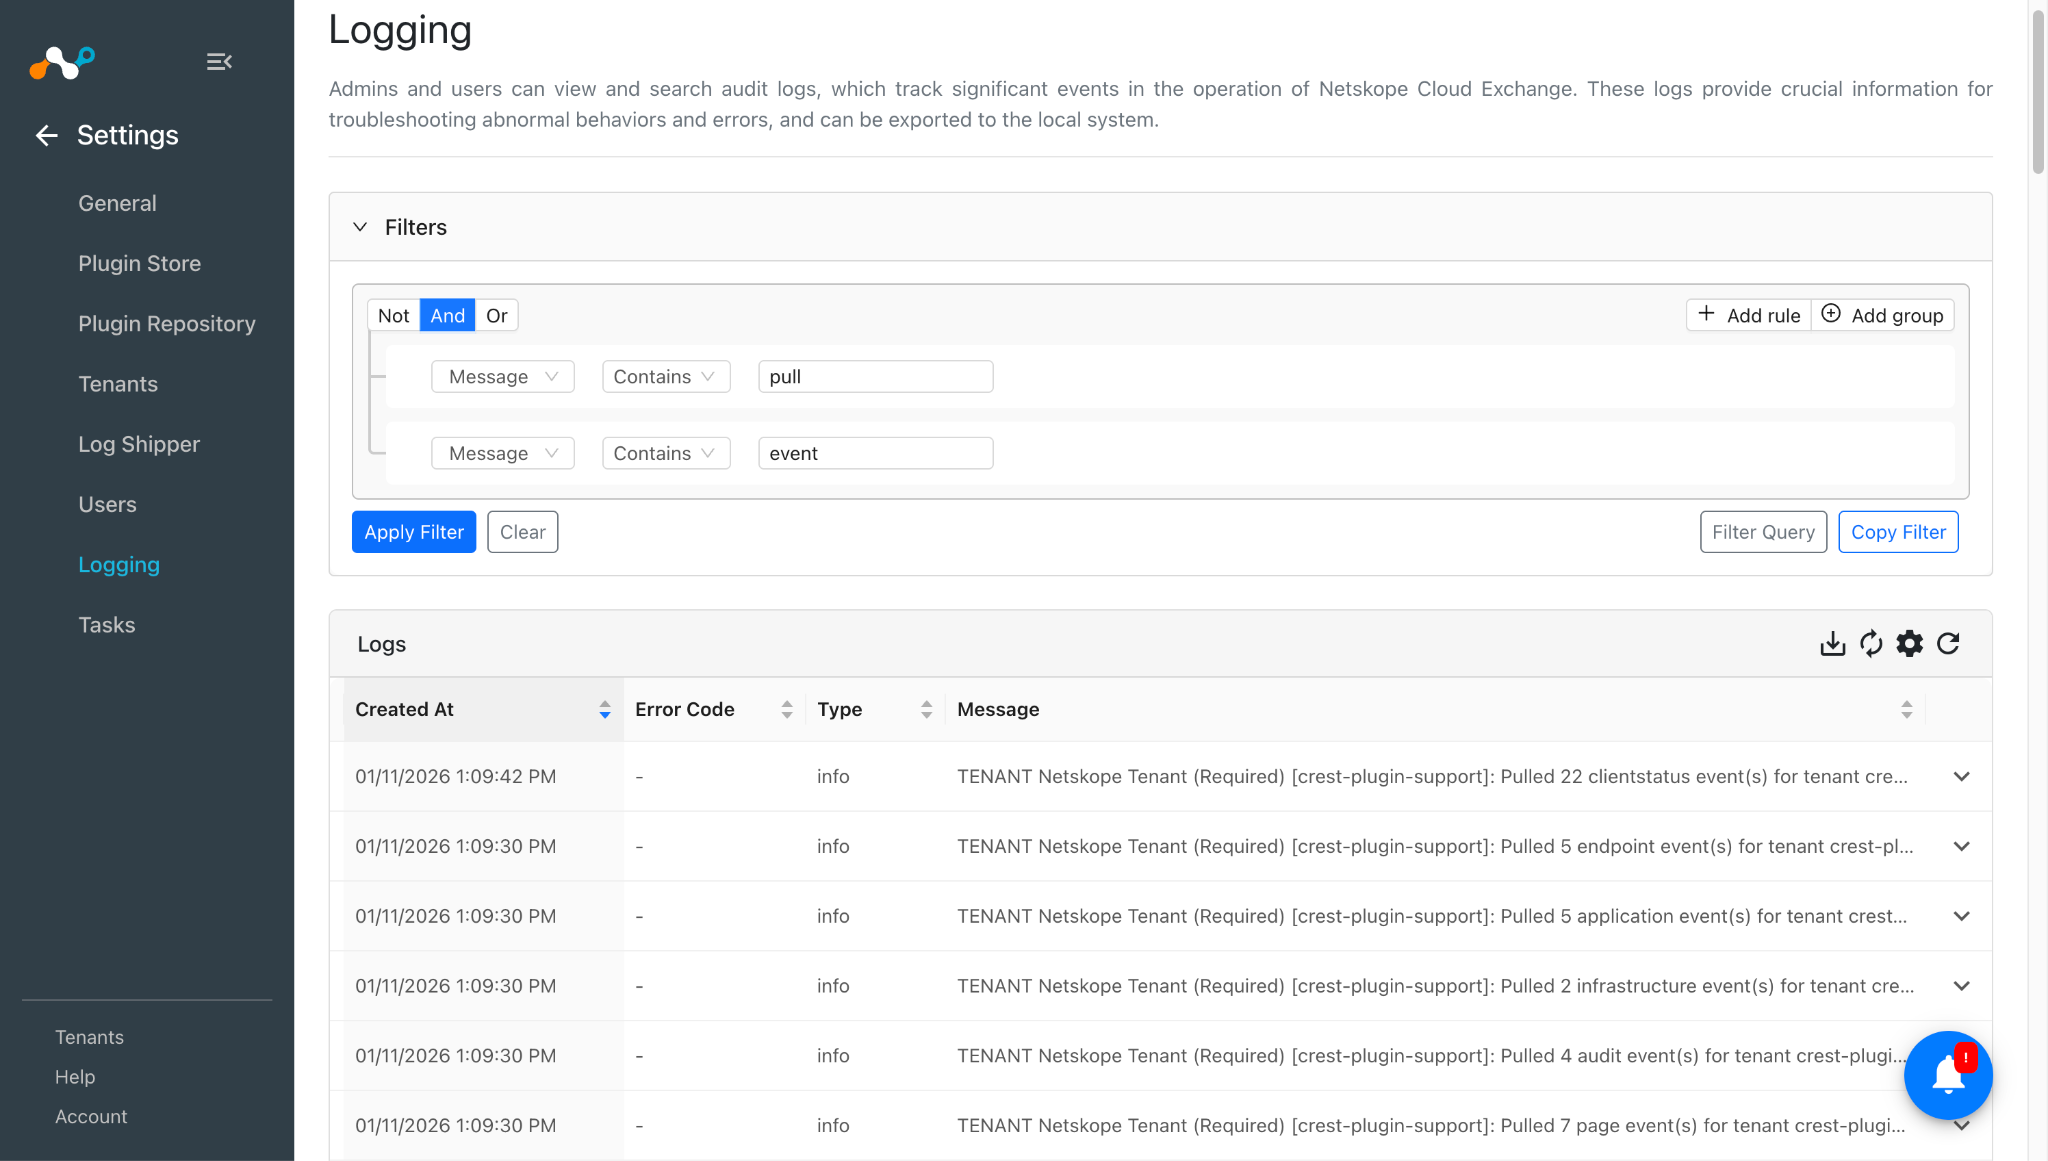
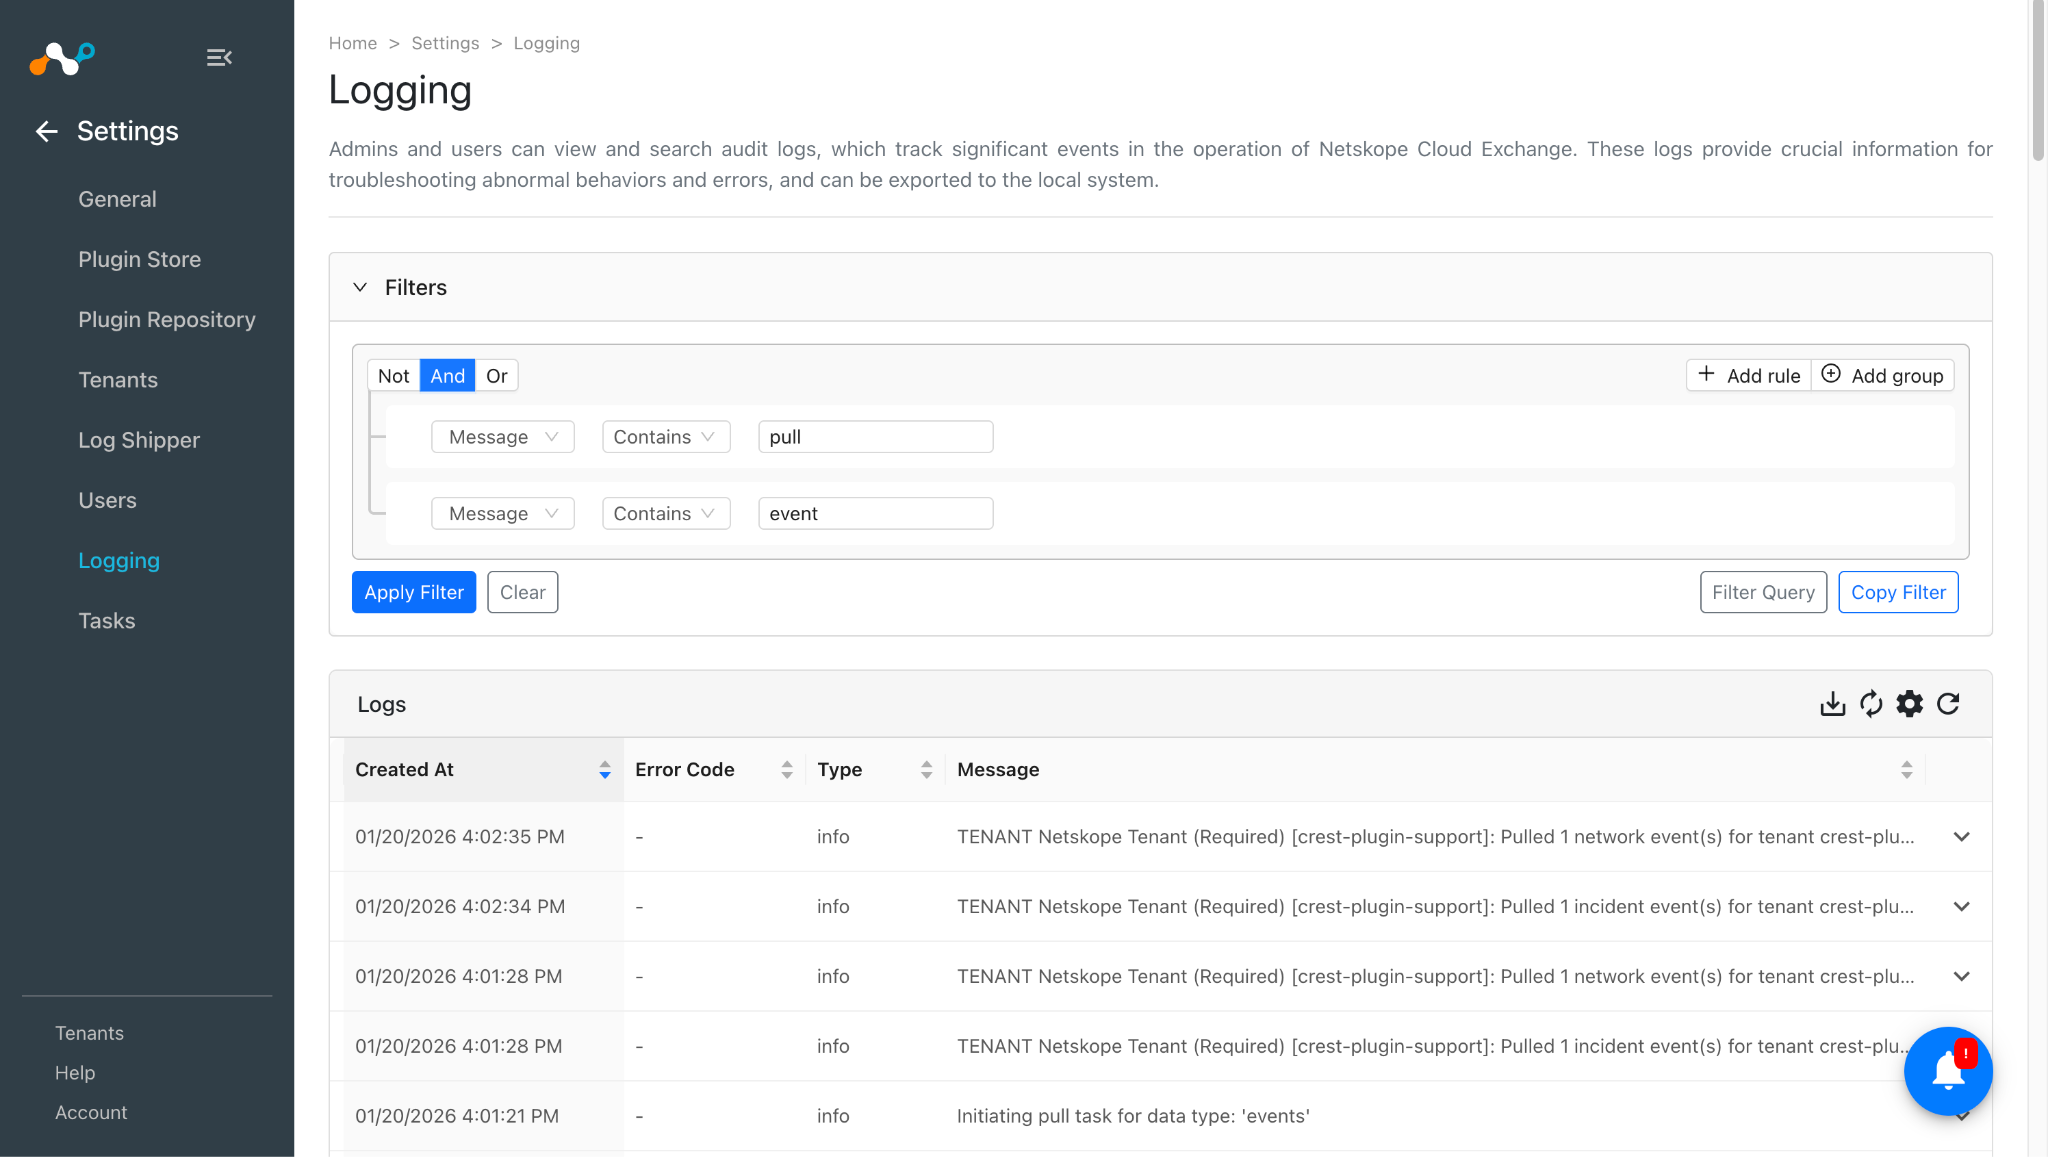
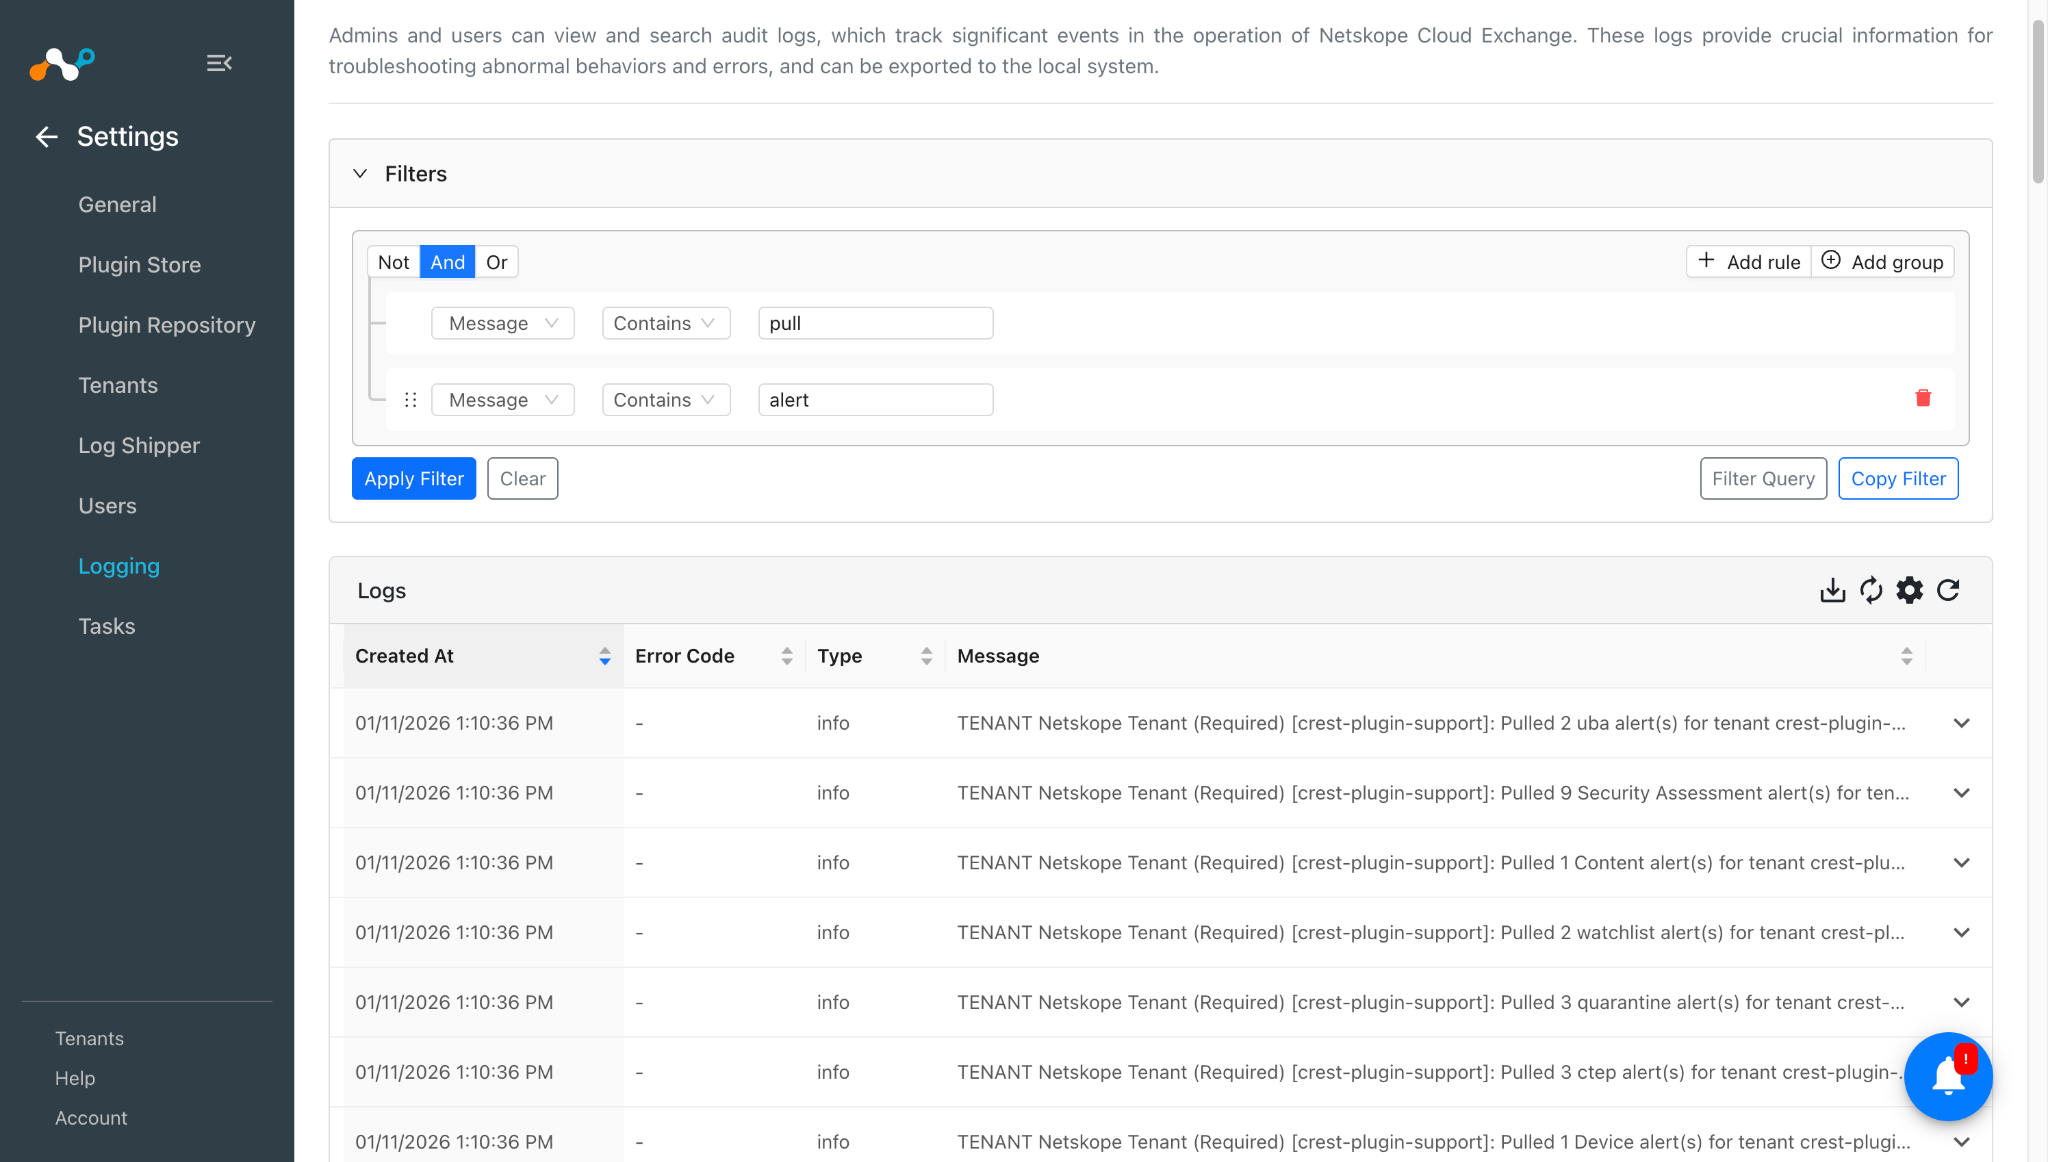
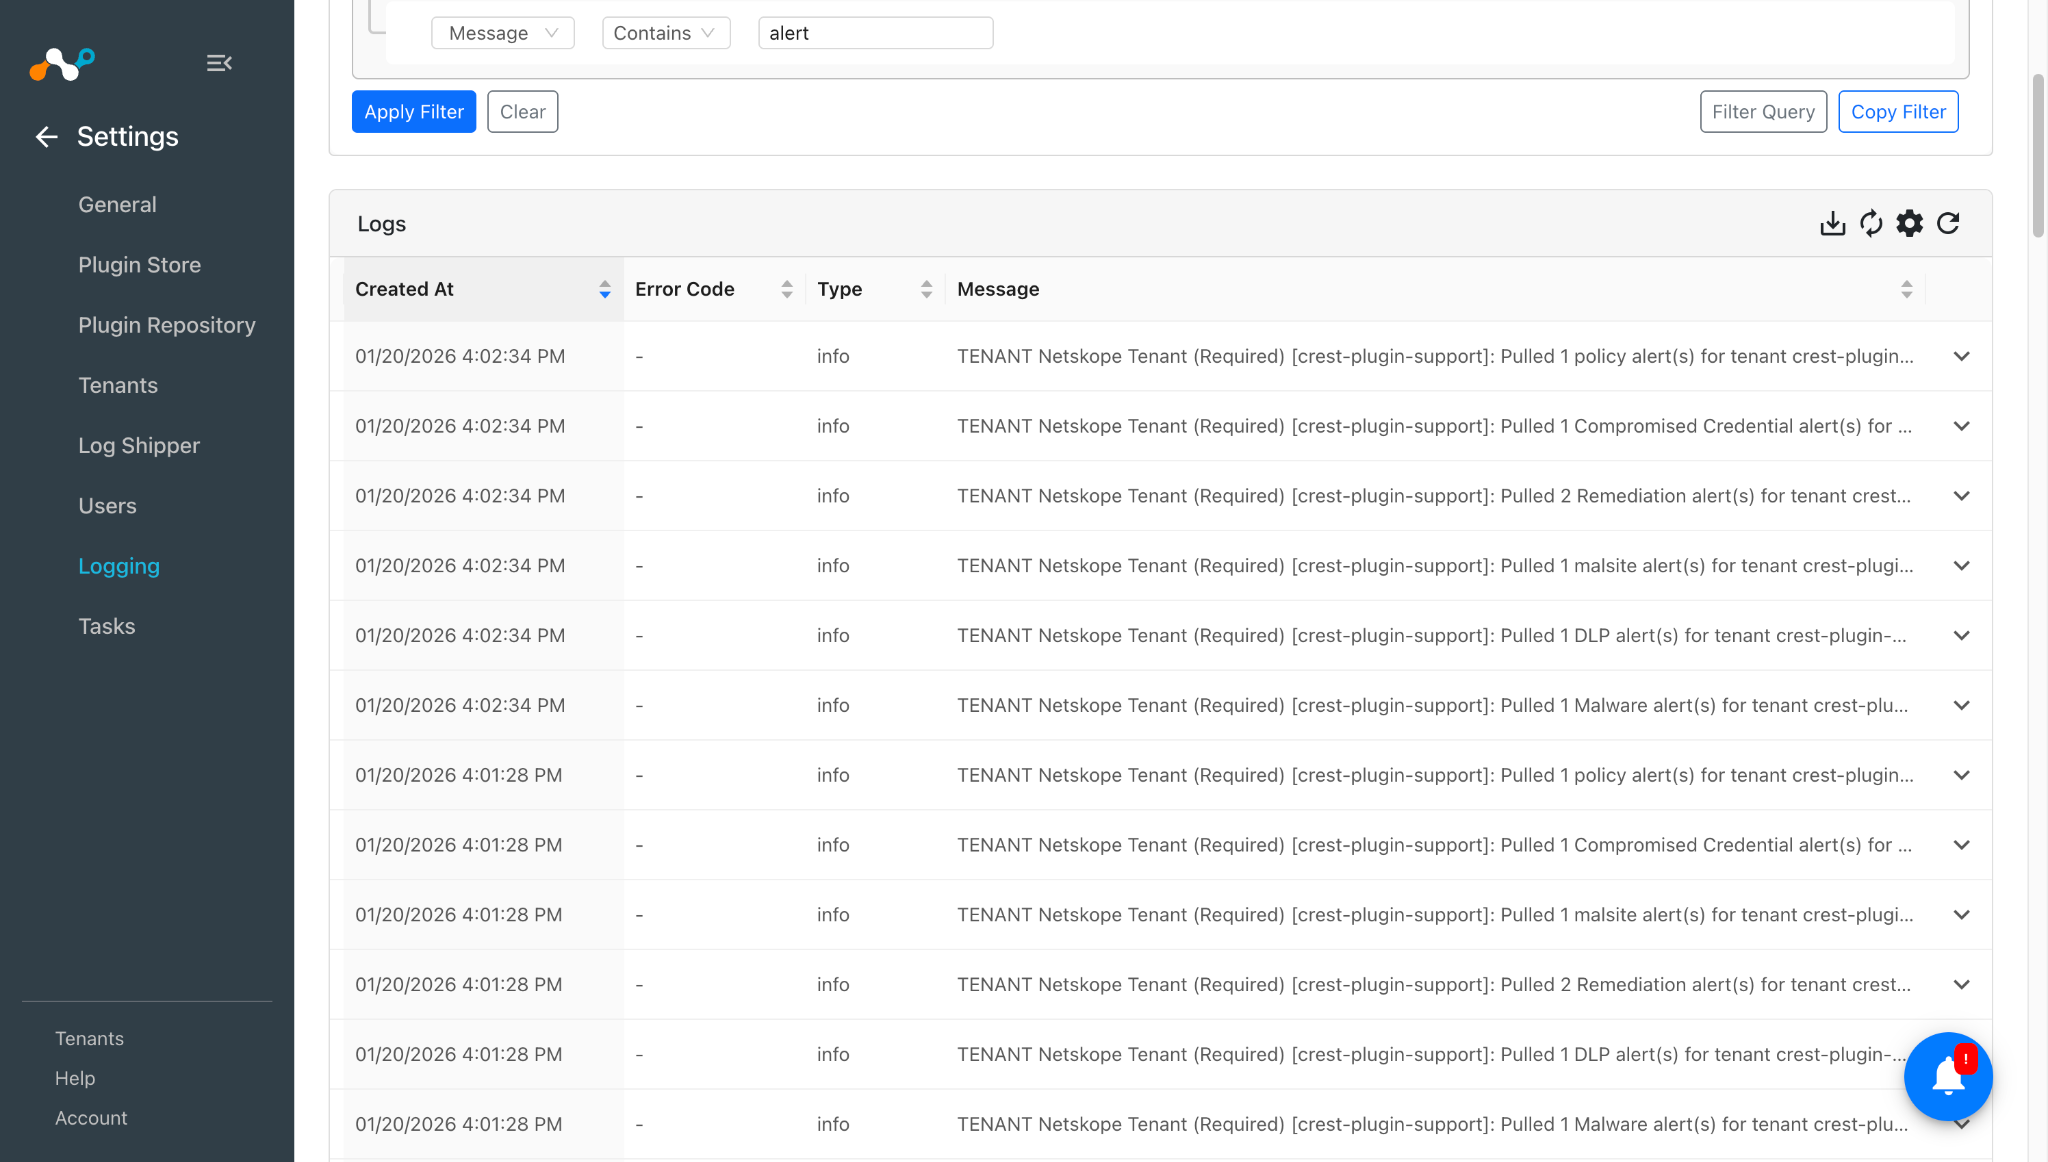
To Validate the ingestion from Cloud Exchange
- Go to Settings > Logging. Apply the filter per your requirements. Example: message Like “[CLS Amazon Security Lake]” to check the logs related to the plugin.
- You can search the logs for verifying the successful ingestion:
CLS Amazon Security Lake [CLS Amazon Security Lake]: [<alert/event name>] Successfully uploaded to S3. Note that for WebTx use <alert/event name> as v2.
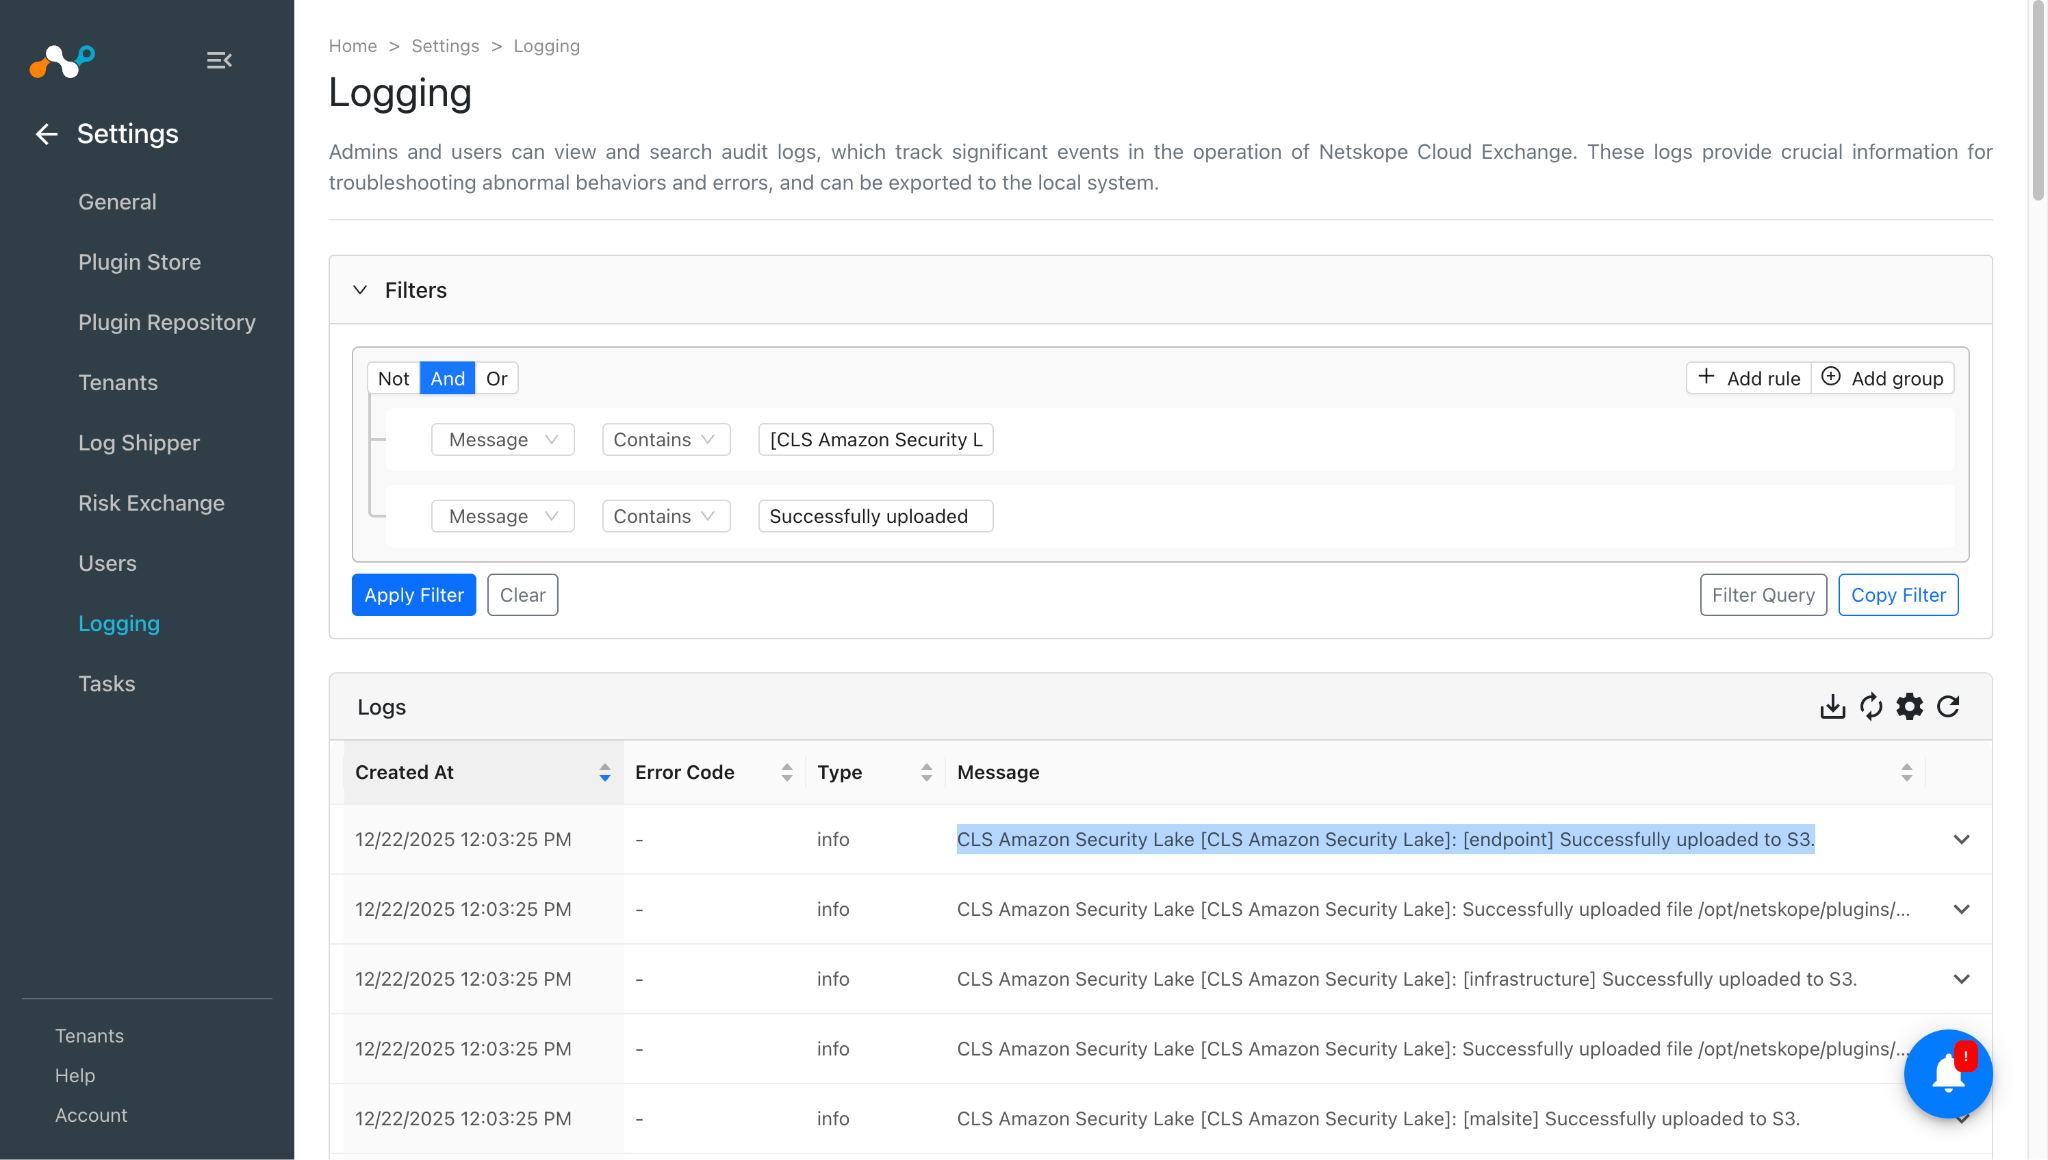
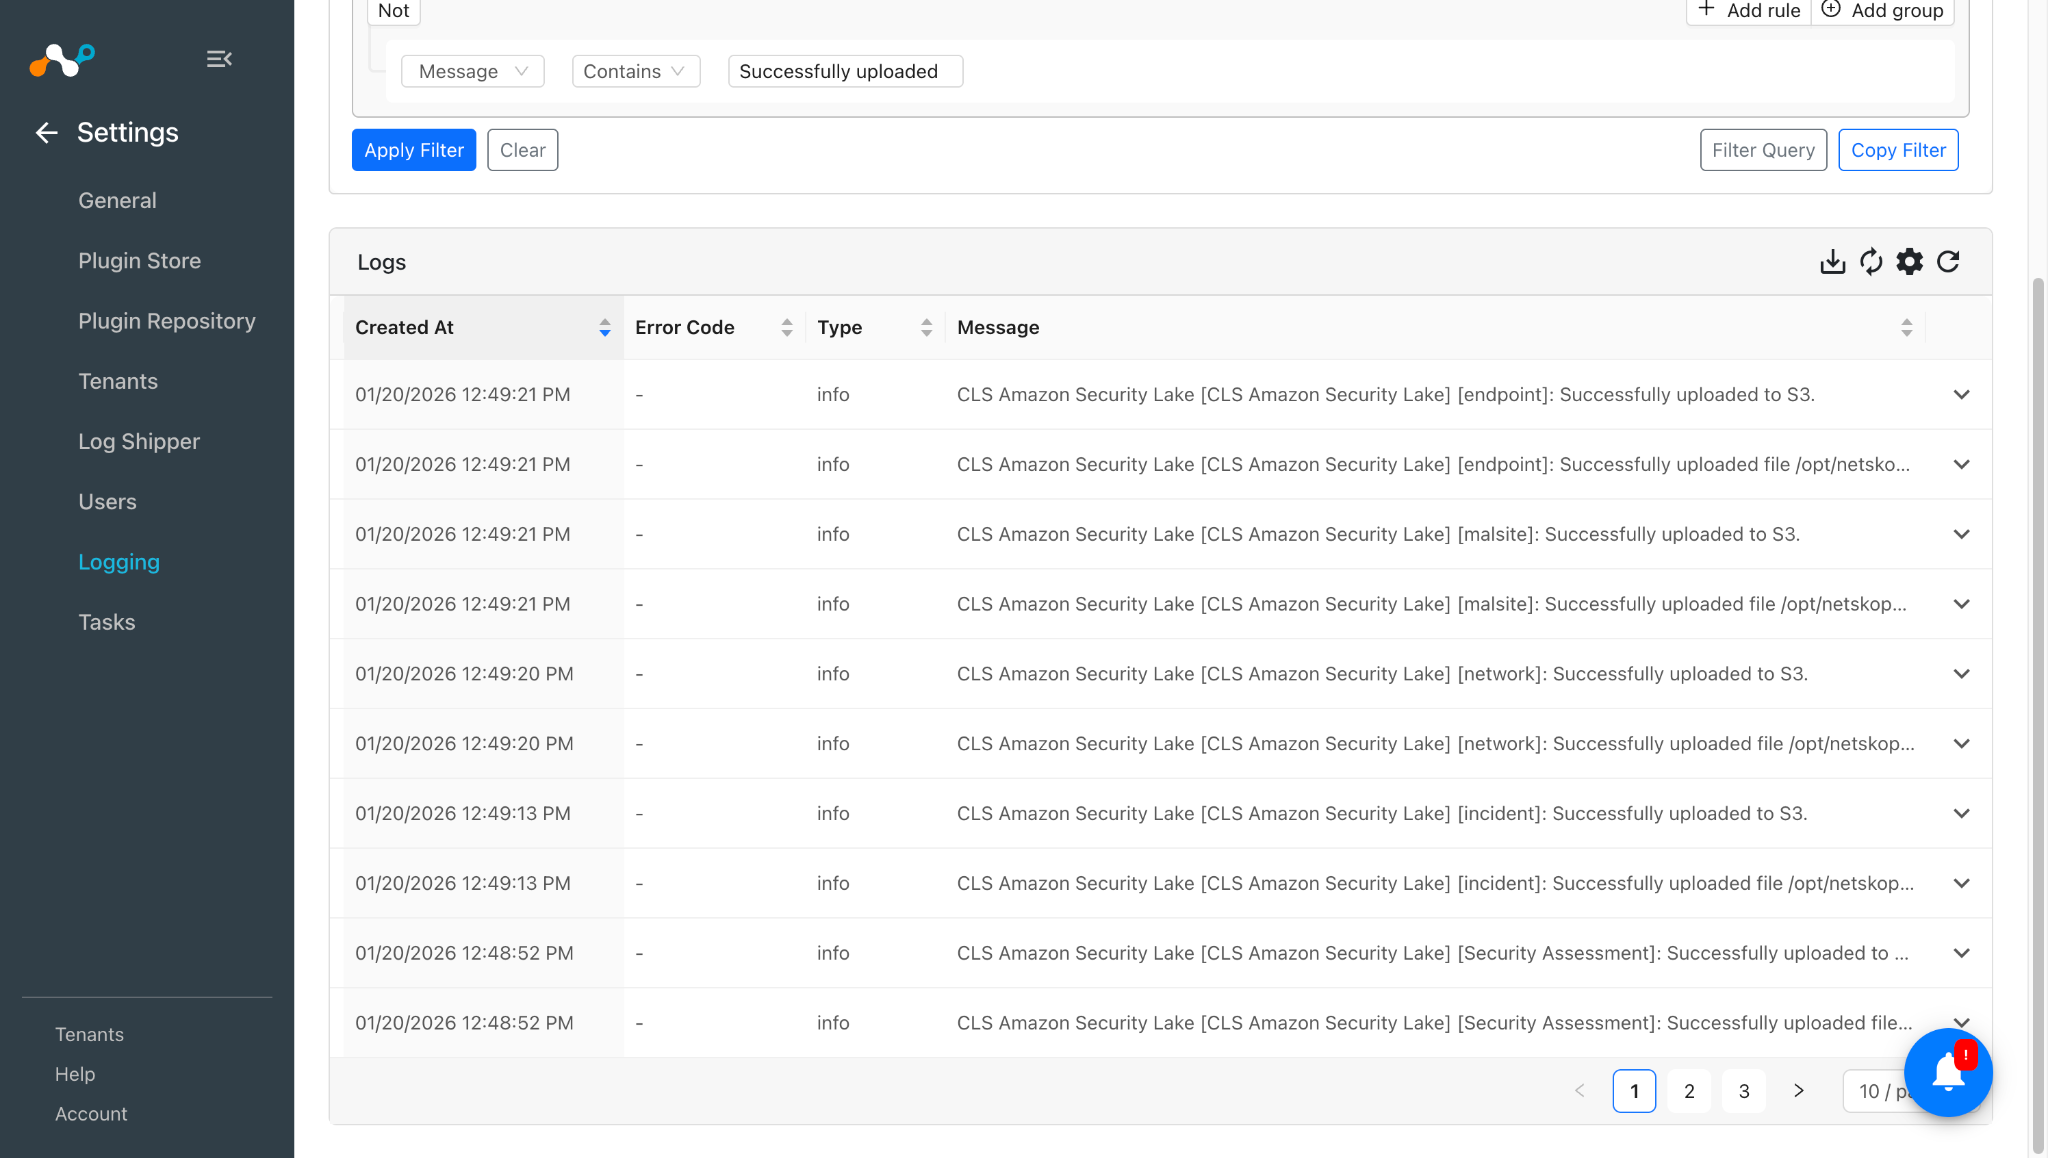
Note
- Data will not be ingested to the destination if the pulled alert/event/webtx is less than 265 MB size and then no same type of alert/event is pulled again after 5 minutes.
- Logs similar to below examples does not mean that the data is ingested to Security Lake S3 bucket:
| CLS Amazon Security Lake [CLS ASL] [alerts] [ctep]: Successfully added 1 log(s) to the AWS Security Lake upload file. The file will be uploaded to the AWS Security Lake bucket once either 256 MB file size or 5 minutes upload condition is met. |
| Ingested 1 [alerts][ctep] log(s) into configuration CLS ASL successfully. Time taken: 2 seconds. |
To Validate in AWS
Go to S3 Bucket ➔ < security lake bucket name > ➔ ext ➔ Custom Data Source for alert/event/webtx.
This is example destination location for ‘ns_incident’ custom data source:
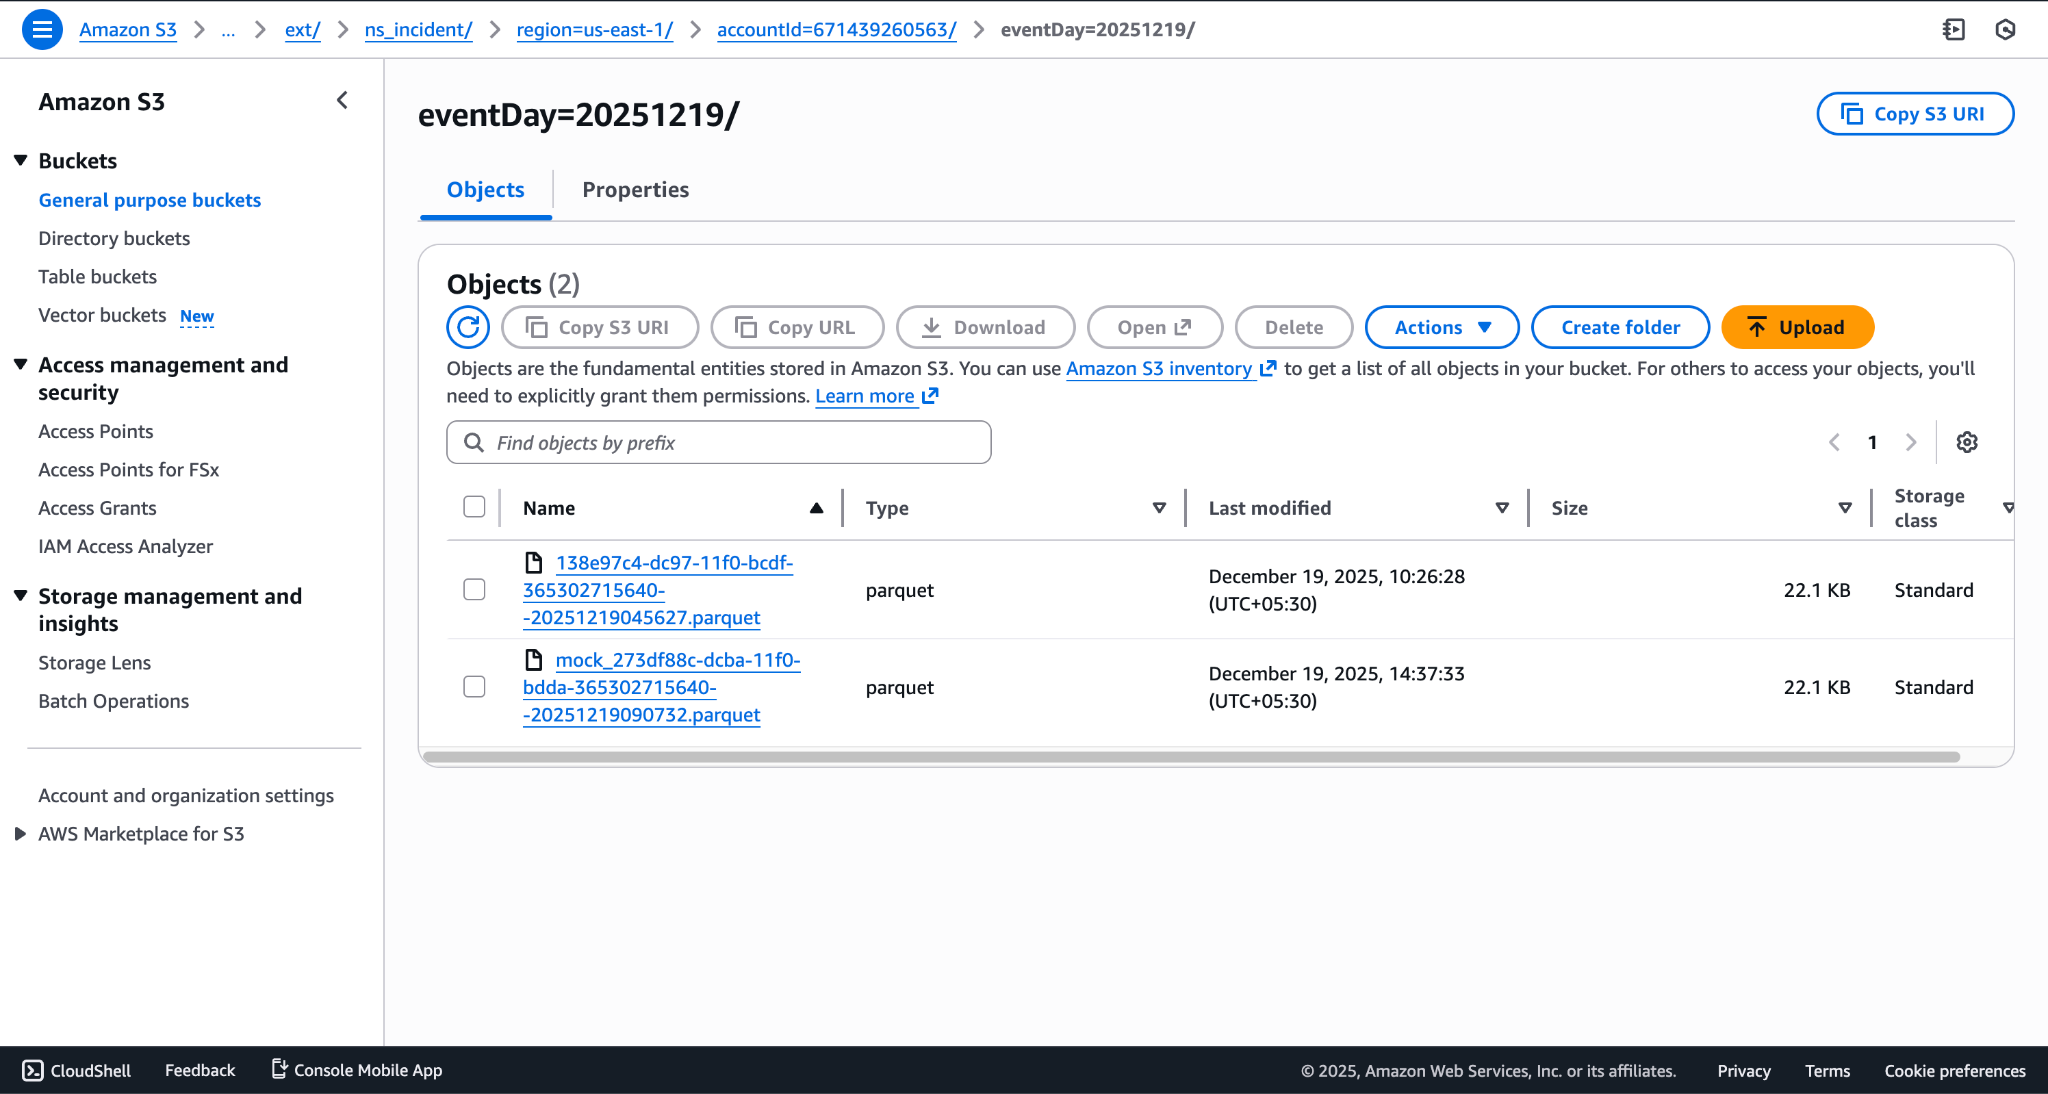
Note
- It will have different folders according to dates(i.e. eventDay) under each alert/event/webtx type folder.
- If you have configured the plugin with “Parquet File Name Prefix” then each file will have that prefix added to it.
- Data will not be ingested to the destination if the pulled alert/event/webtx is less than 265 MB size and then no same type of alert/event is pulled again after 5 minutes.
To Validate Data on Athena
Note
Make sure the user has required permissions to query the data on Athena. Permissions can be provided to the user’s role from AWS Lake Formation > Data Permissions > Grant. For more information related to the permissions for querying data on Athena, you can contact the AWS Support team.
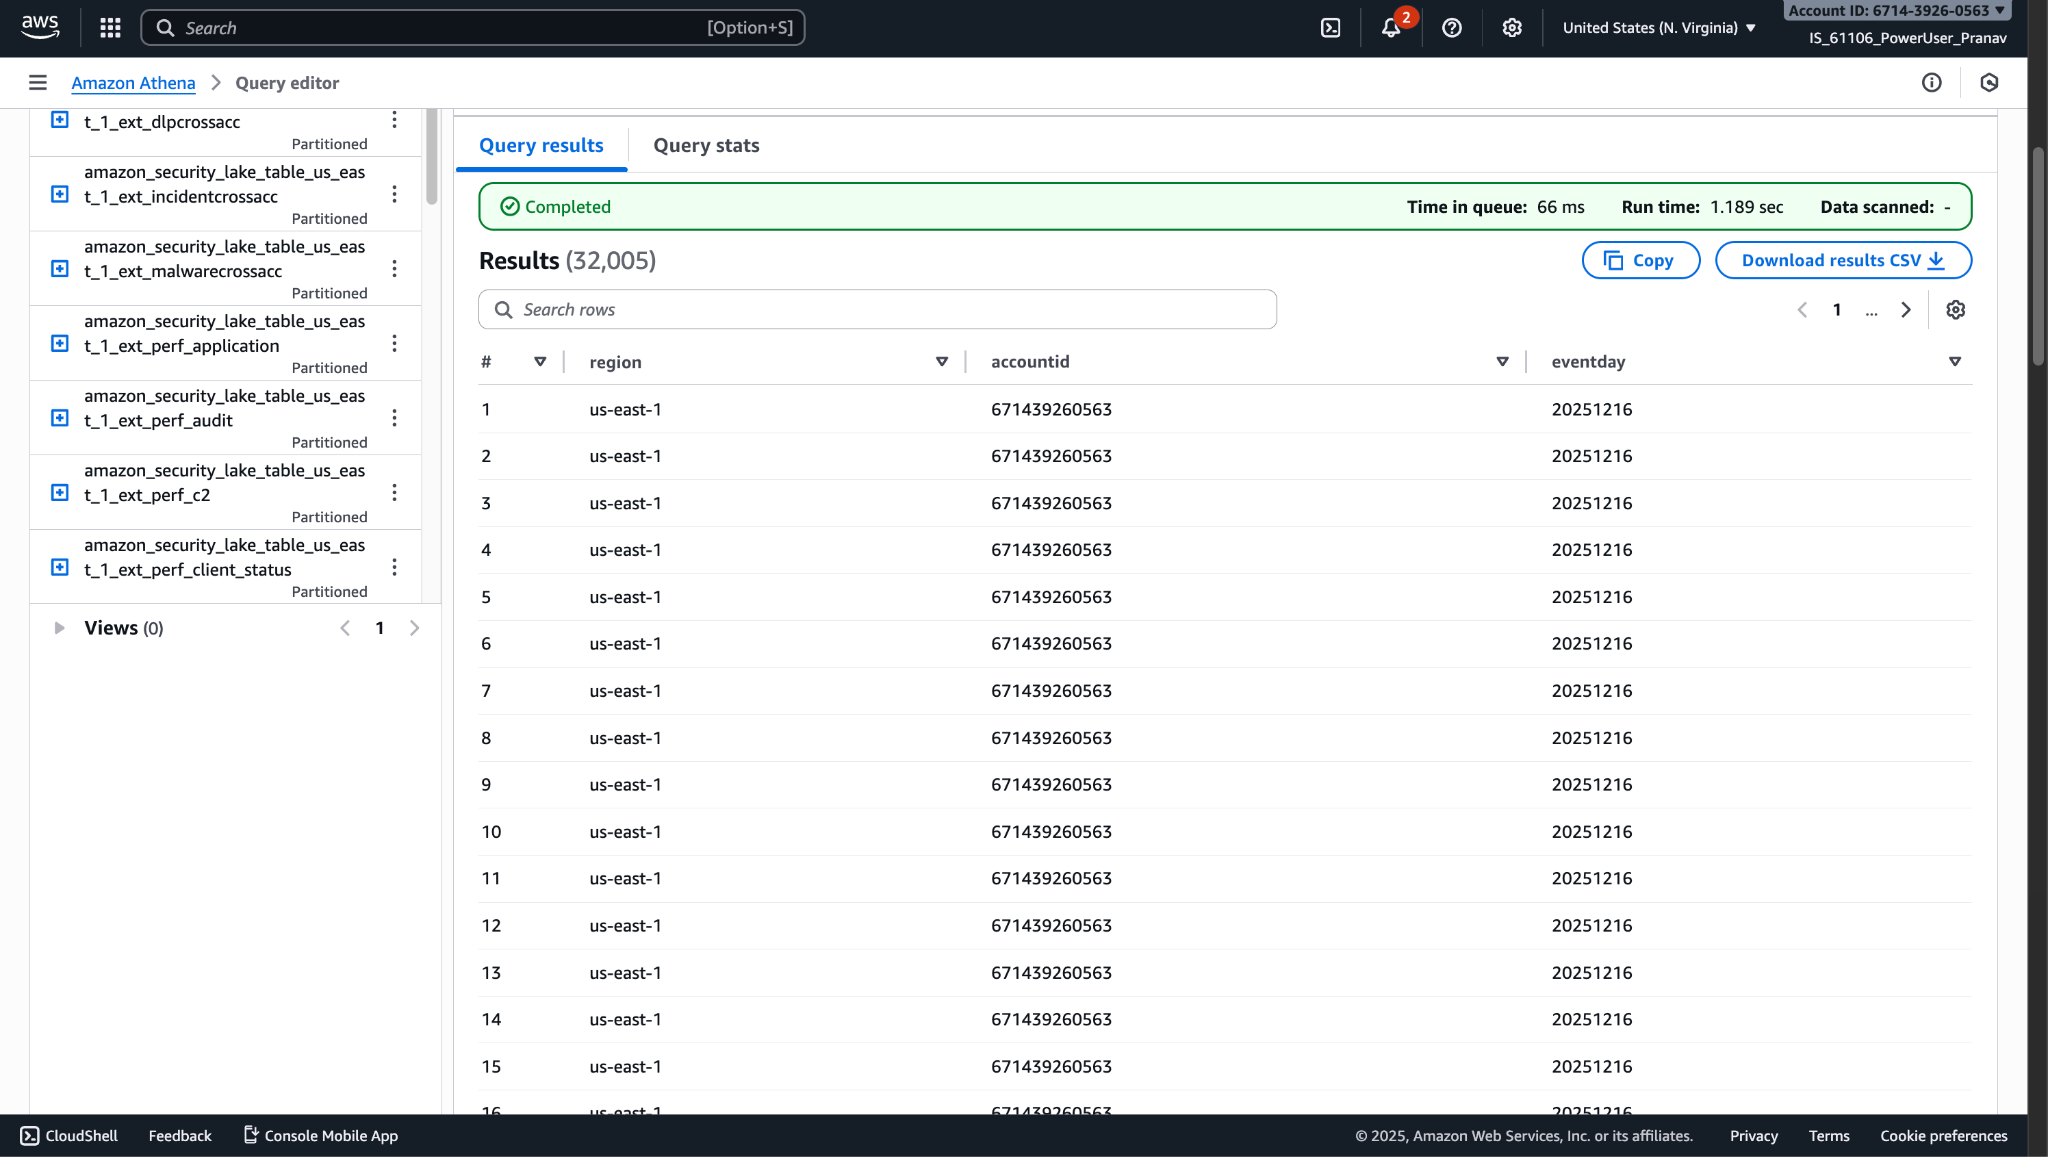
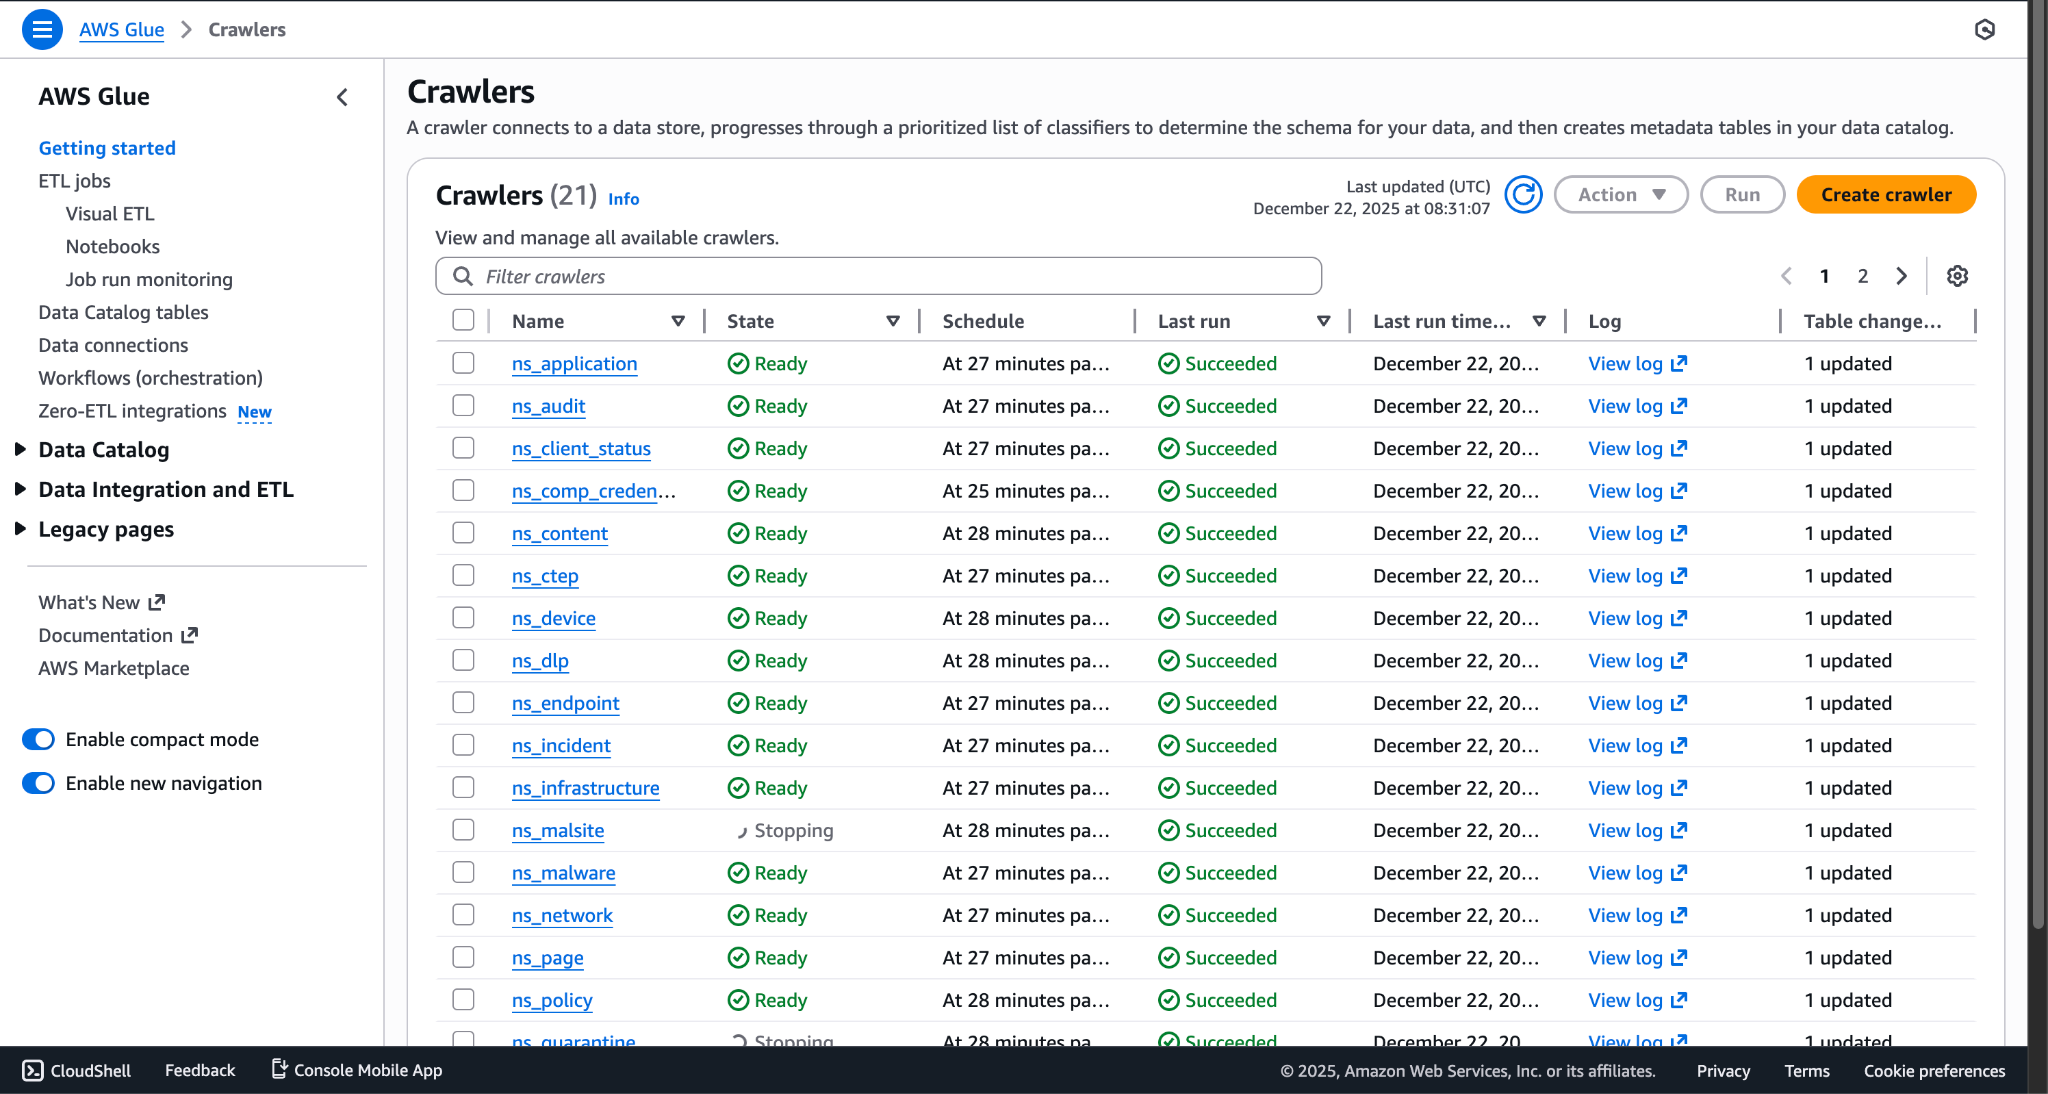
- Before searching the data on Athena, make sure all the crawlers are executed successfully. Users can execute any crawler from the AWS Glue > Crawlers page on AWS. Select the needed crawlers and click on Run button to execute. Once it is executed properly then the user can search the ingested data on Athena. Users can also set an automatic schedule to execute these Crawlers by manually editing Crawler for each alert/event/webtx.
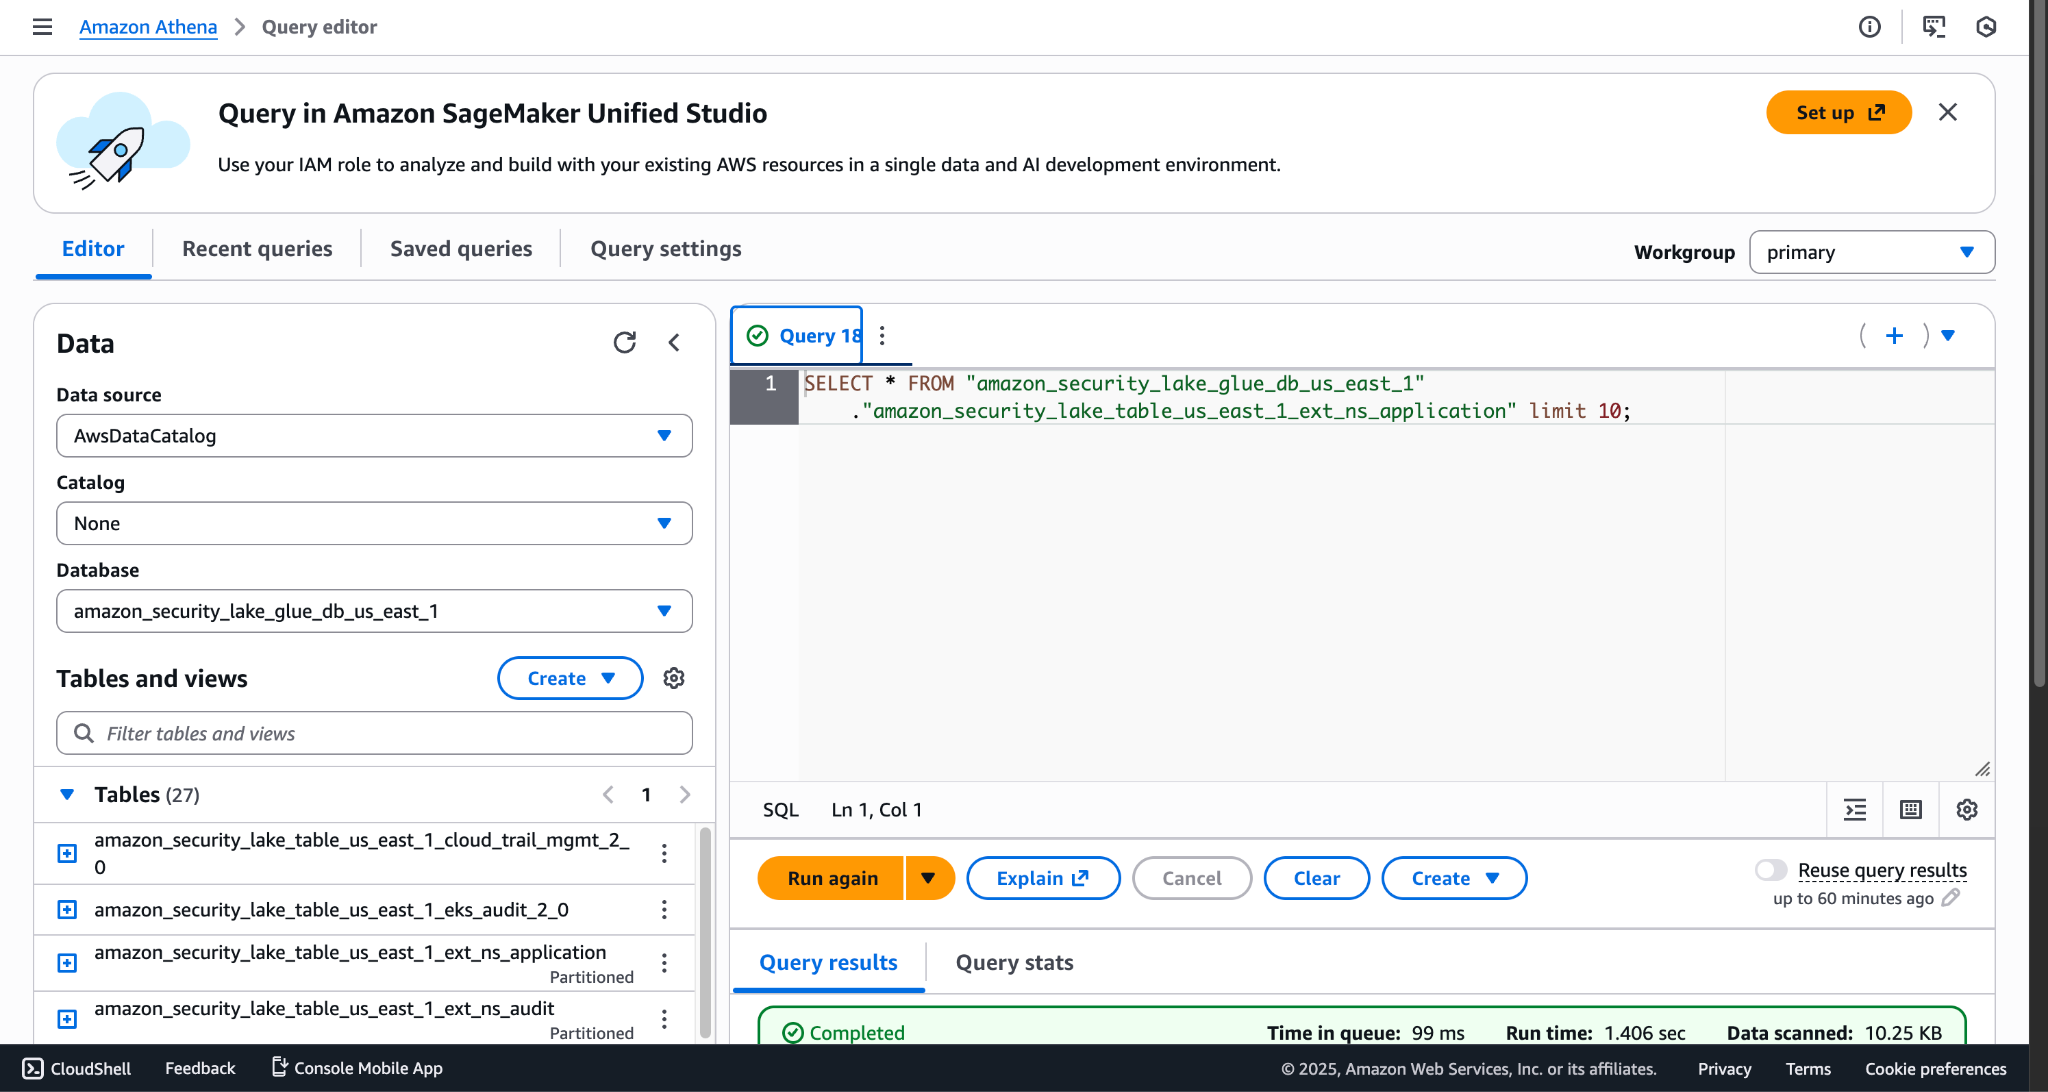
- To search the ingested data, go to the Amazon Athena > Query editor.
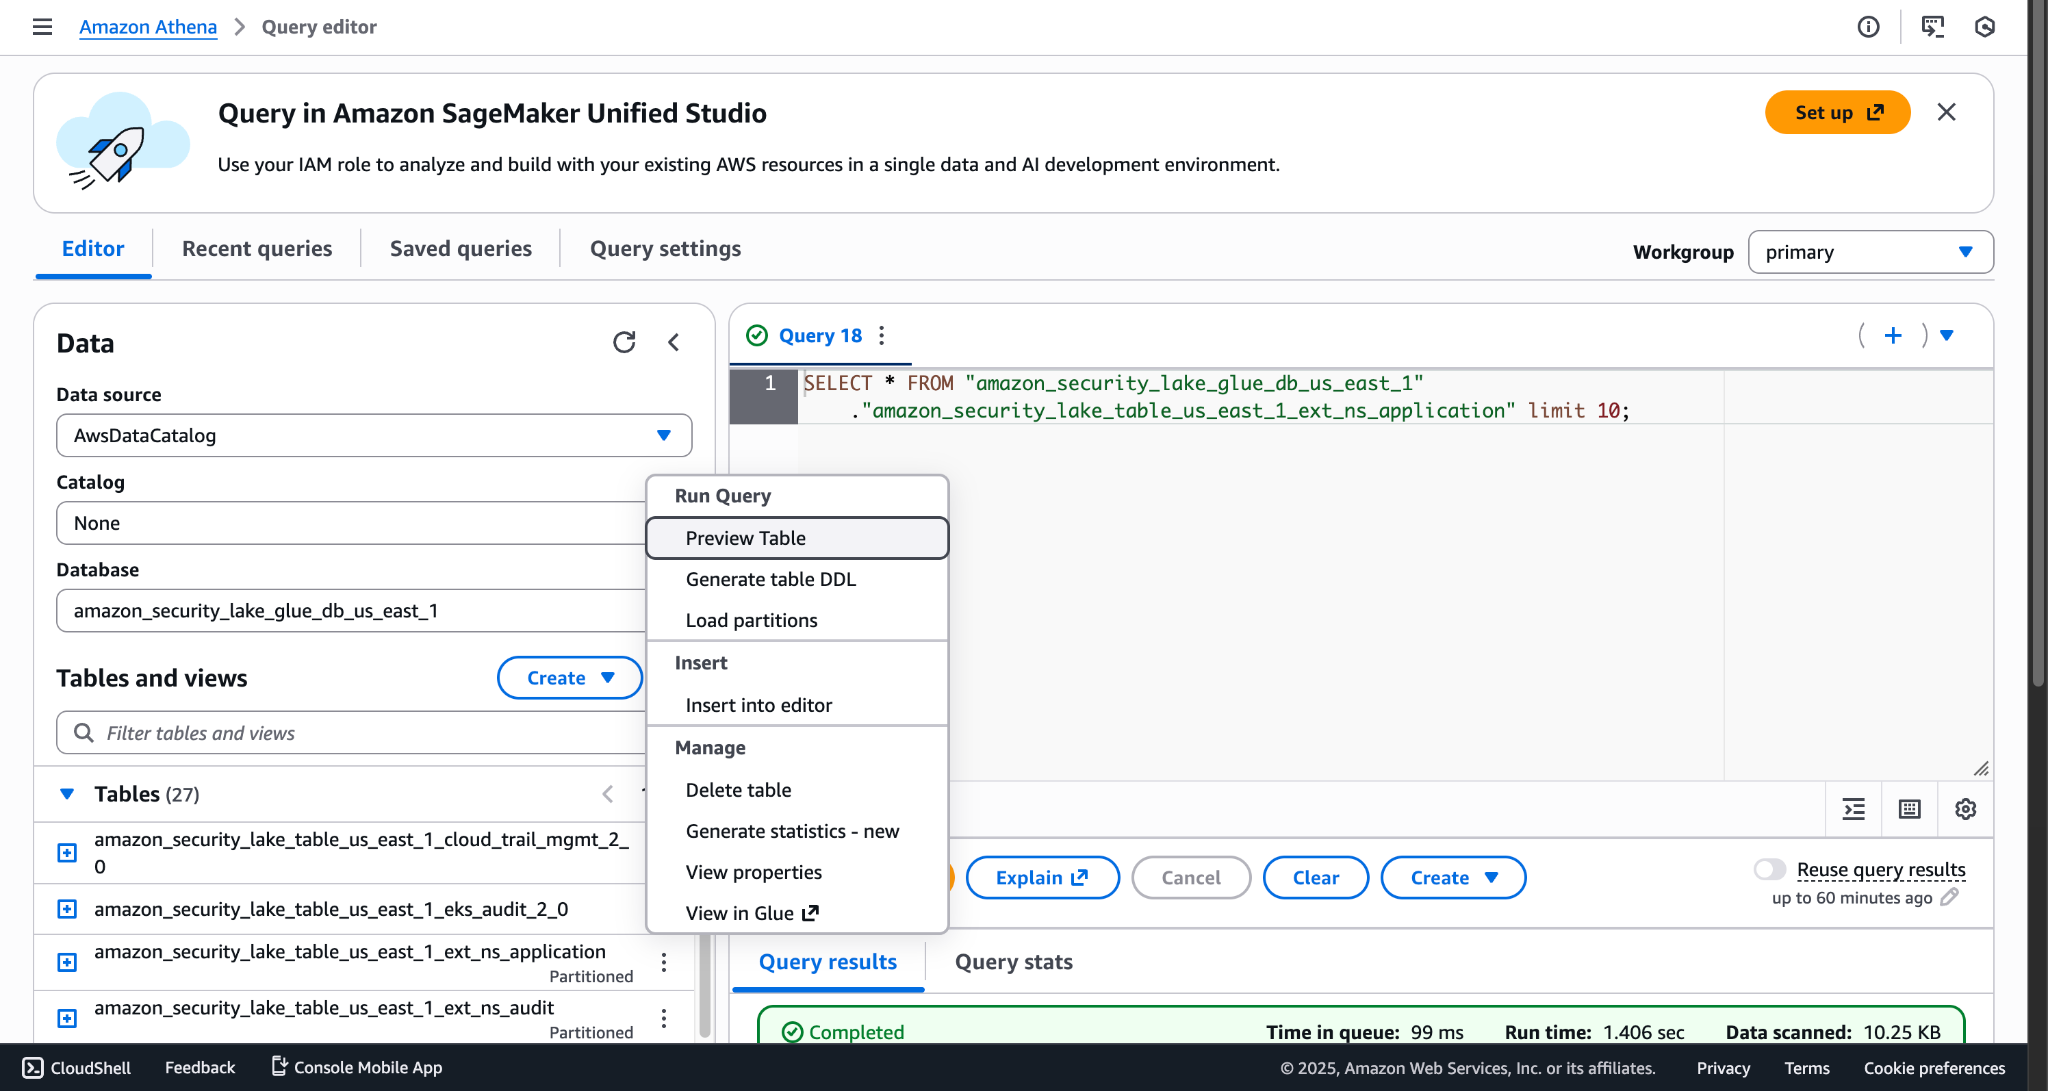
- Click on 3 dots > Preview Table for the table specific to the alert, event, or webtx. Here you can set the query as per your requirements.
- This is sample ingest application event:
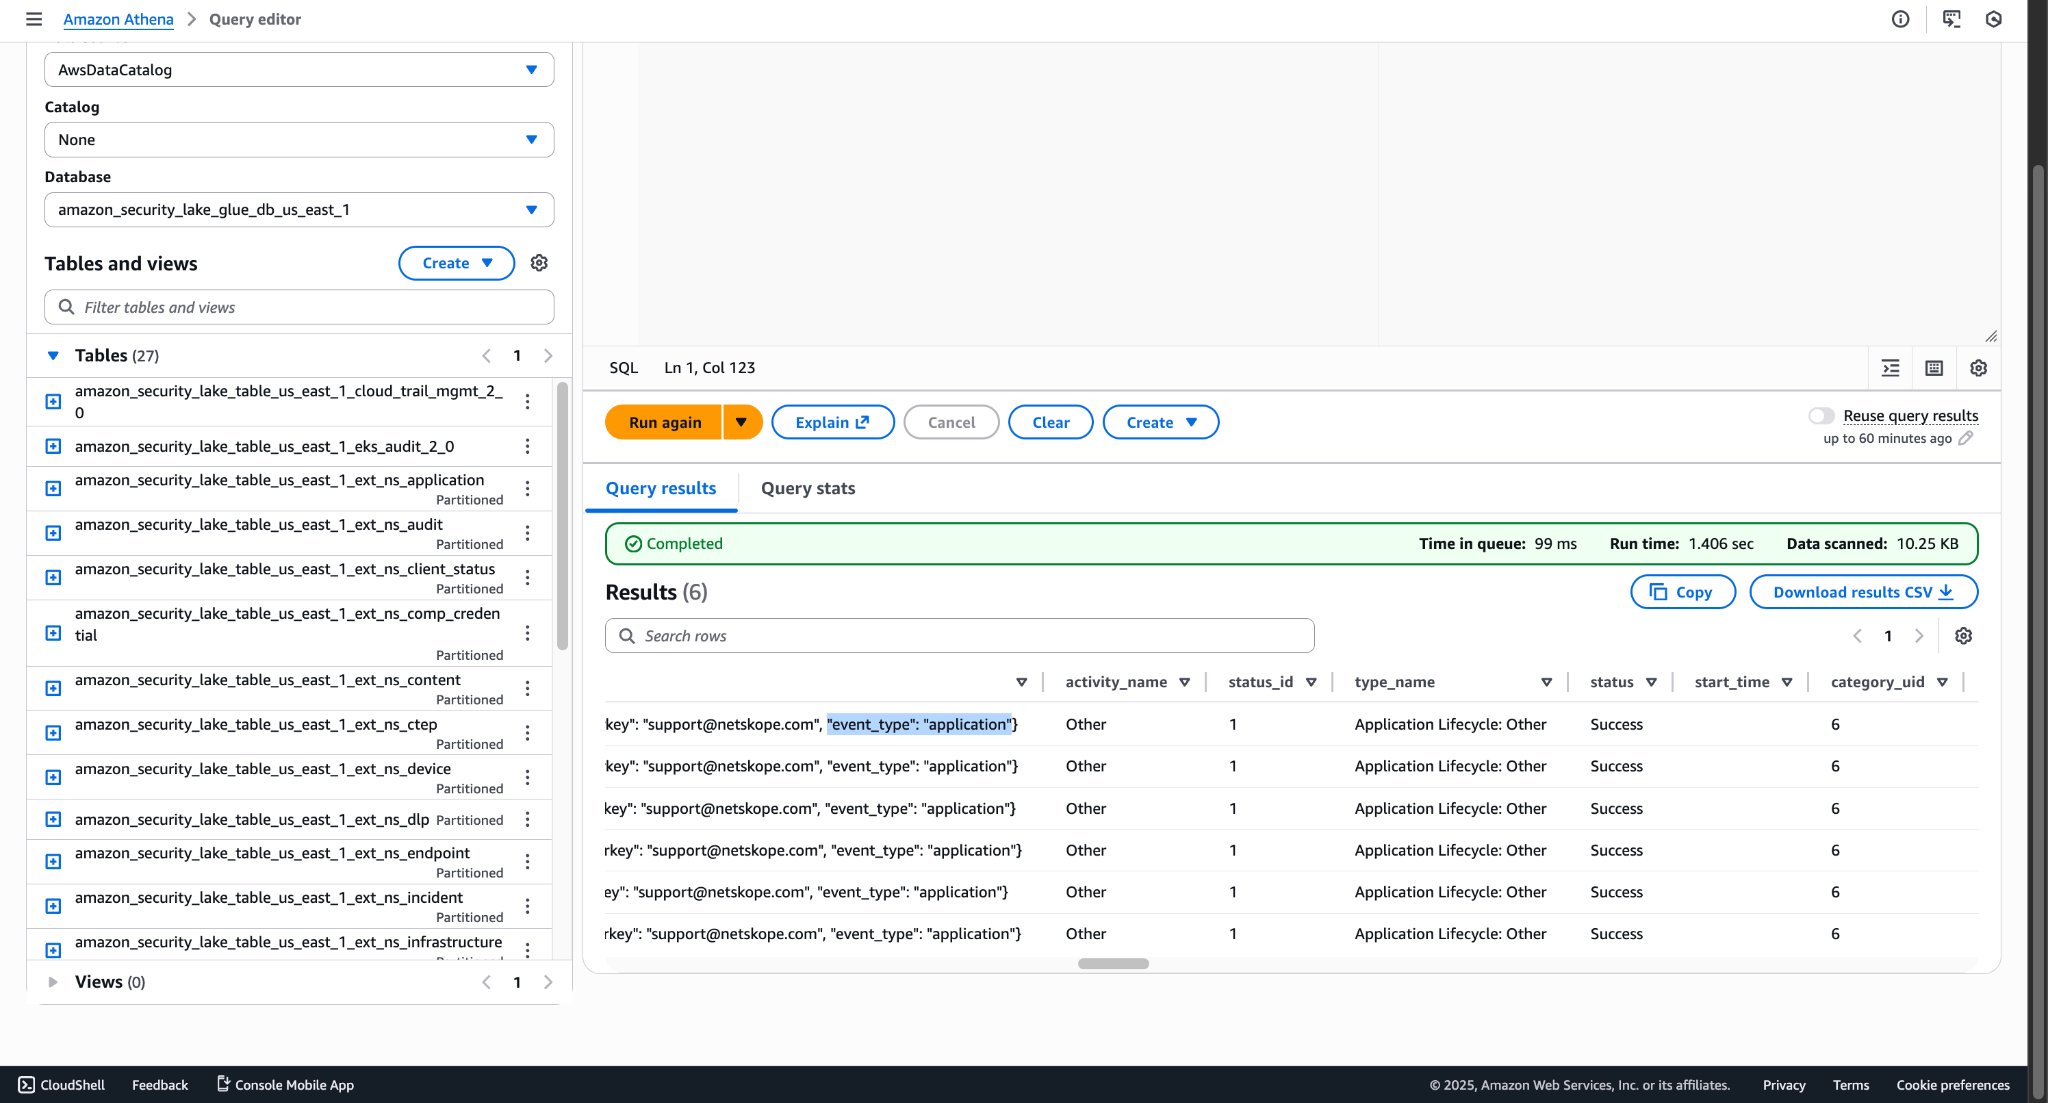
Scroll to view all the supported fields.
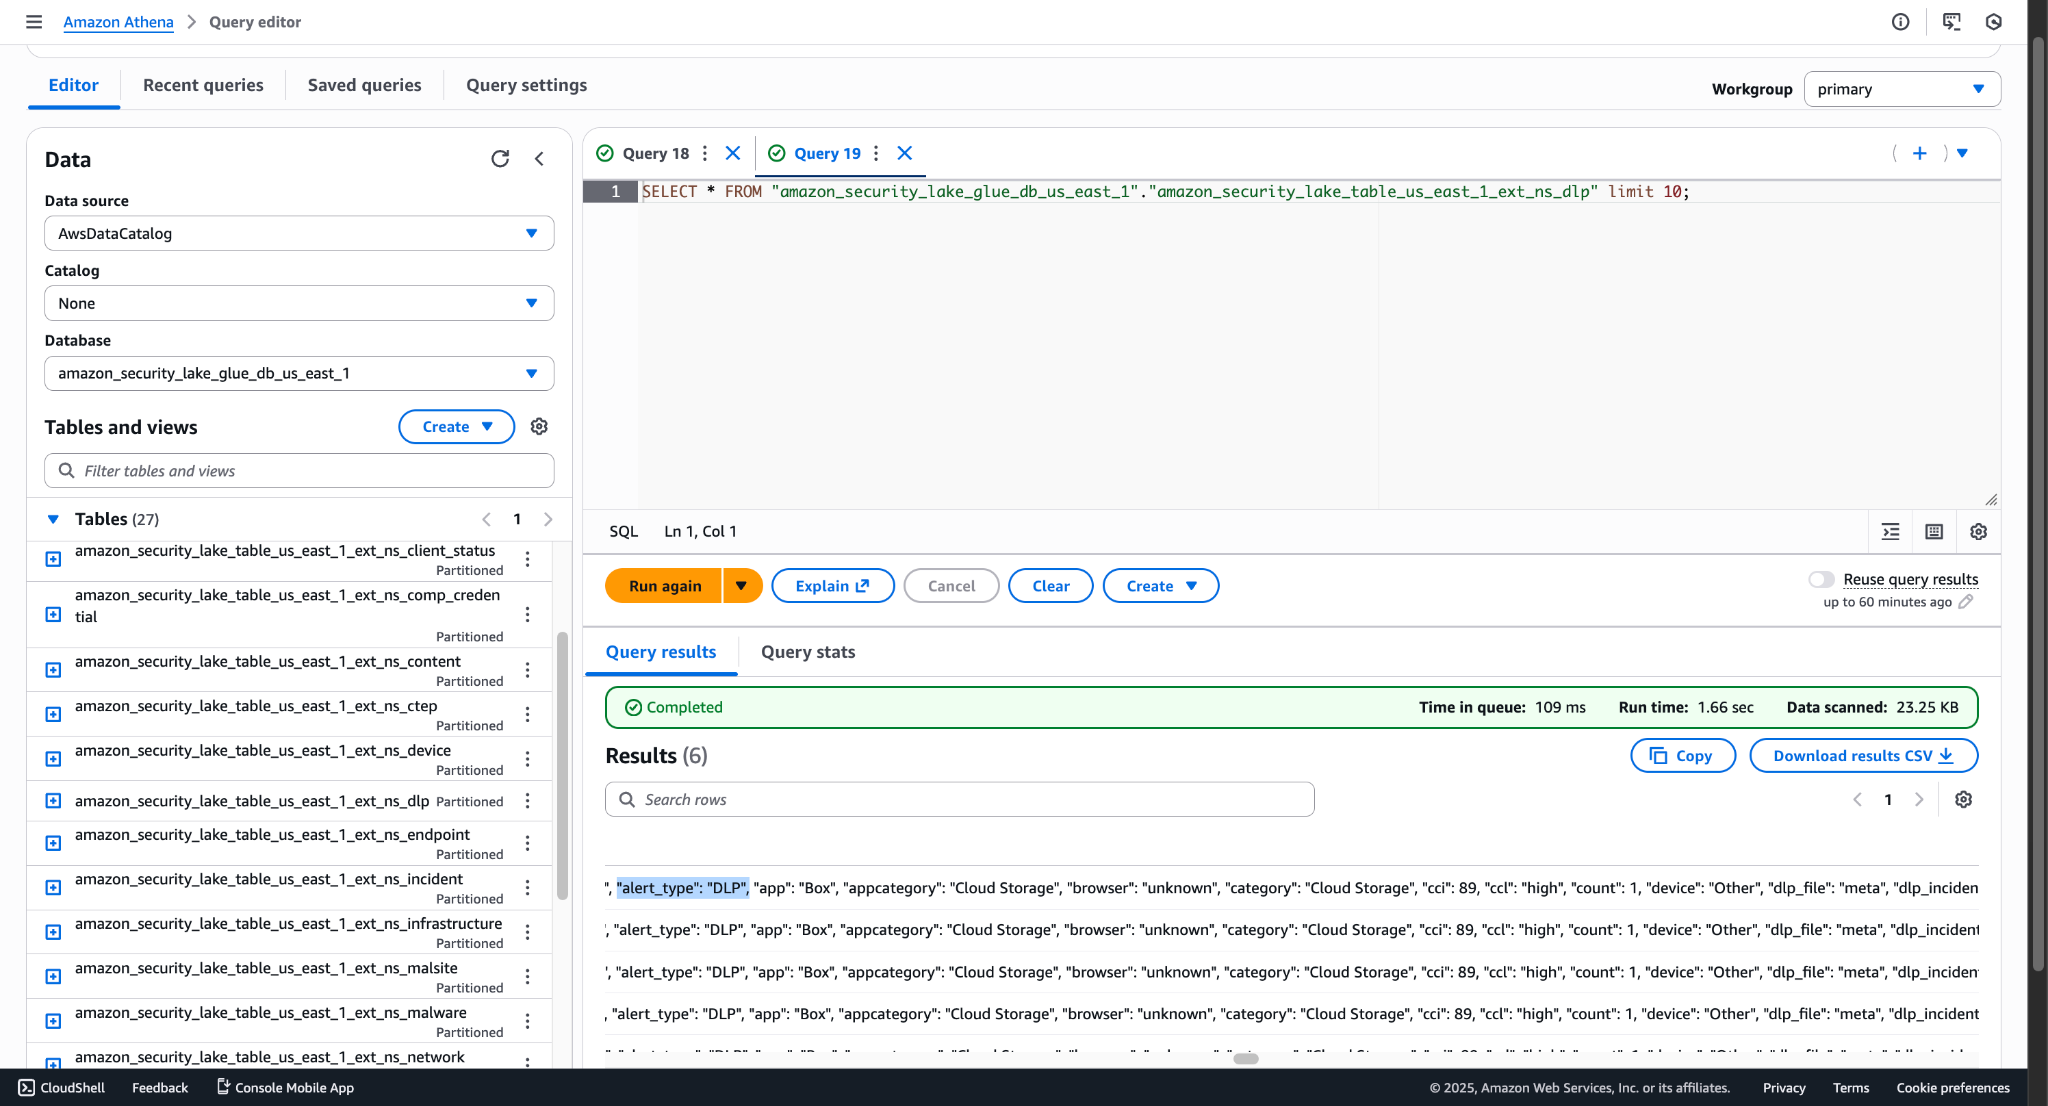
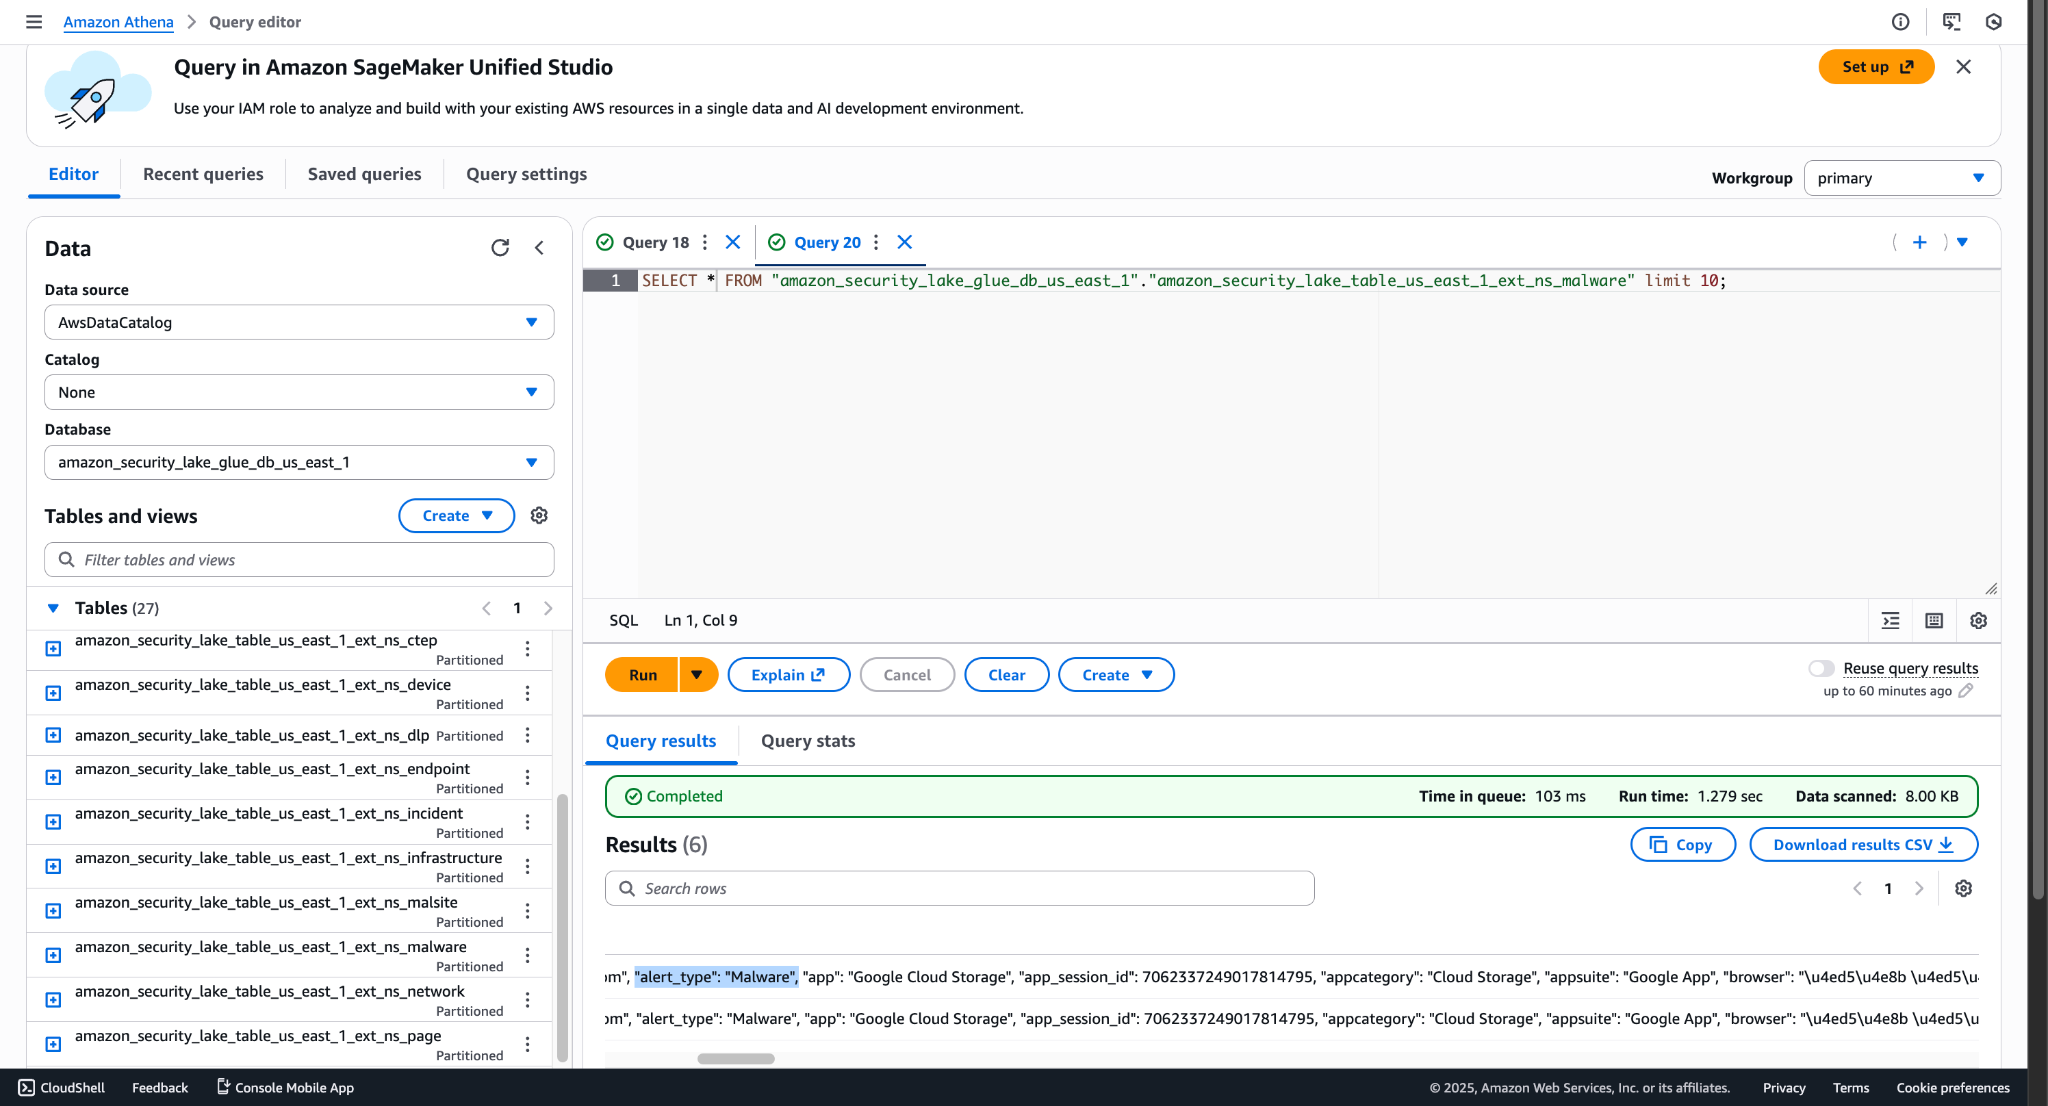
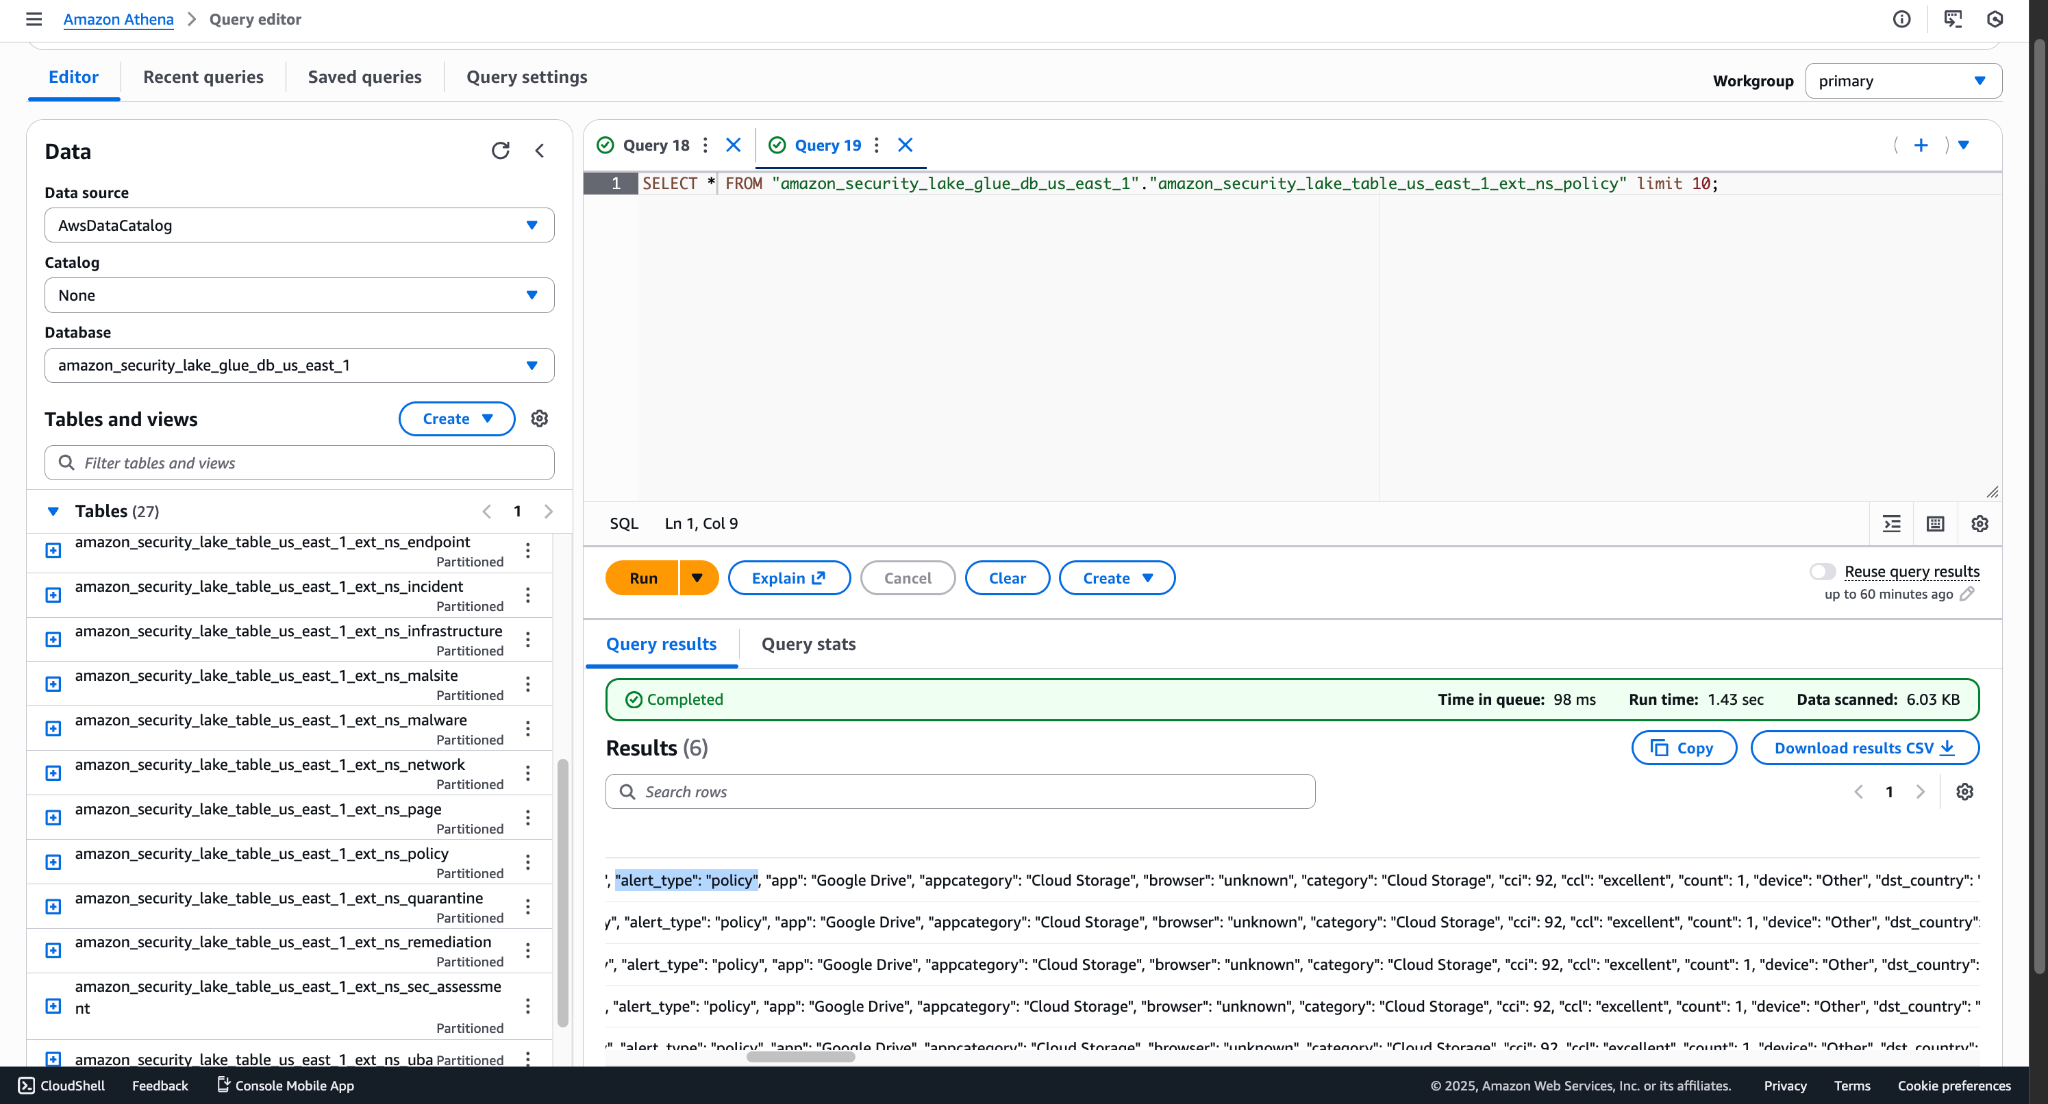
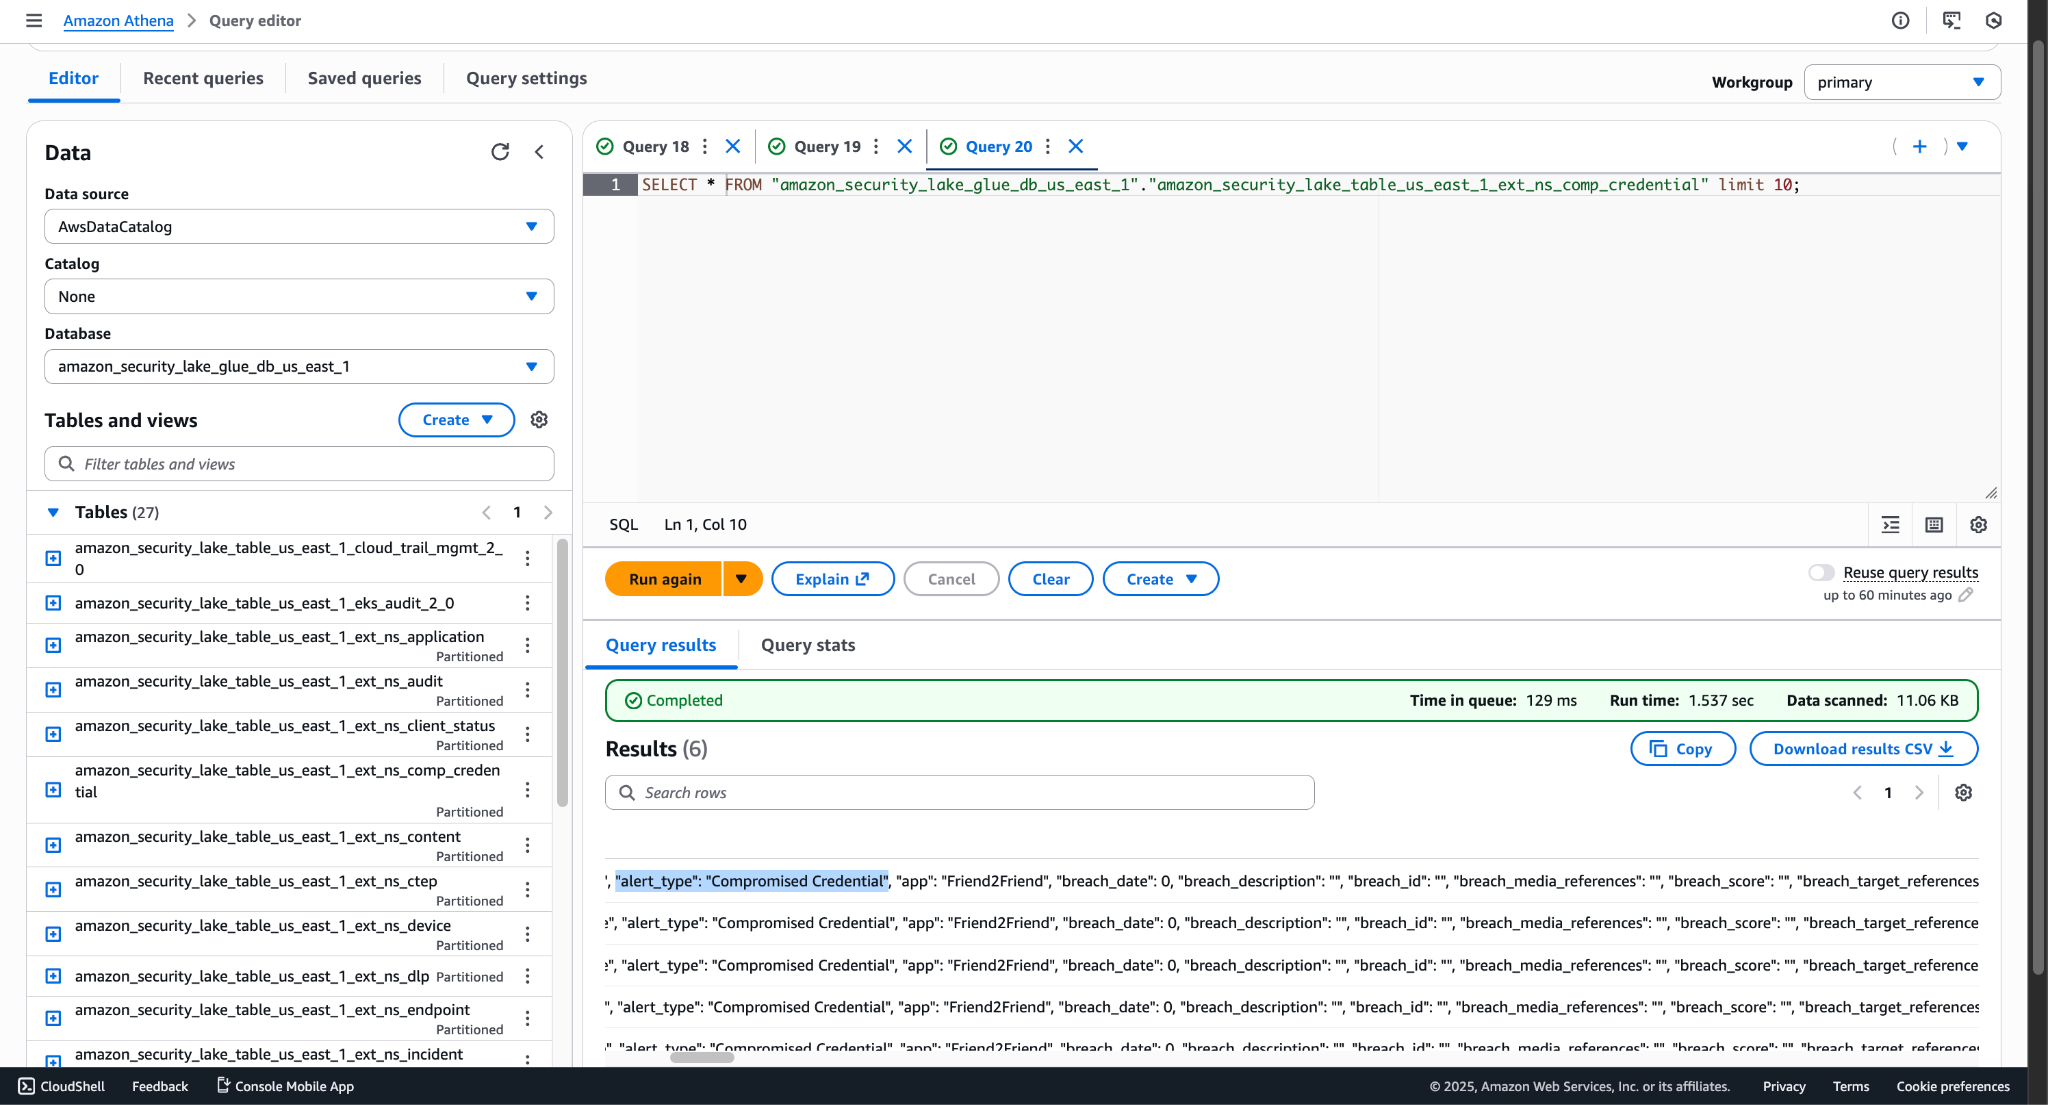
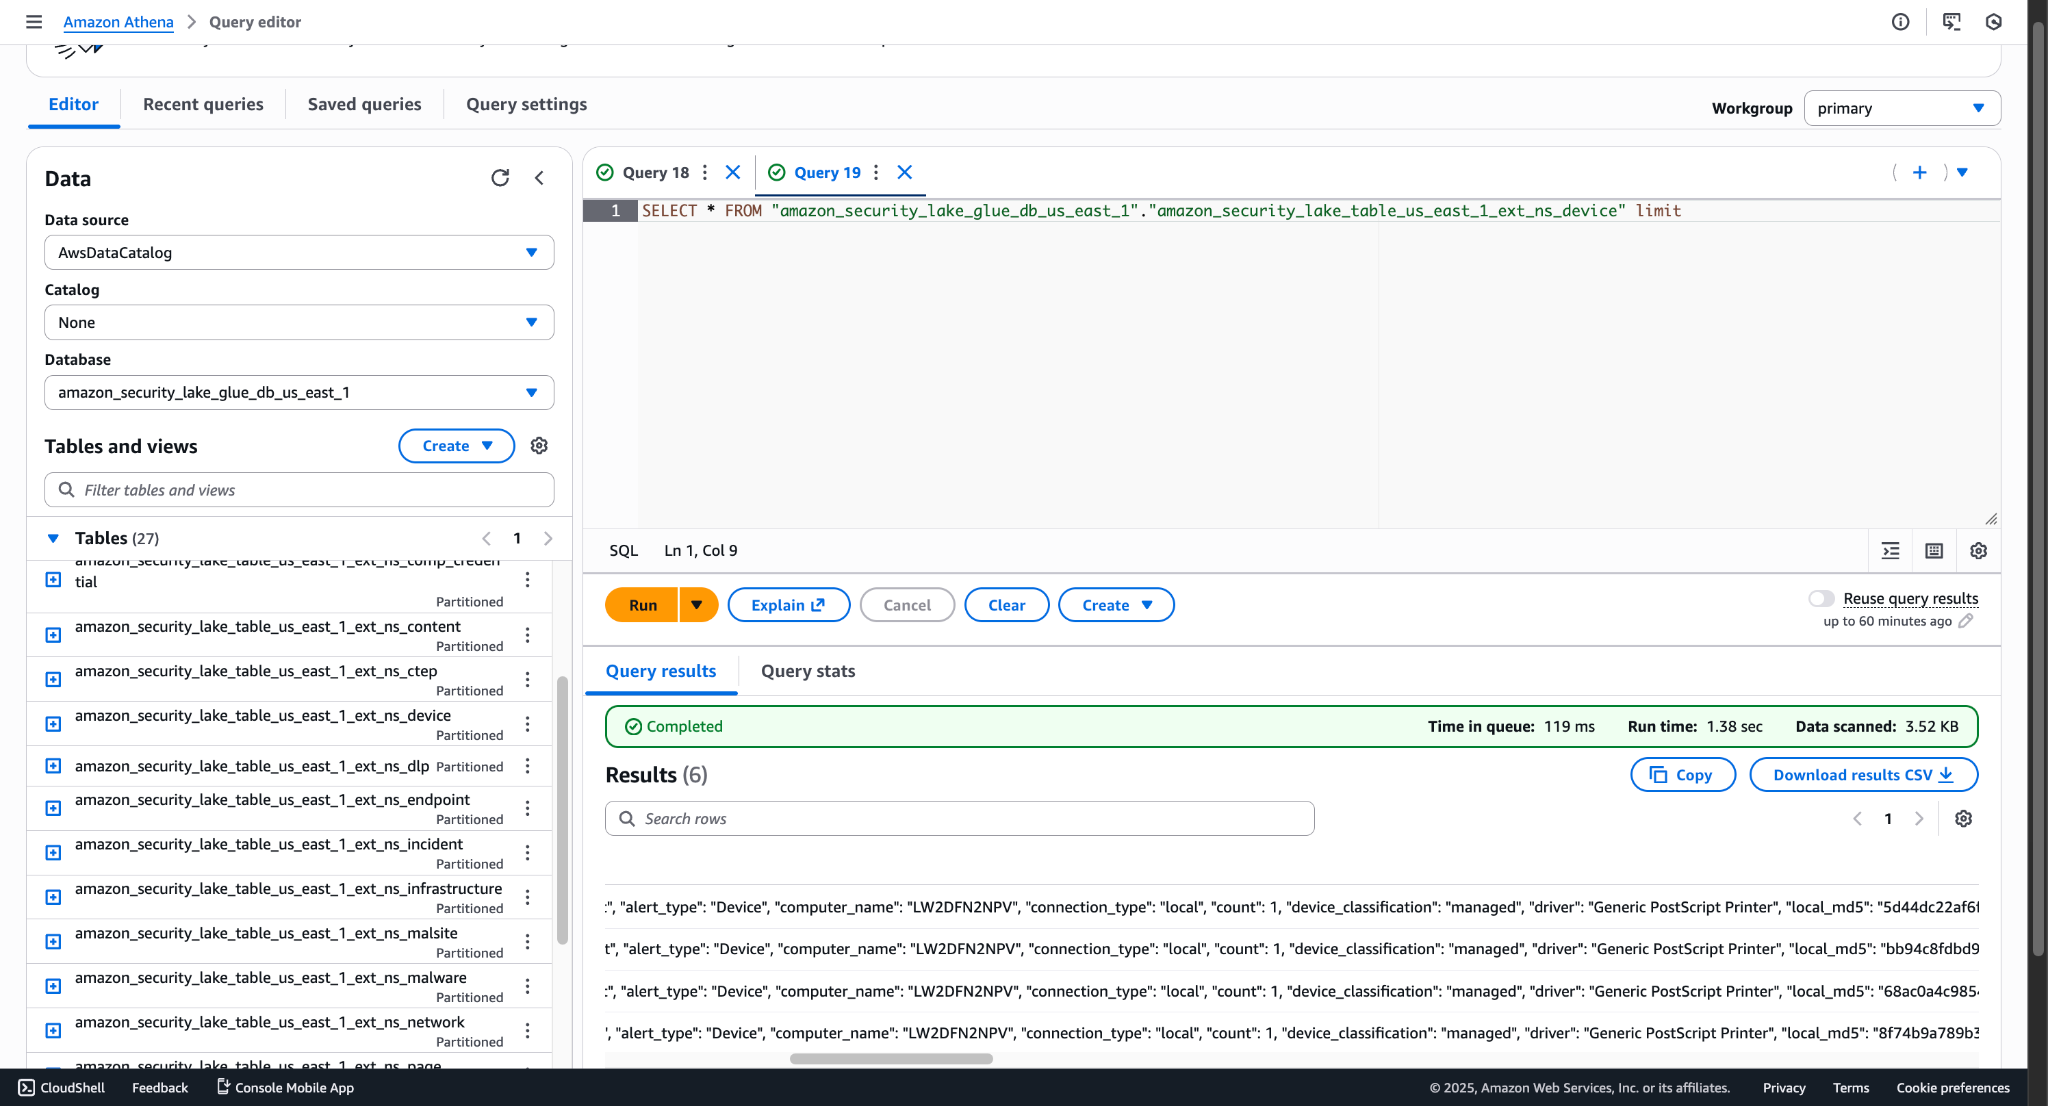
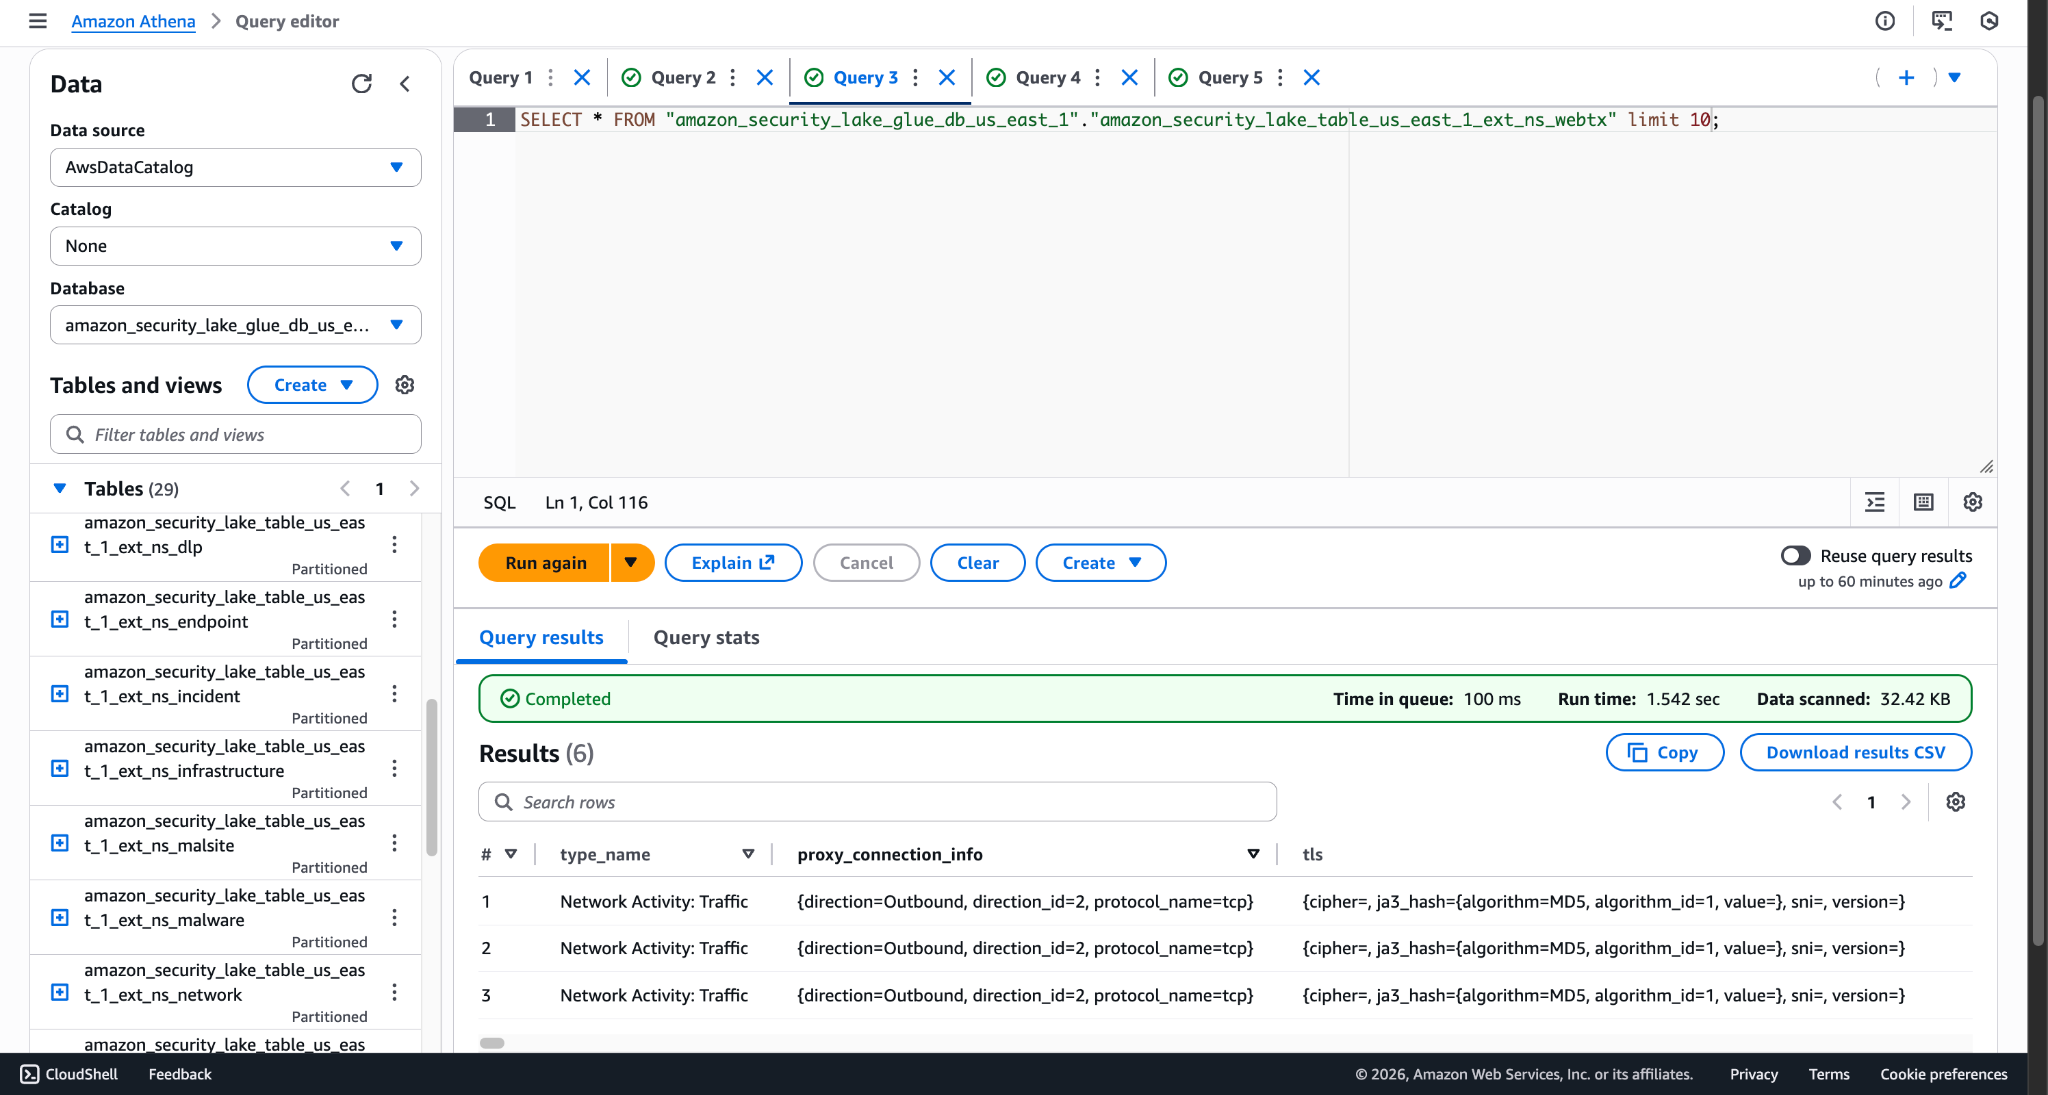
Here are some samples of ingested data:
For Events 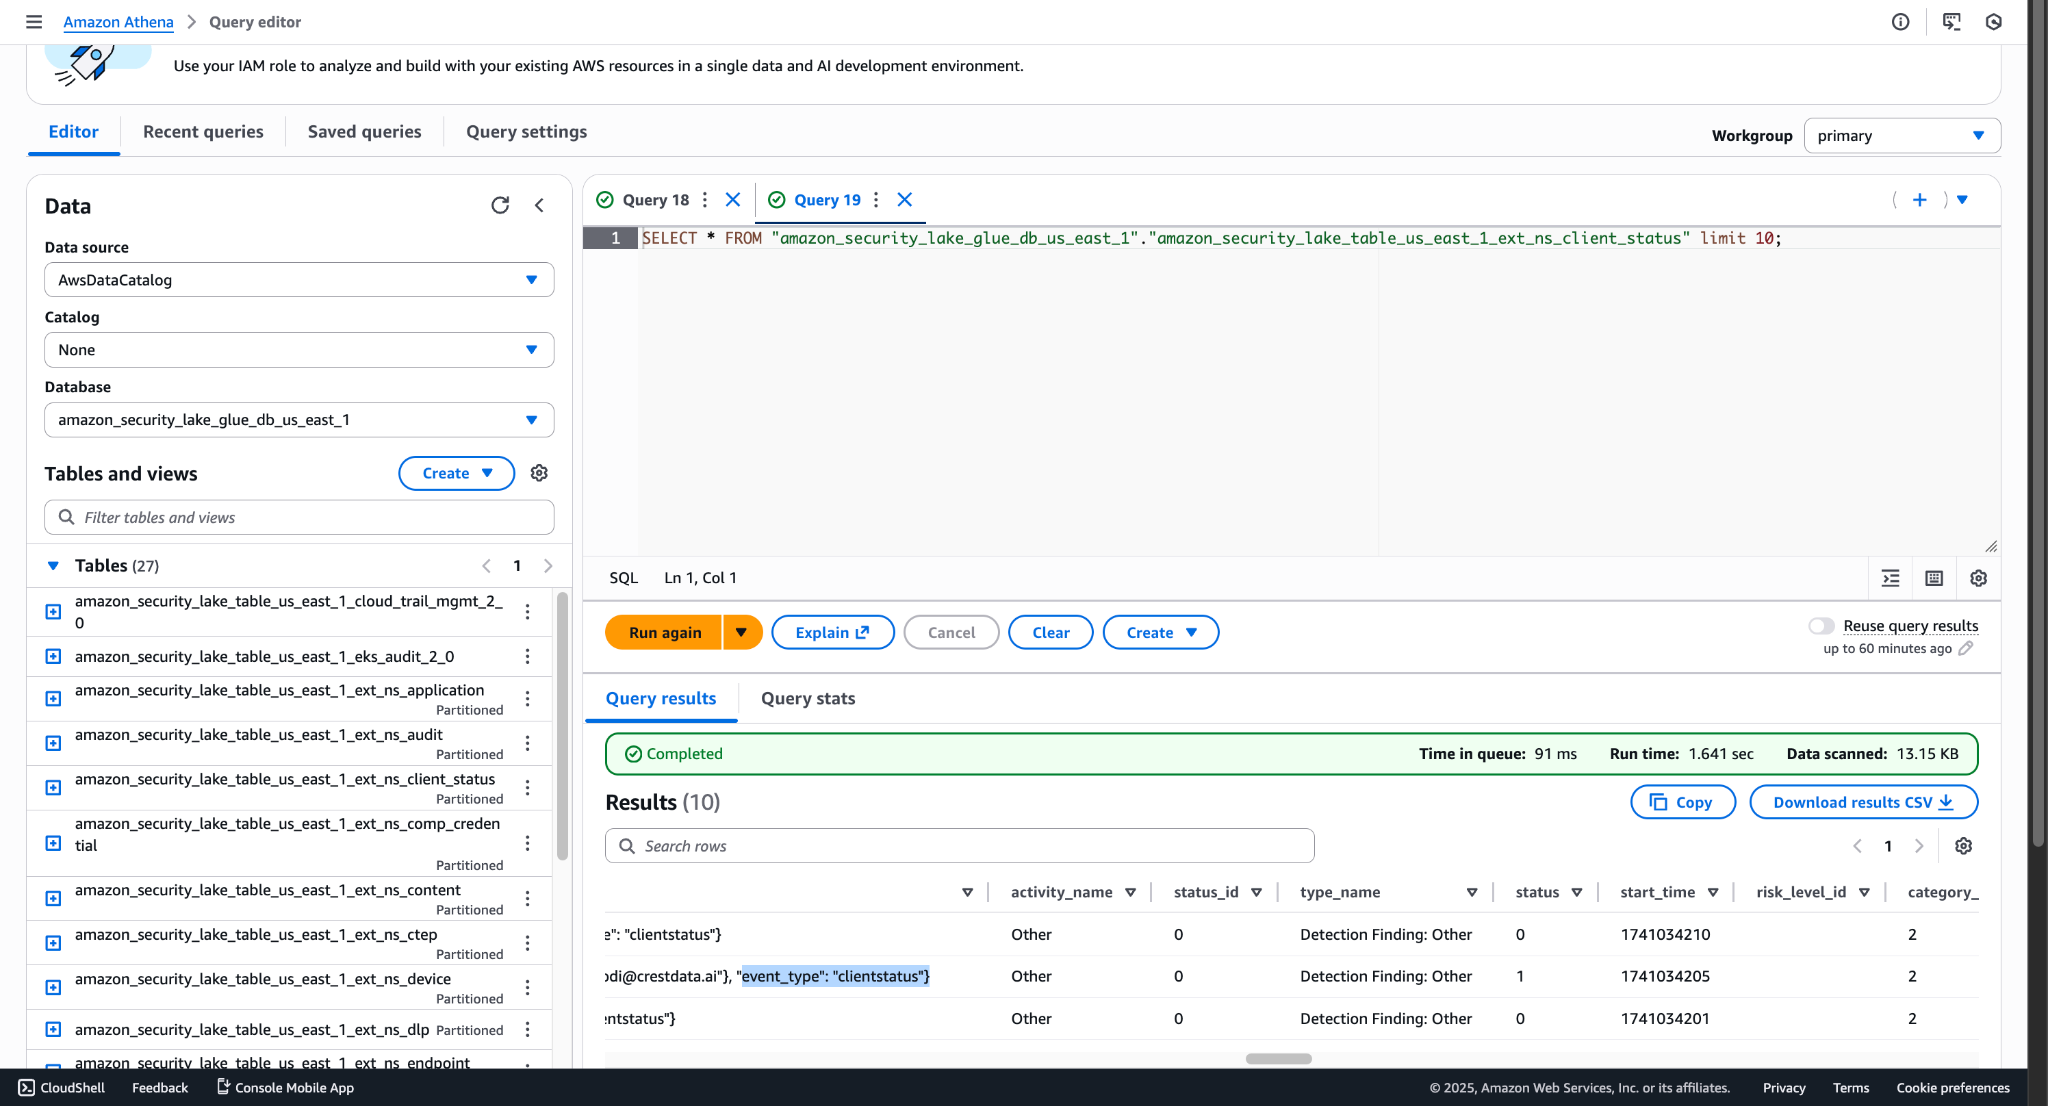
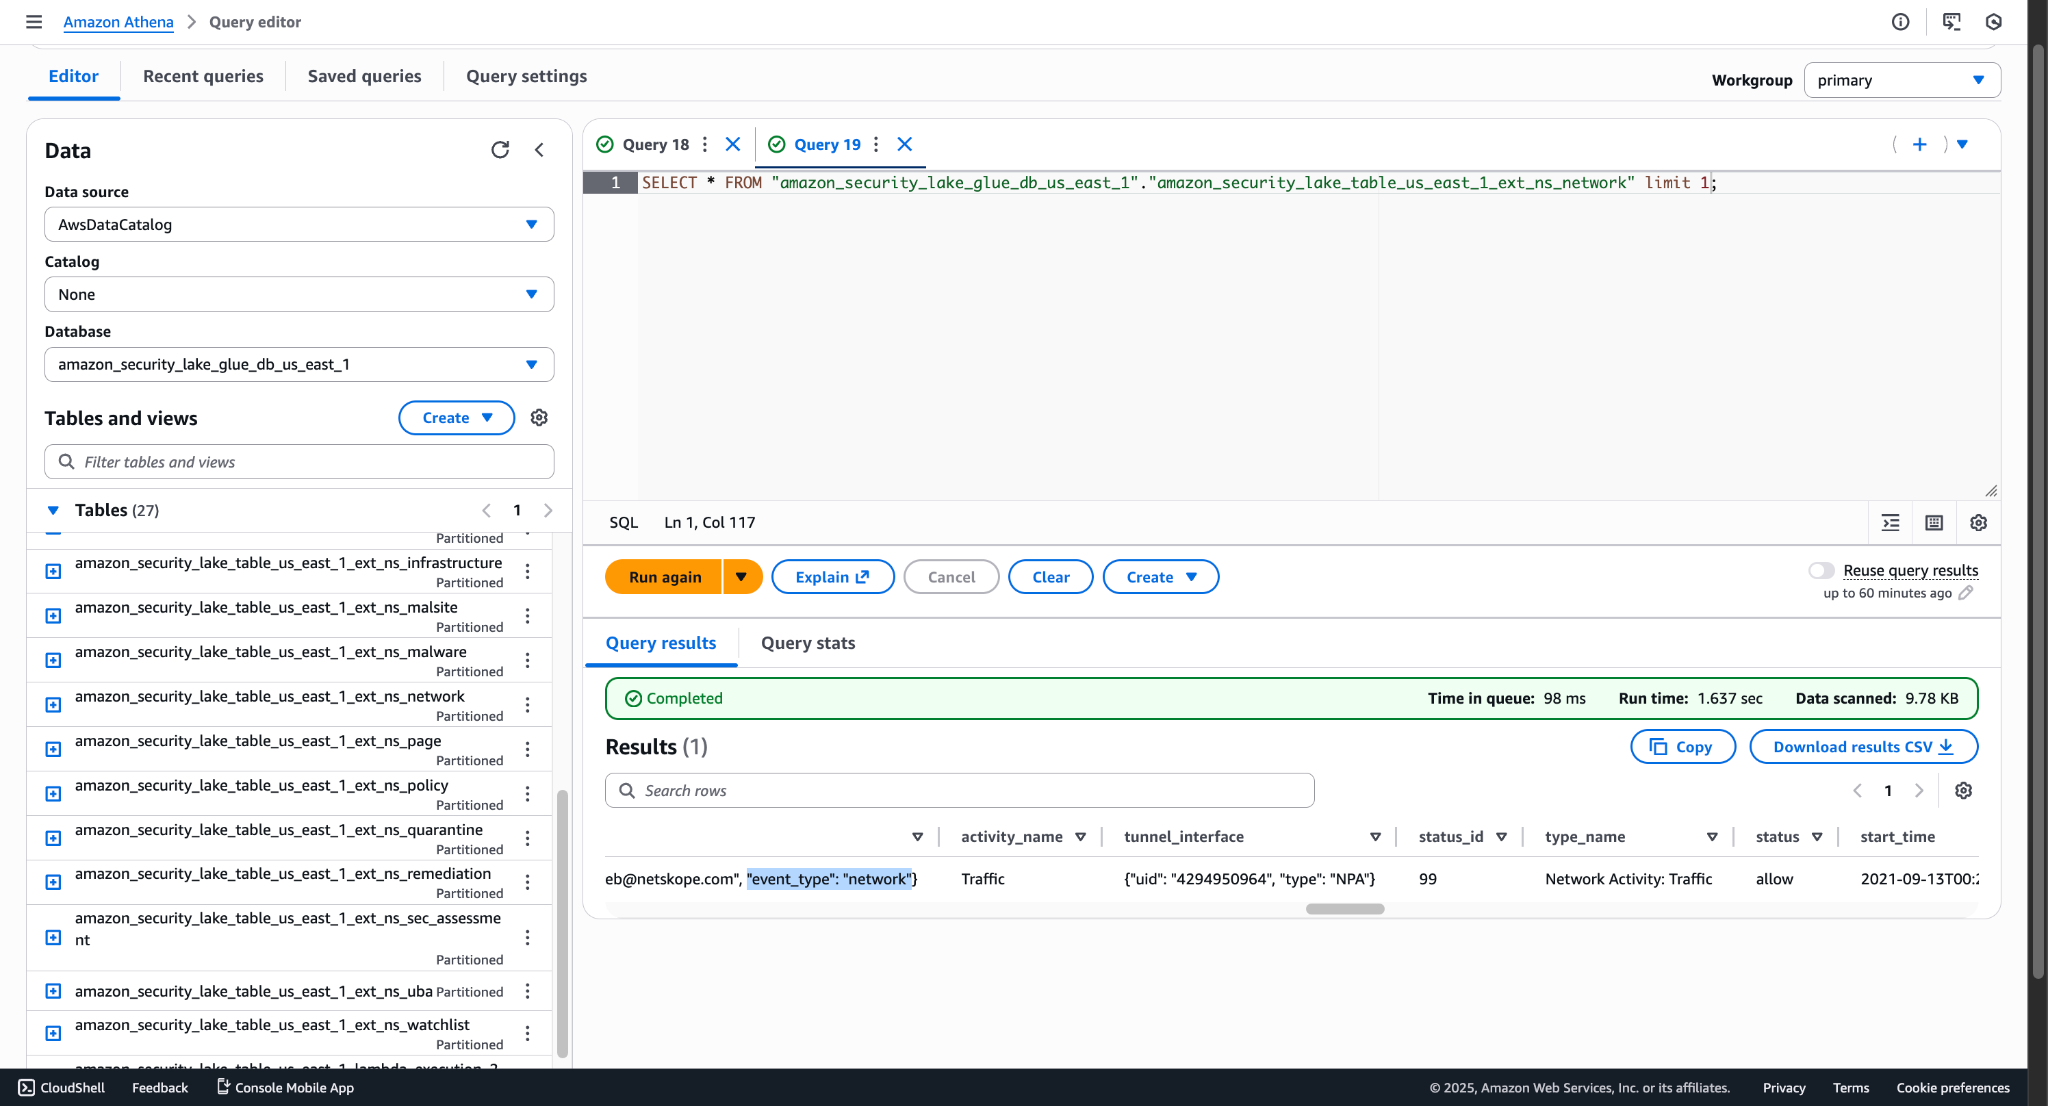
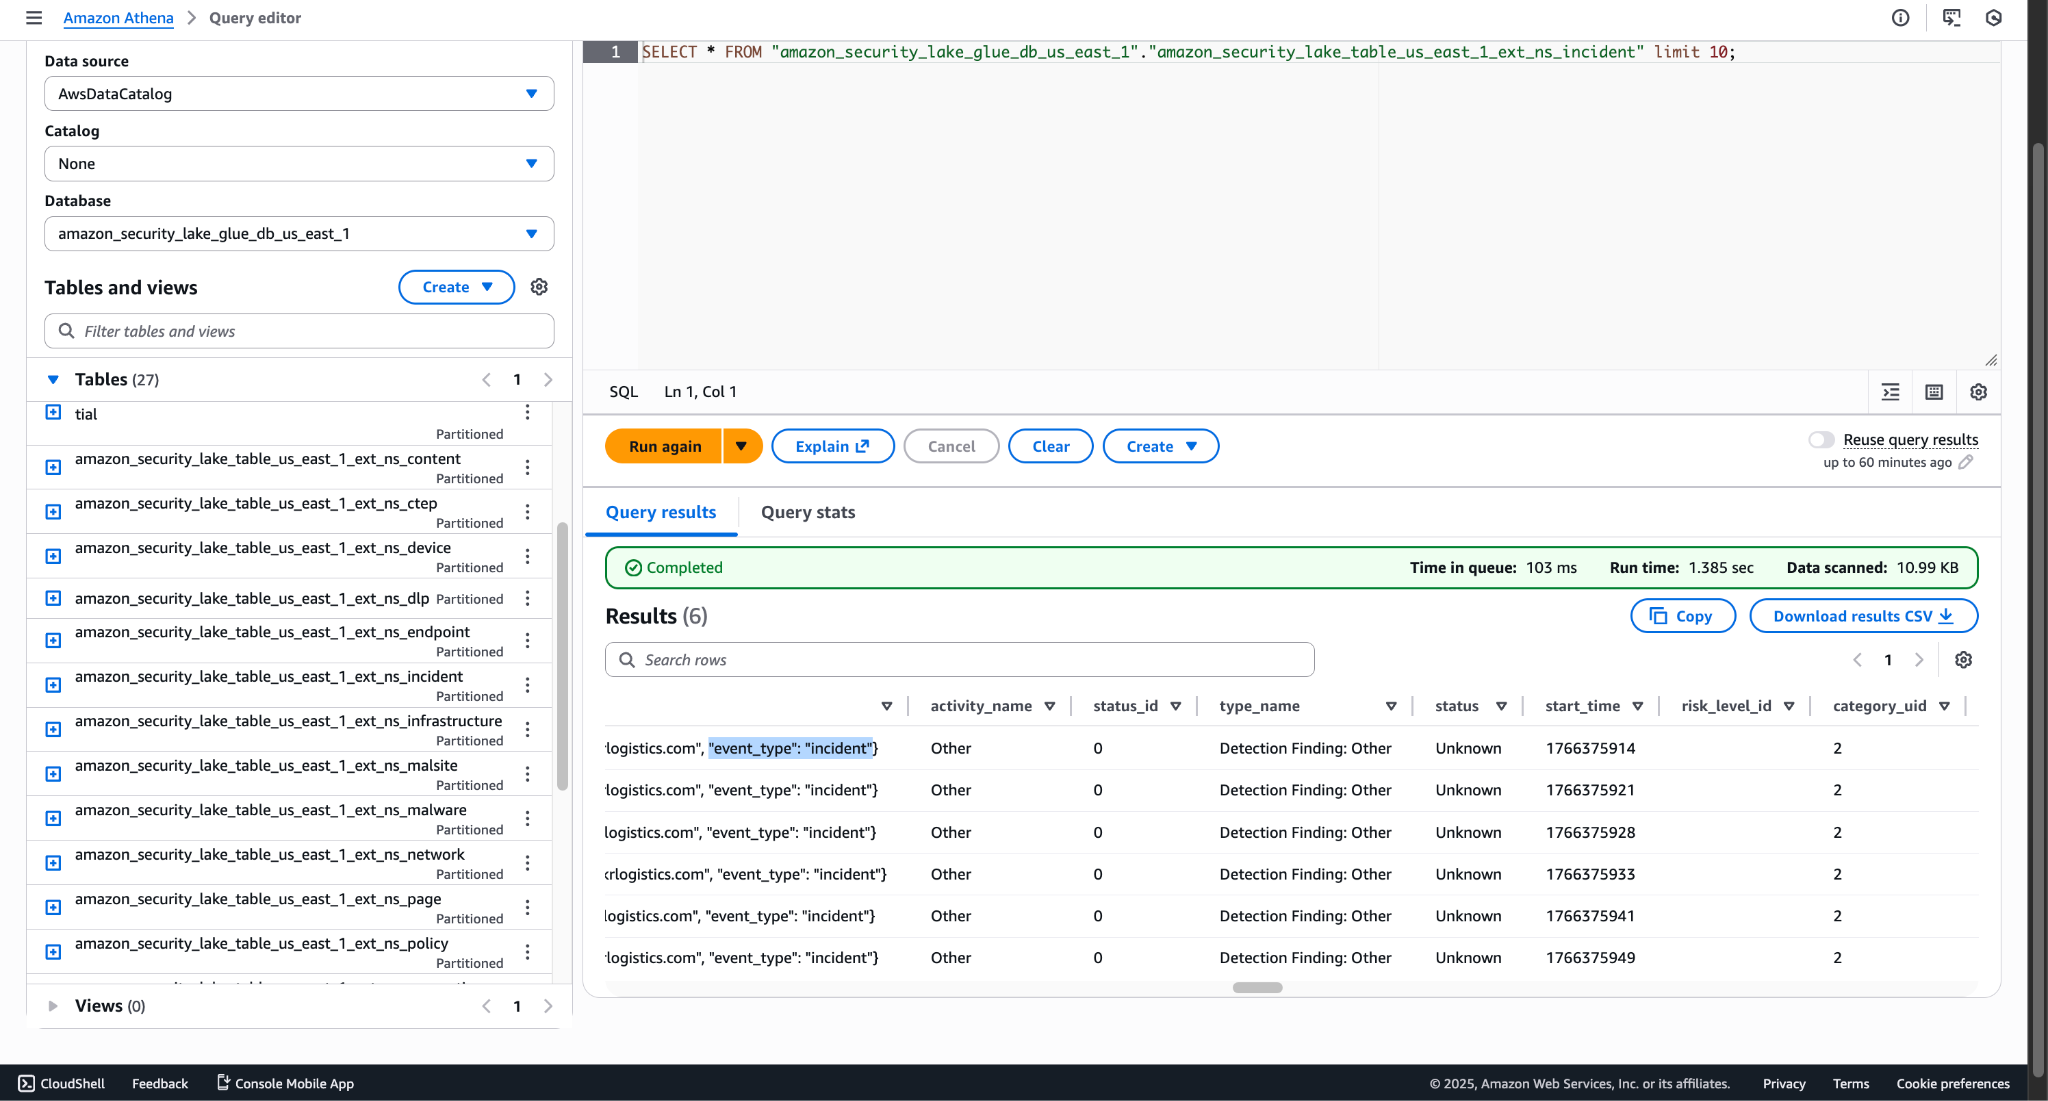
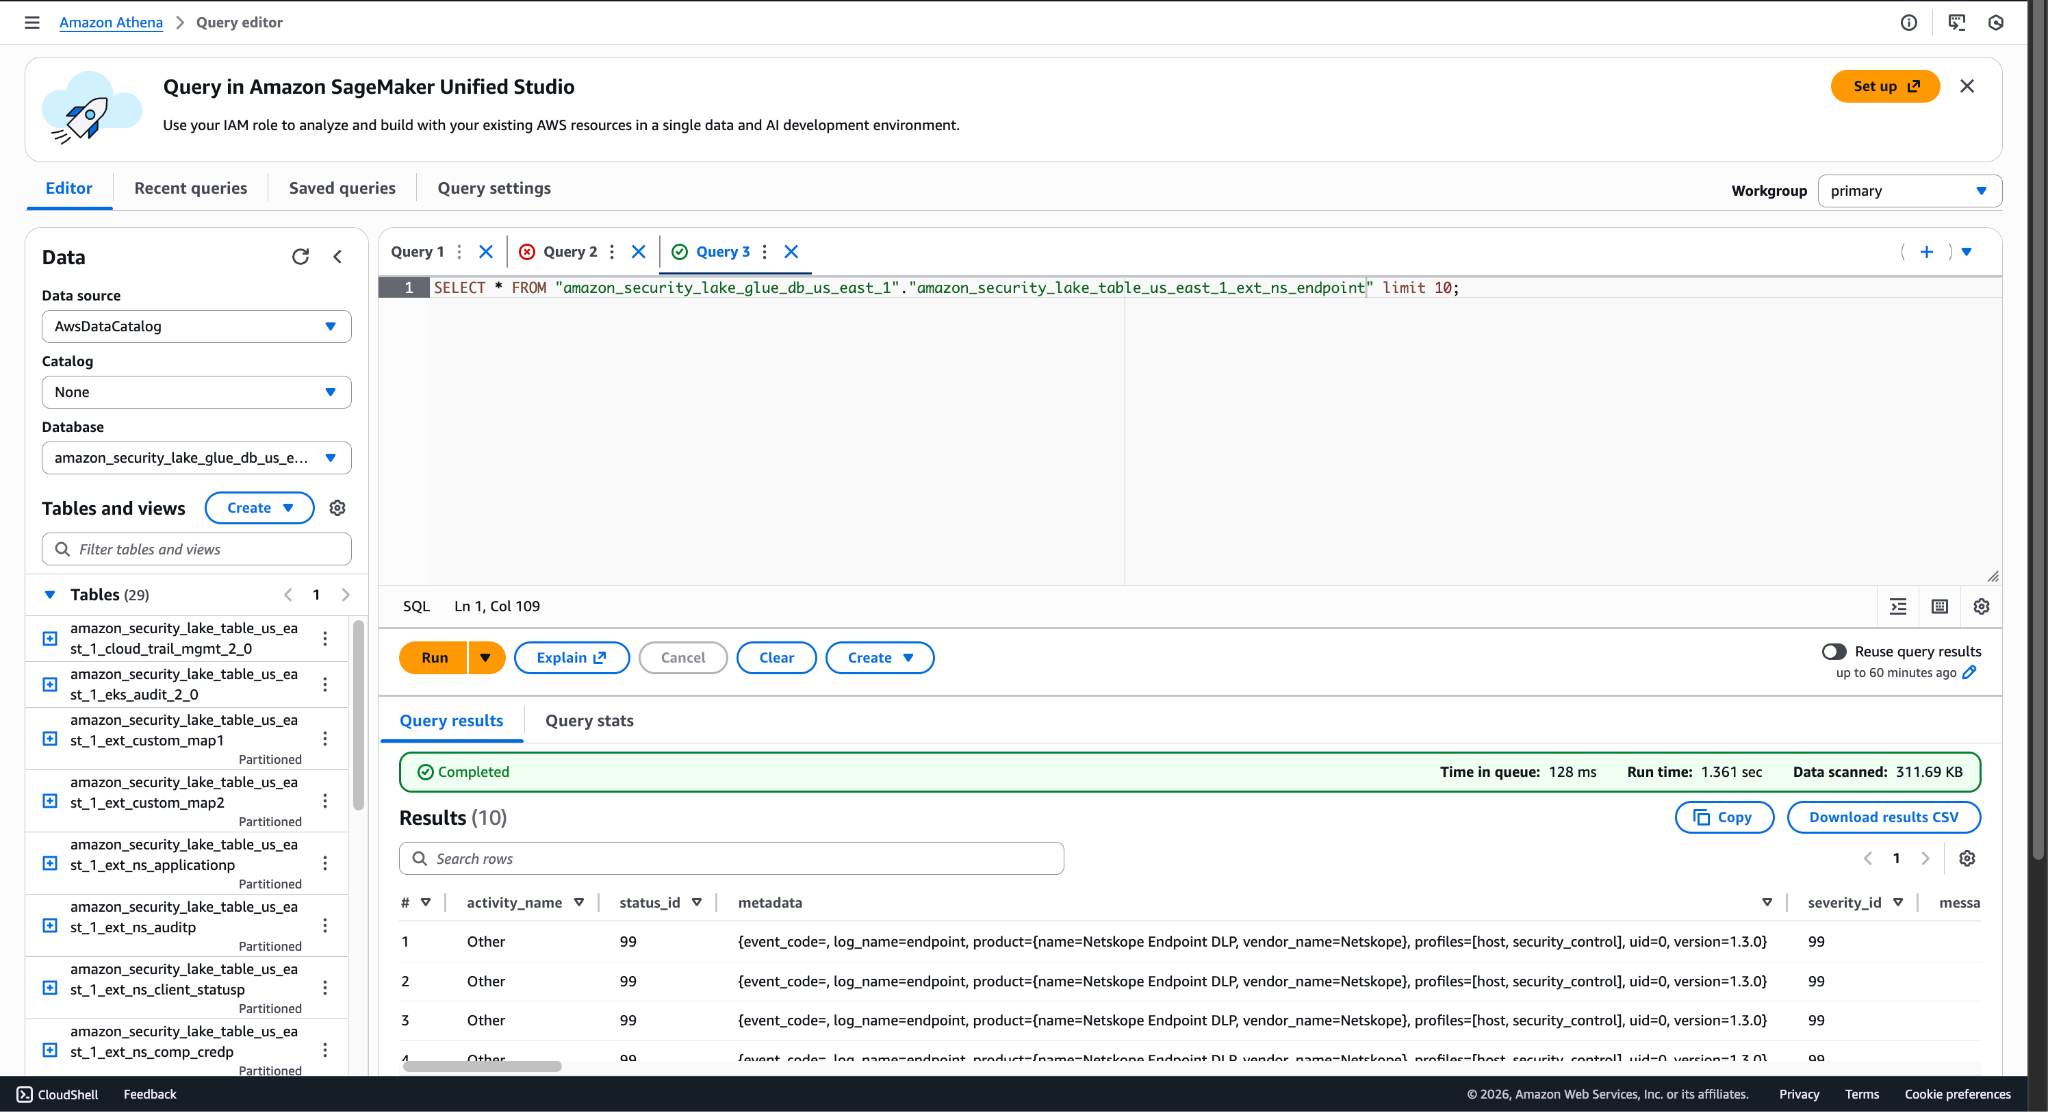
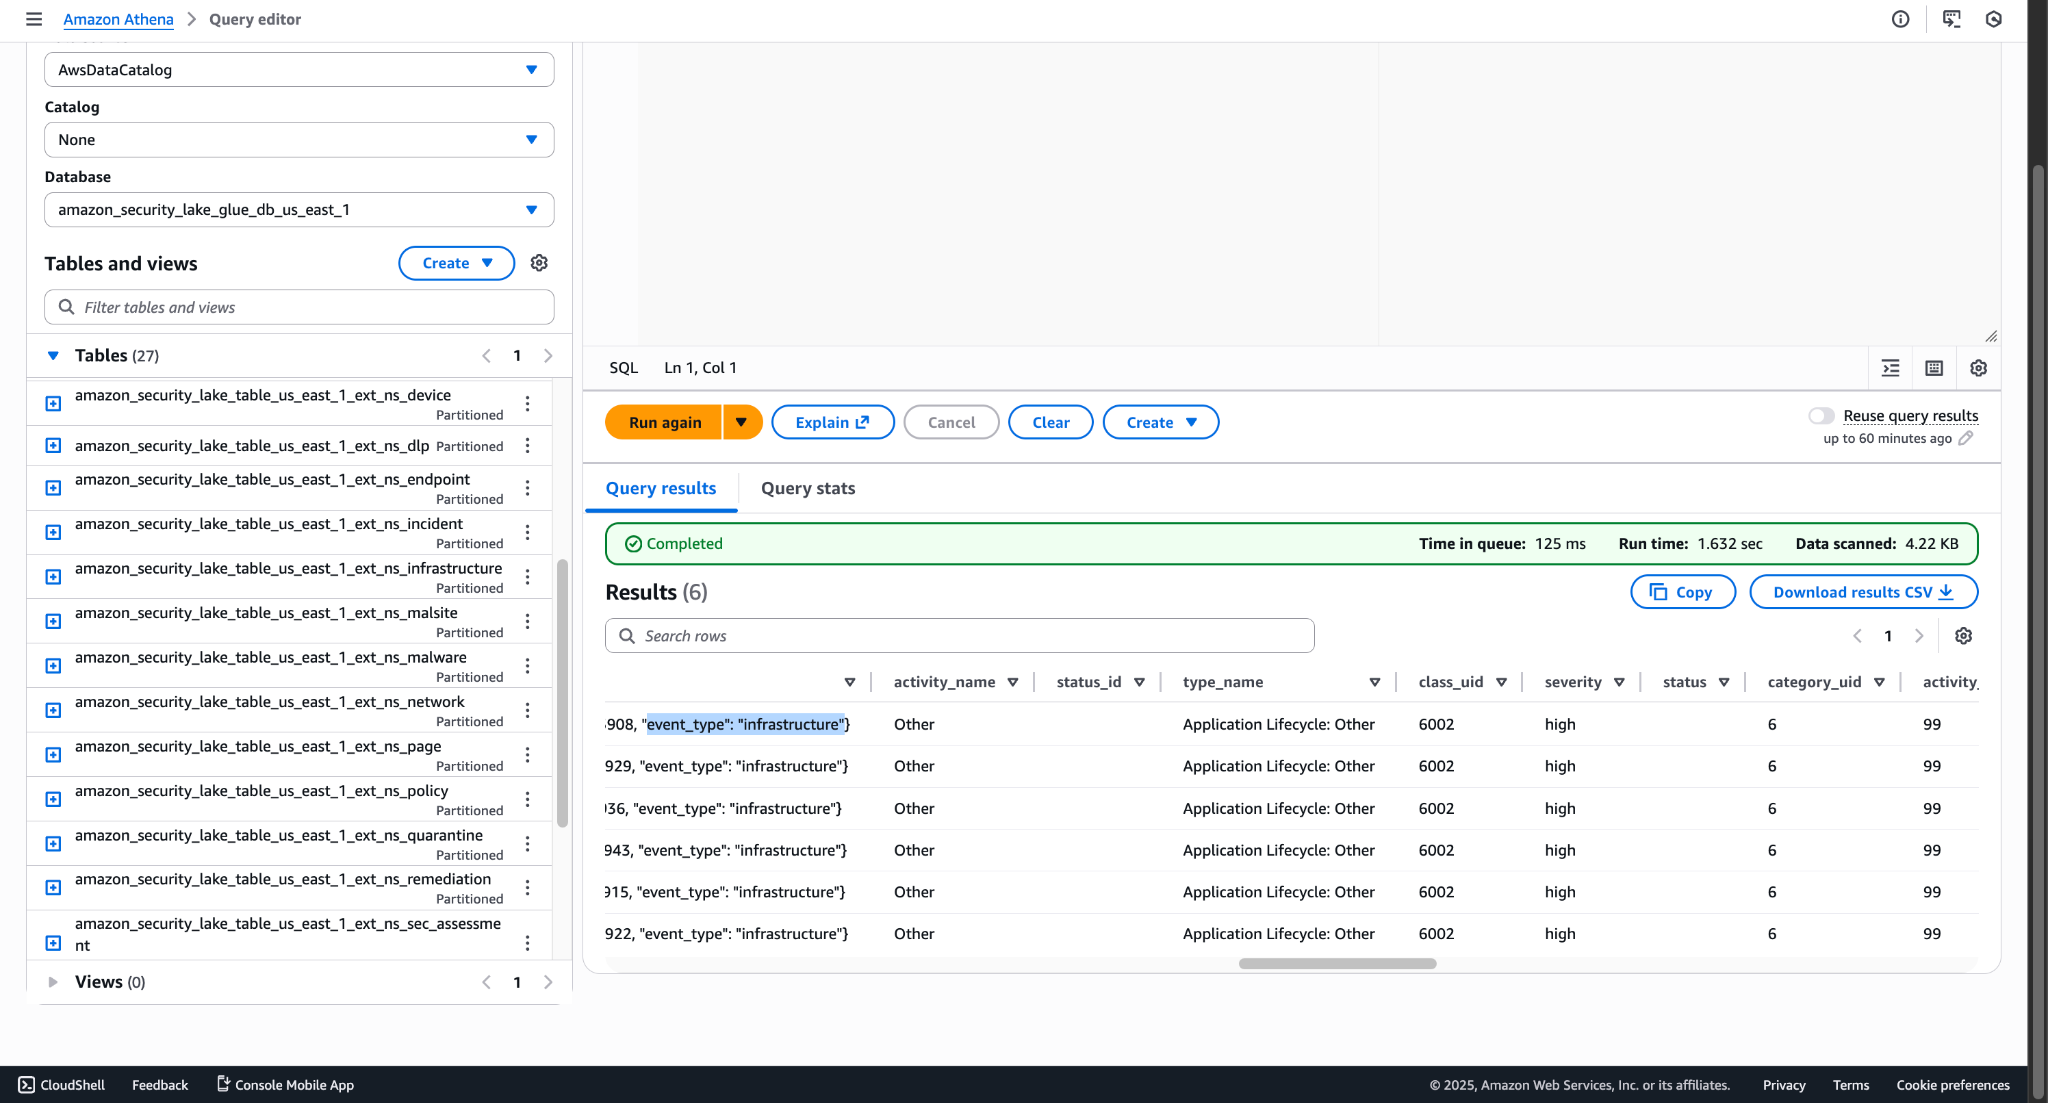
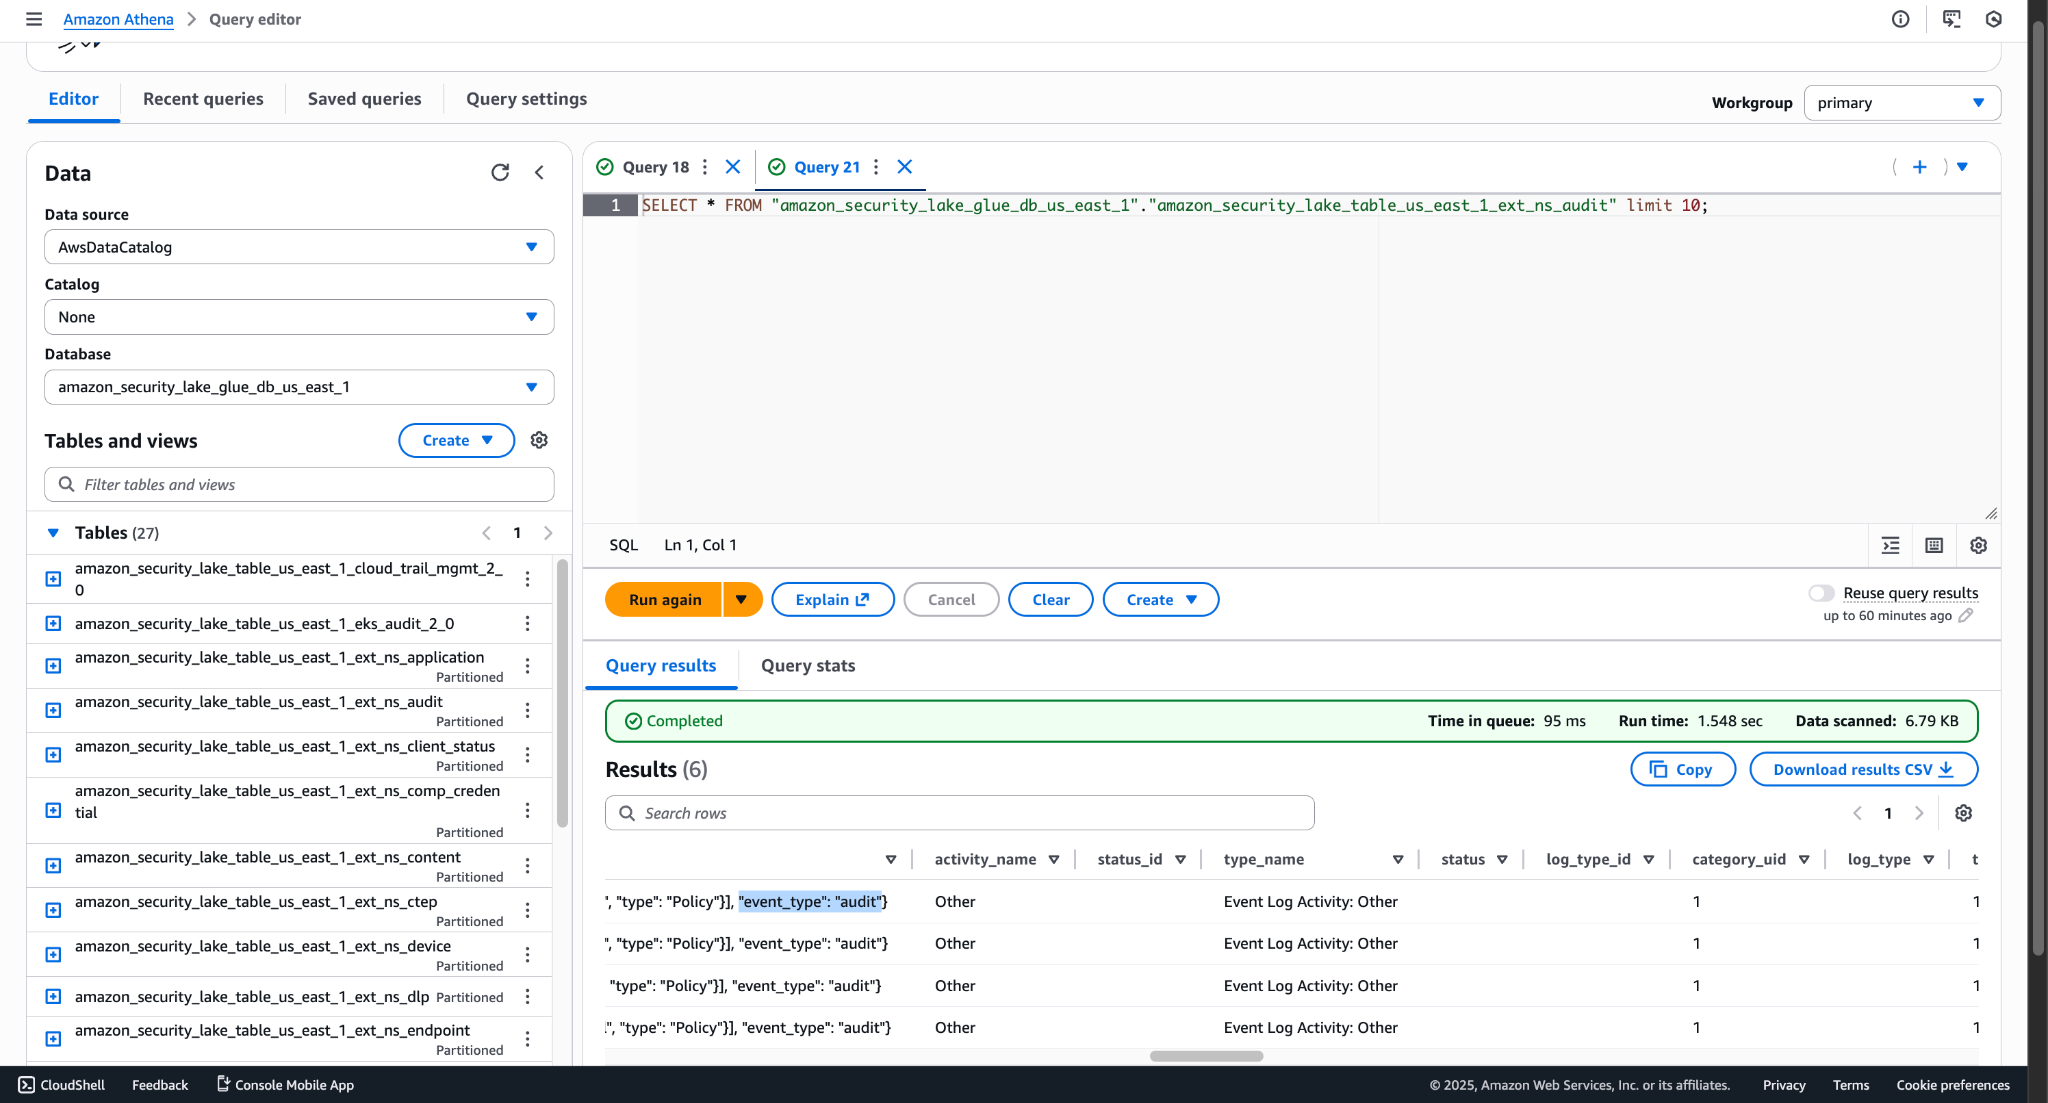
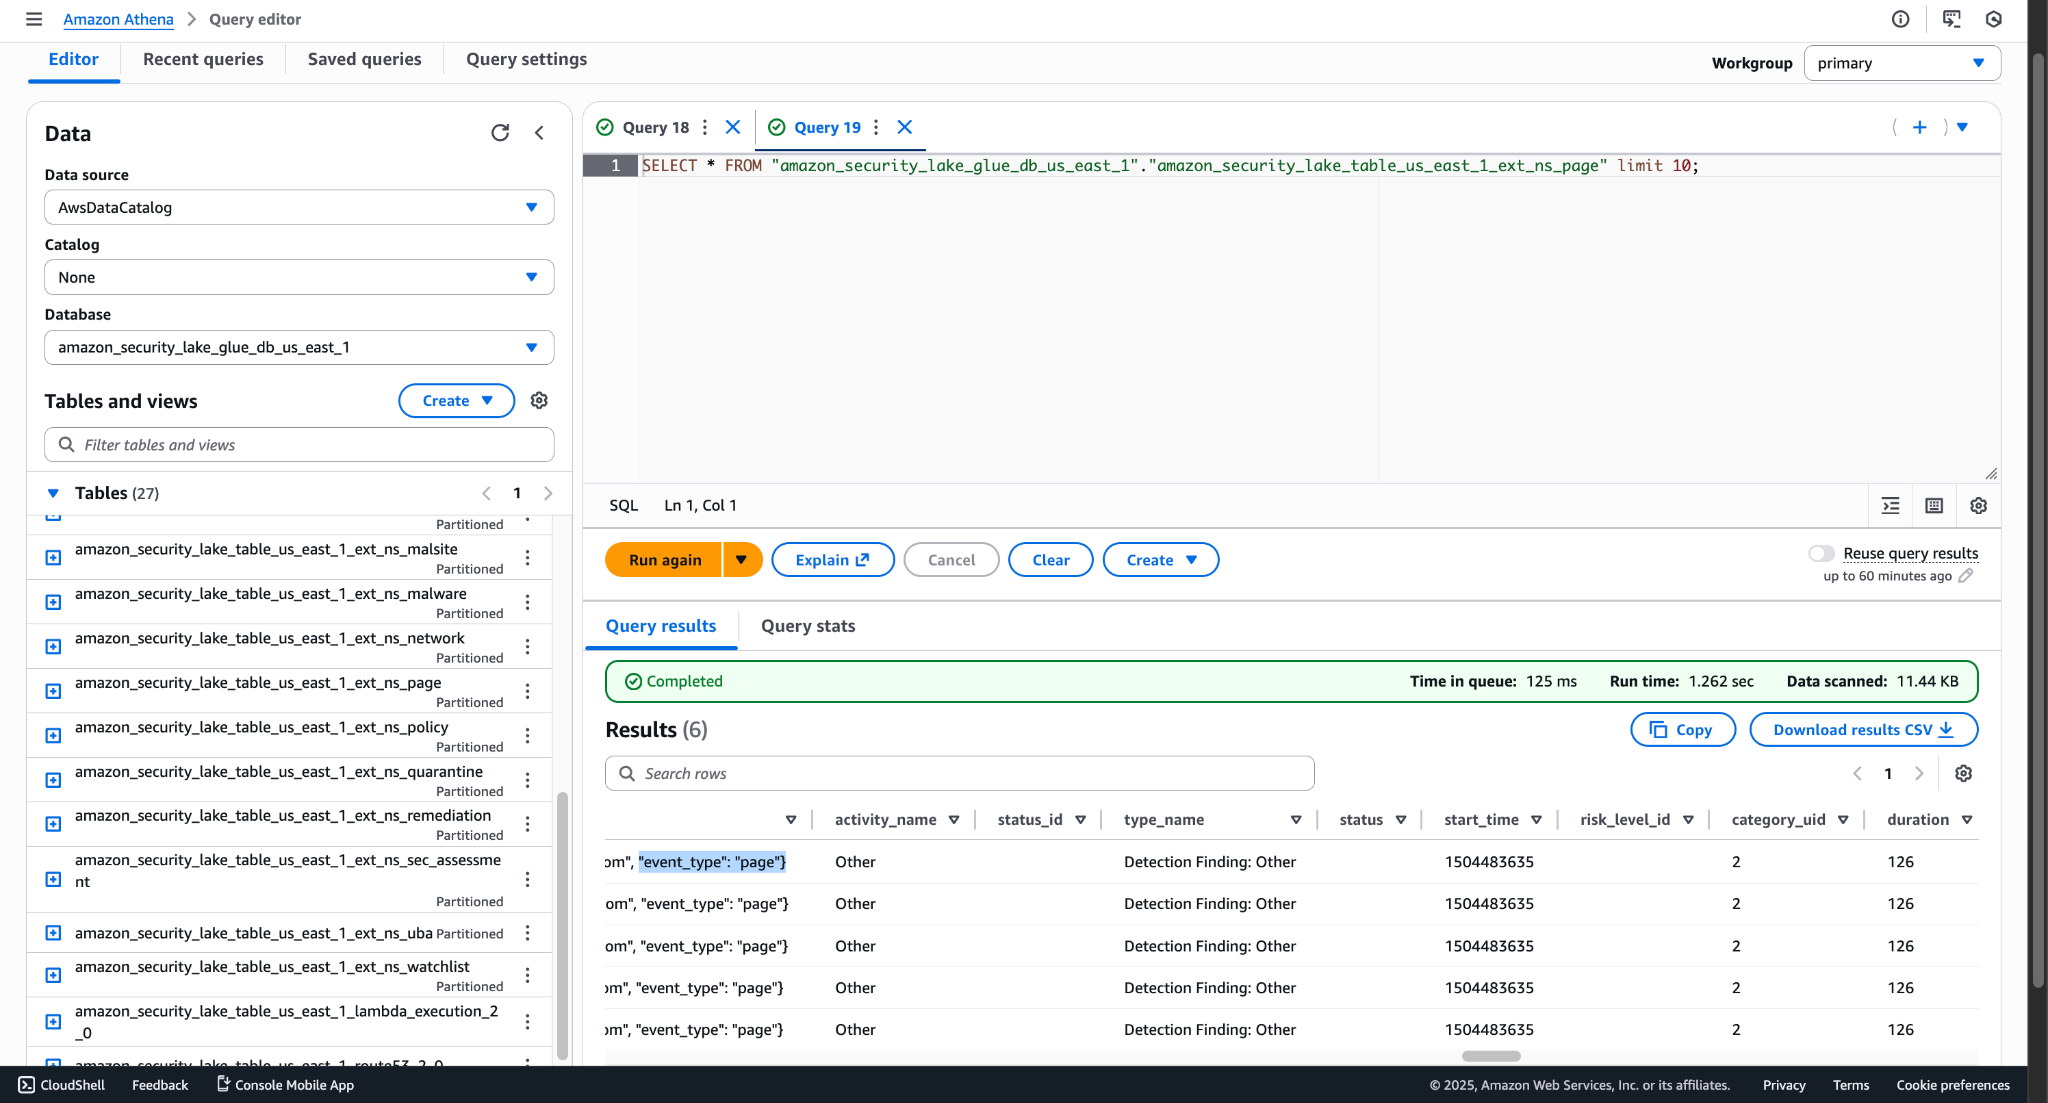
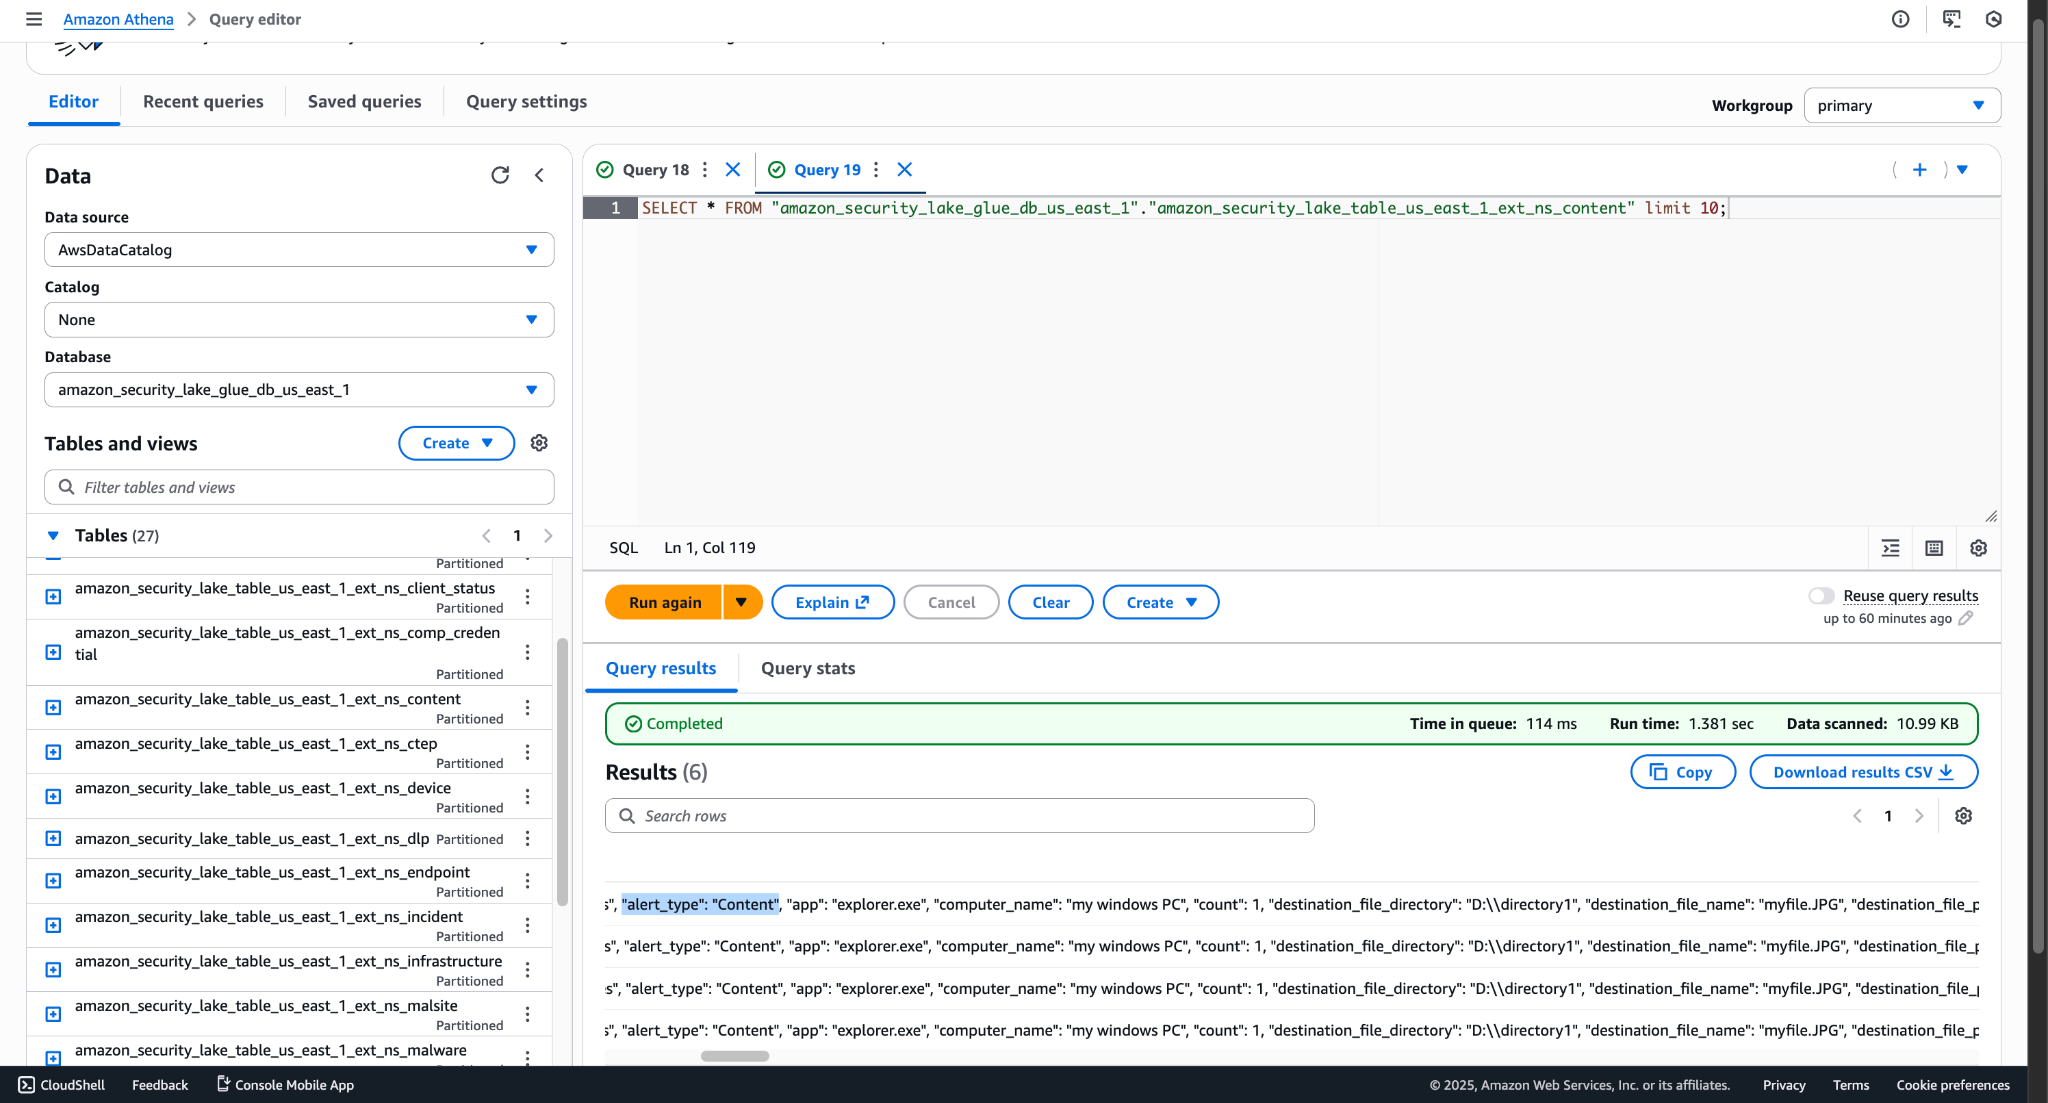
For Alerts
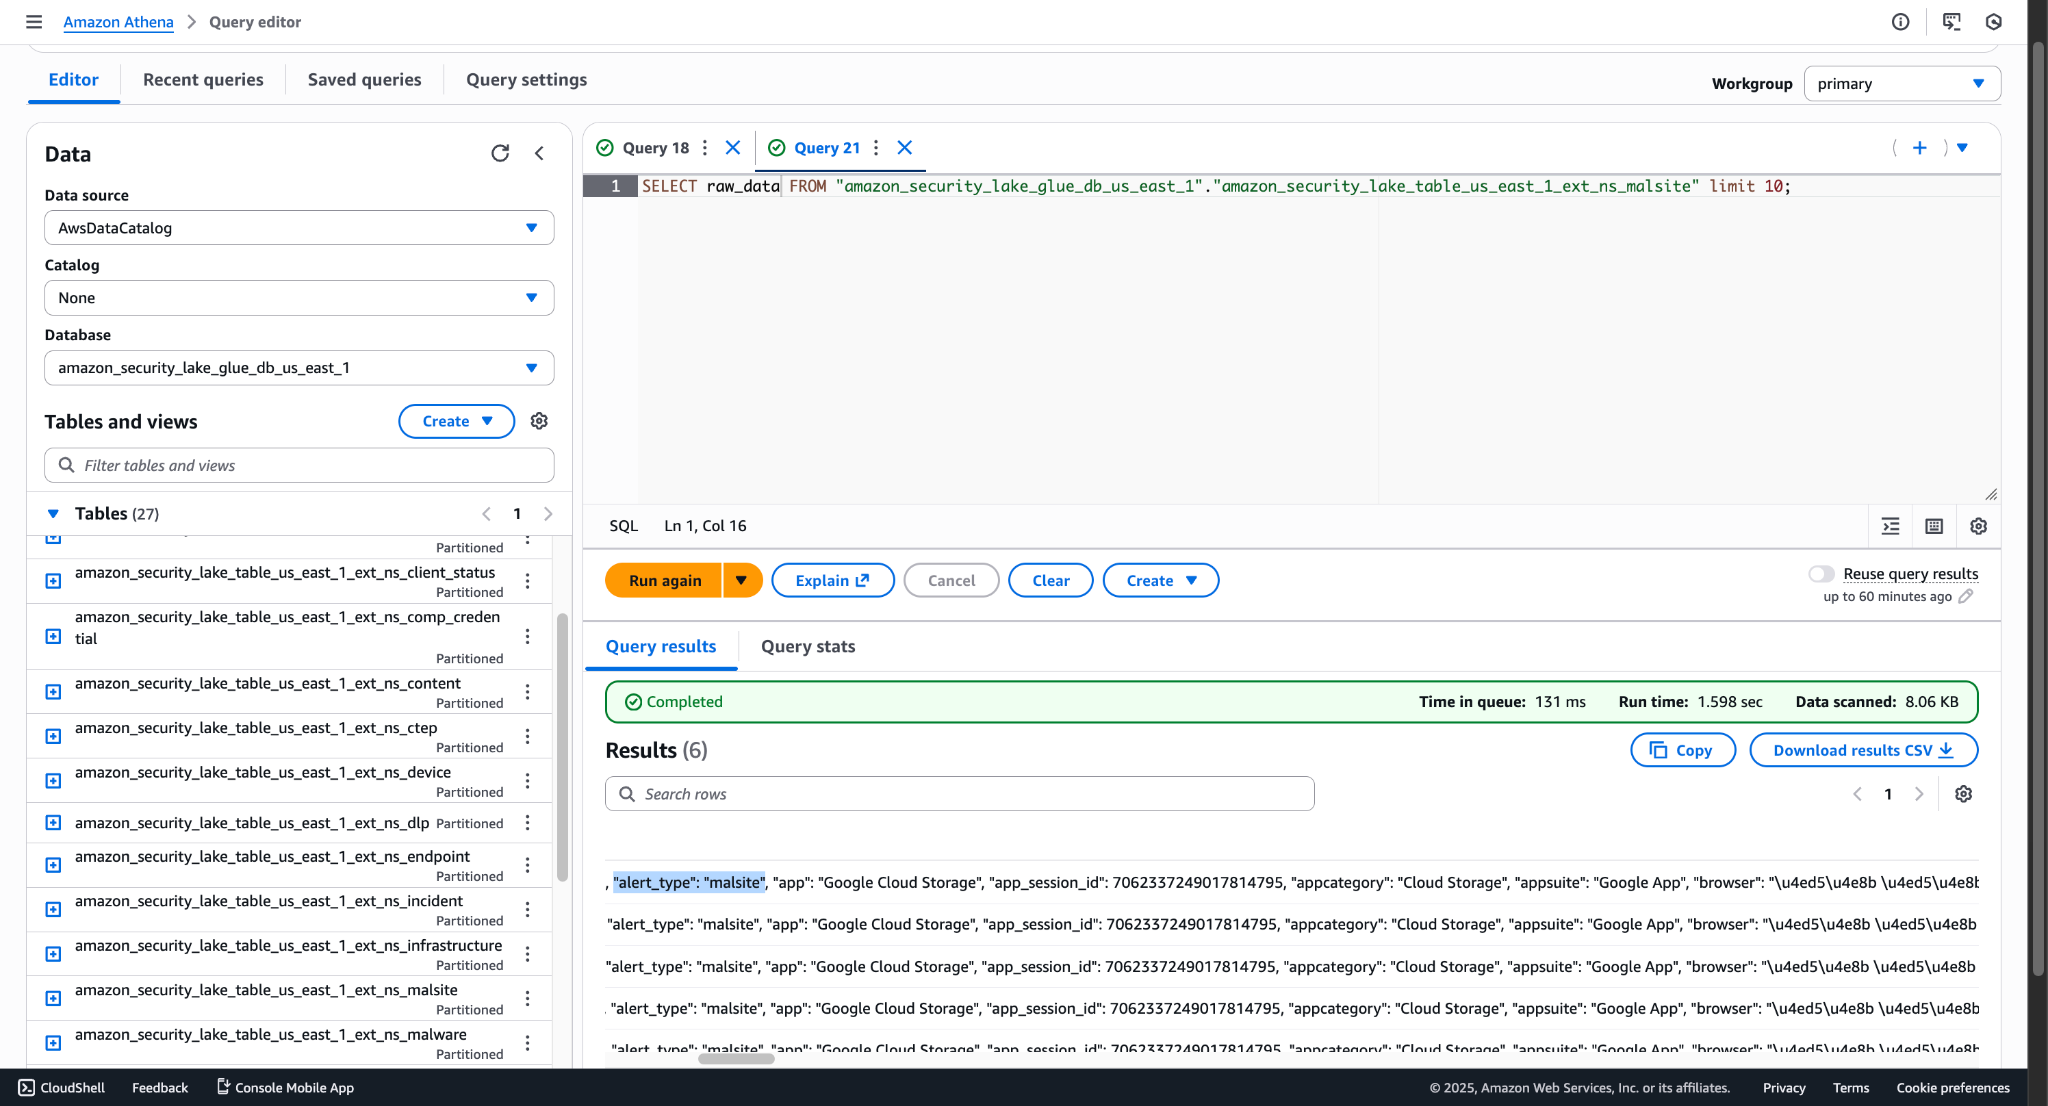
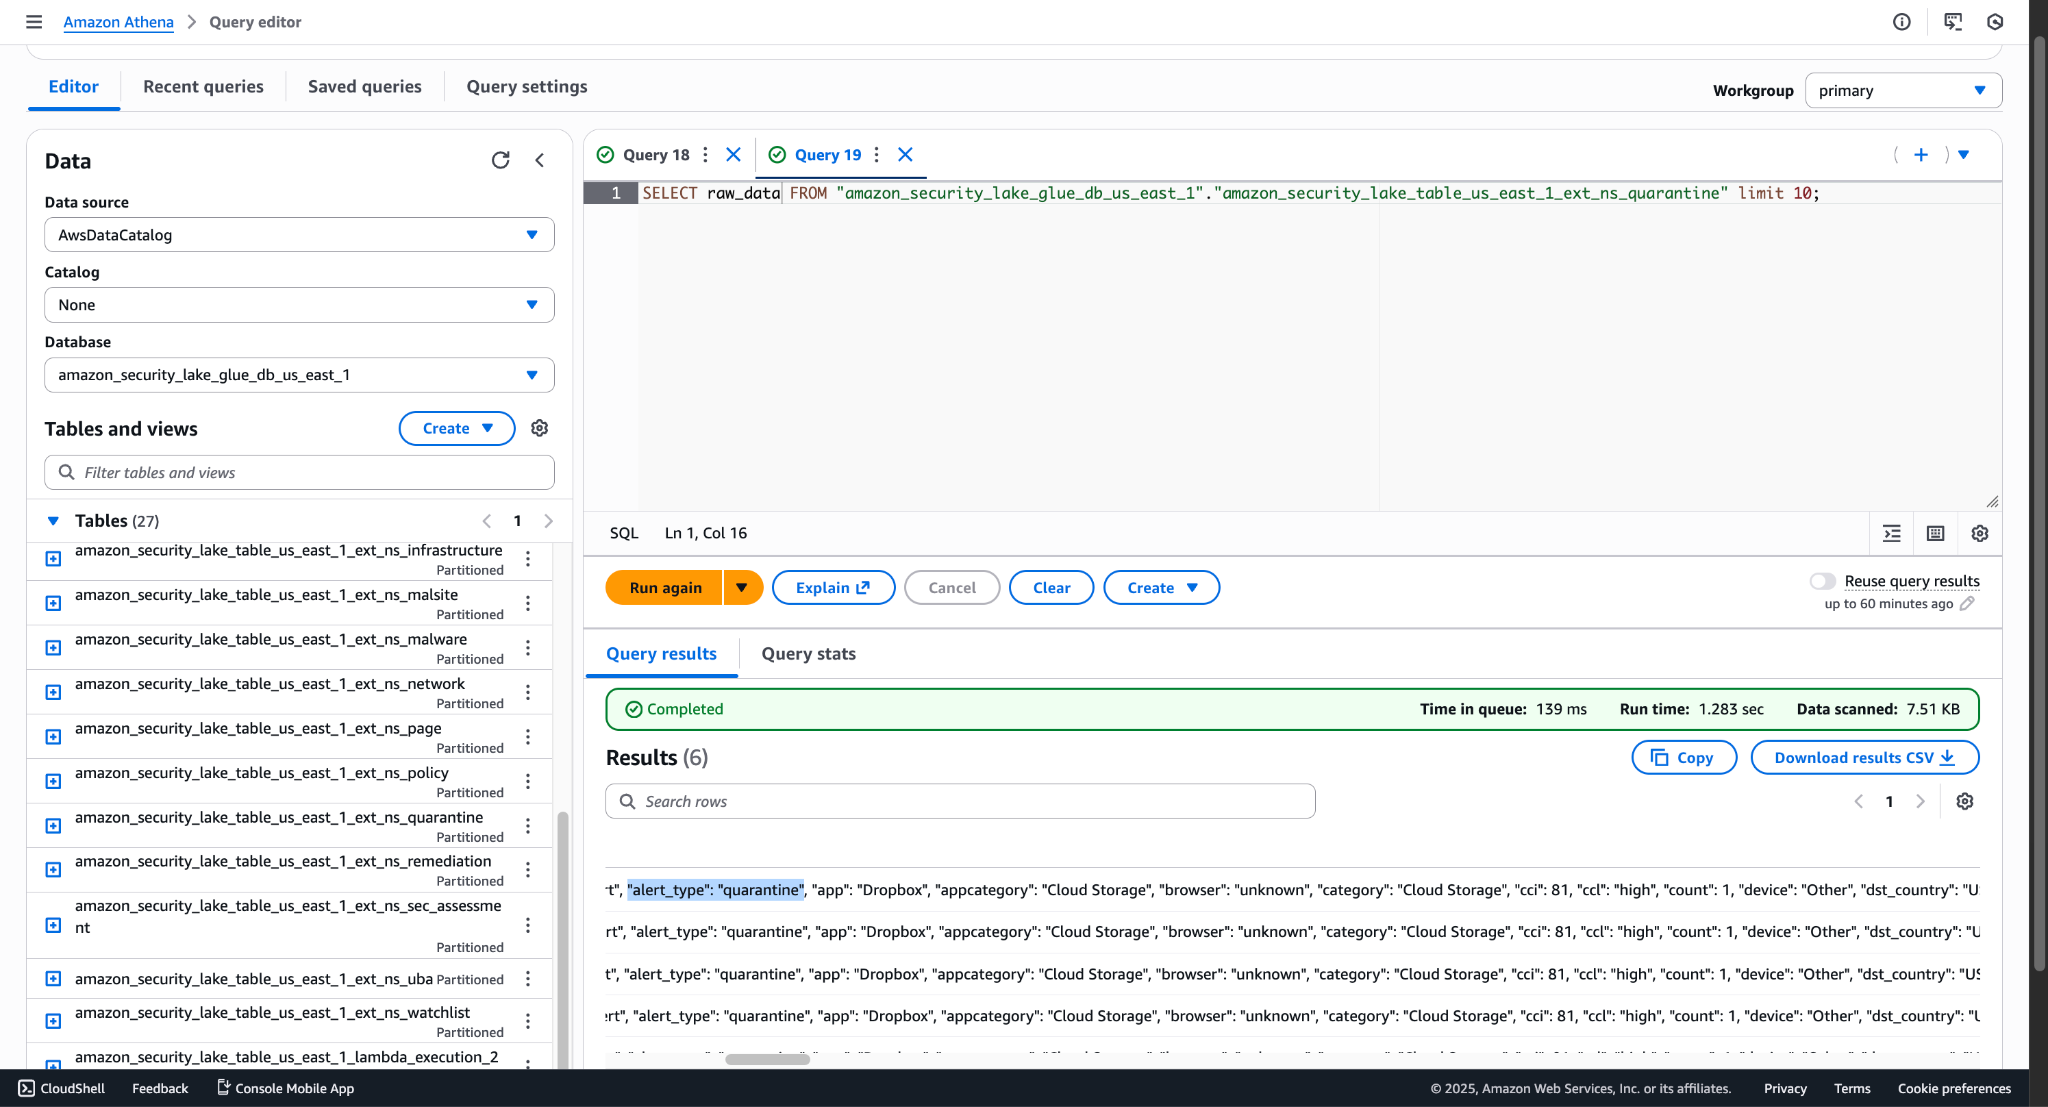
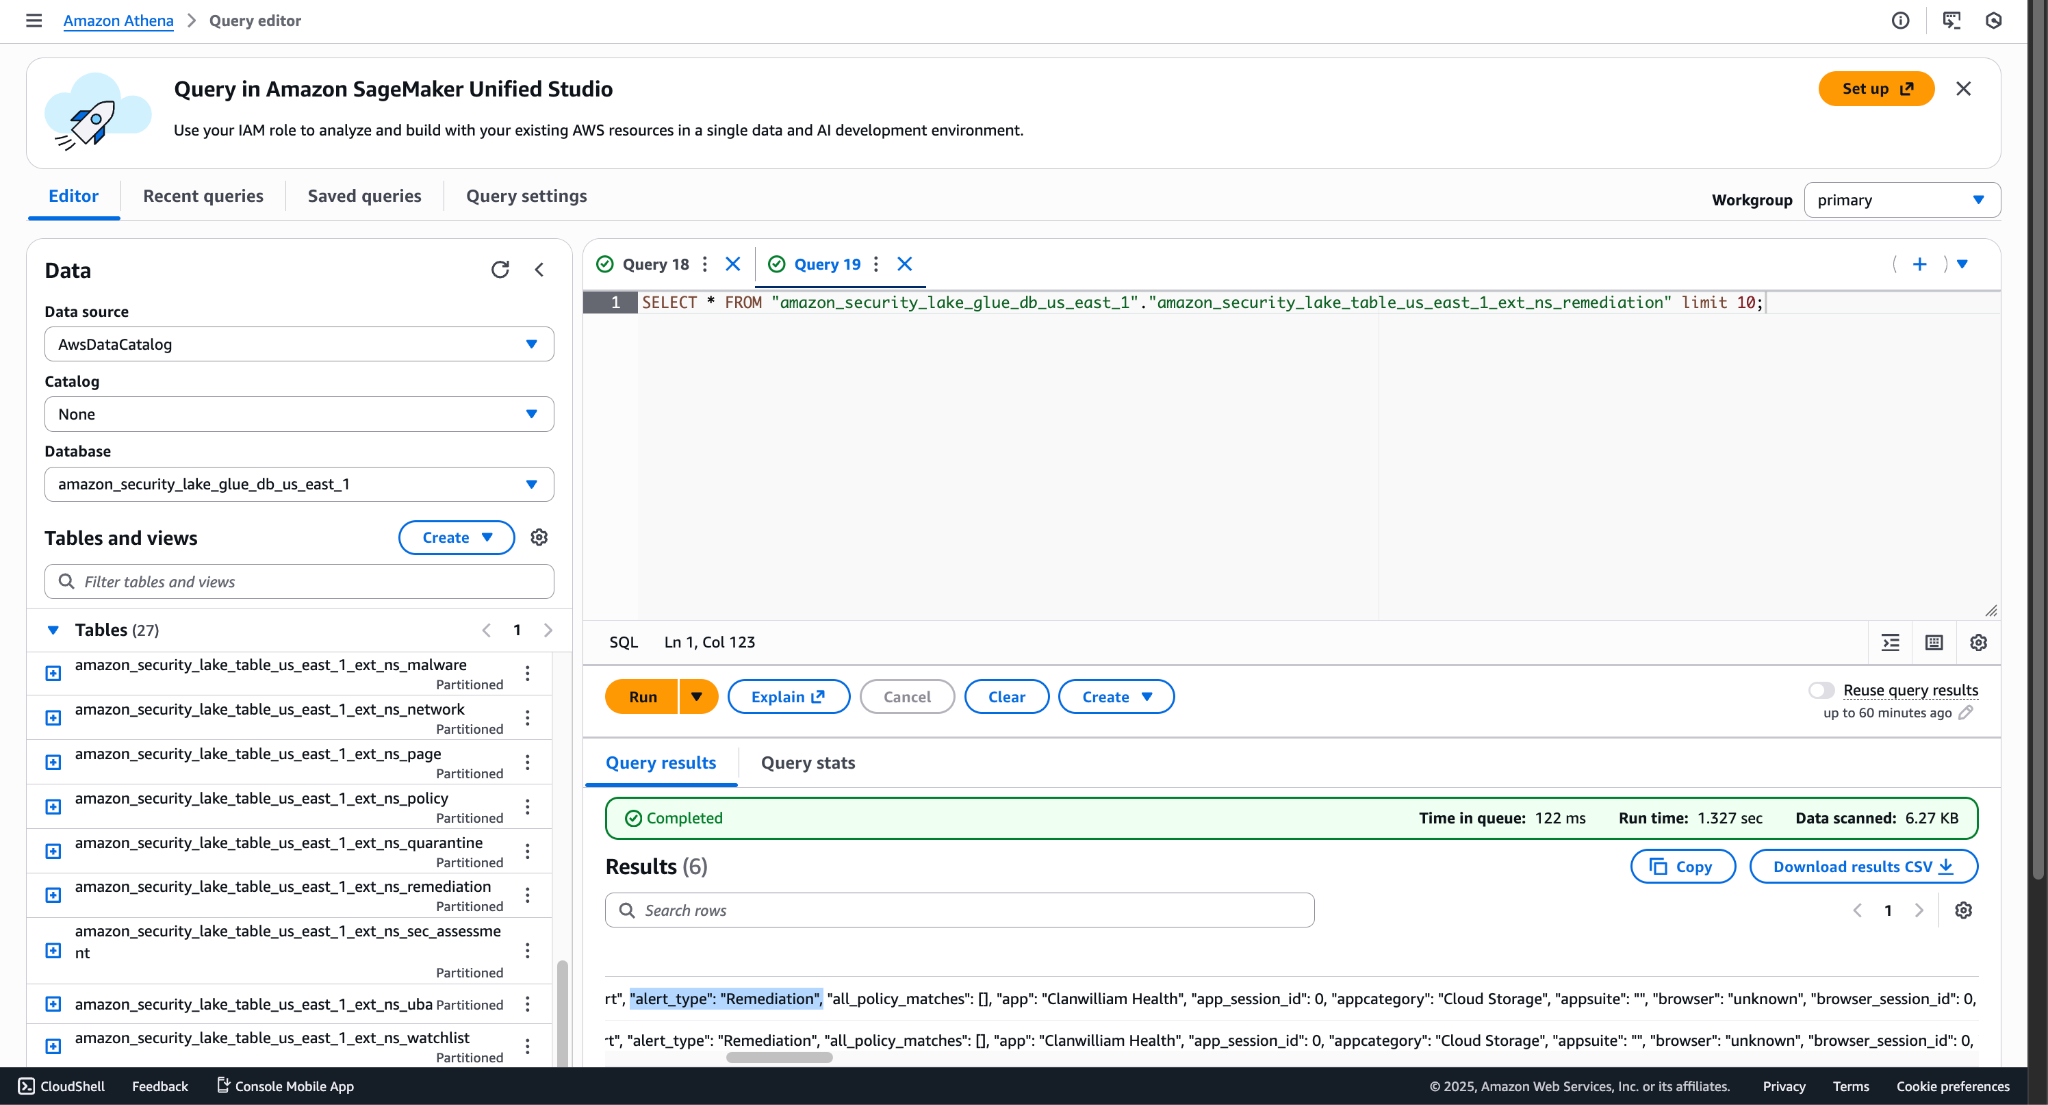
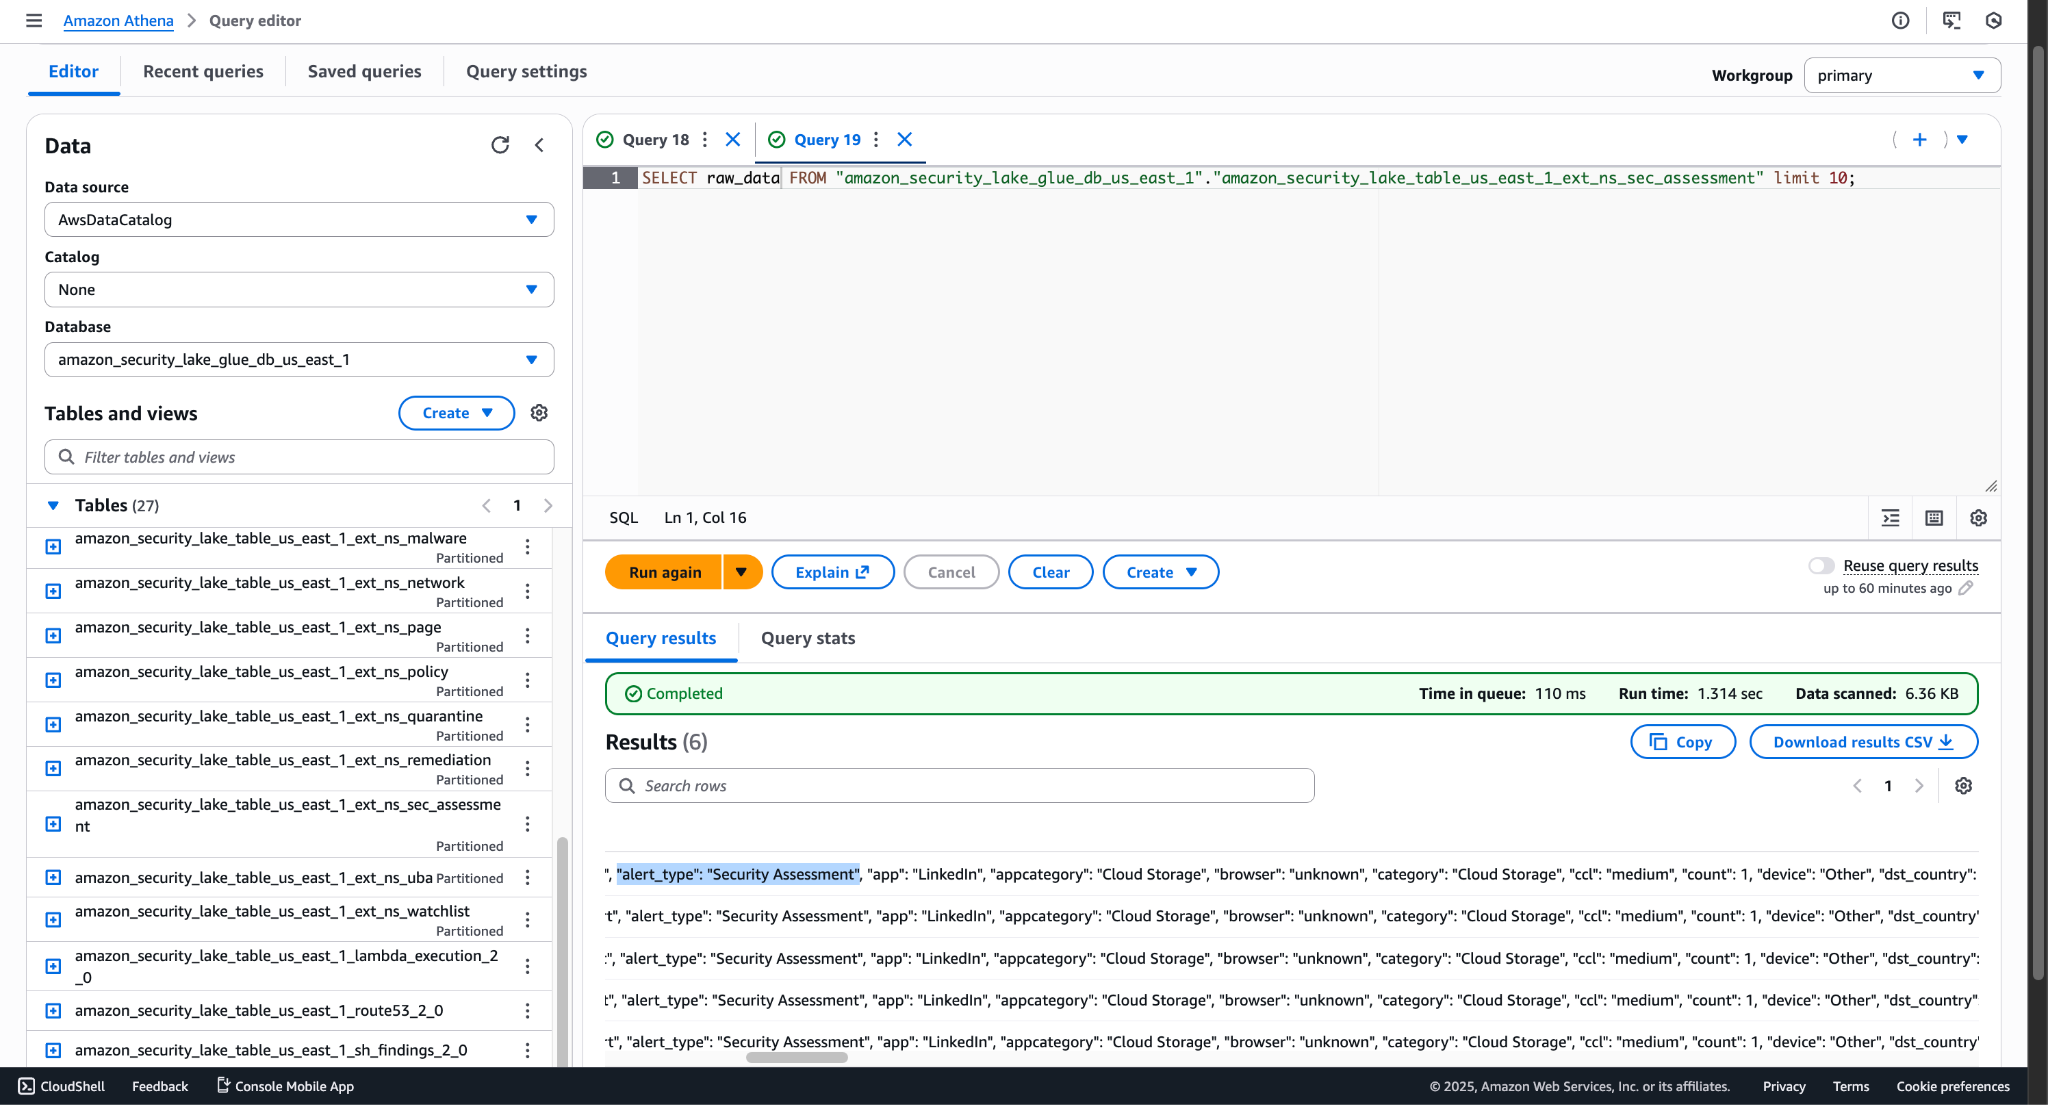
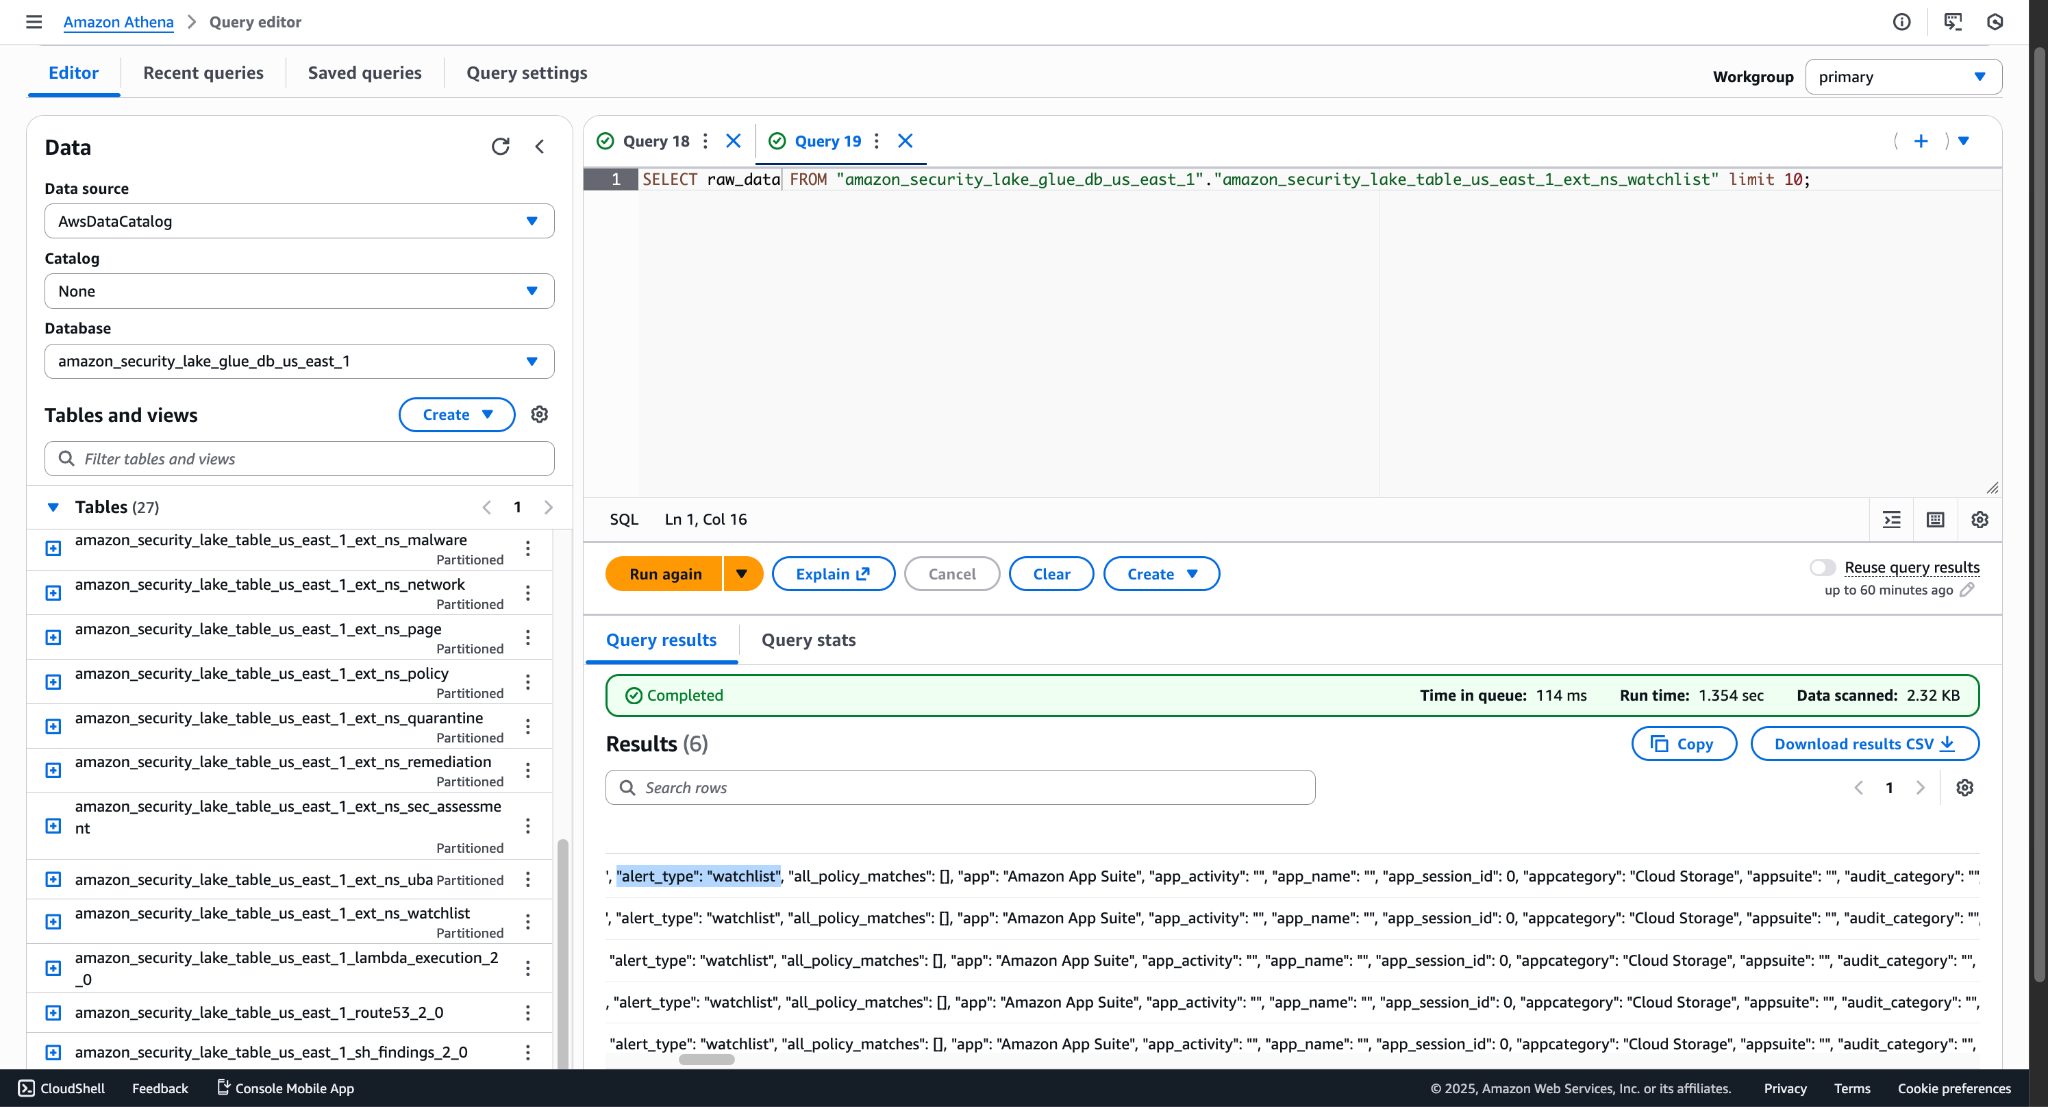
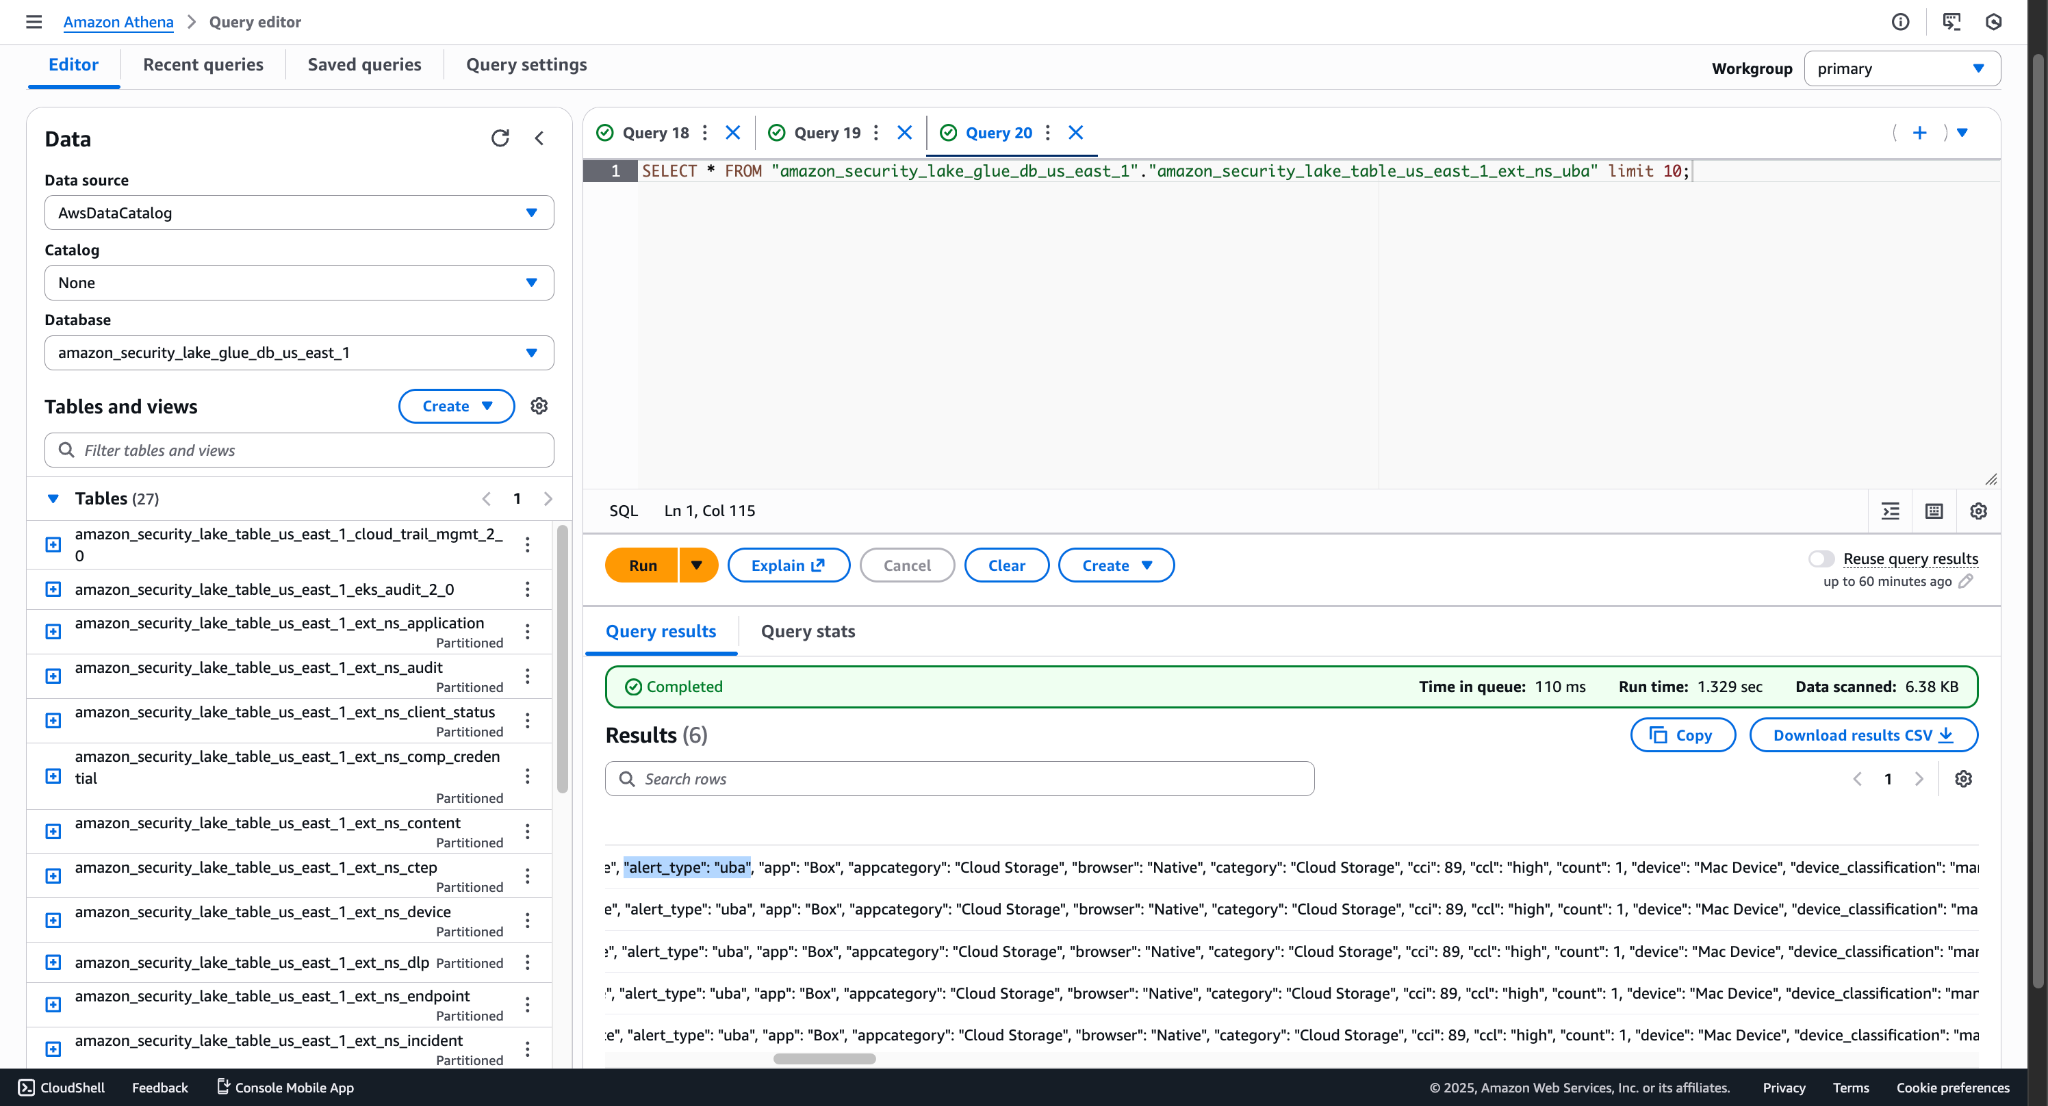
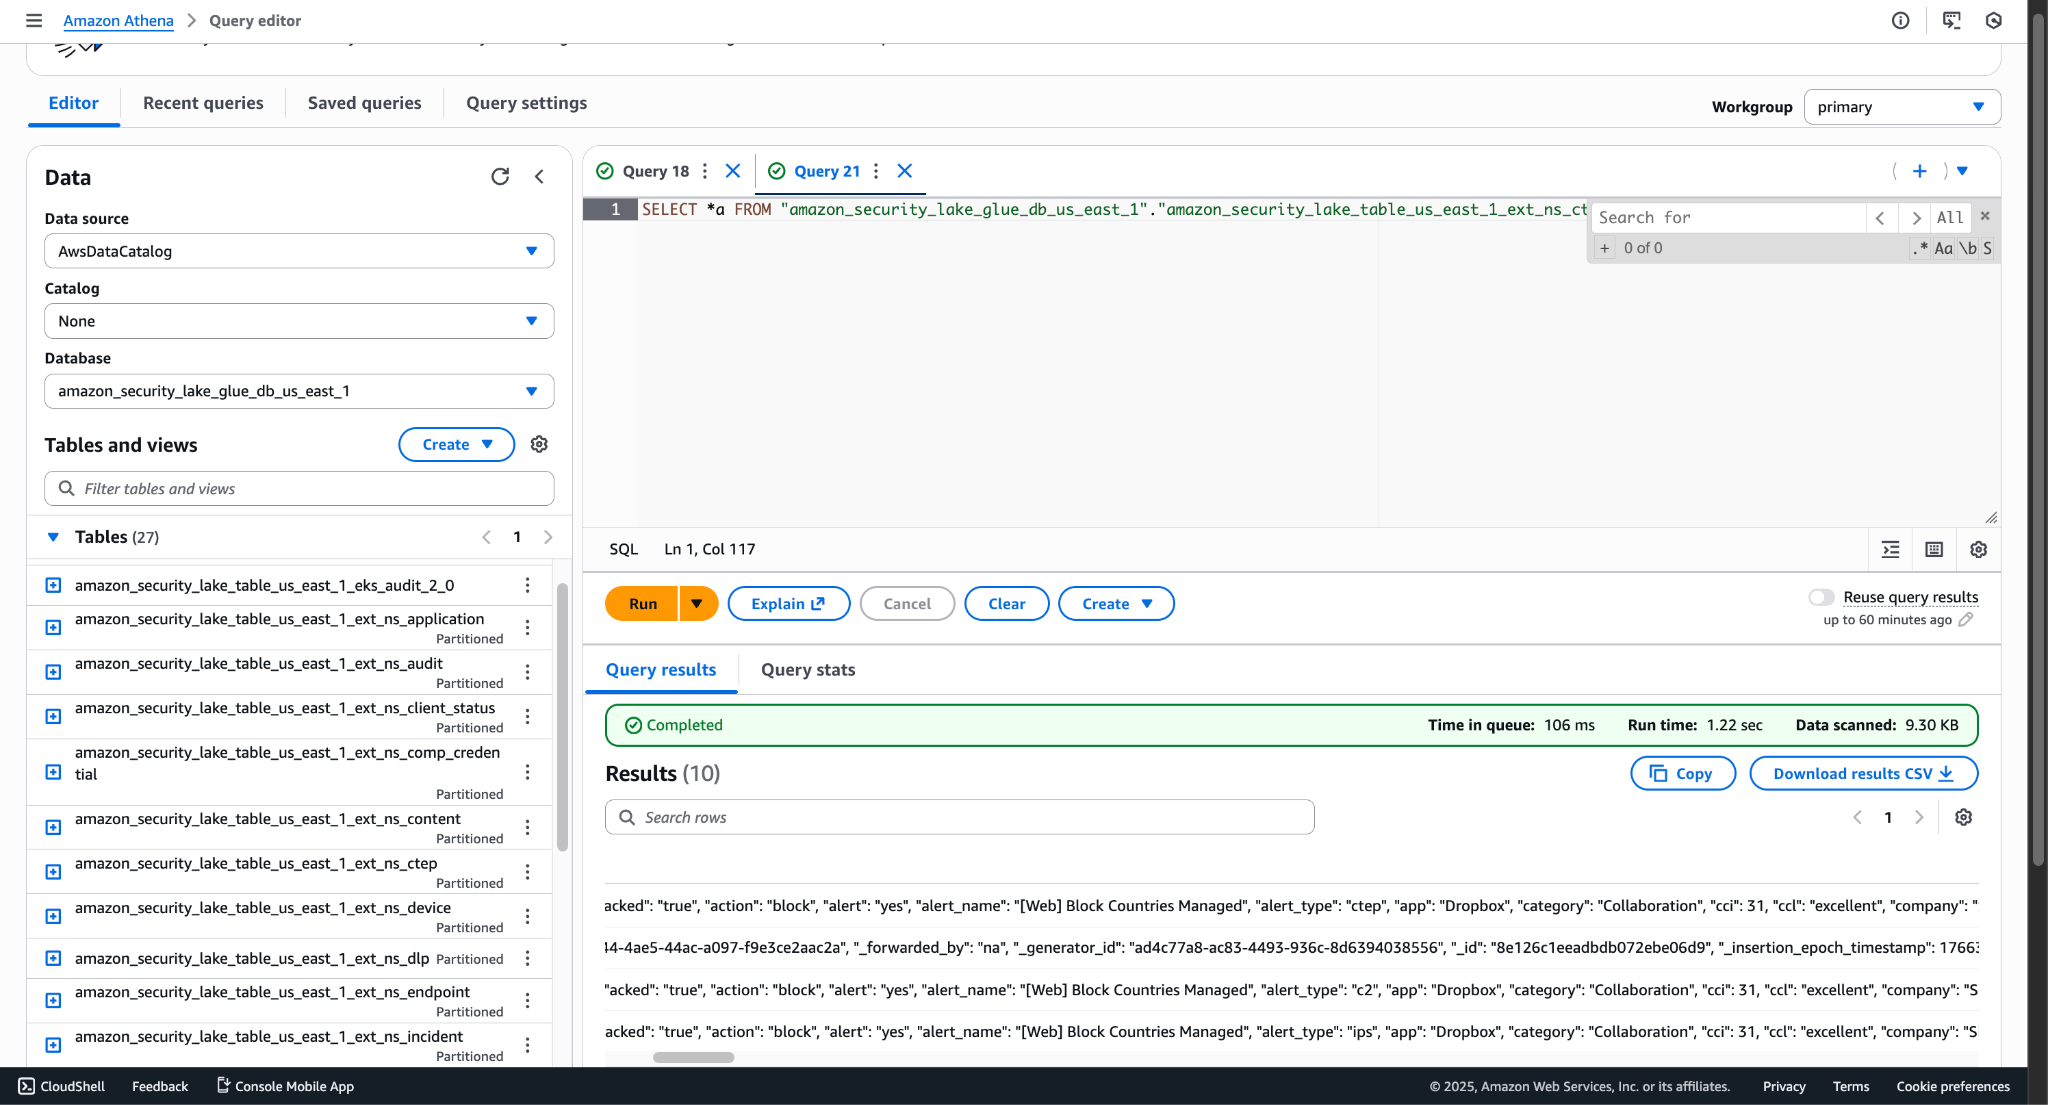
Note
The table of CTEP alerts will store CTEP, C2, and IPS alerts.
For WebTx
Troubleshooting the AWS Security Lake Plugin
If you see any error while configuring the Plugin. It may be because of following reasons:
- Invalid credentials
- Security Lake is not enabled on the provided AWS account.
What to do:
- Verify if the provided credentials are valid or not. Refer the steps mentioned in Configuration on AWS section.
- Make sure Security Lake is enabled on the provided AWS account.
If you don’t see any Parquet files in the destination bucket in 10-15 mins after configuring. It may be due to following reasons:
- Data is not getting pulled from the source plugin.
- Data pulled is less than 256 MB and no new same type of data is pulled again.
What to do:
- Verify if the logs are pulled or not, check logs from the Logging page for the Source Plugin.
- Note that data will not be ingested to the destination if the pulled alert/event/webtx is less than 265 MB size and then no same type of alert/event is pulled again after 5 minutes.
Unable to ingest data on AWS (Security Lake S3 bucket). It may be due to one of the below mentioned reasons:
- Insufficient permissions
- For AWS IAM Roles Anywhere authentication, Auto-update Provider Role Trust Policy is set to No and the user has not updated the Trust Policies of the Provider role.
What to do:
- Make sure you have followed the appropriate steps mentioned under Configuration on AWS section.
- Use ‘Steps after the plugin is configured with Auto-update Provider Role Trust Policy as No’ section to update the required roles.
Unable to validated ingested files in S3 bucket for given bucket name
This problem may occur because older versions of the plugin used to have S3 bucket name as the plugin configuration name and all types of data was ingested in a single location.
What to do:
Configure a fresh CLS Amazon Security Lake v2.0.0 instead of upgrading the plugin from older plugin. version
Unable to query data on Athena, it may be due to following reasons:
- No data is ingested on Security Lake S3 bucket.
- User does not have permission to query data on Security Lake Database.
What to do:
- Make sure data is ingested on the Security Lake S3 bucket. Refer to the Validate from the AWS section.
- Make sure the user has the necessary permissions to access the Security Lake Database. Permissions can be provided to the user’s role from AWS Lake Formation > Data Permissions page. For more information related to the permissions for querying data on Athena, you can connect to the AWS Support team.
Parquet file is uploaded in the S3 bucket but Data is not visible on Athena or only some of the columns are visible. It can be because of the following reasons:
- Crawler for that particular alert/event/webtx is not executed.
- Insufficient permissions
What to do:
- Either user needs to manually run the Crawler from AWS Glue > Crawlers page or user needs to Set output and scheduling for the Crawler as per their need.
Note
Each alert/event type and Webtx will have a separate Crawler.
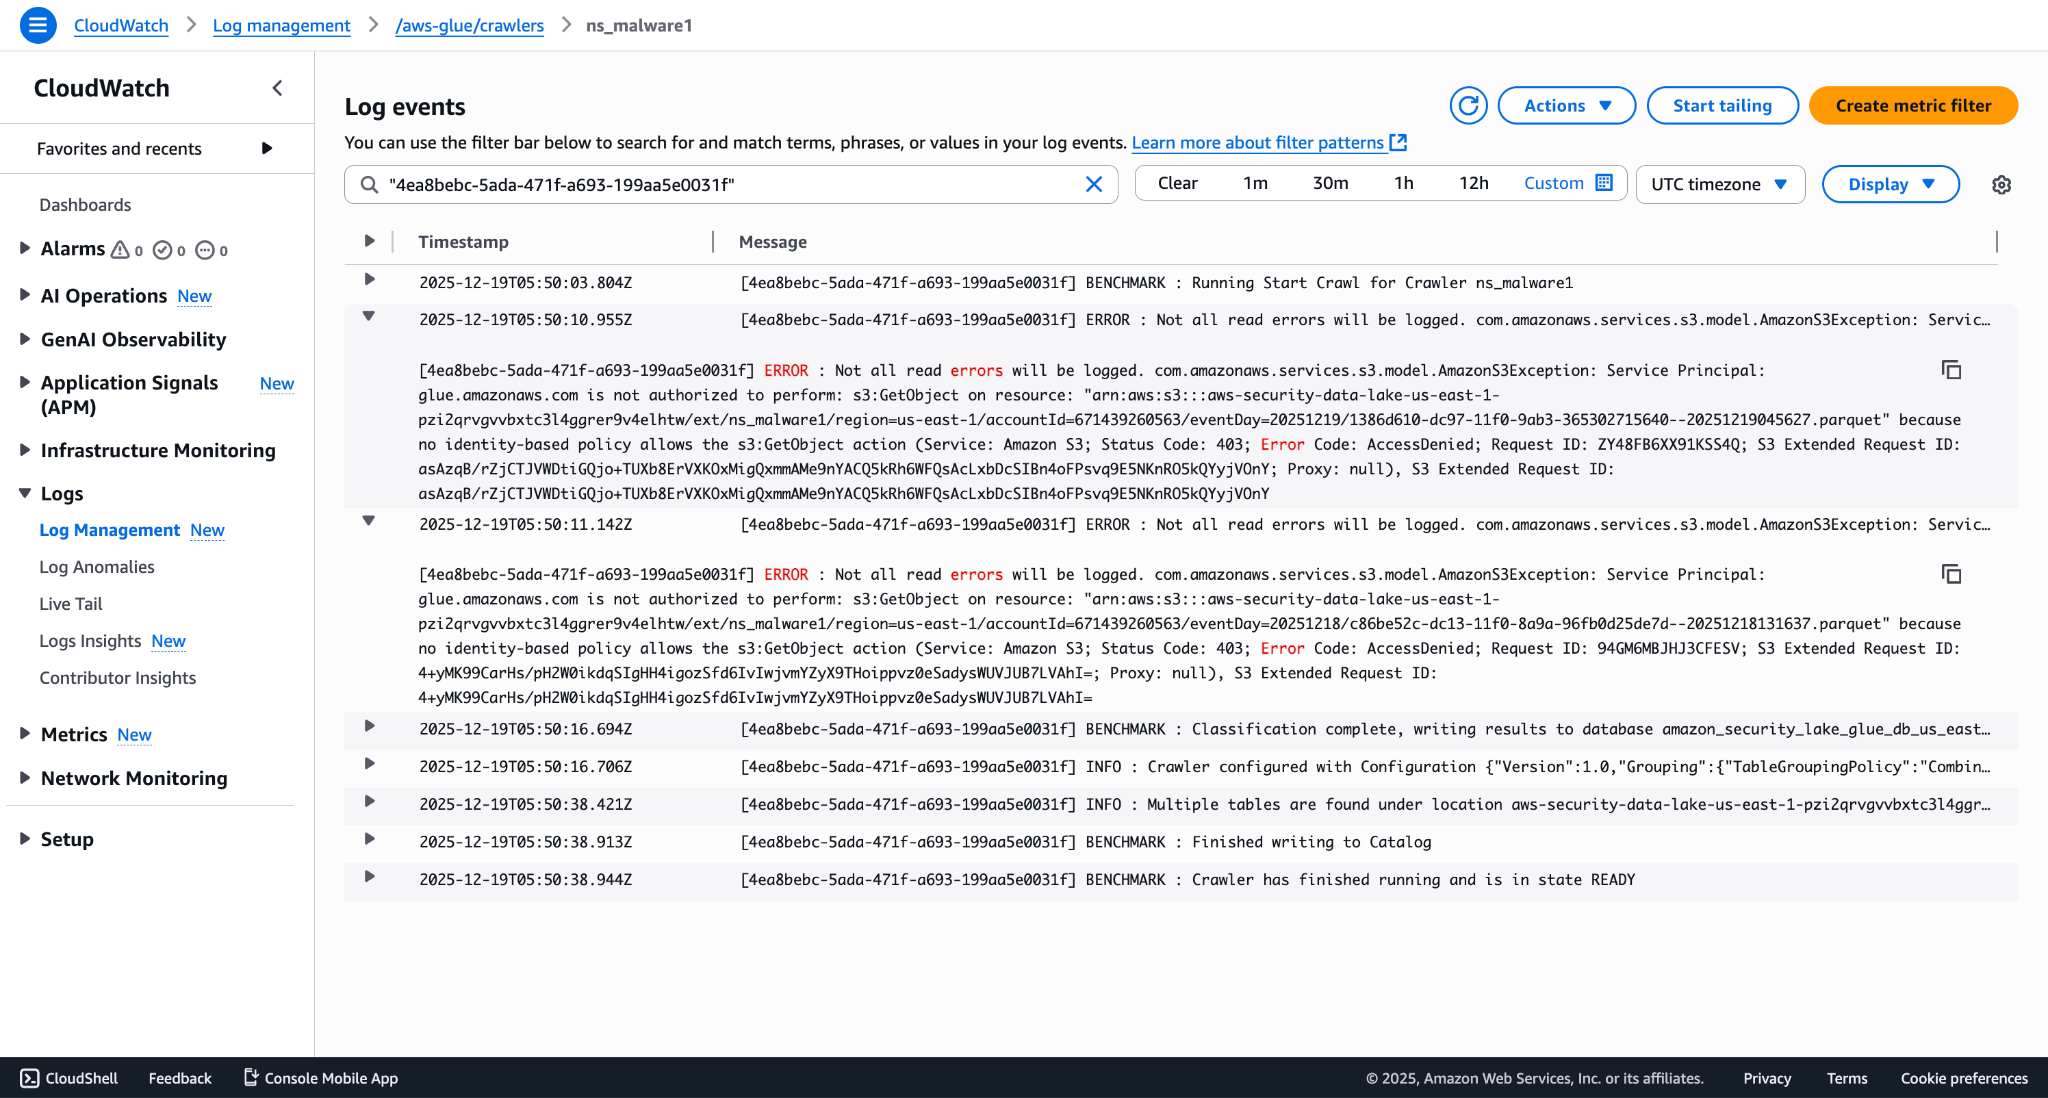
- Check the CloudTrail logs for particular crawler execution and verify if there are any errors in it similar to below image.Verify the permissions for the generated credentials for configuring the plugin or contact AWS support team.
Known Behaviors
- Data will not be ingested to the destination if the pulled alert/event/webtx is less than 265 MB size and then no same type of alert/event is pulled again after 5 minutes.
- Files for the pulled data will not be deleted if it is not ingested to the destination. Example: If user configured a the CLS Amazon Security Lake v2.0.0 plugin and pulled 1 mb of each type of alerts/events and Webtx during the initial pull and then either no new data is pulled or the plugin configuration is deleted then the files created during the initial pull will never get deleted.
- Folders for any alert/event/webtx type will be created while uploading the first file of that type of alert/event/webtx on the Security Lake S3 bucket.
- All the resources created by the plugin (i.e. Custom Data Sources, Crawlers, Tables under Data Lake formation) on AWS will not be deleted by deleting the plugin configuration.
- Even if the Custom Data source for particular alert/event/webtx is deleted still the plugin will keep uploading the data to the destination folder until the folder is present under the Security Lake S3 bucket and if the destination folder is also deleted then the user will encounter an error. Example error log:
CLS Amazon Security Lake [CLS ASL19thJana] [Malware]: S3 upload failed with unexpected error: Failed to upload /opt/netskope/plugins/security_lake_staging/temp_15497_1768910939013.parquet to aws-security-data-lake-us-east-1-drr9keiinq7es73ywbjszqfsmbchwc/ext/a_delete/region=us-east-1/accountId=472514710809/eventDay=20260120/cd51579e-f5f8-11f0-ad9f-de8f29b50429--20260120120859.parquet: An error occurred (InvalidAccessKeyId) when calling the PutObject operation: The AWS Access Key Id you provided does not exist in our records.. Not retrying.
- In the Default Mappings, there will be some fields that are mapped to some default values.
- The total Logs/Webtx Sent to External Receiver count on the Log Delivery page will not represent the count of ingested data. This count represents the number of Logs/Alerts/Events/Webtx pulled and stored in the file on Cloud Exchange and later on it will be uploaded to the Security Lake S3 bucket on AWS.
- Skipped count for pulled alerts/events/webtx can be verified from the logs. Example log:
CLS Amazon Security Lake [CLS ASL]: [alerts][Compromised Credential] Processed 2 records: 1 succeeded, 0 failed, 1 empty records skipped.
- OCSF schema defines some fields in sibling pairs, for example activity_name (String) and activity_id (Integer from a predefined enum), status and status_id etc. In the Default Mappings, for all such fields the Integer enum values is mapped to 99 . This allows the String half of the pair to contain any field received from Netskope.
For example: In Compromised Credential Alert, severity_id is mapped to default value 99. It is recommended to refer to its String sibling severity and not severity_id to get the actual value received from Netskope. - Logs similar to below examples does not mean that the data is ingested to Security Lake S3 bucket:
| CLS Amazon Security Lake [CLS ASL] [alerts] [ctep]: Successfully added 1 log(s) to the AWS Security Lake upload file. The file will be uploaded to the AWS Security Lake bucket once either 256 MB file size or 5 minutes upload condition is met. |
| Ingested 1 [alerts][ctep] log(s) into configuration CLS ASL successfully. Time taken: 2 seconds. |
To verify the ingestion of data to the Security Lake S3 bucket, refer to the ‘To validate the ingestion from Netskope Cloud Exchange’ and ‘To validate from the AWS’ sections.
- Users might observe some errors or warnings while validating the uploaded parquet files using the official OCSF validator endpoint, but they should not affect querying data on Athena. Below are some examples:
{
  "error": "attribute_enum_value_unknown",
  "message": "Unknown enum value at \"proxy_http_request.http_method\"; value \"\" is not defined for enum \"http_method\".",
  "value": "",
  "attribute": "http_method",
  "attribute_path": "proxy_http_request.http_method"
}
{
    "message": "Attribute \"evidences[0].device.os_machine_uuid\" value does not match regex of type \"uuid_t\".",
    "type": "uuid_t",
    "value": "f5d060933f64c16cc6661ad5",
    "warning": "attribute_value_regex_not_matched",
    "attribute": "os_machine_uuid",
    "regex": "[0-9a-fA-F]{8}-[0-9a-fA-F]{4}-[0-9a-fA-F]{4}-[0-9a-fA-F]{4}-[0-9a-fA-F]{12}",
    "attribute_path": "evidences[0].device.os_machine_uuid"
},
{
    "message": "Attribute \"device.mac\" value does not match regex of type \"mac_t\".",
    "type": "mac_t",
    "value": "",
    "warning": "attribute_value_regex_not_matched",
    "attribute": "mac",
    "regex": "^([0-9A-Fa-f]{2}[:-]){5}([0-9A-Fa-f]{2})$",
    "attribute_path": "device.mac"
}
{
    "message": "Attribute \"evidences[2].email.to[0]\" value does not match regex of type \"email_t\".",
    "type": "email_t",
    "value": "[\"amark@default.com\", \"johnak@default.com\", \"test_user@netstate.com\"]",
    "warning": "attribute_value_regex_not_matched",
    "attribute": "to",
    "regex": "^[a-zA-Z0-9!#$%&'*+-/=?^_`{|}~.]+@[a-zA-Z0-9-]+\\.[a-zA-Z0-9-.]+$",
    "attribute_path": "evidences[2].email.to[0]"
}
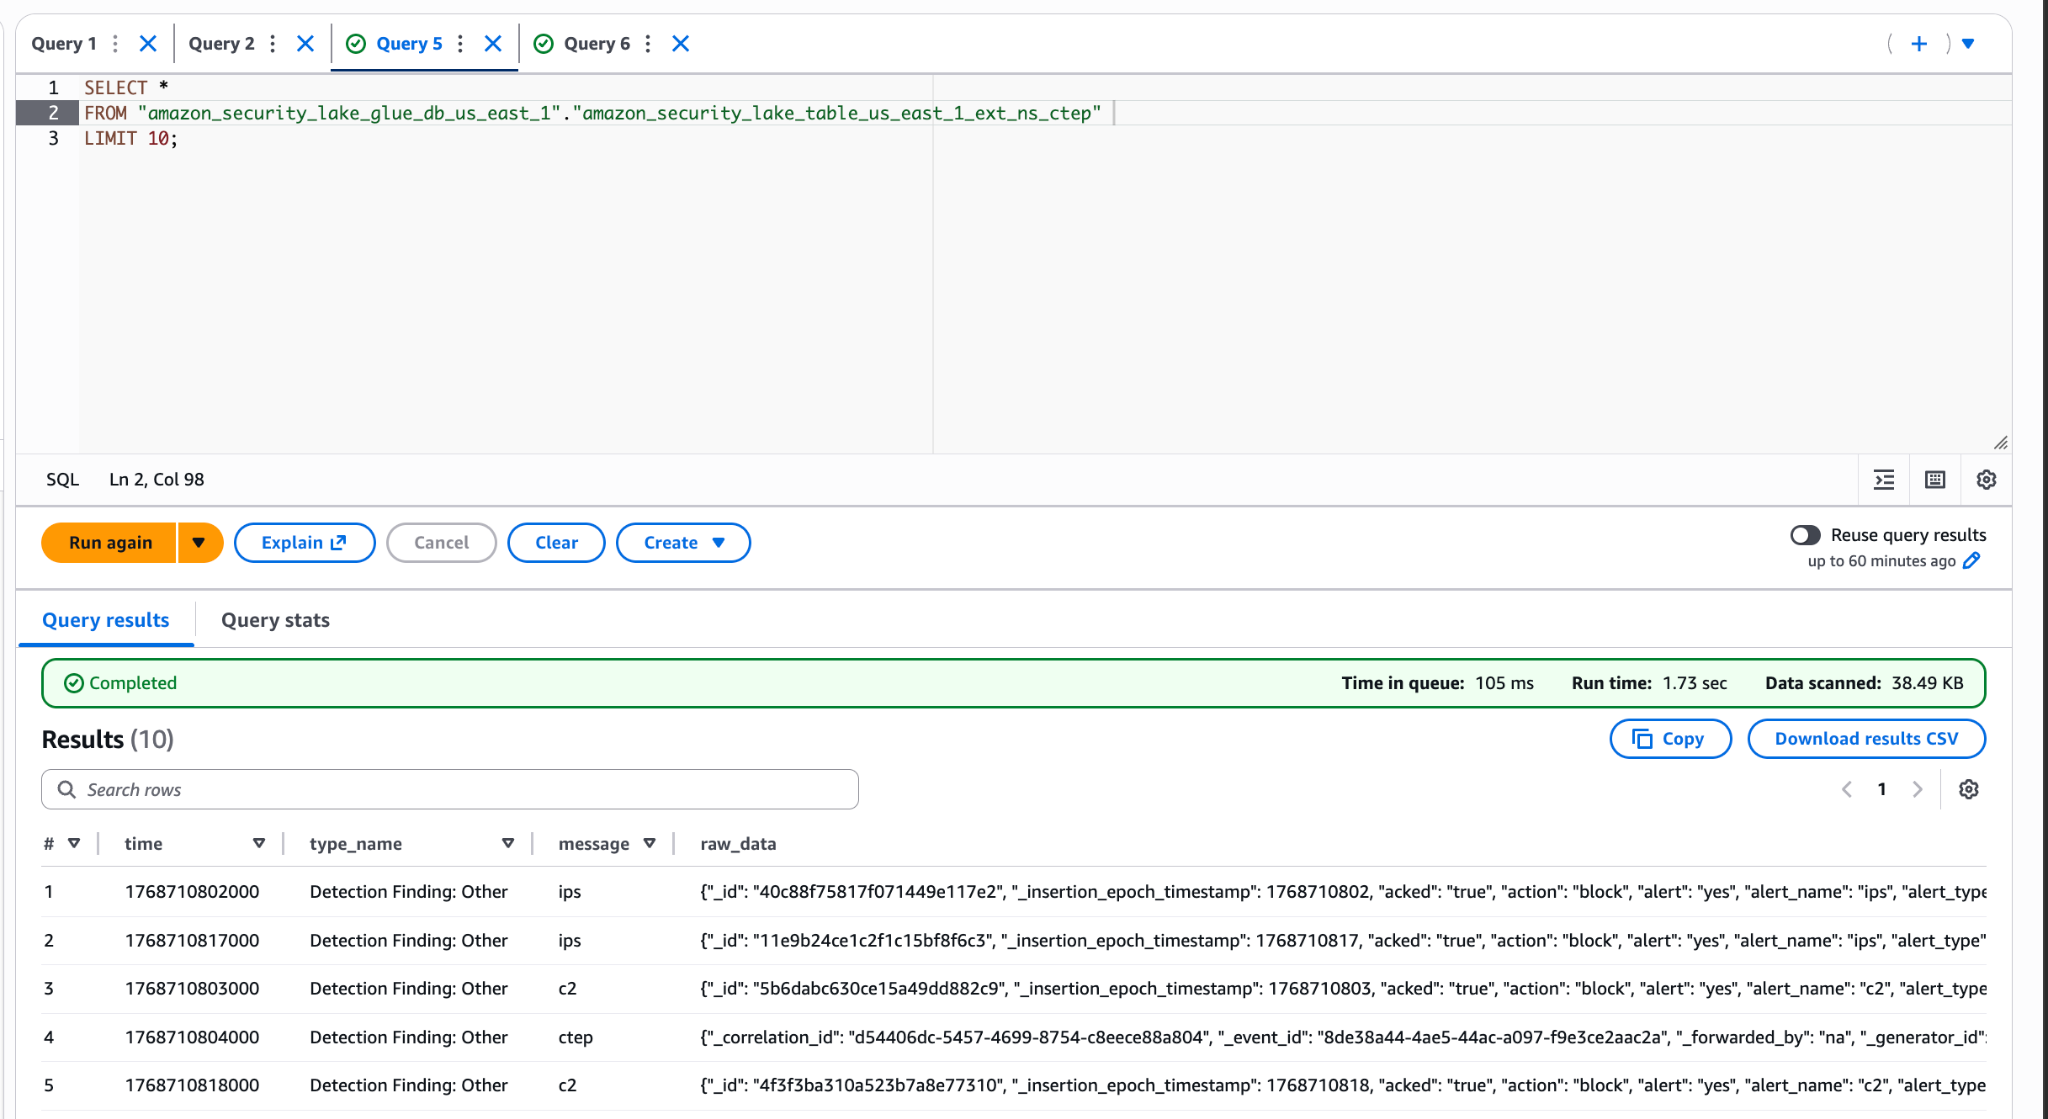
- Alerts of types C2 and IPS will be ingested under the table of CTEP alerts on AWS platform.
- Only some of the columns will be visible in the Athena table if the crawler for a particular table is not executed. Either manually run the crawler for a particular table or set a schedule for particular crawler to execute automatically at a specific time.