

The App Connector Management Portal allows you to manage dedicated connectors activities detection enablement. For any Cloud App, you can now choose to:
-
Enable fully — all supported activities are detected
-
Enable partially — only specific activities are detected
-
Keep disabled — until you’re ready to turn it on
How to Use the Portal
Step 1: View Connector Status
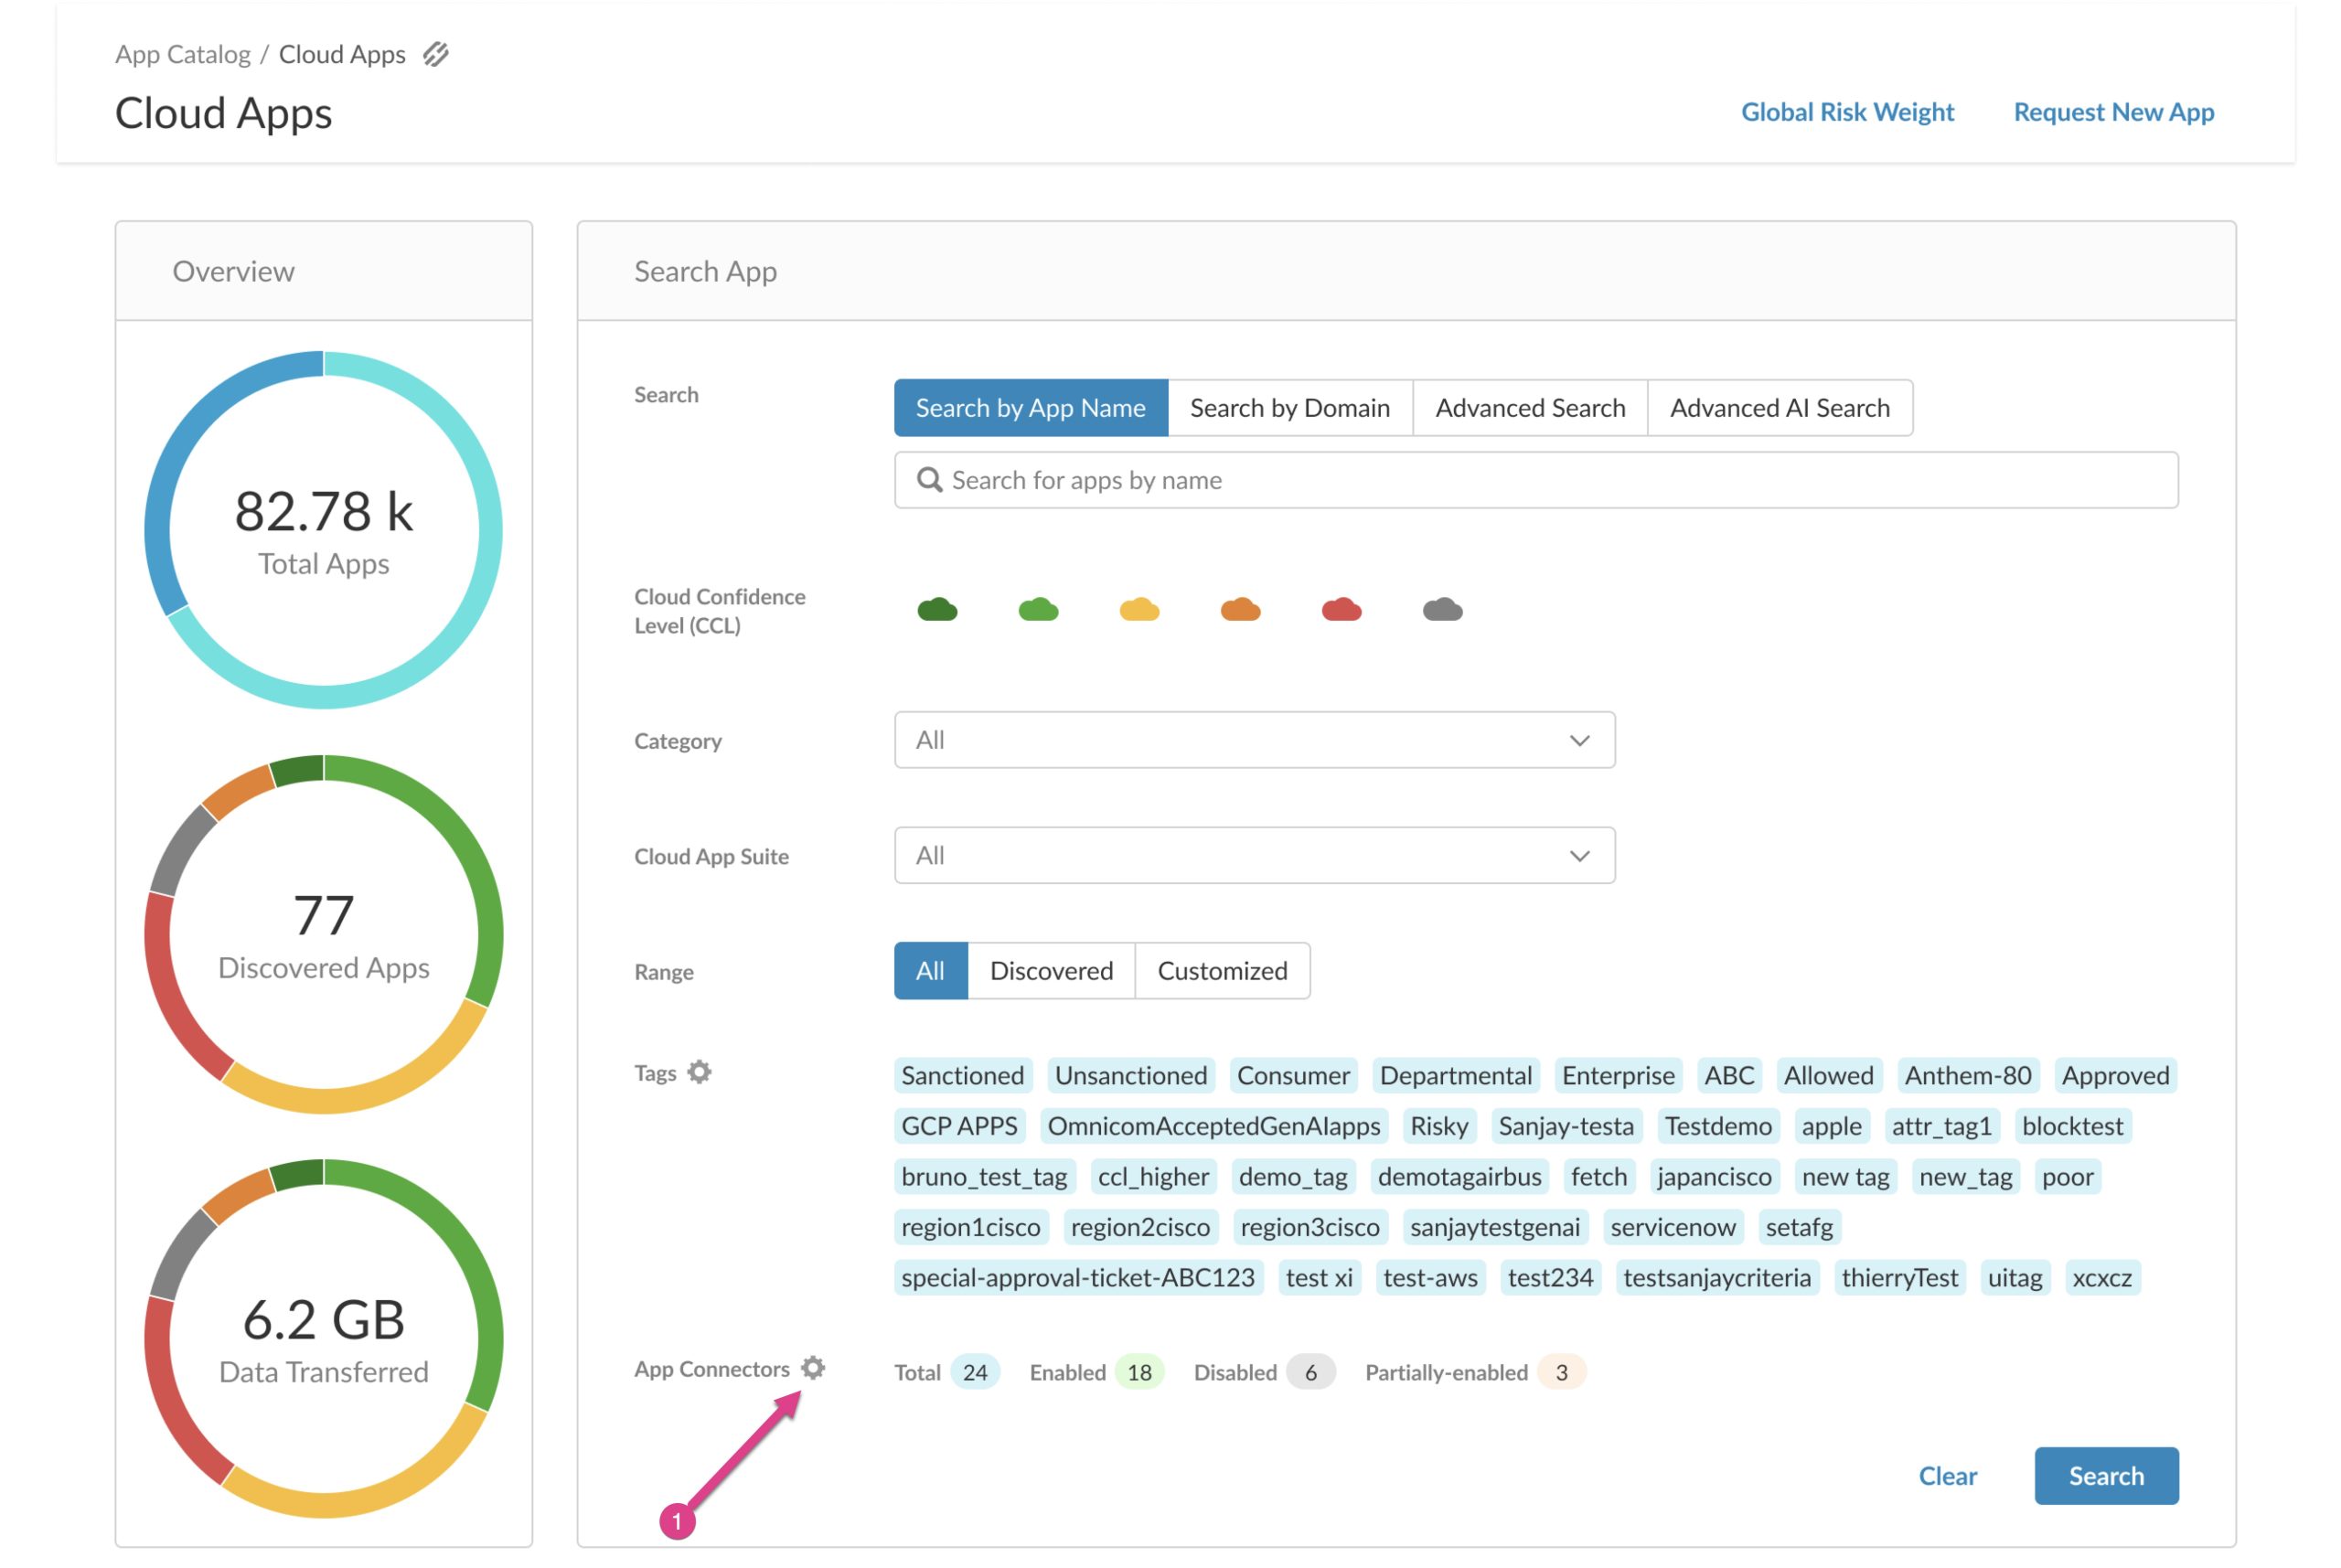
Navigate to App Catalog → Cloud Apps. The App Connectors panel shows an at-a-glance summary:
-
Total — all App Connectors available in your tenant
-
Enabled — fully active connectors
-
Partially-Enabled — connectors with some activities enabled
-
Disabled — inactive connectors
Step 2: Open the Management Overview
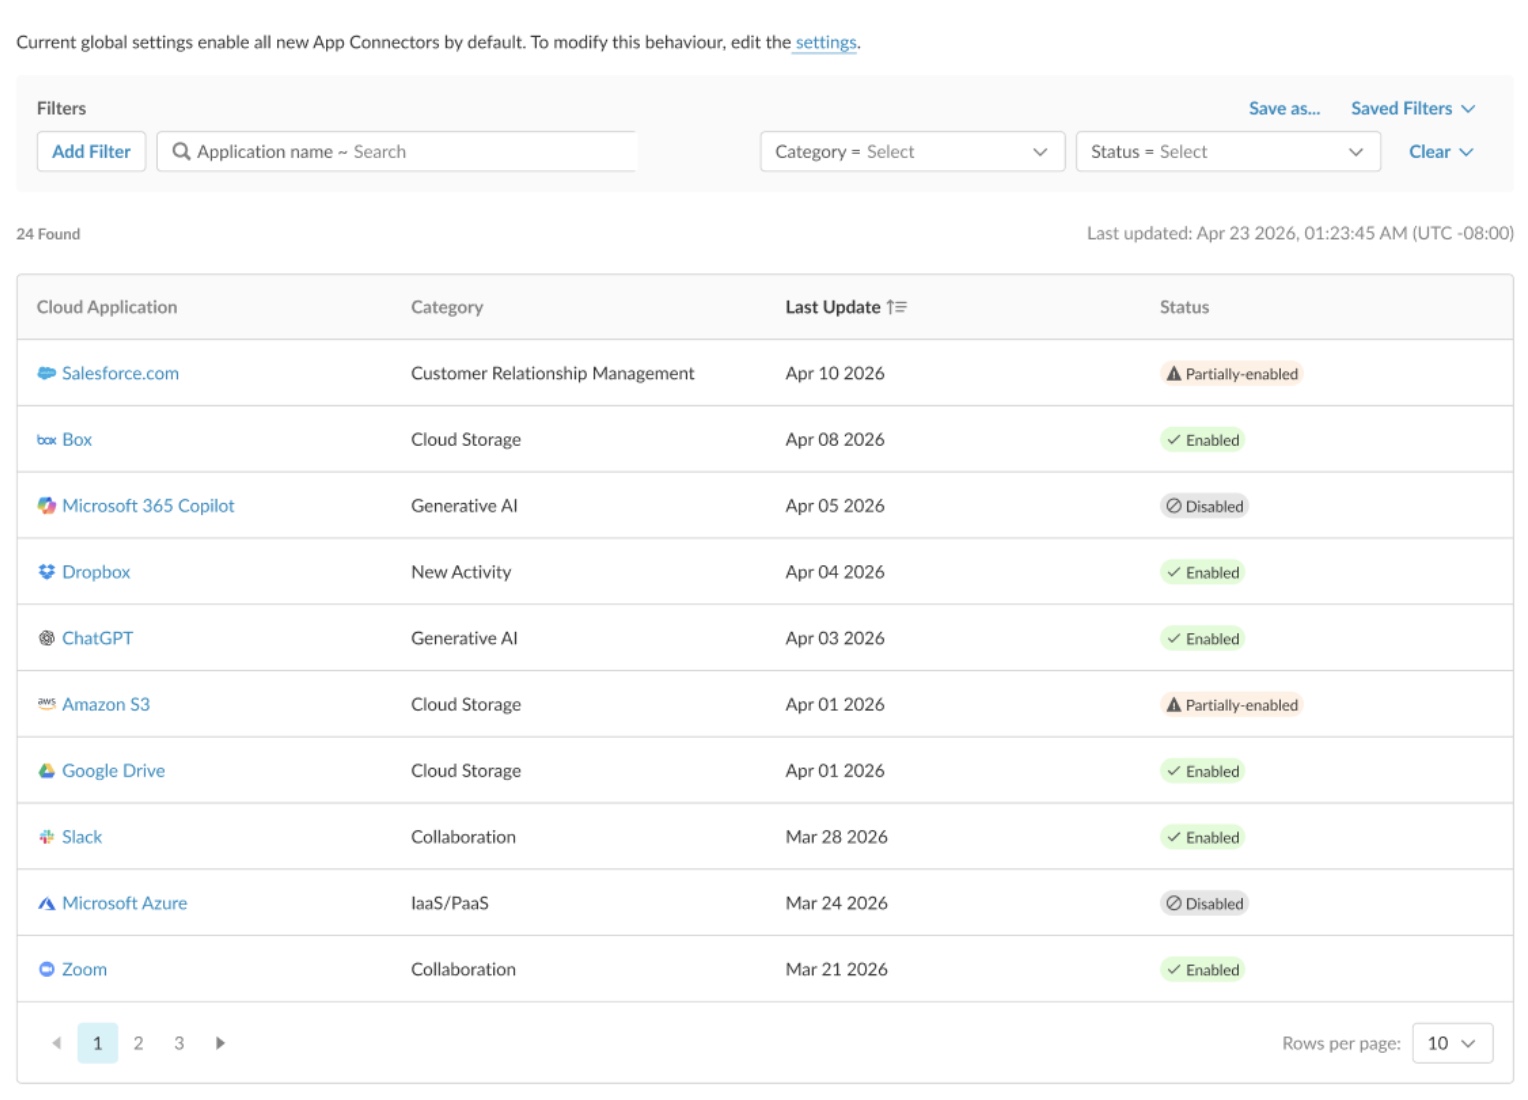
Click the gear icon next to App Connectors to open the management overview page. This page lists every Cloud App with a dedicated connector, along with its category, last update date, and current status. Use the filters or search bar to quickly find disabled or partially-enabled connectors.
Step 3: Configure a Connector
Click any app name to open its configuration panel, which lists all supported activities for that app (for example, Upload, Download, Preview, Share). You can:
-
Toggle individual activities on or off
-
Use Enable All / Disable All to set every activity at once.