

Release Notes
1.0.0 (Requires minimum Cloud Exchange version 6.1.0)
Added
- Initial release.
Supported file types: csv, txt, .gz and .zip.
This document explains how to configure the AWS S3 EDM plugin v1.0.0 with the Exact Data Match plugin of the Netskope Cloud Exchange platform. This plugin is used to pull a CSV or TXT file from an AWS S3 bucket and to generate EDM hashes of the pulled file. The file can be uncompressed or compressed as .gz or .zip.
Prerequisites
- A Netskope tenant (or multiple, for example, production and development/test instances) that is already configured in Cloud Exchange.
- A Netskope Cloud Exchange tenant with the Tenant plugin and Netskope Exact Data Match plugin already configured.
- Amazon S3 bucket permissions to the IAM user.
- ListBucket
- GetObject
- GetBucketLocation
- Connectivity to the following hosts: AWS S3 Bucket access.
- For Secret Manager configuration, refer to this documentation and to set up Azure Key Vault Secrets Manager refer to this documentation
AWS S3 EDM Plugin Support
This plugin is used to pull a CSV or TXT file from an AWS S3 bucket and to generate EDM hashes of the pulled file. The file can be uncompressed or compressed as .gz or .zip.
| Feature | Support |
|---|---|
| Pull | Yes |
| Push | No |
Permissions
Amazon S3 bucket permissions to the IAM user to pull CSV files:
- ListBucket
- GetObject
- GetBucketLocation
API Details
List of APIs Used
This plugin uses the AWS SDK for Python (Boto3) to read one file from an AWS S3 bucket. For “AWS IAM Roles Anywhere” it also makes one direct HTTPS call to the Roles Anywhere endpoint with requests.
Create a Client
client_args = {
    "region_name": region,
    "verify": verify,
    "config": Config(
        proxies=self._get_proxies() or None,
        user_agent=self.user_agent,
        retries={"total_max_attempts": 3, "mode": "standard"},
        connect_timeout=30,
        read_timeout=120,
    ),
}
if credentials:  # AWS IAM Roles Anywhere only
    client_args.update(
        {
            "aws_access_key_id": credentials.get("accessKeyId"),
            "aws_secret_access_key": credentials.get("secretAccessKey"),
            "aws_session_token": credentials.get("sessionToken"),
        }
    )
self._client = boto3.client("s3", **client_args)
Generate Temporary Credentials
response = requests.post(
    f"https://{host}{CANONICAL_URI}",   # https://rolesanywhere.<region>.amazonaws.com/sessions
    data=body,
    headers=headers,                    # AWS4-X509-RSA-SHA256 signed
    proxies=self.proxy,
    timeout=60,
    verify=self.verify,
)
Request body
{
    "durationSeconds": 900,
    "profileArn": profile_arn,
    "roleArn": role_arn,
    "sessionName": "Session",
    "trustAnchorArn": trust_anchor_arn,
}
Check Bucket Existence and Accessibility
self.call(
    "head_bucket",
    client.head_bucket,
    bucket,
    Bucket=bucket,
)
Verify Bucket Region
location = client.get_bucket_location(Bucket=bucket)
bucket_region = location.get("LocationConstraint") or "us-east-1"
Get File Metadata
response = self.call(
    "head_object",
    client.head_object,
    bucket,
    key,
    Bucket=bucket,
    Key=key,
)
Pull the Sample of a .csv, .txt or .gz File
response = self.client.call(
    "get_object",
    client.get_object,
    bucket,
    key,
    Bucket=bucket,
    Key=key,
)
body = response["Body"]
Download the File
request = {
    "Bucket": bucket,
    "Key": key,
    "Range": f"bytes={offset}-{end}",
}
if info.get("etag"):
    request["IfMatch"] = info["etag"]
response = self.client.call(
    "get_object", client.get_object, bucket, key, **request
)
Performance Matrix
Here is the performance reading conducted for fetching and sanitizing ~1M Rows (25 columns, per column ~50 characters long string, 1.3 GB size, Avg Column Uniqueness: ~96%, Avg Row Uniqueness: ~96%) CSV file on a Large CE instance with these specifications:
| Description | Specification |
|---|---|
| Stack details | Size: Large RAM: 32 GB CPU: 16 Cores |
| CSV data fetched from AWS S3 Without Sanitization | ~8.5K rows/sec |
User Agent
APN/1.1 (ahq9d89xj9gspapczzdb59goq)
Workflow
- Create an S3 Bucket and Policy.
- Generate Private Key, Certificate Body, Password Phrase, Profile ARN, Role ARN, Trust Anchor ARN if using AWS IAM Role Anywhere.
- Configure the AWS S3 EDM Plugin.
- Configure sharing between AWS S3 EDM Plugin and Tenant.
- Validate the AWS S3 EDM Plugin.
Watch a Video
Click play to watch a video.
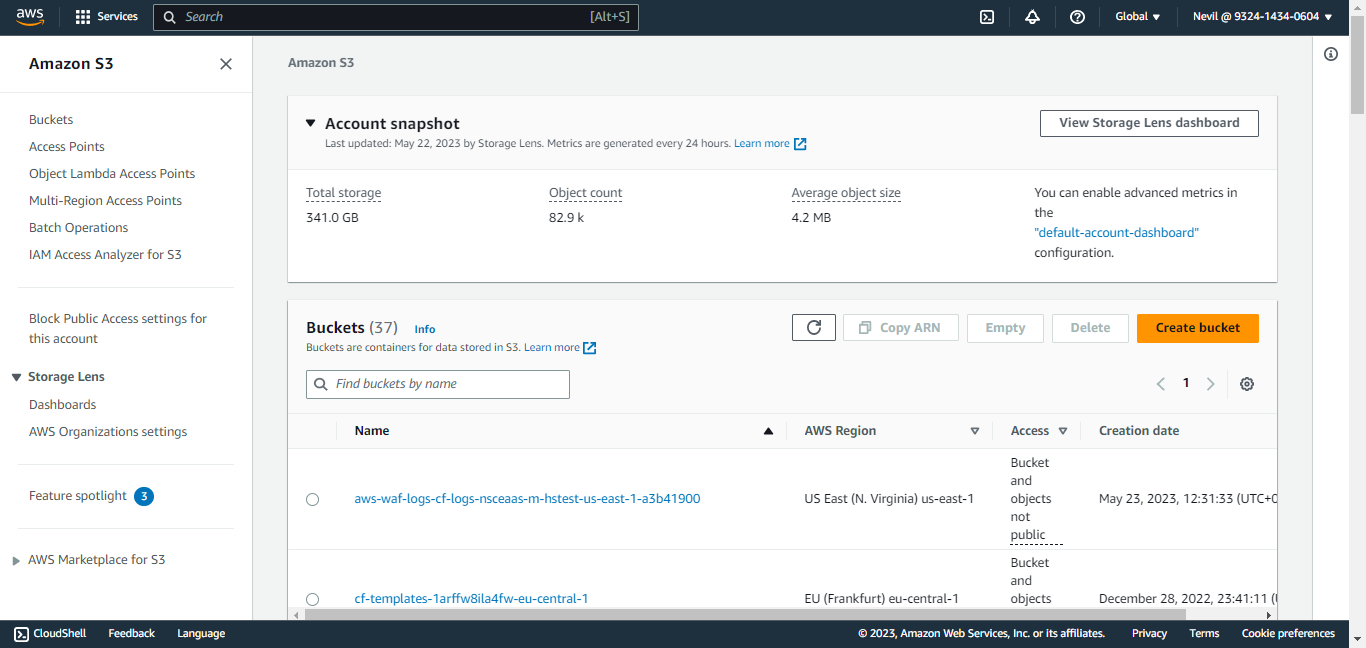
Create AWS S3 Source Bucket
-
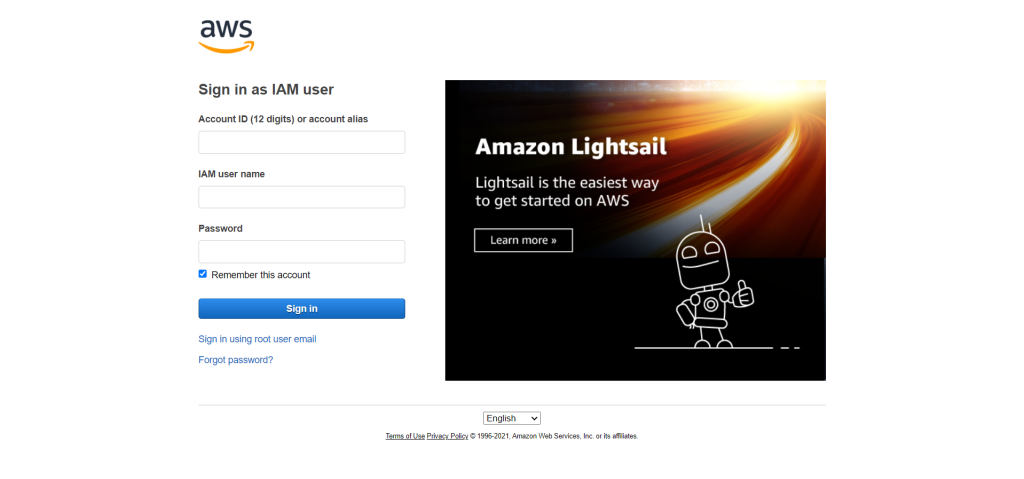
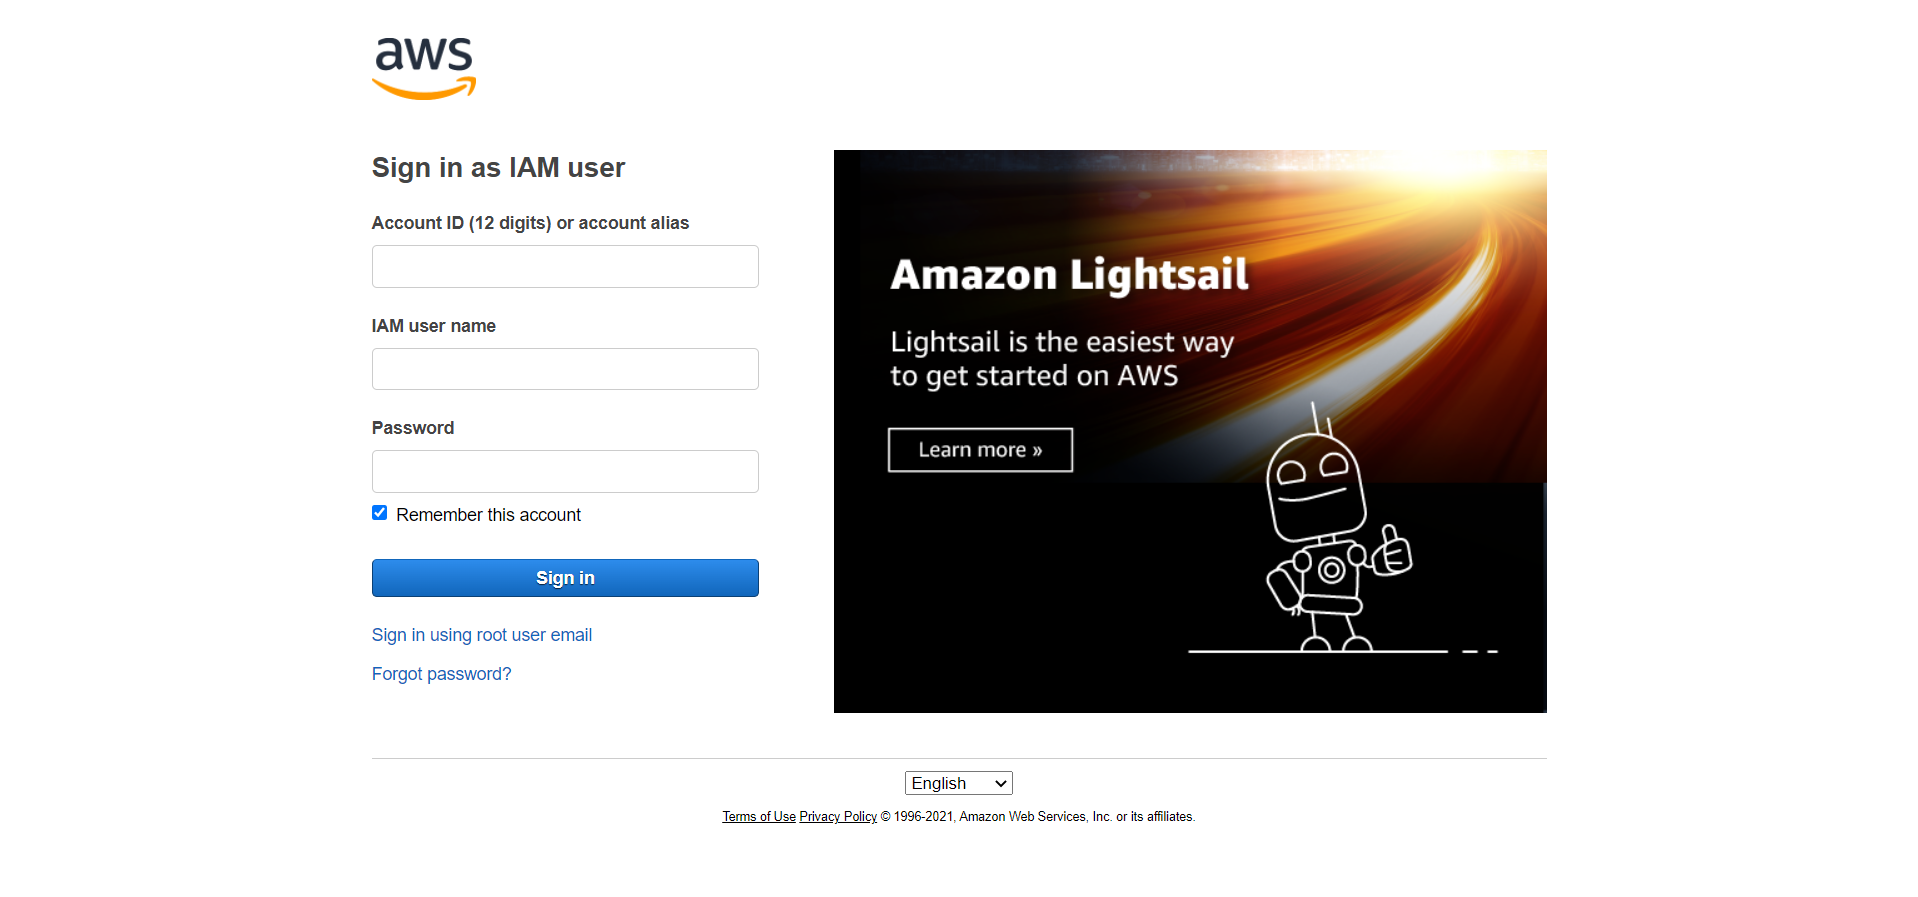
To create a Bucket and set the required policies, log in to the AWS console and enter credentials to log in.
-
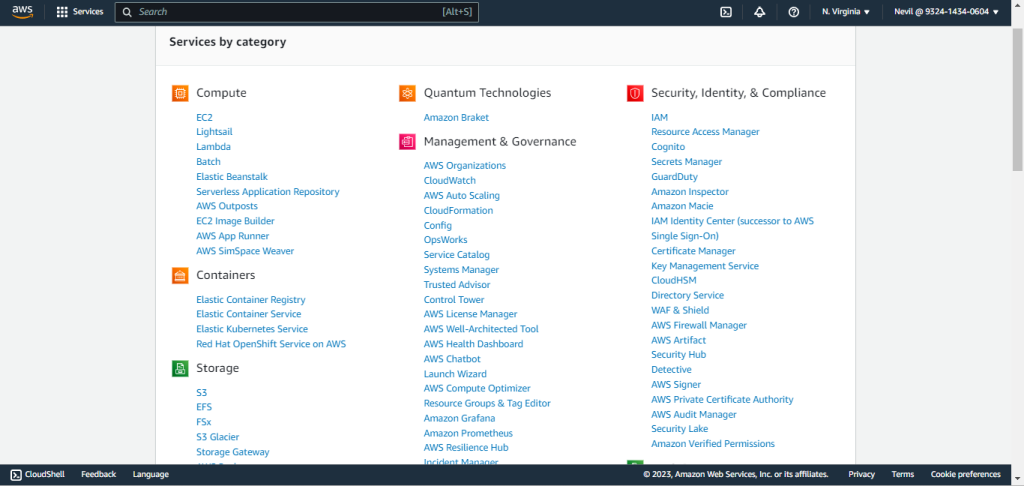
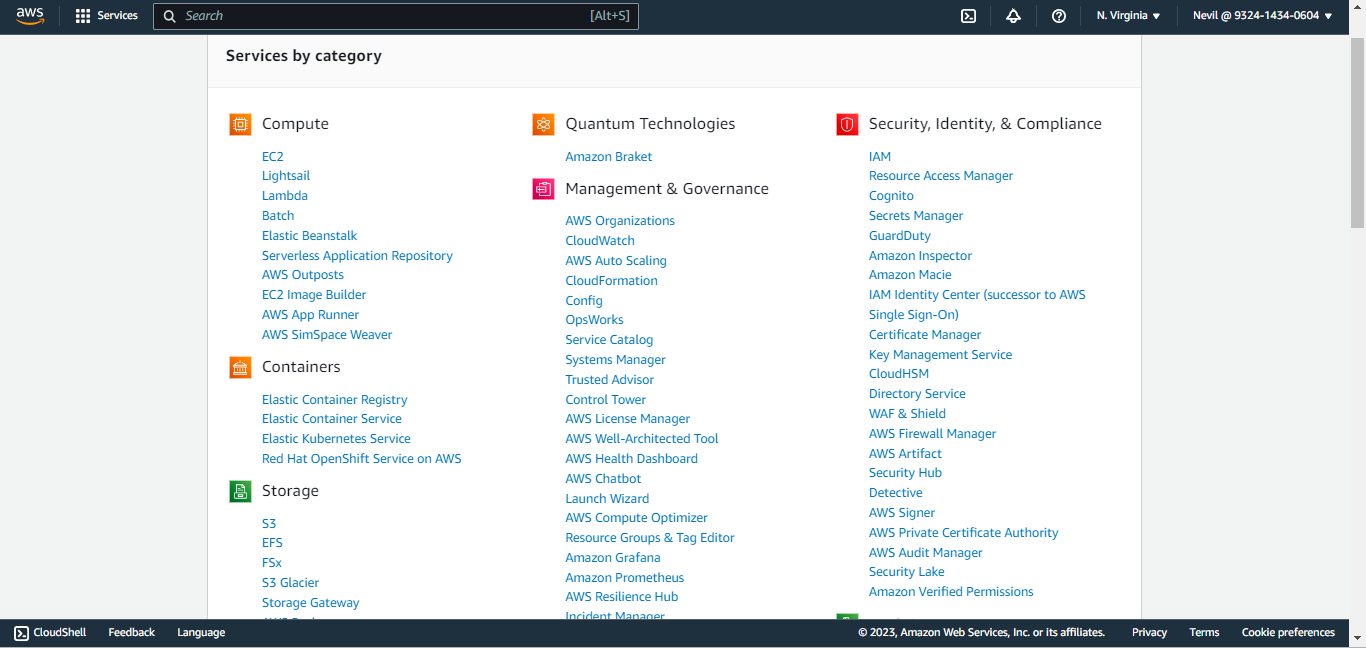
From All Services, search for and select S3 in the search bar.
-
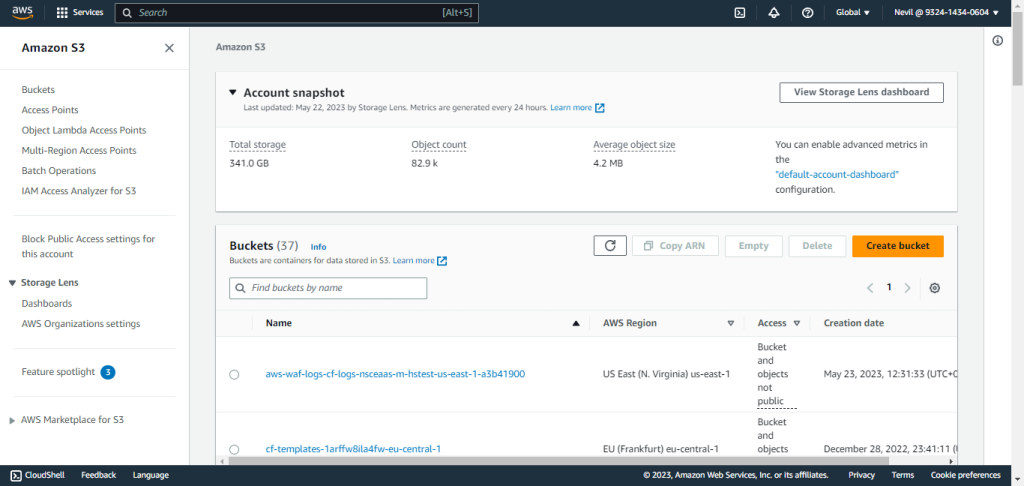
Click Create Bucket.
-
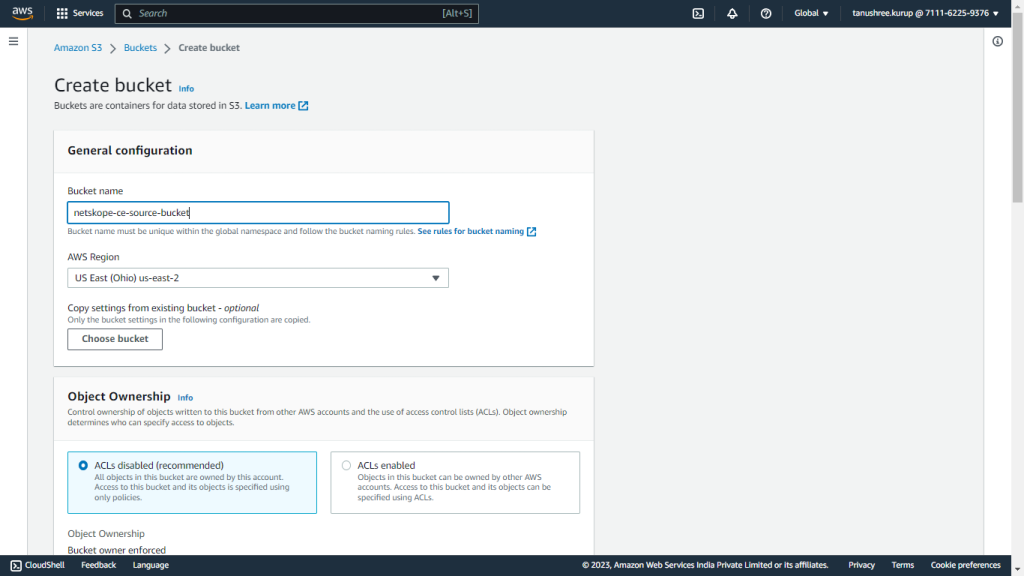
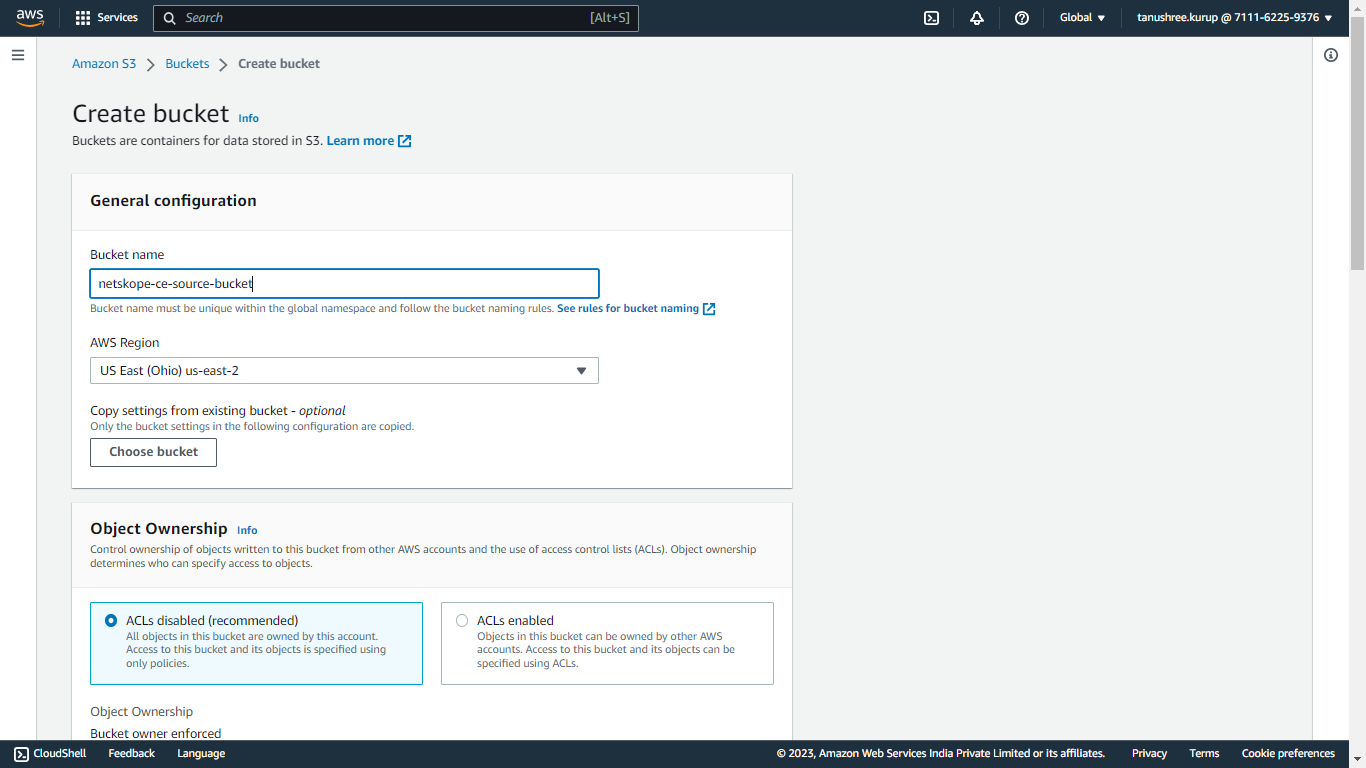
Enter Bucket Name (like netskope-ce-source-bucket), scroll to the bottom, and click Create Bucket.
-
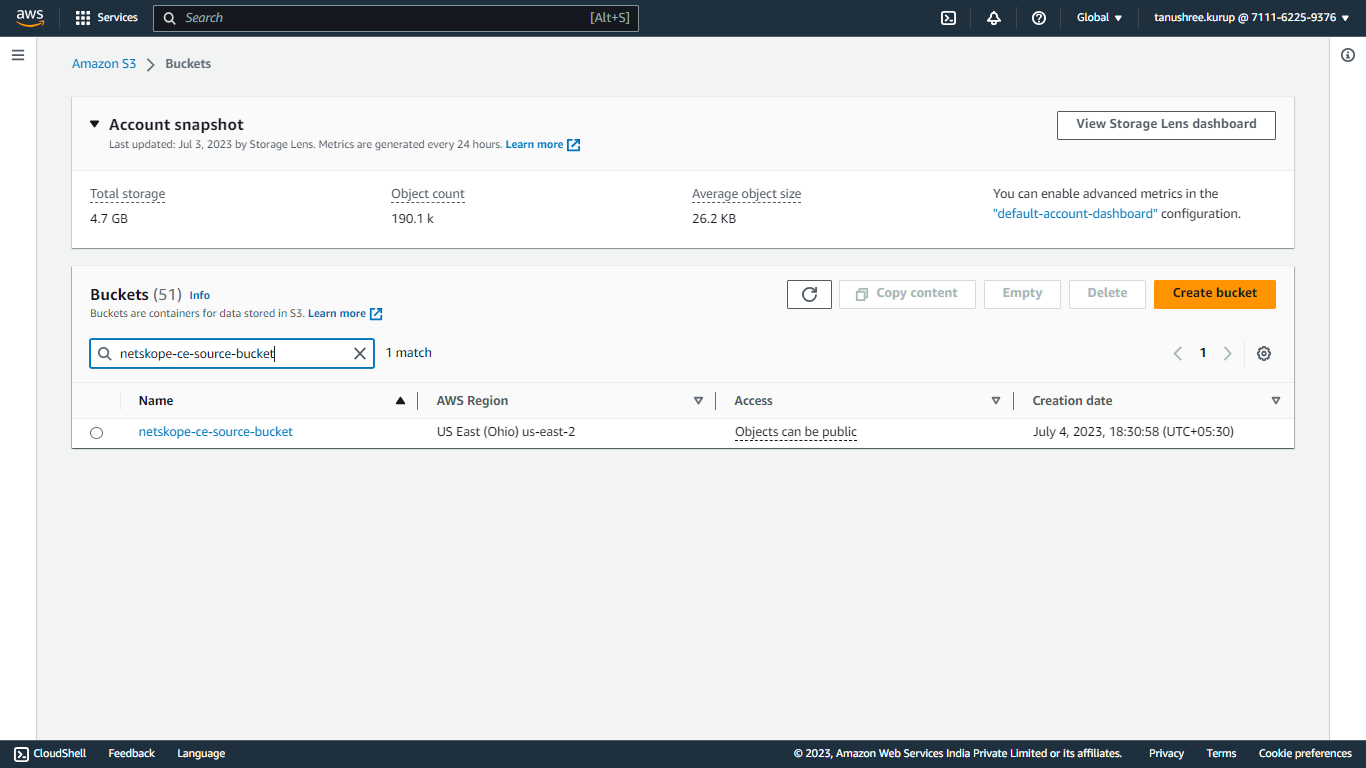
Search for and click your bucket name to open it.
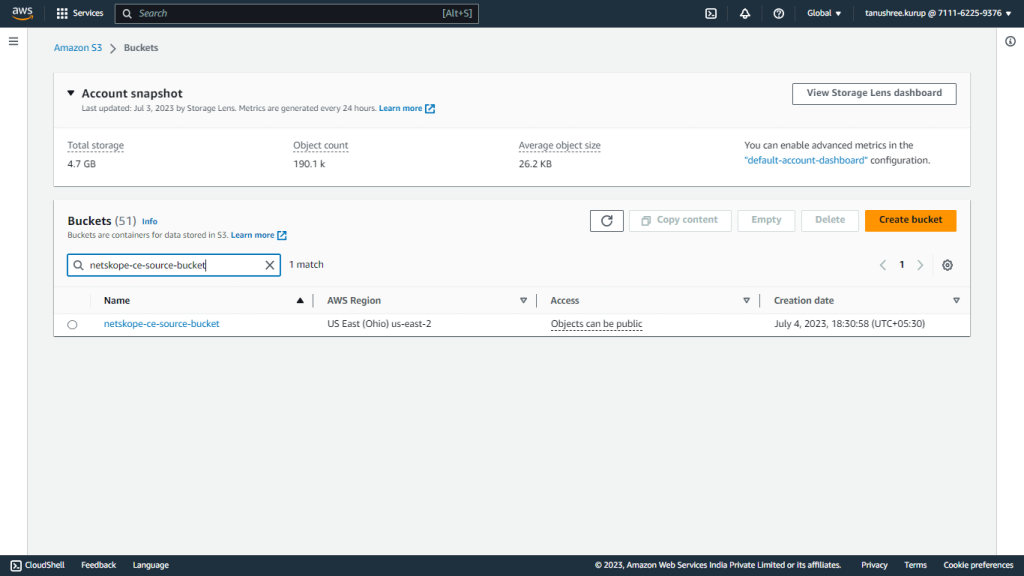
-
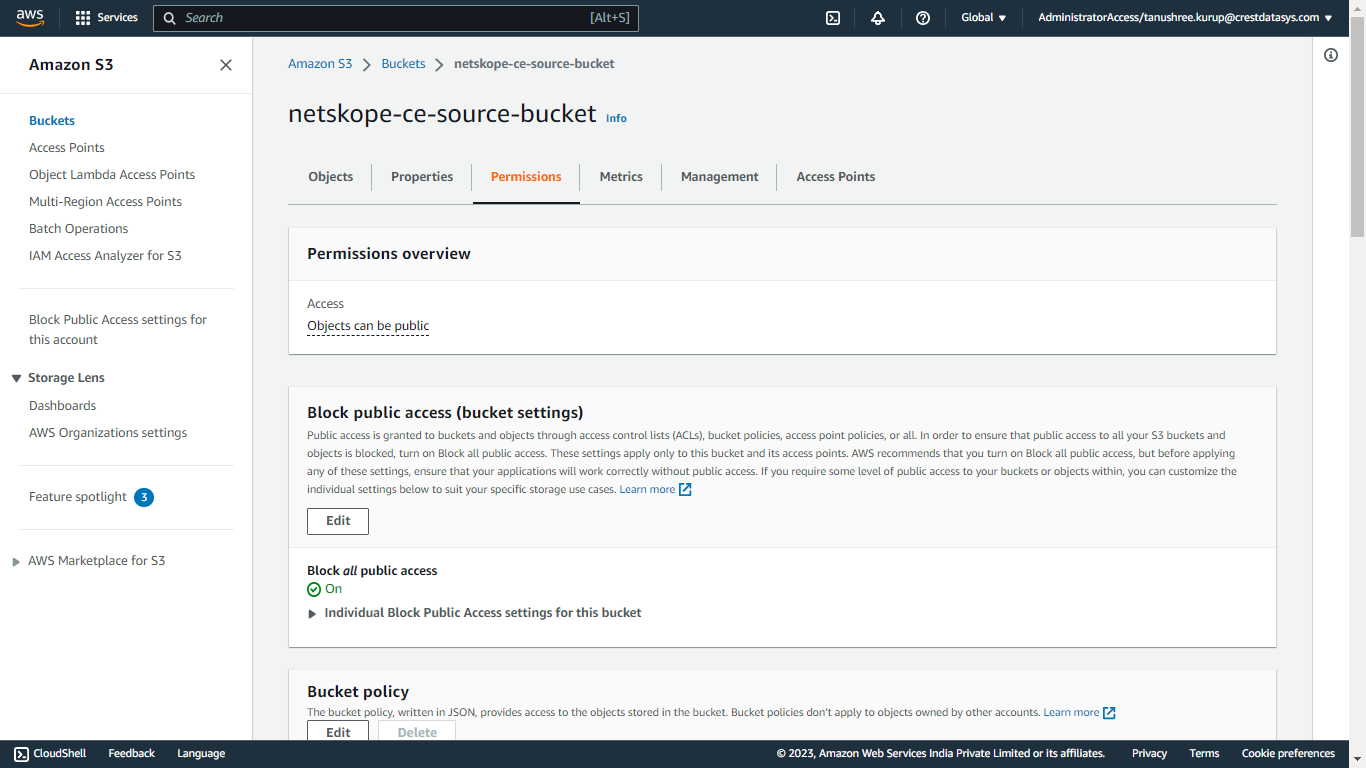
Click Permission to open the permission tab and to set the policy.
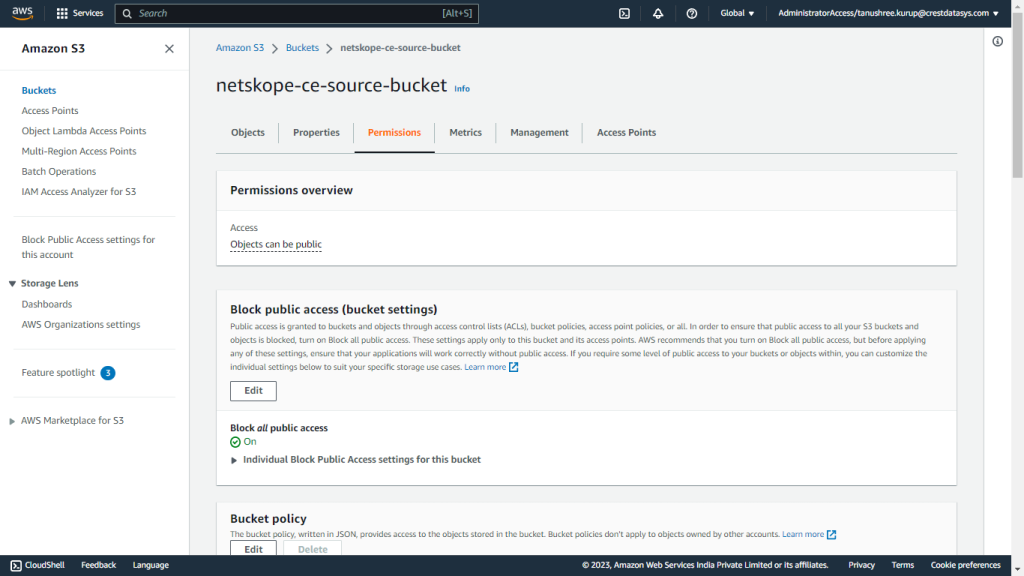
-
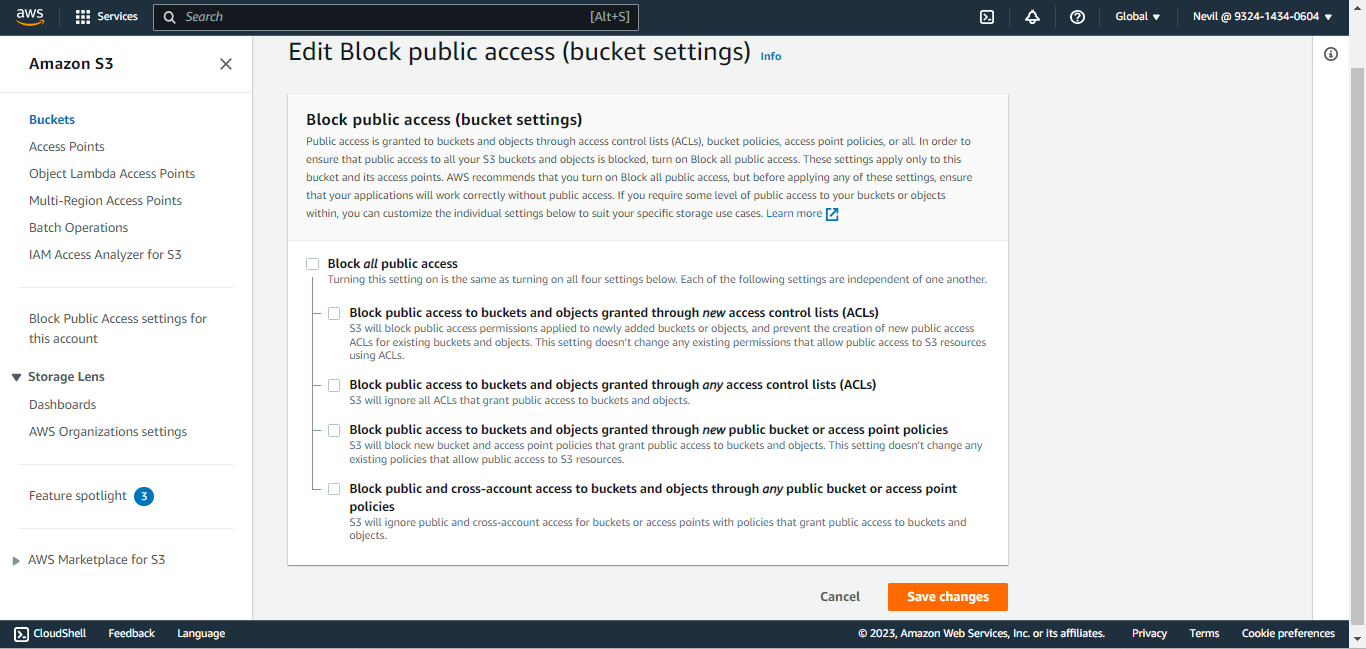
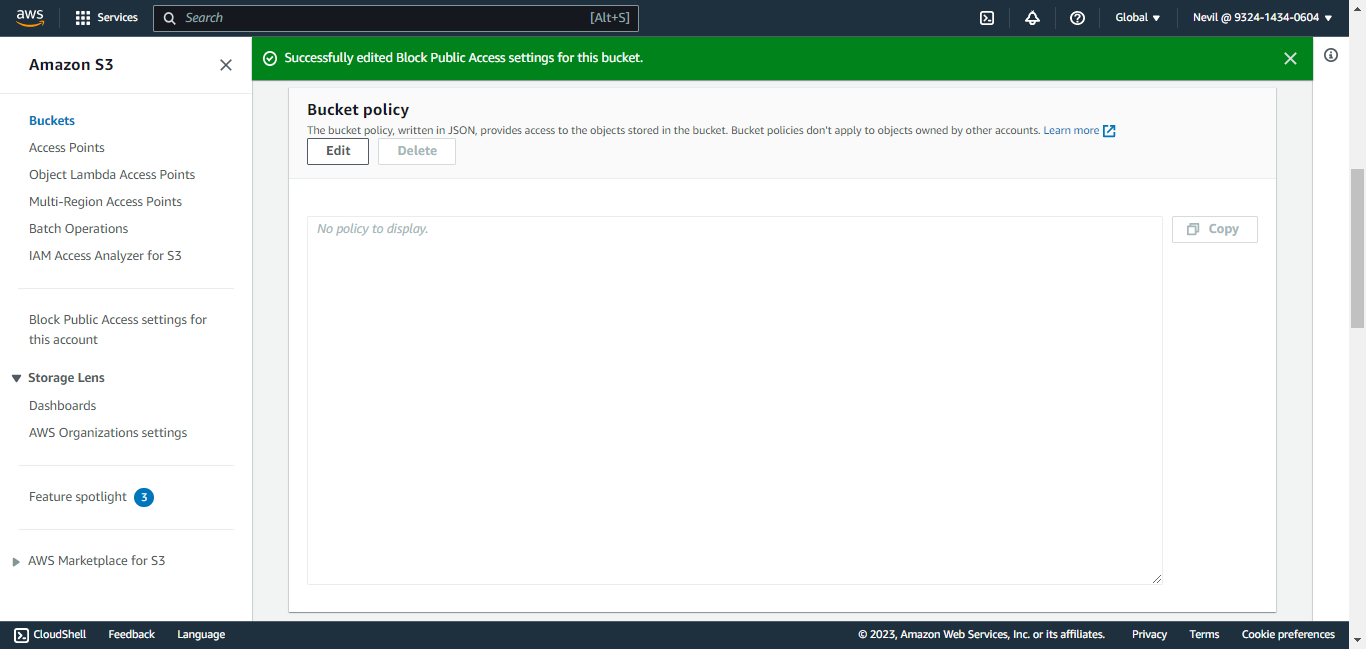
Click Edit in the Block public access (bucket settings) section. Uncheck all checkboxes and click Save Changes. It will ask for confirmation. Click on Confirm.
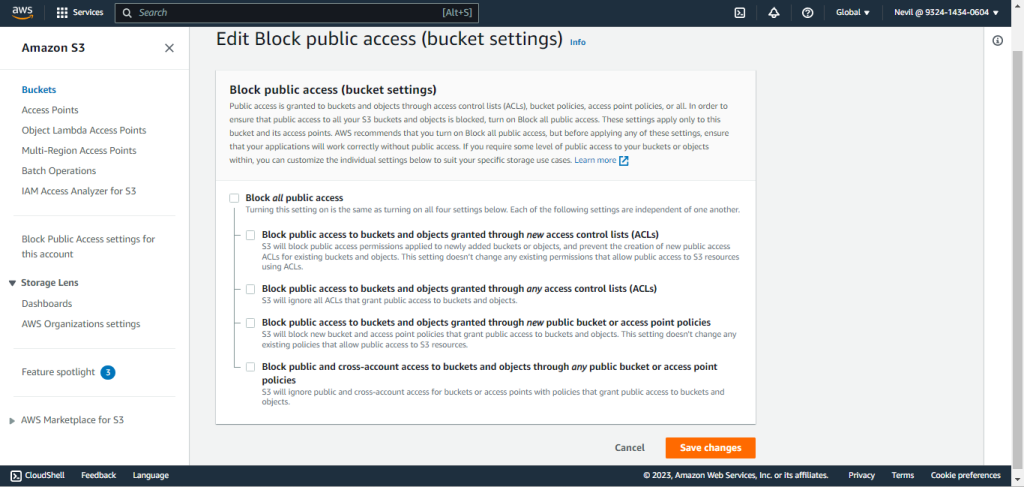
-
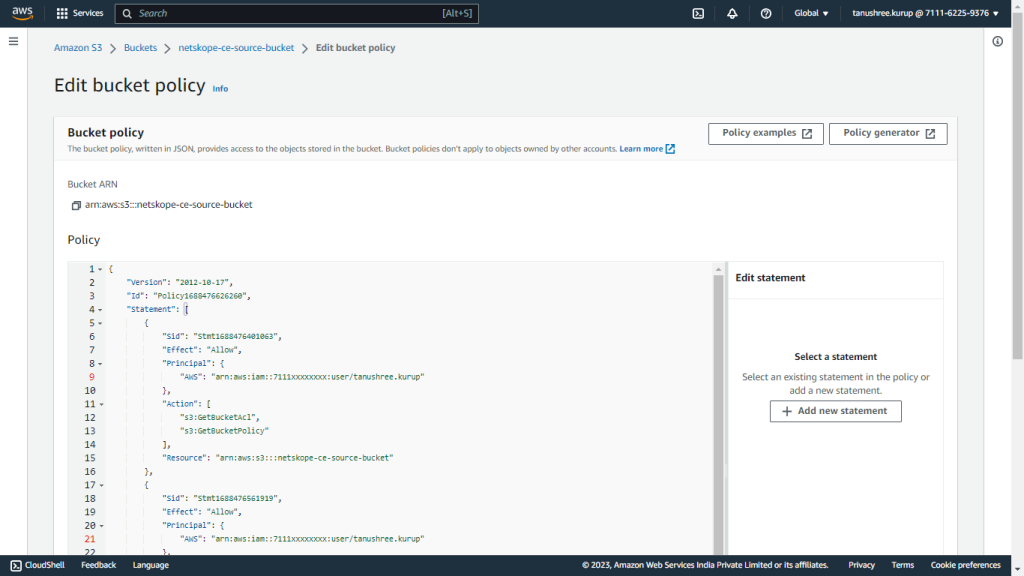
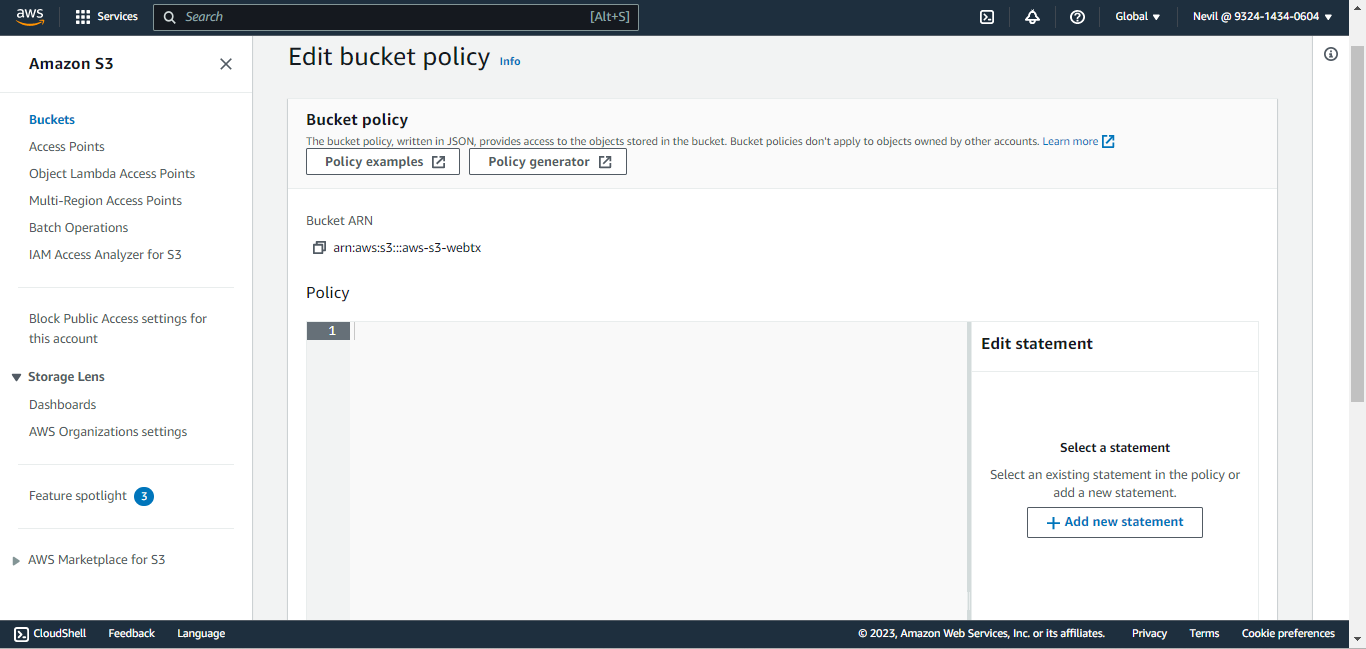
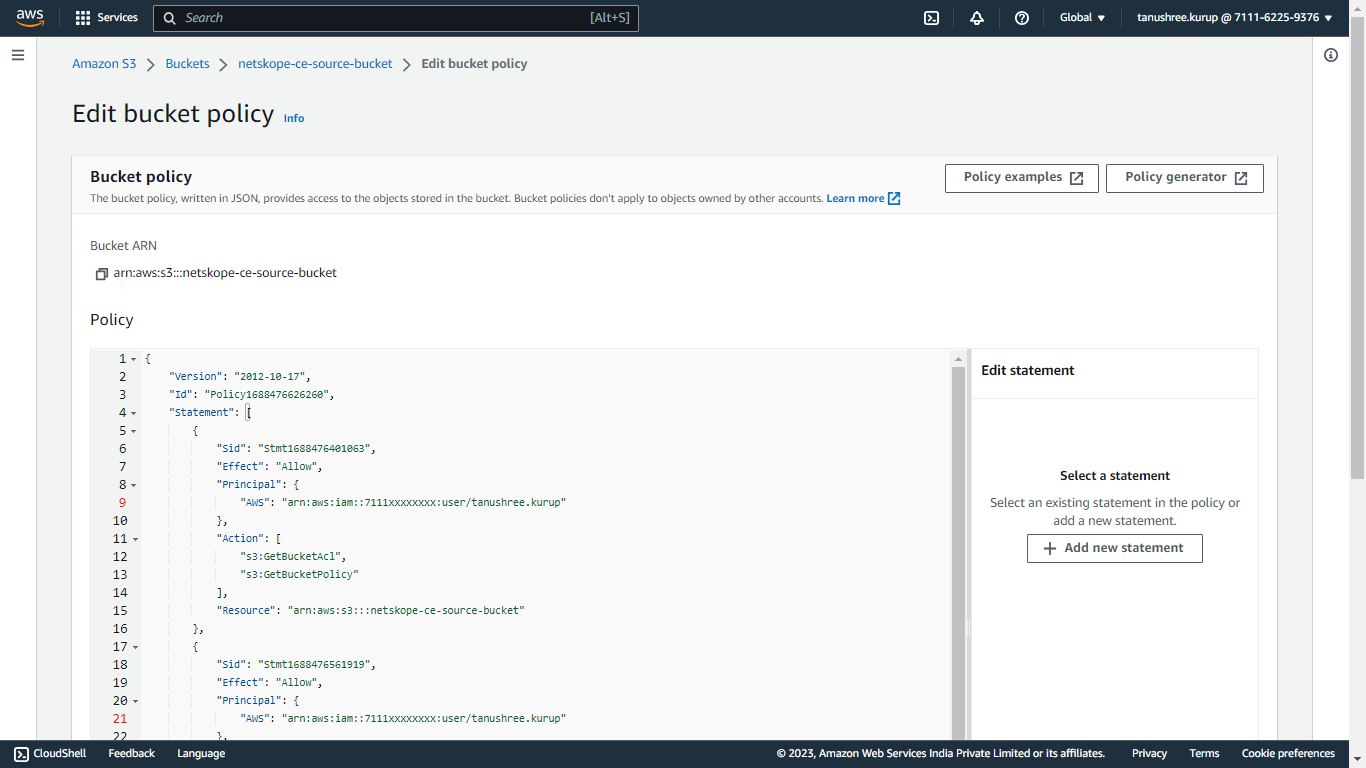
On the Permissions tab in the bucket, click Edit in the Bucket Policy section.
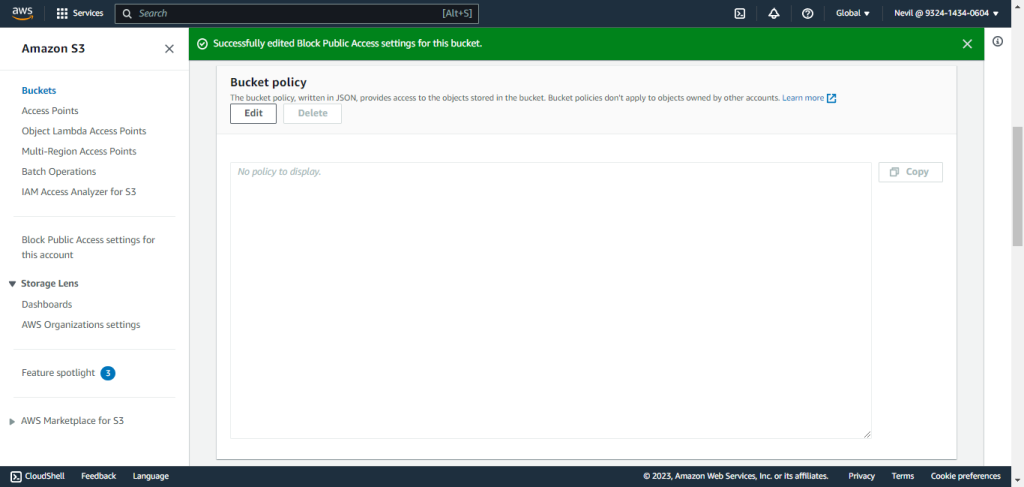
-
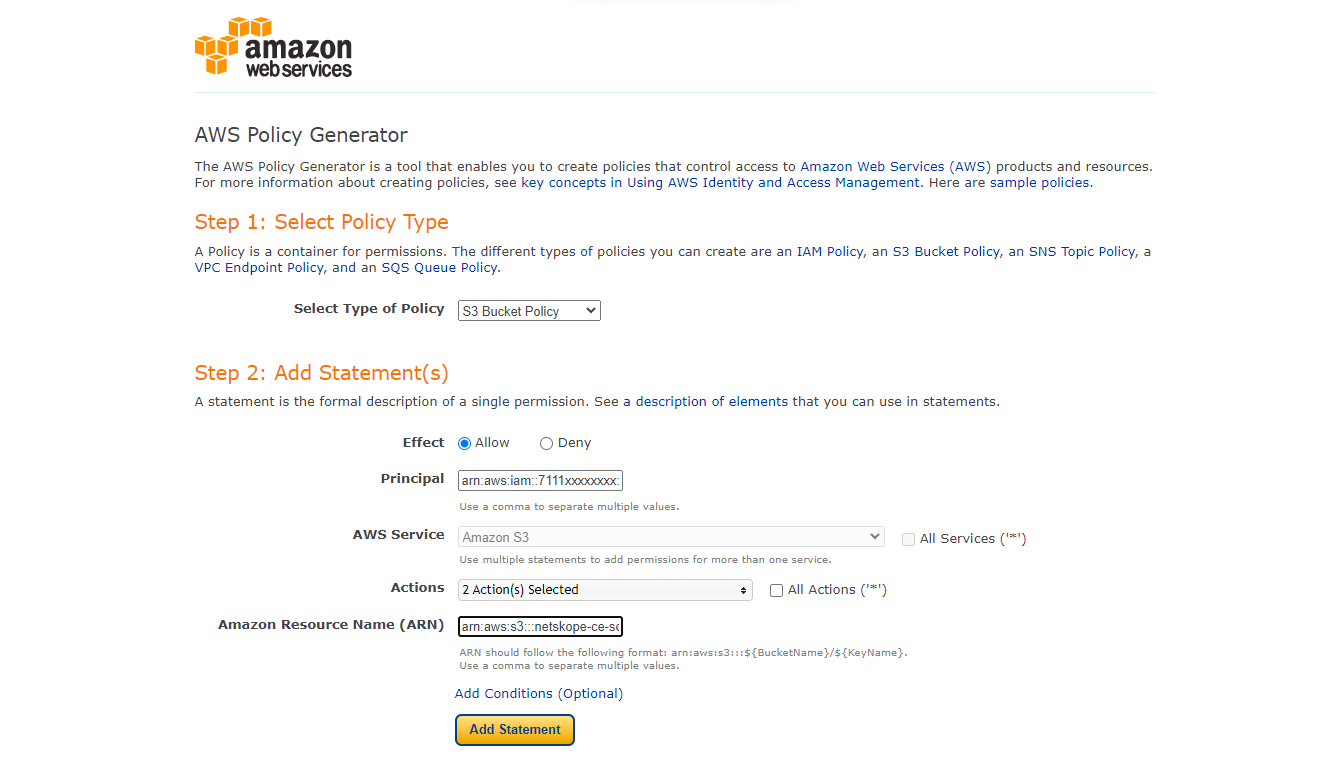
Click Policy Generator.
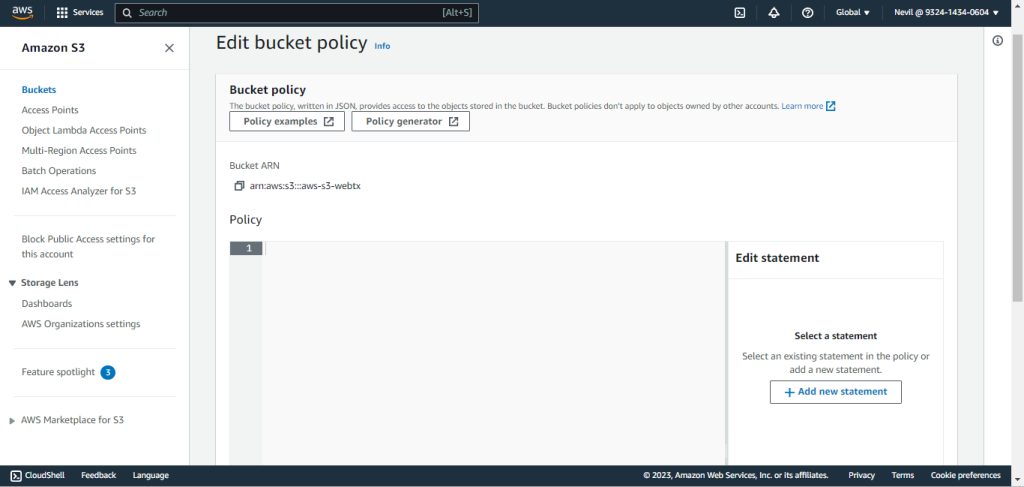
-
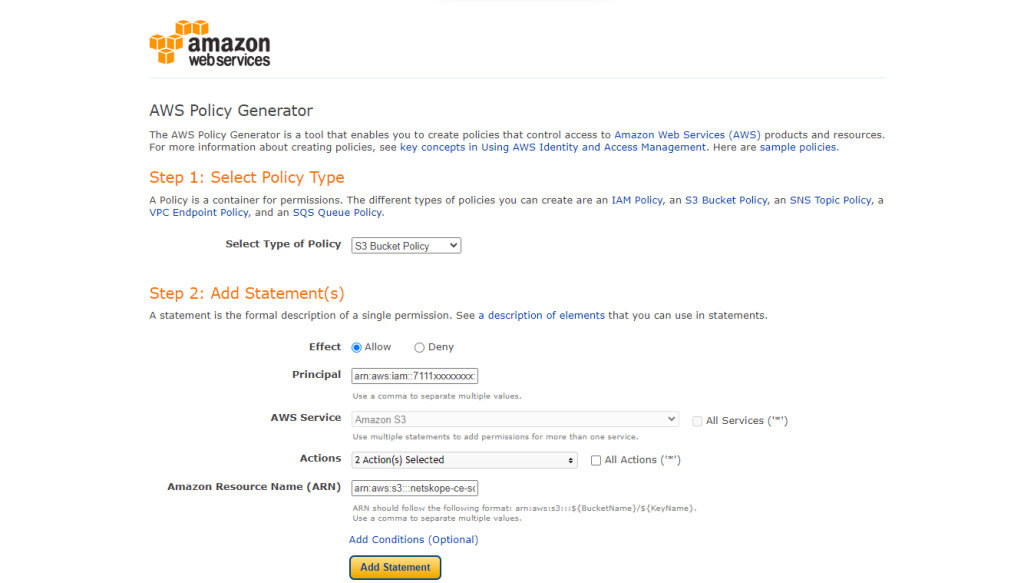
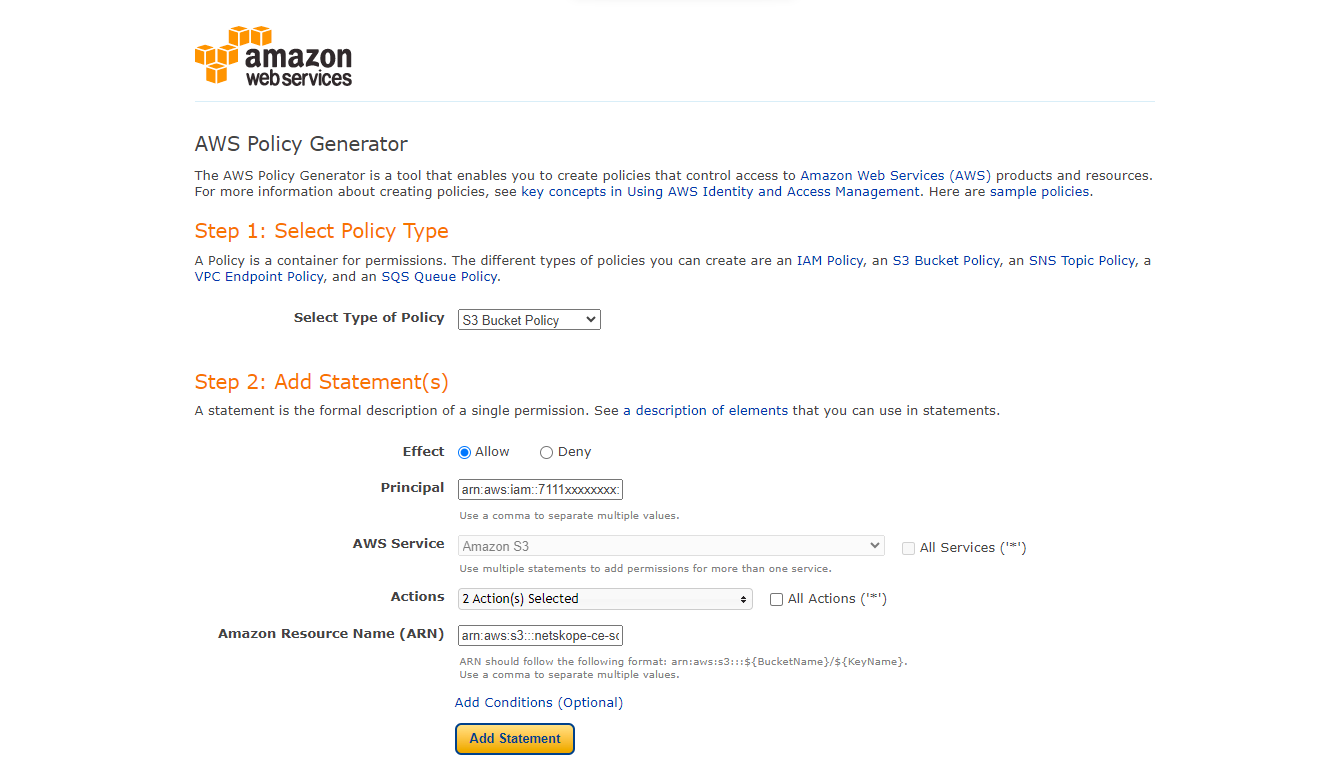
Select S3 Bucket policy as policy type Add Statement details to generate a policy.
Replace the <user-arn> with the user ARN used for accessing the source bucket and <bucket-name> with the source bucket created above.
Examples:<user-arn>: arn:aws:iam::7111xxxxxxxx:user/xxxxxxxx, and<bucket-name>: netskope-ce-source-bucket- Select Type of Policy: S3 Bucket Policy
- Effect: Allow
- Principal:
<user-arn> - Actions:
- GetBucketAcl
- GetBucketPolicy
- ARN:
arn:aws:s3:::<bucket-name> - Click Add Statement.
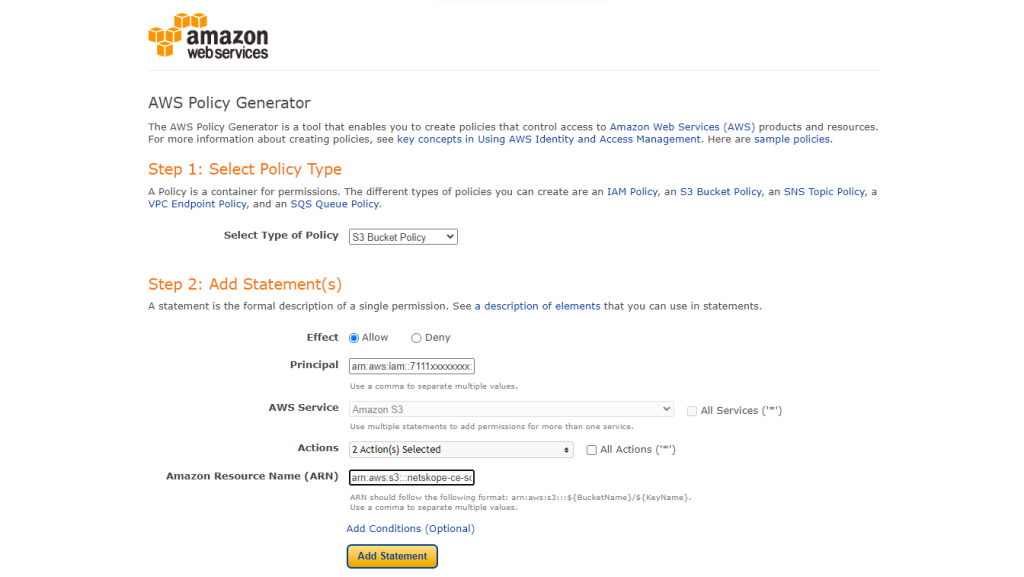
- Select Type of Policy: S3 Bucket Policy
- Effect: Allow
- Principal:
<user-arn> - Actions:
- PutObject
- PutObjectAcl
- ARN:
arn:aws:s3:::<bucket-name>/* - Click Add Statement.
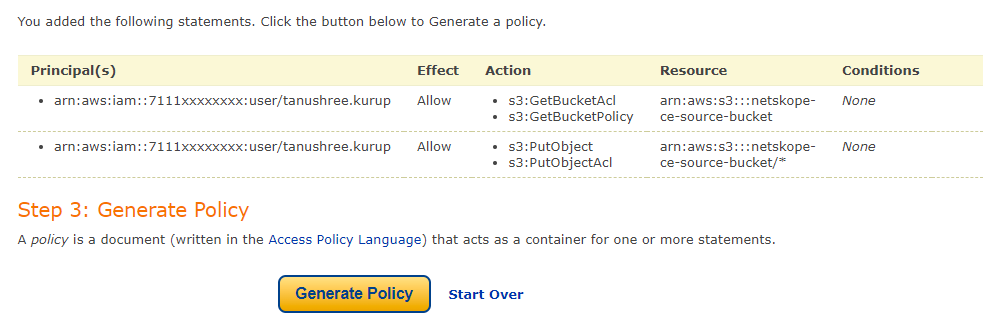
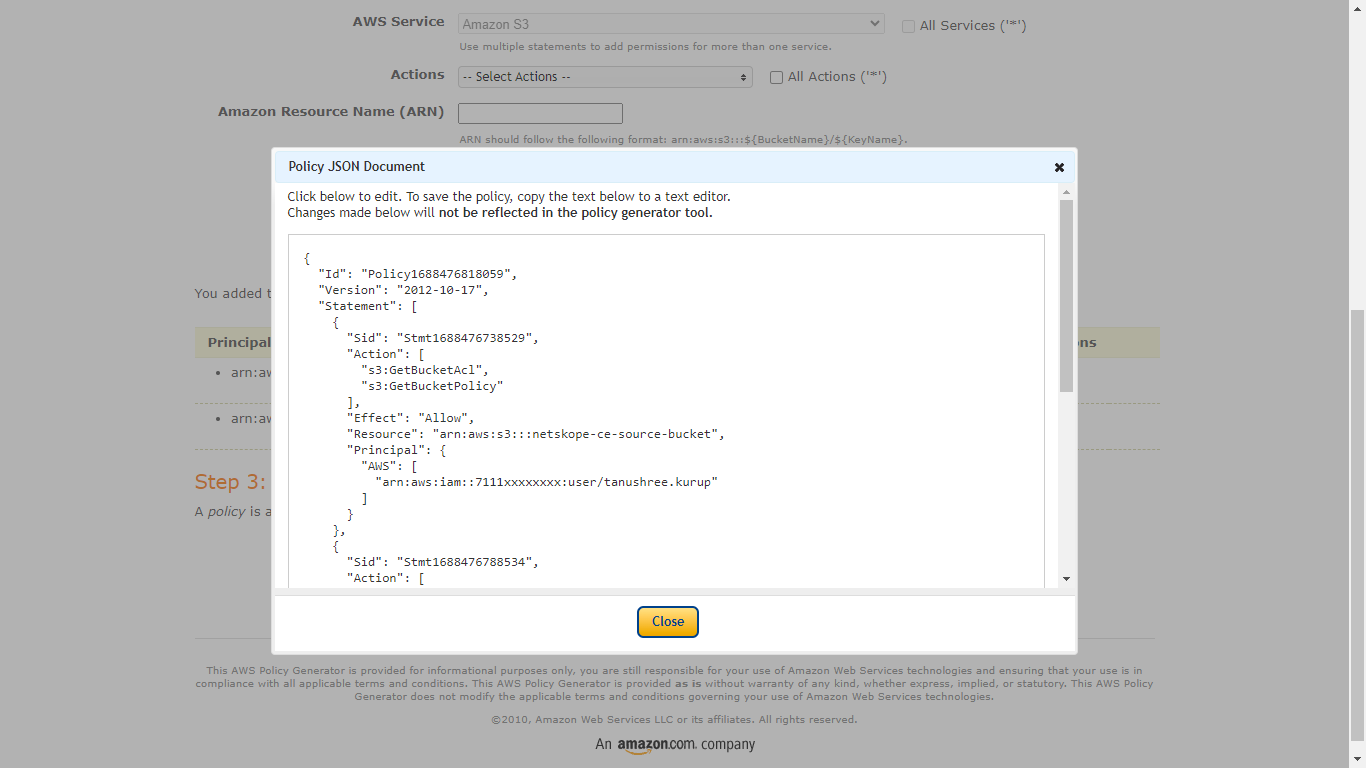
- Click Generate Policy. Make sure to copy the policy generated in this step as it will be used in the next step to attach in the source bucket.
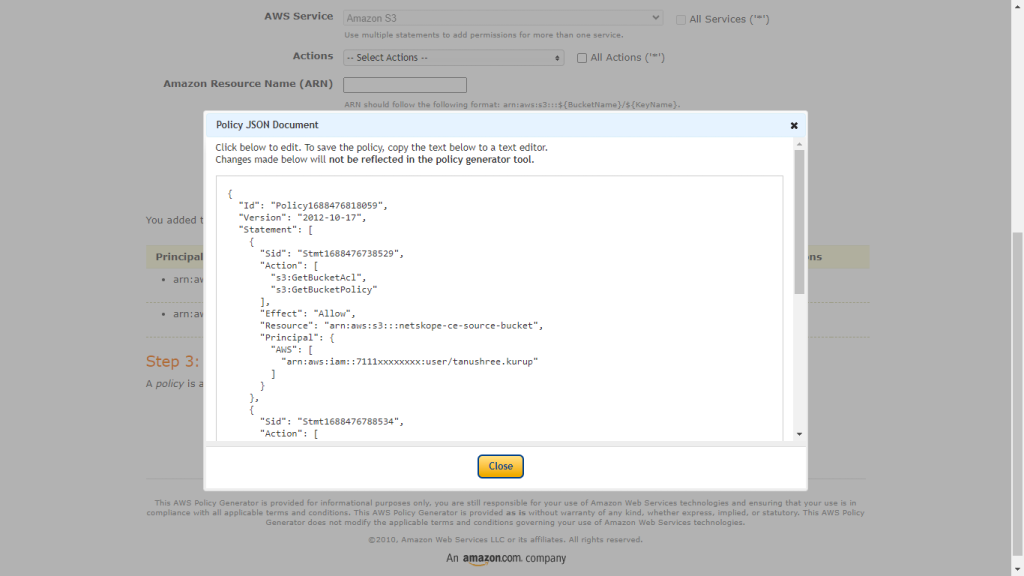
-
Add this policy to the Textbox. Scroll to the bottom and click Save Changes.
Create a Bucket Policy
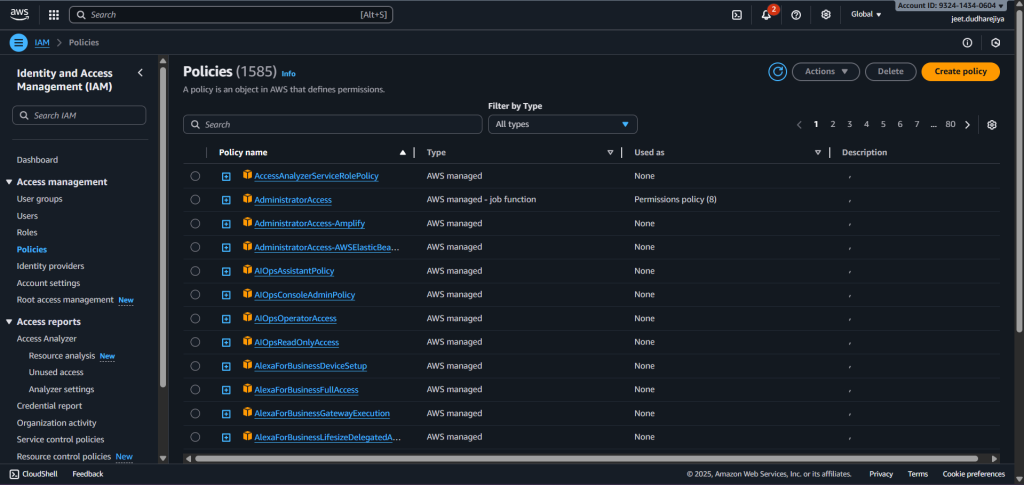
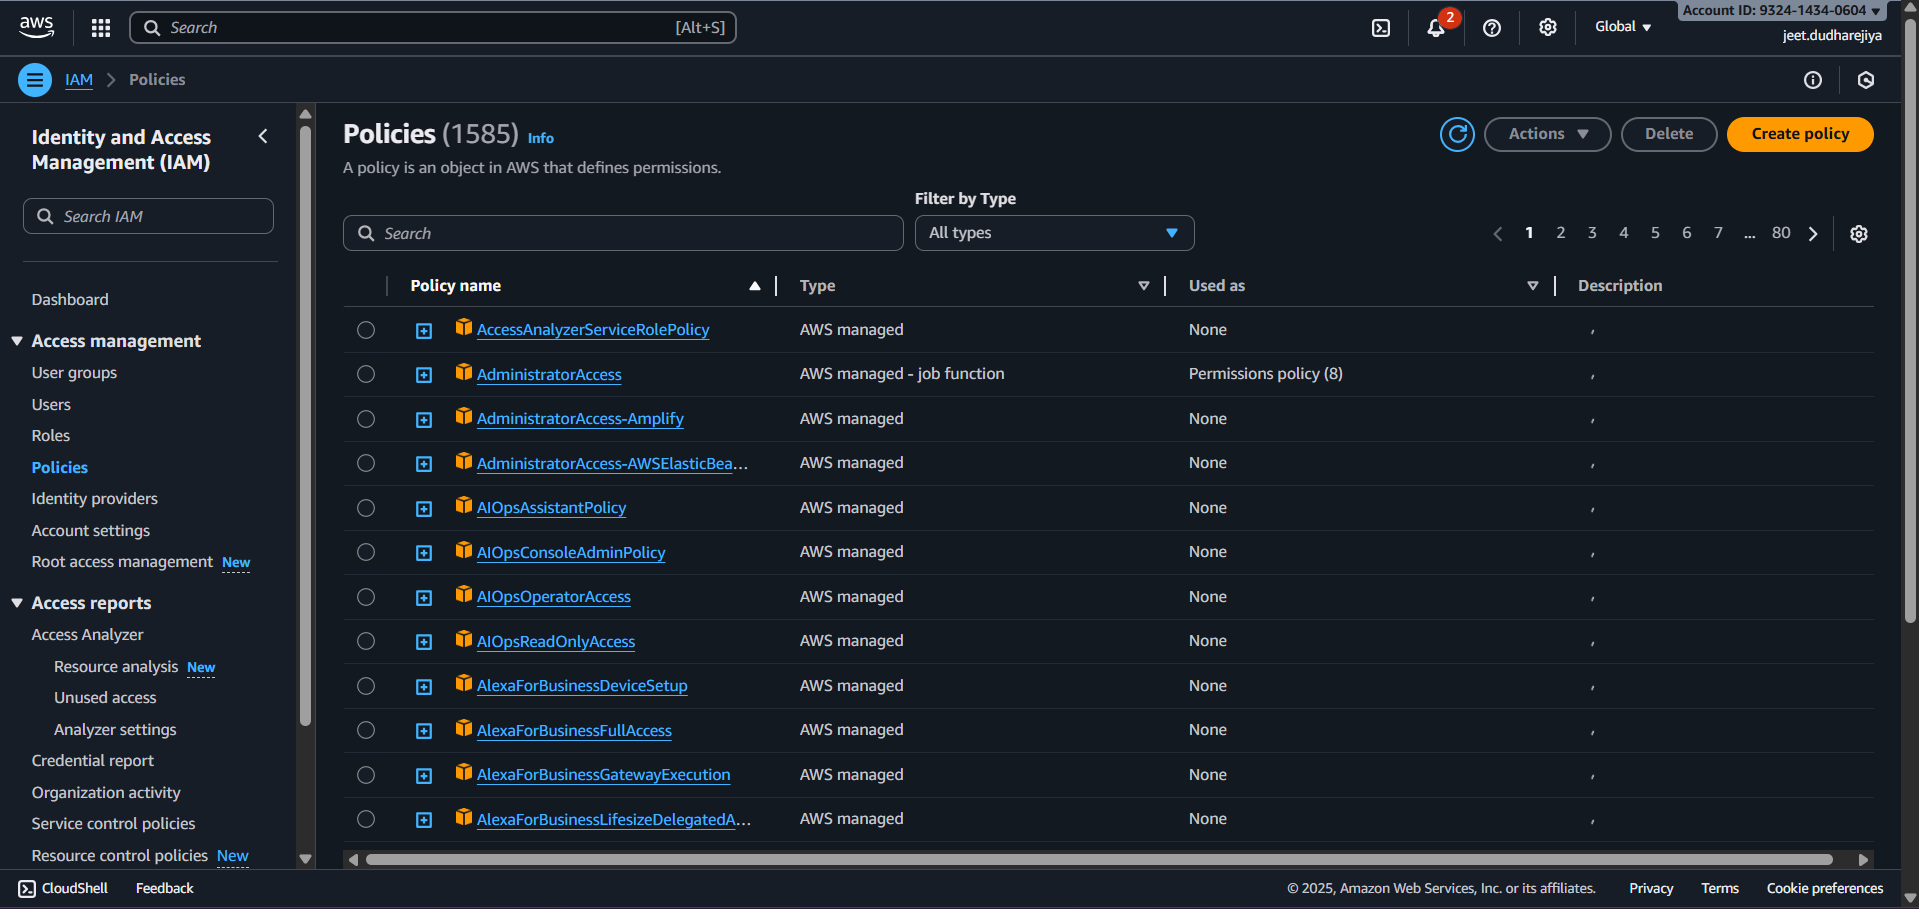
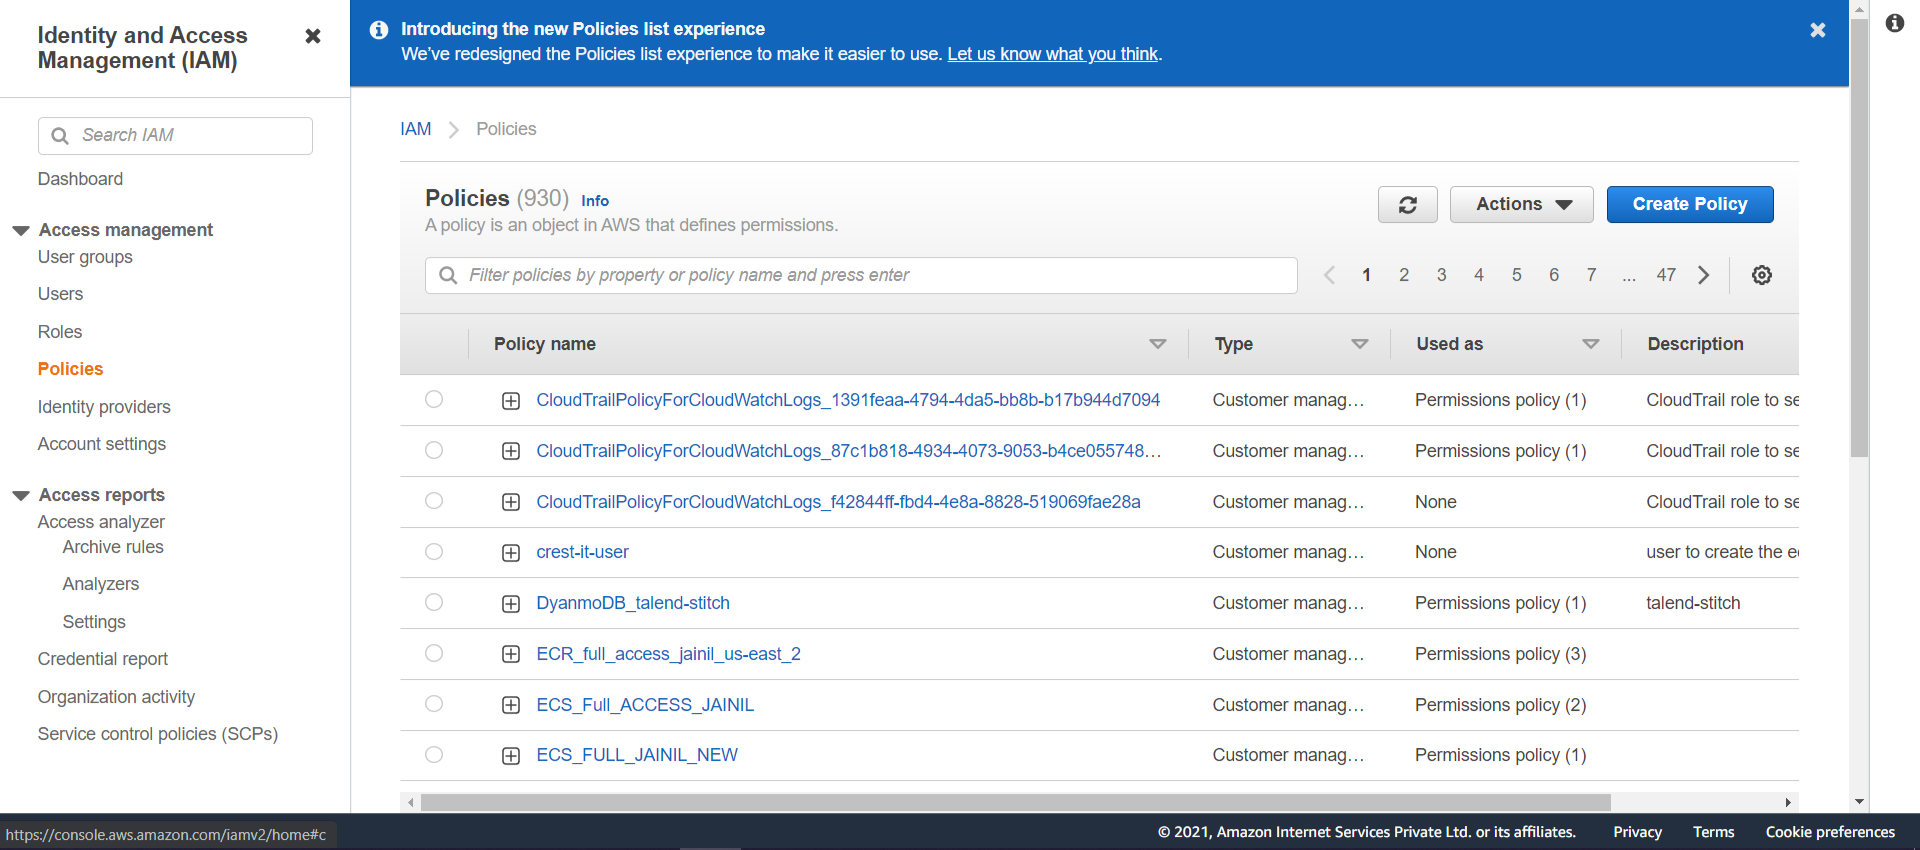
Search for IAM in the search box, and from the left panel, click Policies.
-
Click Create Policy.
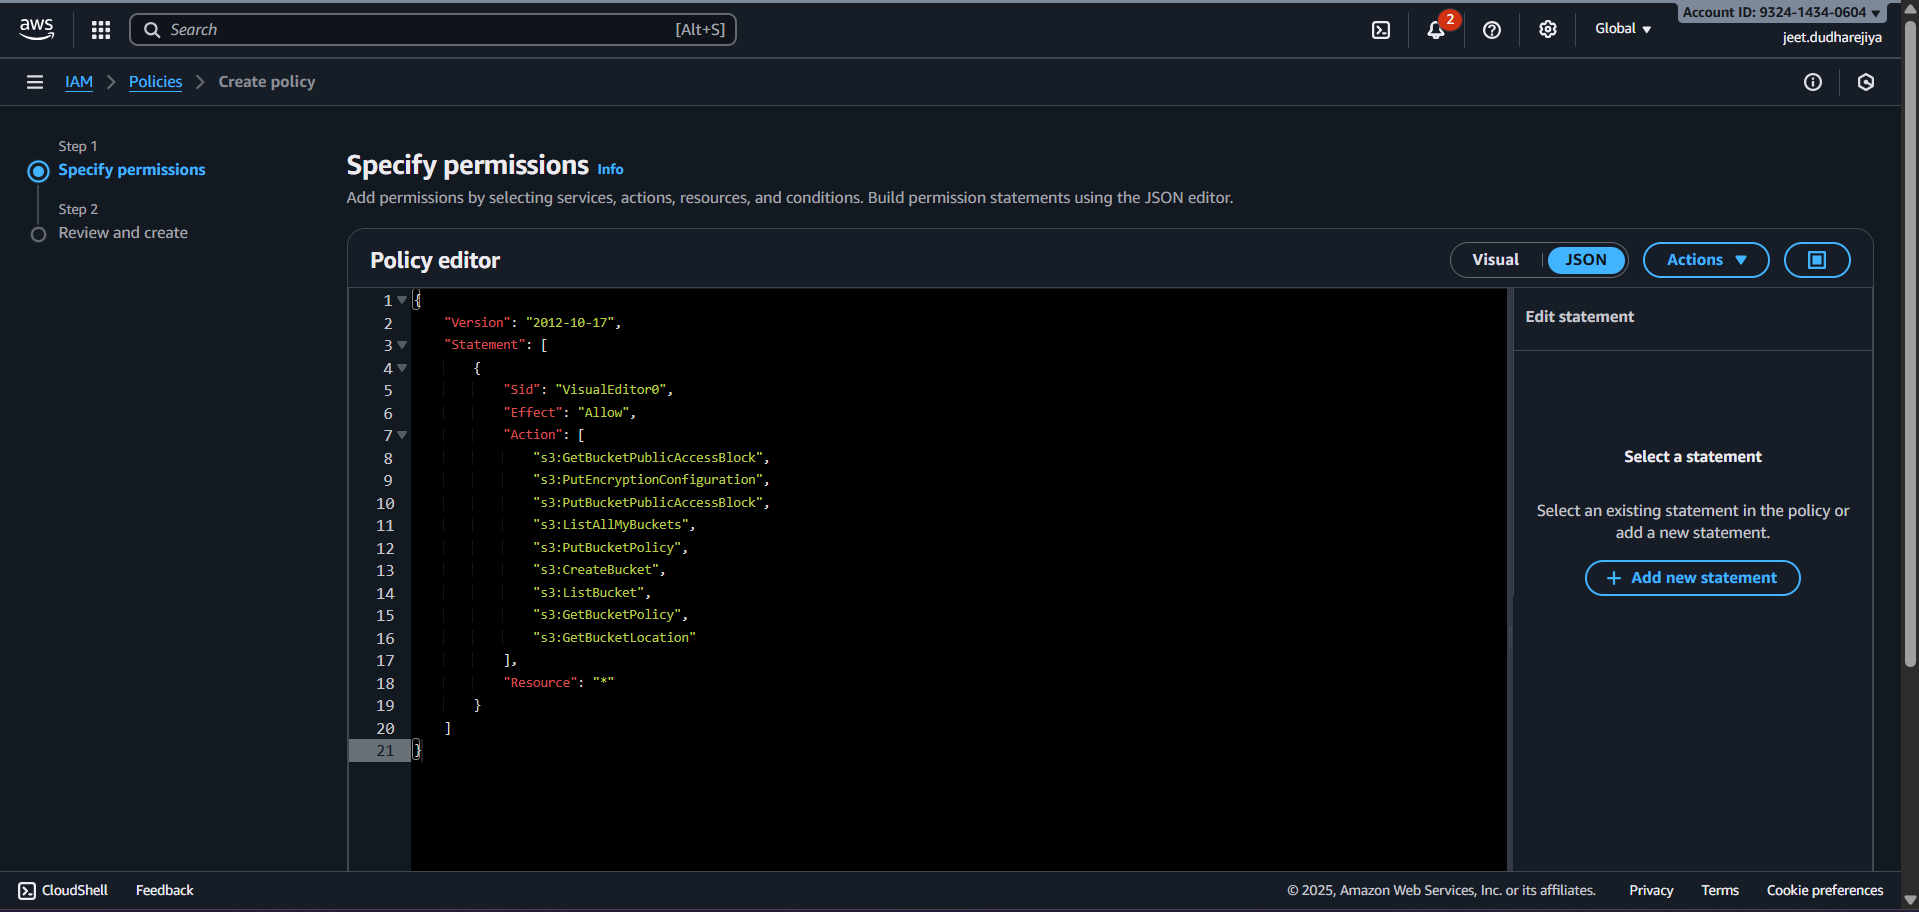
-
Click on the JSON tab, and enter the policy shown below. Click Next: Tags and then click Next: Review.
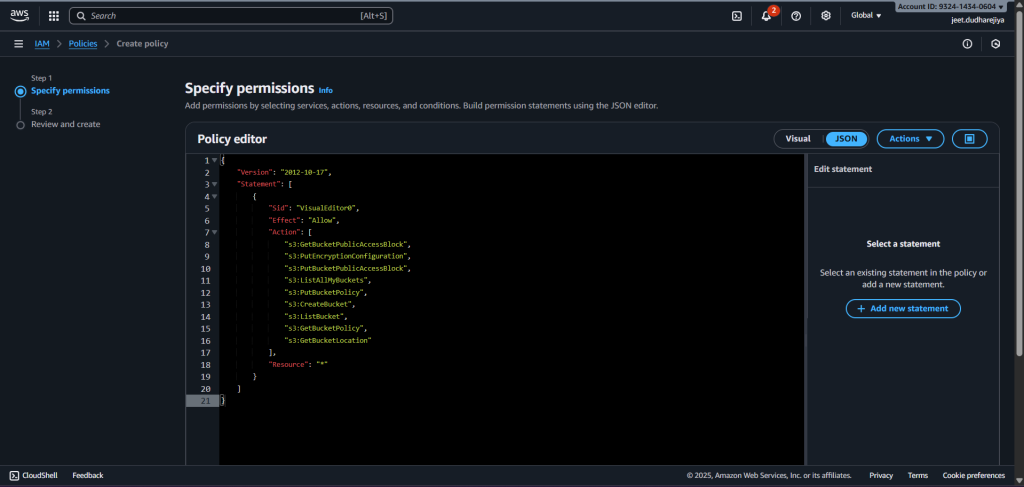
{ "Version": "2012-10-17", "Statement": [ { "Sid": "VisualEditor0", "Effect": "Allow", "Action": [ "s3:GetObject", "s3:ListBucket", "s3:GetBucketLocation" ], "Resource": "*" } ] } -
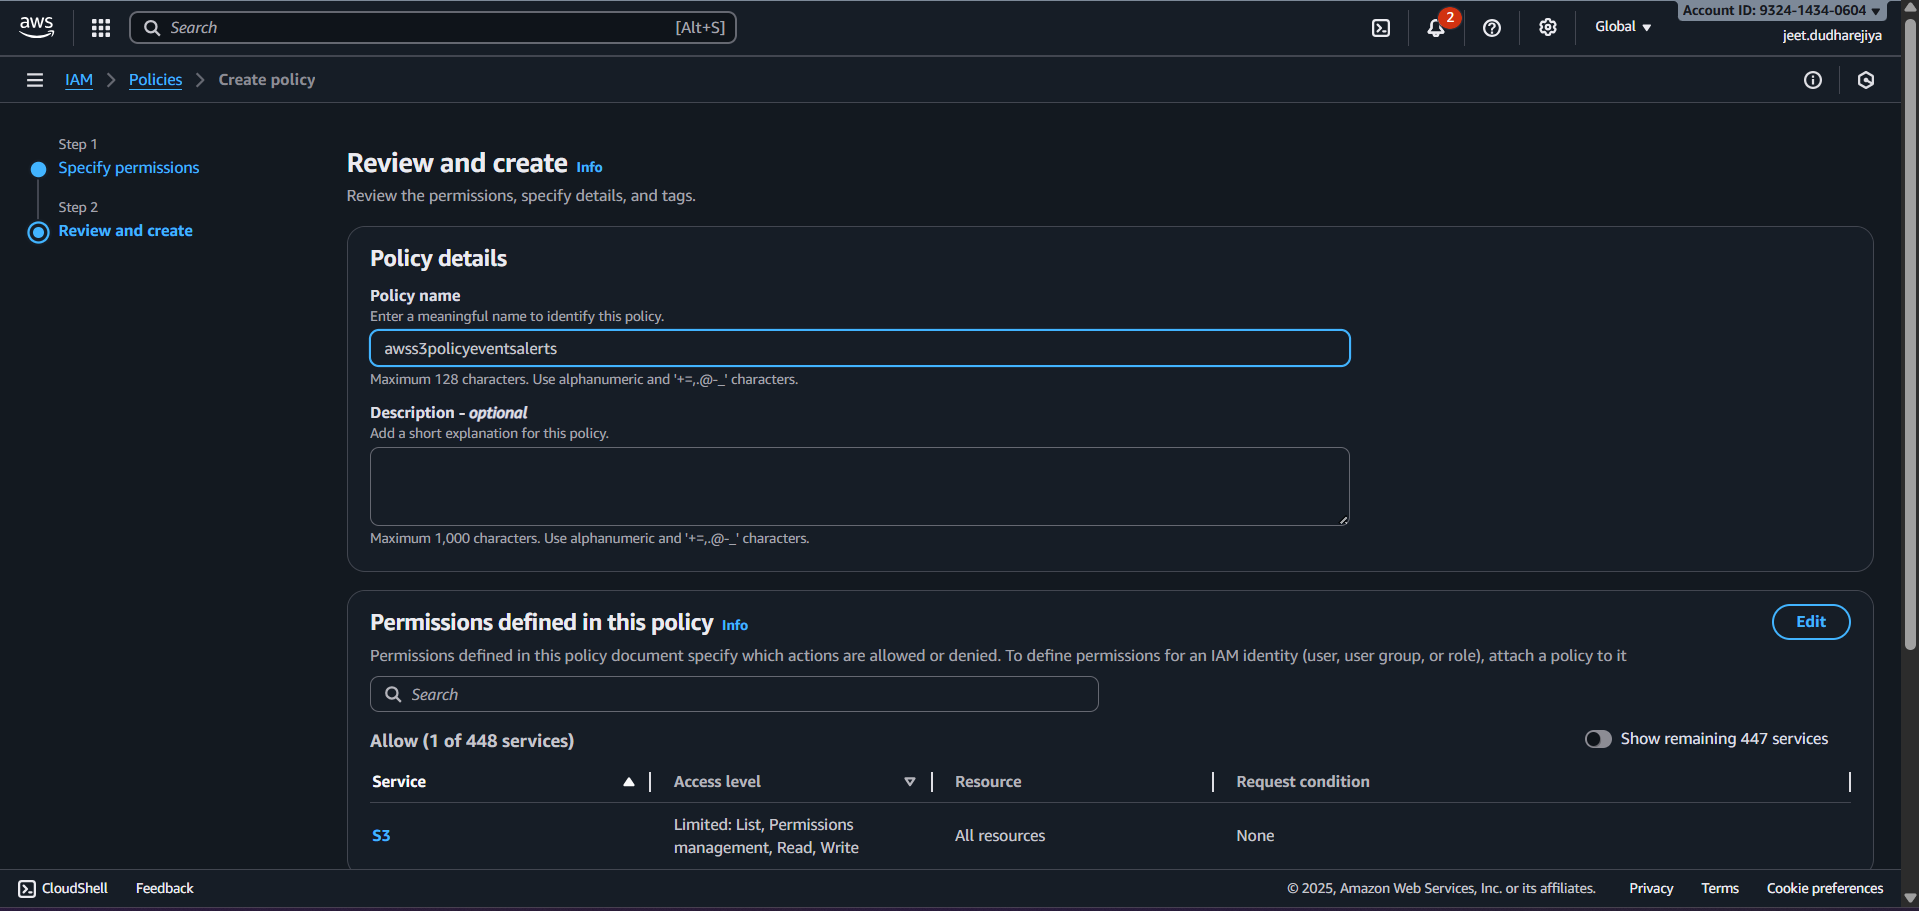
Enter a Name and click Create Policy.
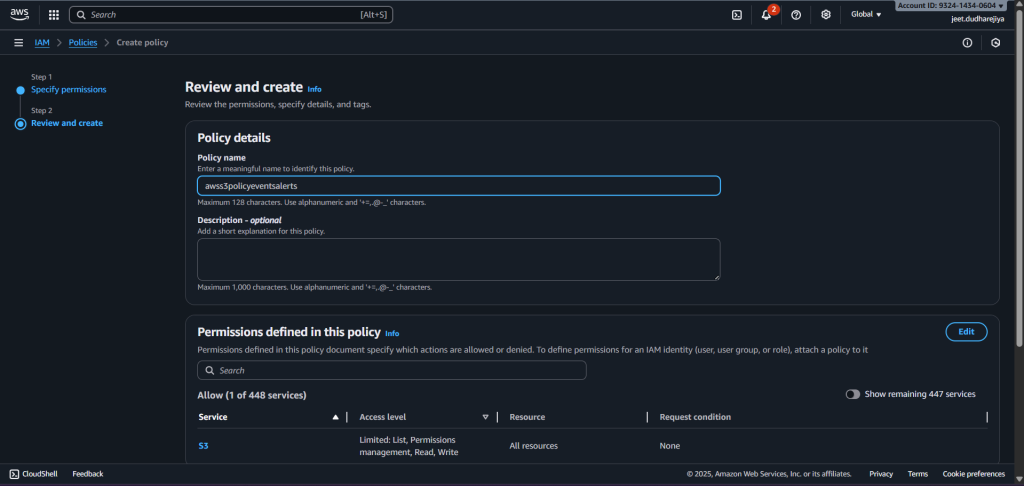
-
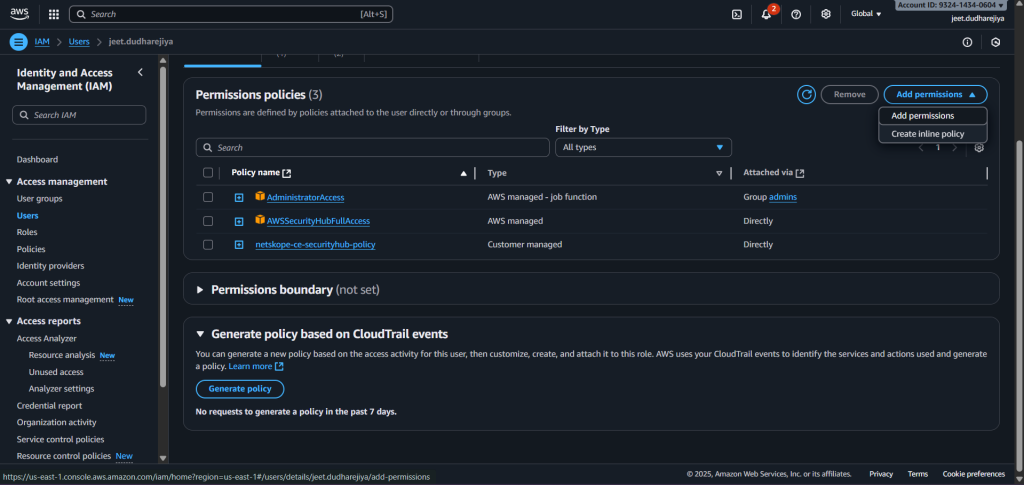
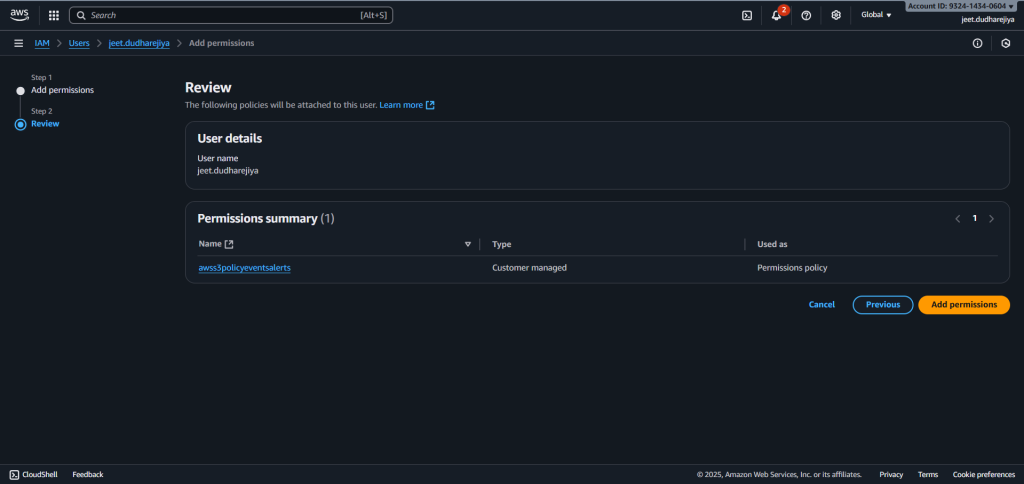
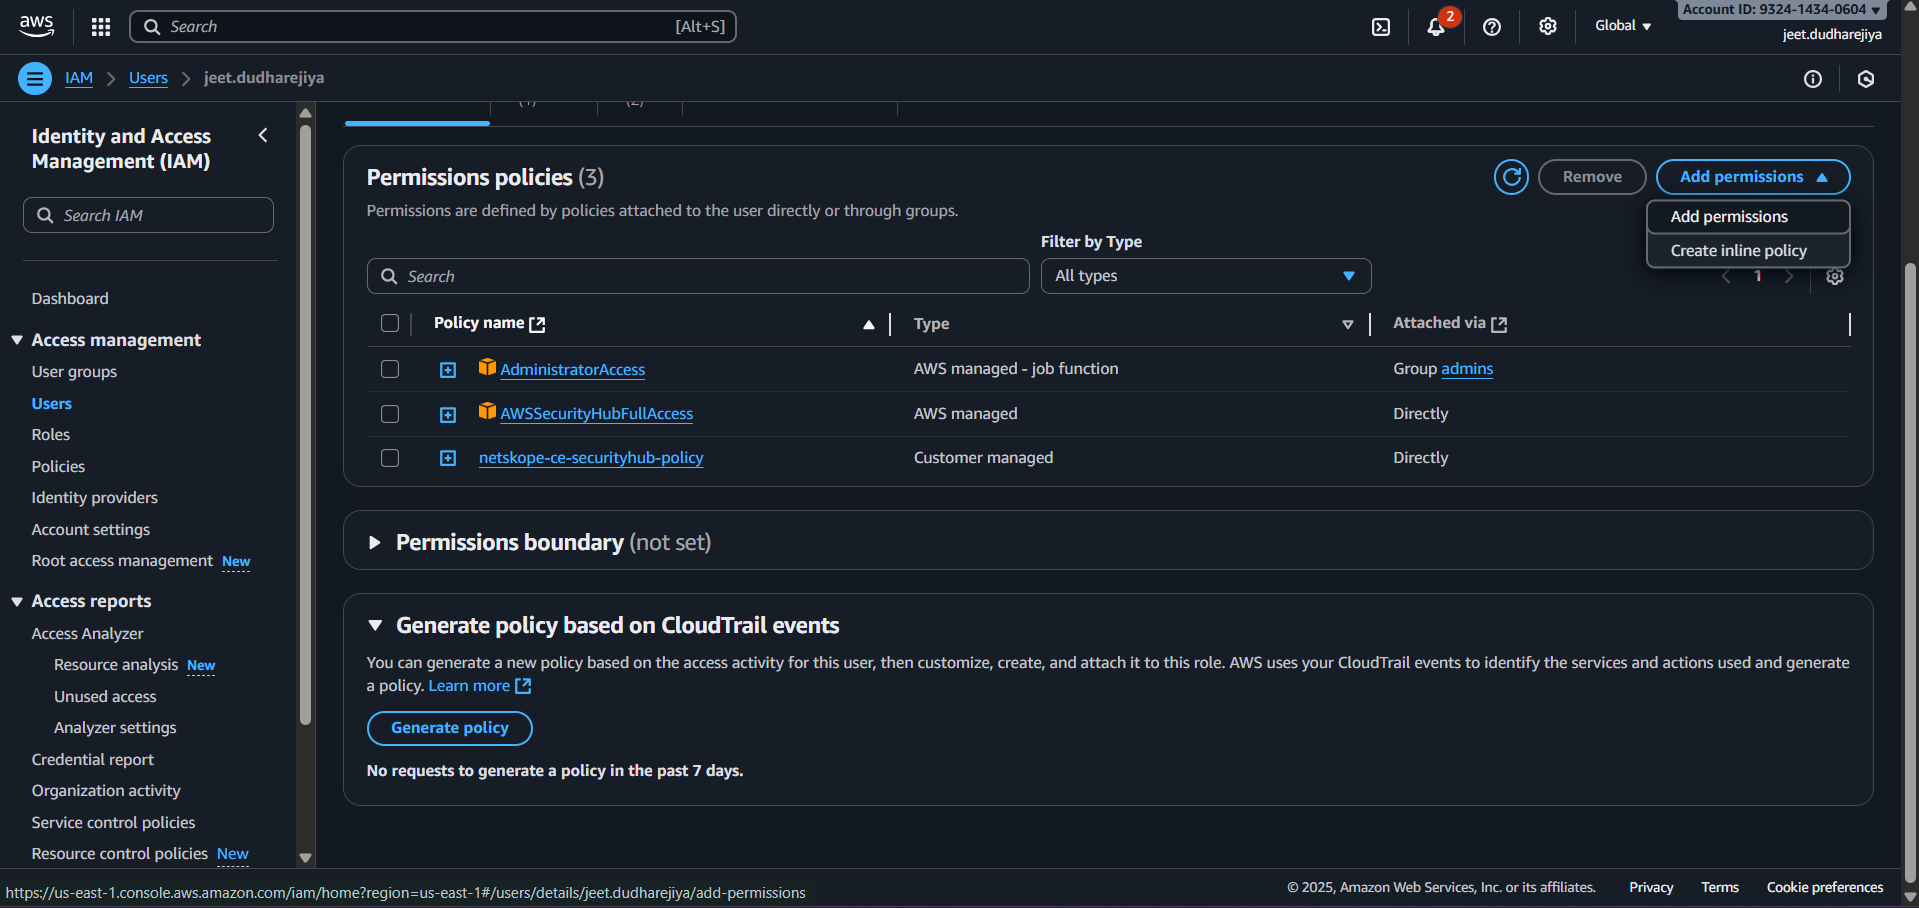
Attach this policy to the user, using these steps:
- Go to IAM > Users. Select the user for which you want to attach a policy, click Add permissions, and then click Add permissions.
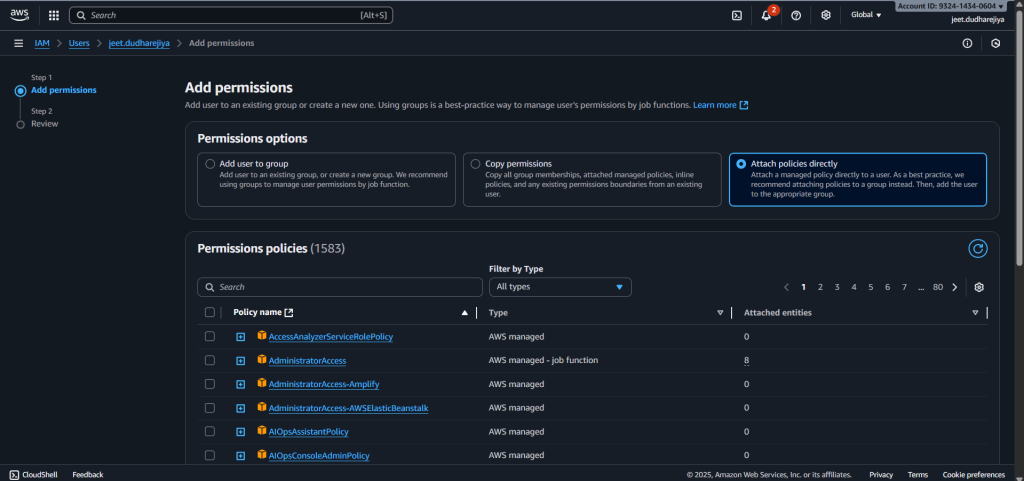
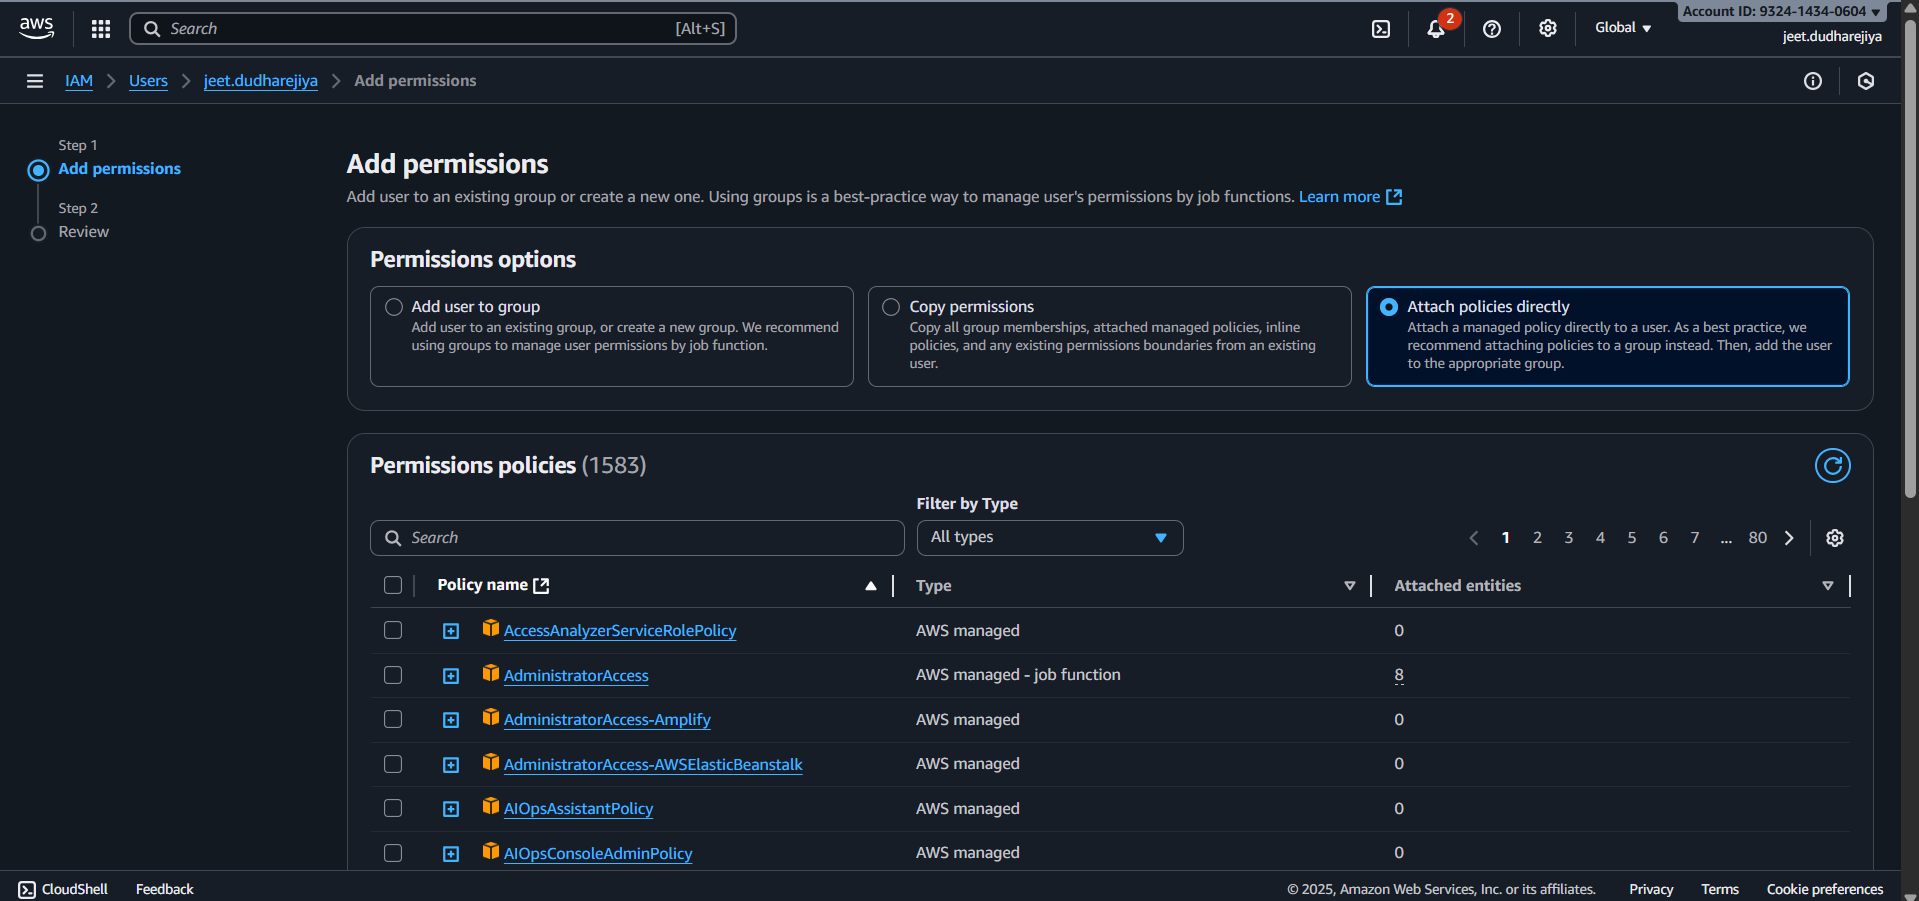
- Select the Attach policies directly option under Permissions, and then search for and select the policy created in the previous step.
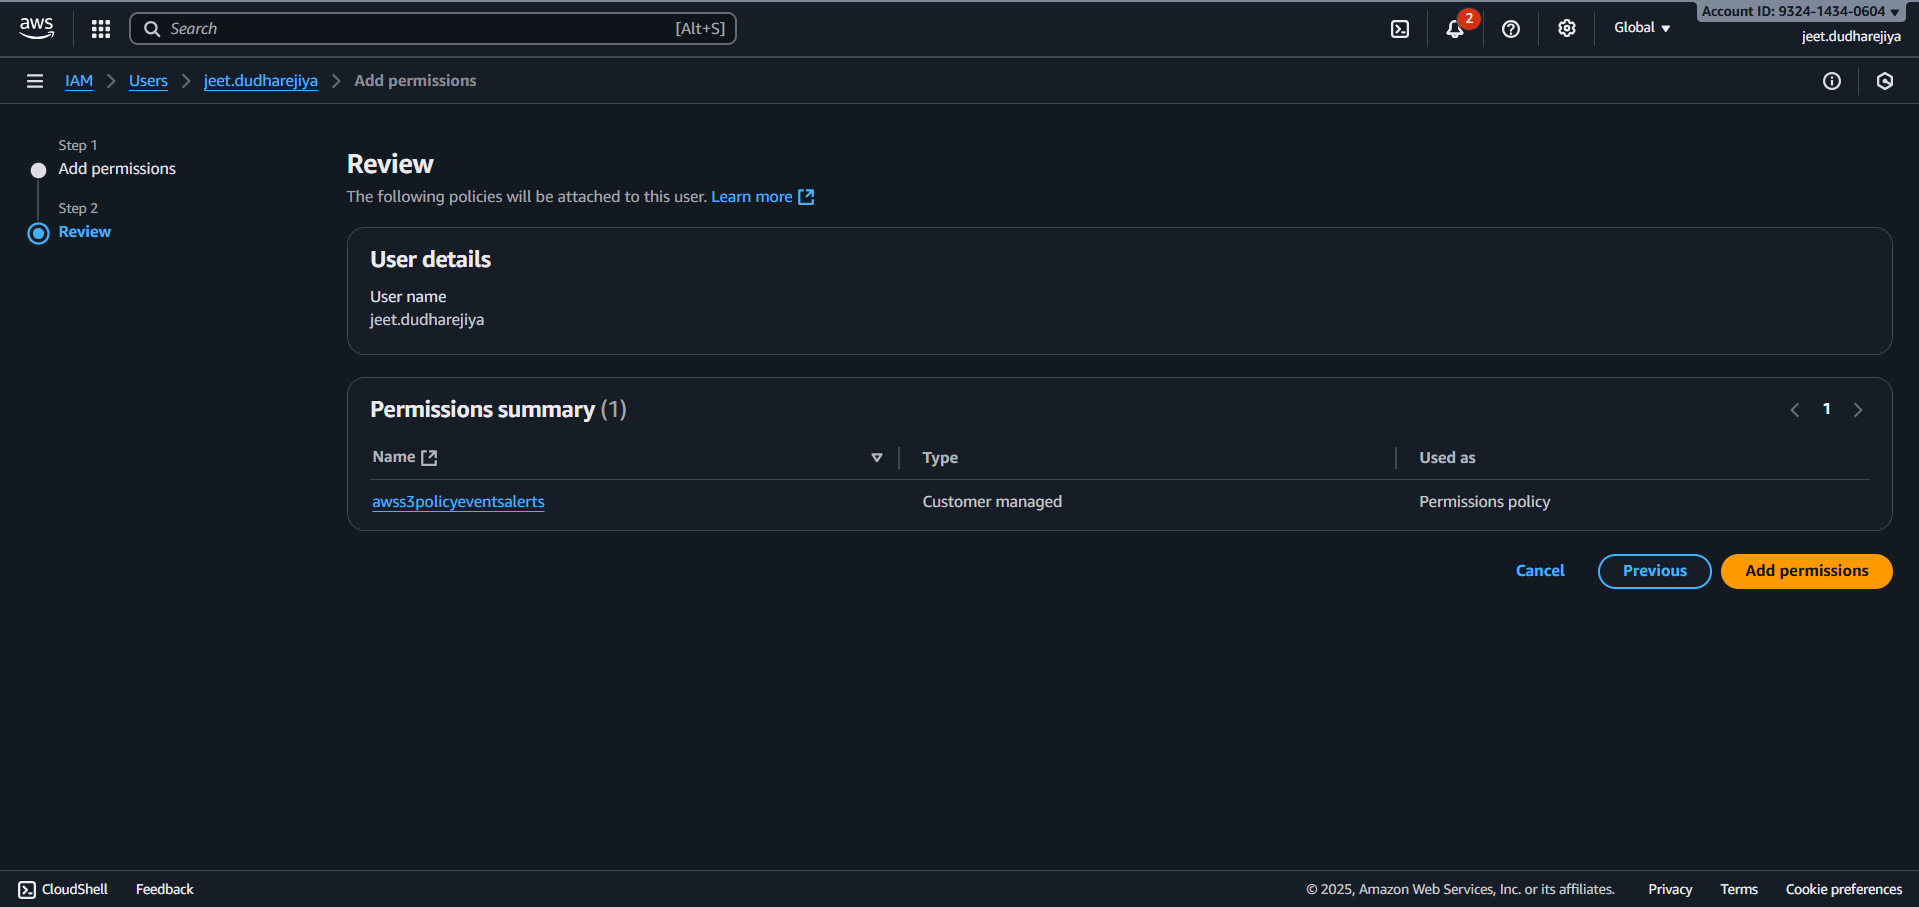
- Click Next, and then click Add permissions. The policy will be attached to the user.
Plugin Authentication Methods
IAM Role Anywhere Configuration
Prerequisites
The AWS Certificate Manager service is required to be enabled to authenticate the plugin using the AWS IAM Roles Anywhere Authentication Method.
Make sure you create the Private Certificate Authority, Trust Anchor, and Profile in the same region in which your AWS S3 Source Bucket resides.
Create a Policy
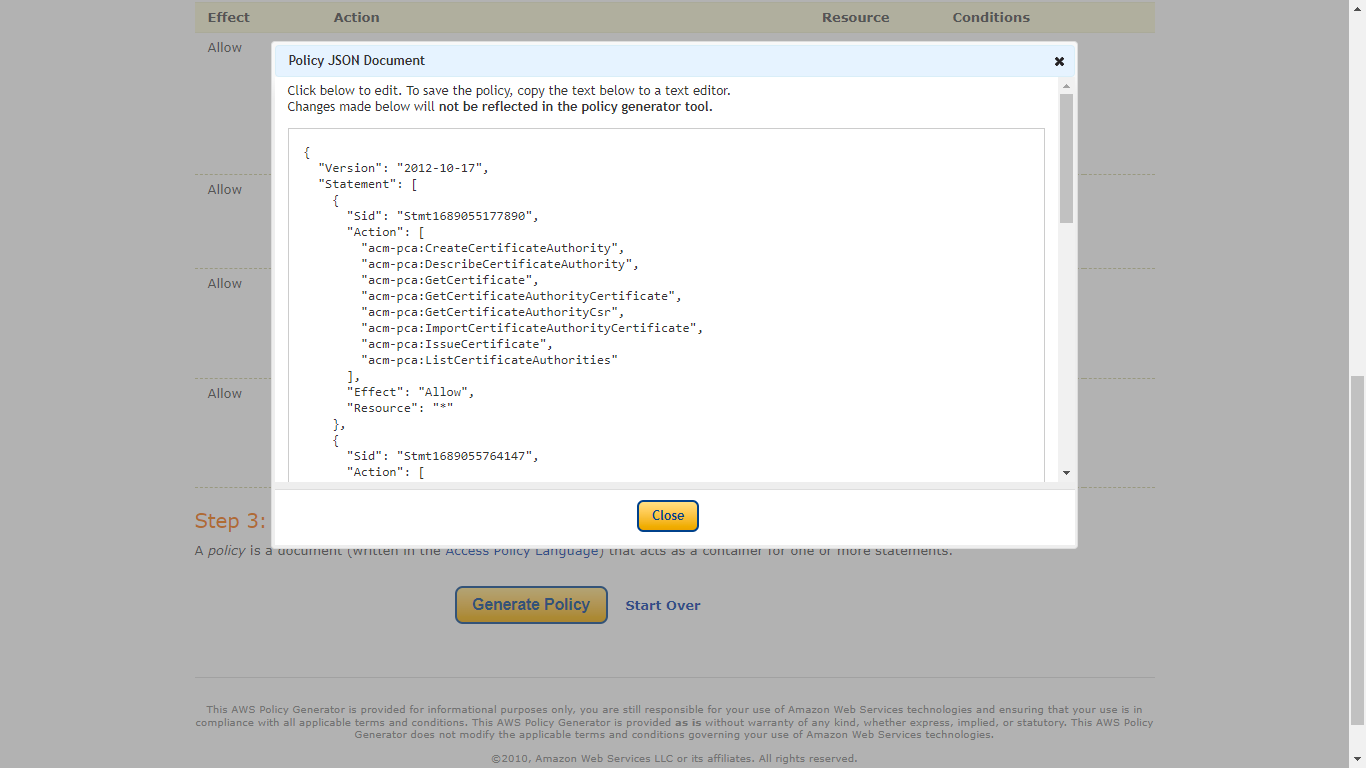
This Policy contains the required permissions for creating a Private CA Certificate(including Permissions for creating Trust Anchor and Profile) and using the IAM Roles Anywhere.
-
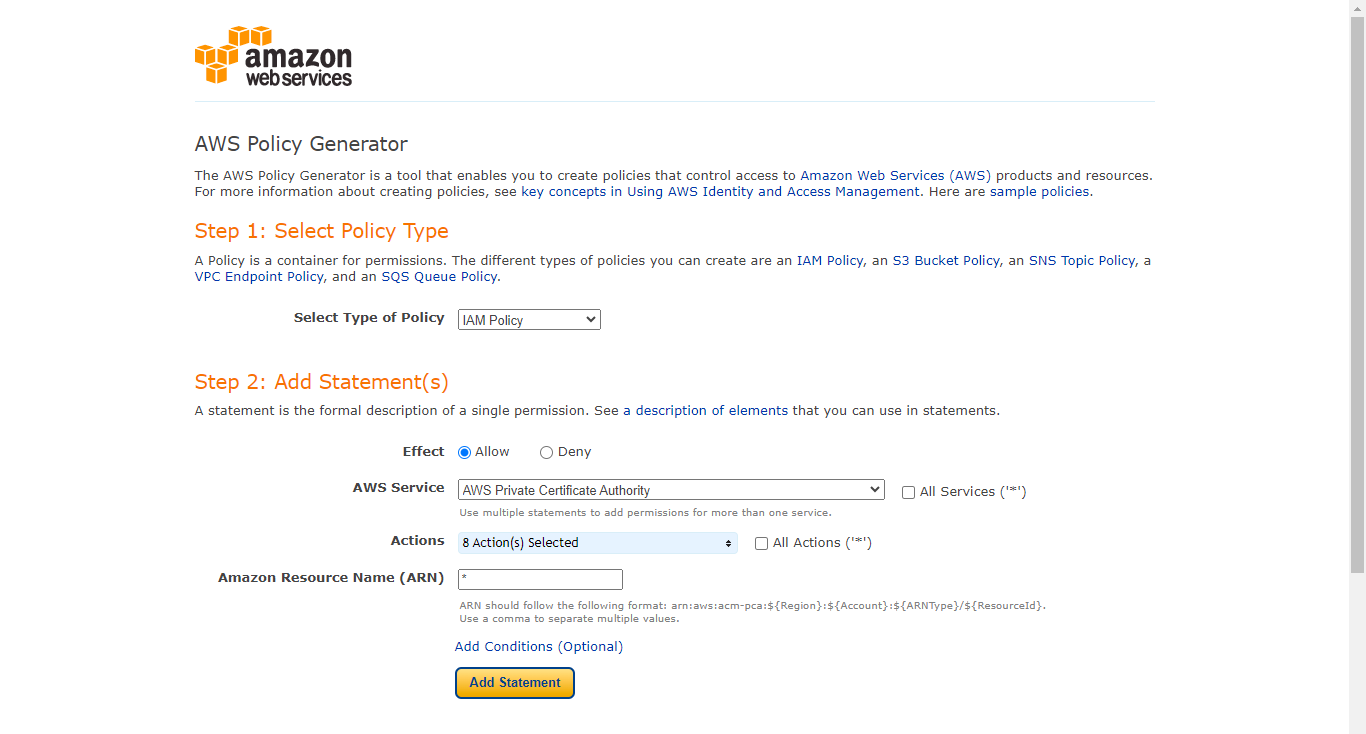
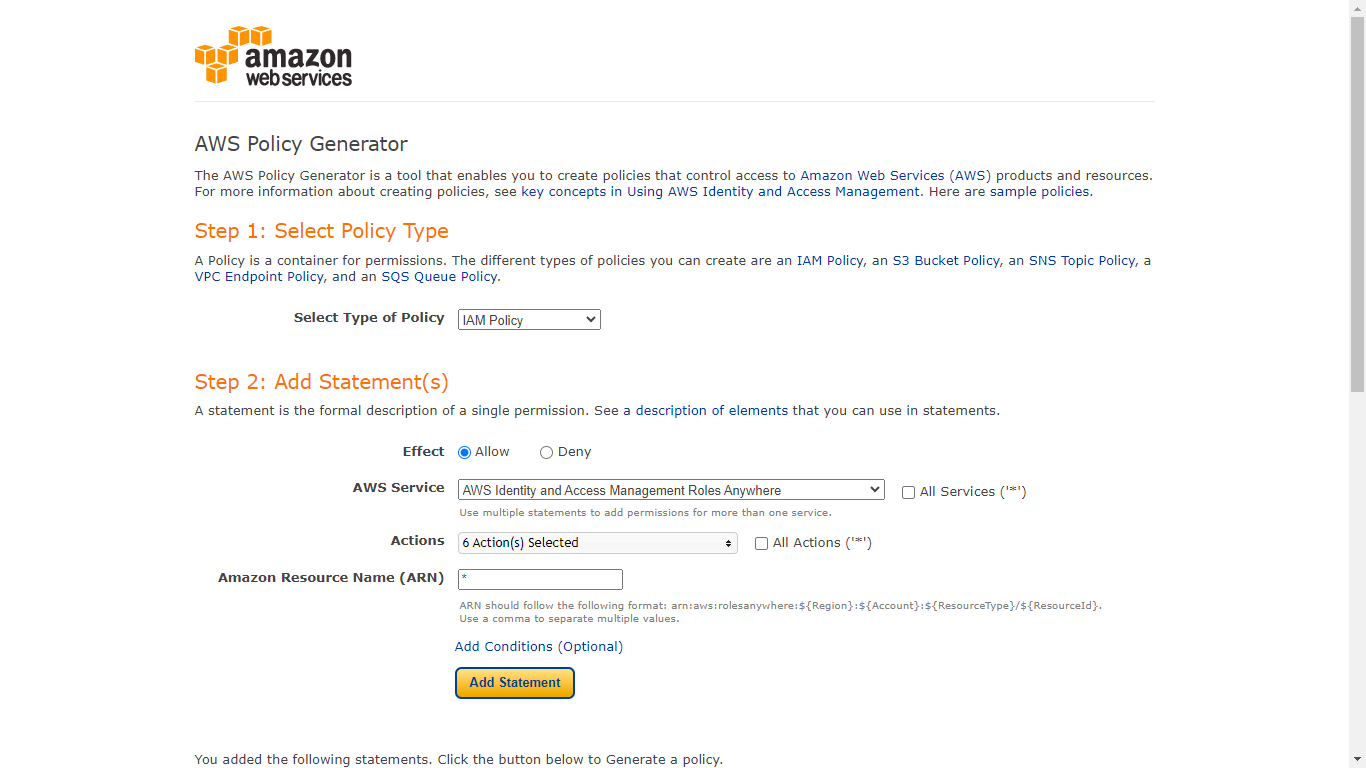
Go to Policy Generator and select IAM Policy as the policy type and generate a policy.
- Select Type of Policy: IAM Policy
- Effect: Allow
- AWS Service: AWS Private Certificate Authority
- Actions:
- CreateCertificateAuthority
- DescribeCertificateAuthority
- GetCertificate
- GetCertificateAuthorityCertificate
- GetCertificateAuthorityCsr
- ImportCertificateAuthorityCertificate
- IssueCertificate
- ListCertificateAuthorities
- ARN: *
- Click Add Statement.
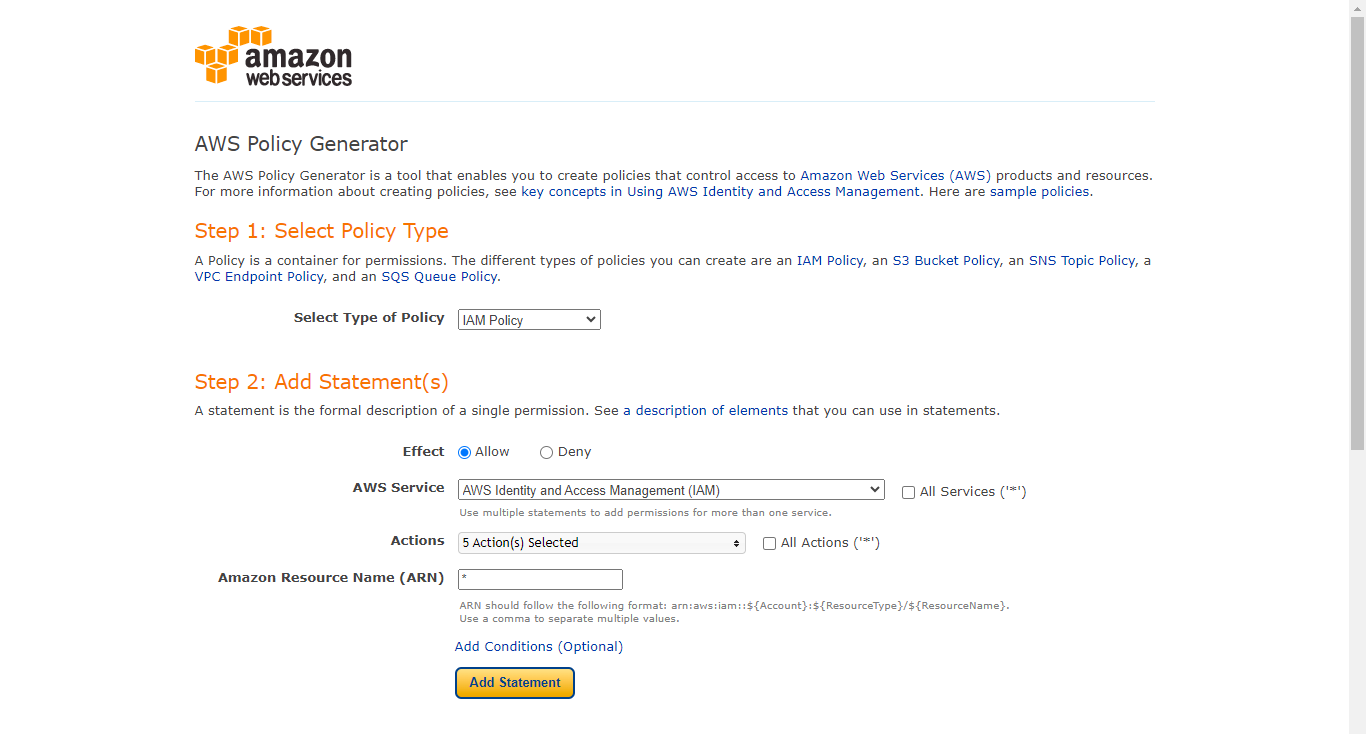
- Select Type of Policy: IAM Policy
- Effect: Allow
- AWS Service: AWS Identity and Access Management (IAM)
- Actions:
- AttachRolePolicy
- CreateAccessKey
- CreateRole
- DeleteRole
- PassRole
- ARN: *
- Click Add Statement.
- Select Type of Policy: IAM Policy
- Effect: Allow
- AWS Service: AWS Certificate Manager
- Actions:
- DescribeCertificate
- ExportCertificate
- GetCertificate
- ListCertificates
- ListTagsForCertificate
- RequestCertificate
- ARN: *
- Click Add Statement.
- Select Type of Policy: IAM Policy
- Effect: Allow
- AWS Service: AWS Identity and Access Management Roles Anywhere
- Actions:
- CreateProfile
- CreateTrustAnchor
- GetProfile
- GetTrustAnchor
- ListProfiles
- ListTrustAnchors
- ARN: *
- Click Add Statement.
- Click Generate Policy.
- Copy the Policy as it will be used in the next step for creating the policy required for creating the Private CA certificates.
-
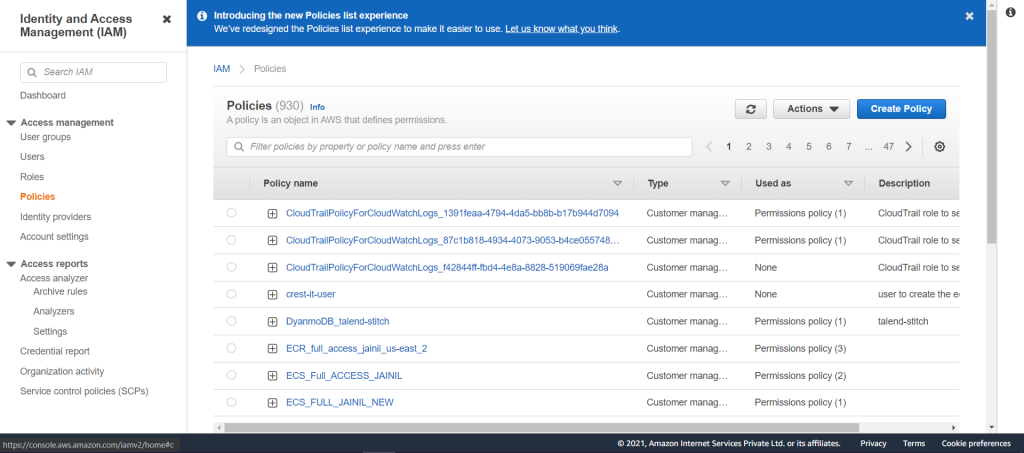
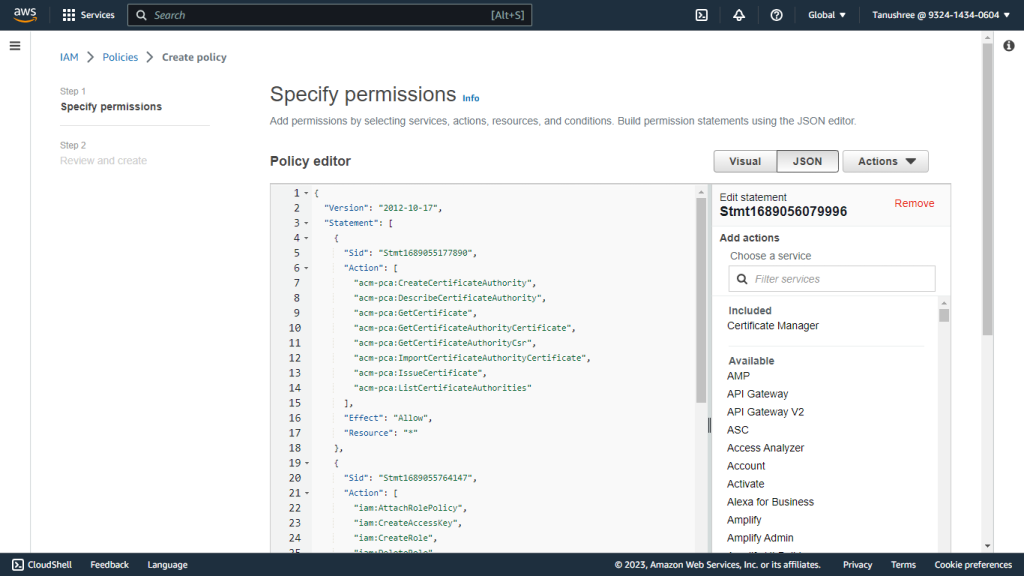
Go to the AWS Console and select IAM from All Services. Click Policies in the left panel and then click Create Policy.
-
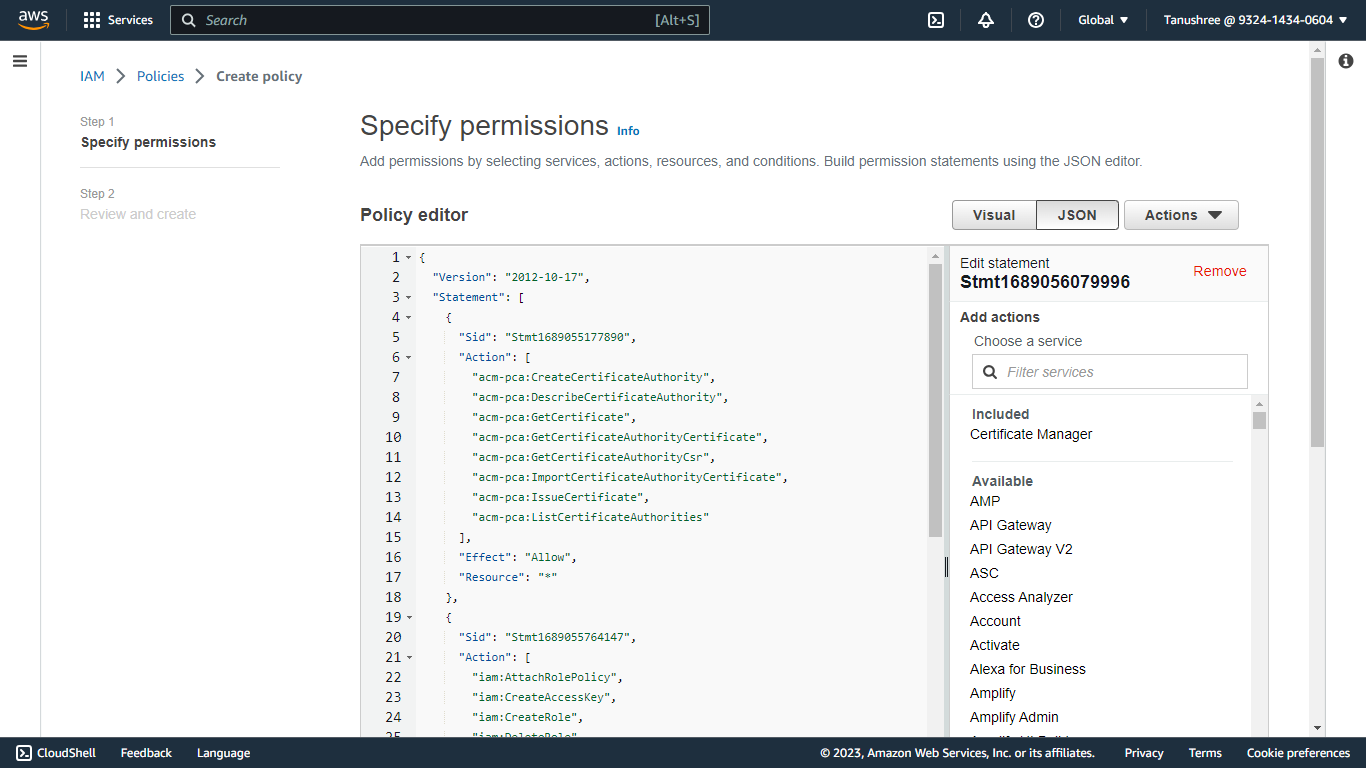
Copy the policy to the JSON tab. Click on Next: Tags and then click on Next: Review.
-
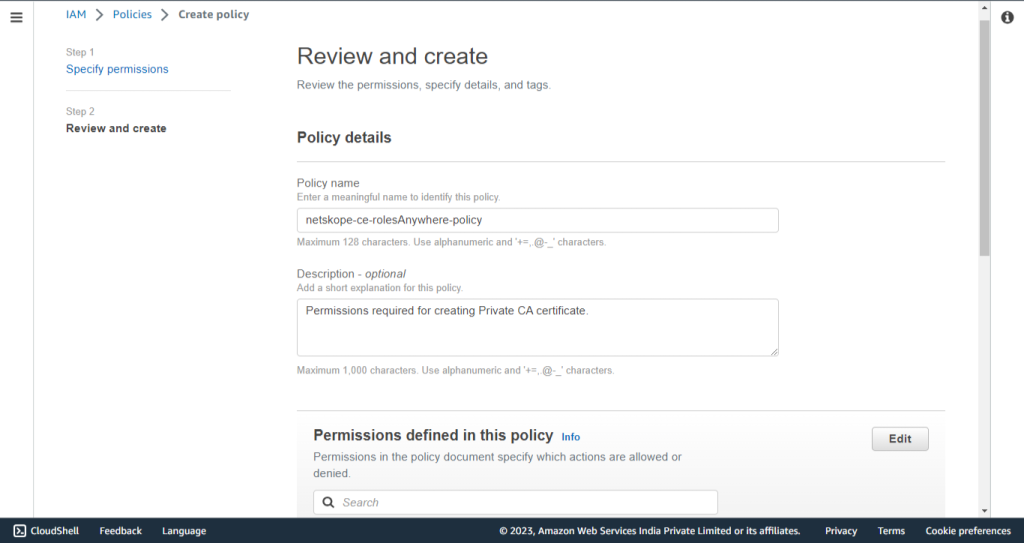
Enter the Name (like netskope-ce-rolesAnywhere-policy), and click Save Changes.
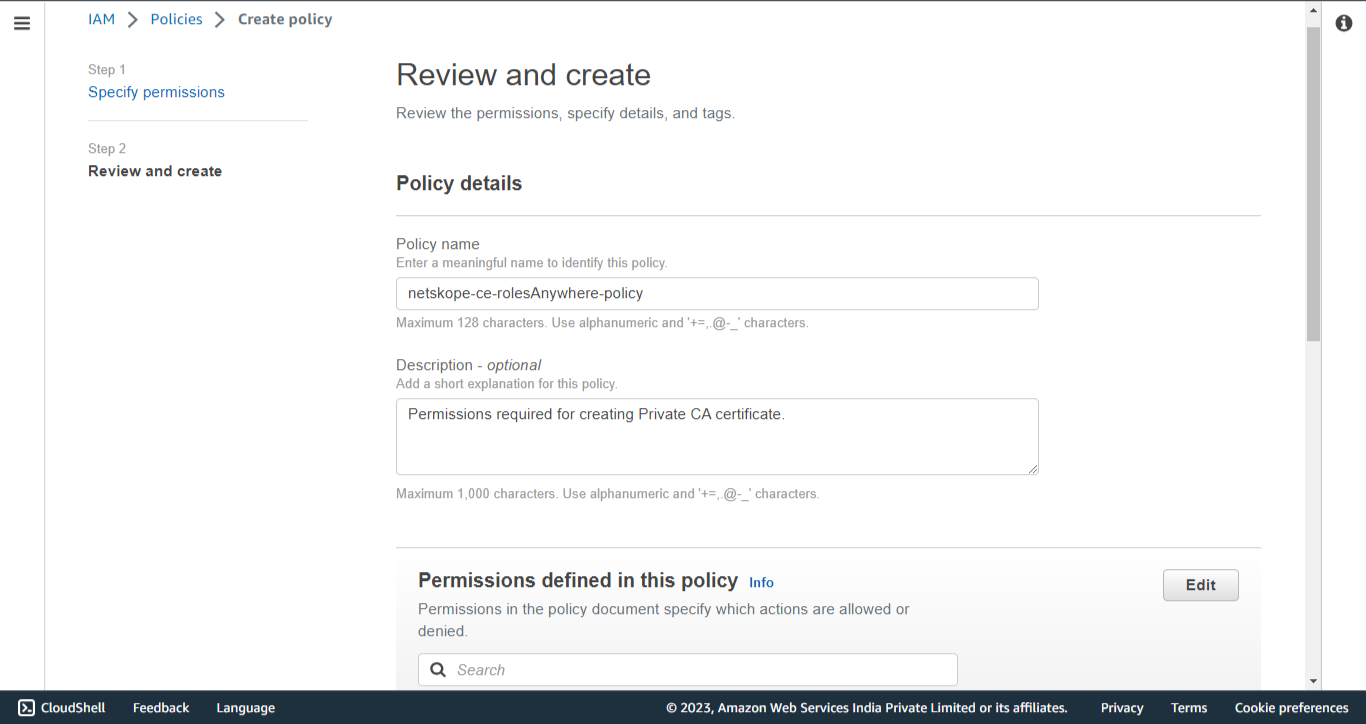
Create Private Certificate Authority
-
Log in to the AWS Console.
-
Search for Certificate Manager.
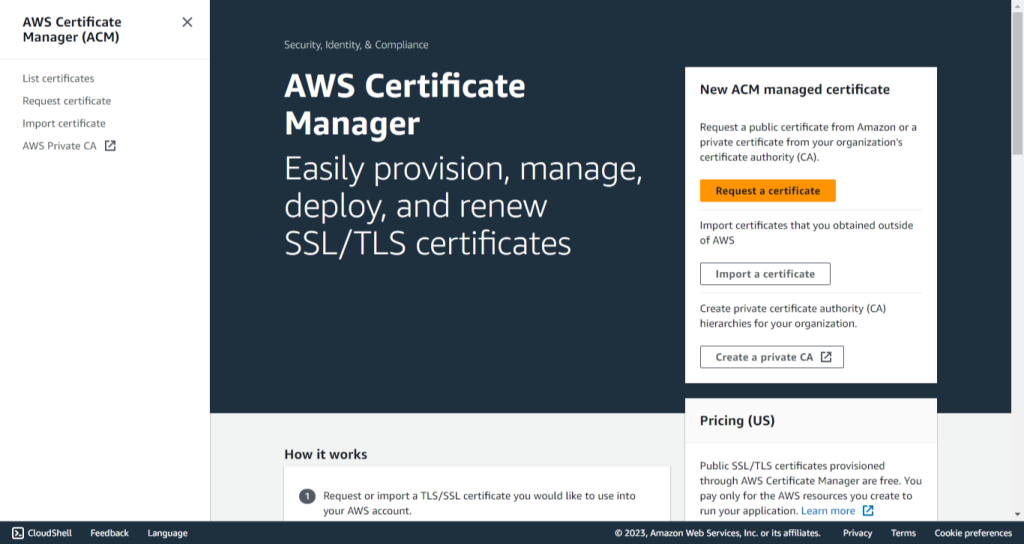
-
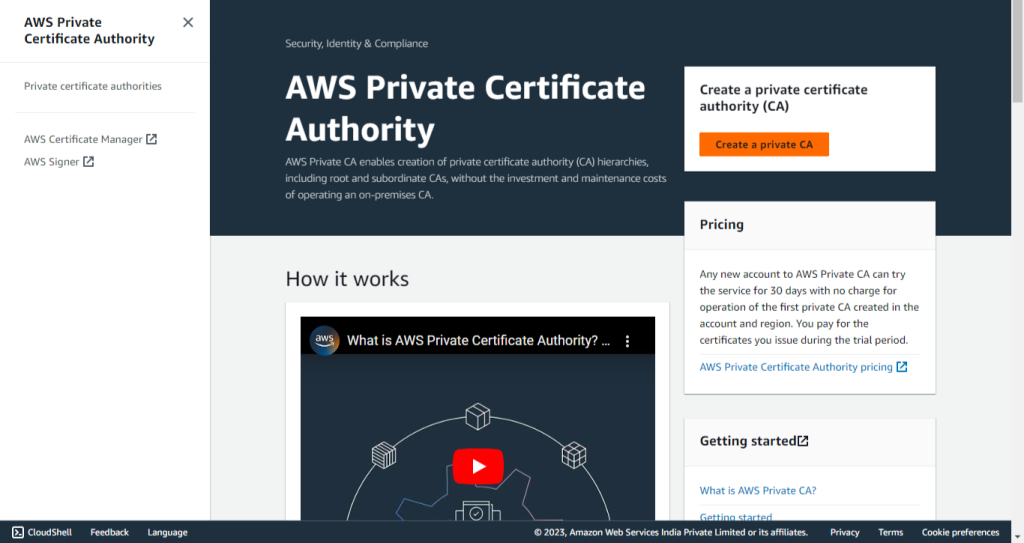
Click AWS Private CA.
-
Click Create a private CA.
-
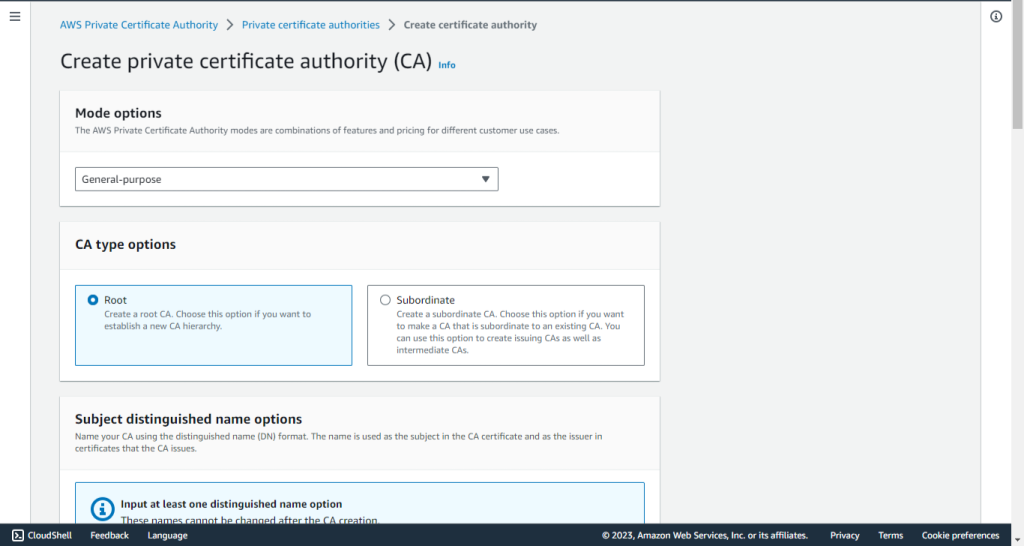
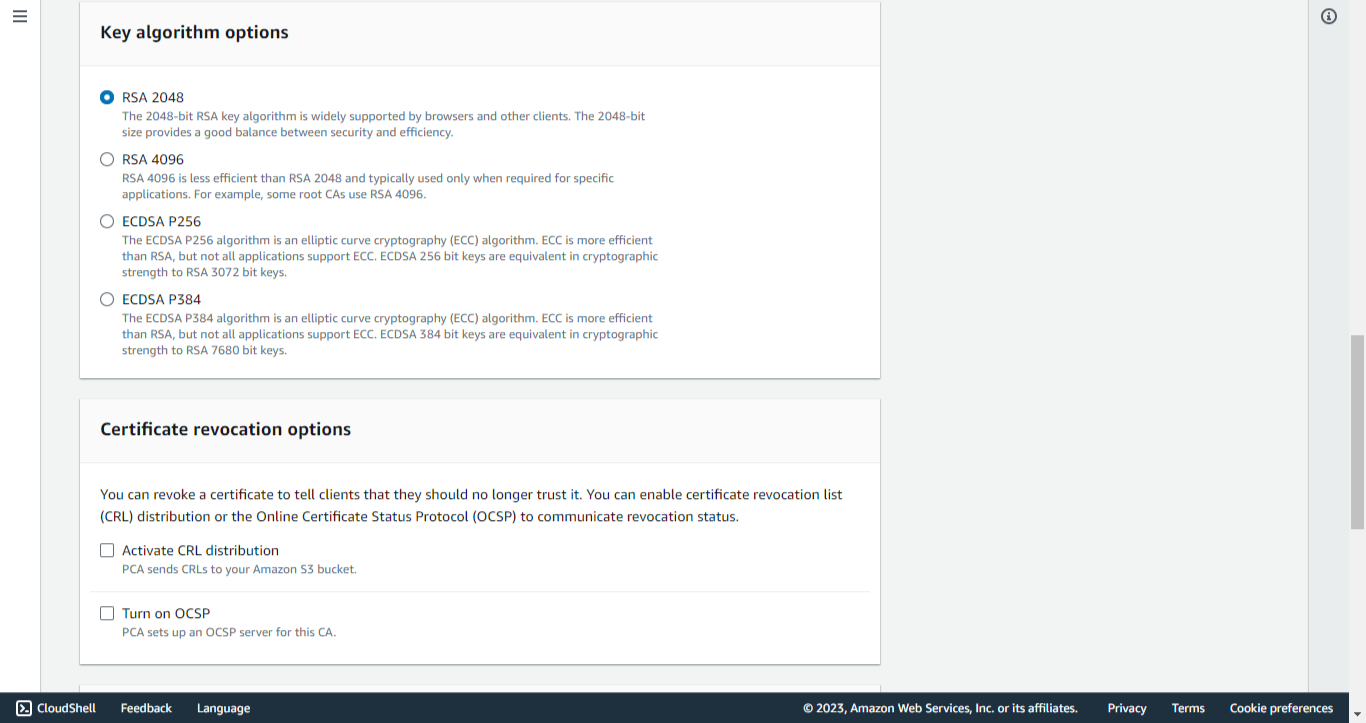
For Mode Options, select General-purpose.
-
For CA type options, select Root.
-
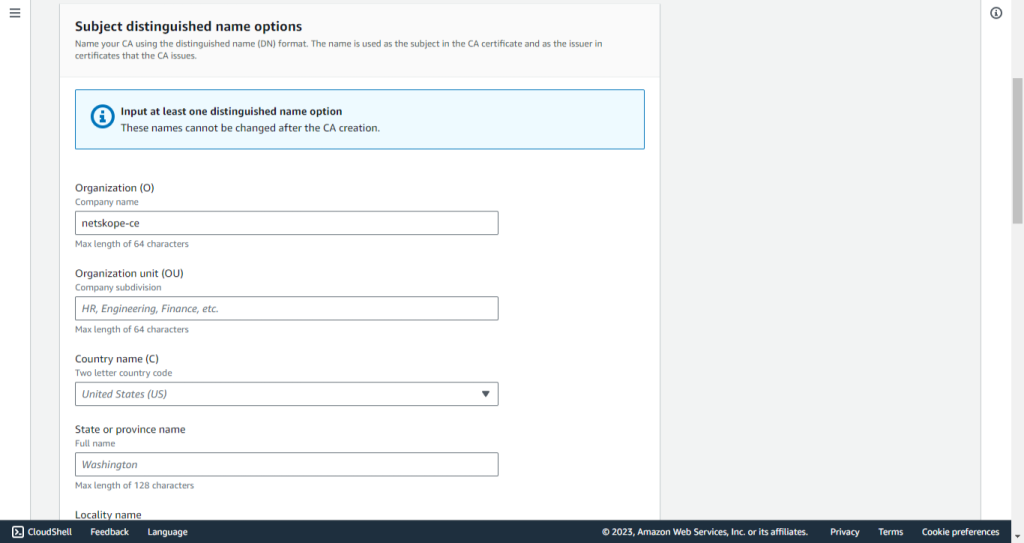
Enter an Organization (O).
-
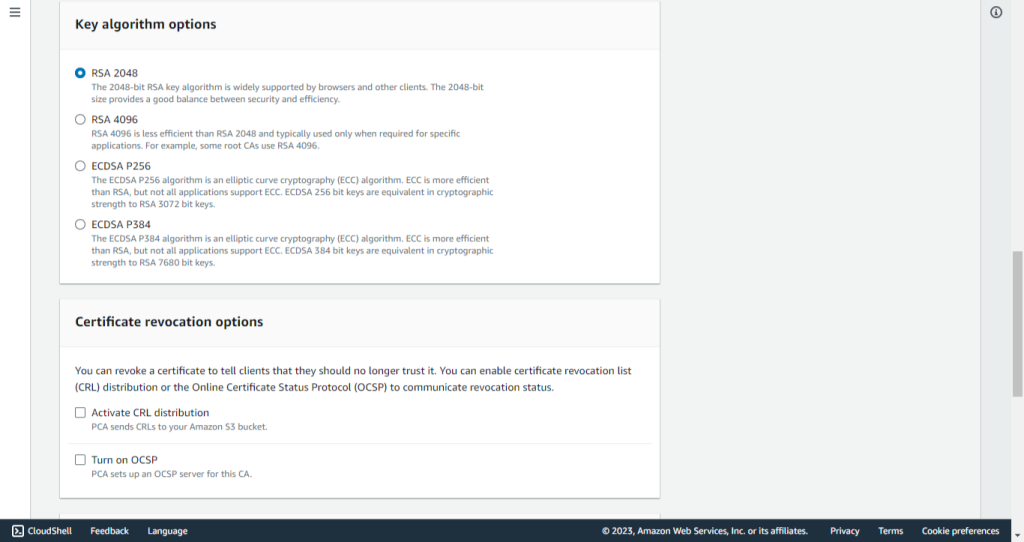
For Key algorithm options, select RSA 2048.
-
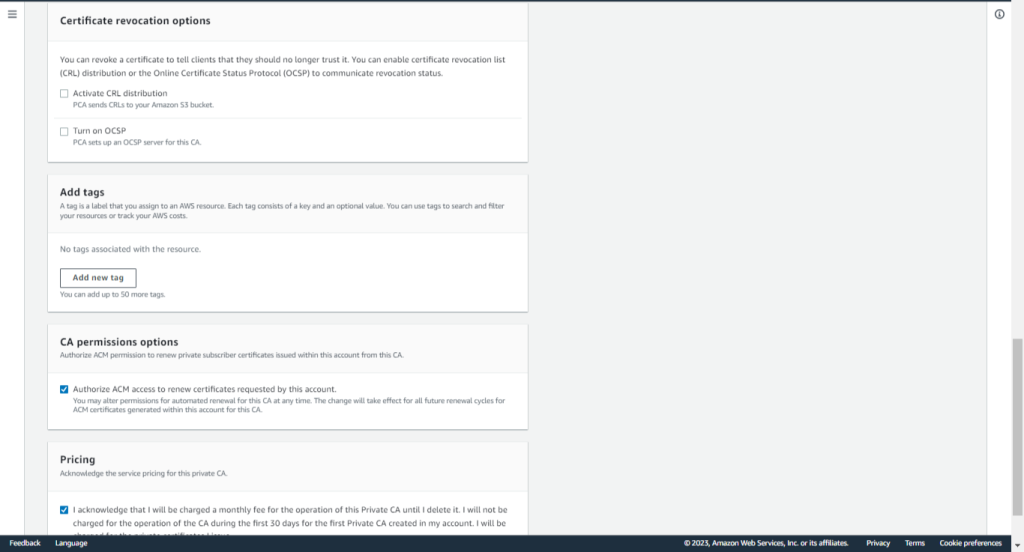
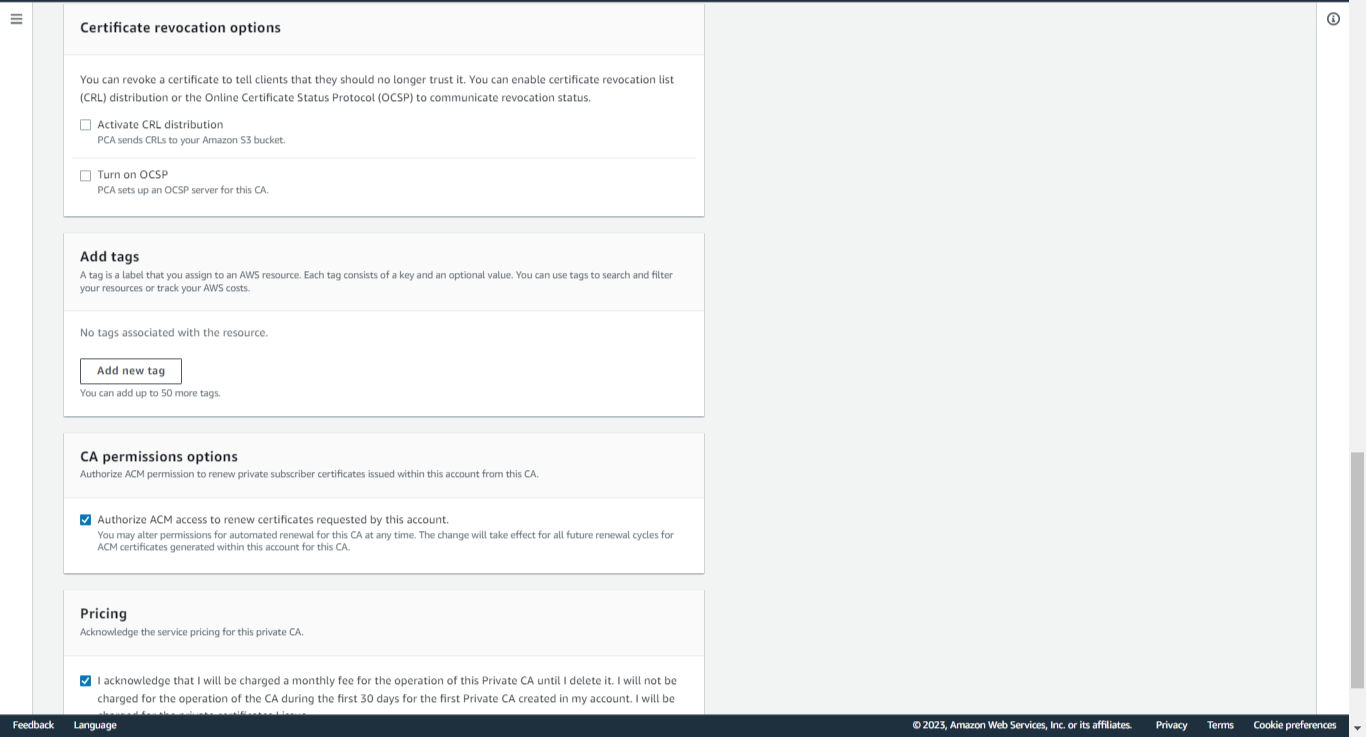
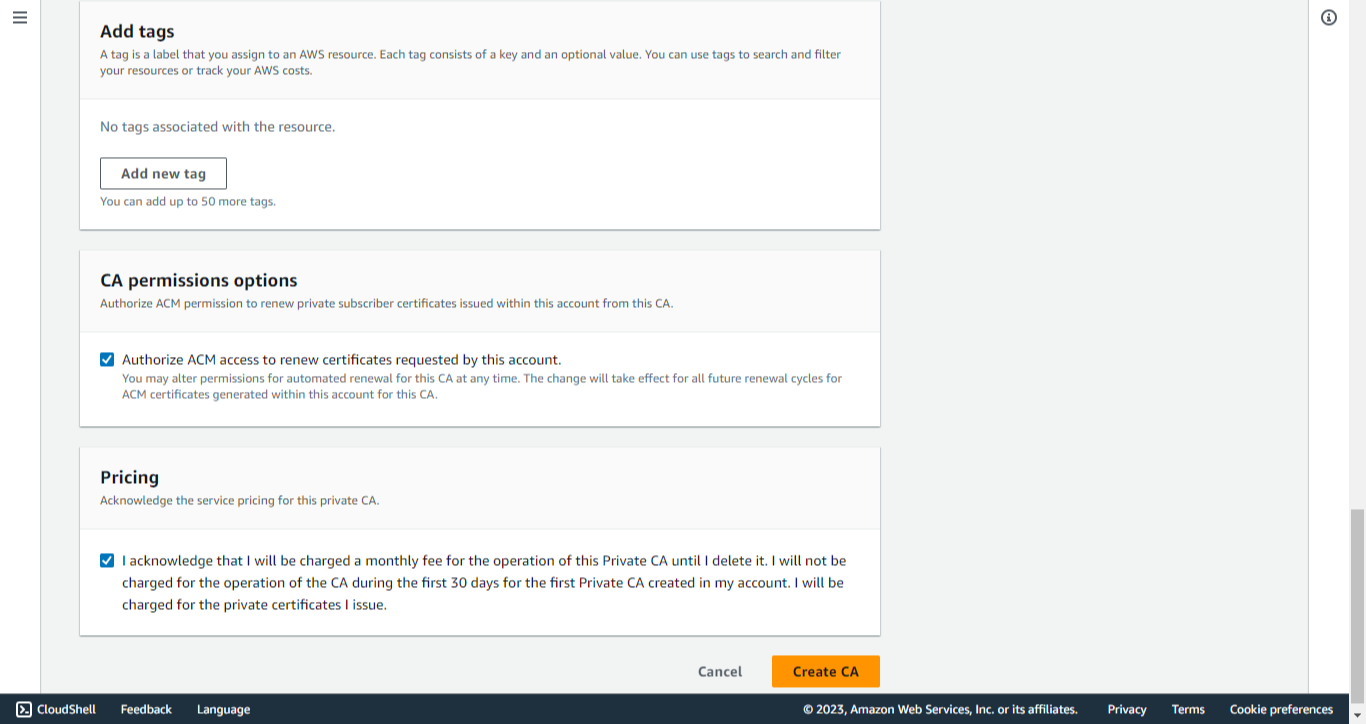
Add tags if any (optional).
-
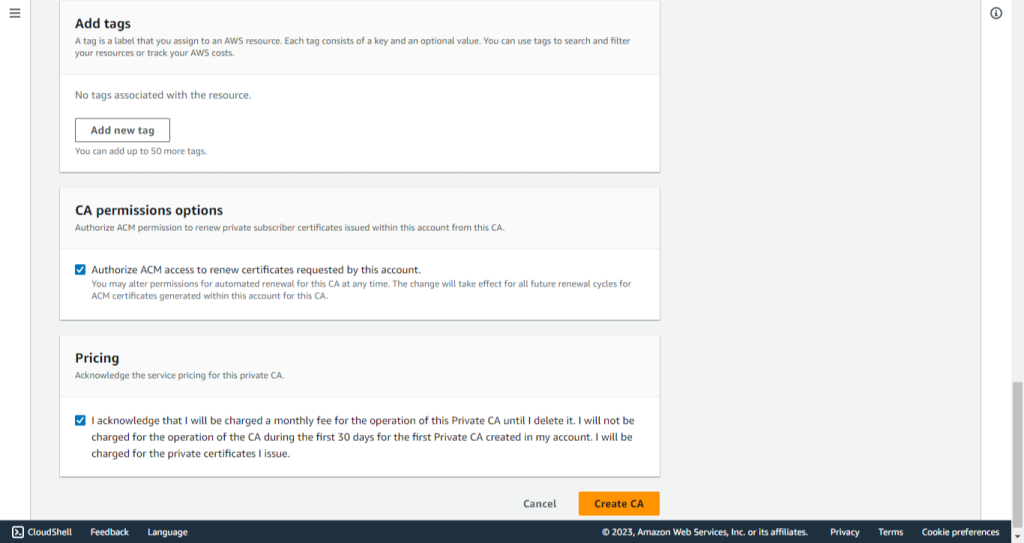
Enable the checkbox in the CA Permissions Options section.
-
Enable the checkbox in the Pricing section.
-
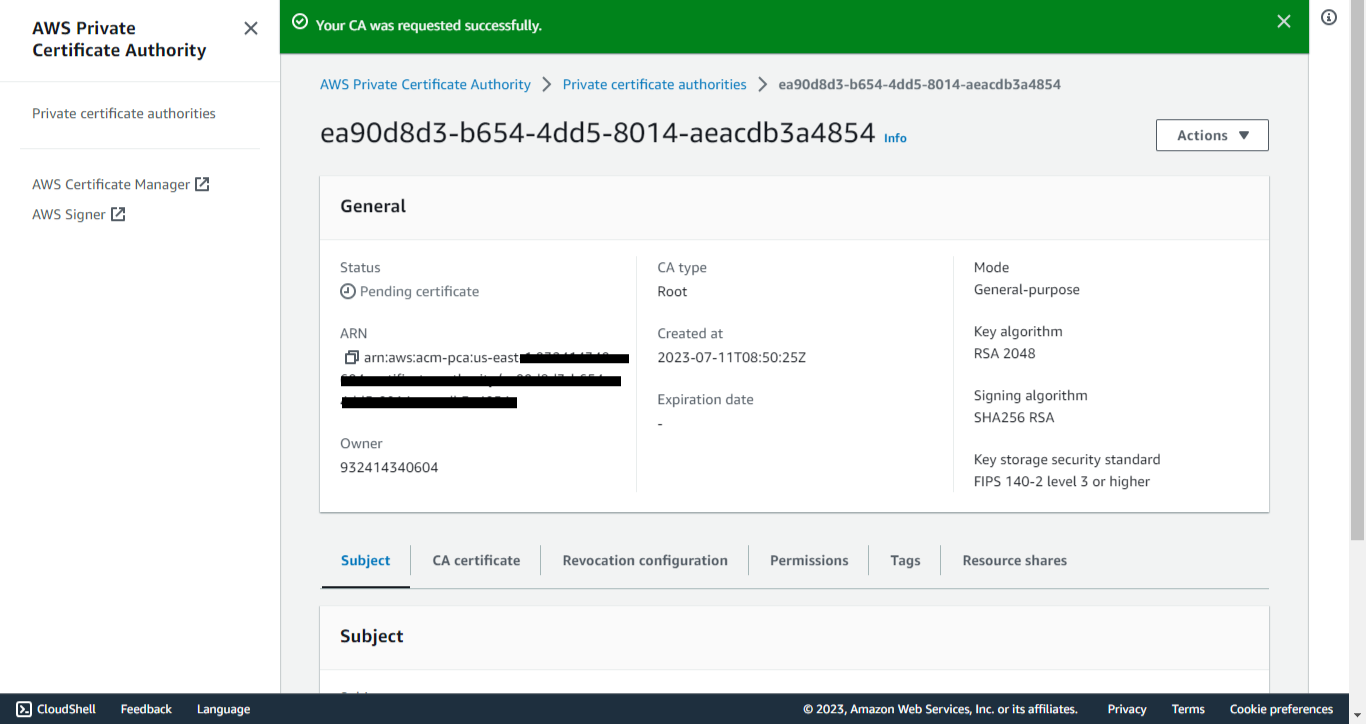
Click Create to create the CA certificate.
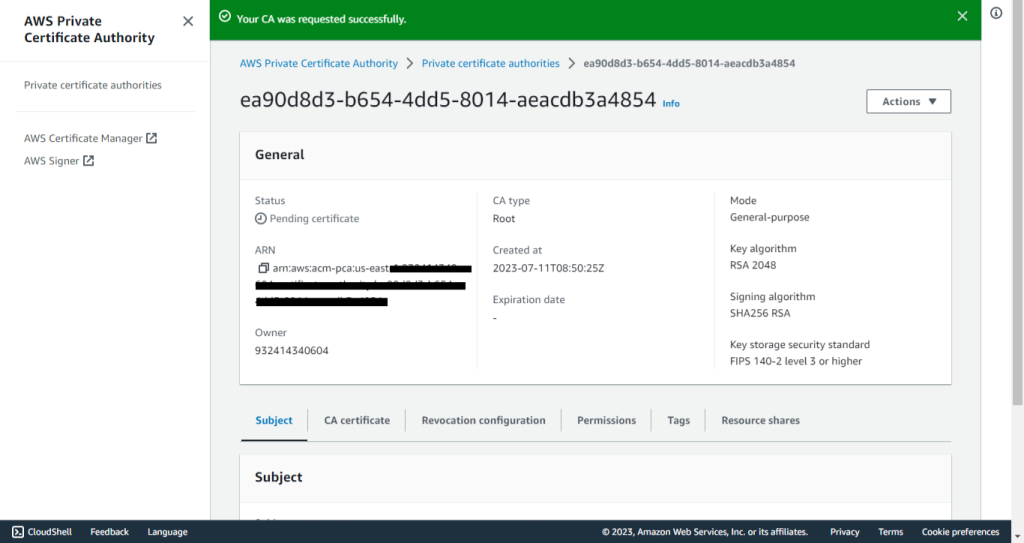
-
From Actions select Install.
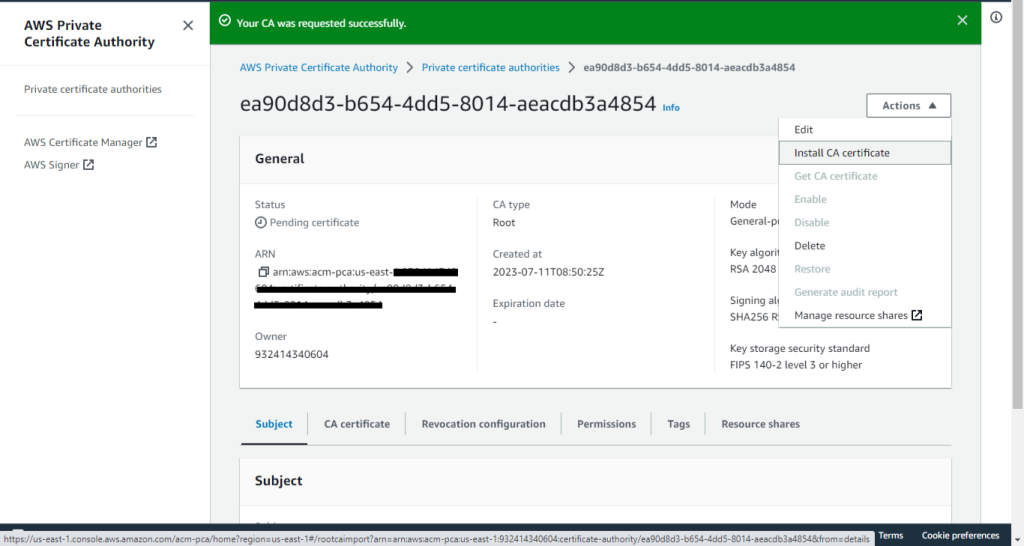
-
Click Confirm and Install.
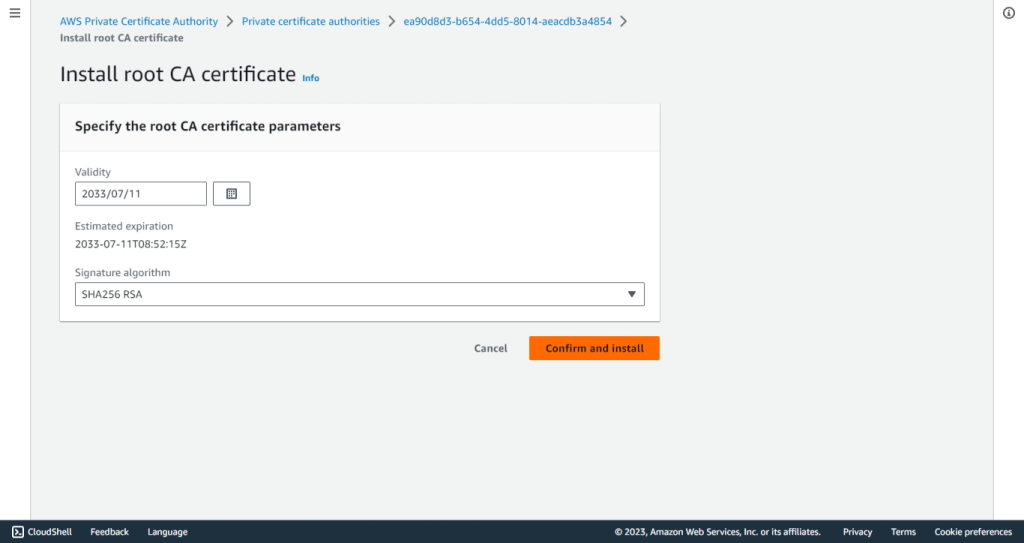
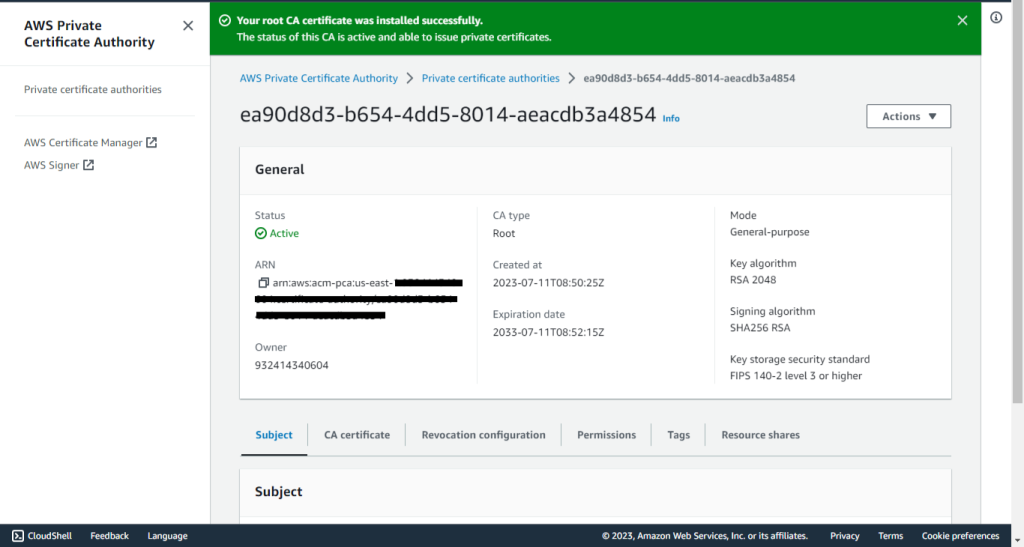
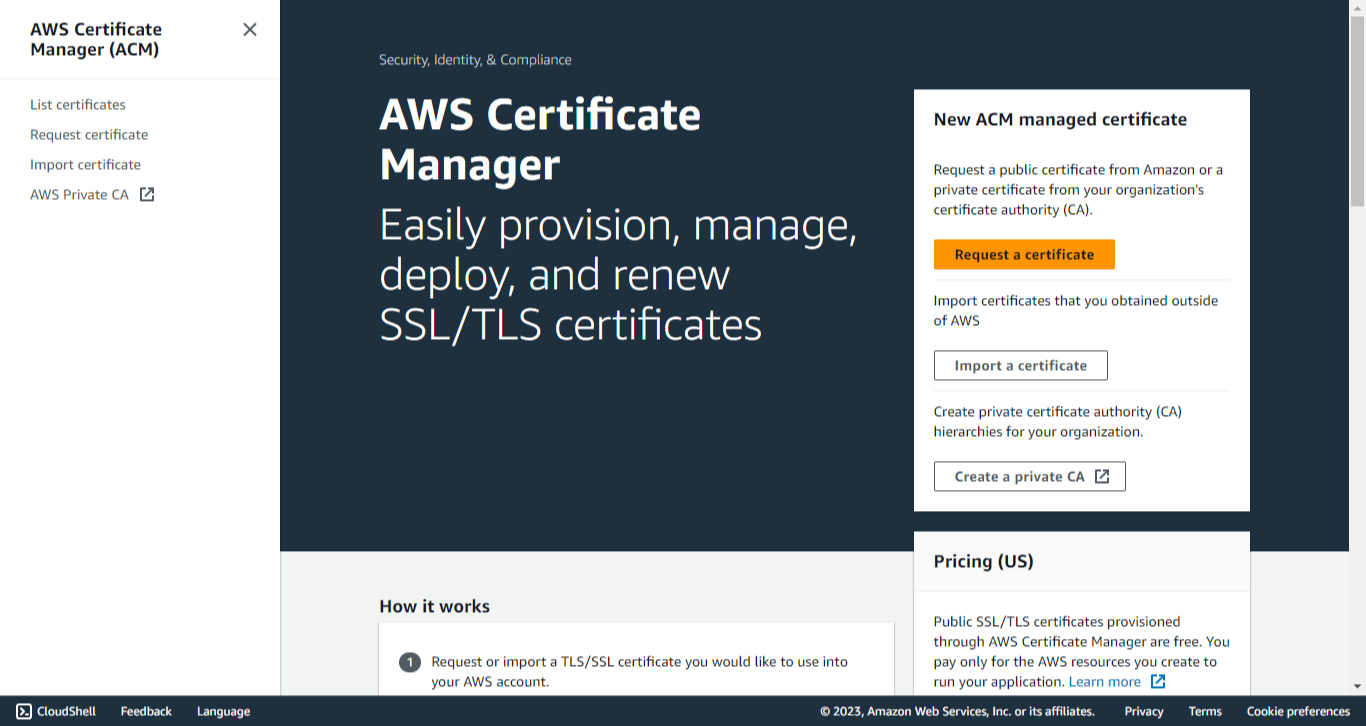
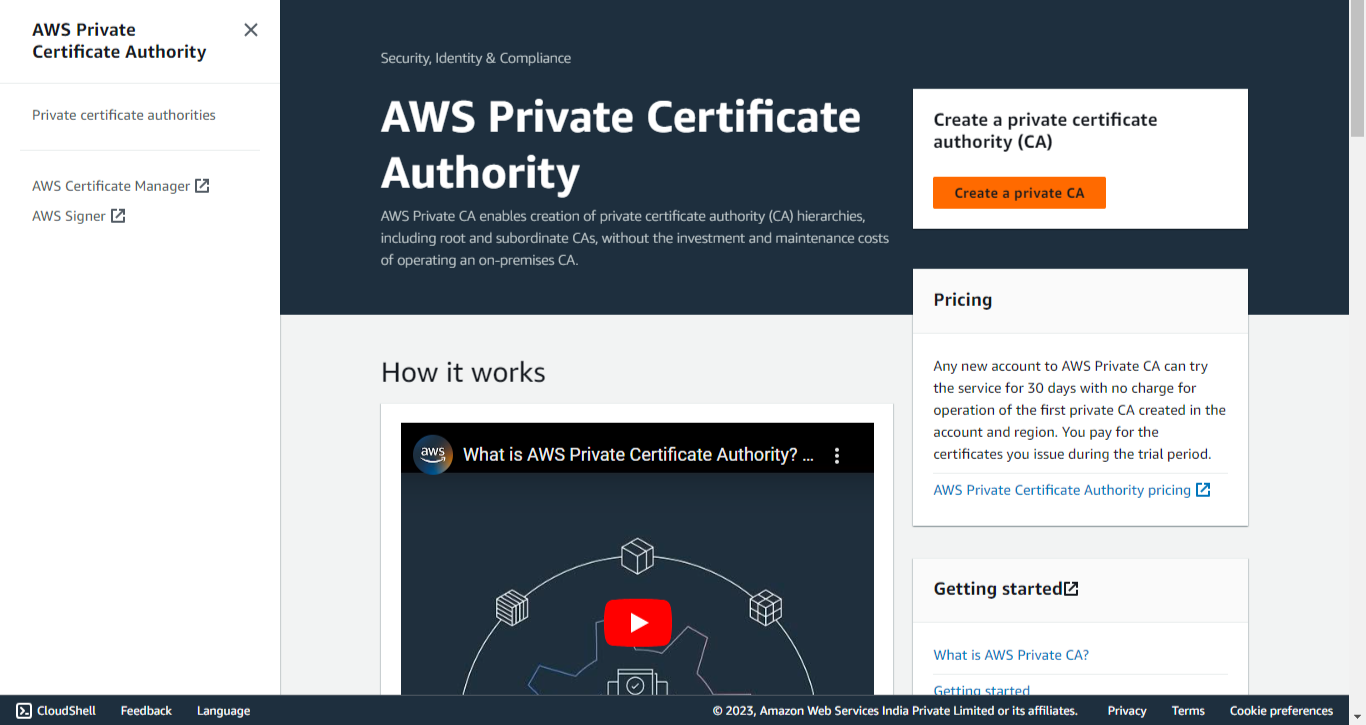
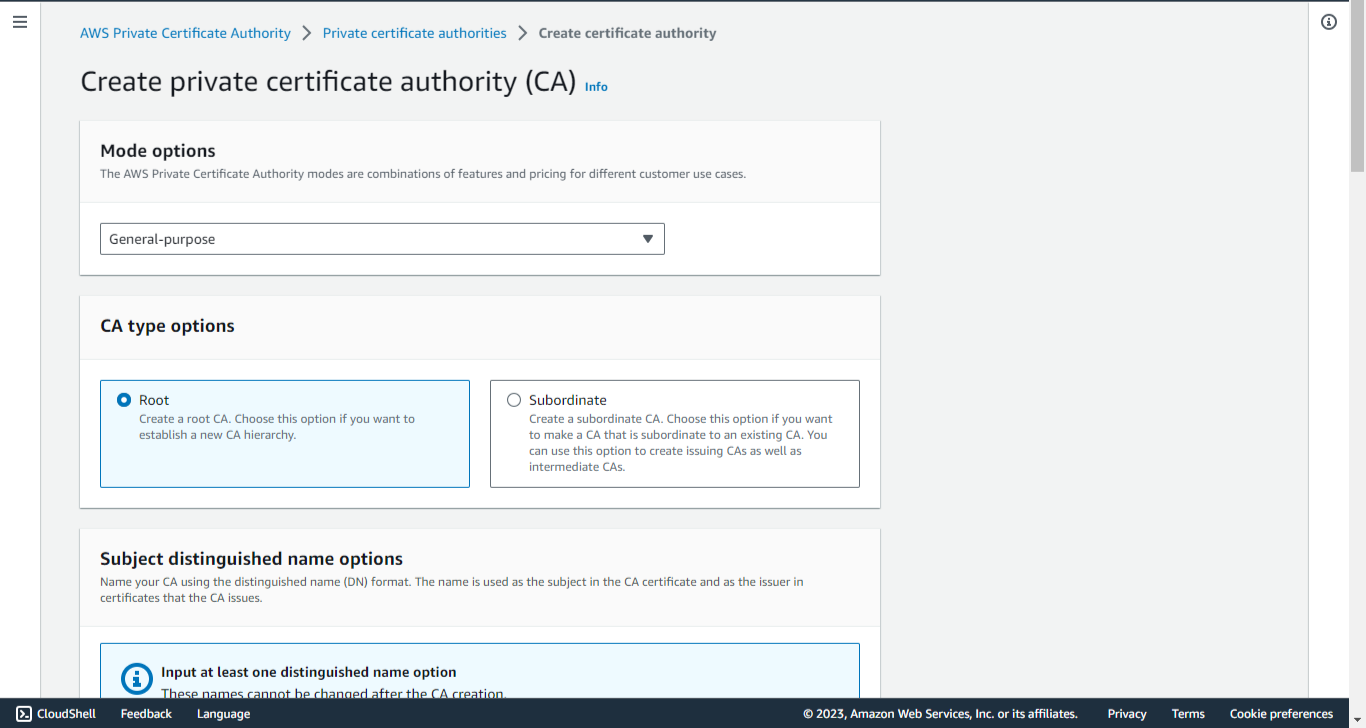
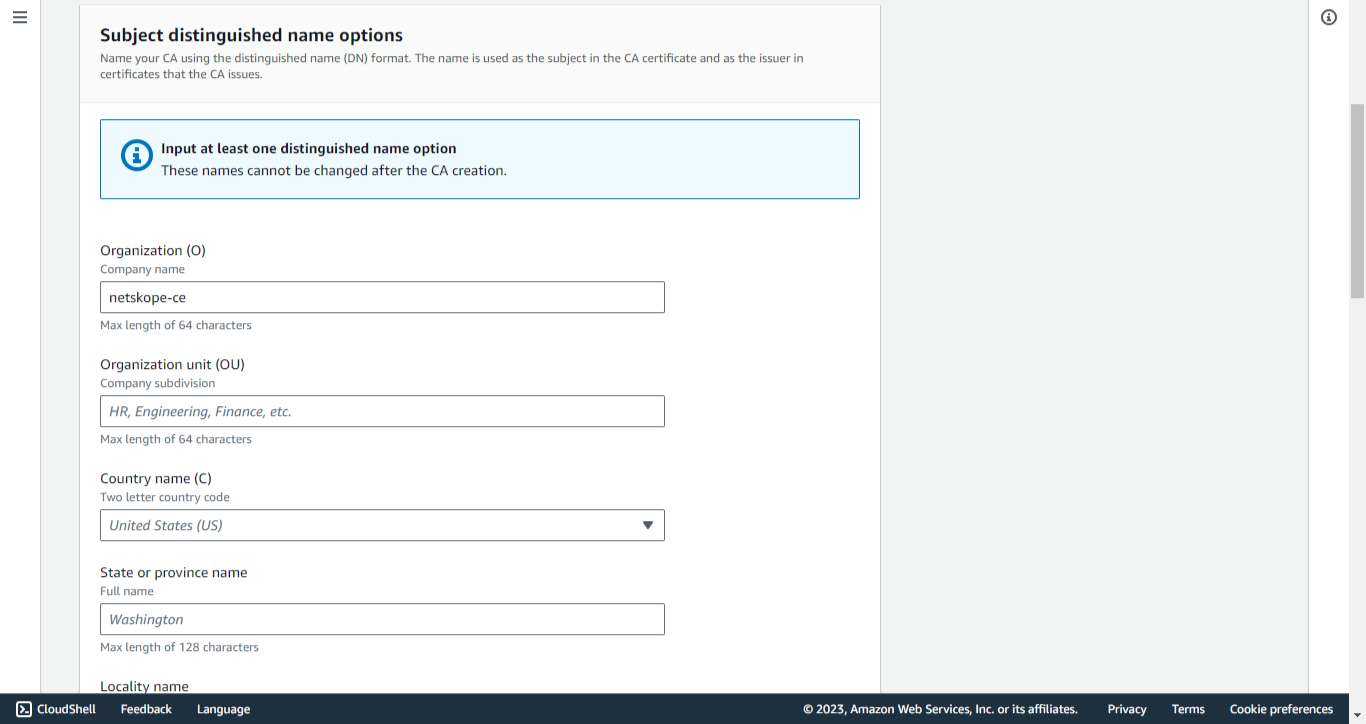
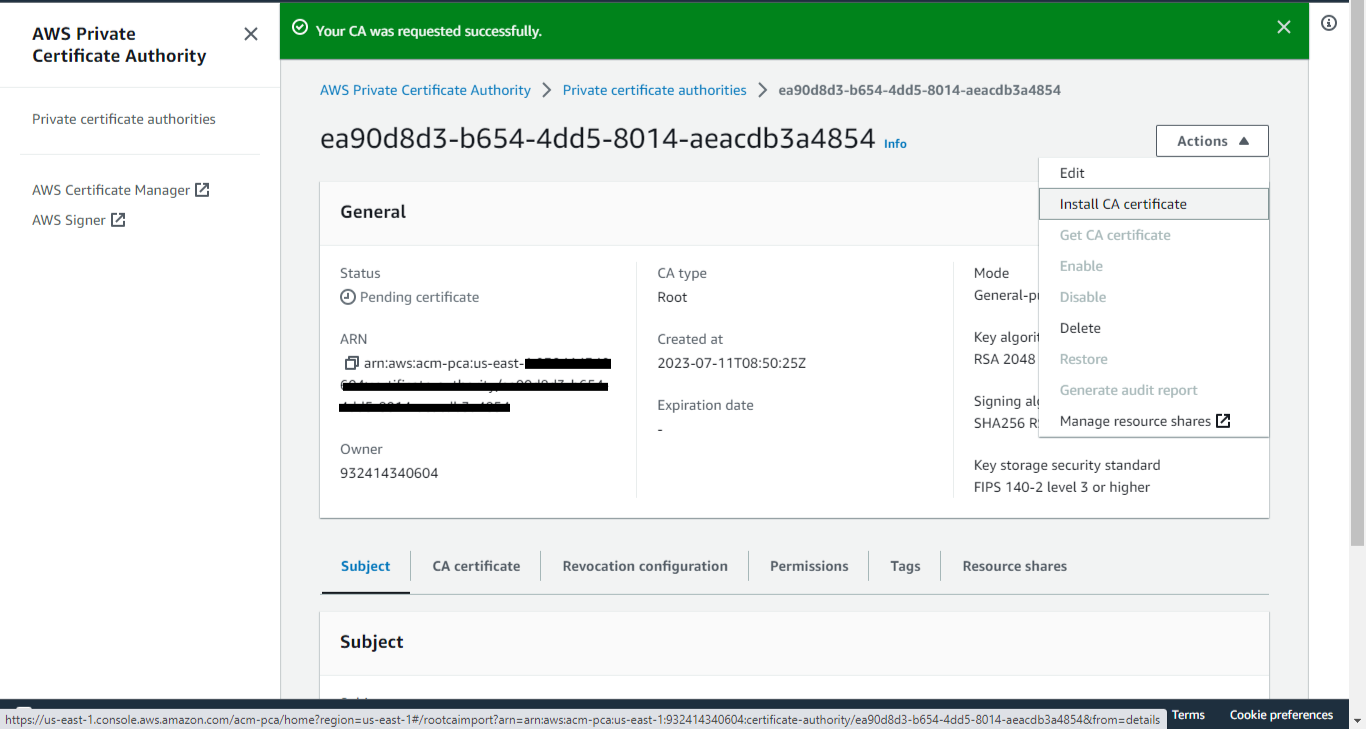
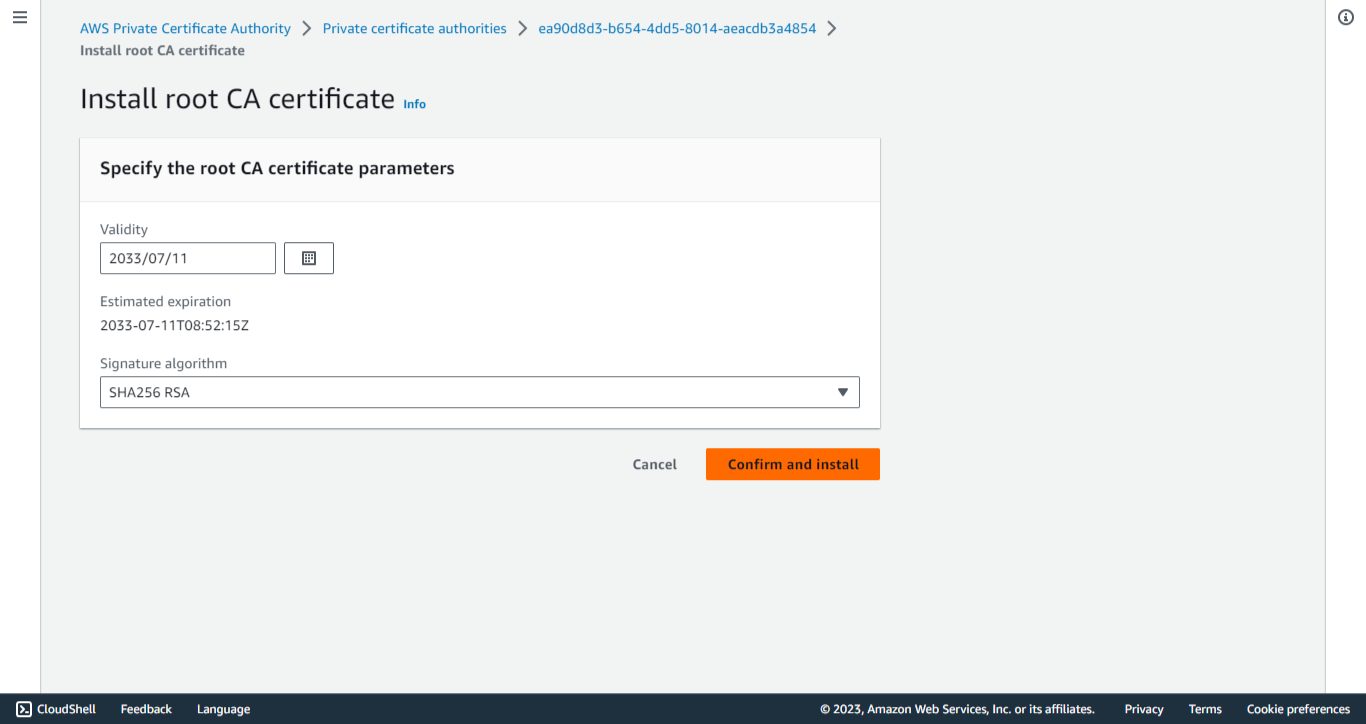
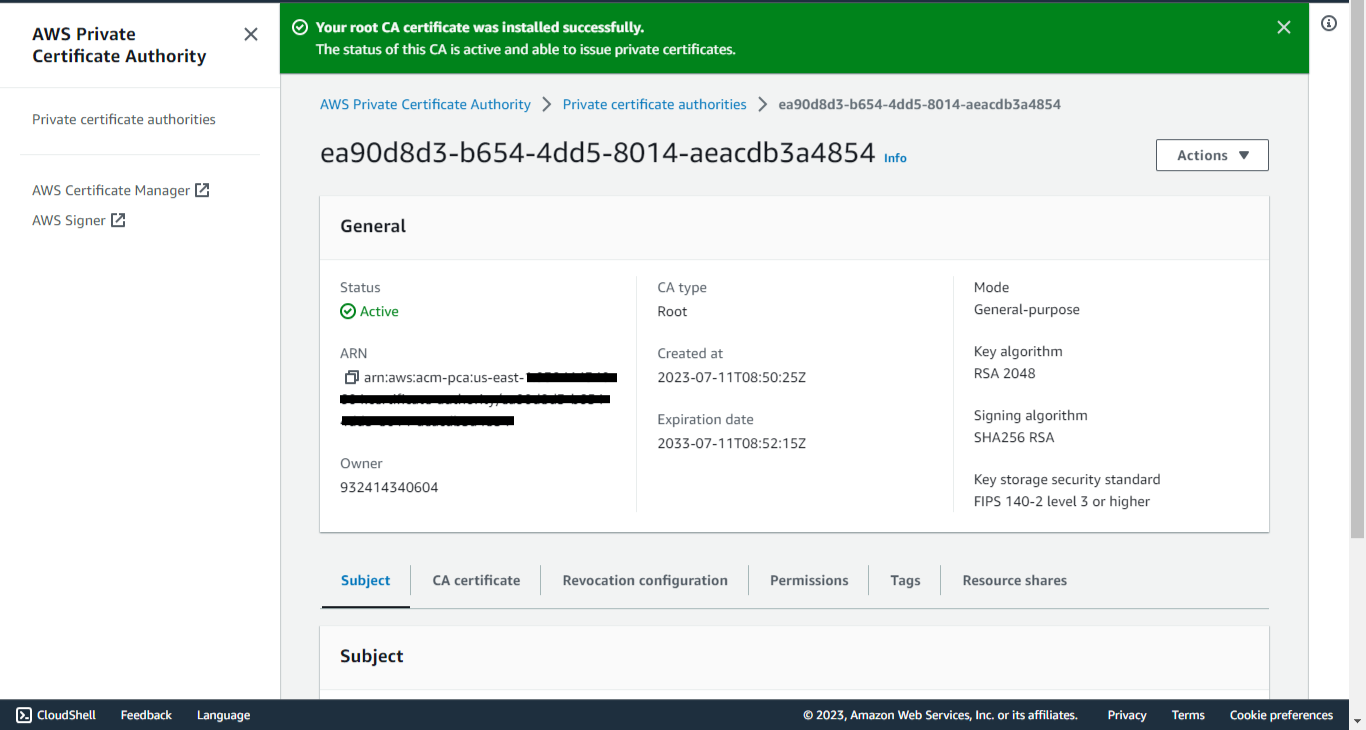
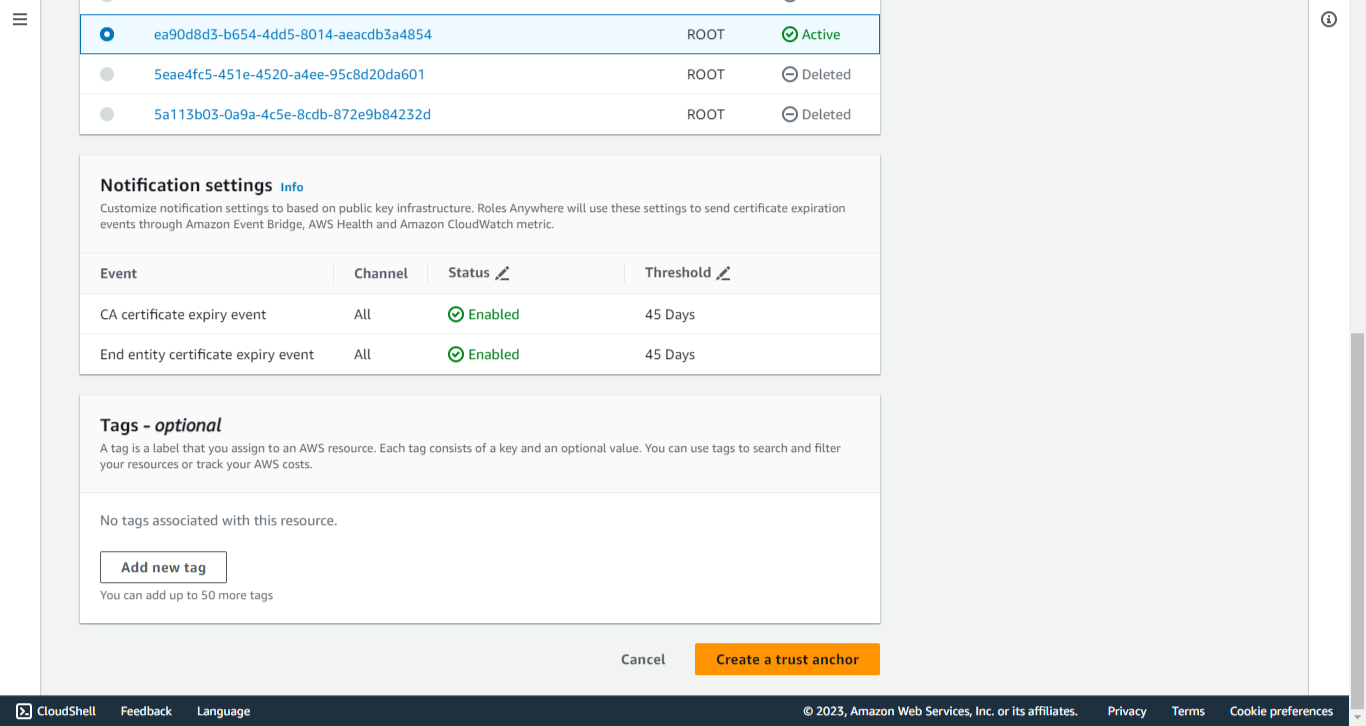
Create Trust Anchor
-
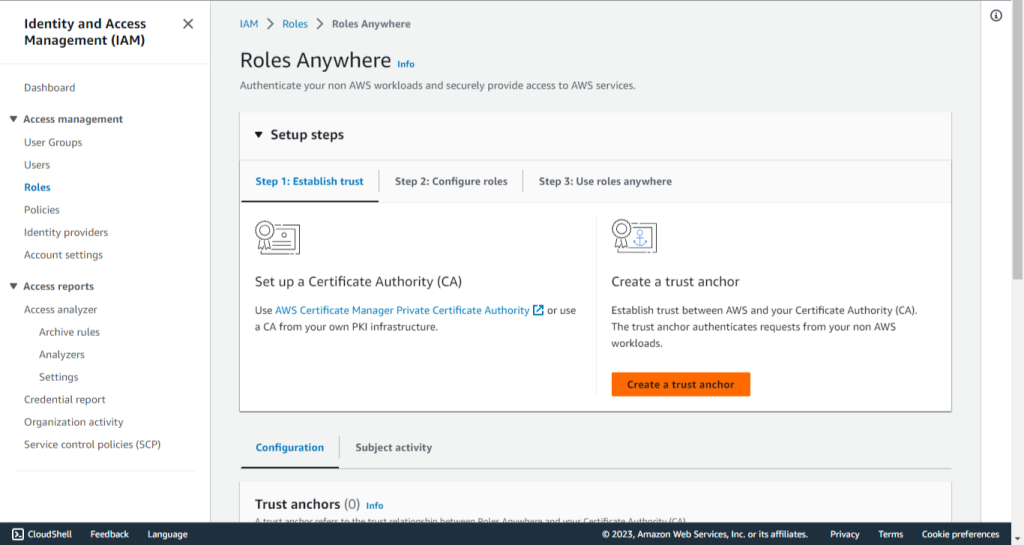
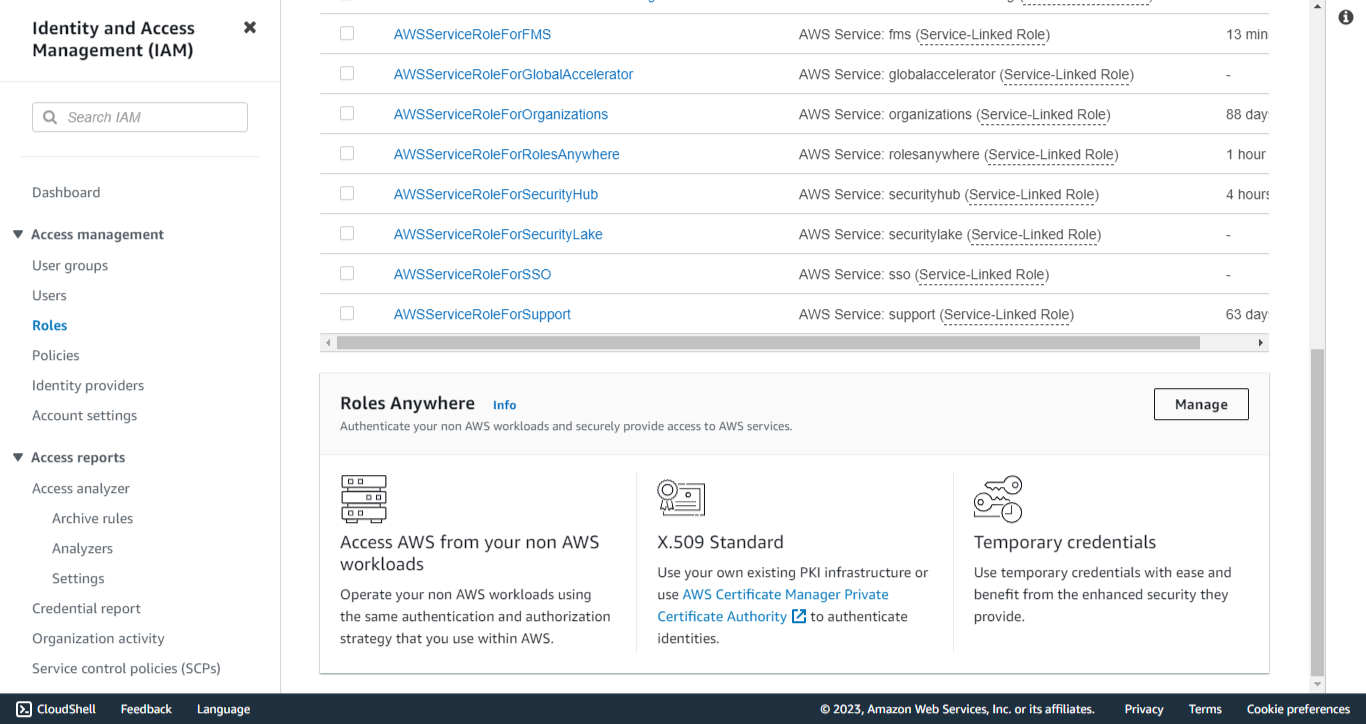
Search for IAM Service and go to Roles under Access management. Scroll down to Roles Anywhere and select Manage.
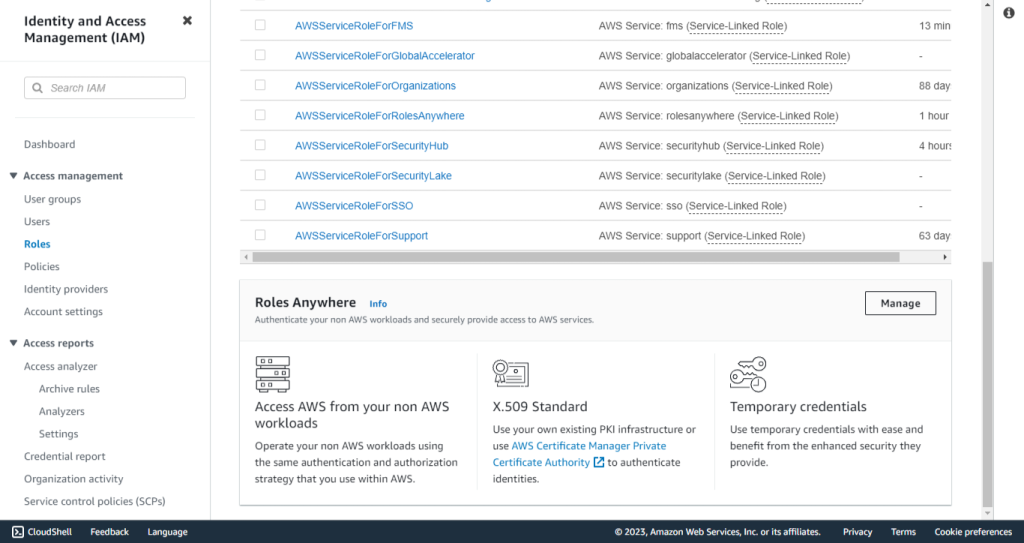
-
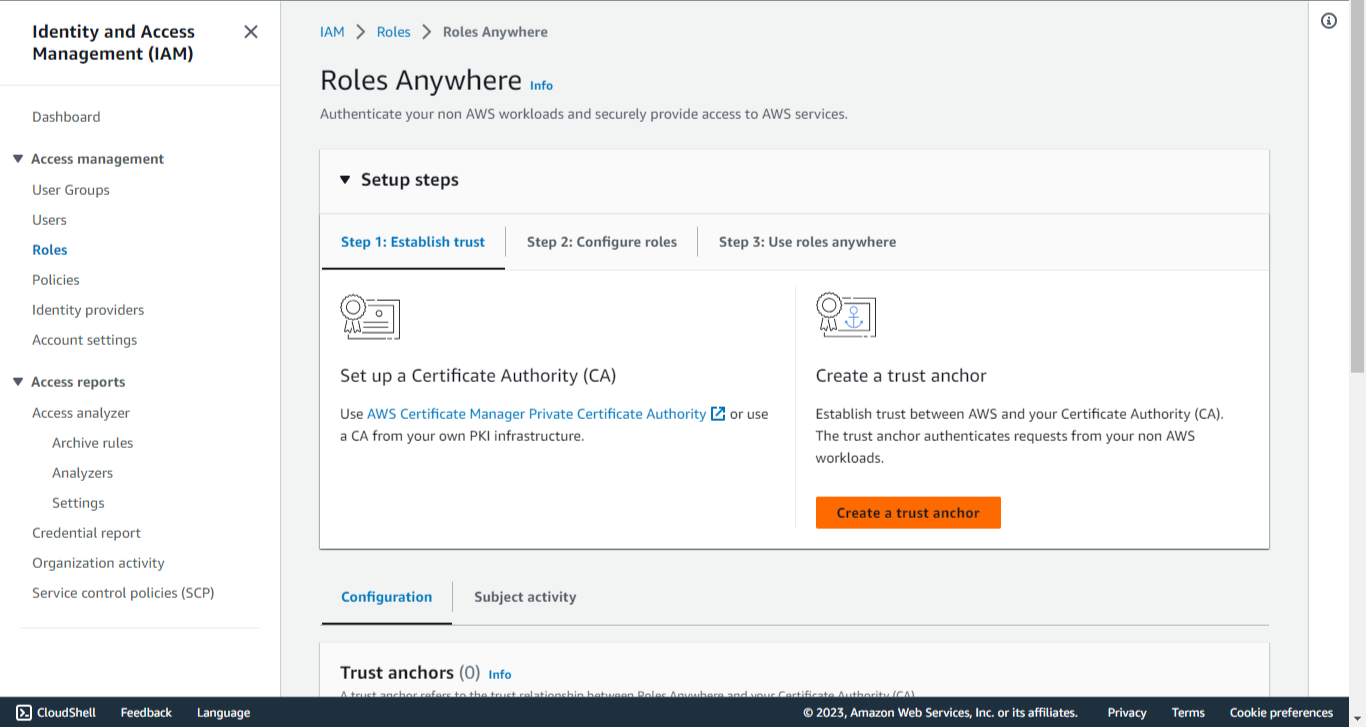
Click Create a Trust anchor.
-
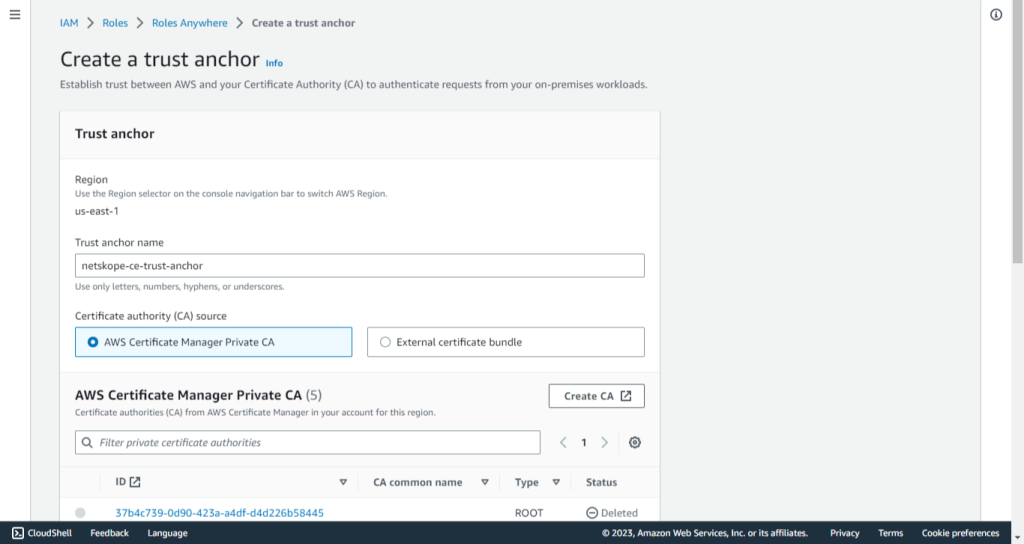
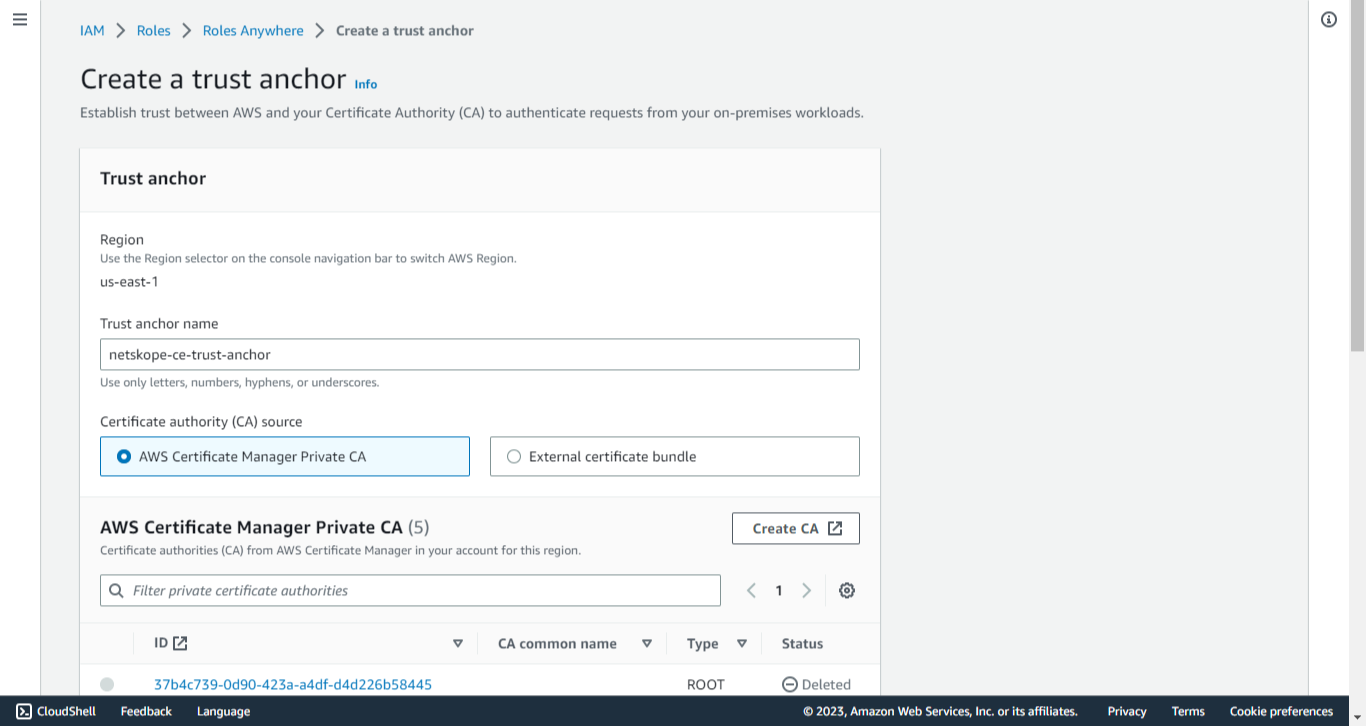
Enter a Trust anchor name, like netskope-ce-trust-anchor.
-
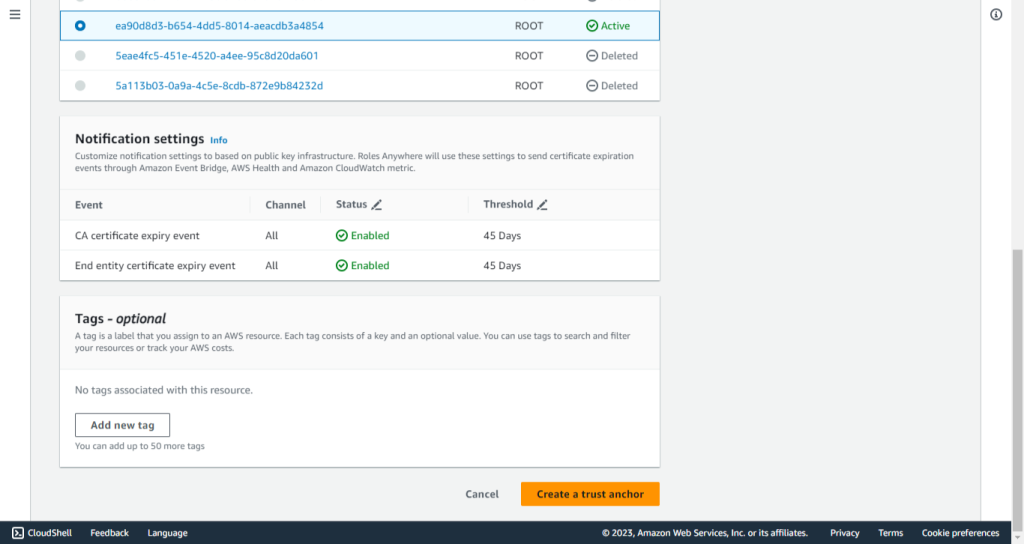
Select AWS Certificate Manager Private CA (created in the previous steps) as the Certificate authority (CA) source.
-
Add tags if required.
-
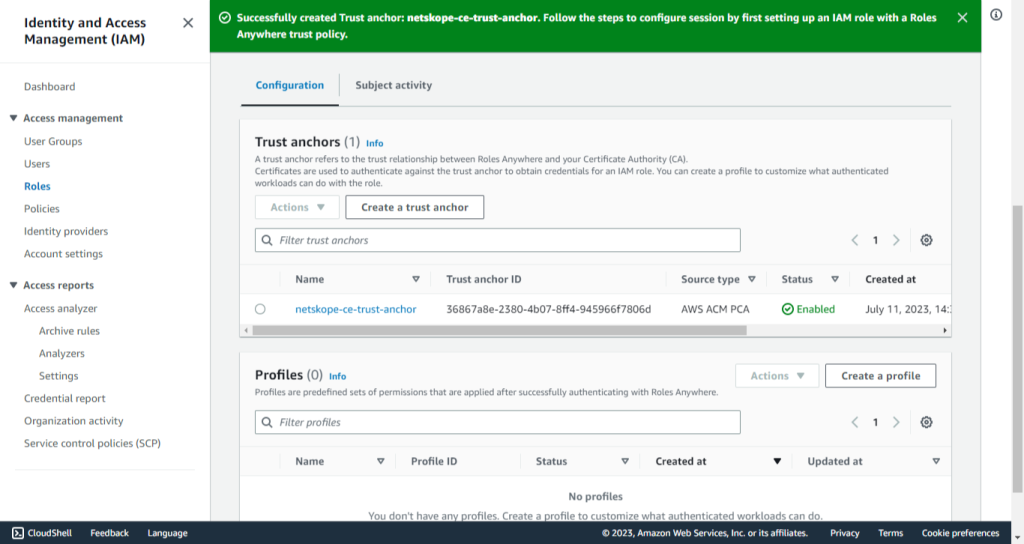
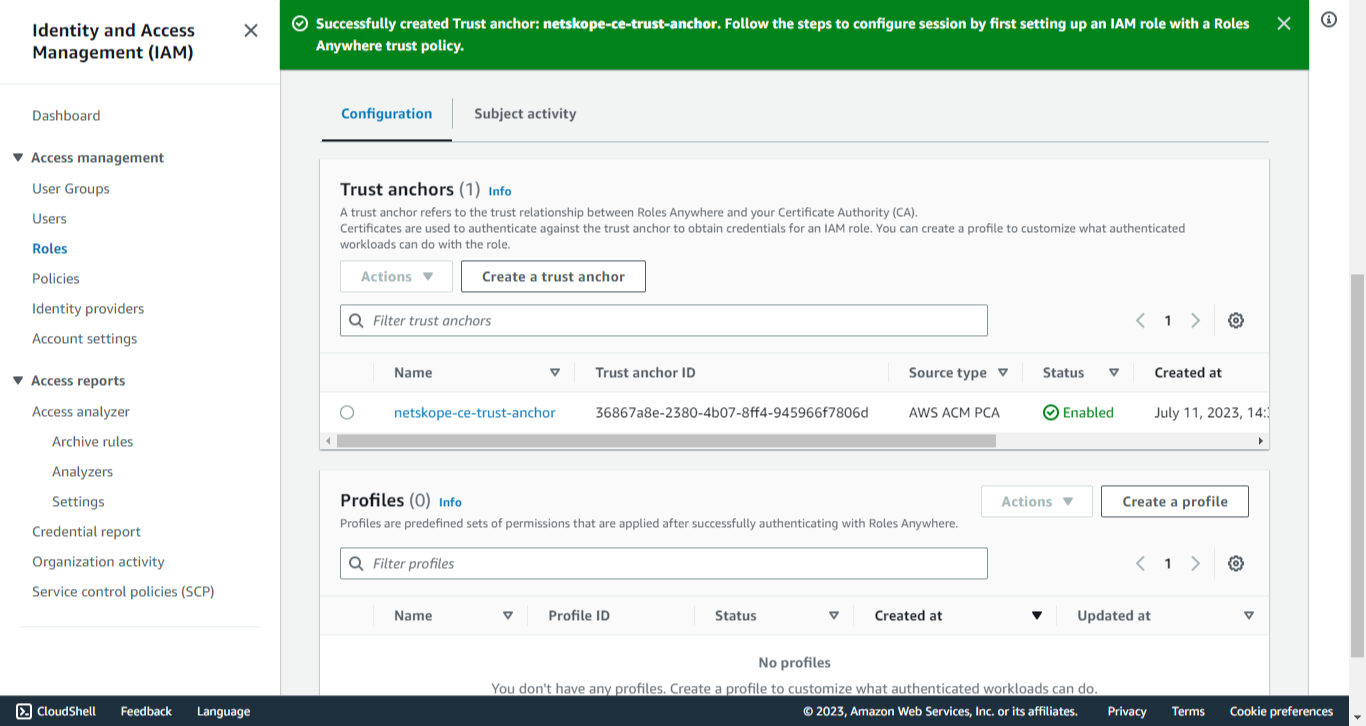
Click Create a trust anchor.
-
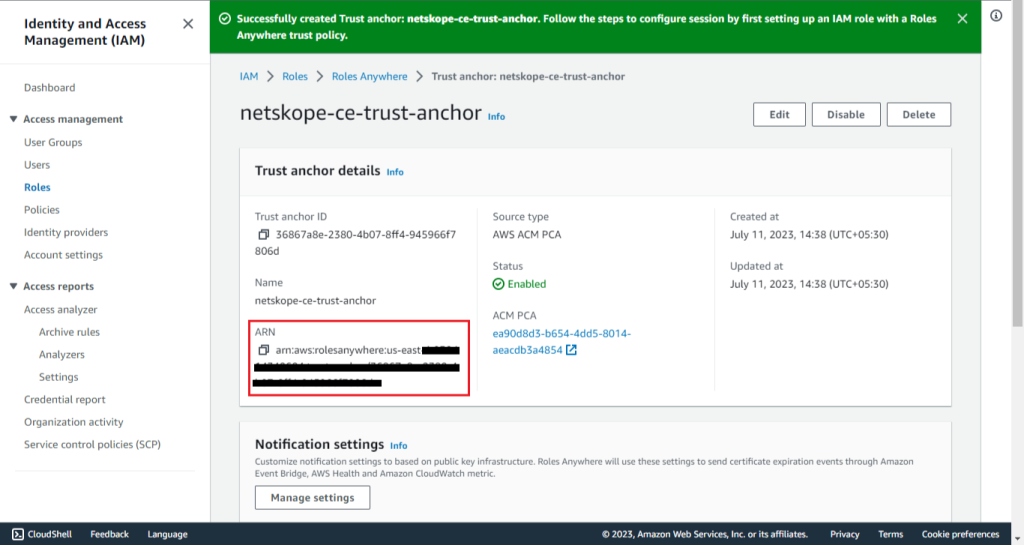
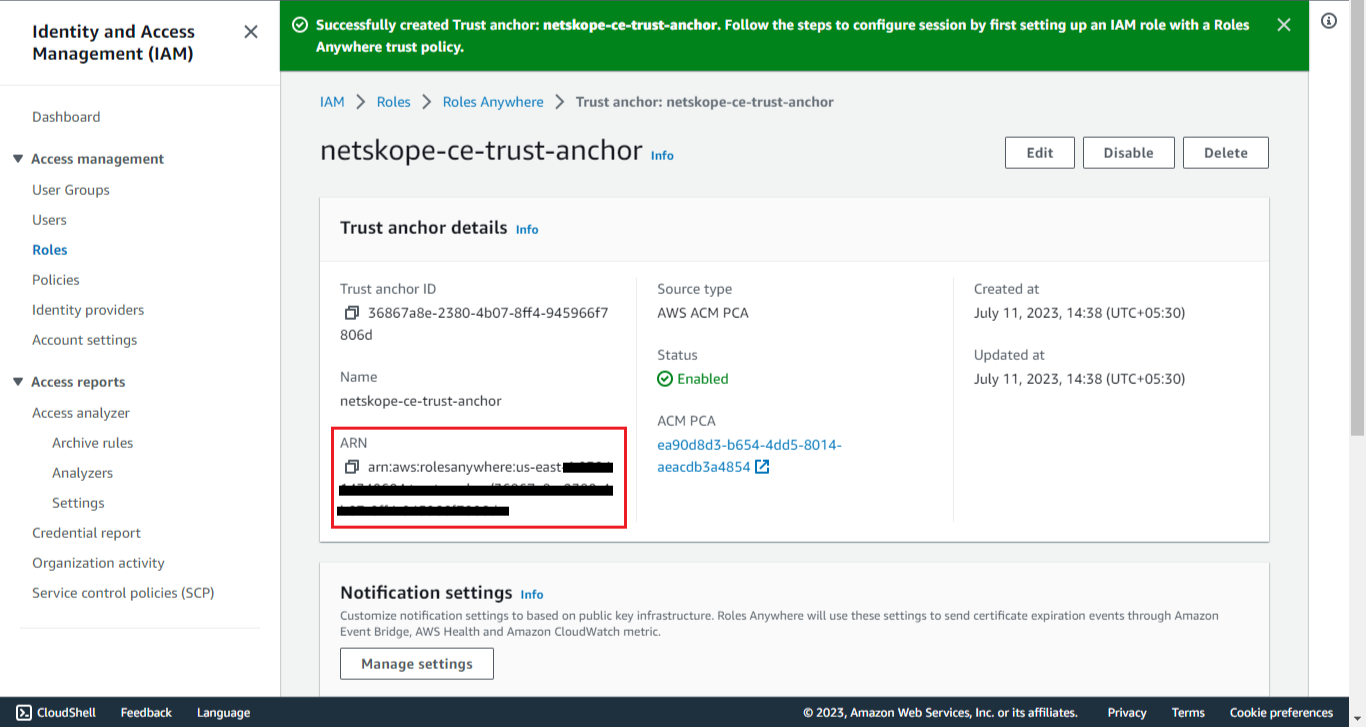
Click on the created Trust Anchor and copy the Trust Anchor ARN
Create IAM Role
-
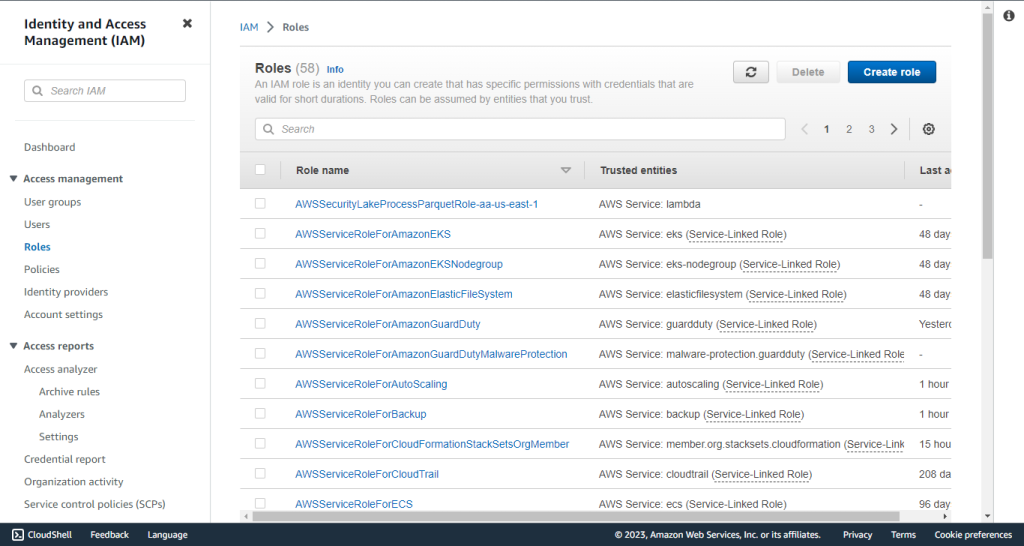
Go to IAM services in the AWS Console.
-
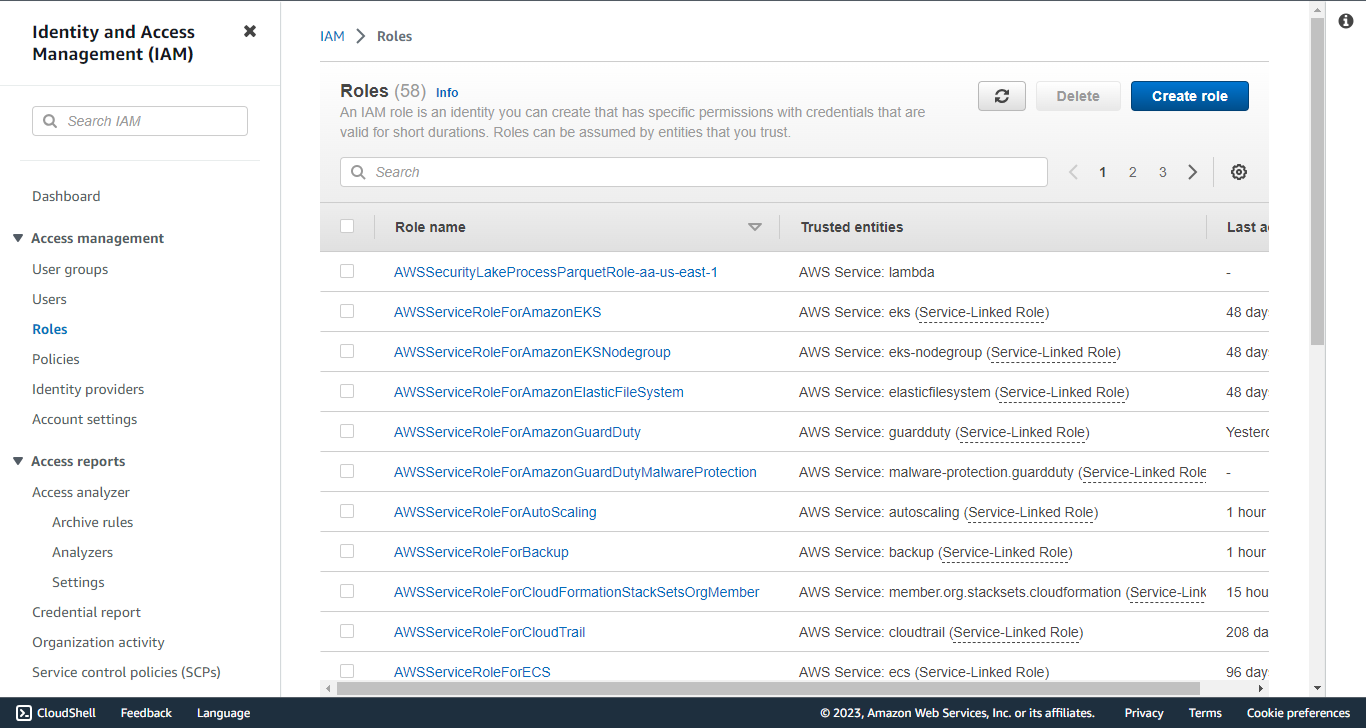
Click Role in the Access management submenu.
-
Click Create Role.
-
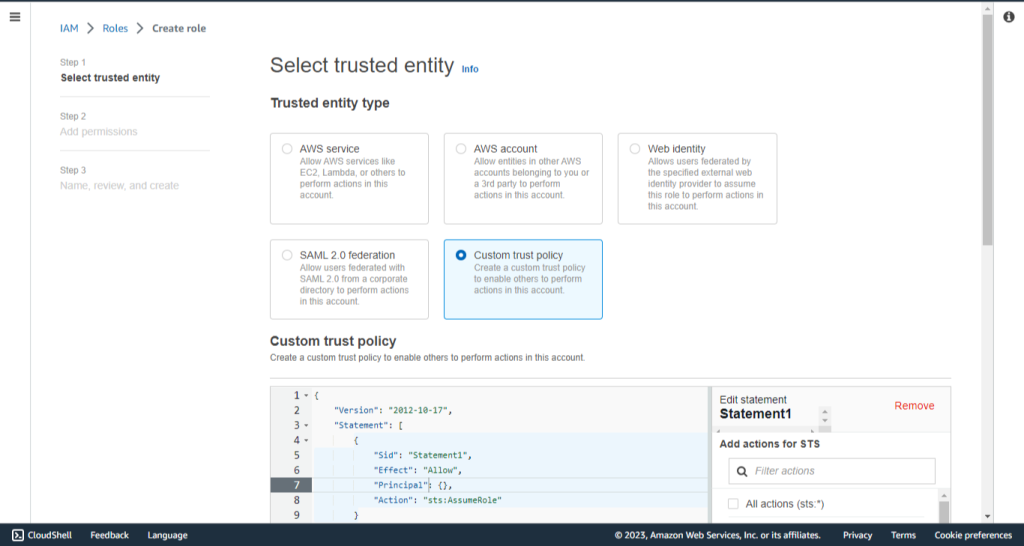
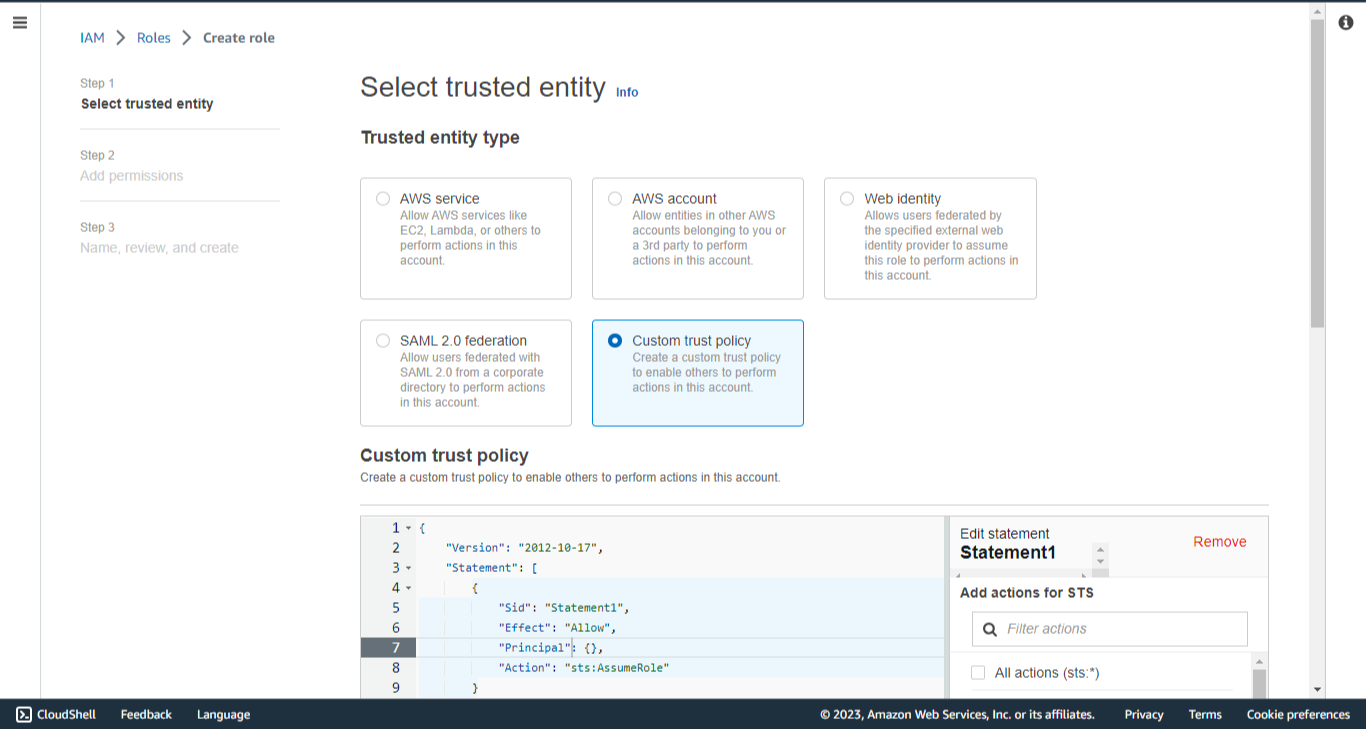
In the Trusted entity type, select Custom Trust Policy.
-
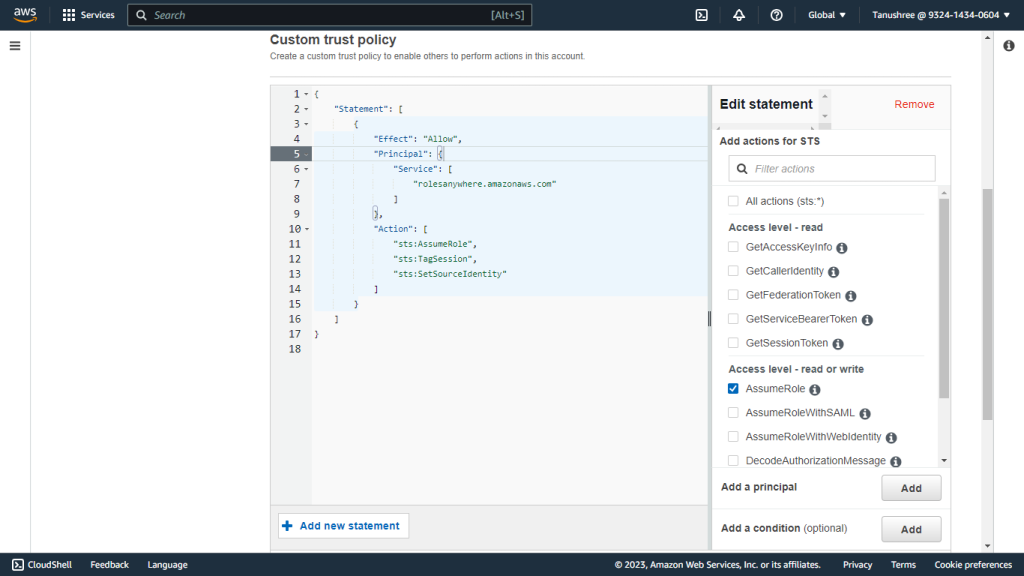
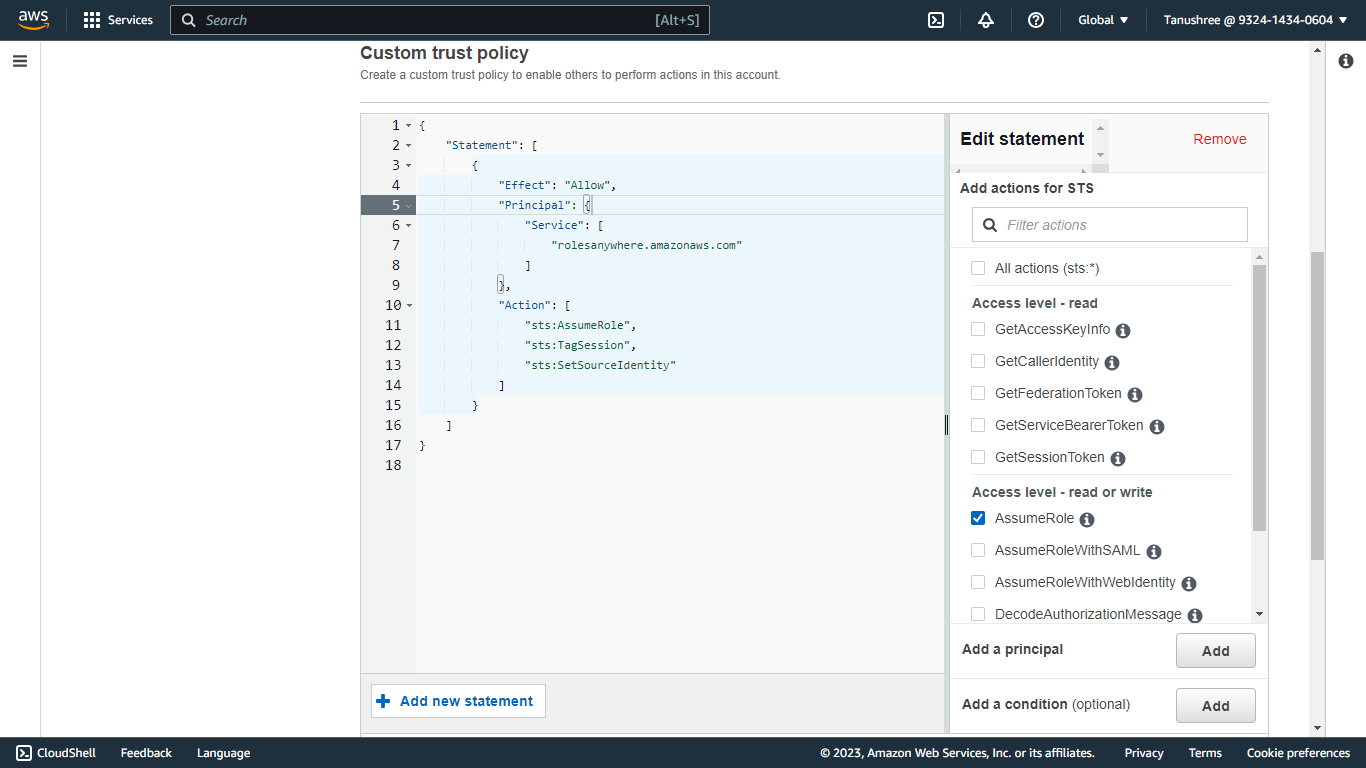
Replace the Custom trust Policy with the below given Trust Policy. This policy contains the permissions for using the Roles Anywhere service:
{
    "Version": "2012-10-17",
    "Statement": [
        {
            "Effect": "Allow",
            "Principal": {
                "Service": [
                    "rolesanywhere.amazonaws.com"
                ]
            },
            "Action": [
                "sts:AssumeRole",
                "sts:TagSession",
                "sts:SetSourceIdentity"
            ]
        }
    ]
}
-
Click Next.
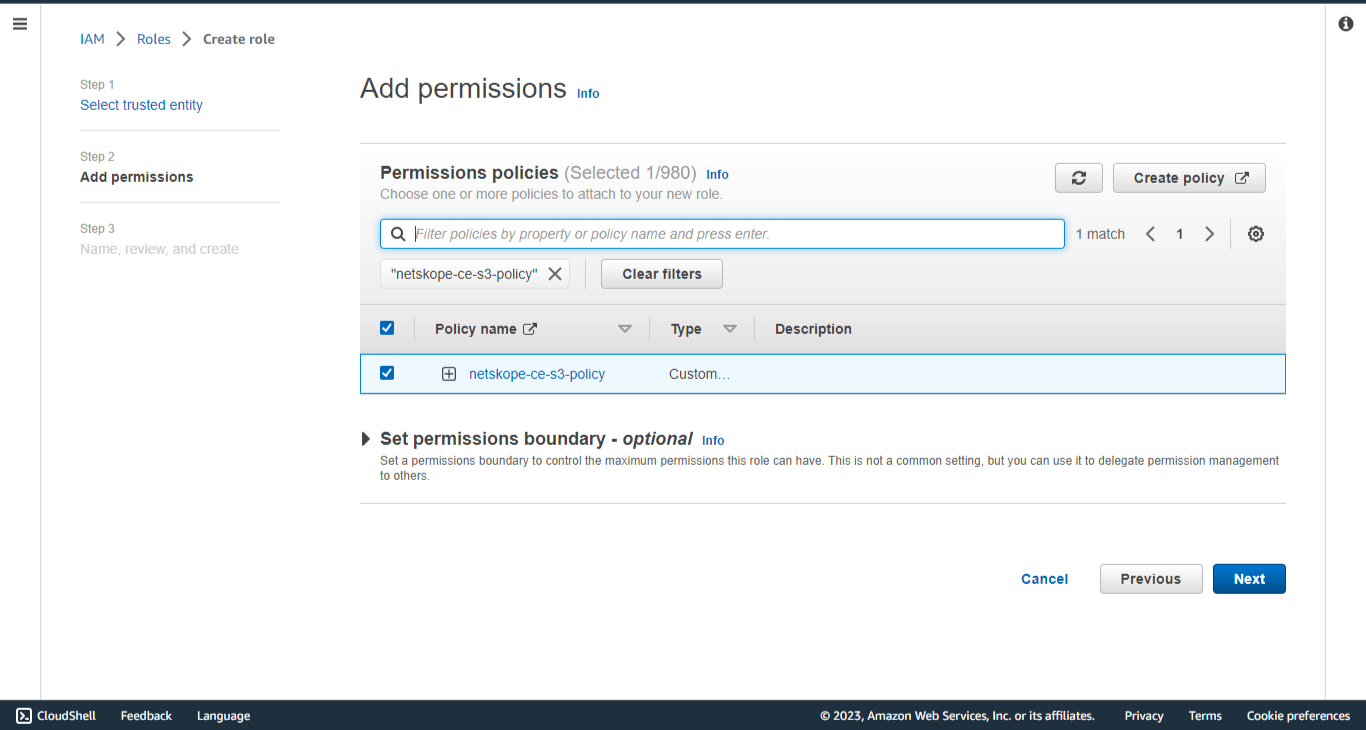
-
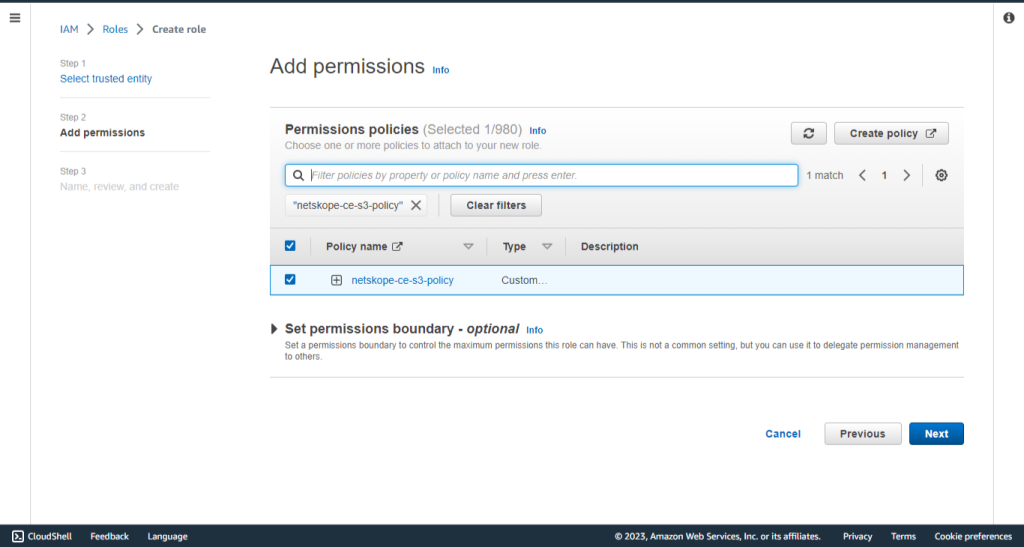
In the Permissions policies, select the policy created previously.
-
Click Next.
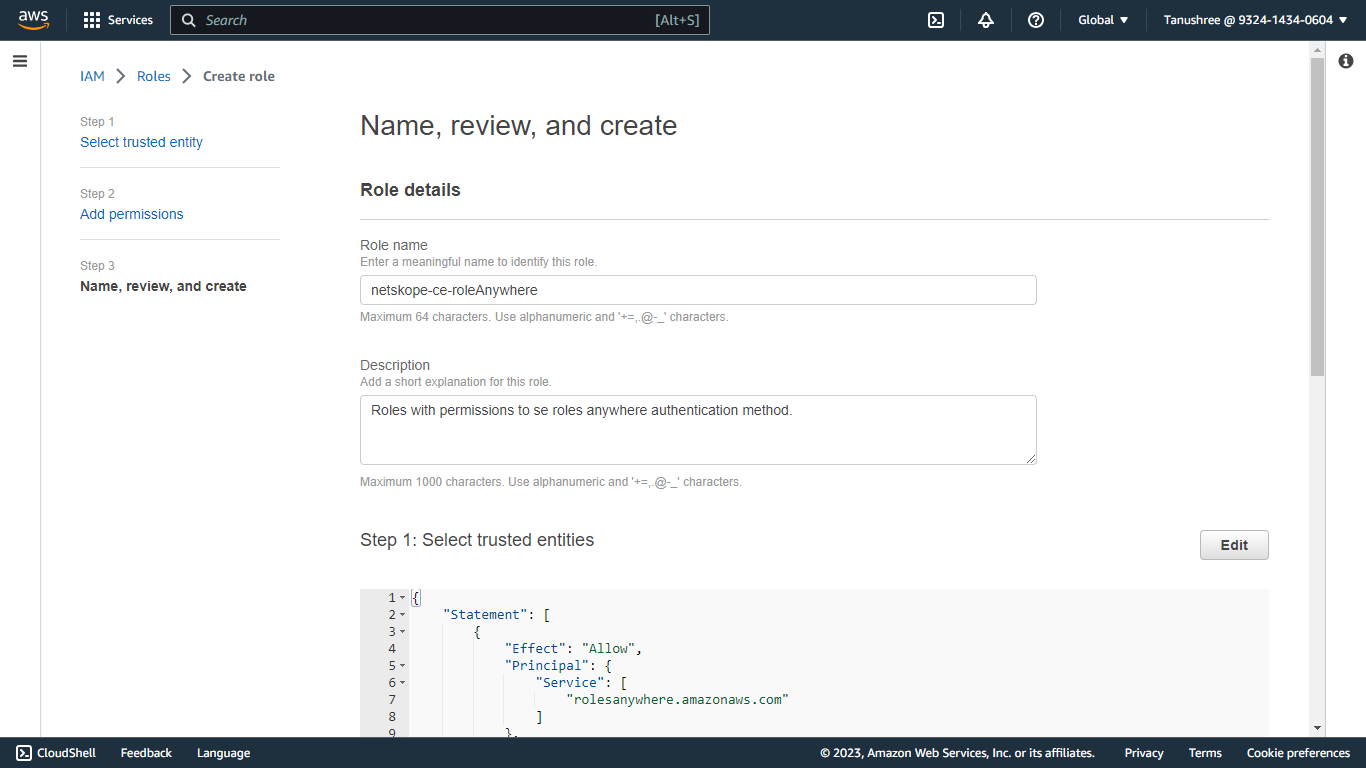
-
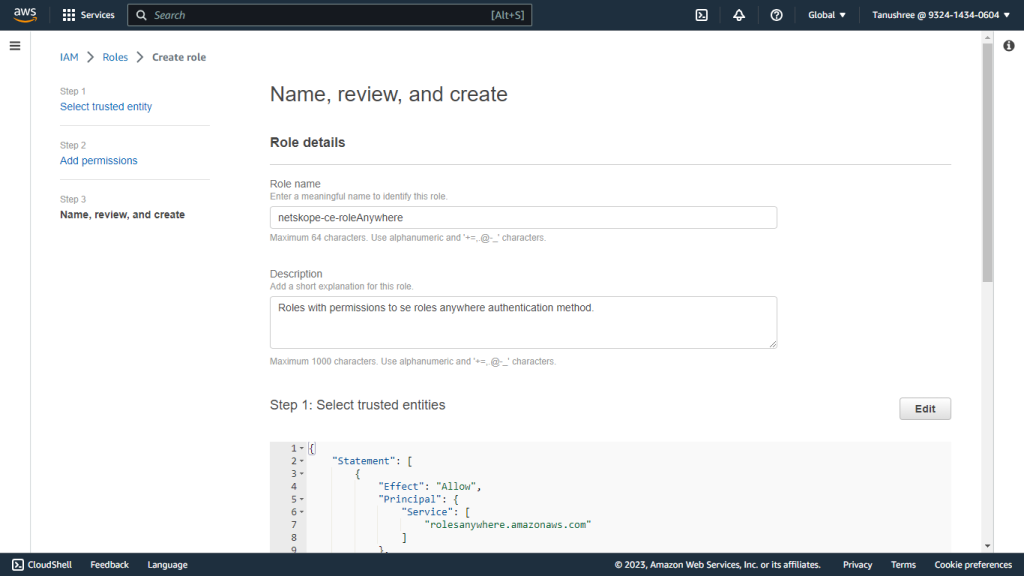
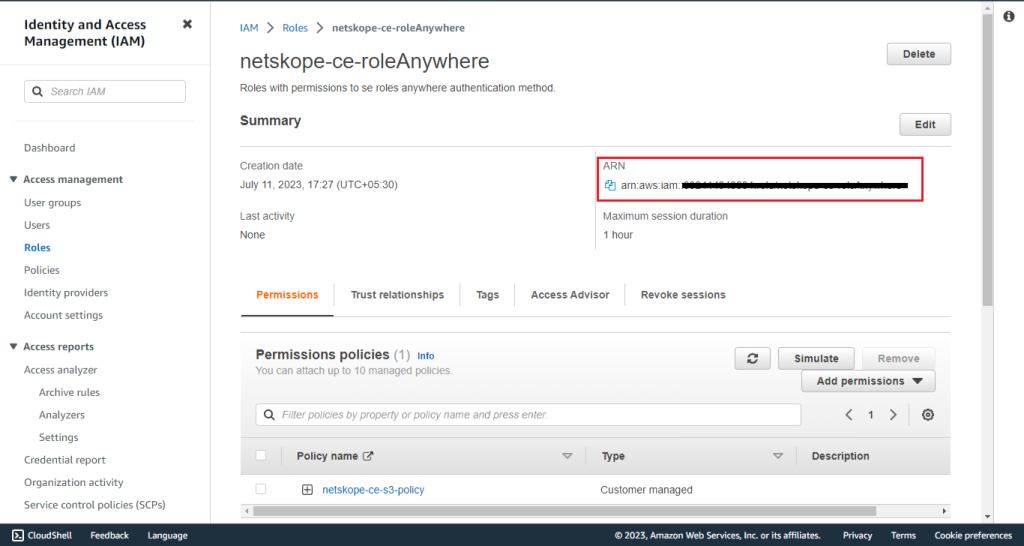
Enter a Role name and Description for the role, like netskope-ce-roleAnywhere.
-
Click Create role.
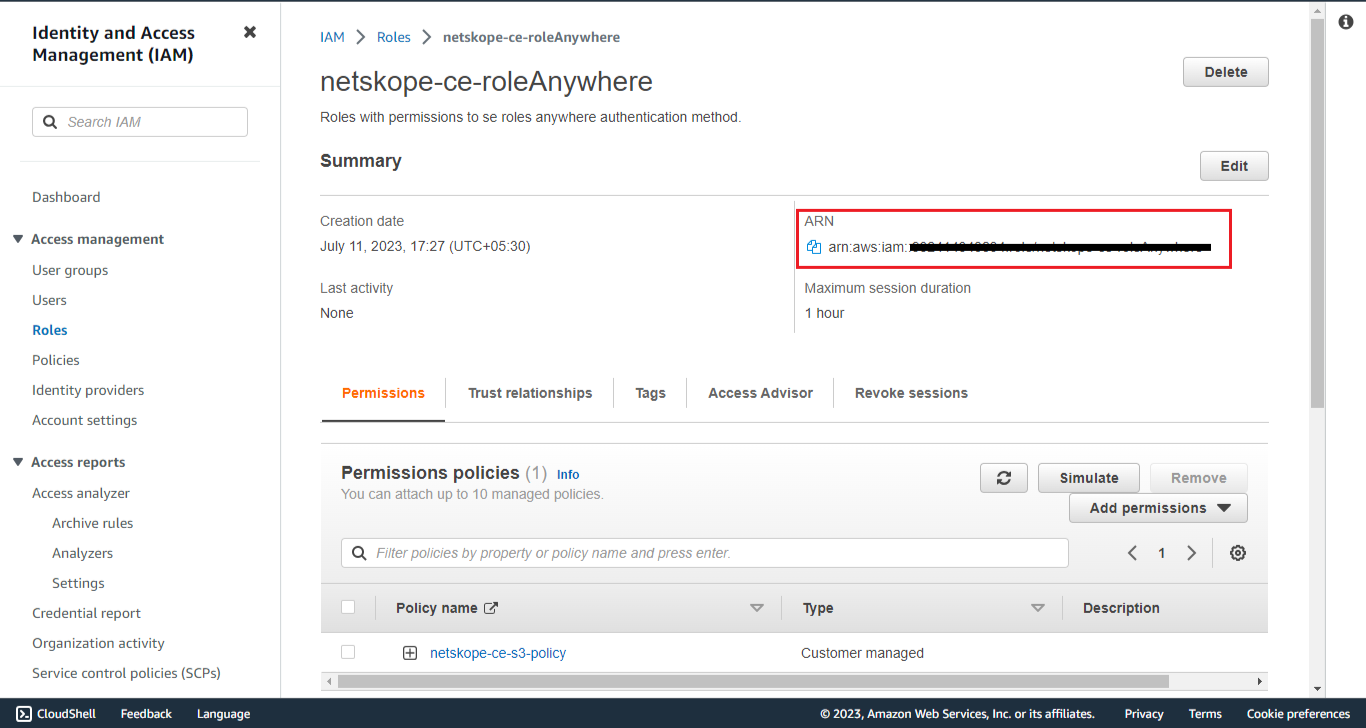
-
Make a note of the Role ARN as this will be required in the Plugin configuration parameter Role ARN for the AWS IAM Roles Anywhere authentication method.
Create a Profile
-
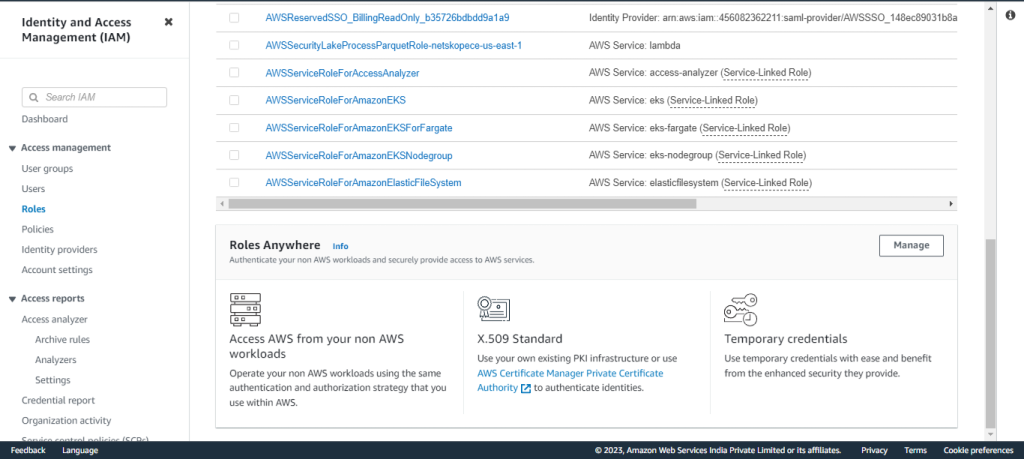
Select Roles present under Access management.
-
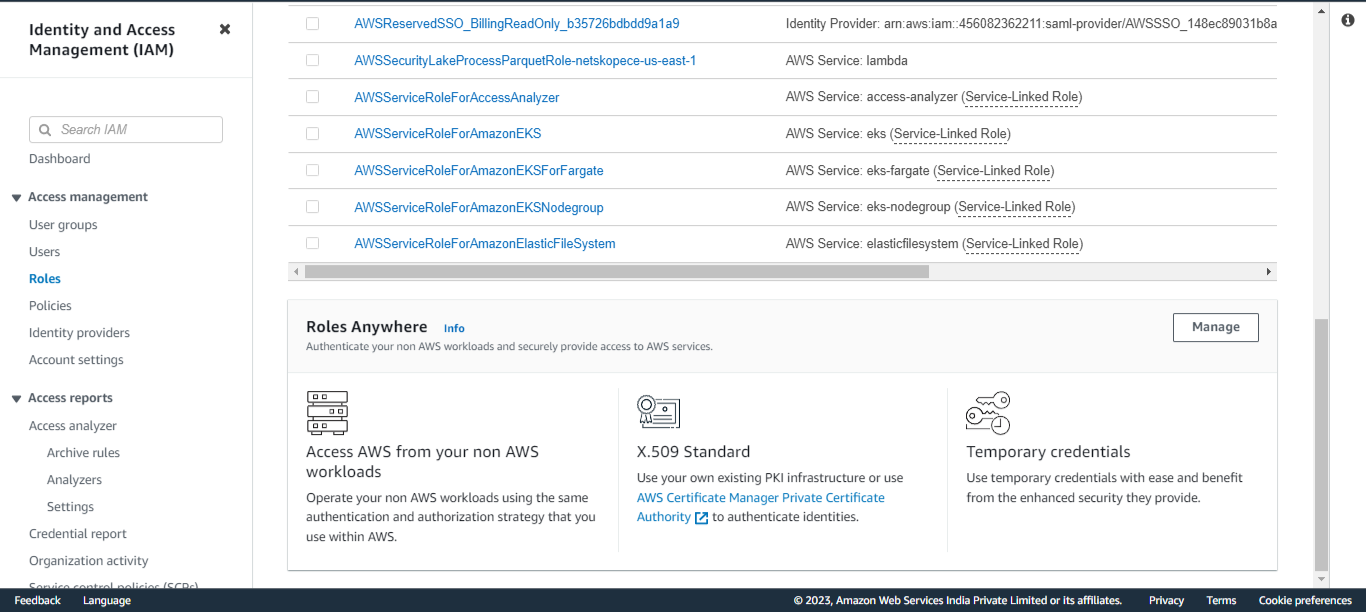
Scroll down to Roles Anywhere and click Manage.
-
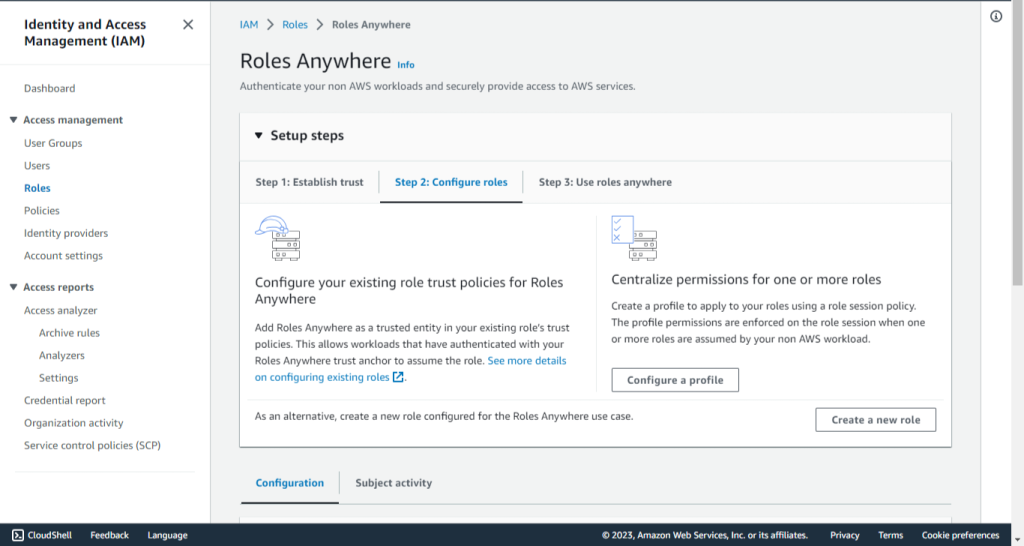
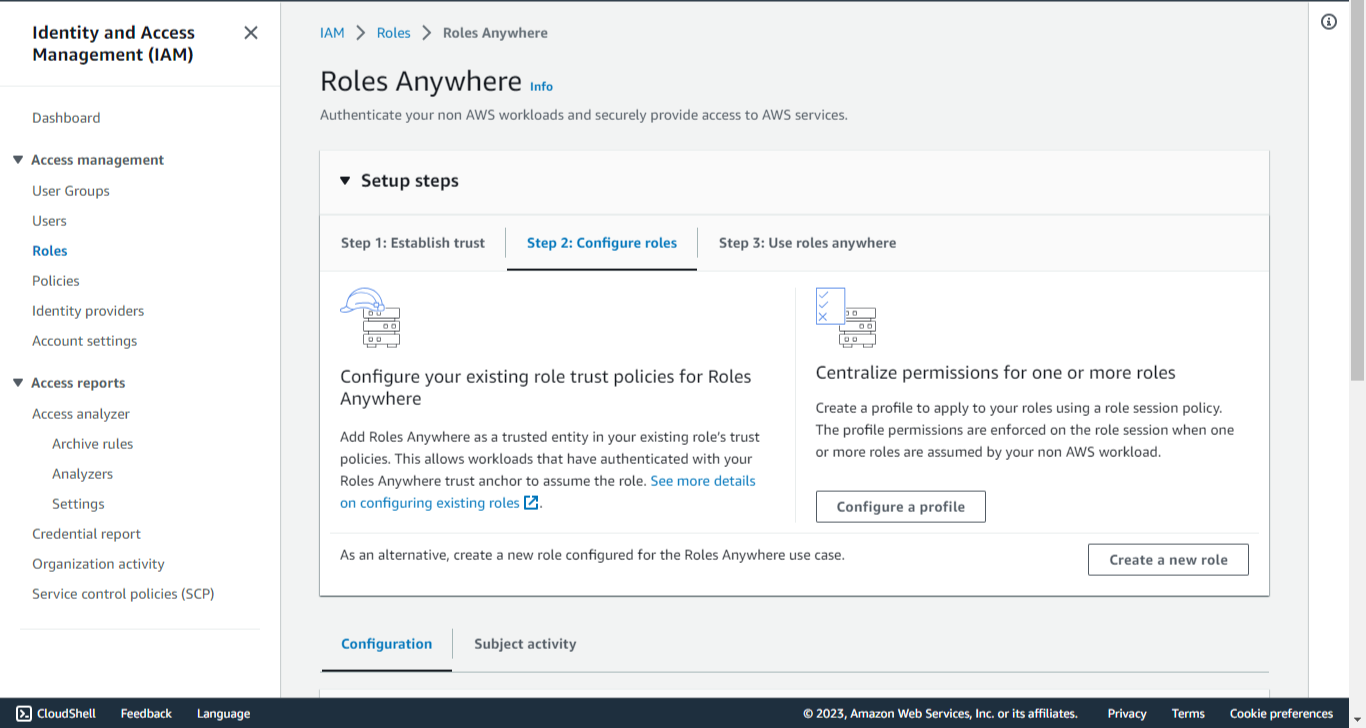
Expand the Setup steps.
-
Click Step 2: Configure roles.
-
Click Configure a profile.
-
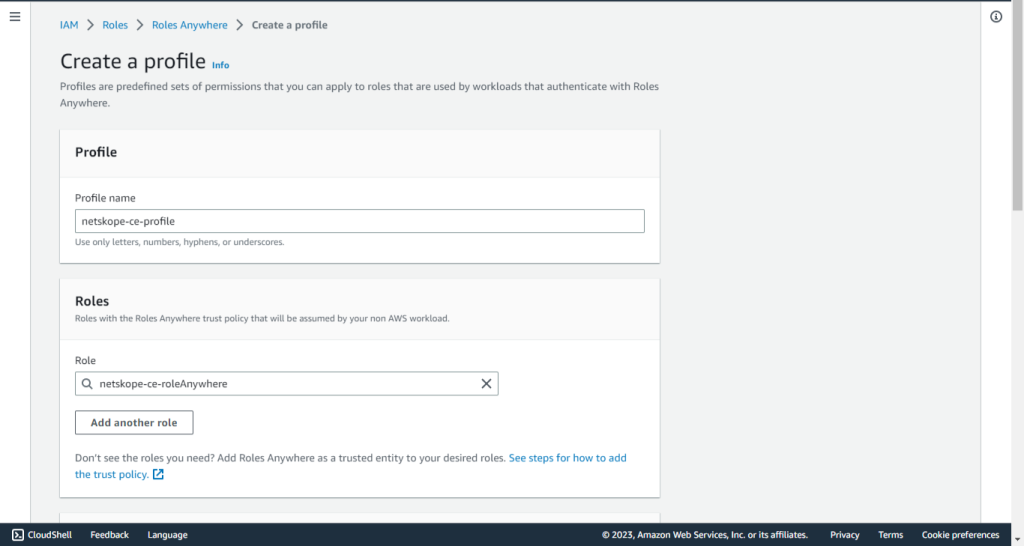
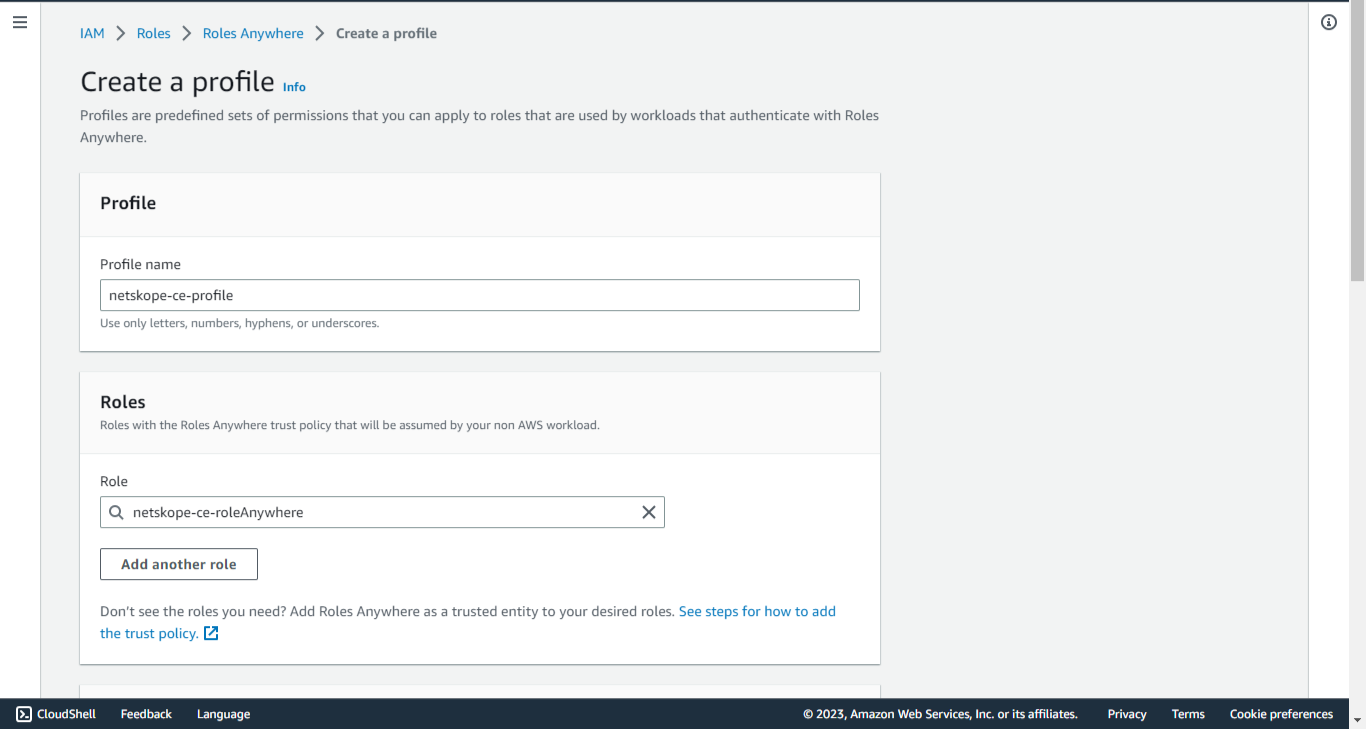
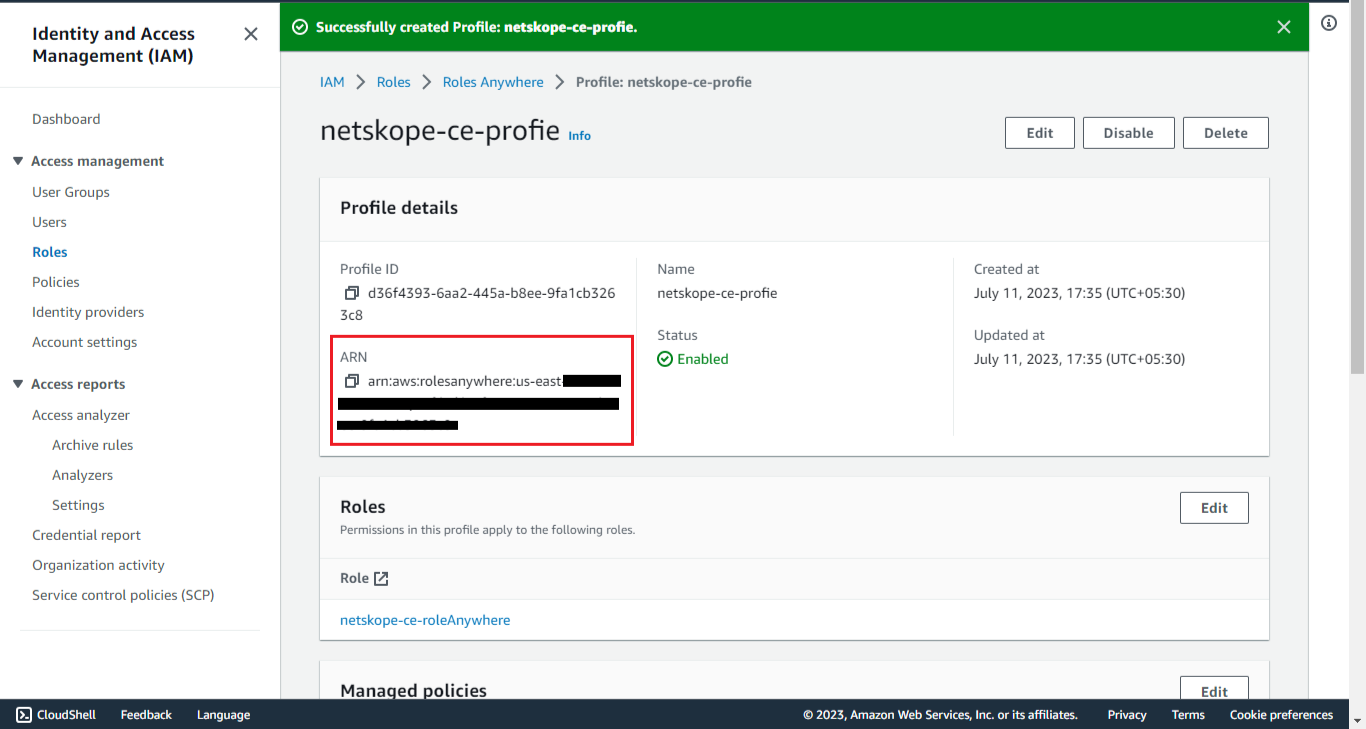
Enter a Profile name, like netskope-ce-profile.
-
Select the role created previously (netskope-ce-roleAnywhere)
-
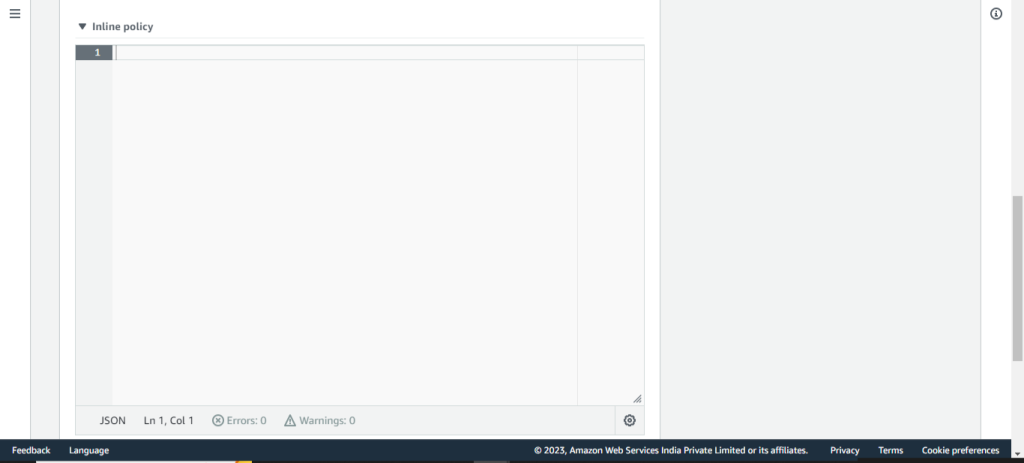
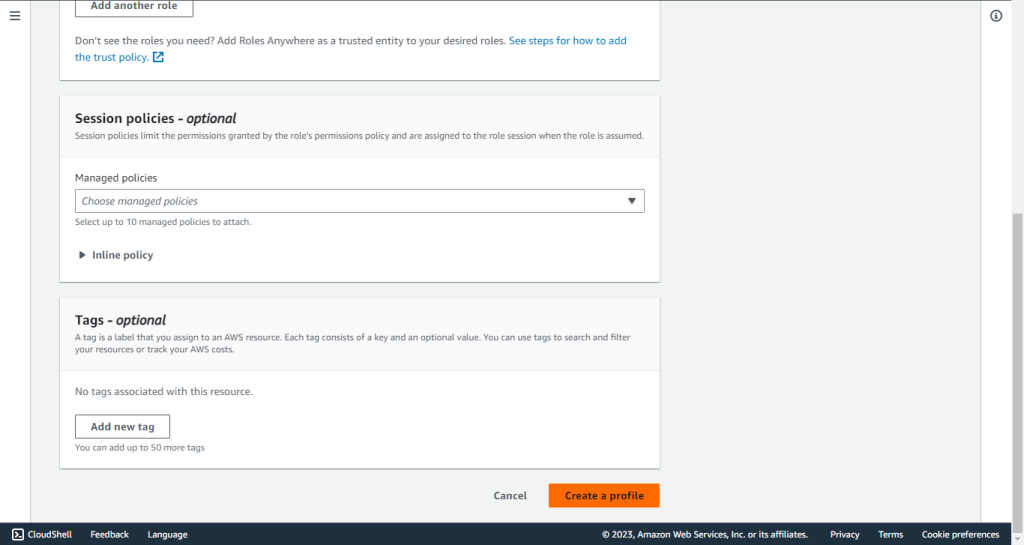
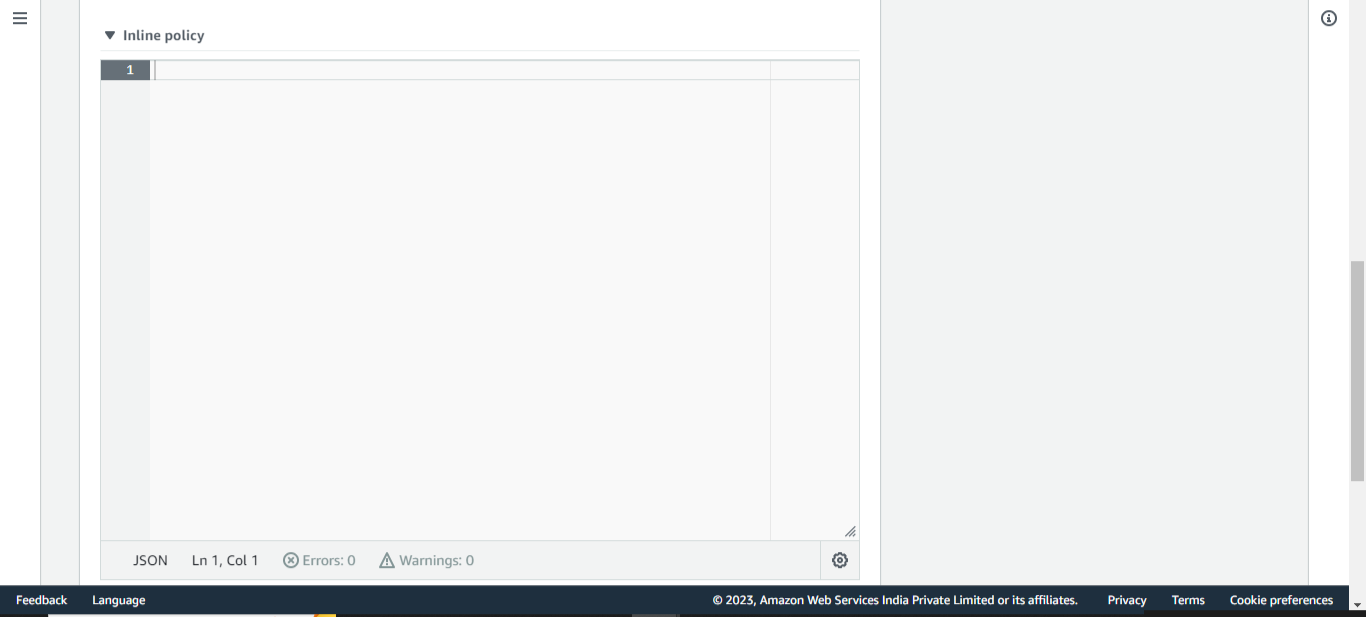
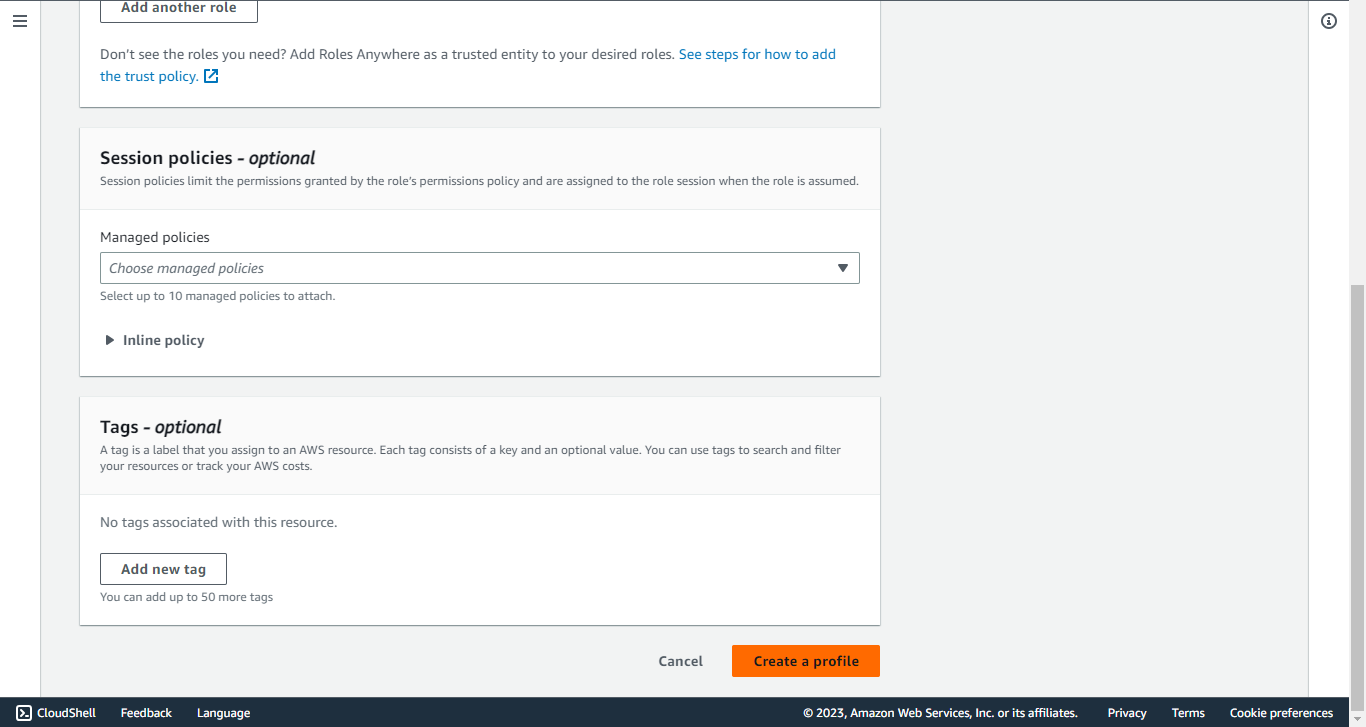
Remove the Inline Policy.
-
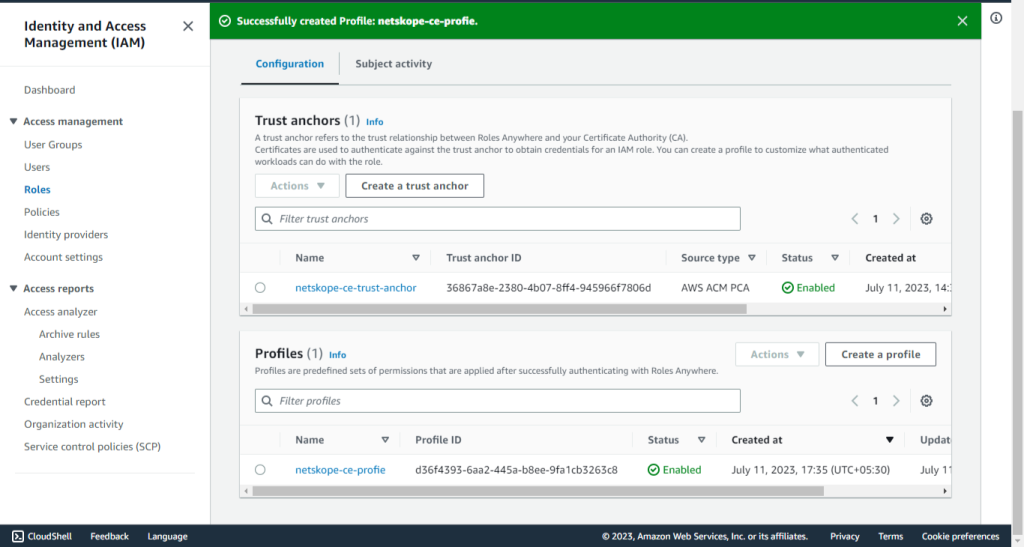
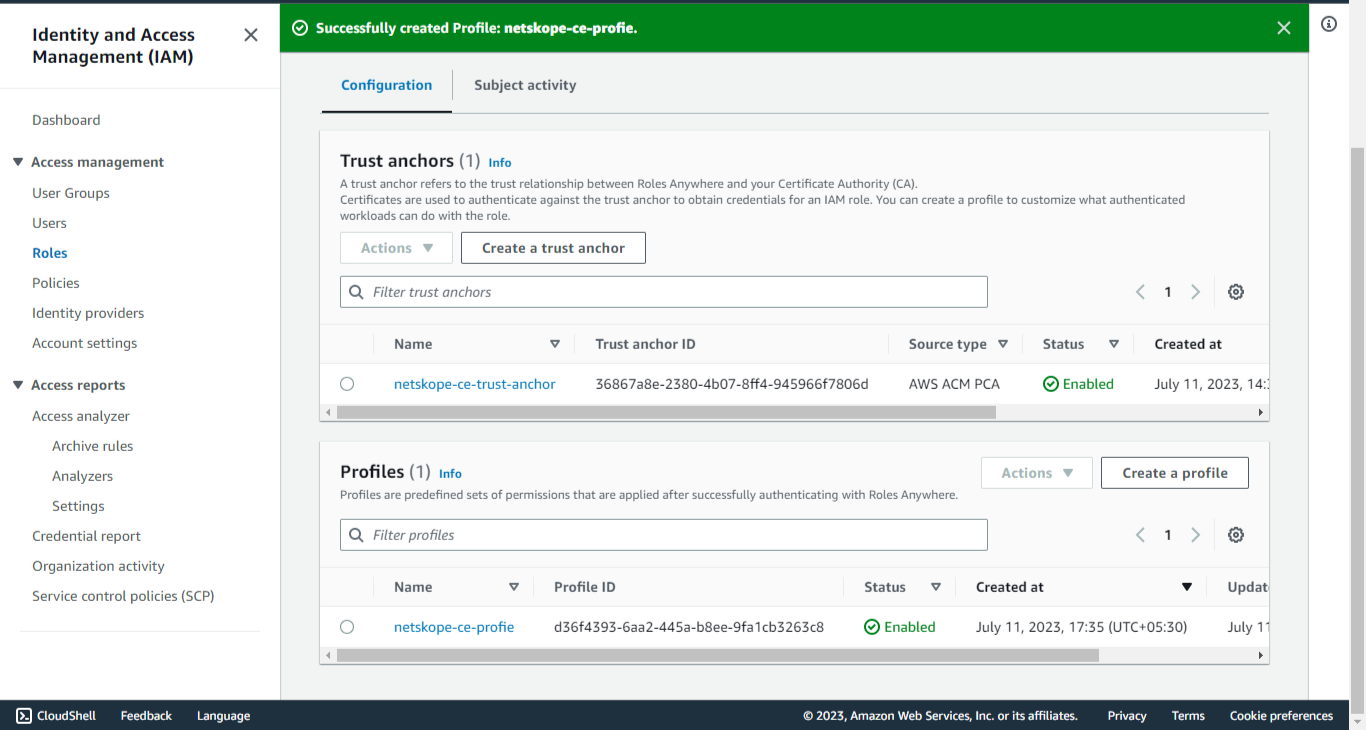
Click Create profile.
-
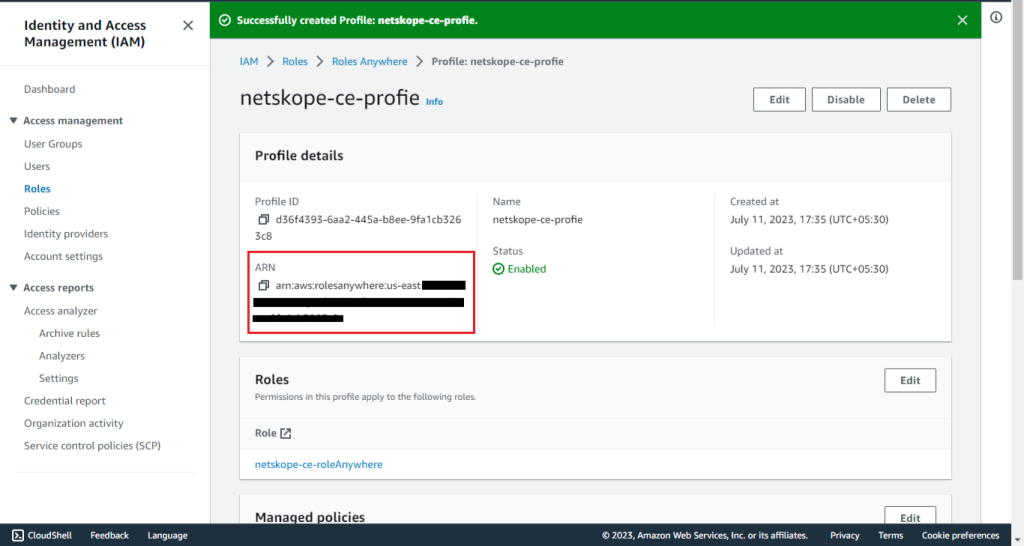
Click on the created Profile and copy the Profile ARN.
Request Private Certificate
-
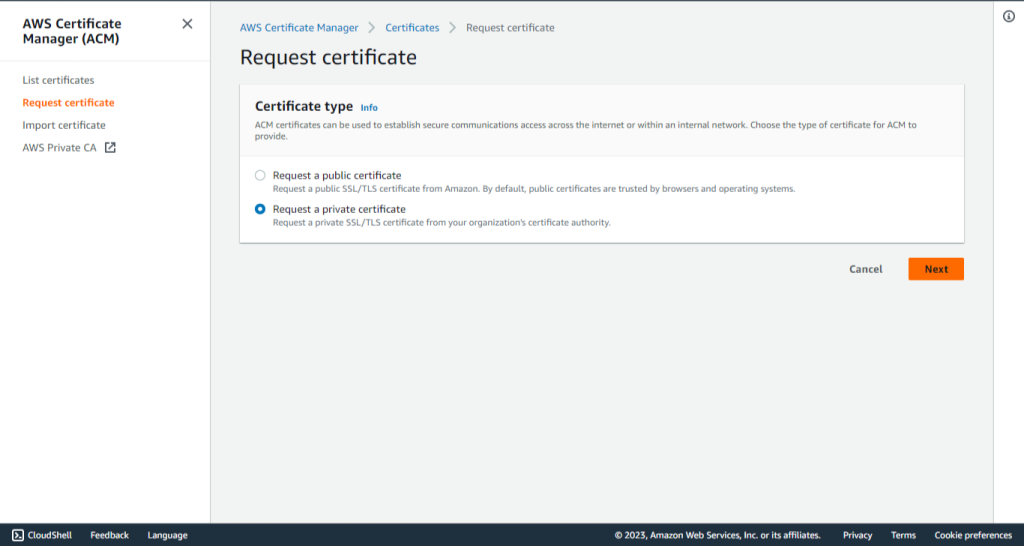
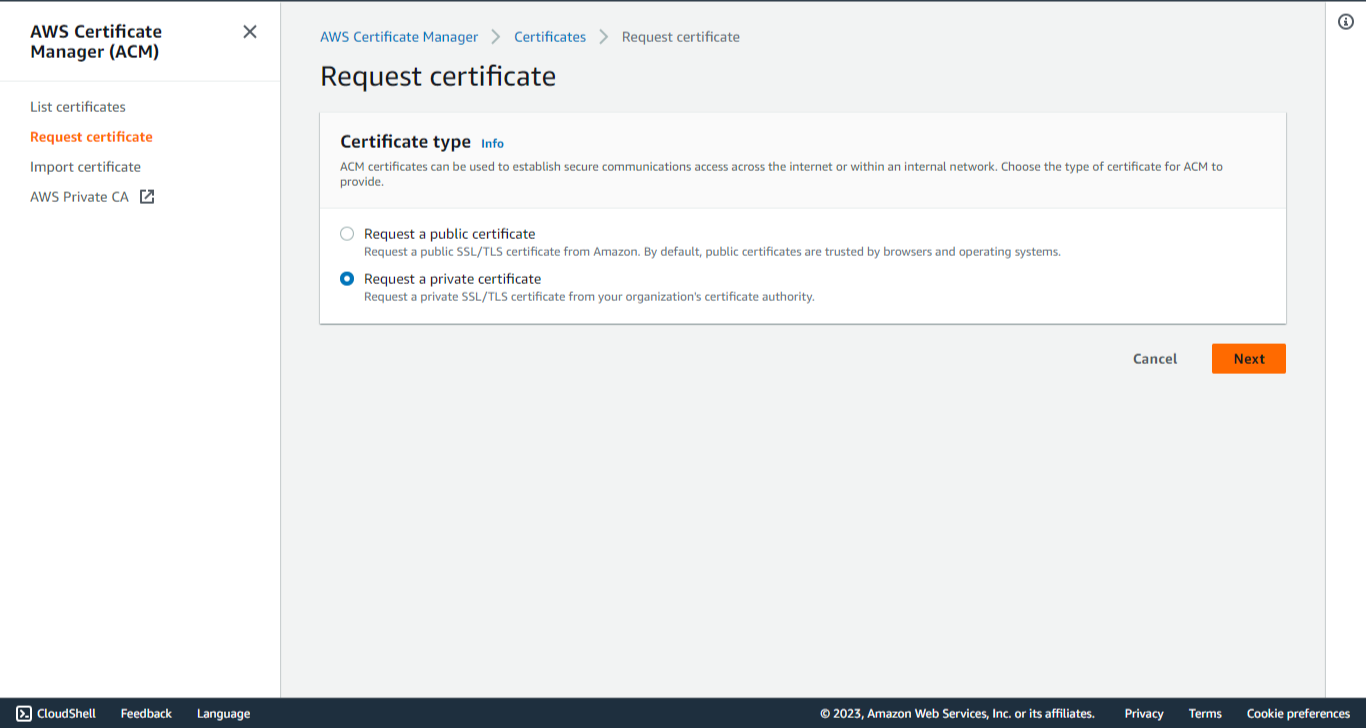
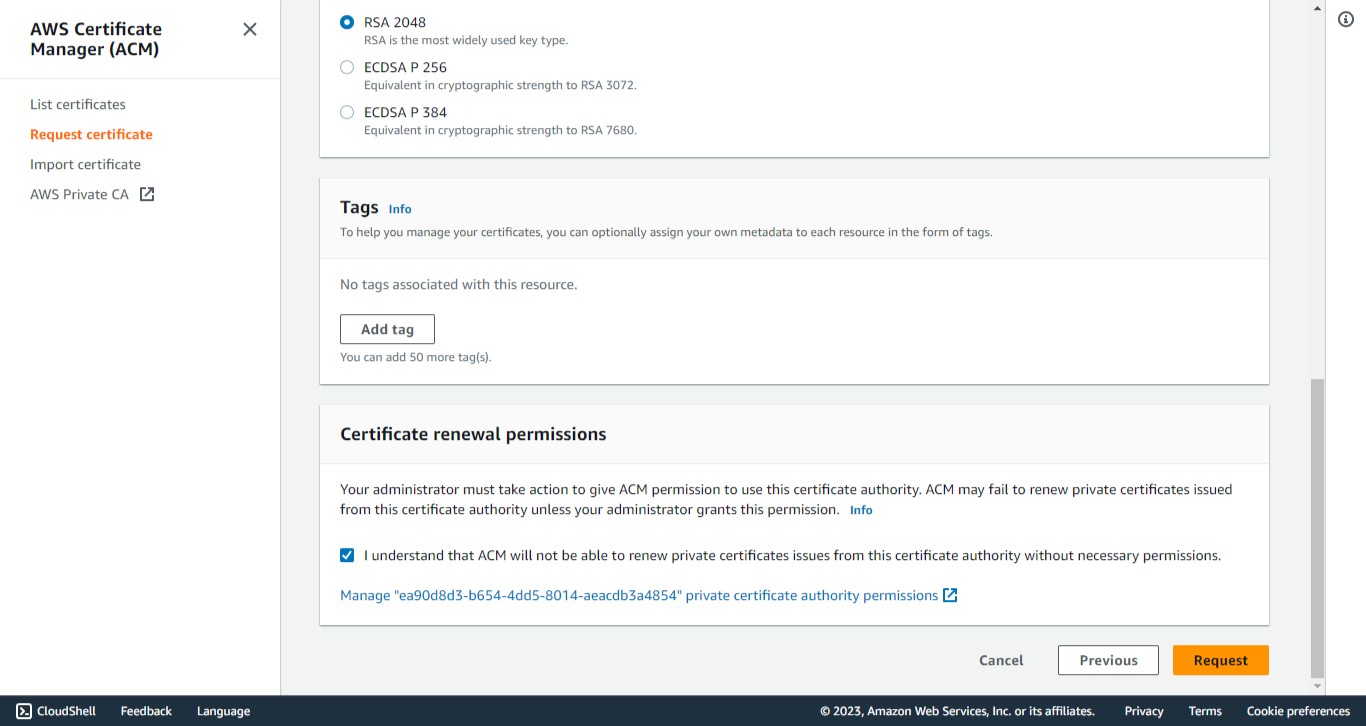
Go to AWS Certificate Manager > Request certificate.
-
Select Request a private certificate.
-
Click Next.
-
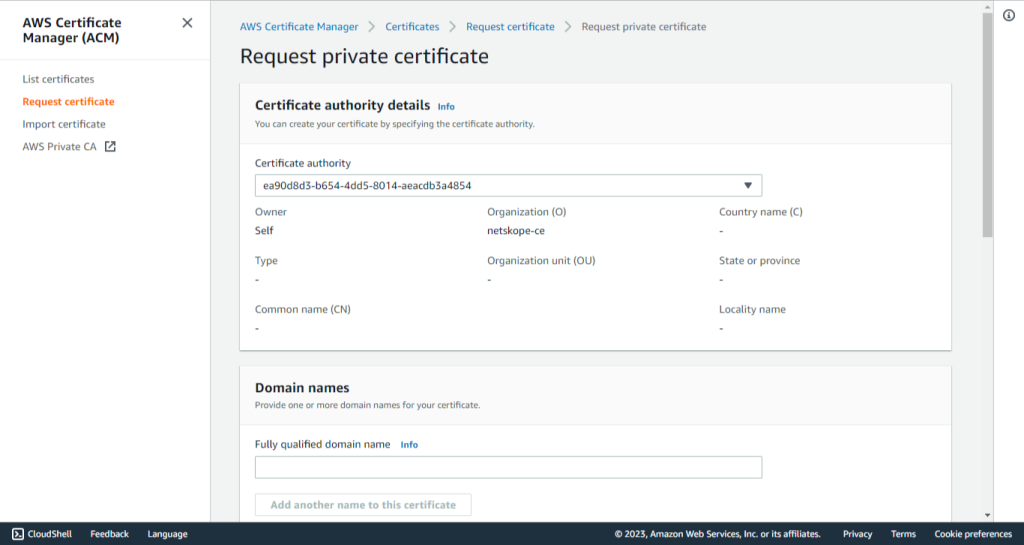
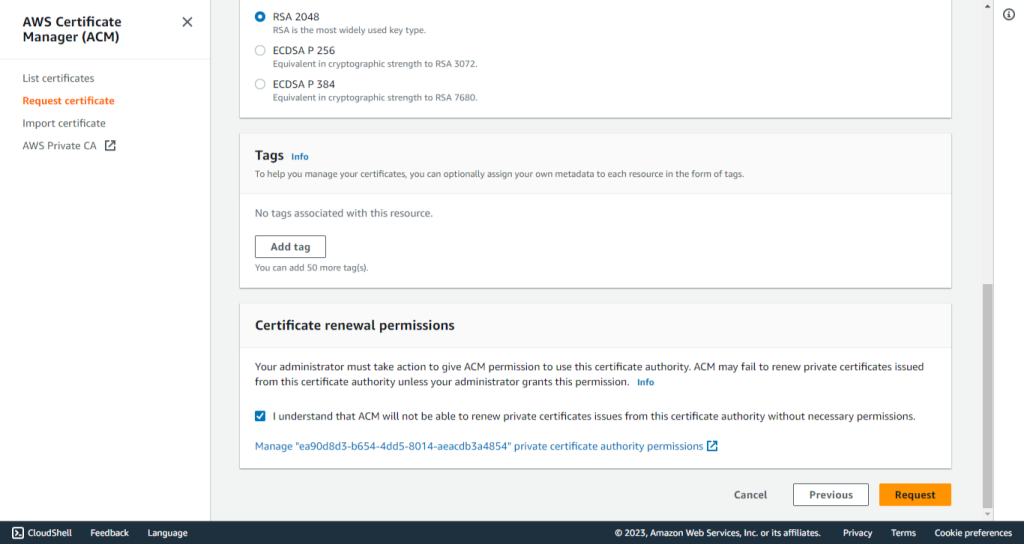
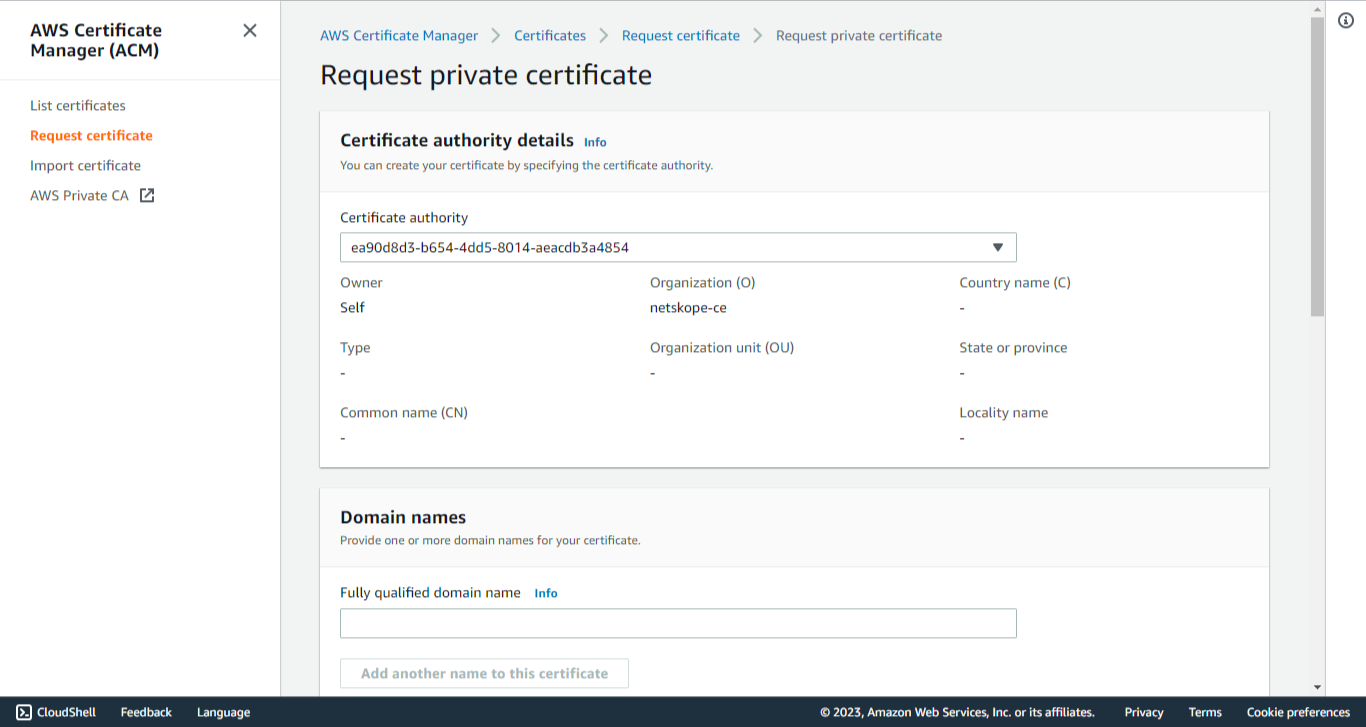
Select the Certificate authority created previously.
-
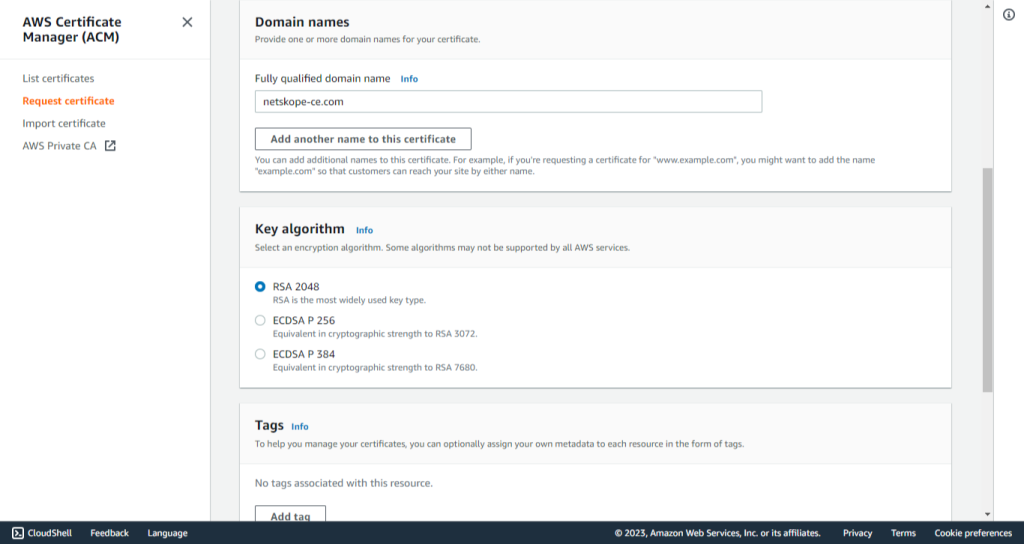
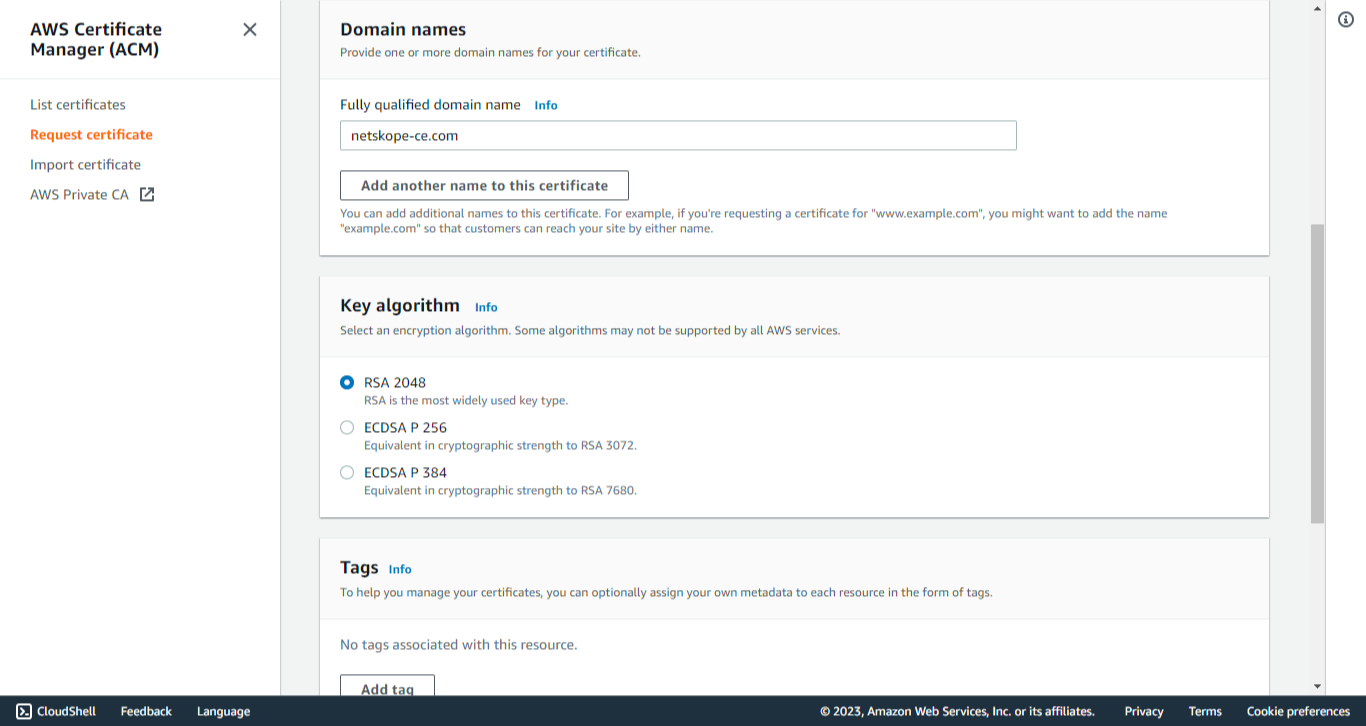
Enter a domain name in the Fully qualified domain name field, like netskope-ce.com.
-
Select RSA 2048 for the Key algorithm.
-
Add tags if required.
-
Acknowledge the Certificate renewal permissions.
-
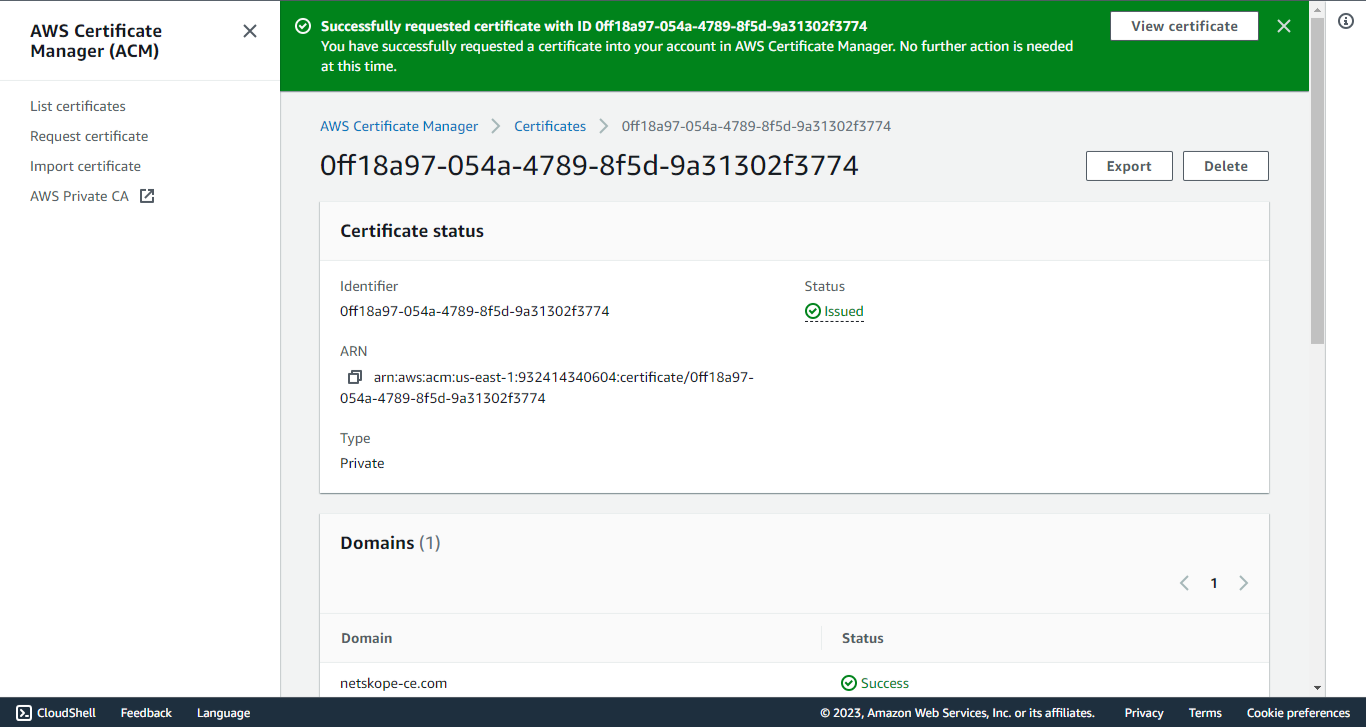
Click Request.
-
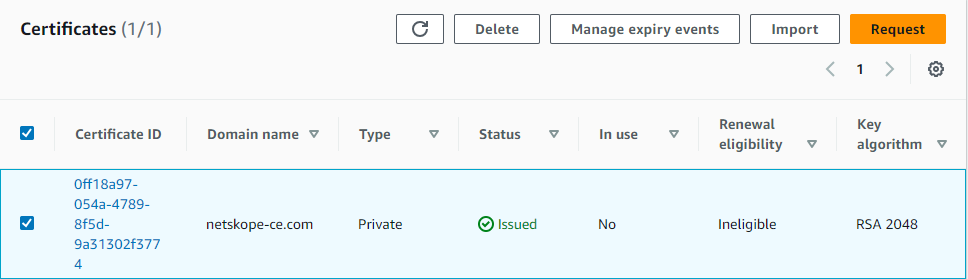
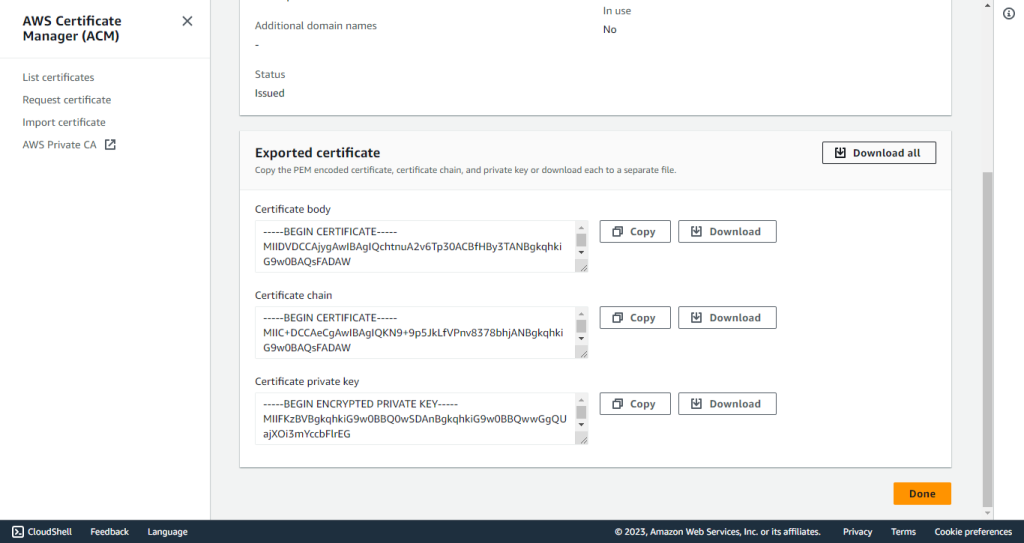
Go to List certificates from the navigation pane of AWS Certificate Manager.
-
Select the certificate created previously.
-
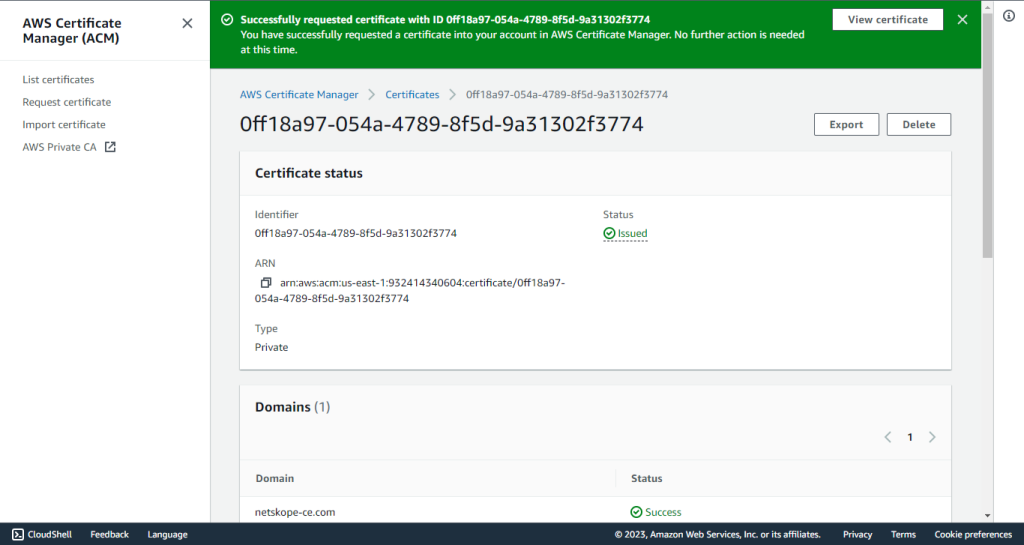
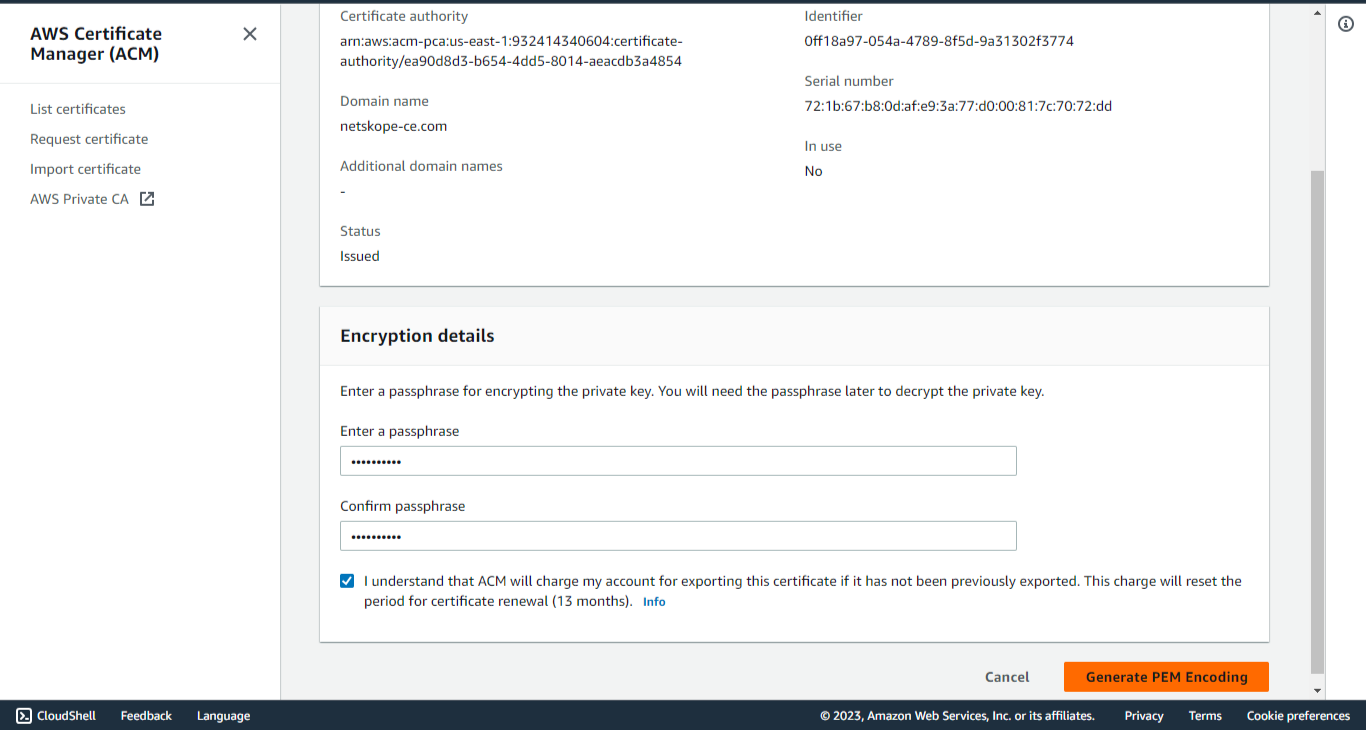
Click Export.
-
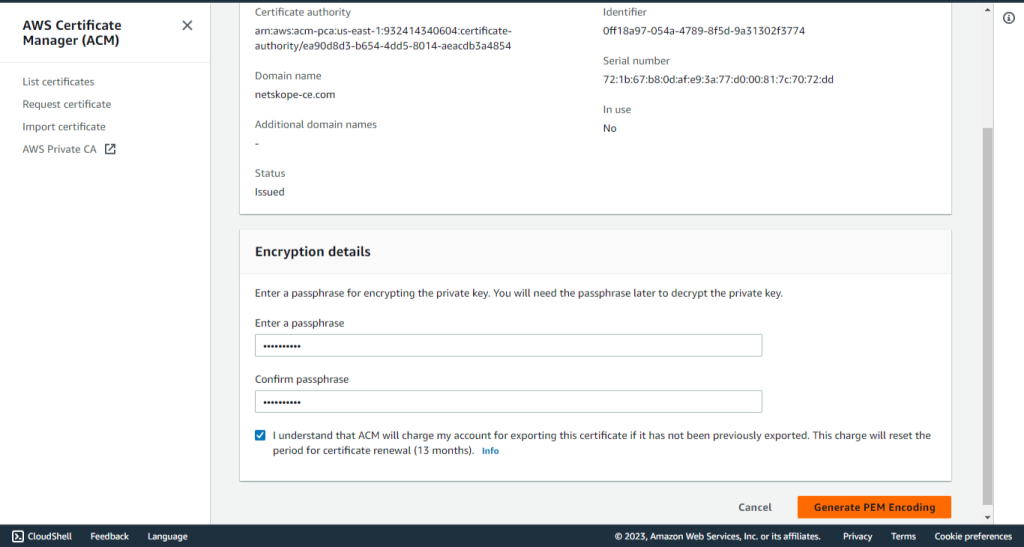
Enter the passphrase. Make a note of the passphrase as it will be required for the Configuration of the AWS S3 Plugin using the AWS IAM Roles Anywhere Authentication method.
-
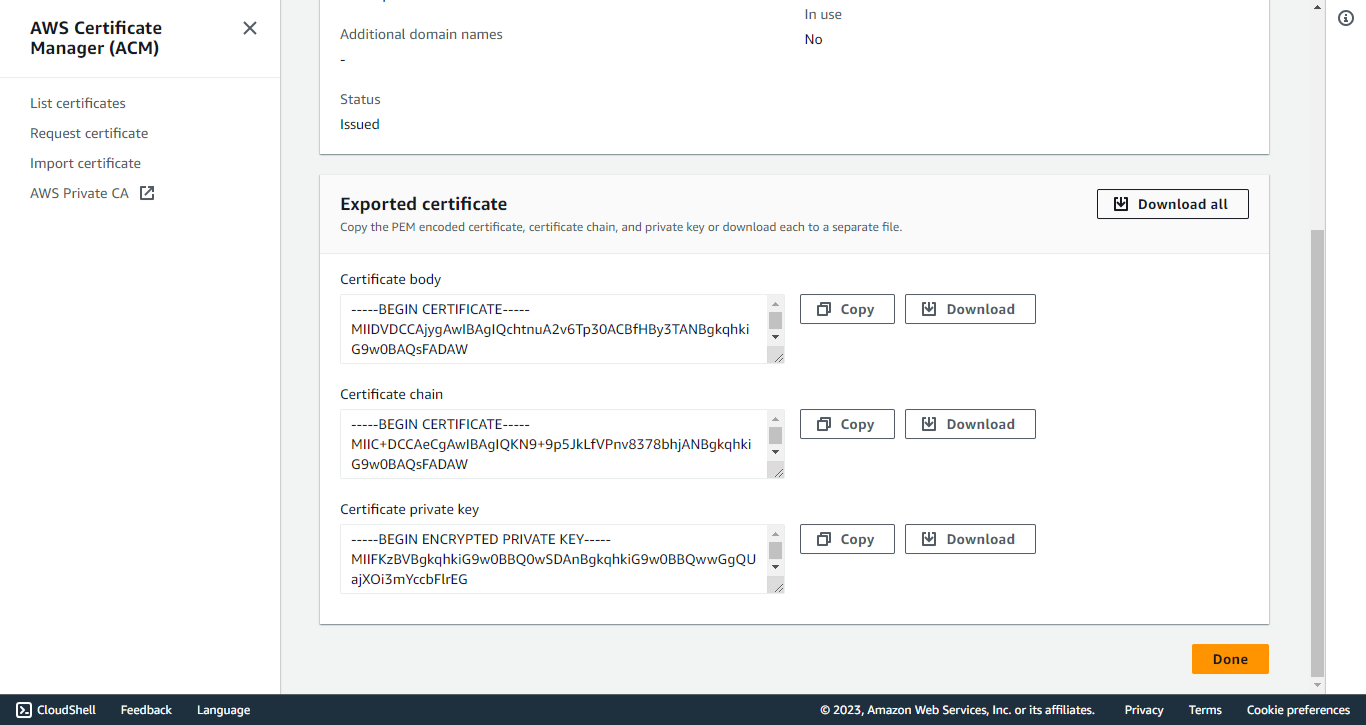
Click Generate PEM Encoding.
-
Download all the Certificates as they won’t be visible again. For new certificates, you will need to Export it again.
For More Info visit AWS IAM Role Anywhere
Deployed on AWS Configuration
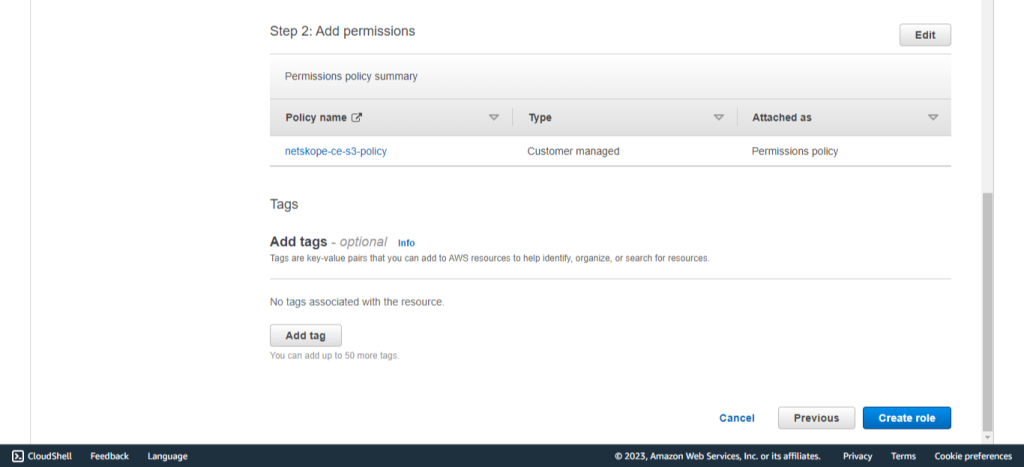
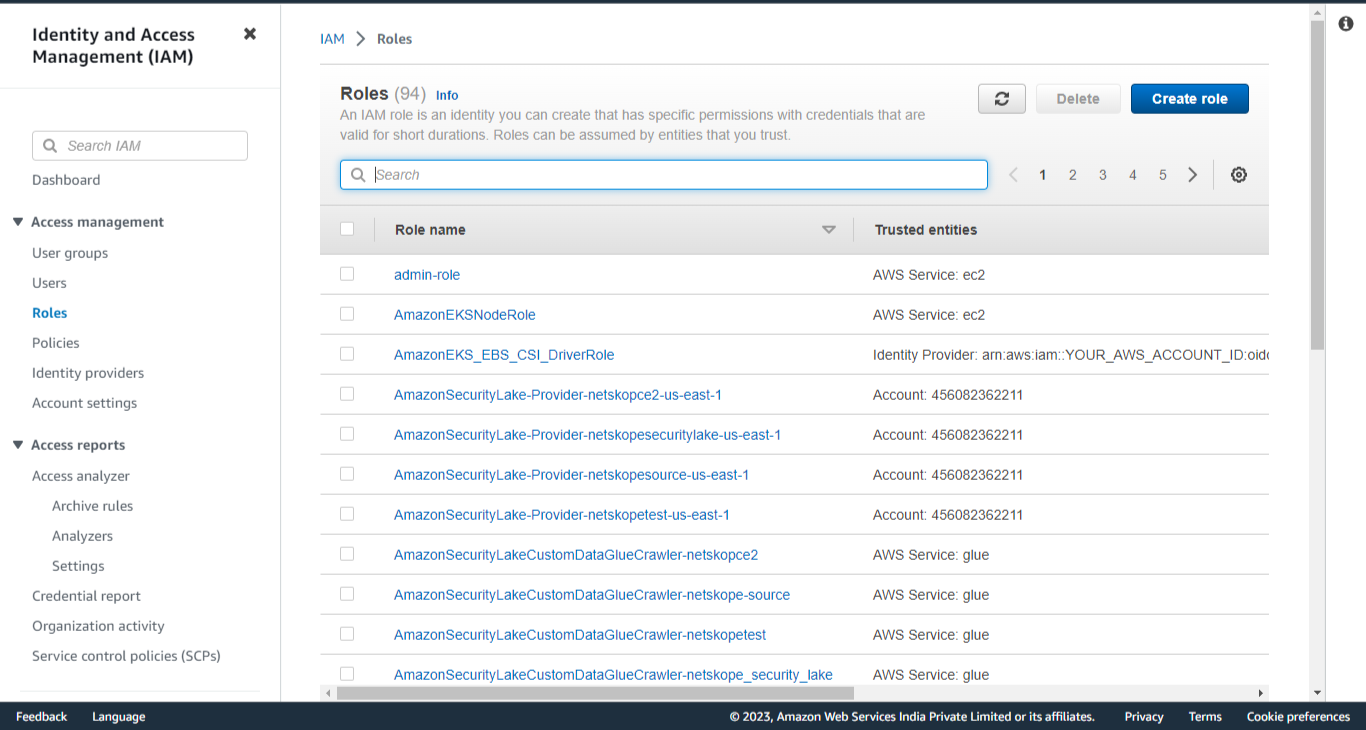
Create a role
-
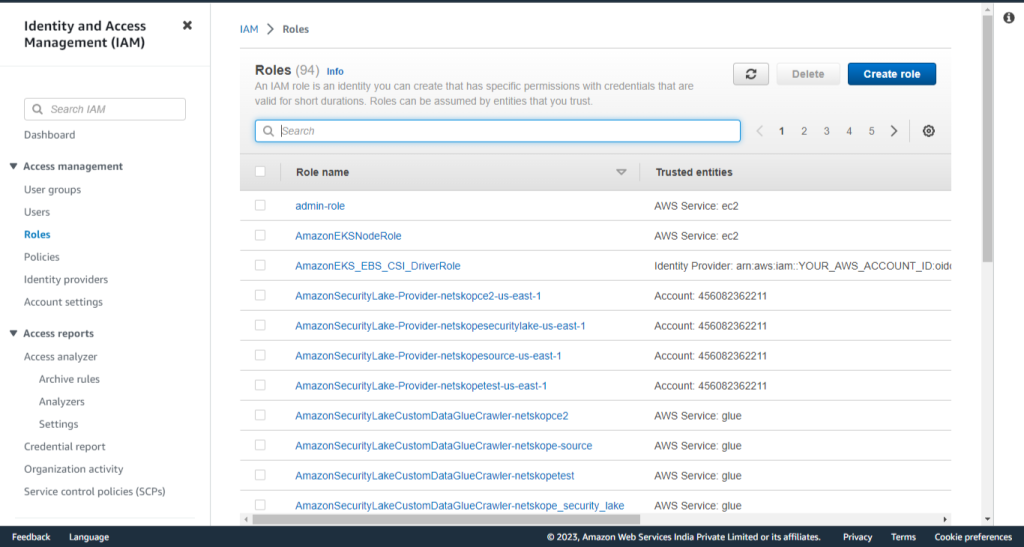
Go to IAM services in the AWS Console.
-
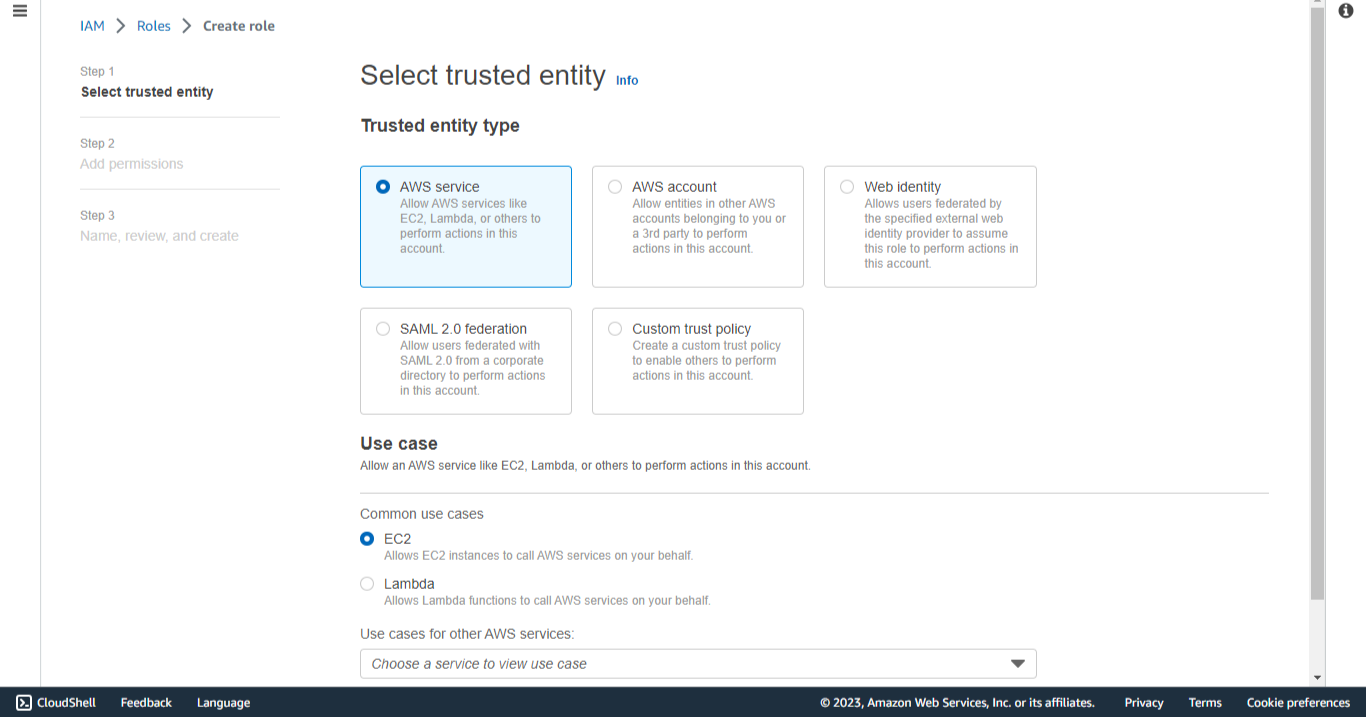
Click Create role.
-
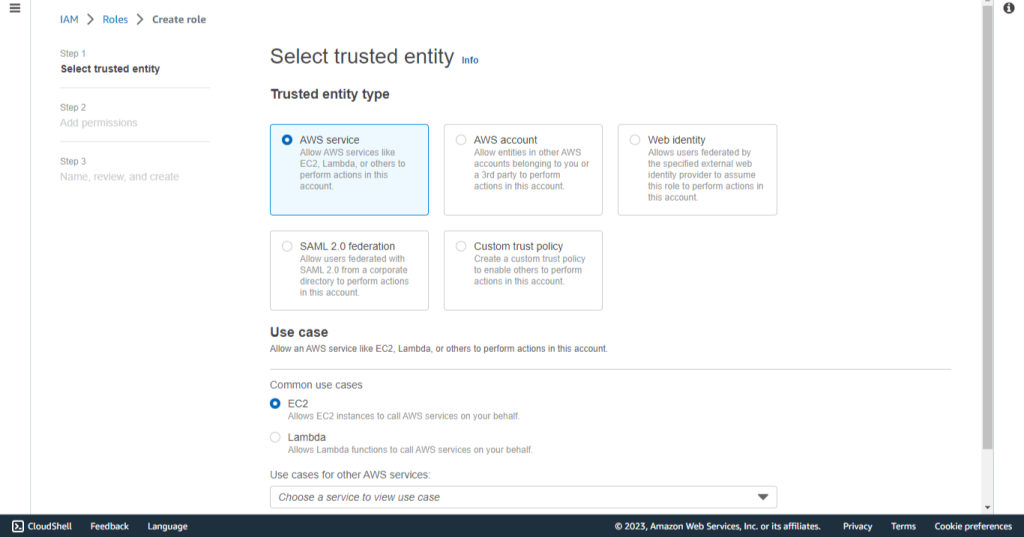
Select the AWS Service.
-
Under Use case, select EC2.
-
Click Next.
-
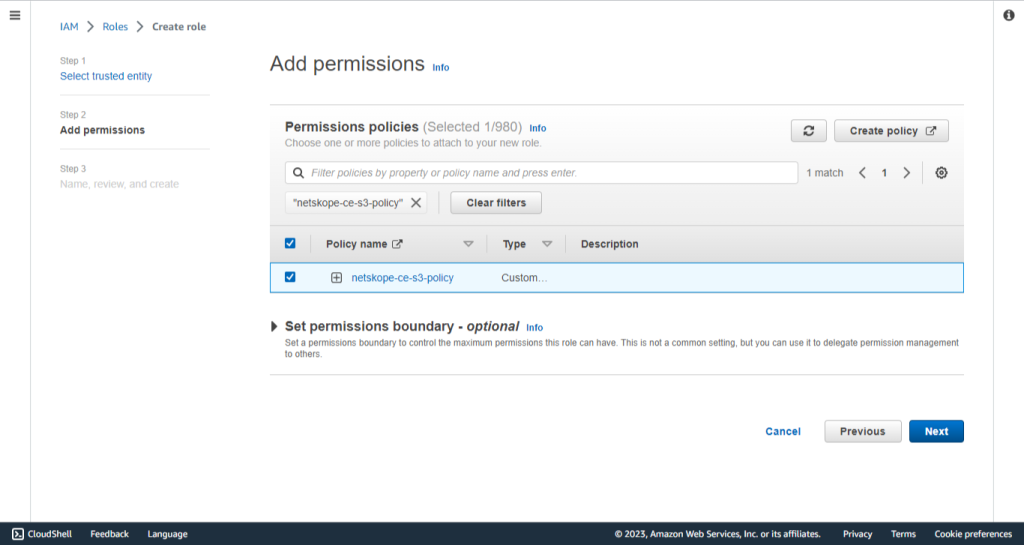
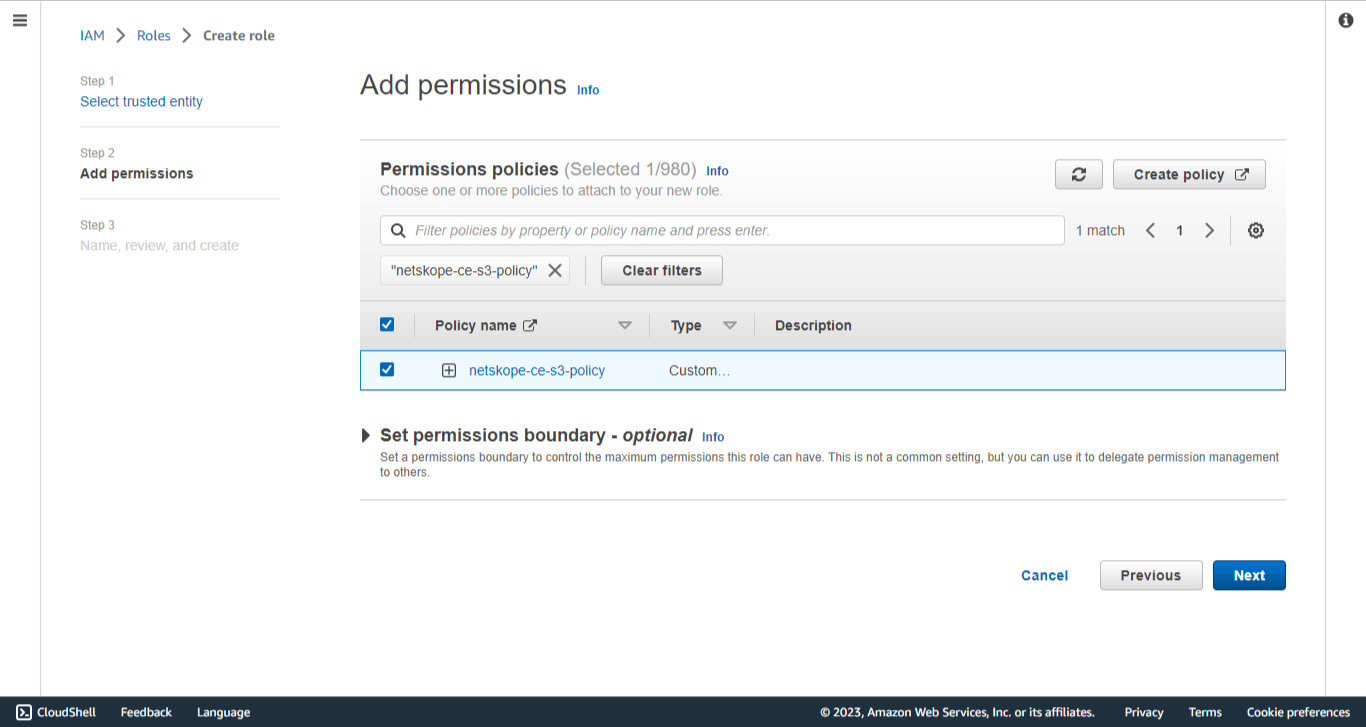
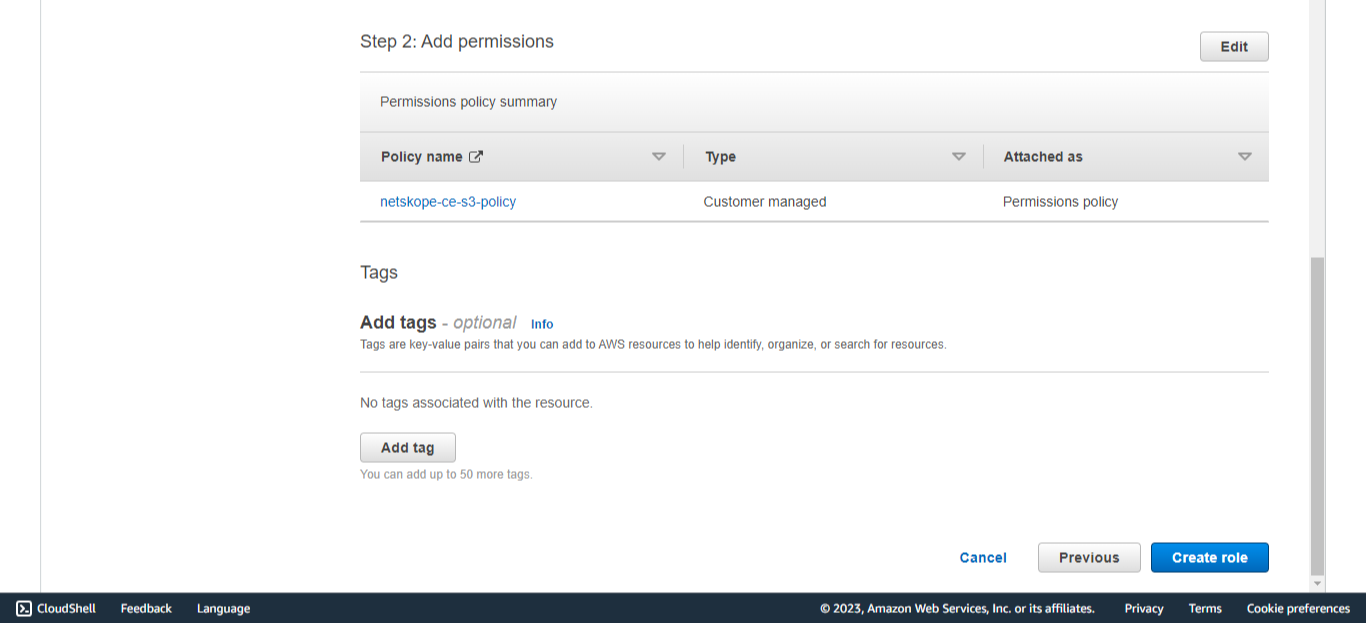
Select the permission policy created in Create Policy.
-
Click Next.
-
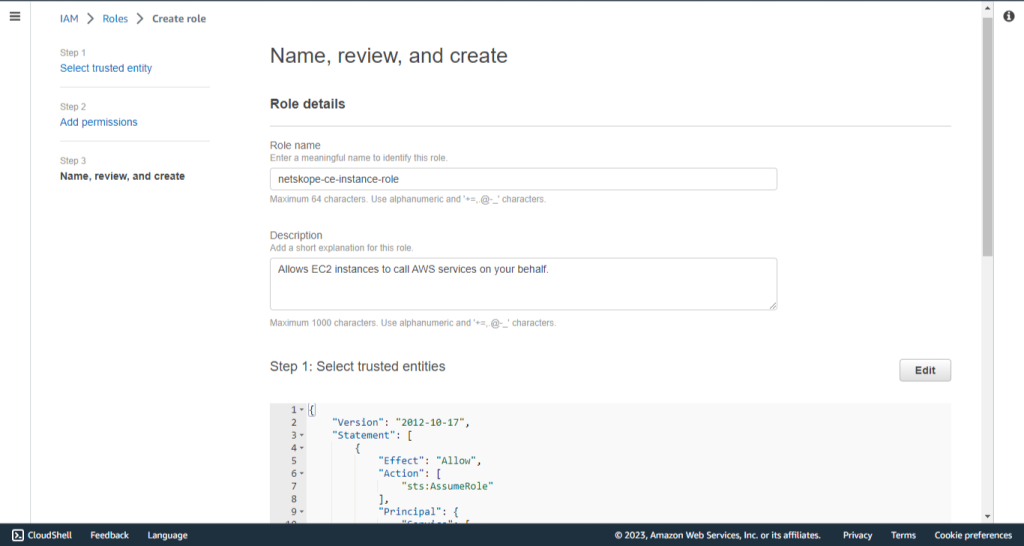
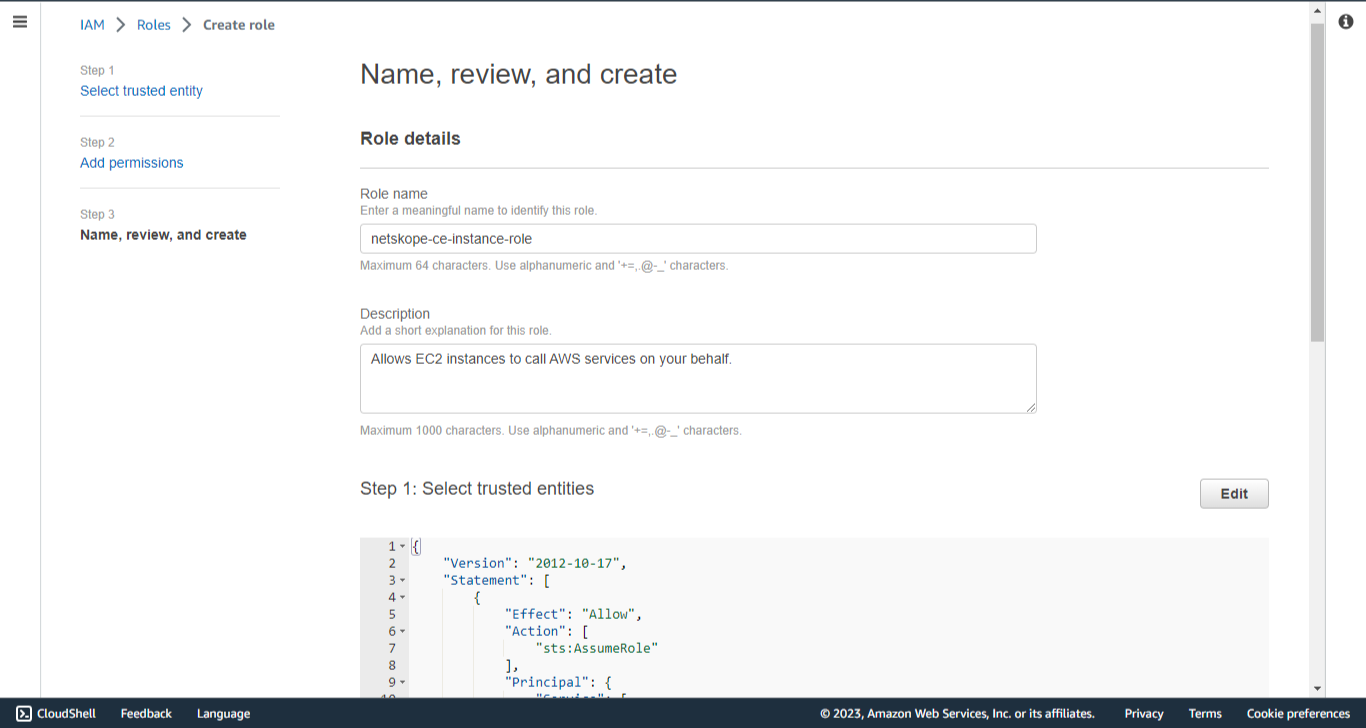
Enter a Role Name, like netskope-ce-instance-role, and a Description.
-
Click Create Role.
Assign role to EC2 Instance
-
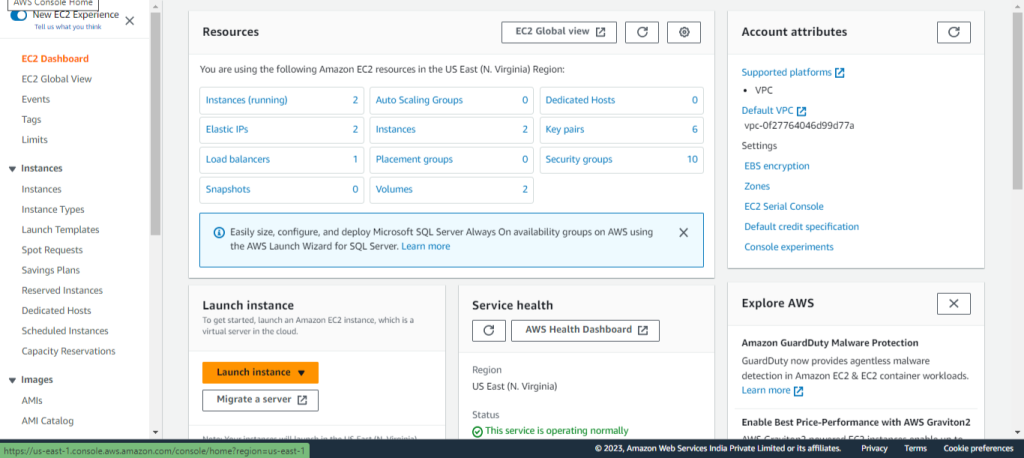
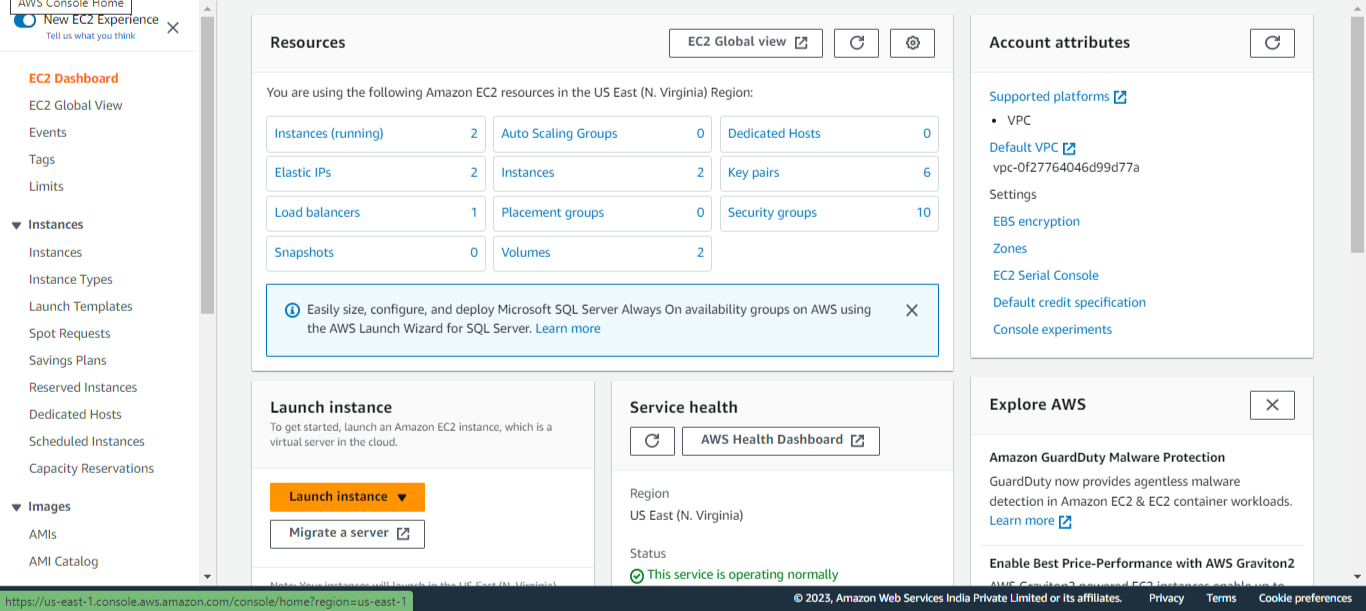
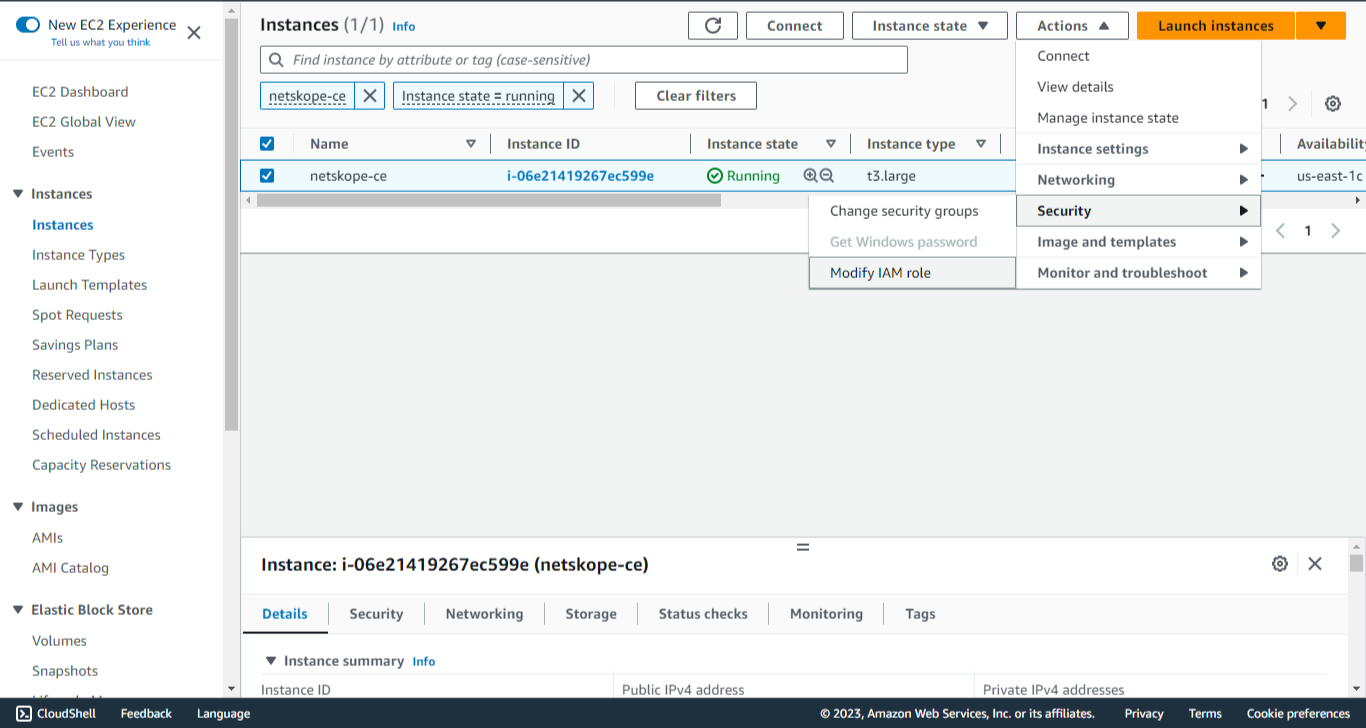
Open your EC2 instance console.
-
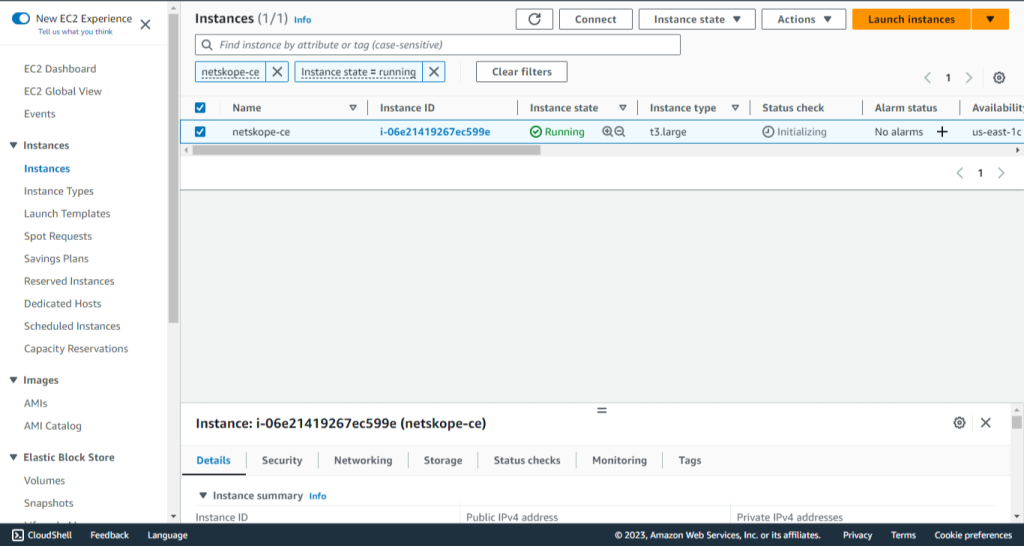
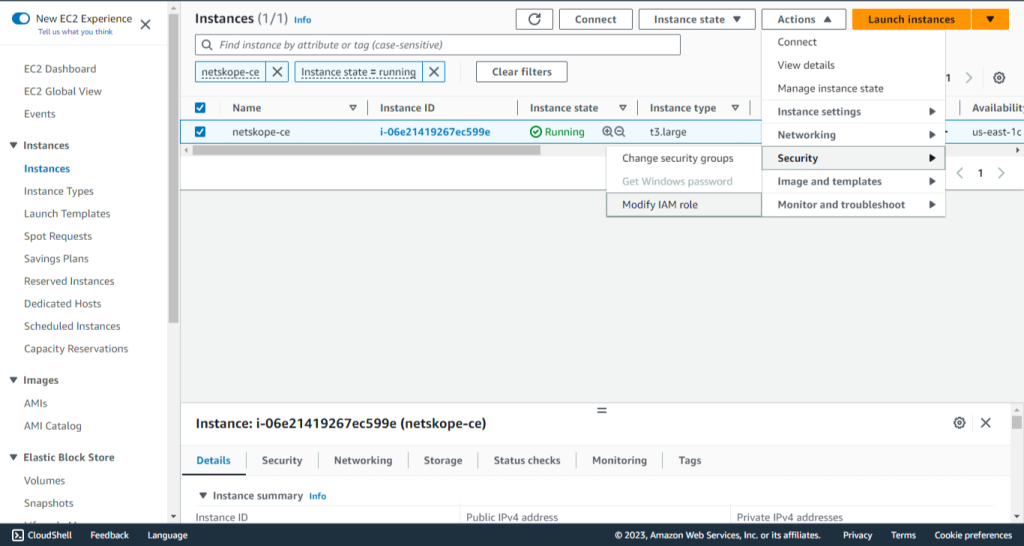
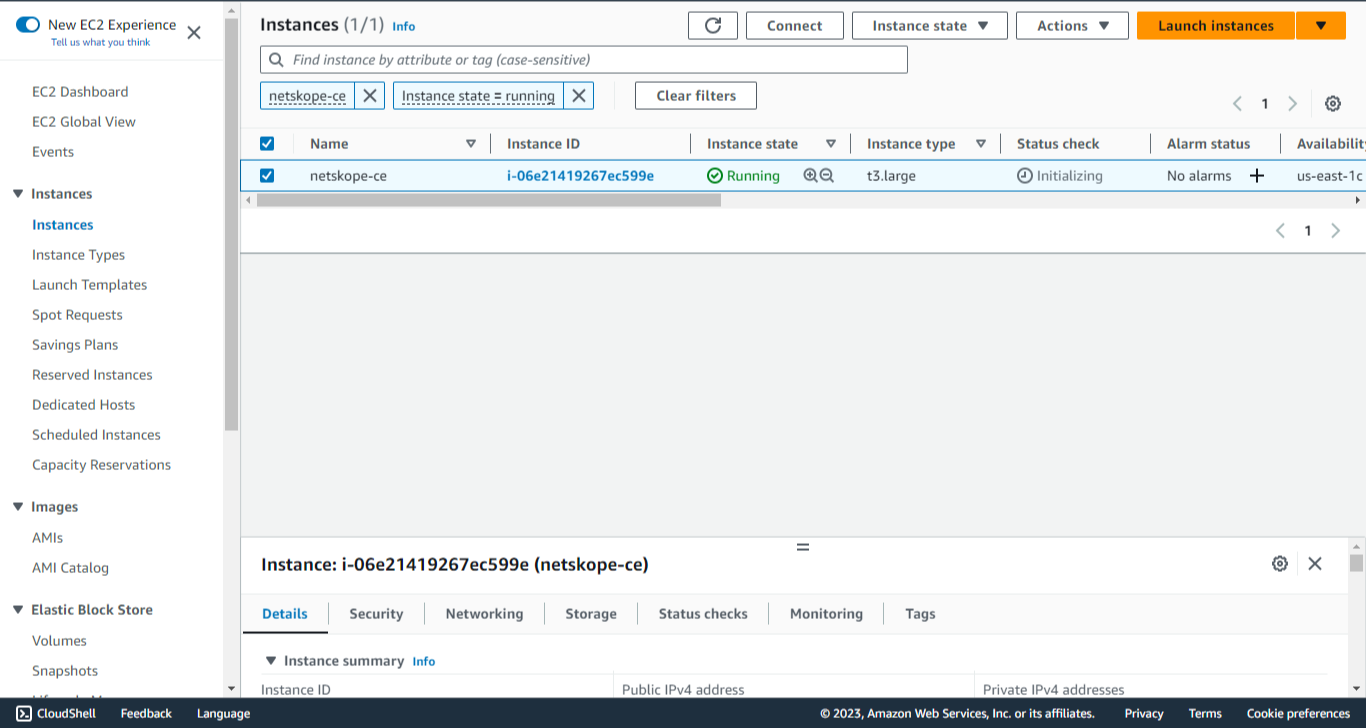
Click on Instances under Instances
-
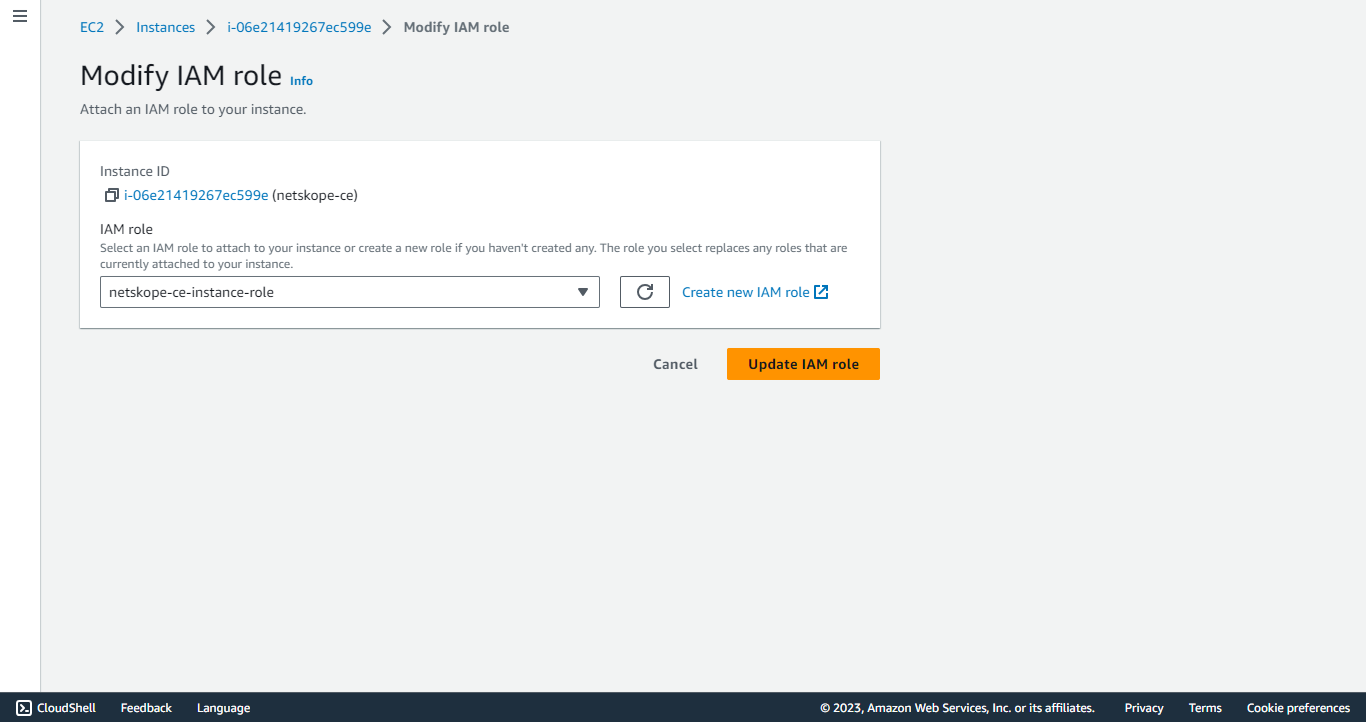
Go to Action > Security > Modify IAM Role.
-
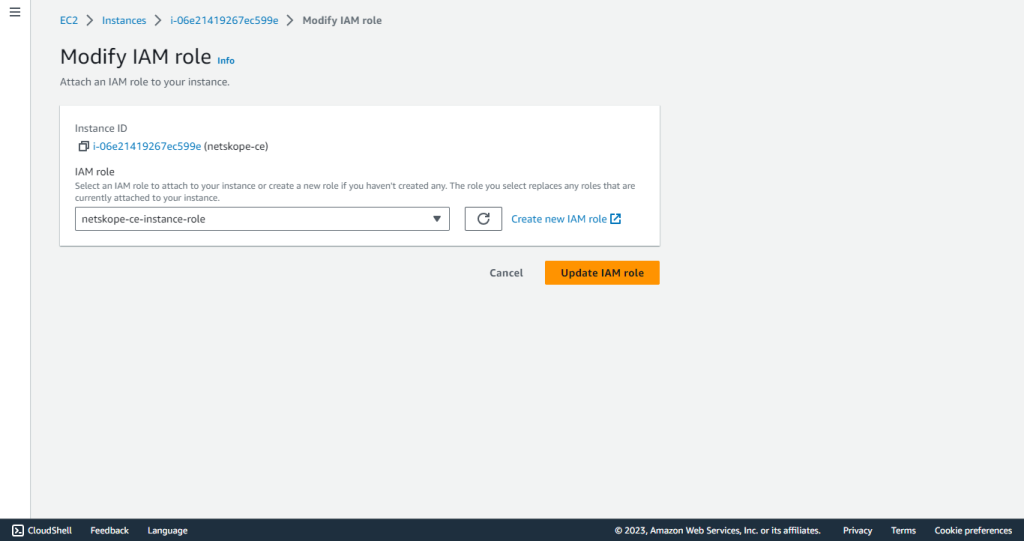
Select the Role that you created above in Create a role (netskope-ce-instance-role).
-
Click Add IAM role/Modify IAM Role. Note that both EC2 instance and Bucket should be on the same region.
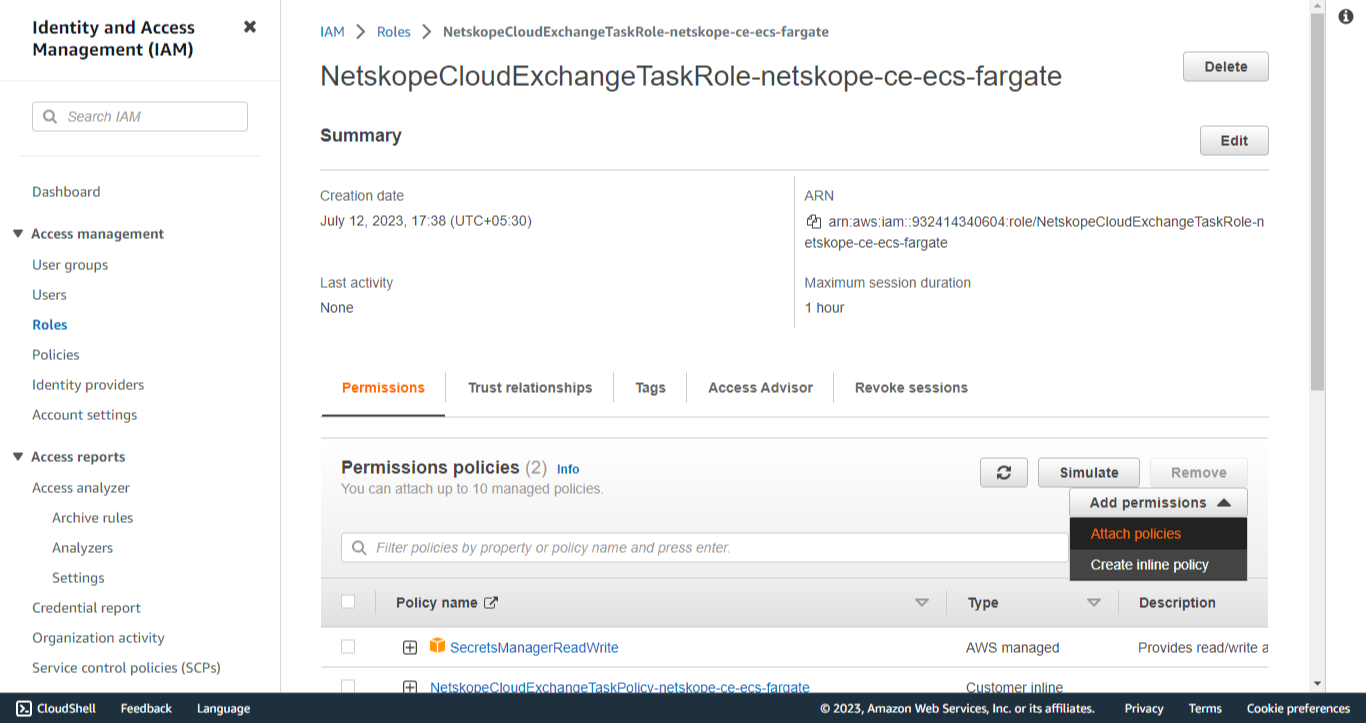
Assign role to Fargate Instance
-
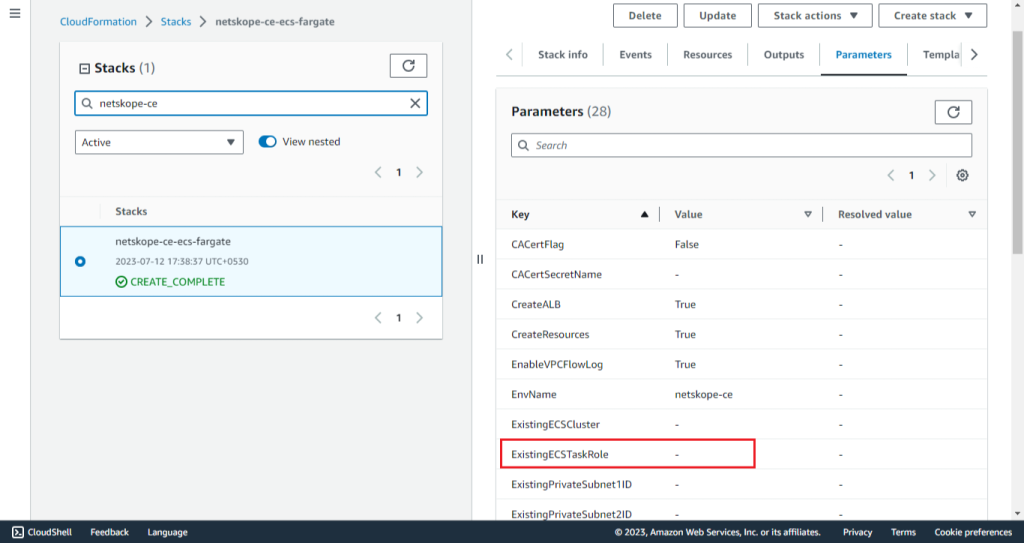
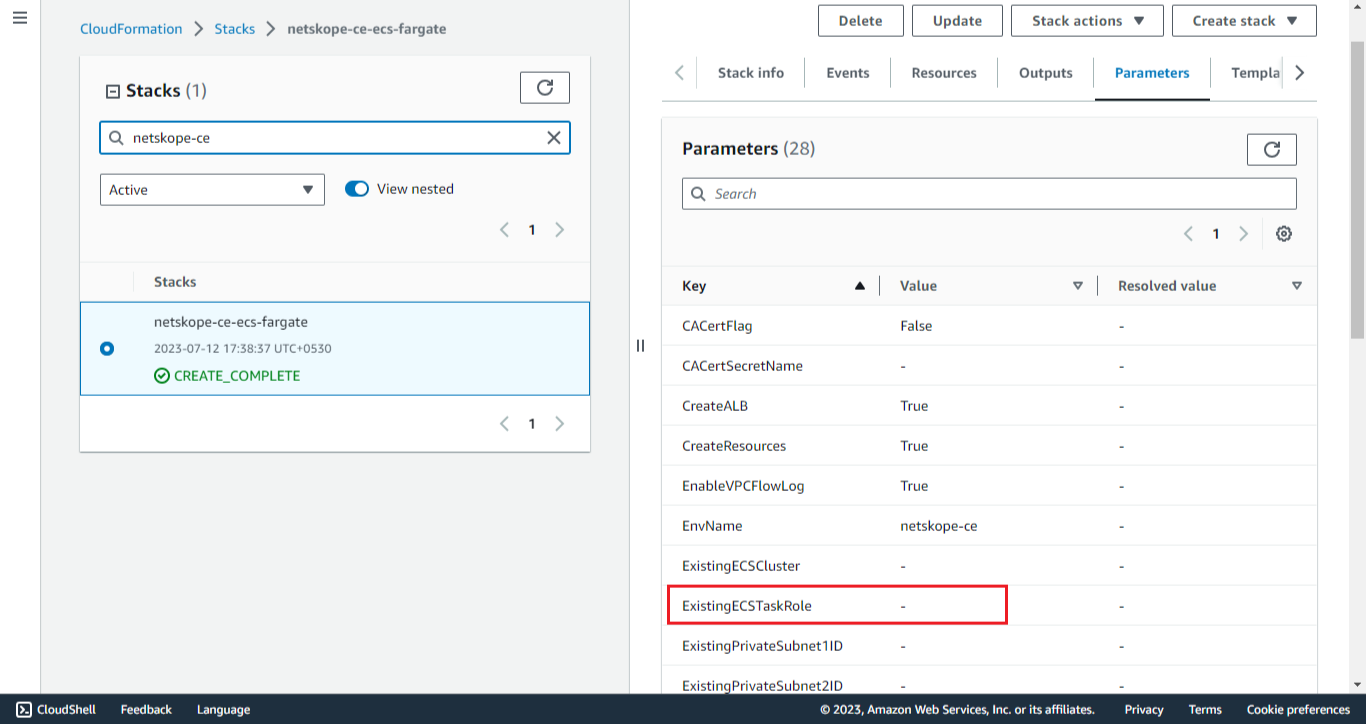
Open your CFN script.
-
Get the ExistingECSTaskRole parameter value if present.
-
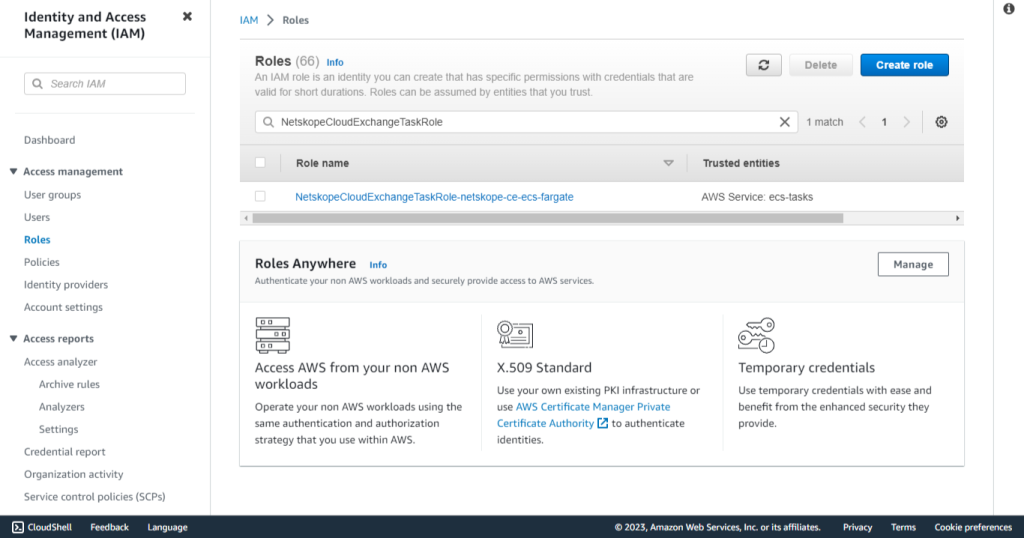
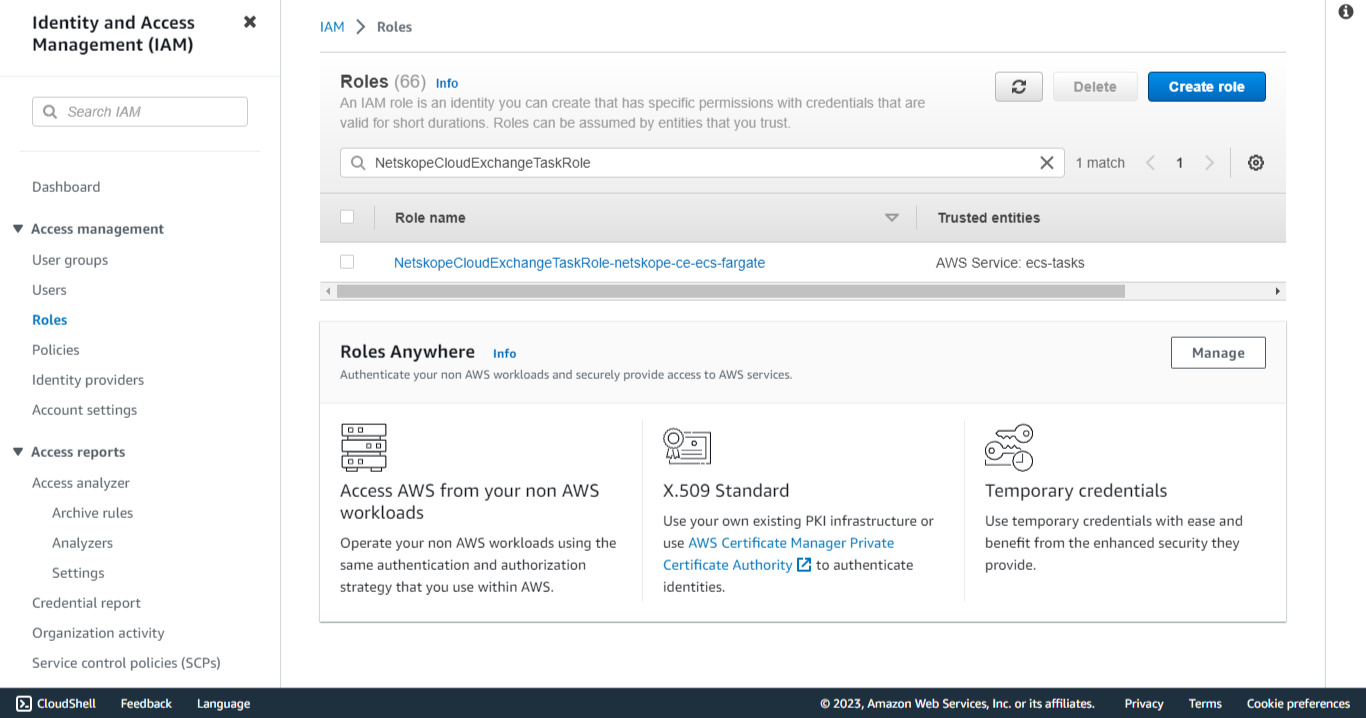
Go to IAM > Roles.
-
Search for the ExistingECSTaskRole parameter value, or else search for NetskopeCloudExchangeTaskRole-<CFN name> and select the role.
-
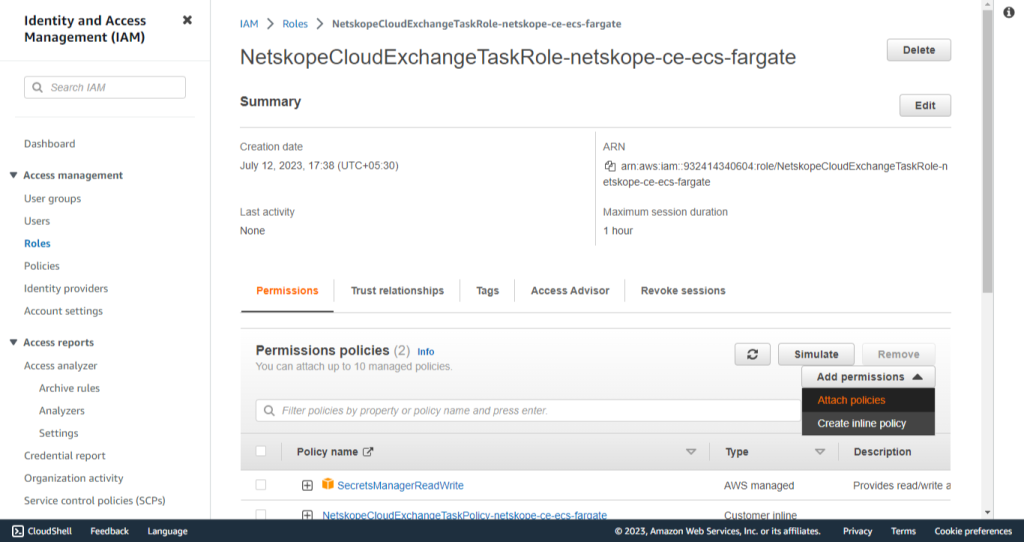
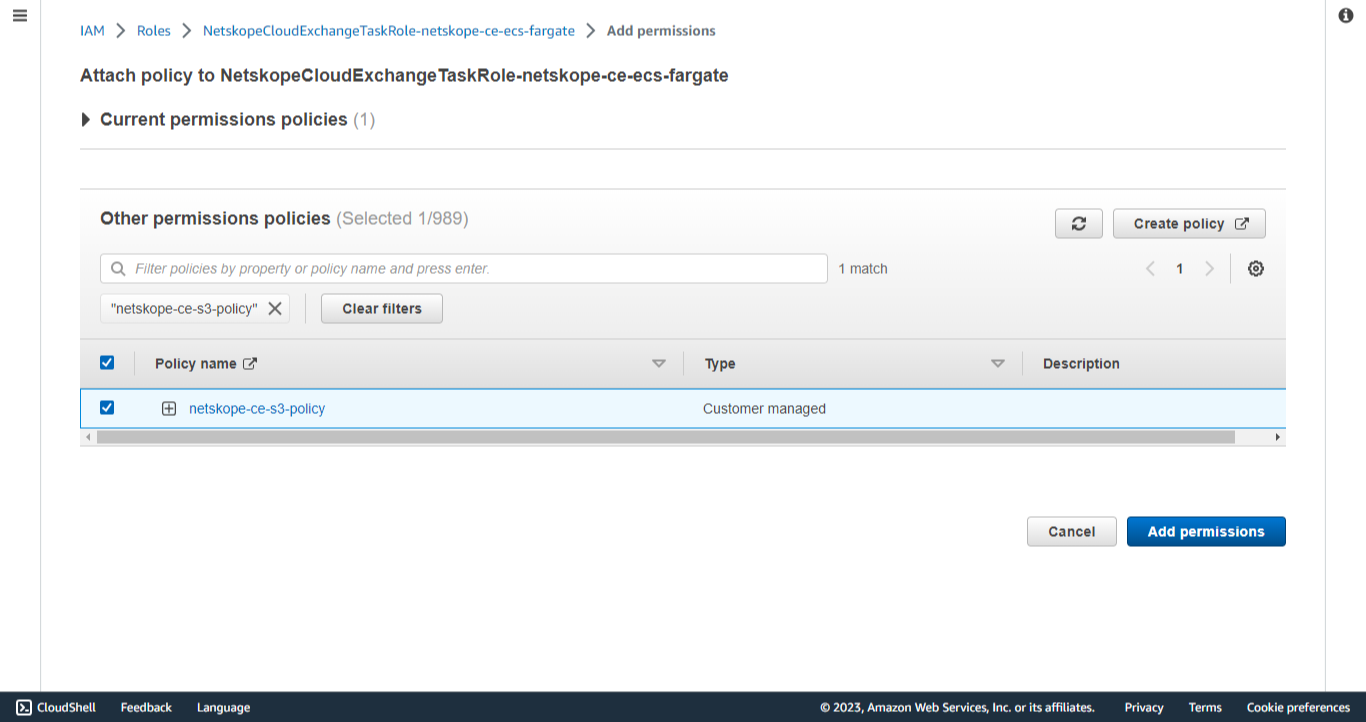
Attach the Policy created previously to this role:
-
Click Add permission and attach policies.
-
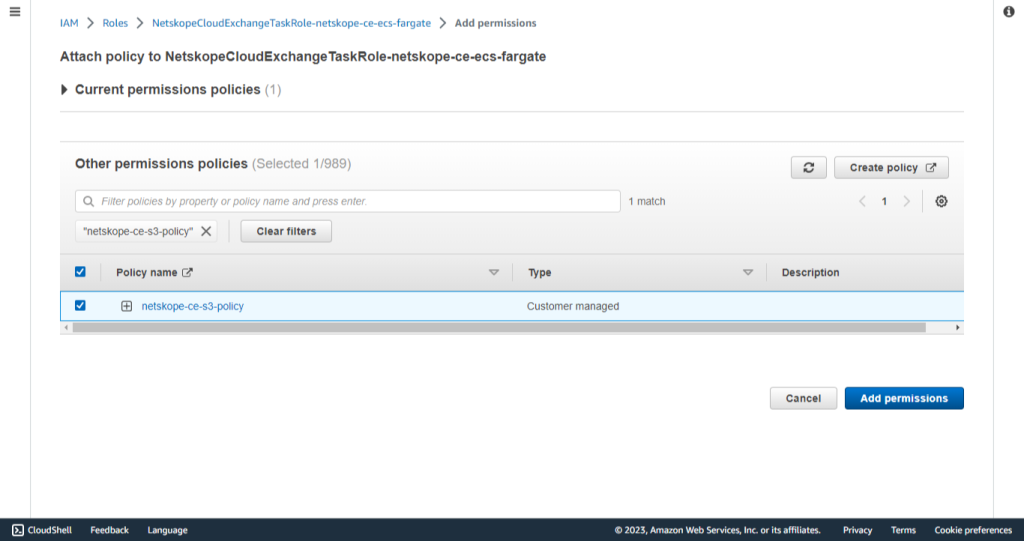
Search and select the policy created previously (netskope-ce-s3-policy).
-
Click Add permissions.
-
Assign role to K8s Instance
- Open your Role created for ServiceAccount while creating K8s instance.
- Attach Policy created in Create Policy
Configure the AWS S3 EDM Plugin
-
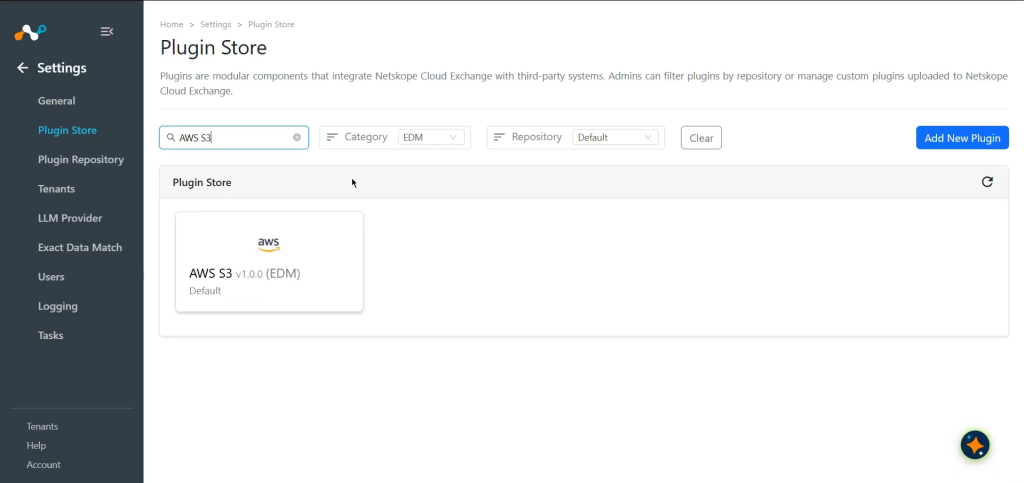
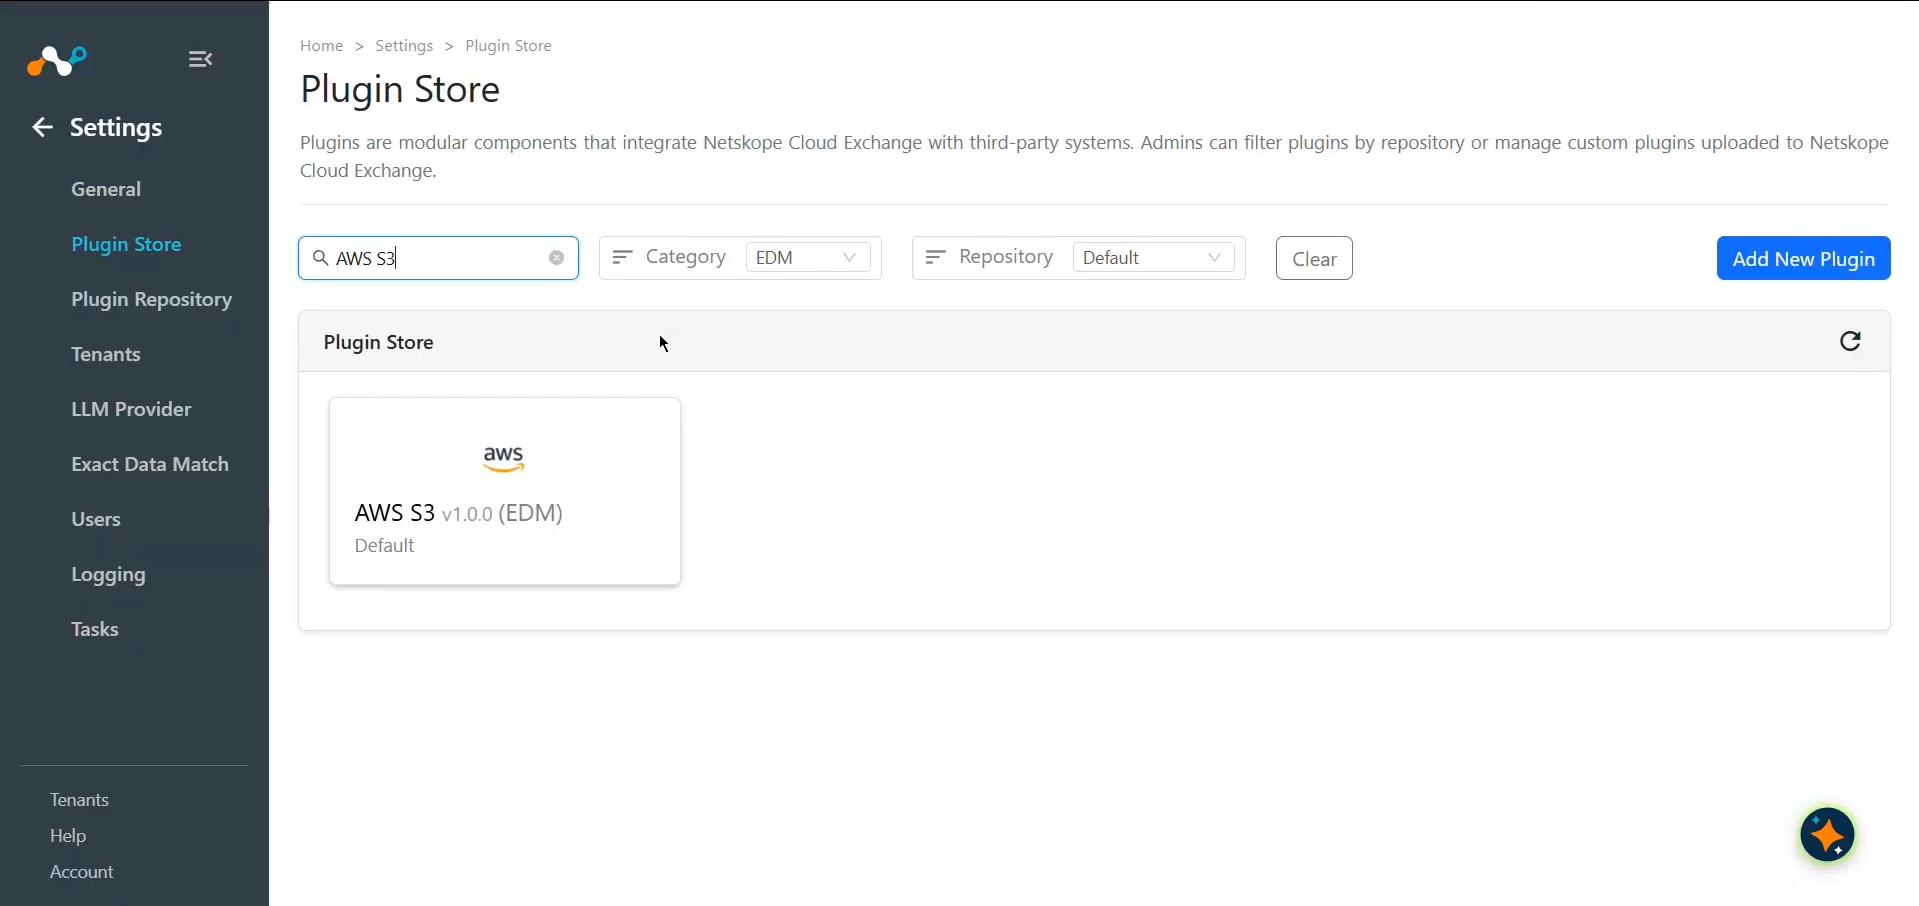
In Cloud Exchange, go to Settings > Plugin Store.
-
Search for and select the AWS S3 EDM v1.0.0 plugin.
-
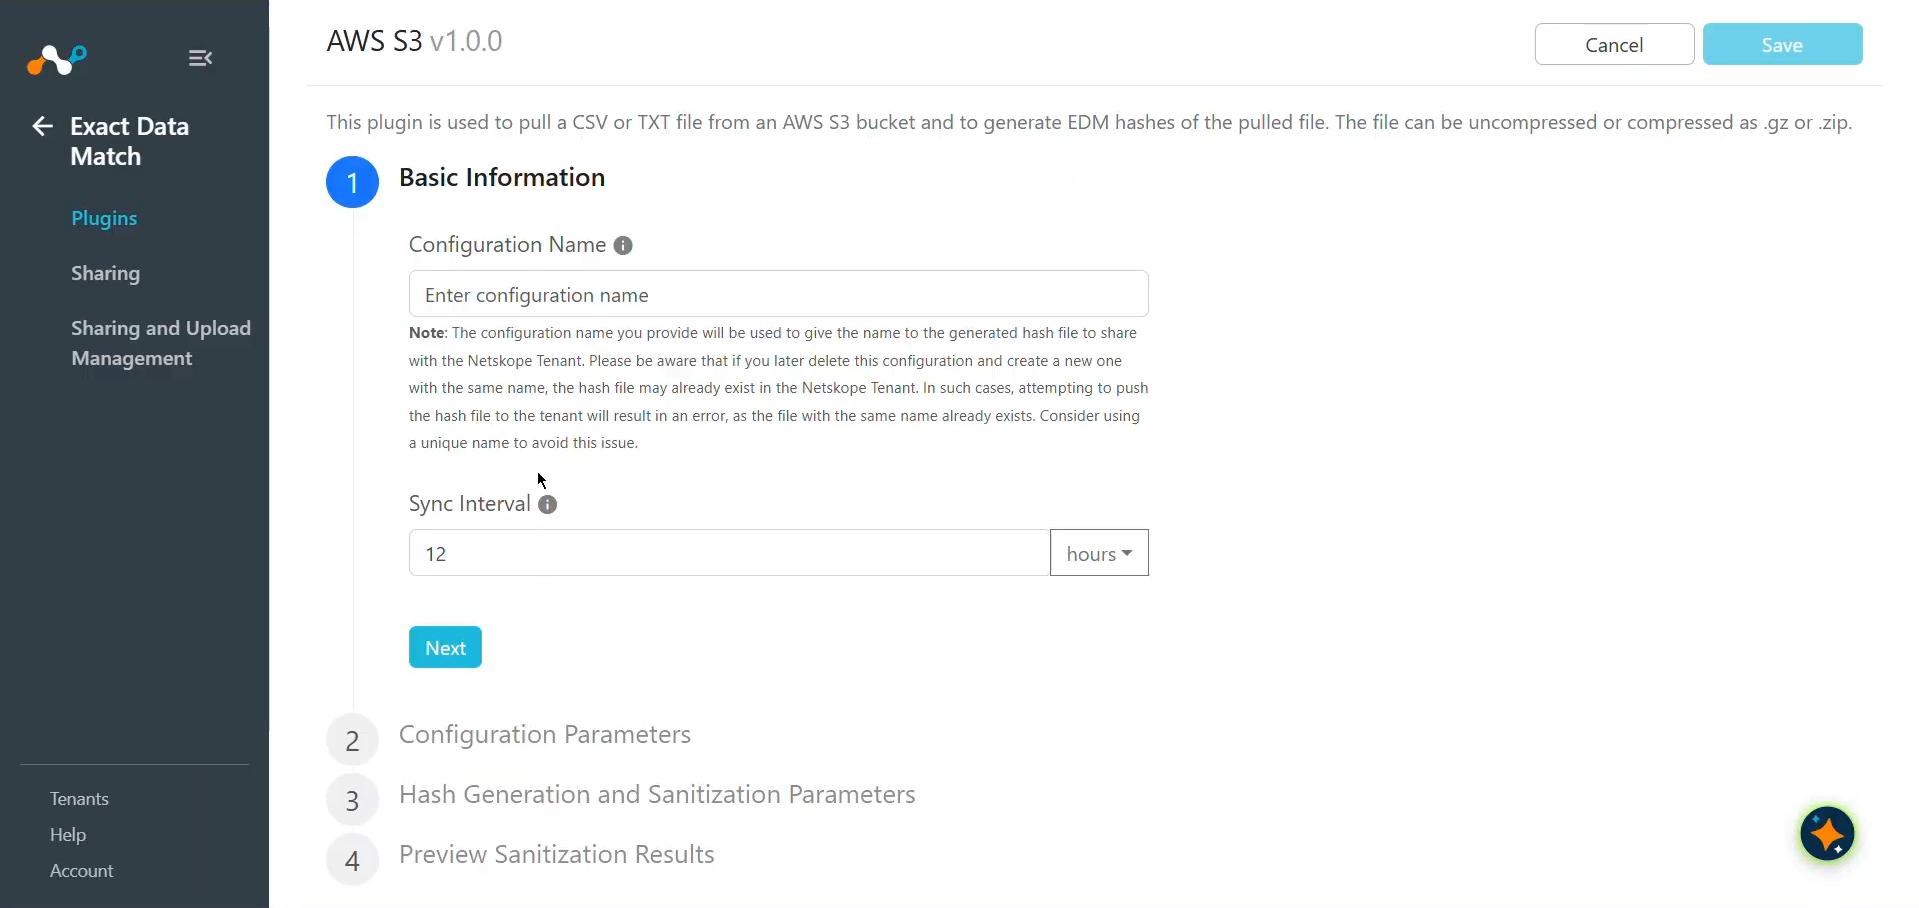
Enter the Basic Information:
- Configuration Name: Enter a name appropriate for your integration.
- Sync Interval: Adjust Sync Interval as per your requirement. (Default: 12 hours).
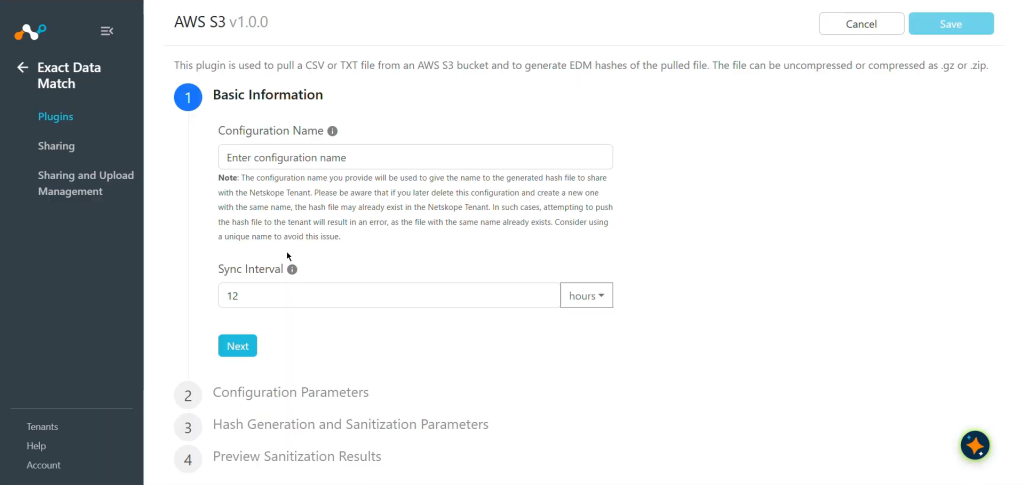 The configuration name you provide will be used to give the name to the generated hash file to share with the Netskope Tenant. Please be aware that if you later delete this configuration and create a new one with the same name, the hash file may already exist in the Netskope Tenant. In such cases, attempting to push the hash file to the tenant will result in an error, as the file with the same name already exists. Consider using a unique name to avoid this issue.
-
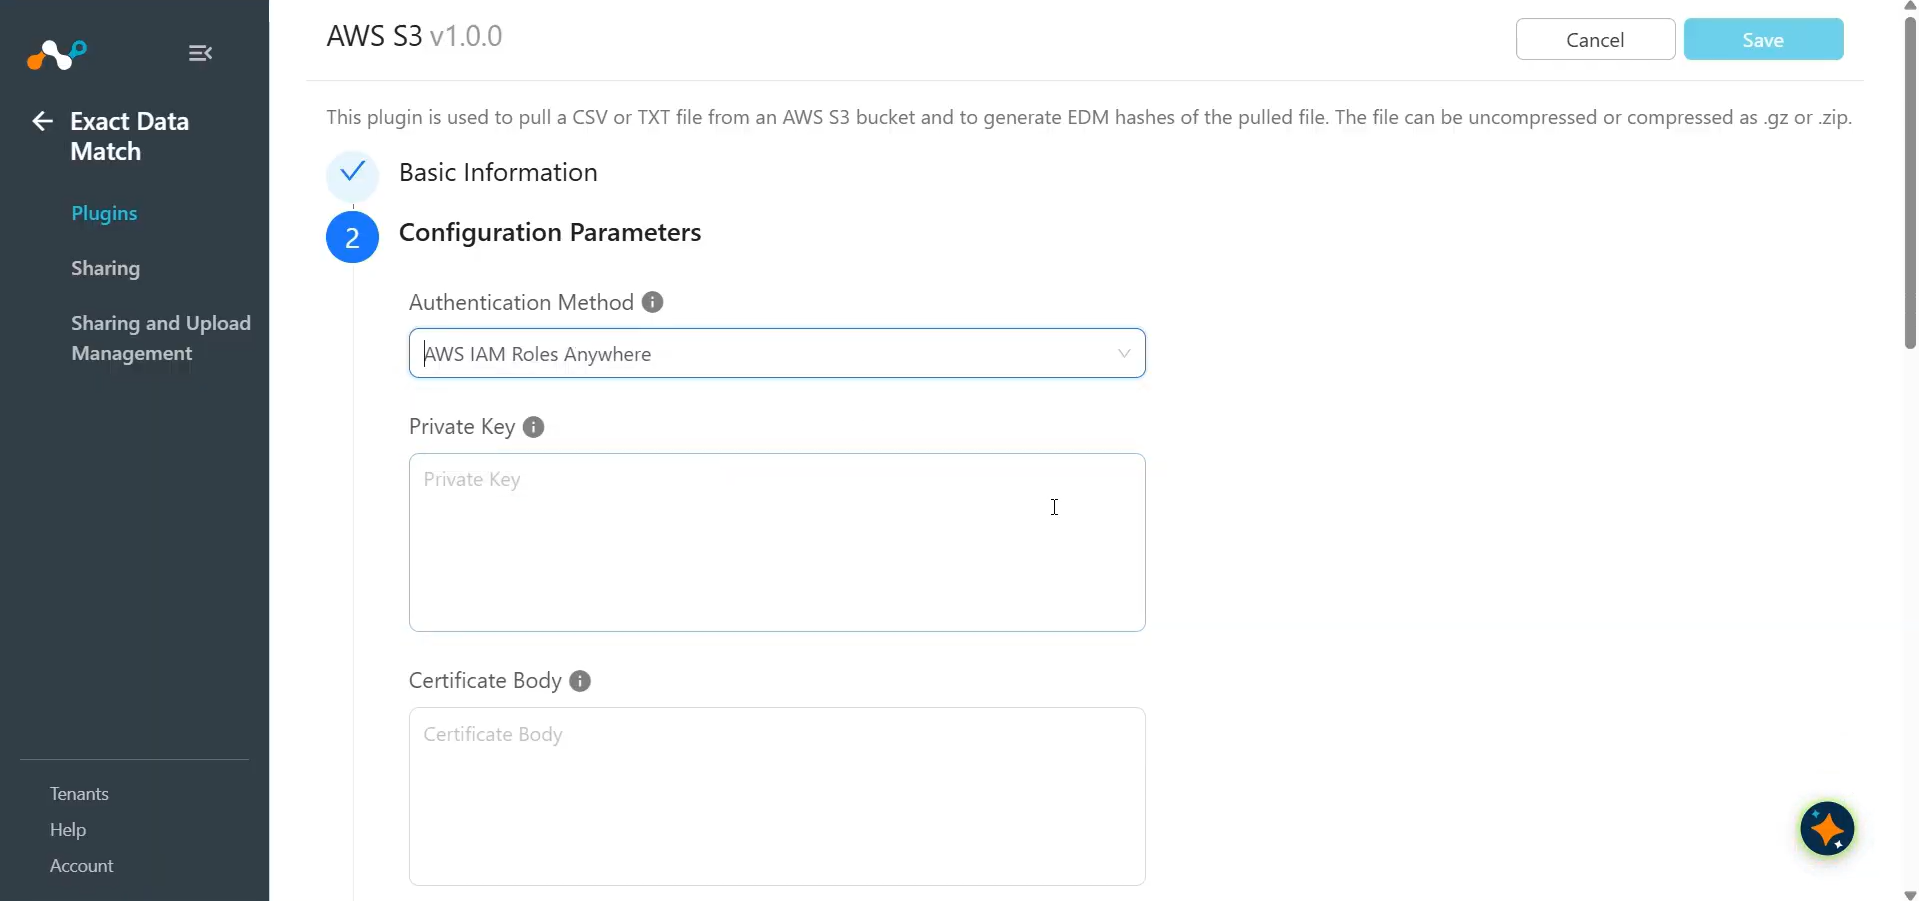
Click Next and enter the Configuration Parameters:
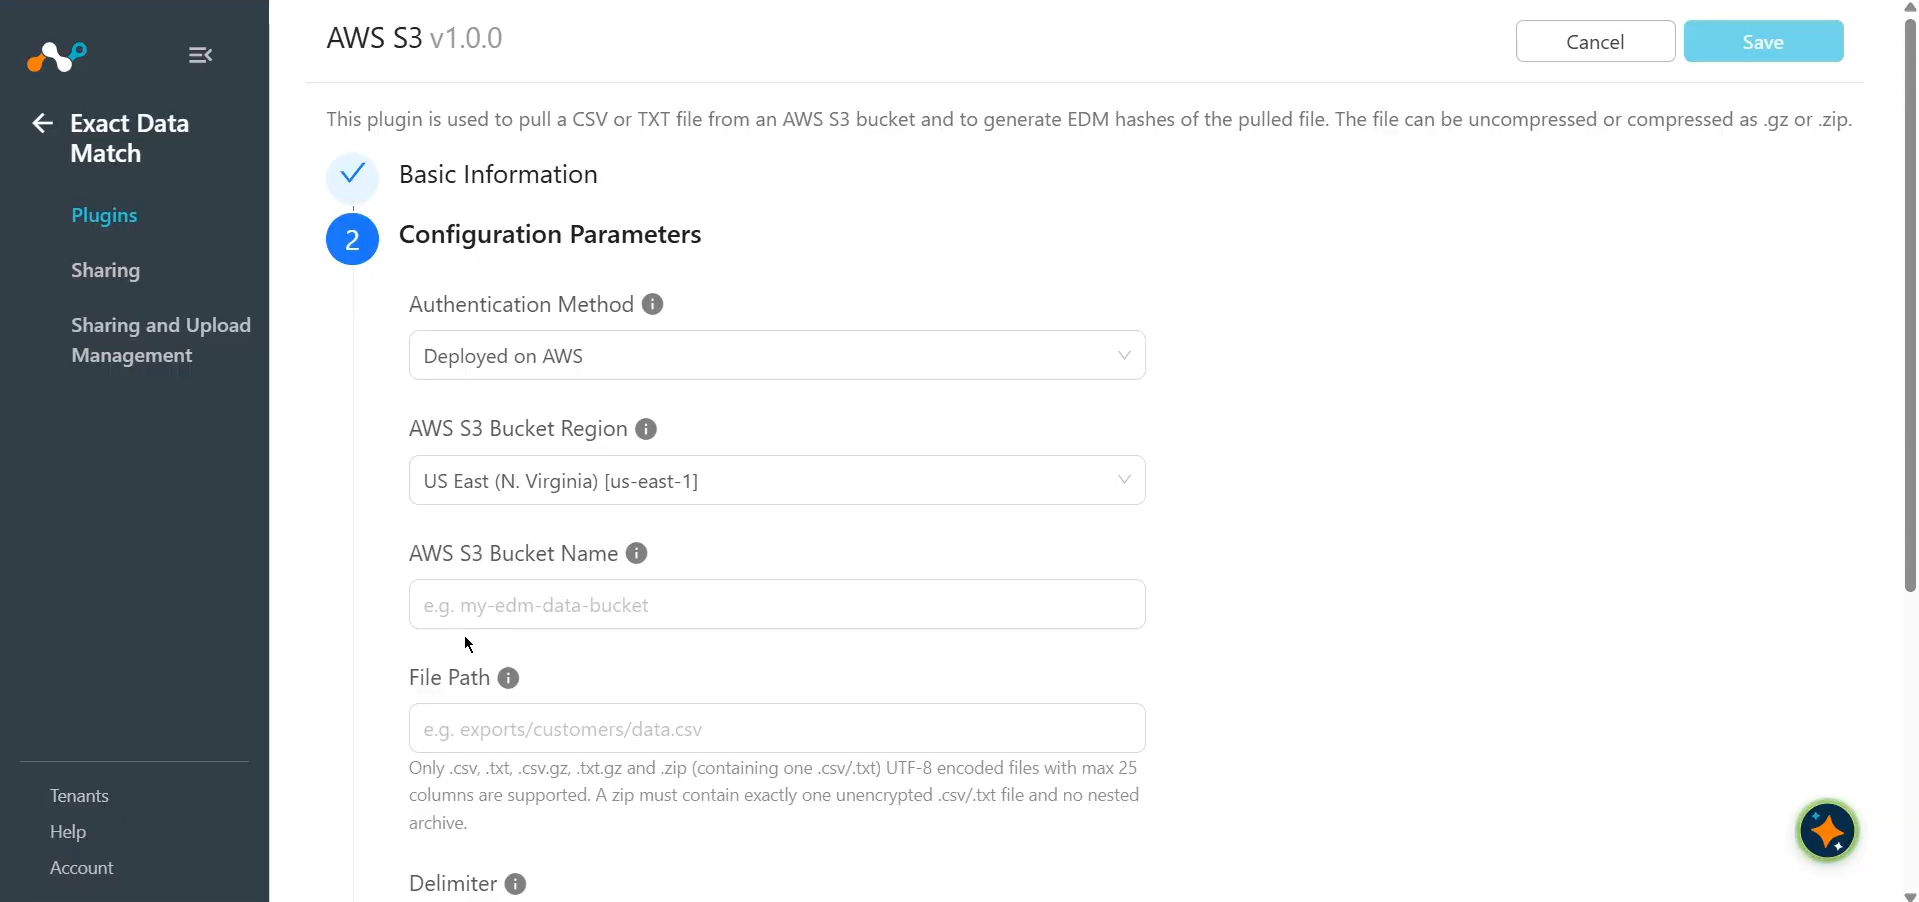
- Authentication Method: Select the method to be used for AWS client authentication.
- Private Key: PEM-encoded private key used to decrypt the AWS Private CA Certificate. Required for AWS IAM Roles Anywhere authentication.
- Certificate Body: PEM-encoded X.509 certificate body issued by your AWS Private or Public CA. Required for AWS IAM Roles Anywhere authentication.
- Password Phrase: Passphrase used to decrypt the Private Key if it is encrypted. Required for AWS IAM Roles Anywhere authentication only if the Private Key is encrypted.
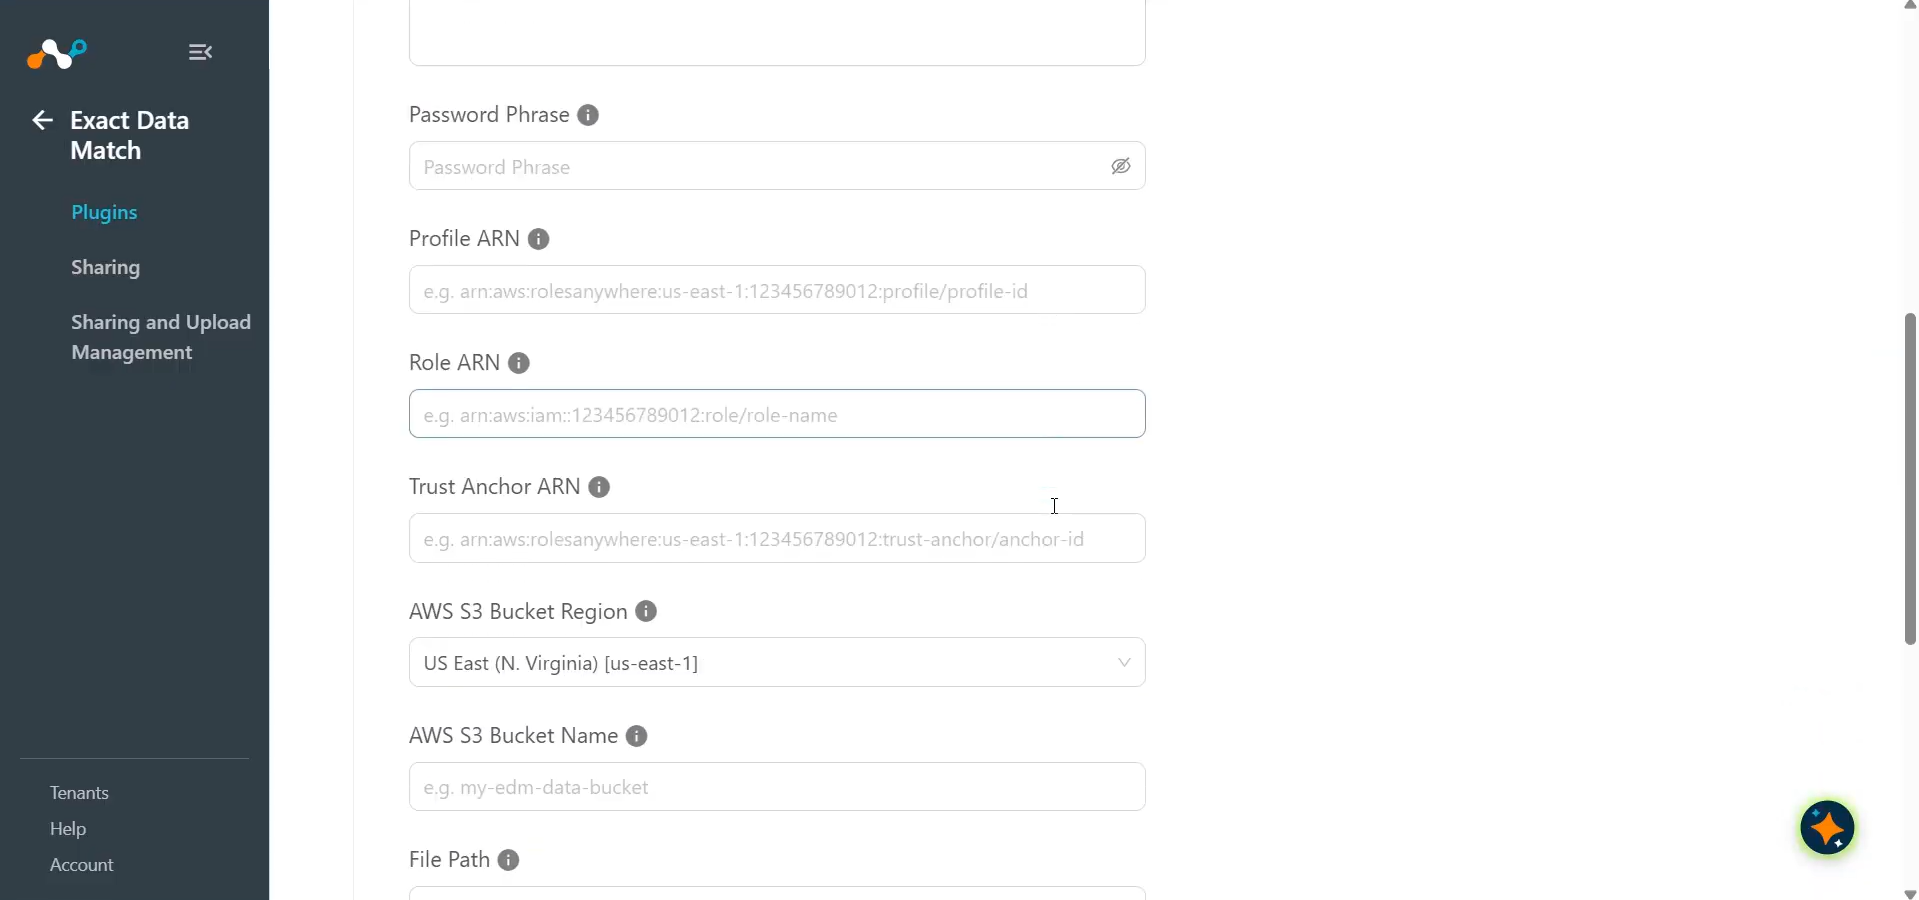
- Profile ARN: AWS Profile ARN for AWS client authentication. Required for AWS IAM Roles Anywhere authentication type.
- Role ARN: AWS Role ARN for AWS client authentication. Required for AWS IAM Roles Anywhere authentication type.
- Trust Anchor ARN: AWS Trust Anchor ARN for AWS client authentication. Required for AWS IAM Roles Anywhere authentication type.
- AWS S3 Bucket Region: AWS region where the S3 bucket resides. Make sure the region matches the region in the Profile ARN and Trust Anchor ARN when using IAM Roles Anywhere. Select Custom Region to enter a region that is not in the list.
- AWS Custom Region: Any valid AWS region code of the bucket, for a region that is not in the AWS S3 Bucket Region list. IAM Roles Anywhere supports the aws, aws-cn and aws-us-gov partitions only (not ISO or eusc- regions).
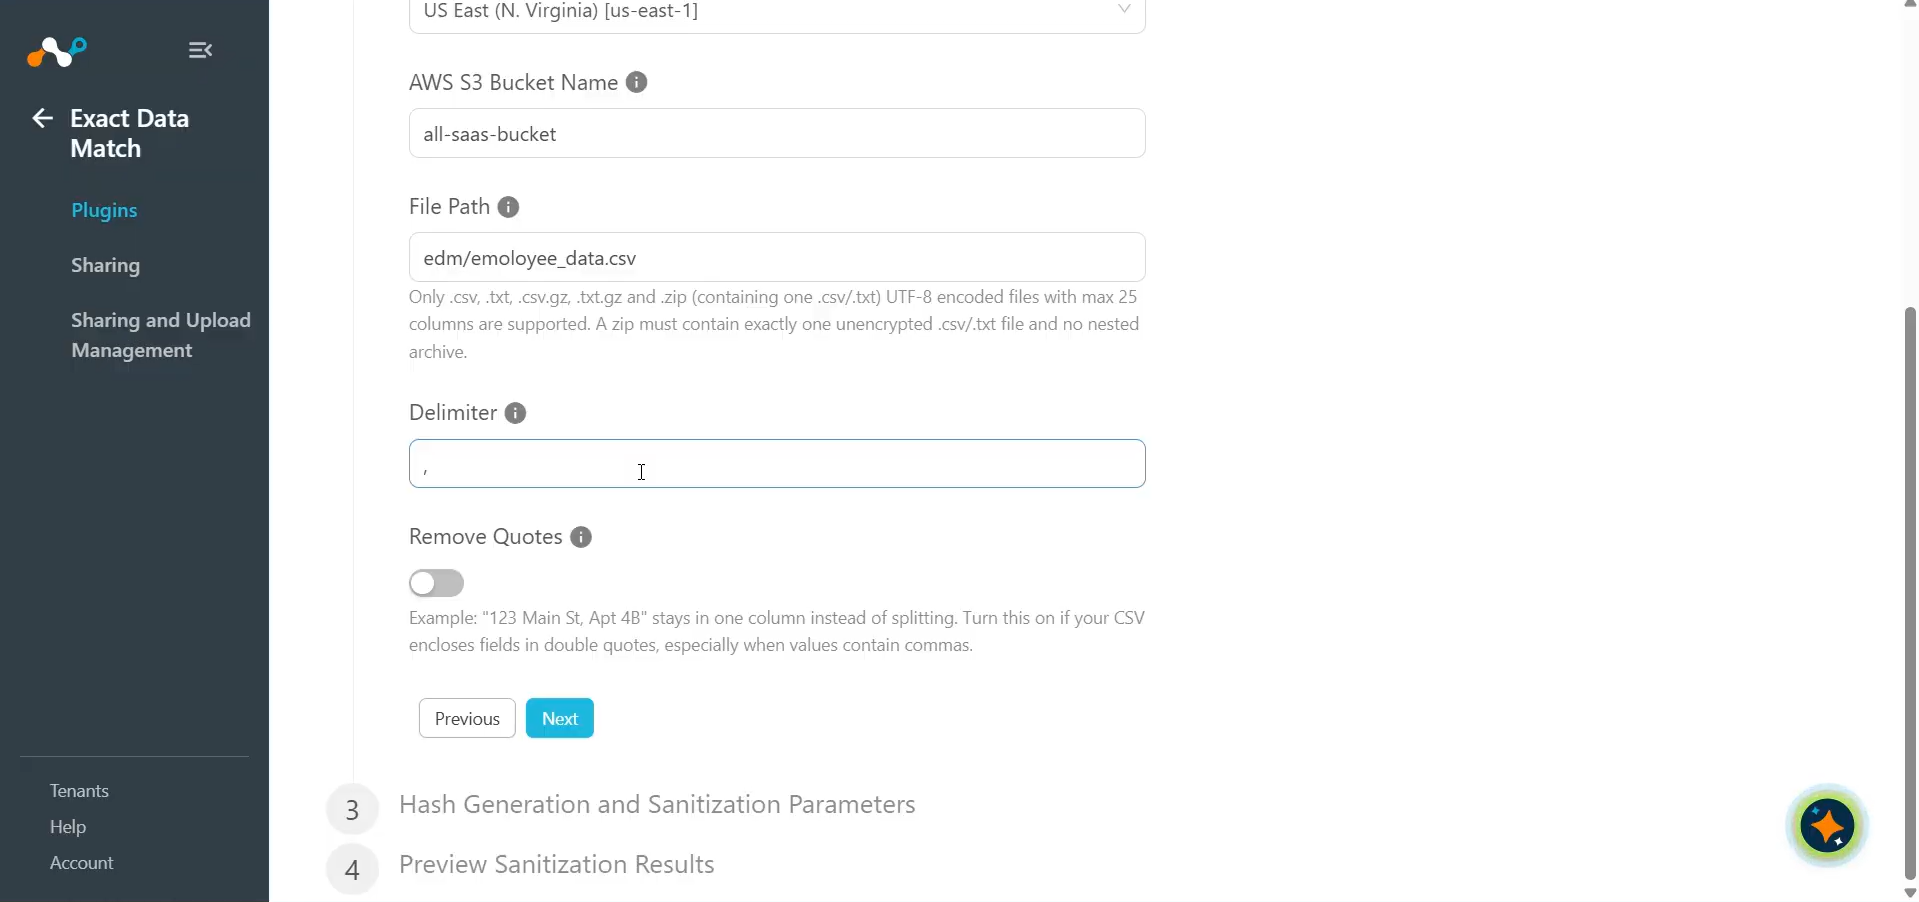
- AWS S3 Bucket Name: Name of the AWS S3 bucket that contains the file to be pulled. Example: my-edm-data-bucket.
- File Path: File path (path of the file inside the bucket) to be pulled. Do not include the bucket name or the s3:// prefix.
- Delimiter: Single character delimiter used in the CSV/TXT file (like comma, pipe, semicolon).
- Remove Quotes: Enable this if your CSV encloses fields in double quotes, especially when values contain commas. Quoted fields will be parsed as single columns. Improper quote placement may cause rows to be skipped.
By default, quotes are treated as literal text. Enable Remove Quotes toggle if your CSV uses double quotes to encapsulate fields that contain commas (e.g., “123 ABC Street, Suite 100”). This ensures the field is treated as a single column. Note that this mode requires strict CSV formatting. If a field starts with a quote, any character, including a space, following the closing quote but preceding the comma (e.g., “Word”,) will cause the row to be skipped.For the AWS IAM Roles Anywhere Authentication Method
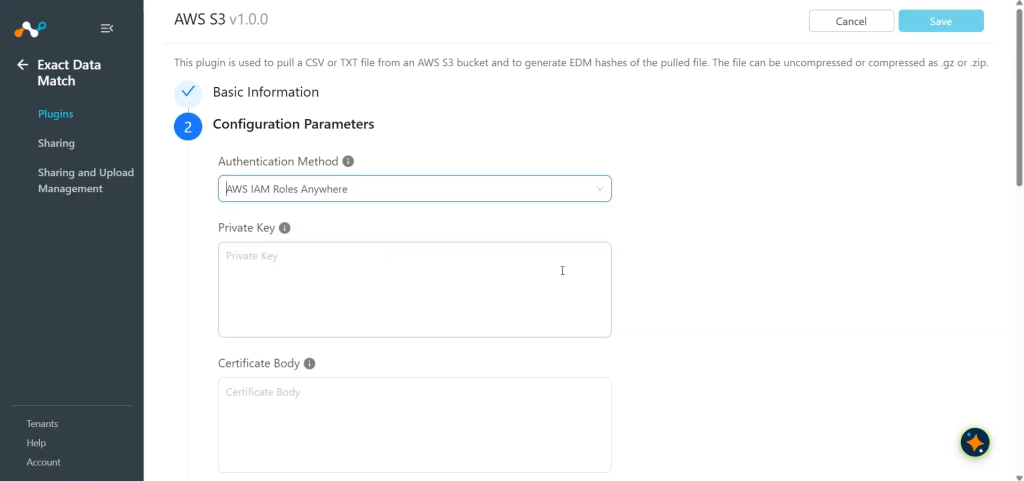
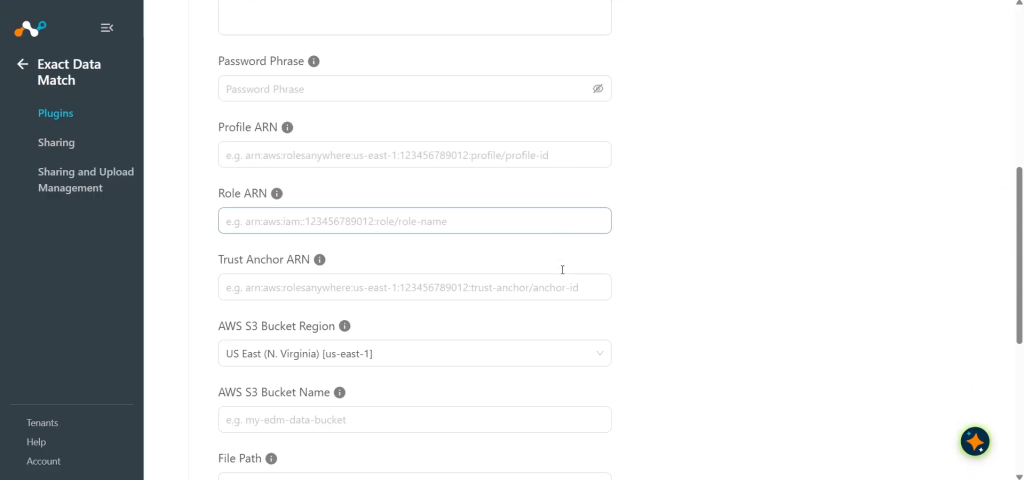
For the Deployed on AWS Authentication Method
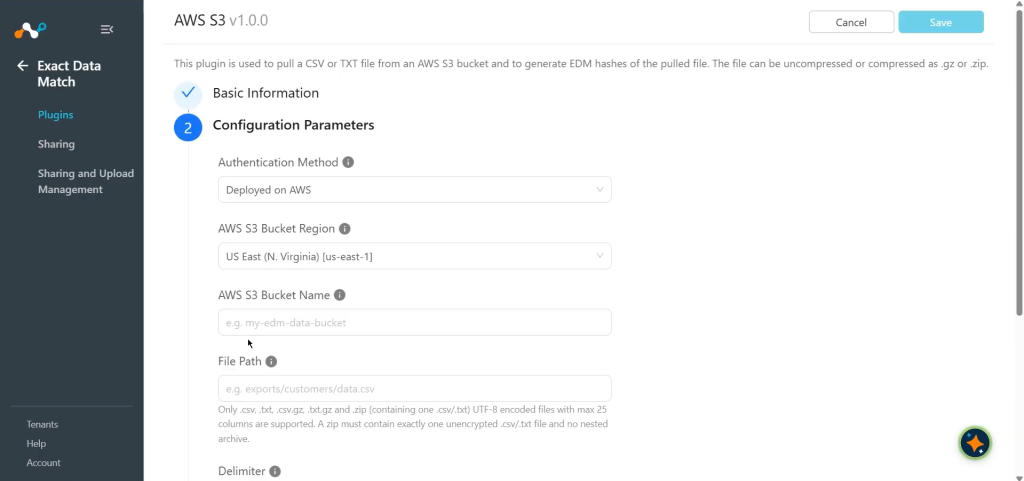
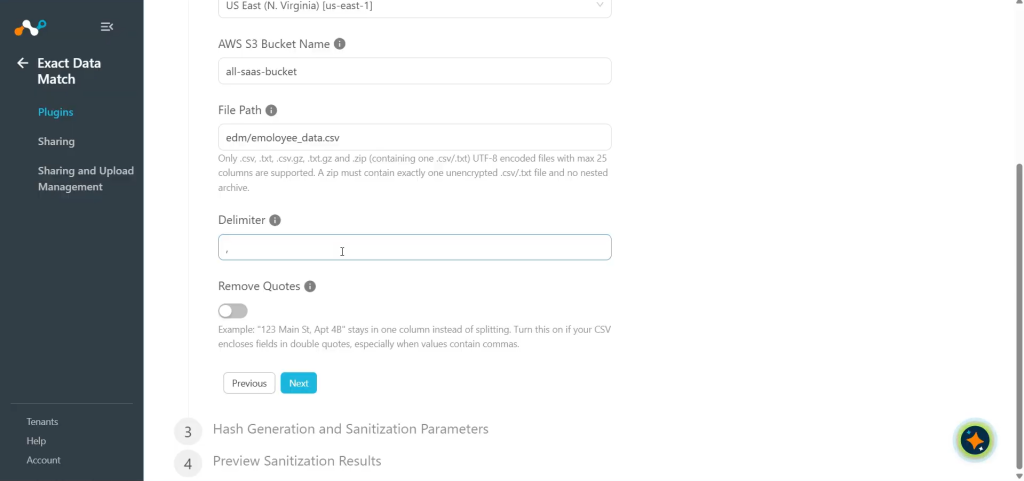 Compressed ZIP or GZ files must contain only one file. If a ZIP or GZ file contains multiple CSV files, an error will occur, and the plugin will not be saved.
-
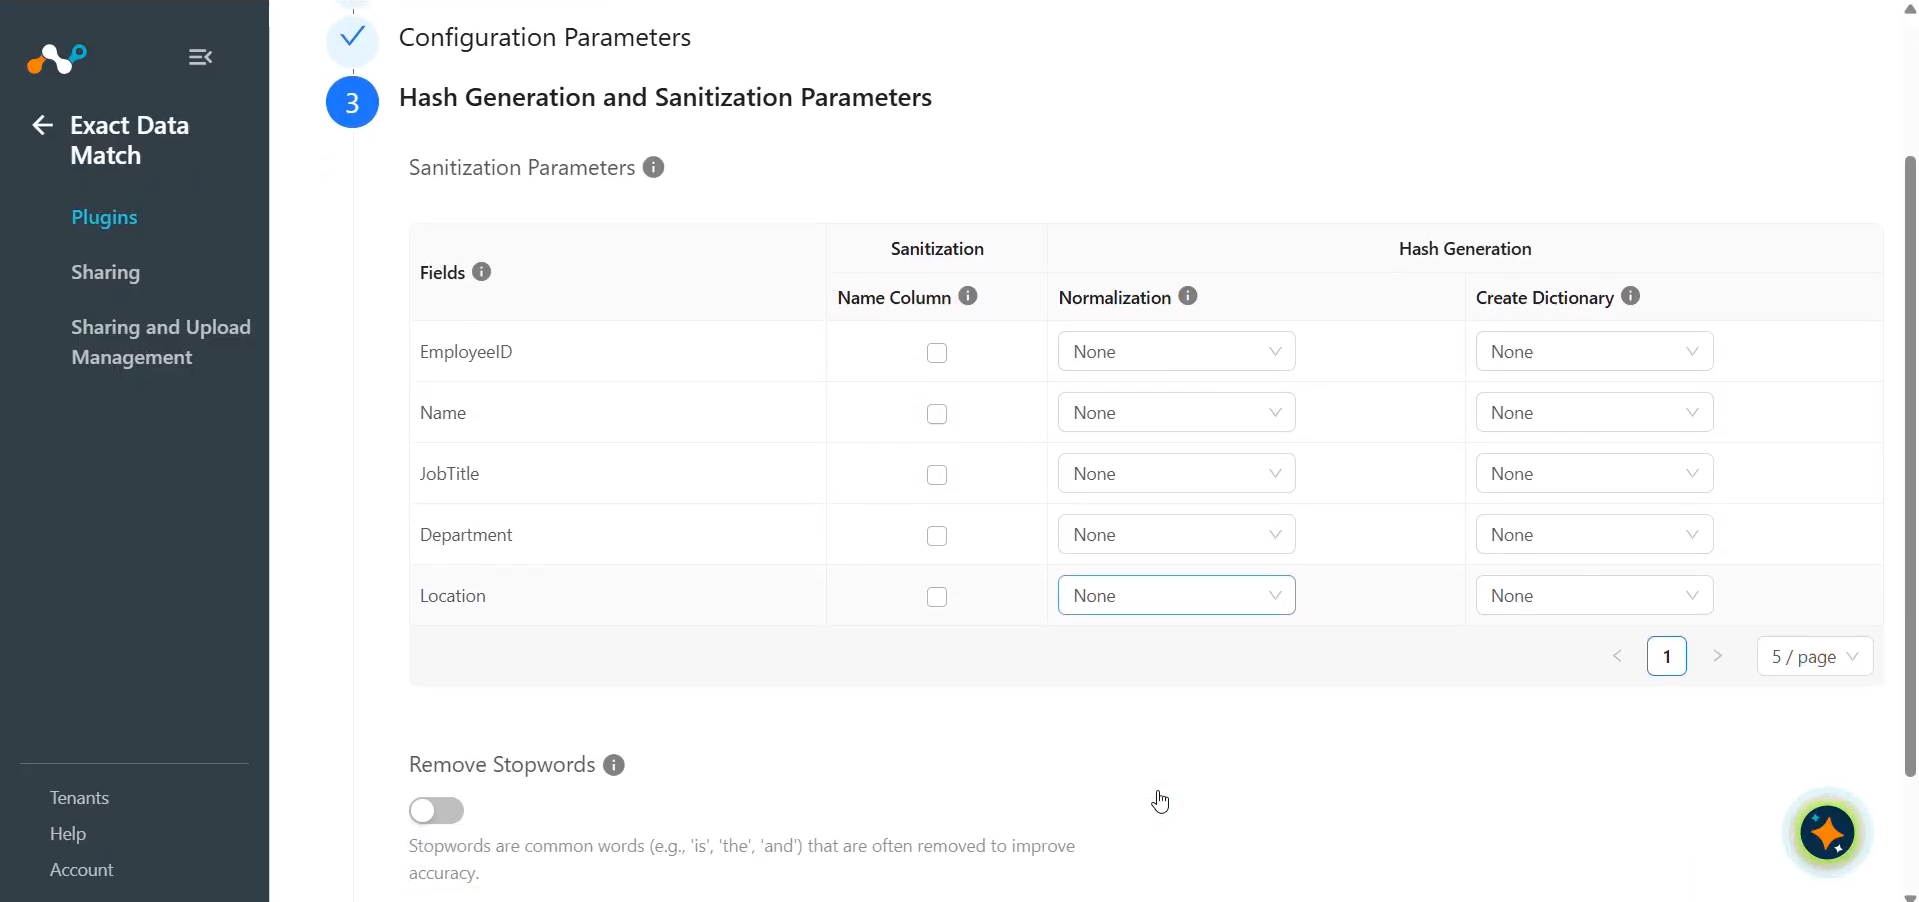
Click Next and enter the Hash Generation and Sanitization Parameters:
- Select the appropriate options for sanitization and hash generation operations:
- Sanitization (Name Column): Sanitize the content by checking the Name Column checkbox. (Default: Unchecked). The Sanitization Process performs the following actions:
- One character: The cell will be marked as invalid if it contains only one character.
- Digits: Cells containing digits will be marked as invalid.
- Stopwords: Cells that match a stopword from the list will be marked as invalid (This works only if the
Remove stopwordscheckbox is checked). - Non-alphanumeric characters: Remove all special characters to validate the cell.
- Hash Generation is divided into two parts:
- Normalization: Select the value from dropdown to normalize the data value. (Default: None)
- Create Dictionary: Select value from dropdown to create dictionary of unique values for selected field that can be used in DLP rule in netskope tenant. (Default: None)
- Sanitization (Name Column): Sanitize the content by checking the Name Column checkbox. (Default: Unchecked). The Sanitization Process performs the following actions:
- Remove Stopwords: Mark as checked if you want to remove certain stopwords as part of the sanitization process.(Default:Unchecked) Ensure that Name Column is checked for the applicable field to reflect the changes.
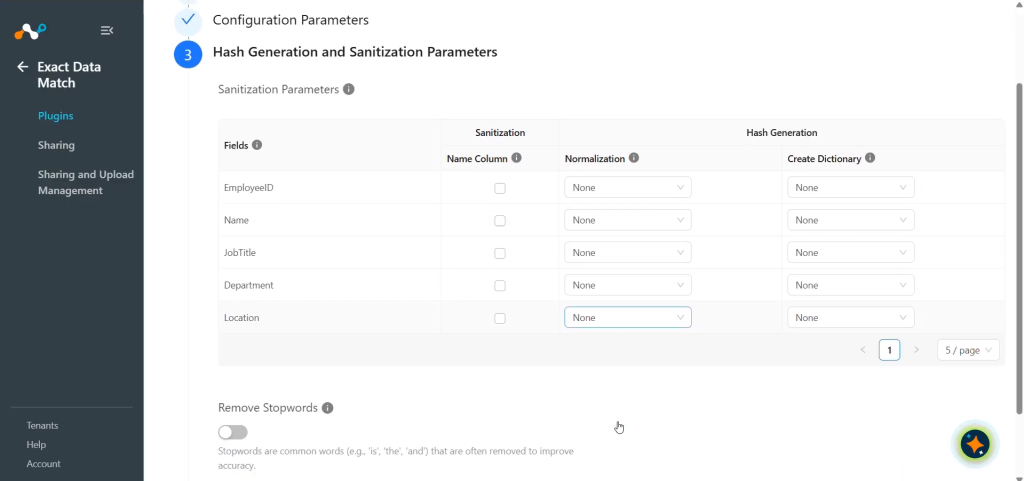
- User Normalization parameter to normalize the fetched results. For example, a number such as 123-45-6789 or 123 45 6789 will be treated as 123456789. Number normalizations ignore characters such as dots, dashes and spaces. A string normalization ignores the case sensitivity of the letters.
- Use the Create Dictionary option only when necessary, as this operation is resource-intensive and may impact system performance. Choose this option thoughtfully for optimal efficiency.
- Select the appropriate options for sanitization and hash generation operations:
-
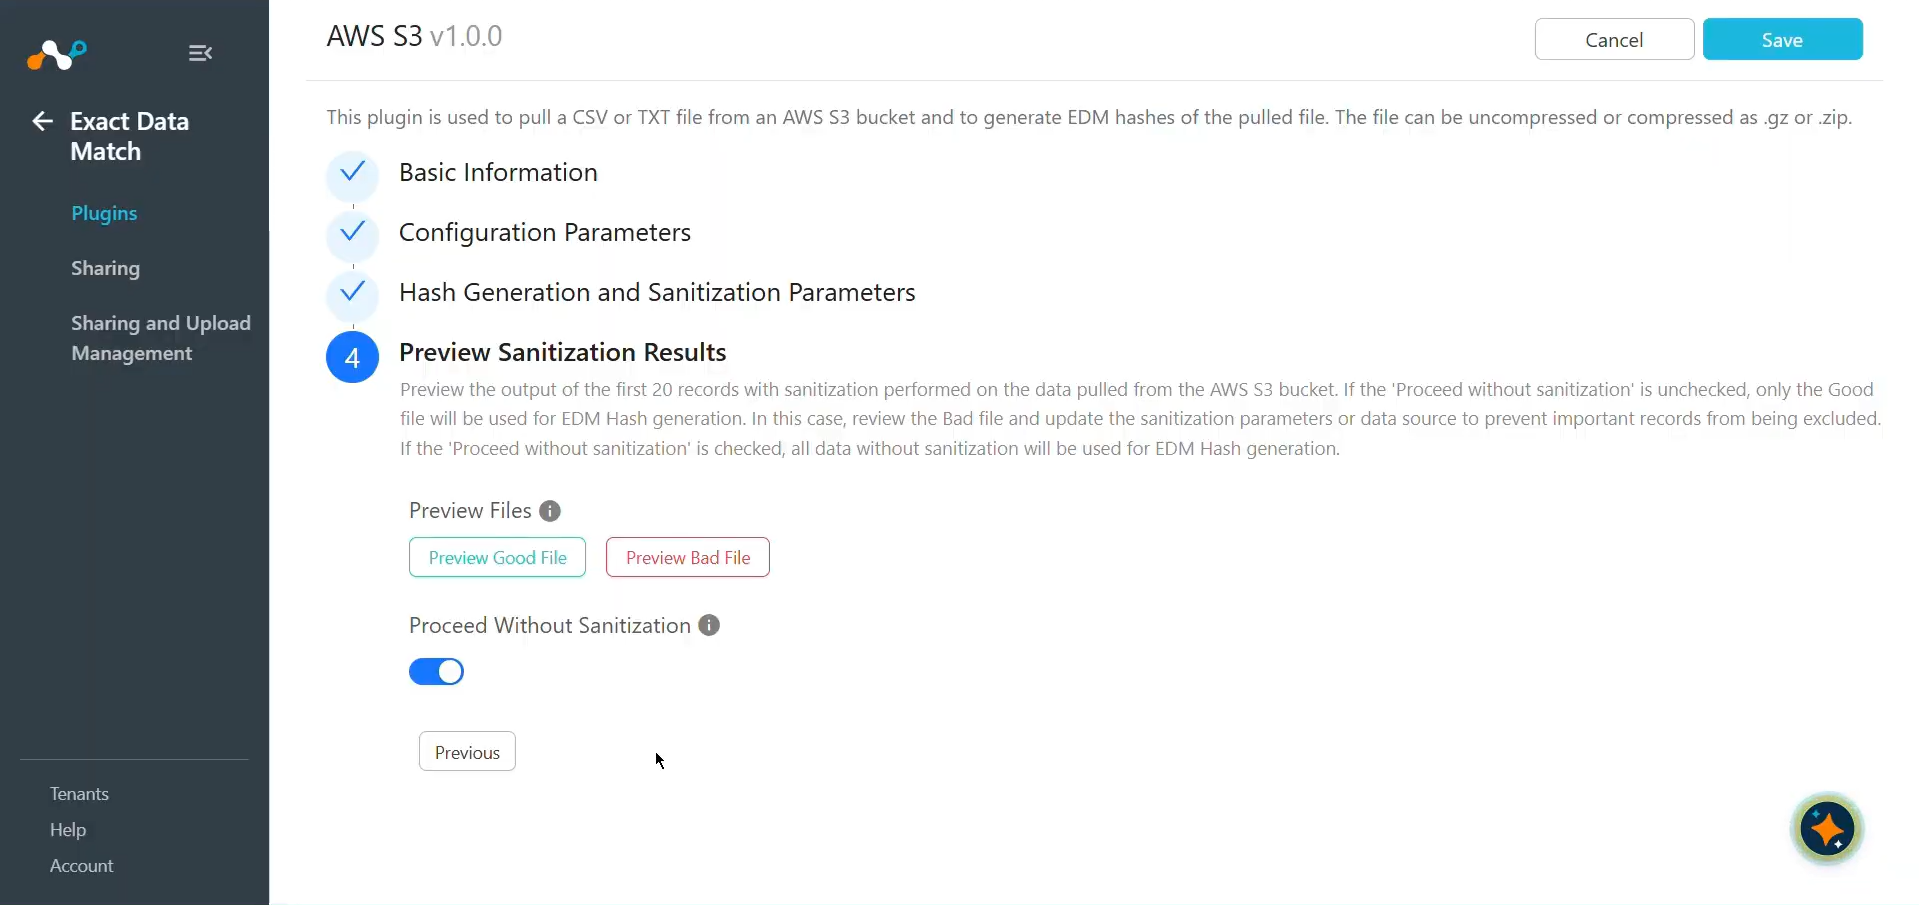
Click Next. Preview the sanitization sample output by clicking Preview Good File or Preview Bad File.
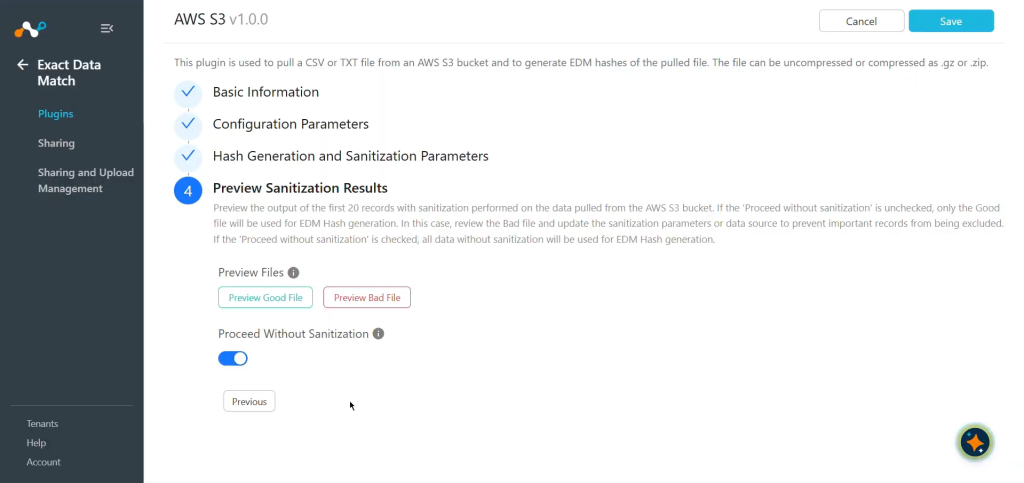 If you are using the plugin with sanitization ON, then the performance may be differ due to extra processing.
-
Proceed without sanitization: Uncheck this option to proceed with sanitization. (Default: Checked)
All the data will be under consideration for hash generation if this option is Unchecked; otherwise, only the Good File content will be part of the hash generation. -
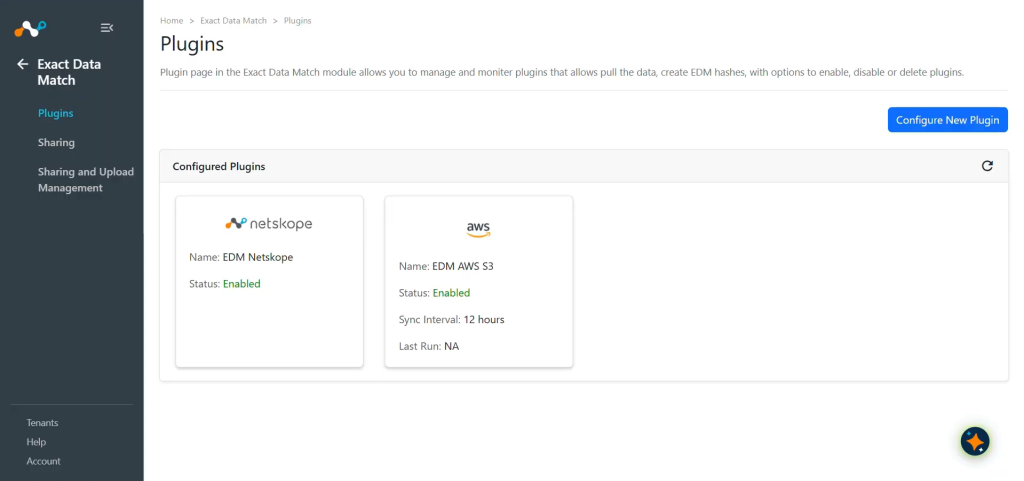
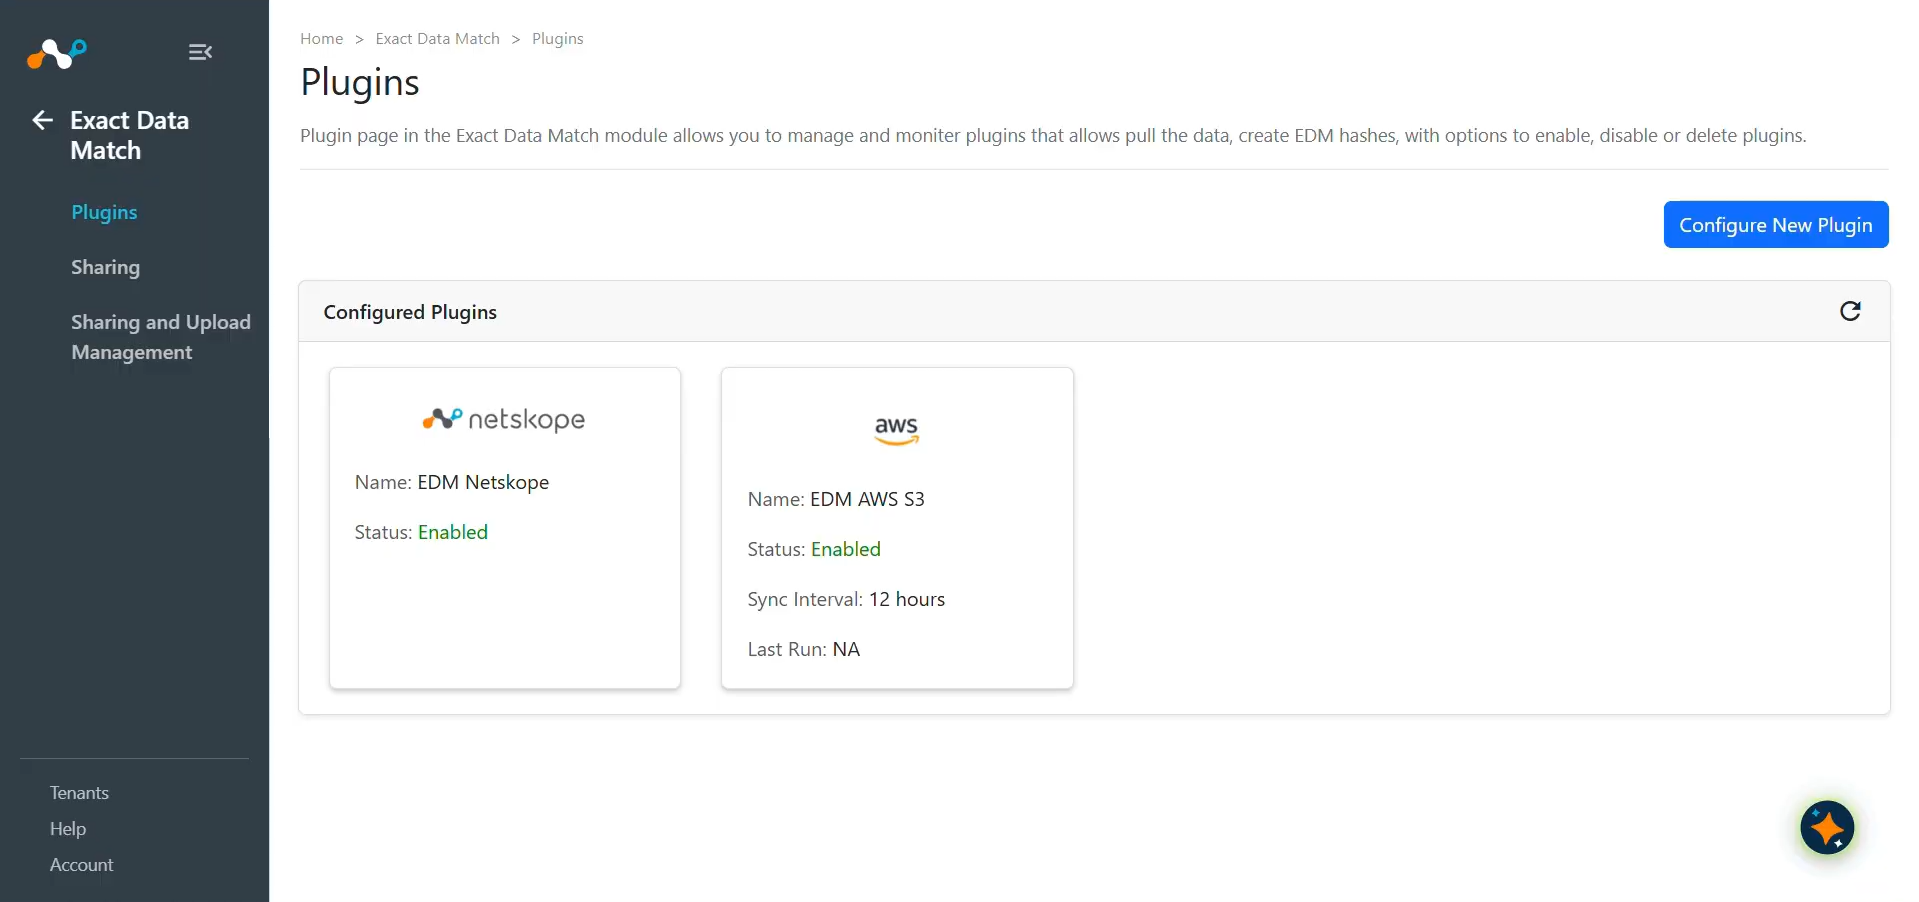
Click Save. You will be redirected to Exact Data Match > Plugins page where you can see your configured plugin.
Configure EDM Sharing for AWS S3
A sharing configuration is used to share the generated EDM hashes with the destination platform. To share EDM hashes with your Netskope Tenant, create a sharing configuration using these steps:
-
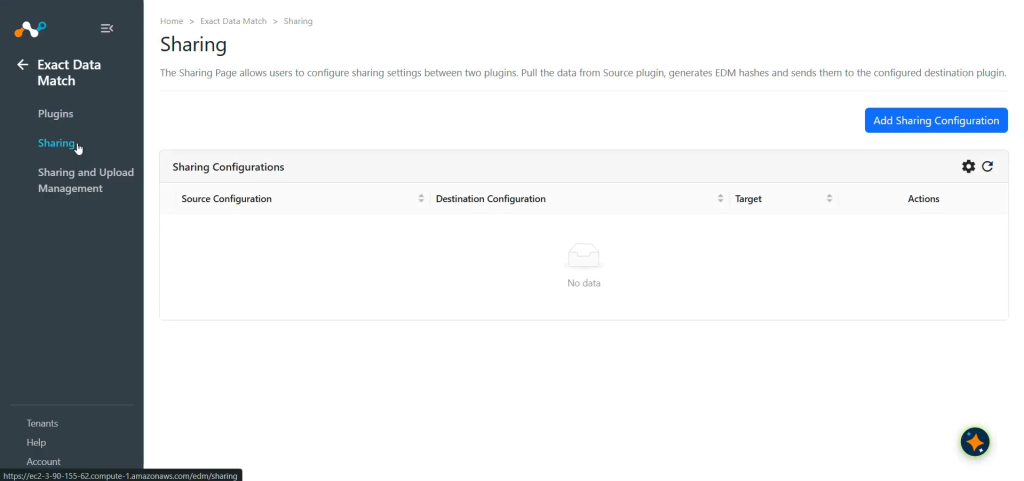
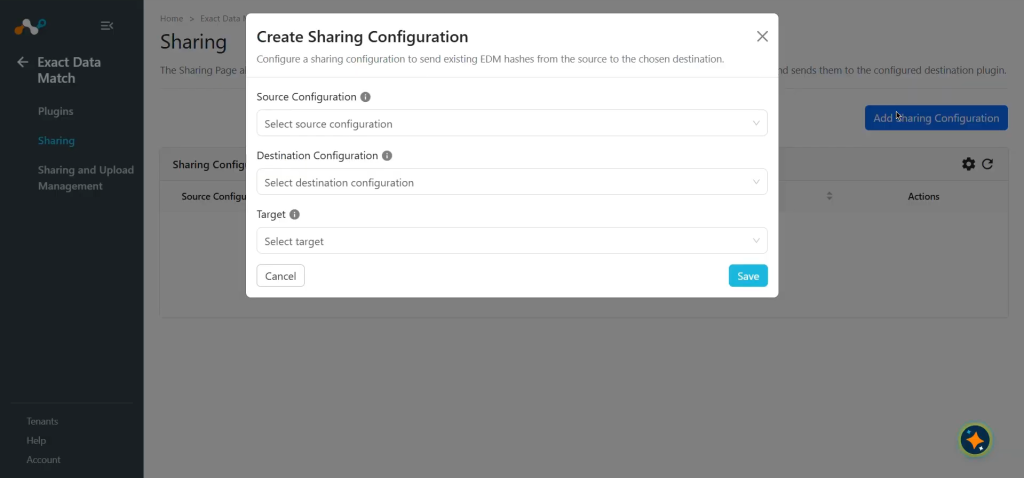
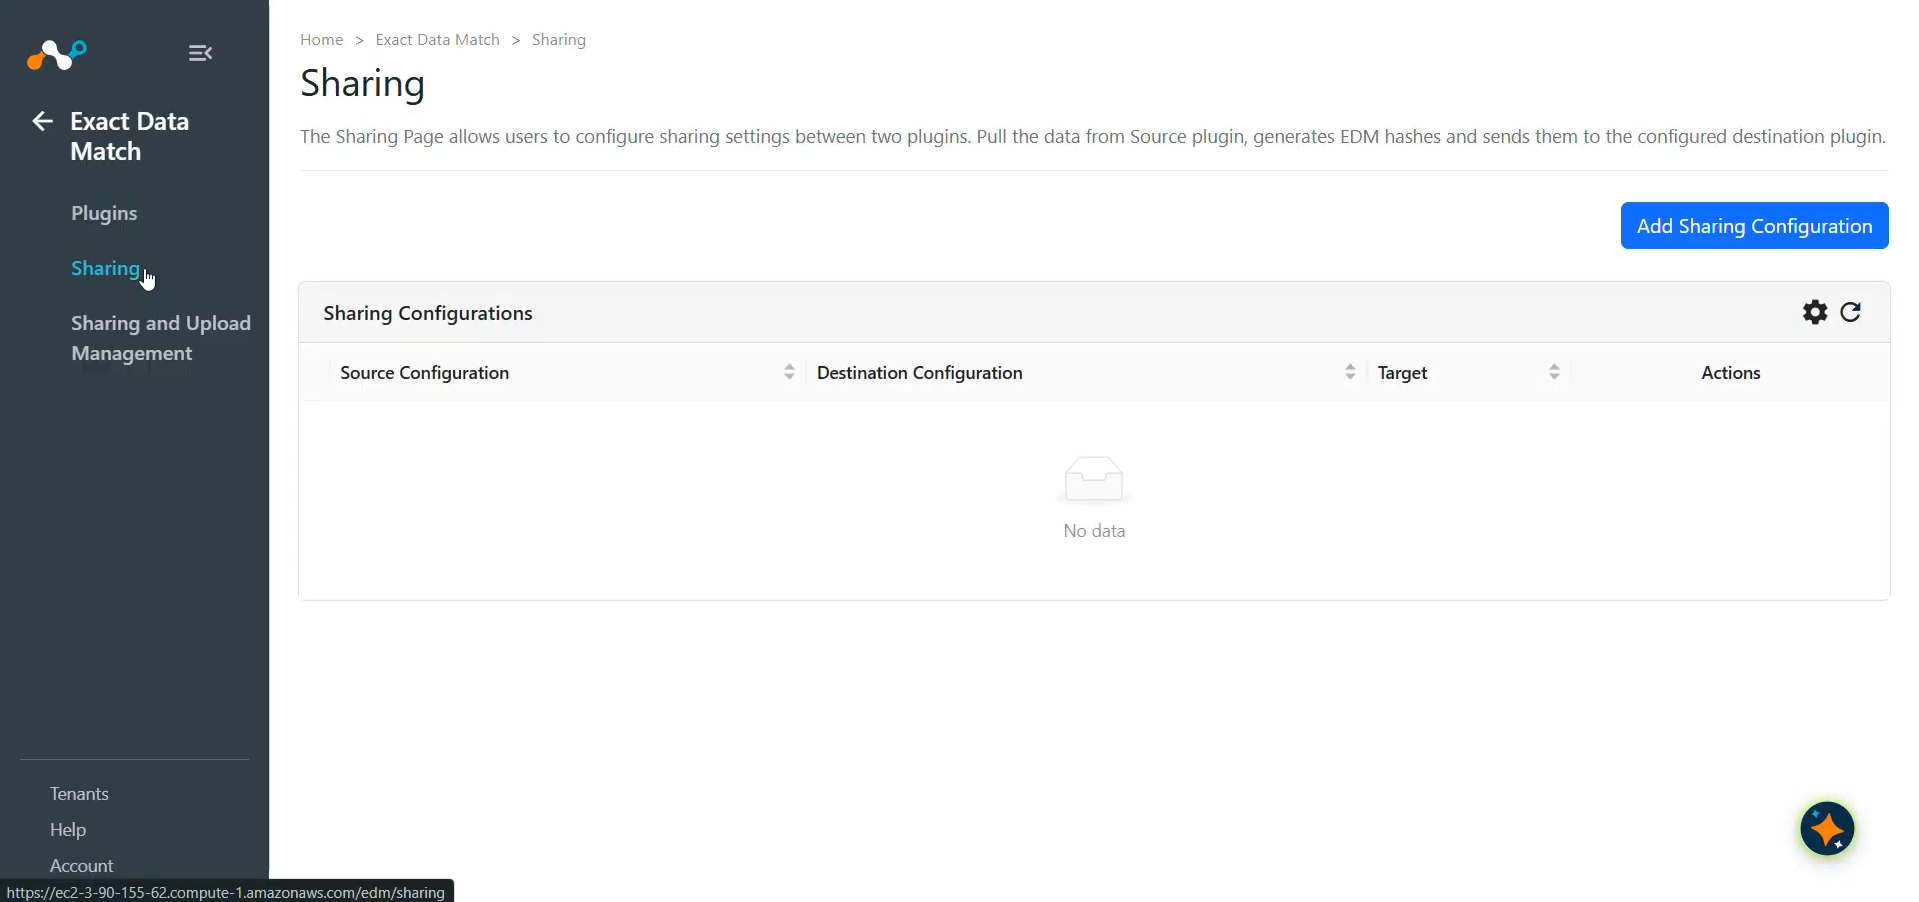
Go to Exact Data Match > Sharing and click Add Sharing Configuration.
-
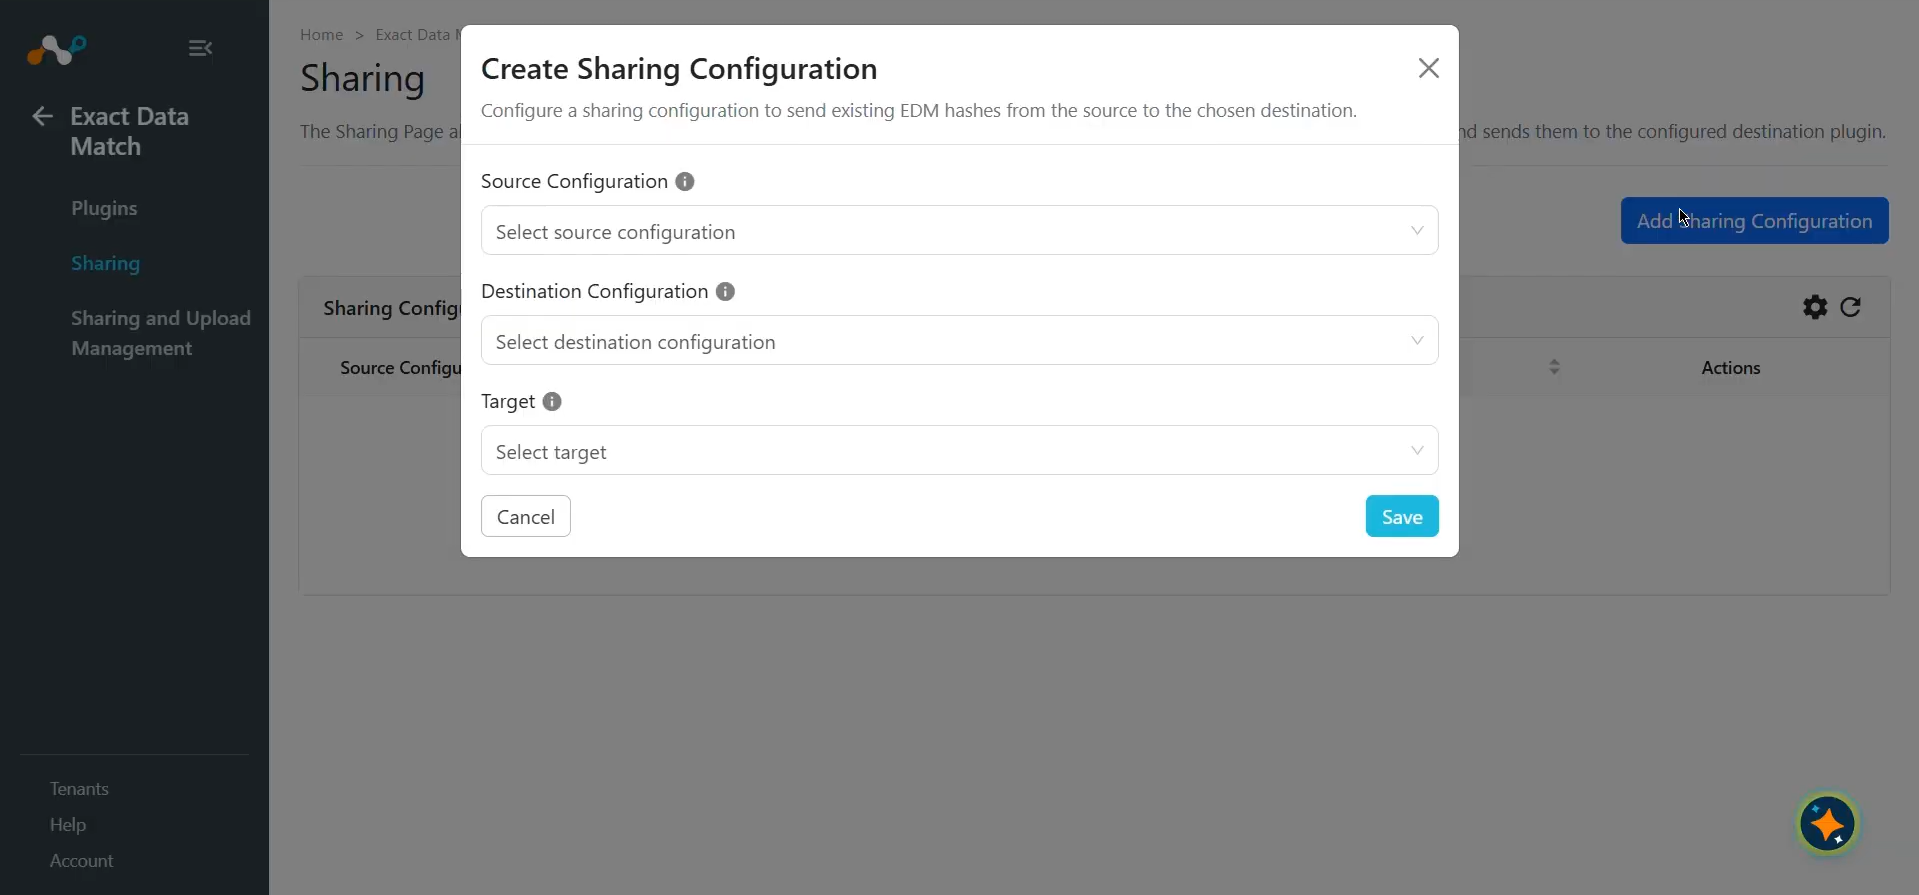
Configure the sharing parameters:
- Source Configuration: Select the configured AWS S3 EDM plugin.
- Destination Configuration: Select a destination where EDM Hash will be shared.
- Target: The value is automatically set according to the selected Destination Configuration.
-
Click Save.
Validate the AWS S3 EDM Plugin
Validate in Cloud Exchange
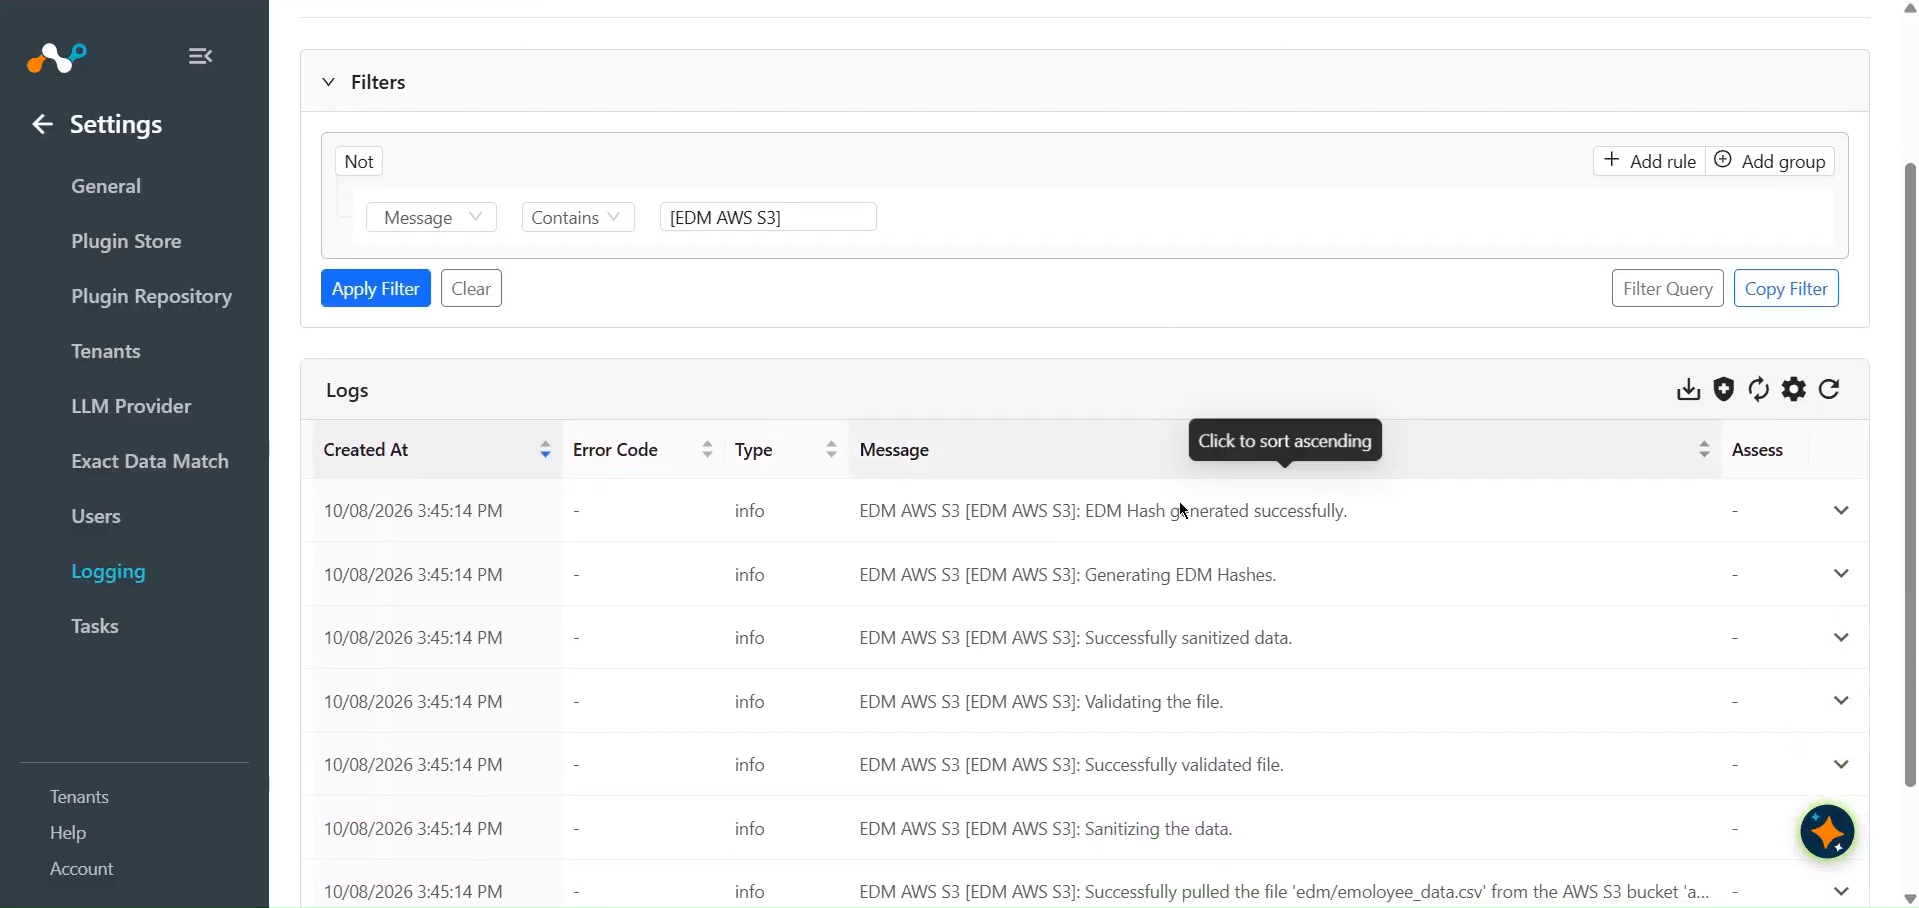
To validate the pulling of the configured plugin in Cloud Exchange, go to Settings > Logging and search for the AWS S3 EDM plugin logs.
You can verify the plugin operation from the logs available at Logging in Cloud Exchange:
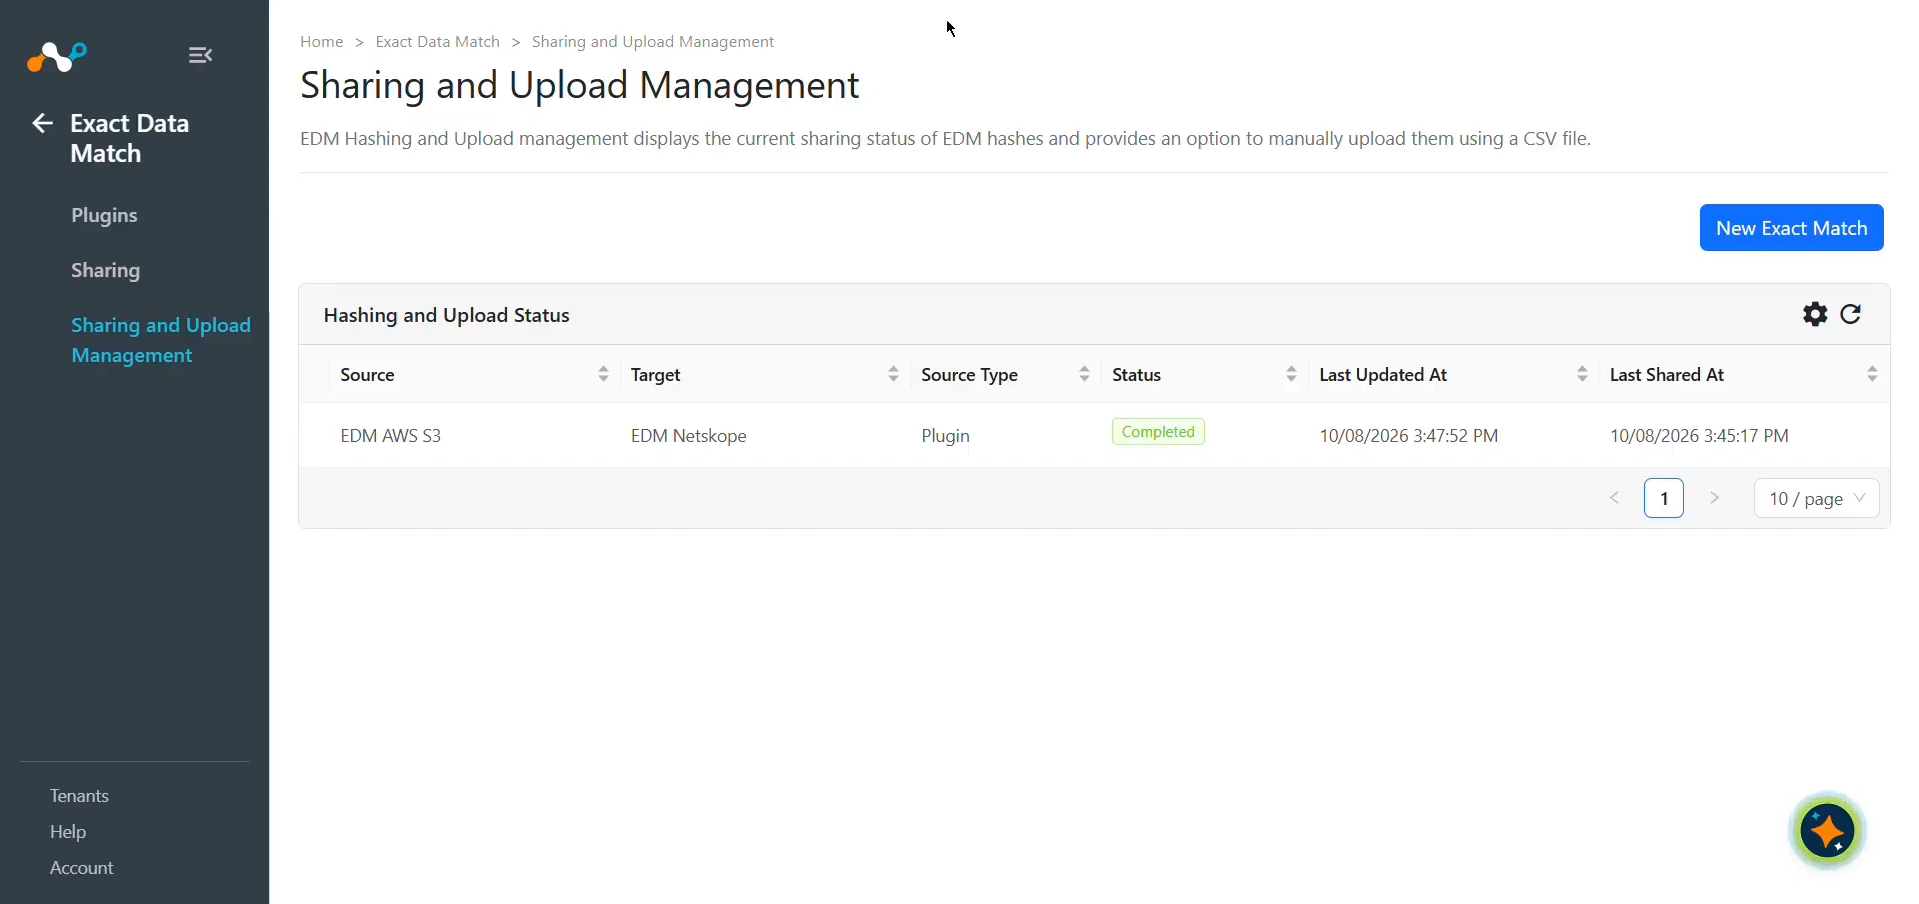
You can also verify the status of Hash Generation and Sharing generated Hash from Exact Data Match > Sharing and Upload Management.
The status values are as follows:
- Scheduled: Indicates that the sharing has been configured, and the pull and push operations are waiting in the queue for processing.
- Generating Hash: Indicates that the hash generation process has started. This stage includes fetching > validating > sanitization (if enabled) > generating hash.
- Uploading Hash: Indicates that uploading the hash to the destination configuration has started.
- Upload Completed: Indicates that hashes are uploaded to the destination configuration.
- Checking Apply Status: Checking the apply status of hashes to the destination configuration.
- Apply In Progress: The hash process has started and is in progress on the destination.
- Completed: Indicates that the hash file has been pushed successfully to the destination configuration.
- Failed: Indicates that the final result of the action has failed to execute. The actions are Generating Hash/Uploading Hash/Checking Apply Status.
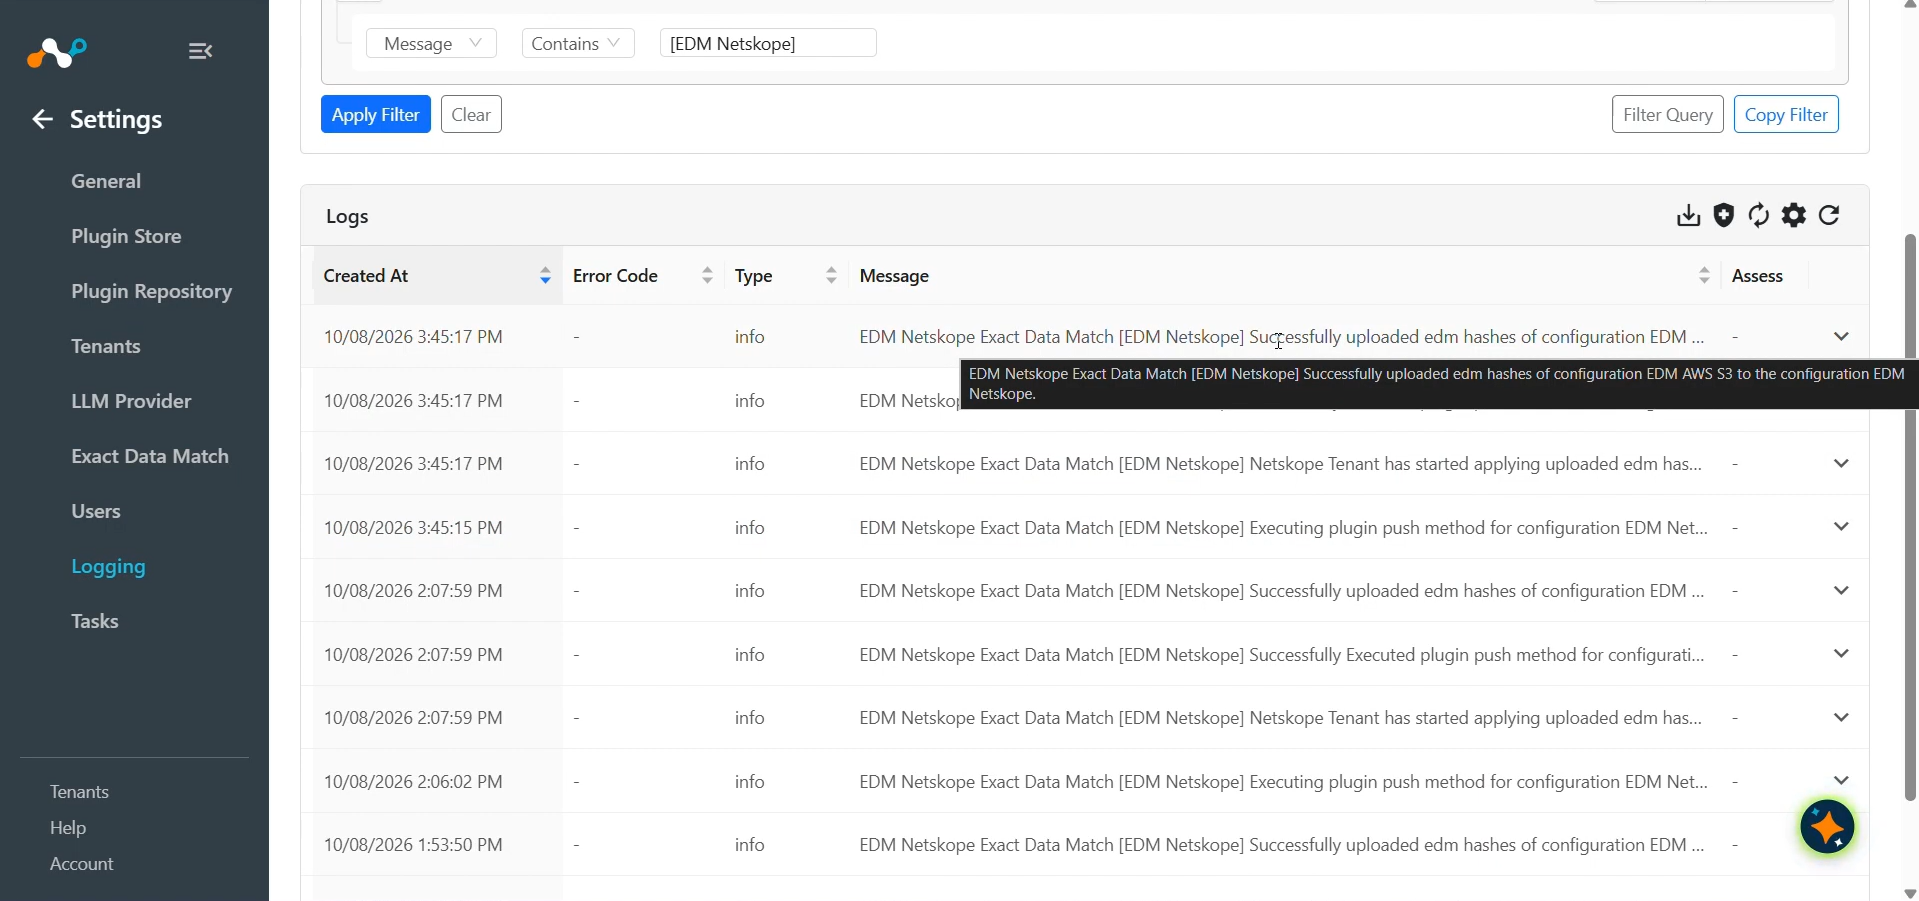
Shared EDM hashes can be verified from the logs available at Logging in Cloud Exchange:
Validate on the Netskope Tenant
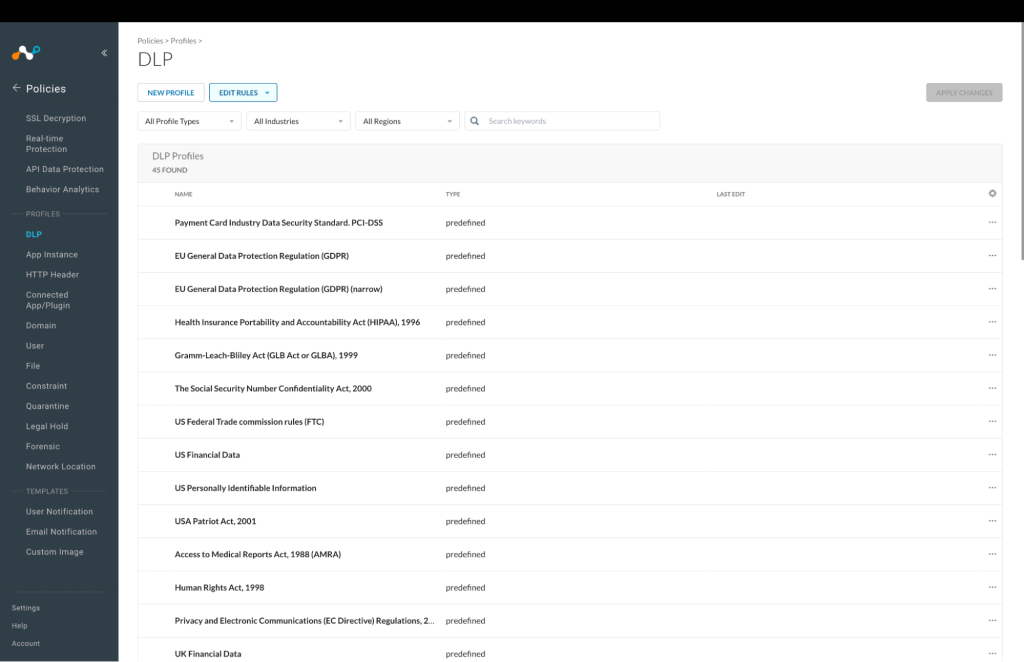
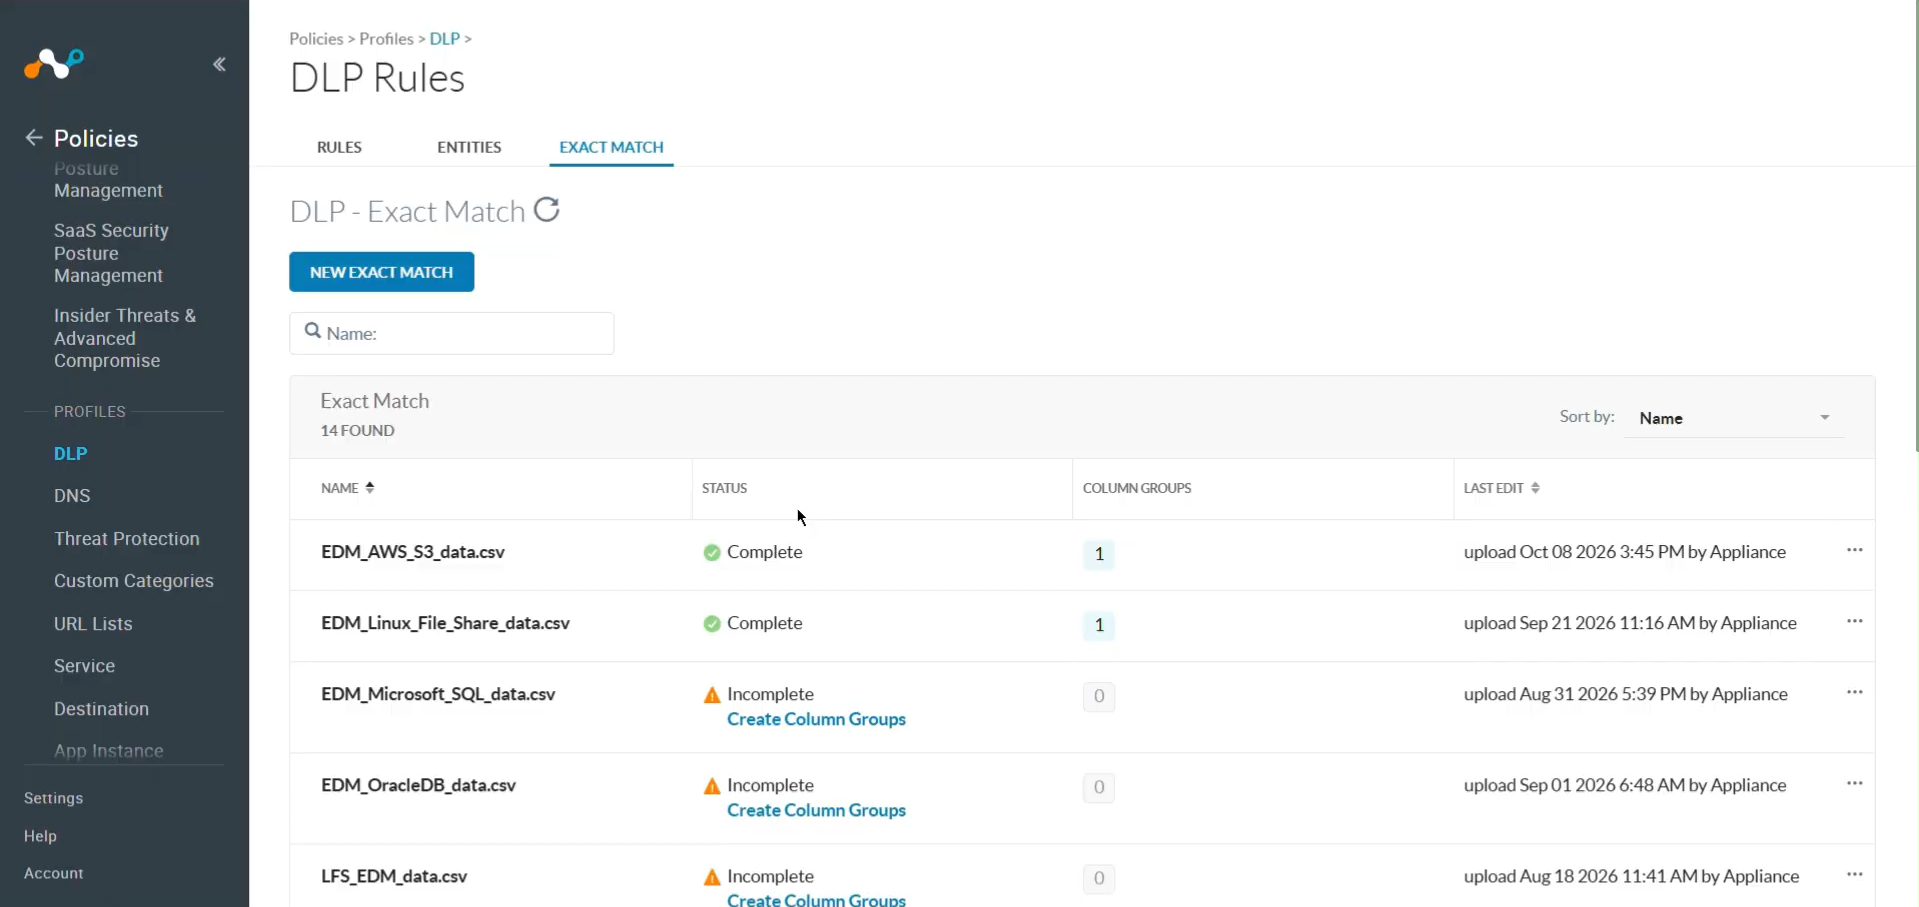
To ensure the push of EDM hashes on the Netskope Tenant from the cloud exchange:
-
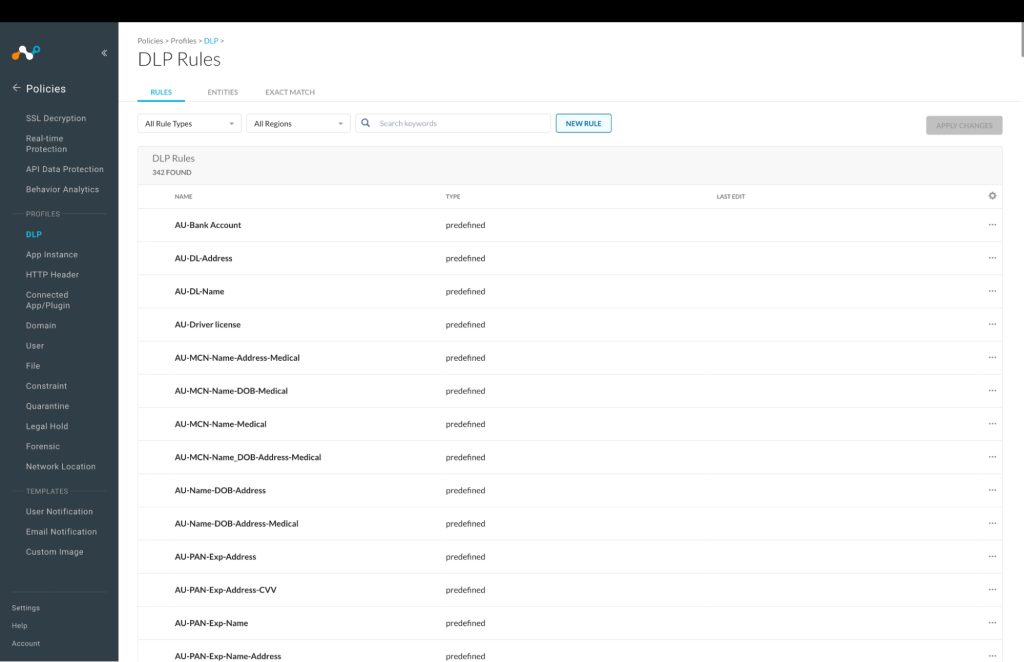
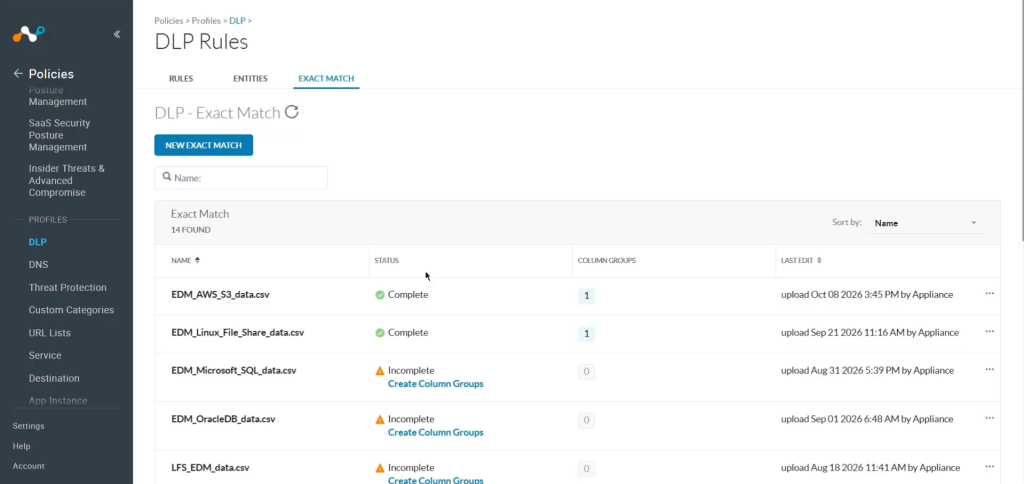
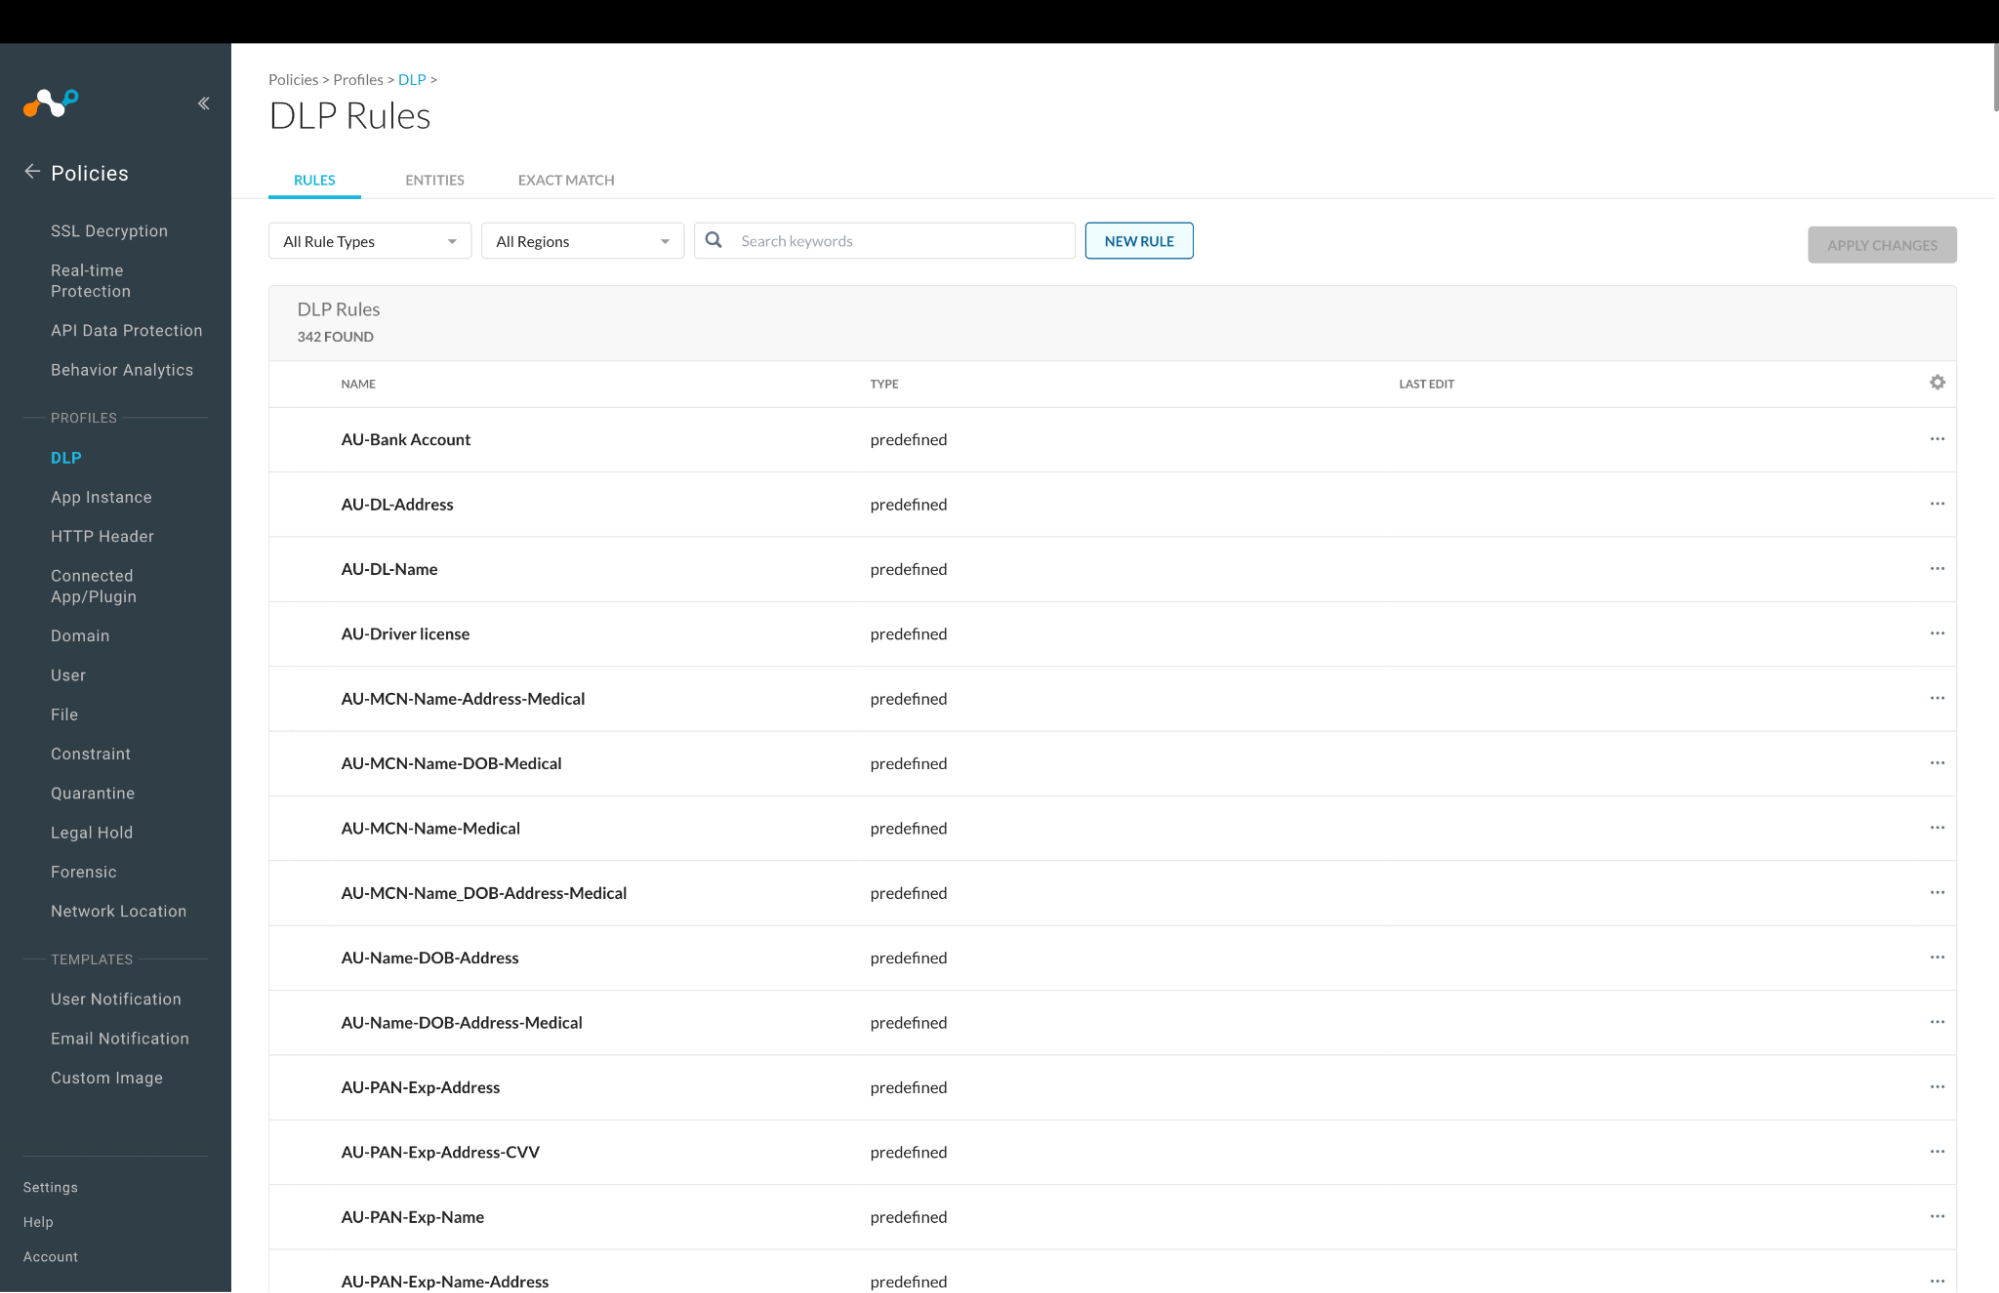
On Netskope Tenant, go to Policies > DLP.
-
Click Edit Rules and select Data Loss Prevention.
-
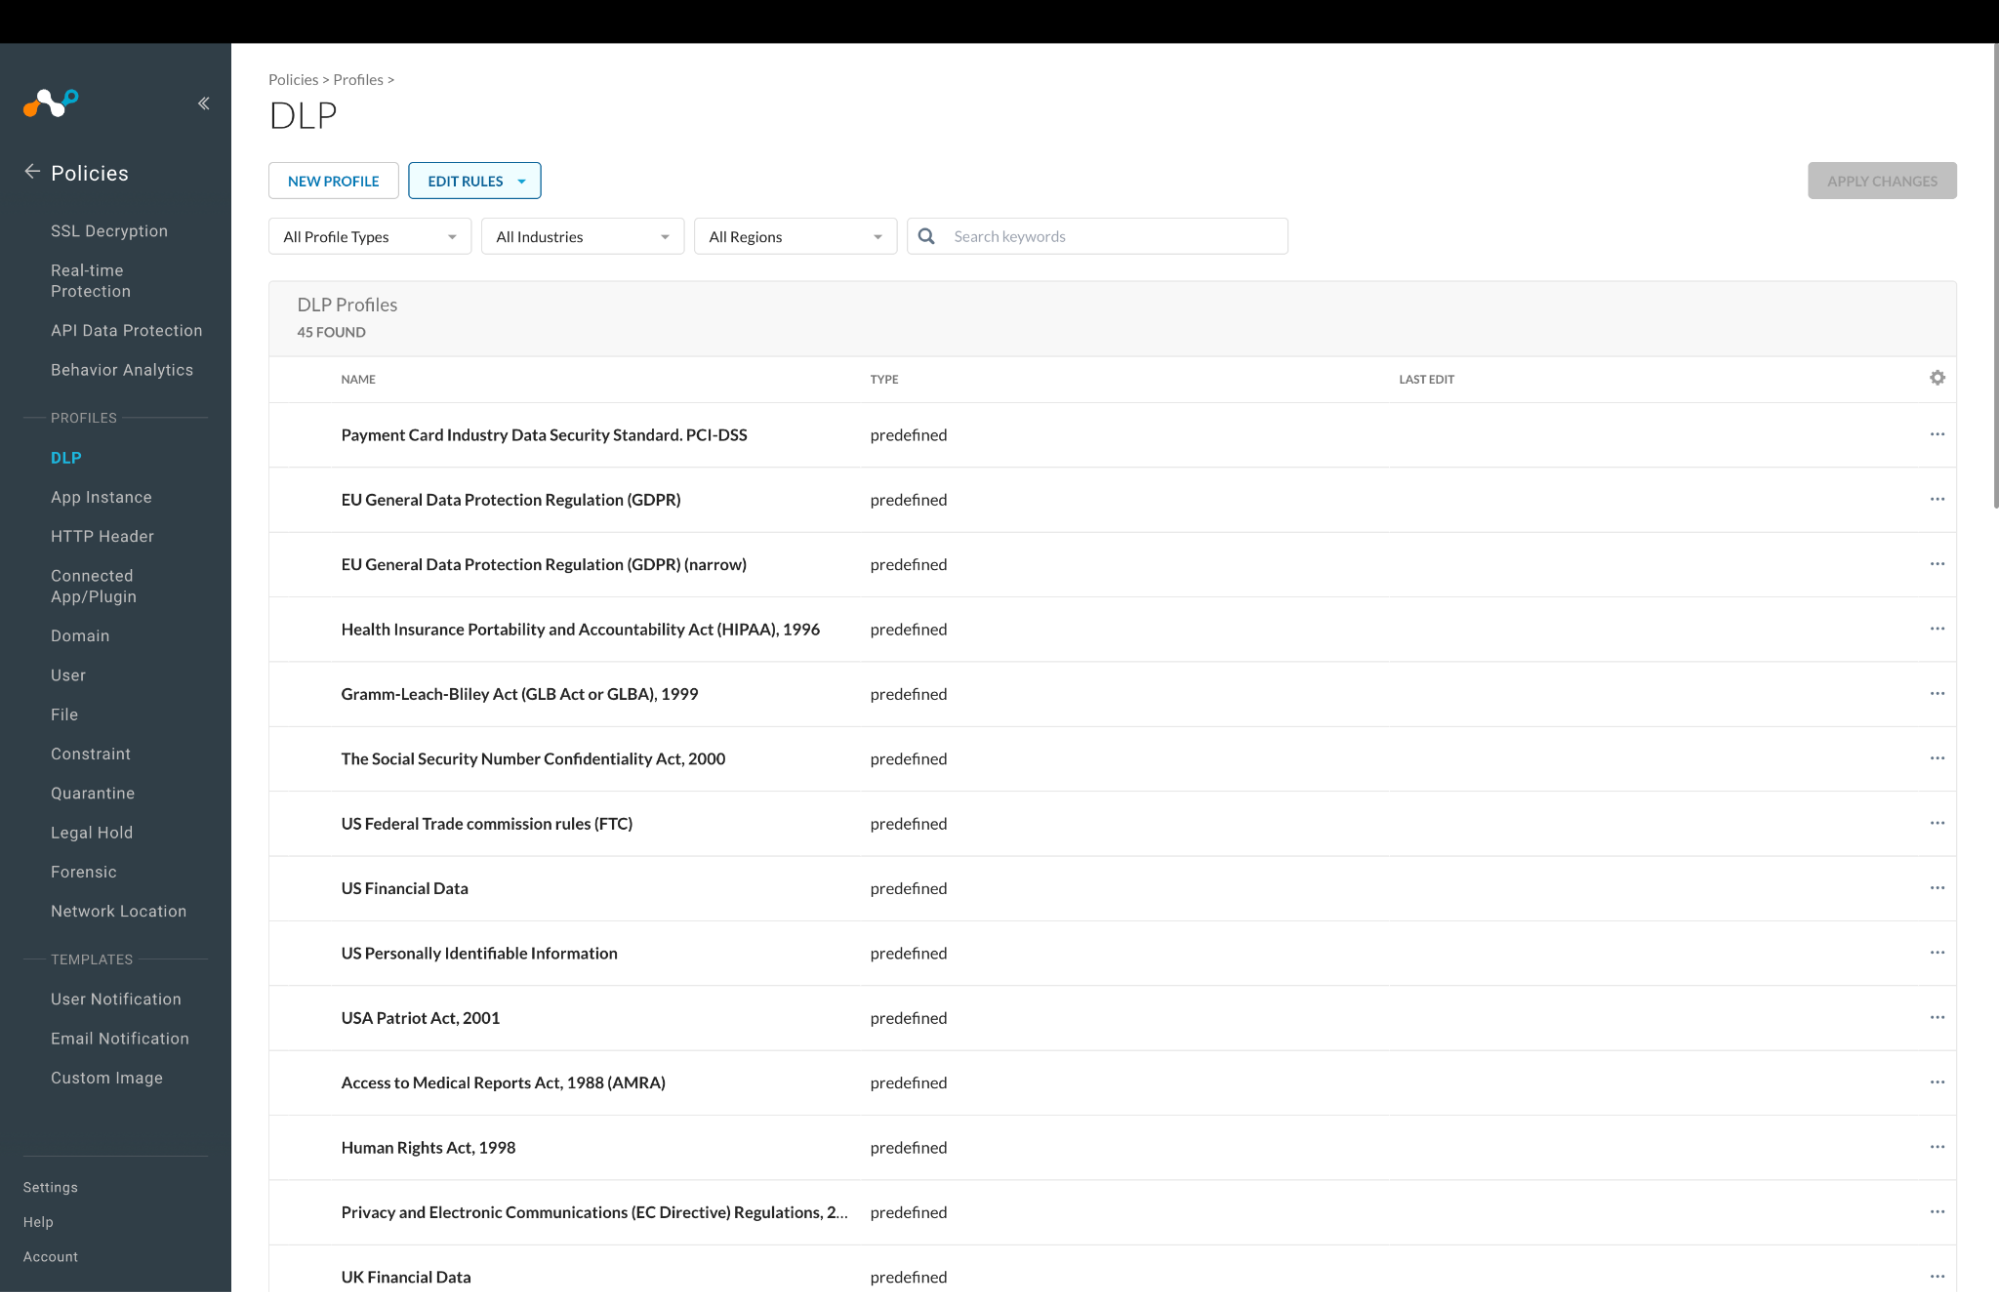
On the Exact Match tab, a list of files is shown.
Troubleshooting the AWS S3 EDM Plugin
Unable to configure the AWS S3 EDM Plugin
If you are unable to configure the AWS S3 EDM plugin, it could be due to one of the following reasons:
- Incorrect credentials provided.
- The IAM role does not have permission to read the CSV file.
- Network connectivity issues between Cloud Exchange and the server.
- The S3 object is encrypted with an AWS KMS key, and the IAM role does not have the required KMS permissions.
What to do:
-
Verify that the credentials are correct.
-
Check file permissions on the server.
-
Verify network connectivity between Cloud Exchange and the server.
-
Check AWS KMS permissions: If validation or file retrieval fails with
Access Denieddespite havings3:ListBucketands3:GetObjectpermissions, check whether the S3 object uses AWS Key Management Service (SSE-KMS) encryption.- Open the object in the AWS S3 console and navigate to Properties → Server-side encryption settings to verify the encryption type.
- Alternatively, run the following command from AWS CloudShell or a machine with the AWS CLI configured:
aws s3api head-object --bucket <bucket> --key <file-path> - If
ServerSideEncryptionisaws:kmsandSSEKMSKeyIdidentifies a customer-managed key, ensure that the IAM role used by the plugin has thekms:Decryptpermission on the key and that the key policy allows the role. - For a KMS key in another AWS account, both the IAM policy of the role and the key policy in the account that owns the key must allow access.
- If the KMS permissions are correct, check the S3 bucket policies for explicit denies and any applicable AWS Organizations policies, as AWS may return a generic
Access Deniederror without explicitly identifying a KMS permission issue.
CSV file not found or access denied
If you receive errors about file not found or access denied:
What to do:
- Verify the CSV file path is correct and the file exists.
- Ensure the user has read permissions for the file.
- Check if the file is not locked by another process.
- Verify that S3 bucket is accessible and the role have permissions to access the S3 Bucket.
Hash generation fails or takes too long
If hash generation fails or performance is poor:
What to do:
- Check available disk space on Cloud Exchange (ensure at least 2x CSV file size).
- Reduce CSV file size or split into smaller files.
- Disable sanitization if not required to improve performance.
- Monitor system resources during processing.
Known Behaviors
- Sanitization can reduce processing speed by approximately 65% but improves data quality.
- Dictionary creation is resource-intensive and should only be used when necessary.
- The plugin creates temporary files during processing that are automatically cleaned up.
- SSH connection timeouts may occur with very large files; consider increasing timeout values.
- Memory usage scales with CSV file size; monitor system resources during large file processing. For CE instance disk space, refer to this documentation.
Limitation
Each Netskope tenant has a limit of handling up to 5 staging files. If this maximum limit is reached, you may encounter the following error while sharing hashes:
EDM Netskope Exact Data Match [EDM Netskope] Received exit code 400, Error occurred while uploading edm hashes of configuration EDM AWS S3 to the configuration EDM Netskope.
To resolve this error, you have to delete the existing files from staging.