

By default, Browser Access application segments are accessed through a default Netskope public host FQDN such as:
192-168-1-100-443-tenantname.npaproxy.goskope.com
Custom Hostname allows you to present a stable, branded external hostname, like myapps.example.com, to users when they launch Browser Access application segments from the portal, instead of the default Netskope public host FQDN. The Custom Hostname is used in the launch URL when users access Browser Access application segments from the portal, and remains active throughout the session. Portal tiles continue to display the application segment name or custom portal tile name.
Tip
Custom Hostname is optional. Browser Access functions normally with the default Netskope public host FQDN if no Custom Hostname is configured.
Configure a Custom Hostname
- In the Browser Access application segment configuration, locate the Custom Hostname setting.
- Enter the desired external hostname (like
myapps.example.com). - Ensure that DNS for the custom hostname has a CNAME record pointing to the auto-generated tenant hostname.
- Confirm that a valid TLS certificate is in place for the custom hostname.
- Save the configuration.
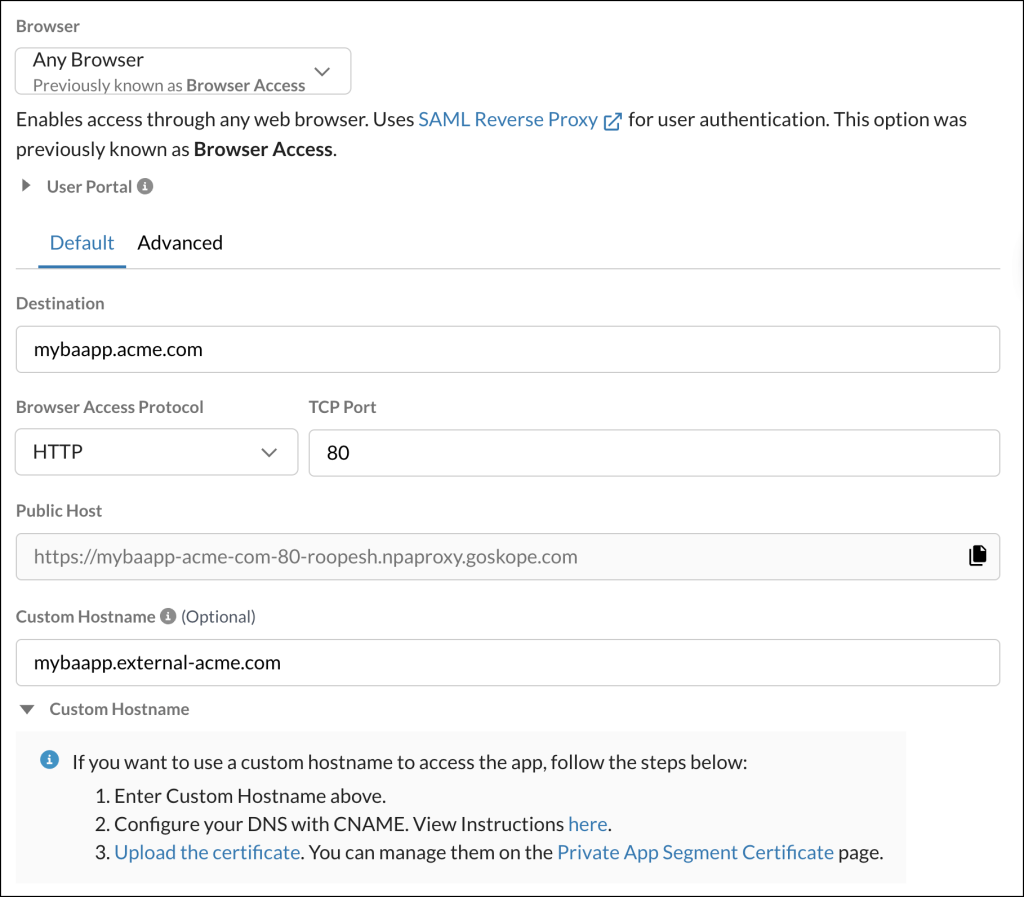

After propagation, launched sessions for this application will use the Custom Hostname as the external hostname.
Considerations
- Custom Hostname is configured per Browser Access application.
- A valid TLS certificate must be configured for the custom hostname; certificate management is outside the Browser Access proxy.
- If URL rewrite is also active, redirects issued by the backend application will be rewritten to use the Custom Hostname rather than the auto-generated hostname.
Custom Hostname Verification
- Open the Browser Access portal and click the application tile. Confirm the launched URL uses the Custom Hostname.
- Complete authentication flows and confirm the Custom Hostname is retained throughout.