

This document explains how to configure Google Workspace as your IdP to work with Browser Access to perform authentication in a browser.
Prerequisites
To complete this procedure you need:
- A basic understanding of SAML, like knowing the relation between the service provider (SP) and the identity provider (IdP).
- A Google Workspace account. If you don’t have one, use these instructions to create one.
- A Private App configured for Browser Access.
For more information about creating a SAML application in Google, go here.
Workflow
- Get your Google Workspace SSO information.
- Configure Google Workspace with a customized SAML application.
First configure Google Workspace with a customized SAML application, finally end with the connecting of private app in the Clientless way.
Get your Google Workspace SSO Information
- Log in to Google Workspace and go to the Security Settings SSO page.
- Copy the SSO URL and Certificate.

Create a Netskope SAML Reverse Proxy Account
- In the Netskope tenant, go to Settings > Security Cloud Platform > Reverse Proxy > SAML and click Add Account.
- Enter a name and select Private Apps from the Application dropdown list.

- Enter your Google Workplace SSO URL and certificate.
- Click Save.
- Click Network Settings beside the account name.

- Copy the ACS URL and Audience URL.
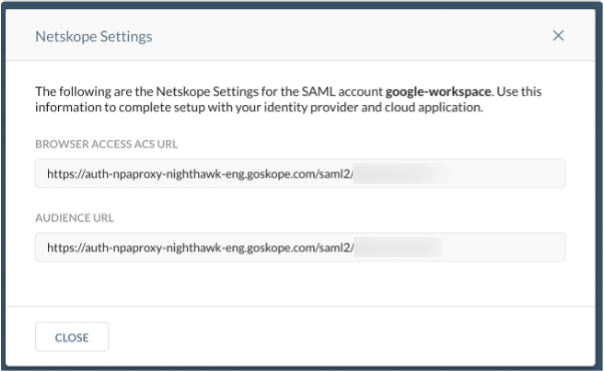
Create a SAML Application
- Go back to Google Workspace
 , click Add App, and then click Add Custom SAML App.
 - Enter an App Name and click Continue.

- On the next page just click Continue.

- For ACS URL, enter the ACS URL from the Netskope UI. For Entity ID, enter the Audience URL from the Netskope UI.
- Click Finish.
Test Browser Access
- To get the Public Host address, go to Settings > Security Cloud Platform > App Definition > Private App Segments and click on your Application Segment. Copy the Public Host.

- Use your Google Workspace account to authenticate and log in.