

Overview
You can use Column Classification Rules (CC Rules) in Netskope DSPM to identify and classify specific data types found in structured data stores, like databases. This article outlines how to configure these rules and how to use them within Hybrid DLP Profiles to classify both structured and unstructured content within Netskope DSPM.
Prerequisite: You must have the DSPM feature enabled on your tenant to use these settings.
Understand Rule Types
Netskope DLP utilizes two distinct rule types. Unlike traditional rules used for traffic inspection, these rules function differently within the context of DSPM repository scanning.
It is important to understand when to use each one:
| Rule Type | Goal | Application Context |
|---|---|---|
Content Rules (CI) | Inspects the file body to identify sensitive data within unstructured formats (e.g., PDF, DOCX, CSV). | Unstructured Data Stores (e.g., Cloud Storage buckets, SaaS App drives). |
| Column Classification (CC) | Inspects database columns and headers to identify sensitive data within structured tables. | Structured Data Stores (e.g., BigQuery, Snowflake, Redshift). |
Create a Column Classification Rule
Use this rule type specifically for scanning structured data stores in DSPM.
Steps to create the rule:
-
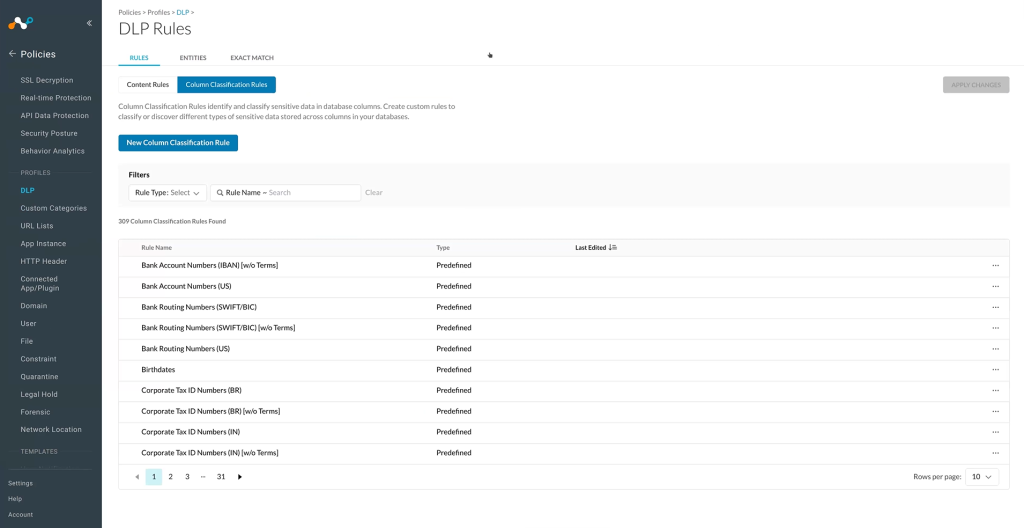
Go to Policies > DLP > Rules
-
Select the Column Classification Rules tab.
-
Click New Column Classification Rule.
-
Enter a Name for your rule.
- Tip: Use a prefix like
CC_(e.g.,CC_Financial) to easily distinguish these from standard DLP rules.
- Tip: Use a prefix like
-
Define the rule logic.The rule triggers based on the combination of conditions you set:

- Header Match: Enter keywords that might appear in a column’s name (e.g., “TAX ID”, “SSN USER”). Multiple keywords use OR logic.
- Content Match: Select the DLP entities, dictionaries, or regular expressions that match the actual data format within the cells.
-
Header Match: Enter keywords that might appear in a column’s name (e.g., “TAX ID”, “SSN USER”).
- Logic: If you enter multiple keywords here, the system uses OR logic (matches if any keyword is found).
-
Content Match: Select the DLP entities, dictionaries, or regular expressions that match the actual data format within the cells.
- Logic: If you select multiple entities, the system uses OR logic.
As you add entities, the system automatically derives the main Entity Data Type (EDT). Ensure selected entities have an EDT and ESL configured. -
Combined Logic (AND):To minimize false positives, we recommend configuring both Header Match and Content Match. In this scenario, the rule triggers only if both conditions are met.
Exception: There are use cases where you might want to match only on content (e.g., distinct data patterns without predictable headers). In these cases, you can configure Content Matchalone.
-
Click Save.
- Result: Rules utilizing Content Match ensure high-confidence classification, visible in the Classification Management screen.

Create a Content Inspection Rule
Use this rule type if you plan to build a Hybrid Profile that also covers network traffic (Real-time policies).
-
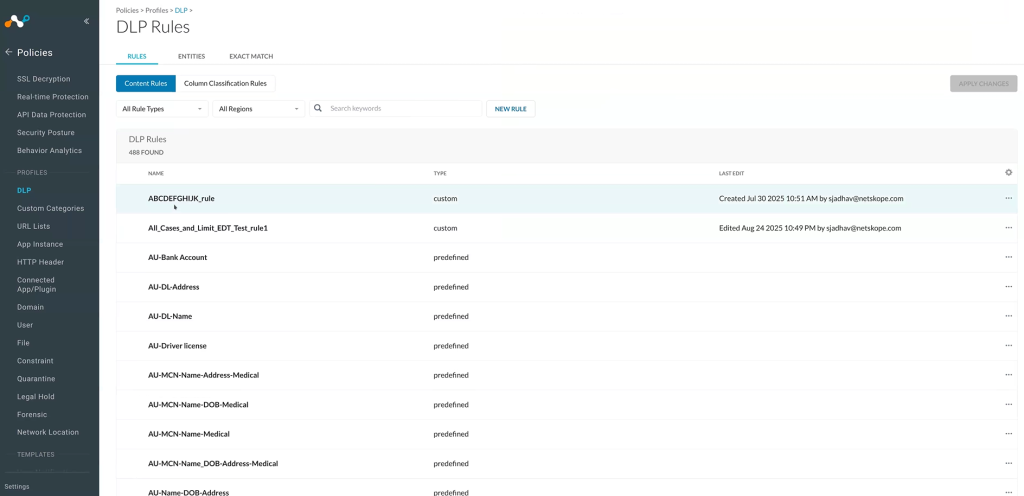
Go to Policies > DLP > Rules
-
Select the Content Rules tab.
-
Click New Rule.
-
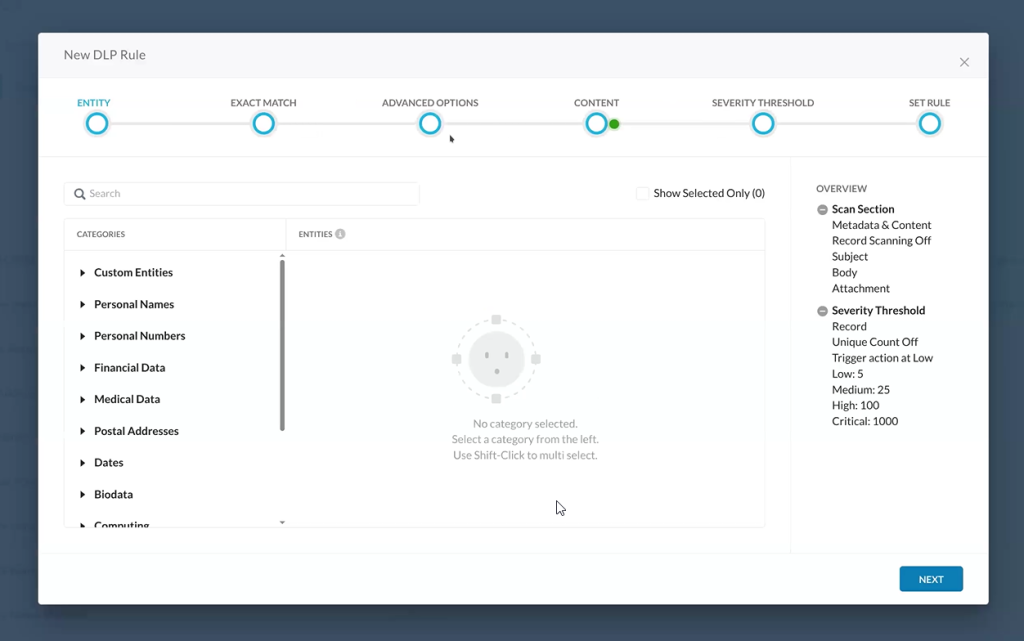
Select the categories and entities you want to detect (e.g., Financial Data, PII).
-
Click Next and follow the wizard to define match criteria and severity thresholds.
-
Click New Rule.


Create a Hybrid DLP Profile
A Hybrid Profile combines both rule types into a single profile. This versatile approach allows you to classify both structured and unstructured content within Netskope DSPM, or extend your existing real-time policies for reuse within DSPM.
HYB_Customer_PII). This helps you quickly differentiate DSPM profiles from traditional DLP profiles.Steps to create the profile:
-
Go to Policies > DLP > Profiles.
-
Click New Profile or select an existing profile to edit.
-
Within the profile configuration, add rules to both tabs:
-
Content Inspection Rules: Add your standard DLP rules for network traffic.
-
Column Classification Rules: Add the CC rules you created for DSPM scanning.
-
-
Click Save.
How Hybrid Profiles Work
In DSPM, you do not apply profiles directly to a policy. Instead, you configure a DSPM Discovery Profile, which tells the DSPM application which DLP Profiles are in-scope for classification.
Once configured, Netskope DSPM automatically evaluates the correct set of rules based on the data store type:
| Policy Context | Active Rules |
|---|---|
| Unstructured (e.g., Cloud Storage, SaaS Apps) | Only the Content Rules are evaluated to scan files. |
| Structured (e.g., Databases, Data Warehouses) | Only the Column Classification (CC) rules are evaluated to scan columns. |
Apply Changes
After saving any DLP configuration, you must click Apply Changes for your settings to take effect in DSPM. This action pushes your new configurations to the DLP appliance and to DSPM for SaaS Apps.
You can apply changes at any time; you do not need to wait until a profile is fully configured. For example, you can define a profile and tweak one of its rules, then apply changes immediately.