

The installation instructions describe how to integrate your Microsoft 365 Commercial & GCC High account with Netskope. The steps to configure Microsoft 365 Commercial and GCC High are the same unless explicitly called out. When you configure the Microsoft 365 app instance on the Netskope tenant, it automatically integrates the following apps and enables Netskope to scan these services for security posture management.
-
Microsoft 365 Entra ID (formerly Azure AD)
-
Microsoft 365 Exchange
-
Microsoft 365 Defender
-
Microsoft 365 Intune
-
Microsoft 365 SharePoint
-
Microsoft Teams
Considerations
Commercial Licenses
Netskope requires a minimum set of Microsoft 365 licenses to scan through your Microsoft 365 environment. The following licenses are supported:
- Microsoft 365 A3, A5
- Microsoft 365 E3, E5
- Microsoft 365 F1, F3
GCC High Licenses
Netskope requires a minimum set of Microsoft 365 GCC High licenses to scan through your Microsoft 365 GCC High environment. The following licenses are supported:
- Microsoft 365 A3, A5 – GCCHIGH
- Microsoft 365 E3, E5 – GCCHIGH
- Microsoft 365 F1, F3 – GCCHIGH
- Office 365 E1, E3, E5 – GCCHIGH
Netskope supports other Microsoft 365 GCC High licenses too, as long as additional licenses are obtained for Microsoft Intune (Plan 1 – GCCHIGH) and Microsoft Entra ID P1 (or P2) – GCCHIGH.
See the Manage Microsoft 365 and Office article to understand what licenses you have.
Procedure
Follow the procedure to integrate your Microsoft 365 account with Netskope.
Step 1: Grant Access to Microsoft 365 Account
To authorize Netskope to access your Microsoft 365 account, follow the steps below:
-
Log in to the Netskope tenant UI and go to Settings > Configure App Access > Next Gen > Security Posture.
-
Select the Microsoft 365 icon, and then click Setup Security Posture Instance.
-
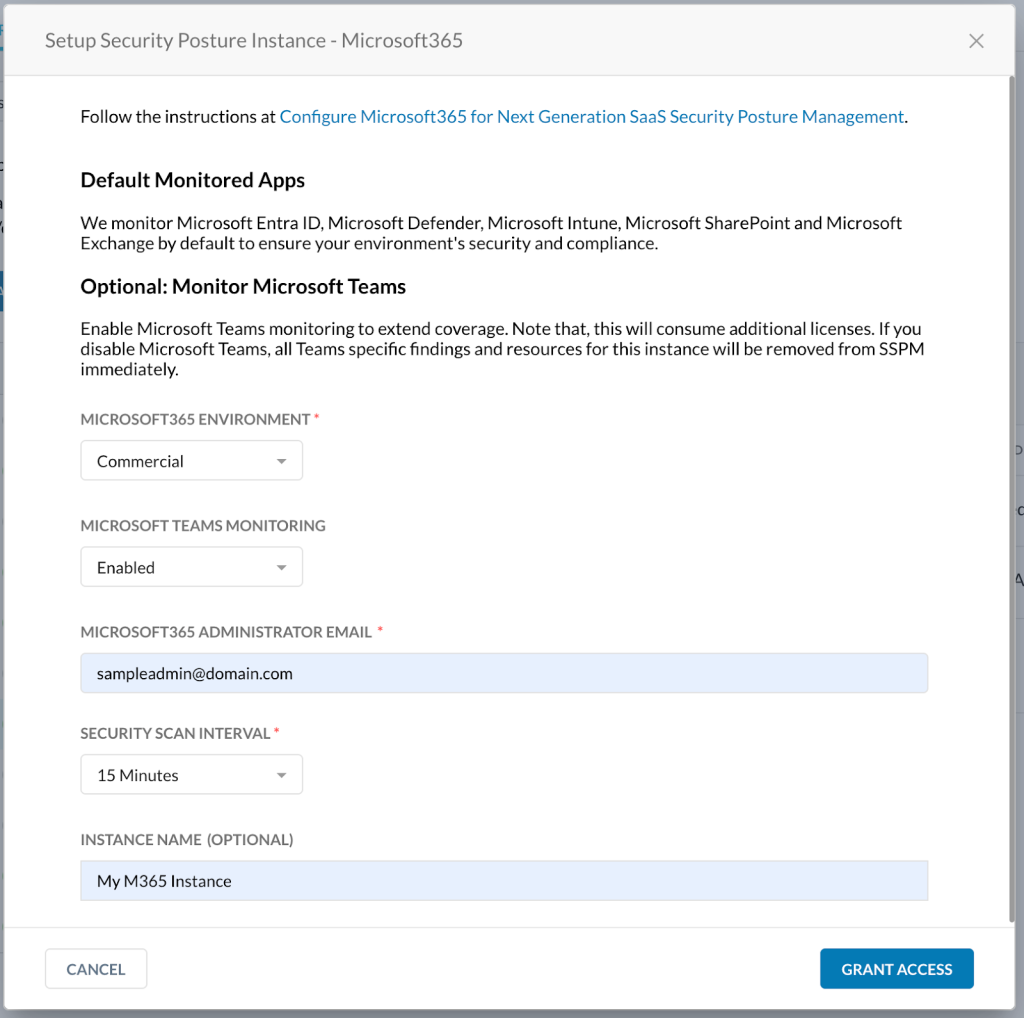
The Setup Security Posture Instance – Microsoft 365 window opens. Enter the following details:
-
Under Microsoft 365 Environment, select Commercial or GCC High.
-
You can enable or disable Microsoft Teams Monitoring for your instance.
You will require additional license for this.
-
If MS Teams is deselected after being enabled, all related resources and findings will be deleted.
-
If you re-enable MS Teams, it’ll be treated as a new enablement and resources will be freshly retrieved.
-
-
Enter the Microsoft 365 Administrator Email to authorize apps.
-
Select the Security Scan Interval.
NOTE: “SpoSite” resource type in Microsoft365 appsuite will be fetched every 1 hour interval irrespective of the scan interval configured because this resource could be huge in number and Microsoft does not have a polling API support for this. -
(Optional) Enter an Instance Name.
-
-
Click Grant Access.
NOTE: Microsoft 365 tenants whose admin SharePoint site uses a custom domain instead of <tenant>-admin.sharepoint.com currently require manual configuration. Contact Netskope support for more information. -
You will be prompted to log in to your Microsoft 365 account with global administrator username and password, and then Accept the permissions and click Close.

-
Refresh your browser, and you will see the instance.


Step 2: Add Entra ID Roles
Once you have granted access to the Microsoft 365 app, you should assign the Netskope application client ID to the Global Reader role. To do so, follow the steps below:
-
Log in to portal.azure.com as a global administrator.
-
Click View under Manage Microsoft Entra ID from the left navigation.
-
On the left navigation, click Roles & administrators.
-
Search for the role Global Reader, and click on the Global Reader role.
-
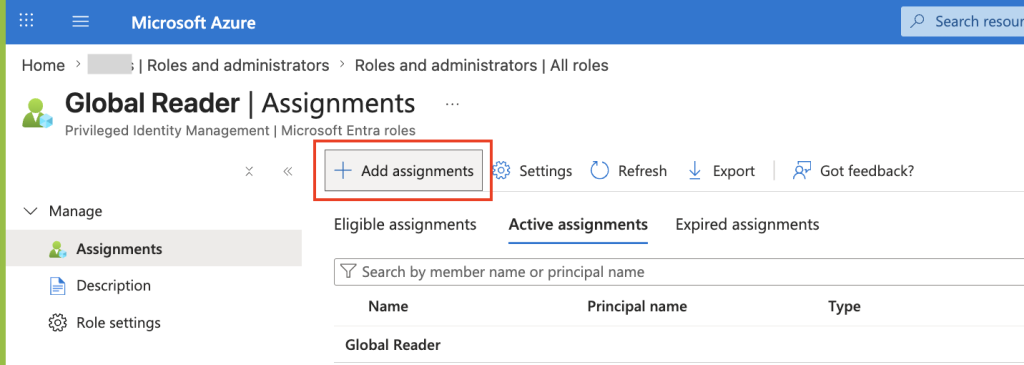
Click + Add assignments.
-
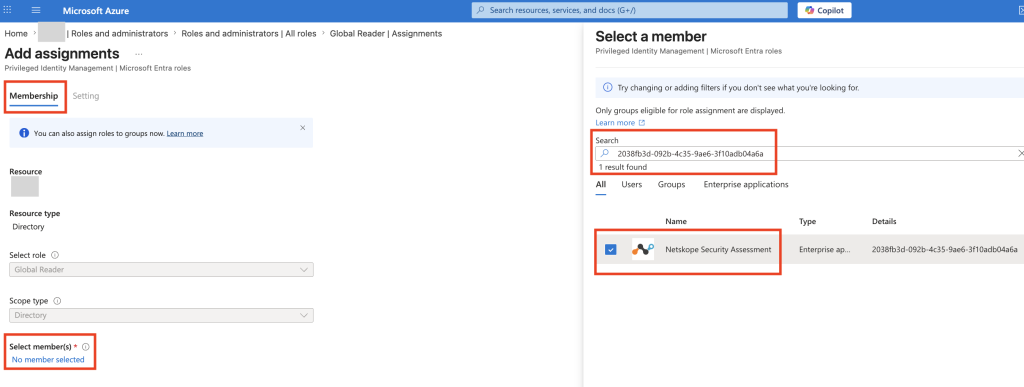
In the Membership tab, Click on No Members Selected and then select members.
-
In the search bar, enter the Netskope application client ID 2038fb3d-092b-4c35-9ae6-3f10adb04a6a. Select the Netskope Security Assessment app and click Select.
A following warning is shown after selecting the app for active assignments. You do not have any action item for this warning. Refer to the Assign Eligibility document for more information.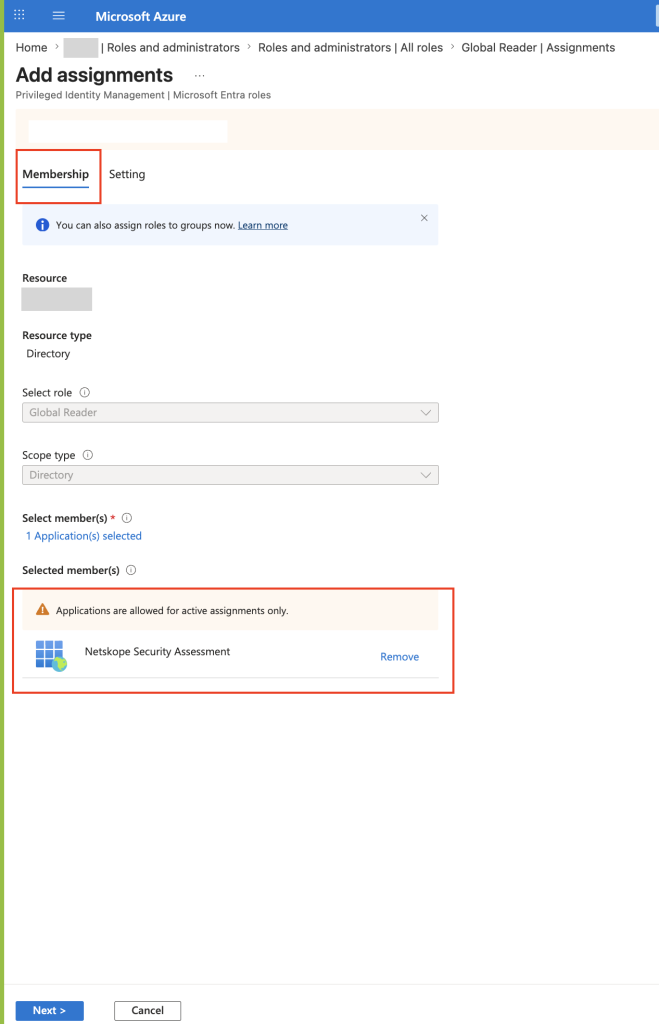
-
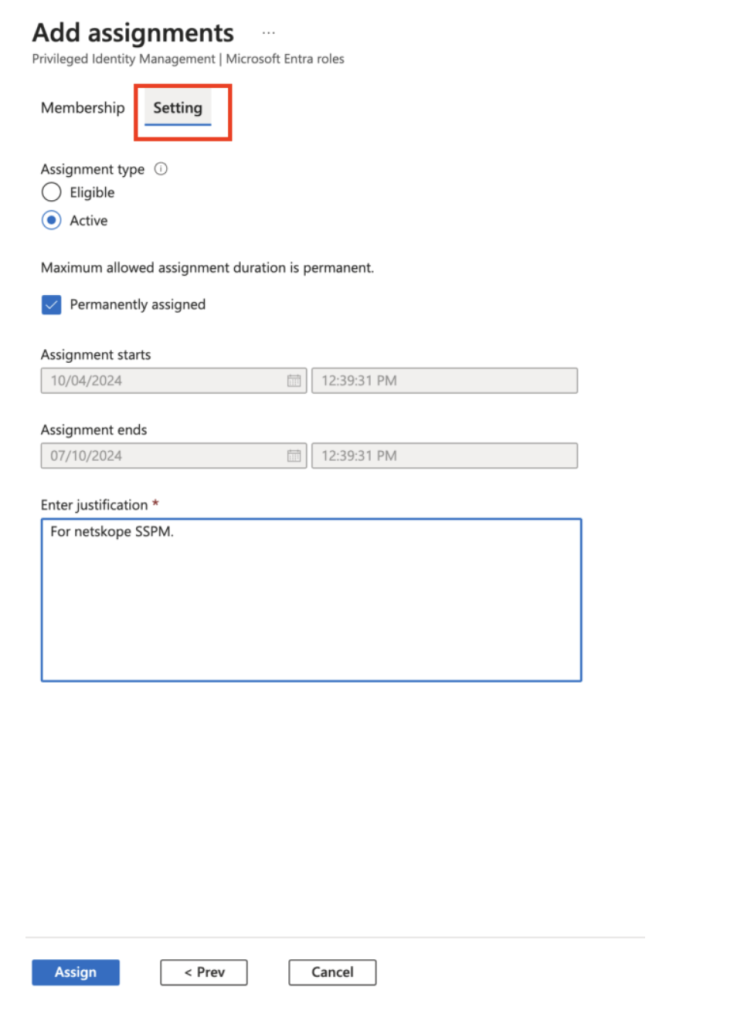
In the Add assignments > Setting tab
-
Select Assignment Type = Active
-
Enable the Permanently assigned option
-
Enter justification as “For Netskope SSPM”
-
-
-
Click Assign.


