

Portal Links allow you to publish deep links from the Browser Access or Enterprise Browser portal that include full application paths. Portal Links control the initial launch URL from the portal and the post-authentication return-to-path, ensuring users land directly at the intended application location rather than the root path.
Tip
Portal Links are optional. URL rewrite and Custom Hostname function independently without Portal Links configured.
Prerequisites
- The Browser Access portal is enabled for your tenant.
- The target Browser Access or Enterprise Browser application is configured and accessible.
Important
Portal Link configuration in the Advanced tab depends on a hostname that is first defined in the Default tab. Create the base hostname under Default before configuring a path under Advanced.
Configure Portal Links
Portal Links are configured in the Advanced tab of the private app segment configuration.
Step 1: Open the Advanced Tab
- Navigate to the private app segment configuration and confirm that the Browser Access portal is enabled.
- In the Default tab, create the base hostname for this application (like
mybaapp.acme.com). - Switch to the Advanced tab.
Step 2: Configure the Portal Link
- Toggle on Custom User portal App Name and Link.
- In the User Portal App Name field, enter the display name for the tile in the portal.
- In the Link field, enter the full path for the Portal Link, relative to the hostname defined in the Default tab (like
/app1).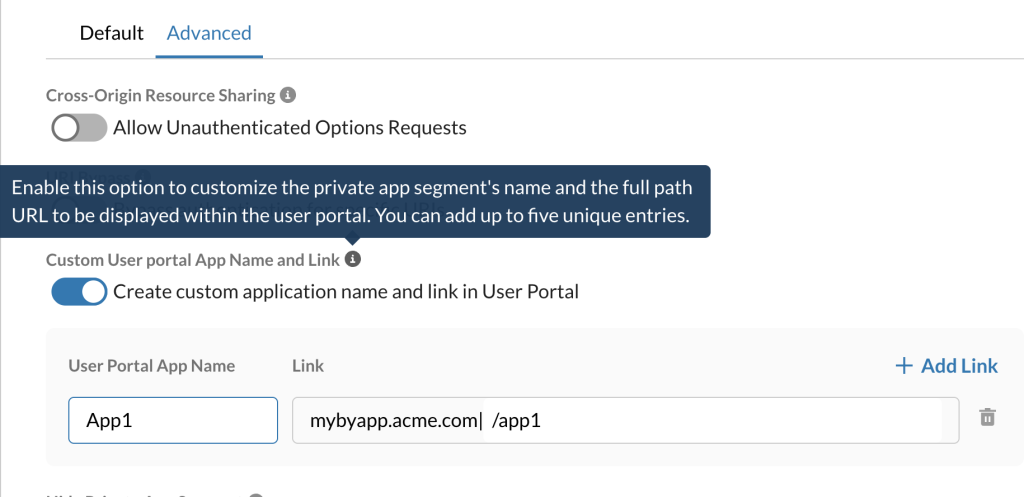
Note
You can add up to five Portal Link entries per application using the + Add Link button. Each entry creates a separate portal tile.

Step 3: Hide the App Segment Tile (Optional)
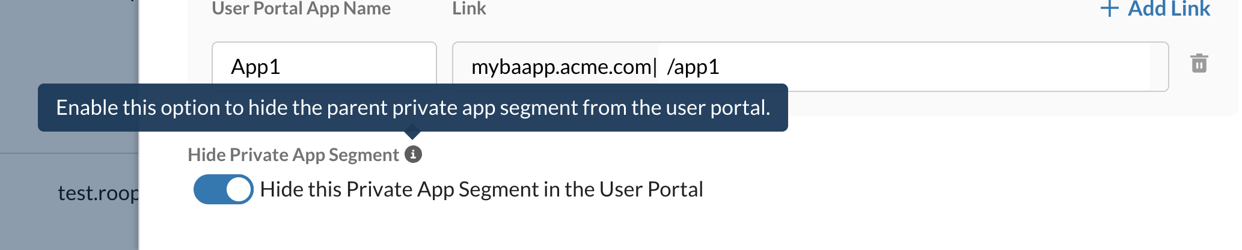
Use this option to hide this app segment’s tile from the User Portal. This can be used independently, or alongside Custom Portal Links if you want only the custom-named tiles to appear.
- Toggle on Hide Private App Segment to hide this app segment’s tile from the User Portal.
- If Custom Hostname is configured, confirm that the launched URL uses the custom hostname.
- Click Save.
Considerations
- For HTTP and HTTPS Browser Access apps, Portal Links support custom paths (like
/app1,/Citrix/HTML5Web). - For RDP/SSH apps, the Custom User Portal App Name and Link option is available, but only / is accepted as the path.
- The base hostname must be defined in the Default tab before a path can be configured in the Advanced tab.
- The path entered in the Advanced tab must be relative (starting with ‘/’), not a full URL.
- Portal Links control the launch URL and post-auth return-to-path. They do not rewrite redirects that occur within the application after launch; that is handled by URL rewrite.
Portal Links Verification
- Click the portal tile configured with a Portal Link.
- Confirm the URL includes the configured full path.
- After authentication, confirm the return URL preserves the full path.
Troubleshooting
| Symptom | Resolution |
|---|---|
| Portal Link does not preserve the full path | Confirm a base hostname is defined in the Default tab before configuring the path in Advanced. Ensure the path is relative (like /Citrix/HTML5Web). |
| Error when configuring a Portal Link path in Advanced tab | Verify the base hostname exists in the Default tab. The Advanced tab accepts only the path portion, not a full URL. |
| Base app entry still visible in portal after hiding | Confirm the Hide Private App Segment toggle is enabled and the configuration has been saved and propagated. |
| Portal tile not appearing in the portal |
Confirm the Browser Access portal is enabled for your tenant and that the application’s access policy permits the test user. |
| Two tiles appearing in the portal for the same application | This is expected when Custom User Portal App Name and Link is enabled — each entry creates a separate tile. Enable Hide Private App Segment to hide the original app segment tile, leaving only the custom-named tiles visible. |