

Webhooks send AI Command Center findings to the tools your team already uses to track work. You add each tool as a destination, such as Slack, Jira Cloud, ServiceNow, or a custom endpoint. After you add a destination, you can select it when you create a ticket for a finding or a rule.
Adding a Webhook Destination
Use this procedure to add any type of destination. The fields in the Add destination dialog change based on the type you select.
To add a destination:
- In the Netskope tenant, navigate to the AI Command Center.
- In the left navigation, click Configuration, and then click Webhooks. The Webhooks page opens.
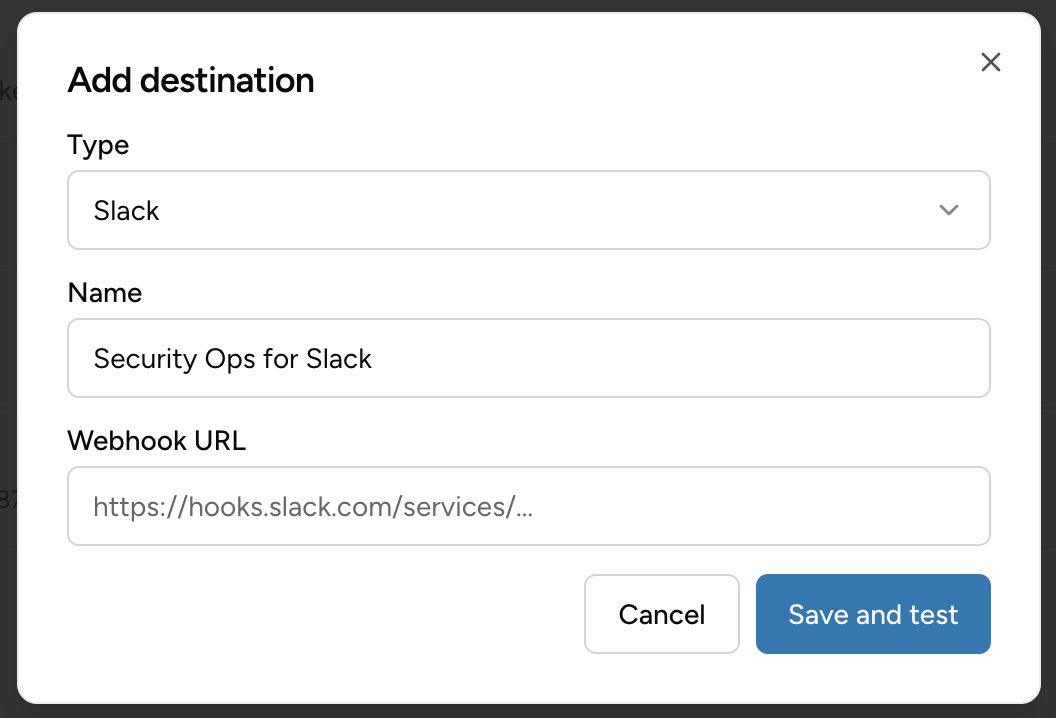
- Click Add destination. The Add destination dialog opens.
- From the Type list, select Slack, Jira Cloud, ServiceNow, or Custom webhook.
- In the Name field, enter a name that helps you recognize the destination.
- Complete the remaining fields for the type you selected. See Webhook Destination Settings.
- Click Save and test.
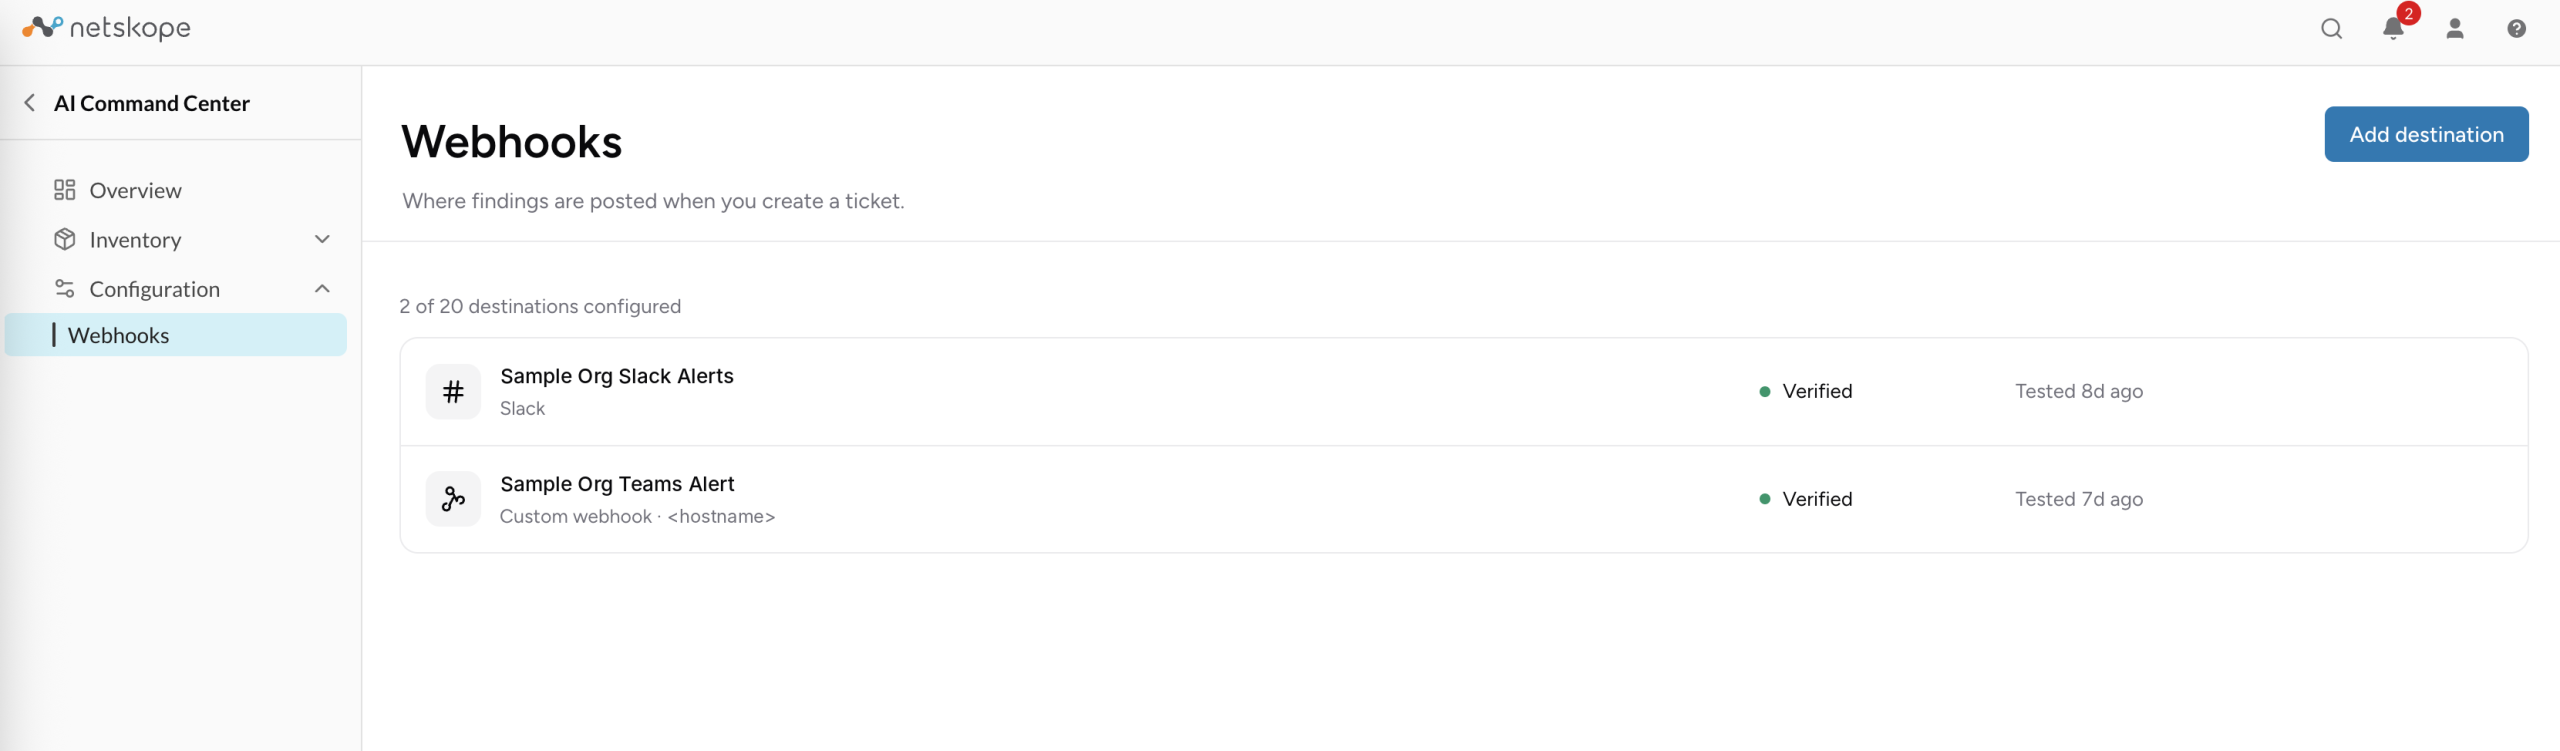
Netskope saves the destination and tests it. If the test passes, the destination appears on the Webhooks page with a Verified status. If it doesn’t, see Troubleshooting Destination Errors.
Viewing Configured Destinations
The Webhooks page lists each destination you add. Each row shows the destination name, its type, a status, and when Netskope last tested it. For a custom webhook, the row also shows the host name of the endpoint. A counter above the list shows how many destinations you have configured out of the 20 available.
Netskope tests a destination when you click Save and test or Test.
The following table describes the status values.
| Status | Description |
|---|---|
| Verified | The last test passed. |
| Error | The last test failed. This status also appears if the destination rejects your credentials while Netskope sends a ticket. |
| Unverified | Netskope saved the destination, but the test didn’t complete. Click Test. |
Managing Destinations
Each destination row on the Webhooks page has actions you use to maintain the destination. Test and Edit appear in the row. To see Set as default and Delete, click the more options menu (…) in the row.
The following table describes the actions:
| Action | Description |
|---|---|
| Test | Tests the destination again and updates its status. |
| Edit | Opens the destination so you can change its settings. Click Save and test to apply the changes. |
| Set as default | |
| Delete | Removes the destination. |
Webhook Destination Settings
The following tables describe the fields in the Add destination dialog for each type.
Common Settings
The following table describes the fields that appear for every destination type.
| Field | Description |
|---|---|
| Type | The kind of destination to add. Select Slack, Jira Cloud, ServiceNow, or Custom webhook. |
| Name | The name that identifies the destination, for example, Security Ops. |
Slack Settings
The following table describes the field that’s specific to a Slack destination.
| Field | Description |
|---|---|
| Webhook URL | The Slack webhook URL that receives findings. The URL starts with https://hooks.slack.com/services/. |
Jira Cloud Settings
The following table describes the fields that are specific to a Jira Cloud destination.
| Field | Description |
|---|---|
| Base URL | The URL of your Jira Cloud site, for example, https://your-site.atlassian.net. |
| The email address of the Jira user that creates tickets. | |
| API token | The Jira API token for that user. |
| Project key | The key of the Jira project that receives tickets, for example, SEC. |
| Issue type | The Jira issue type that Netskope uses for new tickets, for example, Task. |
| Labels (optional) | The labels to add to each ticket, for example, aicc or prod-security. Netskope always adds the netskope-aicc label and a correlation label. |
ServiceNow Settings
The following table describes the fields that are specific to a ServiceNow destination.
| Field | Description |
|---|---|
| Instance URL | The URL of your ServiceNow instance, for example, https://your-instance.service-now.com. |
| Username | The user name of the ServiceNow integration user. |
| Password | The password of the integration user. |
| Table | The ServiceNow table that receives records. The field is prefilled with incident. |
| Assignment group (optional) | The ServiceNow group to assign new records to, for example, Network Security Ops. |
Custom Webhook Settings
The following table describes the fields that are specific to a custom webhook.
| Field | Description |
|---|---|
| URL | The URL of the endpoint that receives findings. Use a public HTTPS URL. |
| Custom headers (optional) | The HTTP headers that Netskope sends with each request. Click Add header, and then enter a header name and a value. You can add up to 10 headers. Host, Content-Type, and any header that starts with X-Netskope- are reserved. Netskope stores header values encrypted and masks them after you save. |
| Sign requests (HMAC-SHA256) | Sign each request with a shared secret so your endpoint can confirm the request came from Netskope and wasn’t changed in transit. When you turn on this option, you must enter a signing secret. See Verifying Signed Requests. |
| Signing secret | The shared secret that Netskope uses to sign requests. Required when signing is on. Use a random value of at least 32 bytes. After you save, you can’t read the secret again. The console shows only that a secret is set, and the last 4 characters of long secrets. If you change the endpoint URL, enter the secret again. |
Verifying Signed Requests
When you turn on Sign requests (HMAC-SHA256), your endpoint can use the signature to confirm that Netskope sent the request and that nobody changed the request body after Netskope sent it.
Signature Header
Each signed request includes the following header:
X-Netskope-Signature: t=<timestamp>,v1=<signature>
Where
- t: The time Netskope sent the request, in Unix seconds.
- v1: The HMAC-SHA256 of the signed string, as lowercase hexadecimal.
The signed string is the timestamp, a period (.), and the raw request body:
<t>.<raw request body>
Test deliveries are signed the same way.
Verifying a Request
To verify a request:
- Get the t and v1 values from the X-Netskope-Signature header.
- Make the string <t>.<raw request body>. Use the raw body bytes exactly as received. Don’t parse the JSON and serialize it again.
- Calculate the HMAC-SHA256 of that string with your secret. Encode the result as lowercase hexadecimal.
- Compare your value to v1 with a constant-time comparison. If they are different, reject the request.
- Reject the request if t is too far from your current time, for example, more than 5 minutes. This stops someone from sending a captured request again.
The following Python example shows these steps:
import hashlib
import hmac
import time

def verify(secret: bytes, header: str, raw_body: bytes, tolerance: int = 300) -> bool:
    parts = dict(p.split("=", 1) for p in header.split(","))
    t, v1 = parts["t"], parts["v1"]
    signed = t.encode() + b"." + raw_body
    expected = hmac.new(secret, signed, hashlib.sha256).hexdigest()
    if not hmac.compare_digest(expected, v1):
        return False
    return abs(time.time() - int(t)) <= tolerance
To find and discard duplicate deliveries, use the Idempotency-Key or X-Netskope-Delivery header.
Troubleshooting Destination Errors
If a destination shows an Error status, test it again and correct the settings that caused the failure.
To fix a destination with an Error status:
- On the Webhooks page, find the destination and click Test.
If the test fails, Netskope shows the reason. - Click Edit, and then correct the settings.
- Click Save and test.
The status changes to Verified when the test passes.
The following table describes each reason and how to fix it.
| Reason | What to do |
|---|---|
| Authentication failed | Check the API token or password. Make sure it’s valid and has permission to create tickets or post messages. |
| Destination not found | Check the project key, issue type, table, or URL. |
| Destination rejected the request | Read the message. Fix the required fields or the field mapping in the destination. |
| Destination unreachable | Check the host name. Make sure the endpoint is public and its firewall allows Netskope traffic. |
| Destination blocked | Use a public HTTPS URL. |
| Timeout | Make sure the endpoint is running and responds quickly, and then test again. |
| Rate limited | Wait, and then test again. If it keeps happening, ask the destination admin to raise the limit. |
| Destination error | Check the destination service, and then test again. |