

Overview
Netskope DSPM supports scanning Azure Synapse Analytics Data Stores. Follow these instructions to setup your Azure Synapse Analytics database and configure its connection to Netskope DSPM.
Create Netskope DSPM Service Principal
Begin by configuring a Azure Synapse Analytics service principal app registration which will be dedicated to Netskope DSPM’s use. We then need to grant the app registration IAM access to relevant resources: Synapse Analytics and any file/data storage which Synapse is expected to read from.
Register Netskope DSPM App Service Principal
- Login to your Azure portal and search for App registration
- Click on New Registrations and complete the registration by providing app Name. It is recommended to include “Netskope DSPM” in the name, to make it easier to identify, then click Register.

- Go to Overview of the created app and capture Application ID and Tenant ID (Directory ID).
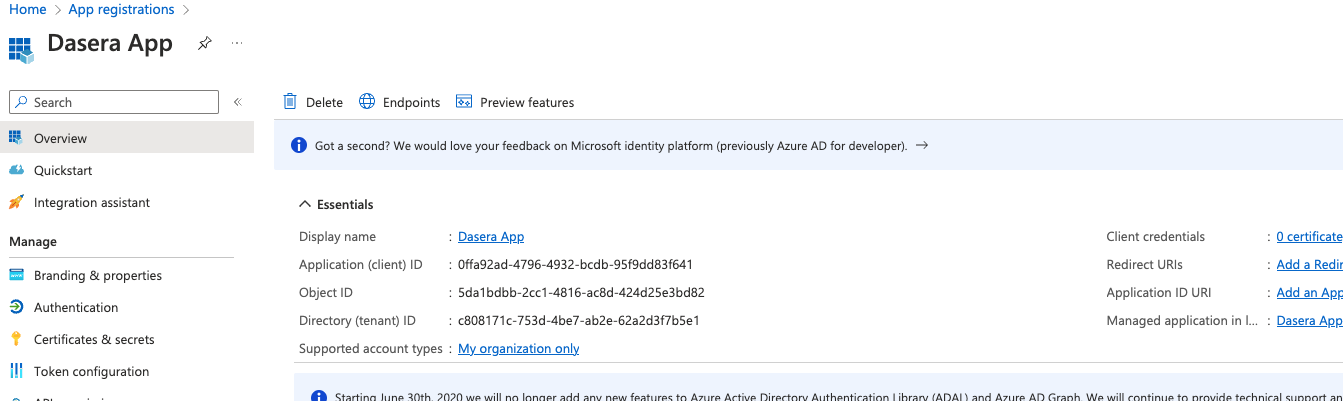
- From Netskope DSPM App overview, navigate to Certificates & secrets and click on New client secret.
- Enter Description and validity of secret, then click Add.
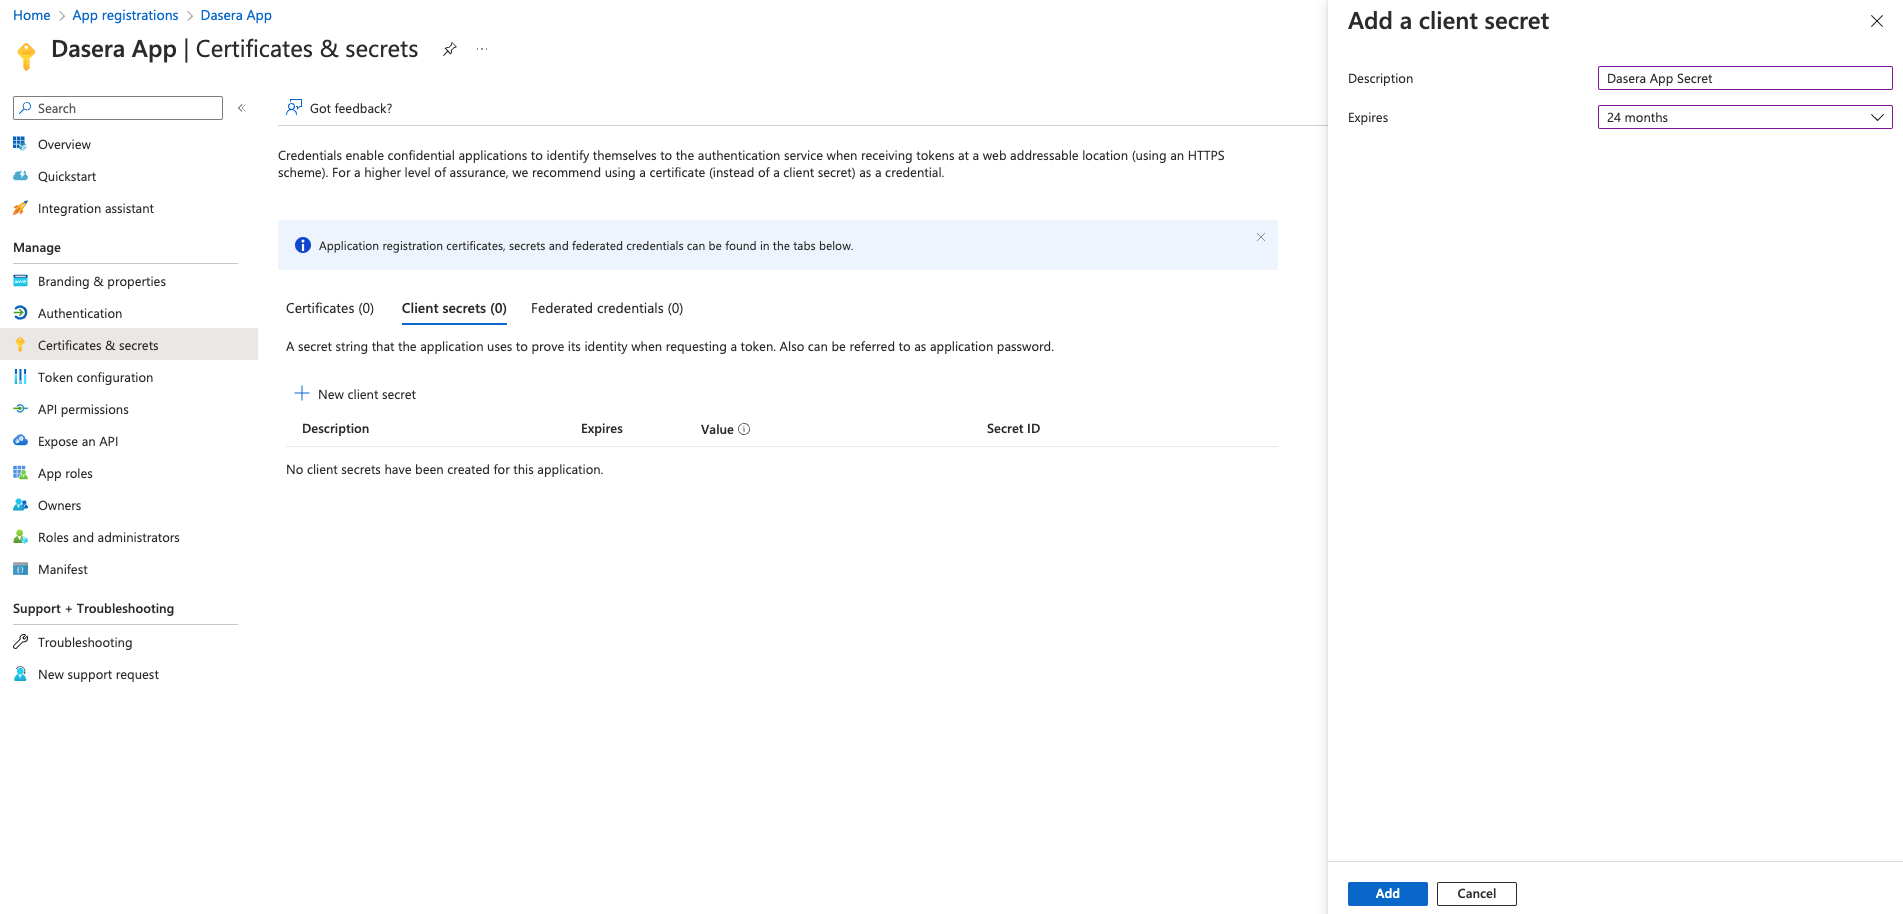
- Copy and capture the secret value as Application Secret. The secret is never shown again after this step

- Additionally, the app registration will need to allow MSAL redirects. Go to Authentication, click on Add a platform and select Mobile and desktop applications

- Select the third checkbox that says
msal0ffa92ad-4796-4932-bcdb-95f9dd83f641://auth (MSALonly)and Click Configure.
Grant Application Access
This step will slightly differ based on Azure storage service being used. Below steps illustrated for the default Azure Data Lake Storage Gen2 storage
- Navigate to Open Synapse Studio, Manage section and click Add

- Add role as Synapse Administrator and search for above created App registration and click Apply

- Search and navigate to Storage accounts and click on the displayed storage account to be granted access

- Navigate to Access Control (IAM) and Add role assignment

- Search for role Storage Blob Data Reader, select and move to next tab Members

- Select Members and search for above created App registration and click Select

- Review + assign and this app should be visible in role assignment

This storage account access steps 3 to 7 will have to be repeated for other storage accounts
Create SQL User
An administrator will need to run the following commands on the Synapse workspace:
For Serverless:
- On each non-master database, run:
CREATE USER [Netskope One DSPM_application] FROM EXTERNAL PROVIDER;
ALTER ROLE db_datareader ADD MEMBER [Netskope One DSPM_application];
For Dedicated:
- On each non-master database, run:
CREATE USER [Netskope One DSPM_application] FROM EXTERNAL PROVIDER;
EXEC sp_addrolemember 'db_datareader', [Netskope One DSPM_application];
- Additionally, on the master database, run:
CREATE LOGIN Netskope One DSPM_application WITH PASSWORD = '<secure password here>'; CREATE USER Netskope One DSPM_application FROM LOGIN Netskope One DSPM_application;
Retrieve Connection Information
In addition to configuring a service account, Netskope DSPM will also require additional information in order to communicate with your Azure Synapse Analytics database. Please follow the steps below to identify the connection values for later use within Netskope DSPM.
| Highlight Color | Corresponding Netskope DSPM Value | Example |
|---|---|---|
| Grey | Data Store Endpoint |  |
| Red | SQL Pool Type |  |
Connect Your Data Store
Step 1: Provide Credentials
Follow these steps to configure the connection:
-
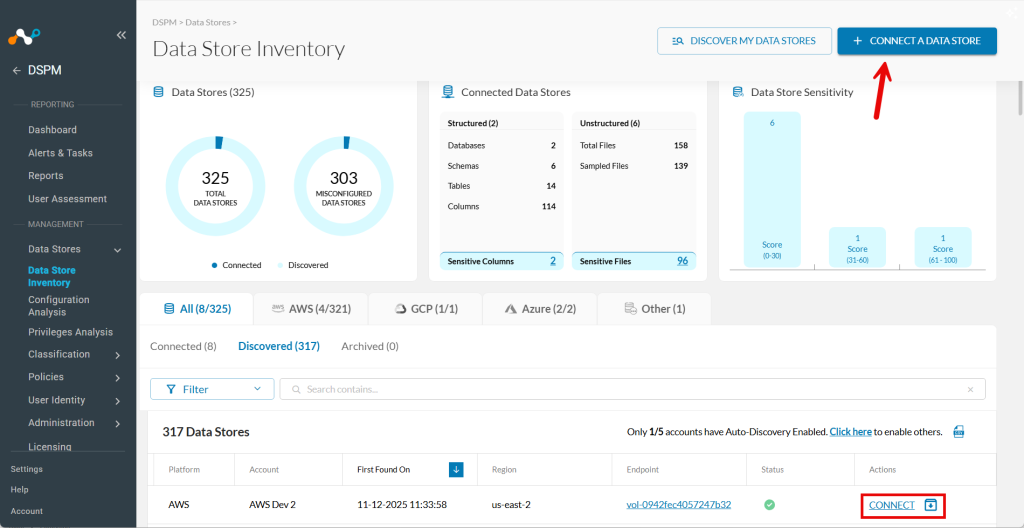
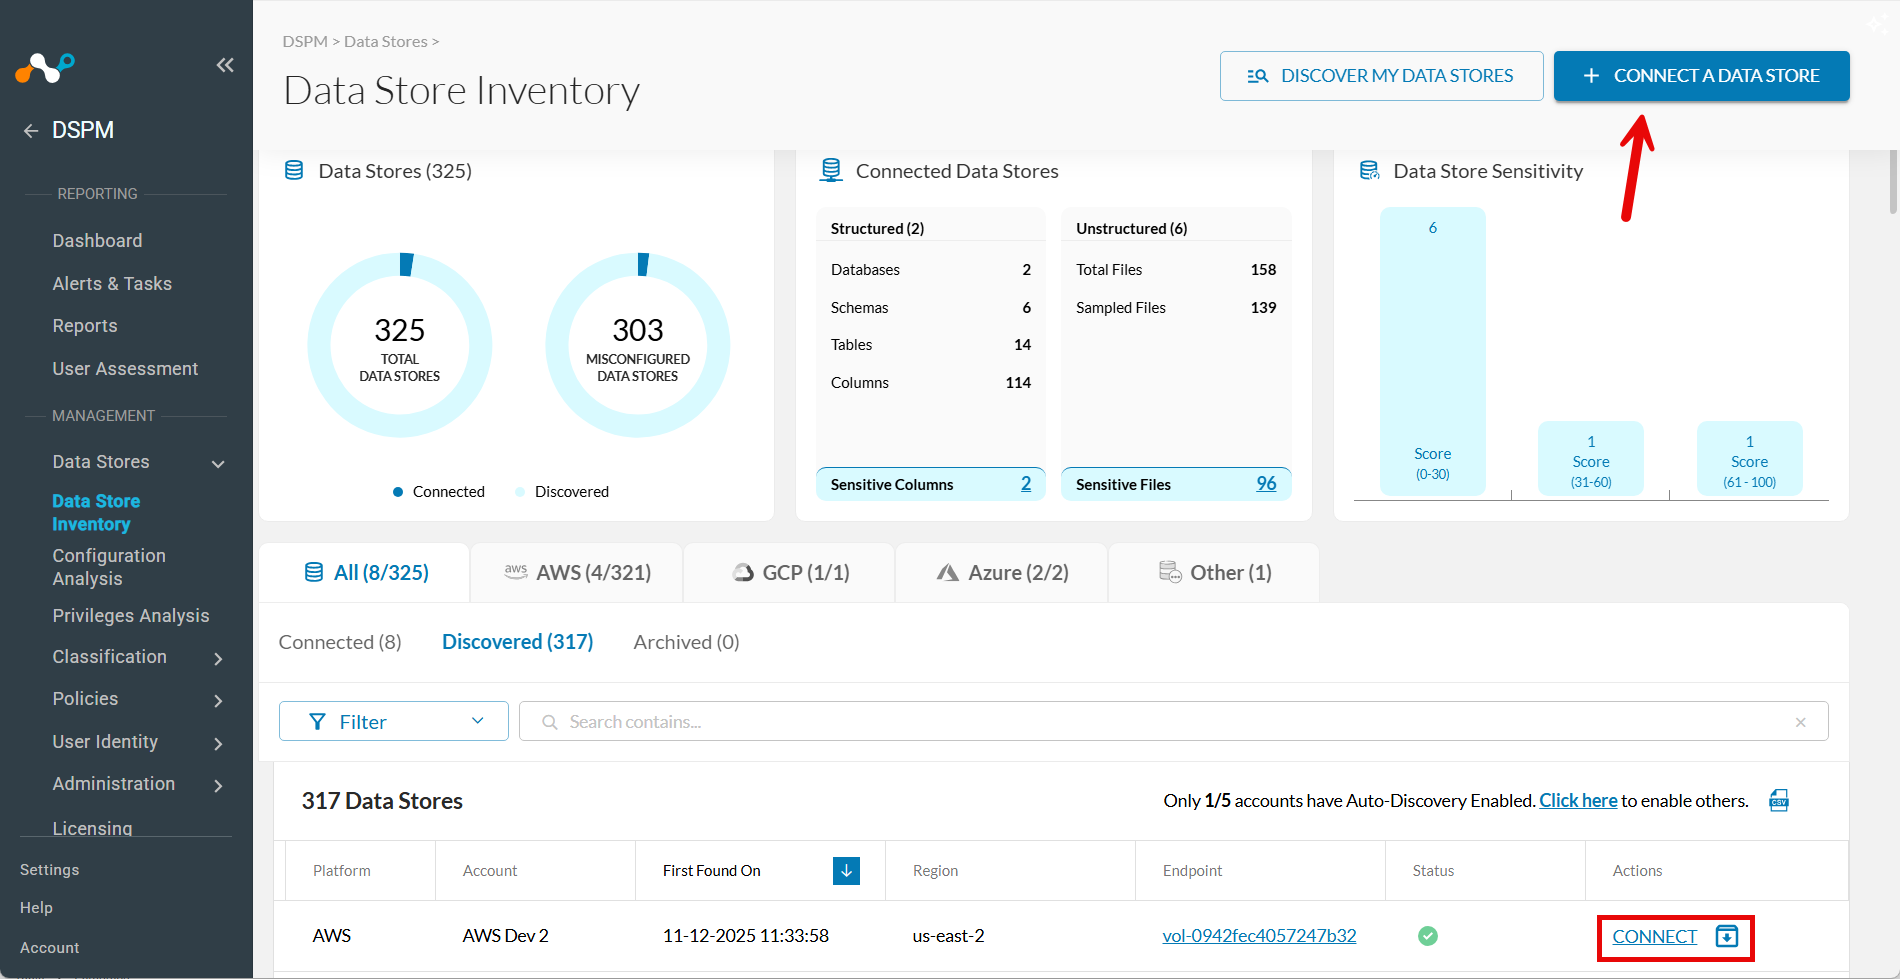
Go to Data Stores > Data Store Inventory.
-
Click CONNECT A DATA STORE in the upper right.
Tip: Alternatively, if the data store was already found by auto-discovery, go to the Discovered tab and click Connect in the Actions column.
-
In the Connect a Data Store window, click the data store icon you wish to connect.
-
In the Provide Credentials section, complete the following fields:
| Field | Value |
|---|---|
| Azure Account Name | Select one of the Azure Accounts defined within the Infrastructure Section screen. The field will default if there is just one Azure account configured. |
| Data Store Identifier | Friendly name to describe this Data Store. Your value is displayed in other Netskope DSPM screens such as Policy Management and Classification Management. |
| Data Store Endpoint | Enter the corresponding value from the prior section above. |
| SQL Pool Type | Enter the corresponding value from the prior section above. |
| Principal ID | Application ID captured from Create Netskope DSPM Service Principal section point 3. |
| Principal Secret | Application Secret captured from Create Netskope DSPM Service Principal section point 6. |
| Scan Frequency | Controls how often your Data Store is reviewed for changes, Netskope DSPM’s recommended frequency is defaulted, which you can override (if desired). |
| Sidecar Pool | If you will use sidecars to monitor this data store, select a sidecar pool with network visibility to said data store. This field is displayed when there is at least one defined sidecar pool. To learn more, please visit our Sidecar Administration article. |
Step 2: Scanning Infrastructure
- Click Next.
- When the Select Capabilities tab appears, complete the following fields:
- Assign a Data Owner (Optional): Select one or more users responsible for this data store.
- Which databases should Netskope DSPM scan?: Select the specific data stores and schemas to monitor, if applicable.
- Features: Select the features you want to enable.
| Capability | Supported for Azure Synapse Analytics |
|---|---|
| Discovery | Yes (always-on) |
| Privilege Analysis | Yes |
| Shadow Data Analysis | No |
| Classification | Yes |
| Data In Use Monitoring | Yes (custom query logs only) |
| Automation | Yes (always-on) |
Step 3: Review and Save
- Click Save.
- When the Review tab appears, the system validates your configuration. If there are any issues, follow the on-screen instructions to fix them.
- Click Save to finalize the connection.