

Overview
Netskope DSPM supports scanning MongoDB Data Stores, both those setup using MongoDB Atlas or on-prem. While the instructions are written from a MongoDB Atlas perspective, they should be applicable to on-prem installations (with some variation in steps and screenshots).
Create a MongoDB Service Account
Netskope DSPM requires programmatic access to connect to & scan your MongoDB Data Stores, including assigning specific user permissions. Please follow the steps below to create the necessary configurations within the MongoDB console.
- Log into MongoDB Atlas.
- Navigate to the SECURITY > Database Access screen.
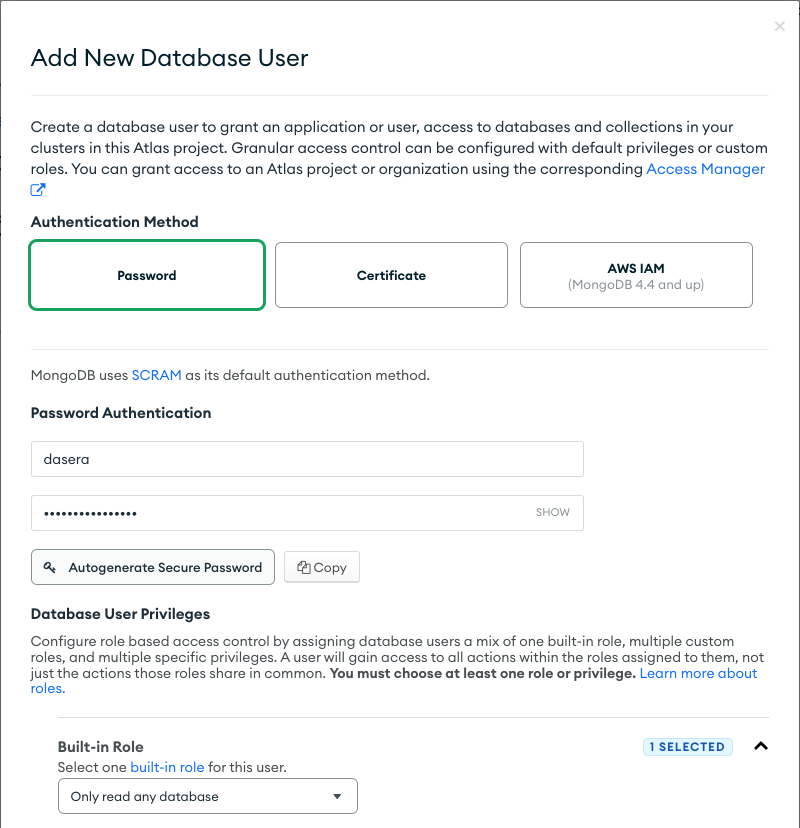
- Click the ADD NEW DATABASE USER button. A modal titled “Add Database User” is displayed.
- Within the Authentication Method section, select “Password”.
- Within the Password Authentication section, complete the following fields:
- Username: any value; it is recommended to include “Netskope DSPM” in the name, to make it easier to identify
- Password
- Within the Database User Privileges section, complete the following field:
- Built-In Role: Only read any database
- Click the Add User button.
Retrieve Cluster Connection Information
In addition to configuring a service account, Netskope DSPM will also require additional information in order to communicate with your MongoDB cluster. Please follow the steps below to identify the connection values for later use within Netskope DSPM.
- Log into MongoDB Atlas.
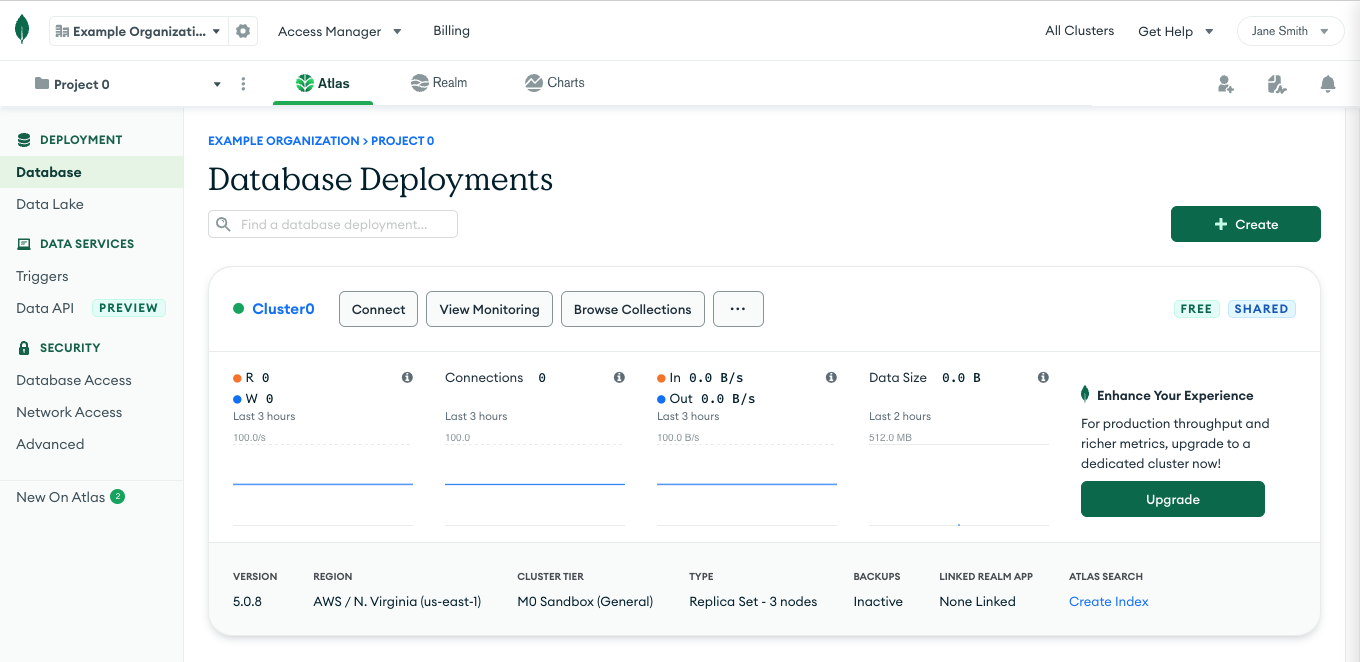
- Navigate to the DEPLOYMENT > Databases screen.
- For the cluster you plan on connecting to Netskope DSPM, click its Connect button.
- The Connect to Cluster modal is displayed, starting with the Setup Connection Security tab.
- Click the Connect your Application button. The modal will auto-navigate you to the next tab.
- On the Choose a connection method tab, complete the following fields:
- Driver: Java
- Version: 3.4 or later
- Make note of the following highlighted portion of the connection string, which will later be used within Netskope DSPM for connecting your MongoDB Data Stores:
| Highlight Color | Corresponding Netskope DSPM Value | Example |
|---|---|---|
| Blue | Data Store Endpoint | 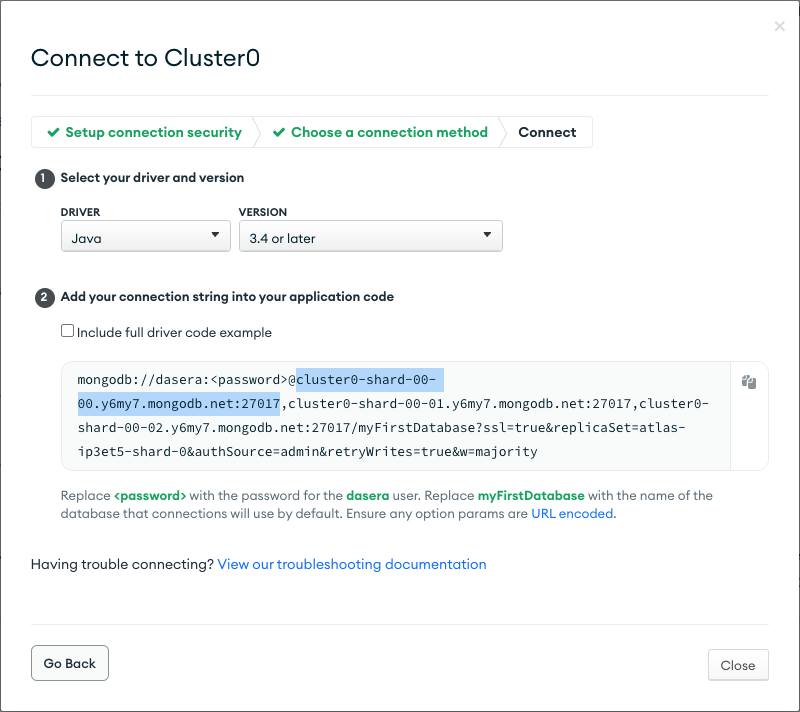 |
Connect Your Data Store
Step 1: Provide Credentials
Follow these steps to configure the connection:
-
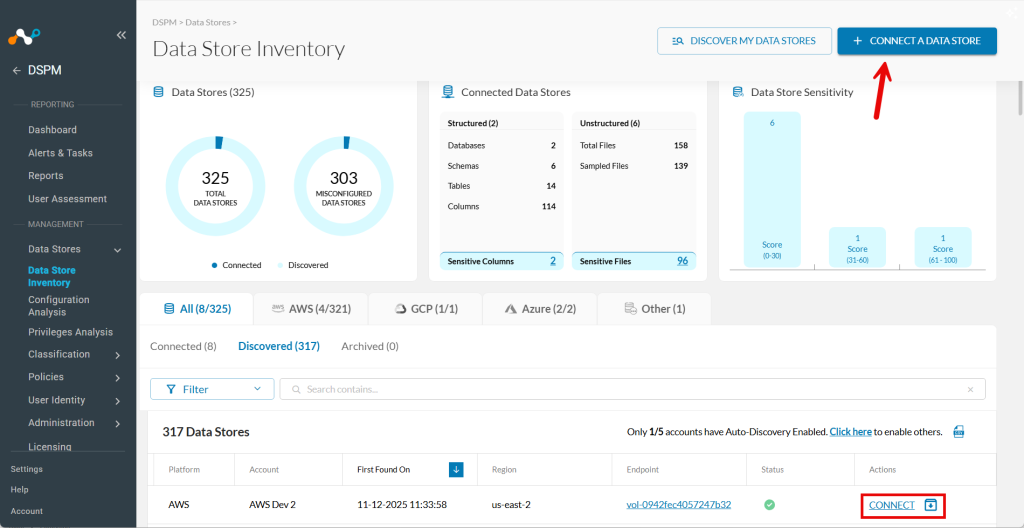
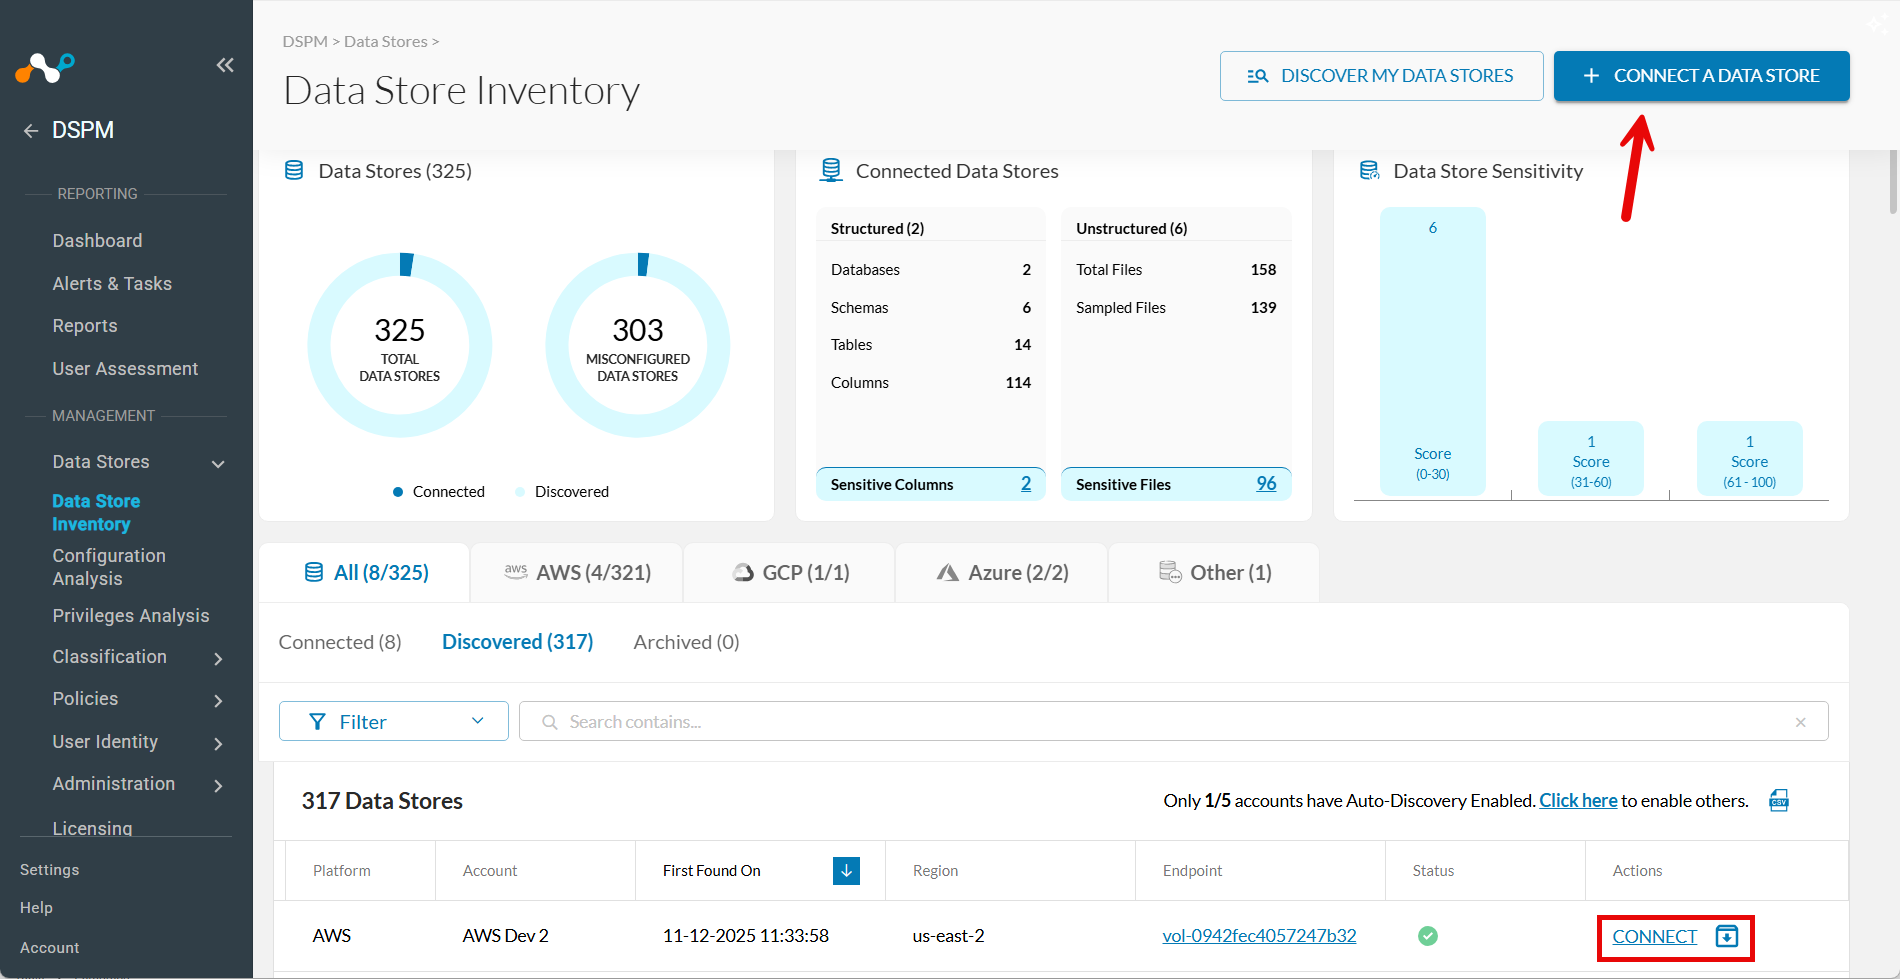
Go to Data Stores > Data Store Inventory.
-
Click CONNECT A DATA STORE in the upper right.
Tip: Alternatively, if the data store was already found by auto-discovery, go to the Discovered tab and click Connect in the Actions column.
-
In the Connect a Data Store window, click the data store icon you wish to connect.
-
In the Provide Credentials section, complete the following fields:
| Field | Value |
|---|---|
| Data Store Identifier | Friendly name to describe this Data Store. Your value is displayed in other Netskope DSPM screens such as Policy Management and Classification Management. |
| Data Store Endpoint | Enter the corresponding value from the Retrieve Cluster Connection Information step above. |
| Database Username | Enter the corresponding value from the Create a MongoDB Service Account step above. |
| Password | Enter the corresponding value from the Create a MongoDB Service Account step above. |
| Scan Frequency | Controlling how often your Data Store is reviewed for changes, Netskope DSPM’s recommended frequency is defaulted, which you can override if (desired). |
| Sidecar Pool | If you will use sidecars to monitor this data store, select a sidecar pool with network visibility to said data store. This field is displayed when there is at least one defined sidecar pool. To learn more, please visit our Sidecar Administration article. |

Step 2: Scanning Infrastructure
- Click Next.
- When the Select Capabilities tab appears, complete the following fields:
- Assign a Data Owner (Optional): Select one or more users responsible for this data store.
- Which databases should Netskope DSPM scan?: Select the specific data stores and schemas to monitor, if applicable.
- Features: Select the features you want to enable.
| Feature | Supported for MongoDB? |
|---|---|
| Discovery | Yes (always-on) |
| Privilege Analysis | No |
| Classification | Yes |
| Data In Use Monitoring | No |
| Automation | Yes (always-on) |
Step 3: Review and Save
- Click Save.
- When the Review tab appears, the system validates your configuration. If there are any issues, follow the on-screen instructions to fix them.
- Click Save to finalize the connection.