

Overview
Netskope One DSPM supports scanning self-managed MySQL data stores. Follow these instructions to set up your self-managed MySQL database and configure its connection to Netskope One DSPM.
Create a Netskope One DSPM Service Account
Begin by configuring a MySQL service account, which will be dedicated to Netskope One DSPM’s use. The following instructions apply to all of the cloud infrastructure solutions listed above.
- As an administrator, log into your MySQL database’s shell.
- Create the Netskope One DSPM-specific MySQL user by executing the following commands in order:
| Command | Outcome | Notes |
|---|---|---|
CREATE USER 'dasera_user'@'%' IDENTIFIED BY 'dasera_password'; | Creates the Netskope One DSPM-specific user. | Substitute dasera_user and dasera_password with your own preferred values.@’%’ creates a user which supports remote connection. As an alternative, substitute it with @’#.#.#.#’ to allow a specific IP address. |
GRANT SELECT ON *.* TO 'dasera_user'@'%'; | Grants to the Netskope One DSPM-specific user the required permissions which power capabilities within the Netskope One DSPM platform. | Substitute dasera_user with the value used above.*.* means “on all schemas, in all tables in those schemas”, and it applies to future tables and schemas as well. |
Retrieve Connection Information
In addition to configuring a service account, Netskope One DSPM will also require additional information to communicate with your self-managed MySQL database. Please follow the steps below to identify the connection values for later use within Netskope One DSPM.
| Corresponding Netskope One DSPM Value | Details |
|---|---|
| Endpoint | Enter either the IP address or DNS name for your Self-Managed MySQL instance, used to create the service account above. This can be found by running ipconfig.exe from the instance’s CLI and parsing its output. |
Connect Your Data Store
Step 1: Provide Credentials
Follow these steps to configure the connection:
-
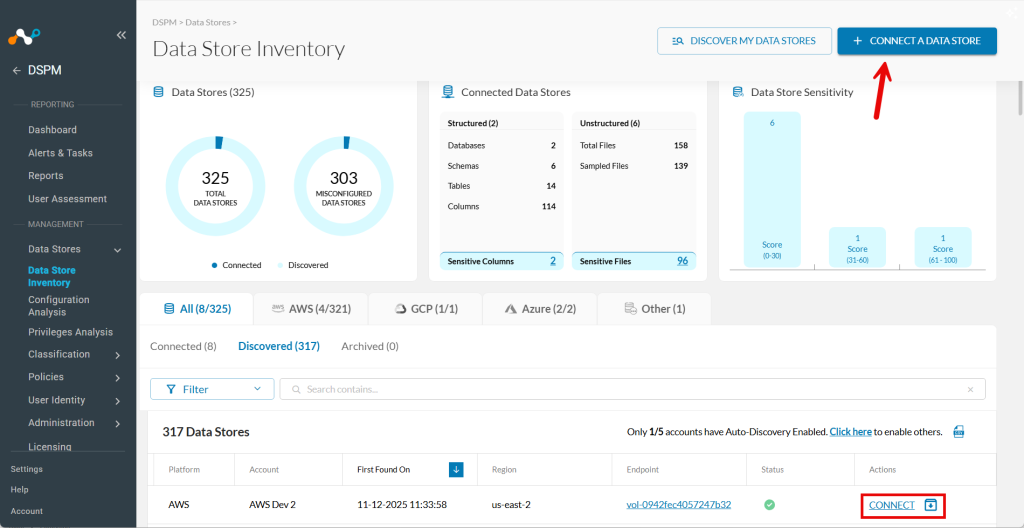
Go to Data Stores > Data Store Inventory.
-
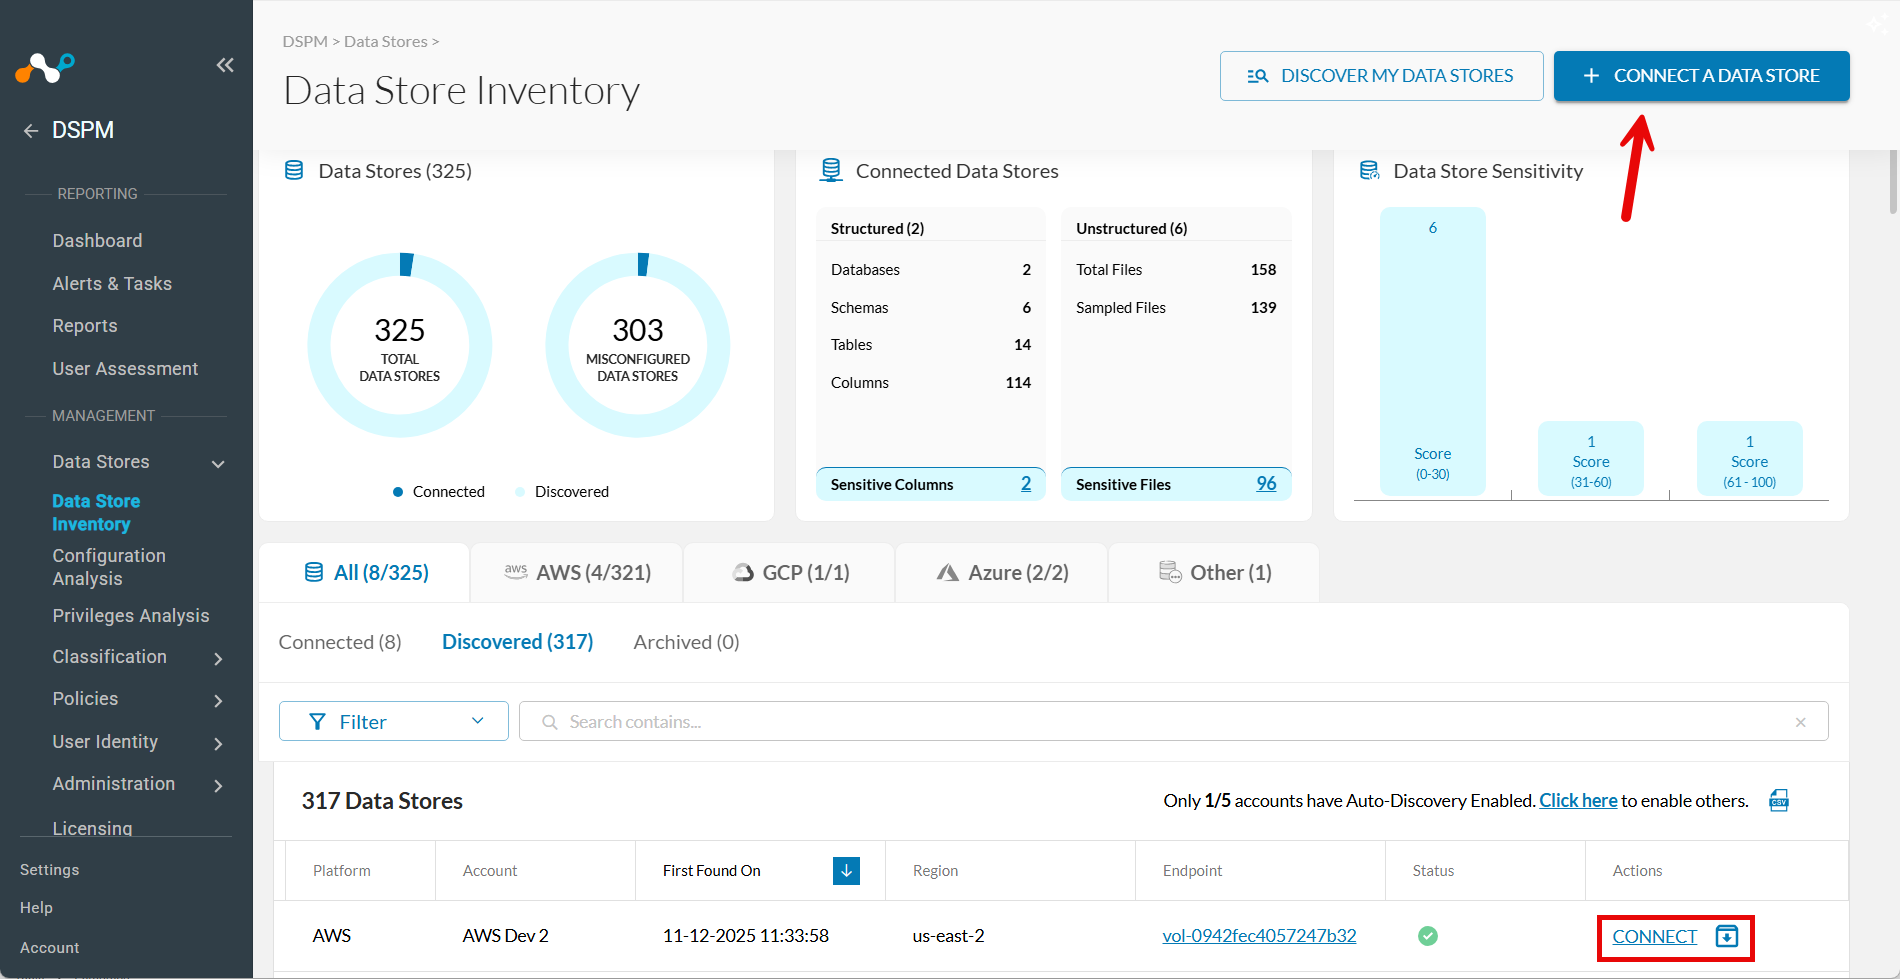
Click CONNECT A DATA STORE in the upper right.
Tip: Alternatively, if the data store was already found by auto-discovery, go to the Discovered tab and click Connect in the Actions column.
-
In the Connect a Data Store window, click the data store icon you wish to connect.
-
In the Provide Credentials section, complete the following fields:
| Field | Value |
|---|---|
| Data Store Identifier | Friendly name to describe this Data Store. Your value is displayed in other Netskope One DSPM screens such as Policy Management and Classification Management. |
| Data Store Endpoint | IP address or DNS name for the database, as described in Retrieve Connection Information section above. This entry contains a port number if the database is accessible on a non-default port. eg. 10.5.25.5:4576 |
| Authentication Method | Select AWS Secrets Manager or Username / Password authentication. |
| Secret ARN | If using AWS Secrets Manager authentication, enter Secret ARN obtained from AWS Secrets Manager. |
| Username | Enter the corresponding value from the prior section above. |
| Password | Enter the corresponding value from the prior section above. |
| Scan Frequency | Controls how often your Data Store is reviewed for changes, Netskope One DSPM’s recommended frequency is defaulted, which you can override (if desired). |
Step 2: Scanning Infrastructure
- Click Next.
- When the Select Capabilities tab appears, complete the following fields:
- Assign a Data Owner (Optional): Select one or more users responsible for this data store.
- Which databases should Netskope DSPM scan?: Select the specific data stores and schemas to monitor, if applicable.
- Features: Select the features you want to enable.
| Capability | Supported for self-managed MySQL Data Stores |
|---|---|
| Discovery | No |
| Configuration Analysis | Yes |
| Privilege Analysis | Yes (MySQL version 8.0 or higher required) |
| Shadow Data Analysis | Yes |
| Classification | Yes |
| Data In Use Monitoring | Yes Note: Enabling query logging on a MySQL database may impact its performance. Once you have completed these configurations, closely monitor your database along with any pipelines / applications that are dependent on it. |
| Automation | Yes (always-on) |
Step 3: Review and Save
- Click Save.
- When the Review tab appears, the system validates your configuration. If there are any issues, follow the on-screen instructions to fix them.
- Click Save to finalize the connection.