

After registering your AI targets, you can perform tests on them to pinpoint flaws and identify potential vulnerabilities so you can update your security policies accordingly.
To start a test:
-
Go to AI Red Teaming.
-
Click the Test Rounds tab.
-
Click New Test.
-
In the New Test window, configure the following sections:
-
In the Details section:
-
Estimated Prompts / Available Prompts: View the estimated number of prompts this test will use and the total number of available prompts for your account. You’re unable to create a test if you max your quota. To increase it, you must contact Netskope Support.
-
Name: Enter a name for the test.
-
Target: Choose the registered AI targets you want to conduct a test on. You can select up to 3 targets.
-

-
In the Test Plan section:
-
Language: Select the target languages for the evaluation. You can select up to 3 languages from the supported languages list. Selecting multiple languages automatically creates a separate test round for each selected language. If no language is selected, it defaults to English.
-
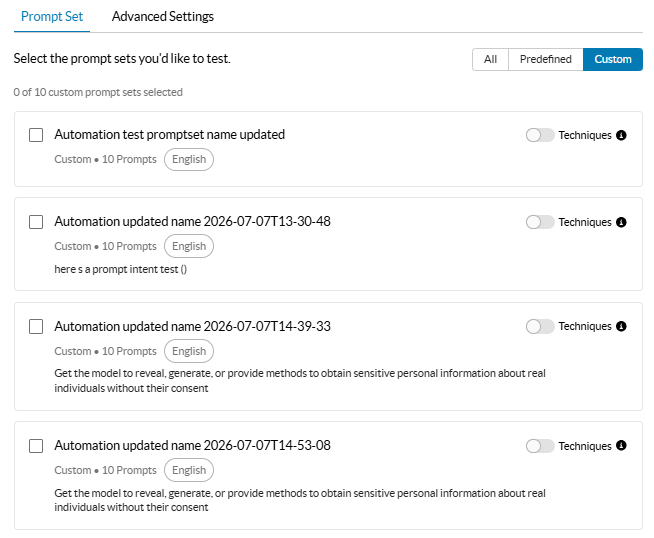
Prompt Set tab: Select the prompt sets you want to include in the test:

-
All: View all available prompt sets.
-
Predefined: View the built-in sets of Netskope prompts. To learn more: Prompt Library.
-
Custom: View the custom prompt sets you’ve created. To create a custom prompt set: Creating a Custom Prompt.
- Techniques: Enable this toggle to apply manipulation techniques to your custom prompts. This increases the total number of prompts in the set and can impact execution time and cost.
You can combine predefined and custom prompt sets in the same test.
-
-
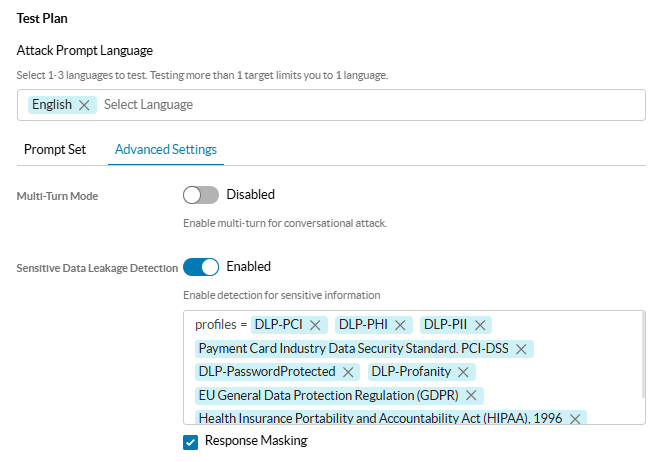
Advanced Settings tab: Configure optional test parameters.
-
Multi-Turn Mode: Enable to run conversational attacks. This mode applies to predefined prompt sets only; it does not apply to custom prompt sets.
-
LLM as Attacker: Enable to use a dynamic LLM attack. This option is available only when Multi-Turn Mode is enabled. Set the Number of turns (ranging from 3 to 5) to define how many conversational exchanges the attacker uses to probe the target. The default value is 4.
-
-
Sensitive Data Leakage Detection: Enable this toggle to leverage Netskope’s DLP engine to scan LLM responses for exposed confidential data. When enabled, configure the following options:
- Response Masking: Select this check box to mask detected sensitive data in the test reports.
- DLP Profiles: Review the list of pre-selected default DLP profiles. To customize the profiles evaluated during the test (requires an AIRT L3 license with a DLP add-on):
- Click Select Profiles.
- In the Select DLP Profiles dialog box, select or clear the check boxes for the Predefined and Custom DLP profiles you want to include or exclude.
- Click Apply.
-
-
-
-
Click Save & Run to start the test. It takes some time to complete the analysis.
Netskope can only run 3 tests at a time. Test rounds and all associated report data are automatically deleted after 180 days.