Netskope’s System for Cross-domain Identity Management (SCIM) implementation allows organizations to automate user provisioning and synchronize complex identity data across their cloud ecosystem. By leveraging the official Netskope User Authentication application, administrators can seamlessly map standard SCIM 2.0 attributes, Enterprise User extensions, and custom tenant schemas to satisfy granular policy requirements.
This guide provides the technical requirements and step-by-step workflows for:
-
Extending the Netskope SCIM Schema: Using RBAC v3 tokens to define custom attributes via API.
-
Official App Configuration: Setting up automated provisioning in the Microsoft Entra ID and Okta app catalogs
-
Attribute Mapping: Synchronizing enterprise metadata (e.g., manager, department) and custom-defined tenant attributes.
-
UI Visualization: Verifying synchronized identity data directly within the Netskope tenant.
Understanding Netskope SCIM Schemas
Netskope’s SCIM implementation follows a layered approach to identity management. Before creating custom schemas, review the supported standard extensions to ensure your required attributes aren’t already available:
-
SCIM 2.0 Core Schema: Supports essential identity attributes such as username and name.
-
Core URN :urn:ietf:params:scim:schemas:core:2.0:User
-
-
Enterprise User Extension: Includes standardized corporate metadata such as department, division, organization, and manager.
-
Enterprise URN: urn:ietf:params:scim:schemas:extension:enterprise:2.0:User.
-
-
Netskope Platform Schema: Contains attributes uniquely defined and managed by the Netskope platform to support specific cloud security features.
-
Netskope URN: urn:ietf:params:scim:schemas:extension:netskope:2.0:User.
-
-
Custom Tenant Schema: This extension allows organizations to define and synchronize bespoke user attributes tailored to unique business needs.
-
Custom URN: urn:ietf:params:scim:schemas:extension:tenant:2.0:User
-
Notes and Limitations
-
Email Addresses: While the SCIM RFC supports multiple values for email addresses, the Netskope SCIM implementation only supports a single value for the email attribute.
-
Custom attributes must be single-value strings.
-
Maximum length of a custom attribute name – 32 characters
-
Maximum length of a custom attribute value – 64 characters
-
Okta and Azure do not send delete requests for removed custom attributes.
-
Admin permissions are required to access SCIM setup.
-
Avoid patching core/enterprise schemas unless your org uses them.
Define the Custom Tenant Schema via API
To use custom attributes, you must first create and extend the tenant schema via an API call. Use the following API request to create the custom schema. Replace placeholders with actual values:
curl --location --request PUT 'https://<tenant-url>/api/v2/scim/Schemas/urn:ietf:params:scim:schemas:extension:tenant:2.0:User' \
--header 'accept: application/scim+json;charset=utf-8' \
--header 'Content-Type: application/scim+json;charset=utf-8' \
--header 'Authorization: Bearer <api-token>' \
--data '{
  "name": "My Department Schema",
  "attributes": [
    {
      "name": "Director",
      "type": "string",
      "description": "For exec staff",
      "mutability": "readWrite",
      "returned": "default",
      "required": false,
      "multiValued": false,
      "caseExact": false,
      "uniqueness": "none"
    },
    {
      "name": "SubDepartment",
      "type": "string",
      "description": "My SubDepartment",
      "mutability": "readWrite",
      "returned": "default",
      "required": false,
      "multiValued": false,
      "caseExact": false,
      "uniqueness": "none"
    }
  ],
  "description": "Department schema",
  "id": "urn:ietf:params:scim:schemas:extension:tenant:2.0:User",
  "meta": {
    "location": "https://<tenant-url>/Schemas/urn:ietf:params:scim:schemas:extension:tenant:2.0:User",
    "resourceType": "Schema"
  }
}'
Enable Core/Enterprise Schema Attributes
This step is optional. Proceed only required if your organization plans to use core or enterprise attributes.
curl --location --request PATCH 'https://<tenant-url>/api/v2/scim/Schemas/urn:ietf:params:scim:schemas:core:2.0:User' \
--header 'accept: application/scim+json;charset=utf-8' \
--header 'Content-Type: application/scim+json;charset=utf-8' \
--header 'Authorization: Bearer <api-token>' \
--data '{
  "schemas": ["urn:ietf:params:scim:api:messages:2.0:PatchOp"],
  "Operations": [{
    "op": "add",
    "path": "attributes",
    "value": {
      "name": "displayName",
      "type": "string"
    }
  }]
}'
Integration with Identity Providers
This approach utilizes the official Netskope User Authentication application available in the Okta and Microsoft Entra ID app catalogs.
Integrating with OKTA
-
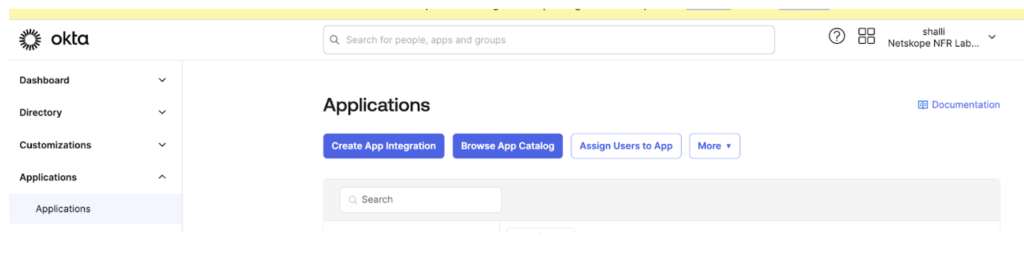
In the Okta Admin Console, go to Applications and click on Browse App Catalog.
-
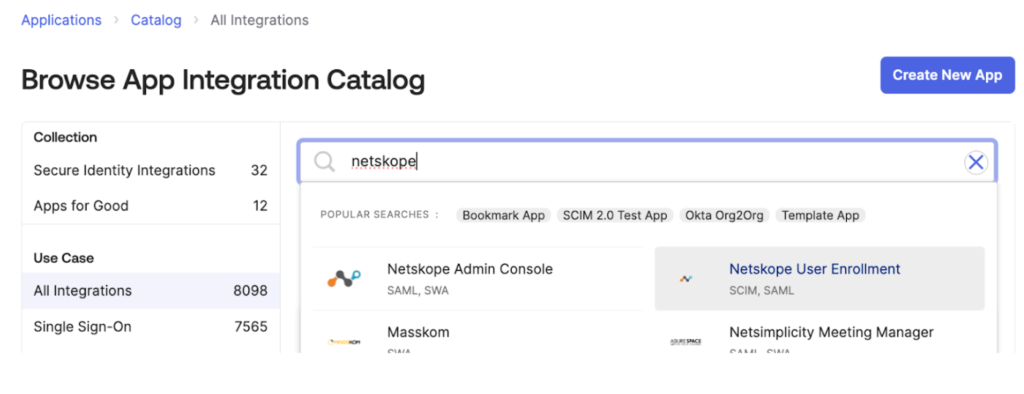
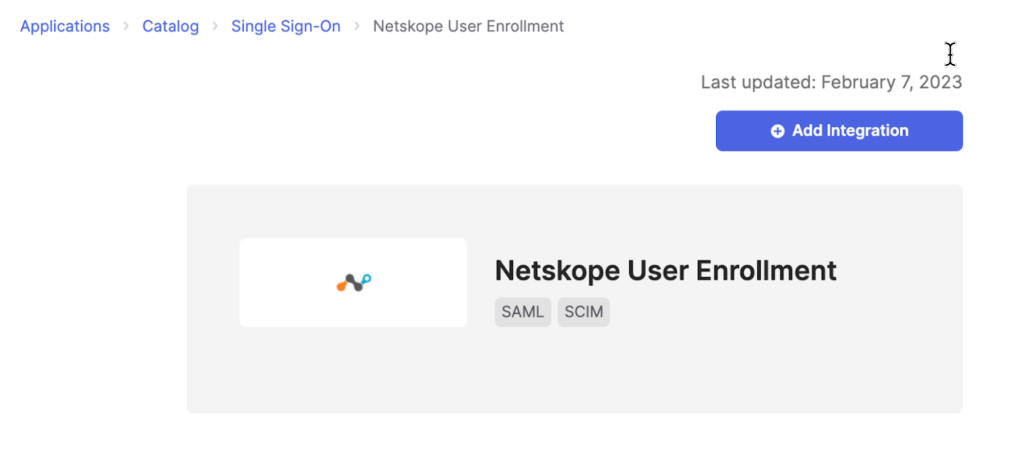
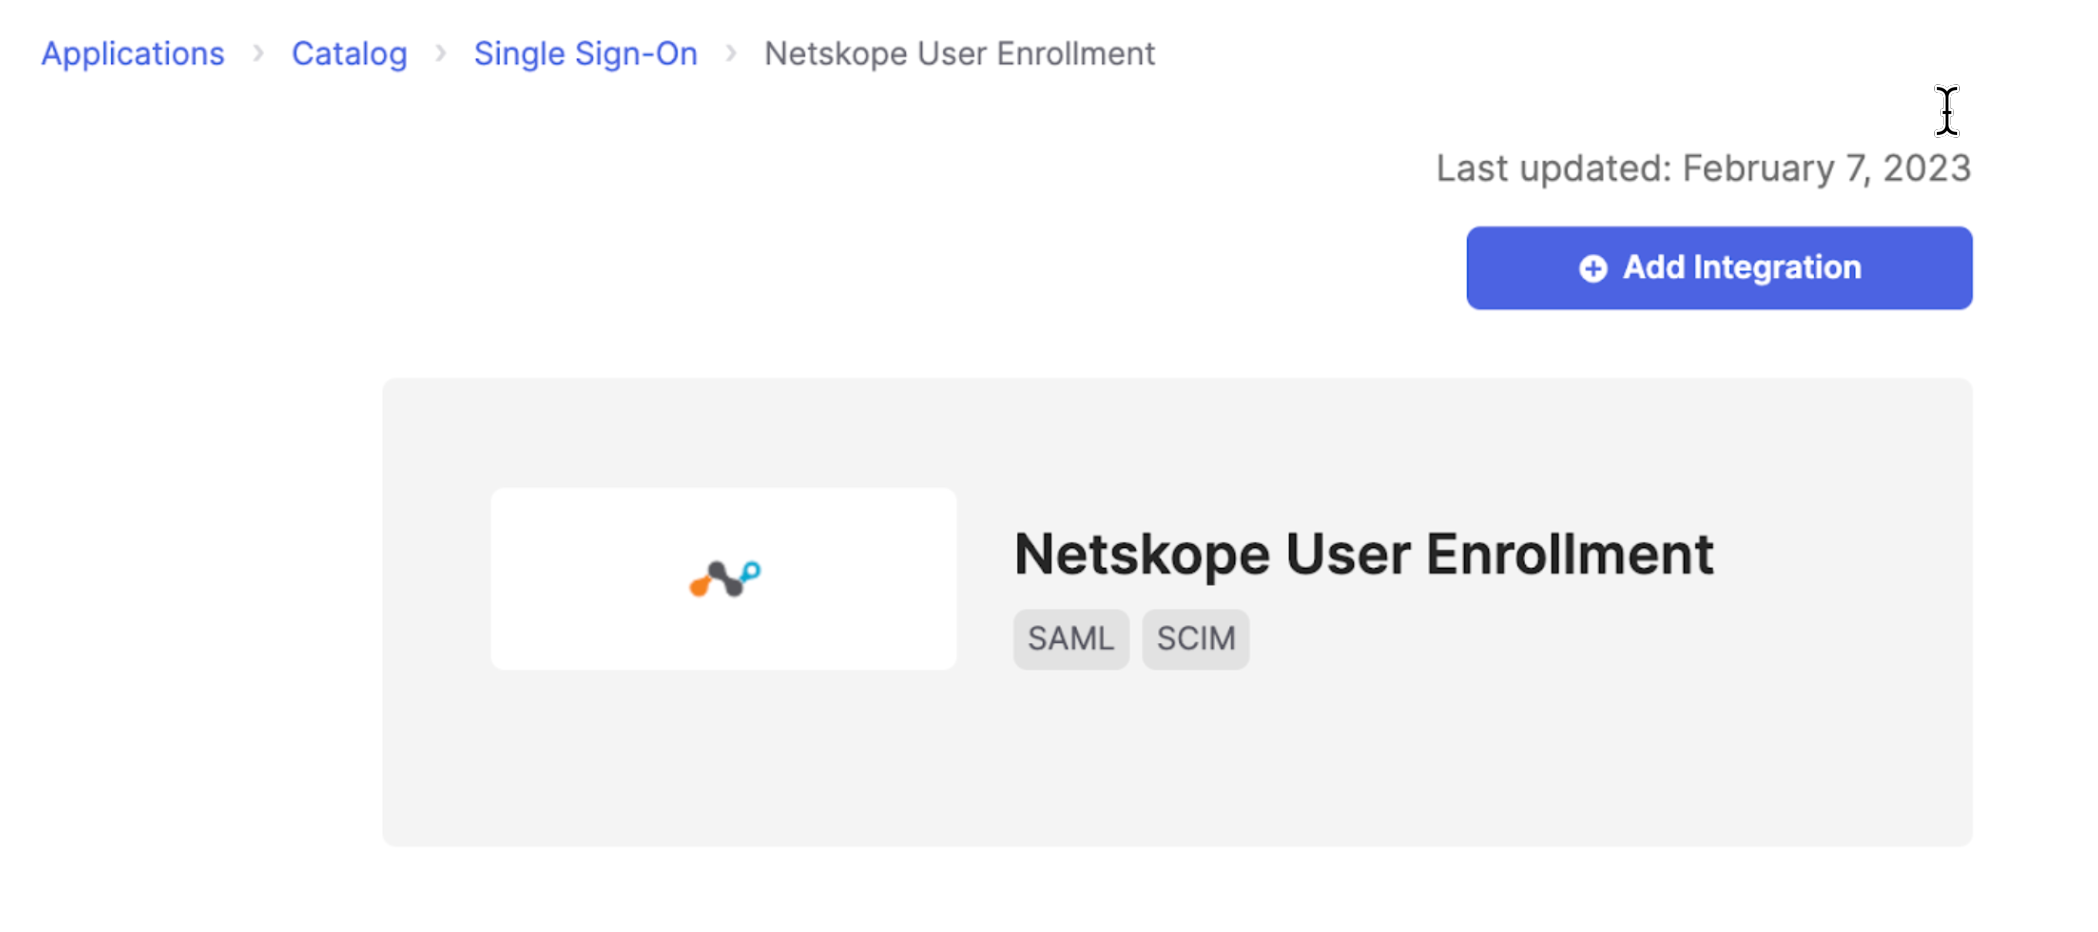
Search for Netskope User Enrollment, select the app, and click Add Integration.
-
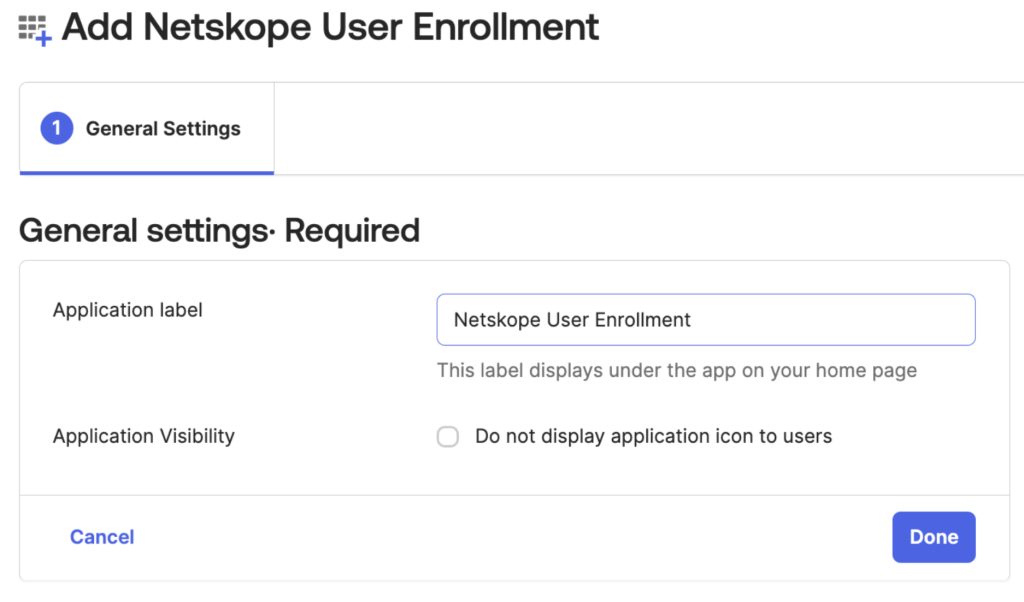
Provide an Application label and complete the setup wizard.
-
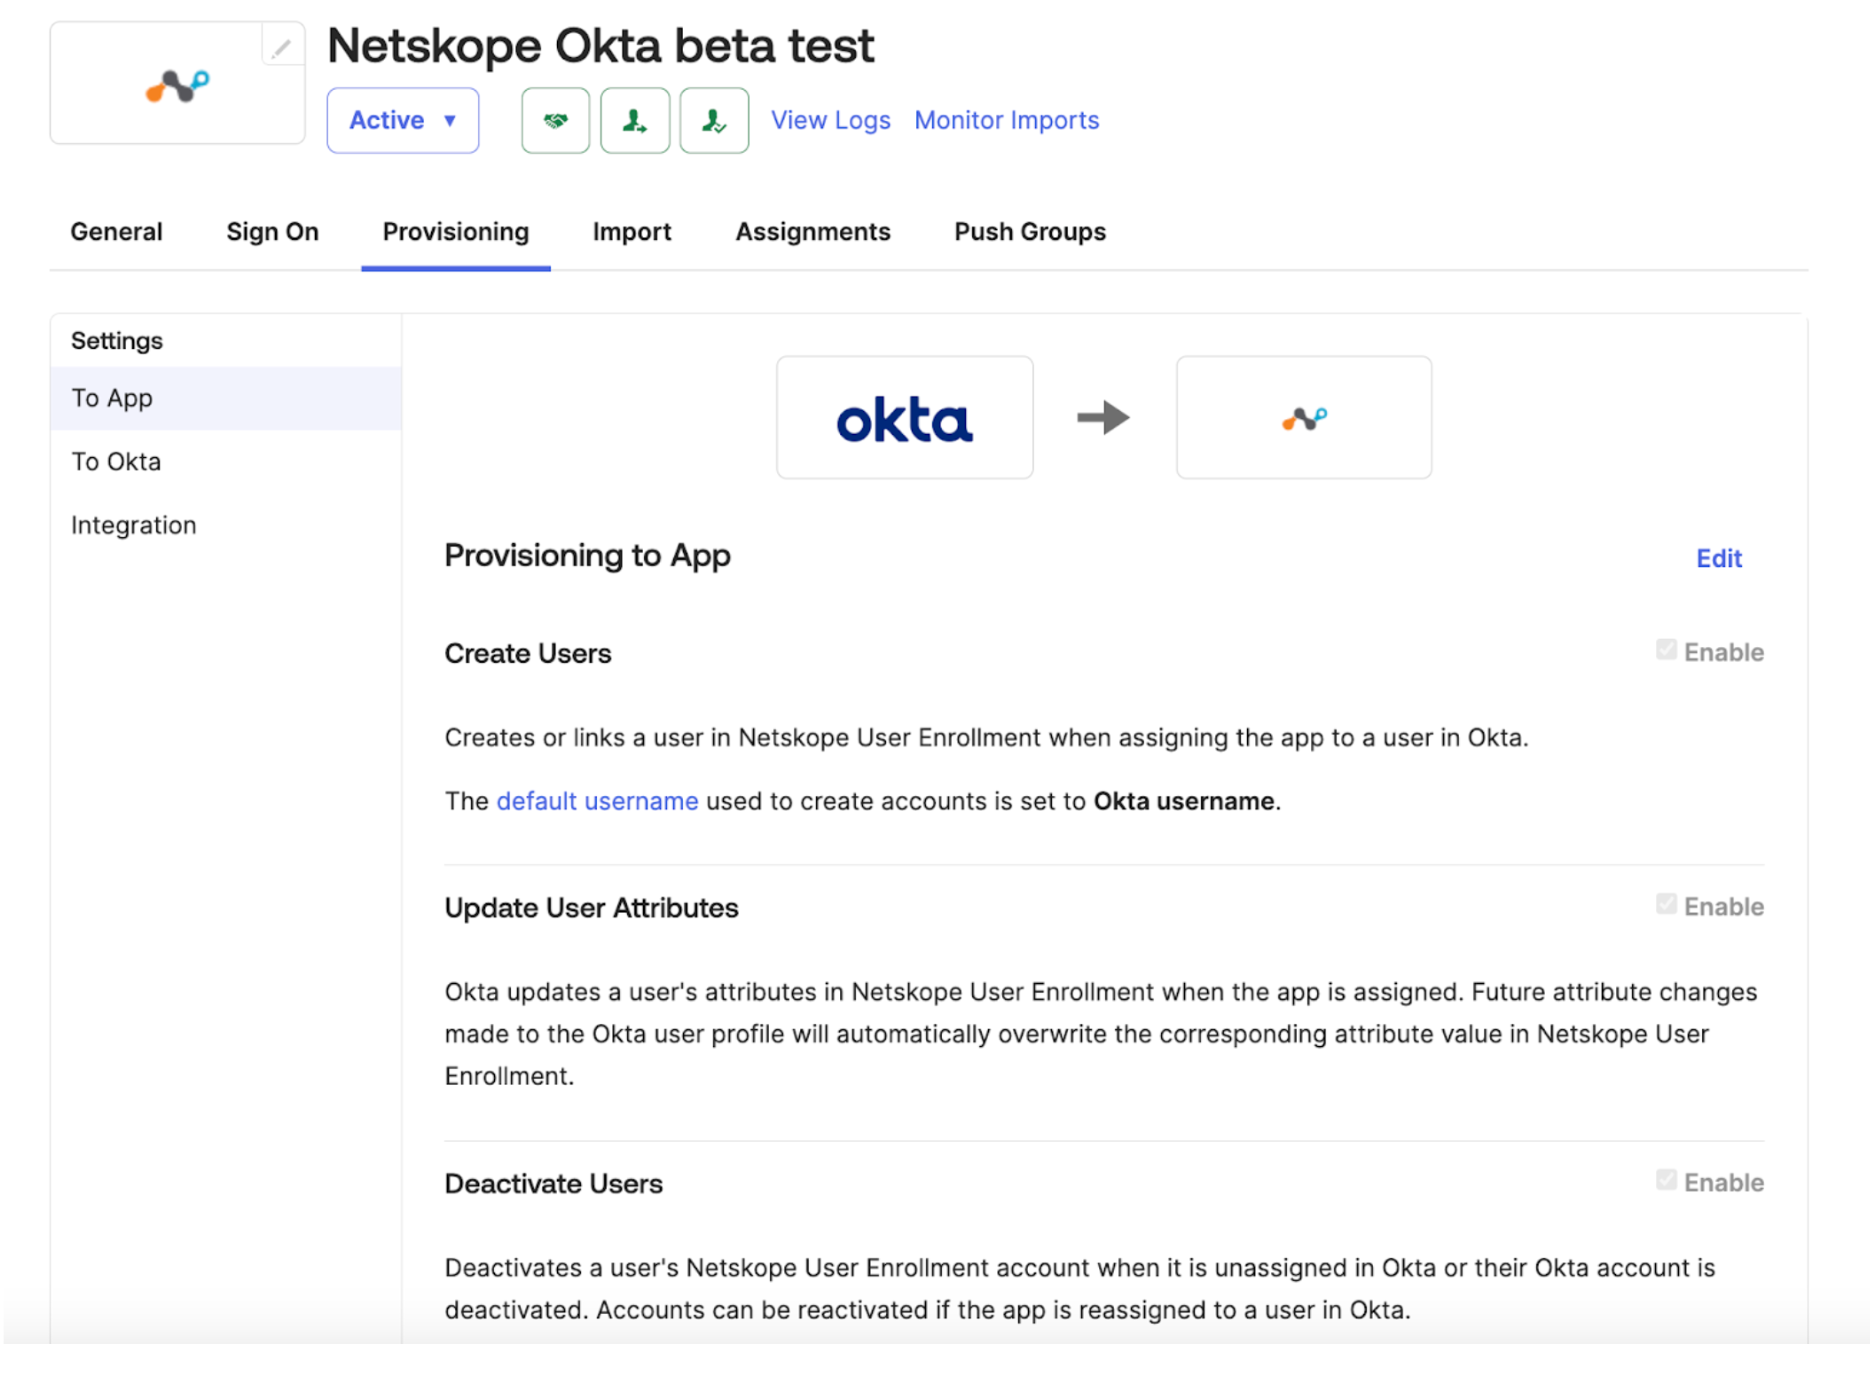
Once the app is created, go to the Provisioning tab.
-
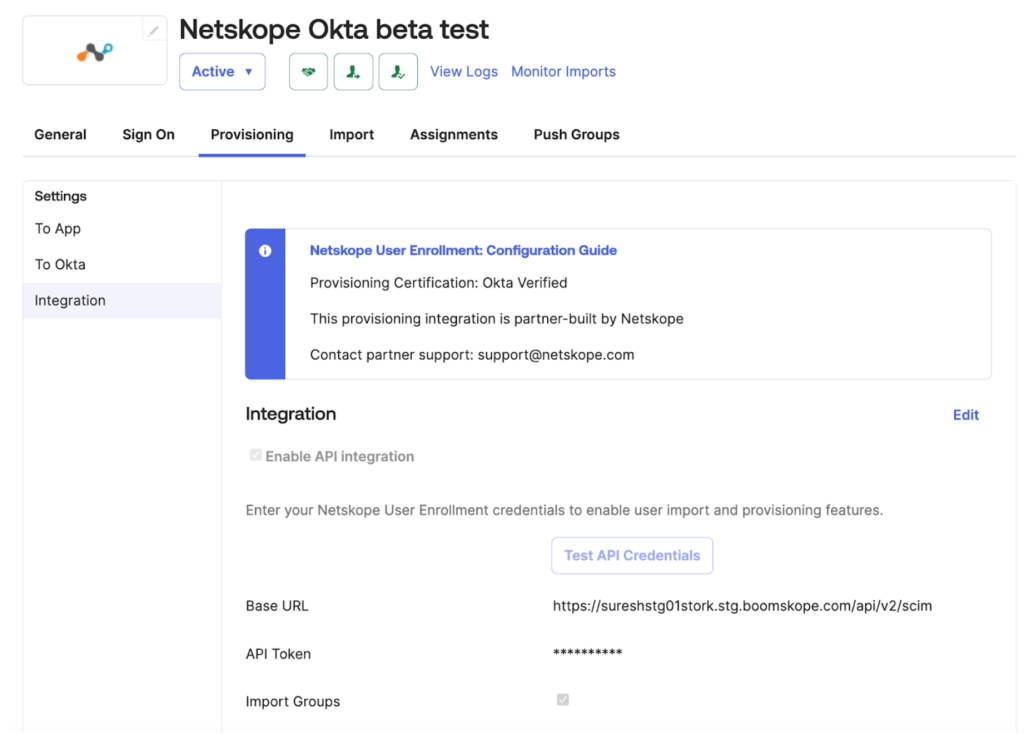
Under Integration, enter the Base URL and API Token. Click Test API Credentials.
-
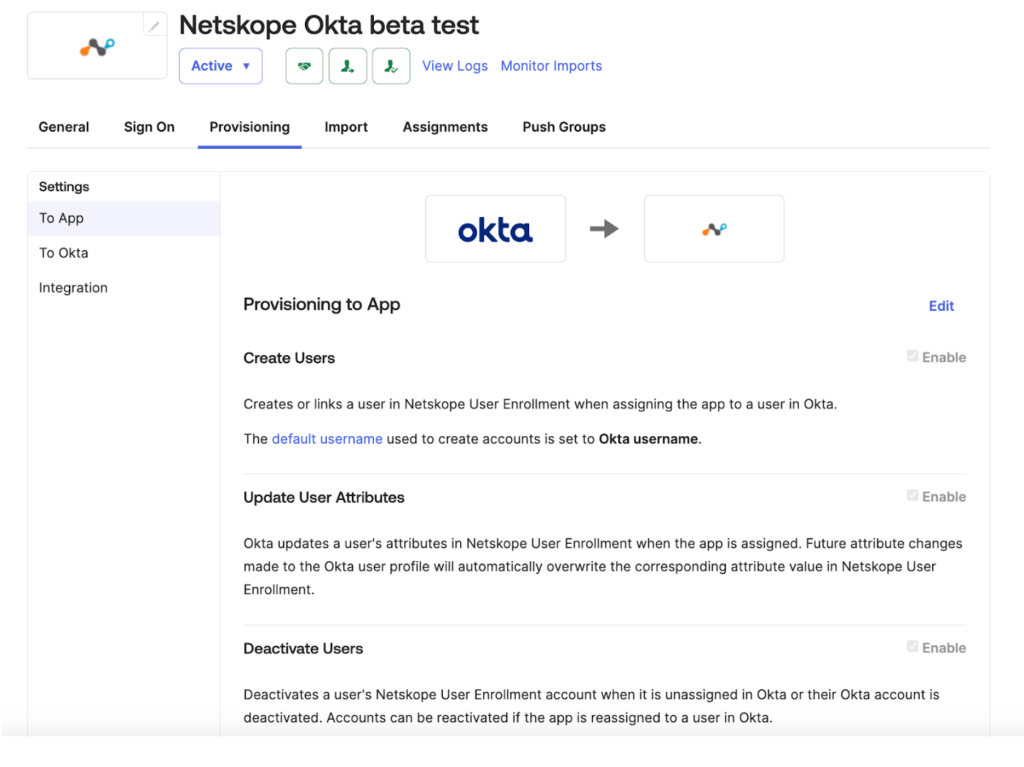
In the To App section, click Edit and enable Create, Update, and Deactivate options, then Save.
-
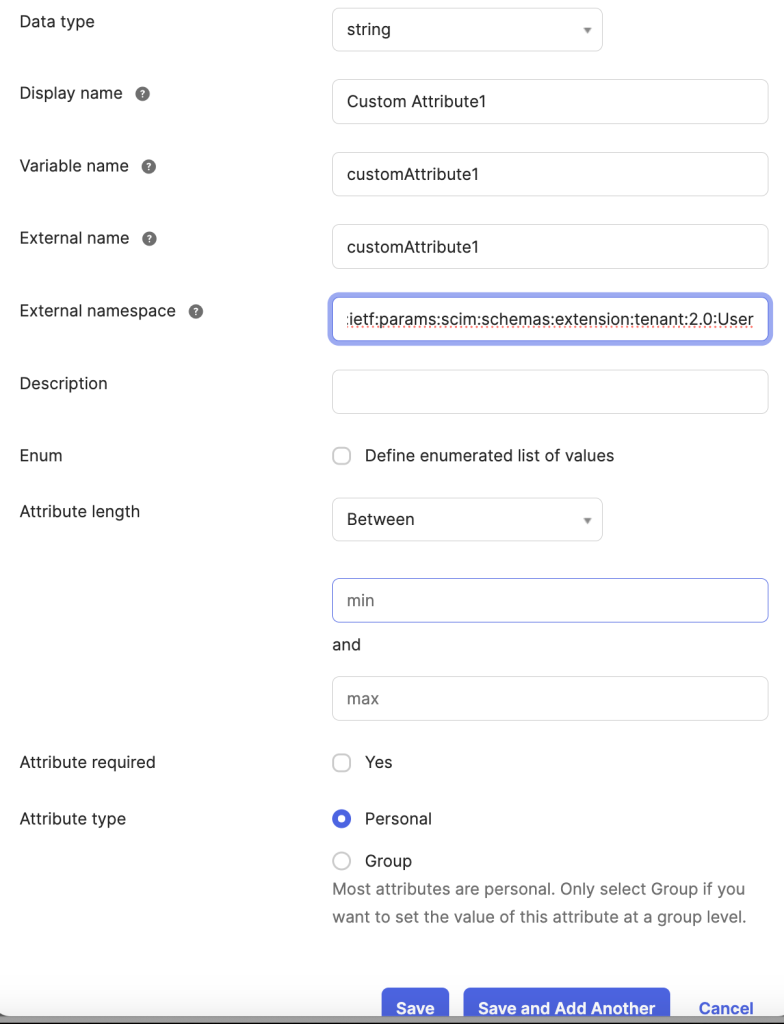
Go to Directory > Profile Editor > Netskope User Enrollment App > Add Attribute.
Example for adding core attributes, to sync a user’s department, click Add Attribute and define the ‘Department‘ string as a custom attribute.
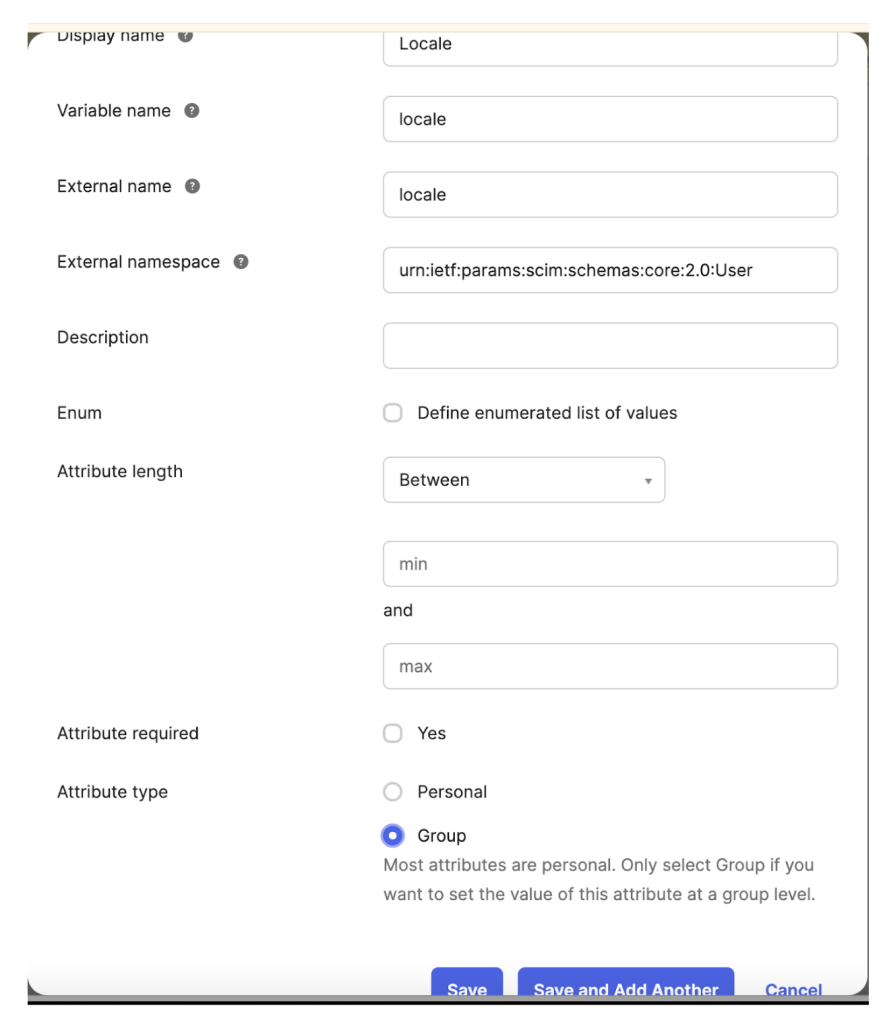
Example for Enterprise Attributes
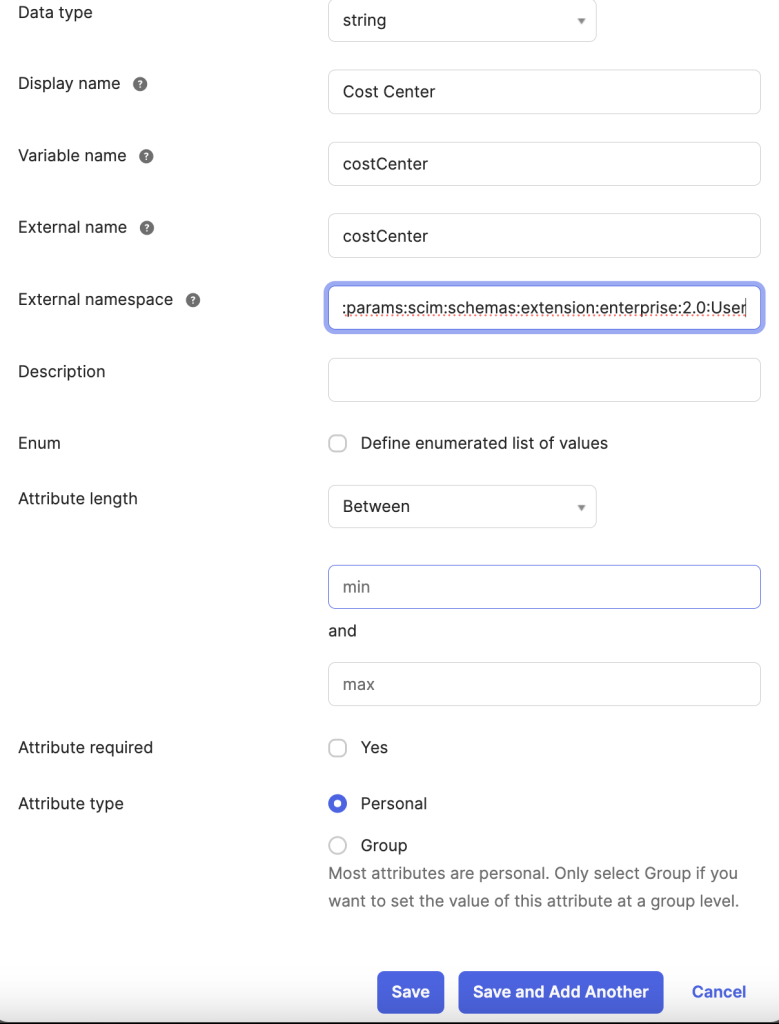
Example for Custom Attributes. You can provide any name when adding custom attributes.
-
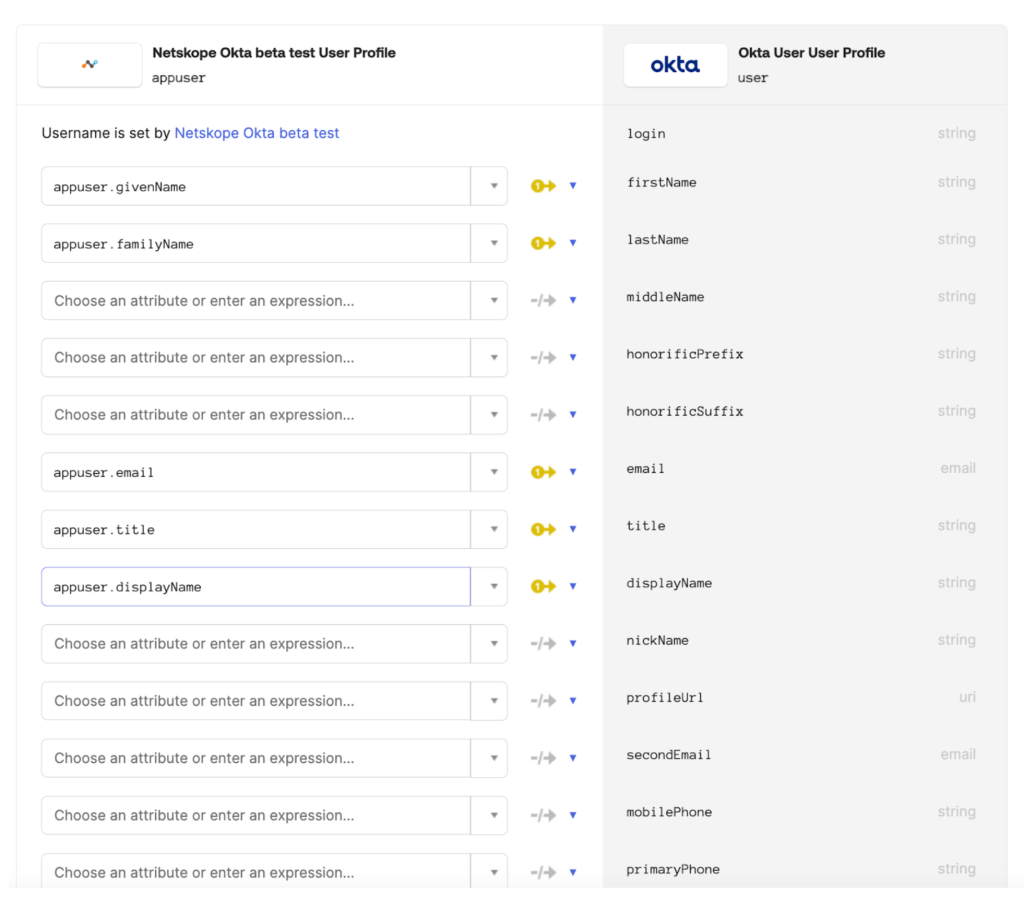
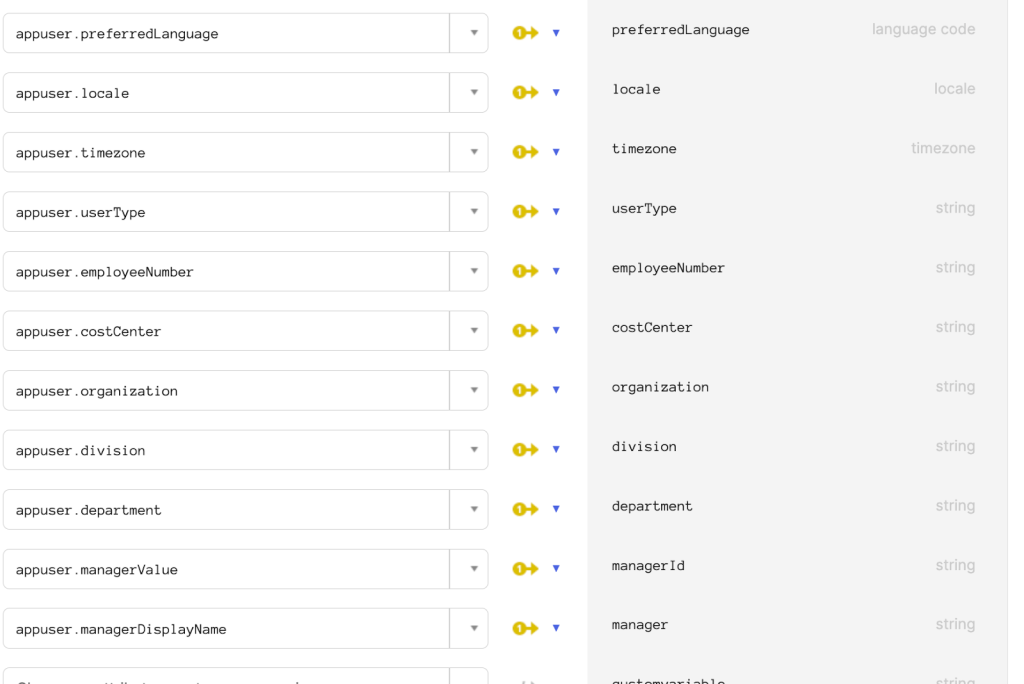
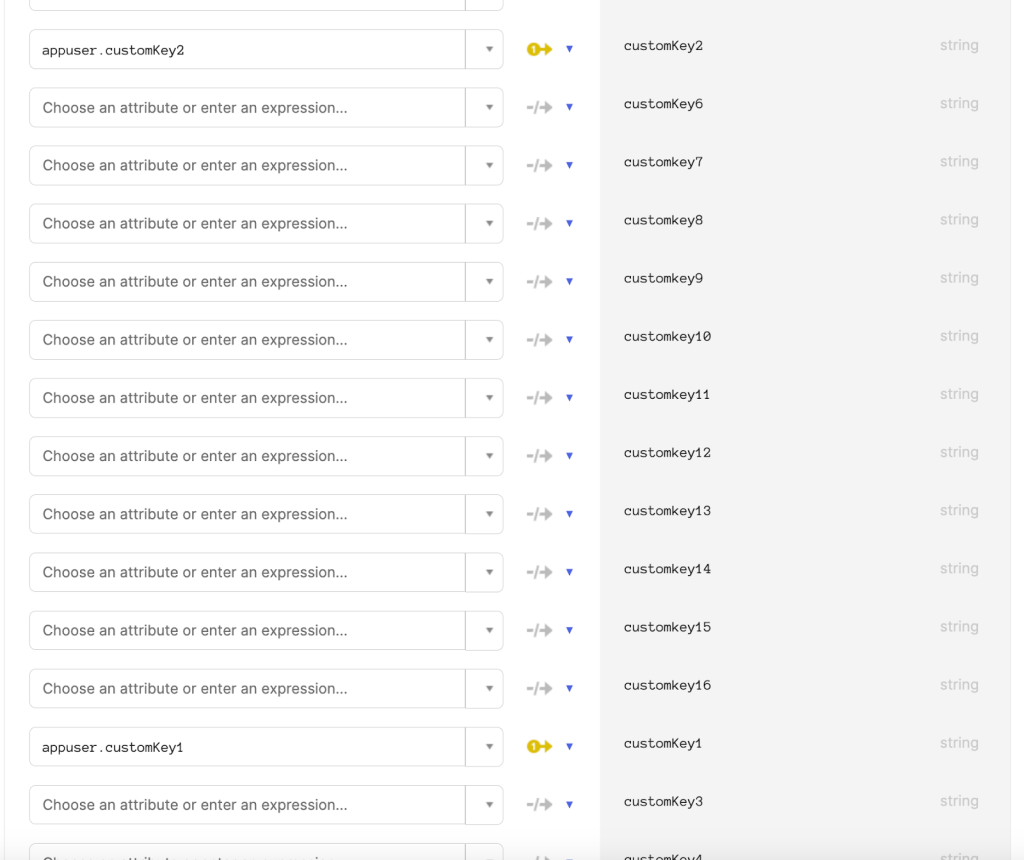
Click Mappings, map the Okta user attributes to the custom app attributes, then Save and apply updates.
Core and Enterprise Attribute Mapping
Custom Attribute Mapping






Integrating with Microsoft Entra ID (previously known as Azure)
-
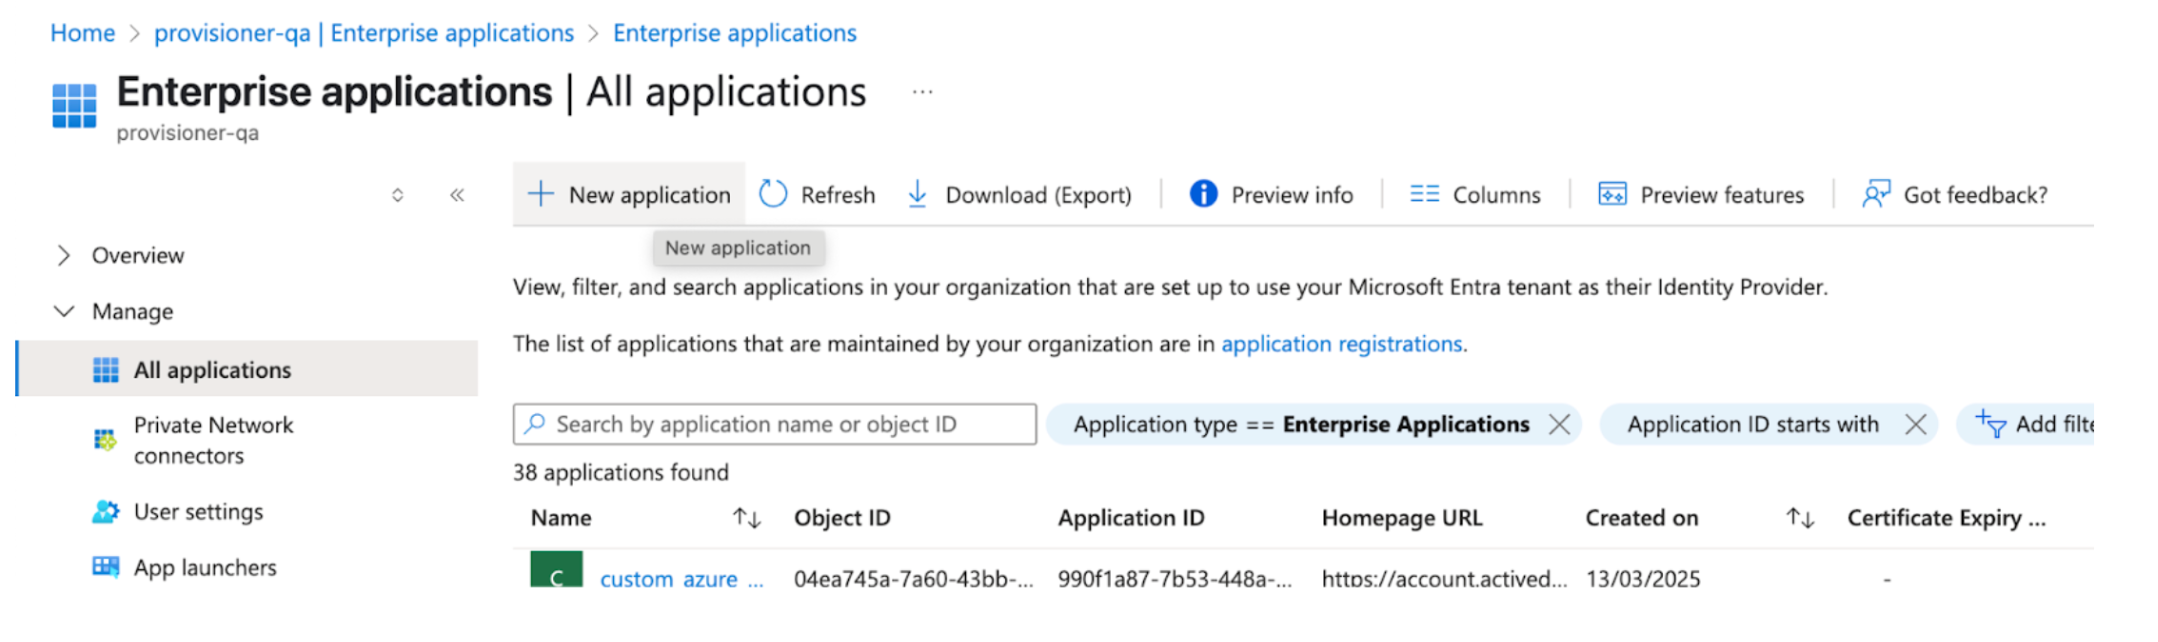
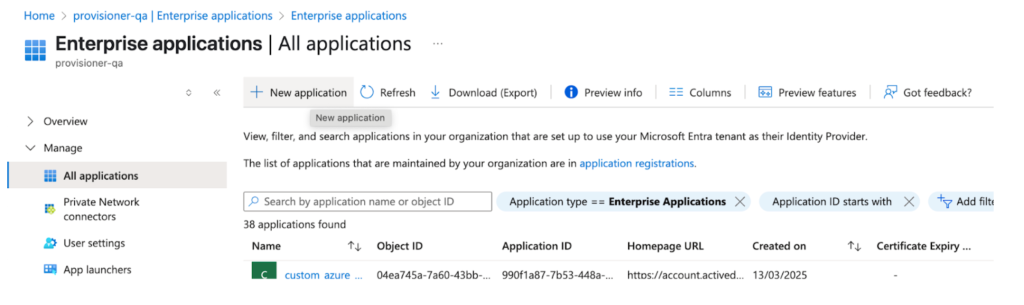
Navigate to Enterprise application and click on New Application
-
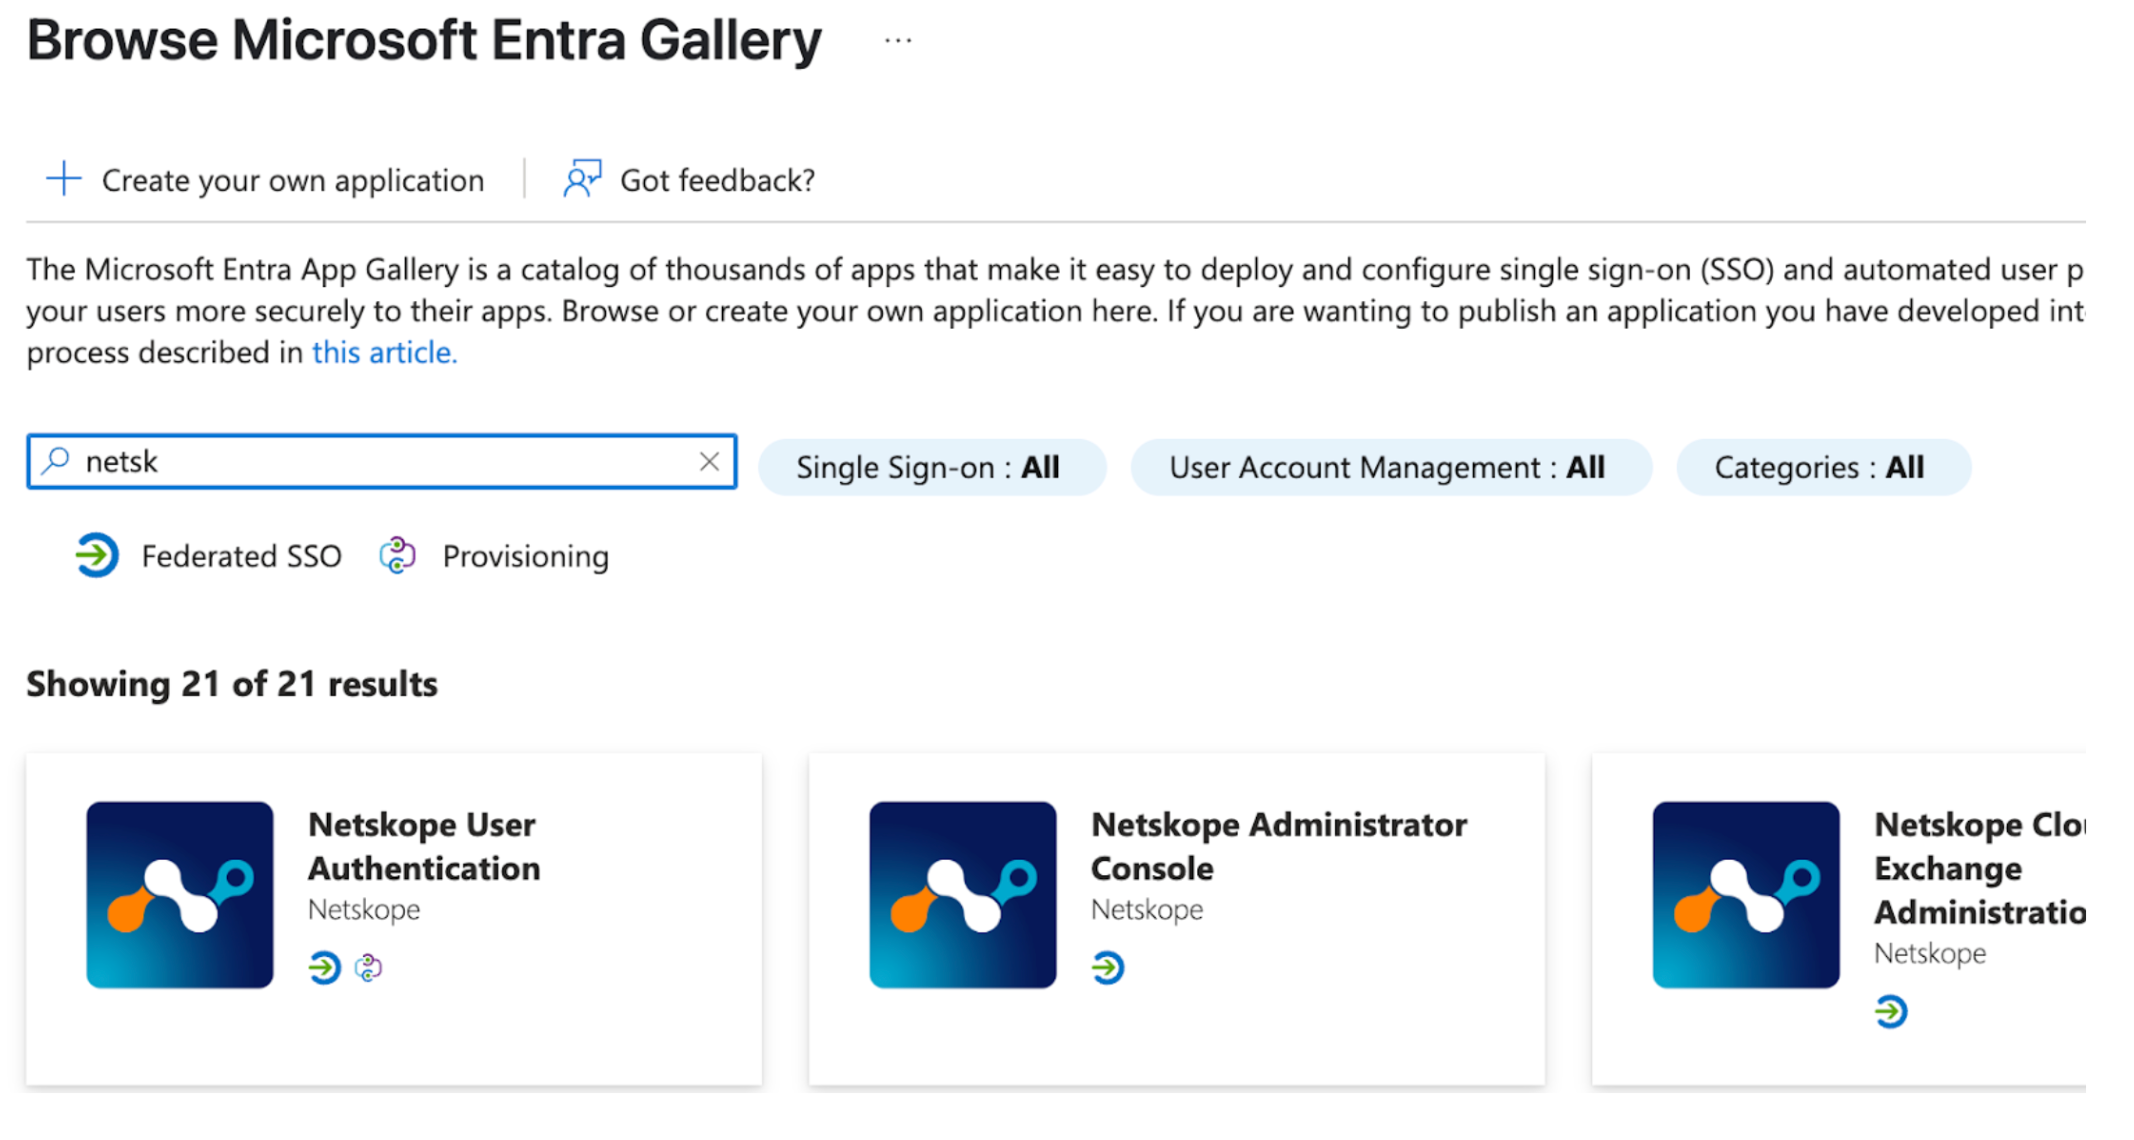
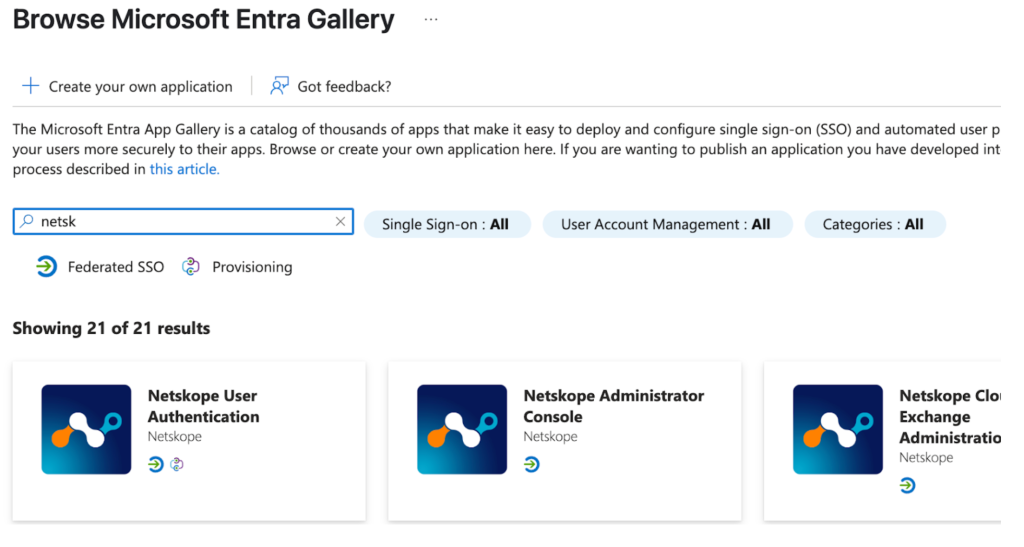
Search for netskope and select Netskope User authentication
-
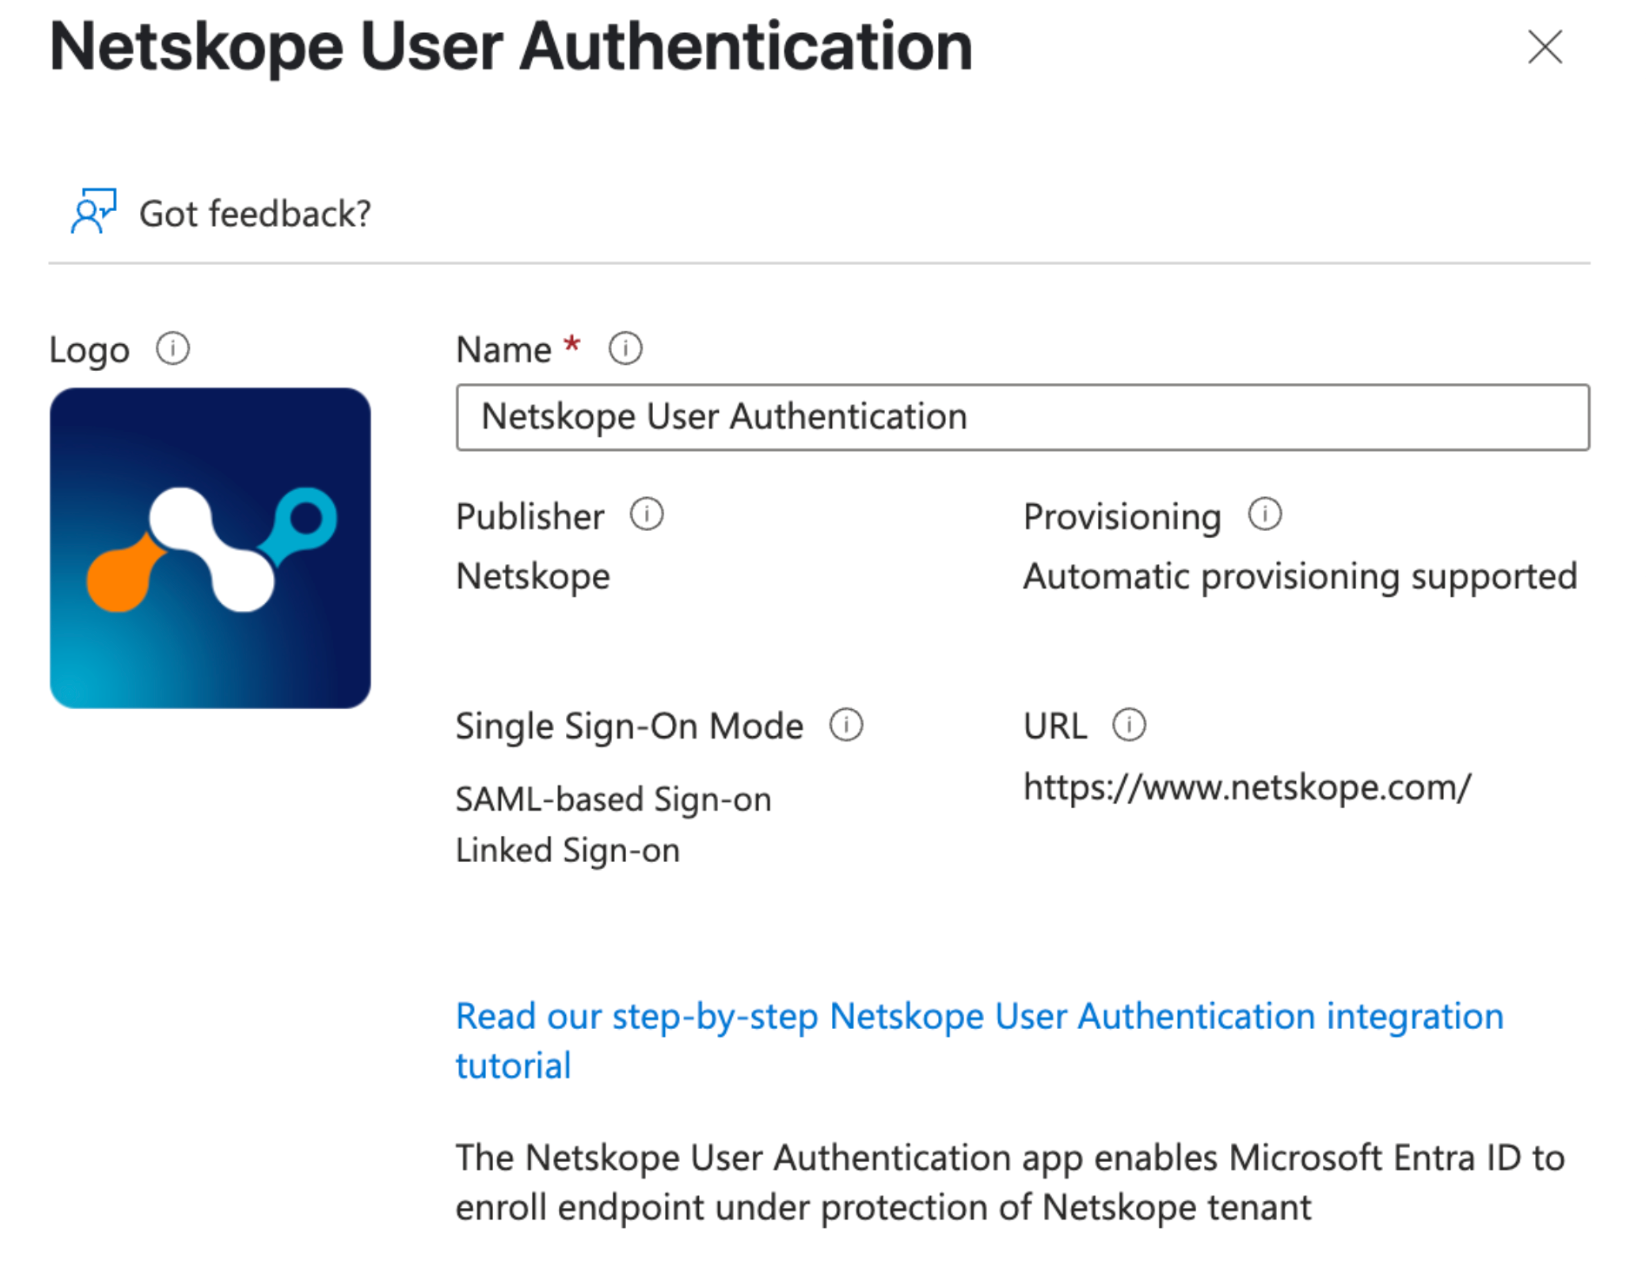
Provide the name of application and click on Create button
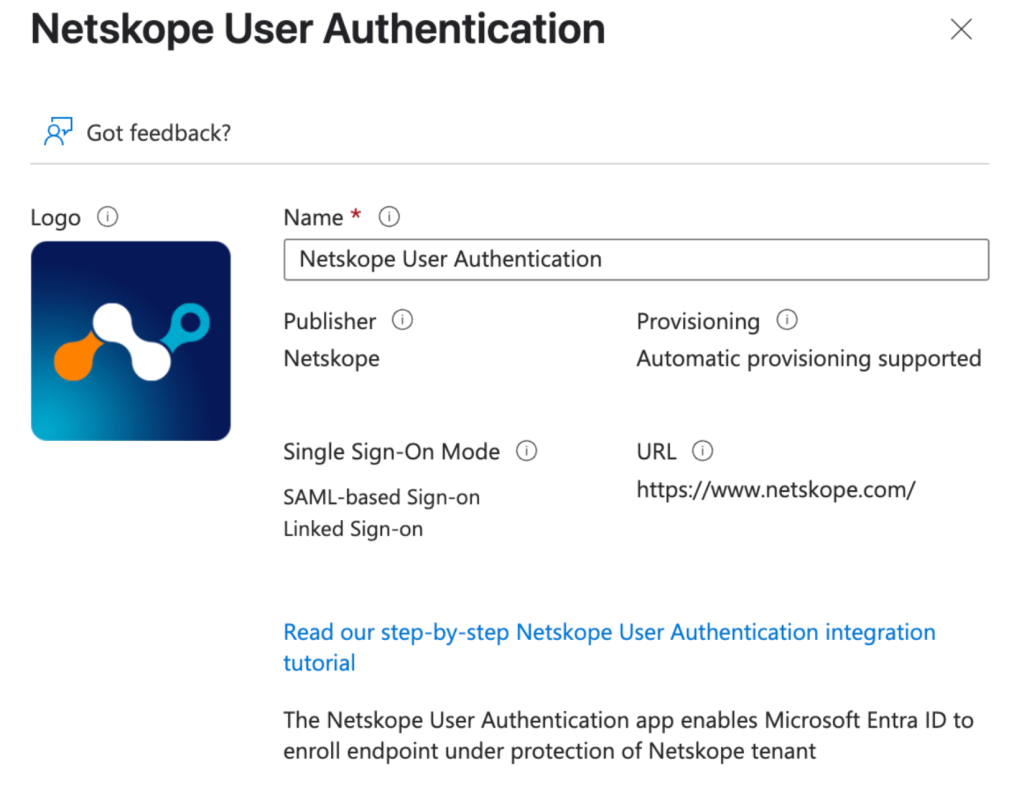
-
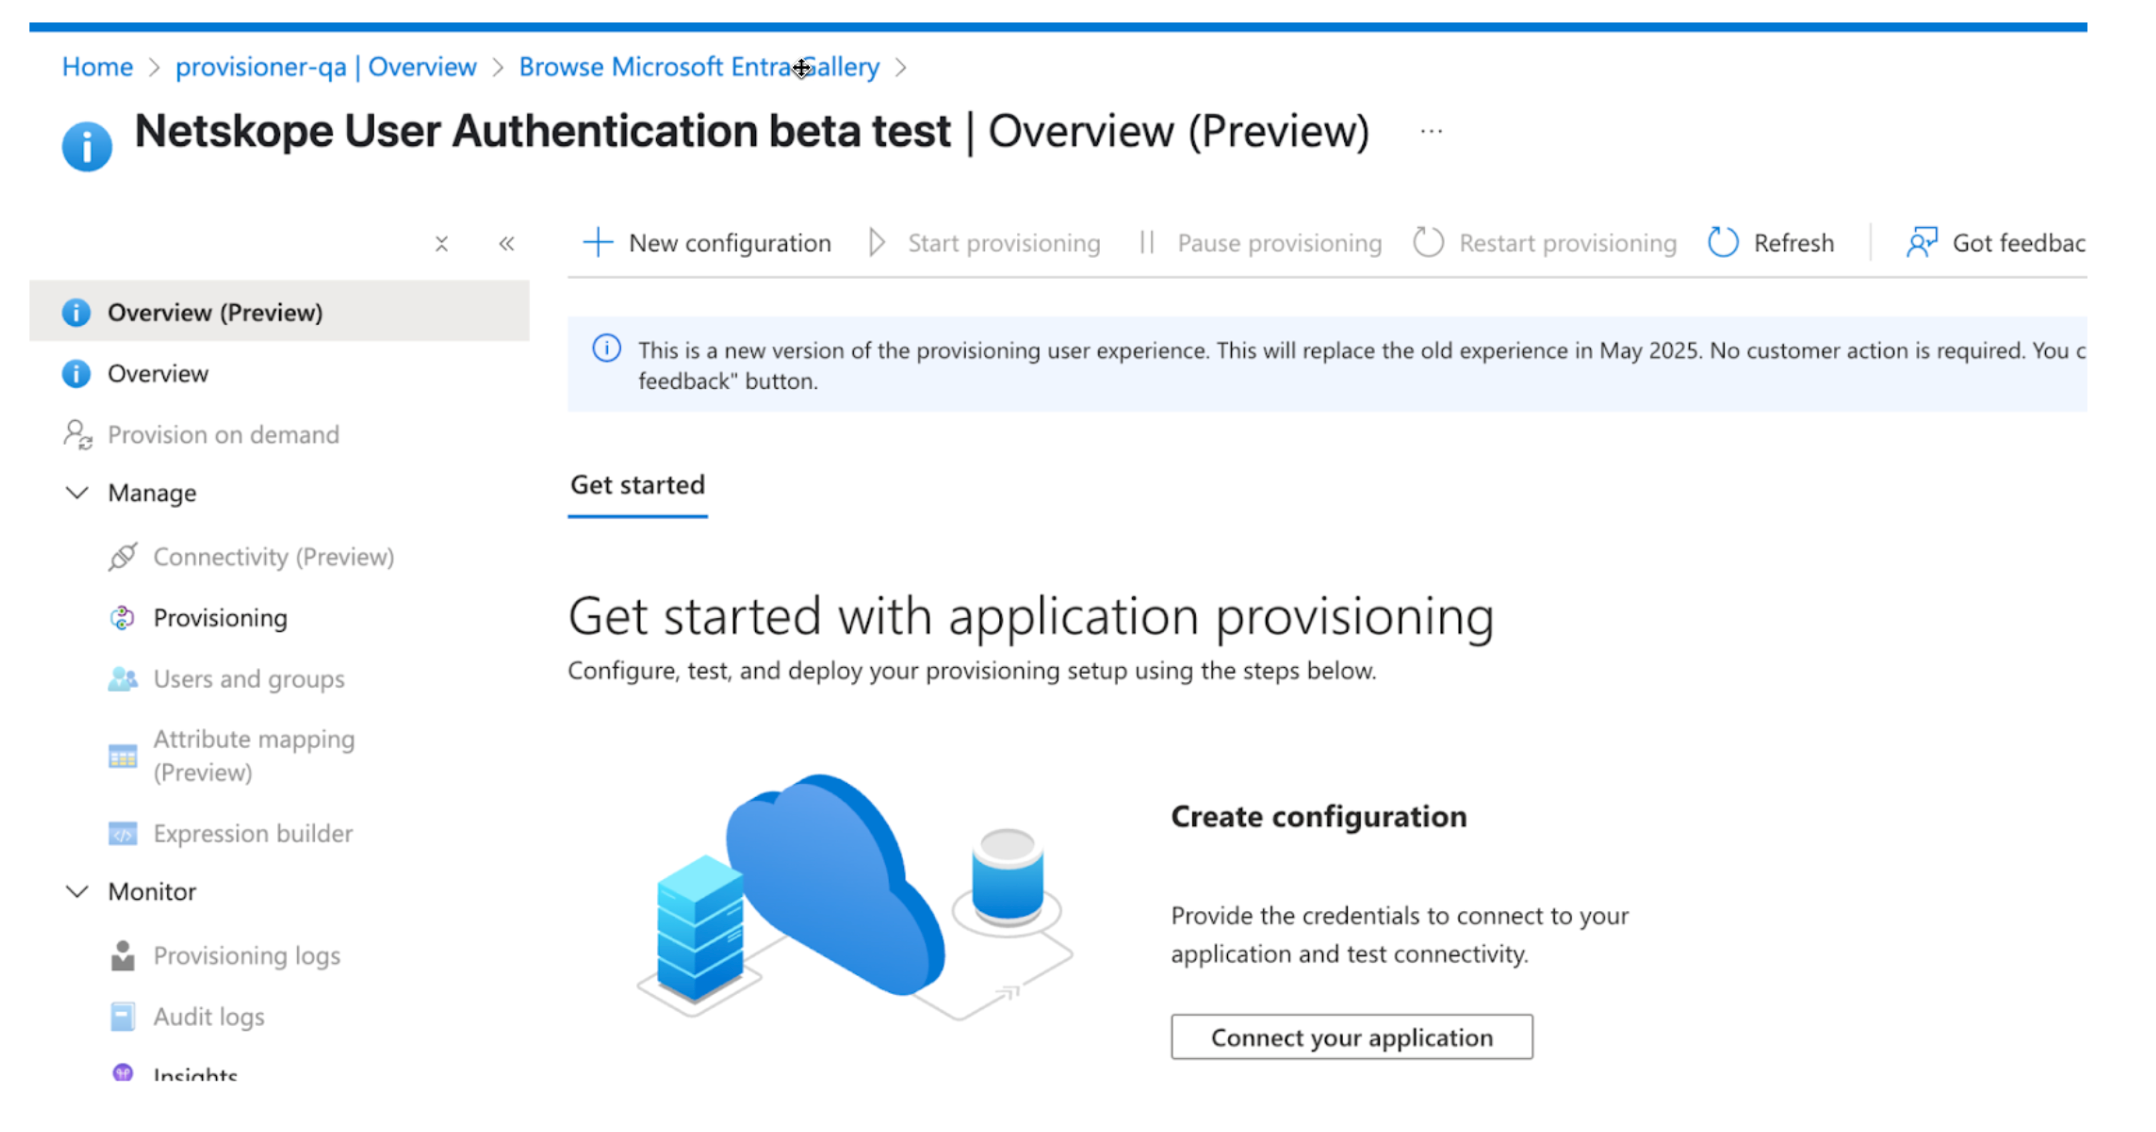
After app is created click on New configuration.
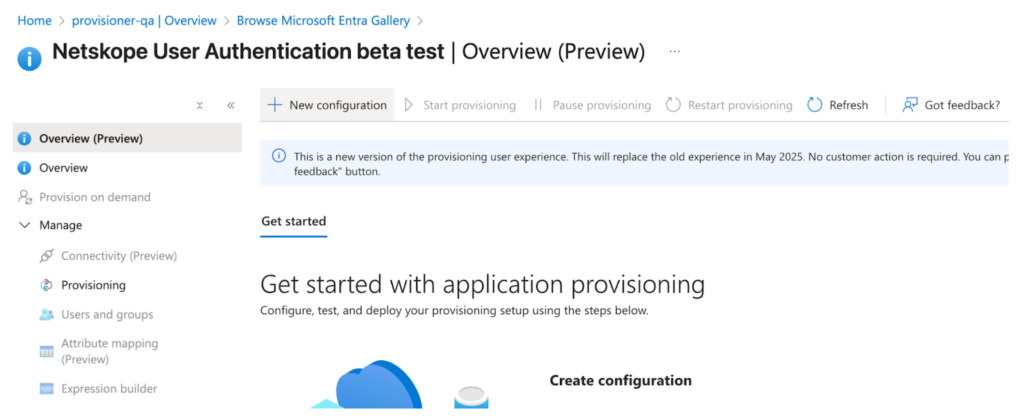
-
Add Tenant URL and token and click on Test Connection and click on Create button.
-
Click on Provisioning under left side panel.
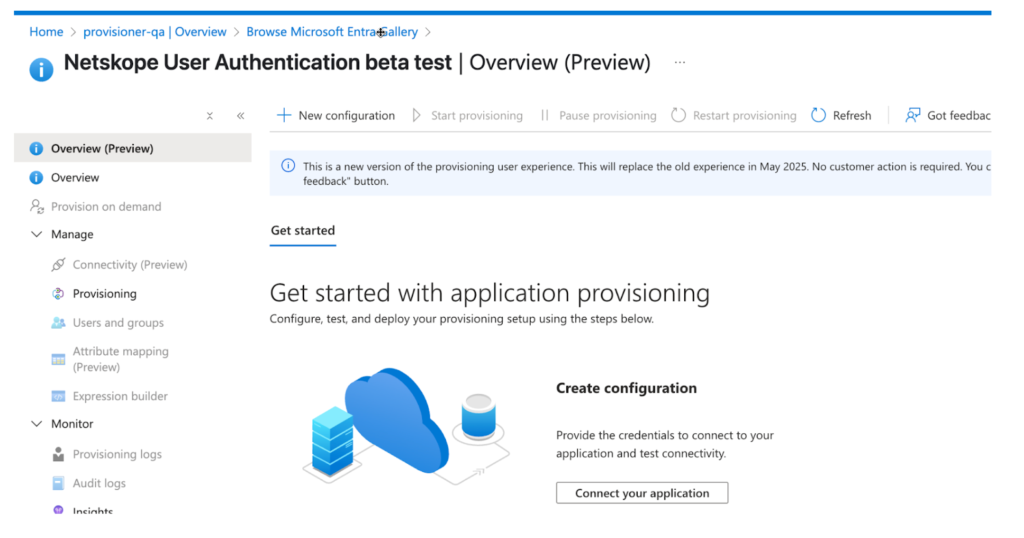
-
Click on Provision Microsoft Entra ID Users under Mappings.

-
Scroll down and select Show Advanced options.
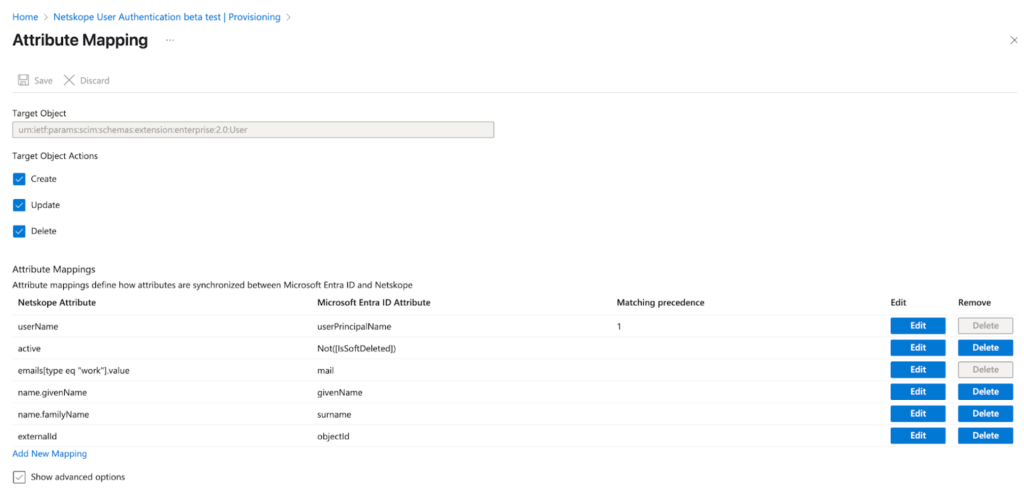
-
Click the Edit attribute list for Netskope option.
If the ‘Edit attribute list’ is not visible, copy/paste this URL into your browser:
https://entra.microsoft.com/?Microsoft_AAD_Connect_Provisioning_forceSchemaEditorEnabled=true
After the page loads, you must navigate to the User Attribute Provisioning section within the same browser tab for the editor to appear. Be aware of the following limitation:
This workaround enables the editor for your current browser session only. If you log out or your session expires, the option will be hidden again, and you must use the URL to re-enable it.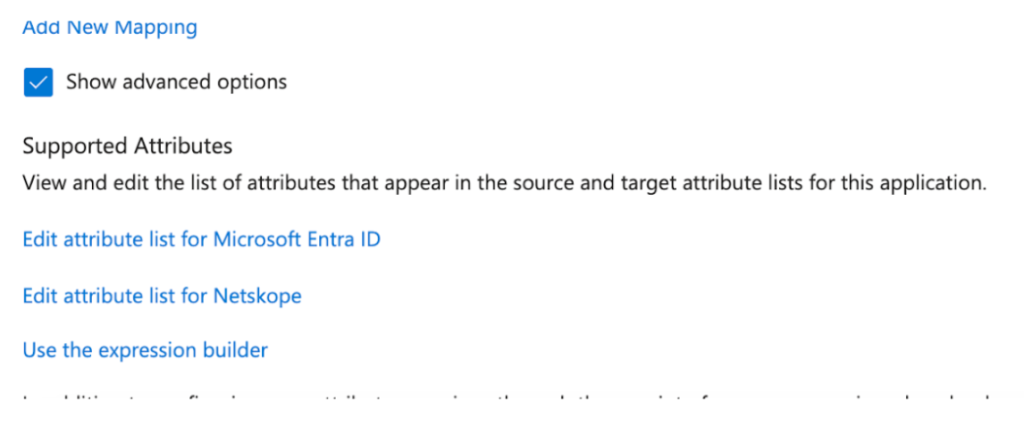
-
Add the enterprise and custom attributes. For example:
Add the enterprise attributes like sample below
urn:ietf:params:scim:schemas:extension:enterprise:2.0:User:costCenterAdd the custom attributes like sample below
urn:ietf:params:scim:schemas:extension:tenant:2.0:User:customKey1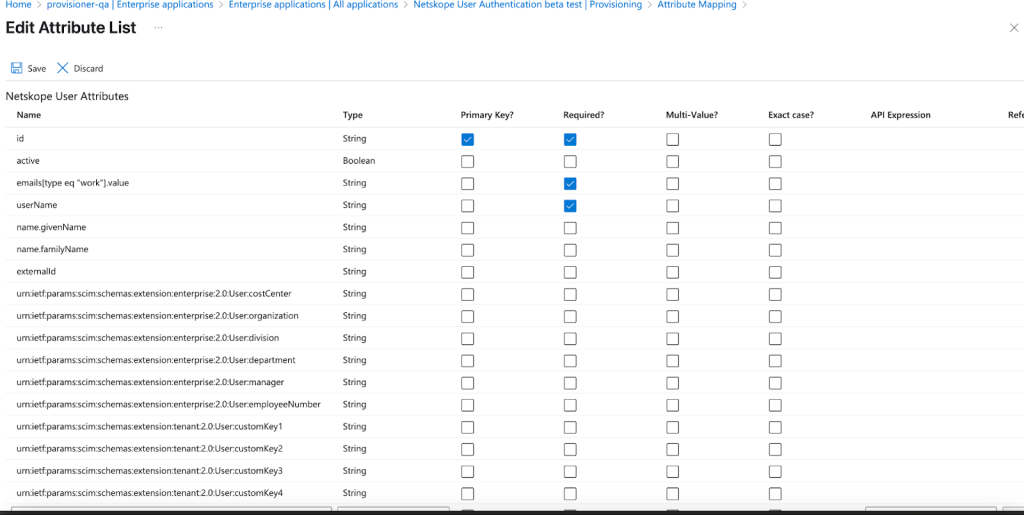
-
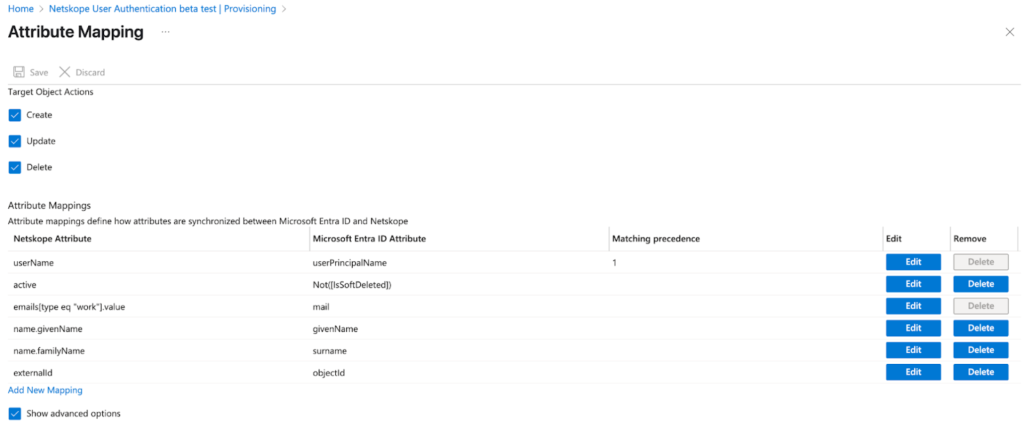
Map attributes click on Add new mapping.
-
Map source and target attribute here and click on Save.