

Release Notes
1.0.0 (Minimum required CE version 6.0.0)
Added
- Initial release.
- Log Types: Alerts, Events, Webtx.
- Format Type: JSON.
This document explains how to configure the Databricks v1.0.0 plugin with the Log Shipper module of the Netskope Cloud Exchange platform. This plugin is used to send Netskope Alerts (DLP, Malware, Policy, Compromised Credential, Malsite, Quarantine, Remediation, Security Assessment, Watchlist, UBA, CTEP, Device, Content), Events (Page, Application, Audit, Infrastructure, Network, Incident, Endpoint, Client Status) and WebTx data to an AWS S3 bucket. This plugin supports ingestion in JSON format only. To view the data on databricks, make sure the S3 bucket is linked with the Databricks External Location.
Prerequisites
To complete this configuration, you need:
- A Netskope tenant (or multiple, for example, production and development/test instances).
- A Netskope Cloud Exchange instance with the Tenant plugin and Log Shipper plugin already configured.
- Already configured AWS Netskope LogStreaming Plugin or Azure Log Streaming Plugin for pulling Webtx logs.
- A Databricks Workspace instance linked with an AWS account and Unity Catalog enabled.
- An AWS S3 bucket with the following IAM permissions granted to the authenticating role: s3:ListBucket, s3:GetBucketLocation, s3:PutObject.
- An AWS S3 bucket linked with Databricks External Location.
Databricks Plugin Support
This plugin is used to send Netskope Alerts (DLP, Malware, Policy, Compromised Credential, Malsite, Quarantine, Remediation, Security Assessment, Watchlist, UBA, CTEP, Device, Content), Events (Page, Application, Audit, Infrastructure, Network, Incident, Endpoint, Client Status) and WebTx data to an AWS S3 bucket. This plugin supports ingestion in JSON format only. To view the data on databricks, make sure the S3 bucket is linked with the Databricks External Location.
| Data Type | Support |
|---|---|
| Events | Yes (Page, Application, Audit, Infrastructure, Network, Incident, Endpoint, Client Status) |
| Alerts | Yes (DLP, Malware, Policy, Compromised Credential, Malsite, Quarantine, Remediation, Security Assessment, Watchlist, UBA, CTEP, Device, Content) |
| WebTx | Yes |
| Cloud Exchange Logs | No |
Permissions
These permissions are needed for the plugin configuration:
- s3:ListBucket on the target S3 bucket
- s3:GetBucketLocation on the target S3 bucket
- s3:PutObject on the target S3 bucket
API Details
List of APIs Used
| API Endpoint | Method | Use Case |
|---|---|---|
| /sessions | POST | Generate temporary AWS credentials (IAM Roles Anywhere only) |
Generate Temporary Credentials
Endpoint: POST https://rolesanywhere.{region}.amazonaws.com/sessions
Request Headers:
| Key | Value |
|---|---|
| Content-Type | application/json |
| X-Amz-Date | {timestamp} |
| X-Amz-X509 | Base64-encoded DER certificate |
| Authorization | AWS4-X509-RSA-SHA256 Credential=170190831808398918967185780480038694669/20260611/us-east-1/rolesanywhere/aws4_request, SignedHeaders=content-type;host;x-amz-date;x-amz-x509, Signature=……………….. |
| User-Agent | APN/1.1 (ahq9d89xj9gspapczzdb59goq) |
Request Body:
{
  "durationSeconds": 900,
  "profileArn": "{profile_arn}",
  "roleArn": "{role_arn}",
  "sessionName": "Session",
  "trustAnchorArn": "{trust_anchor_arn}"
}
Sample Response:
{
  "credentialSet": [
    {
      "credentials": {
        "accessKeyId": "ASIA...",
        "secretAccessKey": "...",
        "sessionToken": "...",
        "expiration": "2024-01-01T00:15:00Z"
      }
    }
  ]
}
Library: AWS SDK for Python (Boto3)
1. Creating the S3 Client
s3_client = boto3.client(
    "s3",
    aws_access_key_id=self.aws_public_key,
    aws_secret_access_key=self.aws_private_key,
    aws_session_token=self.aws_session_token,
    region_name=self.configuration.get("region_name", "").strip(),
    config=Config(
        proxies=self.proxy,
        user_agent=self.useragent,
    ),
)
2. Check Bucket Existence
s3_client.head_bucket(Bucket=bucket_name)
3. Get Bucket Region
location = s3_client.get_bucket_location(Bucket=bucket_name)
bucket_region = location.get("LocationConstraint") or "us-east-1"
4. Upload File to S3
s3_client.upload_file(
    file_name,      # local temp file path
    bucket_name,    # S3 bucket name
    object_name,    # S3 object key
)
Performance Matrix
This performance reading was conducted on a Large Stack in Cloud Exchange with these VM specifications. These readings are added with the consideration that it will ingest around 15k Netskope alerts/events in 5 seconds to the destination.
| Description | Specification |
|---|---|
| Stack details | Size: Large, RAM: 32 GB, CPU: 16 Cores |
| Alerts/Events ingested to SIEM | ~ 180K Alerts/Events per minute |
| Webtx ingested to SIEM | ~ 150K Webtx logs per minute |
User Agent
APN/1.1 (ahq9d89xj9gspapczzdb59goq)
Workflow
- Get credentials for configuring the Databricks plugin
- Configure the Databricks plugin.
- Configure a Business Rule.
- Configure Log Delivery.
- Validate the plugin.
Watch a Video
Click play to watch a video.
Configuration on AWS
Create a Policy
-
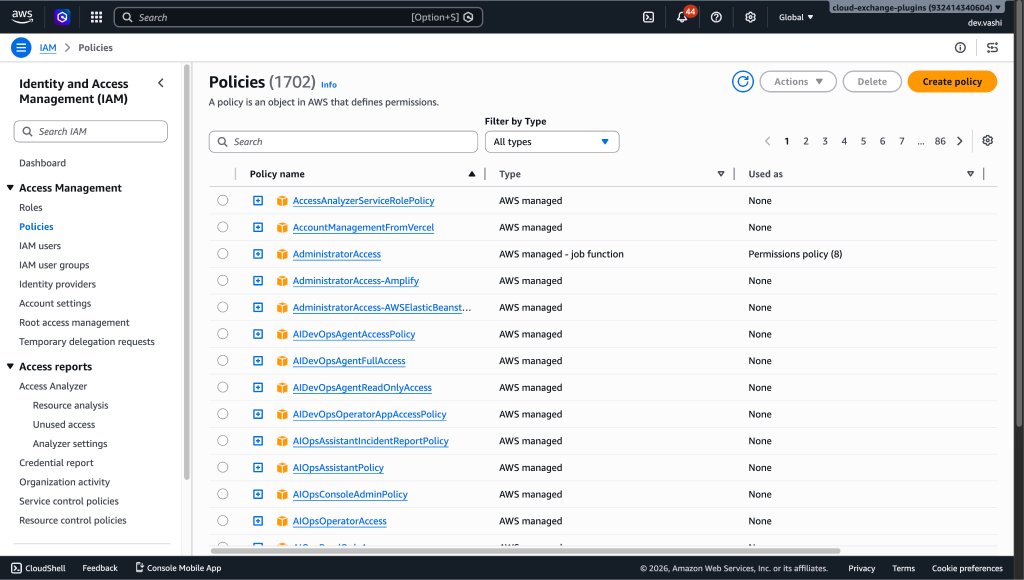
Log in to your AWS account, go to IAM > Policies and then click Create Policy.
-
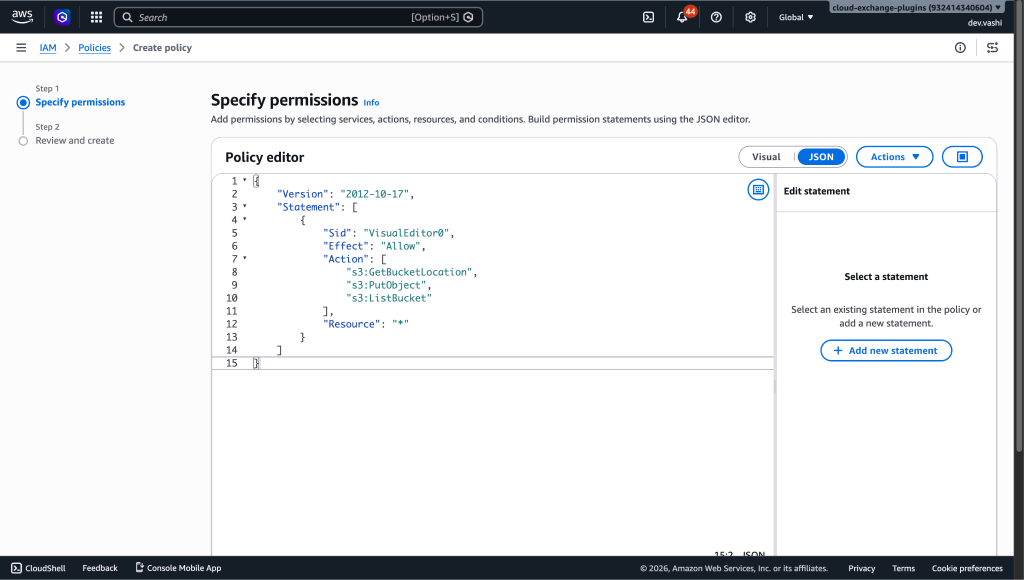
Select json and paste this policy in it.
{
	"Version": "2012-10-17",
	"Statement": [
		{
			"Sid": "VisualEditor0",
			"Effect": "Allow",
			"Action": [
				"s3:GetBucketLocation",
				"s3:PutObject",
				"s3:ListBucket"
			],
			"Resource": "*"
		}
	]
}
-
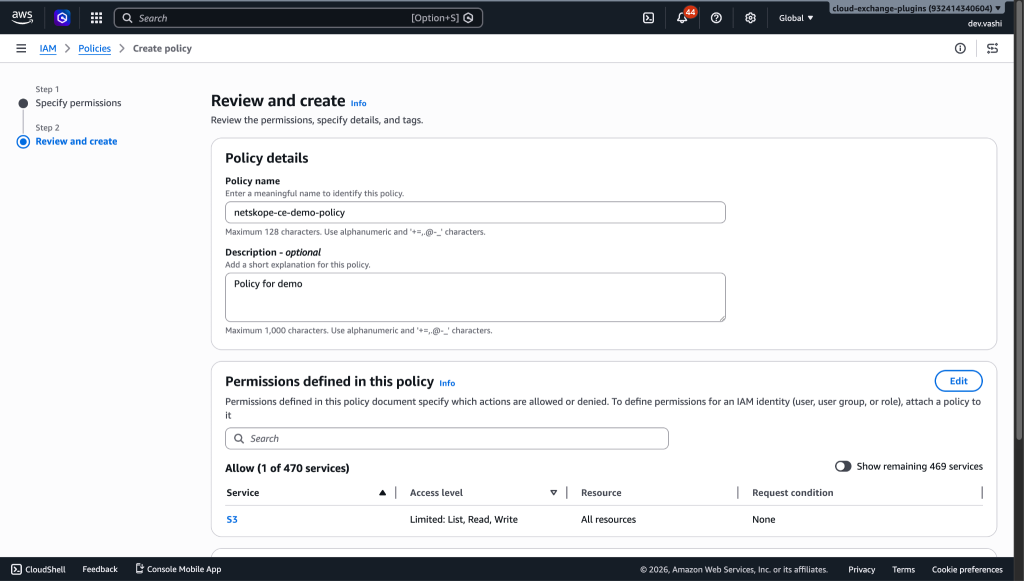
Enter a name and description.
-
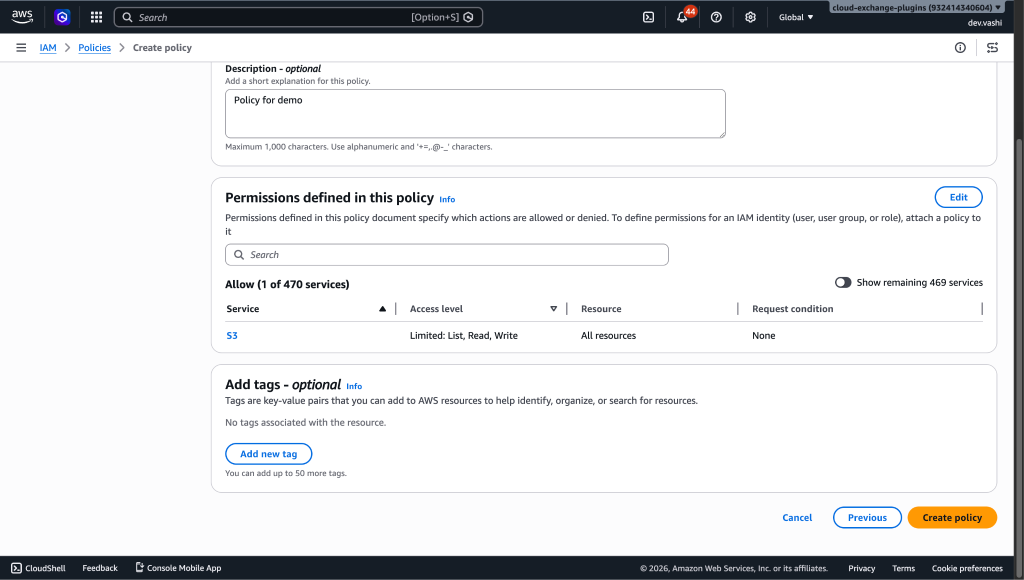
Click Create Policy.


Deployed on AWS authentication
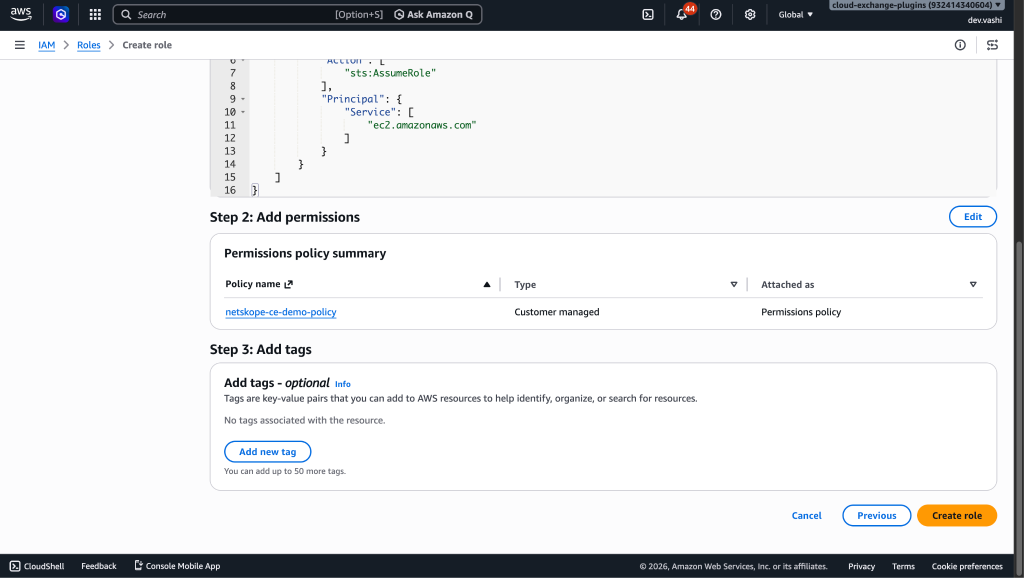
Create a Role
-
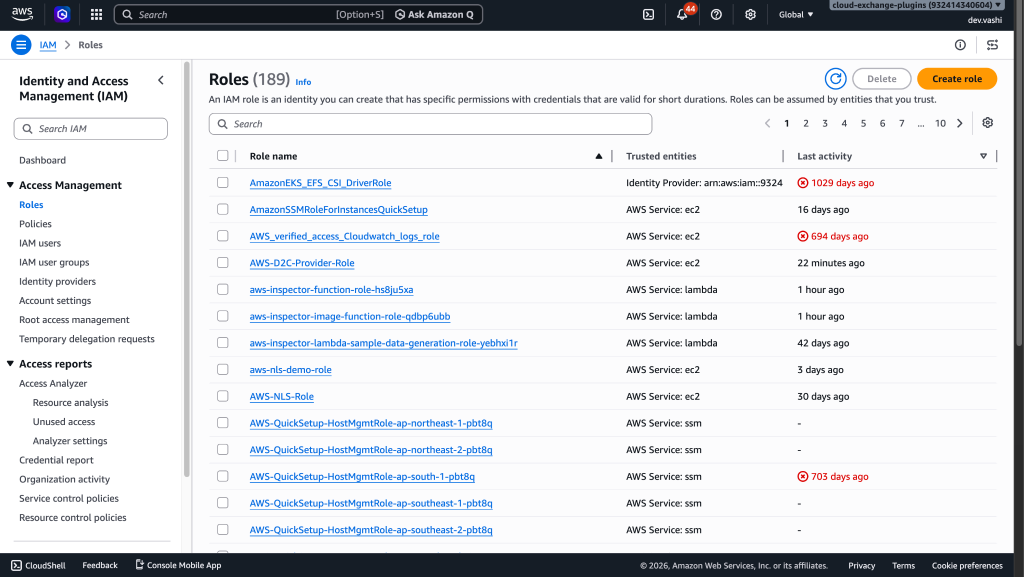
Go to IAM Services in the AWS Console.
-
Go to the Roles page under Access management and click Create Role.
-
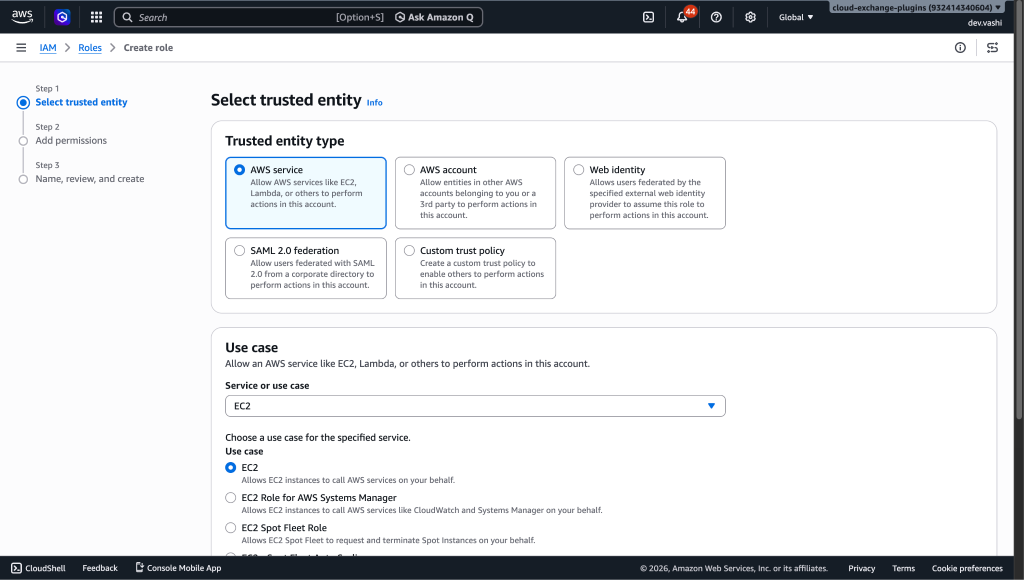
Select the AWS Service.
-
Under Use case, select EC2.
-
Click Next.
-
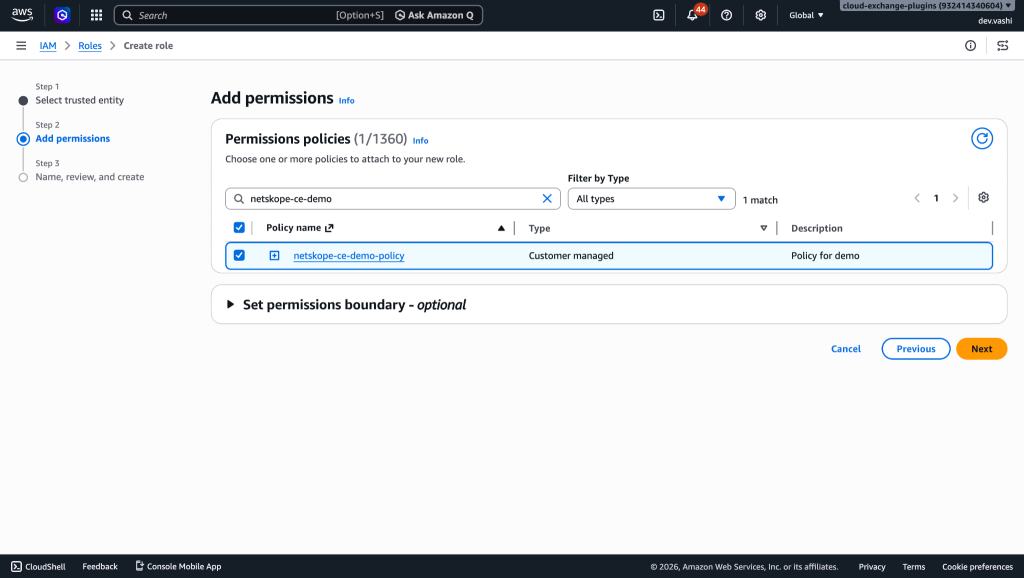
Select the permission policy created in Create a Policy.
-
Click Next.
-
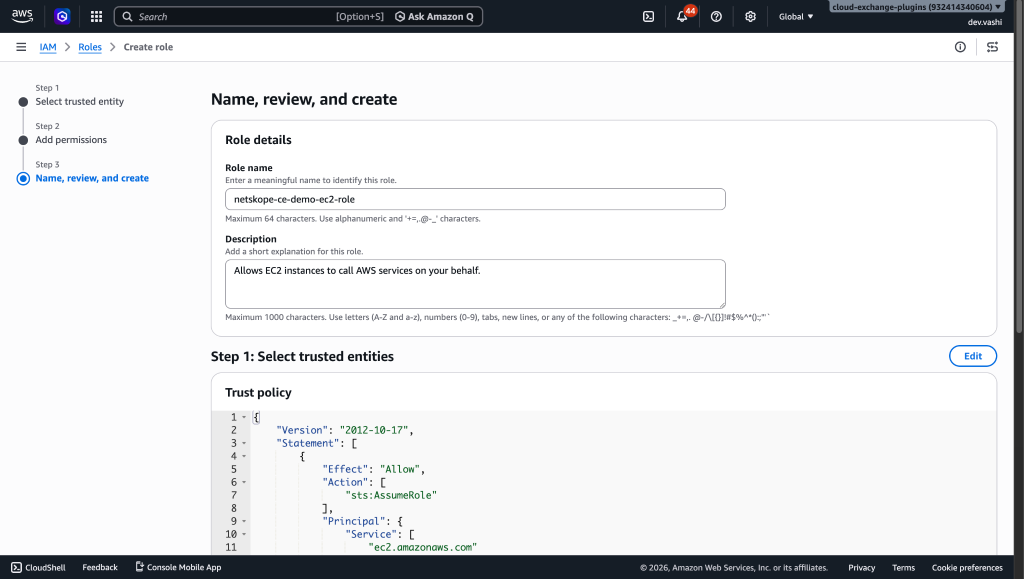
Enter a Role Name and Description.
-
Click Create Role.


Assign a Role to EC2 Instance
-
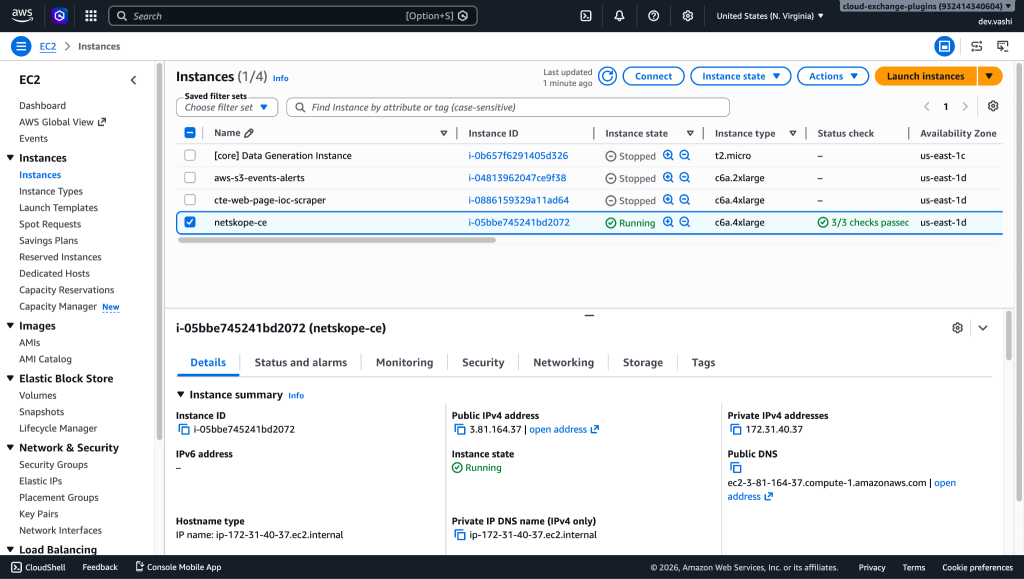
Open your EC2 instance console.
-
Go to the Instances page and select the required instance where Cloud Exchange is deployed.
-
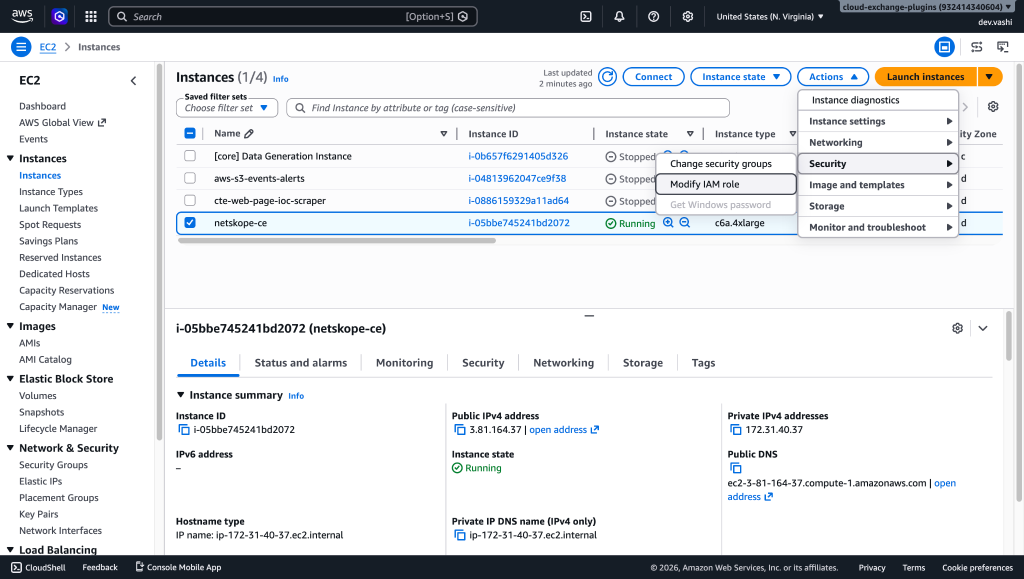
Go to Action > Security > Modify IAM Role.
-
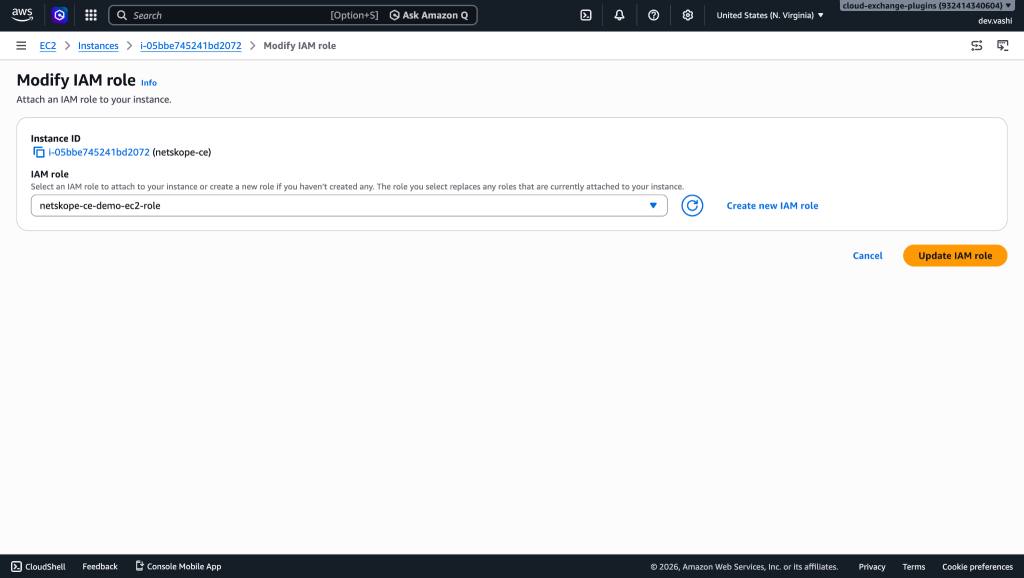
Select the Role that you created above in Create a Role.
-
Click Add IAM Role/Update IAM Role. Note that both the EC2 instance and S3 bucket should be in the same region.
 Restart your EC2 instance if you get permission related errors even after updating the IAM role for the EC2 instance.


IAM Role Anywhere authentication
Prerequisites
The AWS Certificate Manager service is required to be enabled to authenticate the plugin using the AWS IAM Roles Anywhere authentication method.
Make sure you create the Private Certificate Authority, Trust Anchor, and Profile in the same region that your AWS S3 bucket resides.
Create a Policy
This Policy contains the required permissions for creating a Private CA Certificate(including Permissions for creating Trust Anchor and Profile) and using the IAM Roles Anywhere.
-
Go to Policy Generator and select IAM Policy as the policy type and generate policy.
-
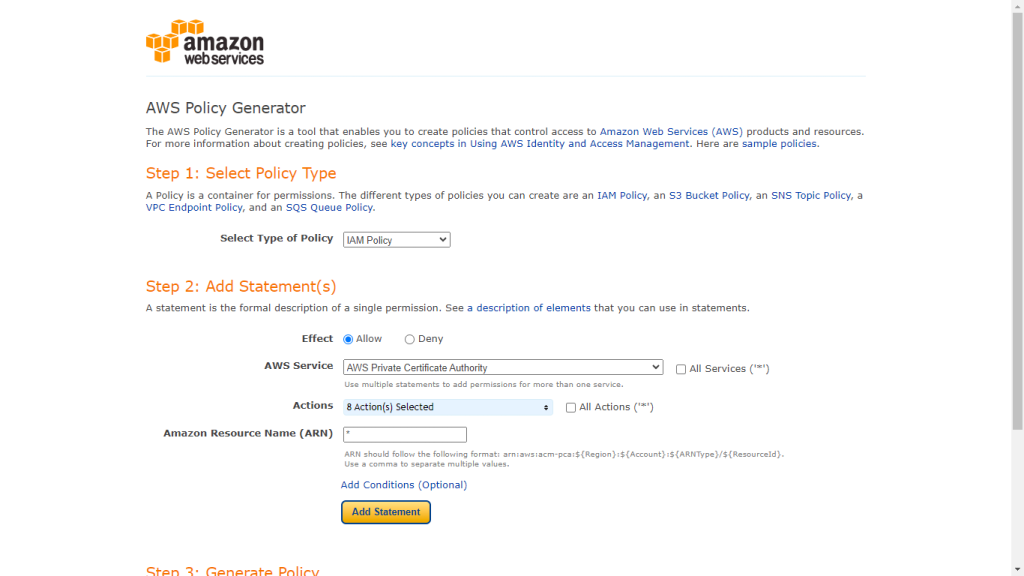
Select Type of Policy: IAM Policy
-
Effect: Allow
-
AWS Service: AWS Private Certificate Authority
-
Actions:
- CreateCertificateAuthority
- DescribeCertificateAuthority
- GetCertificate
- GetCertificateAuthorityCertificate
- GetCertificateAuthorityCsr
- ImportCertificateAuthorityCertificate
- IssueCertificate
- ListCertificateAuthorities
-
ARN: *
-
Click Add Statement.
-
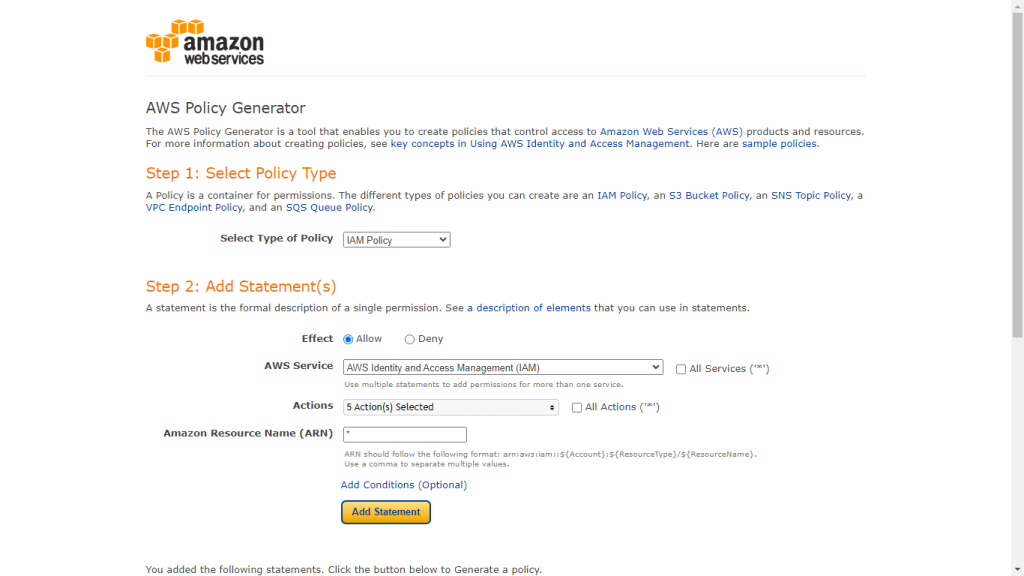
Select Type of Policy: IAM Policy
-
Effect: Allow
-
AWS Service: AWS Identity and Access Management (IAM)
-
Actions:
- AttachRolePolicy
- CreateAccessKey
- CreateRole
- DeleteRole
- PassRole
-
ARN: *
-
Click Add Statement.
-
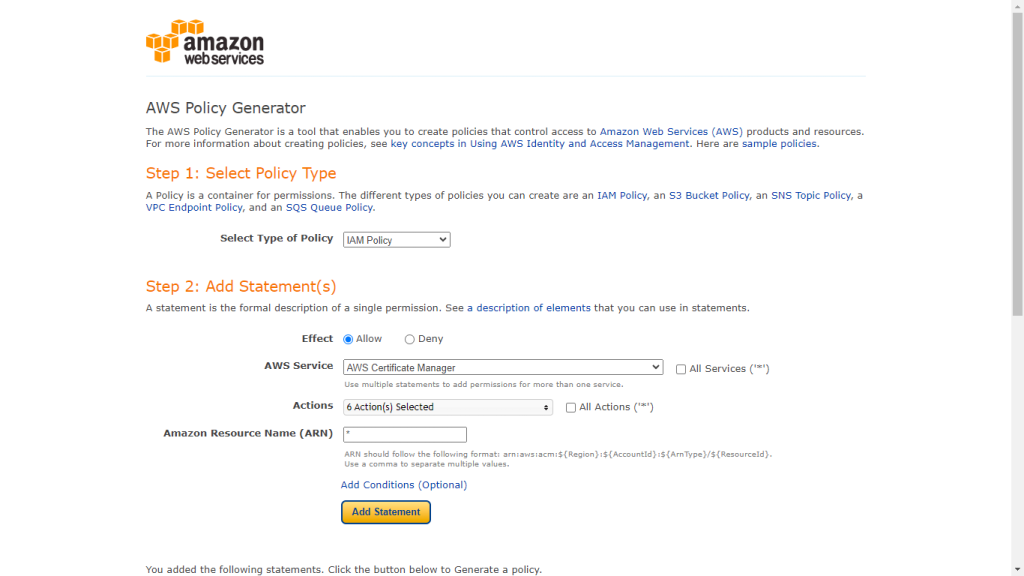
Select Type of Policy: IAM Policy
-
Effect: Allow
-
AWS Service: AWS Certificate Manager
-
Actions:
- DescribeCertificate
- ExportCertificate
- GetCertificate
- ListCertificates
- ListTagsForCertificate
- RequestCertificate
-
ARN: *
-
Click Add Statement.
-
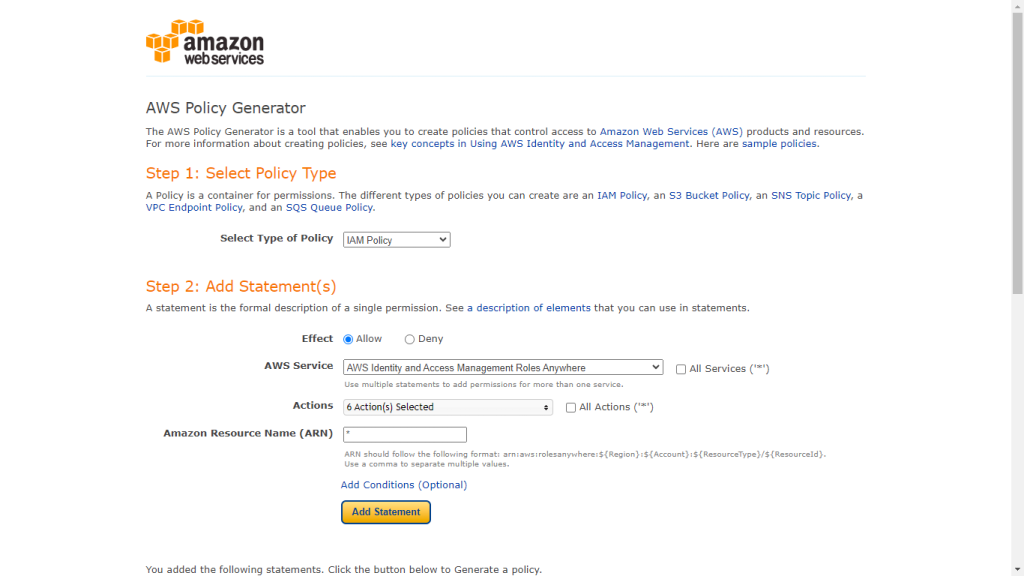
Select Type of Policy: IAM Policy
-
Effect: Allow
-
AWS Service: AWS Identity and Access Management Roles Anywhere
-
Actions:
- CreateProfile
- CreateTrustAnchor
- GetProfile
- GetTrustAnchor
- ListProfiles
- ListTrustAnchors
-
ARN: *
-
Click Add Statement.
-
Click Generate Policy.
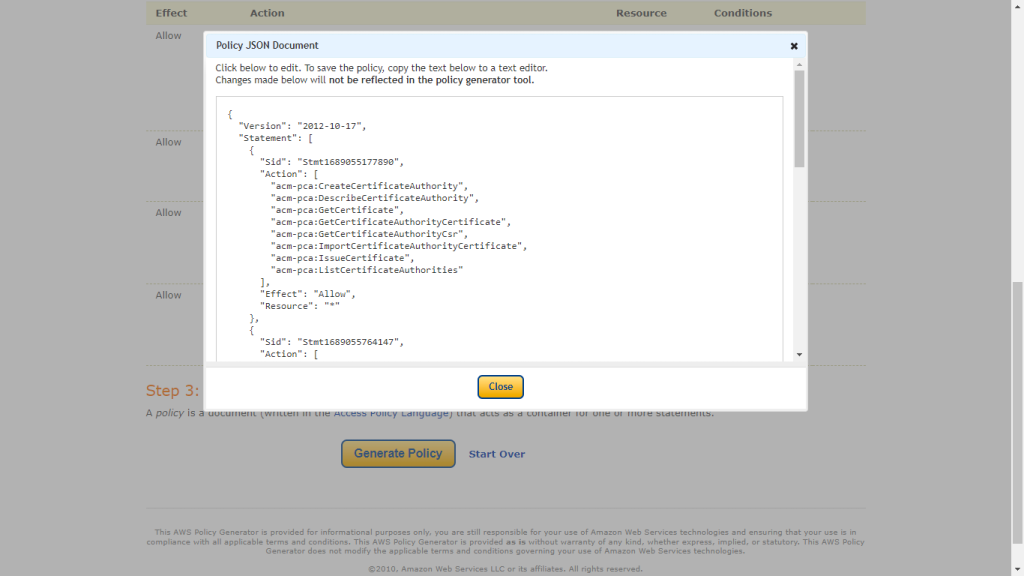
-
Copy the Policy as it will be used in the next step for creating the policy required for creating the Private CA certificates.
-
-
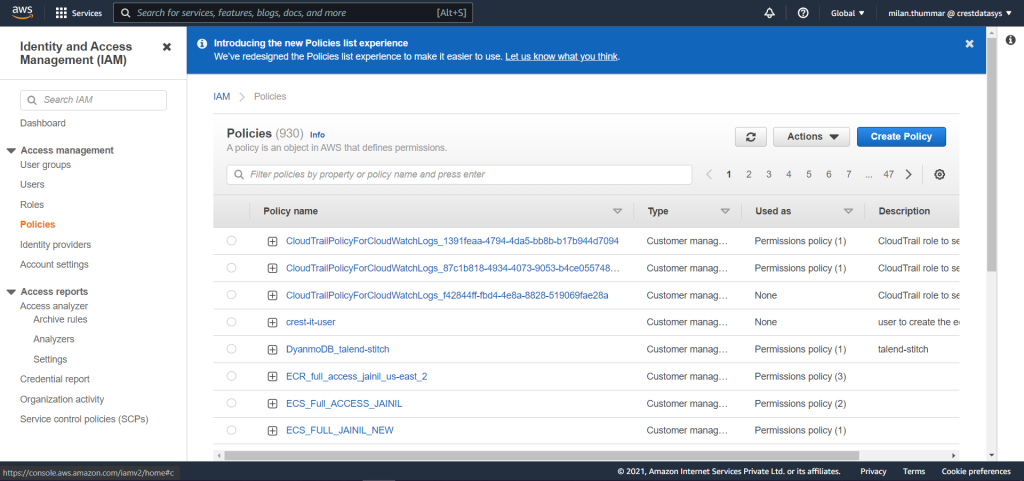
Go to the AWS Console and select IAM from All Services. Click Policies in the left panel, and then click Create Policy.
-
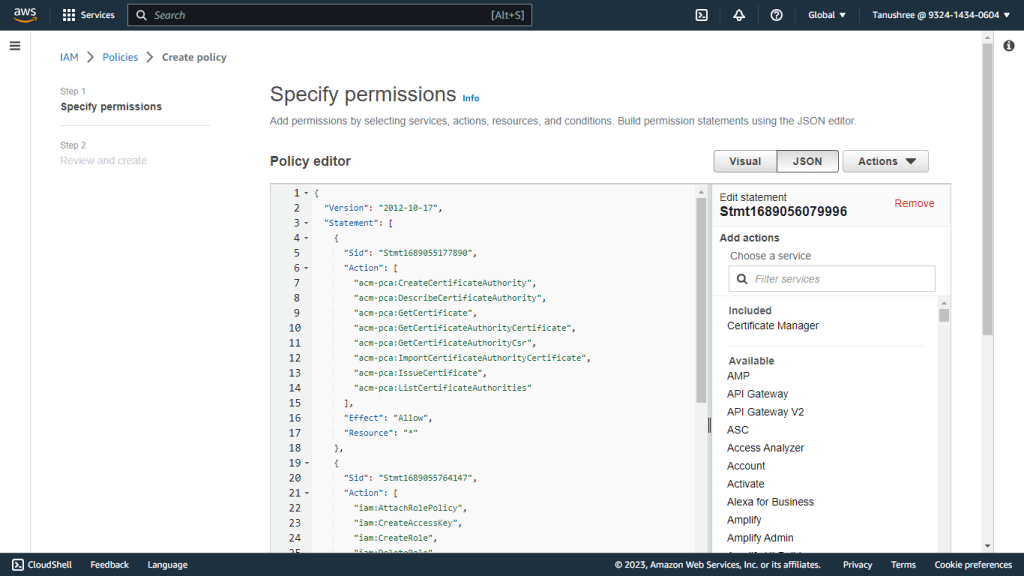
Paste the policy generated in the previous section to the JSON tab. Click Next: Tags and Next: Review.
-
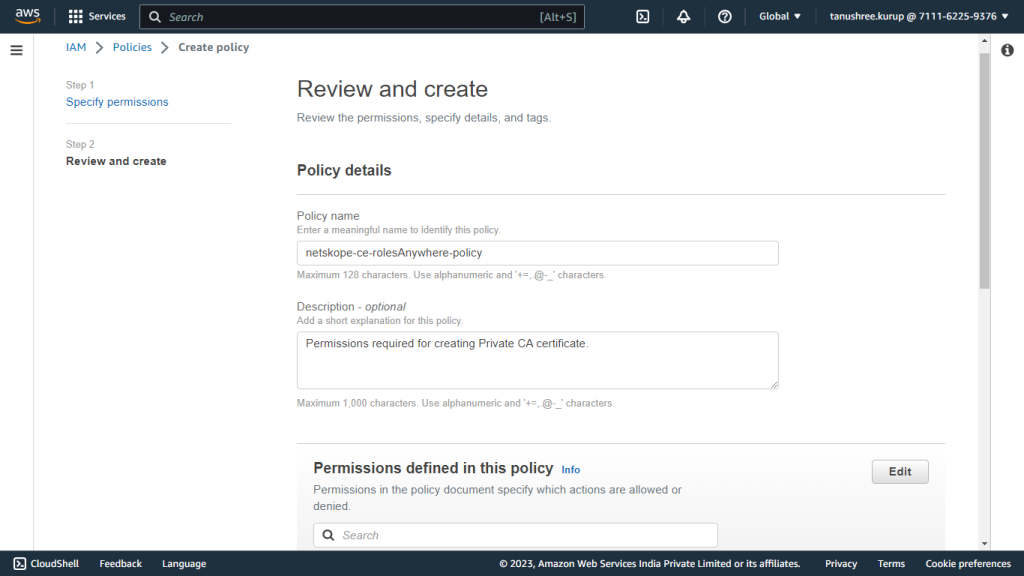
Enter a Name and click Save Changes.


Create a Private Certificate Authority
-
Log in to the AWS Console.
-
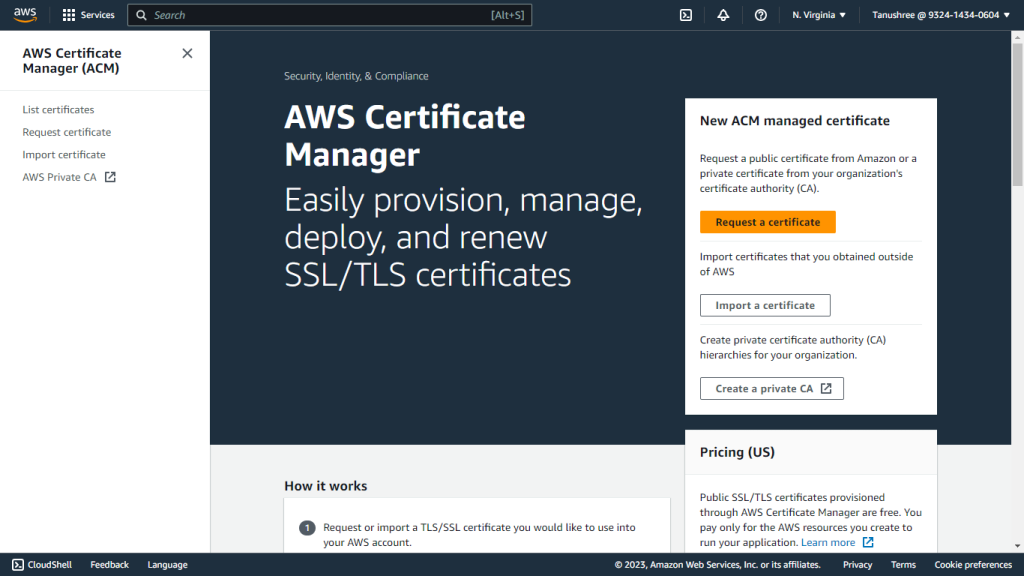
Search for Certificate Manager.
-
Click AWS Private CA.
-
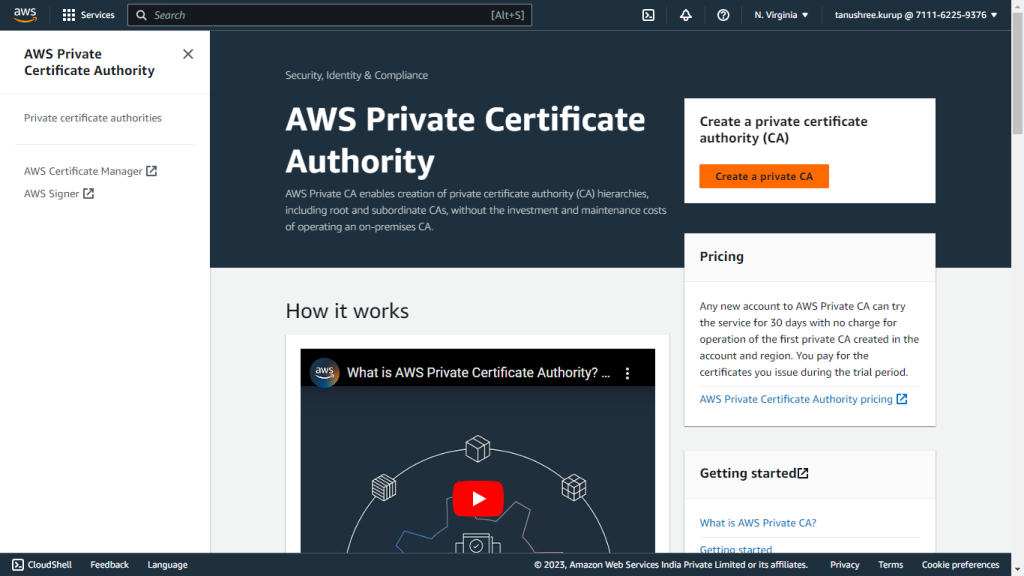
Click Create a private CA.
-
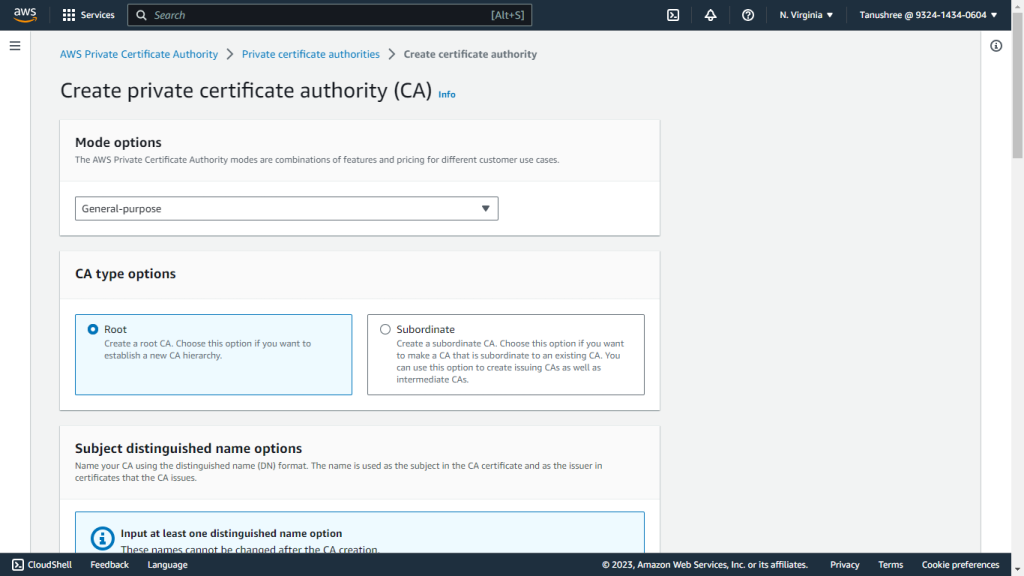
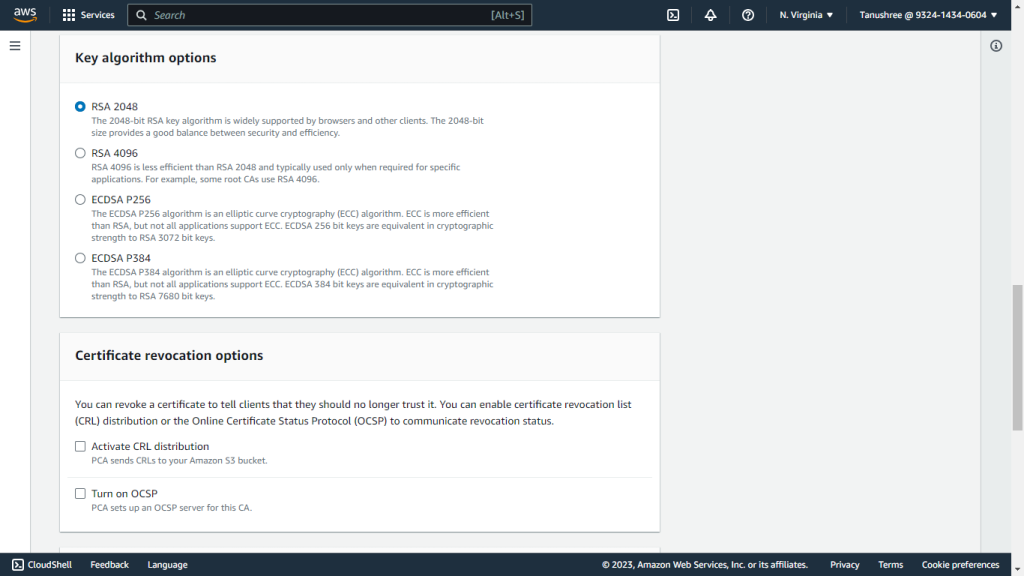
For Mode Options, select General-purpose, and for CA type options, select Root.
-
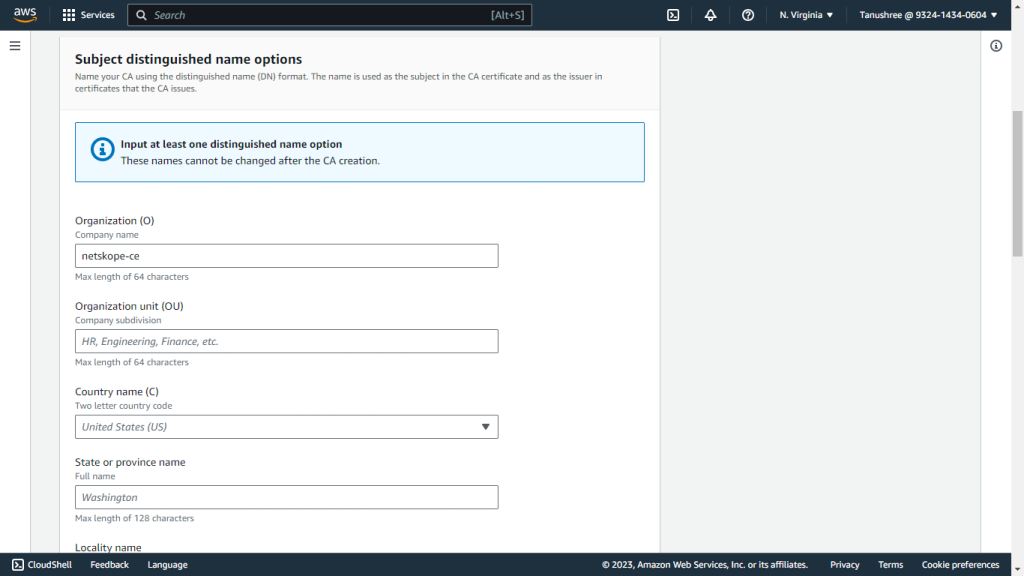
Enter the Organization (O).
-
For Key algorithm options, select RSA 2048.
-
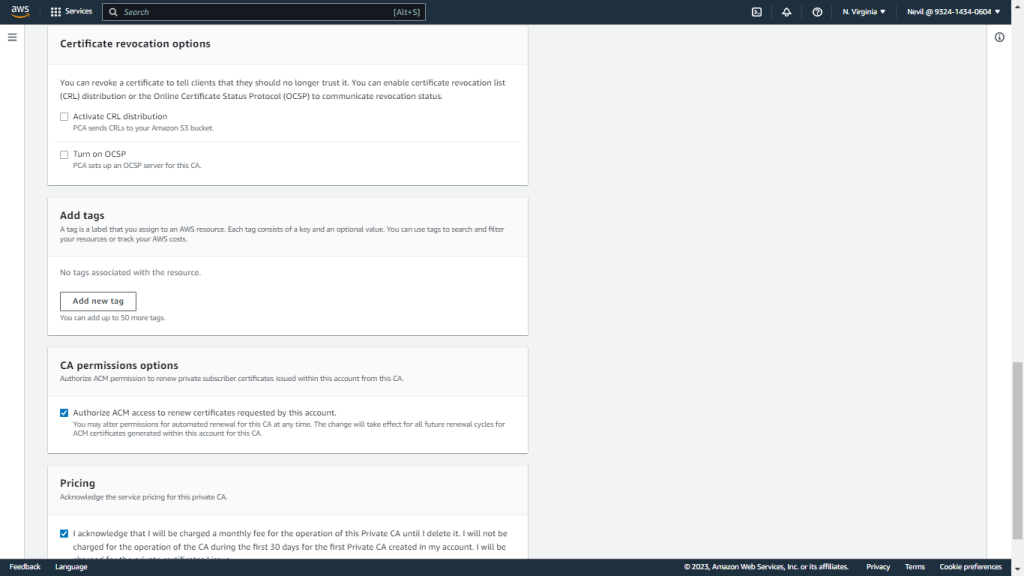
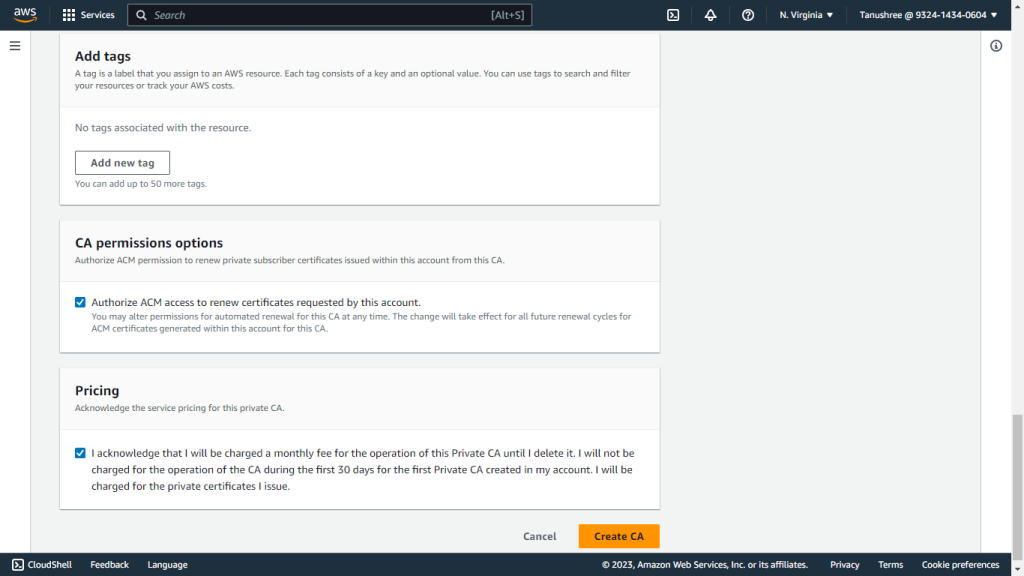
Add tags if any (optional).
-
Enable the checkbox in the CA permissions options section.
-
Enable the checkbox in the Pricing section.
-
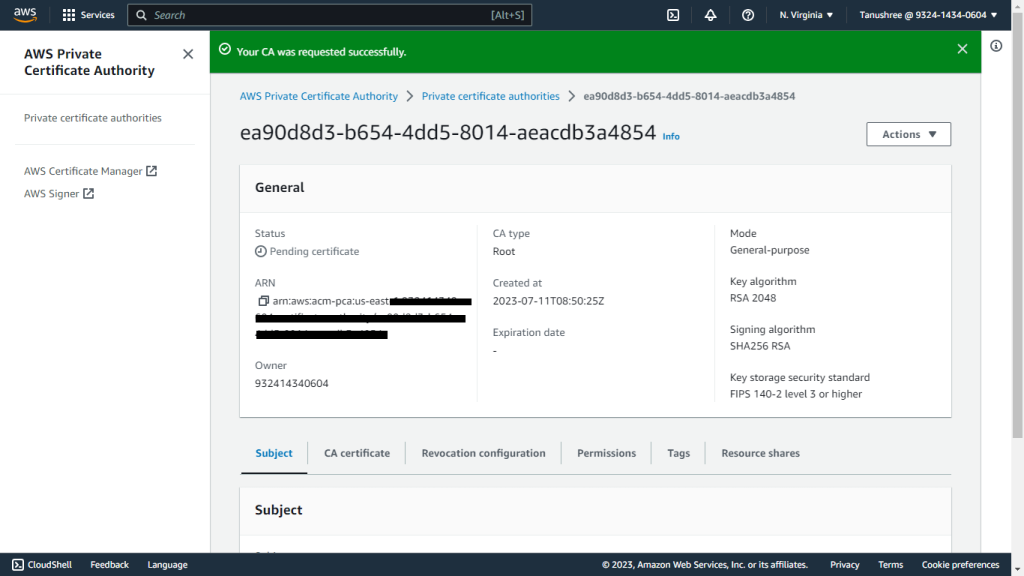
Click Create to create the CA certificate.
-
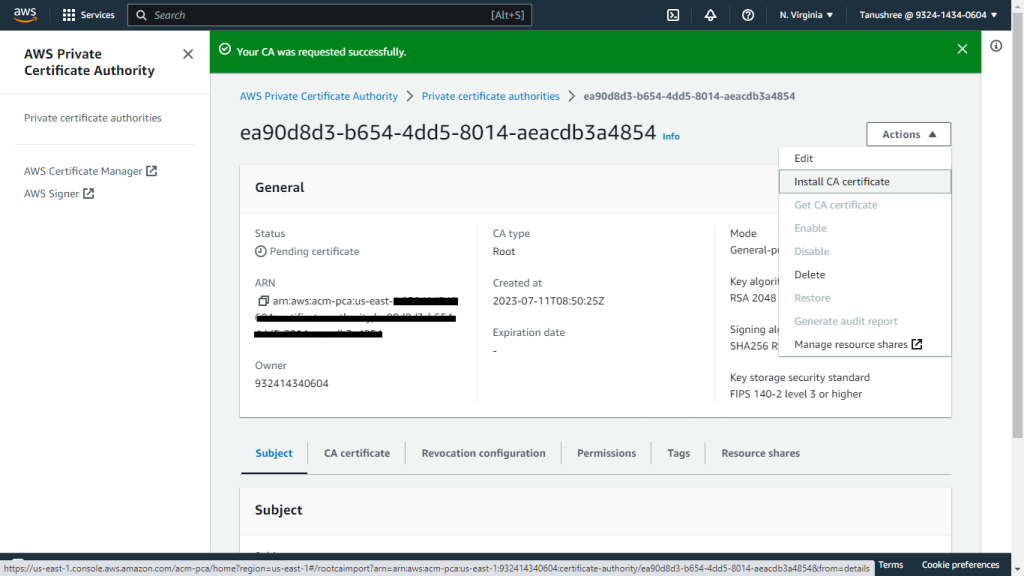
For Actions, select Install.
-
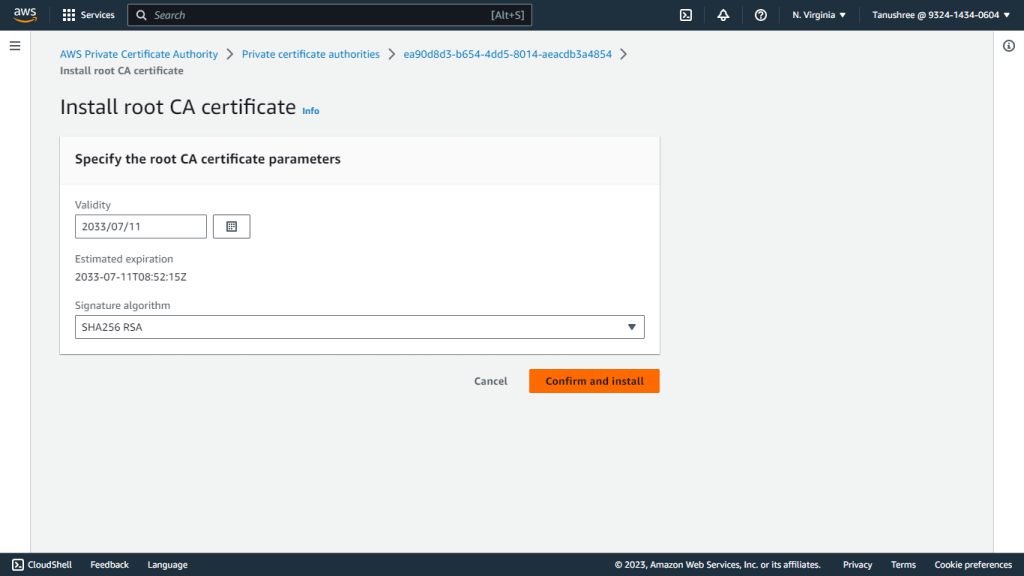
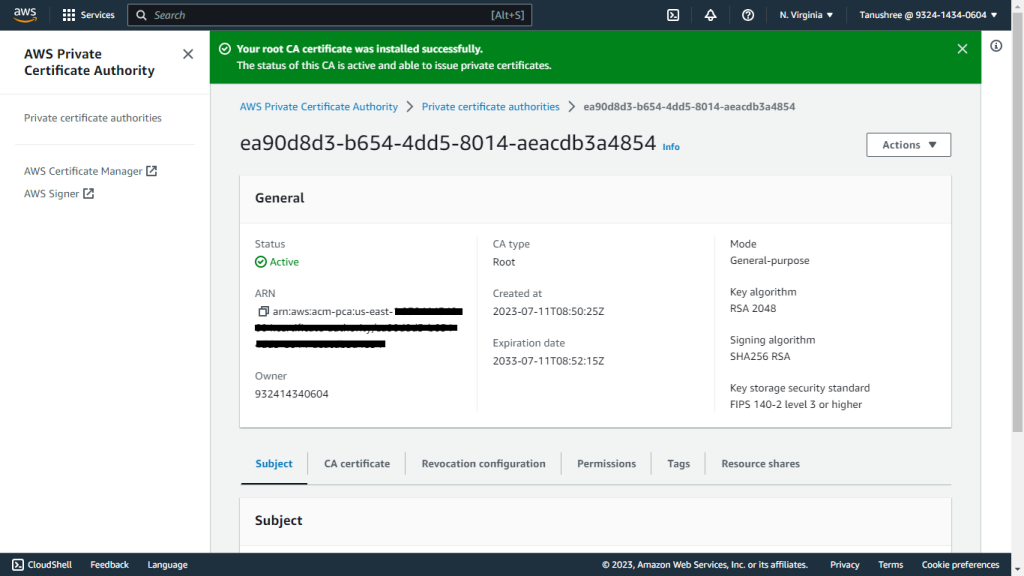
Click Confirm and Install.


Create a Trust Anchor
-
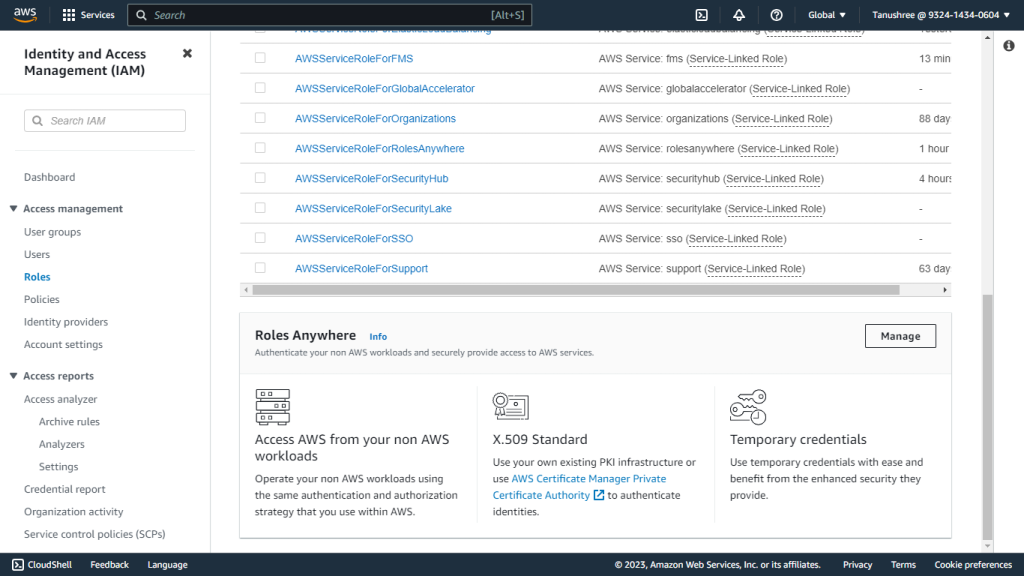
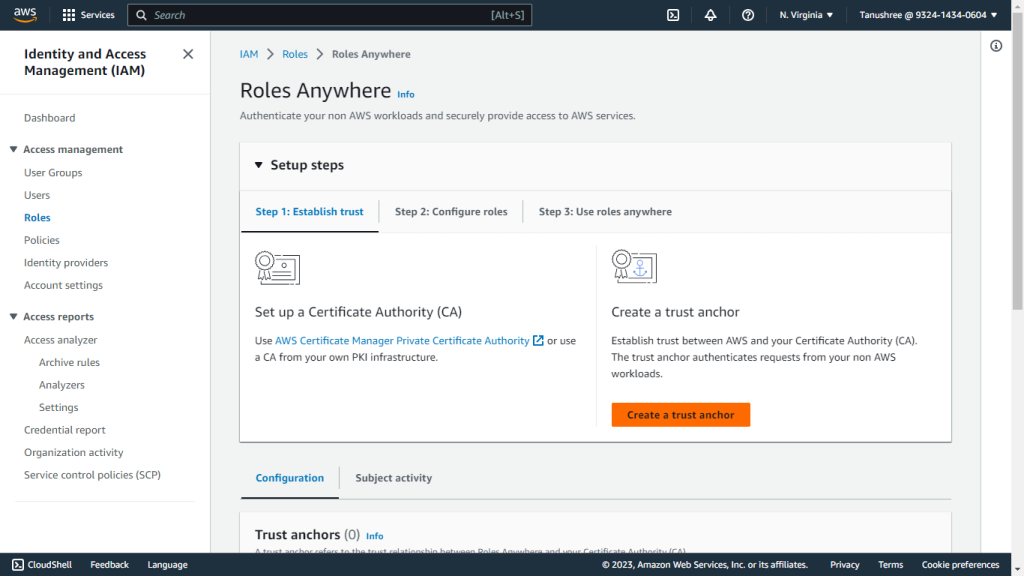
Search for IAM Service and go to Roles under Access management. Scroll down to Roles Anywhere and select Manage.
-
Click Create a trust anchor.
-
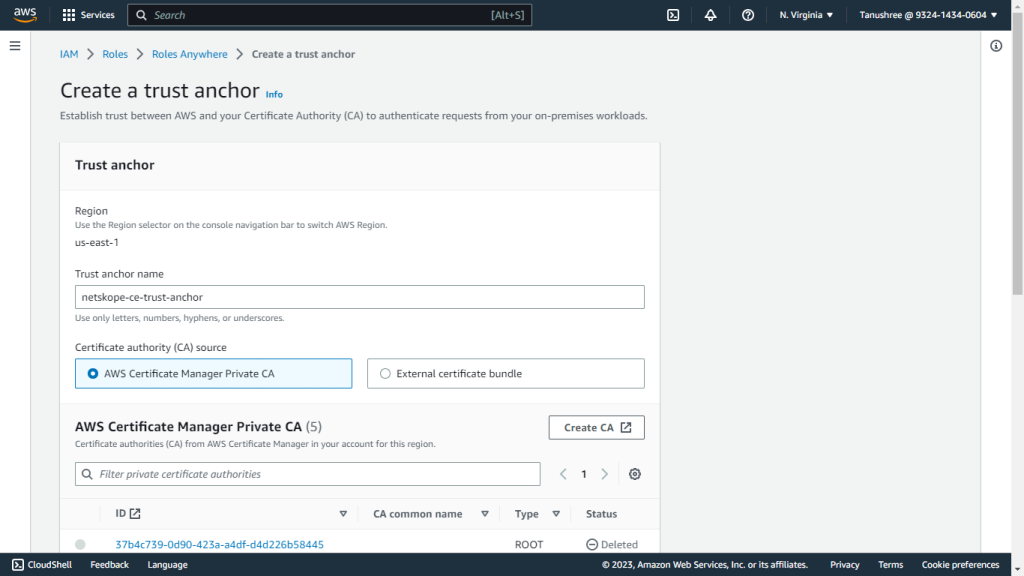
Enter a Trust anchor name.
-
Select the AWS Certificate Manager Private CA(created in the previous steps) as a Certificate authority (CA) source.
-
Select the certificate that you created under AWS Certificate Manager Private CA.
-
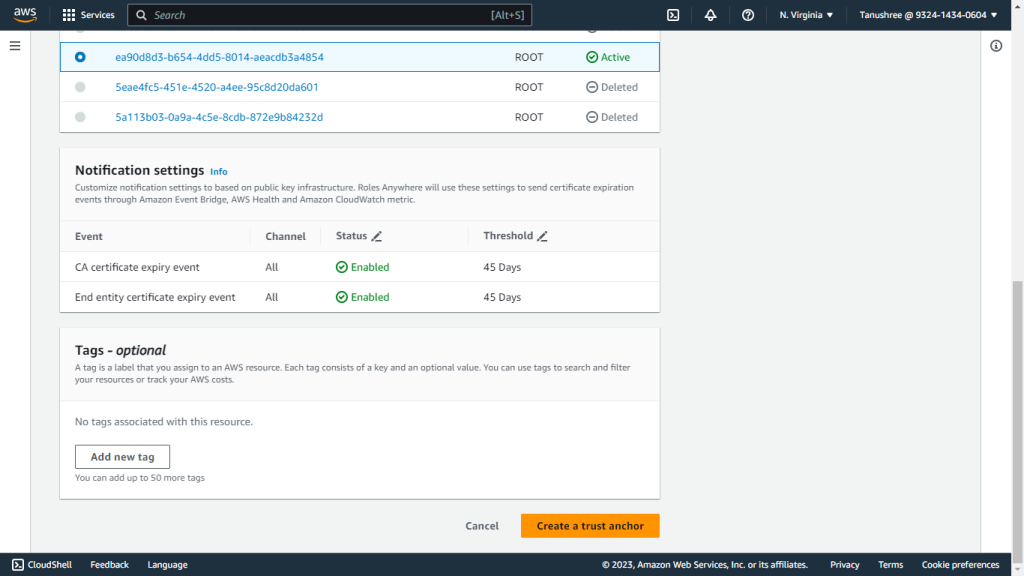
Add tags if required.
-
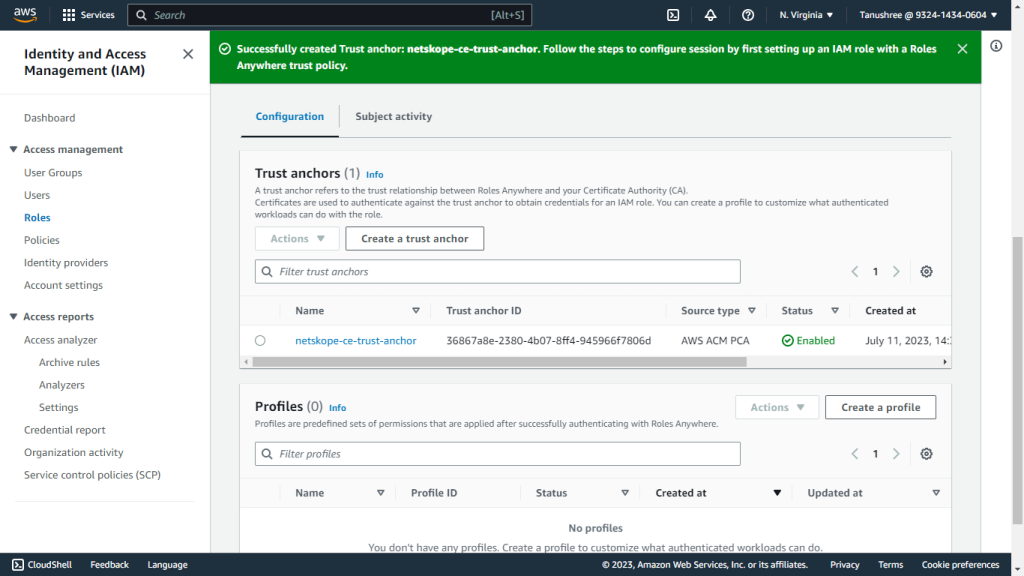
Click Create a trust anchor.
-
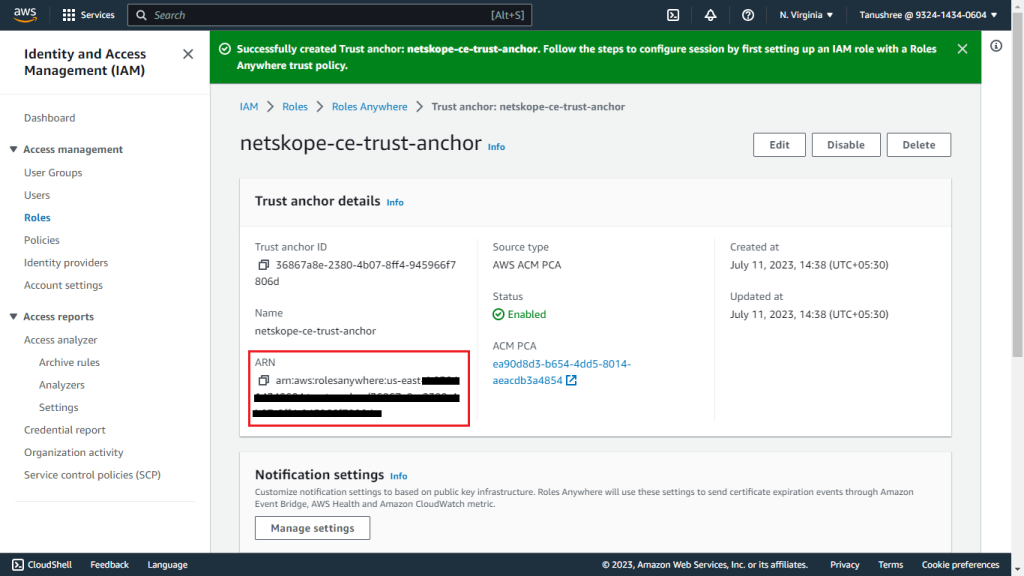
Click on the created Trust Anchor and copy the Trust Anchor ARN. This will be required in the plugin Trust Anchor ARN configuration parameter for the AWS IAM Roles Anywhere authentication method.


Create an IAM Role
-
Go to IAM Services in the AWS Console.
-
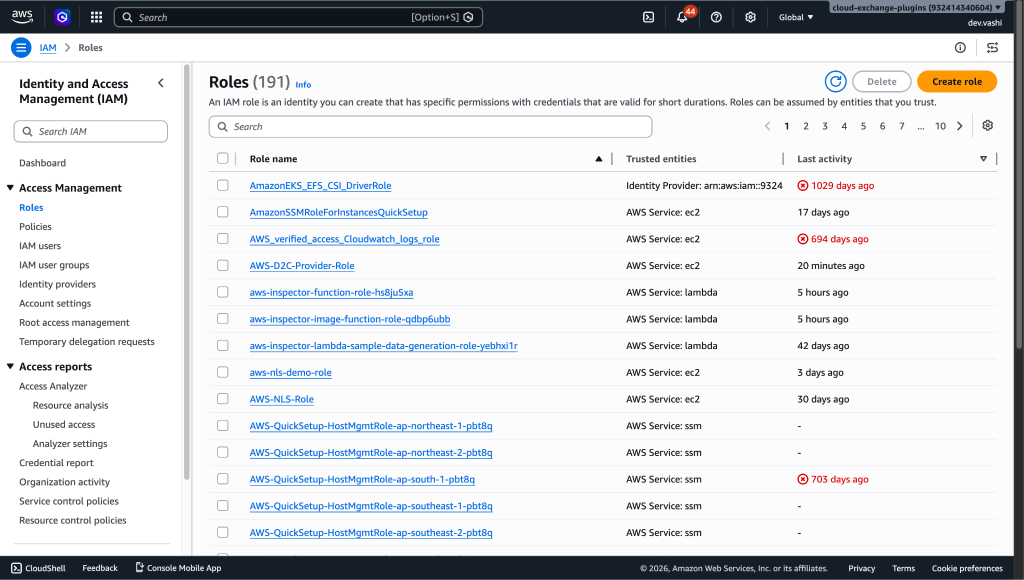
Click Role in the Access management submenu.
-
Click Create Role.
-
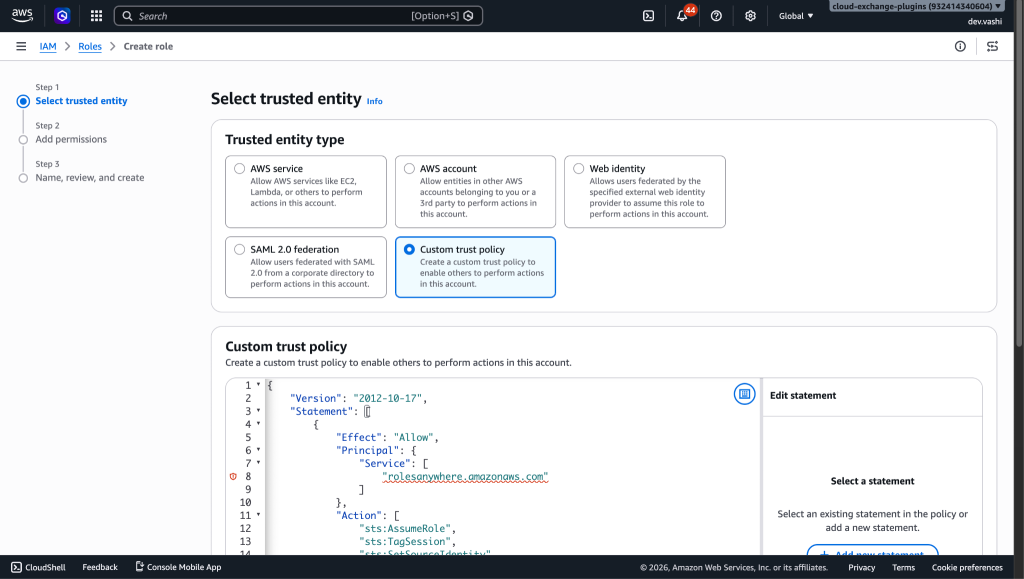
For the Trusted entity type, select Custom Trust Policy.
-
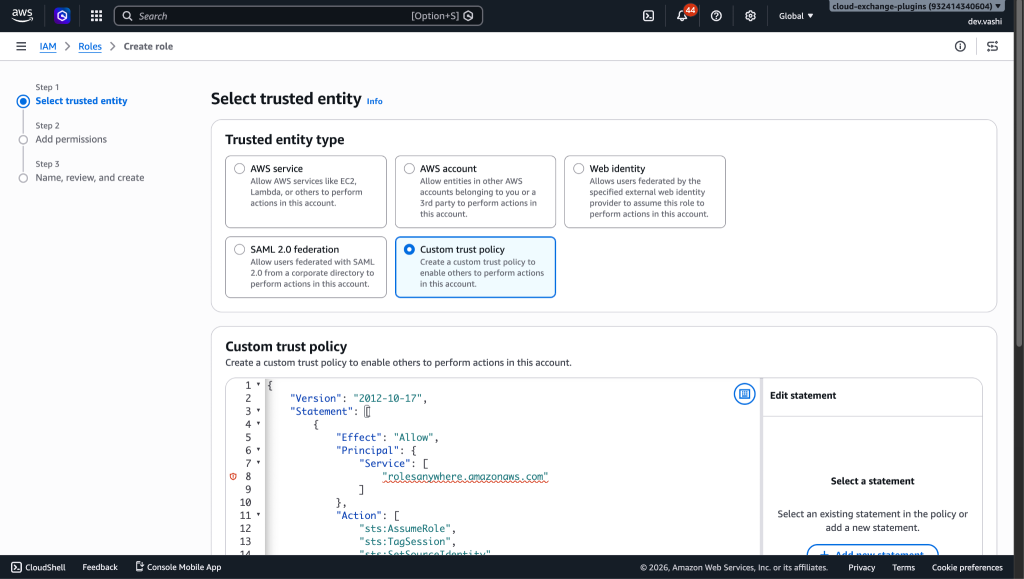
Replace the Custom Trust Policy with this Trust Policy. This policy contains the permissions for using the Roles Anywhere service:
{
    "Version": "2012-10-17",
    "Statement": [
        {
            "Effect": "Allow",
            "Principal": {
                "Service": [
                    "rolesanywhere.amazonaws.com"
                ]
            },
            "Action": [
                "sts:AssumeRole",
                "sts:TagSession",
                "sts:SetSourceIdentity"
            ]
        }
    ]
}
-
Click Next.
-
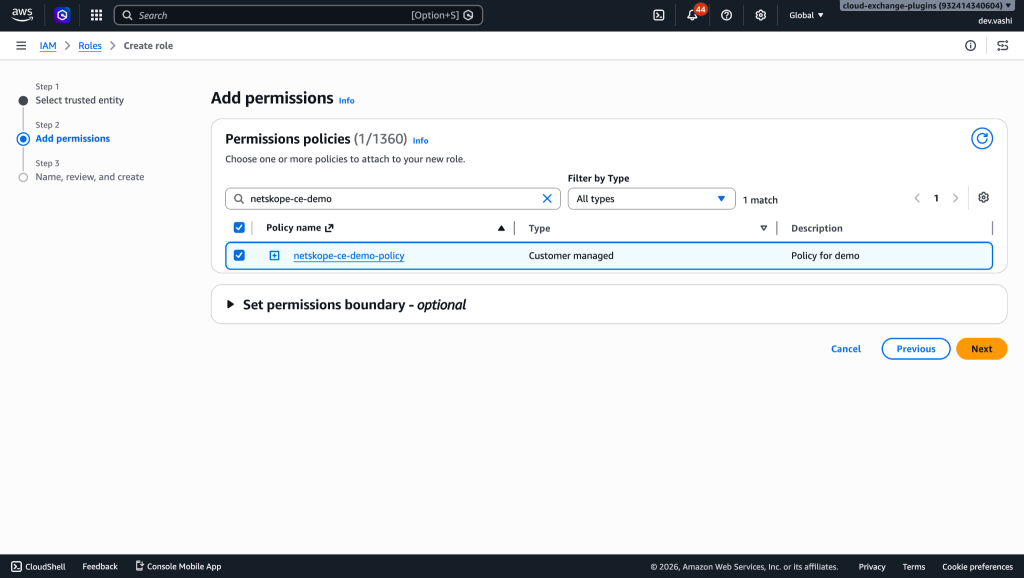
In the Permissions policies, select the created policy from the Create a policy section previously.
-
Click Next.
-
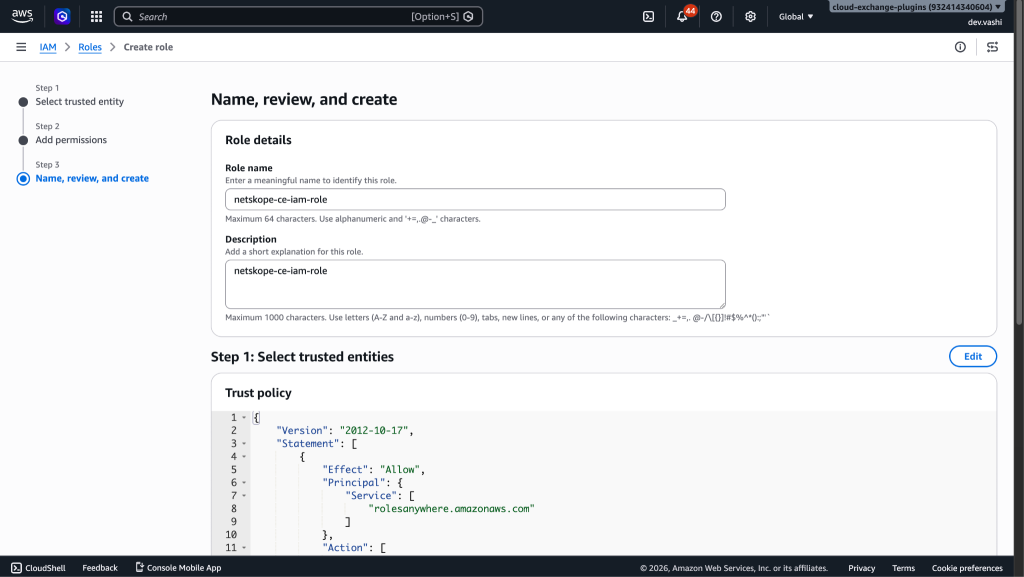
Enter a Role name and Description for the role.
-
Click Create role.
-
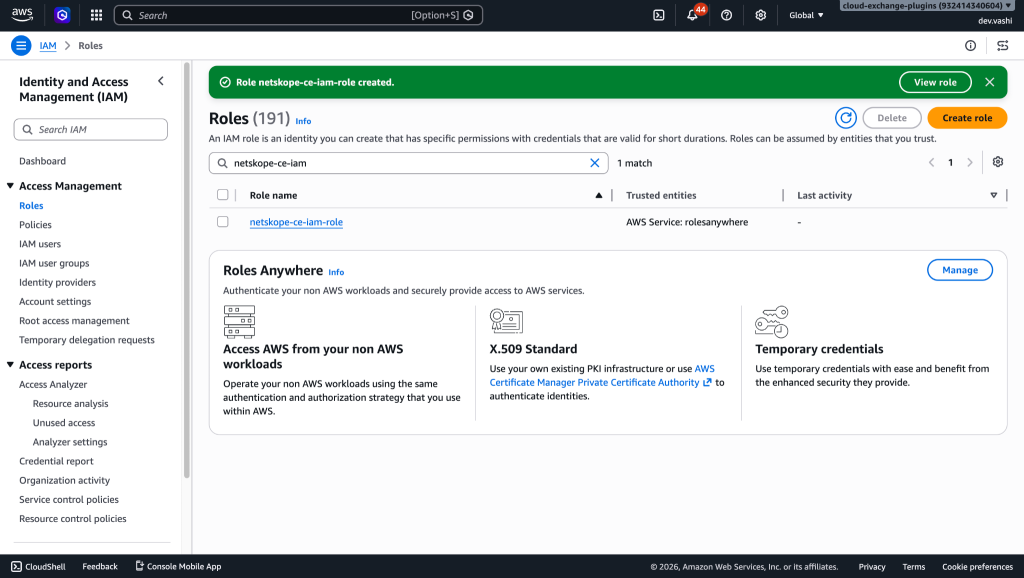
Search for the created role and click on the Role Name.
-
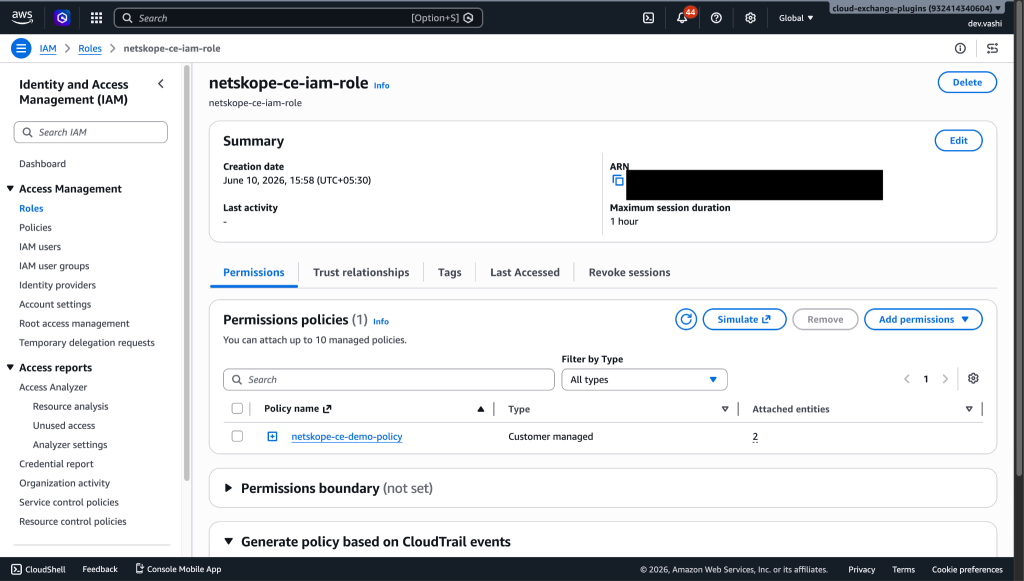
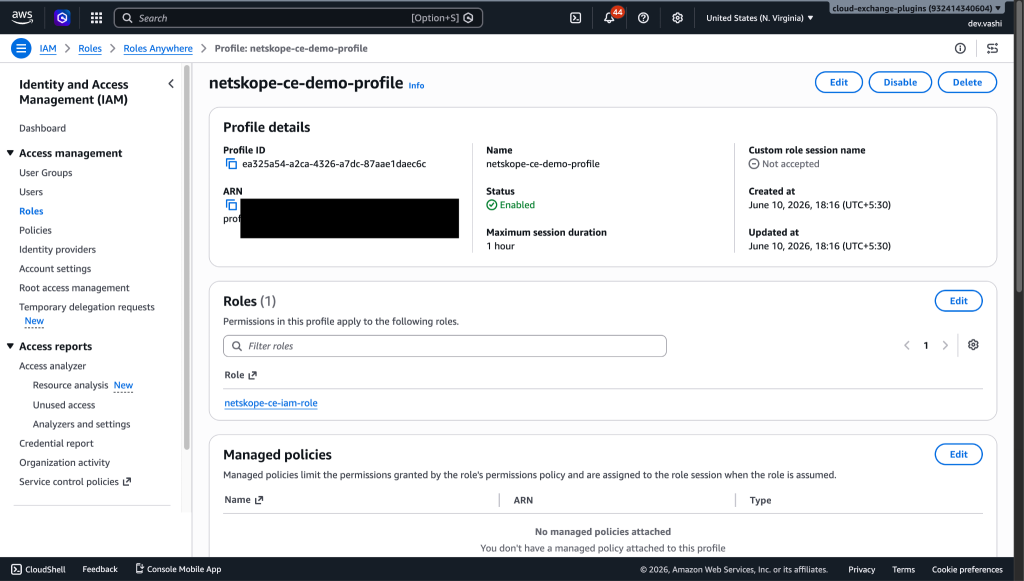
Make a note of the Role ARN because this will be required in the plugin Role ARN configuration parameter for the AWS IAM Roles Anywhere authentication method.


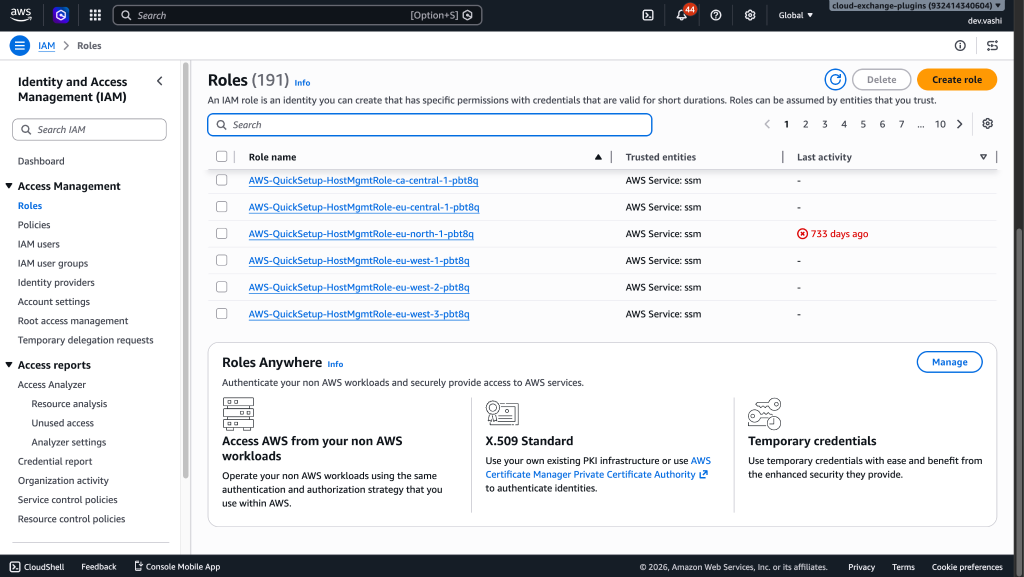
Create a Profile
-
Go to IAM Services in the AWS Console.
-
Select Roles present under Access management.
-
Scroll down to Roles Anywhere and click Manage.
-
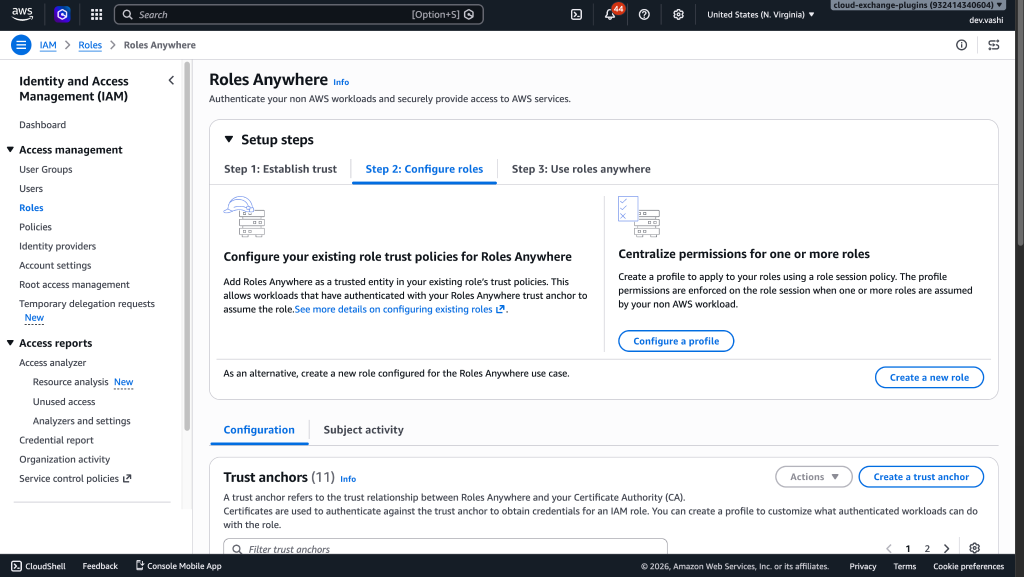
Expand the Setup steps.
-
Click Step 2: Configure roles.
-
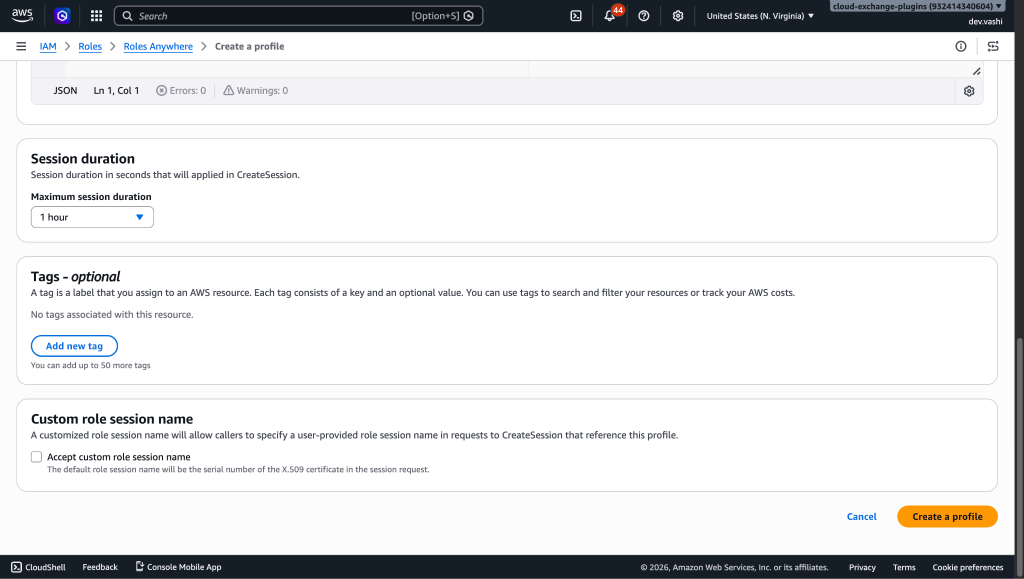
Click Configure a profile.
-
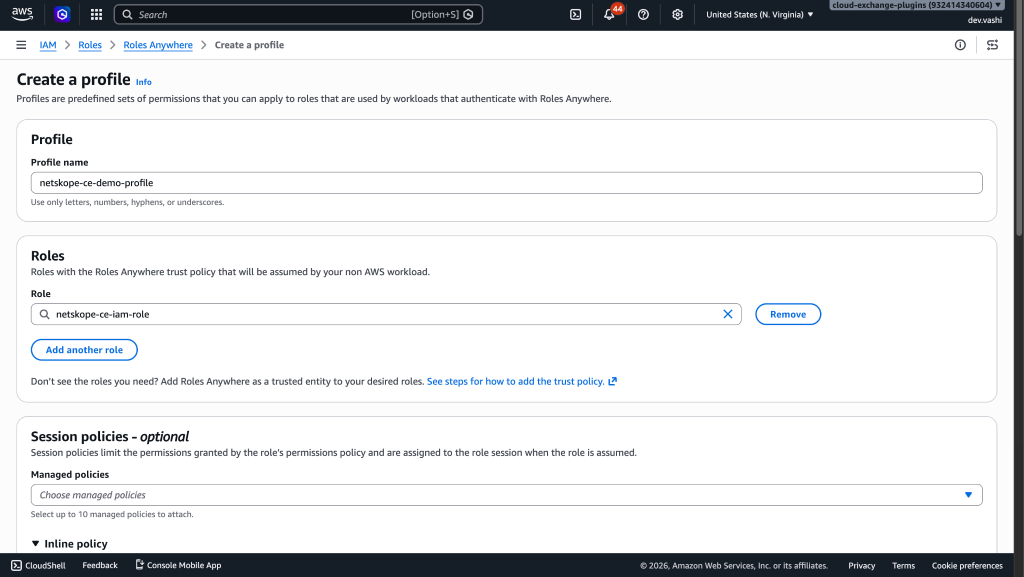
Enter a Profile name.
-
Select the role created in the Create IAM Role step.
-
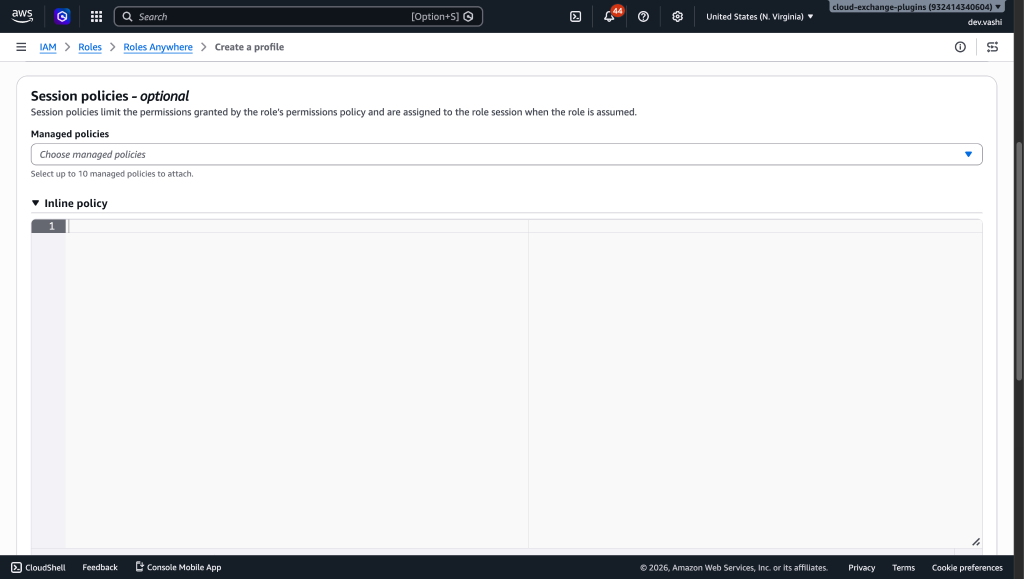
Remove the Inline Policy.
-
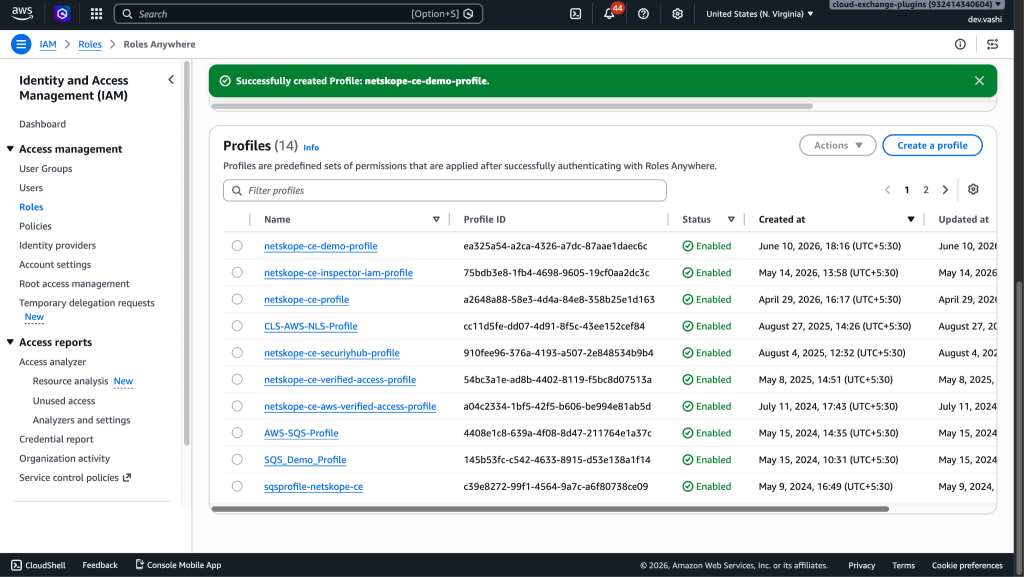
Click Create profile.
-
Click on the reated Profile and copy the Profile ARN.


Request a Private Certificate
-
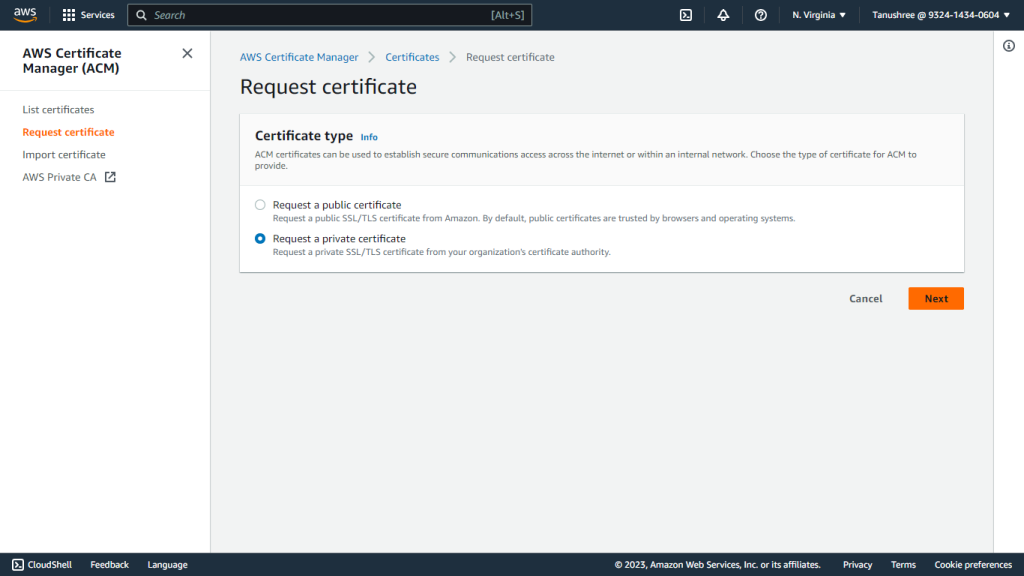
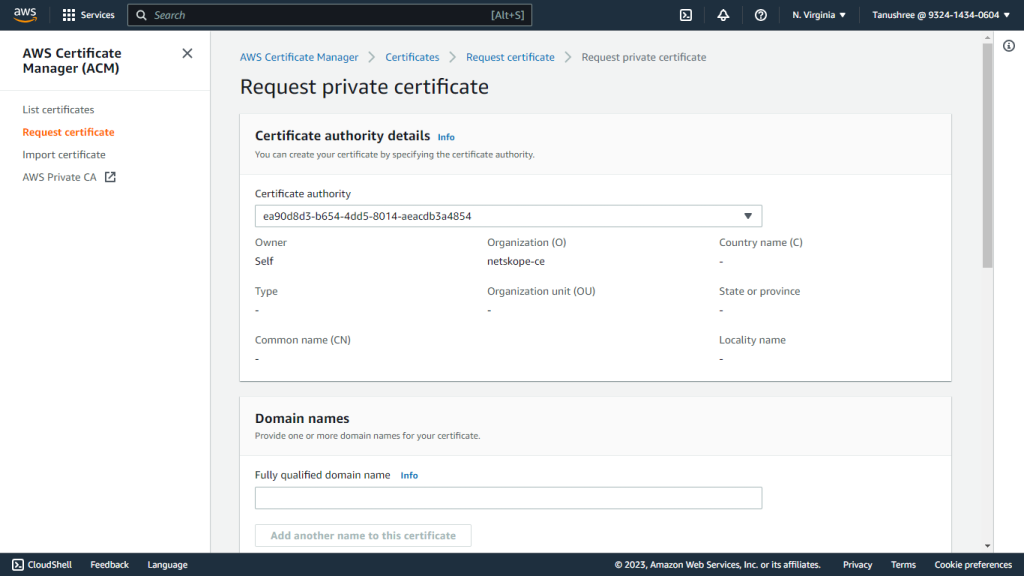
Go to AWS Certificate Manager > Request certificate.
-
Select Request a private certificate.
-
Click Next.
-
Select the Certificate authority created in the previous steps.
-
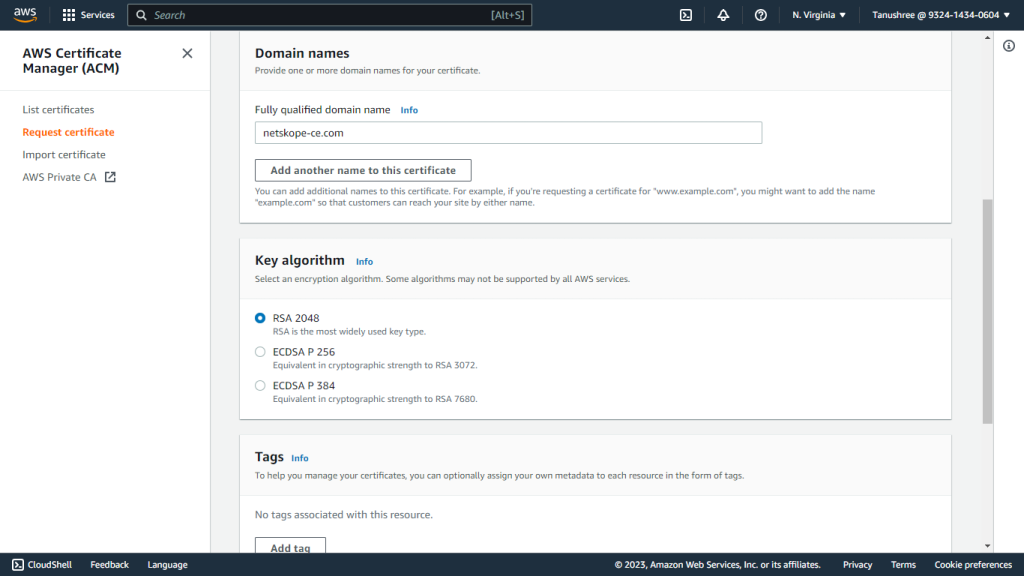
Provide a domain name in the Fully qualified domain name field. For example: netskope-ce.com.
-
For Key algorithm, select RSA 2048.
-
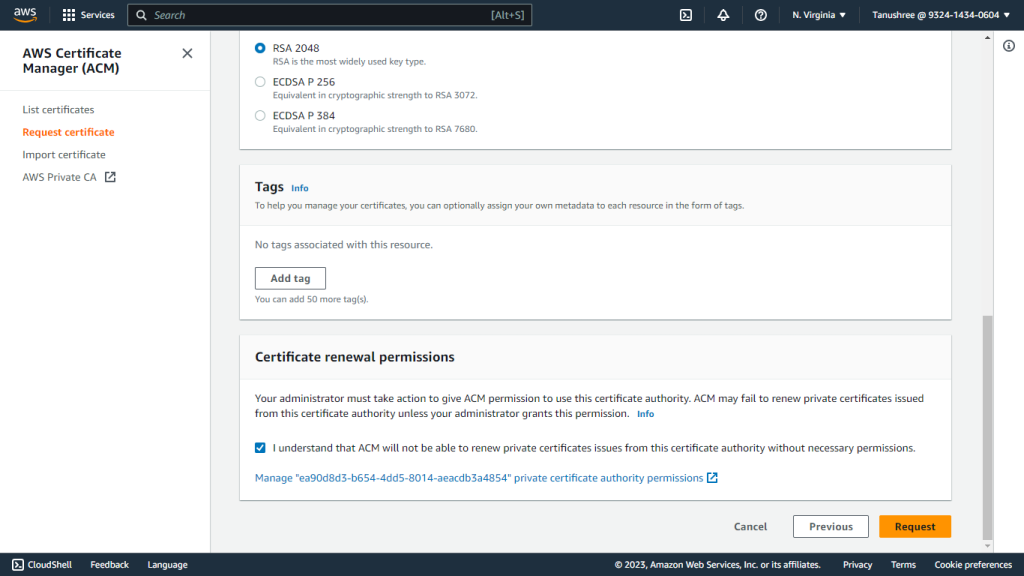
Add tags if required.
-
Acknowledge the Certificate renewal permissions.
-
Click Request.
-
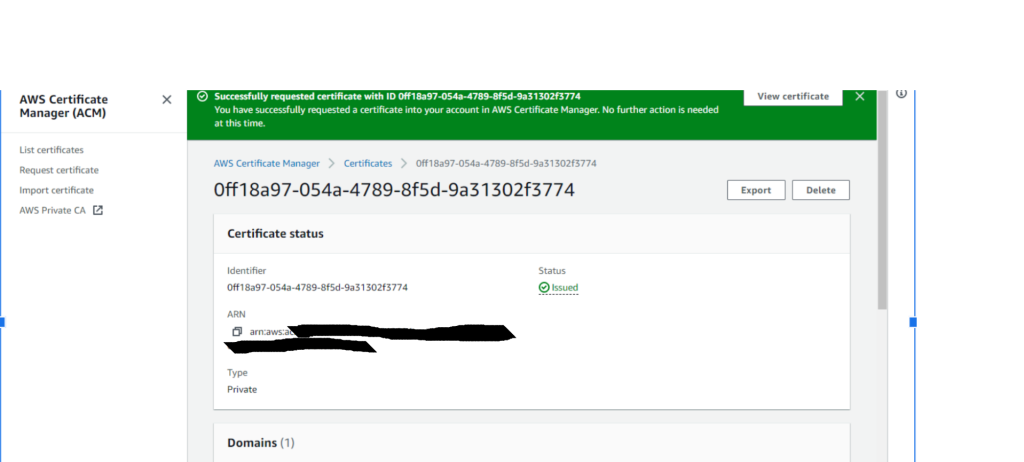
Go to List certificates from the navigation pane of AWS Certificate Manager.
-
Select the certificate created previously.

-
Click Export.
-
Enter the passphrase. Make a note of the passphrase as it will be required for the configuration of the AWS S3 Plugin using the AWS IAM Roles Anywhere authentication method.
-
Click Generate PEM Encoding.
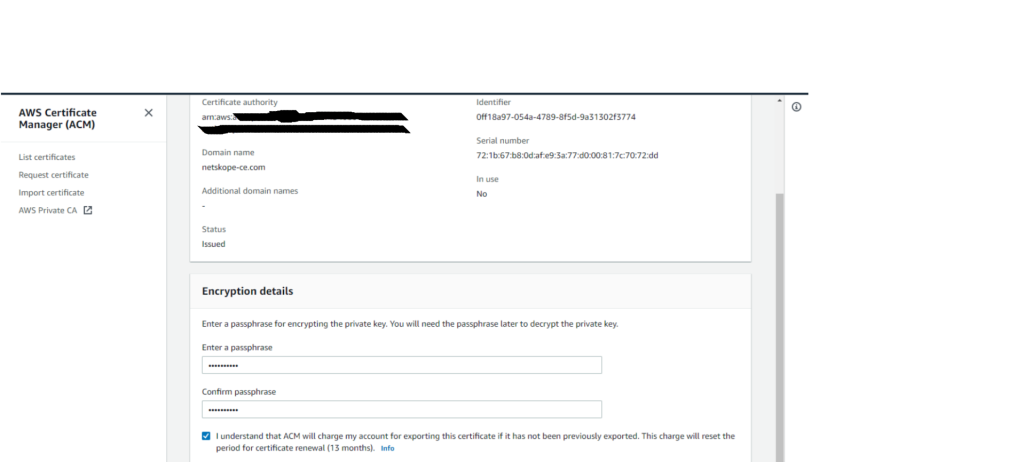
-
Download all the Certificates because they won’t be visible again. For new certificates, you will need to Export them again.
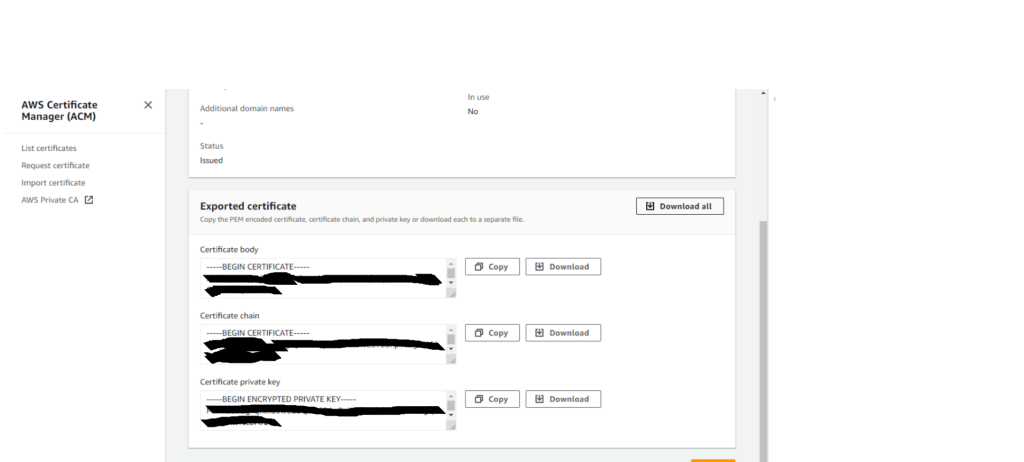
-
Copy the Certificate body and Certificate Private Key, because they will be required for the Configuration of the AWS S3 Plugin using the AWS IAM Roles Anywhere Authentication method. For More Info visit AWS IAM Role Anywhere


Link an AWS S3 Bucket to a Databricks External Location
-
Log in to Databricks and go to Workspace.
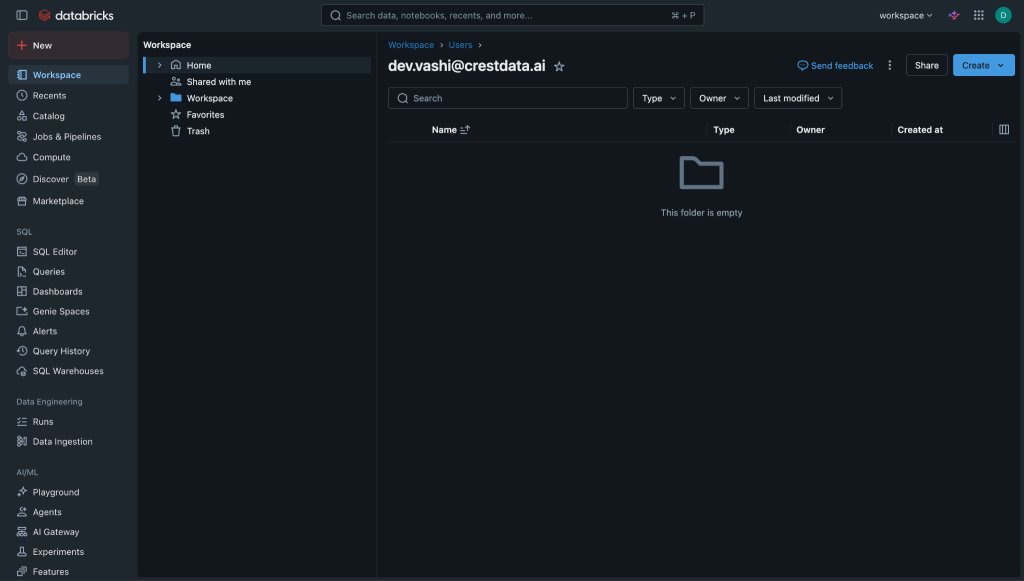
-
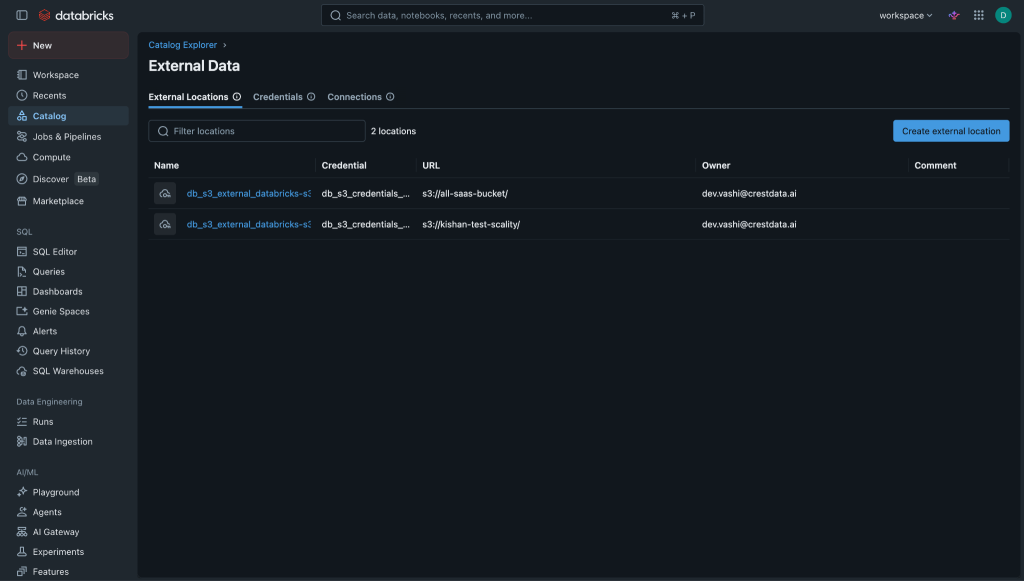
In the top search bar, enter External Locations and select it from the results.
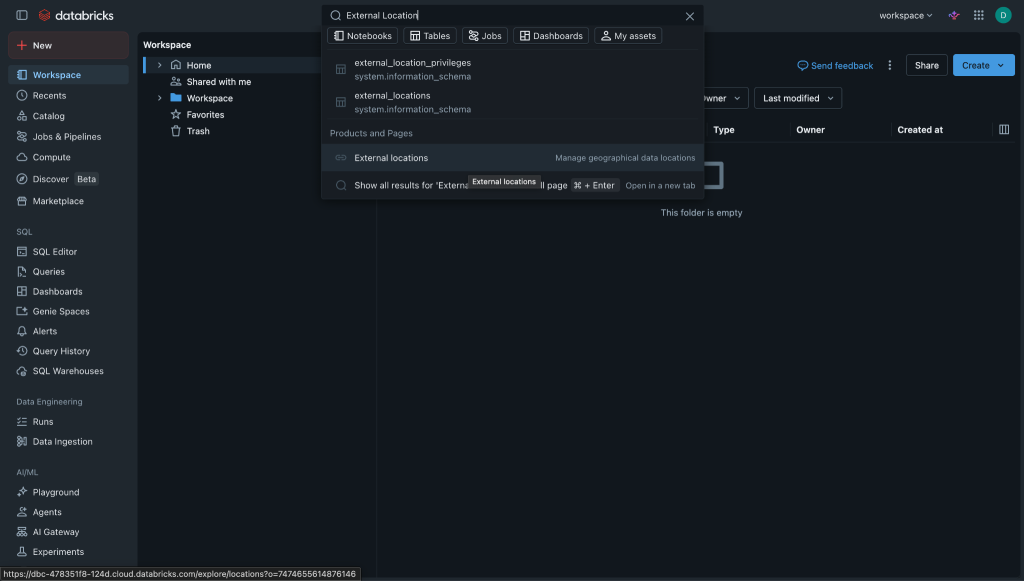
-
Click Create external location.
-
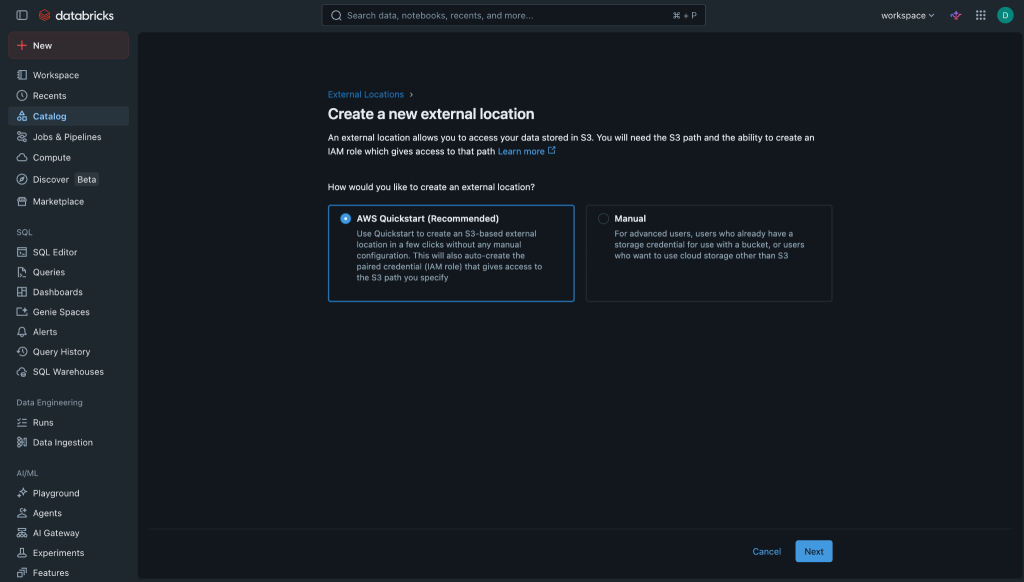
Select AWS Quickstart and click Next.
-
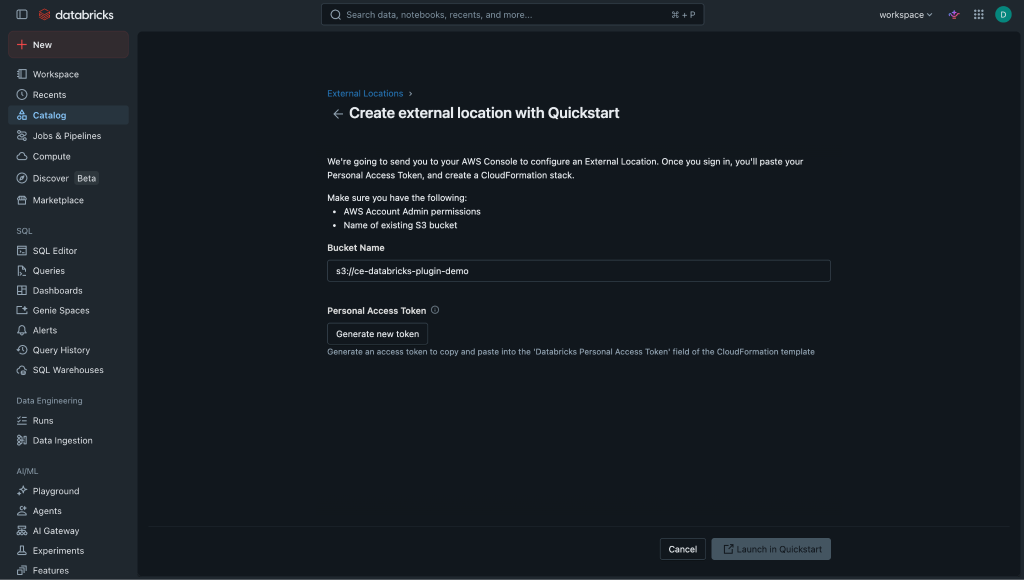
Provide the bucket name in this format s3://<bucket-name>, and click Generate new token.
-
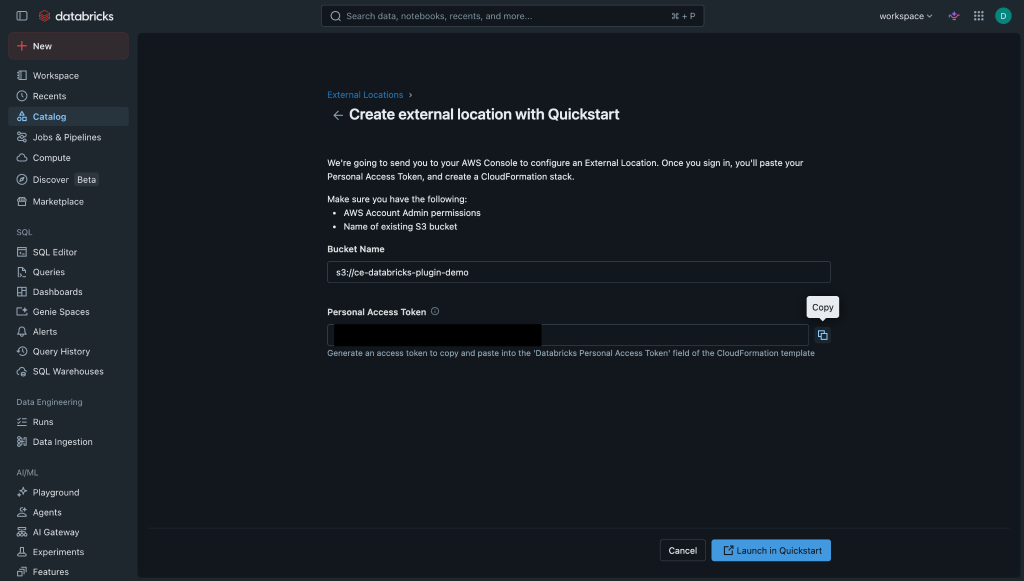
Copy the generated token, and then click Launch in Quickstart.
-
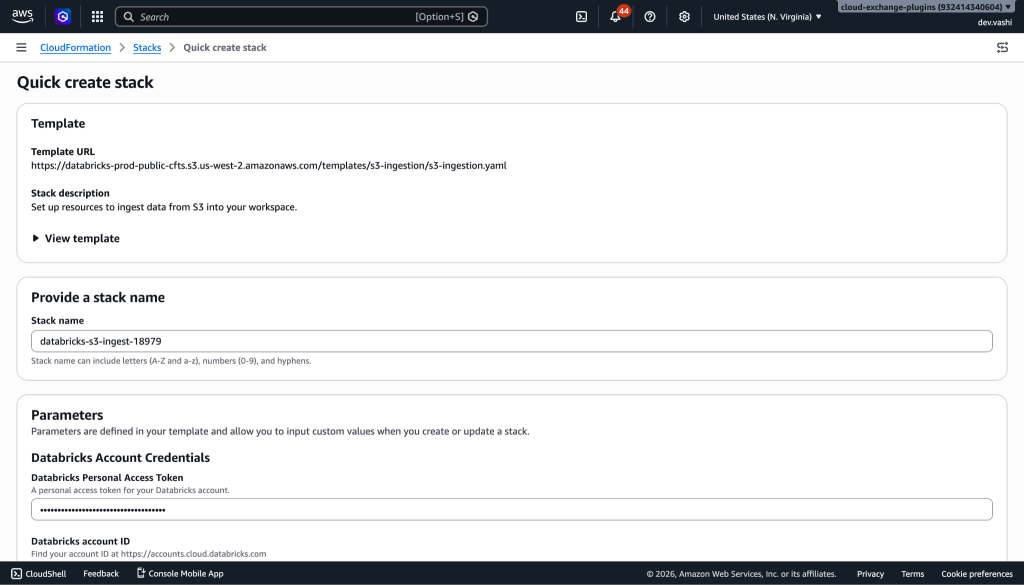
This will redirect you to the AWS console. Enter the Personal Access Token in the Databricks Personal Access Token field.
-
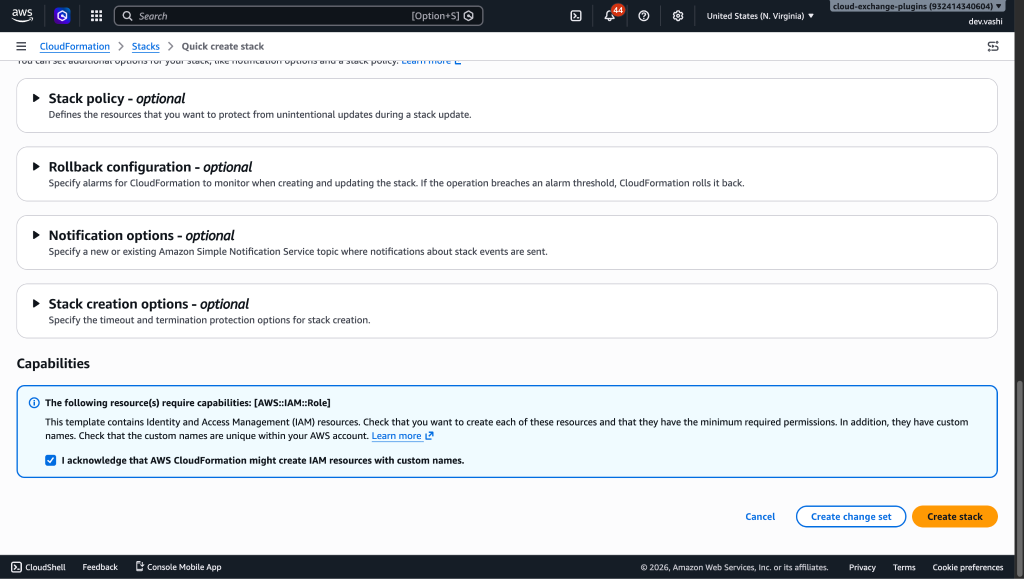
Check the Acknowledgement, and then click Create stack.
-
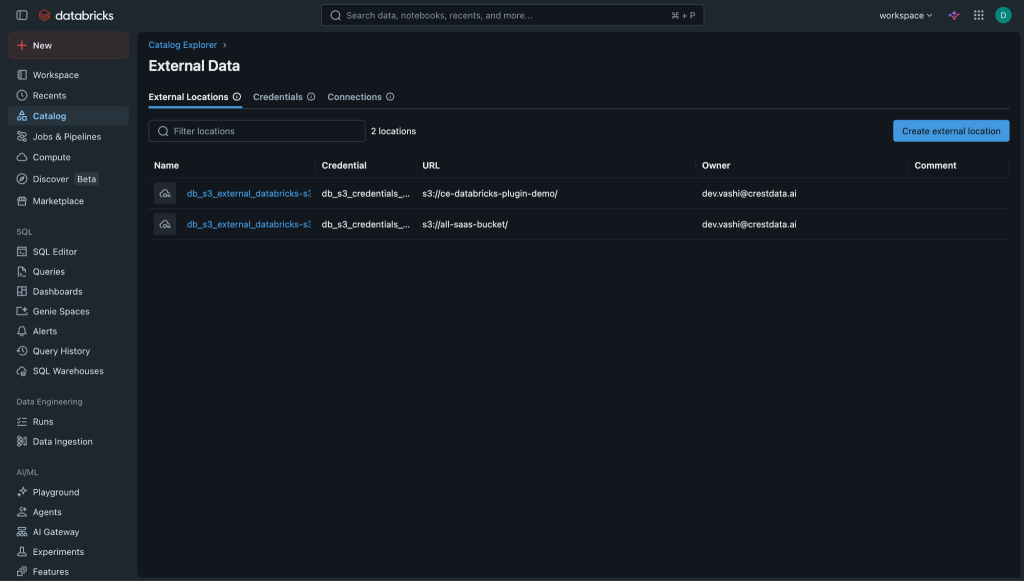
After it is done, you will be able to see the external location on the Databricks after 10 minutes to 15 minutes.


Note
- Refer this Databricks documentation for more information related to linking an S3 bucket with an External location.
- If you do not want to use a different S3 bucket for the Databricks plugin, then you can directly link the S3 bucket used for Netskope Log Streaming to the Databricks External location.
Configure the Databricks Plugin
-
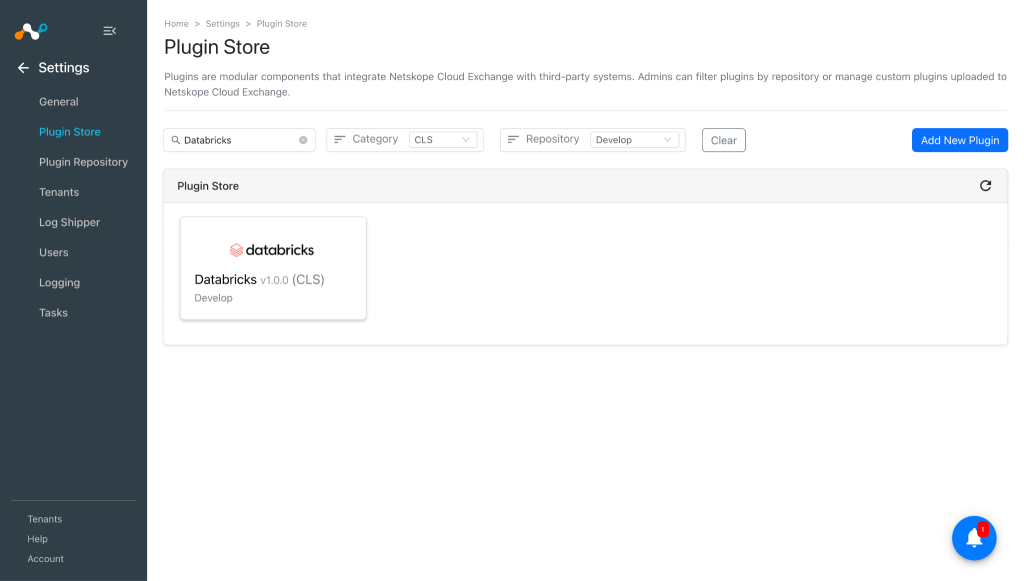
In Cloud Exchange, go to Settings > Plugin Store. Search for and select the Databricks v1.0.0 (CLS) plugin.
-
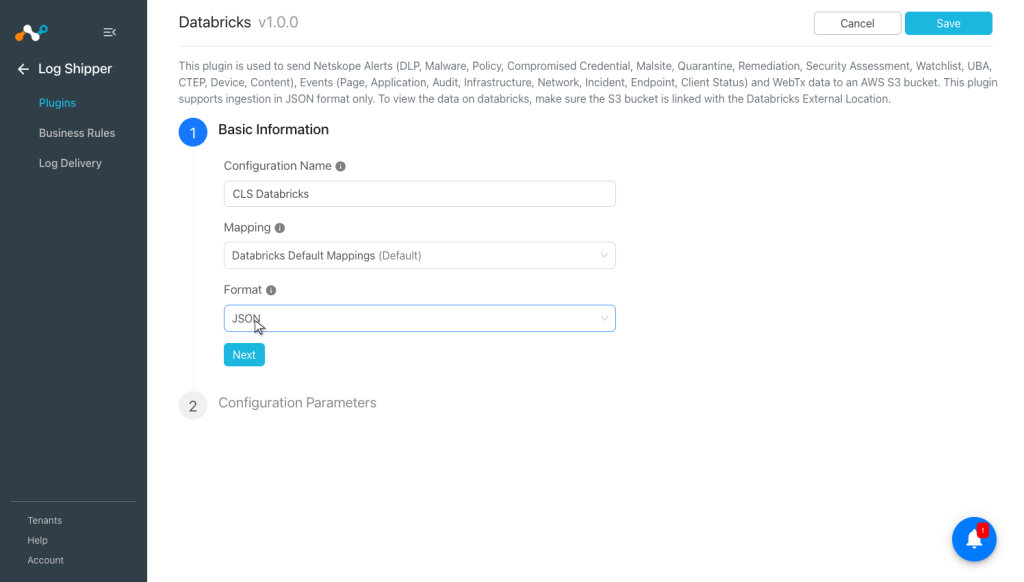
Enter the Basic Information:
- Configuration Name: Provide a plugin configuration name.
- Mapping: Choose the mapping configuration to be used. You can add a new one from Settings > Log Shipper.
- Format: Choose the format of data you want to transform. When JSON is selected, raw JSON logs will be sent. The ingestion may be affected if the Log Delivery Configuration does not accept raw log format.
-
Click Next and enter the Configuration Parameters, depending on the authentication method:
-
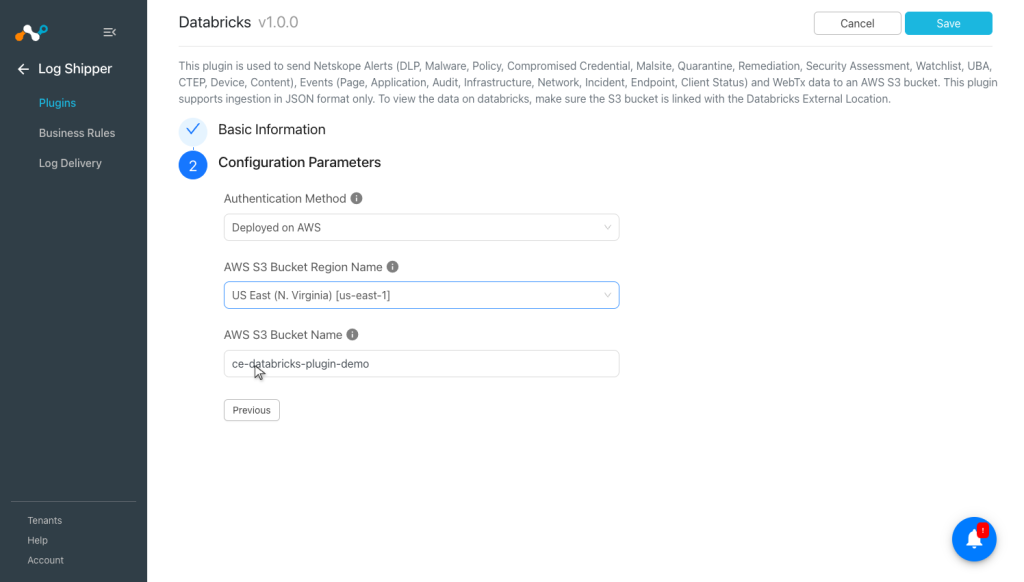
Deployed on AWS authentication:
- Authentication Method: Select the method to be used for AWS client authentication. ‘Deployed on AWS’ uses the IAM instance profile or role attached to the AWS environment. ‘AWS IAM Roles Anywhere’ uses an X.509 certificate and private key to obtain temporary AWS credentials — use this when CE is running outside AWS.
- AWS S3 Bucket Region Name: AWS region where the target S3 bucket resides. Make sure the region matches the region in the Profile ARN and Trust Anchor ARN when using IAM Roles Anywhere.
- AWS S3 Bucket Name: Name of the target AWS S3 bucket where Netskope Alerts and Events will be stored. This bucket must be linked with the Databricks External Location.
Example: netskope-alerts-bucket.
-
IAM Roles Anywhere authentication:
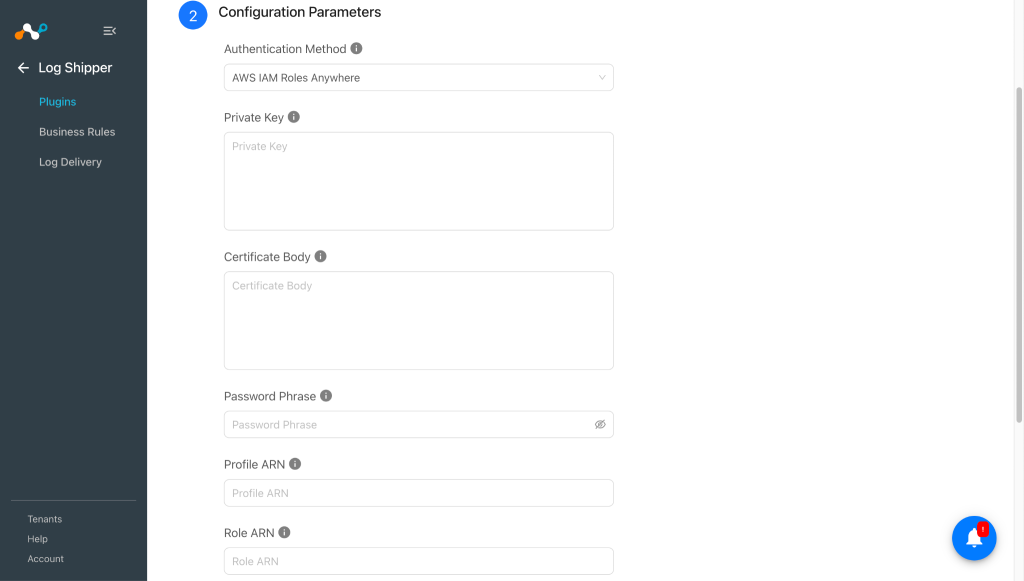
- Authentication Method: Select the method to be used for AWS client authentication. ‘Deployed on AWS’ uses the IAM instance profile or role attached to the AWS environment. ‘AWS IAM Roles Anywhere’ uses an X.509 certificate and private key to obtain temporary AWS credentials. Use this when CE is running outside AWS.
- Private Key: PEM-encoded private key used to decrypt the AWS Private CA Certificate. Required for AWS IAM Roles Anywhere authentication.
- Certificate Body: PEM-encoded X.509 certificate body issued by your AWS Private or Public CA. Required for AWS IAM Roles Anywhere authentication.
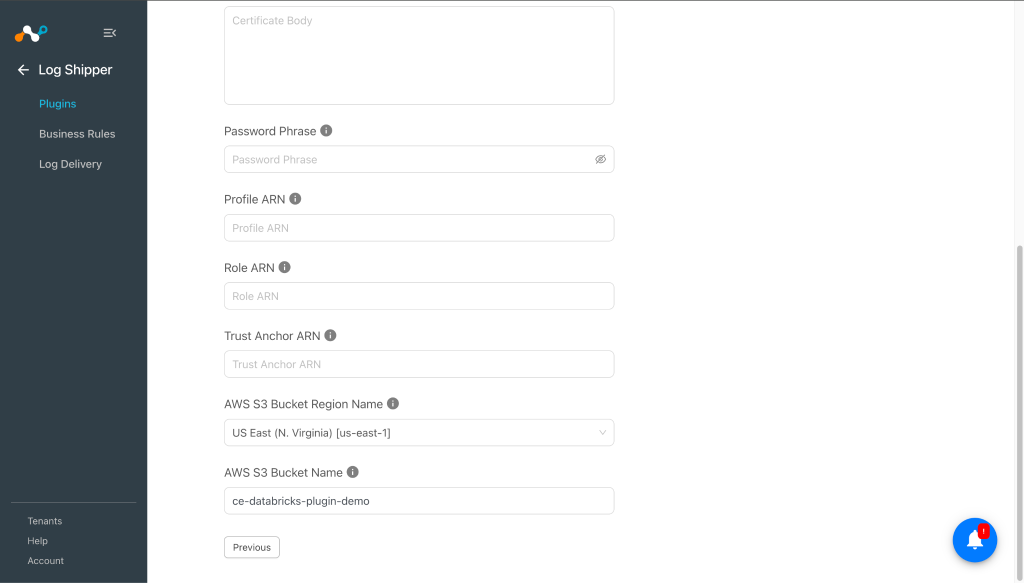
- Password Phrase: Passphrase used to decrypt the CA certificate if it is encrypted. Required for AWS IAM Roles Anywhere authentication.
- Profile ARN: ARN of the IAM Roles Anywhere profile. Format: arn:aws:rolesanywhere:{region}:{account-id}:profile/{profile-id}. Required for AWS IAM Roles Anywhere authentication.
- Role ARN: ARN of the IAM role to be assumed. Format: arn:aws:iam::{account-id}:role/{role-name}. Required for AWS IAM Roles Anywhere authentication.
- Trust Anchor ARN: ARN of the IAM Roles Anywhere trust anchor. Format:arn:aws:rolesanywhere:{region}:{account-id}:trust-anchor/{anchor-id}. Required for AWS IAM Roles Anywhere authentication.
- AWS S3 Bucket Region Name: AWS region where the target S3 bucket resides. Make sure the region matches the region in the Profile ARN and Trust Anchor ARN when using IAM Roles Anywhere.
- AWS S3 Bucket Name: Name of the target AWS S3 bucket where Netskope Alerts and Events will be stored. This bucket must be linked with the Databricks External Location. Example: netskope-alerts-bucket.
-
-
Click Save.
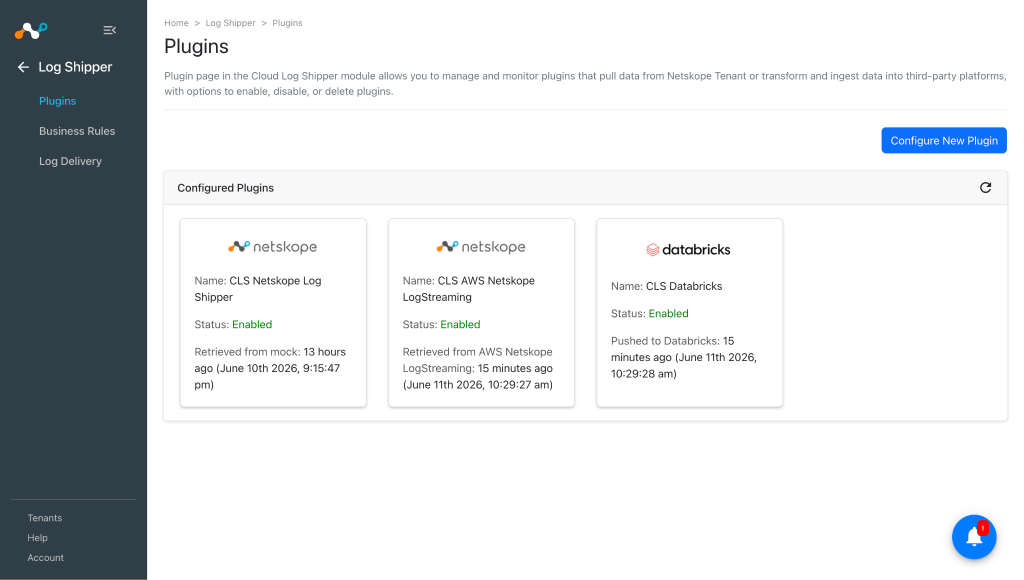


Configure a Log Shipper Business Rule for Databricks
-
In Log Shipper, go to Business Rules and click Add Business Rule.
-
By default, there’s a business rule that filters all alerts and events. If you want to filter out any specific type of alert or event, click Create New Rule and configure a new business rule by adding the rule name and filter(s).
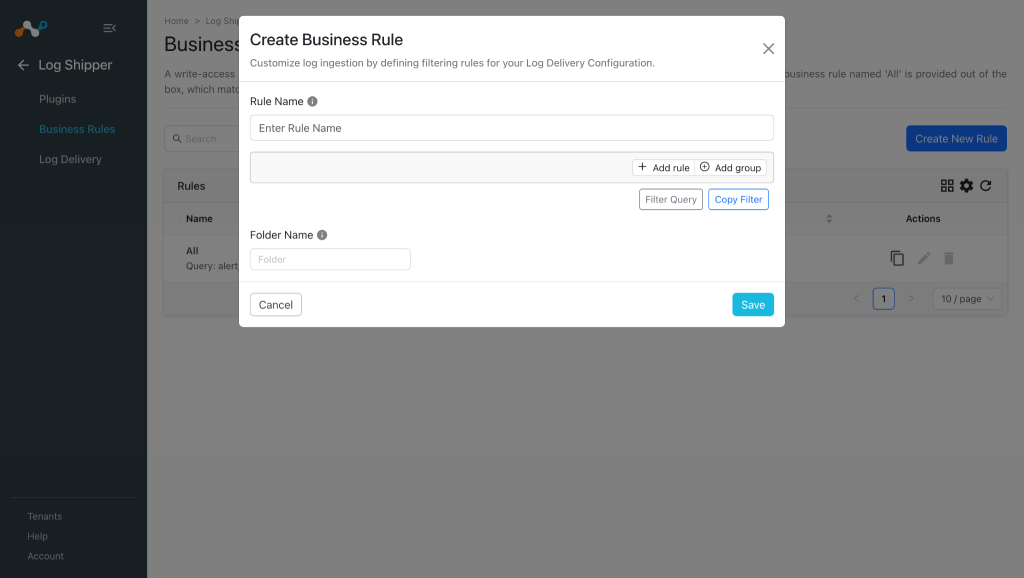
-
Click Save.

Configure Log Shipper Log Delivery for the Databricks Plugin
-
In Log Shipper, go to Log Delivery and click Add Log Delivery Configuration.
-
Select a Source Configuration, Destination Configuration, and Business Rule.
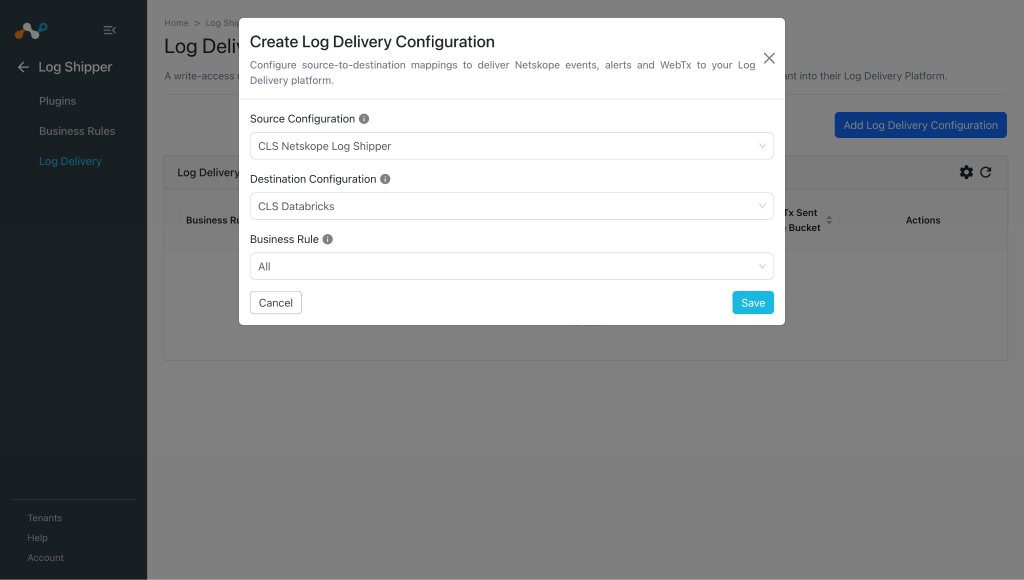
-
Click Save.
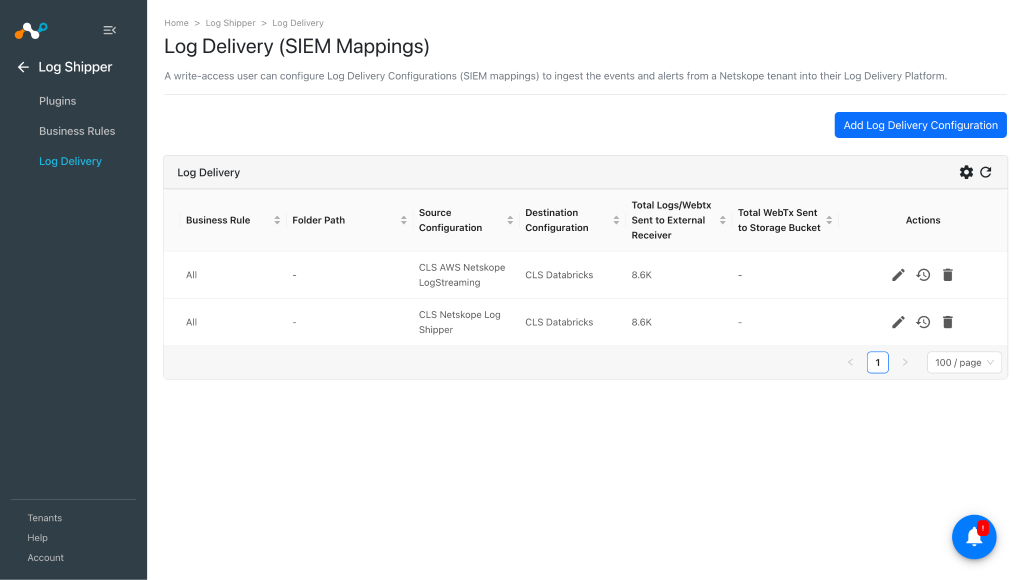


Validate the Databricks Plugin
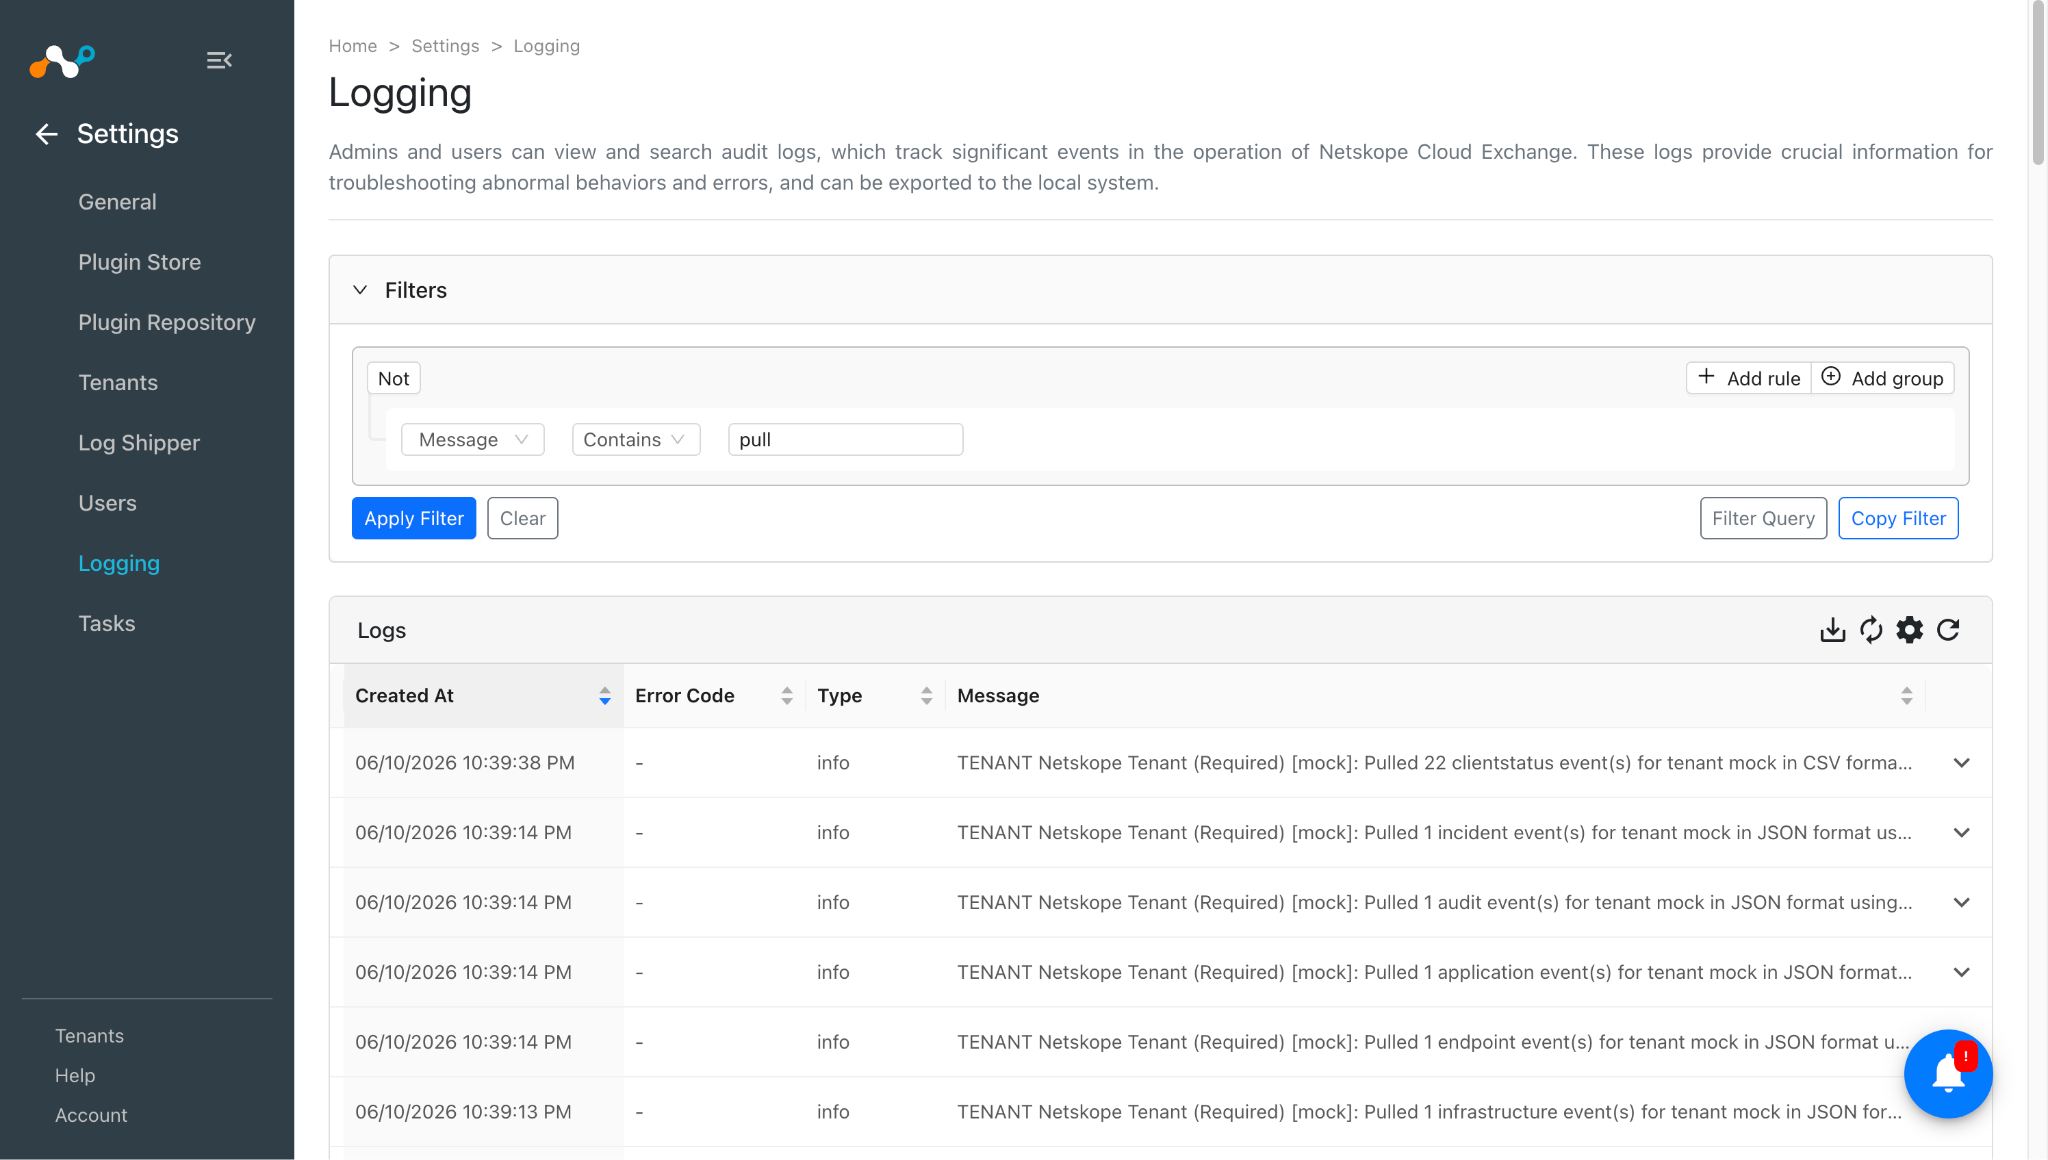
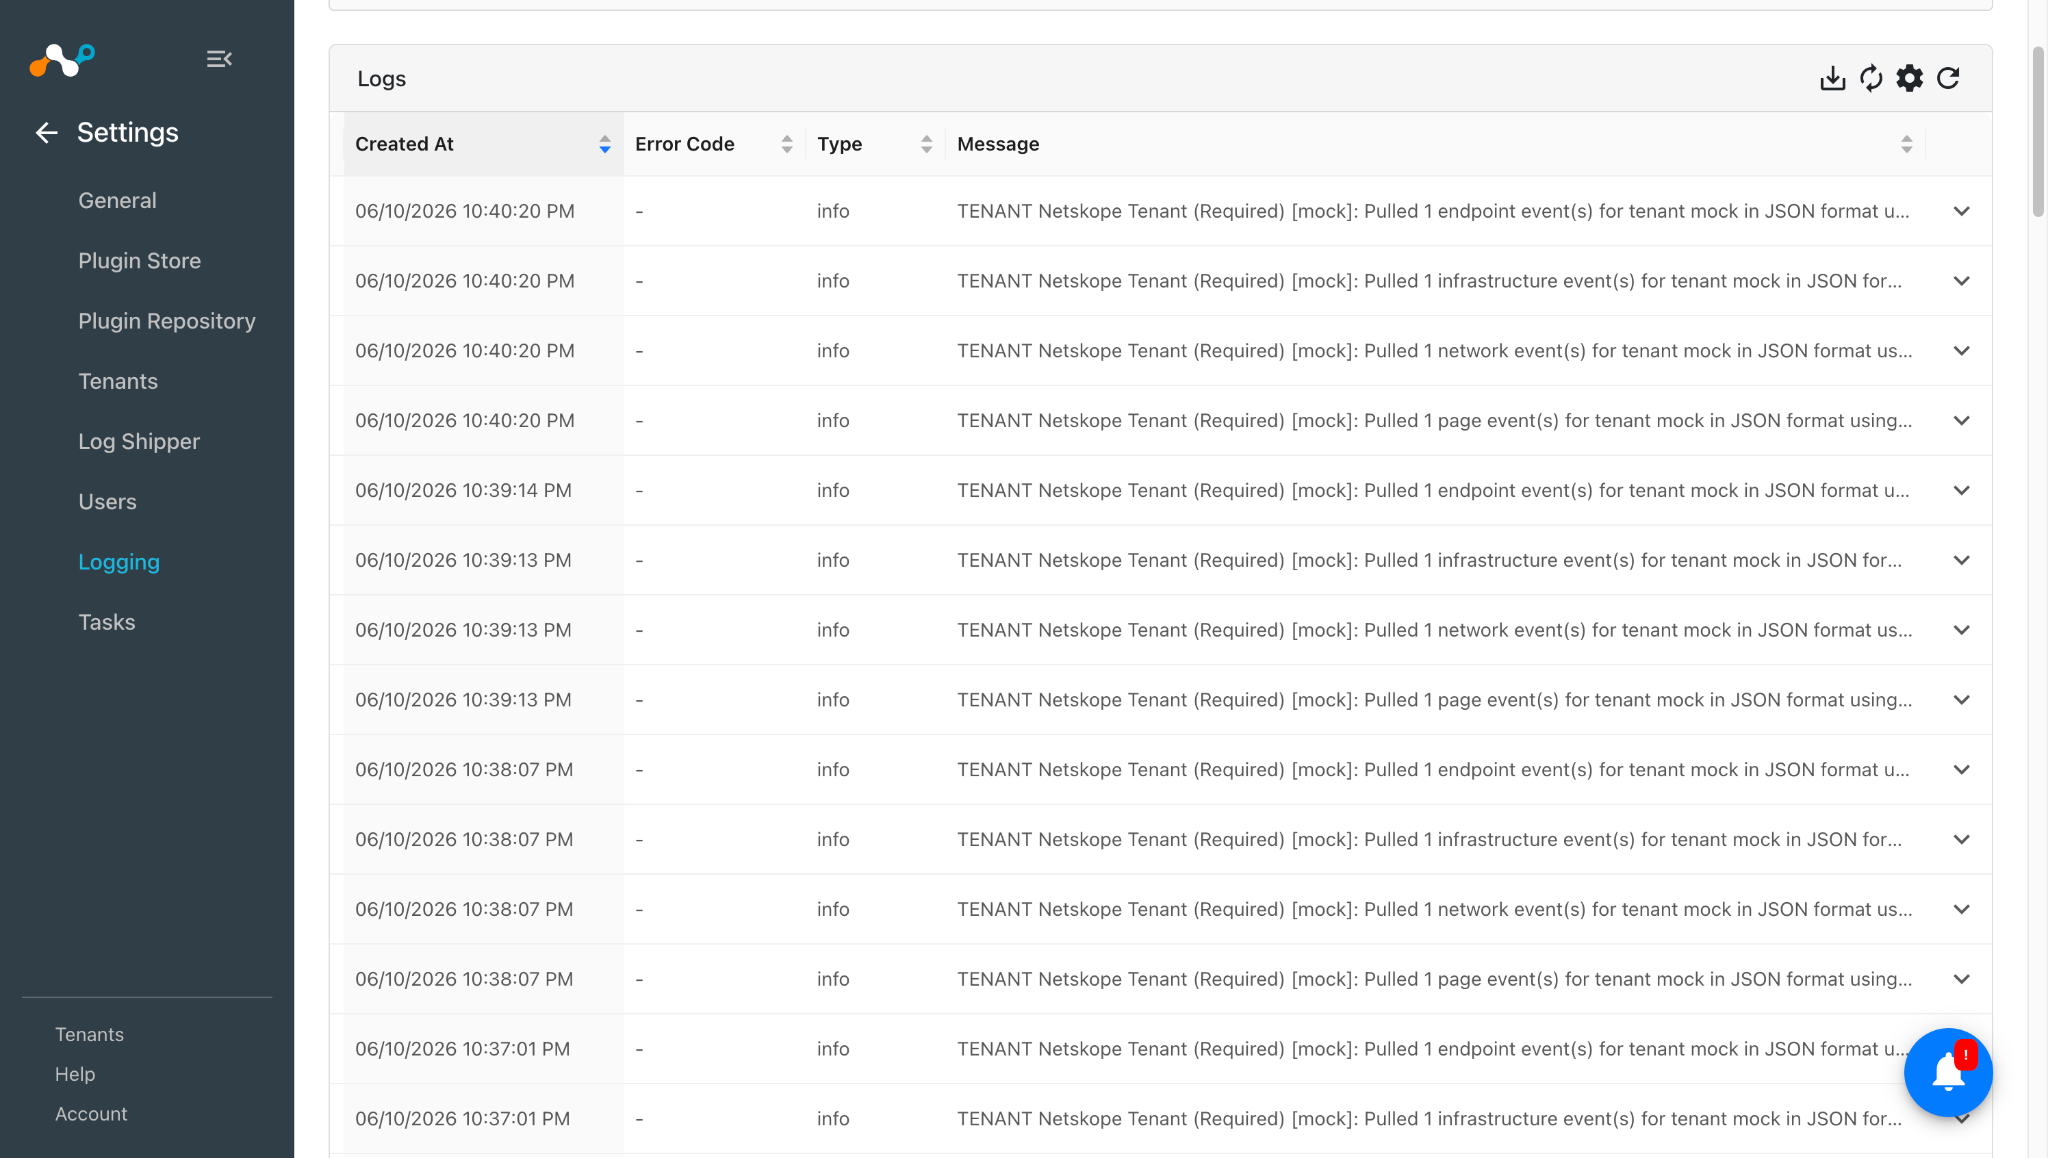
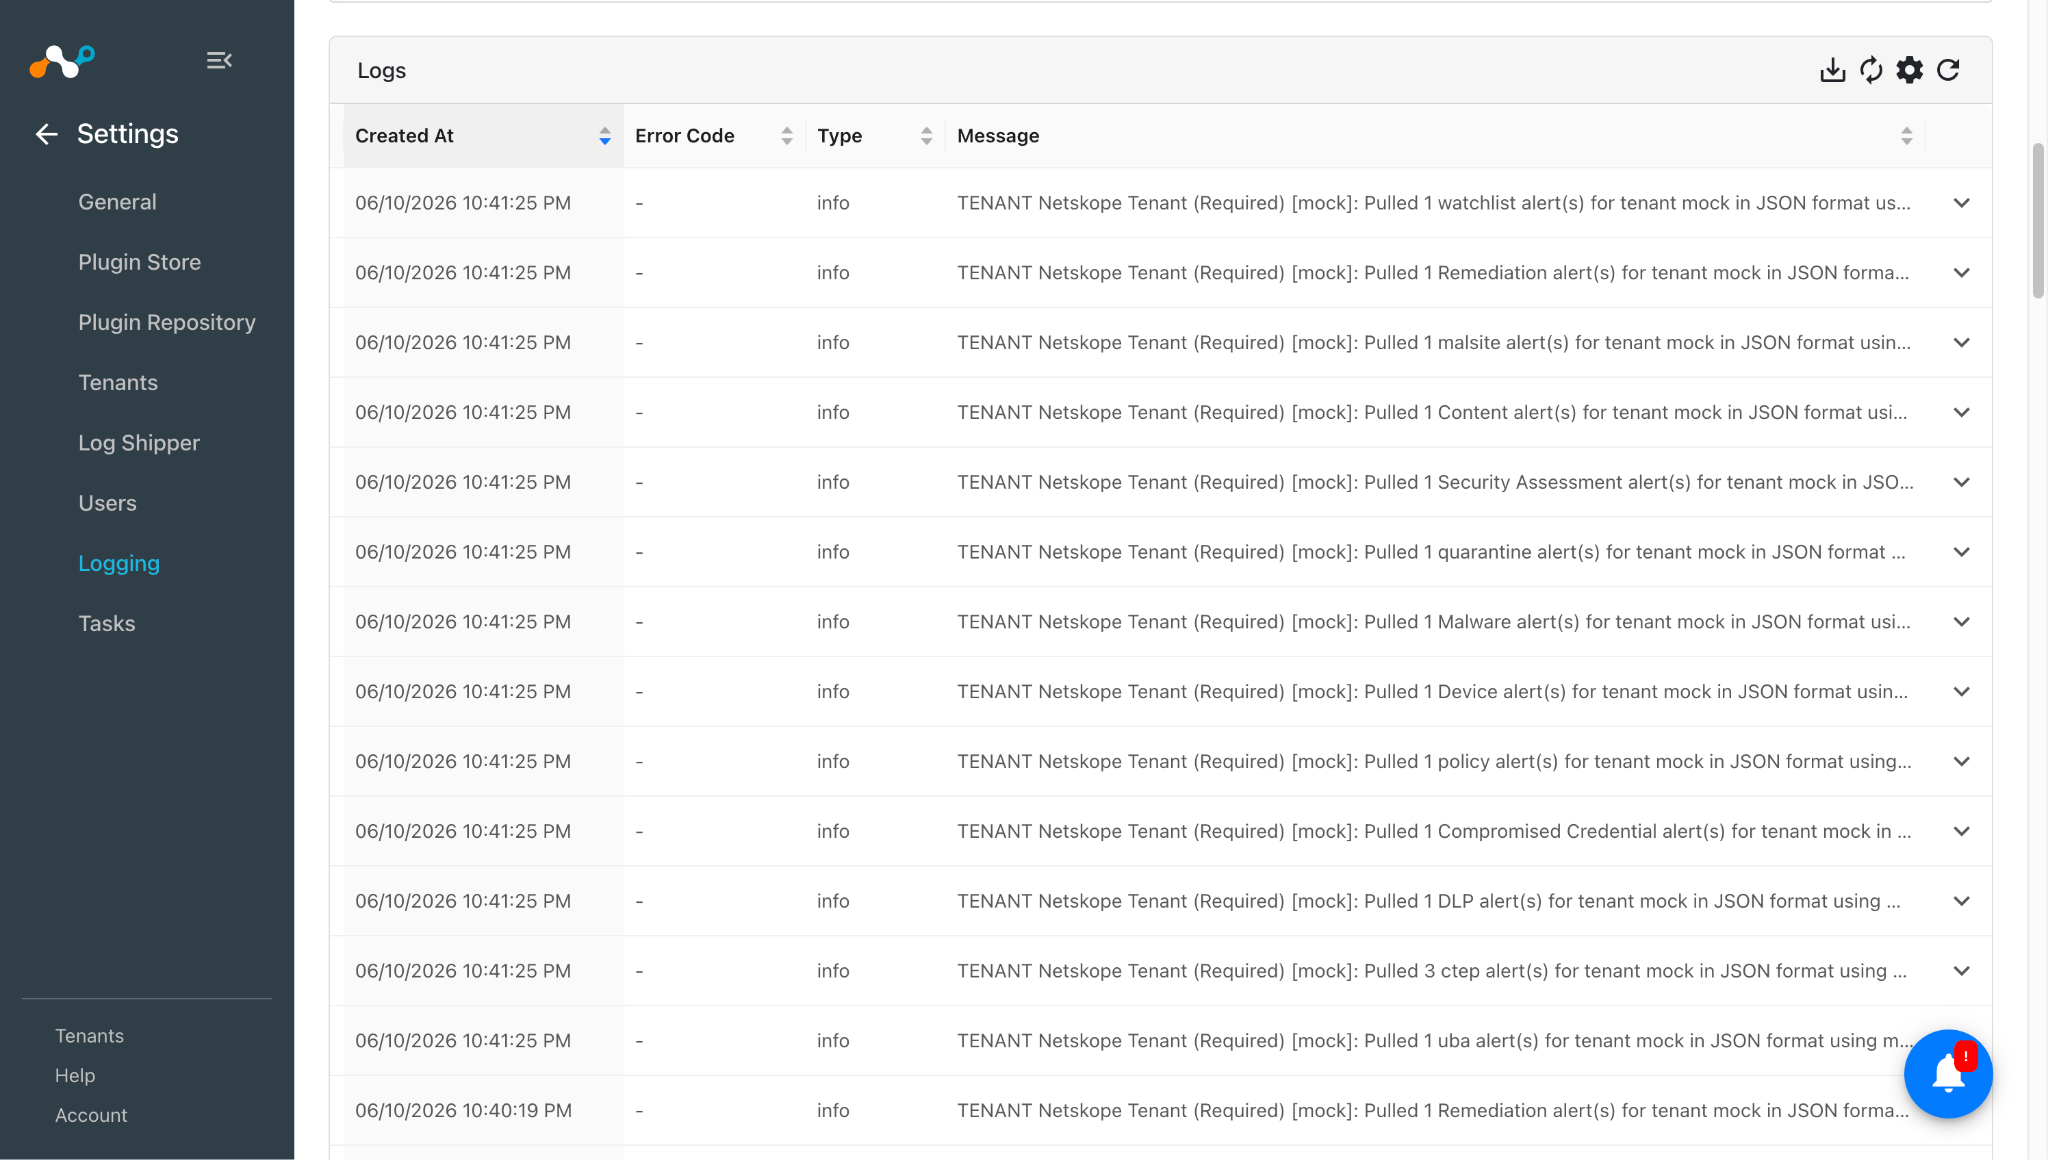
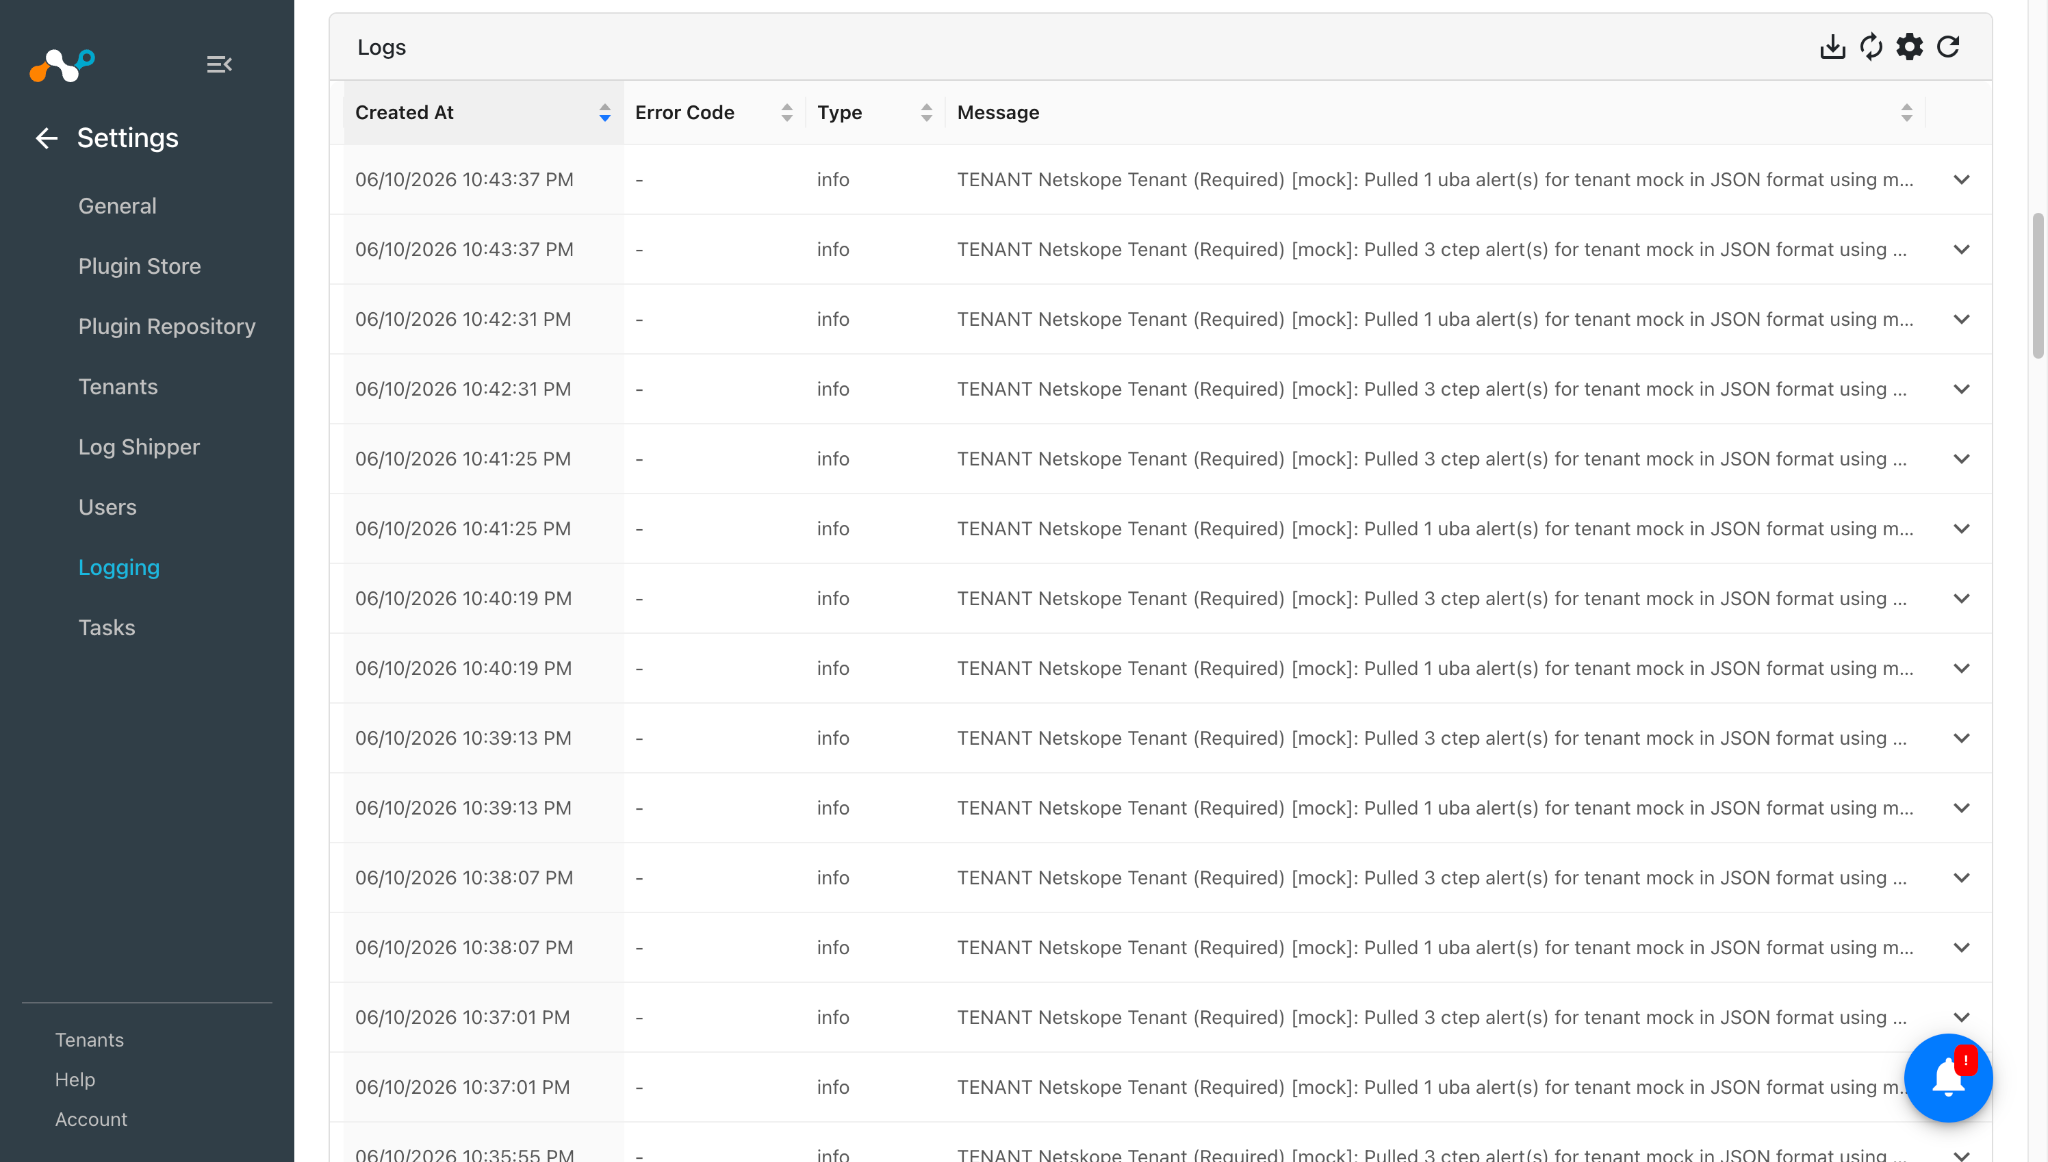
Validate the Pull
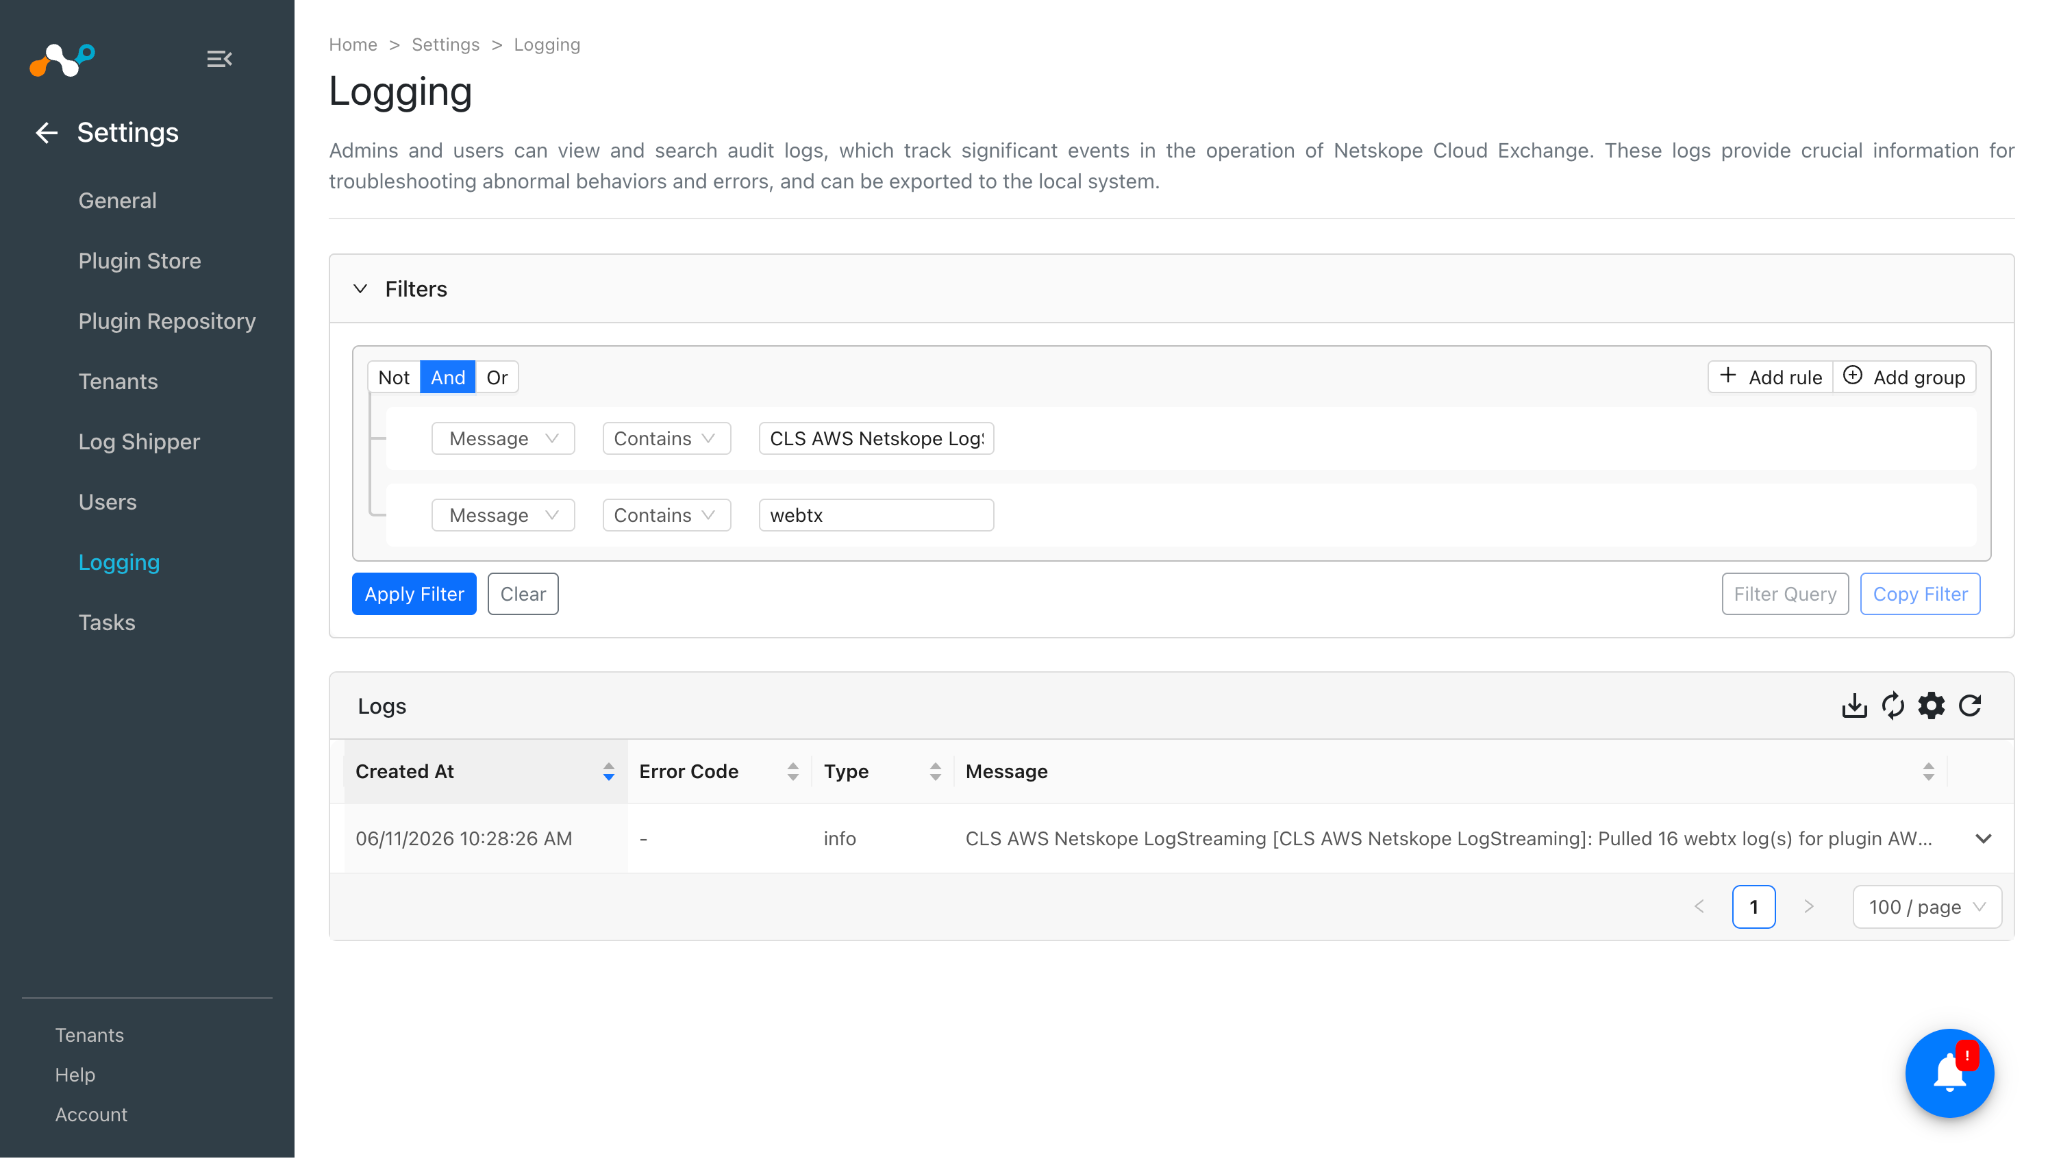
In Cloud Exchange, go to Logging and search for the pulled logs.
Validate the Push
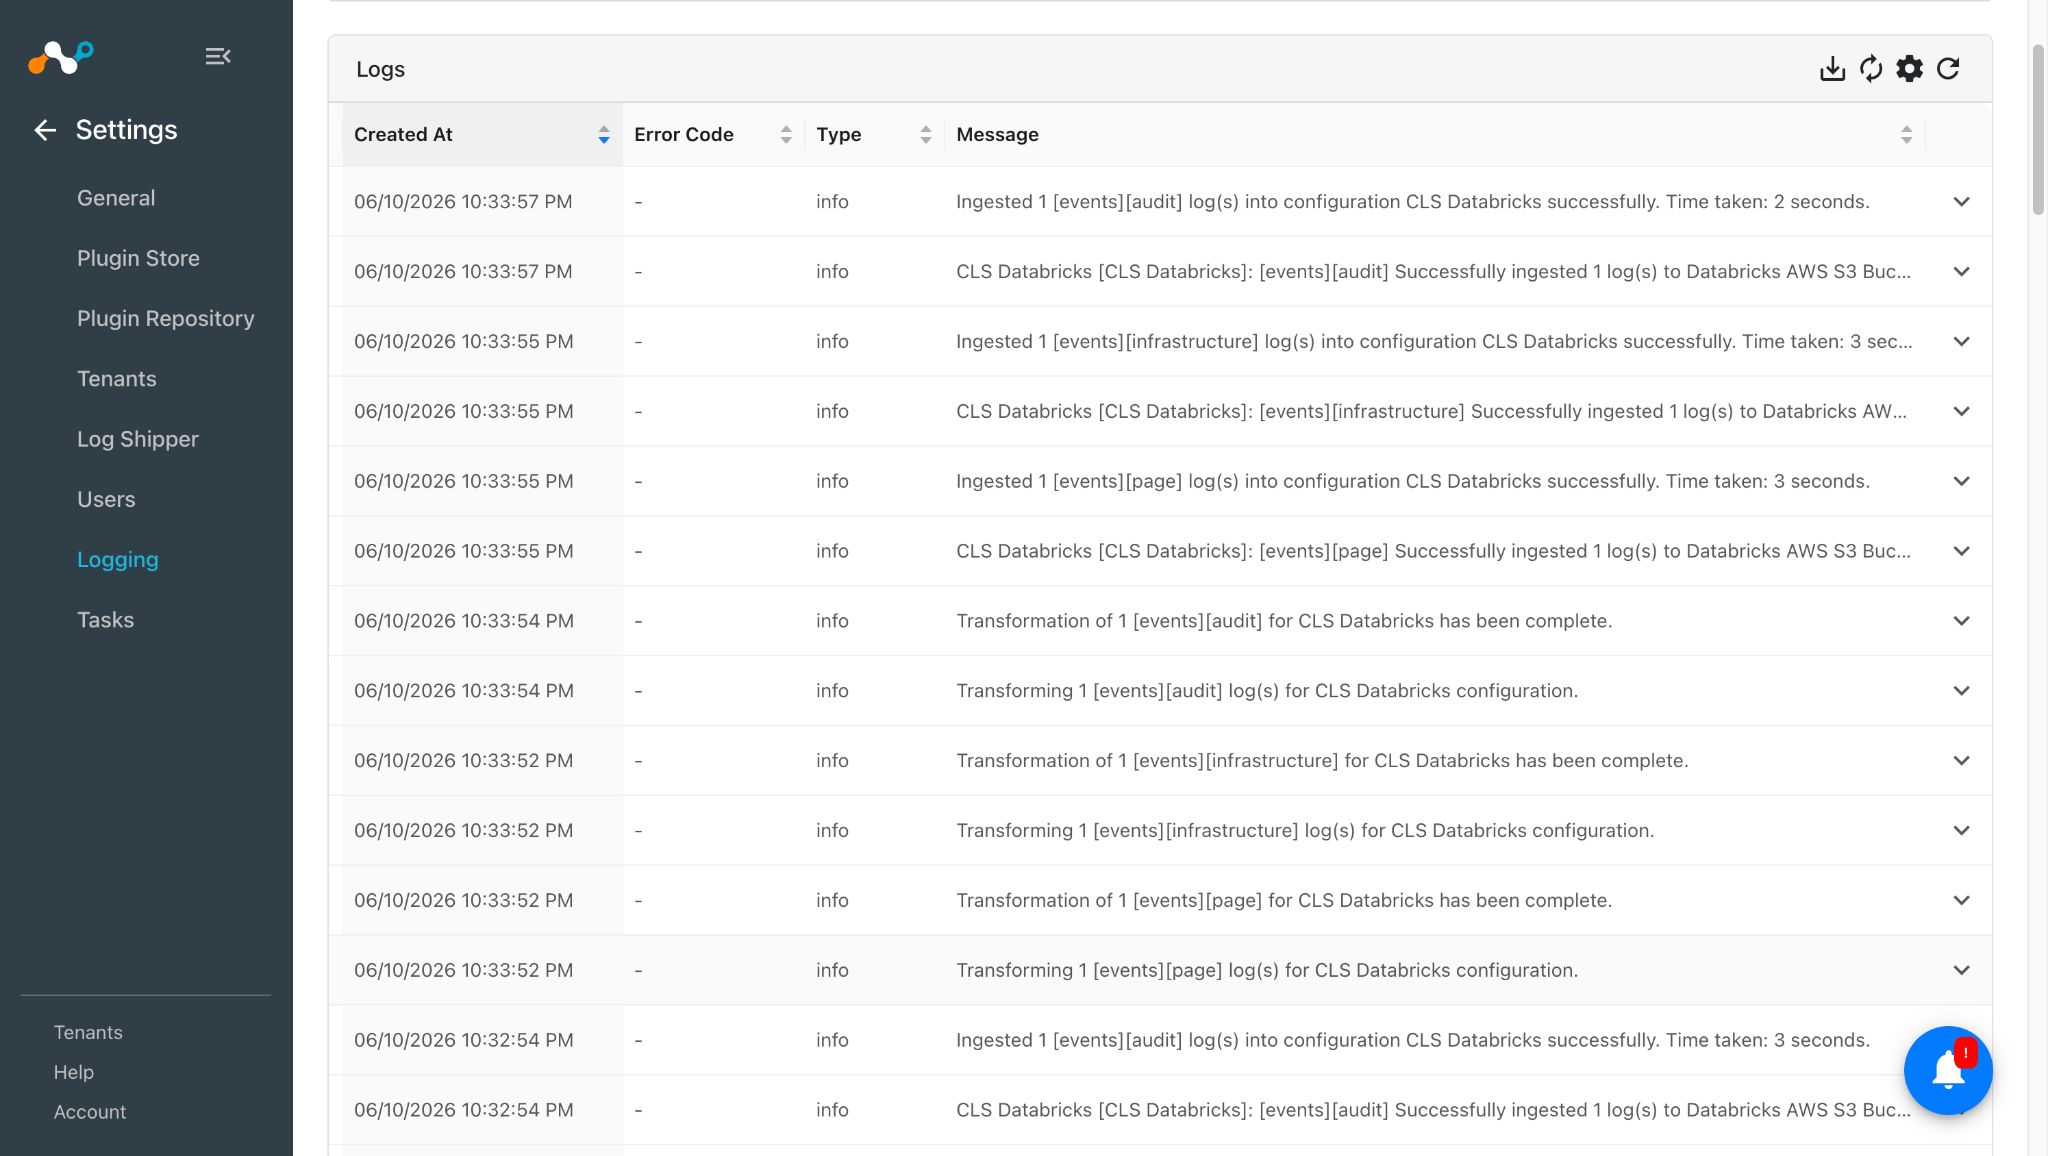
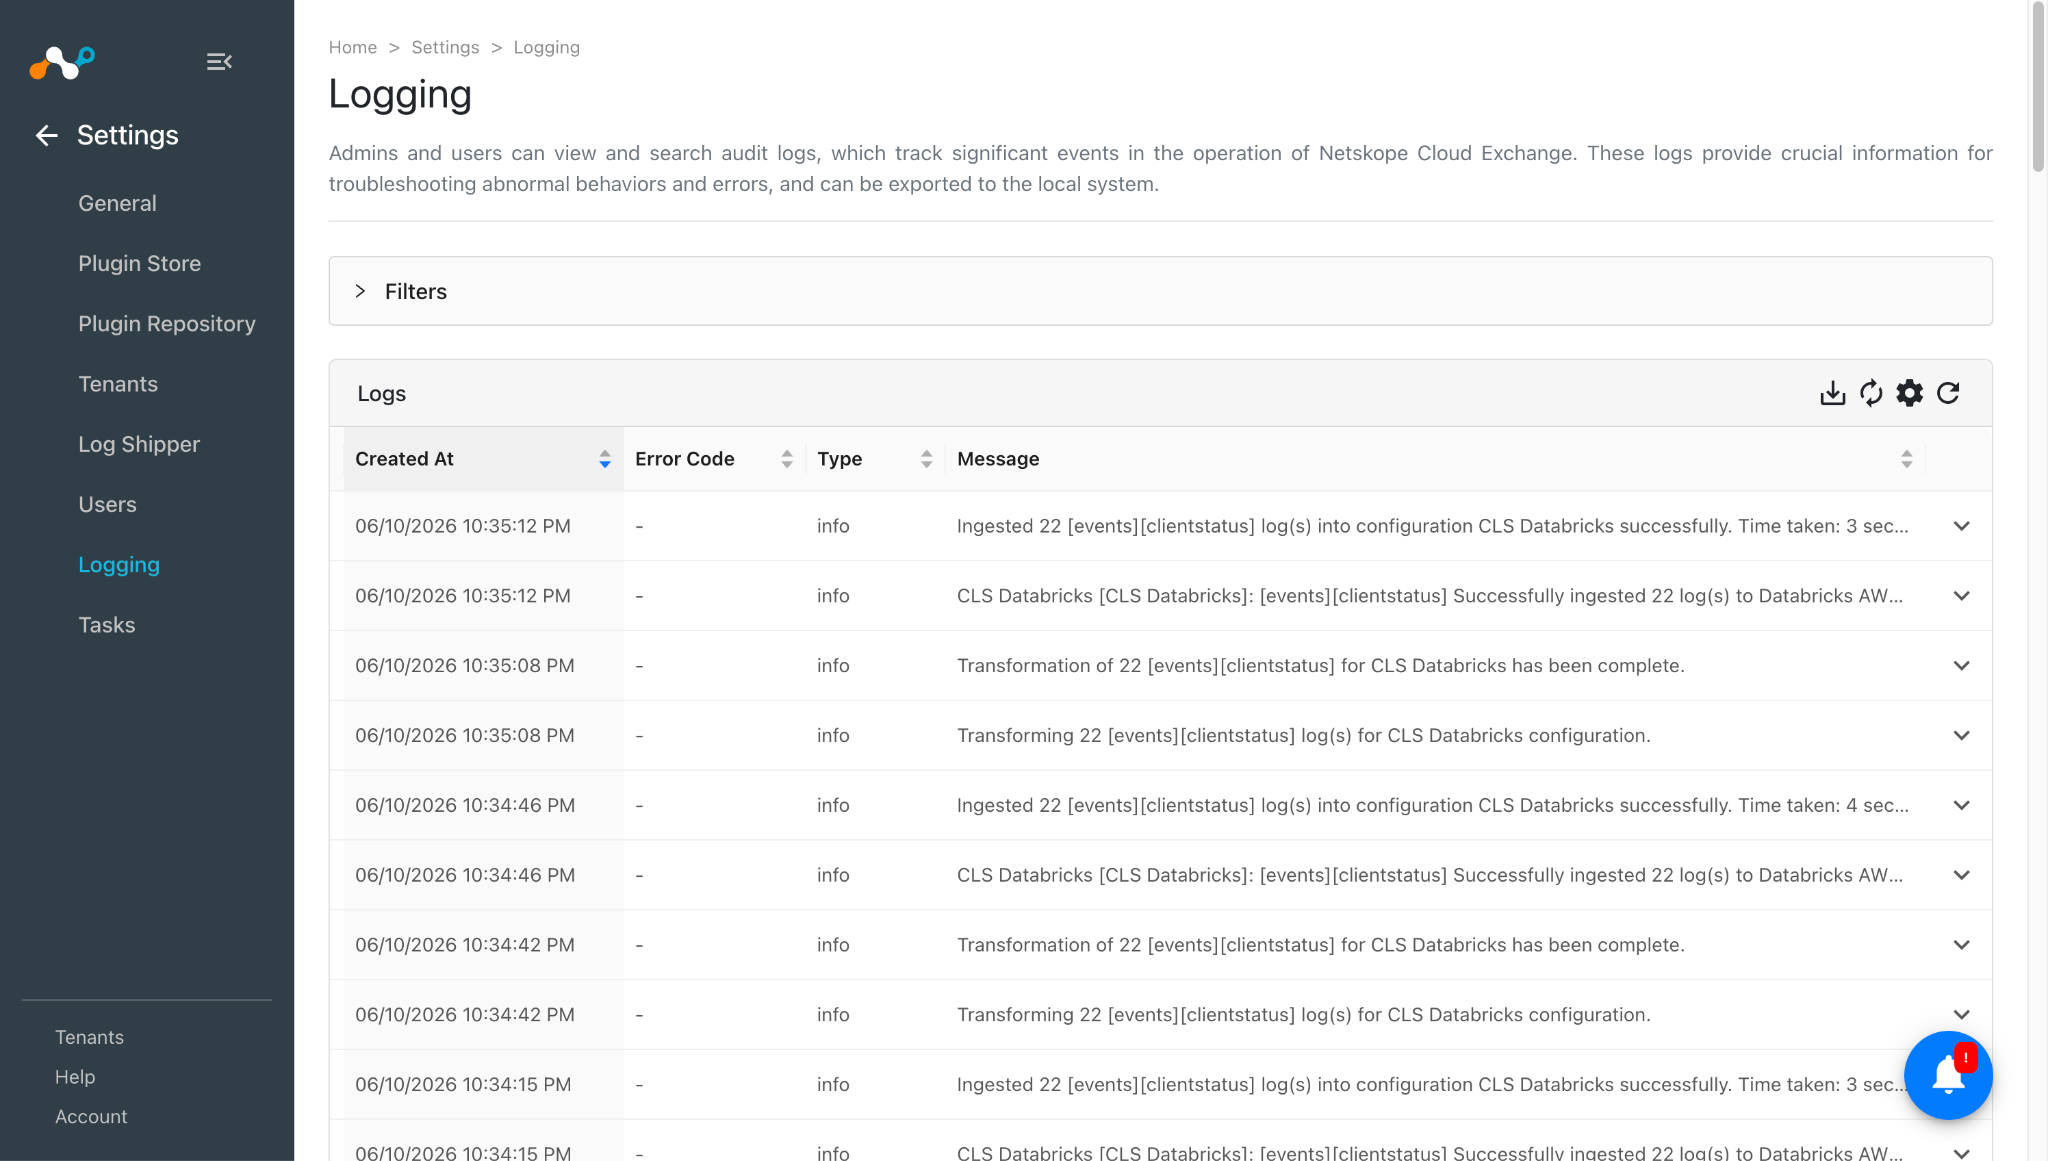
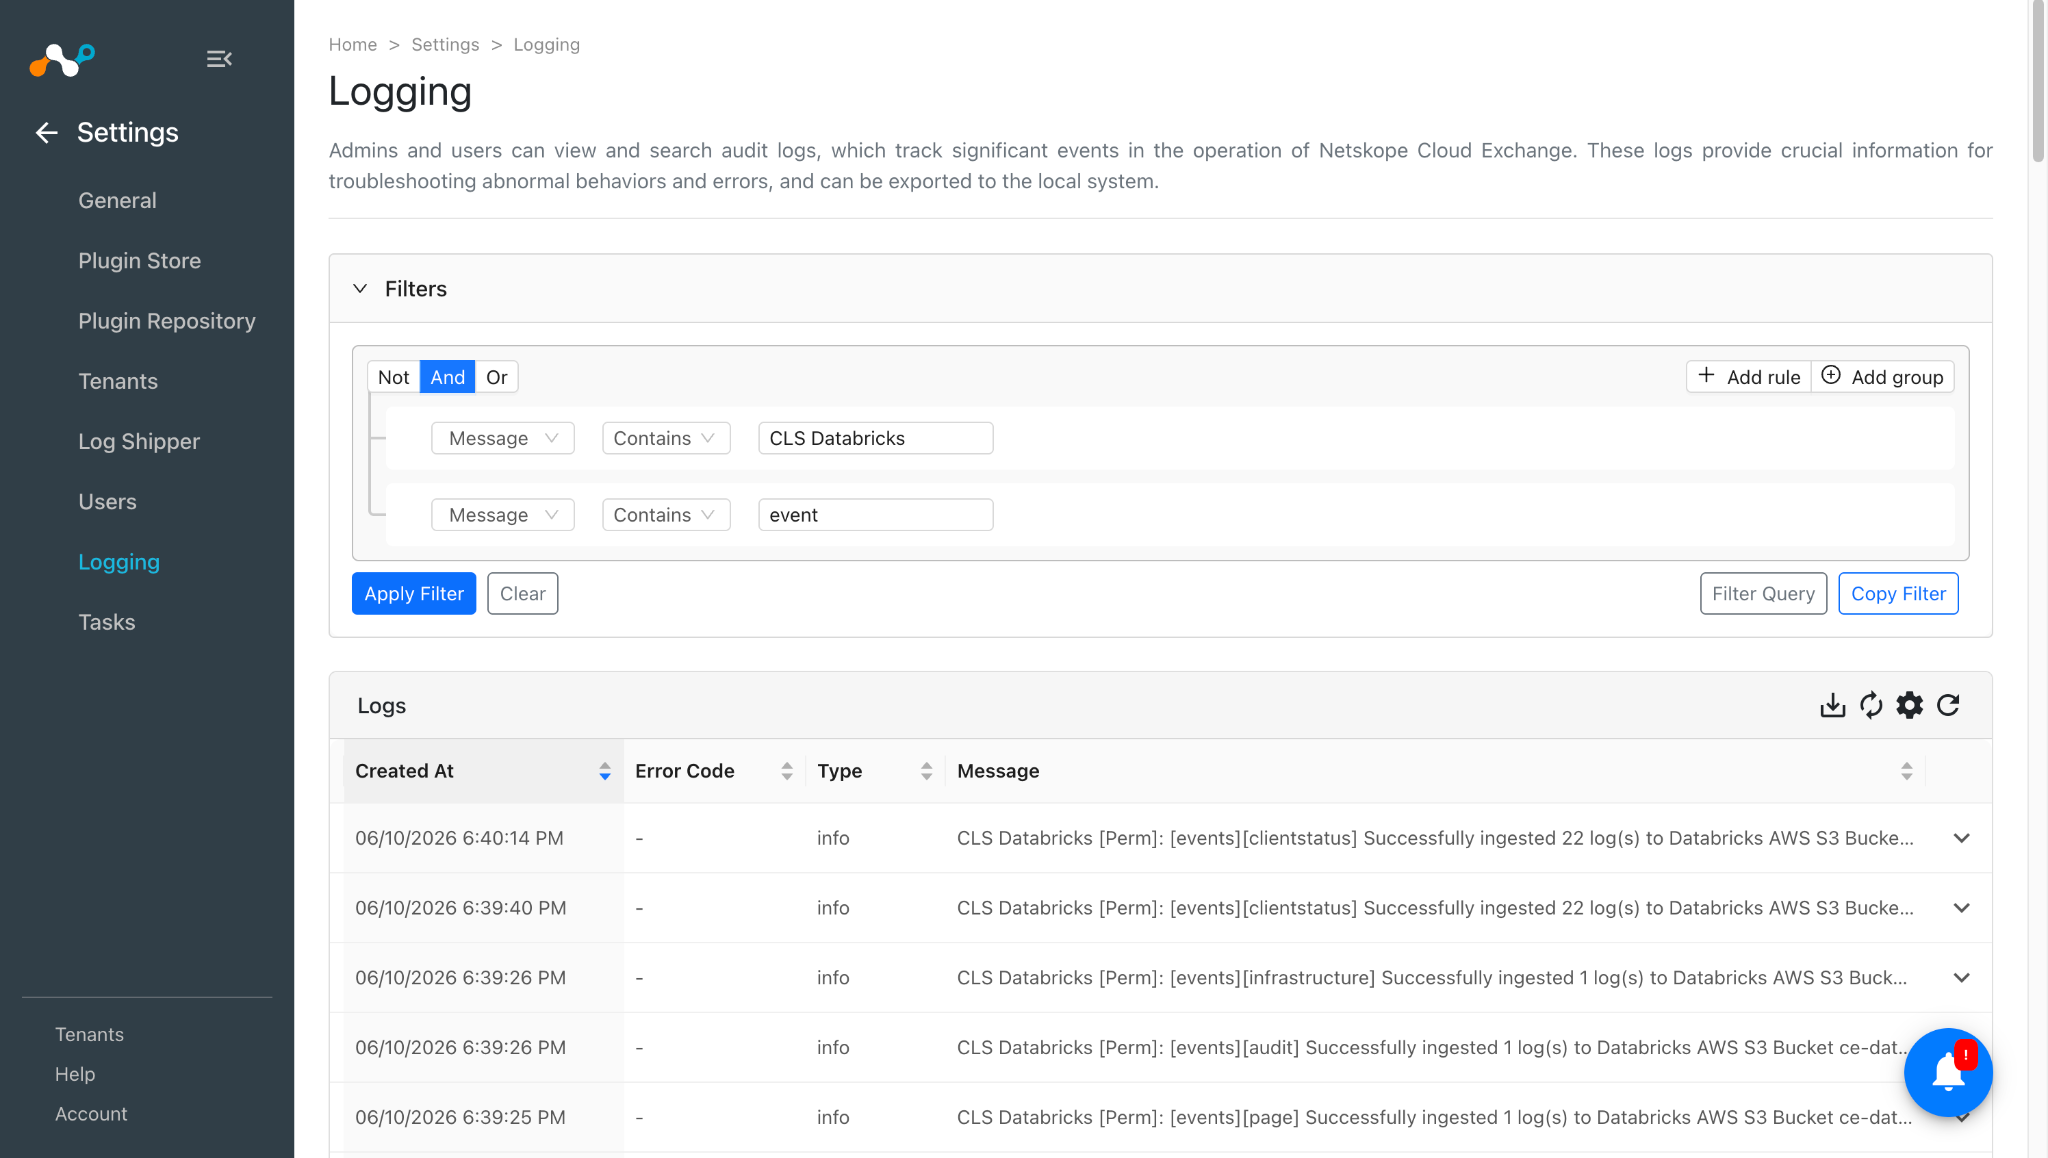
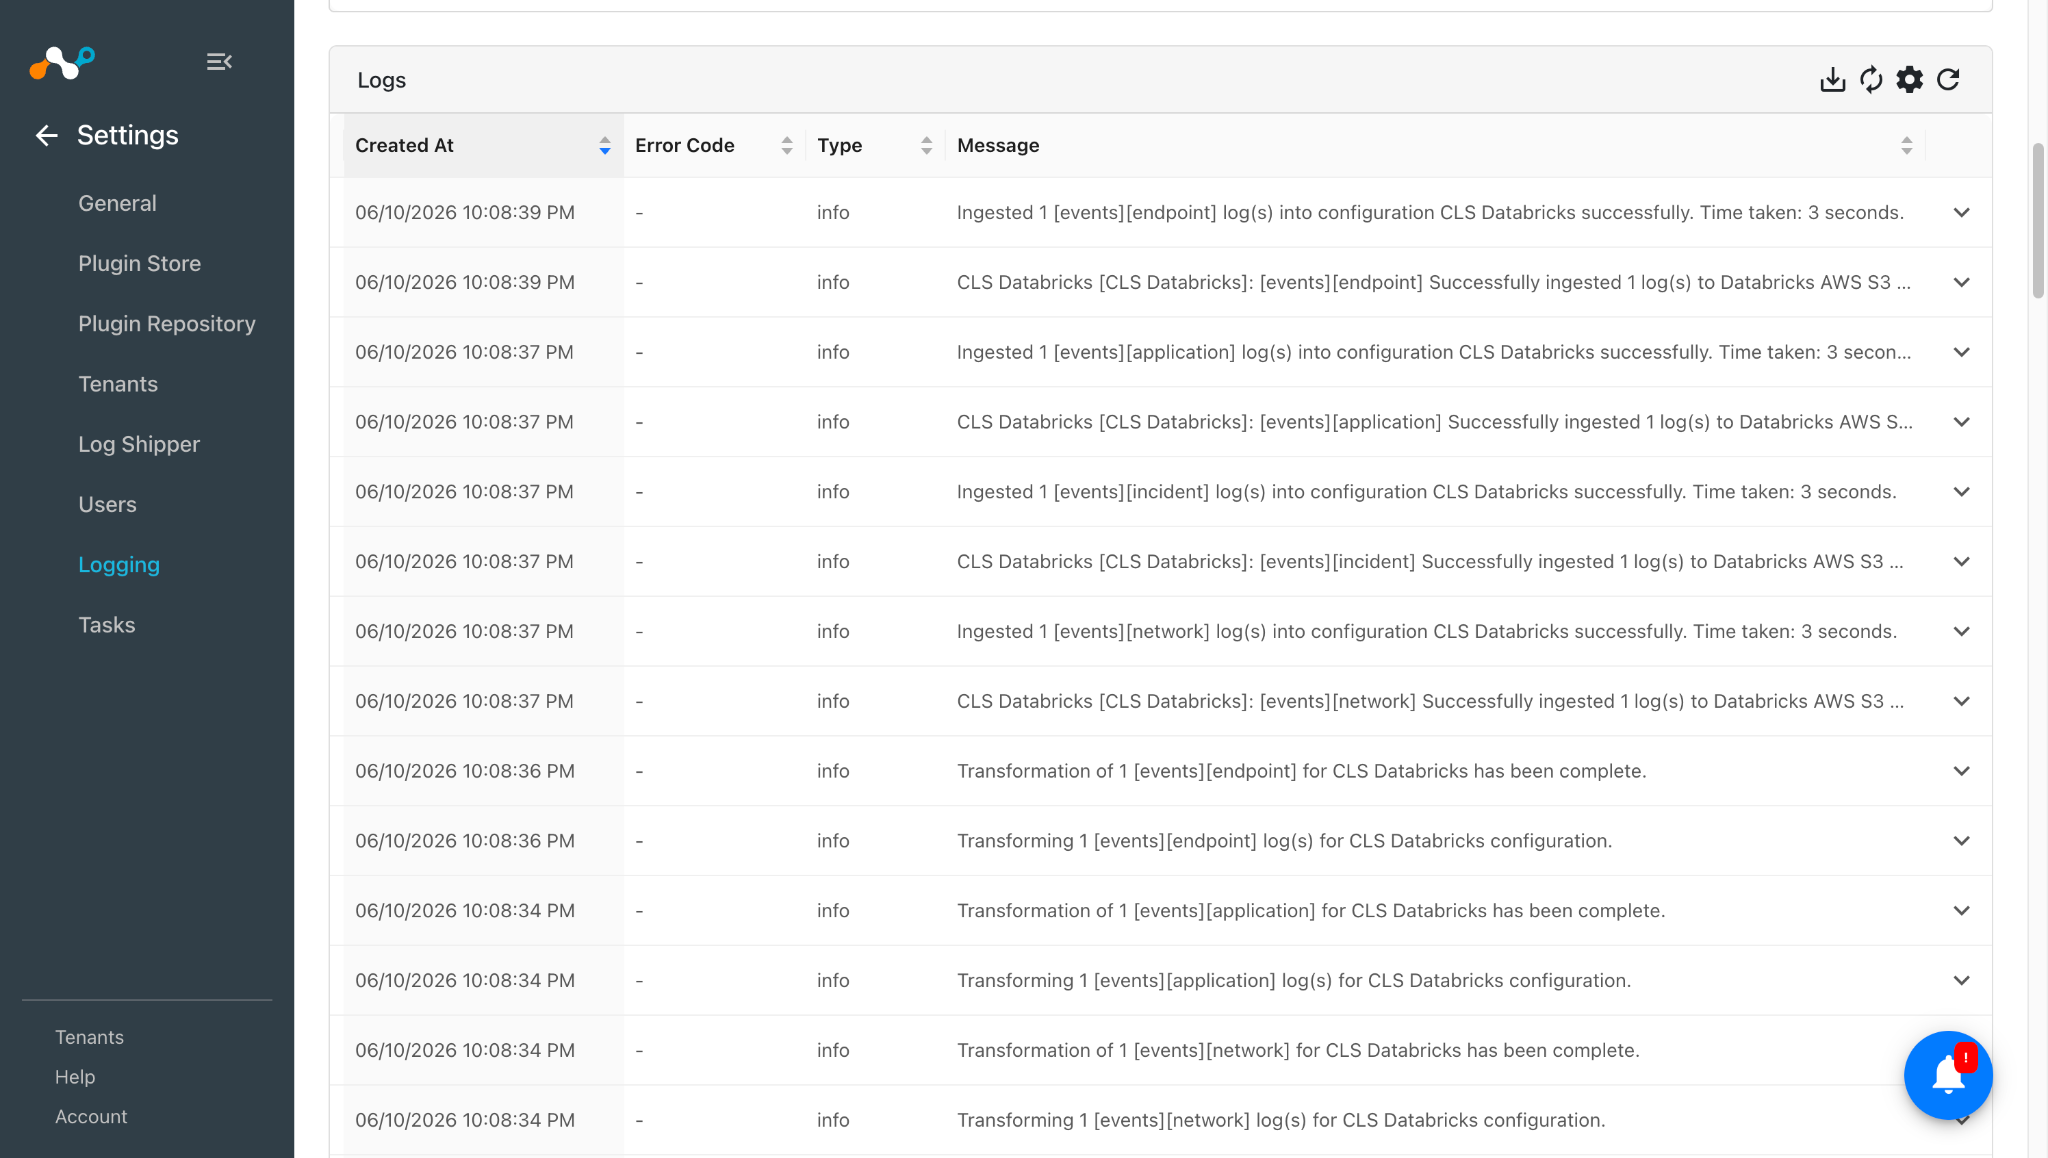
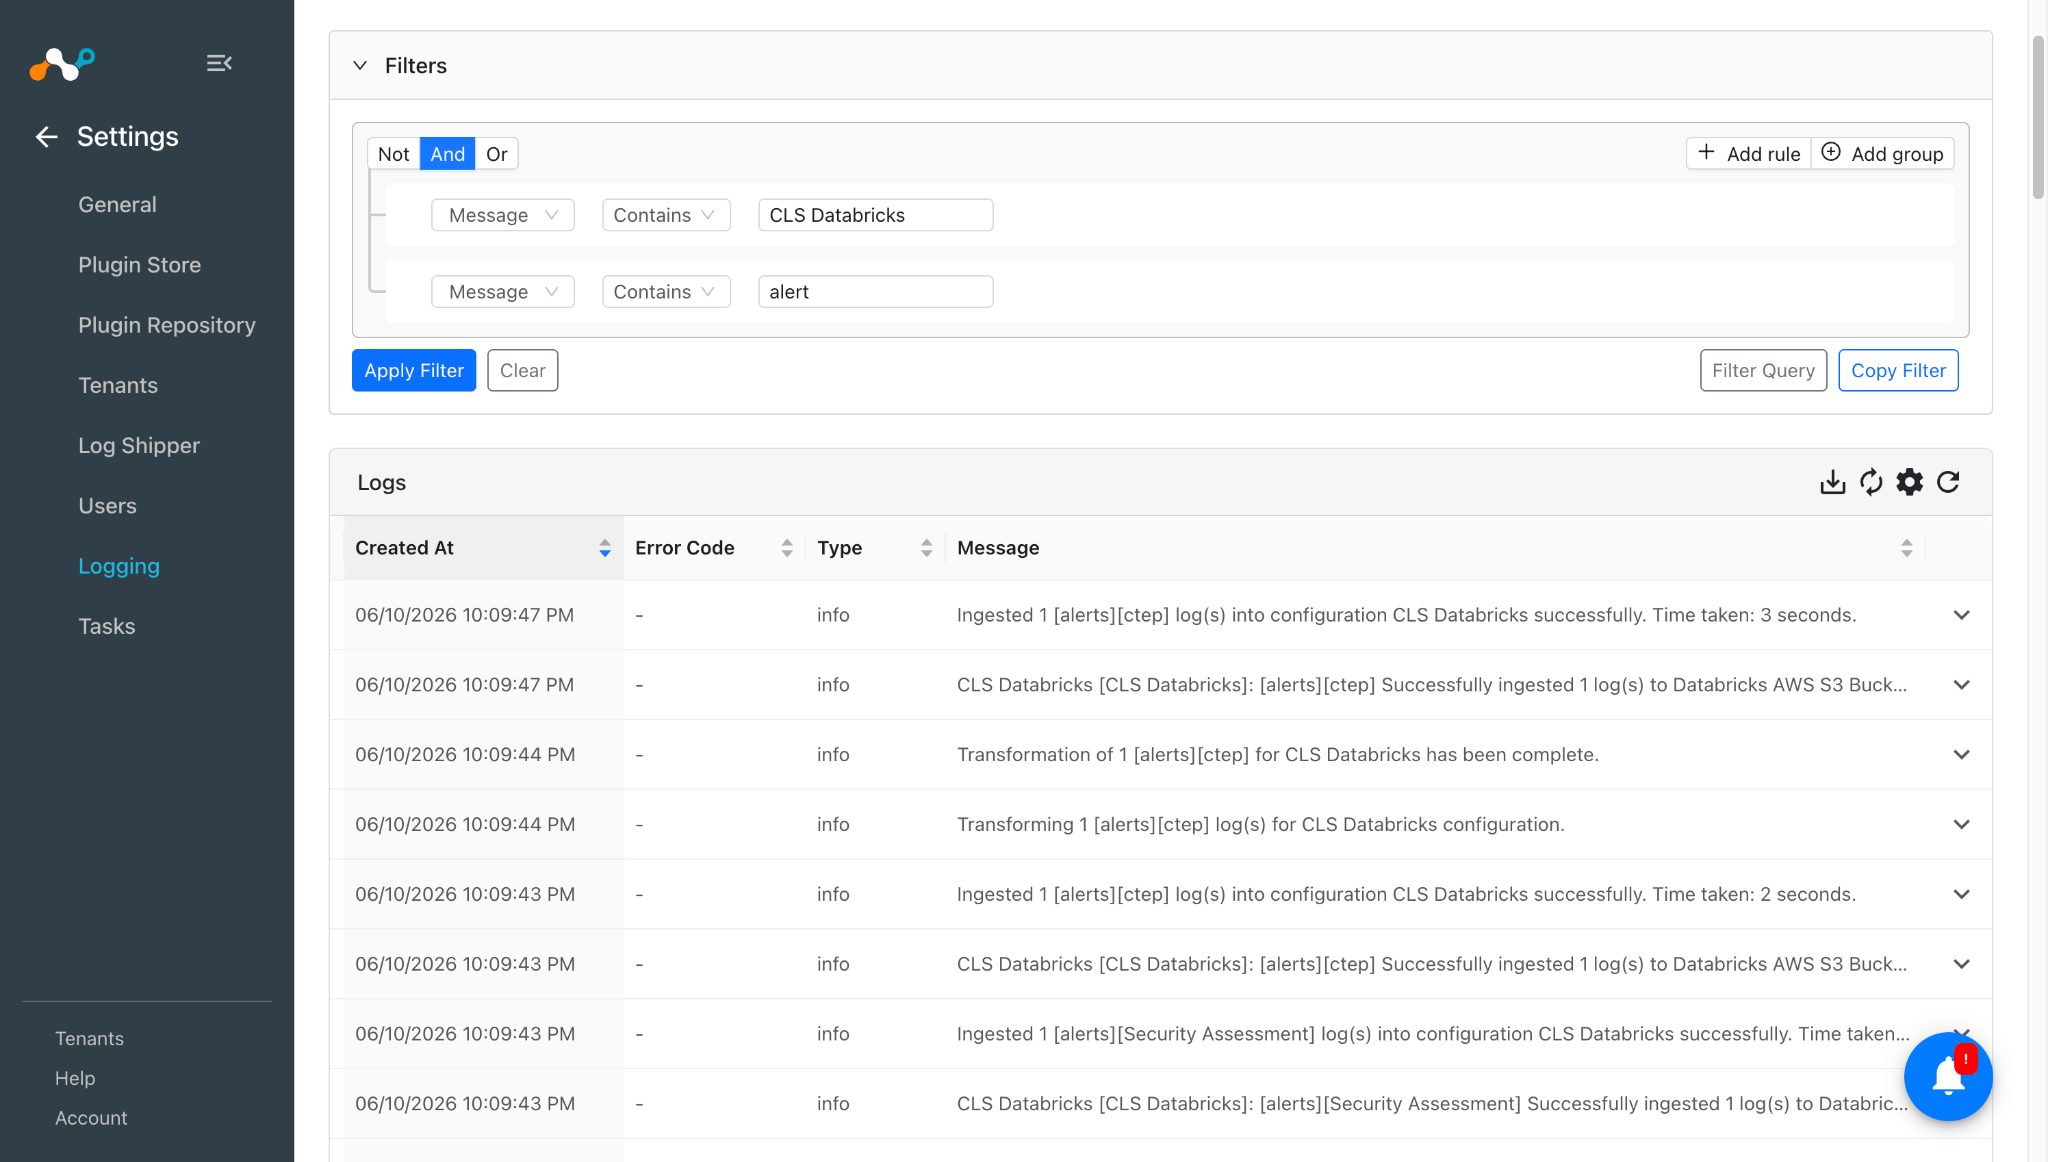
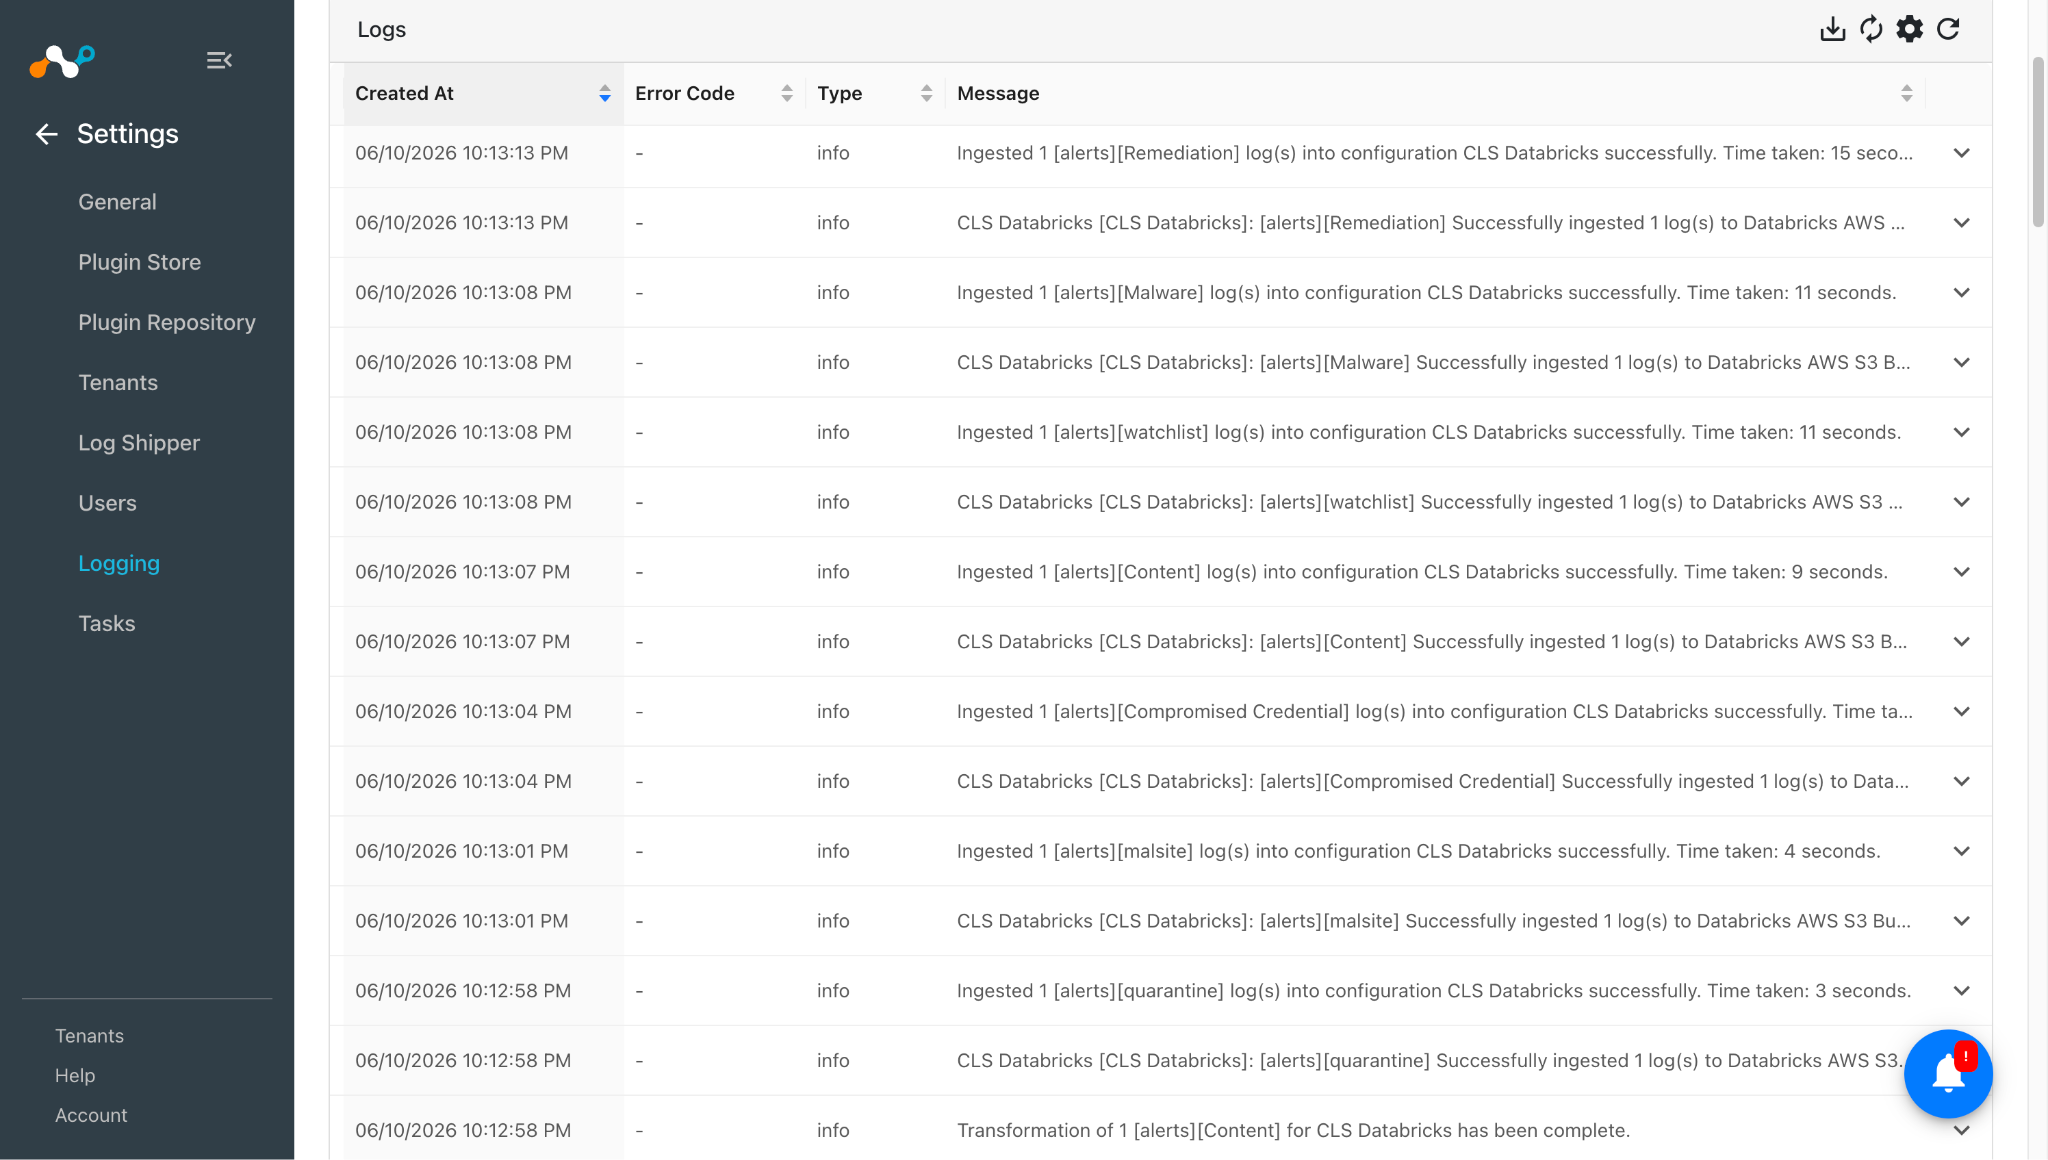
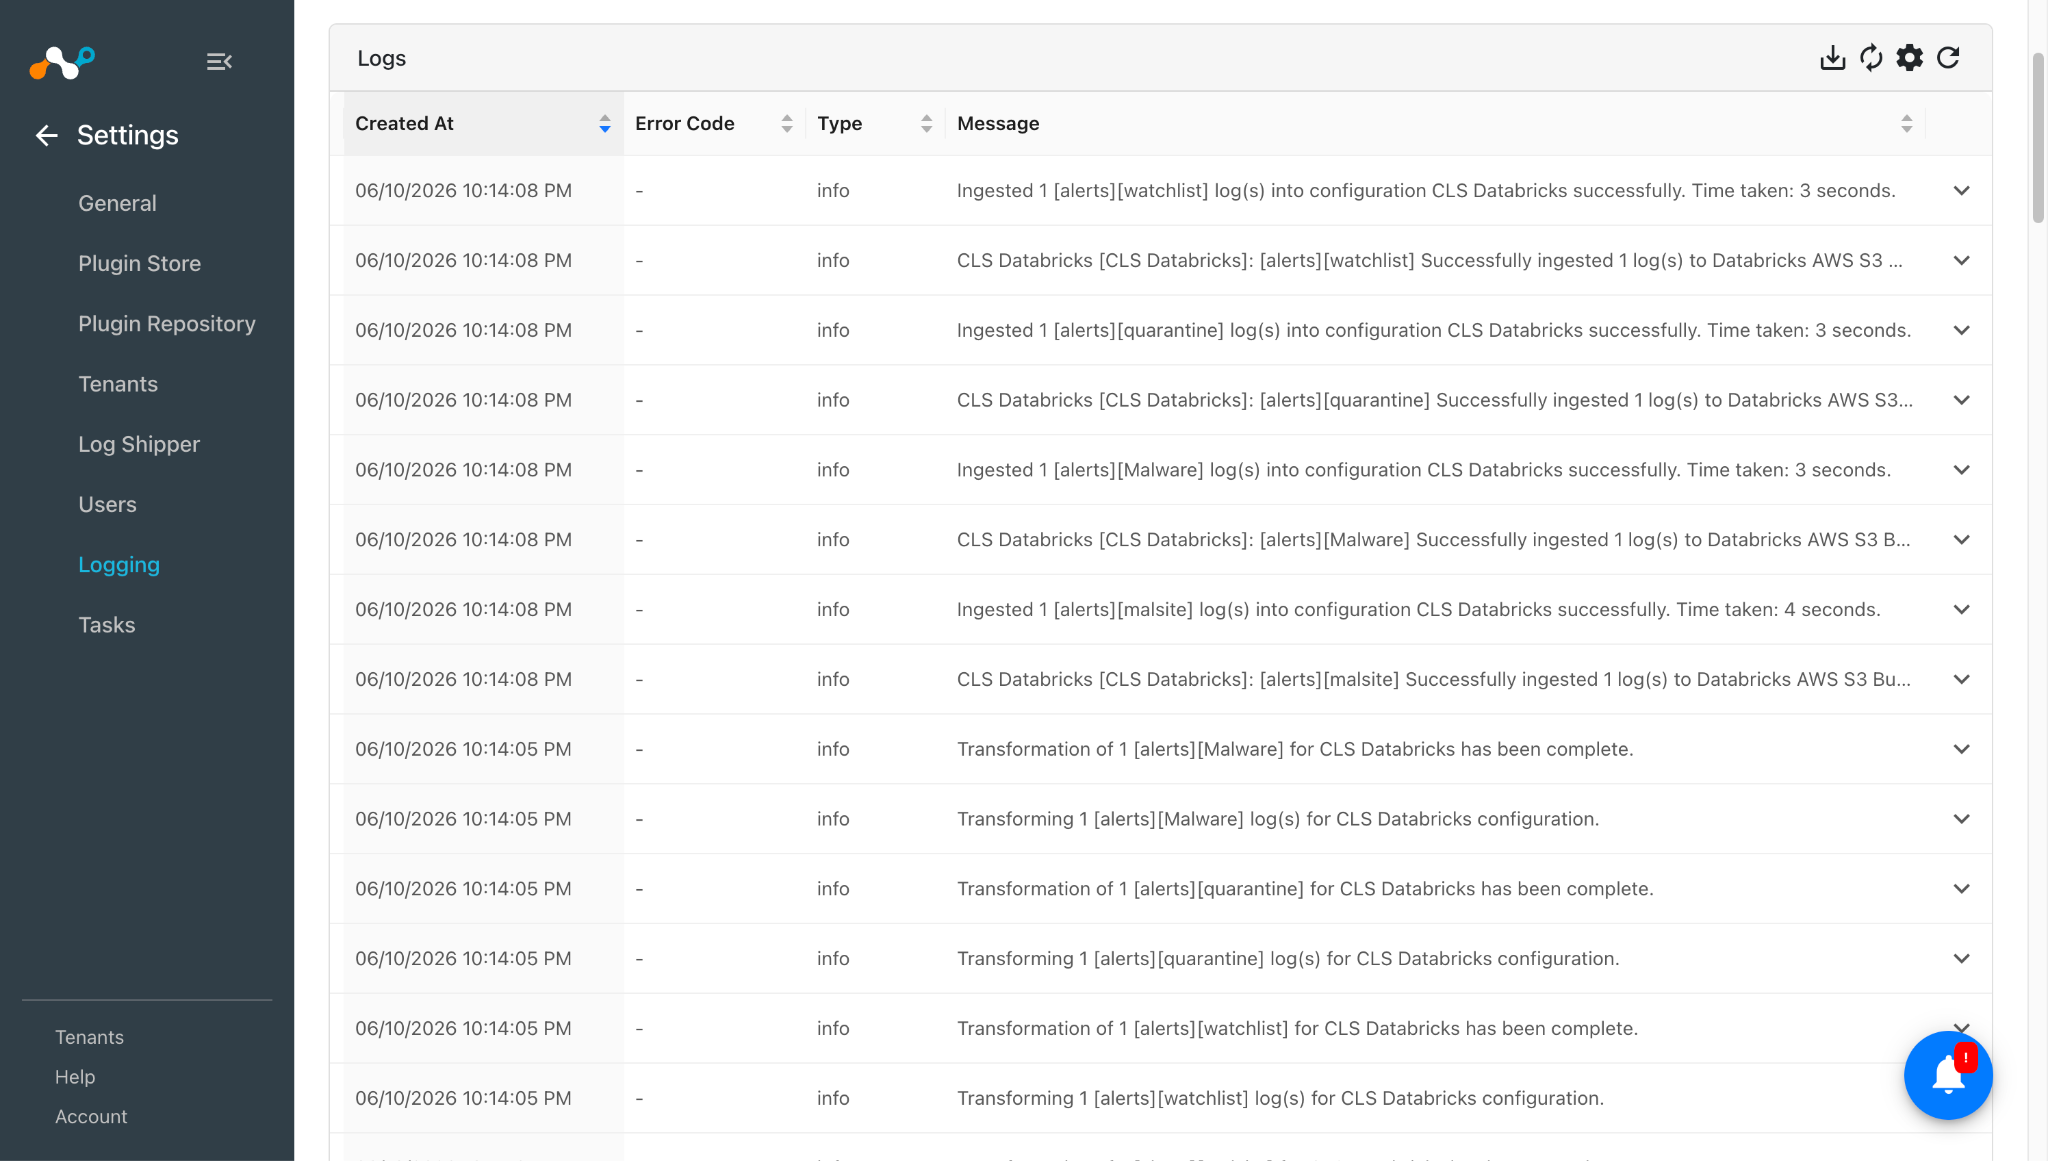
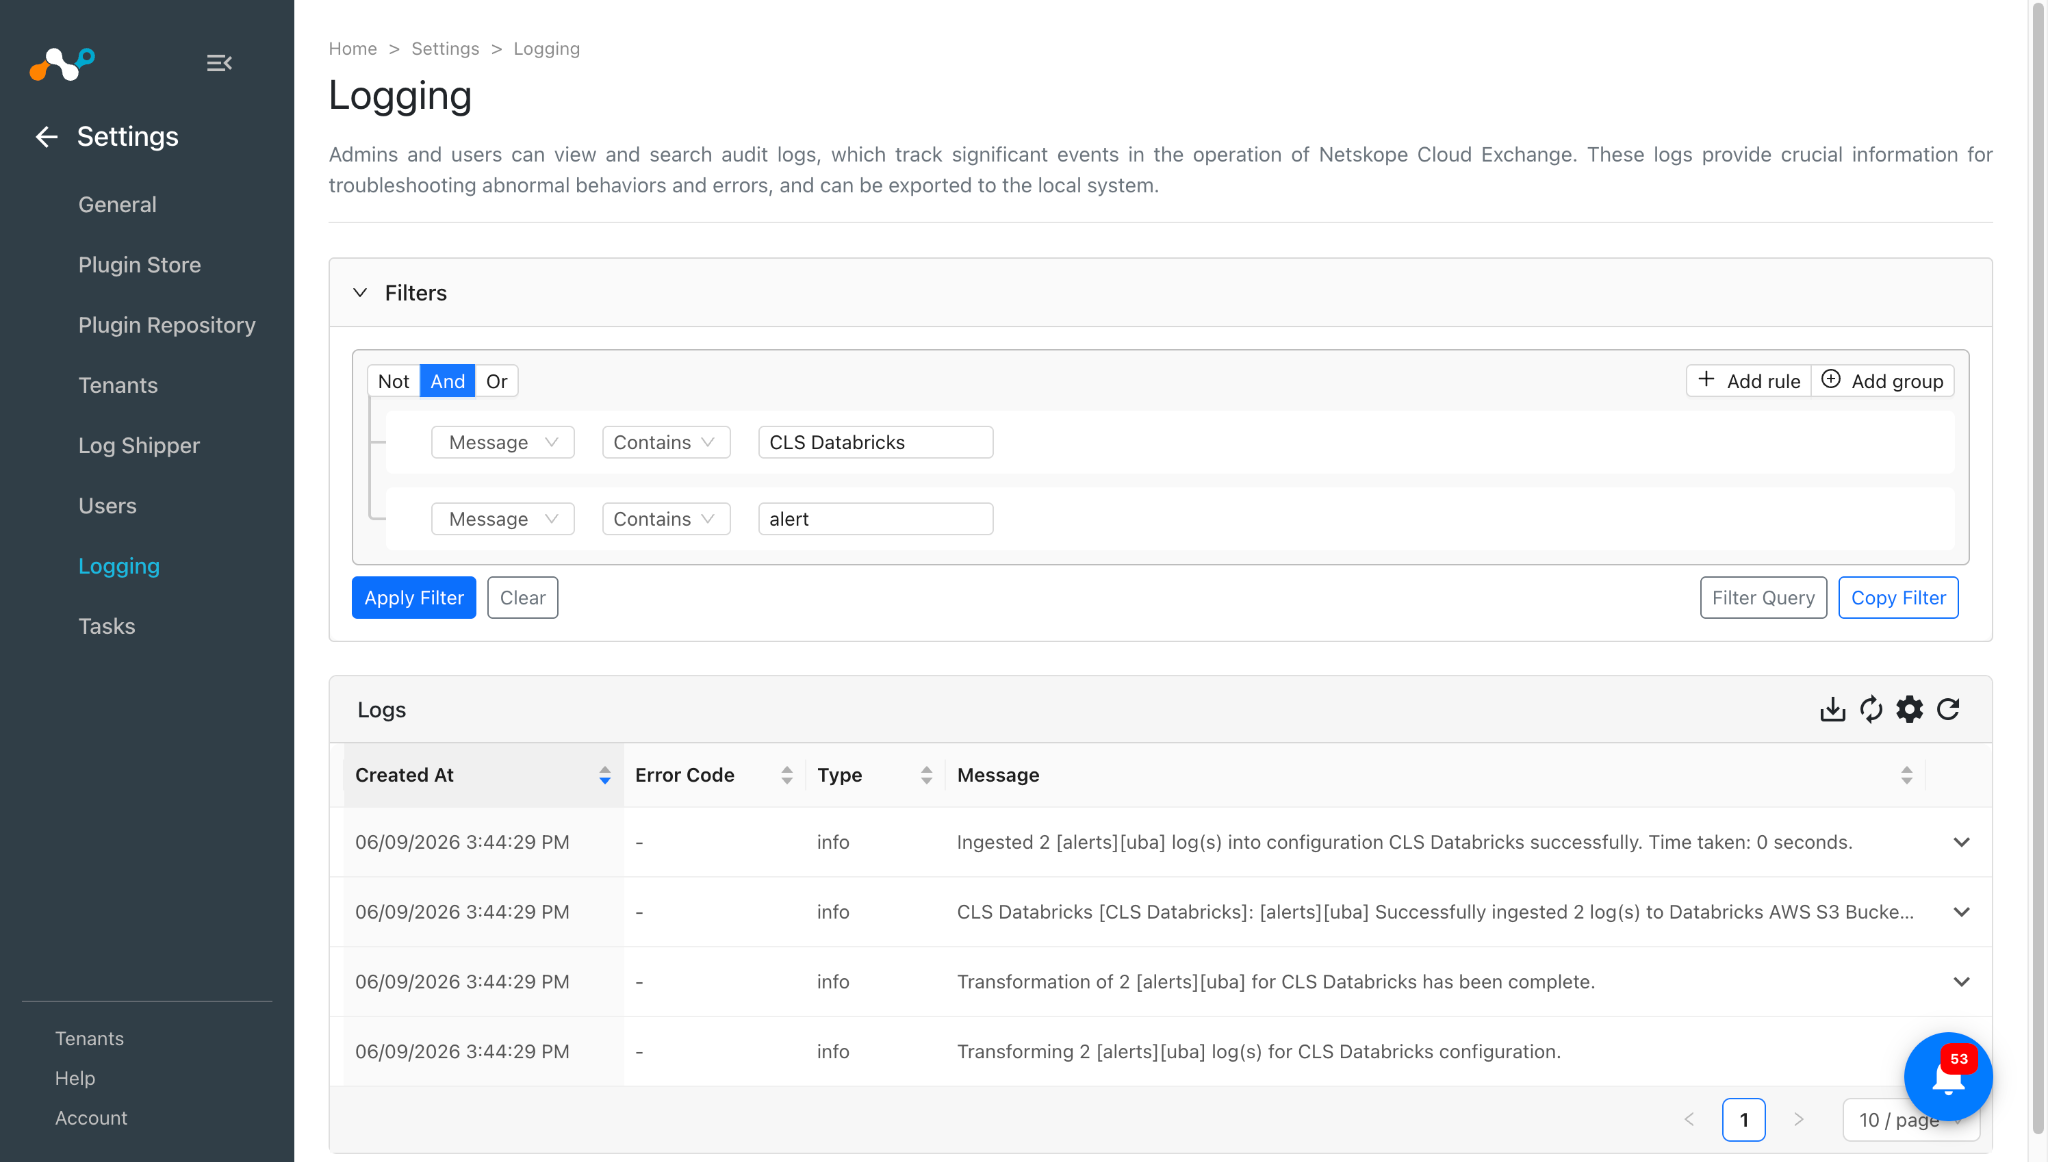
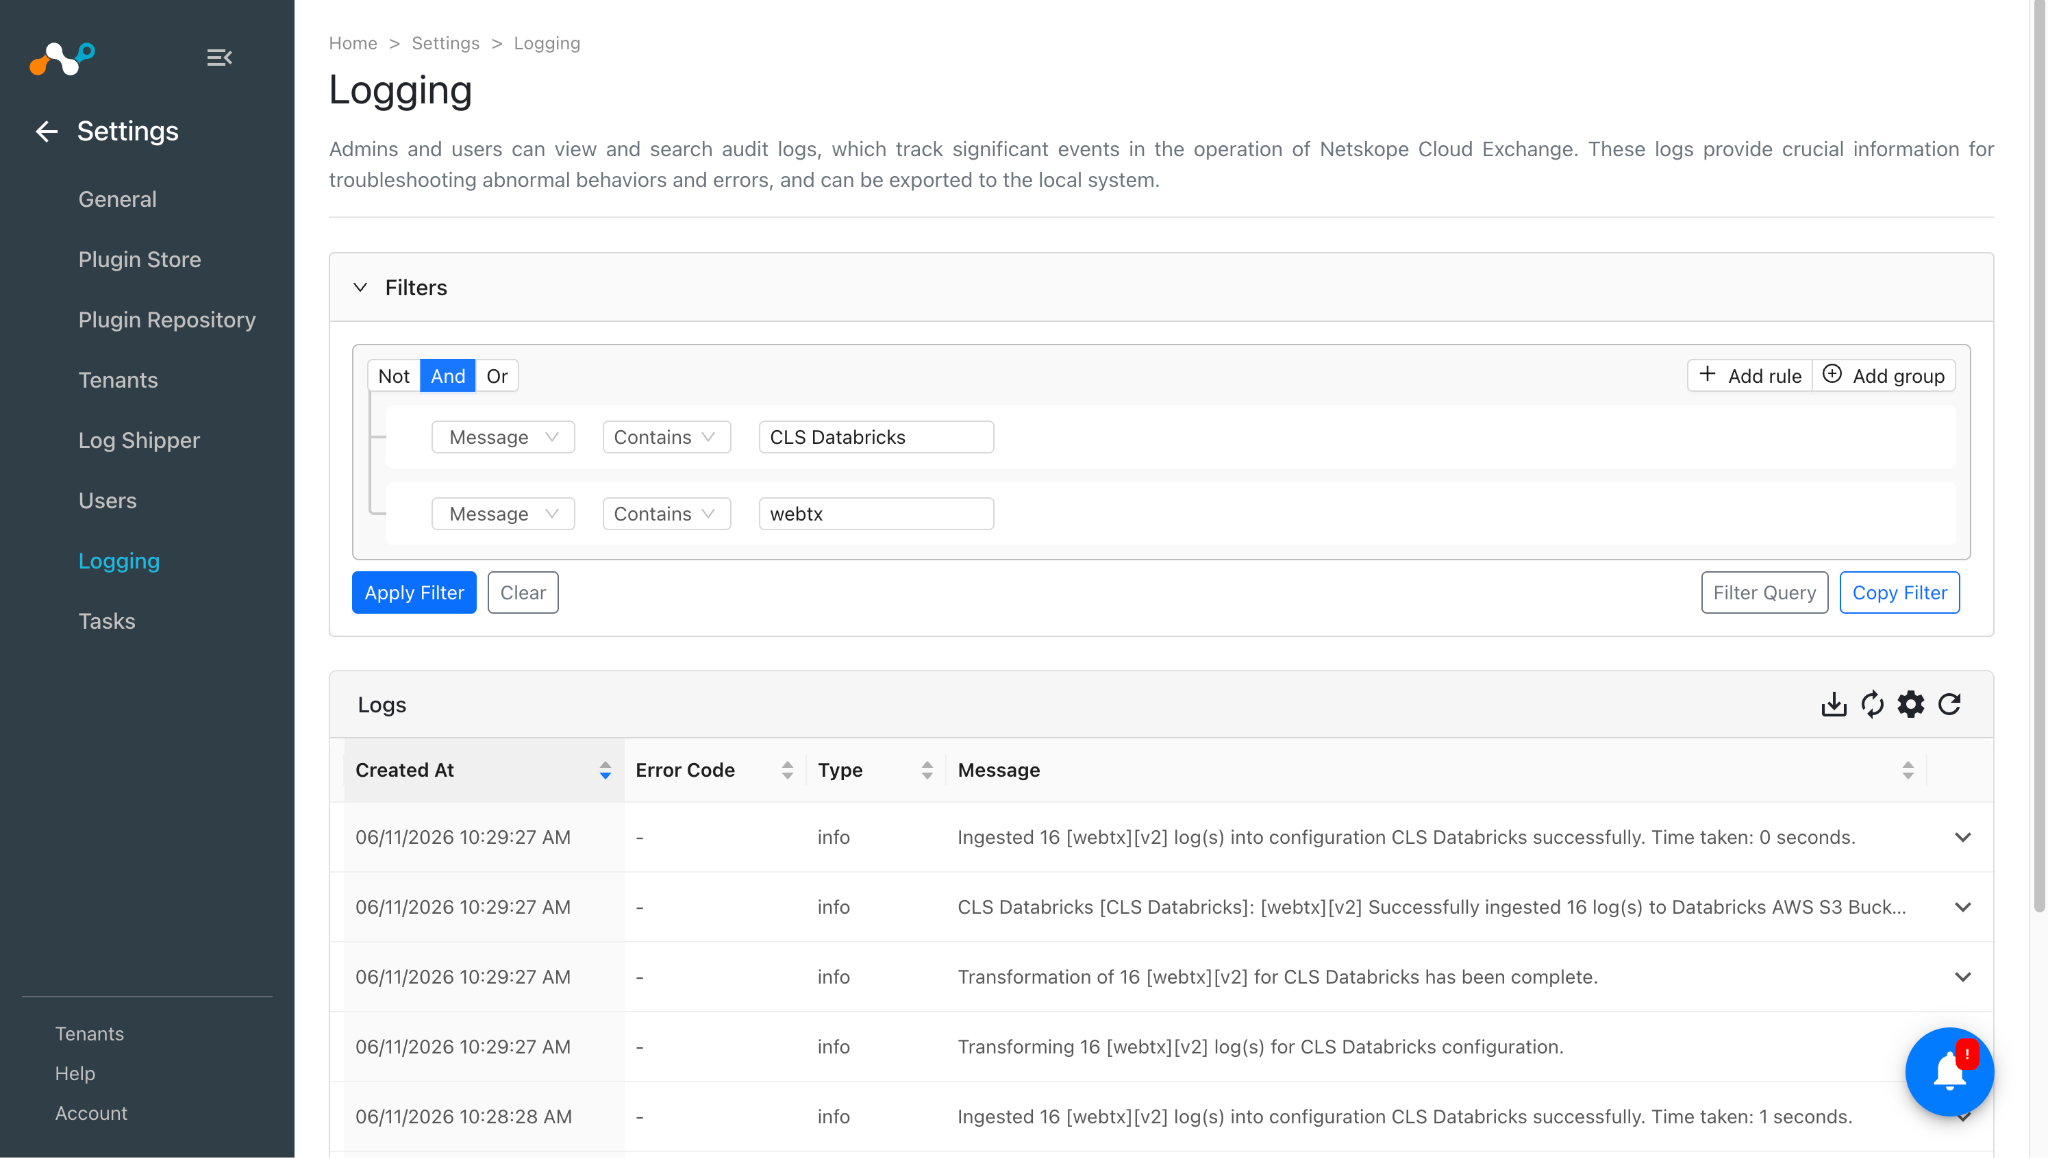
To validate the plugin workflow in Cloud Exchange, go to Logging and search for ingested Events and Alerts with the filter: message contains “ingested” or message contains “<destination plugin configuration name>”.

Validate the Push on Databricks
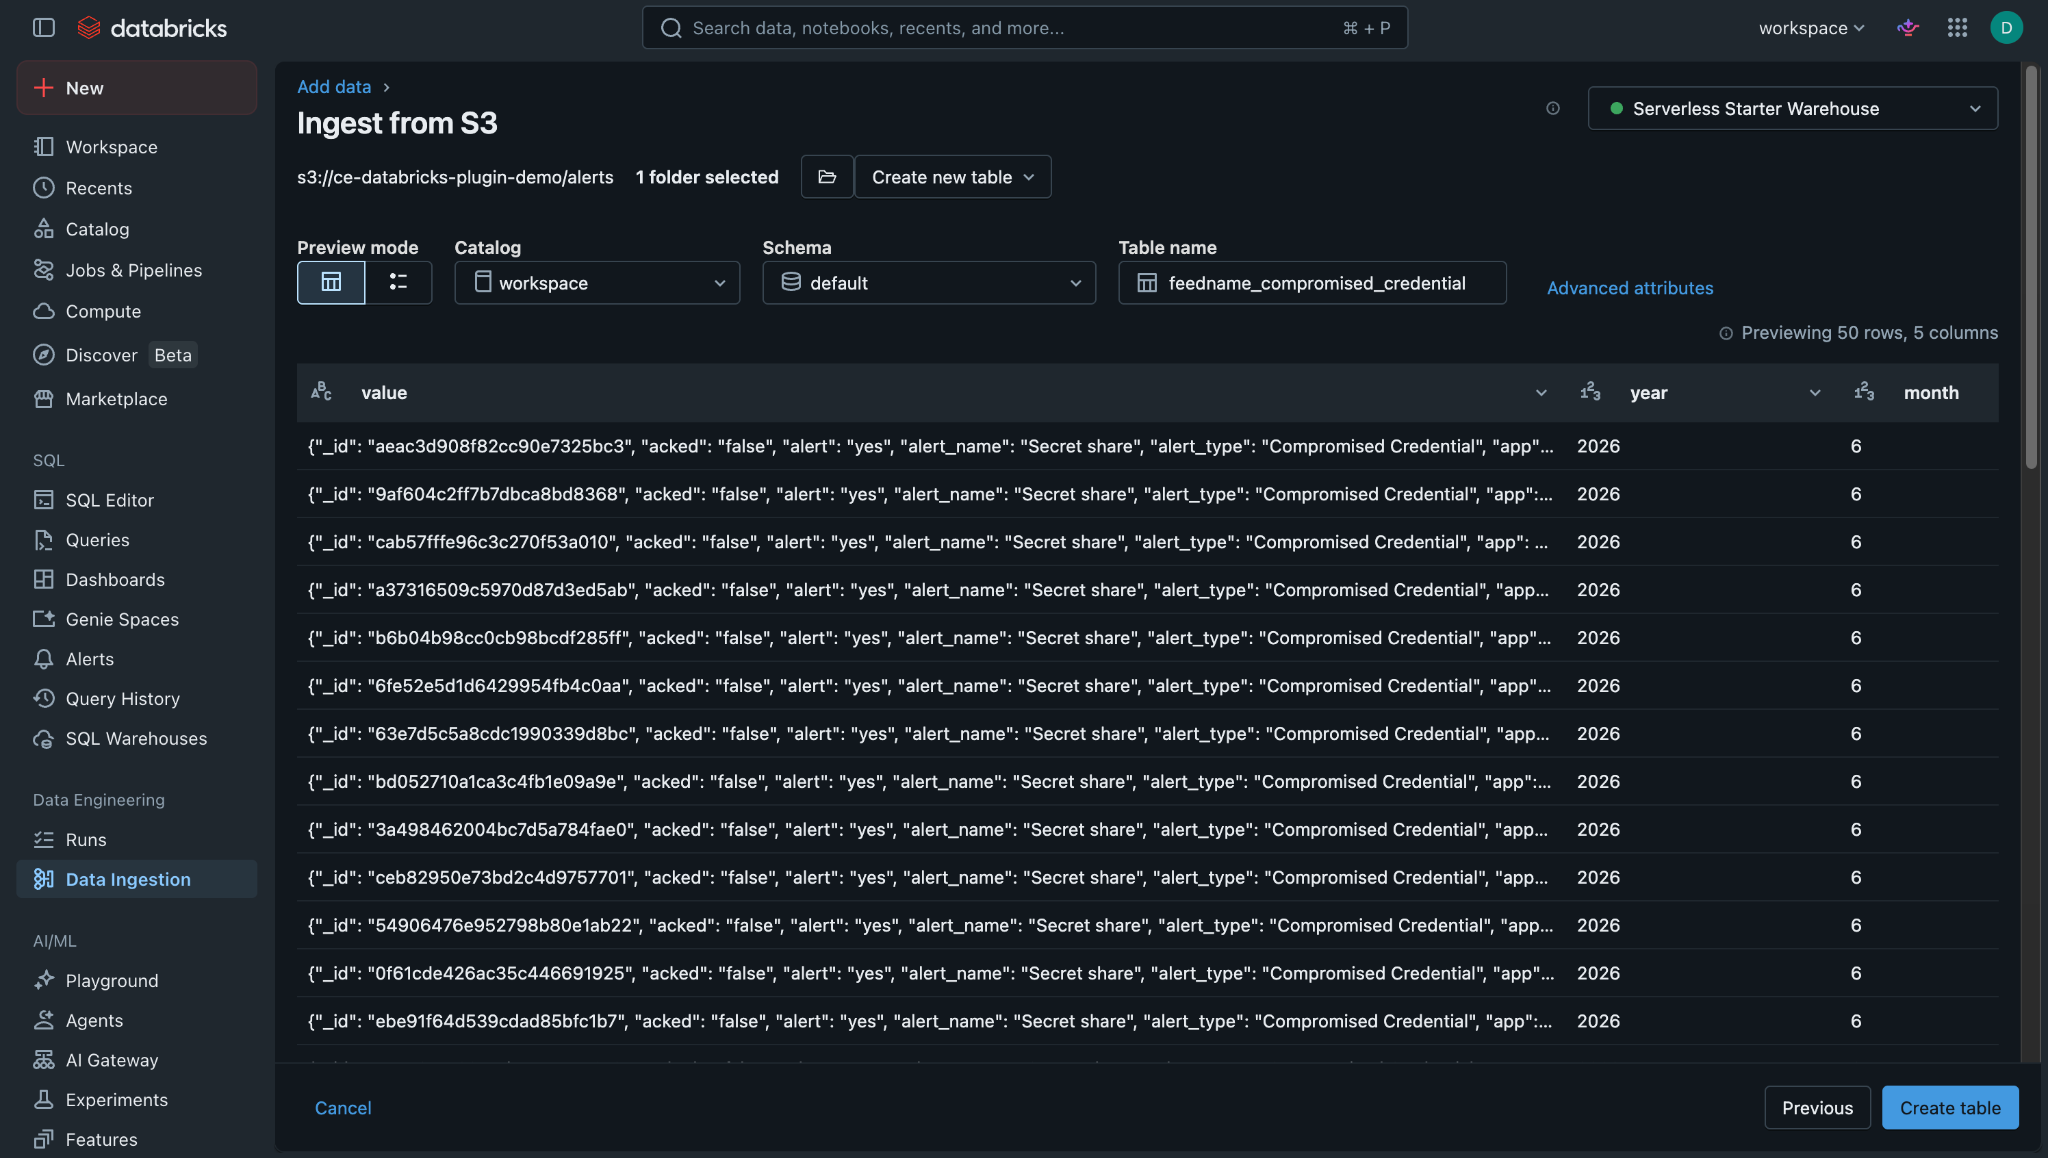
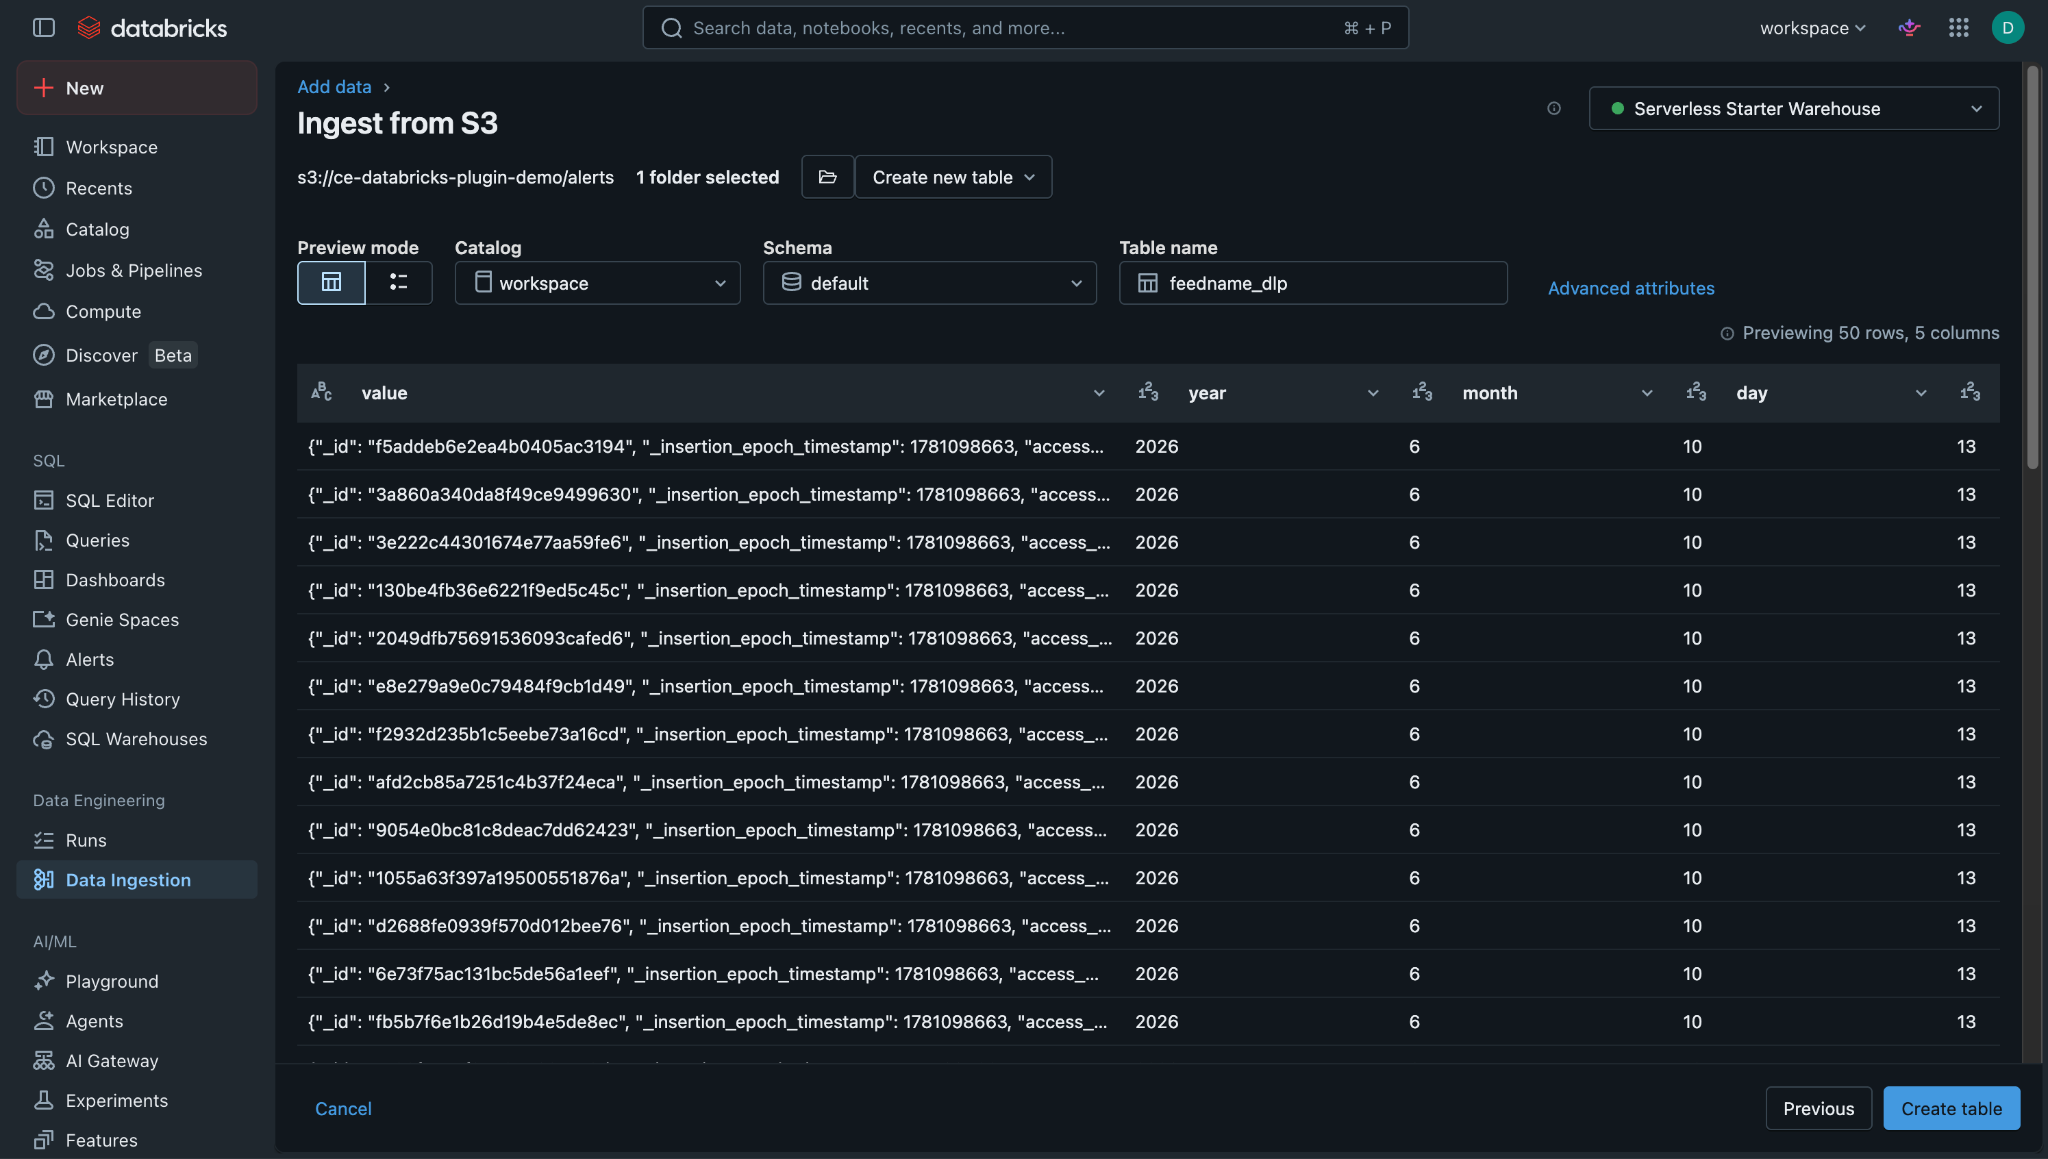
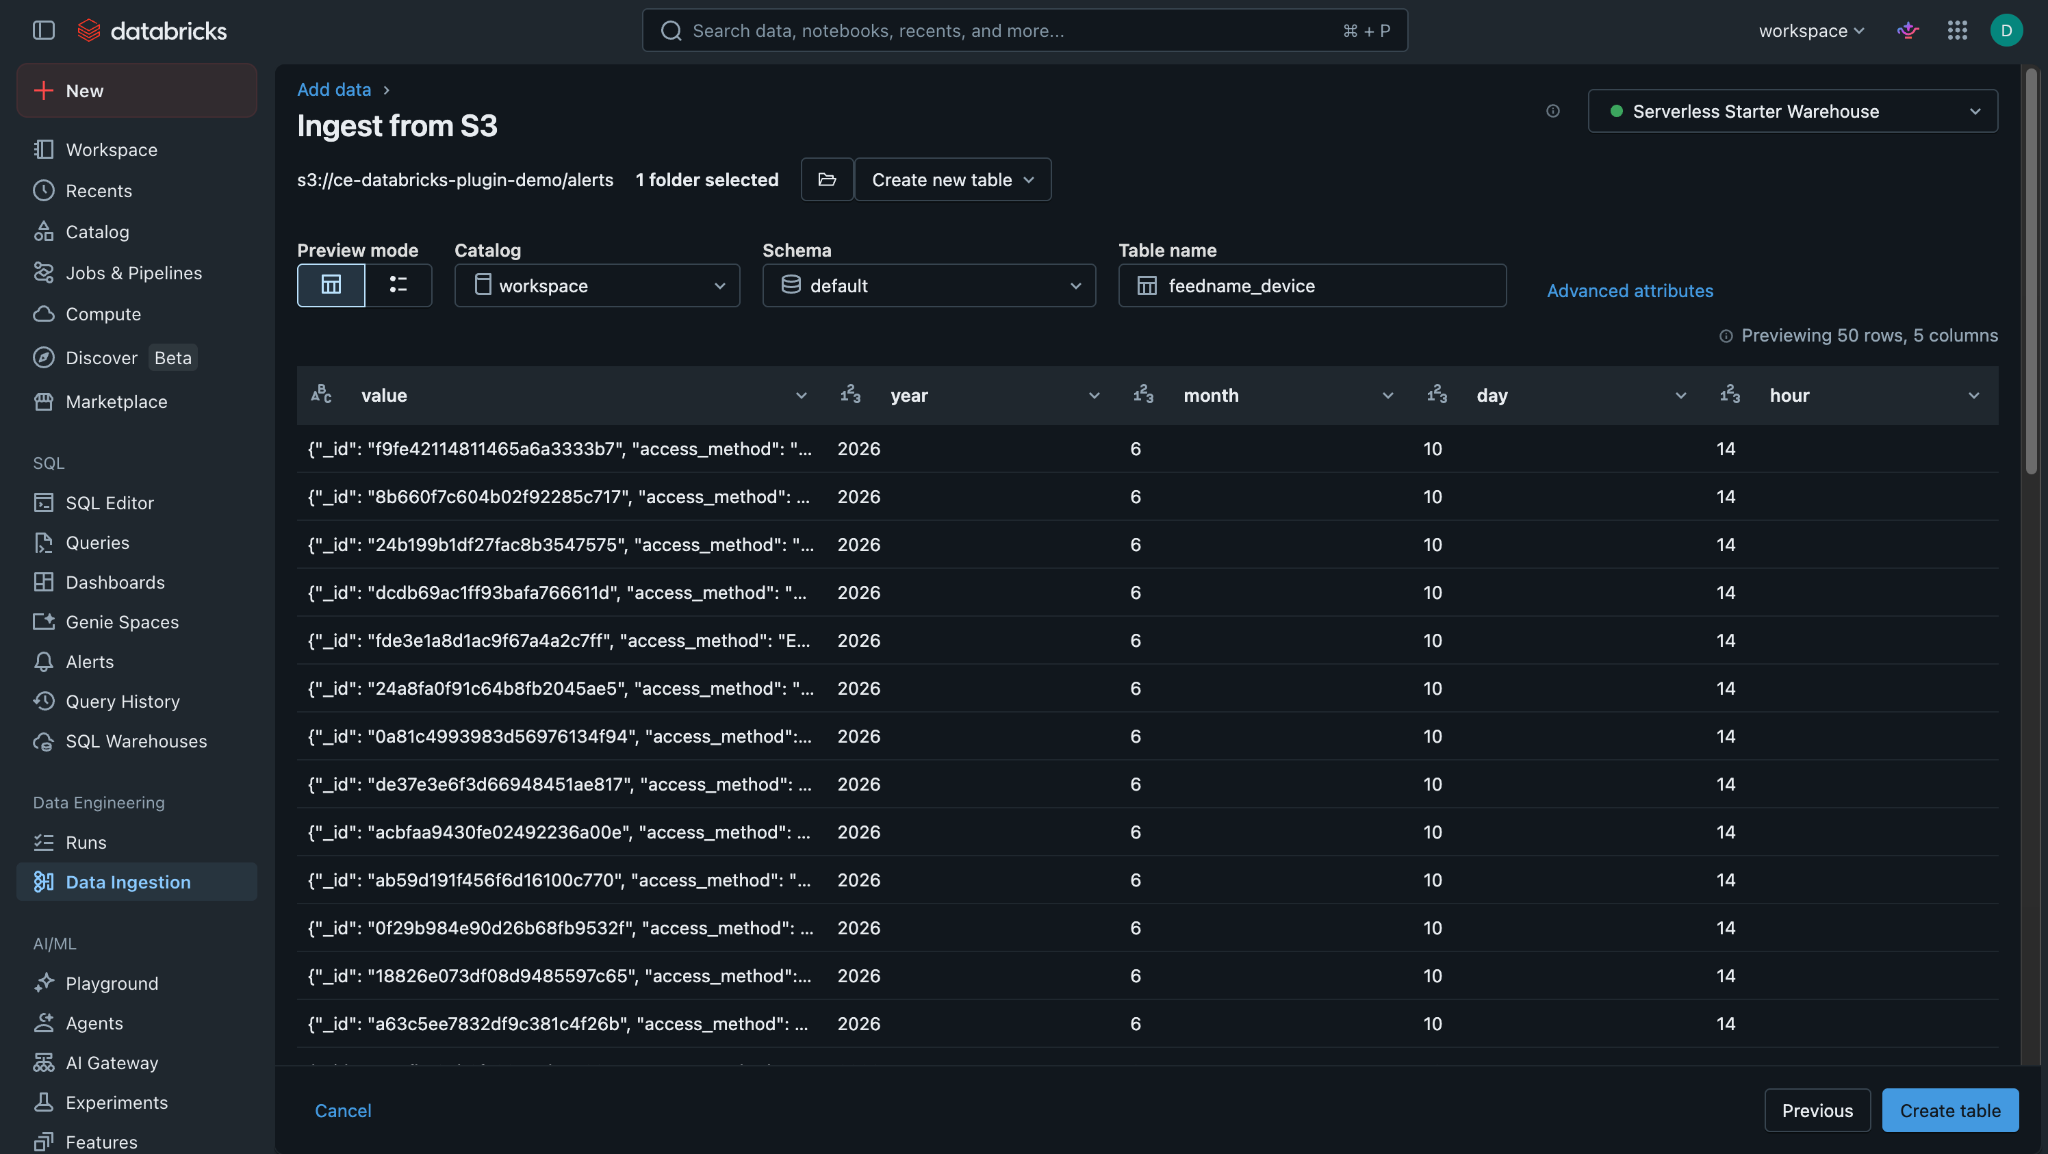
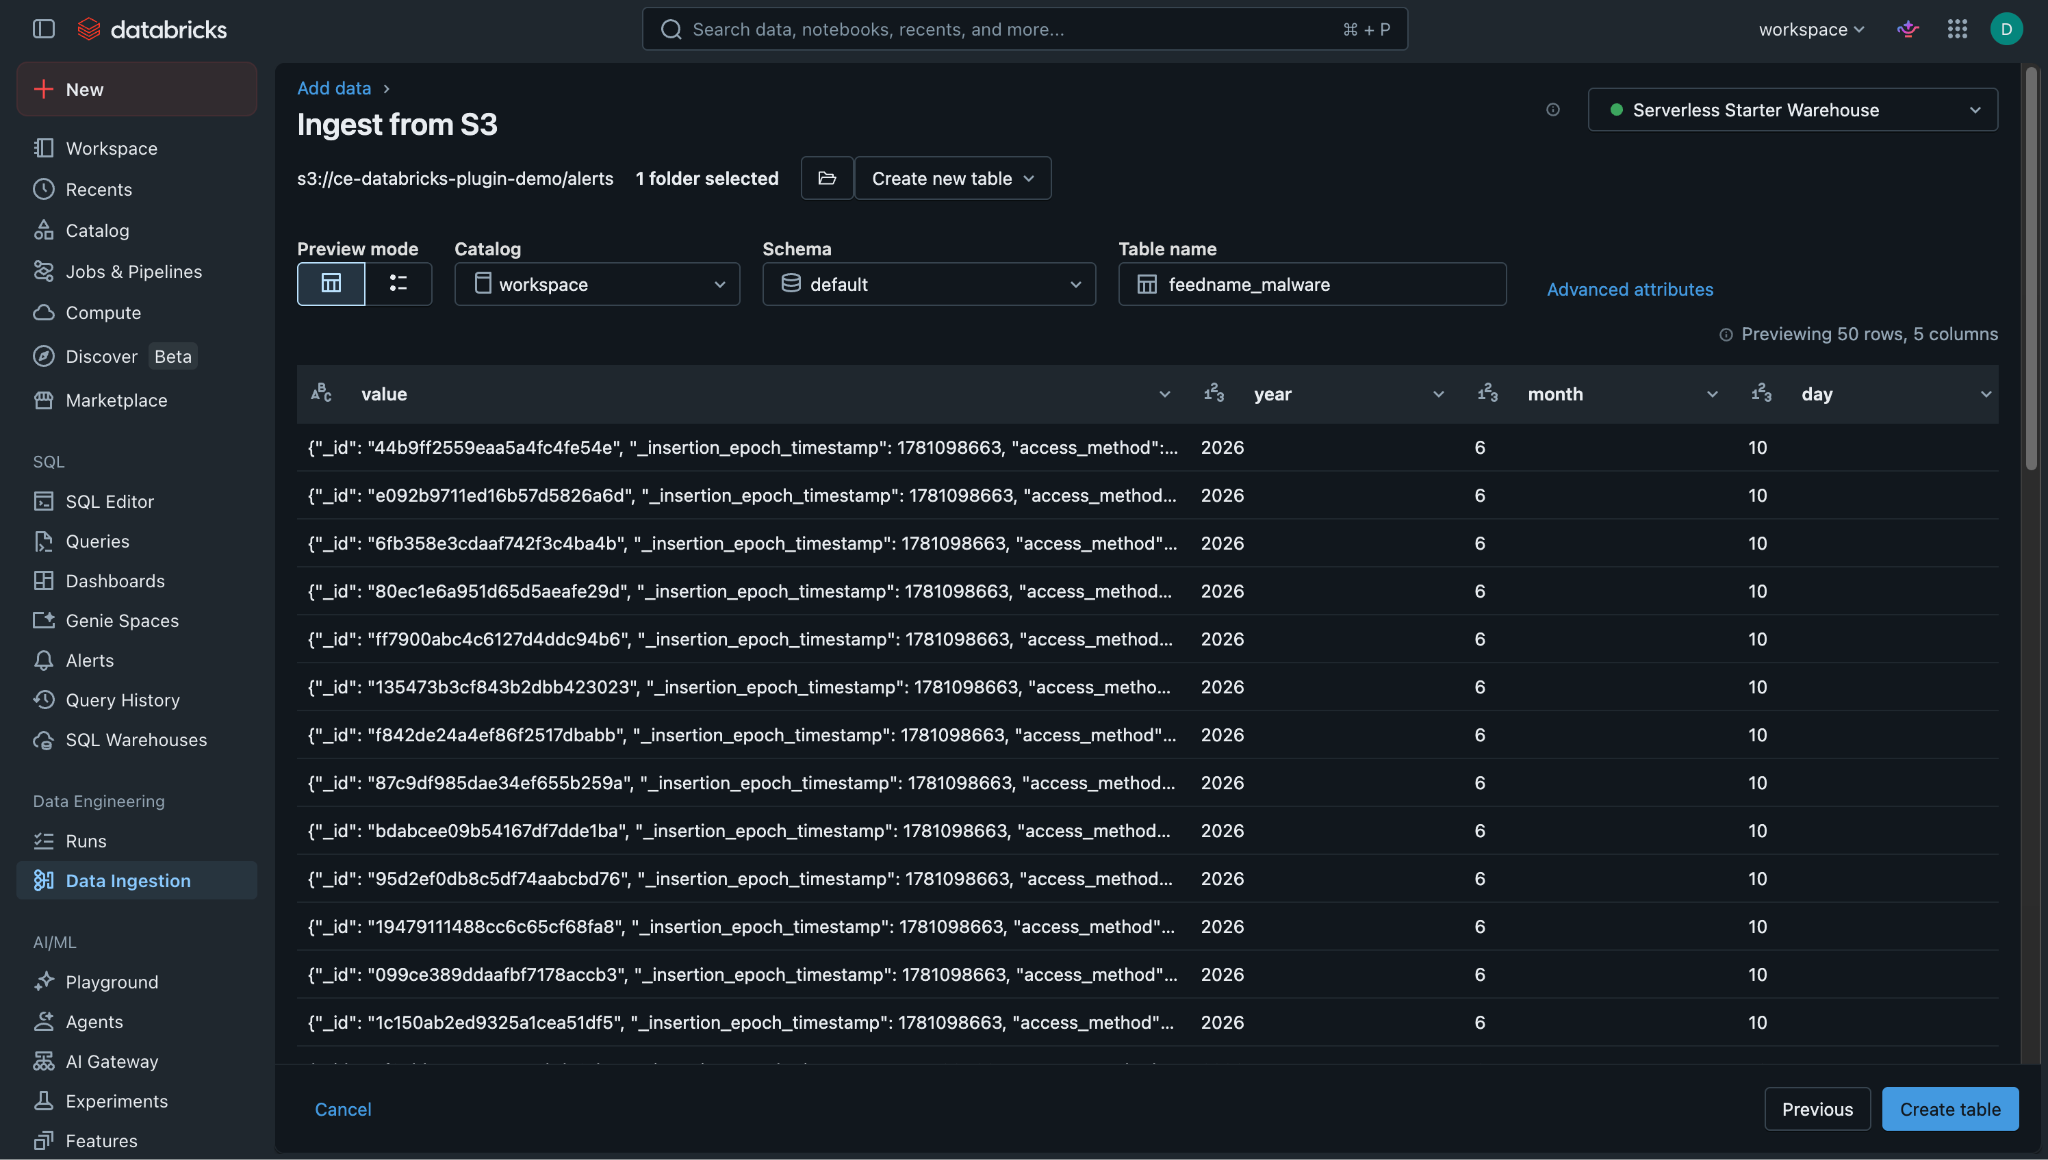
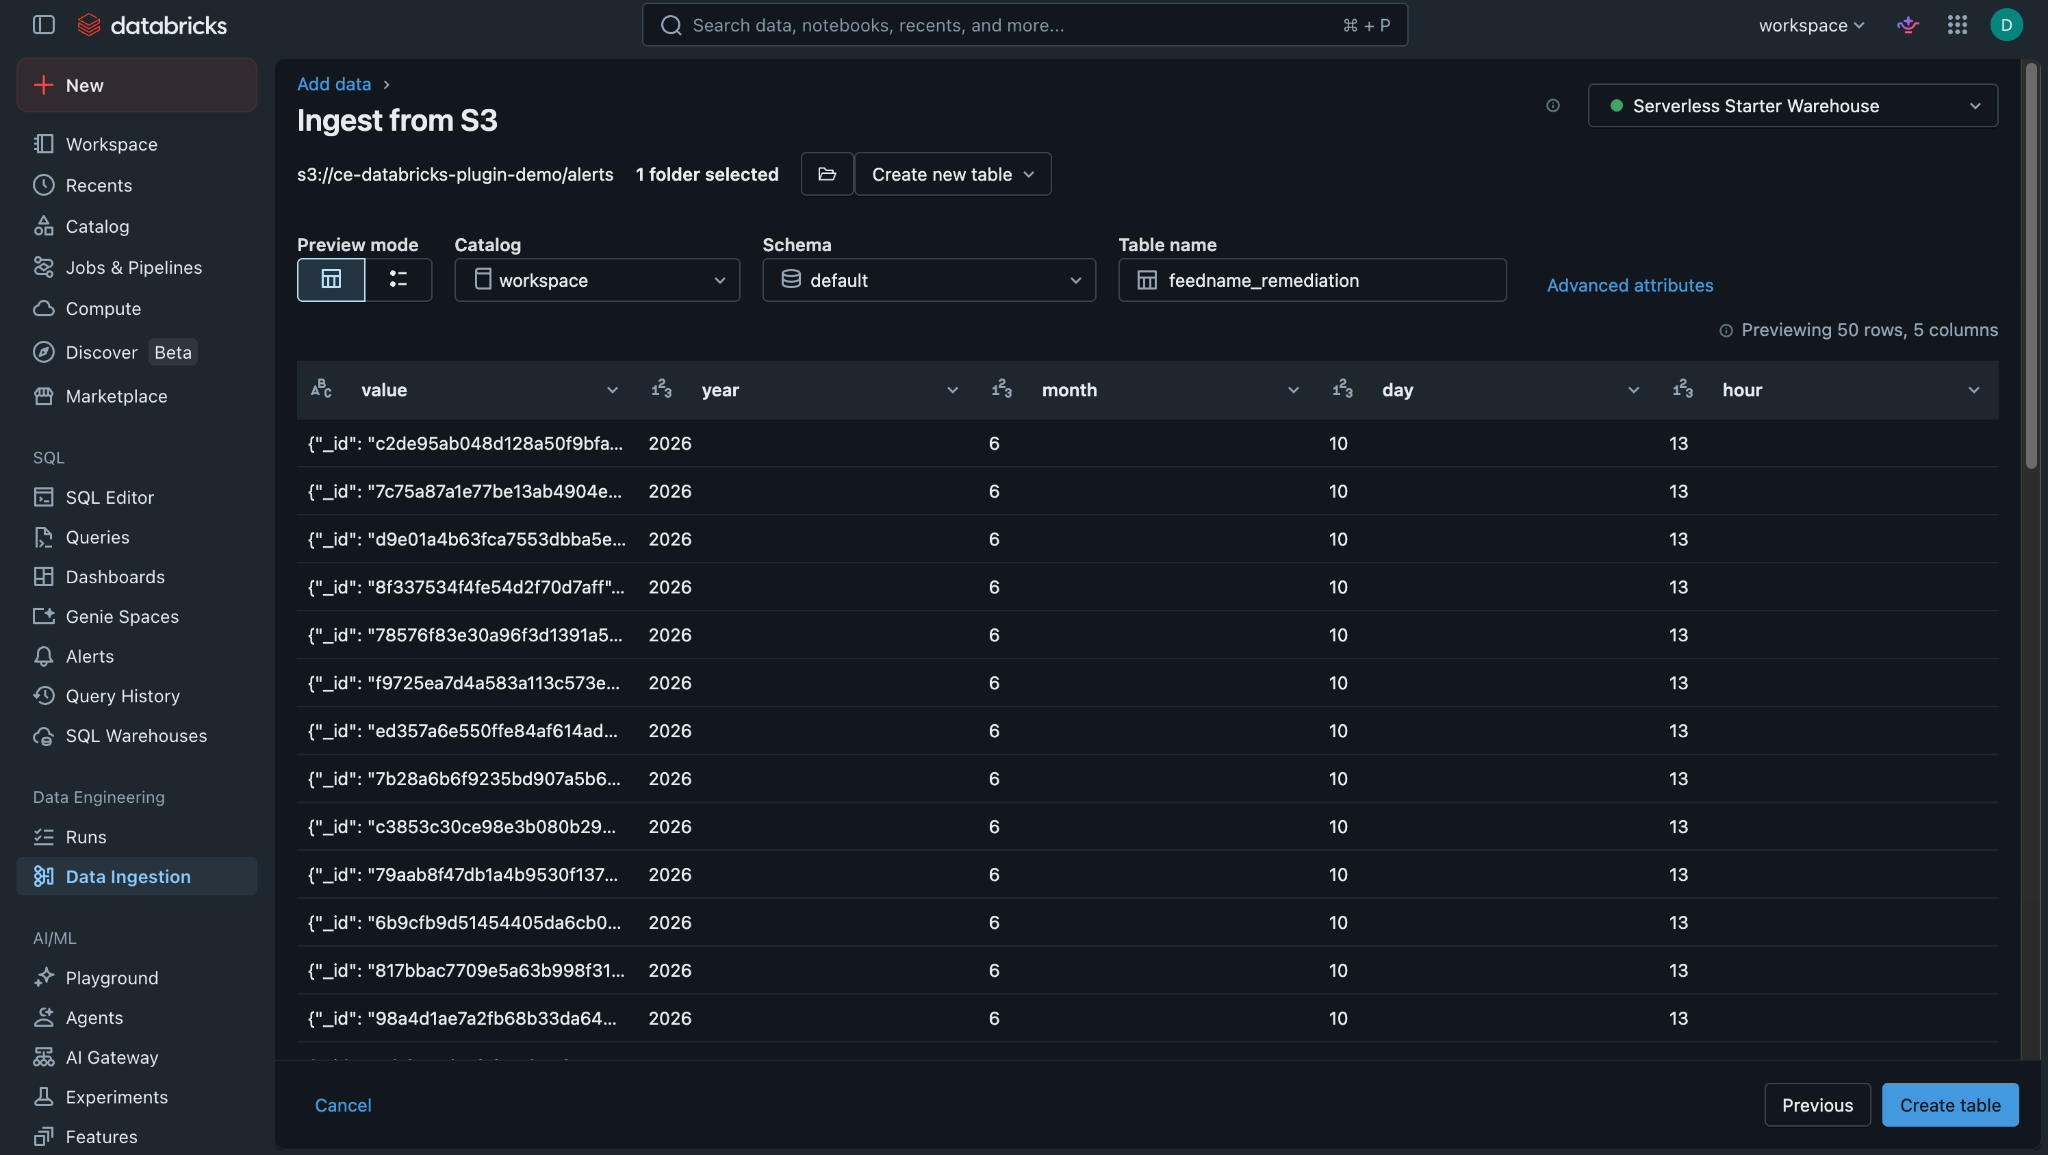
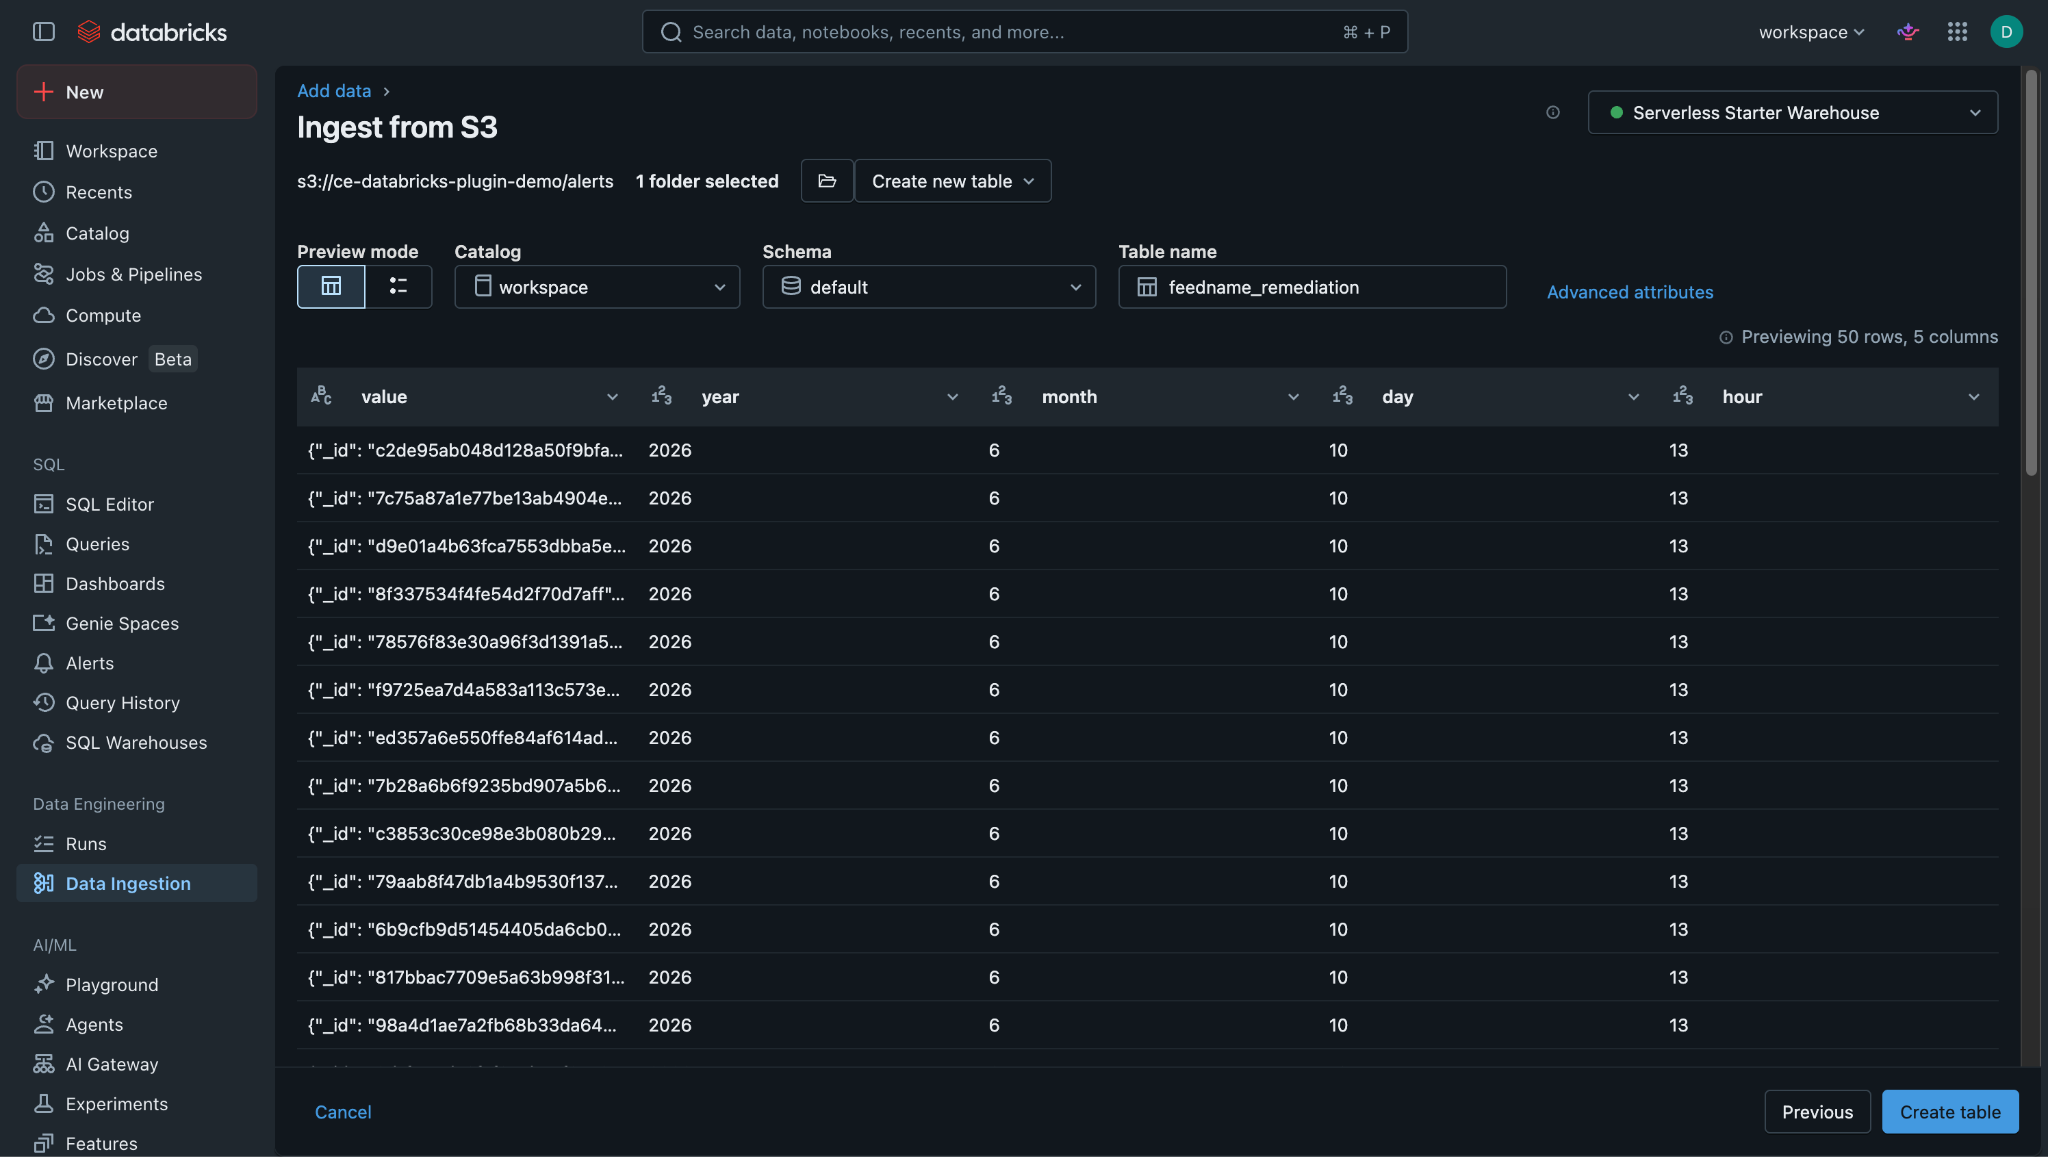
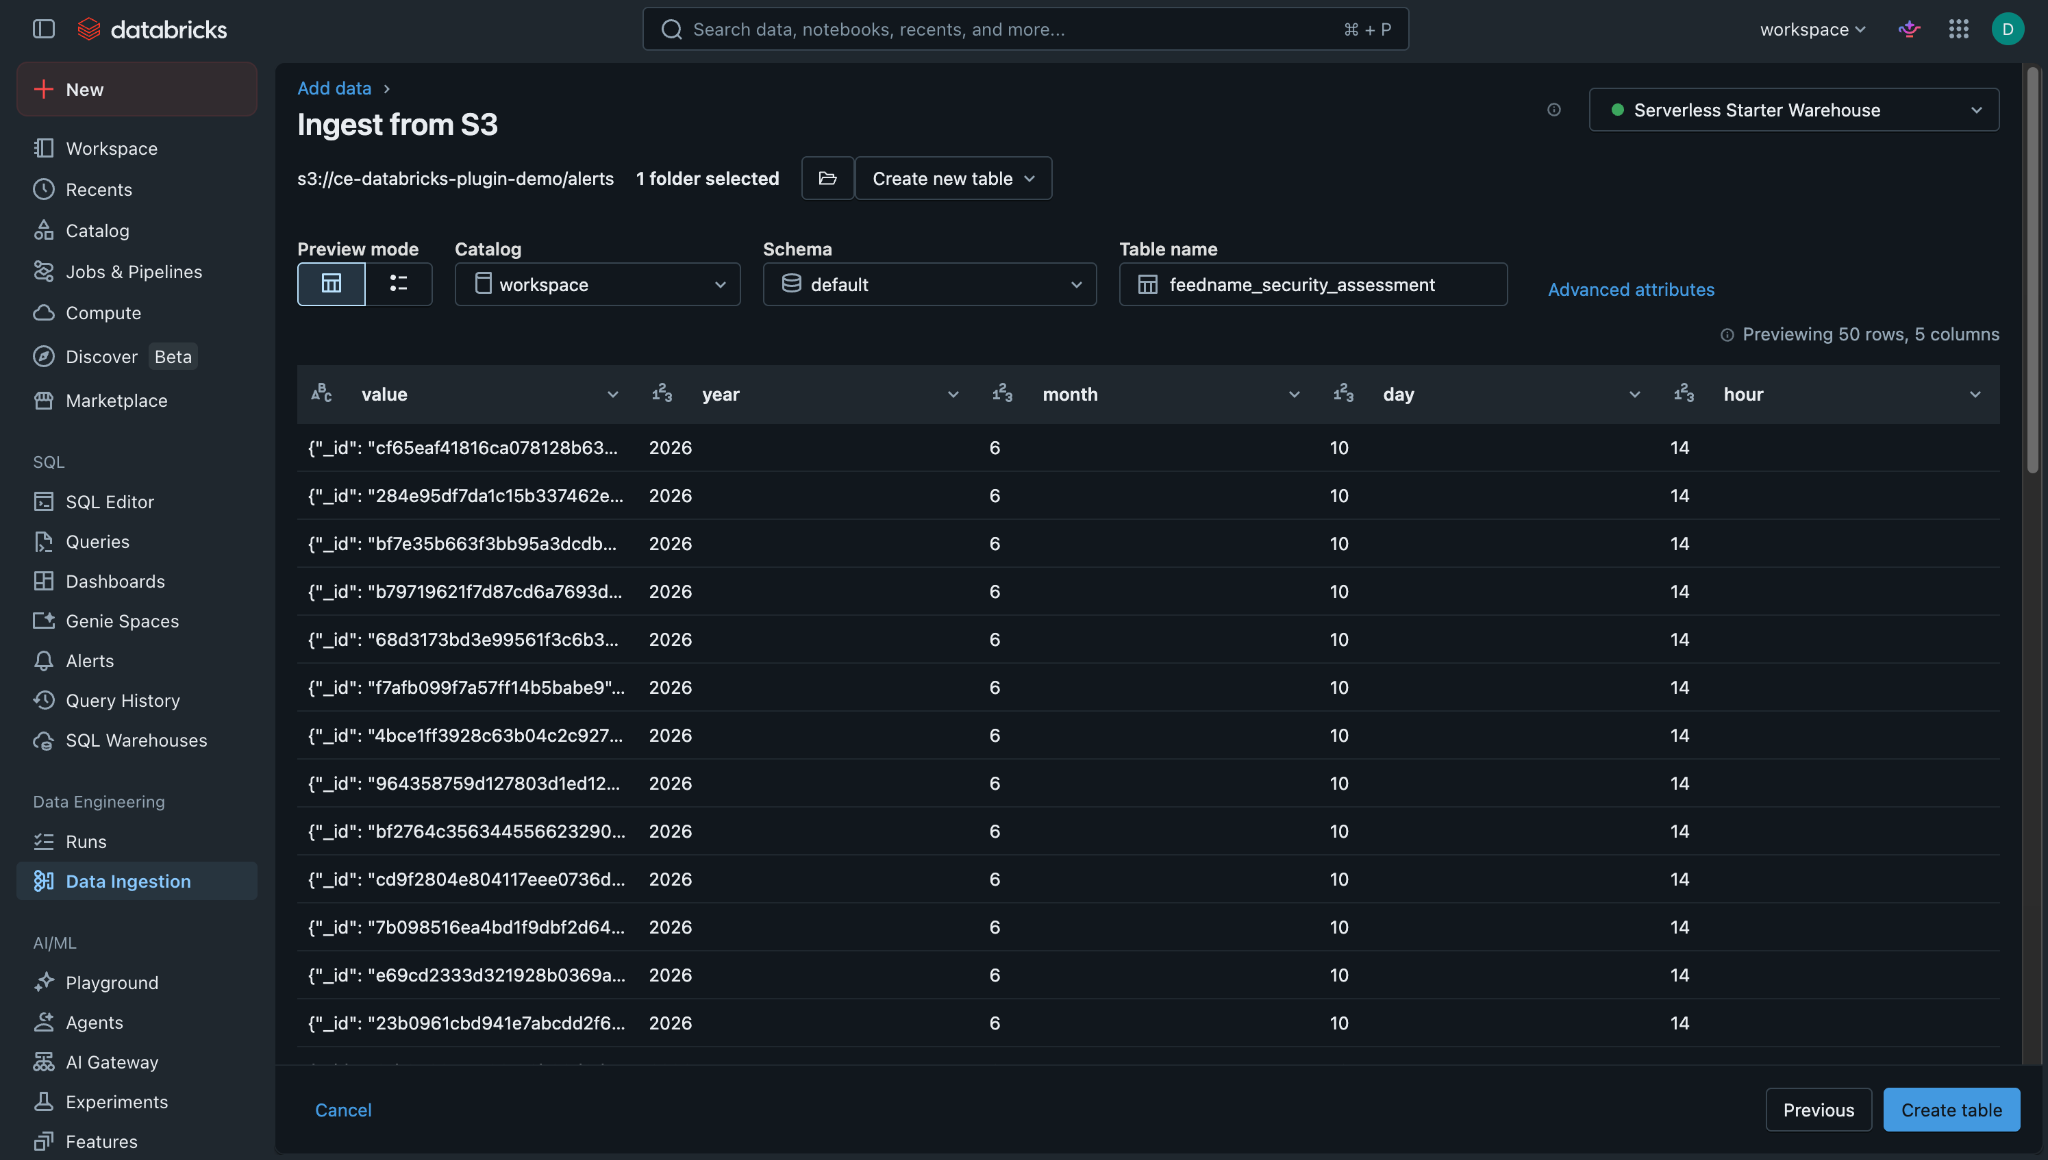
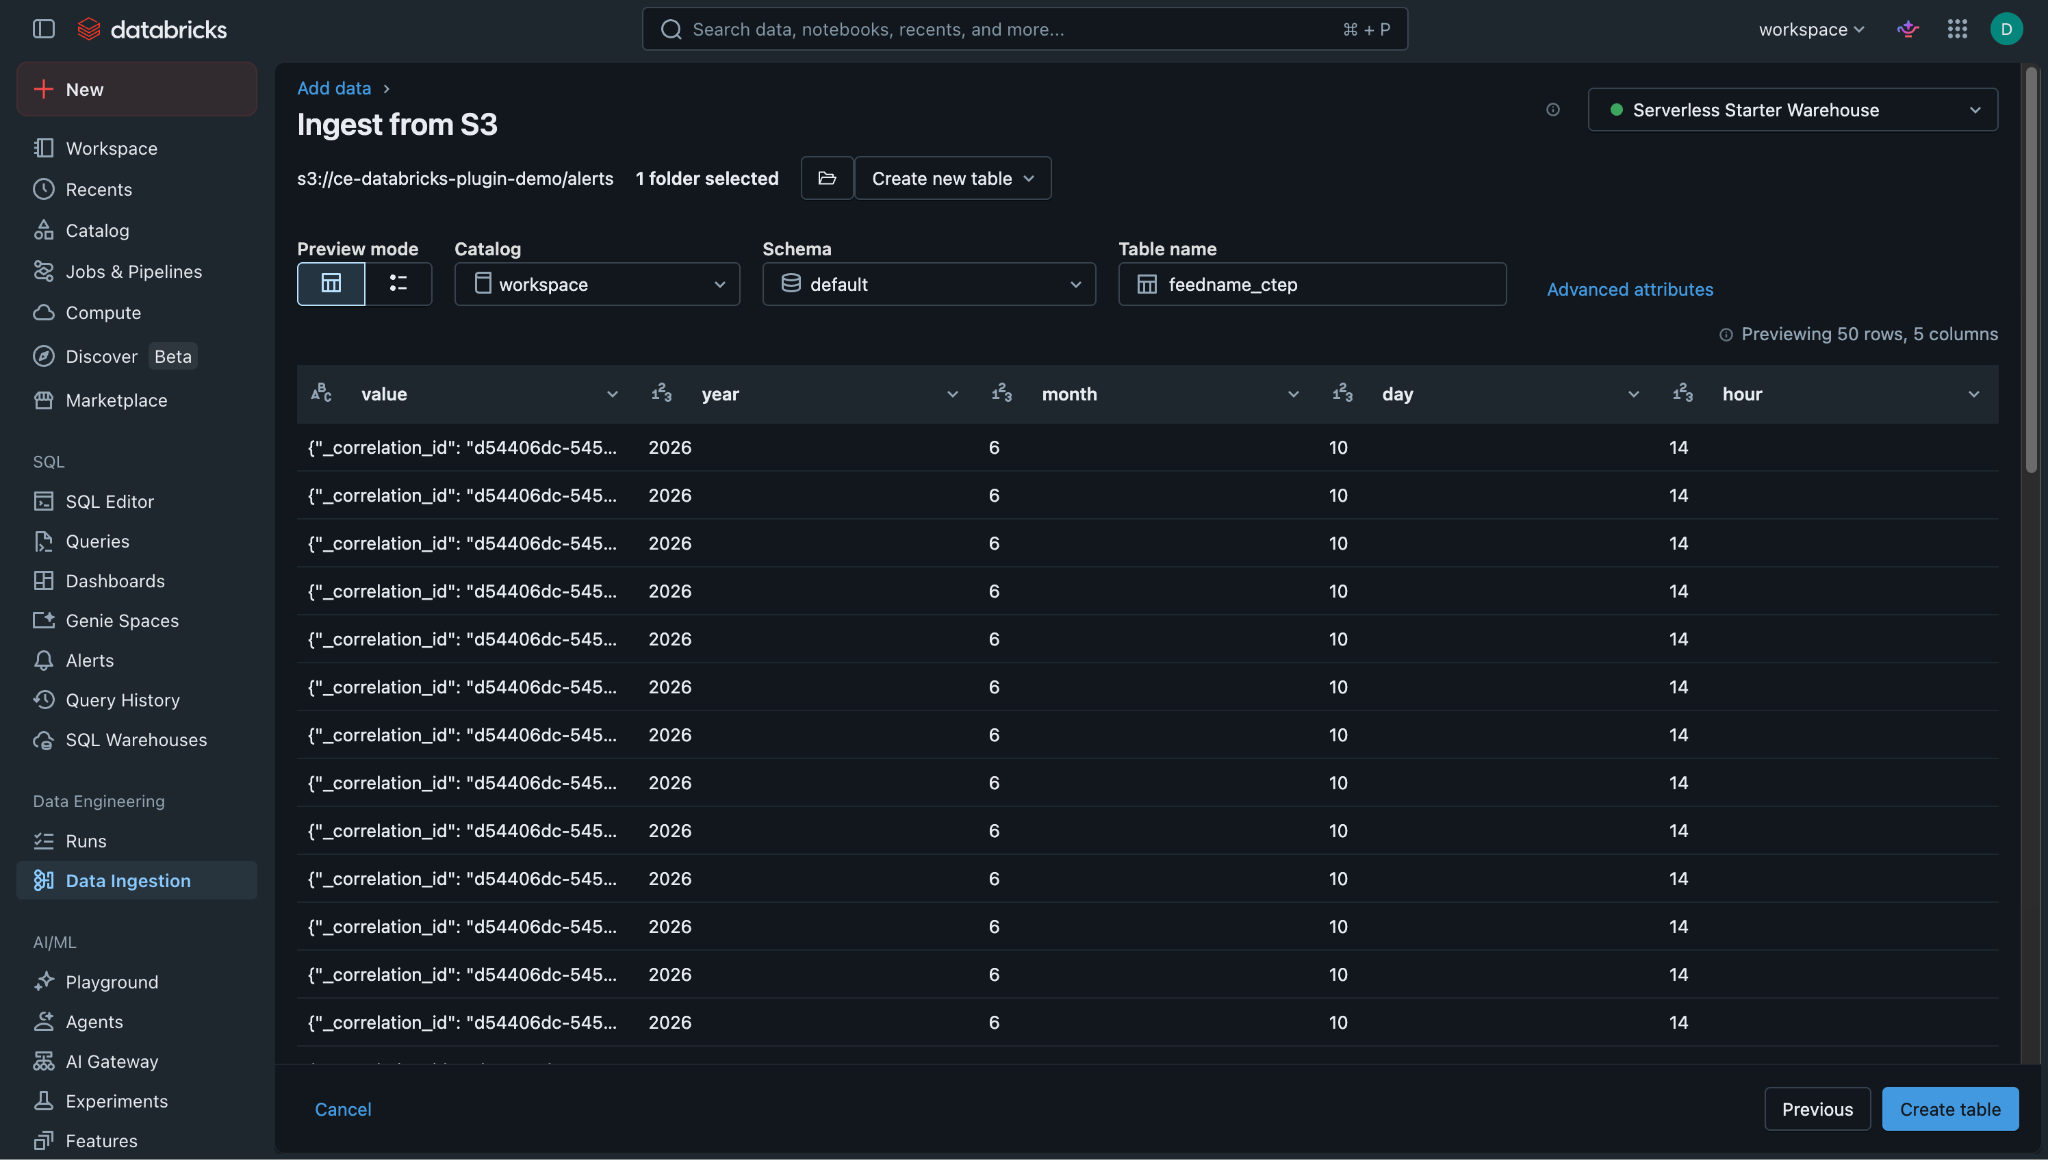
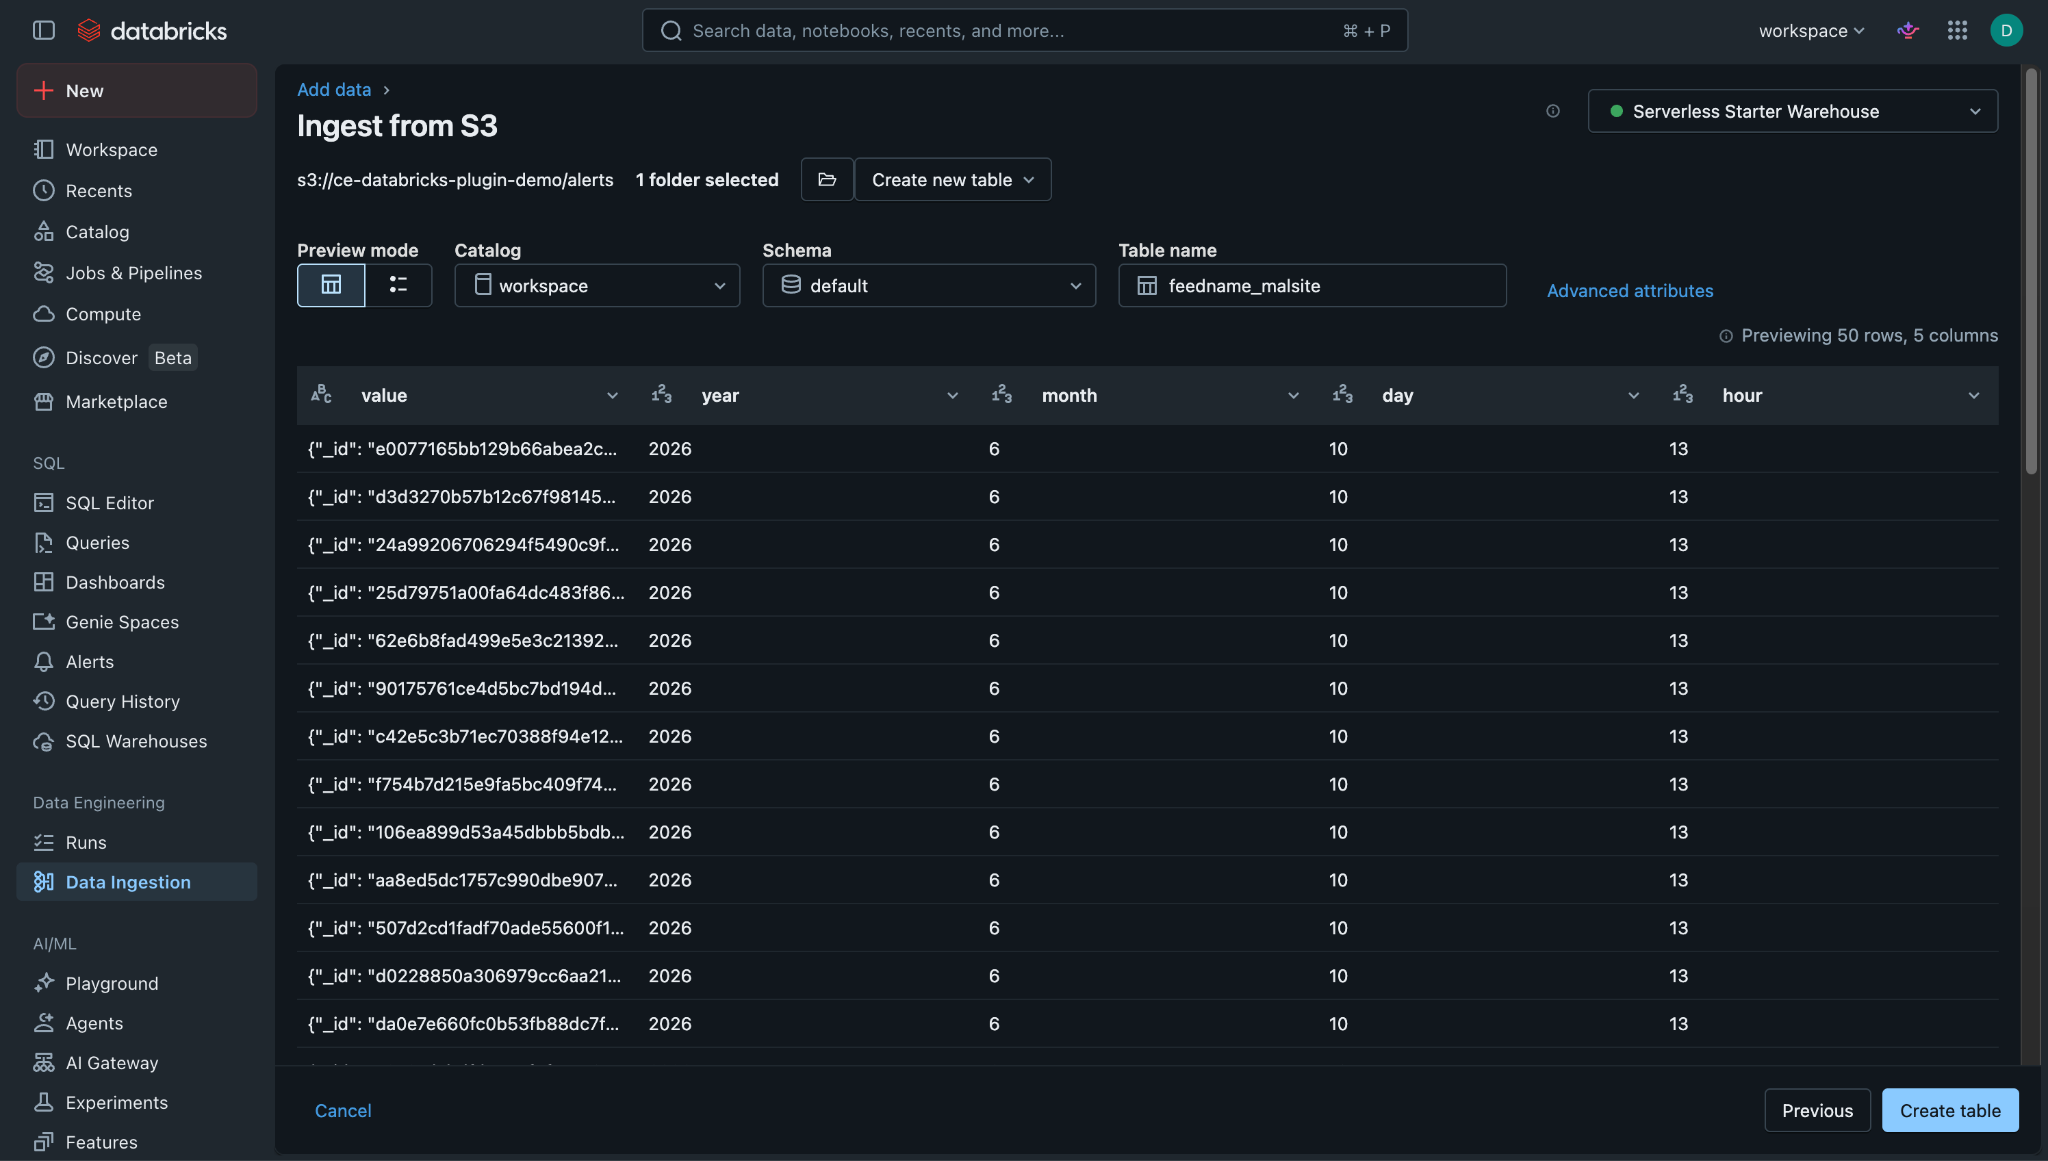
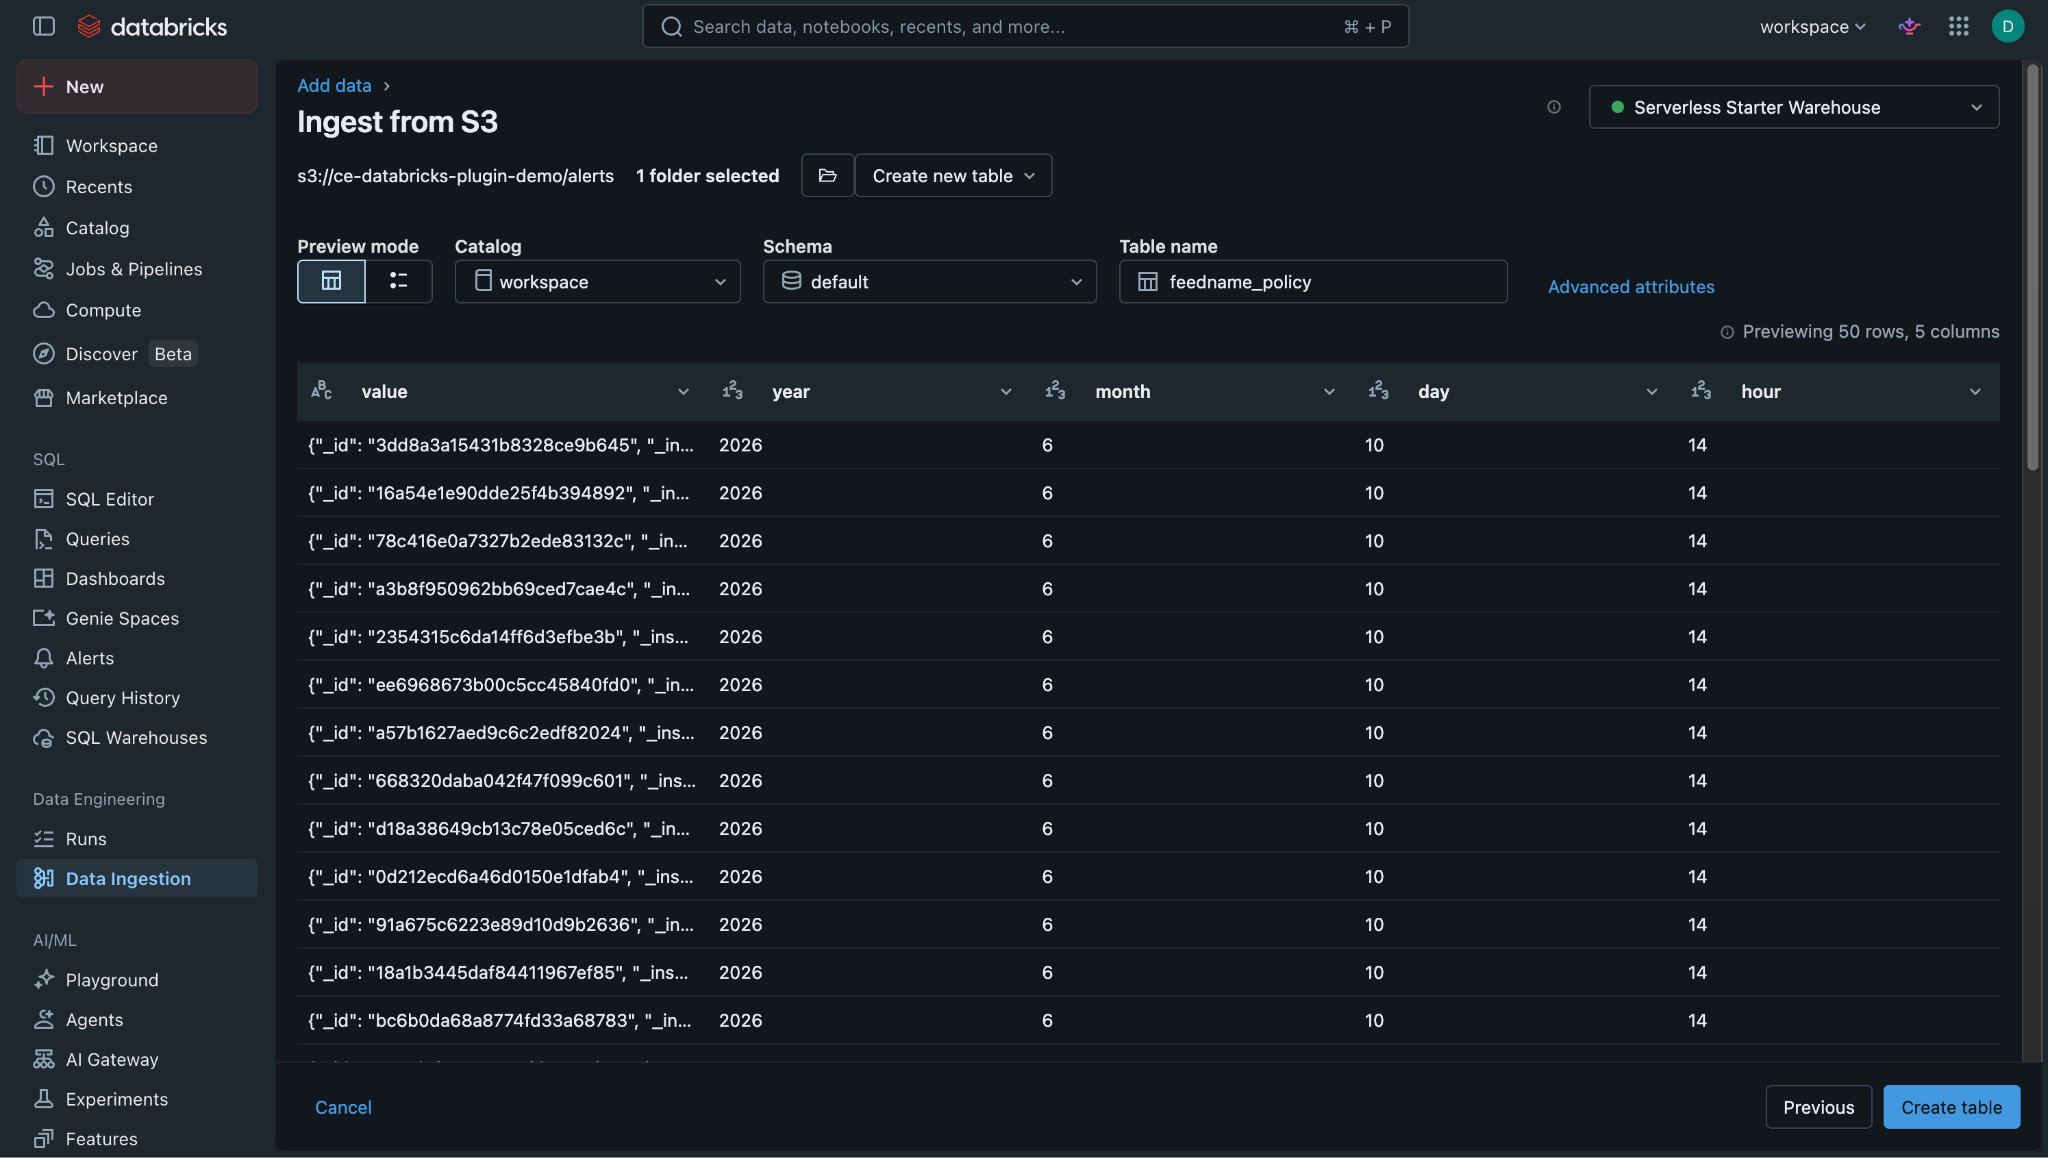
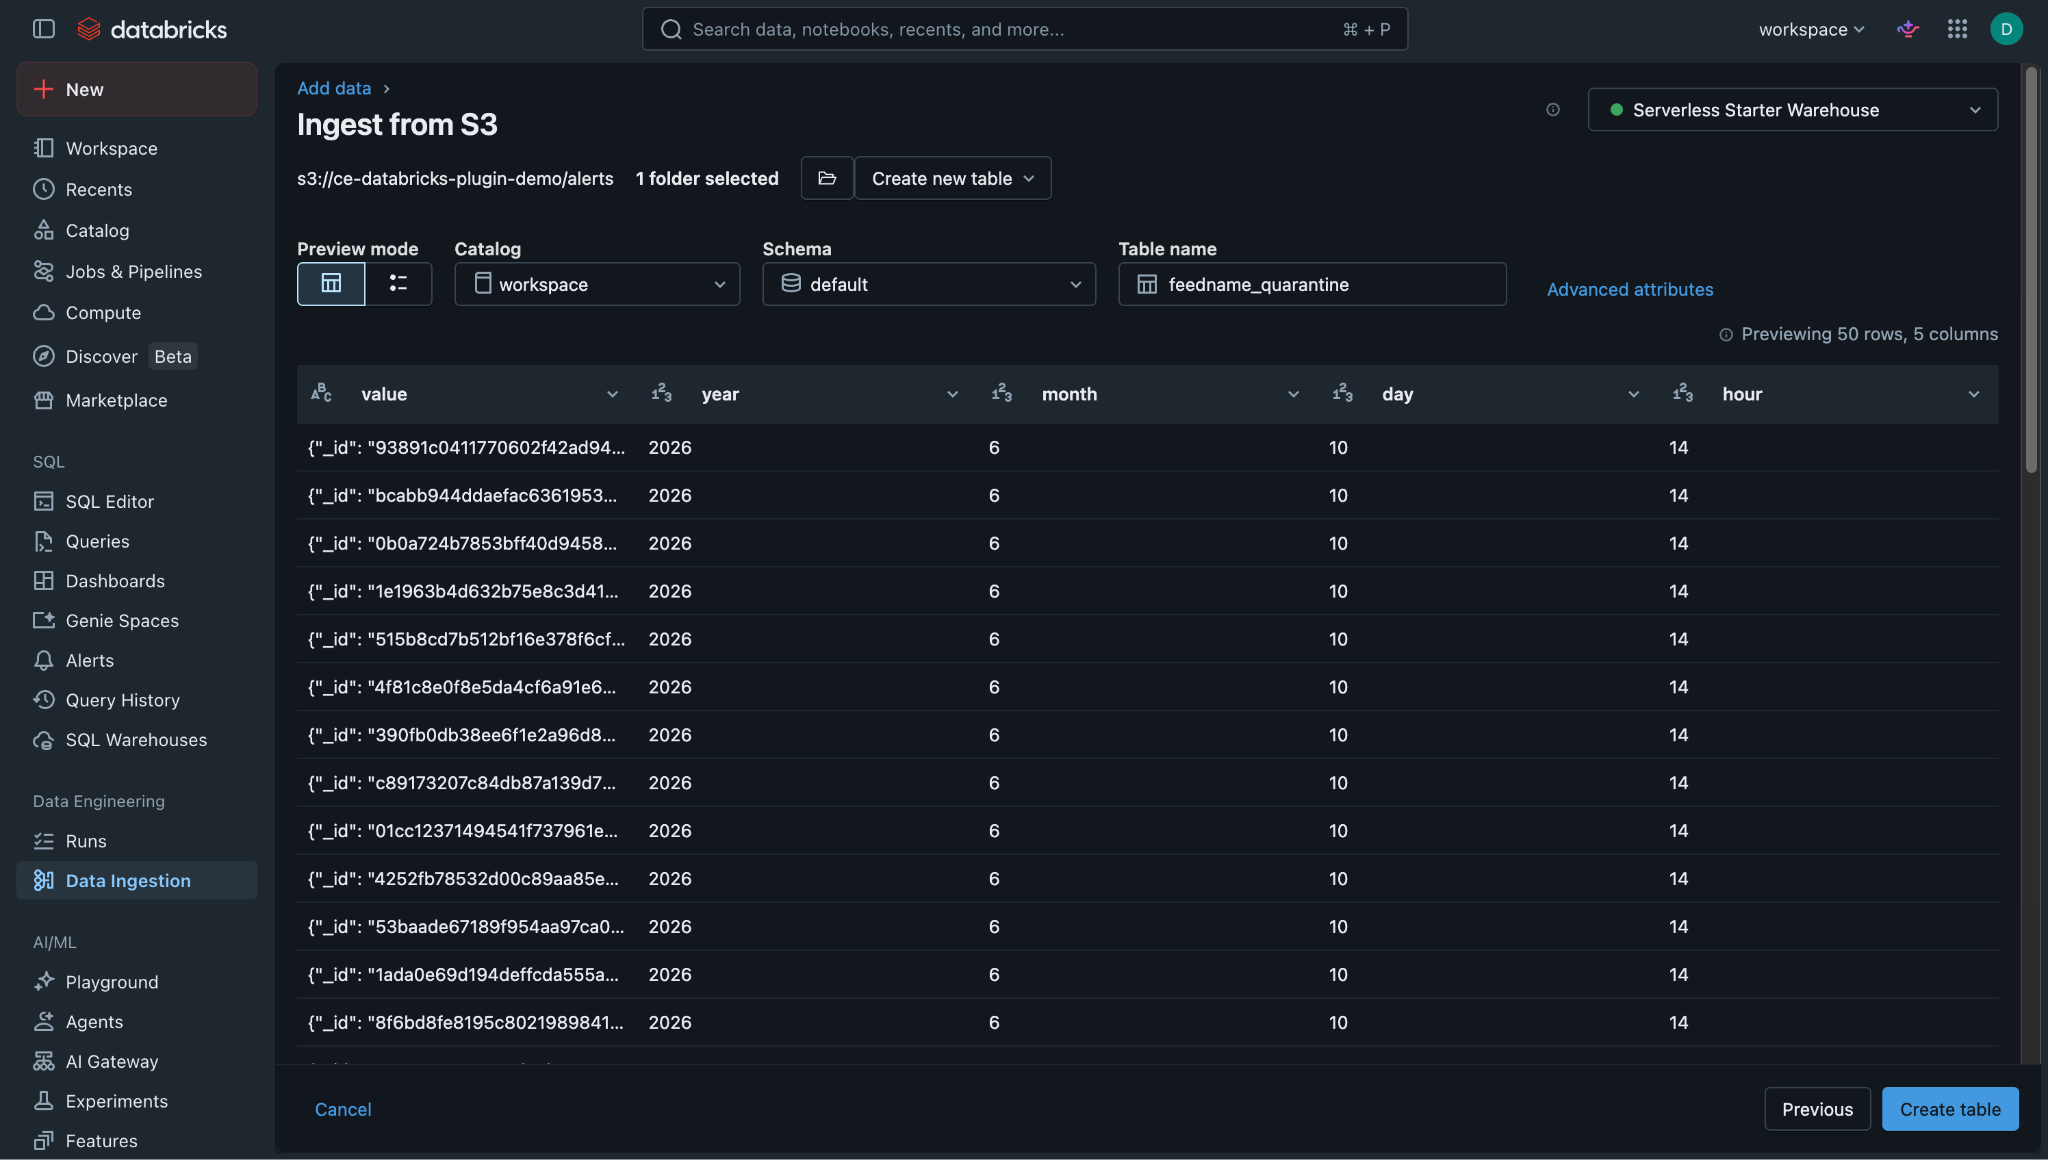
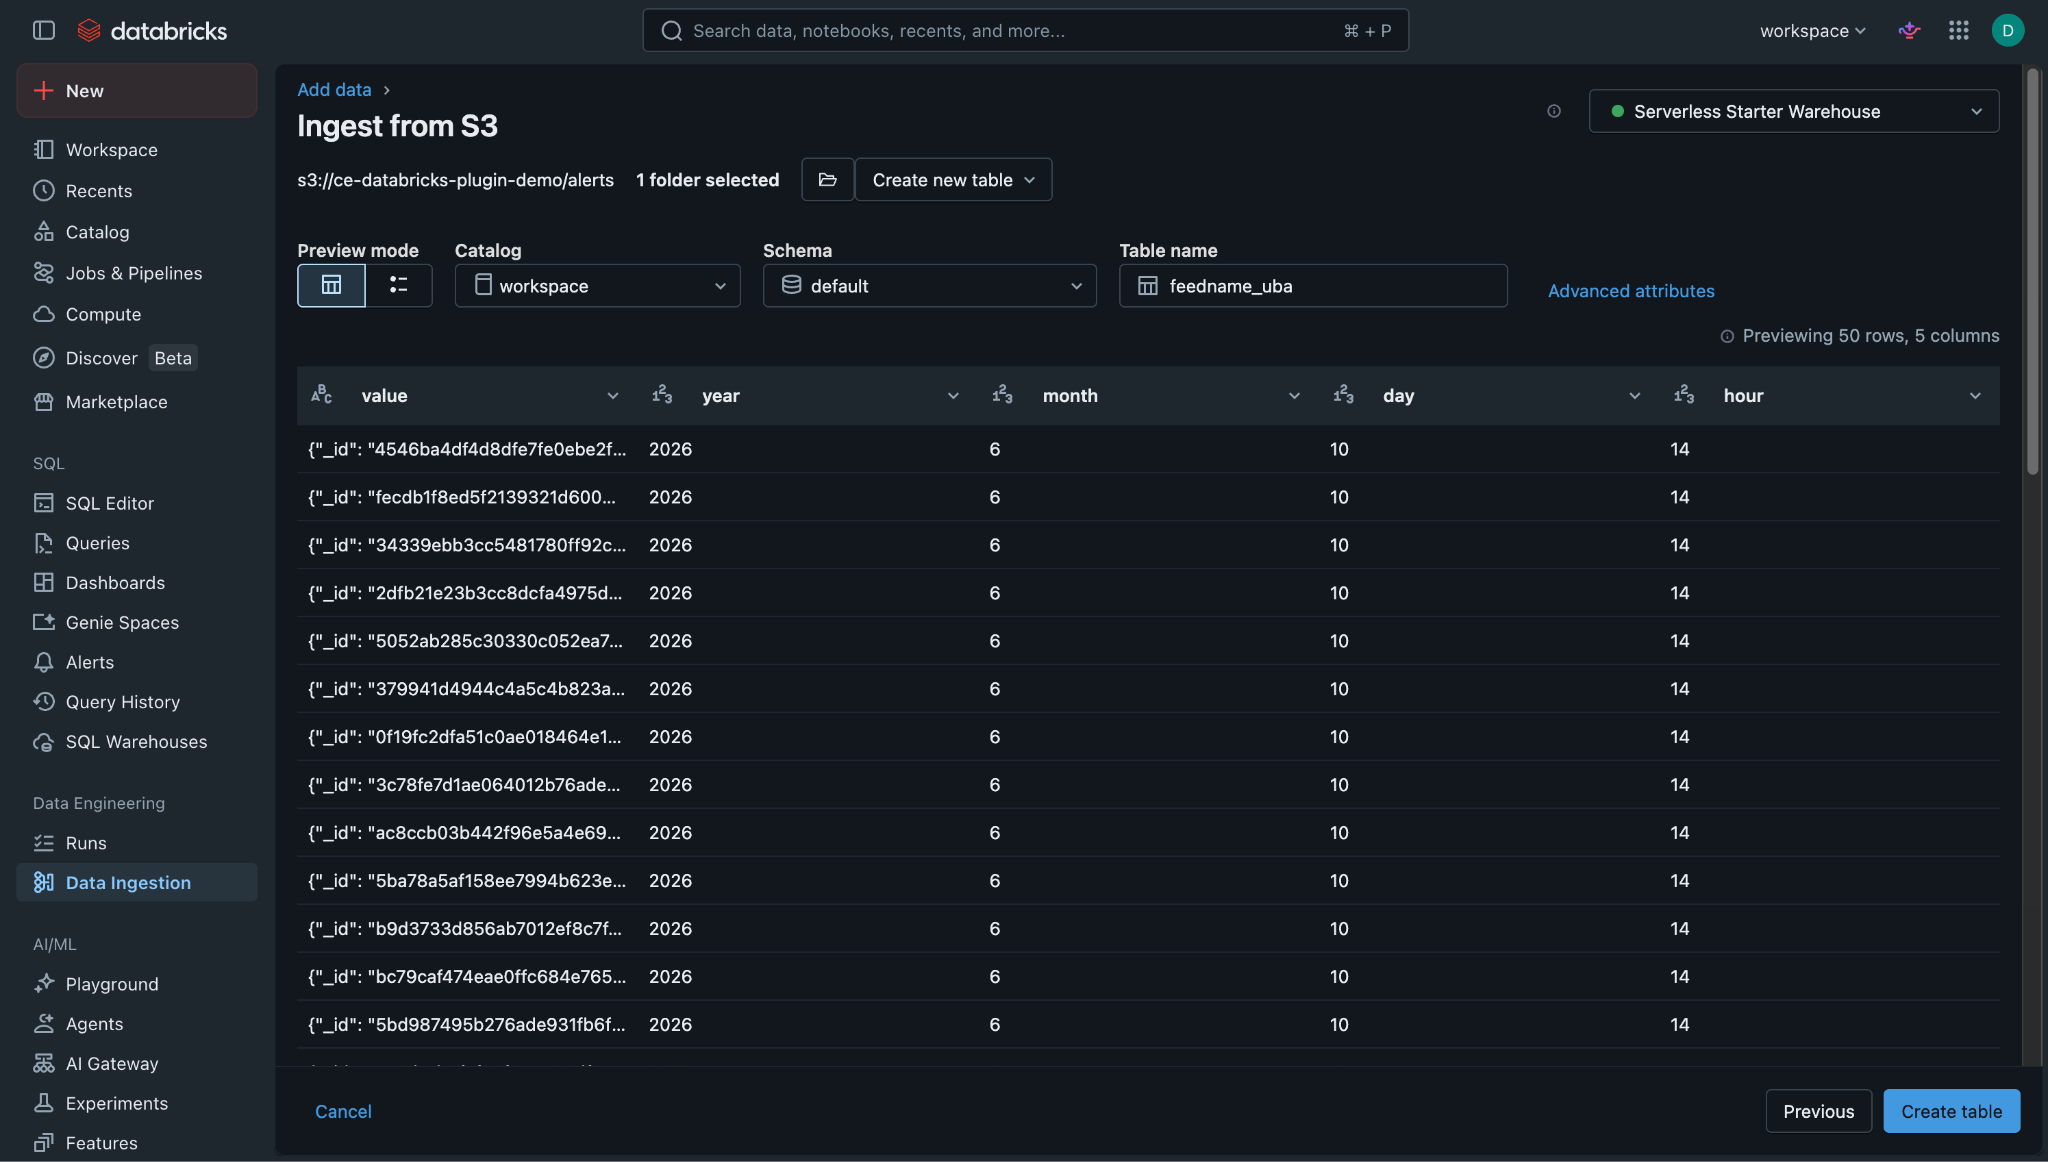
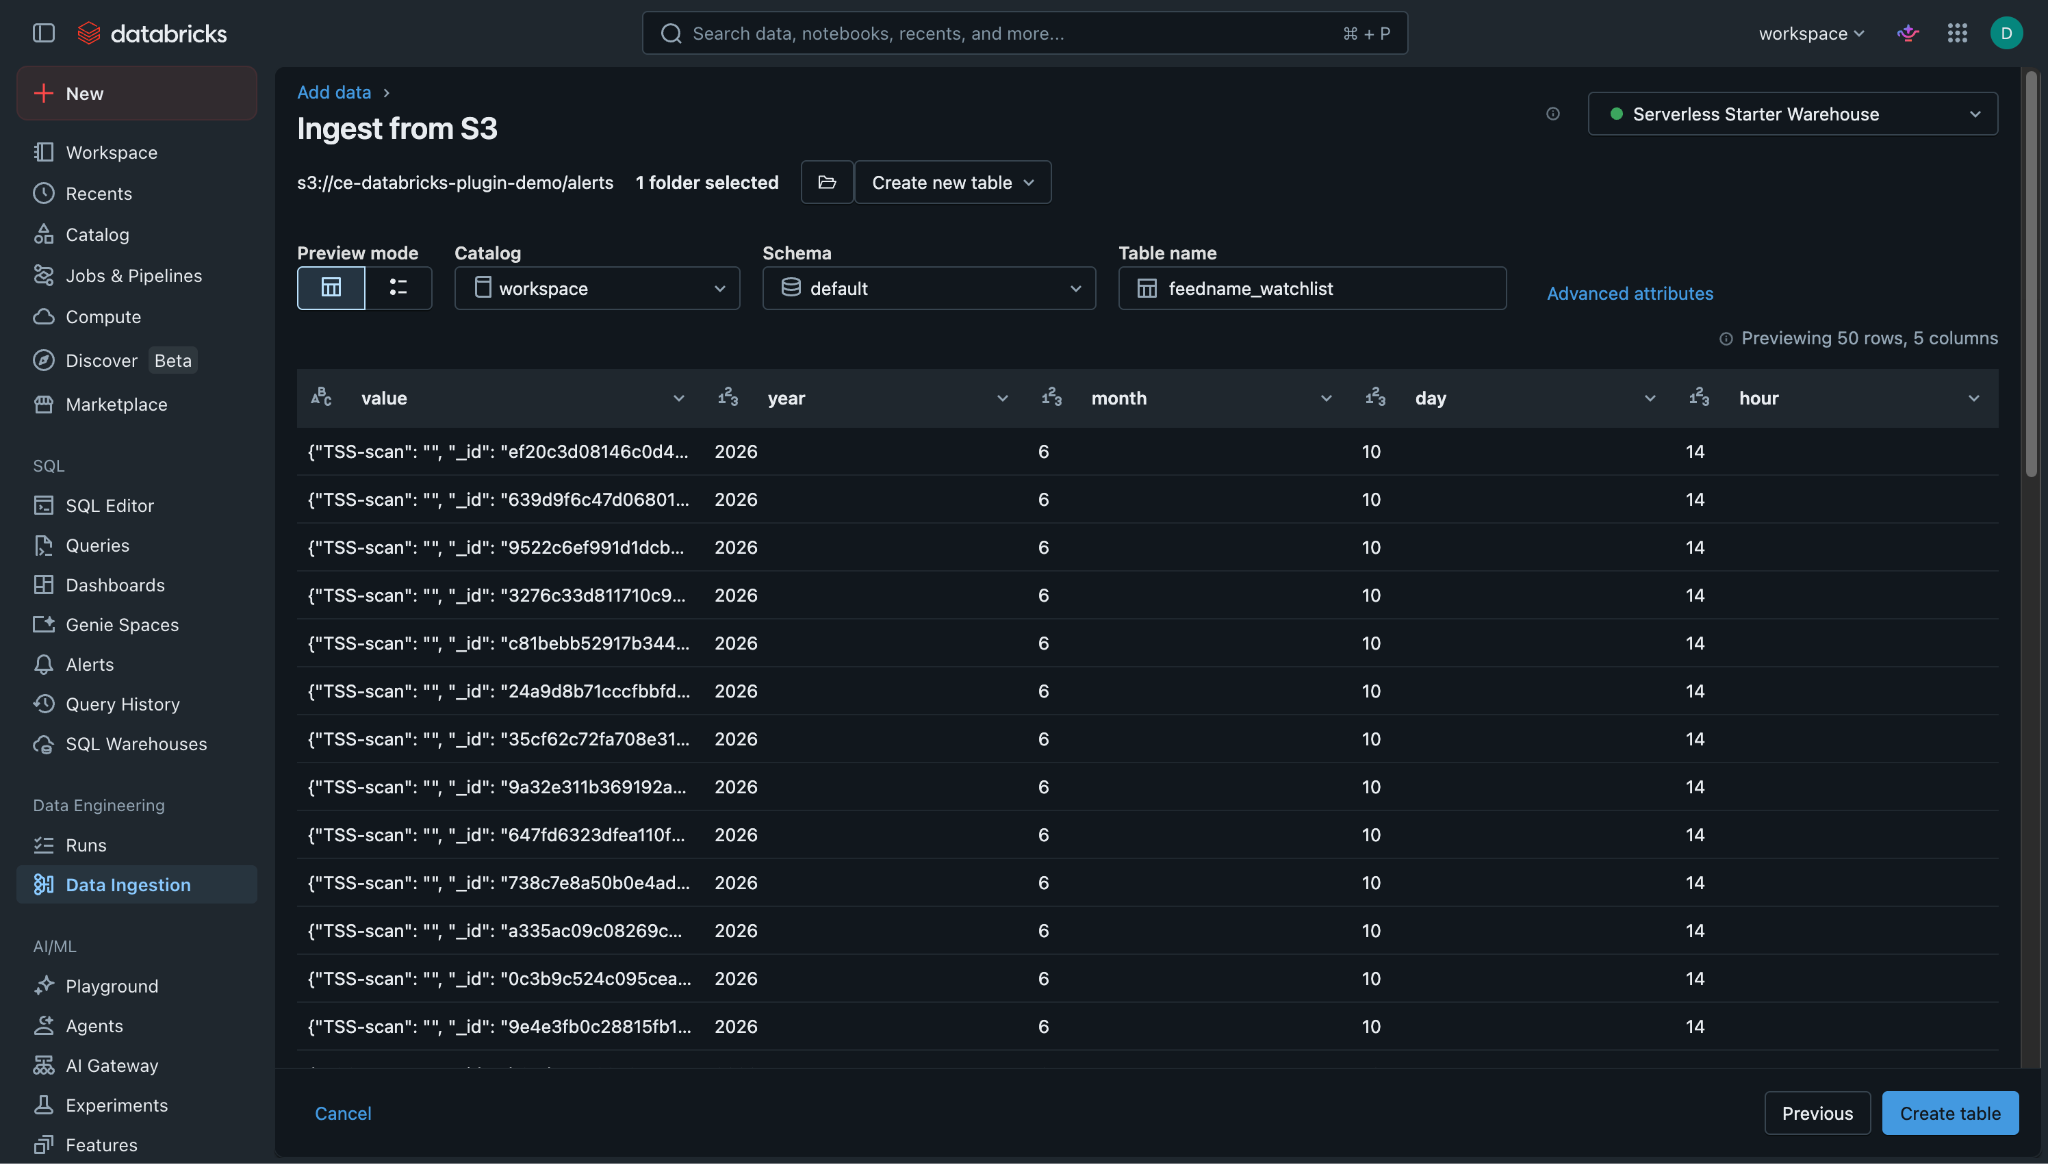
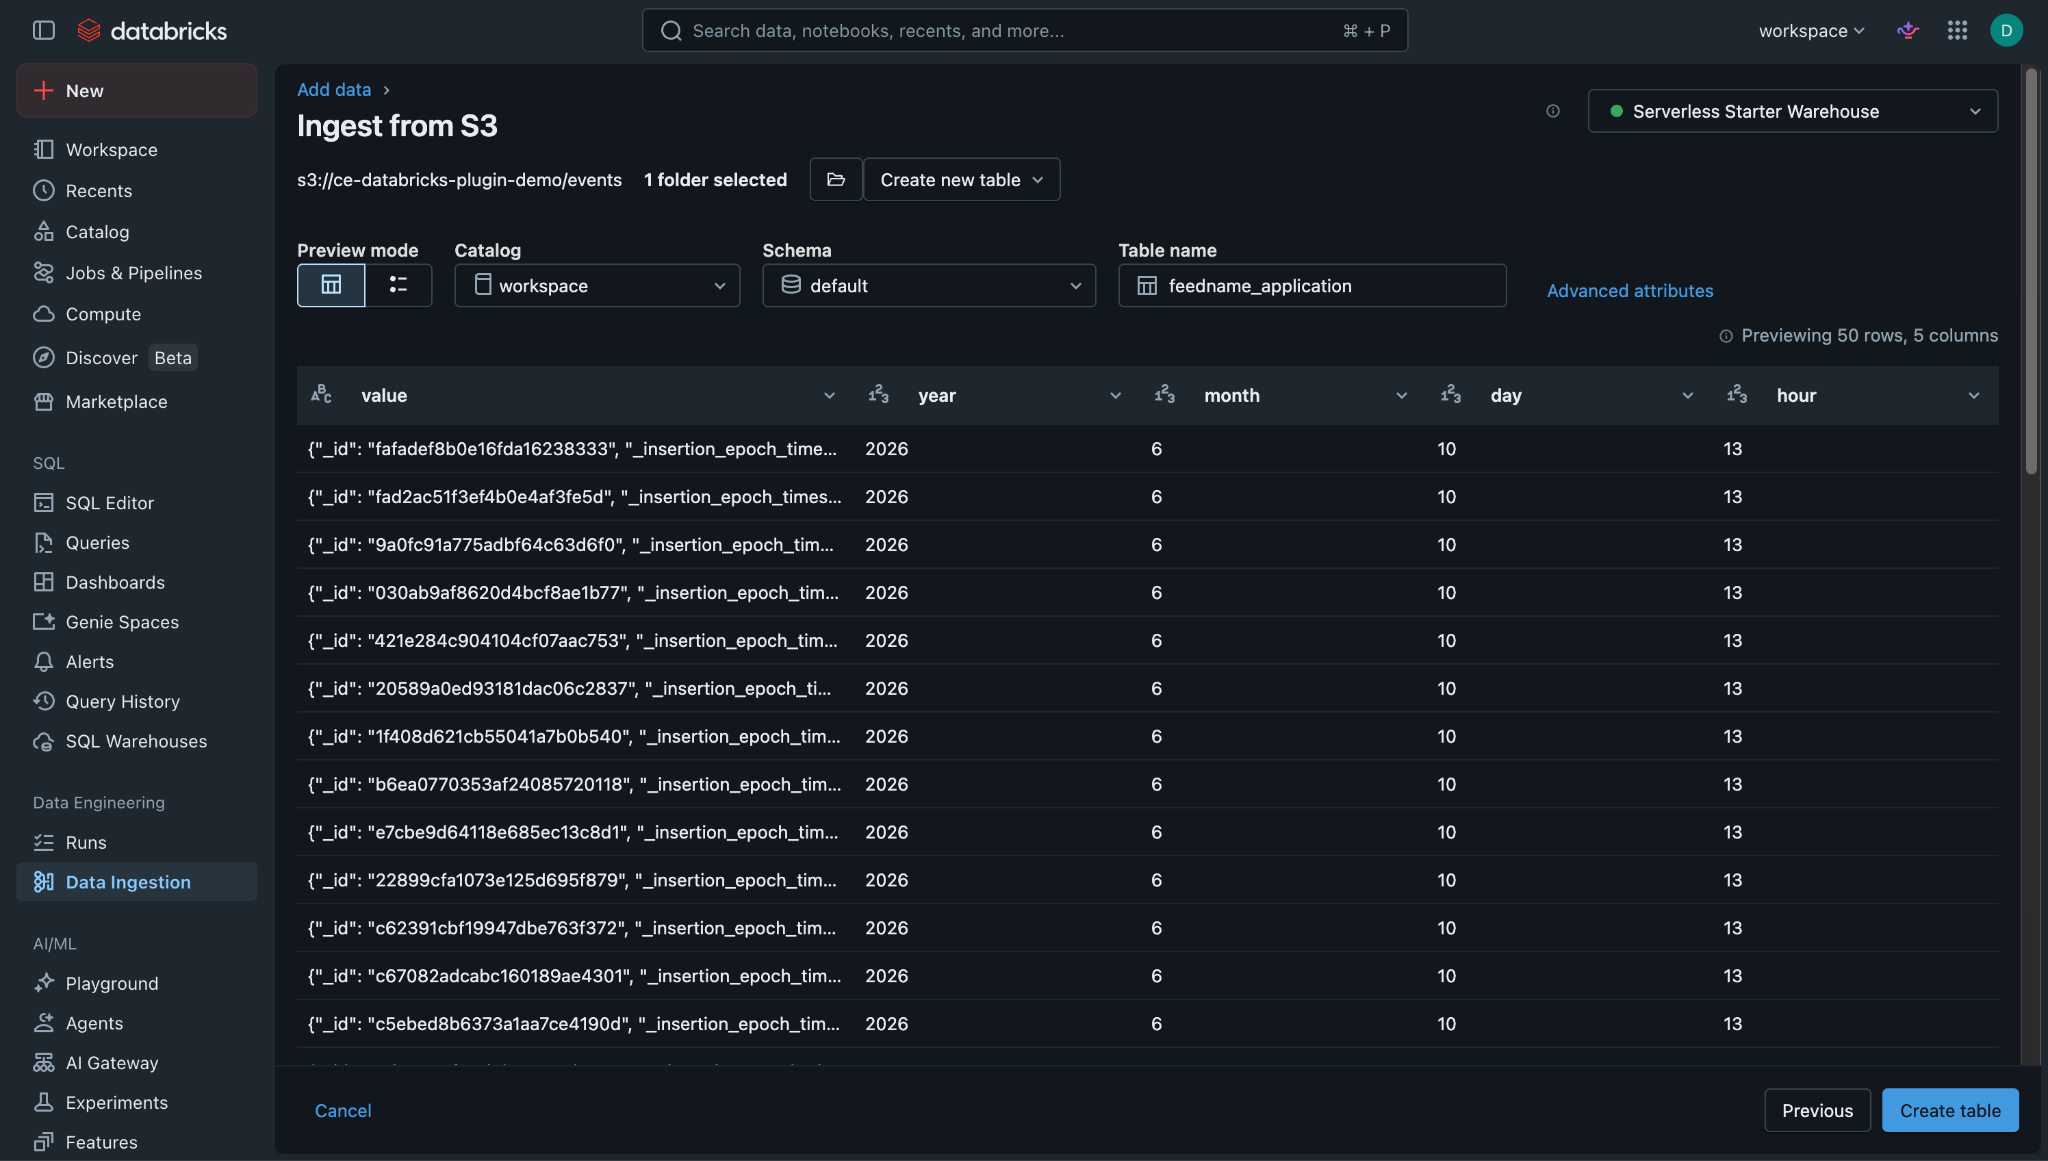
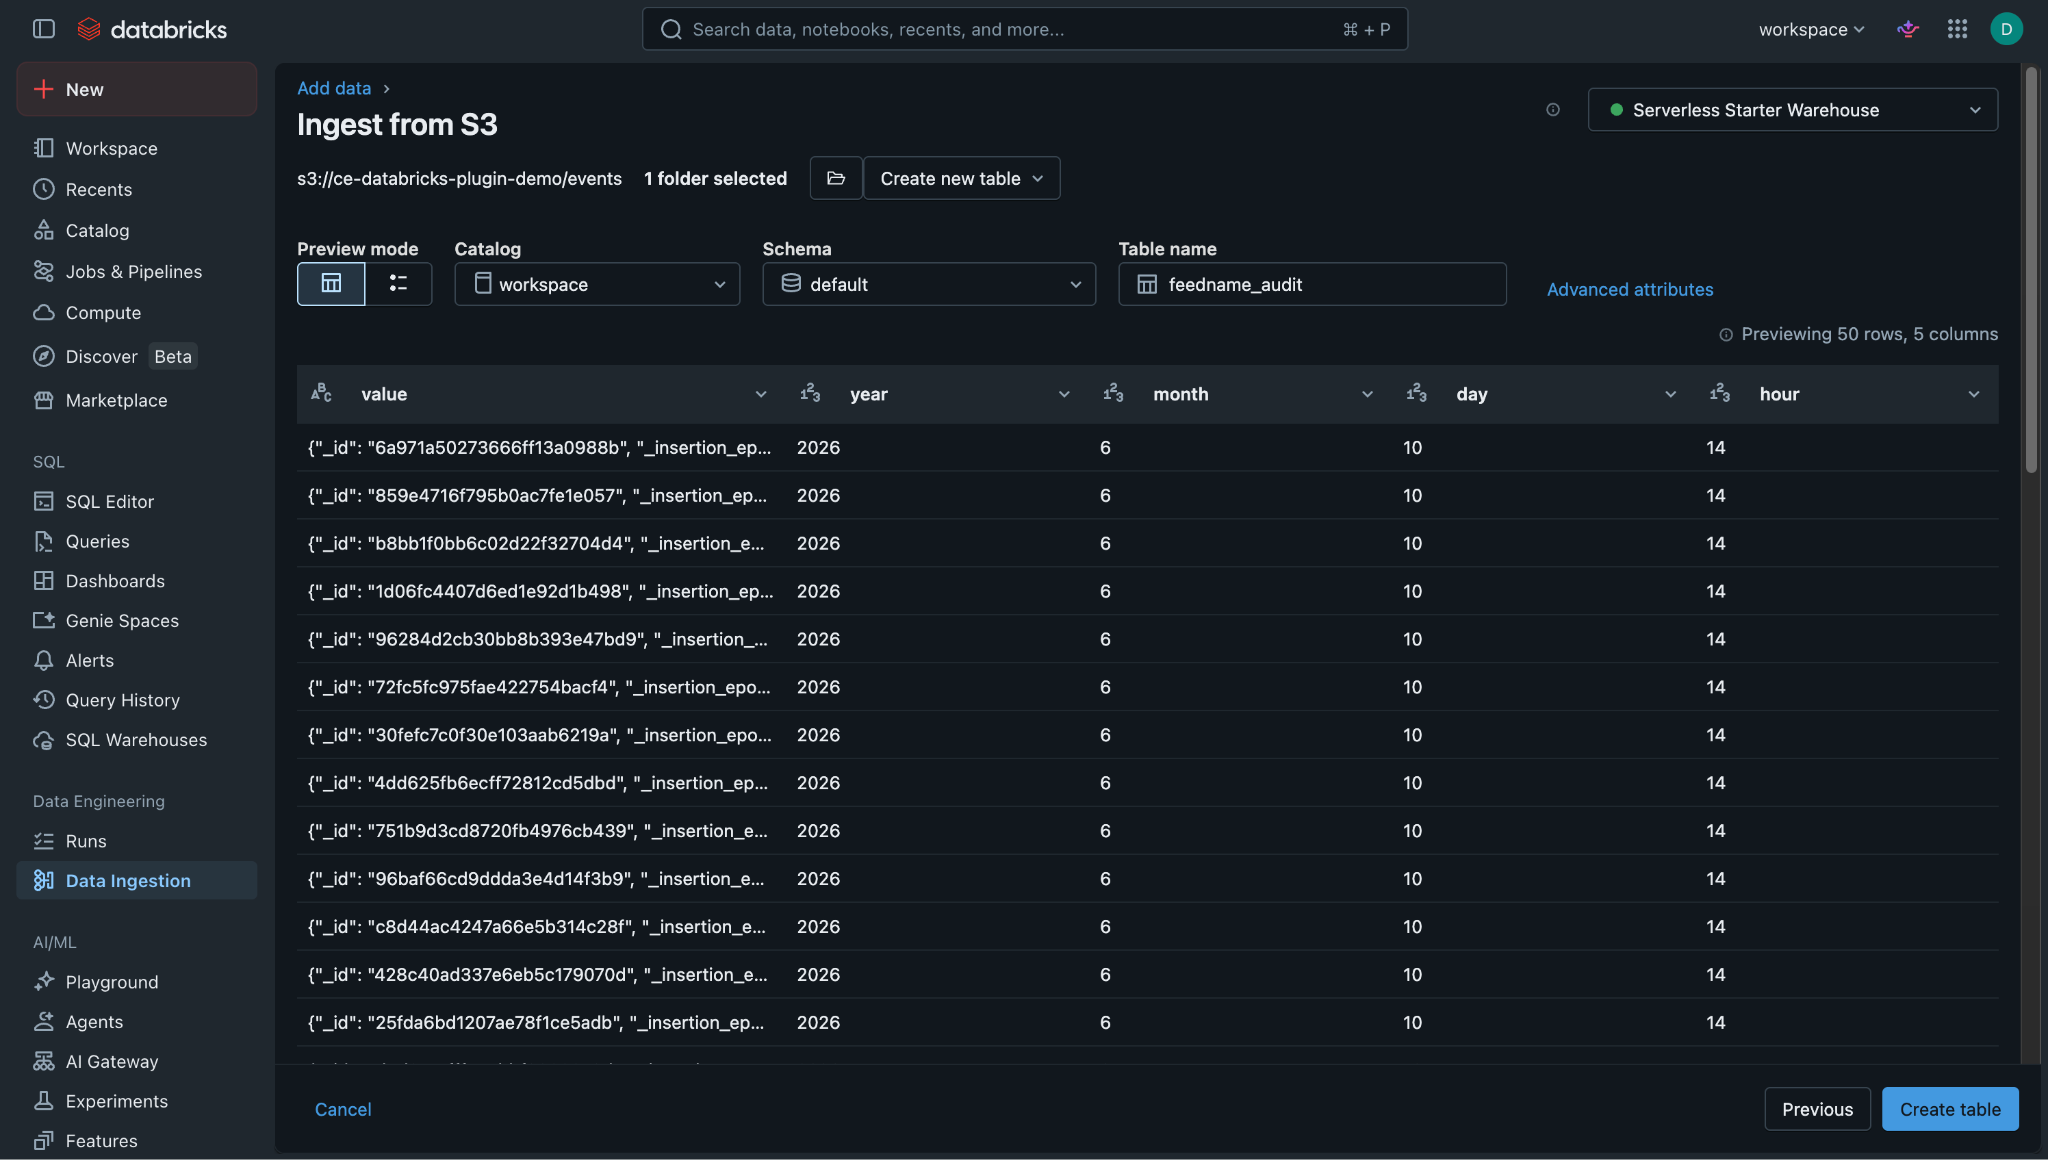
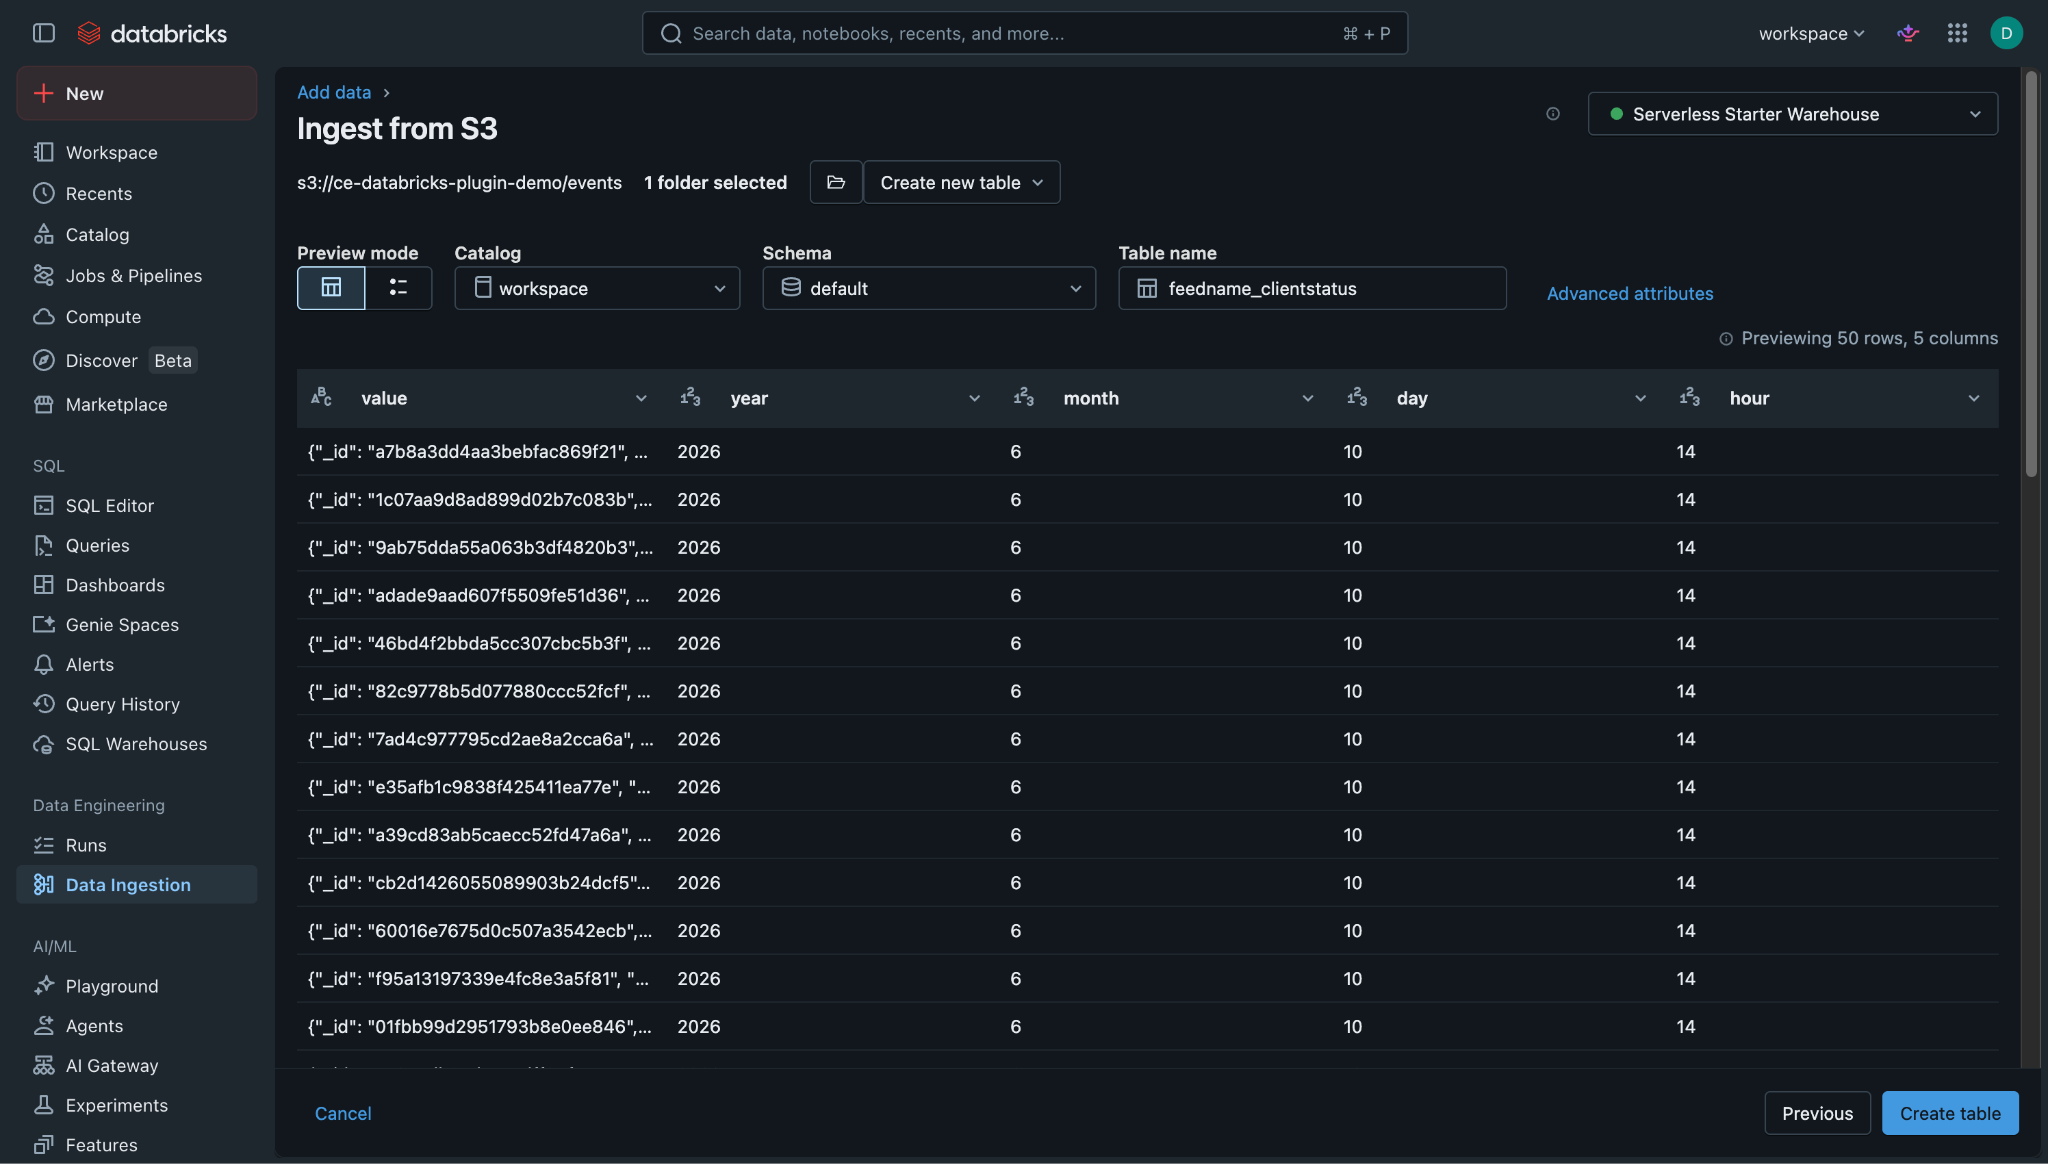
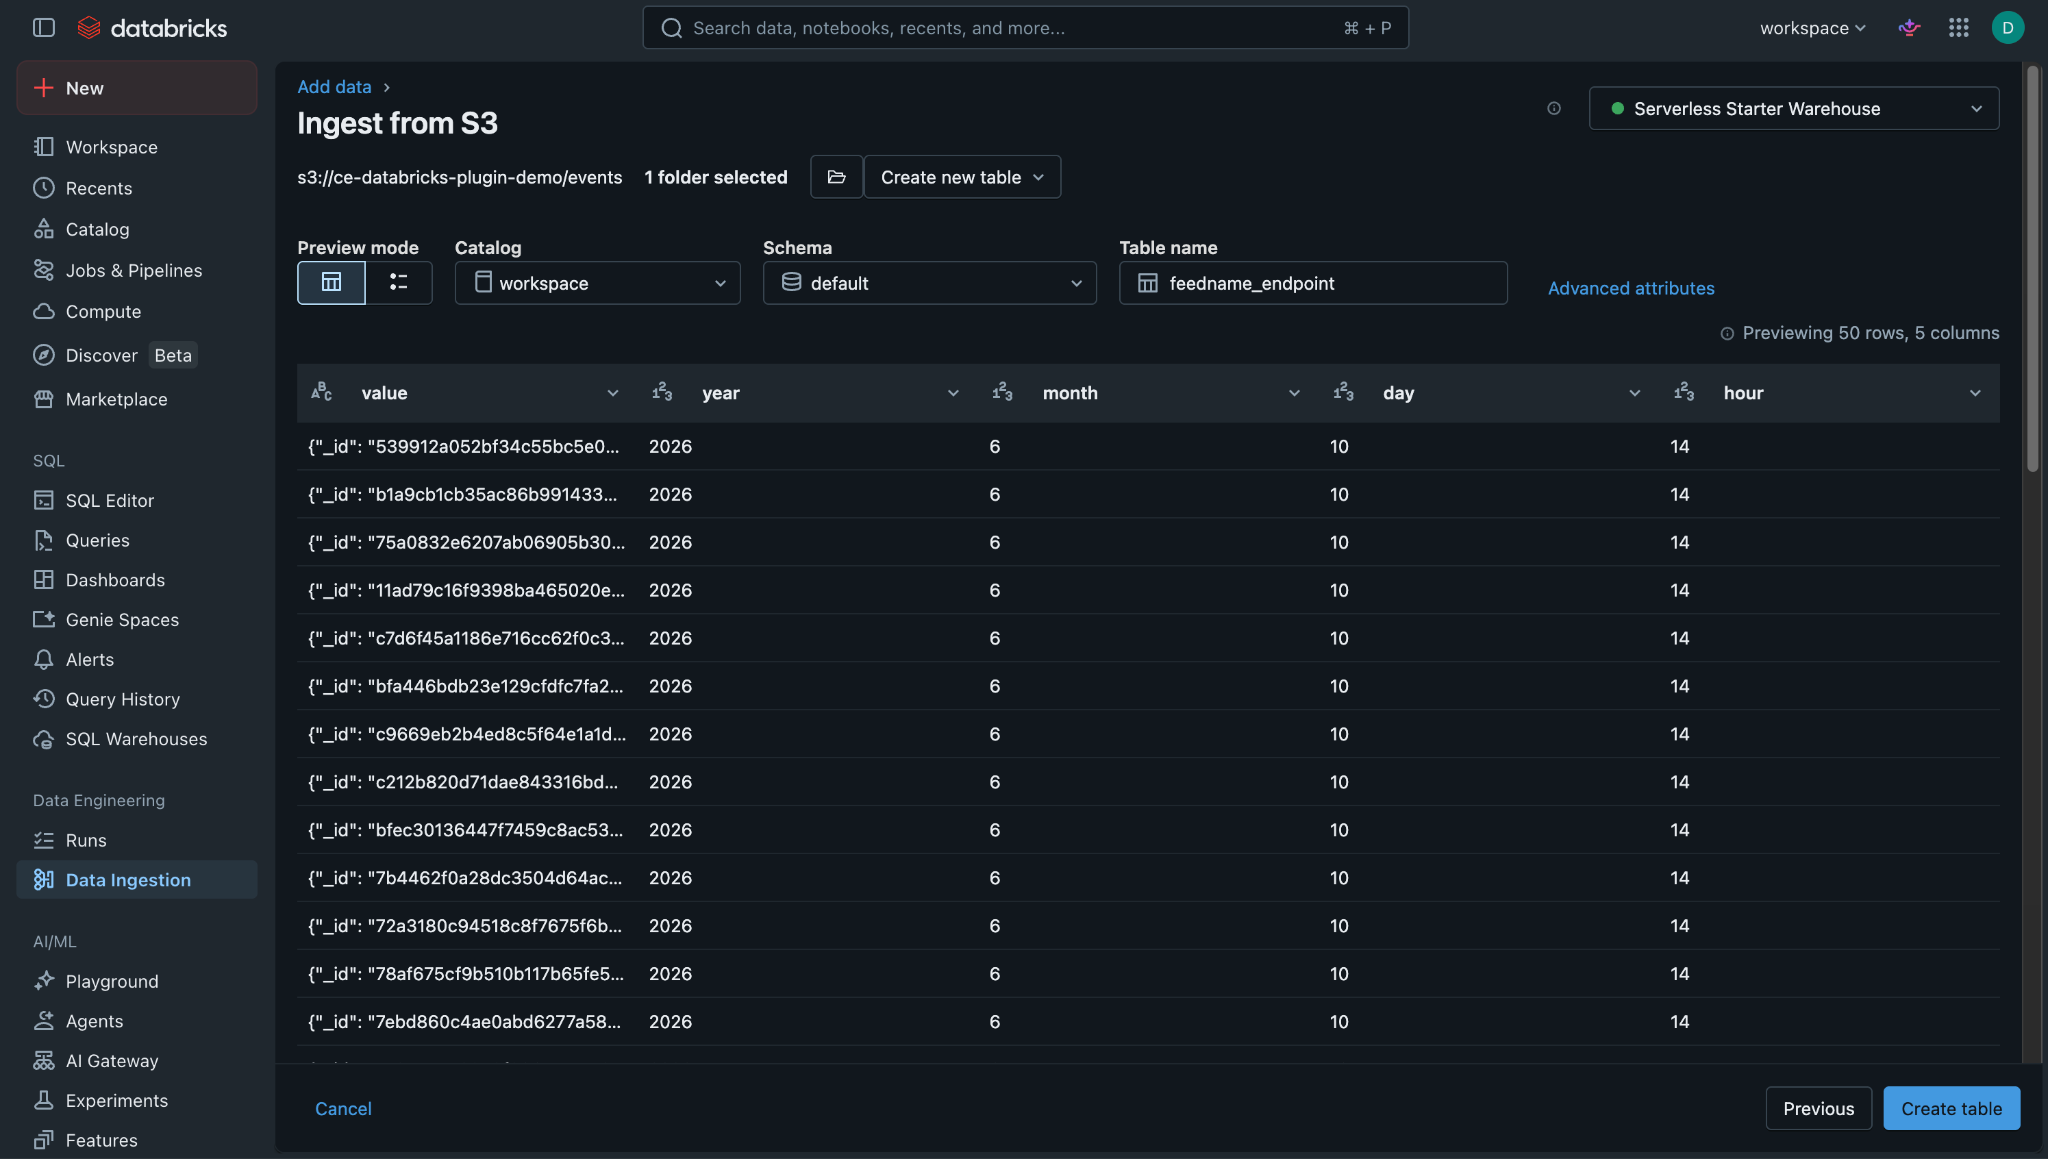
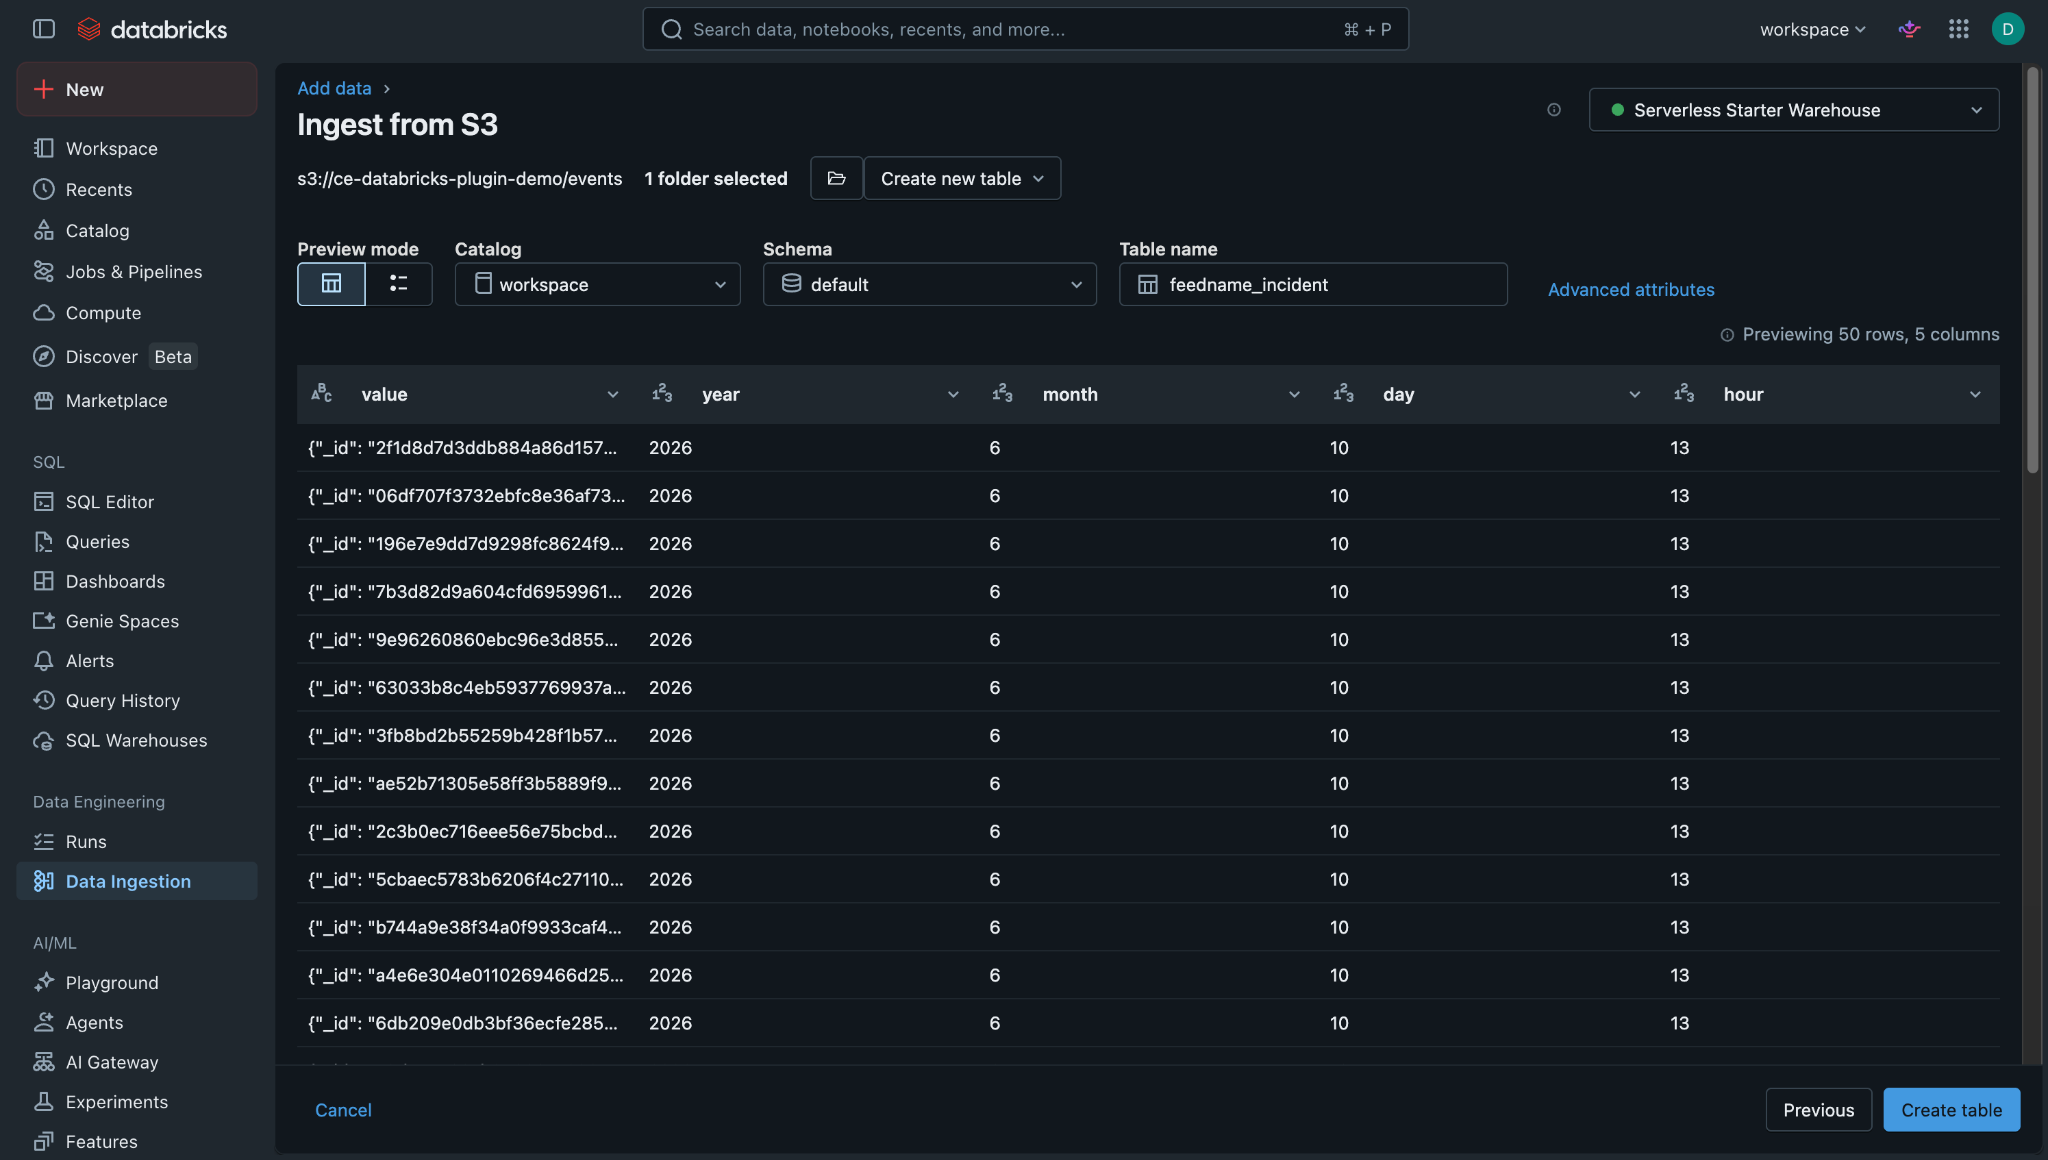
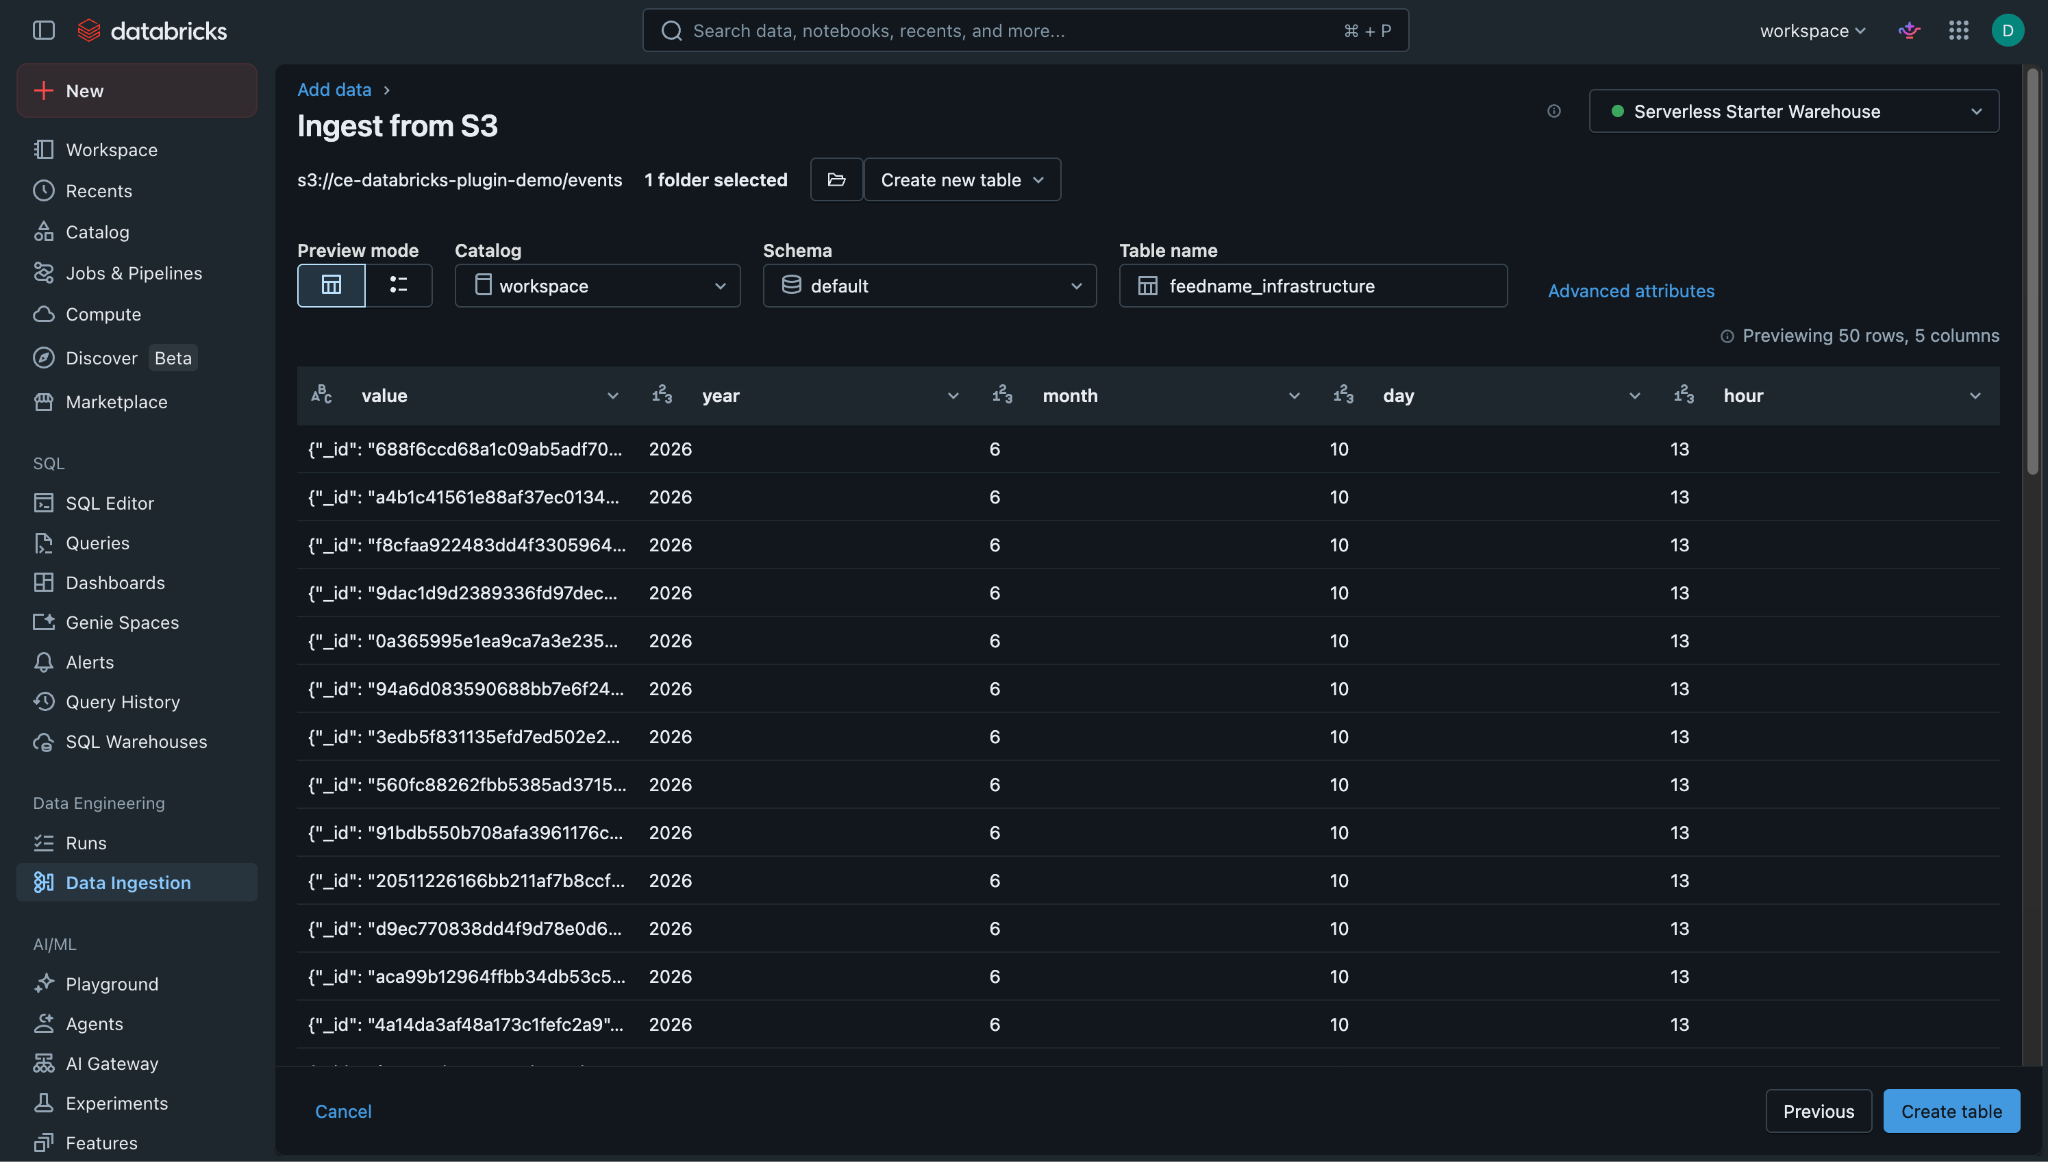
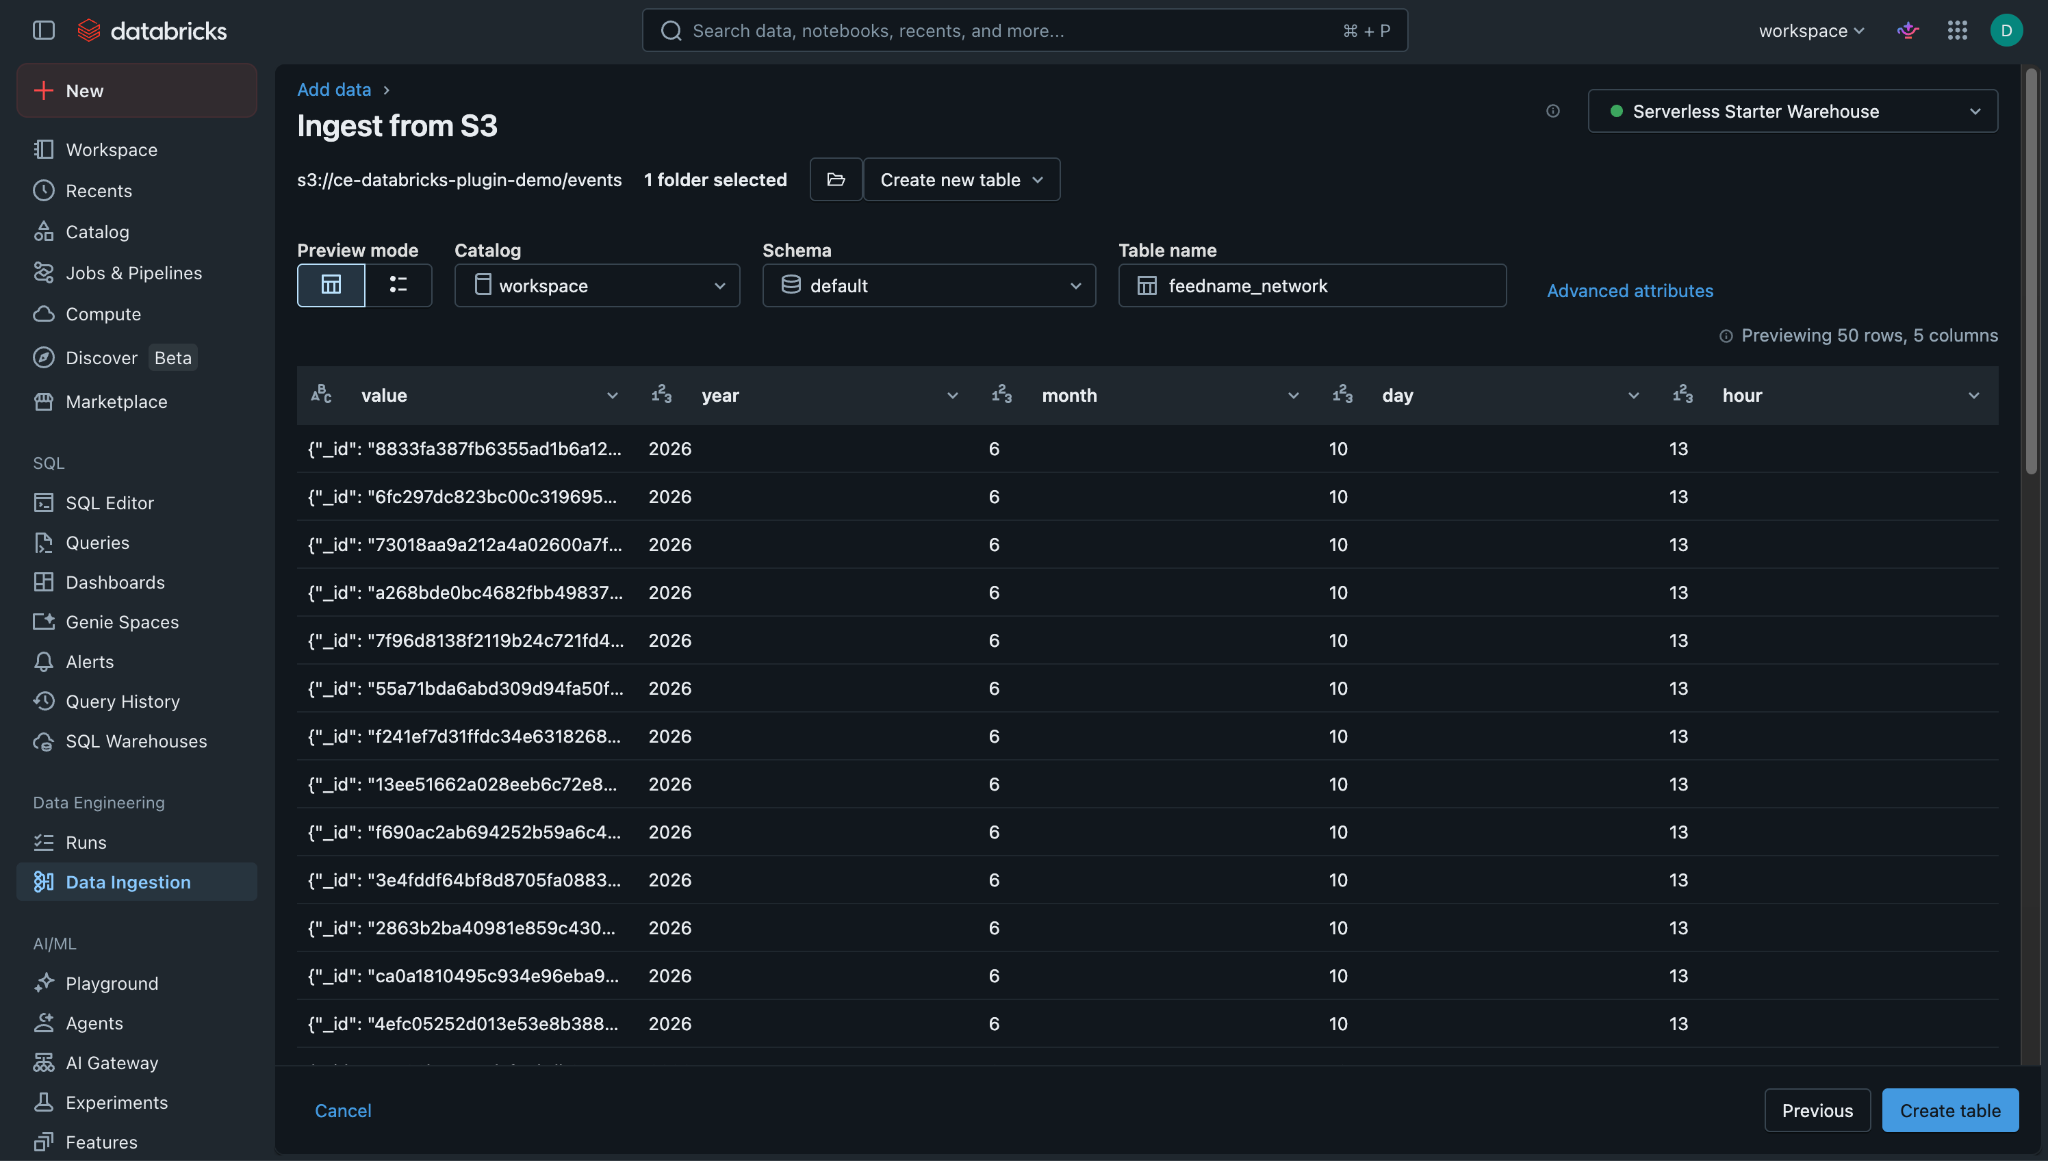
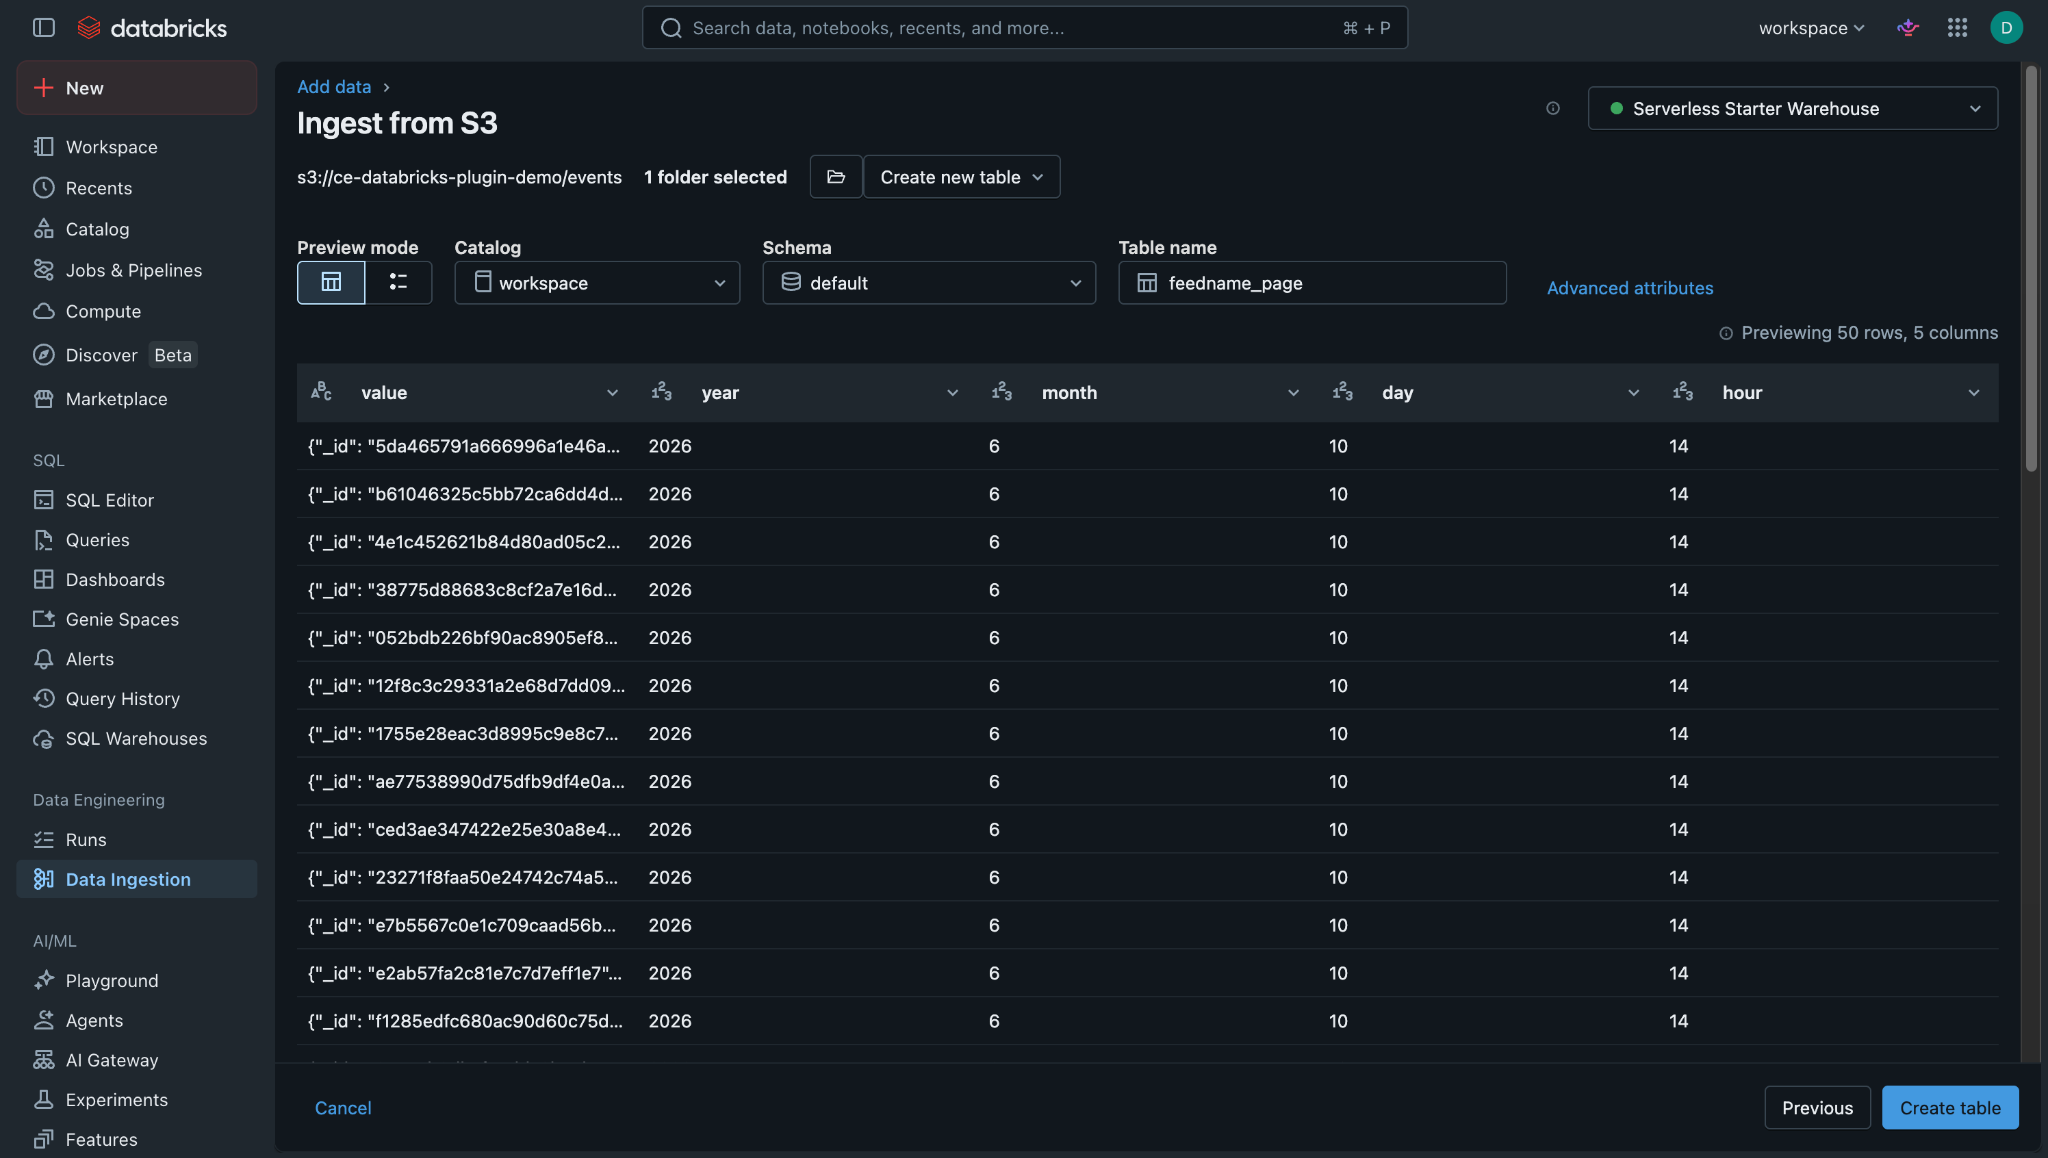
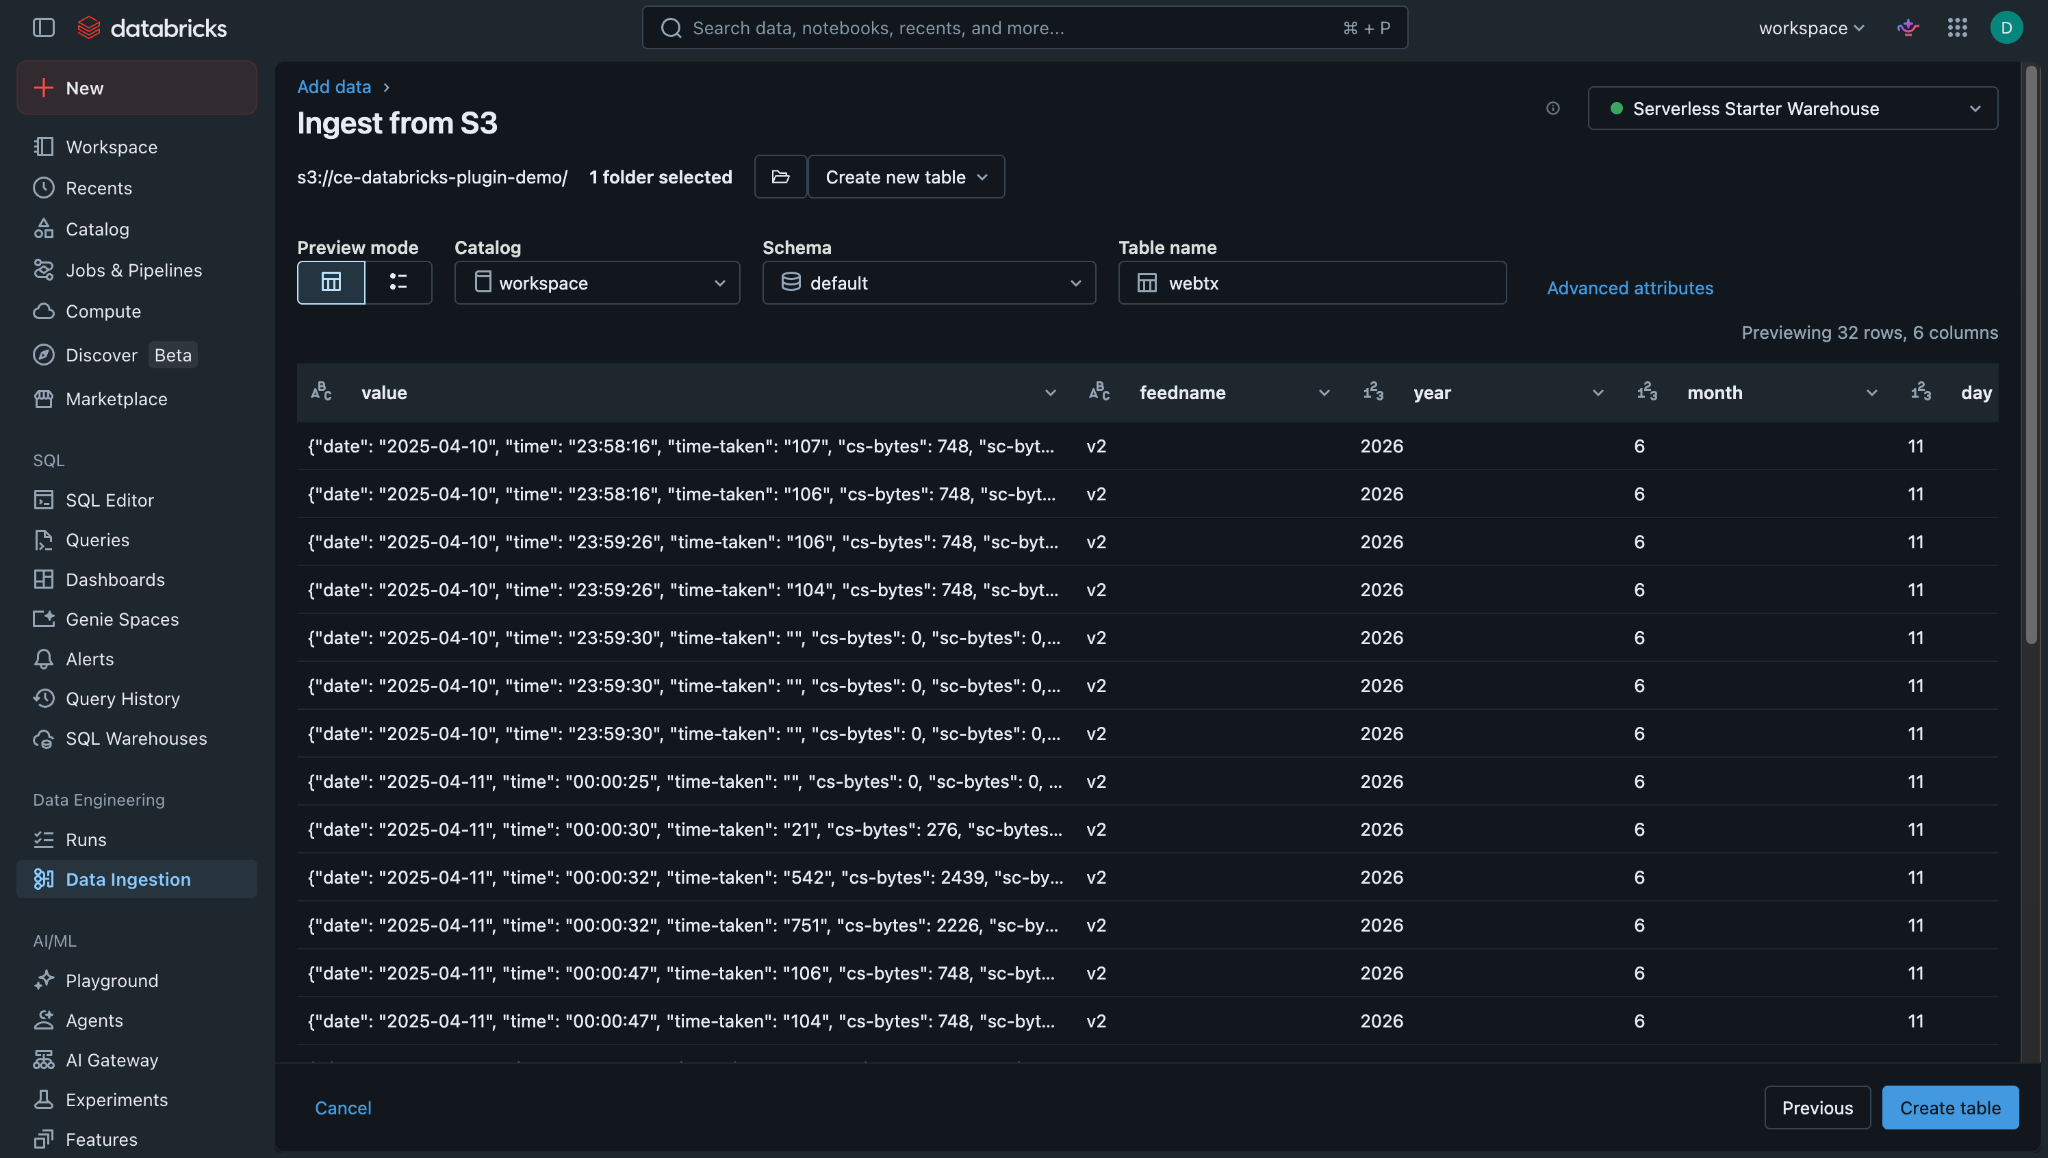
Log in to the Databricks instance and go to the Data Ingestion page.
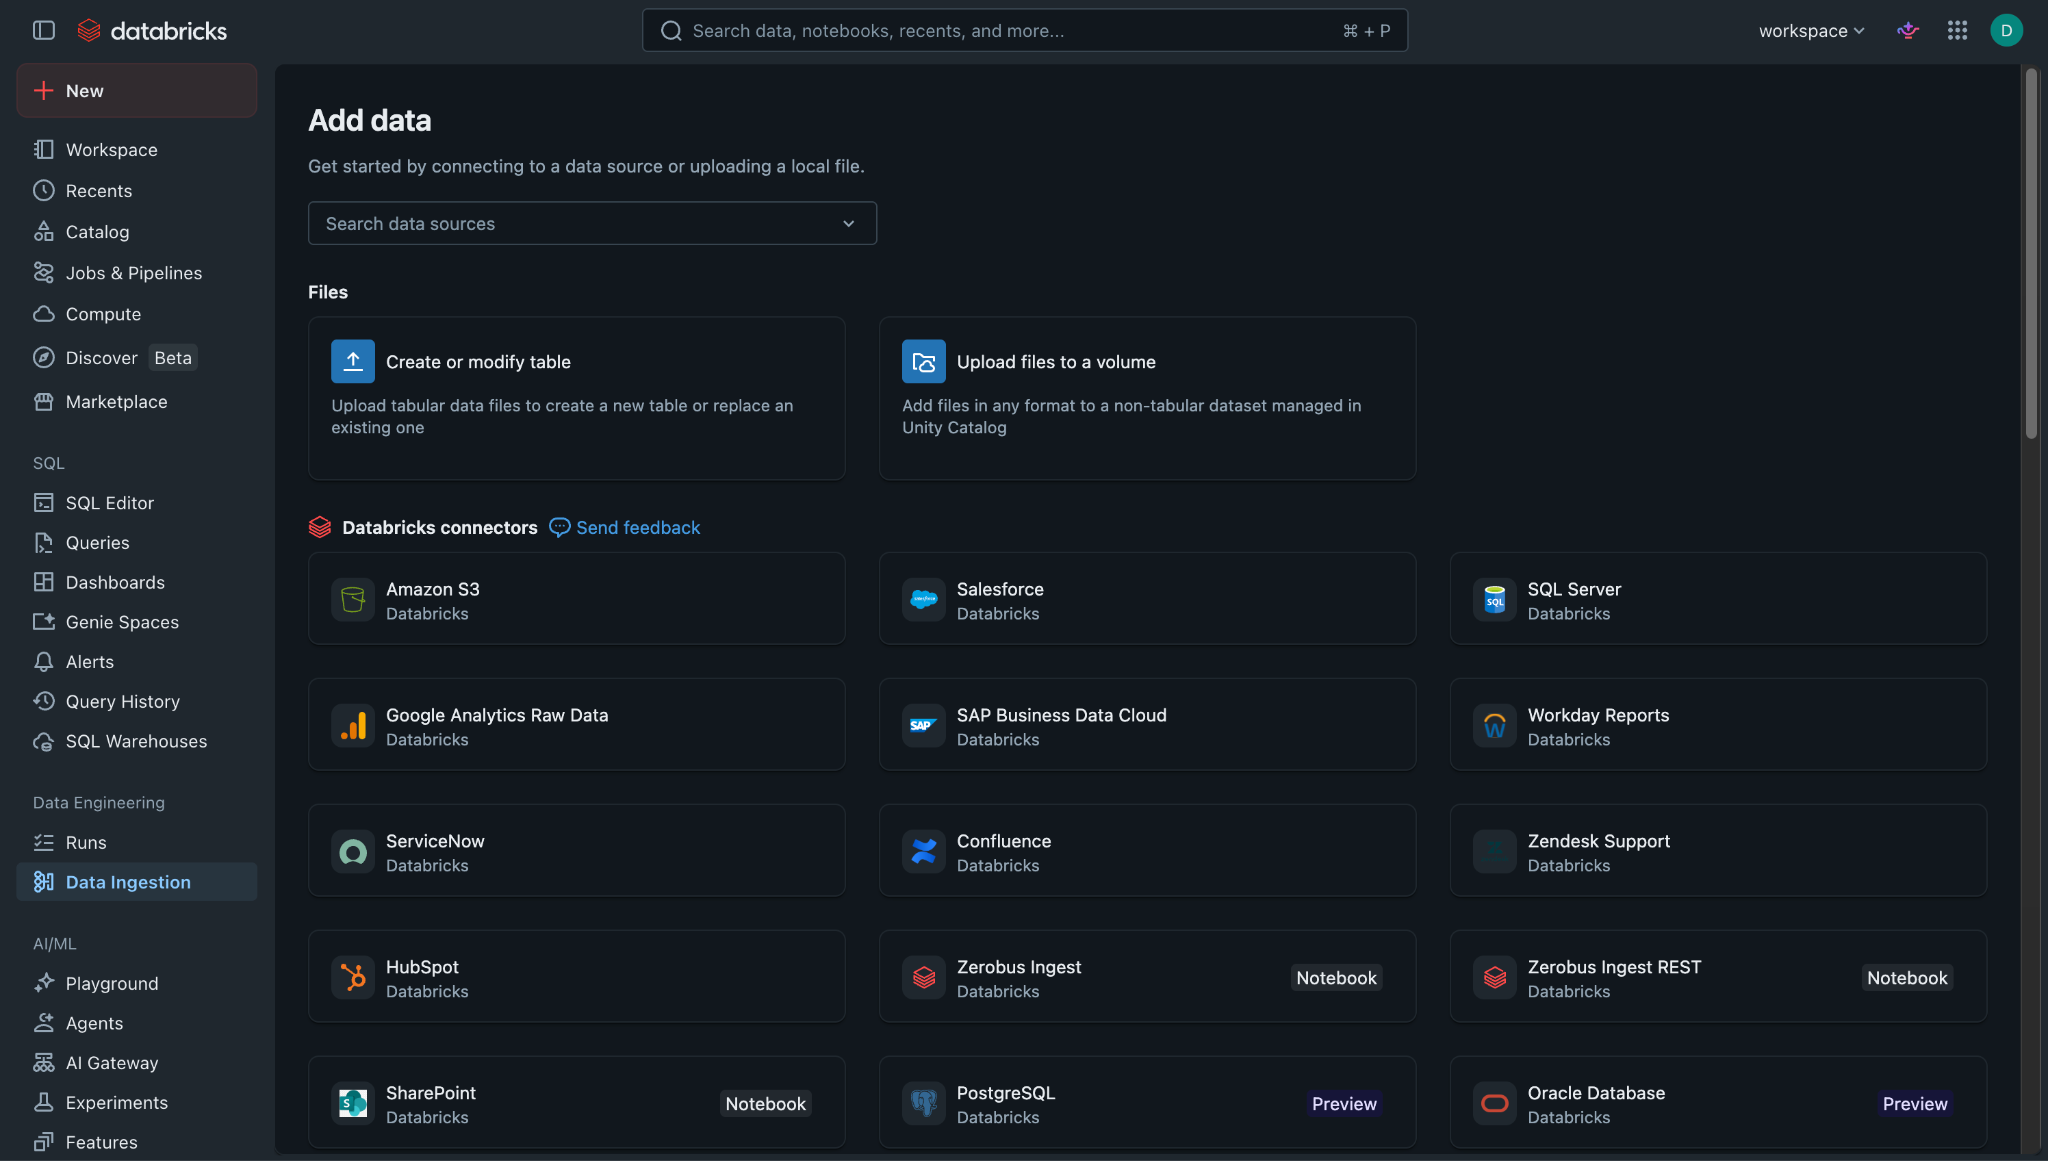
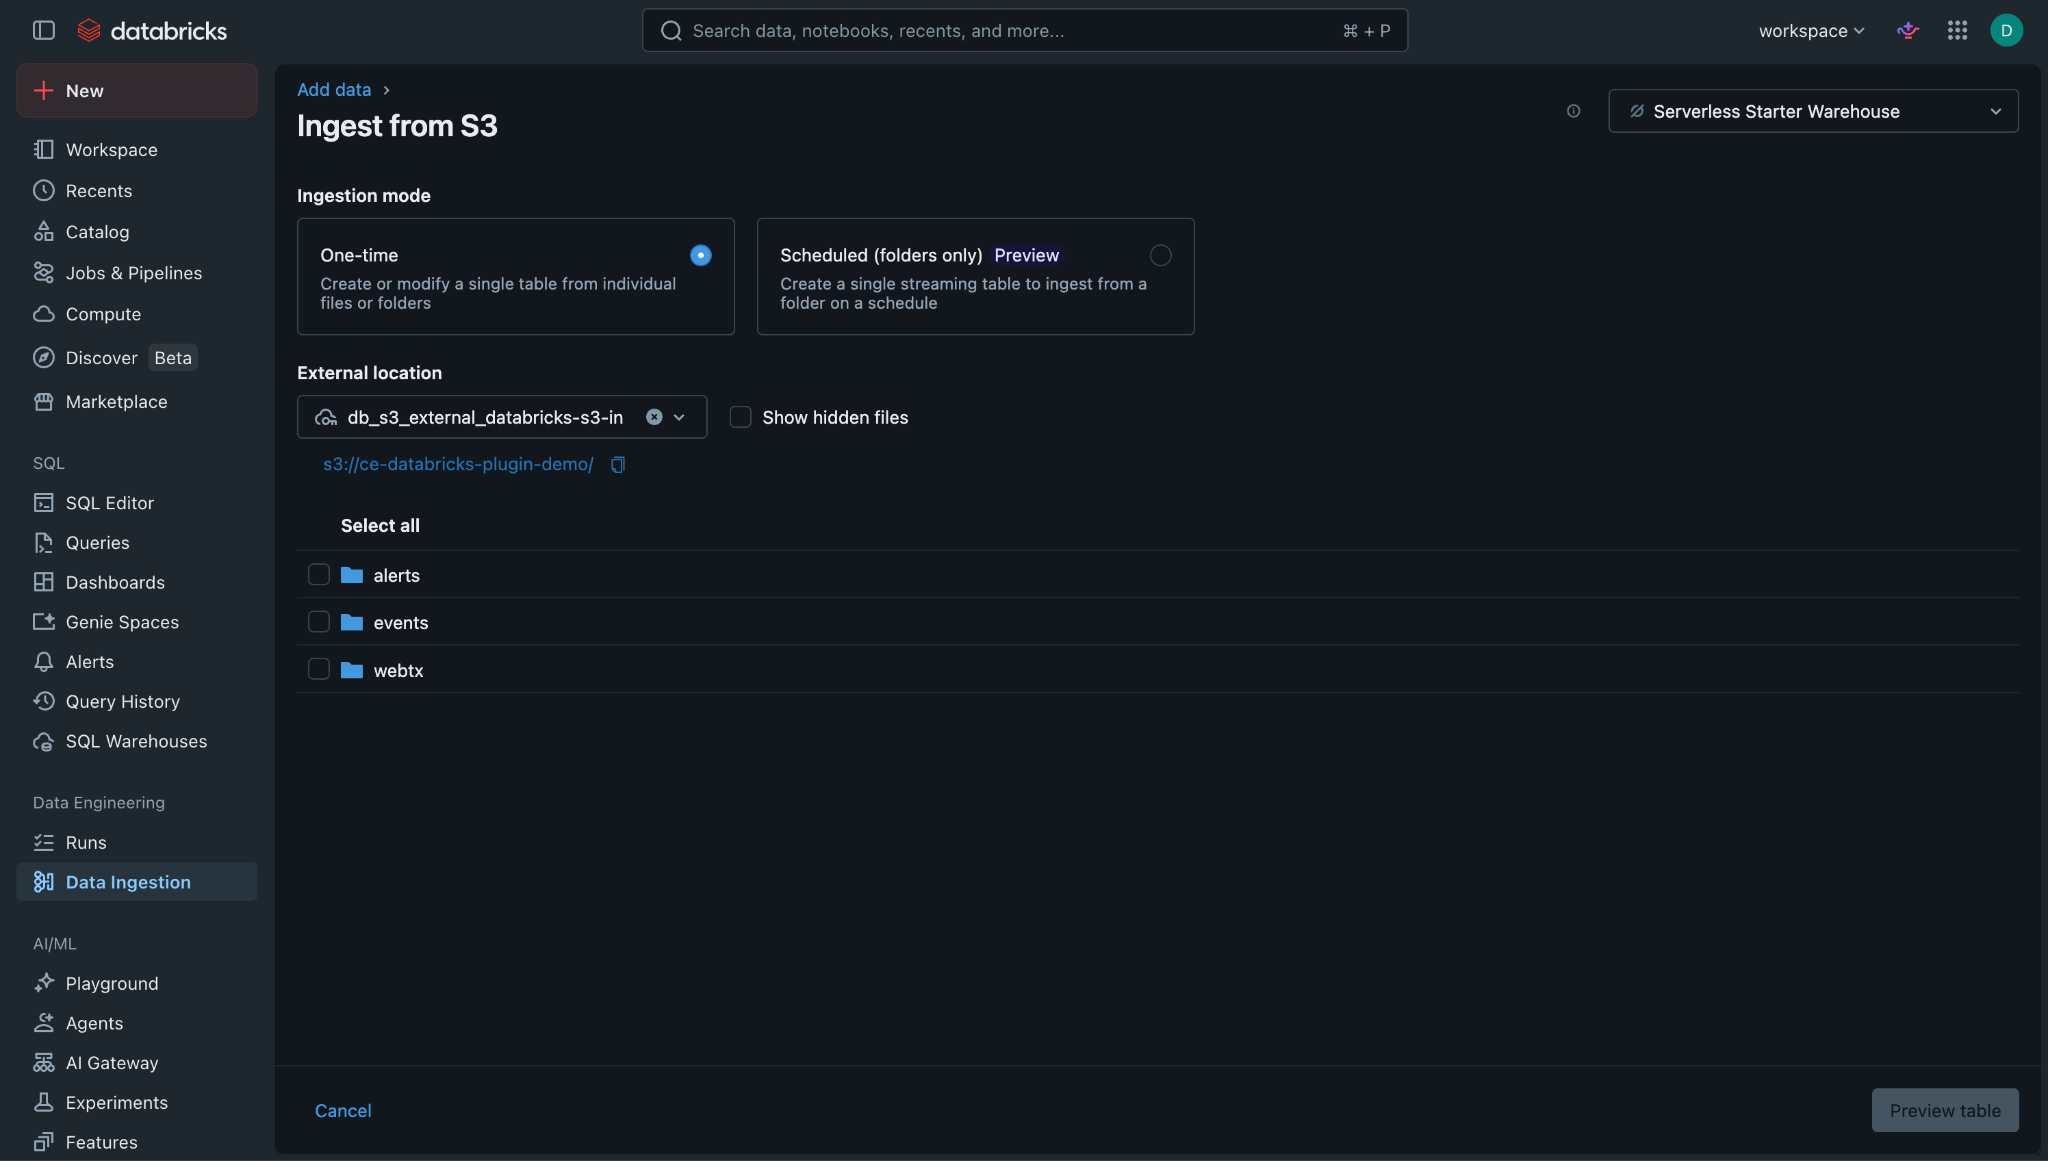
Click Amazon S3 under Databricks connectors. Select the External location used while configuring the plugin on Cloud Exchange.
Sample ingested alerts:
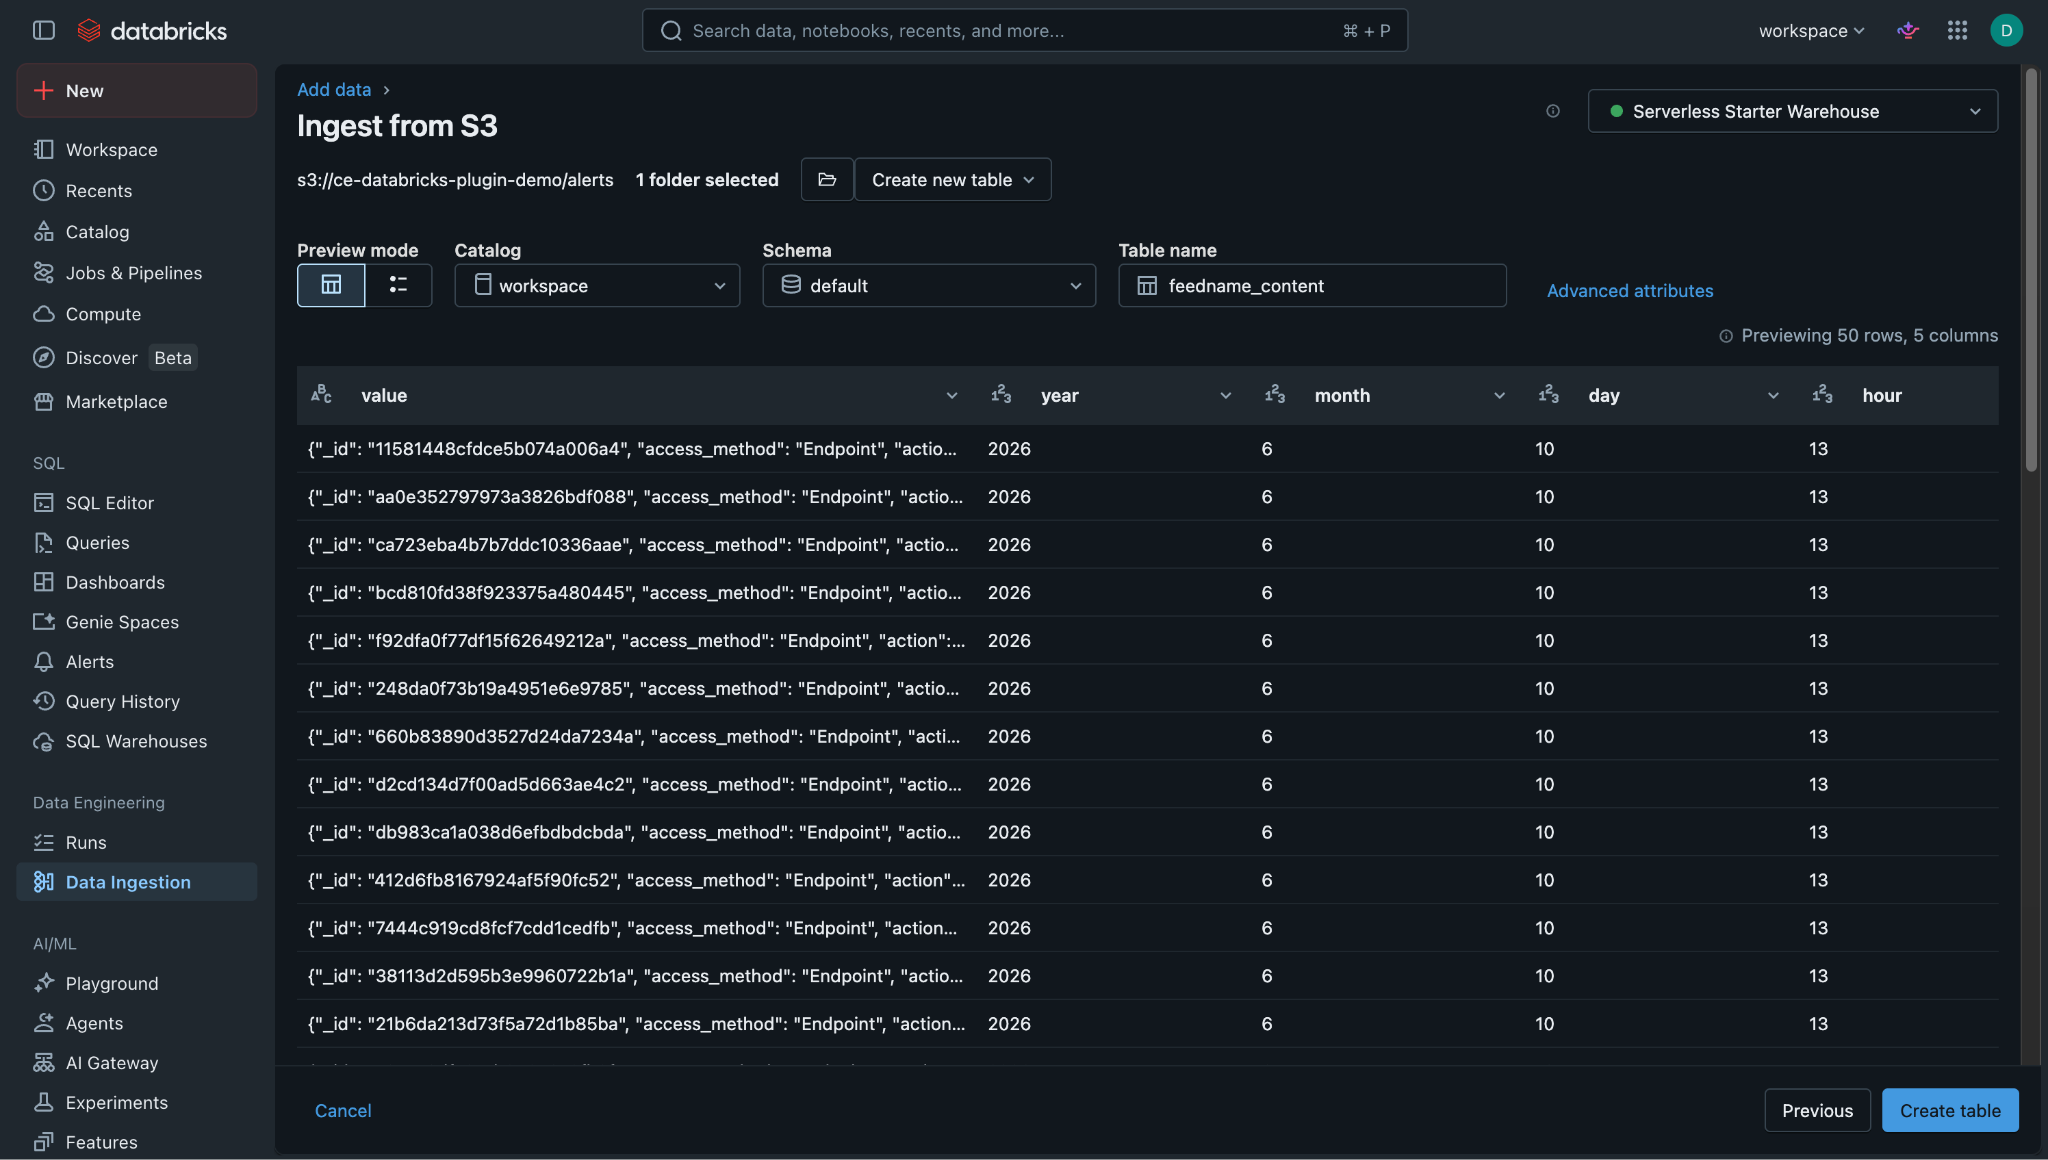
Sample ingested events:
Sample ingested Webtx logs:
Troubleshooting the Databricks Plugin
Unable to configure the plugin
It may be due to one of these reasons:
- Role not assigned to the EC2 instance where Cloud Exchange is hosted in case of Deployed on AWS authentication.
- Incorrect credentials in case of IAM roles anywhere authentication.
What to do:
- In case you are using Deployed on AWS authentication then refer to the Deployed on AWS authentication section
- In case you are using IAM roles anywhere authentication then refer to the IAM Role Anywhere authentication section.
AWS S3 bucket region mismatch
If you see the error AWS S3 bucket exists but is in region ‘{actual}’, not the configured region ‘{configured}’, it could be due to the AWS S3 Bucket Region Name in the plugin configuration does not match the bucket’s actual region.
What to do:
- In the AWS S3 Console, go to the target bucket and verify its region under the bucket properties.
- Update the AWS S3 Bucket Region Name in the plugin configuration to match the actual bucket region and save the configuration.
Known Behavior
- When using the AWS IAM Roles Anywhere authentication method, proxy settings configured in Cloud Exchange are not forwarded to the IAM Roles Anywhere credential requests. The plugin attempts a direct connection to rolesanywhere.{region}.amazonaws.com. Ensure direct connectivity to this endpoint is available when using IAM Roles Anywhere behind a proxy.
- The Cloud Exchange SSL Validation setting is applied only to Databricks API calls. IAM Roles Anywhere credential requests and AWS S3 (boto3) calls always use the library default SSL verification and are not affected by the Cloud Exchange SSL validation setting.