

This article describes how to deploy Netskope Client on Android devices using Omnissa Workspace ONE.
Prerequisites
- Administrators must possess proficient working knowledge of Omnissa Workspace ONE UEM.
- Administrators must review Netskope Client Client Enrollment Methods to understand the Client User Enrollment methods available for their environment.
- Import users into the Netskope tenant – see Provisioning Users for Netskope Client.
- Download Netskope Root and Tenant Certificates and ensure the certificates are available when needed.
- See Deploy Netskope Client via IdP when using IDP as the method of user enrollment.
- Login to Workspace ONE UEM console and register your Android enterprise through Managed Google Play Accounts. To learn more, view Registering your Android device.
Supported Platforms
This article outlines the Netskope Client deployment instructions for the following user enrollment methods and supported platforms. User enrollment methods not documented here are not supported at this time.
-
Workspace ONE UE Version: Workspace ONE UEM version 9.4 and later.
-
Netskope Client Playstore Version: 96.0.0.1009
Configure Omnissa Workspace One for Android Enterprises
To use Android Enterprise devices in Omnissa Workspace One, set up a Managed Google Play account.
Android Enterprise Modes
Netskope supports the following Android device modes:
- Android Managed
- Android BYOD
- Android COPE
To learn more about different Android device modes, view Device Modes.
Deploying Android Applications
Perform the following steps to deploy your Android applications:
-
Go to Resources > Apps > Native > Public > +Add Application.
-
Provide the mandatory fields and click Next.
-
Select Netskope Client.
-
Click Approve.
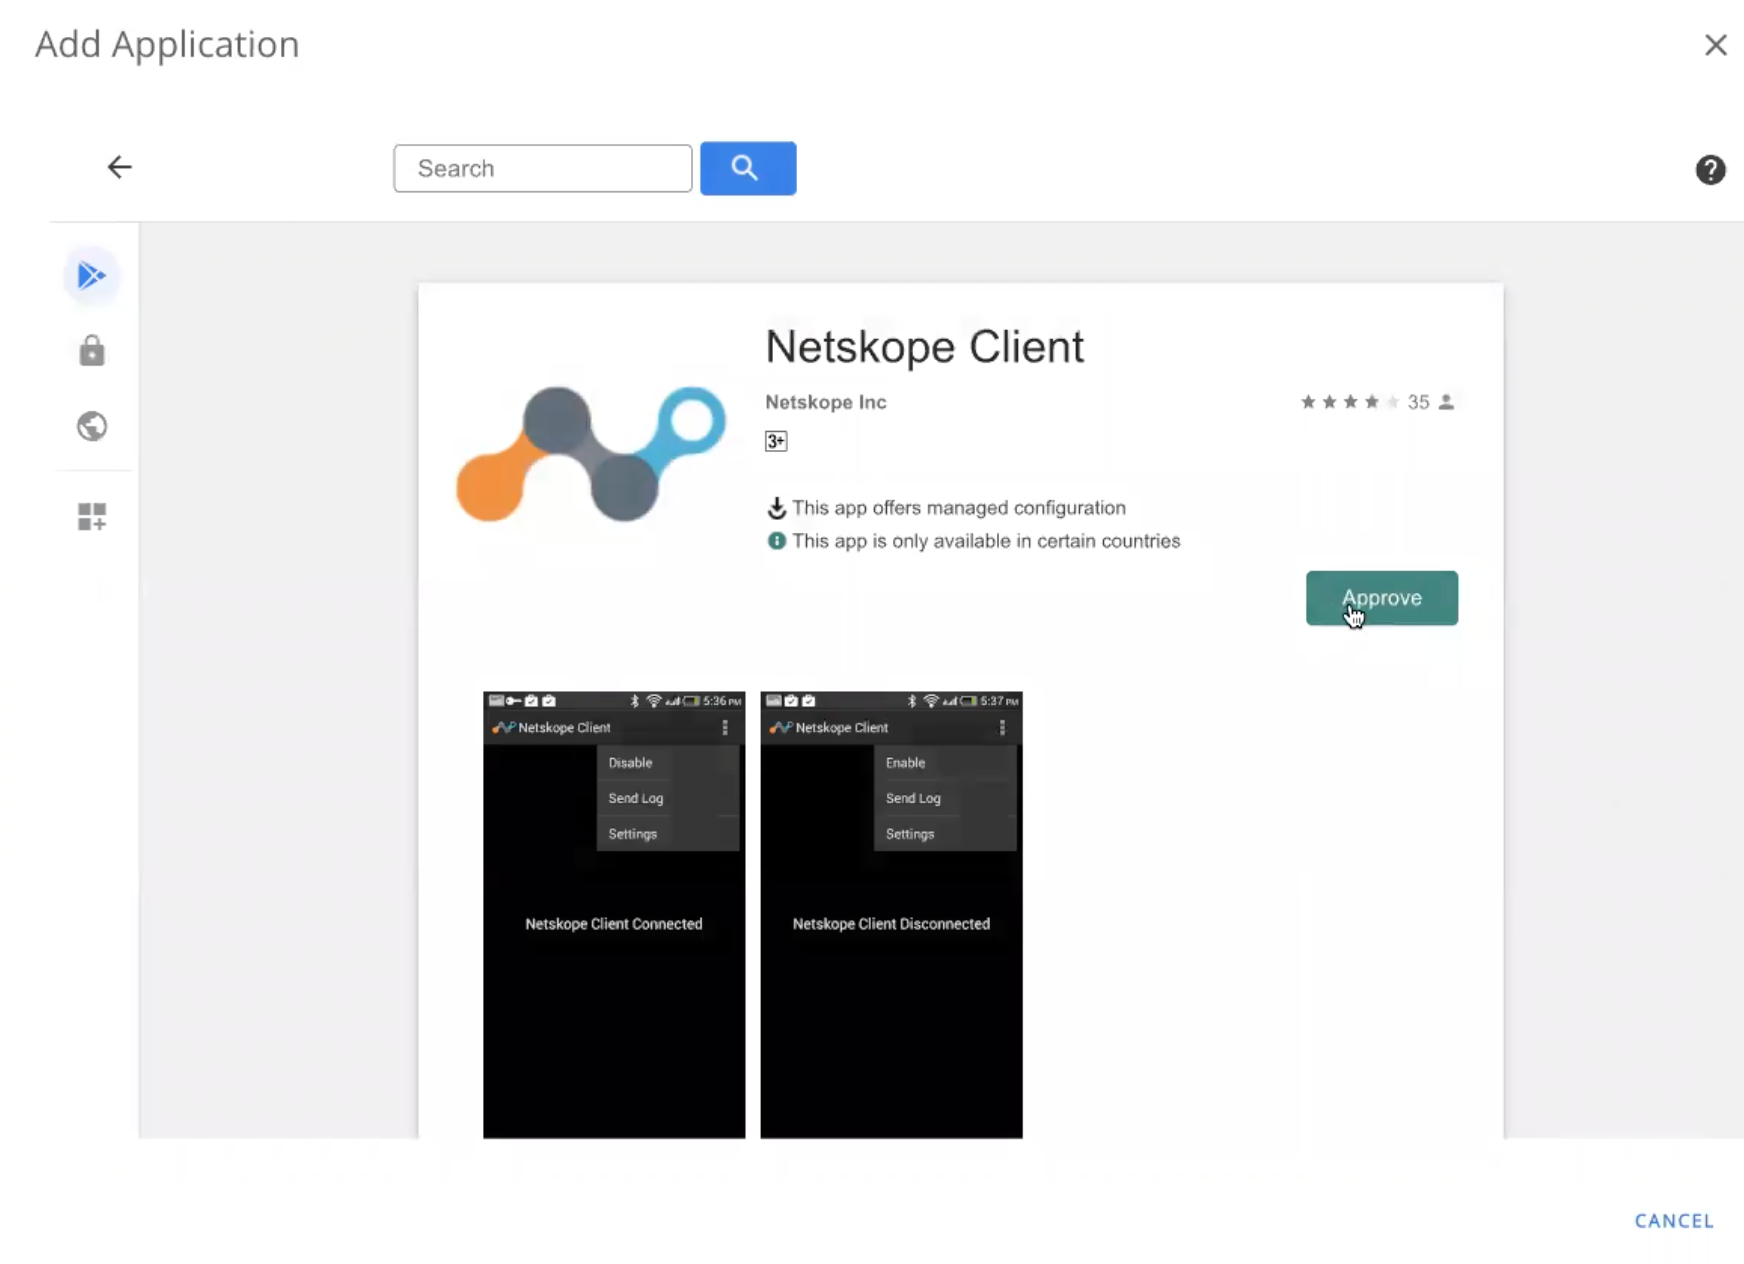
-
In the Edit Application – Netskope Client, check the existing details.
-
Click Save and Assign.
-
In the Netskope Client – Assignment page, assign your Netskope Client to a device mode.
-
Click Create.
-
Click Save and Publish the Netskope Client to the web.
-
Click Deployment to configure the application and control availability.
-
Enter these parameters:
-
Push Mode: Set the application to install automatically (auto) or manually (on demand) when needed.
-
Send Application Configuration: Enable this checkbox.
-
Application Configuration: Enter the Configuration key/value information for these fields:
-
Email Address: {EmailAddress}
For environments where user context is not available(such as shared devices, kiosks), use static email addresses. This email must match provisioned user account email in Netskope tenant.
-
-
token: <Orgkey> (Organization ID in the Netskope UI)
-
host: addon-<tenant hostname>.goskope.com
-
enrollauthtoken: Enter the Authentication Token.
-
enrollencryptiontoken: Enter the Encryption token.

Zero Touch Enrollment using VPN Profile
The custom VPN profile is a list of key-value pairs that you can add in the configuration to enable the silent enrollment for your Android devices. Creating a VPN profile from Omnissa Workspace ONE address the following challenges:
-
After you deploy Client for Android devices and complete the enrollment process, you need to accept Notification and Permission prompts to create the VPN profile.
-
Preventing users from disabling the connectivity through Netskope.
To create a VPN profile:
-
In Workspace One UEM console, click Resources > Profiles > Add > Add Profile.
-
Click Android.
-
Provide a name for the profile. For example, Netskope Android VPN.
-
Expand the Custom Settings option and click Add.
-
Copy-paste the following code snippet in the text field.
<characteristic uuid="00000000-0000-0000-0000-000000000000" type="com.airwatch.android.androidwork.app:com.netskope.netskopeclient">
<parm name="profileName" value="VPN" type="string" />
<parm name="action" value="0" type="string" />
<parm name="EnableAlwaysOnVPN" value="True" type="boolean" />
<parm name="LockDown" value="false" type="boolean" />
<parm name="EnableLockDownWhitelist" value="True" type="boolean" />
<parm name="LockdownWhitelistedPackageIds" value="com.netskope.netskopeclient" type="string" />
<parm name="authentication_type" value="2" type="string" />
</characteristic>
Includecom.netskope.netskopeclientin the LockdownWhitelistedPackageIds for the LockDown mode. Append the certificate pinned applications configured in your steering configuration to this list. For example, if you want to bypass traffic for Example App1 with package ID: com.example.app1 and Example App2 with package ID com.example.app2, then append the package IDs for these two apps to the list by using a “;” separator (no space required between package IDs).<parm name="LockdownWhitelistedPackageIds"value="com.netskope.netskopeclient;com.example.app1;com.example.app2"type="string"/> -
Expand Credentials and click ADD.
-
Upload the root certificate details required for successful SSL interception.
-
Click Next.
-
In the Assignment section, assign the profile to a smart group from the list of options given in the Smart Group drop-down menu.
-
Click Save and Publish.