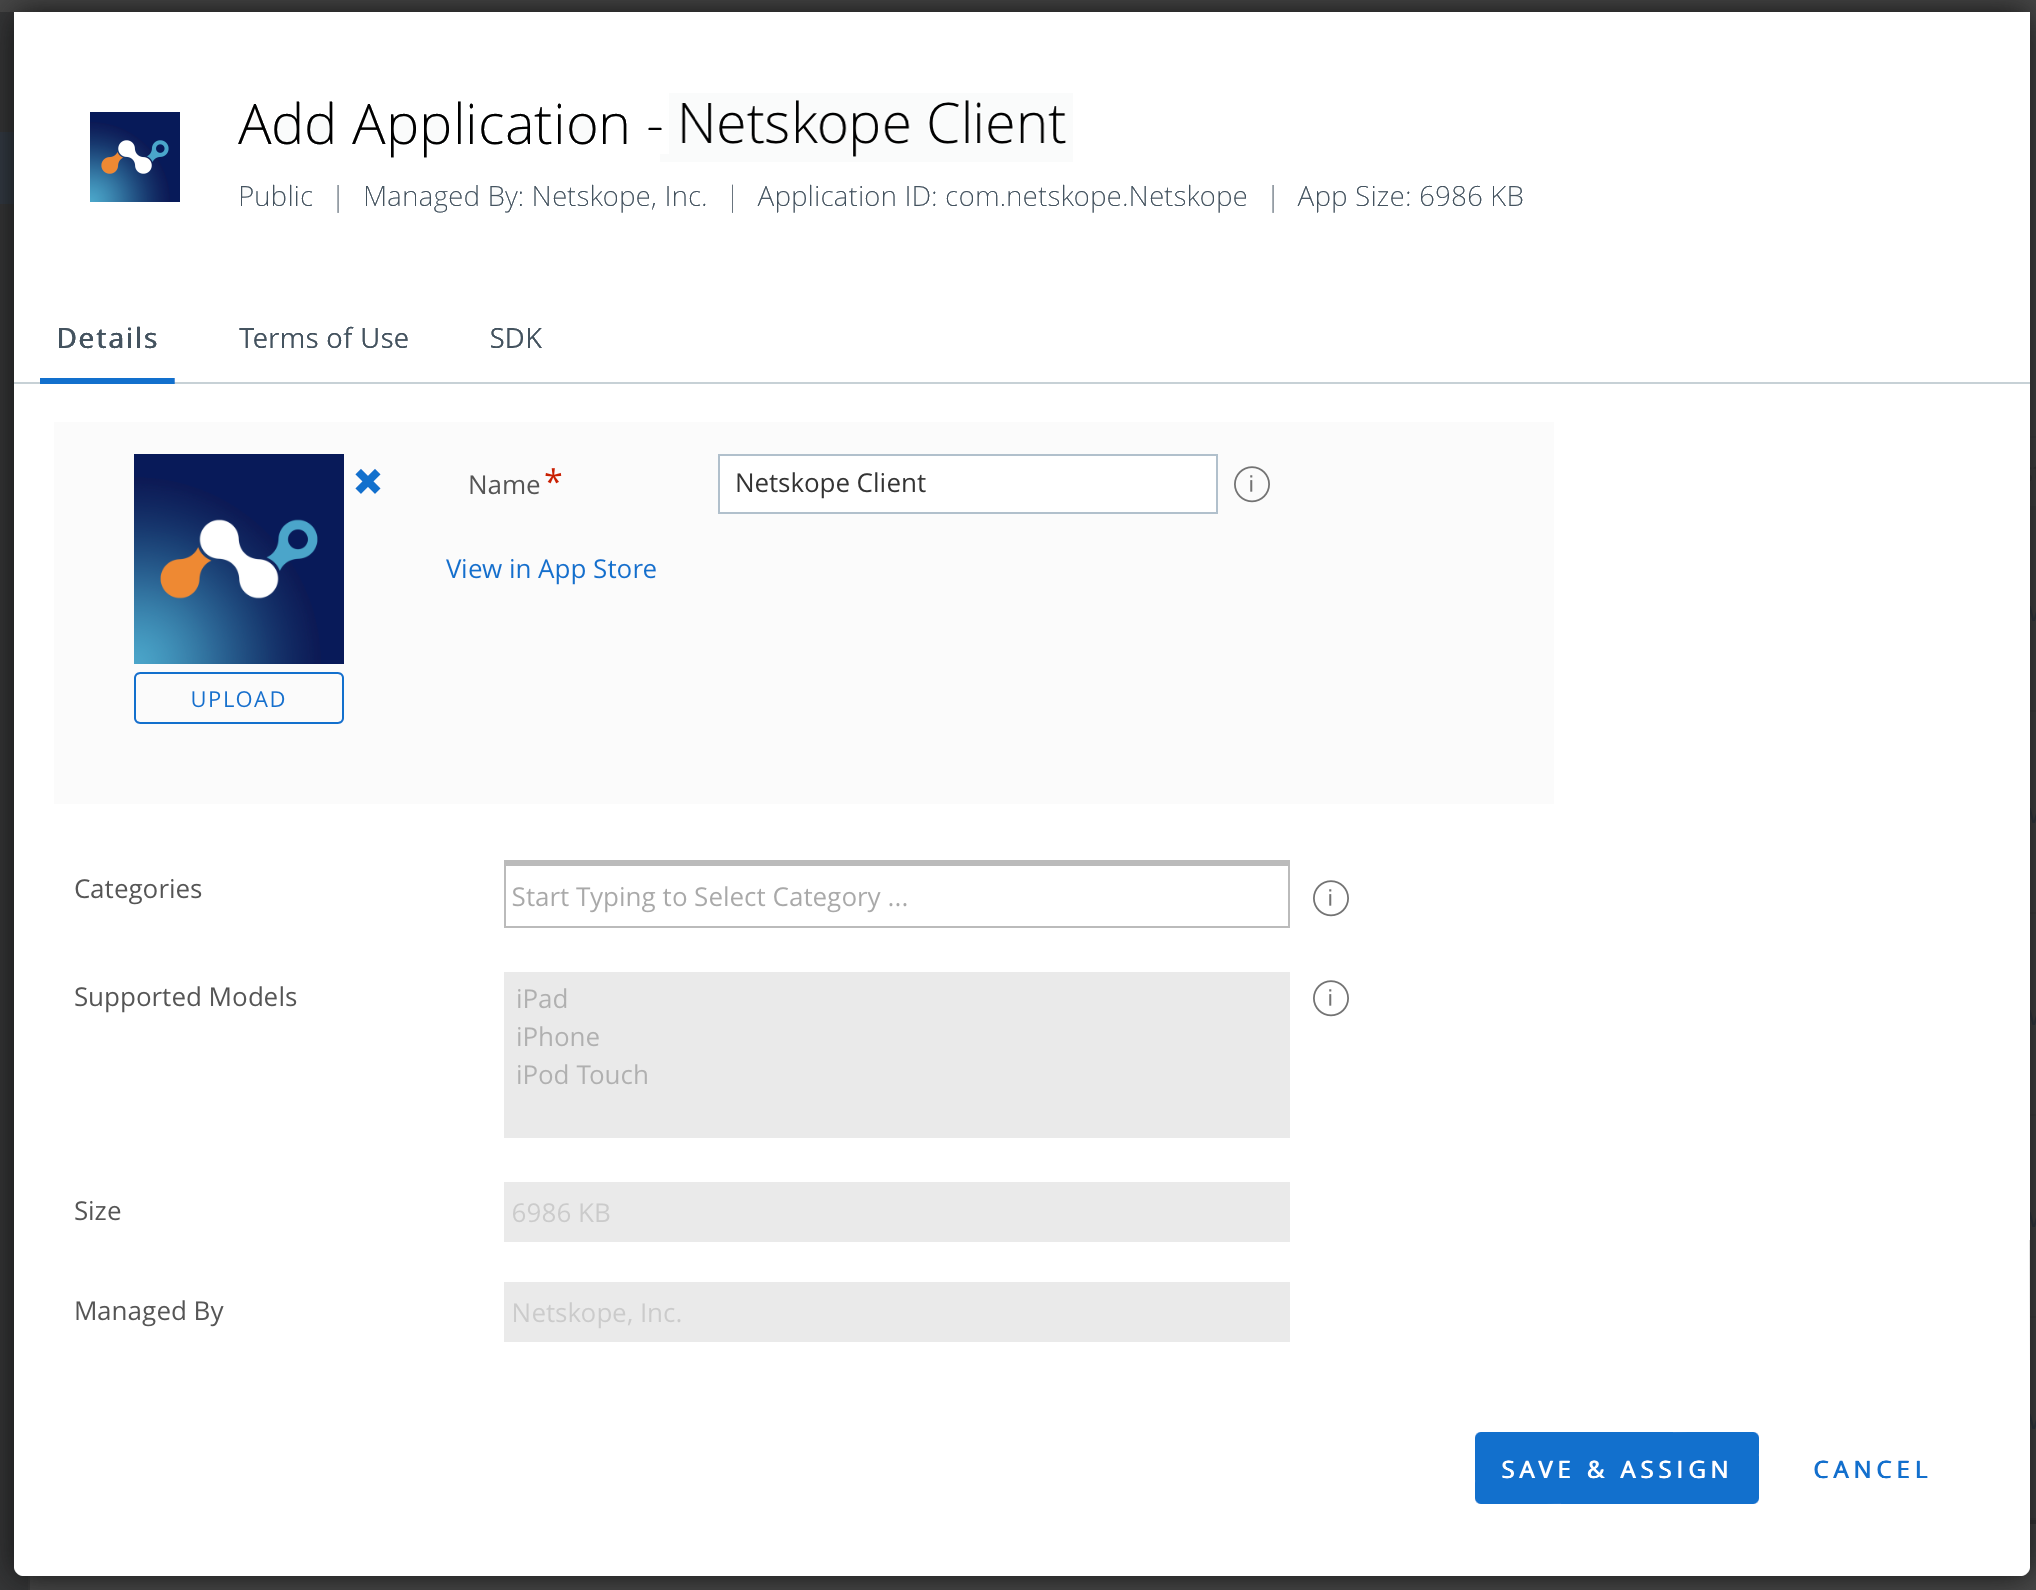
This article describes how to deploy Netskope Client on iOS devices using Omnissa Workspace ONE.
Prerequisites
- Administrators must possess proficient working knowledge of Omnissa Workspace ONE UEM.
- Administrators must review Netskope Client Client Enrollment Methods to understand the Client User Enrollment methods available for their environment.
- Import users into the Netskope tenant – see Provisioning Users for Netskope Client.
- Download Netskope Root and Tenant Certificates and ensure the certificates are available when needed.
- See Deploy Netskope Client via IdP when using IDP as the method of user enrollment.
Supported Platforms and Enrollment Methods
This article outlines the Netskope Client deployment instructions for the following user enrollment methods and supported platforms. User enrollment methods not documented here are not supported at this time.
| Enrollment Method | Single User | Multi-User |
|---|---|---|
| PLIST | Y | N |
Configuration Profile Setup
Profiles manage the core configuration for Client installation. The following sections detail how to configure these profiles effectively.
Administrators must choose the VPN profile type that best fits their requirements, either On-Demand VPN or Per-App VPN.
On-Demand VPN
The following steps explain how to configure a Profile for an On‑Demand VPN deployment.
-
Go to Resources > Profiles & Baselines > Profiles.
-
Click Add Profile from the Add dropdown options.
-
Select Apple iOS from the platform list.
-
Select Device Profile in Select Context and click Next.
-
Enter a unique Profile name. For example, Netskope Client Configuration Profile.
-
Start typing VPN in the search text box of the configuration profile.
-
Expand VPN and click Add.
-
Configure the following settings to allow access to a service or an app:
-
Connection Name: Enter a descriptive name for the Connection Name.
-
Connection Type: Select Custom.
-
Identifier:
com.netskope.Netskope -
Server: Enter your VPN server name from the Netskope UI. For example, gateway-<tenant-URL>.
-
Account: Click the + symbol and select EnrollmentUserID.
-
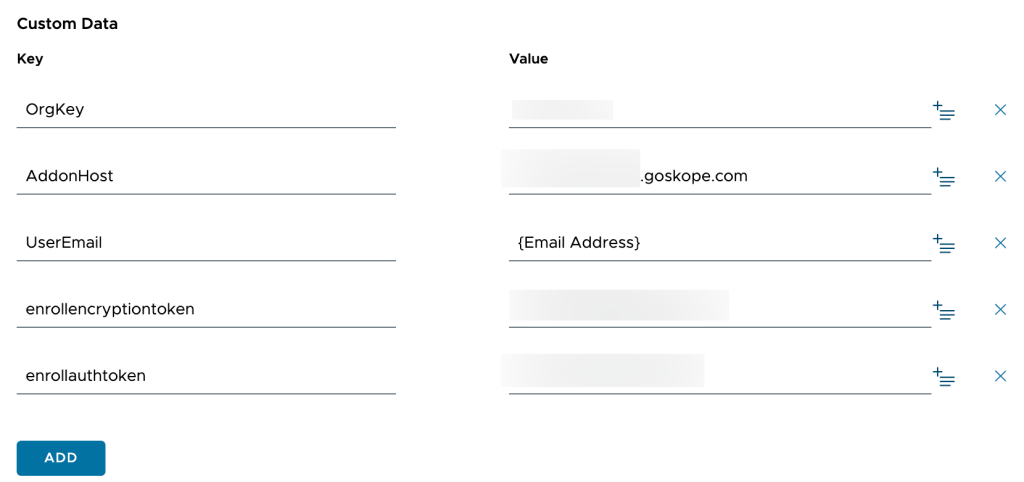
Custom Data: Add the following Key:value pairs:
-
OrgKey: Use the tenant organizational key
-
AddonHost: Use the addon URL for the tenant: addon-<tenant-URL>.
-
UserEmail: Use the variable that contains the user identity for the enrollment: {EmailAddress}
-
enrollauthtoken: Enter the Authentication Token.
-
enrollencryptiontoken: Enter the Encryption token(Optional).
-
ForceDisabledSteering: True.
Use this key-value pair if you want Netskope Client to steer only Private Access traffic.
-
-
User Authentication: Select Certificate.
-
Enable VPN On Demand: Select the checkbox to enable this option.
-
Use new on-demand Keys: Select the checkbox to enable this option.
-
-
Click Next.
-
Enter these parameters:
-
Smart Groups: Start typing to select a smart group.
-
Exclusions: No
-
Deployment: Managed
-
Assignment Type: Auto
-
Allow Removal: Always( You can select the desired option)
-
Managed By: Netskope Inc.
-
-
Click Save & Publish.
Per-App VPN
The following steps explain how to configure a Profile for a Per-App VPN deployment.
-
Go to Resources > Profiles & Baselines > Profiles.
-
Click Add Profile from the Add dropdown options.
-
Select Apple iOS from the platform list.
-
Select Device Profile in Select Context and click Next.
-
Enter a unique Profile name. For example, Netskope Client Configuration Profile.
-
Start typing VPN in the search text box of the configuration profile.
-
Expand VPN and click Add.
-
Configure the following settings to allow access to a service or an app:
-
Connection Name: Enter a descriptive name for the Connection Name.
-
Connection Type: Select Custom.
-
Identifier:
com.netskope.Netskope -
Server: Enter your VPN server name from the Netskope UI. For example, gateway-<tenant-URL>.
-
Account: Click the + symbol and select EnrollmentUserID.
-
Custom Data: Add the following Key:value pairs:
-
OrgKey: Use the tenant organizational key
-
AddonHost: Use the addon URL for the tenant: addon-<tenant-URL>.
-
UserEmail: Use the variable that contains the user identity for the enrolment: {EmailAddress}
-
enrollauthtoken: Enter the Authentication Token.
-
enrollencryptiontoken: Enter the Encryption token(Optional).
-
ForceDisabledSteering: True.
Use this key-value pair if you want Netskope Client to steer only Private Access traffic.
-
OnDemandConnectionsHoldTimeout: 20
To define timeout to control the iOS On-demand connections hold feature, add the key-value pair: OnDemandConnectionsHoldTimeout: <numeric value in seconds>. This numeric value in the VPN profile can hold the connection for a longer time until it establishes the tunnel successfully and handles traffic. Netskope recommends using values that are large enough to cover normal connection time.
-
-
Per-App VPN Rules: Toggle to enable this option.
-
Connect Automatically: Toggle to enable this option.
-
Provider Type: Select Packet Tunnel from the options in the dropdown menu.
-
User Authentication: Select Certificate.
-
-
Click Next.
-
Enter these parameters:
-
Smart Groups: Start typing to select a smart group.
-
Exclusions: No
-
Deployment: Managed
-
Assignment Type: Auto
-
Allow Removal: Always( You can select the desired option)
-
Managed By: Netskope Inc.
-
-
Click Save & Publish.
-

Associate Per-App VPN Profile With Managed App Configuration
The following section describes the steps to associate managed applications with Per-App VPN profile in Omnissa Workspace ONE.
-
Go to Resources > Apps > Native.
-
Click the Public tab.
-
Select managed application (For example, Box) and click the application.
-
Click Assignment and click on assignment rule.
-
Select Tunnel & Other Attributes, click Edit and select Per-App VPN profile from the dropdown.
-
Click Save and Publish.
Zero-Touch Enrollment
Netskope client is capable of enrolling silently without any user action when enrollment data supplied through a VPN profile. For a limited number of use cases such as testing mapped to single identity, kiosks deployments and alike enrollment data should be populated through VPN profile and email key must use static email address value (which is provisioned in Netskope tenant).
Push Netskope Root and Tenant Certificates
Provide additional trust to end users by pushing certificates during client installation. Before you can push the root and tenant certificates, ensure that you do the following:
- Download root and tenant certificates from Netskope Certificates page.
- Login to Netskope tenant admin console with admin credentials.Go to Settings > Manage > Certificates > SIGNING CA. The certificate download options are displayed in the Certificate Setup section.
- Convert the downloaded certificates to .cer format by renaming the .pem files to .cer.
Perform the following steps to add certificates to Omnissa Workspace ONE:
-
Go to Resources > Profiles & Baselines > Profiles.
-
Click Add Profile from the Add dropdown options.
-
Select Apple macOS from the platform list.
-
Select Device Profile in Select Context and click Next.
-
Enter a unique Profile name. For example, Netskope Client Configuration Profile.
-
Start typing Credentials in the search text box of the configuration profile.
-
Expand Credentials and click Add.
-
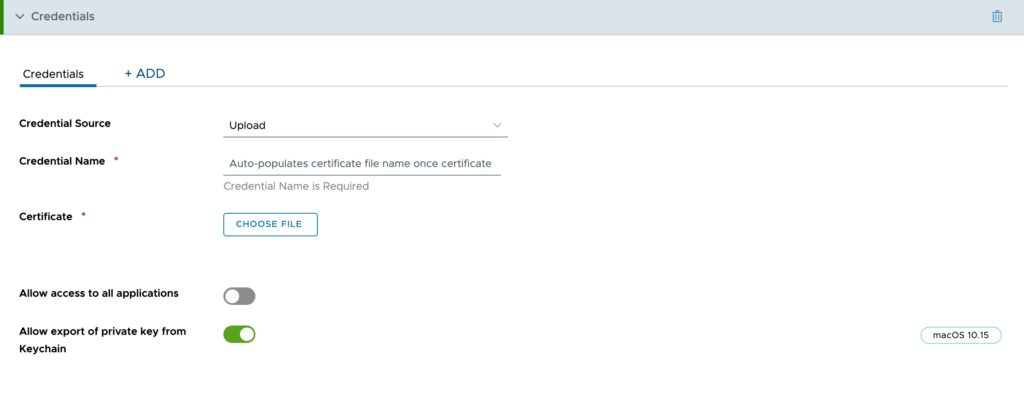
Enter the following details:
-
Credential Source: Select Upload.
-
Credential Name: It auto-populates the name after uploading the certificate.
-
Certificate: Click Choose File > Browse for the rootcaCert.cer file you downloaded from the Netskope tenant.
-
-
Click Attach Certificate.
Once you click Attach Certificate, the webUI displays the uploaded certificate details such as validity, thumbprint, and so on.
-
Click +Add to add another certificate.
-
Click Choose File > Browse for the caCert.cer file you downloaded from the Netskope tenant.
-
Click Attach Certificate.
The webUI now displays two Credentials tabs in your Credentials payload.

-
Click Next.
-
Add the assignment details.
-
Click Save & Publish.

Add Netskope Client App
Public Apple Store
The following section describes the steps to add the application from the public store in Omnissa Workspace ONE.
Perform the following steps to add Netskope Client:
-
Go to Resources > Apps > Native.
-
Click the Public tab.
-
Click +ADD APPLICATION.
-
Select Apple iOS from the Platform dropdown menu.
-
In Source, click SEARCH APP STORE.
Purchased App via Apple Business / School Manager
Purchase Netskope Client through the respective tools if your organization is leveraging Apple Business Manager or Apple School Manager. The Netskope Client shows up in the list of applications available for deployment after the tokens are synchronized.
-
Go to Resources > Apps > Native.
-
Click Purchased tab.
-
Click +Select for Netskope Client application.


Netskope Client Assignment Settings
To configure the assignment settings:
-
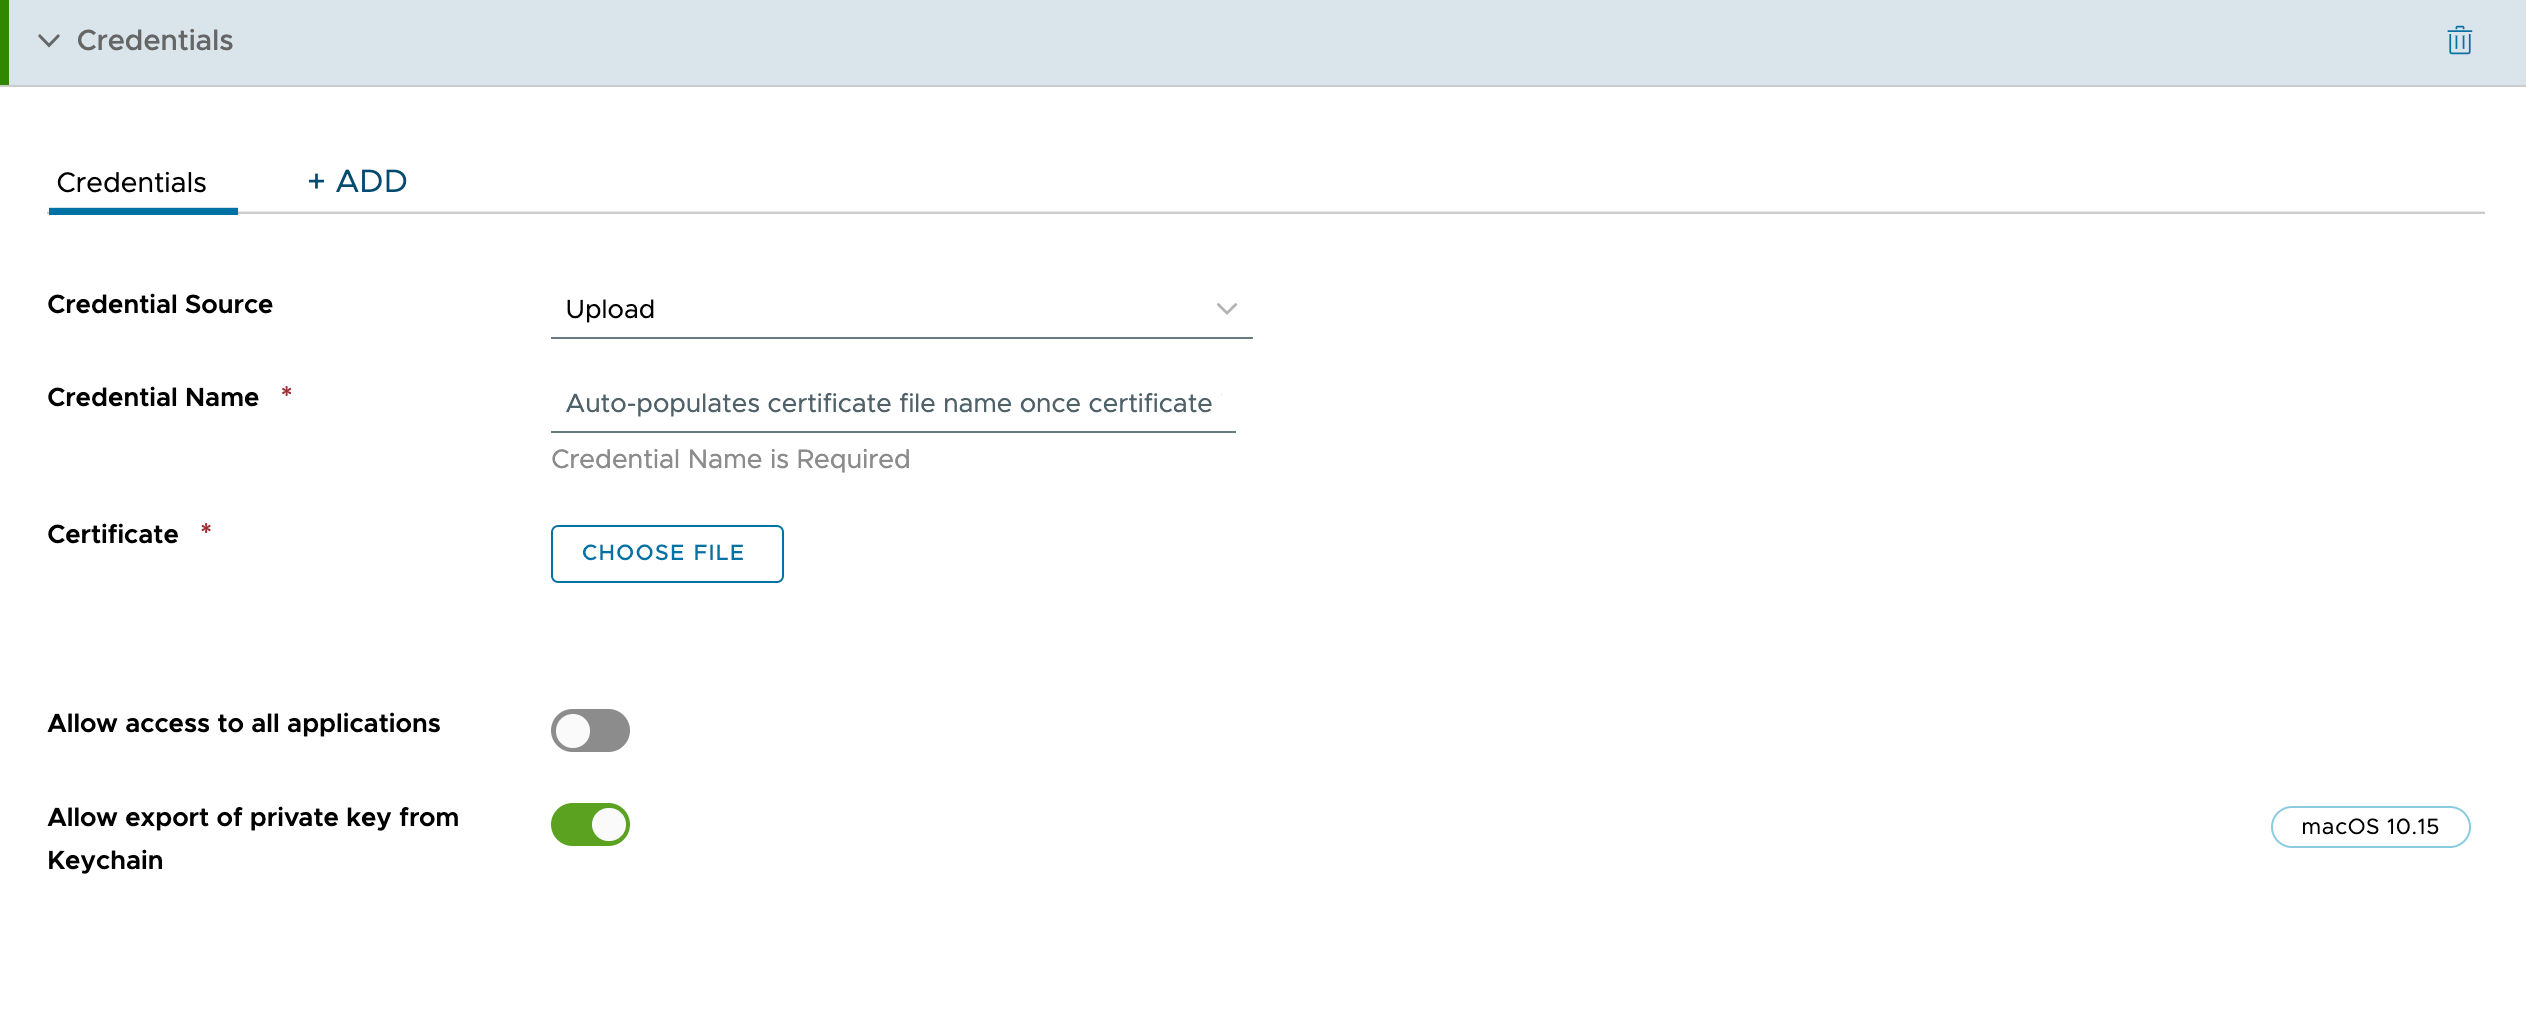
In the Add Application – Netskope Client window, click Save & Assign.

-
After you click Save & Assign, it navigates to the assignment configuration for the App.
-
In Netskope Client – Assignment > Distribution, enter the assignment Name and select a target smart group.
-
In Netskope Client – Assignment > Restrictions, configure the app restrictions.
-
Click Create and save the assignments.
-
Click Publish once you review the app setting.