

This article provides instructions to deploy Netskope Client on macOS devices(Big Sur and later) using the Microsoft Intune. The following steps are for deploying Netskope Client on macOS devices running macOS 11.x (Big Sur) or later.
Prerequisites
-
Devices running macOS 11.x (Big Sur) or later.
-
Enroll devices in Microsoft’s Endpoint Manager.
-
Download Netskope Root and Intermediate certificates and convert them to the .cer extension. To learn more, see Certificates.
To convert certificates from .pem to .cer, run the following command in a terminal:openssl x509 -inform PEM -in rootcaCert.pem -outform DER -out rootcaCert.cer -
Ensure that users are provisioned to the Netskope tenant using SCIM or Directory Importer. To learn more about user provisioning, see Provisioning and Authentication and Configure Directory Importer.
-
If you are using IdP mode for the Client deployment configure and verify SAML forward proxy authentication. To learn more about SAML Forward Proxy authentication, see Provisioning and Authentication.
Deployment Procedure
Perform the following steps to deploy client on macOS using Intune:
-
Sign in to Microsoft Intune Admin Center.
-
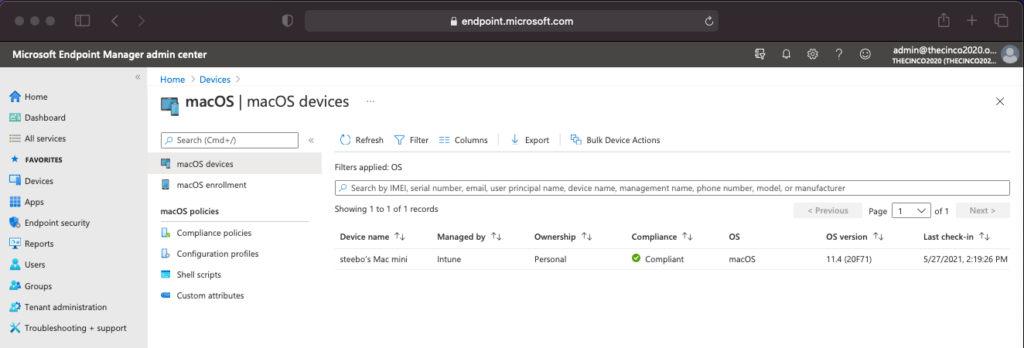
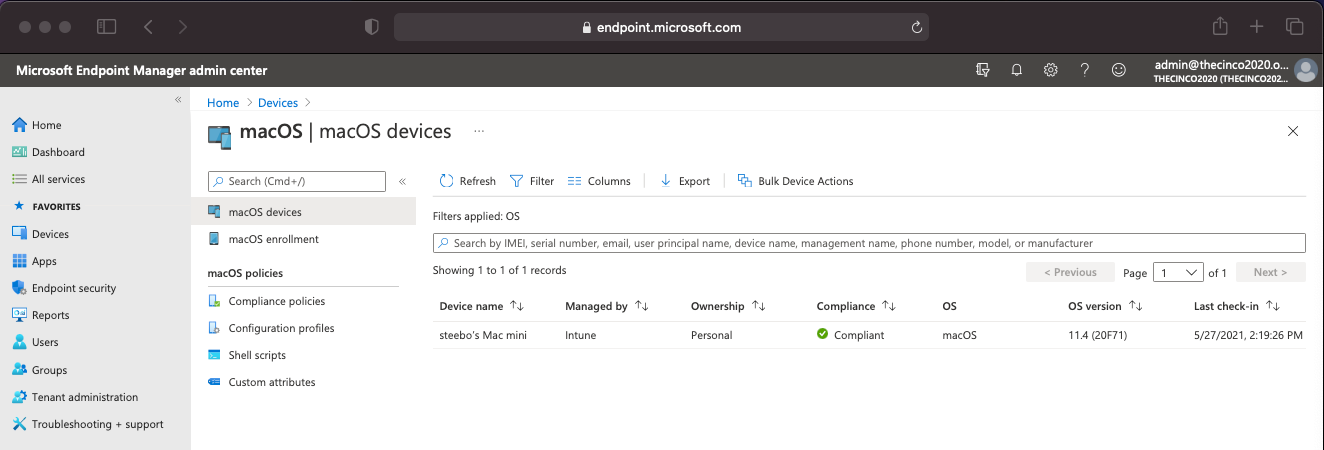
Go to Devices > macOS devices. Ensure that the devices to which you will install Netskope Client are listed.
-
Create two configuration profiles to deploy the Netskope certificates.
-
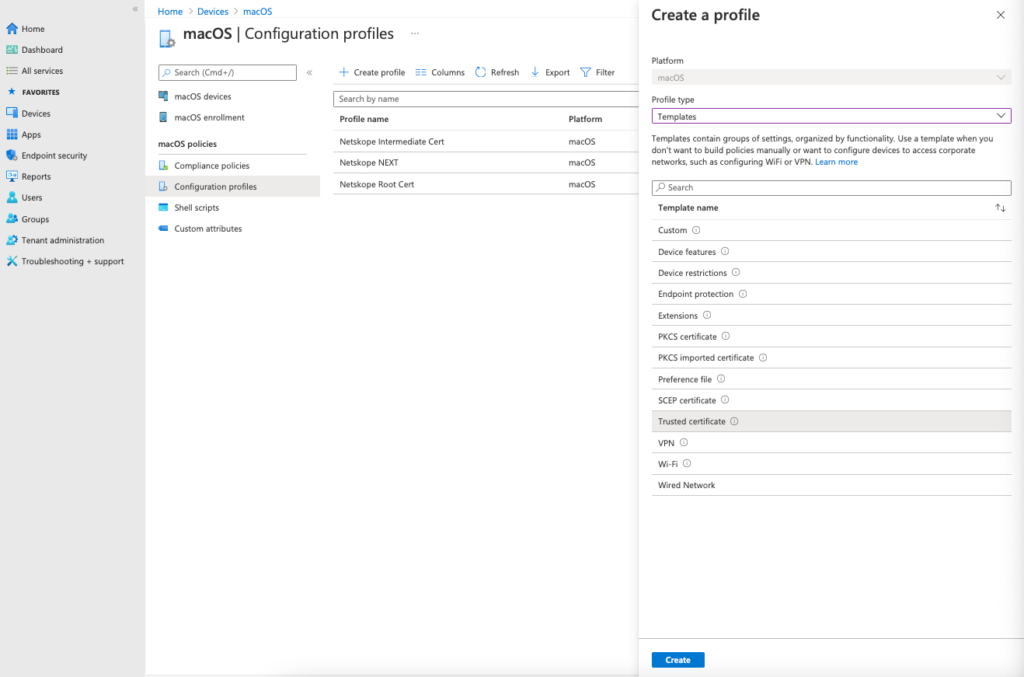
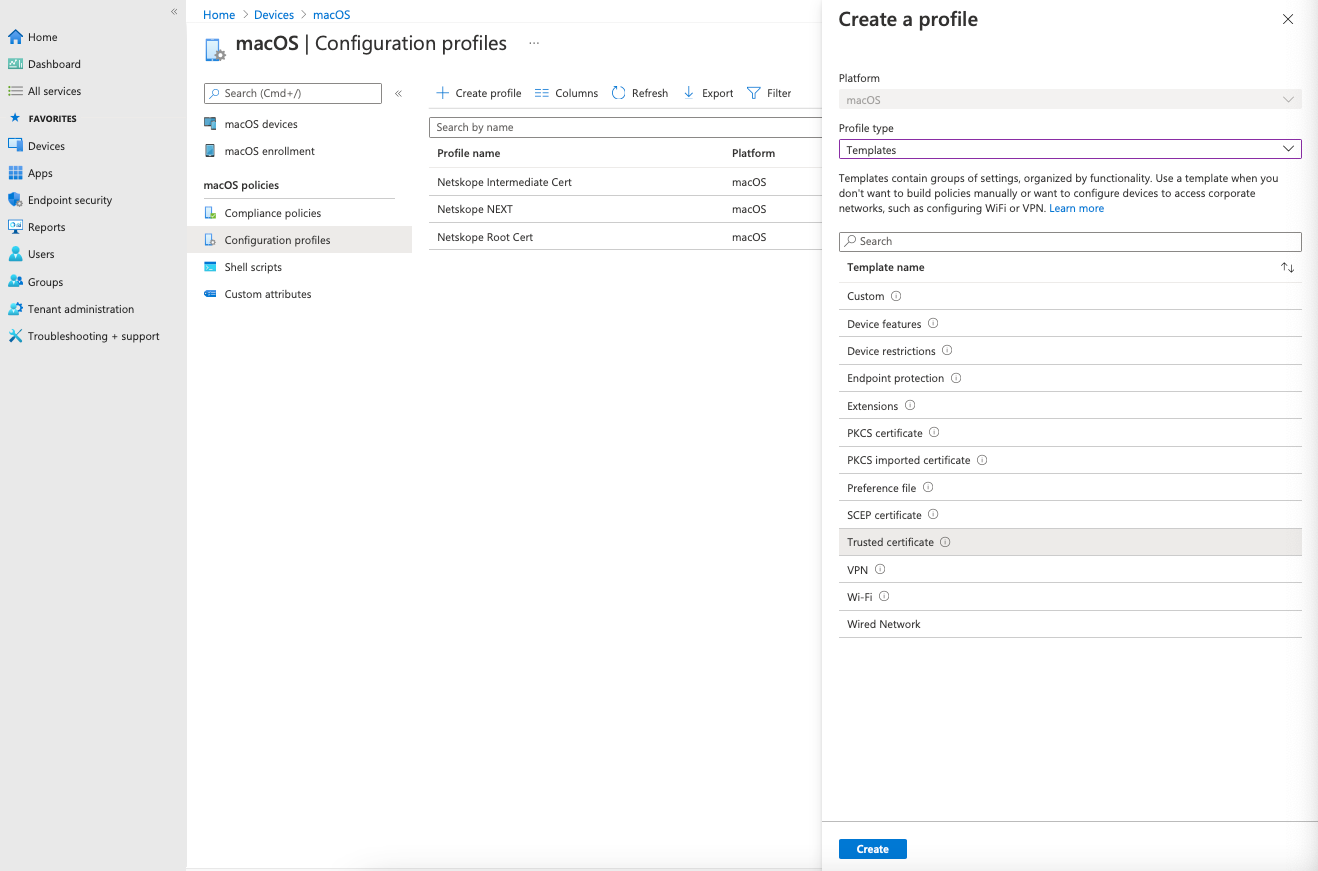
Go to macOS policies > Configuration Profiles > Create Profile and select Profile Type as Templates and Template name as Trusted Certificate.
-
Click Create.
The page will refresh with settings.
-
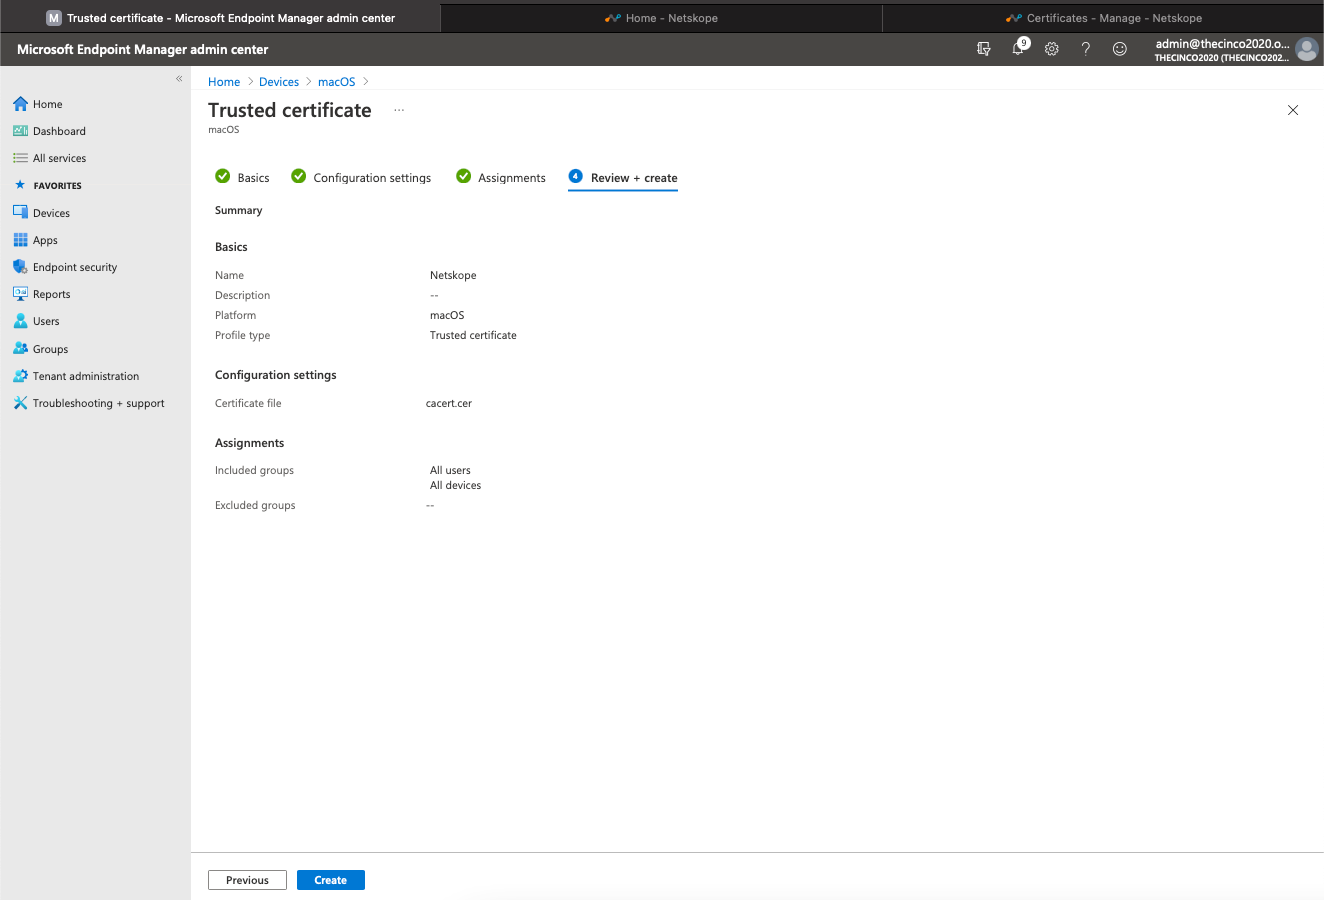
Enter a name for the root certificate profile and click Next.
-
Click the folder icon to select the Netskope root certificate (.cer file) and click Next to continue.
-
Assign the appropriate device group and click Next.
-
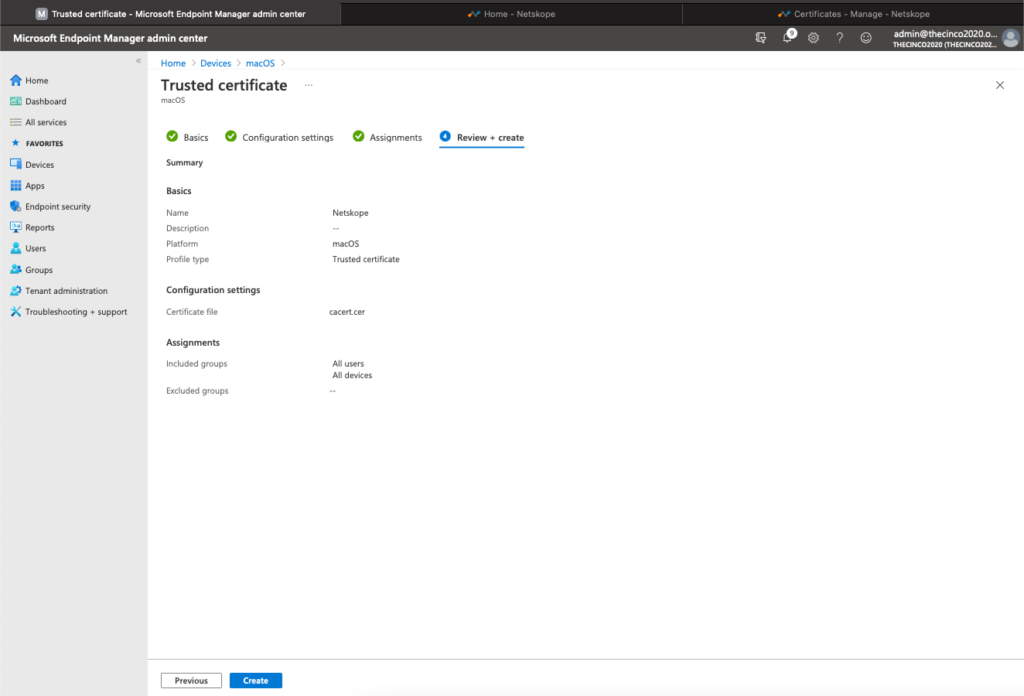
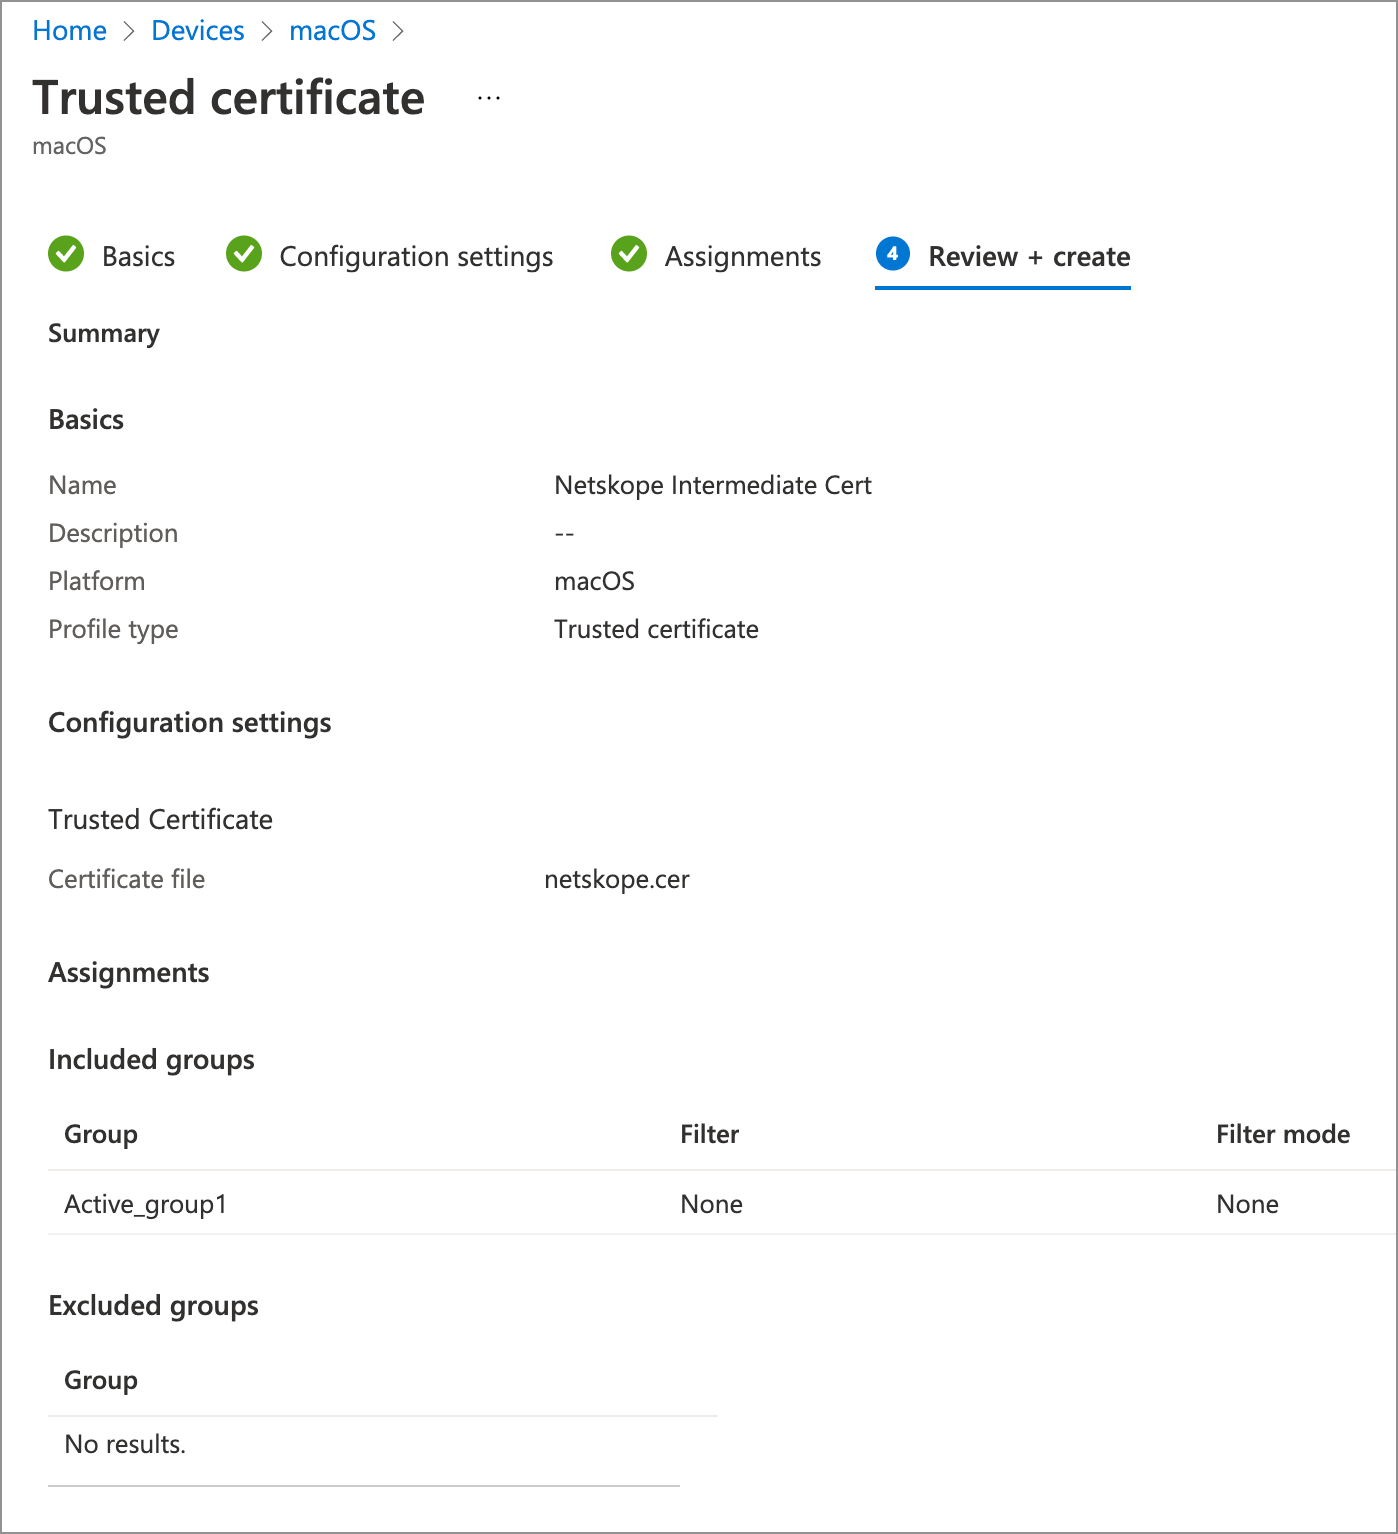
Review the configuration and click Create.
-
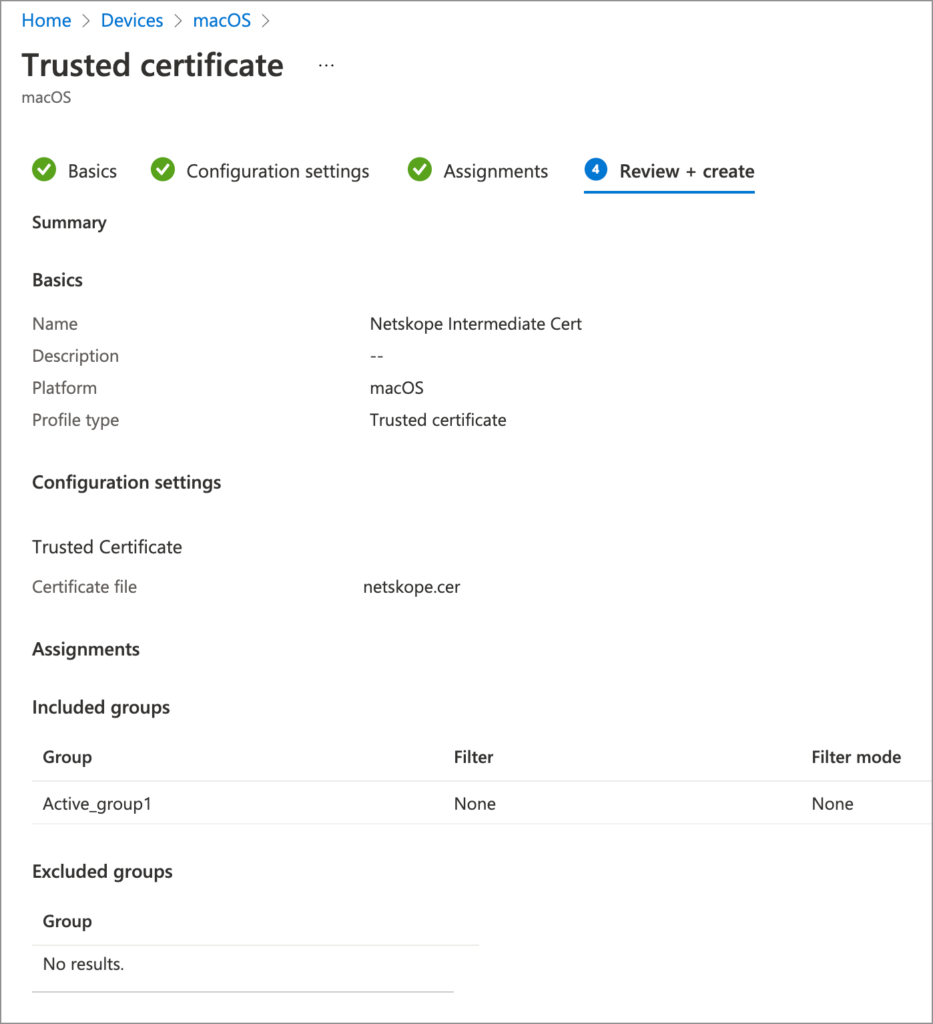
Repeat the steps used to upload Netskope root certificate and create another configuration profile to upload Netskope intermediate certificate.
-
-
Download the Netskope Intune configuration script from Netskope Support portal.
-
Extract the contents of MAC-MDM-script.zip file.
-
Open the script in a text editor and locate the
#Intune Deployment examplesection. Modify the lines by removing the comment (#). -
Choose a deployment mode according to your requirement and update the script options for parameters 4 to 8 as follows for each mode:
Deployment Modes Configuration Parameters IDP Single-User mode - Parameter 4: Enter IDP to specify the client deployment mode is IDP.
- Parameter 5: Domain name. Example, if your tenant URL is https://corp.goskope.com, then enter goskope.com.
- Parameter 6: Tenant name. Example, If your tenant URL is https://corp.goskope.com, enter corp.
- Parameter 7: Email Address request option. Enter 0, if you do not want to request the user’s email address. Enter 1 to request the user’s email address.
- Parameter 8: Enter the enrollencryptiontoken. This is the Enforce encryption of initial configuration of Netskope Client token that you can get if you have enabled Secure Enrollment in Settings > Security Cloud Platform > MDM Distribution > Secure Enrollment.
set -- 0 0 0 idp < tenant domain name > < tenant name > 0/1 enrollencryptiontoken= < Encryption token >
For example, if you have the following tenant details:
- Tenant: abcde.eu.goskope.com
- Organization ID: xxxxxxxxxxxxxxxxxxx
- Encryption Token: yyyyyyyyyyyyyyyyyyyyyyyyyyyyyyyy
set -- 0 0 0 idp eu.goskope.com abcde 0 enrollencryptiontoken=yyyyyyyyyyyyyyyyyyyyyyyyyyyyyyyyIDP Multi-User mode - Parameter 4: Enter IDP to specify that the client deployment is in IDP mode.
- Parameter 5: Domain name. Example, if your tenant URL is https://corp.goskope.com, then enter goskope.com.
- Parameter 6: Tenant name. Example, If your tenant URL is https://corp.goskope.com, enter corp.
- Parameter 7: Email Address request option. Enter 0, if you do not want to request user email address. Enter 1 to request the user’s email address.
- Parameter 8: Enter peruserconfig to specify multi-user IDP deployment mode.
- Parameter 9: Enter the enrollencryptiontoken. This is the Enforce encryption of initial configuration of Netskope Client token that you can get if you have enabled Secure Enrollment in Settings > Security Cloud Platform > MDM Distribution > Secure Enrollment.
set -- 0 0 0 idp < tenant domain name > < tenant name > 0/1 peruserconfig enrollencryptiontoken= < Encryption token >
For example, if you have the following tenant details:
- Tenant: abcde.eu.goskope.com
- Organization ID: xxxxxxxxxxxxxxxxxxx
- Encryption Token: yyyyyyyyyyyyyyyyyyyyyyyyyyyyyyyy
set -- 0 0 0 idp eu.goskope.com abcde 0 peruserconfig enrollencryptiontoken=yyyyyyyyyyyyyyyyyyyyyyyyyyyyyyyyFor macOS devices (single-user installations) that are not AD joined - Parameter 4 : Your tenant URL. Example, If your tenant URL is https://corp.goskope.com, enter addon-corp.goskope.com.
- Parameter 5: For rel 90.2 and later - Your Organization ID.
- Parameter 6: Preferences file (plist) name. When entering the filename, enter the complete filename including the .plist extension.
Example: netskope.plist . Do not add HTTP to the URL in the .plist file. - Parameter 7 : Enter the keyword preference_email.
- Parameter 8: Enter the enrollauthtoken. This is the Enforce authentication of Netskope Client Enrollment token that you can get if you have enabled Secure Enrollment in Settings > Security Cloud Platform > MDM Distribution > Secure Enrollment.
- Parameter 9: Enter the enrollencryptiontoken. This is the Enforce encryption of initial configuration of Netskope client token that you can get if you have enabled Secure Enrollment is enabled in Settings > Security Cloud Platform > MDM Distribution > Secure Enrollment.
set -- 0 0 0 addon- < tenant name >.< tenant domain >.goskope.com < Org ID > < plist file name > preference_email enrollauthtoken= < authentication token > enrollencryptiontoken=< encryption token >
For example, if you have the following tenant details:
- Tenant: abcde.eu.goskope.com
- Organization ID: xxxxxxxxxxxxxxxxxxx
- Authentication Token: zzzzzzzzzzzzzzzzzzzzzzzzzzzzzzzz
- Encryption Token: yyyyyyyyyyyyyyyyyyyyyyyyyyyyyyyy
set -- 0 0 0 addon-abcde.eu.goskope.com xxxxxxxxxxxxxxxxxxx PreferenceProfileName.plist preference_email enrollauthtoken=zzzzzzzzzzzzzzzzzzzzzzzzzzzzzzzz enrollencryptiontoken=yyyyyyyyyyyyyyyyyyyyyyyyyyyyyyyy
To learn about creating plist in Intune, view plist in Intune. -
Save the script.
-
-
To add system extensions, go to macOS policies > Configuration Profiles > Create Profile and select Profile Type as Settings Catalog.
 Since the template “Extensions” is deprecated by Microsoft as displayed in the following screenshot, it does not let you save the profile.
-
Click Create.
It opens the Create Profile window.
-
In Basics, enter a name for the profile.
-
Click Next to continue.
-
In Configuration Settings, click +Add Settings.
-
In Settings Picker, select a category to see all the available settings.
-
Select System Configuration > System Extensions.

This opens another window to configure the System Extensions payload settings for enrolled devices.
-
Select checkbox for Allowed System Extensions.

All options under Allowed System Extensions is selected by default.
-
After you select settings for Allowed System Extensions, go to Configuration Settings on the left-pane and click +Edit Instance.
-
In the Configure Instance window, add the following:
-
Bundle Identifier:
com.netskope.client.Netskope-Client.NetskopeClientMacAppProxy -
Team Identifier:
24W52P9M7W

-
-
Click Save.
-
Click Next to continue.
-
In Scope tags(optional), assign a tag to a profile in a specific group.
-
Click Next to continue.
-
In Assignment, select the users or groups that will receive your profile.
-
Click Next to continue.
-
In Review+Create, you can review the policy configurations.
-
Click Create.
-
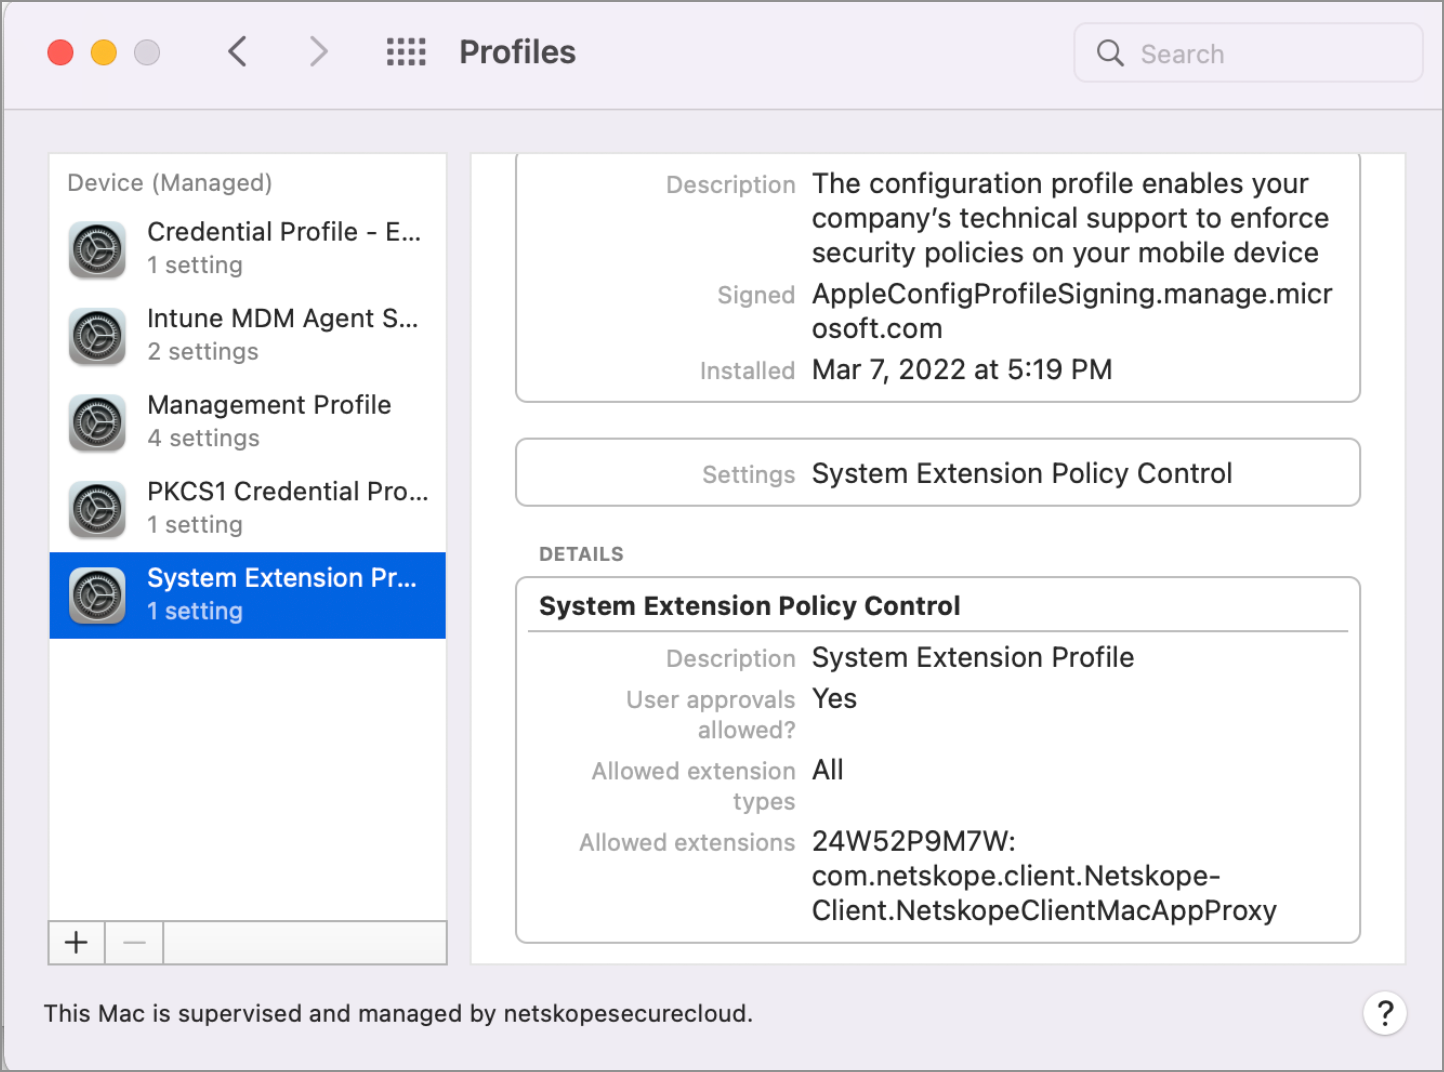
Use the Profiles options in the end-user device to validate if the System Extension was deployed successfully.

-
-
To provide full disk access permission for macOS Sonoma or later, navigate to Dashboard > Devices > macOS > Configuration Profiles > Create Profile > New Policy.
-
Select Settings Catalog from the Templates dropdown menu.
-
Click Create.
It opens the Create Profile window.
-
In Basics, enter a name for the profile.
-
Click Next to continue.
-
In Configuration Settings, click +Add Settings.
-
In Settings Picker, select a category to see all the available settings.
-
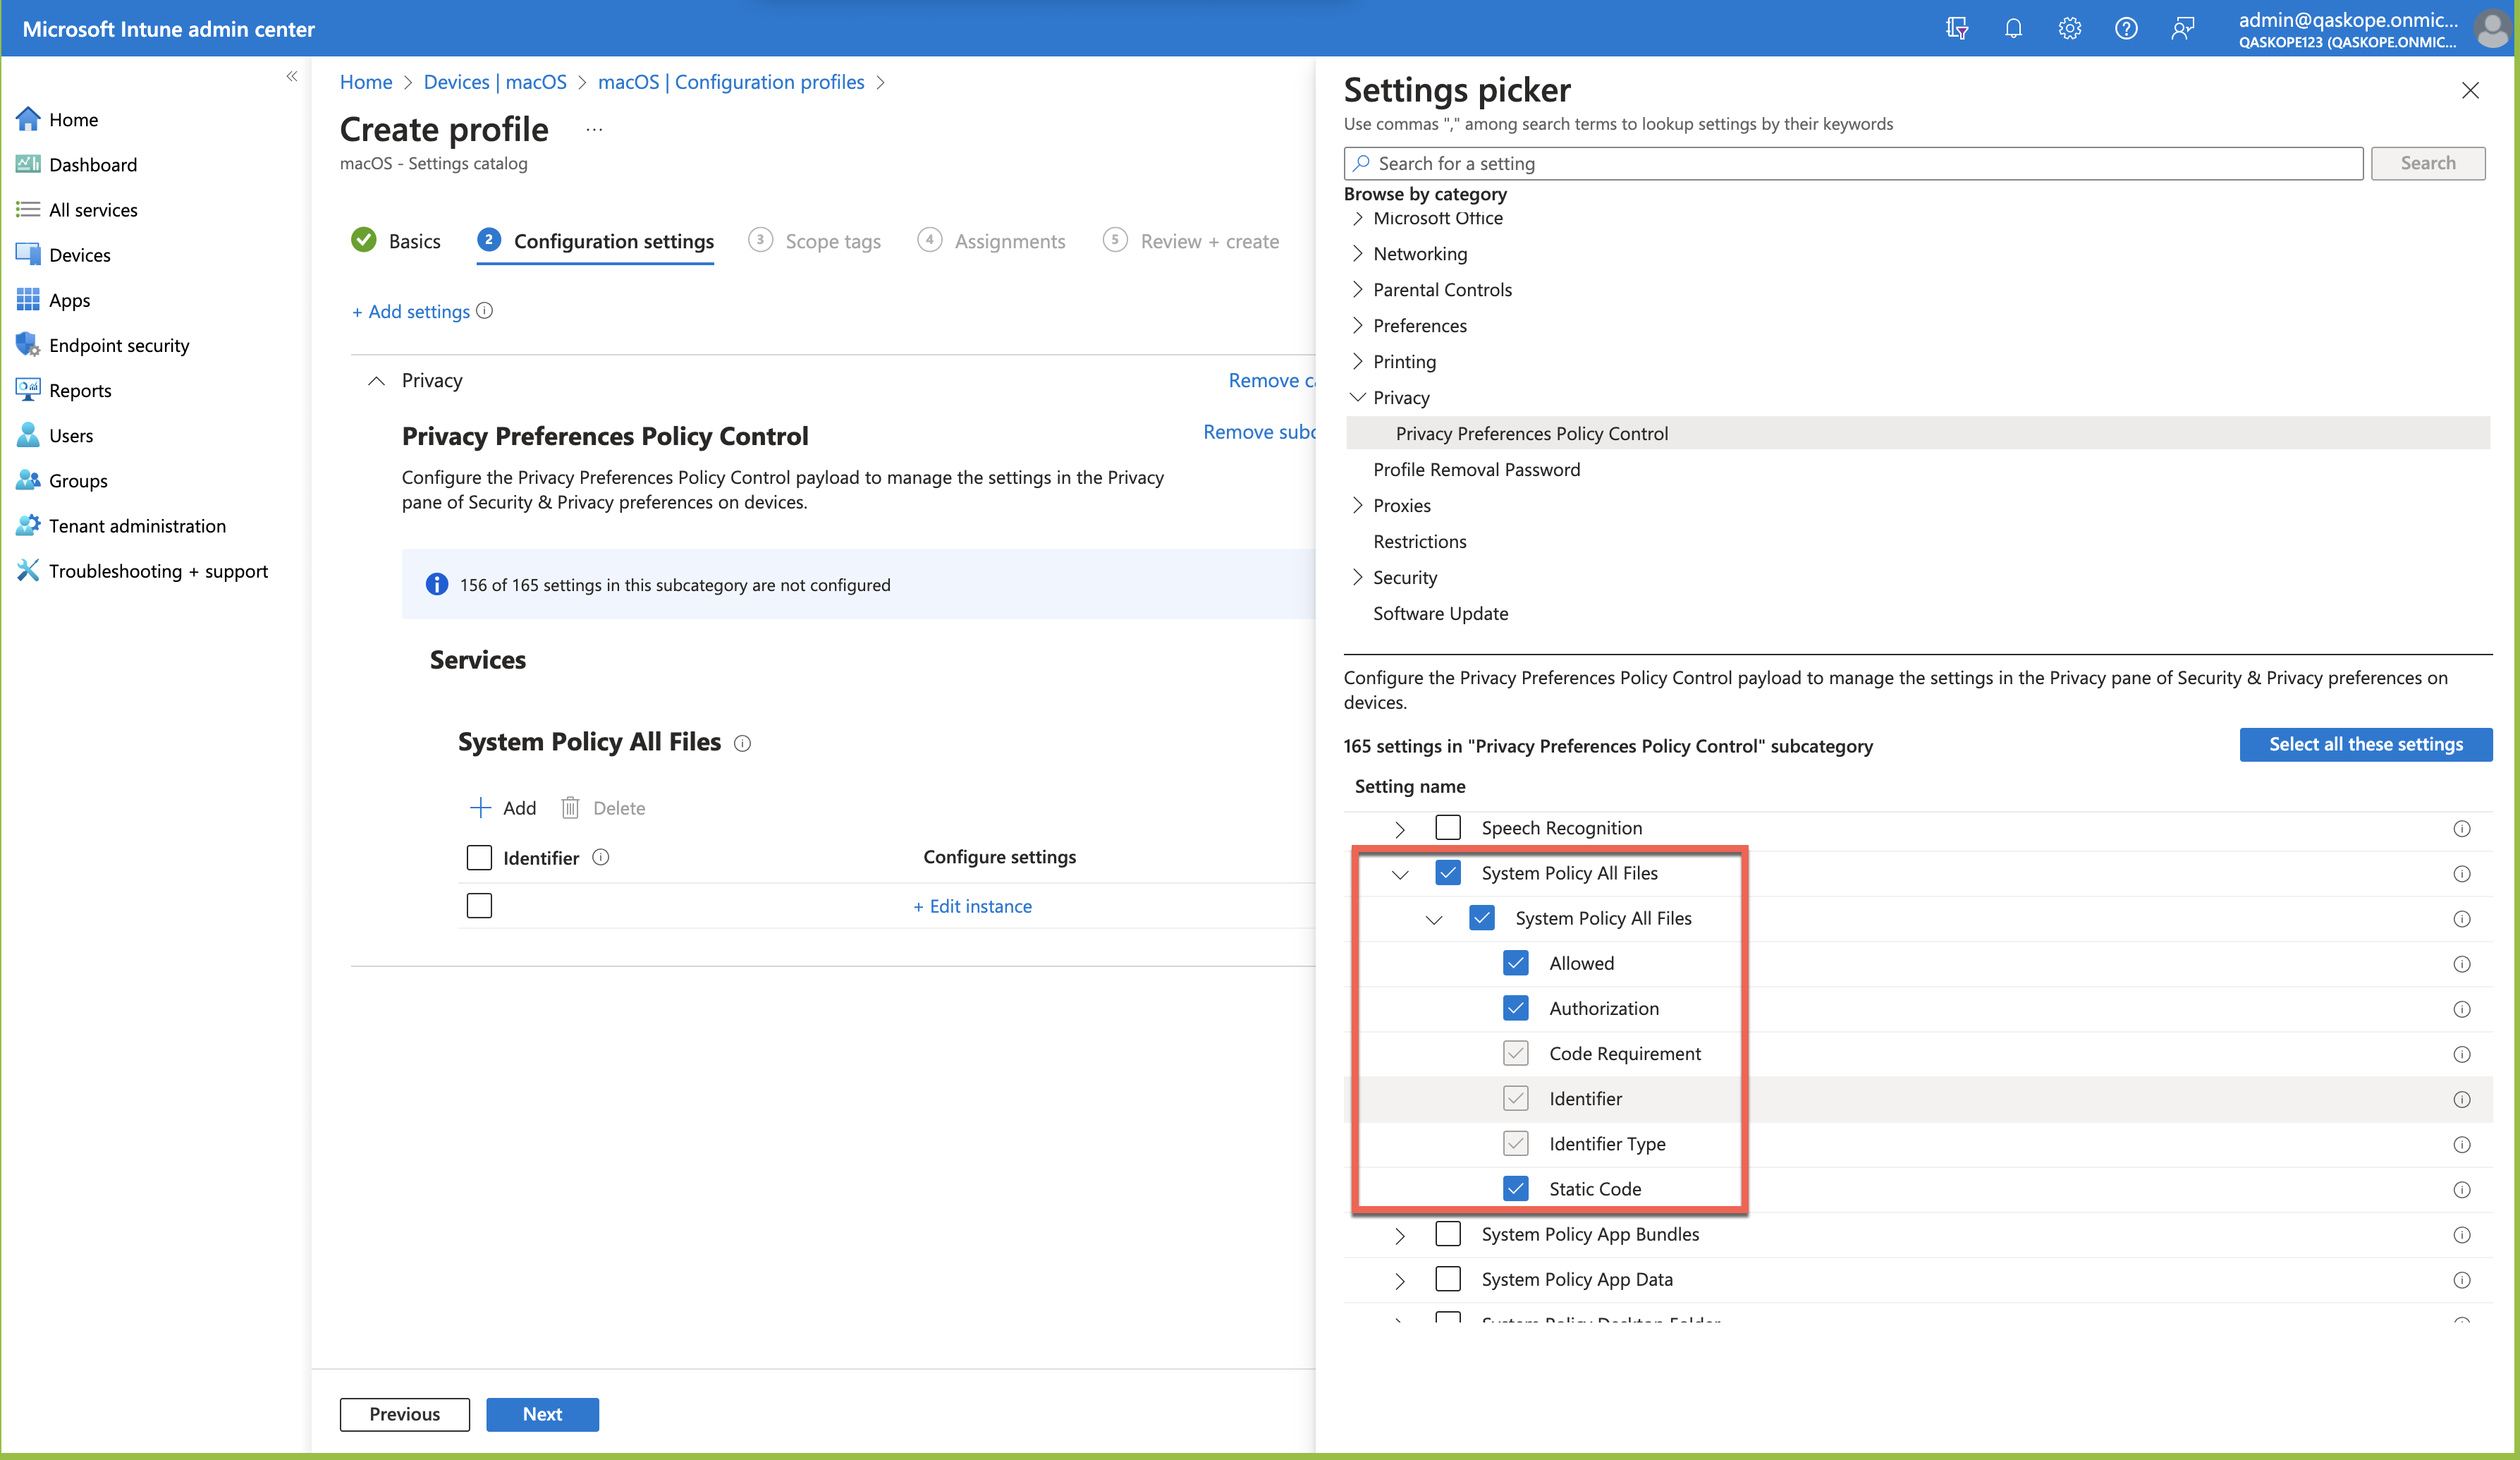
Select Privacy > Privacy Preferences Policy Control.
This opens another window to configure the privacy preferences policy control payload.
-
Select checkbox for System Policy All Files under Services.
All options under System Policy All Files is selected by default.
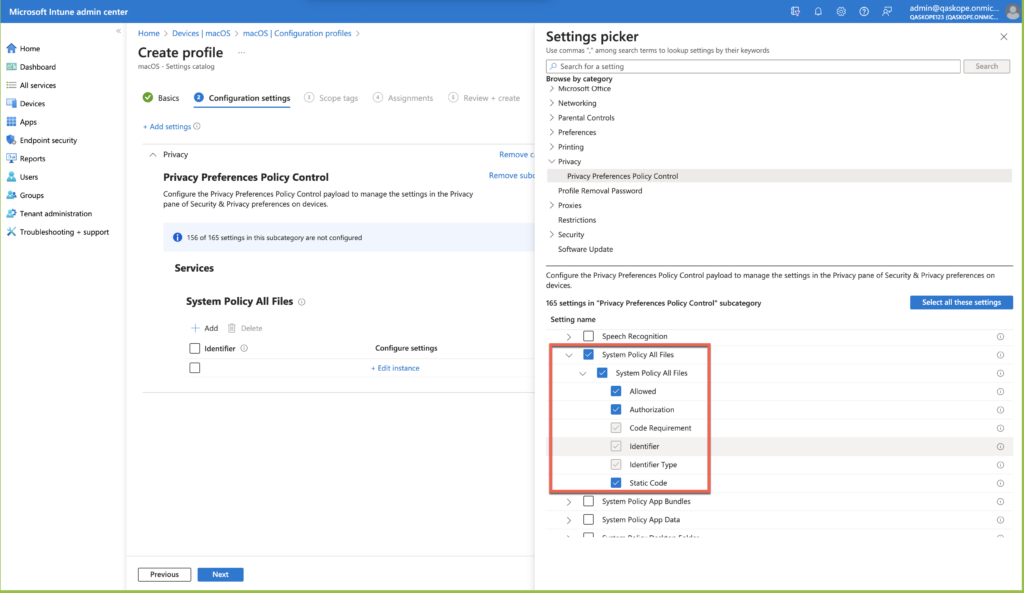
-
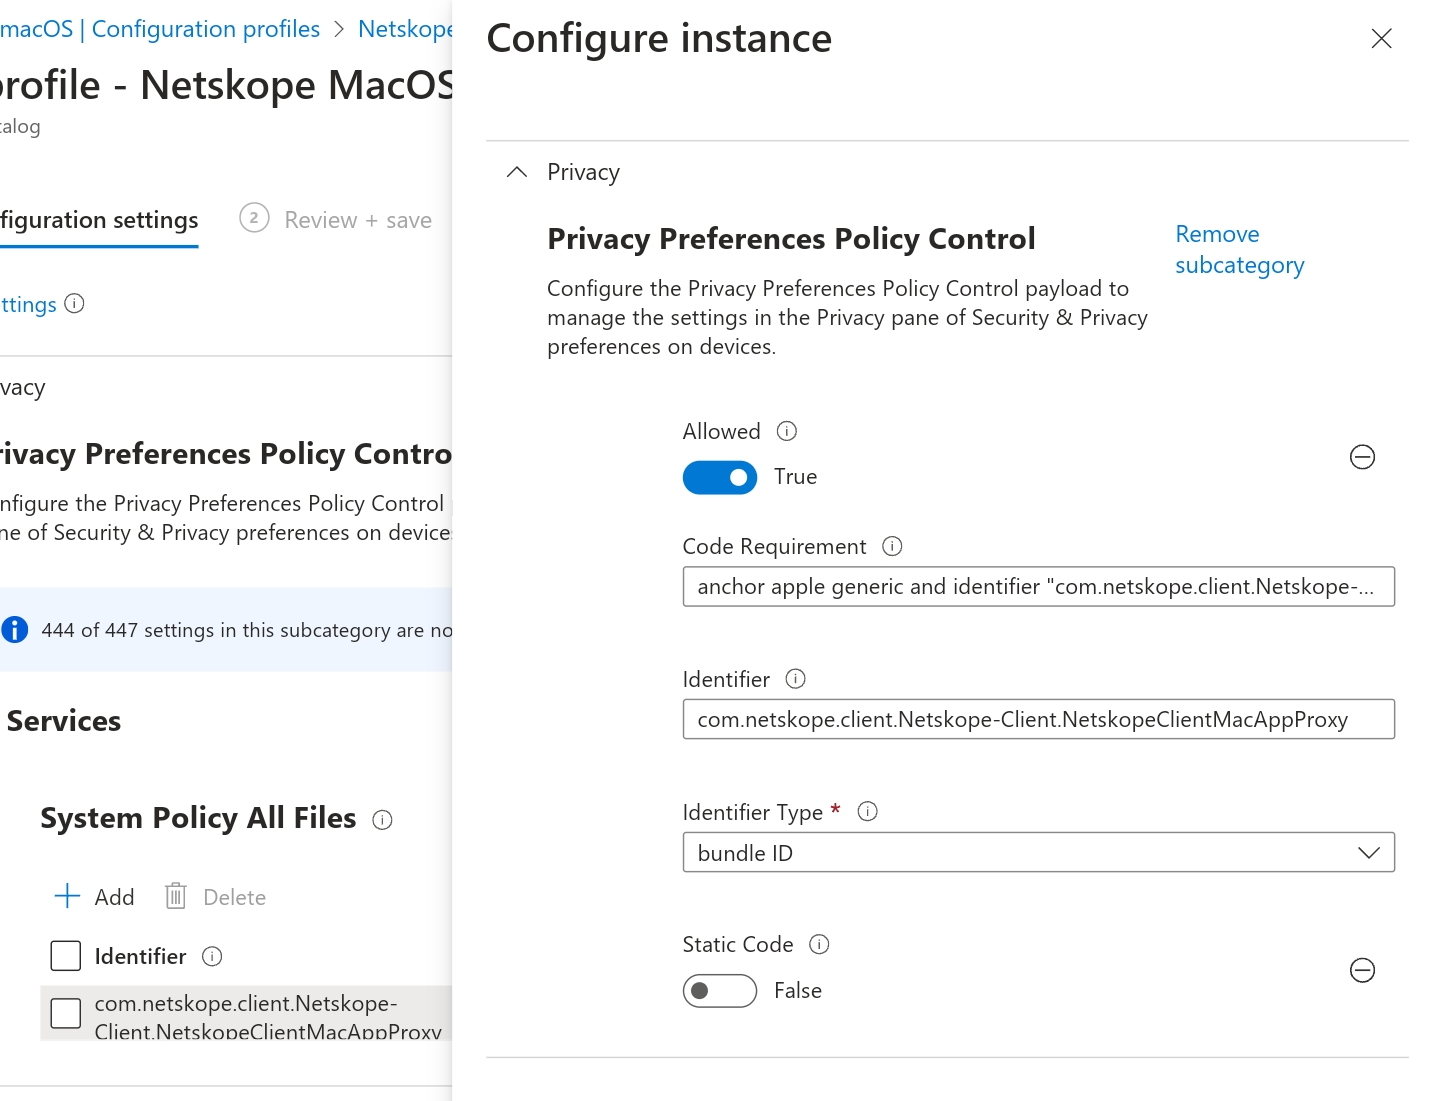
After you select settings for Privacy Preferences Policy Control, go to Configuration Settings on the left-pane and click +Edit Instance.
-
In the Configure Instance window, add the following:
-
Toggle to enable Allowed to True.
-
Code Requirement:
anchor apple generic and identifier "com.netskope.client.Netskope-Client.NetskopeClientMacAppProxy" and (certificate leaf[field.1.2.840.113635.100.6.1.9] /* exists */ or certificate 1[field.1.2.840.113635.100.6.2.6] /* exists */ and certificate leaf[field.1.2.840.113635.100.6.1.13] /* exists */ and certificate leaf[subject.OU] = "24W52P9M7W")
-
Identifier:
com.netskope.client.Netskope-Client.NetskopeClientMacAppProxy -
Identifier Type: Bundle ID.
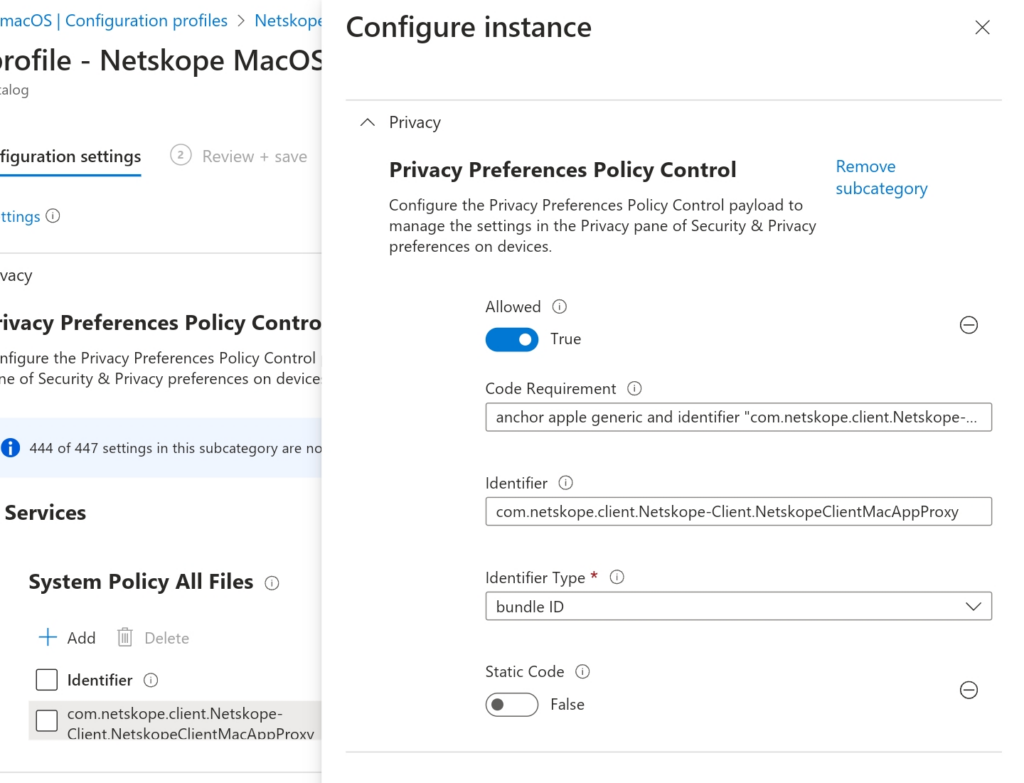 You can remove the Authorization field under Privacy Preferences Policy Control. Click
 next to the Authorization field to delete.
 -
-
Click Save.
-
Click Next to continue.
-
In Scope tags(optional), assign a tag to a profile in a specific group.
-
Click Next to continue.
-
In Assignment, select the users or groups that will receive your profile.
-
Click Next to continue.
-
In Review+Create, you can review the policy configurations.
-
Click Create.
For Endpoint DLP, you can add the following Identifier and Code Requirement:
– Identifier: com.netskope.epdlp.client
– Code Requirement:anchor apple generic and identifier "com.netskope.epdlp.client" and (certificate leaf[field.1.2.840.113635.100.6.1.9] /* exists */ or certificate 1[field.1.2.840.113635.100.6.2.6] /* exists */ and certificate leaf[field.1.2.840.113635.100.6.1.13] /* exists */ and certificate leaf[subject.OU] = "24W52P9M7W")
To learn more: Enabling Endpoint DLP on the Netskope Client for macOS.
-
-
Go to macOS policies > Configuration Profiles.
-
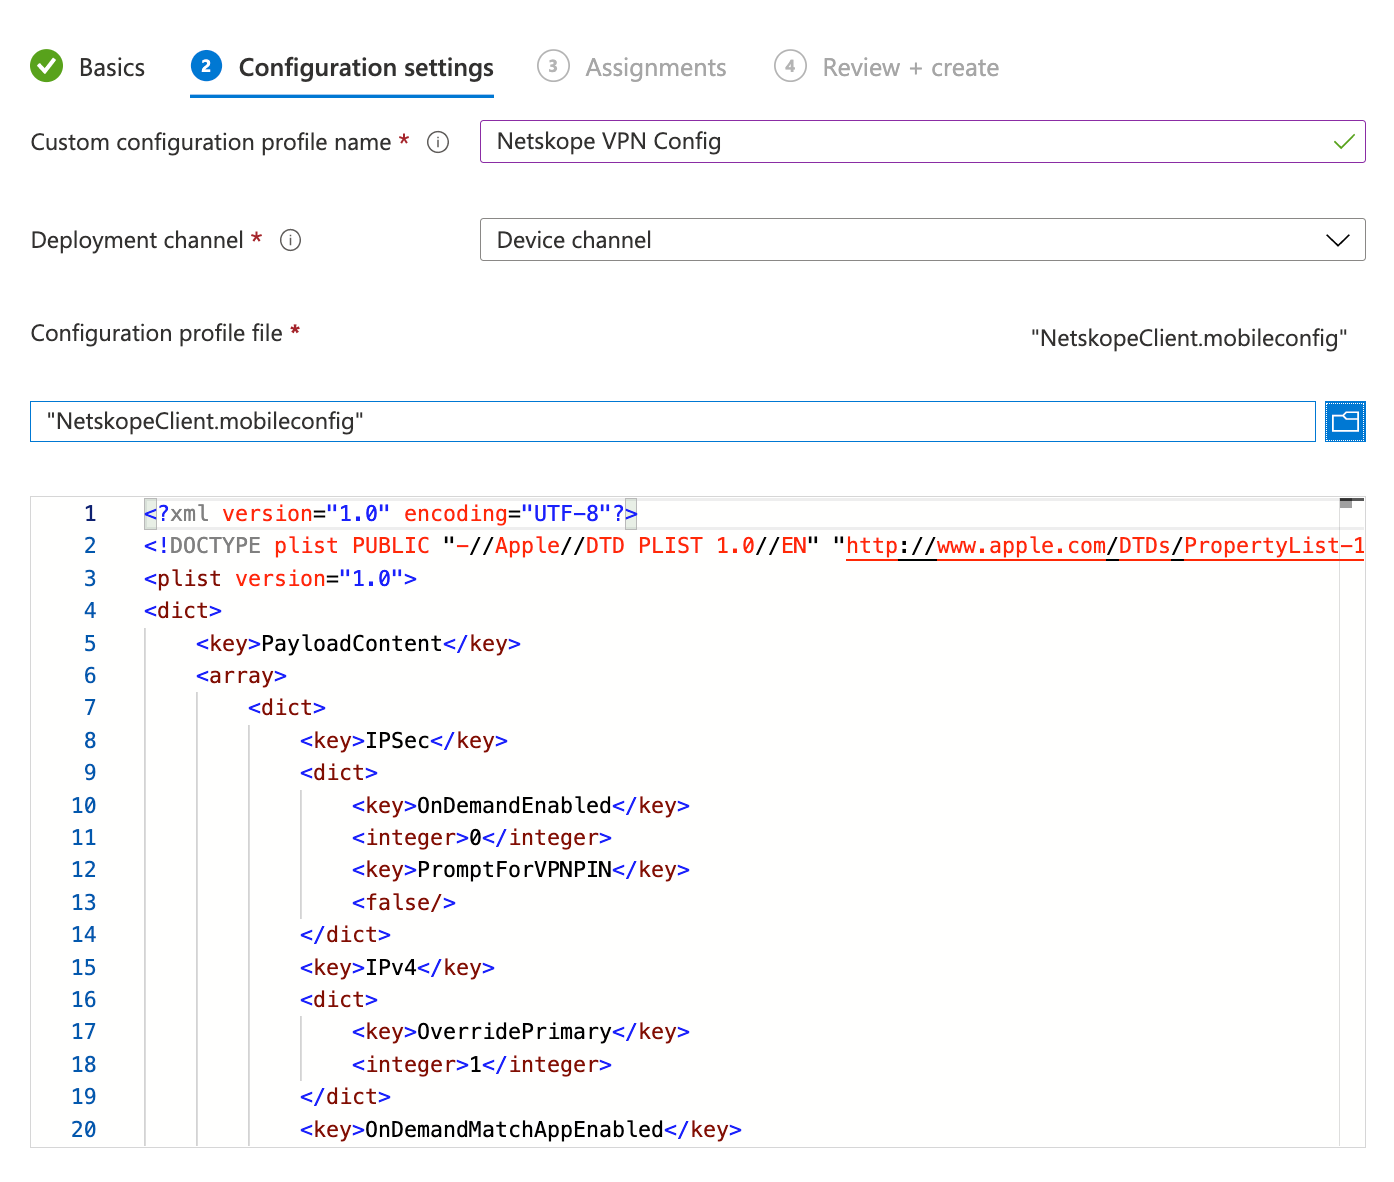
Download custom configuration profiles from Netskope Support portal. Here, click Files > View All to find the configuration profile file (NetskopeClient.mobileconfig).
-
Select Create Profile and under the Profile Types option, select Templates > Custom. Click Create.
It is recommended to create the Configuration Profile before deploying Netskope Client on macOS. This enables to pre-authorize the Netskope App Proxy through MDM to steer traffic silently without any end-user approval. -
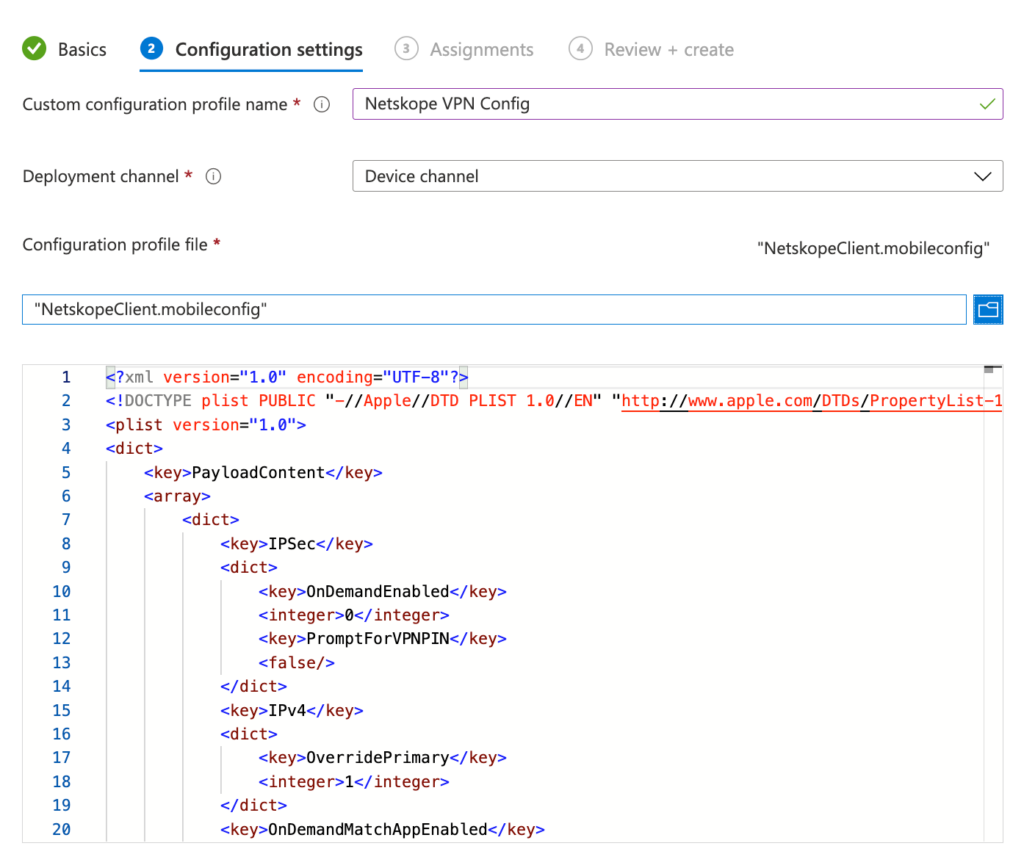
Specify a profile name.
-
Keep the Deployment Channel option to Device Channel.
-
Upload the custom configuration profile downloaded from Netskope Support Portal. Click Next to continue.
-
Select and assign appropriate users or groups. Click Next to continue.
-
Review configuration and click Create.
-
Use the Profiles option in the end-user device to validate if the installation was successful.
-
-
If you want to create PLIST in Intune for non-AD Domain-Joined devices, go to the section Create PLIST in Intune.


Validate Certificate Chain
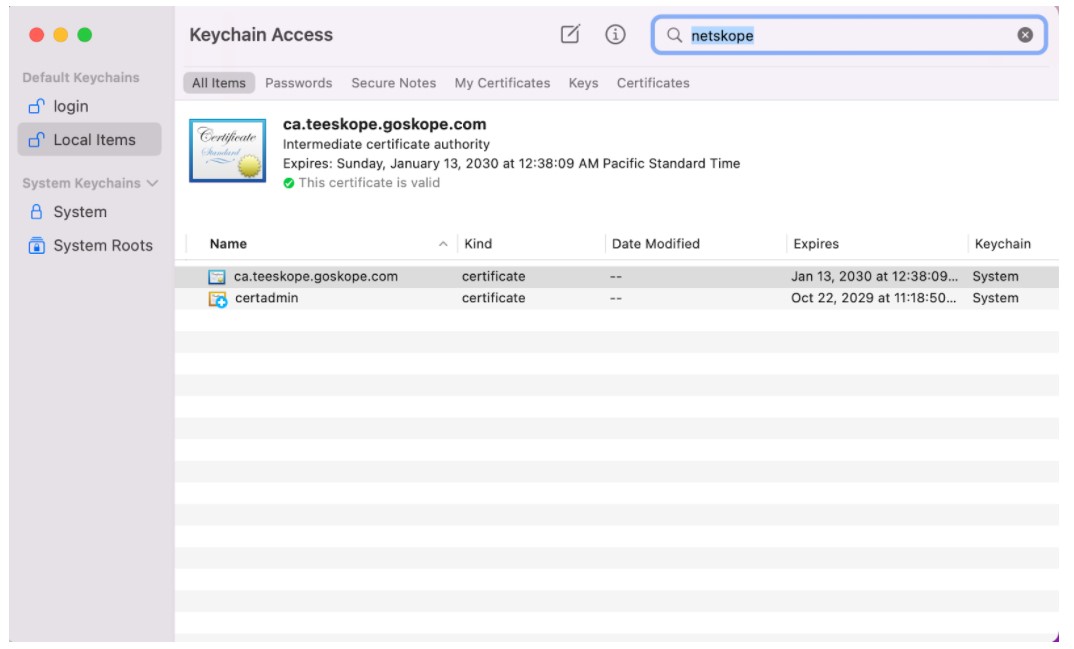
You can validate the complete certificate chain in your Mac keychain.
IdP Enrollment Workflow
If you choose to enroll Netskope Client using IdP mode in Intune, perform the following steps:
-
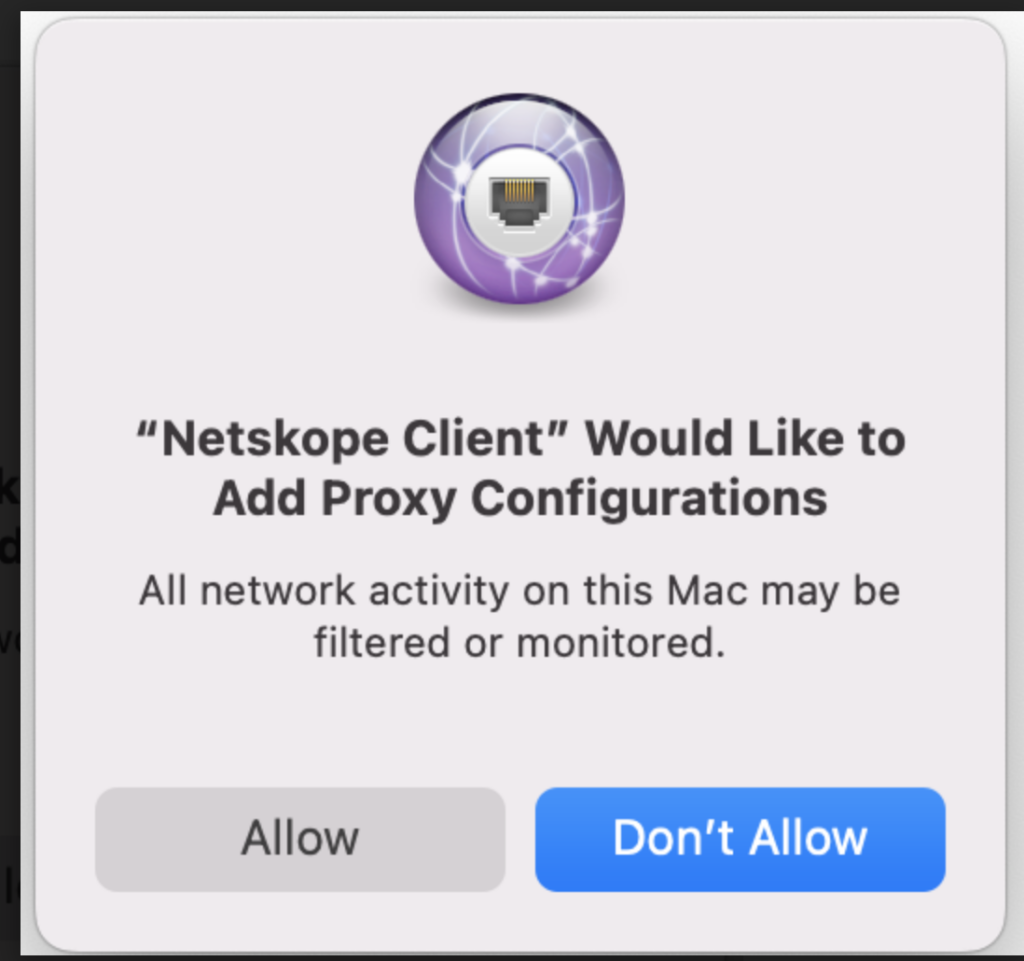
After you complete the steps to deploy Netskope Client in Intune, you will receive a notification to allow the proxy configurations.
-
Click Allow.
-
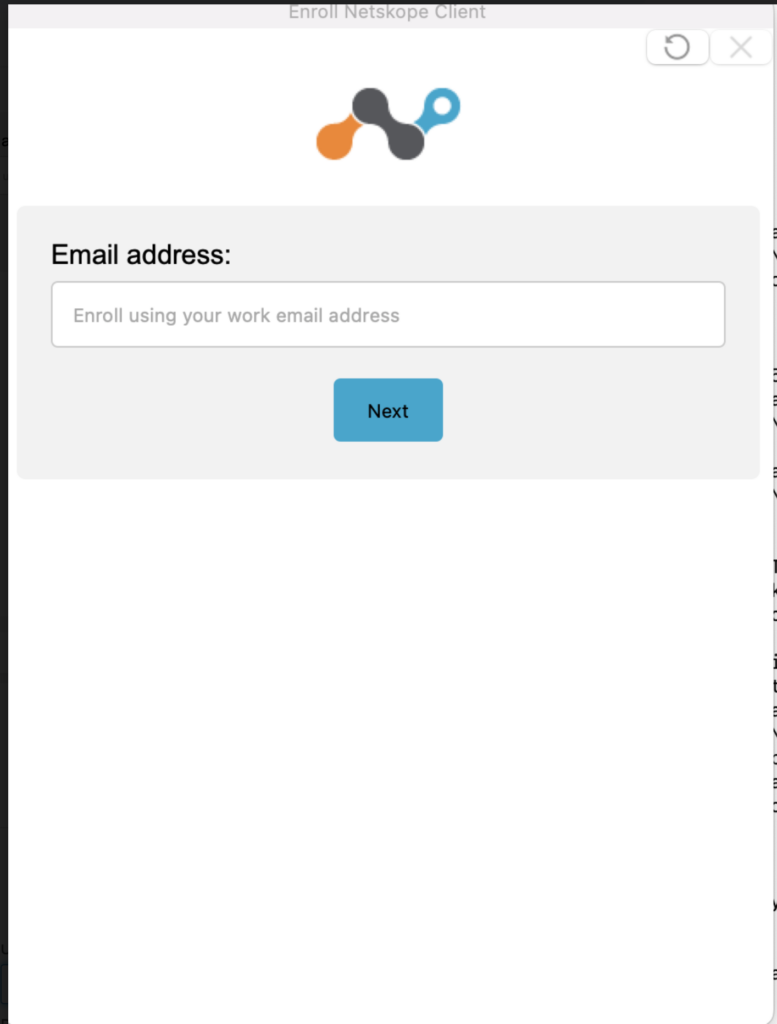
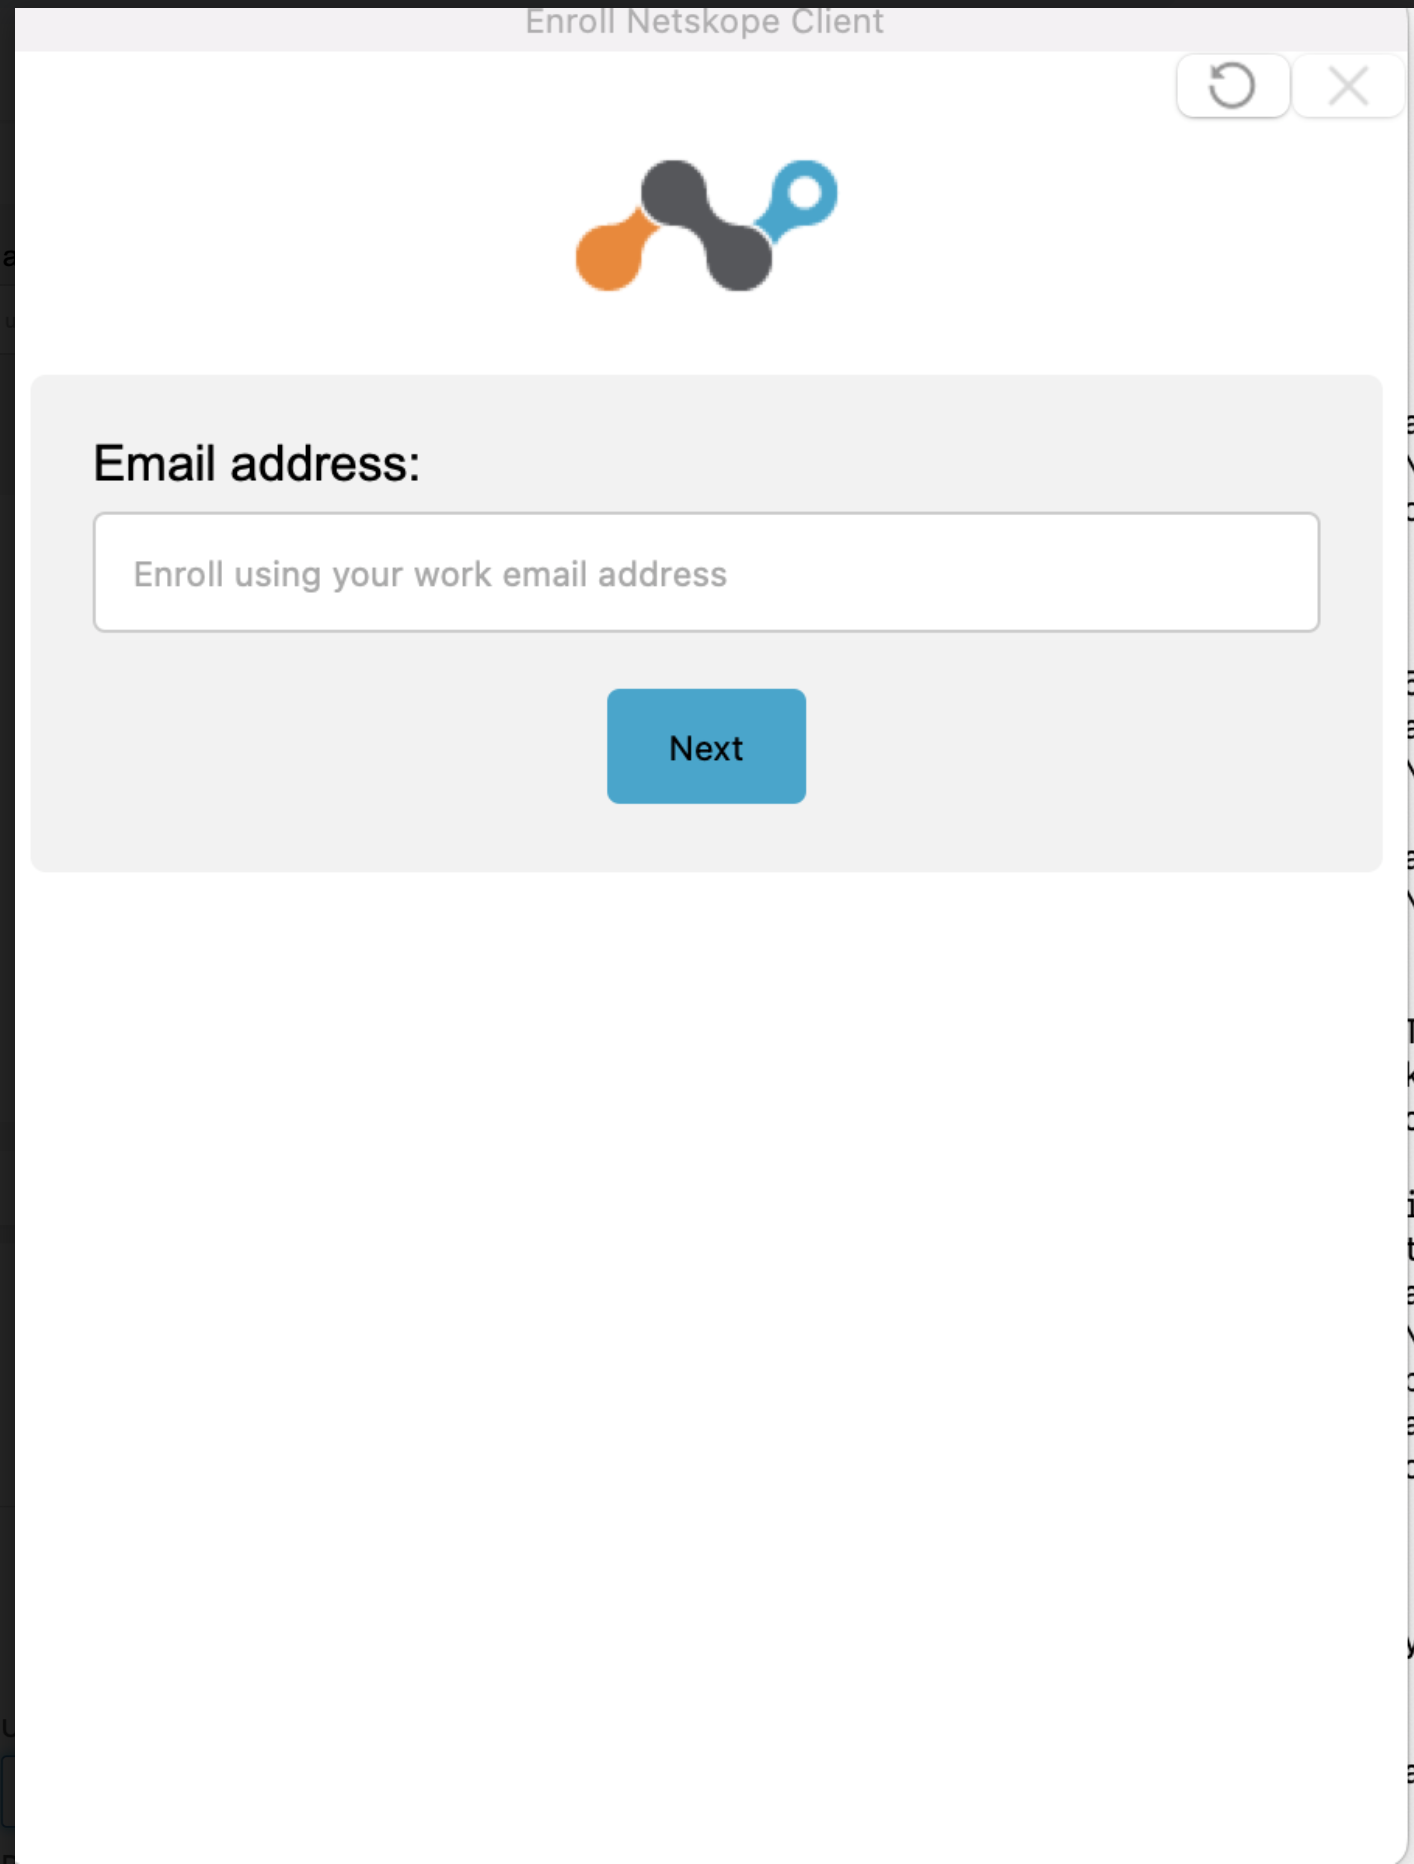
In Enroll Netskope Client, enter the Email Address.
-
Click Next.
-
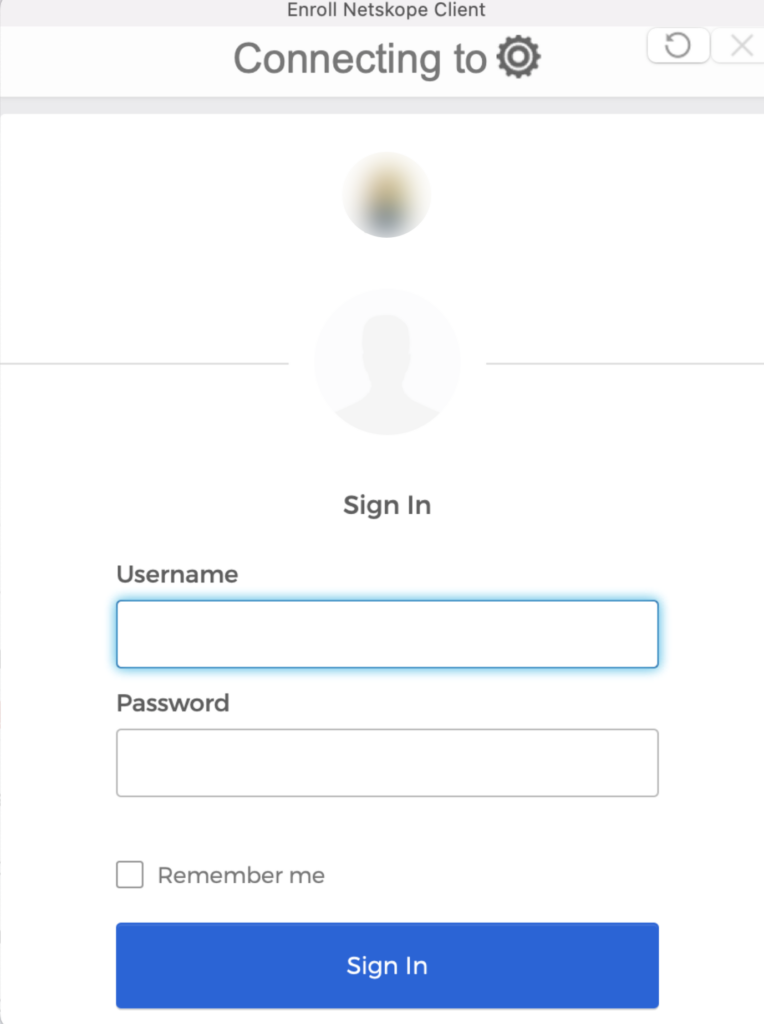
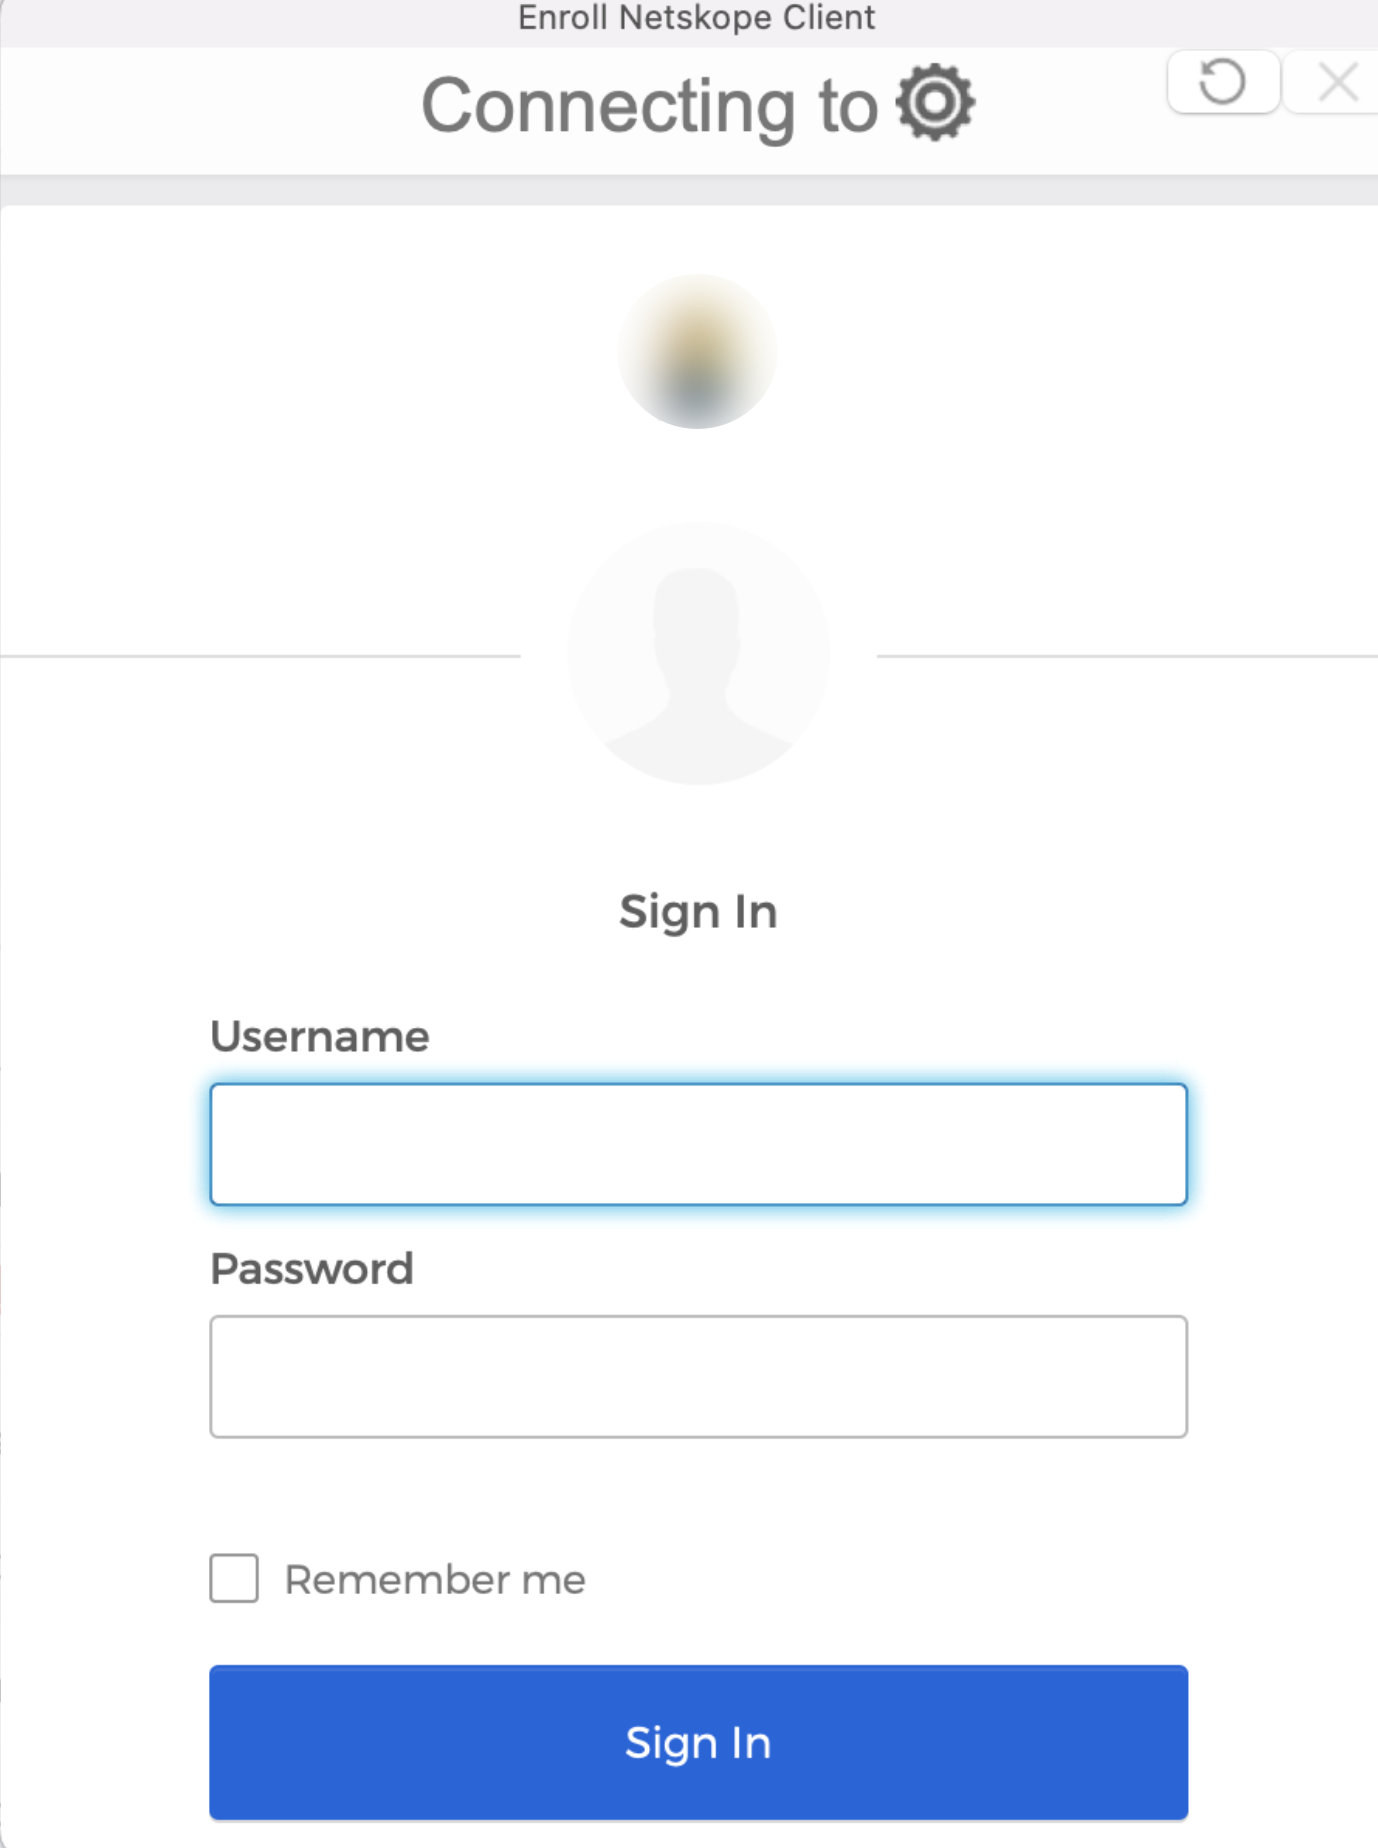
Enter the tenant name and select the tenant domain as shared with the user by their respective IT.
-
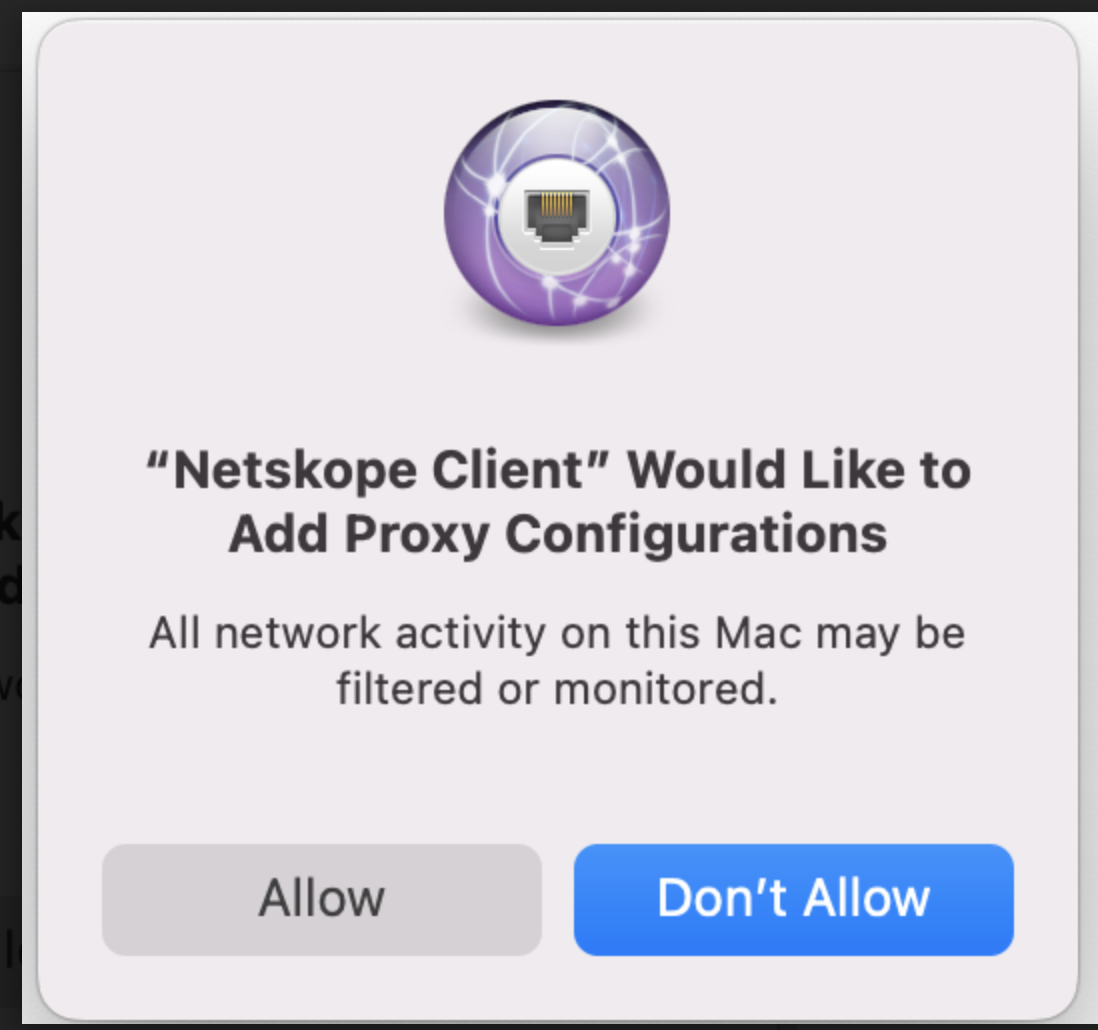
Now, you can sign in using your authentication credential to complete the enrollment process.
Create PLIST in Intune for Non-AD domain-Joined Devices
Creating a preference file in Intune include the following steps:
- Create profile with the Preference file.
- Upload the script file in Intune.
To learn more, view Add a Property List.
Create a Profile Using the Preference File
If you are deploying a Client using a PLIST-based installation, create the Profile type as Preference file and define the email variable with the token {{mail}}.
Follow the steps to create a profile:
-
Sign in to Microsoft Intune Admin Center.
-
Navigate to Devices > Configuration Profiles > Create Profile.
-
Provide the following details in Create a Profile page:
-
Platform: Select macOS
-
Profile Type: Templates. Select the Template name as Preference File.
-
-
Click Create.
-
In Basics, enter the name and description
-
Click Next.
-
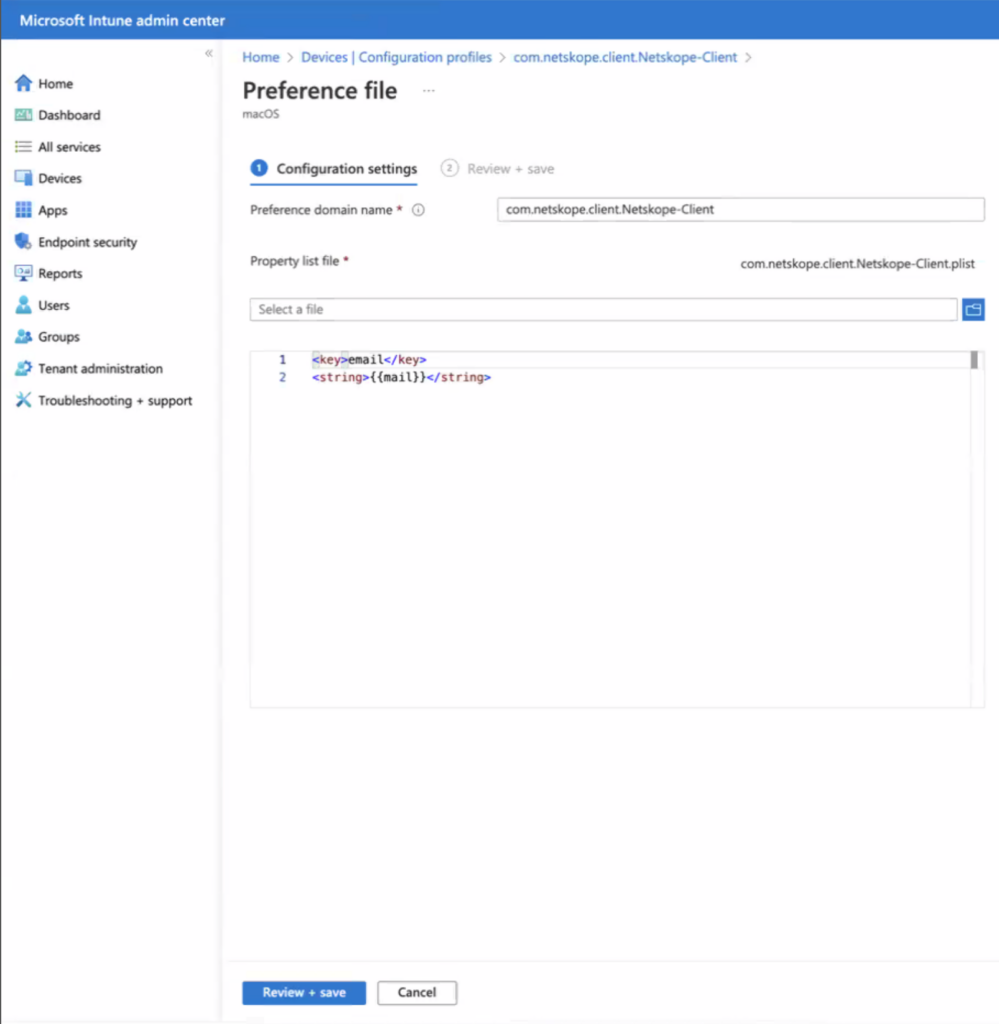
In Configuration Settings, provide the following details:
-
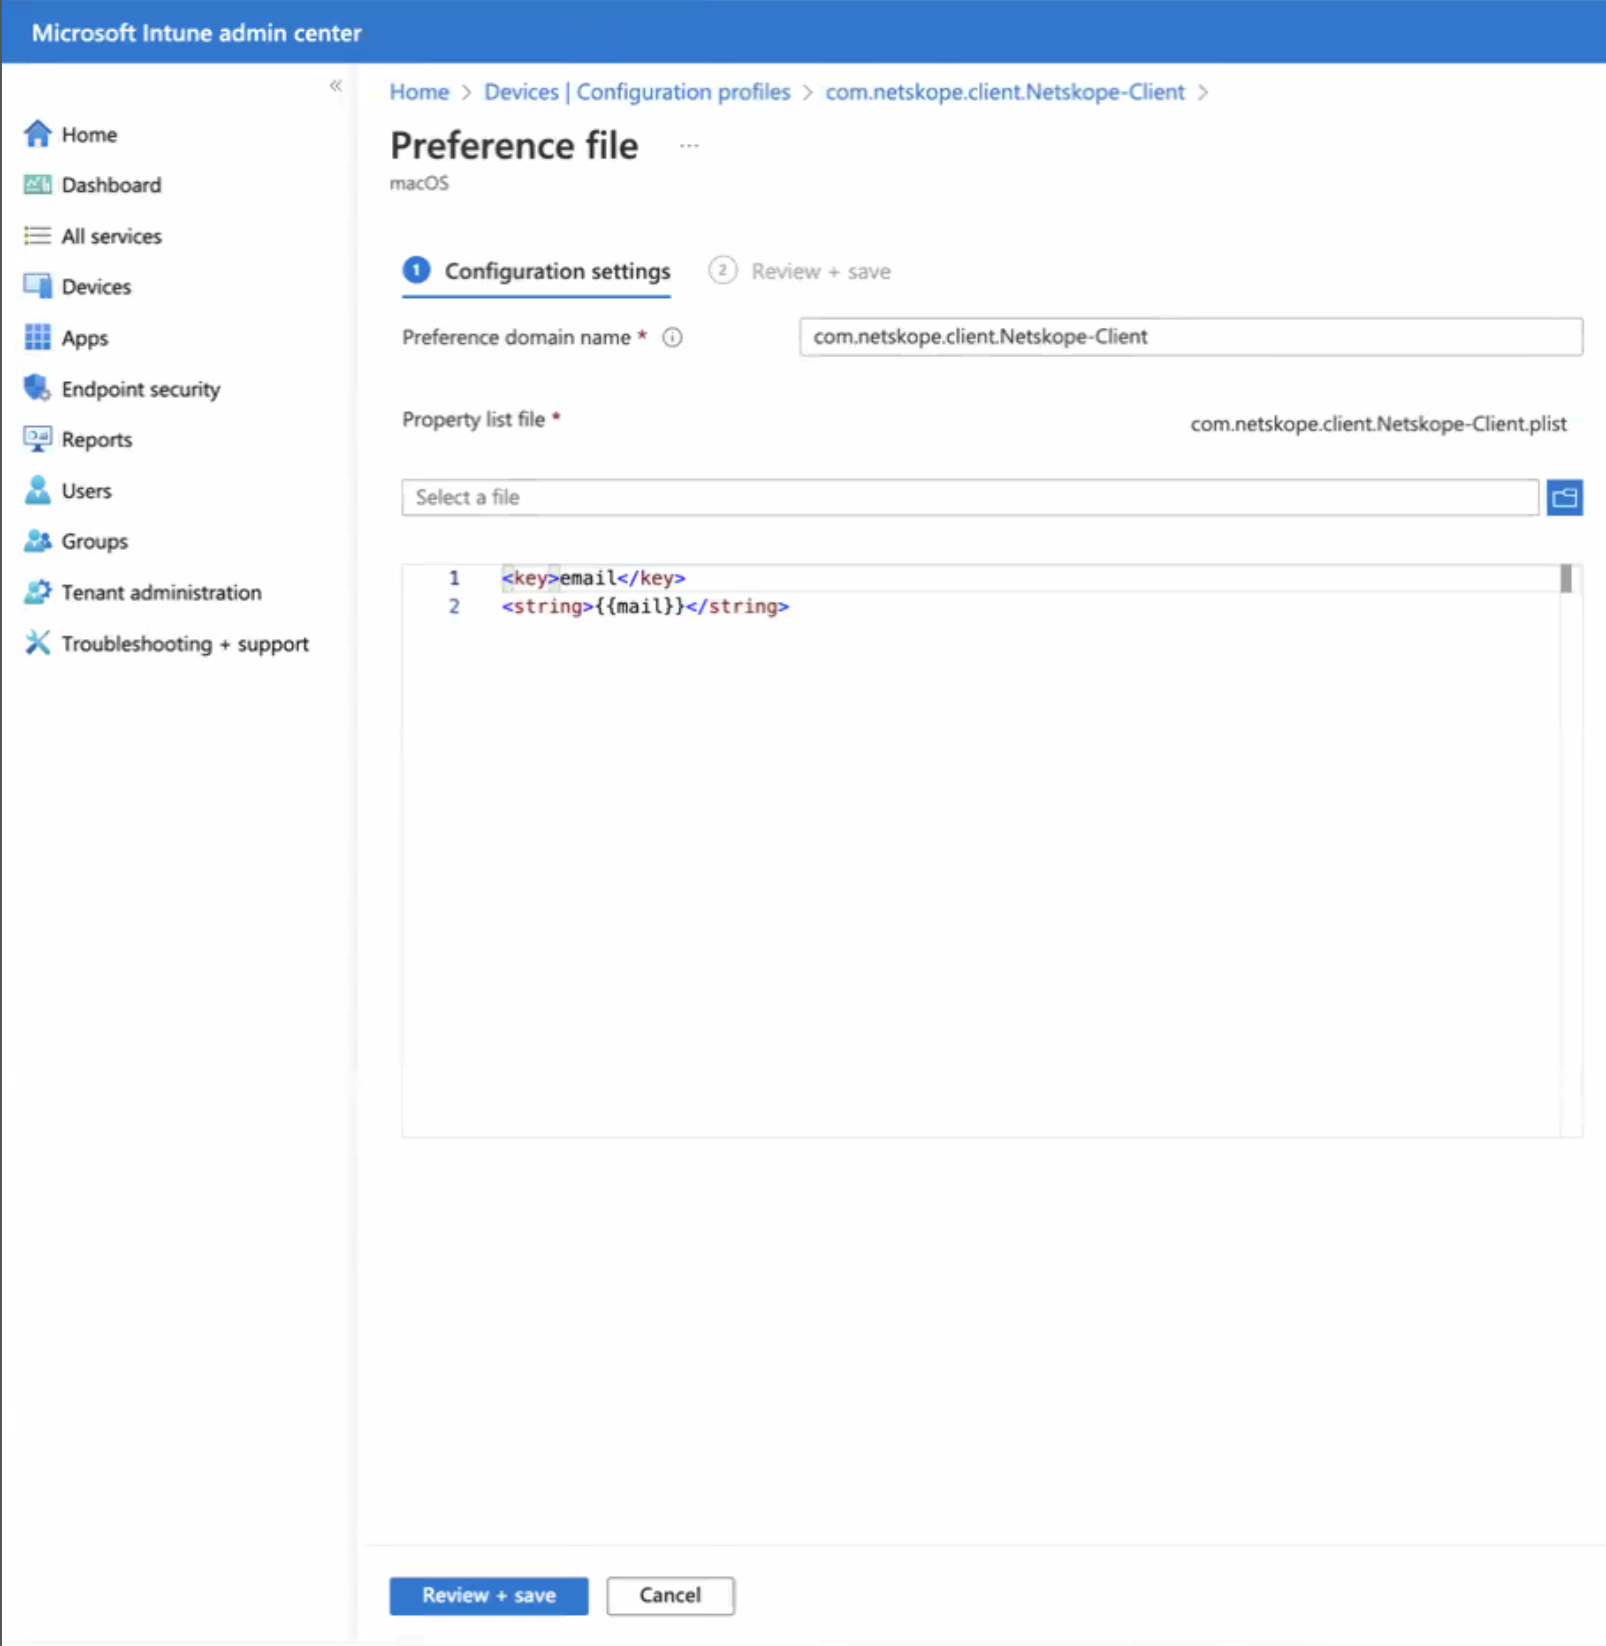
Preference domain name: Enter the bundle ID: com.netskope.client.Netskope-Client.
-
Upload the property list file.
<key>email</key>
<string>{{mail}}</string>
-
-
Select Next.
-
In Scope, assign a tag to filter the profile to specific IT groups.
-
Select Next.
-
In Assignment, select the users or groups that will receive your profile.
-
Select Next.
-
In Review + Create, review your configuration and click Create.
Upload Preinstallation Script File in Intune
Perform the following steps to upload the preinstallation script using macOS app (PKG) type:
-
Go to Apps > Click Create..
-
Click Create.
-
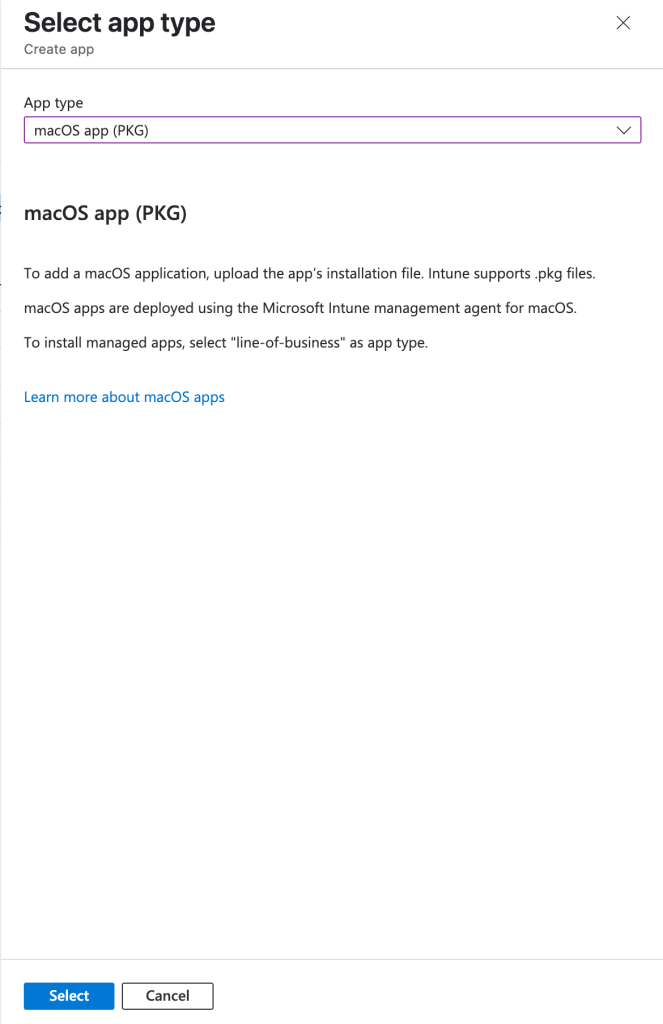
In Select app type, choose macOS app (PKG) from the App type drop-down menu.
-
Click Select.
-
In Select file, click select app package file.
This opens a separate screen App package file.
-
In app package file, click the folder icon to select the .pkg file from your local folder.
-
Click OK.
-
Under App Information, enter the Publisher name.
-
Click Next.
-
Under Program, copy and paste the Netskope Intune configuration script (downloaded from the support portal) in Pre-install script.
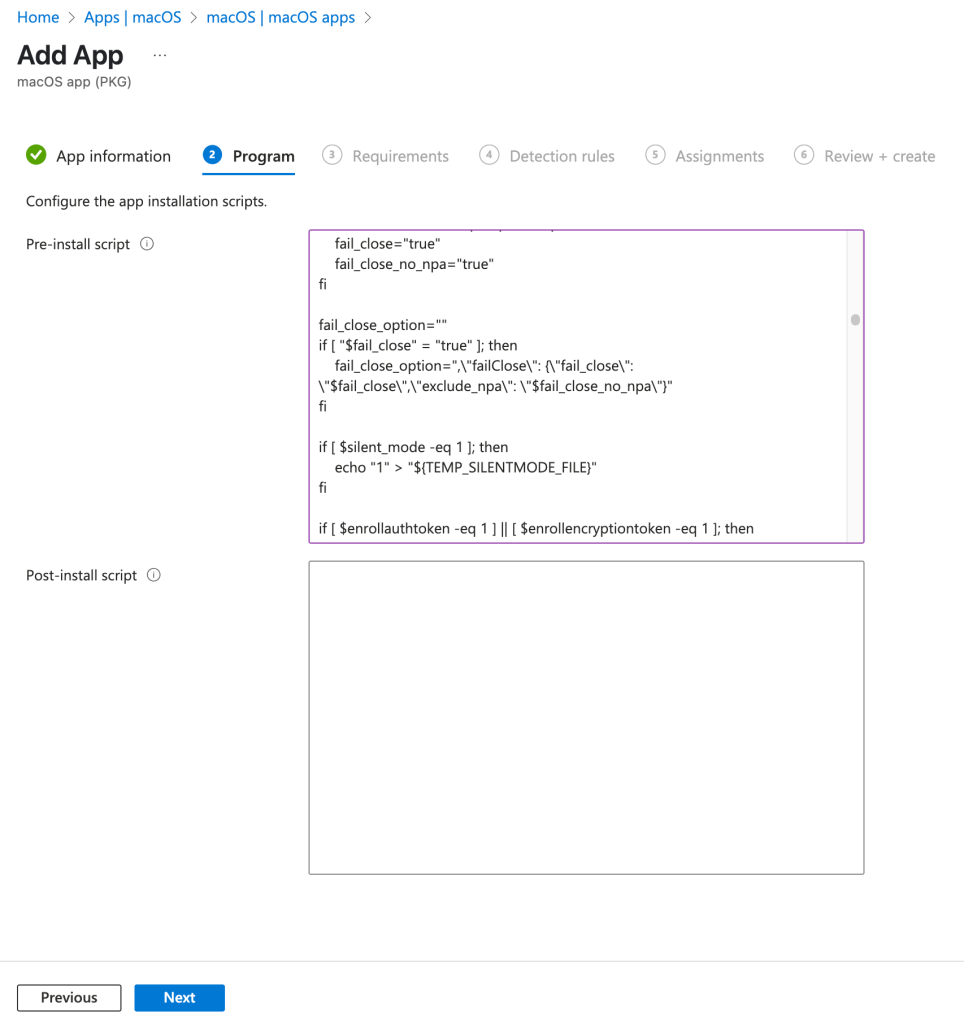
In the preinstallation script, update the Email Preference mode in the script as given in the following example:
set -- 0 0 0 addon-<tenant-URL> <ORG ID> template.plist preference_email
-
Click Next.
-
Under Requirements, Select the Minimum operating system.
-
Click Next.
-
Under Detection Rules, review the AppleBundleIDs.
You can remove the bundle ID com.netskope.client.nsIPFilterNKE. Click the delete icon to remove the bundle ID. -
Click Next.
-
Under Assignment, select the users or groups that will receive your profile.
-
Click Next to continue.
-
Under Review+Create, you can review the policy configurations.
-
Click Create.

