

This topic describes the procedure to configure Ivanti Neurons (formerly known as MobileIron Cloud) for macOS.
Prerequisites
-
Download Netskope Root and Intermediate certificates and convert them to .cer extension. To learn more, see Certificates.
-
Download MobileIron Packager (MIP) from the MobileIron Support portal. To install MIP, install the MobileIron Packager (MIP) app and then download the Netskope agent .pkg file. Upload the Netskope package in the tool to convert it to .mip.
Create Script for App Deployment
You can create your scripts in the All Scripts section. Netskope Client use the instructions held in the script to enroll the user to a device.
Perform the following steps to create the script:
-
Go to Admin > Scripts > All Scripts.

-
Click Add to create the Installation Script.
-
Enter the Script Name, Description, and select Script Type as ‘bash’.
-
Click On Import code from script and upload the minsclientconfiig_<version-number>.sh script.
-
Click Add in Script Input to define the Input Environmental Variables.
-
Provide the Environment Variable Name and Environment Default value.
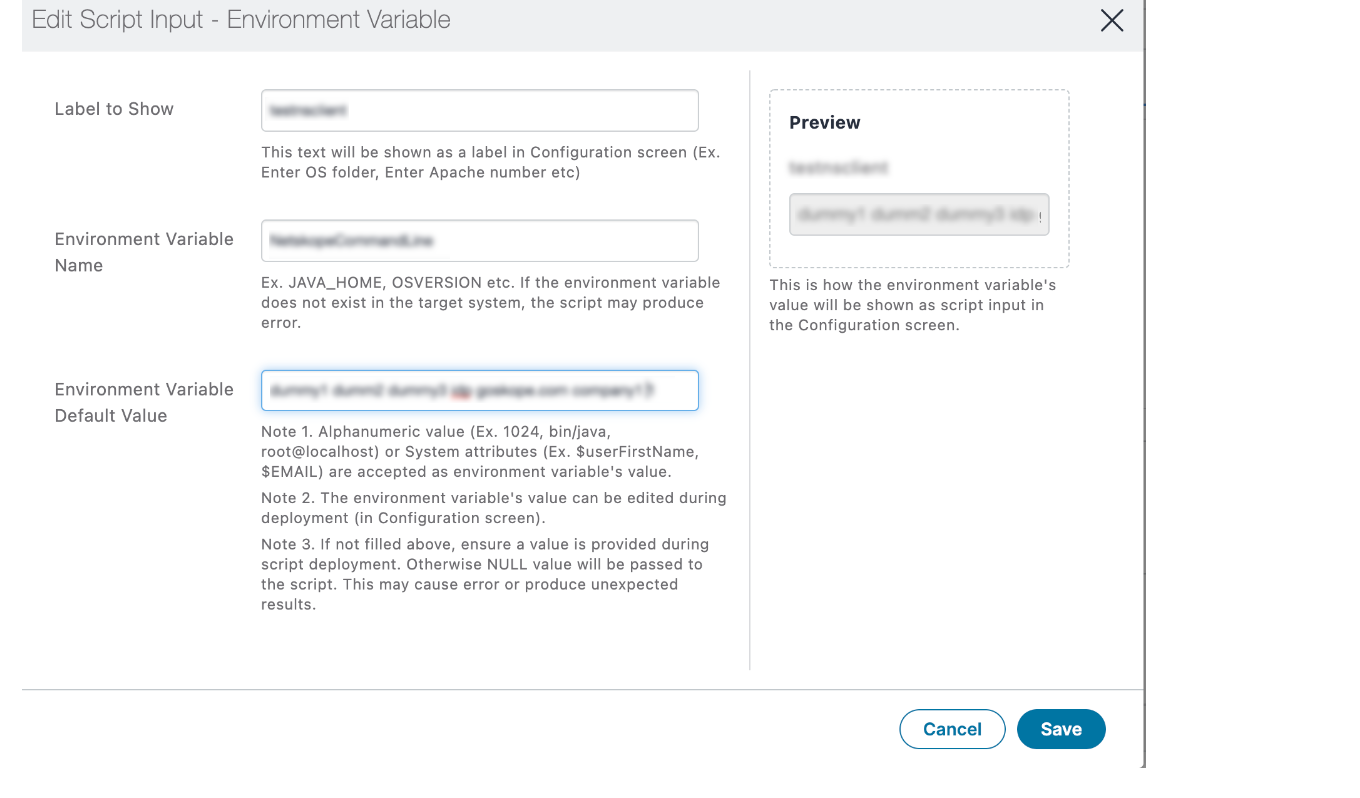 To include secure enrollment tokens, add the two additional parameters while adding the script in Environment Variable Default Value:
enrollauthtokenandenrollencryptiontoken. -
Click Save.
MacOS Configuration Script for Installation
Here, you can define a configuration to distribute the script to the end-user device.
- Go to Configuration > Add > Search and select Mobile@Work for macOS Script.
- Enter Name and select your script in the Configuration Setup.
- After the script Execution select Execute Once On Deployment.
- Click Next.
- Select the Device/Users/Custom.
Adding Netskope App in App Catalog
Adding the Netskope application to Omnissa Workspace ONE for deployment in the mac Device.
- Go to Apps > App Catalog.
- Click Add.

- Select In-house app.

- In the Choose section, upload .mip netskope client pkg

- Click Next. Ensure the file upload is successful.
- In the Describe section, ensure to update the Package ID as.com.netskope.client.Netskope-Client when importing Packager in-house macOS apps and click Next.

- In the Scripts section, define or select the application scripts.
- Pre Install Scripts – Enter the script name to select the script to run before app installation. The preinstall scripts execute or rerun until the script execution success status is received from the client. Once the script execution is completed, the app install command is sent. You can view the script run status in the device details page in the Logs tab.
- Uninstall Scripts: Enter the script name that server sends to a device when it detects an app that is no longer distributed to the device.

- Select the desired options in Add Screenshots, Delegate, and Distribute sections.
- In the App configuration section, click Install Application configuration settings and toggle on Install on Device and select High from the Set App install Priority dropdown menu.

- Click Done.
Approve Network Extension
System Extension configuration allows installation of extension types like Driver Extension, Network Extension and Endpoint Security Extension, without kernel-level access.
- Go to Configuration > Add Configuration > Search for ‘MacOS System Extensions.
- Under Allowed System Extensions, add Allowed Team Identifiers and Allowed System Extensions.
- Add Network Extension Team ID: 24W52P9M7W.
- Click Add to add the following System Extension:
com.netskope.client.Netskope-Client.NetskopeClientMacAppProxy - Also provide the same details in Remove System Extensions.
- Select the Allow user overrides option.
- Click Next.
- Associate to Device/Users/Custom.

Pre-Approve Full Disk Access Permission For macOS
The Netskope Client on macOS requires Full Disk Access permissions for various foundational functionalities. The following configuration pre-approves these permissions and suppresses end-user notifications requesting approval. To learn more, view macOS System Extension configuration.
-
Go to Configurations from the left pane.
-
Click +Add.
-
Search and select Privacy Preference.
-
In Create Privacy Preference Configuration:
-
Enter Name of the configuration.
-
Under Configuration Setup go to System Policy (All Files).
-
Click Actions > Add.
-
Under Identity Dictionary Key:
-
Enter
com.netskope.client.Netskope-Client.NetskopeClientMacAppProxyin Identifier. -
Select Bundle ID in Identifier Type.
-
Enter the following anchor apple generic and identifier in Code Requirement.
"com.netskope.client.Netskope-Client.NetskopeClientMacAppProxy" and (certificate leaf[field.1.2.840.113635.100.6.1.9] /* exists */ or certificate 1[field.1.2.840.113635.100.6.2.6] /* exists */ and certificate leaf[field.1.2.840.113635.100.6.1.13] /* exists */ and certificate leaf[subject.OU] = "24W52P9M7W")
-
Select Allowed.

-
Click Save.
-
-
-
Select Next.
-
In Create Privacy Preference Configuration, select the following:
-
Select Custom.
-
Select Users/User Groups or Devices/Devices Groups.
-
Select respective options based on selection.
-
-
Click Done.
Onboarding macOS device with Ivanti Neurons
Perform the following steps to onboard the macoS device:
- Click Getting Started in the Welcome email to Onboard your endpoint.

- Enter the Email and password.
- Choose one of the following options:
- I own the Device.
- Company owns the Device.
- Install the MDM Profile.

- Verify the app installation process in the ‘install.log’ file.
- Enter the IDP login details such as email address.
-