

This article describes how to deploy Netskope Client on macOS devices using Omnissa Workspace ONE.
Prerequisites
- Administrators must possess proficient working knowledge of Omnissa Workspace ONE UEM.
- Administrators must review Netskope Client Client Enrollment Methods to understand the Client User Enrollment methods available for their environment.
- Import users into the Netskope tenant – see Provisioning Users for Netskope Client.
- Download Netskope Root and Tenant Certificates and ensure the certificates are available when needed.
- See Deploy Netskope Client via IdP when using IDP as the method of user enrollment.
Supported Platforms and Enrollment Methods
This article outlines the Netskope Client deployment instructions for the following user enrollment methods and supported platforms. User enrollment methods not documented here are not supported at this time.
| Enrollment Method | Single User | Multi-User |
|---|---|---|
| IDP | Y | Y |
| PLIST | Y | N |
Configuration Profile Setup
Profiles manage the core configuration for Client installation. The following sections provide a detailed overview of how to configure these profiles effectively.
Pre-Approve Network Extension
The Netskope Client installs a network extension on macOS that requires administrator approval to function. Configure the following to pre-approve the network extension and suppress end-user notifications requesting approval.
To configure:
-
Go to Resources > Profiles & Baselines > Profiles.
-
Click Add Profile from the Add dropdown options.
-
Select Apple macOS from the platform list.
-
Select Device Profile in Select Context and click Next.
-
Enter a unique Profile name. For example, Netskope Client Configuration Profile.
-
Start typing System in the search text box of the configuration profile.
-
Expand System Extensions and click Add.
-
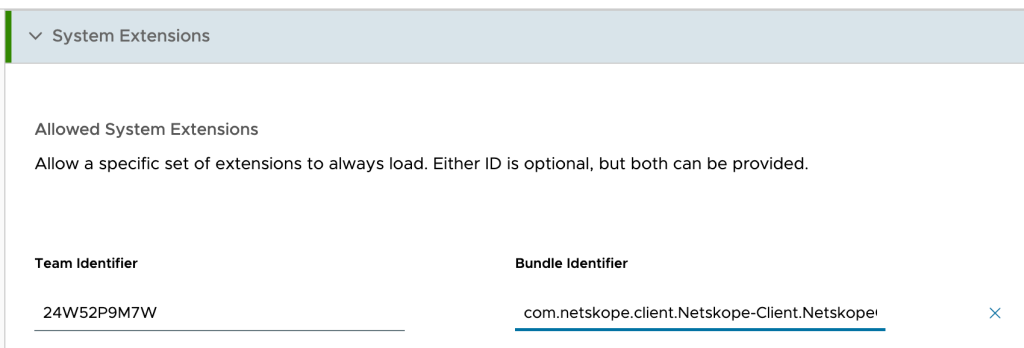
Configure Allow Systems Extensions as follows:
-
Bundle Identifier: com.netskope.client.Netskope-Client.NetskopeClientMacAppProxy
-
Team Identifier: 24W52P9M7W
-
-
Click Next.
If the Next button is not available, remove empty configuration options from other headers. For example, Removable system extensions, Non Removable System extensions.
-
Add the assignment details.
-
Click Save & Publish.

Approve Full Disk Access Permission
The Netskope Client on macOS requires Full Disk Access permissions for various foundational functionalities. The following configuration approves these permissions and suppresses end-user notifications requesting approval.
-
Go to Resources > Profiles & Baselines > Profiles.
-
Click Add Profile from the Add dropdown options.
-
Select Apple macOS from the platform list.
-
Select Device Profile in Select Context and click Next.
-
Enter a unique Profile name. For example, Netskope Client Configuration Profile.
-
Start typing Privacy in the search text box of the configuration profile.
-
Expand Privacy Preferences and click Add.
-
Configure the following settings to allow access to a service or an app:
-
Bundle Identifier:
com.netskope.client.Netskope-Client.NetskopeClientMacAppProxy -
Team Identifier: Select Bundle ID.
-
Code Requirement:
anchor apple generic and identifier "com.netskope.client.Netskope-Client.NetskopeClientMacAppProxy" and (certificate leaf[field.1.2.840.113635.100.6.1.9] /* exists */ or certificate 1[field.1.2.840.113635.100.6.2.6] /* exists */ and certificate leaf[field.1.2.840.113635.100.6.1.13] /* exists */ and certificate leaf[subject.OU] = "24W52P9M7W")

-
Find System Policy All Files under Services section and select Allow.

-
-
Click Next.
-
Add the assignment details.
-
Click Save & Publish.


– Identifier: com.netskope.epdlp.client
– Code Requirement:
anchor apple generic and identifier "com.netskope.epdlp.client" and (certificate leaf[field.1.2.840.113635.100.6.1.9] /* exists */ or certificate 1[field.1.2.840.113635.100.6.2.6] /* exists */ and certificate leaf[field.1.2.840.113635.100.6.1.13] /* exists */ and certificate leaf[subject.OU] = "24W52P9M7W")To learn more: Enabling Endpoint DLP on the Netskope Client for macOS.
Pre-Approve VPN Popup for App Proxy
The Netskope Client installs a network extension on macOS that triggers updates to the device’s Network settings. The following configuration pre-approves these updates and suppresses end-user notifications requesting approval.
Configure VPN using one of the following methods:
Prerequisite: Download custom configuration profiles from Netskope Support Portal. Here, click Files > View All to find the configuration profile file (NetskopeClient.mobileconfig).
-
Go to Resources > Profiles & Baselines > Profiles.
-
Click Add Profile from the Add dropdown options.
-
Select Apple macOS from the platform list.
-
Select Device Profile in Select Context and click Next.
-
Enter a unique Profile name. For example, Netskope Client Configuration Profile.
-
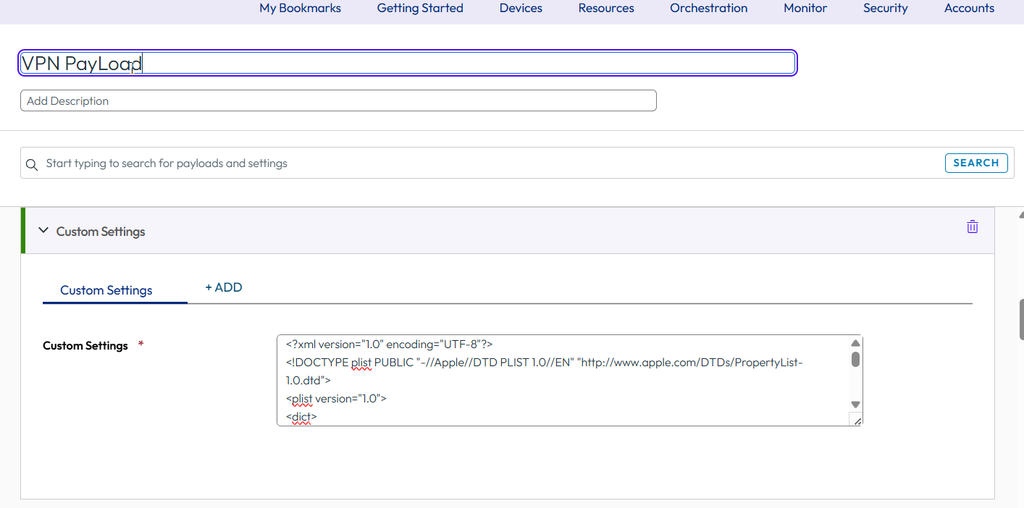
Expand Custom Settings and click Add.
-
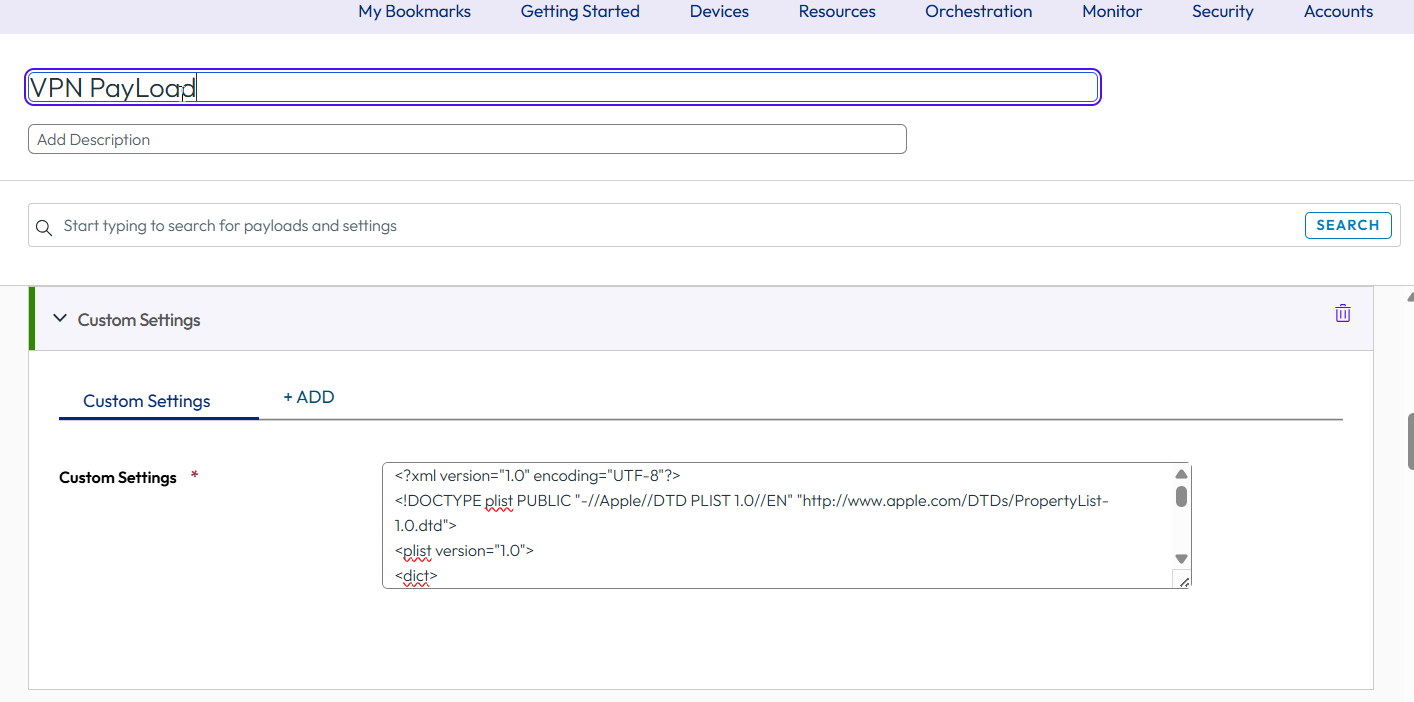
Paste the XML content from .mobileconfig in the Custom Settings text field.
-
Click Next.
-
Go to Resources > Profiles & Baselines > Profiles.
-
Click Add Profile from the Add dropdown options.
-
Select Apple macOS from the platform list.
-
Select Device Profile in Select Context and click Next.
-
Enter a unique Profile name. For example, Netskope Client Configuration Profile.
-
Start typing VPN in the search text box of the configuration profile.
-
Expand VPN and click Add.
-
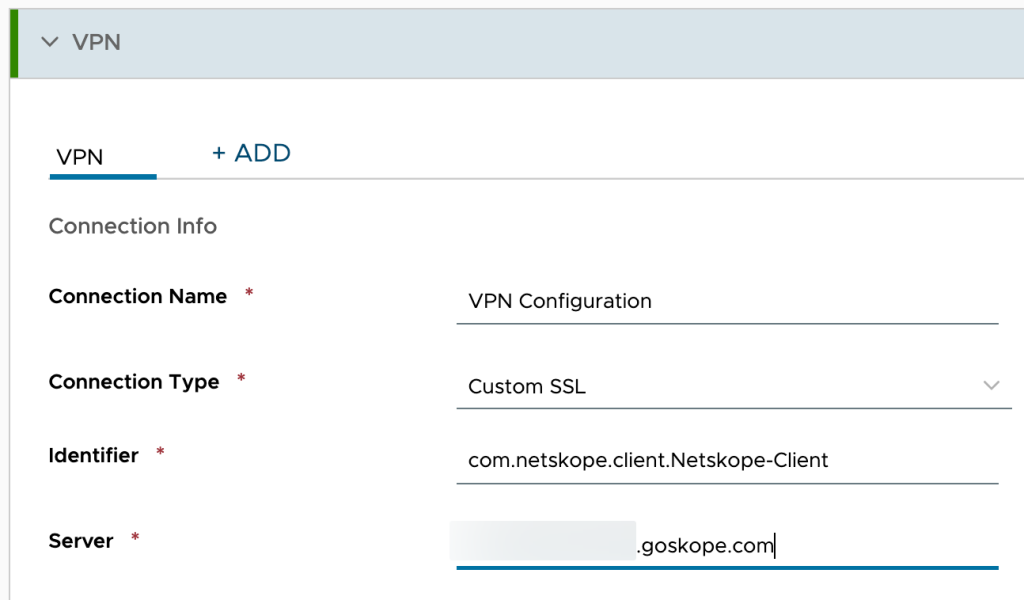
Configure the following settings to allow access to a service or an app:
-
Connection Name: Enter a descriptive name for the Connection Name.
-
Connection Type: Select Custom SSL.
-
Identifier: com.netskope.client.Netskope-Client
-
Server: Enter your VPN server name from the Netskope UI. For example, gateway-<tenant-URL>.
-
-
Click Next.
-
Add the assignment details.
-
Click Save & Publish.

Prevent Disabling of System Extensions in macOS 15 (Sequoia)
Netskope recommends adding two optional deployment parameters, Prevent Disabling of System Extensions and Restrict App Proxy Removal, to manage user permissions regarding System Extensions in macOS 15 (Sequoia) and above. These controls prevent the user from removing the specified system extension.
To configure:
-
Go to Resources > Profiles & Baselines > Profiles.
-
Click Add Profile from the Add dropdown options.
-
Select Apple macOS from the platform list.
-
Select Device Profile in Select Context and click Next.
-
Enter a unique Profile name. For example, Netskope Client Configuration Profile.
-
Start typing System in the search text box of the configuration profile.
-
Expand System Extensions and click Add.
-
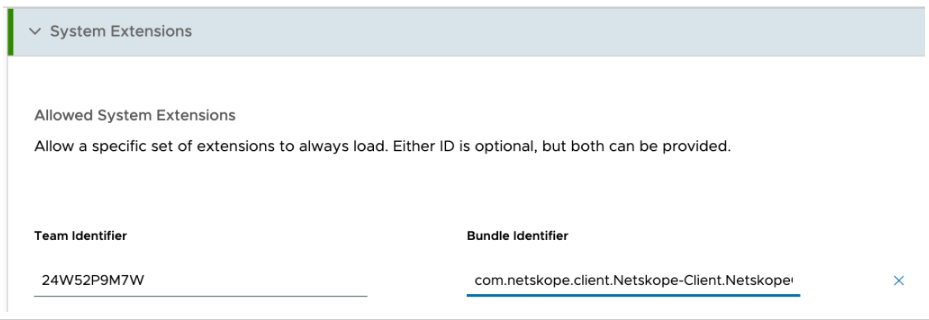
Configure Allow Systems Extensions as follows:
-
Bundle Identifier: com.netskope.client.Netskope-Client.NetskopeClientMacAppProxy
-
Team Identifier: 24W52P9M7W
-
-
Configure Non Removable From UI System Extensions as follows:
-
Bundle Identifier: com.netskope.client.Netskope-Client.NetskopeClientMacAppProxy
-
Team Identifier: 24W52P9M7W
-
-
Click Next.
-
Add the assignment details.
-
Click Save & Publish.
Restrict App Proxy Removal
Netskope recommends adding two optional deployment parameters Prevent Disabling of System Extensions and Restrict App Proxy Removal to manage user permissions regarding System Extensions in macOS 15 (Sequoia) and above. These controls prevent the removal of the specified system extension by the user.
-
Go to Resources > Profiles & Baselines > Profiles.
-
Click Add Profile from the Add dropdown options.
-
Select Apple macOS from the platform list.
-
Select Device Profile in Select Context and click Next.
-
Enter a unique Profile name. For example, Netskope Client Configuration Profile.
-
Start typing Restrictions in the search text box of the configuration profile.
-
Expand Restrictions and click Add.
-
Toggle Restrict System Preferences to enabled under Preferences.
-
Select DISABLE SELECTED ITEMS.
-
Find Network and select checkbox.
-
Click Next.
-
Add the assignment details.
-
Click Save & Publish.
Push Netskope Root and Tenant Certificates
Provide additional trust to end users by pushing certificates during client installation. Before you can push the root and tenant certificates, ensure that you do the following:
-
To download root and tenant certificates from Netskope Certificates page login to Netskope tenant admin console with admin credentials. Go to Settings > Manage > Certificates > SIGNING CA. The certificate download options are displayed in the Certificate Setup section.
-
Convert the downloaded certificates to .cer format by renaming the .pem files to .cer.
Perform the following steps to add certificates to Omnissa Workspace ONE:
-
Go to Resources > Profiles & Baselines > Profiles.
-
Click Add Profile from the Add dropdown options.
-
Select Apple macOS from the platform list.
-
Select Device Profile in Select Context and click Next.
-
Enter a unique Profile name. For example, Netskope Client Configuration Profile.
-
Start typing Credentials in the search text box of the configuration profile.
-
Expand Credentials and click Add.
-
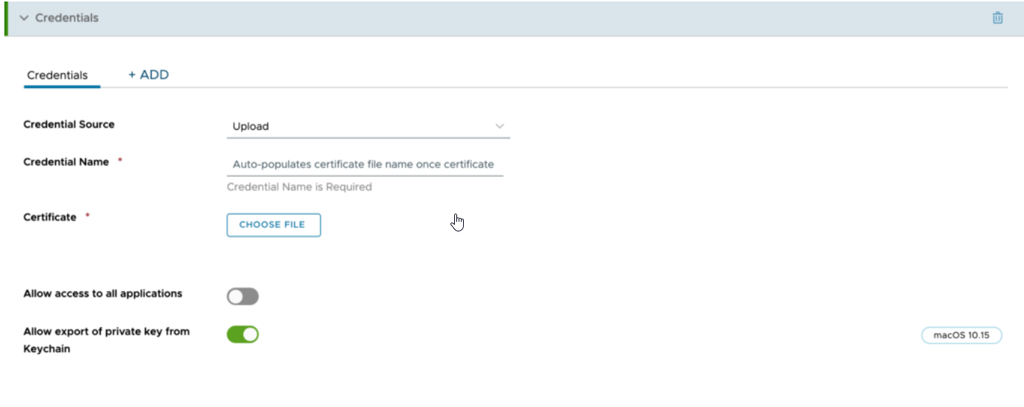
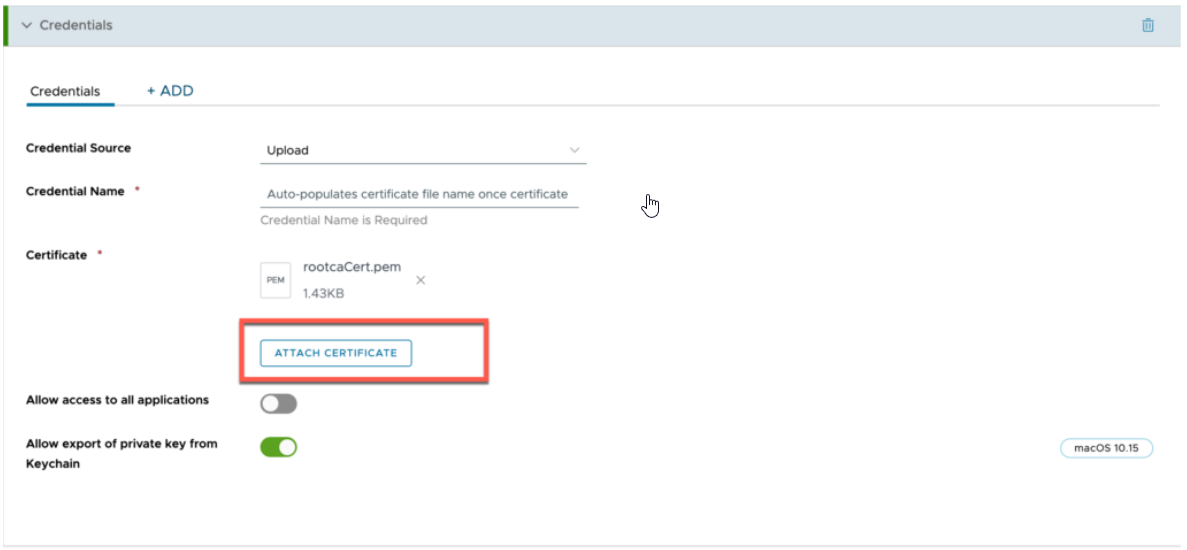
Enter the following details:
-
Credential Source: Select Upload.
-
Credential Name: It auto-populates the name after uploading the certificate.
-
Certificate: Click Choose File > Browse for the rootcaCert.cer file you downloaded from the Netskope tenant.
-
-
Click Attach Certificate.
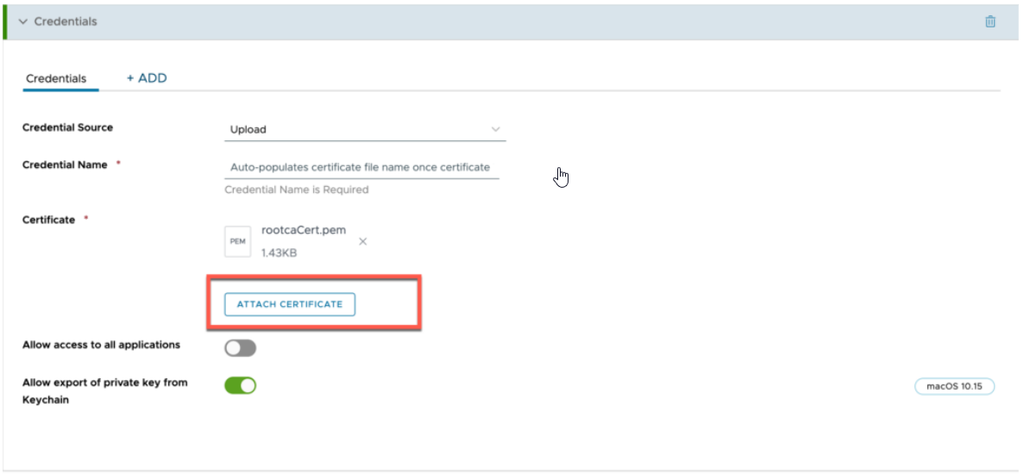
Once you click Attach Certificate, the webUI displays the uploaded certificate details such as validity, thumbprint, and so on.
-
Click +Add to add another certificate.
-
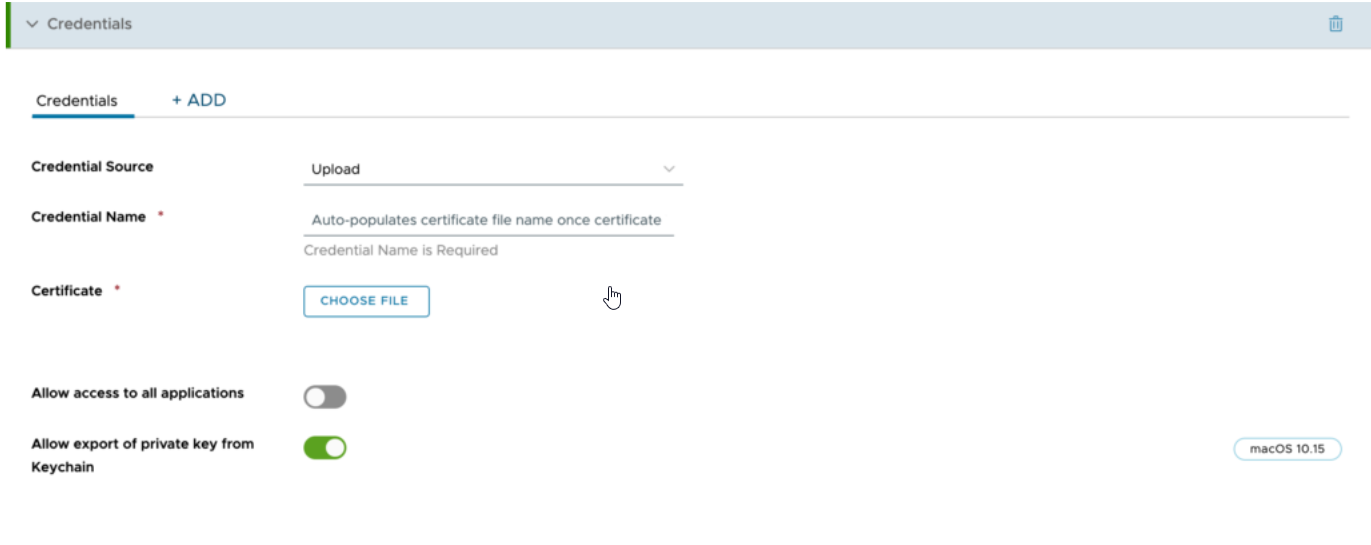
Click Choose File > Browse for the caCert.cer file you downloaded from the Netskope tenant.
-
Click Attach Certificate.
The webUI now displays two Credentials tabs in your Credentials payload.

-
Click Next.
-
Add the assignment details.
-
Click Save & Publish.

Deploy Email from Workspace ONE User Profile to Device
For a PLIST user enrollment, you must deploy the Plist file to the endpoint in advance. This file must contain the user’s email attribute that must be sourced from an email variable within the Workspace Sensor.
Perform the following steps to add the Plist file:
-
Log into your Workspace One admin console.
-
Go to Resources > Sensors.
-
Click Add > macOS.
-
On the New Sensor window, provide Name and Description in the General section.
-
Click Next.
-
In the Details section, select the following:
-
Language: Bash
-
Execution Context: System
-
Response Data Type: String
-
Code:
#!/bin/bash
emailPrefFile="/Library/Managed Preferences/com.netskope.plist"
if [ -f "$emailPrefFile" ];
then
    echo "exists"
    echo "plist exists" > /tmp/plist.txt
else
    /usr/libexec/PlistBuddy -c "add email string $userMail" com.netskope.plist
    cp com.netskope.plist /Library/Managed\ Preferences/
echo "added"
fi
-
-
In the Variables section, create a variable to be used in the script during execution. Add userMail and select {EmailAddress} in the Key and Value fields respectively. You can add other variable names. However, ensure to add the same variable name as provided in the ‘bash’ script.

-
Click Save.
Once deployed, the administrator sees the file: com.netskope.plist under directory: /Library/ManagedPreferences/ on the macOS device. This file must contain the user’s email address. If the email address is not in the Plist file, then review the WorkspaceOne console to ensure you assign an email address to the user. To learn more, view Collect Data with Sensors in macOS and seek assistance from Omnissa Workspace One support when required.

Deploy Netskope Pre-install Script and Client Package
The administrator can add the Netskope Client script and packages along with the instructions to run the script on the device. To learn more, view Deploy Internal macOS Applications.
-
Go to Resources > Apps > Native > Internal.
-
Select Add > Add Application.
-
In Add Application, click Upload to add the Netskope package file.
-
Click Save.
-
Click Continue.
-
Select Full Storage Management in Deployment Type
-
Upload the meta data file (.plist). To create a metadata file, download and install Omnissa Workspace ONE UEM Admin Assistant Tool to your macOS computer. To learn more, view Generate Metadata.
-
Click Continue.
This navigates to Add Application.
-
Under Details, you can review the details and make modifications, if necessary.
-
Click Scripts.
-
UnderInstall Scripts,add Pre-Install Script that runs before the installation process. Choose one of the following scripts according to your requirements:
PLISTIDPIf you are using PLIST mode for enrollment, add the following script in the Pre-Install Script field.
#!/bin/bash
####
# ws1_netskope_pre-install.sh
# WorkspaceOne Pre-install script used to prepare macOS devices for the Netskope client. This script has support for secure enrollment.
# You will need to set the following parameters:
#
# TENANT - This should be to addon-YOUR TENANT.goskope.com
# ORGID - You can obtain your Organization ID from your tenant (Settings > Security Cloud Platform > MDM Distrubtion)
# EMAIL - This value will be fetched from com.netskope.plist file which will be created by ws1_netskope_sensor.sh script
# enrollencryptiontoken - encryption token on Secure Enrollment page if enabled & enforced
# enrollauthtoken - authentication token on Secure Enrollment page if enabled & enforced
#
##
TENANT=addon-<tenant>
ORGID=<org_key>
EMAIL=`defaults read /Library/Managed\ Preferences/com.netskope.plist email`
enrollauthtoken=<auth_token>
enrollencryptiontoken=<encryption_token>
TEMP_BRANDING_DIR="/tmp/nsbranding"
TEMP_ENROLLMENT_TOKEN_FILE="$TEMP_BRANDING_DIR/enroll.conf"
if [ ! -d $TEMP_BRANDING_DIR ]; then
 mkdir -p $TEMP_BRANDING_DIR
fi
NSINSTPARAM_JSON_FILE="${TEMP_BRANDING_DIR}/nsinstparams.json"
echo "{\"TenantHostName\": \"$TENANT\", \"Email\": \"$EMAIL\", \"OrgKey\": \"$ORGID\"}" > "${NSINSTPARAM_JSON_FILE}"
Create_Json() {
    if [[ -f "$TEMP_ENROLLMENT_TOKEN_FILE" ]]; then
        rm "$TEMP_ENROLLMENT_TOKEN_FILE"
    fi
    local a=$1
    local b=$2
    if ! [[ "$a" =~ ^[a-fA-F0-9]{32}$ ]] && [[ "$a" != "0" ]]; then
        echo "Invalid auth token: must be 32 hexadecimal characters"
        return 1
    fi
    if ! [[ "$b" =~ ^[a-fA-F0-9]{32}$ ]] && [[ "$b" != "0" ]]; then
        echo "Invalid encryption token: must be 32 hexadecimal characters"
        return 1
    fi
    echo "{" > $TEMP_ENROLLMENT_TOKEN_FILE
    if [[ "$a" != "0" && "$b" != "0" ]]; then
        echo "\"enrollauthtoken\": \"$a\"," >> $TEMP_ENROLLMENT_TOKEN_FILE
        echo "\"enrollencryptiontoken\": \"$b\"" >> $TEMP_ENROLLMENT_TOKEN_FILE
    elif [[ "$a" == "0" && "$b" != "0" ]]; then
        echo "\"enrollencryptiontoken\": \"$b\"" >> $TEMP_ENROLLMENT_TOKEN_FILE
    elif [[ "$b" == "0" && "$a" != "0" ]]; then
          echo "\"enrollauthtoken\": \"$a\"" >> $TEMP_ENROLLMENT_TOKEN_FILE
    else
         echo "Unsupported use case"
    fi
    echo "}" >> $TEMP_ENROLLMENT_TOKEN_FILE
    chmod 700 "$TEMP_ENROLLMENT_TOKEN_FILE"
    echo "enroll.conf created with provided tokens."
}
if [[ "$enrollencryptiontoken" != "0" || "$enrollauthtoken" != "0" ]]; then
    echo "Using secure enrollment"
    Create_Json "$enrollauthtoken" "$enrollencryptiontoken"
else
    echo "Not using secure enrollment"
    if [[ -f "$TEMP_ENROLLMENT_TOKEN_FILE" ]]; then
        rm "$TEMP_ENROLLMENT_TOKEN_FILE"
    fi
fi
– Replace lines 19, 20, 24, and 25 with values from your tenant. Refer to Client Deployment Parameters to learn more about where to find these values in the Netskope Admin Console.
– Ensure not to add any space while adding values.
– If no secure enrollment token is enabled, add 0 as the token value. For example, if encryption token is not enabled in your tenant, then add enrollencryptiontoken=0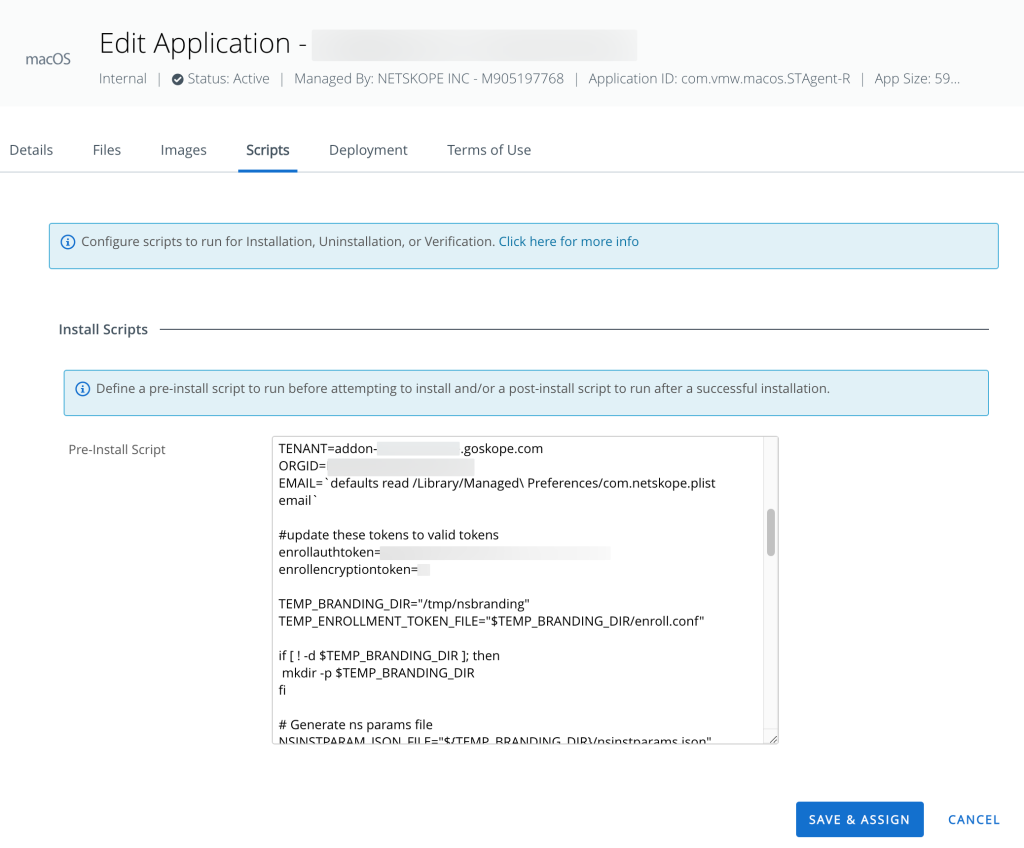
If you are using IDP enrollment method for single-user mode, add the following script in the Pre-Install Script field:
#!/bin/bash
set -euo pipefail

# Workspace ONE Pre-install script for IDP mode to prepare macOS devices for the Netskope client.
# Supports Secure Enrollment. Requires DOMAIN, TENANT_NAME, and optionally enroll tokens.
# ===== USER CONFIGURATION =====
DOMAIN="<tenant domain>"        # e.g., eu.goskope.com
TENANT_NAME="<tenant_name>"     # e.g., nsclient
REQ_EMAIL=true                  # true or false
perusermode=0		            # 1 for enabling per-user mode
enrollauthtoken=0		     # Always 0 in IDP mode
enrollencryptiontoken=0        # 32-character hex or 0 if secure enrollment not enabled
# ==============================

# Validate required inputs
if[["$DOMAIN"=="<tenant_domain>"||"$TENANT_NAME"="<tenant_name>"];then
echo "[ERROR] Please configure DOMAIN and TENANT_NAME before running this script."
exit 1
fi

# Paths
TEMP_BRANDING_DIR="/tmp/nsbranding"
TEMP_ENROLLMENT_TOKEN_FILE="$TEMP_BRANDING_DIR/enroll.conf"
IDPCONFIG_JSON_DIR="/Library/ApplicationSupport/Netskope/STAgent"
IDPCONFIG_JSON_FILE="$IDPCONFIG_JSON_DIR/nsidpconfig.json"
NSUSERCONFIG_JSON_FILE="$IDPCONFIG_JSON_DIR/nsuserconfig.json"

# Create required directories
mkdir -p "$TEMP_BRANDING_DIR"
mkdir -p "$IDPCONFIG_JSON_DIR"

echo "[INFO] Writing IDP config to $IDPCONFIG_JSON_FILE"
cat <<EOF> "$IDPCONFIG_JSON_FILE"
{
 "serviceProvider": {
   "domain": "$DOMAIN",
   "tenant": "$TENANT_NAME"
 },
 "requestEmail": "$REQ_EMAIL"
}
EOF
# Handle per-user mode if enabled
if[["$perusermode"-eq1]];then
echo " [INFO] Per-user mode enabled, writing $NSUSERCONFIG_JSON_FILE"
cat <<EOF>"$NSUSERCONFIG_JSON_FILE"
{
 "nsUserConfig": {
   "enablePerUserConfig": "true",
   "configLocation": "~/Library/Application Support/Netskope/STAgent",
   "token": "",
   "host": "",
   "autoupdate": "true"
 }
}
EOF
fi

# Function: Create enrollment token file
Create_Json(){
local auth_token="$1"
localencryption_token="$2"
# Remove old file
rm -f "$TEMP_ENROLLMENT_TOKEN_FILE"
# Validate tokens
if![["$auth_token"==~ ^[a-fA-F0-9]{32}$]]&&[["$auth_token"!="0"]
];then
echo"[ERROR] Invalid auth token: must be 32 hexadecimal characters or 0"
return 1
fi
if![["$encryption_token"=~ ^[a-fA-F0-9]{32}$]]&&[["$encryption_token"!="0"]];then
echo "[ERROR] Invalid encryption token: must be 32 hexadecimal characters or 0"
return 1
fi

echo
"[INFO] Creating secure enrollment config at
$TEMP_ENROLLMENT_TOKEN_FILE"
{
echo"{"
[["$auth_token"!="0"]]&&echo" \"enrollauthtoken\":\"$auth_token\","
[["$encryption_token"!="0"]]&&echo" \"enrollencryptiontoken\":\"$encryption_token\""
echo"}"
} > "$TEMP_ENROLLMENT_TOKEN_FILE"

chmod 700 "$TEMP_ENROLLMENT_TOKEN_FILE"
echo "[INFO] enroll.conf created successfully"
}

# Secure Enrollment Block
if [["$enrollencryptiontoken"!="0"||"$enrollauthtoken"!="0"]];then
echo "[INFO] Using secure enrollment"
Create_Json "$enrollauthtoken" "$enrollencryptiontoken"
else
echo "[INFO] Not using secure enrollment"
rm -f "$TEMP_ENROLLMENT_TOKEN_FILE"
fi
– Replace line 7, 8, 9, 10, 11, and 12 with values from your tenant. Refer to Client Deployment Parameters to learn more about where to find these values in the Netskope Admin Console.
– If the value given for REQ_EMAIL in “requestEmail”: “$REQ_EMAIL” is true, the SAML IDP URL where you need to enter the email address and navigate you to the OKTA login page. If the REQ_EMAIL value is false, then it directly navigates you to the OKTA login page. -
Click Save & Assign.
-
Once you add an application to the console, start assigning devices to the application.
-
Click the application that you added.
-
Click the Assignment tab.
-
Click Assign available on the right corner of the screen.
-
Under Assignments, click Add Assignment.
-
On the Assignment screen, perform the following:
-
Provide a Name for the assignment.
-
In Assignment Groups, select the desired group
-
-
Click Create.
-
Click Save.

Verifying Client Installation
Check the installation logs on the user’s machine in the /var/log/install.log folder. If the user configuration download script fails and the Netskope client installer is executed, the installer will exit and display the Configuration file missing, aborting installation! error message.
Check Netskope Client Installation Status
-
To verify the status of each device, go to Computer > Policies and click on the policy you created.
-
Click the Logs button at the bottom to view the log files for each device and then click the Show button.
Confirming the Netskope Client Extension Approval
To confirm that the Netskope Client extension has been approved and the client is running, run the following command in your macOS terminal window:
systemextensionsctl list
The output should look like this:
% systemextensionsctl list
1 extension(s)
--- com.apple.system_extension.network_extension
enabled active teamID bundleID (version) name [state]
* * 24W52P9M7W com.netskope.client.Netskope-Client.NetskopeClientMacAppProxy (85.2.0.269/1)
NetskopeClientMacAppProxy [activated enabled]
Additionally, inspect the system preferences and Network UI to confirm that Netskope Client extension is active.
Uninstalling the Netskope Client
See Uninstalling the Netskope Client for instructions on uninstalling the Netskope Client.