This article provides instructions to deploy Netskope Client on Windows devices (either joined to Active Directory or Microsoft Entra ID) using the Microsoft Intune.
Note
To learn more about supported OS and platform, see the Netskope Client Supported OS and Platform section.
The following steps are for deploying Netskope Client on Windows devices.
Prerequisites: On-board or add users into Netskope using Directory Importer or SCIM integration.
-
Ensure the device is enrolled in Microsoft Intune.
-
Log in to the Azure Portal (portal.azure.com).
-
Click More Services.
-
From the left-pane, click Intune.
-
From the main pane, right-click the Intune option and open it in a new tab. This redirects you to endpoint.microsoft.com.

-
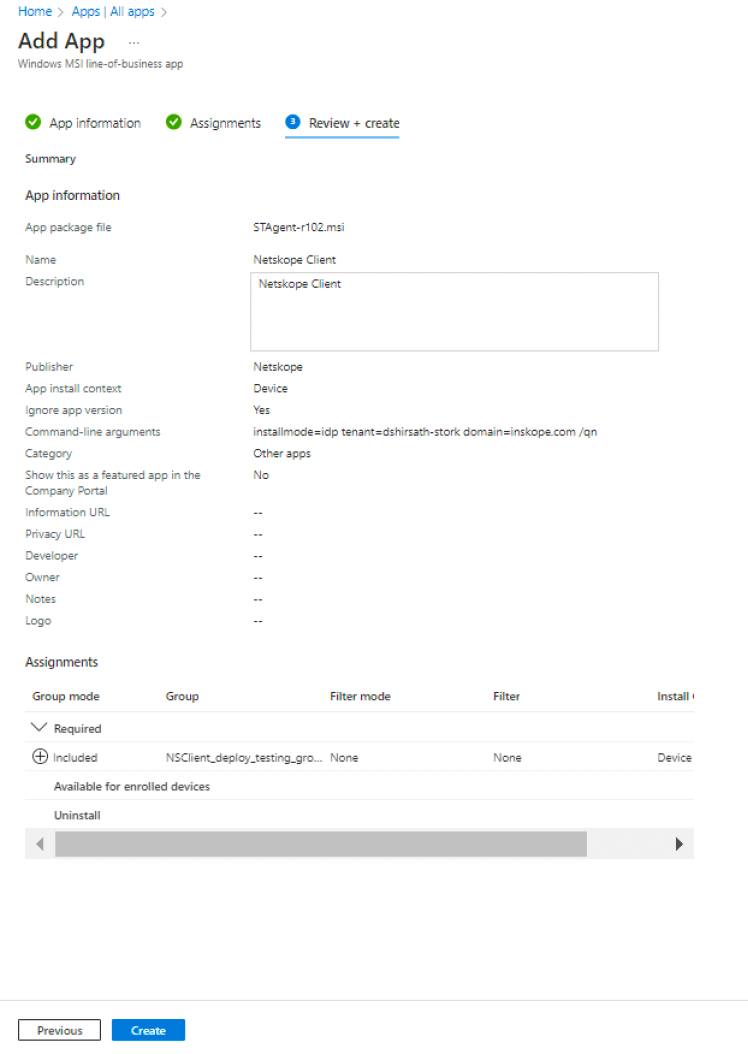
From Microsoft Endpoint Manager admin center, select Apps > All Apps.
-
Select + Add.
-
For App Type, select Line-of-business app.
-
Upload the NSClient.msi to App Package File and select OK.
-
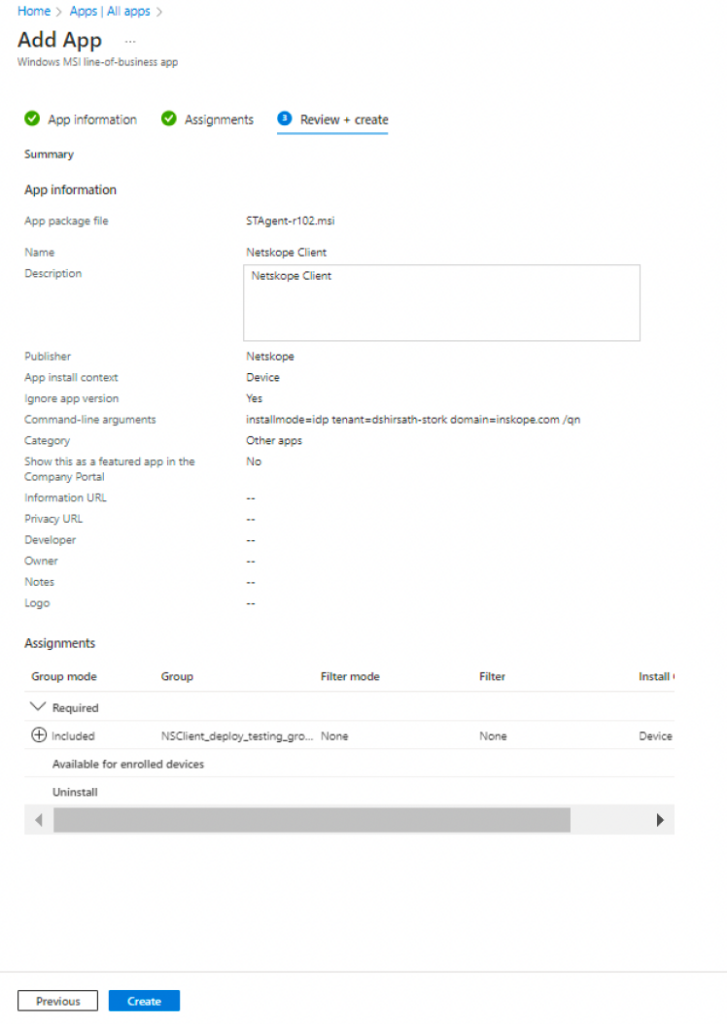
Under App Information:
-
Provide a description.
-
Publisher Name.
-
Set Ignore App Version to Yes if you intend to allow the Netskope client to auto-update.
-
Select the appropriate category.
-
Select No under Display this as a featured app in the Company Portal.
-
Information and Privacy URL are optional values.
-
Under Command-Line Arguments: Enter the command-line arguments to apply to the .msi file upon execution. For example,
installmode=idp tenant=<tenant-name> domain=[region.]<tenant-domain> enrollencryptiontoken=<Encryption Token> /qn
To learn more about other configuration options, view Netskope Client for Windows.

-
-
Click Next.
-
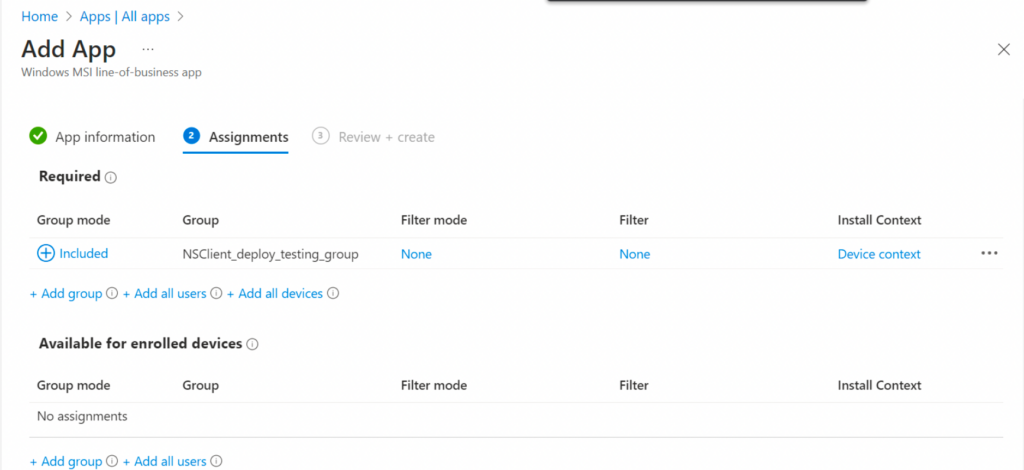
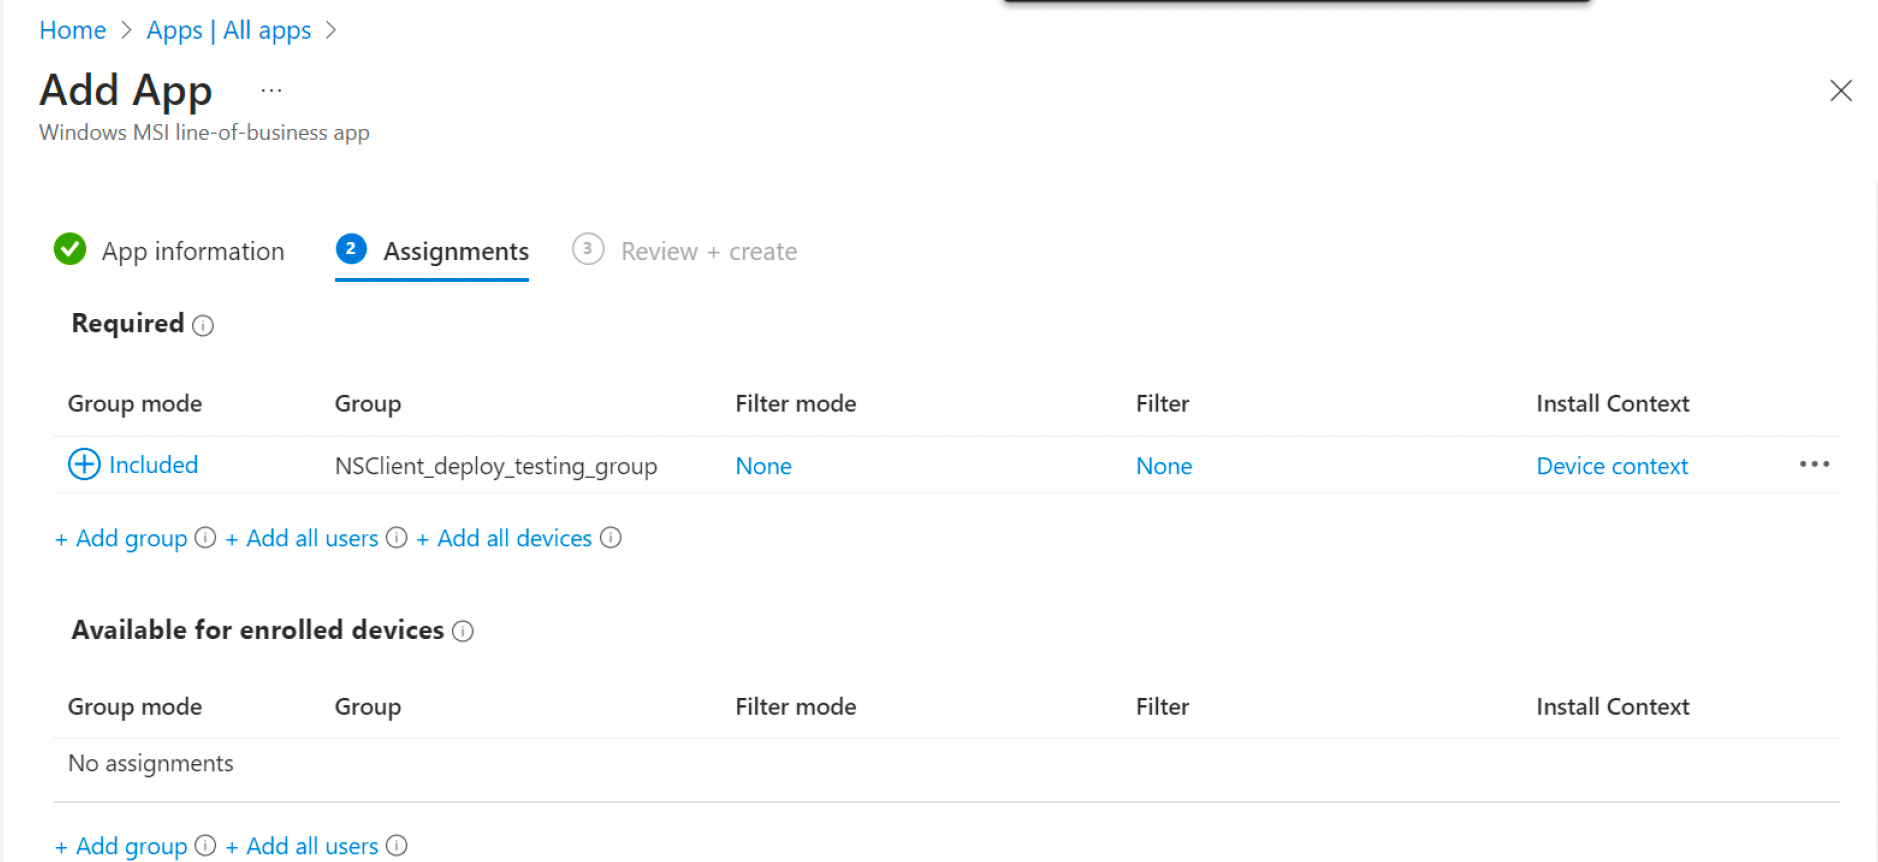
It navigates to the Assignments tab.
-
Under Required category, click Add group to add appropriate groups that need to be included.
-
Click Next.
-
-
It navigates to Review + Create. Click Create to review and complete the process.
-
You can monitor the installation process from Intune. Go to Apps > Windows > Windows | Windows Apps >Search for “Netskope” > Device Install status.


External Browser-based Authentication
External browser support is available for MS Edge, Google Chrome and Firefox when set as the default browser. When deploying the Netskope Client in IDP mode (for single or multi-user environments), you can enable this functionality by modifying the MSIEXEC command line with additional parameters.
-
idpmode=scheme -
httpmethod=get|post (Optional)
idpmode=scheme in the command line during installation. The installation will not be successful without them.–
installmode–
tenant–
domainFor example, while deploying Netskope Client on Windows using Intune, you can configure these parameters in the Command-line arguments field as follows:
msiexec /I STAgent.msi installmode=idp|idpOnly tenant=nsclient domain=goskope.com [enrollauthtoken=<Authentication Token>] [enrollencryptiontoken=<Encryption Token>] idpmode=scheme [httpmethod=post]

Uninstalling Clients
To set up un-installion script for Netskope client in Windows devices follow the procedure as described in this section:
Note
This procedure is applicable only for devices that are AD joined. Also, during subsequent installation, un-assign this app to avoid un-installation of the newly installed Clients.
-
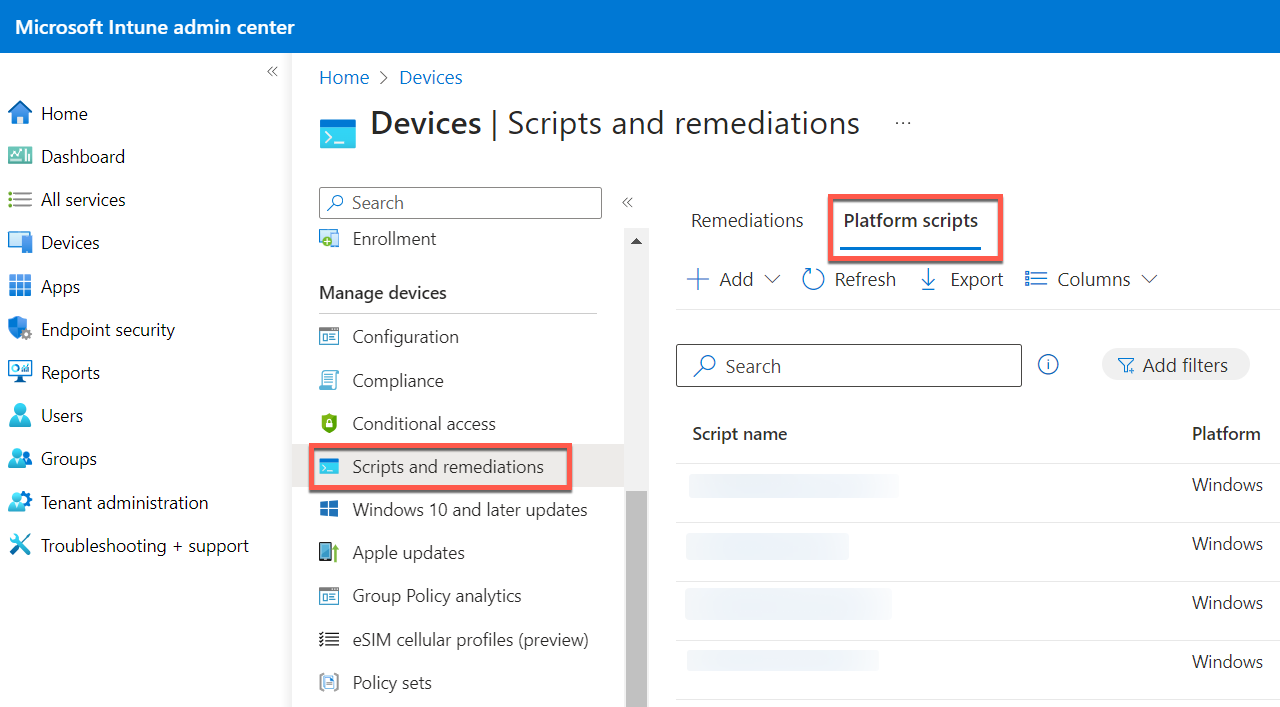
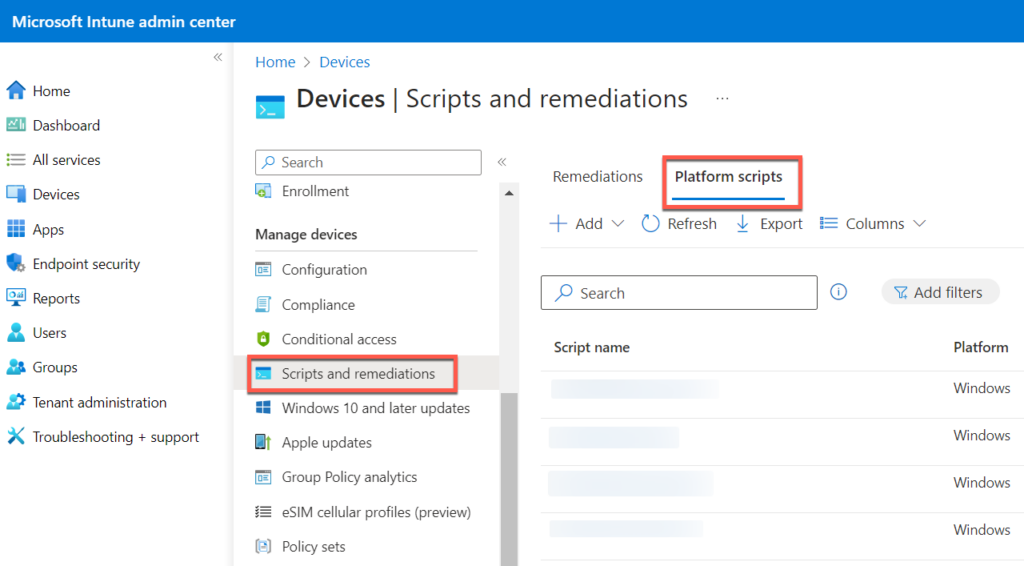
Login to your Intune admin console and select Devices > Scripts and remediations.
-
Click Platform Scripts.
-
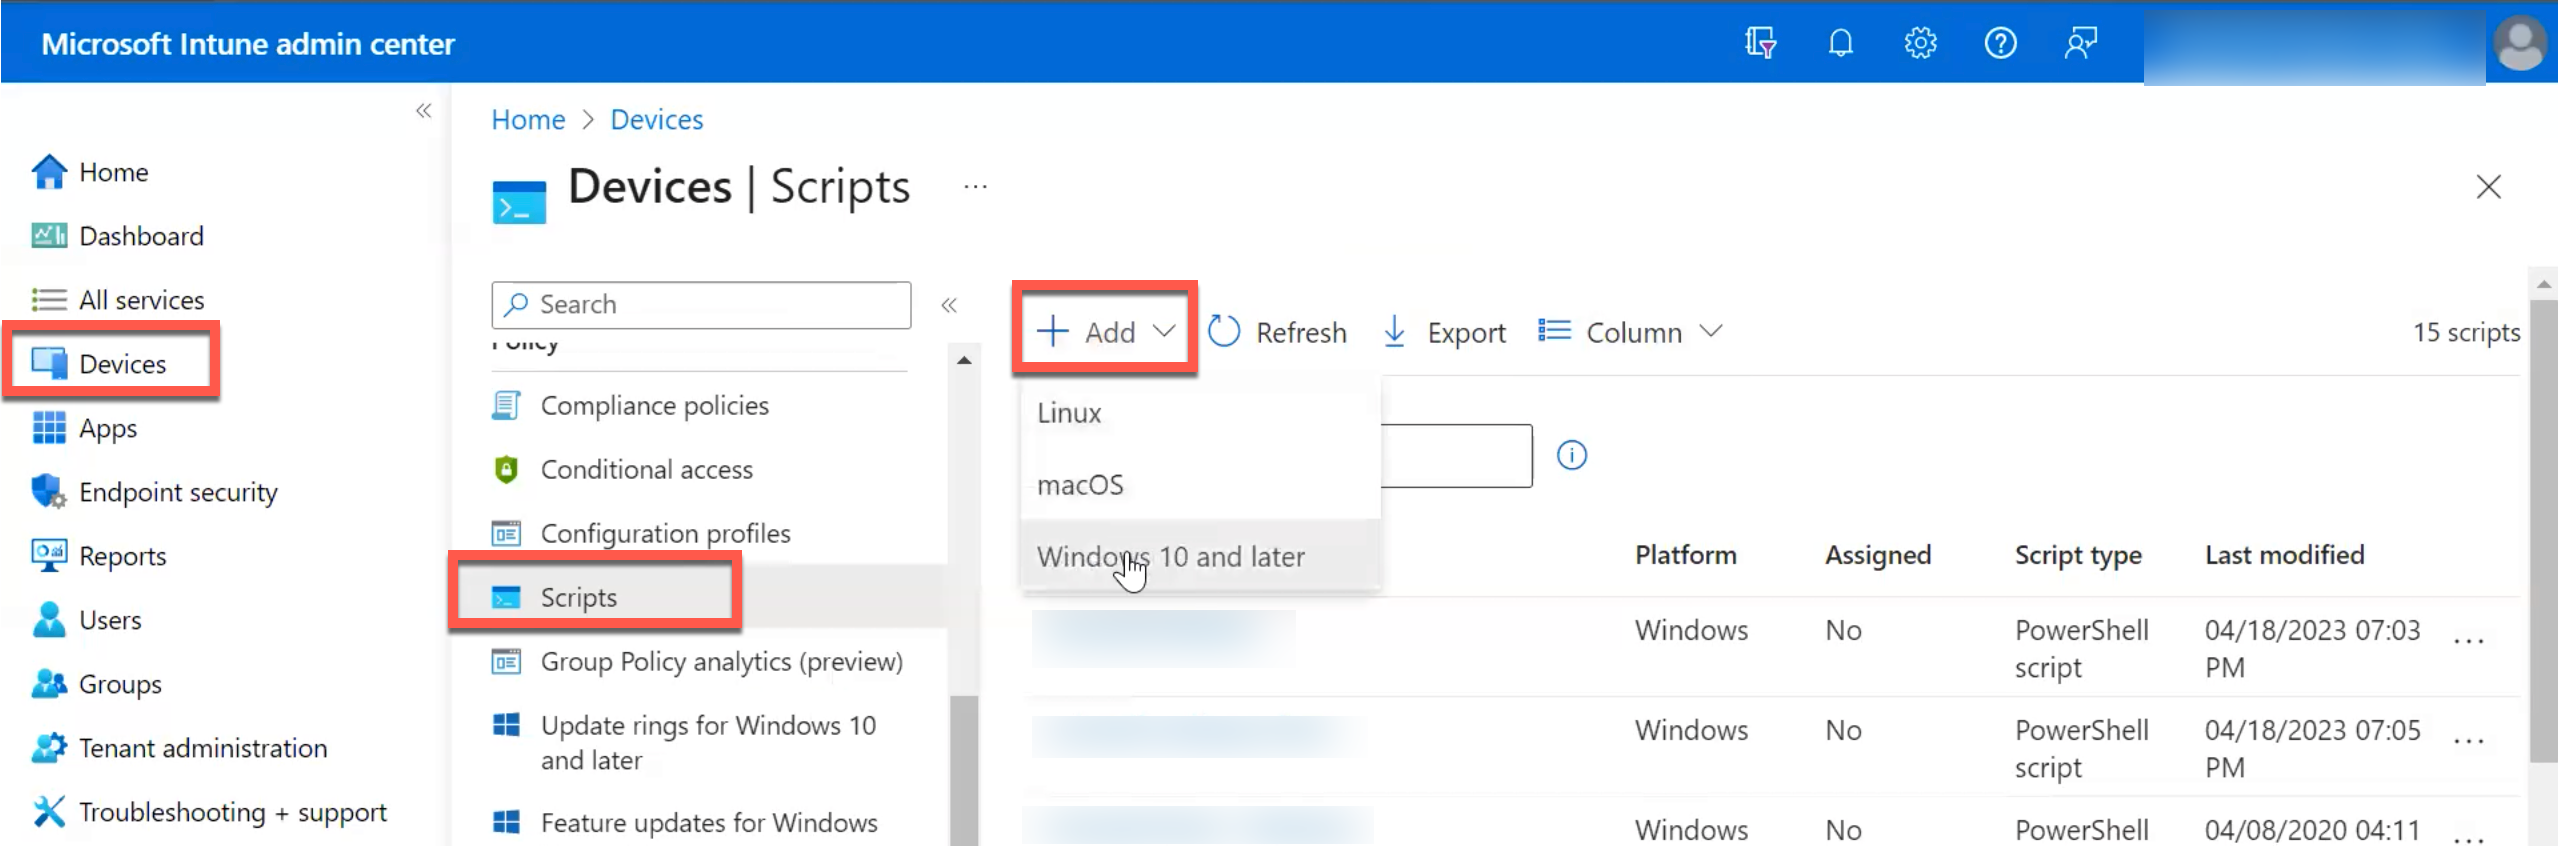
To start adding the uninstallation script, click +Add and select Windows 10 and later.
-
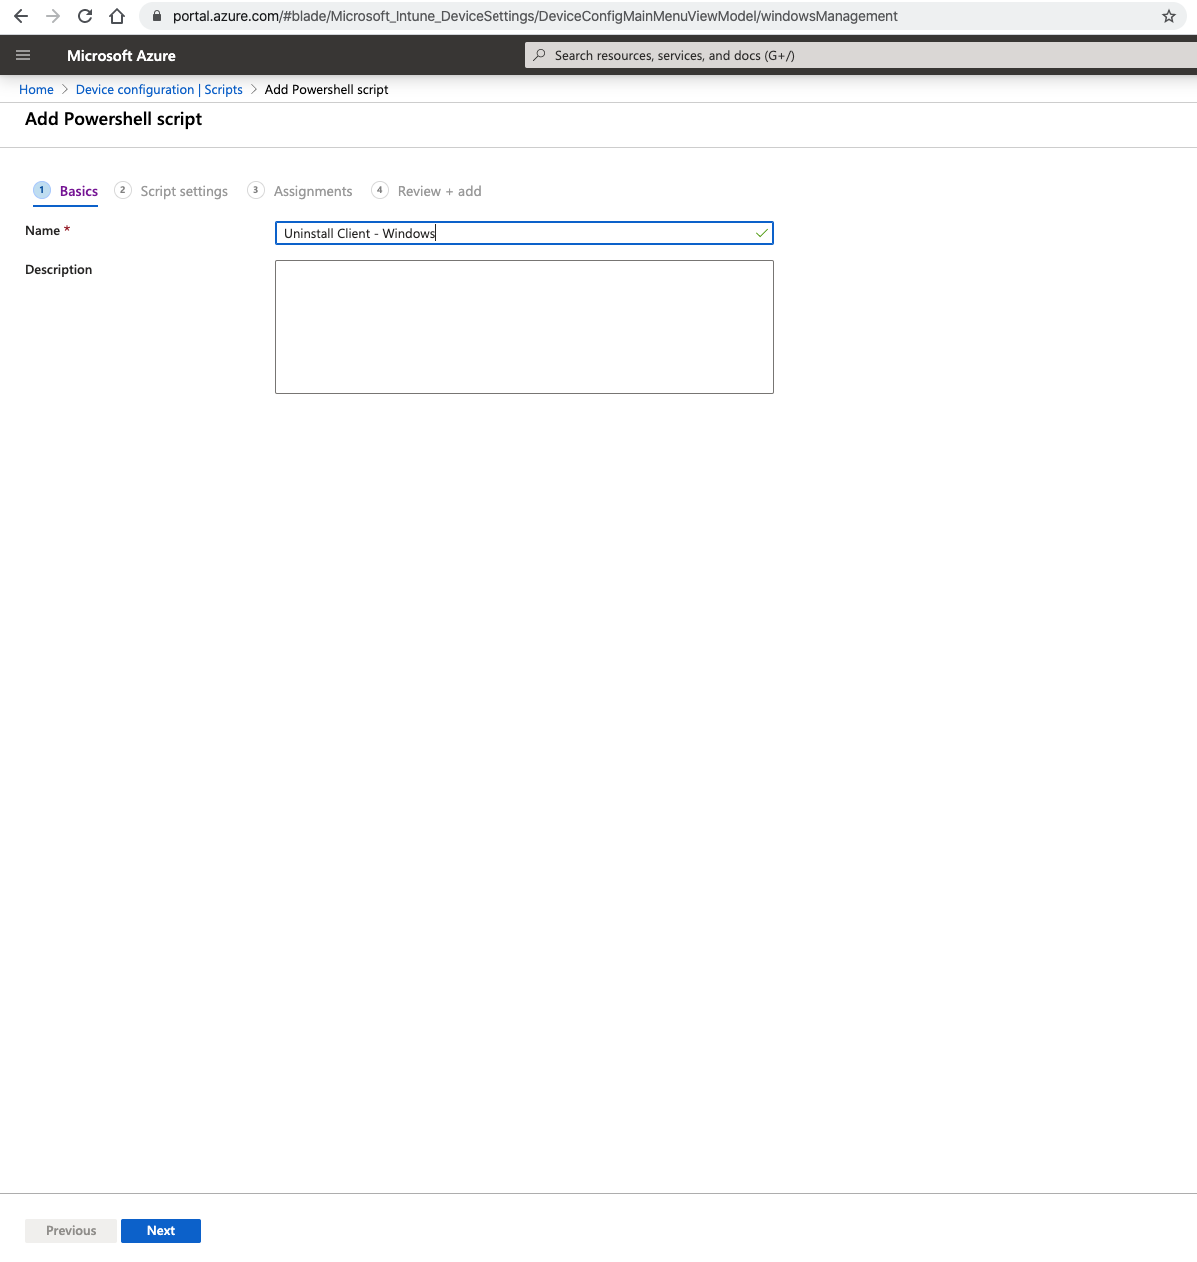
Under Add Powershell script, enter a Name for the script configuration and click Next to continue.
-
Under script settings , from the Script location drop-down, select the powershell script from your computer. Enter the following commands in the powershell script.
$product_identifier= Get-WmiObject -Class Win32_Product | where Name -eq "Netskope Client" | select -expandproperty IdentifyingNumber
msiexec /uninstall $product_identifier /l*v C:\Users\Public\nsclient_uninstall.log /qn
If the Password protection for Client uninstallation option in Client Configuration is enabled, enter the following command in the powershell script.$product_identifier= Get-WmiObject -Class Win32_Product | where Name -eq “Netskope Client” | select -expandproperty IdentifyingNumber
msiexec /uninstall $product_identifier PASSWORD=”[client_uninstall_password]” /l*v C:\Users\Public\nsclient_uninstall.log /qn
For more details, see Password protection for Client uninstallation.Set the following options for the script:
-
Run this script using the logged on credentials – YES
-
Enforce script signature check – NO
-
Run script in 64 bit PowerShell Host – YES
Modify the path for the log to be written to and failure to modify, results in the script failure. The logged in user must have the permission to run this script and write to the specified directory or change Run this script using the logged on credentials to NO to run this from the system context. If running from system context, the system user must have the permission to write to the specified directory.

-
-
Click Next to continue.
-
Under Assignments, assign the user groups for this script. This uninstalls Netskope Client in all devices of the assigned user group.
-
Under Review + add, review your selections and click Add to complete the procedure.