

This document describes how to deploy Netskope Client on Citrix DaaS with Azure Virtual Desktop supporting multi-user environments.
Overview
This virtual environment consists of Windows 11 multi-user sessions in Azure Virtual Desktop and end-users with Citrix DaaS. To learn more, view Citrix DaaS with Azure Virtual Desktop Hybrid.
Environment
-
Citrix Virtual apps and Desktops 7 2507 LTSR CU2 (2507.0.100.428)
-
FSLogix: 3.25.202.4223
-
Windows 11(22H2)
-
Netskope Client version: 132.0.0.
Prerequisites
Check the following prerequisites before deploying Netskope Client on your VDI:
-
Add Certificate Pinned Apps: Create separate Certificate Pinned Applications for the following:
Go to Settings > Security Cloud Platform > App Definitions to create Certificate Pinned Apps. To learn more, view Creating a Custom Certificate Pinned Application.-
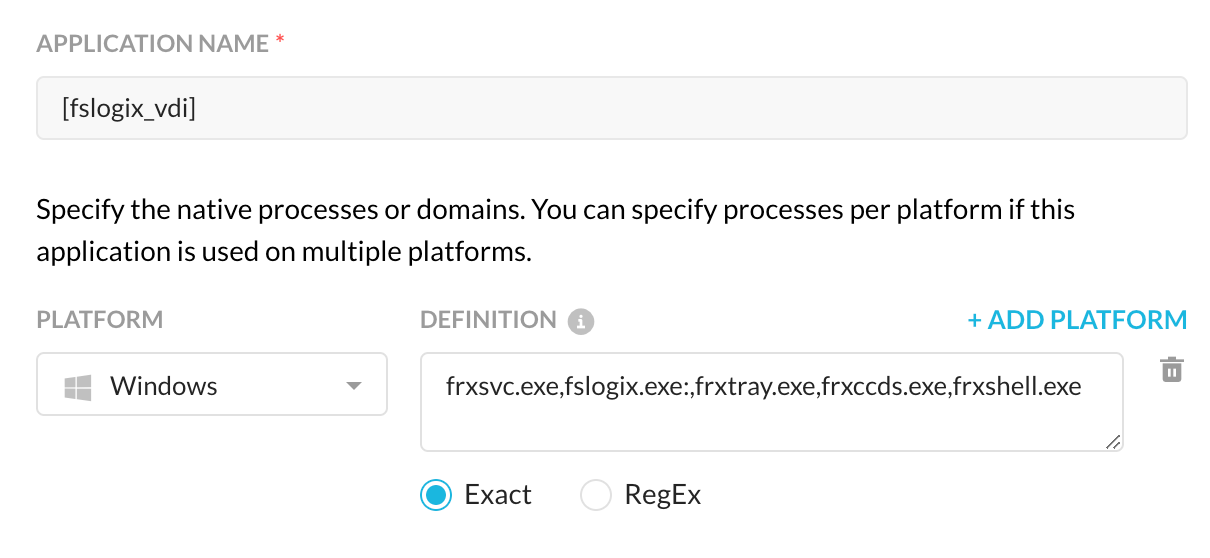
FSLogix processes
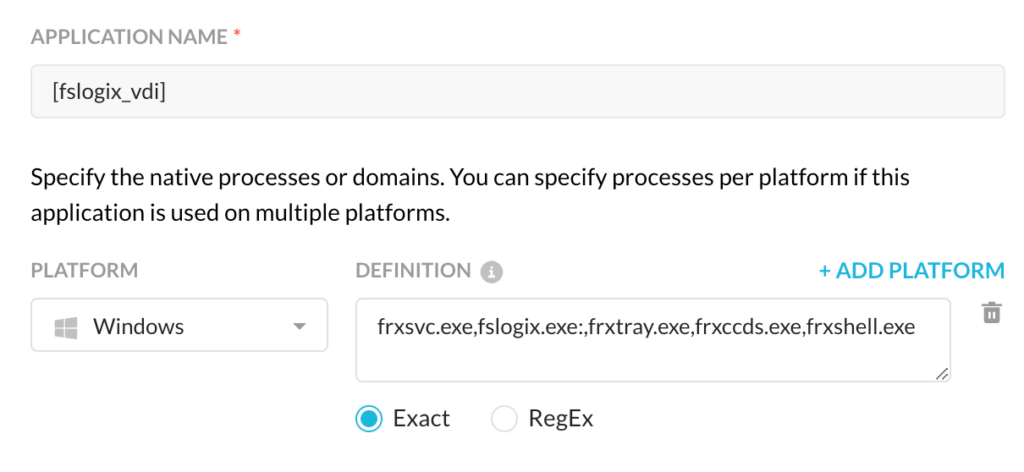
-
Citrix DaaS processes
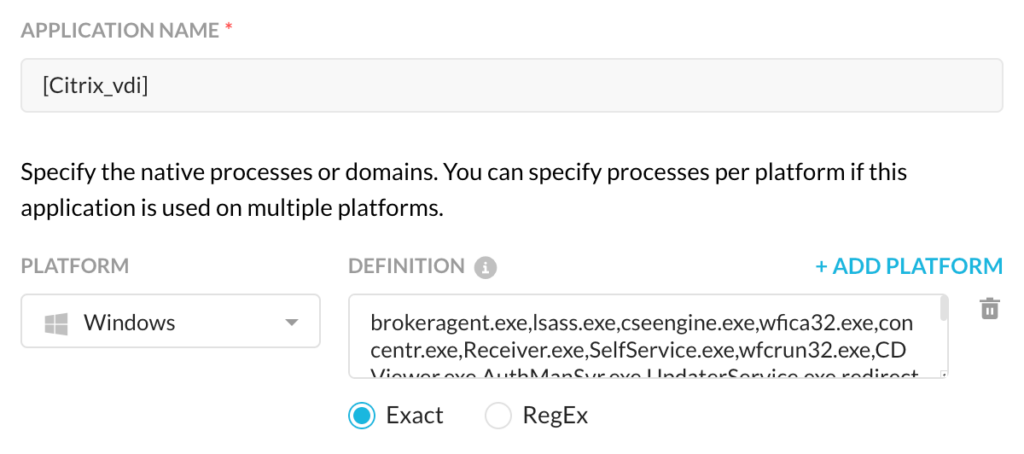
Refer to the following table to understand the process names that you need to add for each Citrix DaaS and FSLogix:
Certificate Pinned App
Process Names
Citrix DaaS
PicaSvc2.exe,brokeragent.exe,lsass.exe,cseengine.exe,wfica32.exe,concentr.exe,Receiver.exe,
SelfService.exe,wfcrun32.exe,CDViewer.exe,AuthManSvr.exe,UpdaterService.exe,redirector.exe,
SelfServicePlugin.exe,ssonsvr.exe,PrimaryAuthModule.exe,storebrowse.exe,CtxWebBrowser.exe,
Browser.exe,CitrixWorkspaceBrowser_proxy.exe,CitrixWorkspaceBrowser.exe,native_bridge.exe,
nmh_launcher.exe,cpviewer.exe,Ctx64Injector64.exe,CtxBrowserInt.exe,CtxCFRUI.exe,CtxTwnPA.exe,
HdxBrowser.exe,HdxRtcEngine.exe,icaconf.exe,migrateN.exe,NMHost.exe,pcl2bmp.exe,PdfPrintHelper.exe,
RawPrintHelper.exe,SetIntegrityLevel.exe,WebHelper.exe,wfcwow64.exe,XpsNativePrintHelper.exe,
XPSPrintHelper.exe,HdxBrowserCef.exe,WinDocker.exe,chrome_pwa_launcher.exe,notification_helper.exe,
chrmstp.exe,setup.exe,usbinst.exe,Ceip.exe,CitrixReceiverUpdater.exe,CitrixWorkspaceNotification.exe,
ConfigurationWizard.exe,PrefPanel.exe,SRProxy.exe,crashpad_handler.exe,CdfCollector.exe,
DiagnosticTool.exe,CWAFeatureFlagUpdater.exe,CemAutoEnrollHelper.exe,CleanUp.exe,NPSPrompt.exe,
SelfServiceUninstaller.exe
FSLogix
frxsvc.exe,fslogix.exe:,frxtray.exe,frxccds.exe,frxshell.exe -
-
Create Network Location configuration for Azure Virtual Desktop: Destination Location exception bypasses traffic sent to specific destinations as defined in the network location profile.
You can get the latest IP address from the Microsoft website in the JSON format. Refer Adding Network Location to learn more about how to extract the IP addresses from Microsoft using the Python script. After converting the .json file to a .csv file, you can configure the Network Location Object through Policies > Network Location.
-
Add Exceptions: After you are ready with the custom Certificate Pinned Apps for Citrix DaaS, FSLogix, and Network Location configurations, proceed with adding exceptions in the selected steering configuration.
-
Add the custom certificate pinned applications in the certificate pinned exceptions. To add a Certificate Pinned Application, view Certificate Pinned Exception.

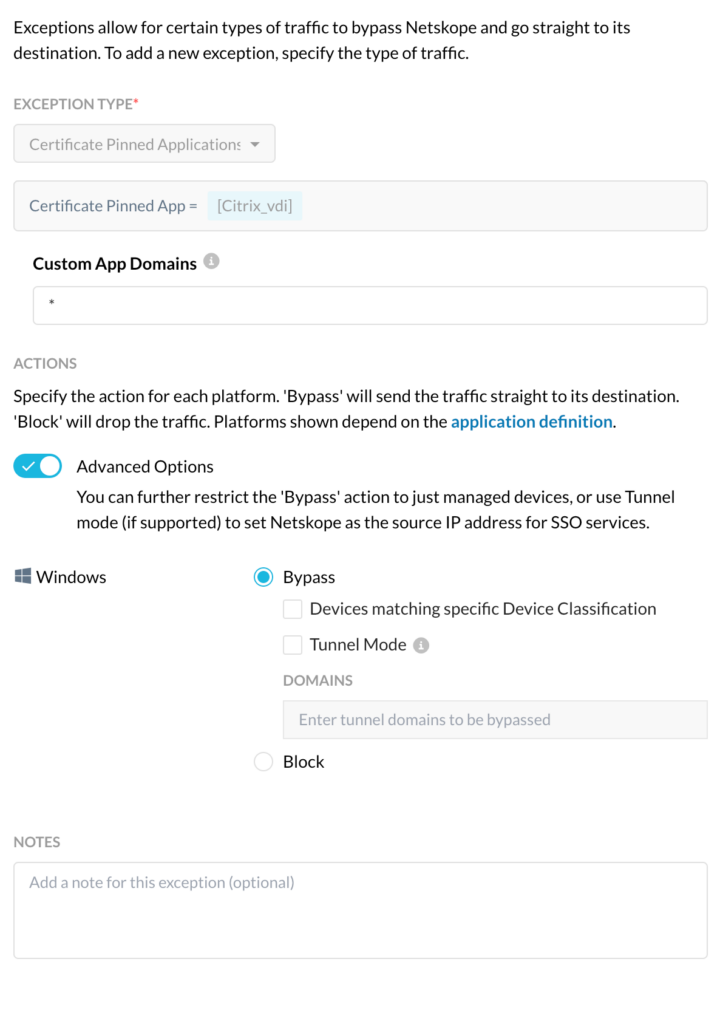
-
Add Destination Location exception to add exceptions for Azure Virtual Desktop network locations. To learn more, view Destination Location Exception.
-


Netskope Client Deployment Procedure
After completing the prerequisites, perform the following to set up Netskope Client in your Citrix Workspace:
-
Log into your Citrix Workspace console.
-
Launch your remote desktop in Citrix Workspace.
-
Install Netskope Client on your remote desktop using any method provided in the deployment methods or using the MSIEXEC commands.
Once the Netskope Client is installed, the provisioned user can see that the Netskope Client is enabled and managed applications are steered through the Netskope tunnel. The bypassed application traffic is directed to the internet.