

This document describes the instructions for the silent deployment of Netskope Client using Endpoint Central on MacOS devices.
Prerequisites
-
Install Endpoint Central agent installed in MacOS devices.
-
Download the desired version of the Netskope Client installer for MacOS (Golden Release is recommended). Refer Support to download the file.
-
Download the Root and Intermediate certificates from your tenant. To download the Root and Intermediate certificates, go to Settings > Manage > Certificates > Signing CA.
-
Download the script
NetskopeEndpointCentral.mobileconfigfrom the Support portal and make the following changes in the script:-
#LINES 12 – 33: Replace with contents of rootCaCert file. Do not copy BEGIN or END lines
-
#LINES 53 – 78: Replace with contents of caCert file. Do not copy BEGIN or END lines
-
#LINE 83: Replace with <tenantname>.goskope.com. For example, ca.netskopecorp.goskope.com.
-
#LINE 133: Replace with gateway-<tenantname>.goskope.com. For example, gateway-netskopecorp.goskope.com.
-
-
Download the preinstall script
ns-preinstall-endpointcentral.shfrom the Support portal and make the following changes in the script:-
#LINE 14: Replace with the correct addon-<tenantname>.goskope.com domain.
-
#LINE 15: Replace with the correct ORGID from your tenant.
To get the ORGID and tenant name, view Client Deployment Parameters. -
-
The MacOS system with active network connectivity.
-
Connection to distribution server (On-premises or Endpoint Central Cloud (depending on configuration).
-
Internet required for Direct Connection to Endpoint Central Cloud.
-
Supported Environments
Supported OS: MacOS Ventura or later
– Silent installation is recommended for Multi-user MacOS systems with IDP based enrollment.
Deployment Procedure
Refer to the following sections to deploy Netskope Client using Endpoint Central.
Create Application Package
To create an application package:
-
Login to Endpoint Central Cloud Instance at https://endpointcentral.manageengine.com
-
Navigate to Software Deployment > Packages.
-
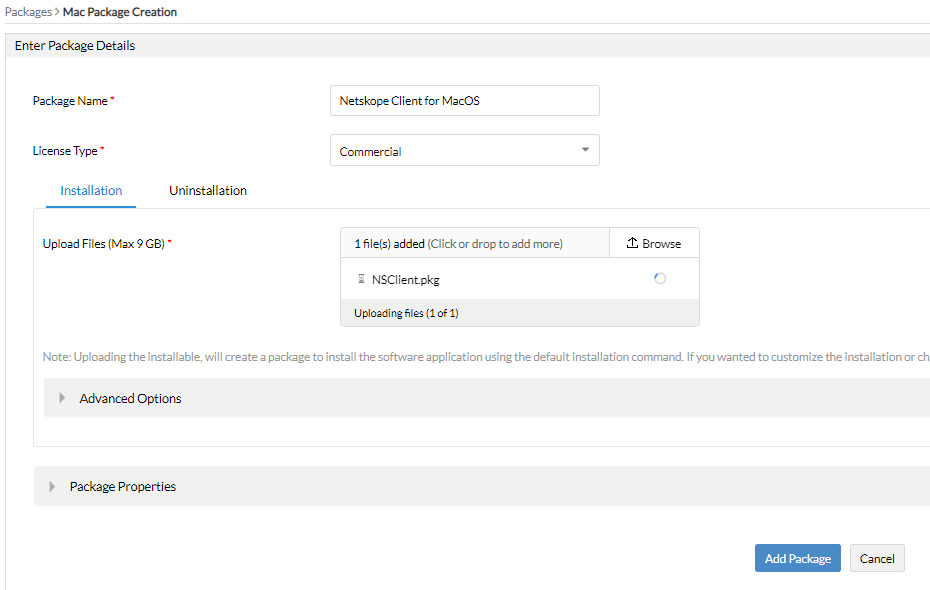
Click Add Package and select Mac from the dropdown menu.
-
Enter the following details:
-
Package Name: For example, Netskope Client for MacOS
-
License Type: Select Commercial
-
In the Installation tab, browse and upload the package file downloaded from the Support portal in Upload Files.
-
-
Click Add Package.
Create Configuration Profile For Silent Install
To create the configuration profile:
-
Navigate to Mobile Device Management from the top menu.
-
Click on Management > Profiles.
-
Click +Create Profile > macOS.

-
This navigates to Create macOS Profile.
-
Enter the Profile name. For example, Netskope MacOS Pre-Reqs.

-
Click Continue.
-
This navigates to Configure Profile.
-
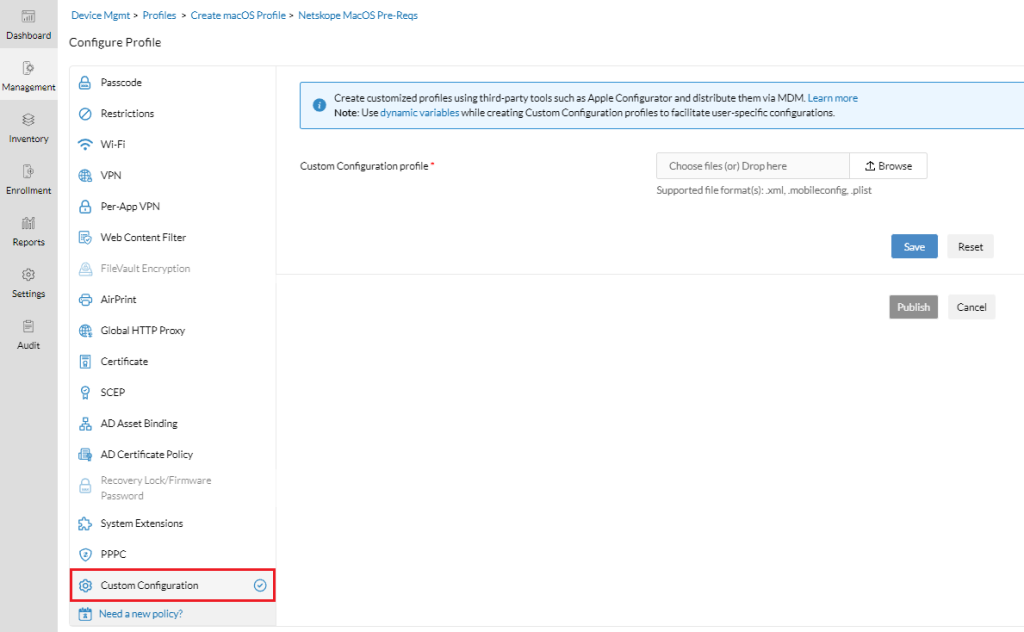
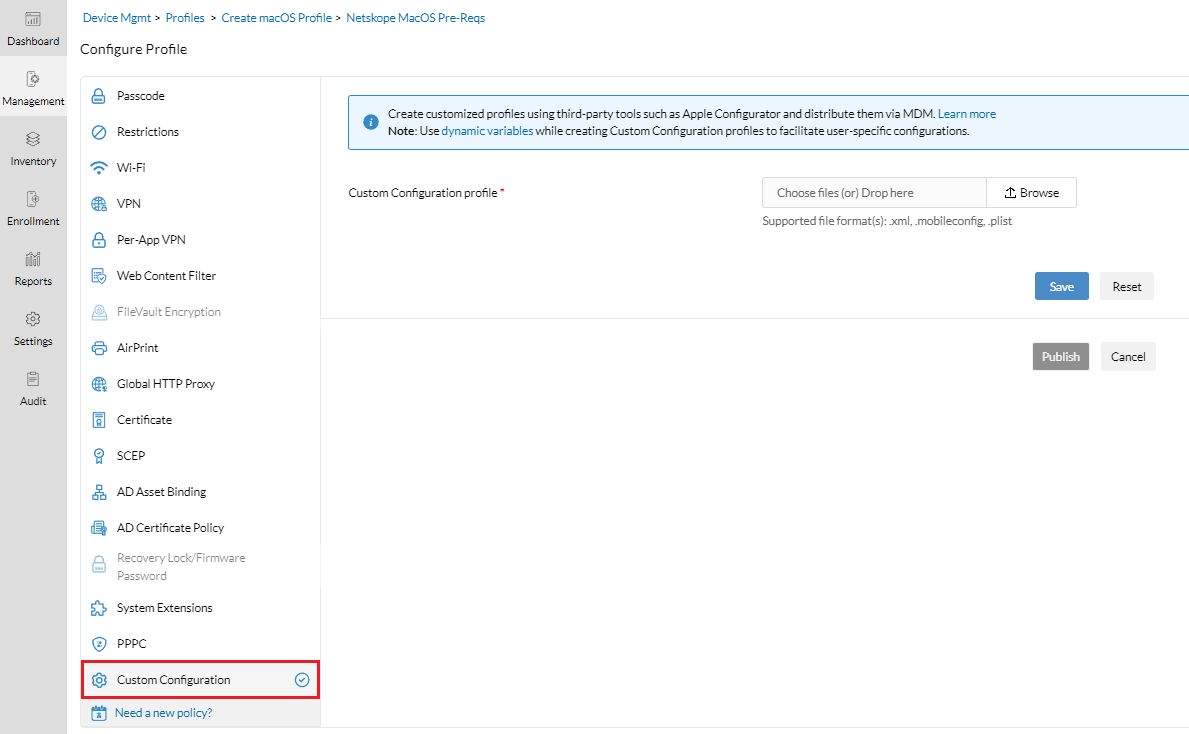
On the left-hand panel, scroll down and click Custom Configuration.
-
In the Custom Configuration profile , click Browse and upload the NetskopeEndpointCentral.mobileconfig file that you downloaded and edited previously.

-
Click Save.
-
Click Publish.
-
On the left-hand panel, click Groups & Devices.
-
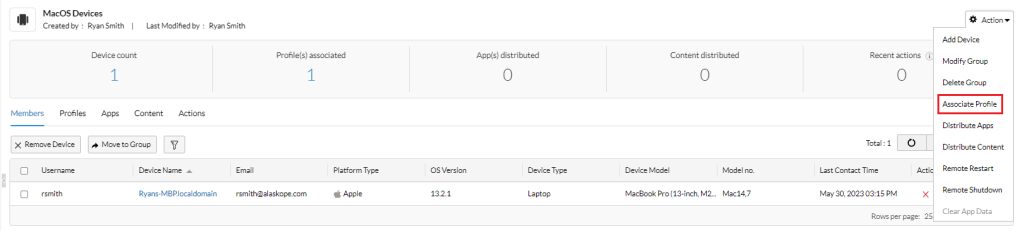
Click the name of the device group you wish to target.
-
Click Action on the far right and choose Associate Profile from the dropdown options.
-
Choose your Prerequisite Profile and click Associate.
-
Confirm the presence of the configuration profile on your MacOS device.

Configure the Preinstall Script
To configure the preinstall script:
-
Navigate to Configurations from the top menu.
-
Click All Configurations.
-
Click +Create Configuration.
-
Select Mac from the dropdown options.

-
Hover over Custom Script and select the Computer Configuration option.

-
Enter the Name for the script. For example, Netskope Pre-Install for MacOS.
-
In Execute Script from / Run, choose Repository.
-
In Script Name , click the Create / Modify Script link. This launches a new window.

-
Click +Add Script.

-
In Script Name, browse and upload the preinstall script.

-
In Platform, select Mac.
-
Click Add.
-
-
Confirm the script is now listed in the repository then close the new tab to return to the previous screen.
-
Click in the Script Name box and you can select the newly uploaded script.
-
In Frequency, you can optionally enable logging for troubleshooting.

-
In Define Target, define the target workstations where you want to deploy the configuration. To define a target, view Defining Targets.
-
Click Deploy.