This document describes the instructions to deploy Netskope Client using Endpoint Central on Windows devices.
Prerequisites
-
Install Endpoint Central agent installed in Windows devices.
-
Download the desired version of the Netskope Client installer for Windows (Golden Release is recommended). Refer Support to download the file.
-
The Windows system with active network connectivity:
-
Connection to distribution server (On-premises or Endpoint Central Cloud (depending on configuration).
-
Internet required for direct connection to Endpoint Central Cloud).
-
Supported Environments
| Windows Version | Deployment Mode |
|---|---|
Windows 10, 11 | AD-joined |
| Windows 10, 11 | IDP |
Deployment Procedure
Refer to the following sections to deploy Netskope Client using Endpoint Central.
Create Application Package
To create an application package:
-
Login to Endpoint Central Cloud Instance at https://endpointcentral.manageengine.com.
-
Navigate to Software Deployment > Packages.
-
Click Add Package and select Windows from the dropdown menu.
-
Enter the following details:
-
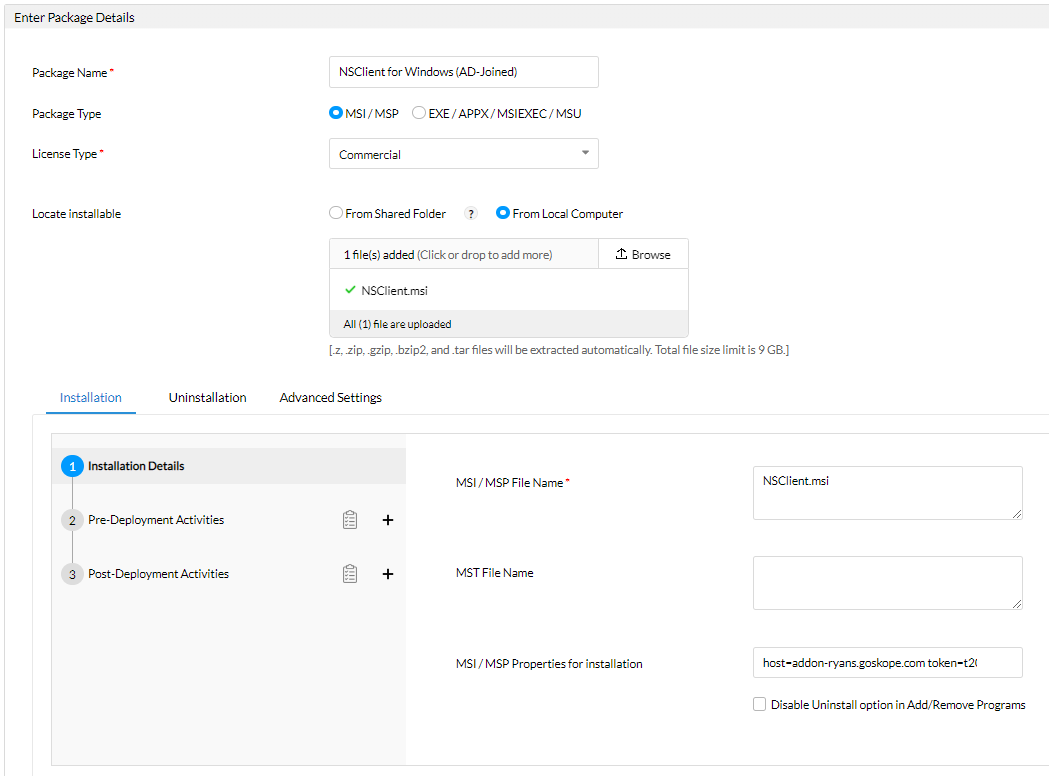
Package Name: For example, NSclient for Windows (AD-Joined)
-
Package Type: Select MSI/MSP.
-
License Type: Select Commercial
-
Locate Installable: You can either upload the package from the shared folder or from your local computer.
-
-
Click the Installation Tab.
-
MSI / MSP File Name = NSClient.msi
-
Pre-Deployment Activities = leave blank
-
Post Deployment Activities = leave blank
-
MSI / MSP Properties for Installation = Add depending on the Netskope Client MSIEXEC Commands.
Example Screenshot for AD-Joined / Silent install

-
-
Click Save.
Create Installation Script
To create the installation script:
-
Navigate to Software Deployment > Packages.
-
Click the ellipsis (…) in the Action column to the right of your newly created package.

-
Select Install Software – Computer from the dropdown options.
-
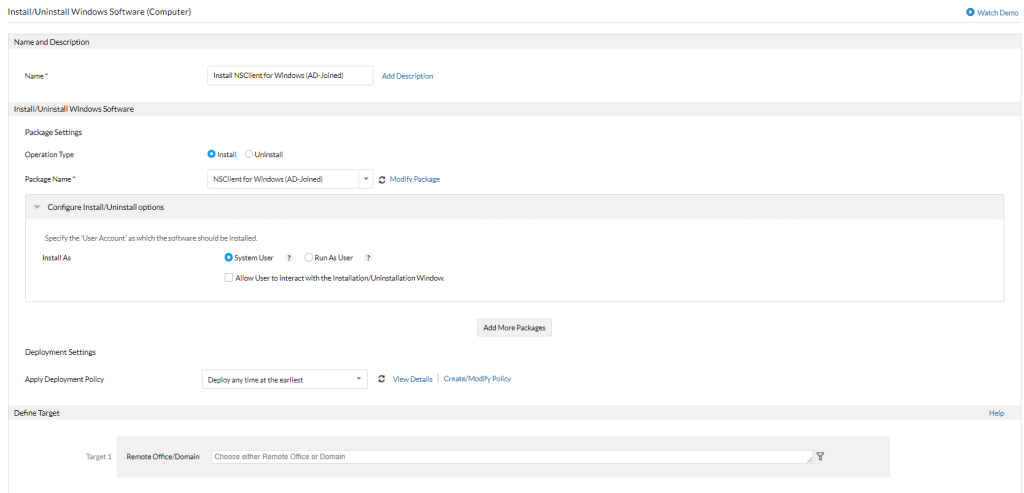
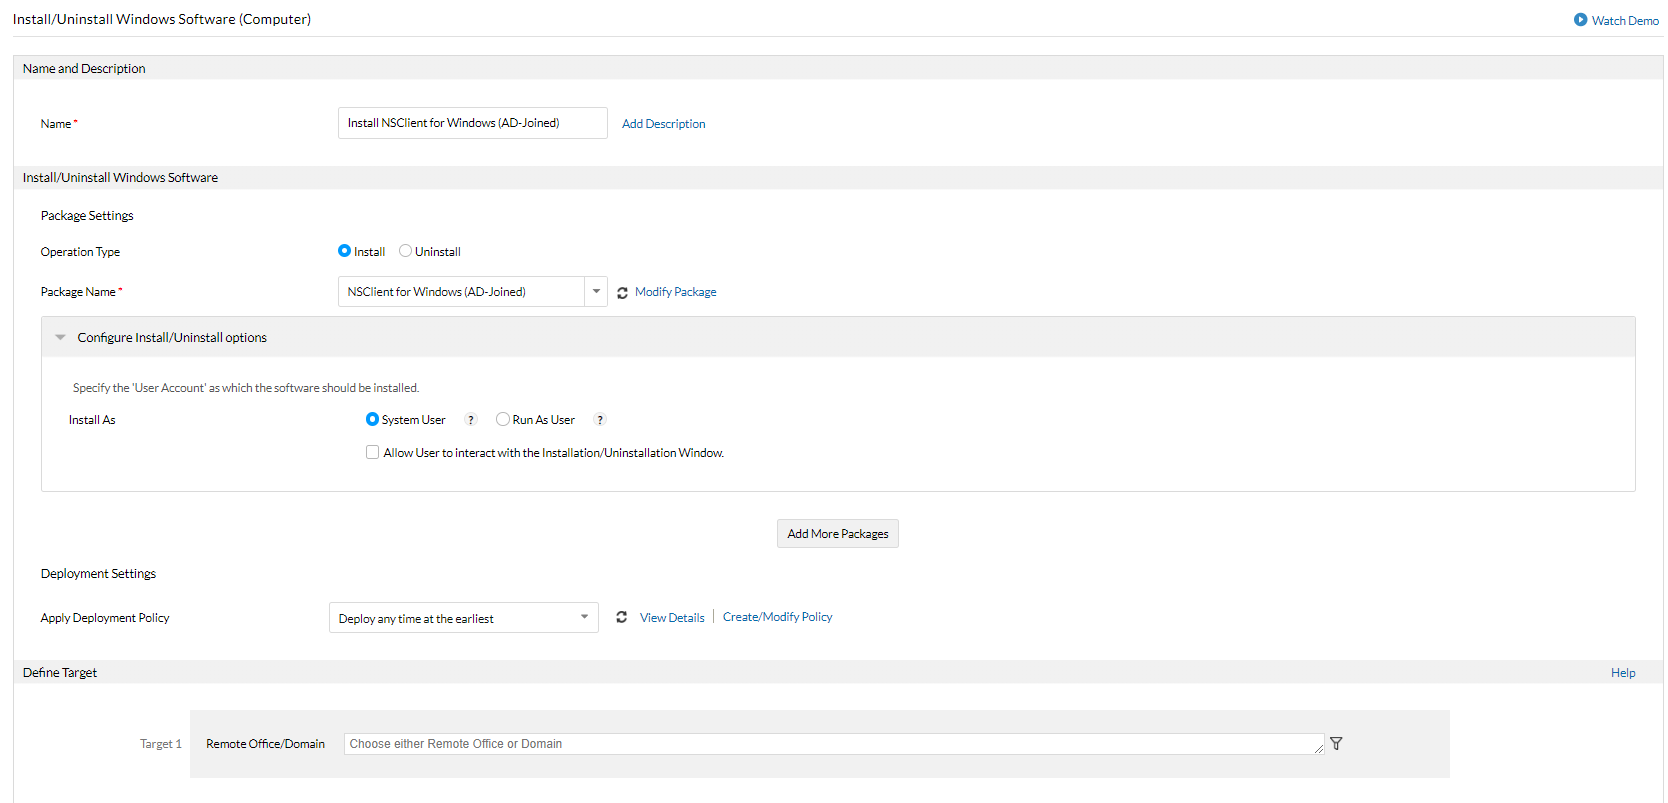
This navigates to Install/Uninstall Windows Software (Computer).
-
Enter the following details:
-
Name: Install Netskope Client for Windows (or similar)
-
Package Settings:
-
Operation Type: Install.
-
Package Name: This is pre-filled for you with the name of the package you created earlier in Create Application Package.
-
Under Configure Install / Uninstall Options > Install As: Select System User.
-
Under Deployment Settings, select a policy according to your preference in Apply Deployment Policy.
-
-
In Define Target, define the target workstations where you want to deploy the configuration. To define a target, view Defining Targets.
-
In Execution Settings (Optional), choose the timeframe in which you want to apply the configuration. To learn more, view Define Execution Settings.
-
-
Click to Deploy, Deploy Immediately or Save (as Draft or Template).