

To deploy OVA, follow the steps below.
-
Login ESXi host to deploy OVA.Unzip ai-gateway-ova.zip file to get ova file. For downloading the file, refer to the steps in Downloading the VMware ESXi Image.
-
Login ESXi host to deploy OVA.
-
Go to Inventory > Hosts and Clusters.
-
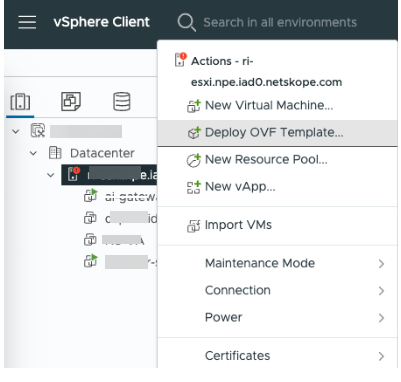
Right click on the host and click Deploy OVF Template.
-
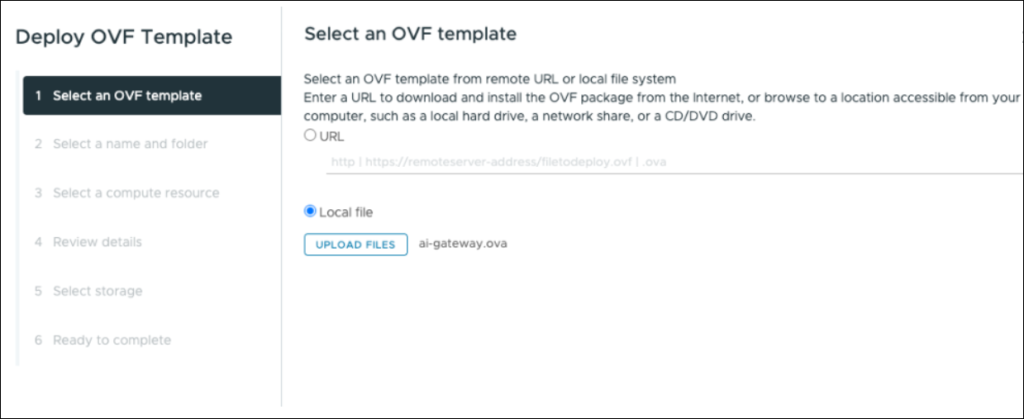
In the Deploy OVF Template page, navigate to Select an OVF template and select the Local file button and click UPLOAD FILES to upload a file.
You can also select the URL button and enter the url to download and install the OVF package from your file server.
-
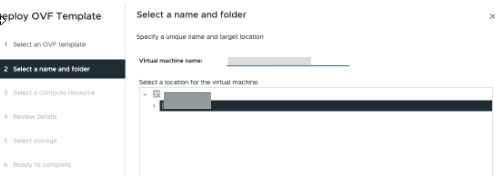
Navigate to Select a name and folder and specify a unique name for the virtual machine in the Virtual machine name field. Also, select a target location for the VM and click Next.
-
Navigate to the Select a computer source menu and select the destination computer resource.
-
Enable Automatically power on deployed VM and click Next.

-
Navigate to the Review details menu, verify the template details in the Review details page and click Next.
-
Navigate to the Select storage menu.
-
In the Select storage page, to select an appropriate storage based on the requirement for the configuration and disk files, select Thin Provision or Thick Provision from the Select virtual disk storage list.
-
Click Next.
-
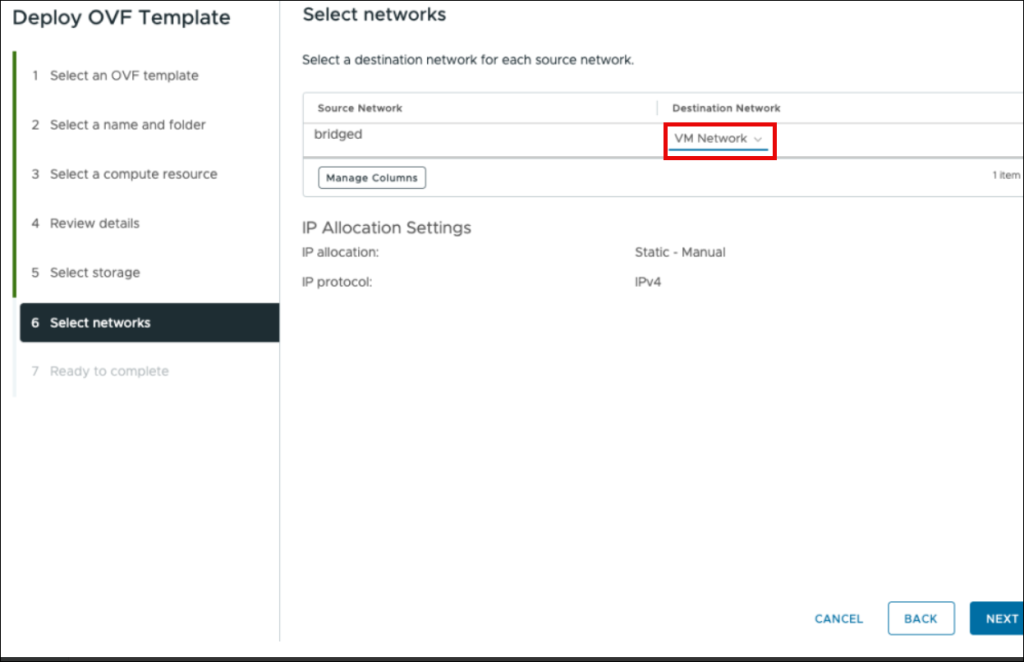
Navigate to the Select networks menu.
-
Select VM Network as destination network and click Next.
-
Navigate to the Ready to complete menu and review all the settings that you have selected. If satisfied, click Finish.
-
After you complete the deployment, you can get an IP address to access the virtual machine using SSH client or Web console.
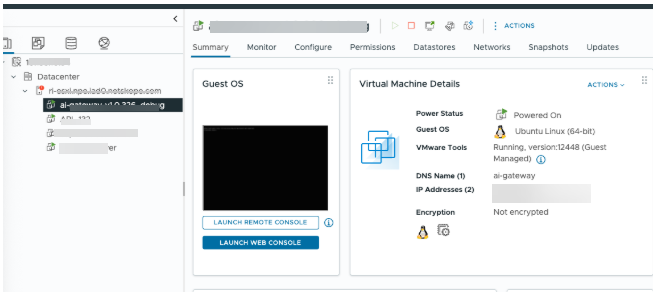


If you want to access using the Web console, click LAUNCH WEB CONSOLE.
If you want to access using SSH client, access using preferred SSH client to login.