

For Virtual Private Edge (VPE), you must deploy and register VPE Nodes, which are the on-premises instances that make up the VPE platform.
Downloading the VPE Image
First, you must download the VPE image from the Netskope UI. Note that the time it takes to download the image depends on the network speed between your environment and the Netskope Management Plane (MP).
To download the image:
- Go to Settings > Security Cloud Platform > On-Premises Infrastructure.
- Click the Next-Gen tab.
- On the Next-Gen page, click Download Image.

- In the Get VM Image window, download the appropriate image.
Deploying the VPE Image
After downloading the image, deploy the VPE Node in your environment with standard hypervisor deployment steps. For examples of similar instructions, see Install the Virtual Appliance on VMware ESX 6.5 or Later or Install the Virtual Appliance on Linux KVM.
Registering the VPE Node
After you successfully deploy the VPE Node, you must configure and then register it in your Netskope tenant.
Configuring the VPE Node
To configure the VPE Node:
- Log in to the VPE CLI via SSH with the default username nsadmin and password nsappliance.
- Use the command
show version-infoto confirm that the software version of the VPE Node is correct. - Use the command auth change-password nsadmin to update the default password. A password must have a minimum length of 14 characters and include at least one number, one uppercase letter, one lowercase letter, and one special character or symbol.
- You must set up the network interface for the VPE Node. Use the command
configureto enter configuration mode. - For DNS configuration, use the command
set dns primary <Primary DNS Server IP>. - The default interface (dp2) is used for management and the dataplane. You can use DHCP configuration for the dp2 interface. Use the command
set interface dp2 v4 enable trueto configure DHCP. - (Optional) Alternatively, you can configure a static IP address for the dp2 interface instead.
- If DHCP is already enabled, use the
show route interfacecommand to see the IP, gateway, and netmask assigned to the interface. - Before setting the static IP address, you must use the following command to disable DHCP:
set interface dp2 v4 enable false. - Use the following commands to set the static IP:
set interface dp2 v4 static ip <IP address>
set interface dp2 v4 static netmask <netmask>
set interface dp2 v4 static gw <gateway>
set interface dp2 v4 static enable true
- Netskope recommends updating the VPE Node hostname for local identification. For example, the Netskope UI displays this hostname during the registration process. Use the following command to update the hostname:
set system hostname <new hostname>.
- If DHCP is already enabled, use the
Creating a Registration Token
After you configure the VPE Node, you must create a one-time registration token for VPE in the Netskope UI.
- Go to Settings > Security Cloud Platform > On-Premises Infrastructure.
- Click the Next-Gen tab.
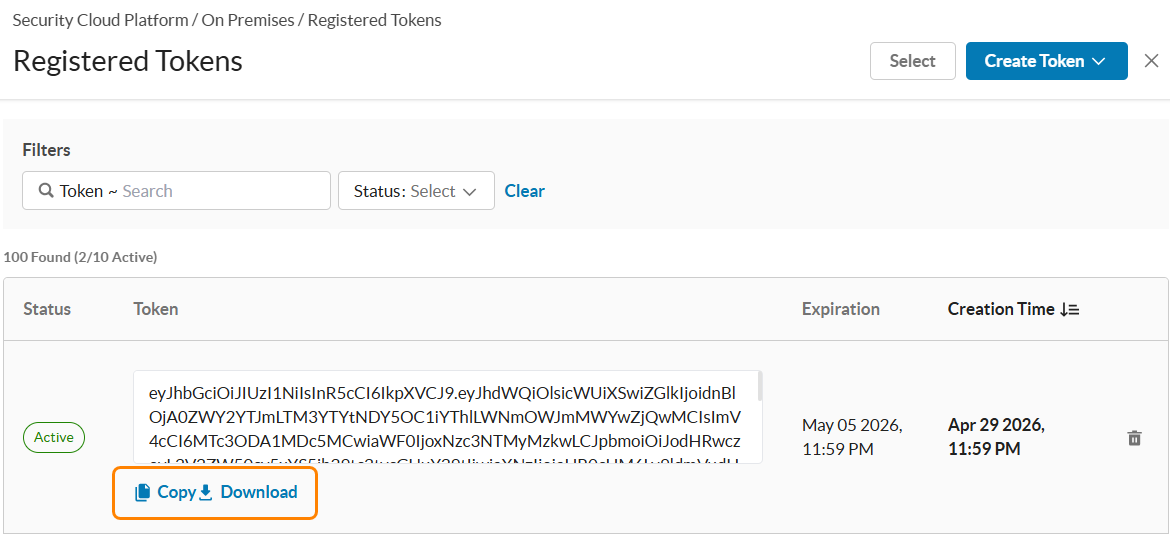
- On the Next-Gen page, click Registration Tokens.

- In the Registered Tokens window, click Create Token and then the number of tokens you wish to create. You can create up to 10 tokens at a time.
- Hover over the token you created and then click Copy or Download.
Saving the Registration Token
After creating the token, return to the VPE CLI to save and pair it with the VPE Node, completing the registration process. Use the following commands to set the token:
configure
set dns primary <vpc-resolver-ip>
set system registrationkey <token>
save
exit
Note
The registration process can take up to 20 minutes to complete, depending on network latency.
Verifying VPE Node Registration
You can verify the success of the VPE Node registration from the Netskope UI and the VPE CLI. In the Netskope UI, the VPE Node is displayed on the Next-Gen page with the VPE Node hostname and serial number.
In the VPE CLI, use the command status tethering to verify the VPE Node serial number.