

Appliance Best Practices and Prerequisites
Appliance Sizing
The following table lists the recommended instance types for cloud deployments and the corresponding size configurations for on-premises environments of the DLP On Demand appliance:
| AWS* | GCP | Azure | VM# | Concurrent Requests^ | Minimum Disk Size | |
|---|---|---|---|---|---|---|
| Small | c5ad.4xlarge | n2-standard-16 | Standard-F16s_v2 | 16 cores/32GB | 480 rps with burst of 576 rps. Max throughput limit: 786 MB per min | 351GB |
| Medium | c5ad.8xlarge | n2-standard-32 | Standard-F32s_v2 | 32 cores/64GB | 1280 rps with burst of 1536 rps. Max throughput limit: 2048 MB per min | 351GB |
| Large | c5ad.16xlarge | n2-standard-64 | Standard-F64fs_v2 | 64 cores/128GB | 2880 rps with burst of 3456 rps. Max throughput limit: 4608 MB per min | 351GB |
* In AWS regions where the c5ad sizing is unavailable, use the c5a instance size.
^ File and Content structure, DLP Profile complexity and features like OCR and EDM, are likely to impact the performance numbers.
# ESX does not support dynamic resizing of the VM after the appliance has been created. This was tested on: VMware ESXi, 8.0.2, 23305546 (VMware ESXi 8.0 Update 2b | 29 FEB 2024 | Build 23305546)
The Small size is intended only for proof-of-concept testing. For production deployments, Netskope recommends using Medium or Large configurations. To ensure optimal performance, use SSDs for all instances.
Networking Considerations
- Allowlisting:
Ensure that Netskope IPs and Amazon S3 (for example,*.s3-us-west-1.amazonaws.com) should be allowlisted. If tenant.goskope.com is the tenant Web UI hostname, then also allow the IPs corresponding to config-tenant.goskope.com and callhome-tenant.goskope.com.
The following domains must also be allowlisted:{"dlpappliancegw.sv5.goskope.com","dlpappliancegw.bom3.goskope.com","dlpappliancegw.am2.goskope.com","dlpappliancegw.sjc1.goskope.com","dlpappliancegw.fr4.goskope.com","dlpappliancegw.ruh1.goskope.com","dlpappliancegw.mel2.goskope.com","dlpappliancegw.sjc2.goskope.com","dlpappliancegw.zur2.goskope.com","dlpappliancegw.lon3.goskope.com","dlpappliancegw.sin2.goskope.com","dlpappliancegw.dfw3.goskope.com","dlpappliancegw.fra2.goskope.com"} - Microsoft AIP:
If you are using the DRM feature with DLP, the Microsoft AIP endpoints must also be allowlisted. - Administrative Access:
If SSH access is permitted (for cases where console access is not sufficient), ensure that systems used to administer the appliance can reach it over SSH. - API Connectivity:
The appliance must be reachable over HTTPS (TCP 443) by all integrating services that send API calls to it. - We do not recommend SSL interception of traffic from DLP On Demand appliance. If a proxy is in place, ensure that respective certificates are imported.
Netskope recommends blocking all other inbound and outbound communication for security. - Deploying multiple DLP On Demand behind a network load balancer is currently not feasible with common implementation scenarios that use asynchronous requests for scanning or result retrieval.
- See the Appliance Troubleshooting page for any other issues.
- To get a DLPoD Appliance running smoothly in an on-premises environment, you will need to configure an upstrean proxy for WebSockets. Standard web traffic (HTTP) is like a series of one-off letters: send a request, get a reply, and the connection closes. WebSockets, however, create a persistent, two-way “open phone line” between your appliance and the cloud service.
Appliance Creation
See the sections below for detailed appliance creation steps for different cloud provide and on-premises environments. During setup, the appliance automatically receives its IP address, netmask, and gateway through DHCP. Once the instance is created, connect to it and complete the tethering process to the Netskope Management Plane.
The UI from R134 will provide links to download KVM, Azure, HyperV, ESXi images. You can also assign AWS images from the UI by providing your account ID.
To download or assign an image, navigate to Security Cloud Platform > On-Premises Infrastructure and select Setup DLP On Demand and select your respective hypervisor.


AWS DLP On Demand Appliance Creation
-
Launch an EC2 instance using the DLP On Demand AMI. The image can be found in Private Images.

-
Set the Instance Type to c5ad.8xlarge or c5ad.16xlarge.

-
Define your desired Storage and use gp3.
-
No SSH key-pair is required at the moment, setup the networking and firewall security groups as appropriate and other configurations can remain at the default setting. We recommend that the appliance is not accessible publicly.
-
Select proceed with no key-pair and launch the instance.
GCP DLP On Demand Appliance Creation
-
Go to Compute Engine – VM Instances and then click Create Instance

-
In Machine Configuration, provide a name for the instance and in General Purpose, select N2.

-
In the Machine Type, select n2-standard-32 or n2-standard-64
-
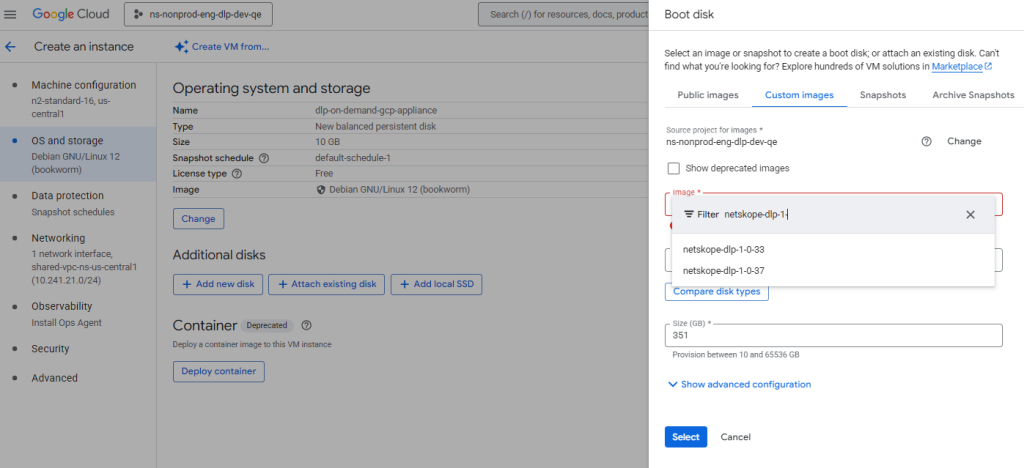
In OS and Storage, select Change under Operating System and Storage and filter the Image. Select the appropriate DLP On Demand appliance image. For Size (GB), enter 300 GB.
-
Setup the networking and firewall security groups as appropriate and other configurations can remain at the default setting, then click Create.

Azure DLP On Demand Appliance Creation
safely ignored.
The appliance boot sequence includes extended initialization tasks such as security hardening, service orchestration, and platform configuration
that run prior to the Azure Guest Agent reporting readiness. The appliance is designed to complete its full initialization independently of the
Azure provisioning signal.
You can confirm appliance readiness by verifying that the instance state is shown as “Running” in the Azure portal.
-
Download the VHD from the presigned URL
-
Untar the VHD using the below command
tar -xvf {downloaded_vhd_tar_file} -C {path to untar the artifacts} -
Create a Storage Account under Resource Group.
-
Create a Container under the Storage Account.
-
On the Storage Account page, open the side-menu Security + Networking and click on Shared access signature.
-
Enable all permissions, set the Start Time as 24h before the current time and End Time as 24h after current time (1 day offset for Start Time and End Time)
-
Click on Generate SAS and connection string and copy the SAS token value.
-
If you don’t have azcopy, install it.
Warning
To upload the file to Azure Blob Storage, use AzCopy. Uploading large files via the Azure Portal is unreliable and may result in file corruption -
Run the command below to upload the
.vhdartifact to the Azure Blob Storage:azcopy copy "{local_path}.vhd" "https://{account_name}.blob.core.windows.net/{container_name}/{vhd_name}.vhd?{SAS_TOKEN}" --blob-type PageBlob -
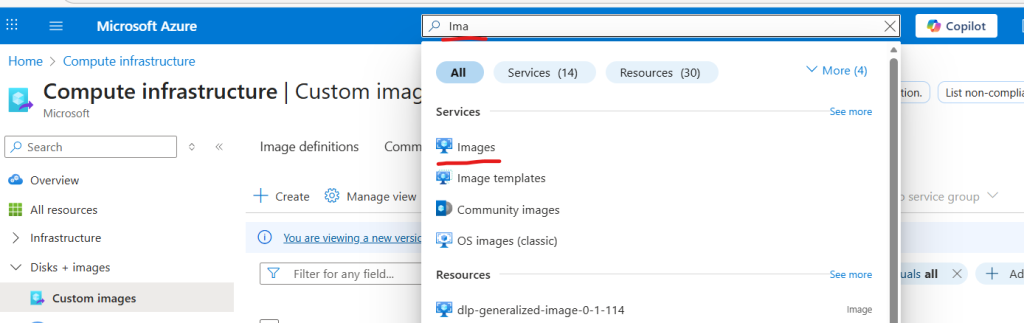
Once the VHD is uploaded,navigate to the Images in Azure:
-
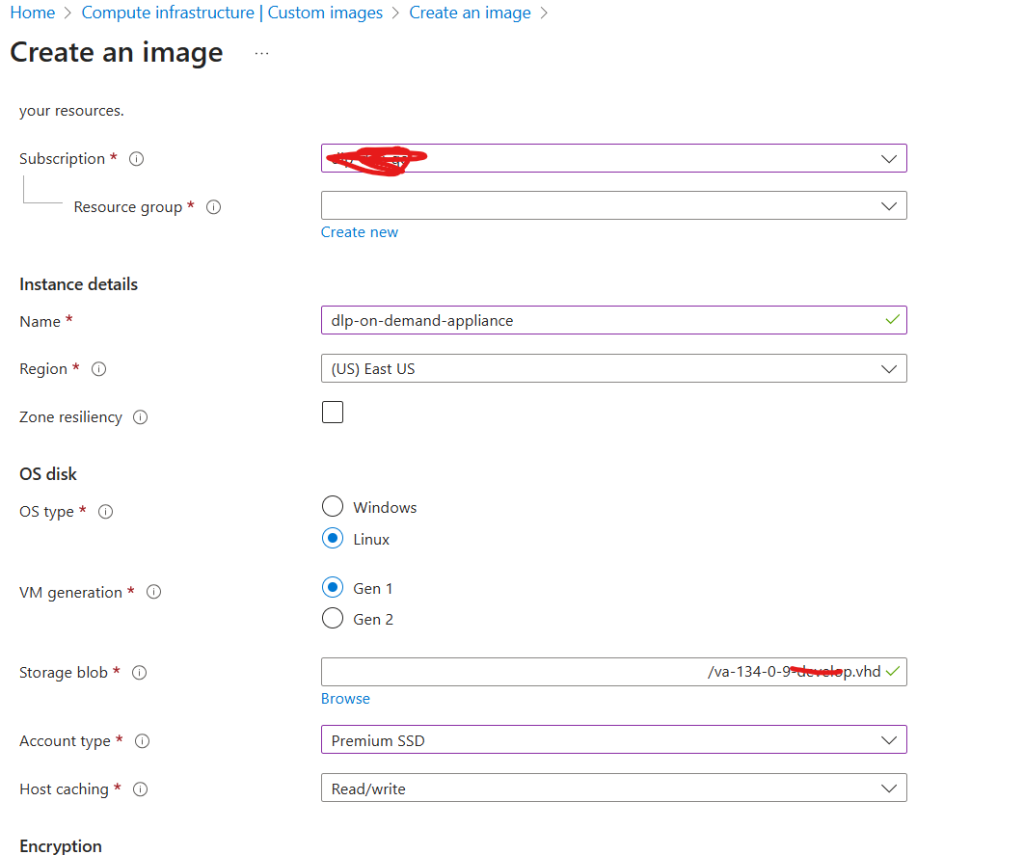
Choose your subscription to create the image.
OS Type: Linux
Choose your VHD from the storage blob
Account Type: Premium SSD
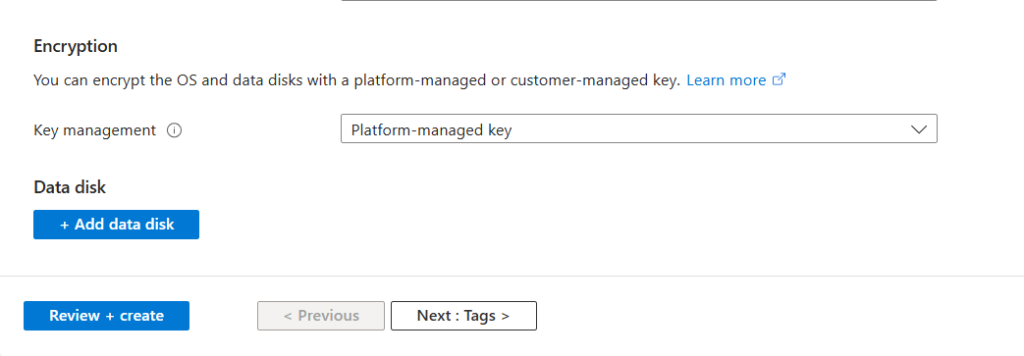
Encryption: Platform managed
-
Click on Review + create to create the image.
-
Create the instance out of the image.
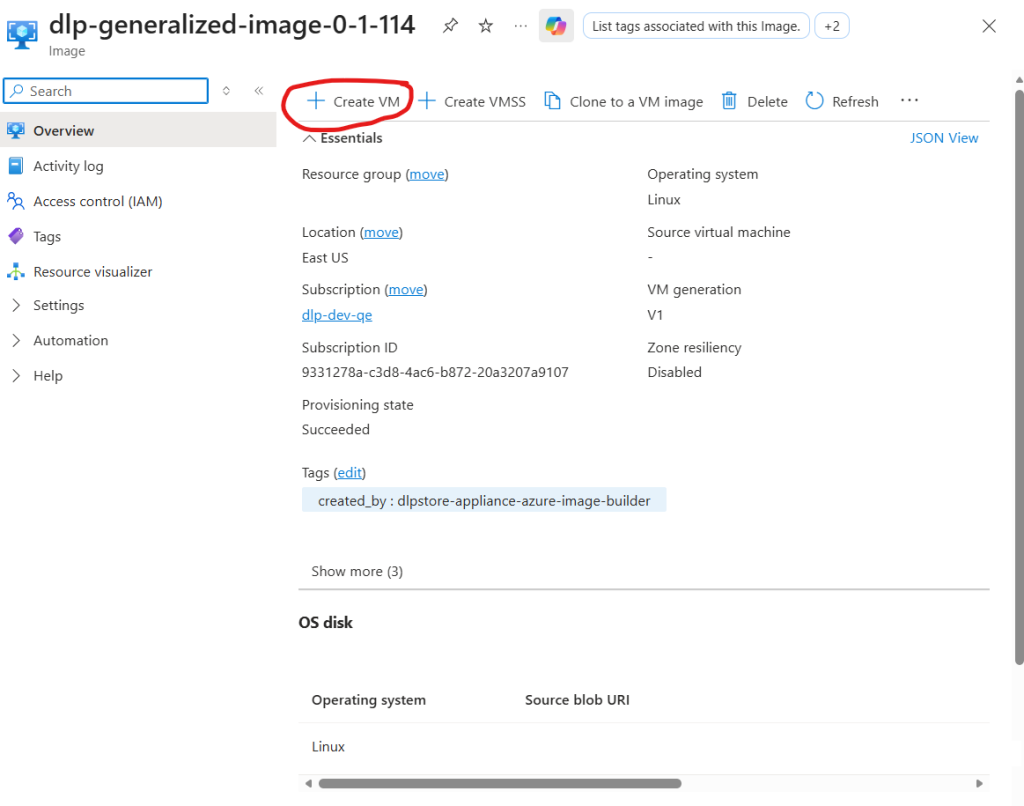
-
Choose the respective subscription and resource group. Provide the VM name. The Image will be auto populated and choose the other parameters.
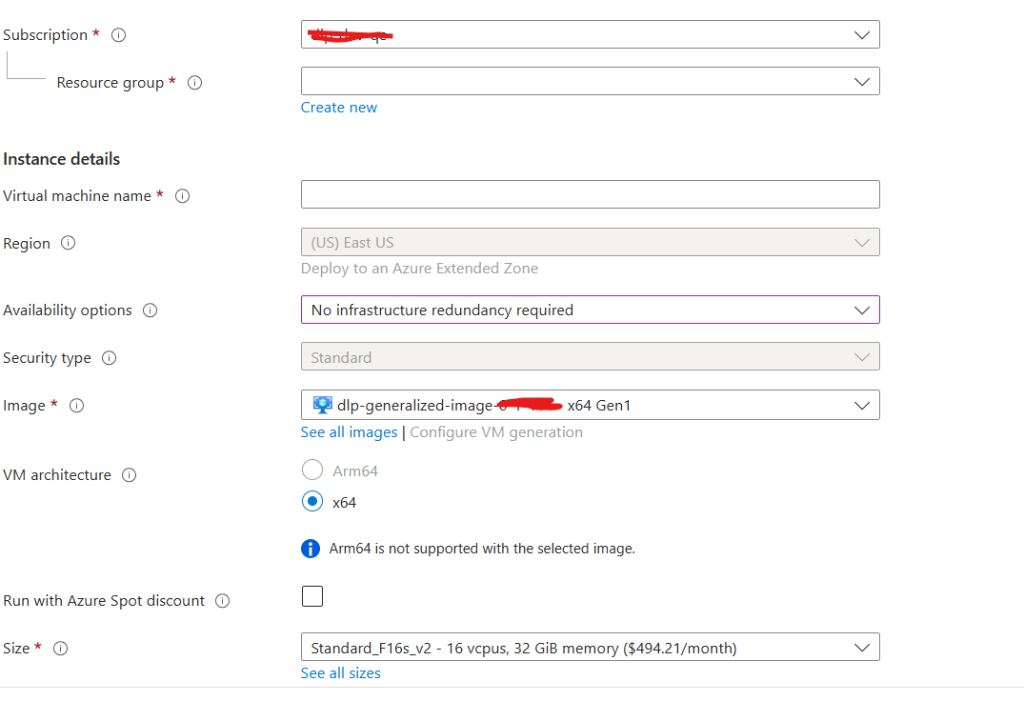
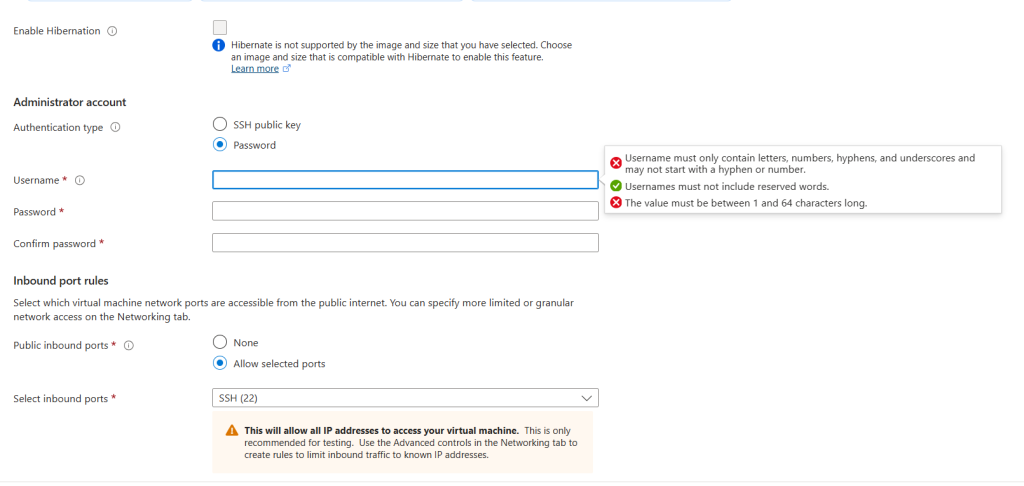
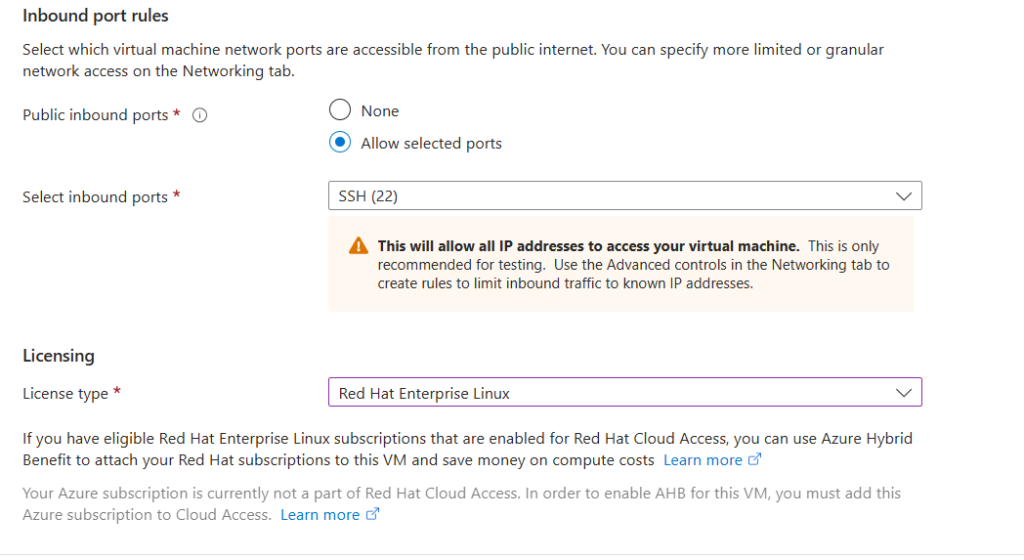
-
Select a minimum of 351 GB disk Premium SSD.

-
Choose your Networking settings and create the VM.


As stated previously, the VM may show deployment failures, but this is expected behavior.

vSphere (ESXi) DLP On Demand Appliance Creation
16 CPU with 32 GB Memory
32 CPU with 64 GB Memory
64 CPU with 128 GB Memory
If you are using vCenter Server, the process is similar and generally done via the vSphere Client:

- Start Deployment:
- Right-click a host, cluster, or datacenter in the inventory and select Deploy OVF Template.
- Select Template:
- Select Local file and then Upload files to choose your local
.ovafile. - Click Next.
- Select Local file and then Upload files to choose your local
- Select Name and Folder:
- Enter a Virtual machine name and select the deployment location (a folder in the vCenter inventory).
- Click Next.
- Select Compute Resource:
- Select the host, cluster, or resource pool where the VM will run.
- Click Next.
- Review Details:
- Review the template details and accept any license agreements.
- Click Next.
- Select Storage:
- Select the datastore and the virtual disk format (e.g., Thin Provision).
- Click Next.
- Select Networks:
- Map the source networks in the OVA to the destination network ports in your vSphere environment.
- Click Next.
- Customize Template (if applicable):
- If the OVA allows for customization, you’ll see a Customize Template screen where you can set initial configuration (e.g., network settings, passwords).
- Click Next.
- Ready to Complete:
- Review the final summary. Check the box to Power on after deployment if desired.
- Click Finish.
Hyper-V DLP On Demand Appliance Creation
-
Download the appliance image from the Setup DLP on Demand window from your tenant
-
Search for and open Hyper-V Manager from the Start menu.
-
Access the Import Wizard:
- In the left pane, click the name of your Hyper-V host (your computer).
- In the Actions pane (on the right), click Import Virtual Machine.

-
Locate the VM Folder:
Click Next on the “Before You Begin” screen.

In the Locate Folder step, click Browse and navigate to the folder that contains the exported VM files (the VM’s configuration file, usually in a subfolder called Virtual Machines). You must select the top-level folder of the exported VM, not a subfolder.
Click Select Folder, then Next.

-
Select the Virtual Machine:
The wizard should now display the virtual machine found in that folder. Select the correct VM from the list and click Next.

-
Choose Import Type: Select one of the following import options:
Register the virtual machine in-place (use the existing unique ID): Use this if the VM files are already in the location where you want them to run and you are not importing a copy.

-
Review and Finish:
Review the summary of your choices and click Finish to start the import process.
Once complete, the VM will appear in the list of virtual machines in the Hyper-V Manager console.

-
Edit the Network Adapter Setting before starting the instance.
-
Right-click the VM name and select Settings….
-
In the left pane, under the Hardware section, click on Network Adapter (or the specific name if you renamed it). Select the network switch which is used to connect in the respective environment.


-
Start the VM: There are a few options to start it:
- Action Pane: Select the VM, and in the Actions pane (on the right), click Start.
- Right-Click Menu: Right-click the VM name and select Start.

KVM DLP On Demand Appliance Creation
-
Download the Appliance Image
Download the appliance image from the Setup DLP on Demand window from your tenant.
-
Create Template Directory and Extract Initial Tarball
Create a directory to hold the VM disk image and extract the initial tarball. The tar includes checksum files also so next step will untar the main artifacts
mkdir dlp-vm-template
tar -xvf dlp-appliance.tar
ls # List files to confirm the nested tar.gz file is present -
Extract the QCOW2 Disk Image
The
.qcow2file is the actual virtual disk image. Extract it into the template directory. Note: The file name in your command (netskope-dlp-on-demand-kvm-qcow2-133.0.7.qcow2.tar.gz) suggests a nested.tar.gzarchive, so the extraction command is:tar -xzvf netskope-dlp-on-demand-kvm-qcow2-133.0.7.qcow2.tar.gz -C /home/ubuntu/dlp-vm-template/ -
Deploy the Appliance using
virt-installThis command creates the VM definition (
dlp-appliance-test) and imports the prepared disk image.--import: Tellsvirt-installto use the existing disk image instead of performing a fresh installation.--disk: Specifies the path to the.qcow2image and its size.--network default: Connects the VM to the defaultlibvirtNAT network.
sudo virt-install --name dlp-appliance-test --ram 65536 --vcpus 32 --os-variant ubuntu24.04 --disk path=/home/ubuntu/dlp-vm-template/netskope-dlp-on-demand-kvm-qcow2-133.0.7.qcow2,size=452 --import --network default --check path_in_use=offIMPORTANT: When
virt-installruns, it often connects the console. Give CTRL+C to exit the console view. The installation/first boot process will continue in the background. Wait a few moments for the appliance to fully boot. -
Verify the VM Status
Check the status of the deployed VM. It should show as
running.sudo virsh list --all
-
Check the Default Network Status
Confirm the default network (typically a NAT bridge on
virbr0) is active.sudo virsh net-list -
Find the Appliance’s IP Address
Since the appliance is on the default virtual network, use
virshto query the DHCP leases to find the IP address assigned to the new VM.sudo virsh net-dhcp-leases default -
Connect to the Appliance via SSH
Use the IP address retrieved in the previous step to connect to your running KVM appliance.
sudo ssh {username}@{IP}
Connecting to a DLP On Demand instance:
Once the instance has been created, it must be connected to Netskope to download the required configuration and profiles before it can begin processing DLP requests. To proceed:
-
SSH into the instance as
nsadminwith passwordnsappliance. This password should be changed upon login.ssh nsadmin@<instance_ip> nsadmin@<instance_ip>'s password: nsappliance
Change the password by running
auth change-passwordnsappliance> auth change-password
-
Automatic Configuration by DHCP is the default. In configurations where DNS is not provided via DHCP, follow these commands:
nsappliance> configure
nsappliance(config)> set dns primary x.x.x.x
nsappliance(config)> set dns secondary x.x.x.x
nsappliance(config)> save
nsappliance(config)> exit
If you intend to configure your network interface manually, follow these commands:
nsappliance> configure
nsappliance(config)> set interface v4 dhcp enable false
nsappliance(config)> set interface v4 static enable true
nsappliance(config)> set interface v4 static ip x.x.x.x
nsappliance(config)> set interface v4 static gw x.x.x.x
nsappliance(config)> set interface v4 static netmask x.x.x.x
nsappliance(config)> set dns primary x.x.x.x
nsappliance(config)> set dns secondary x.x.x.x
nsappliance(config)> save
nsappliance(config)> exit
To revert back to automatic DHCP configuration (in configurations where DNS is not provided via DHCP, you can also set the DNS), use the following commands:
nsappliance> configure
nsappliance(config)> set interface v4 dhcp enable true
nsappliance(config)> set dns primary x.x.x.x
nsappliance(config)> set dns secondary x.x.x.x
nsappliance(config)> save
nsappliance(config)> exit
Please make sure that DNS resolution works on the appliance. Guidance to add a DNS server is provided in this step. -
If you have not created a REST API v1 token, you will need to. If you have already created one, skip to step 4. Otherwise, navigate to Settings > Tools > Rest API v1 and click GENERATE NEW TOKEN.

-
Navigate to Settings > Security Cloud Platform > On-Premises Infrastructure in the Netskope admin console and copy the License Key.
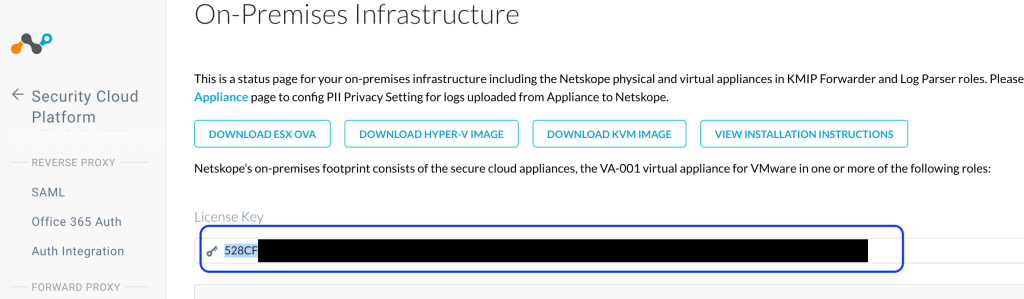
Use the License Key with the following command in configuration mode:
nsappliance> configure
nsappliance(config)# set system licensekey <license-key>
nsappliance(config)# save
nsappliance(config)# exit
-
You can check the tethering status with
status tethering. callhome_reachable needs to be true and tenant-url and serial should be populated.nsappliance> status tethering
 After tethering, the appliance will need approx. 30 mins to initialize before becoming ready.
You will also see this information reflected on the On-Premises Infrastructure page:

Clicking on these appliances will reveal more information about the appliance such as the Hypervisor, OS, etc.


Configuring a custom proxy
You can configure a custom implicit or explicit proxy to sit between the appliance and management plane.
To do so, enter the configure mode and set the management-plane upstream-proxy-server parameters:
root@nsappliance:/home/nsadmin# nsshell
nsappliance> configure
Entering configuration mode

nsappliance(config)# set management-plane upstream-proxy-server
    hostname   Fully qualified domain name (or IP) for proxy server
    password   Password to the proxy server.
        port   port for proxy server
  trusted-ca   Import CA for upstream proxy server into trusted CA store.
    username   Username to the proxy server.
Explicit Example:
nsappliance(config)# set management-plane upstream-proxy-server hostname 10.10.10.10
nsappliance(config)# set management-plane upstream-proxy-server port 8000
nsappliance(config)# set management-plane upstream-proxy-server username <USERNAME>
nsappliance(config)# set management-plane upstream-proxy-server password <PASSWORD>

nsappliance(config)# set management-plane upstream-proxy-server trusted-ca
Copy and paste just your single PEM-formatted server CA certificate (no keys).
Enter one or more lines of input. When done, press Ctrl-D
<PASTE PEM Formatted CA CHAIN>
<Press Ctrl-D>

nsappliance(config)# save
nsappliance(config)# exit
nsappliance> restart dlpaas all
Implicit Example:
nsappliance> configure
Entering configuration mode

nsappliance(config)# set management-plane upstream-proxy-server trusted-ca
Copy and paste just your single PEM-formatted server CA certificate (no keys).
Enter one or more lines of input. When done, press Ctrl-D

nsappliance(config)# save

nsappliance> restart dlpaas all