

This article describes how to import a pre-built OVA (Open Virtual Appliance) image into ESXi to create and run a new virtual machine with Netskope’s Event Streaming Client.
Before You Begin
To complete the installation, ensure you have the following two sets of credentials:
- ESXi Host Credentials: Your organization’s existing credentials to access the ESXi web console.
- Streaming Client VM Credentials: The appliance’s default system credentials (Username: ecava_user, Password: Temppassword@123).
Prerequisites
- Download the Streaming Client OVA file using this link. Note: Ensure you have at least 20 GB of free storage on your ESXi datastore.
- The OVA is packaged with the following default configuration:
- 4 CPUs and 4 GB RAM
- The VM CPU and memory can be resized based on workload requirements
- 4 CPUs and 4 GB RAM
Virtual Machine Import & Configuration Guide
1. During the OVA deployment wizard, apply:
- Disk Provisioning: Select Thin Provision to minimize initial storage consumption.
- Network Mapping: Connect the source network to a virtual machine port group with outbound routing. Recommended adapter type: VMXNET3.
2. Storage Controller Type
- Default Configuration (Supported): This virtual machine is pre-configured with a SATA Controller (AHCI). This is fully supported by ESXi out-of-the-box and will boot normally upon import.
- Performance Upgrade (PVSCSI): ESXi also supports the VMware Paravirtual (PVSCSI) and LSI Logic SAS controllers
3. Network Configuration During the Network Mapping phase of the import wizard, you will need to map the OVA’s source network to your ESXi host’s destination network:
- Network Mapping: Map the source network to your active Virtual Machine Port Group (e.g., “VM Network” or your designated VLAN-backed port group) that provides the necessary outbound routing.
- Network Adapter Type: We recommend ensuring the virtual network adapter is set to VMXNET3 for optimal network performance and low CPU overhead.
Deploying the OVA on ESXi
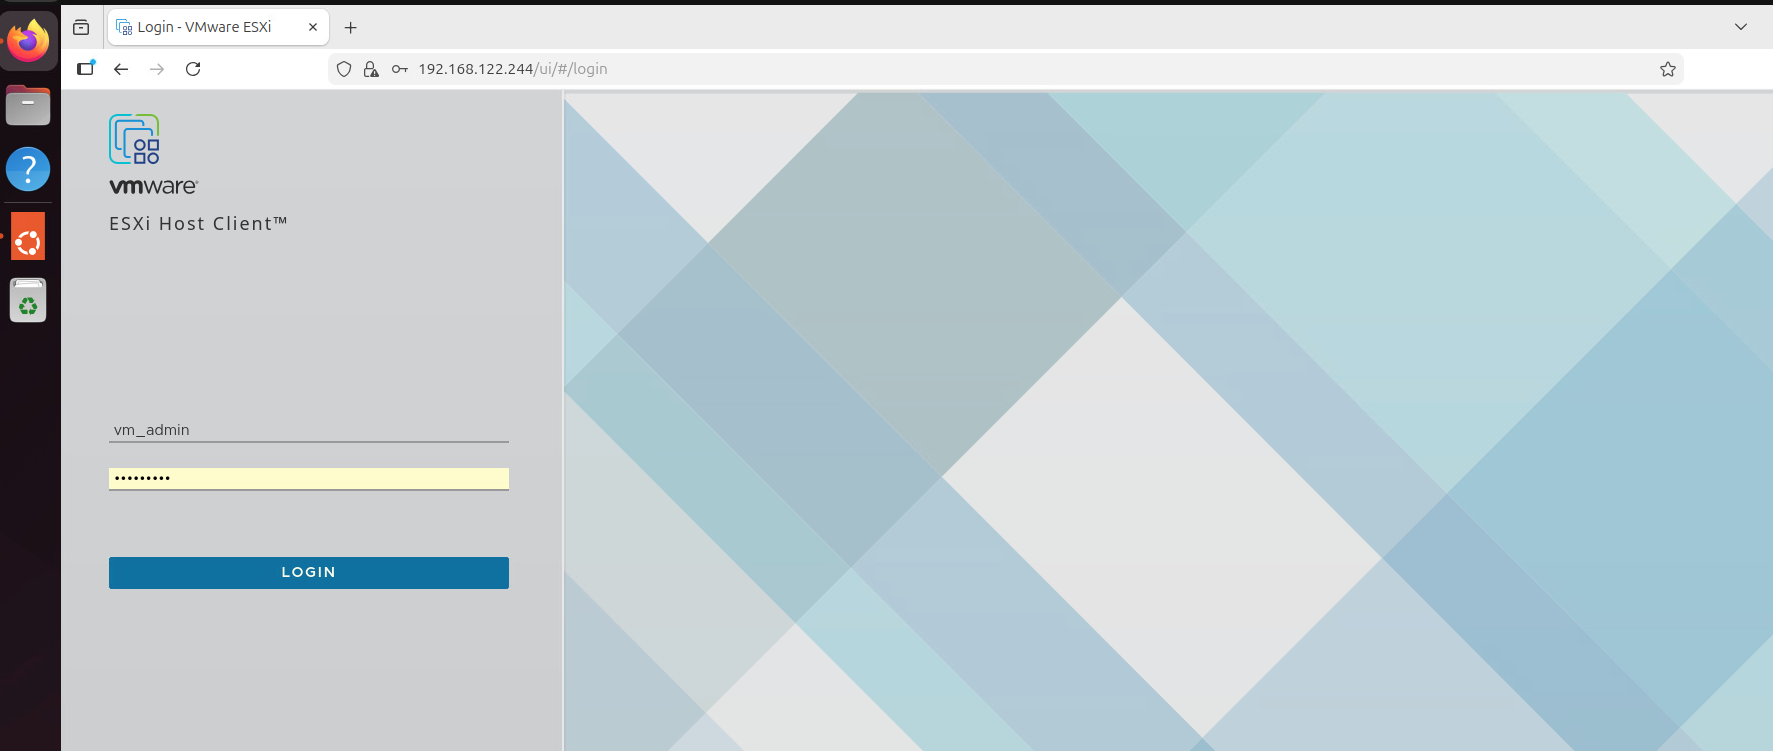
- Navigate to the ESXi host interface (https://<esxi-ip>/ui) and log in using your ESXi administrator credentials.
2. Click Create / Register VM.
3. Deploy a virtual machine from an OVF or OVA file and click Next.
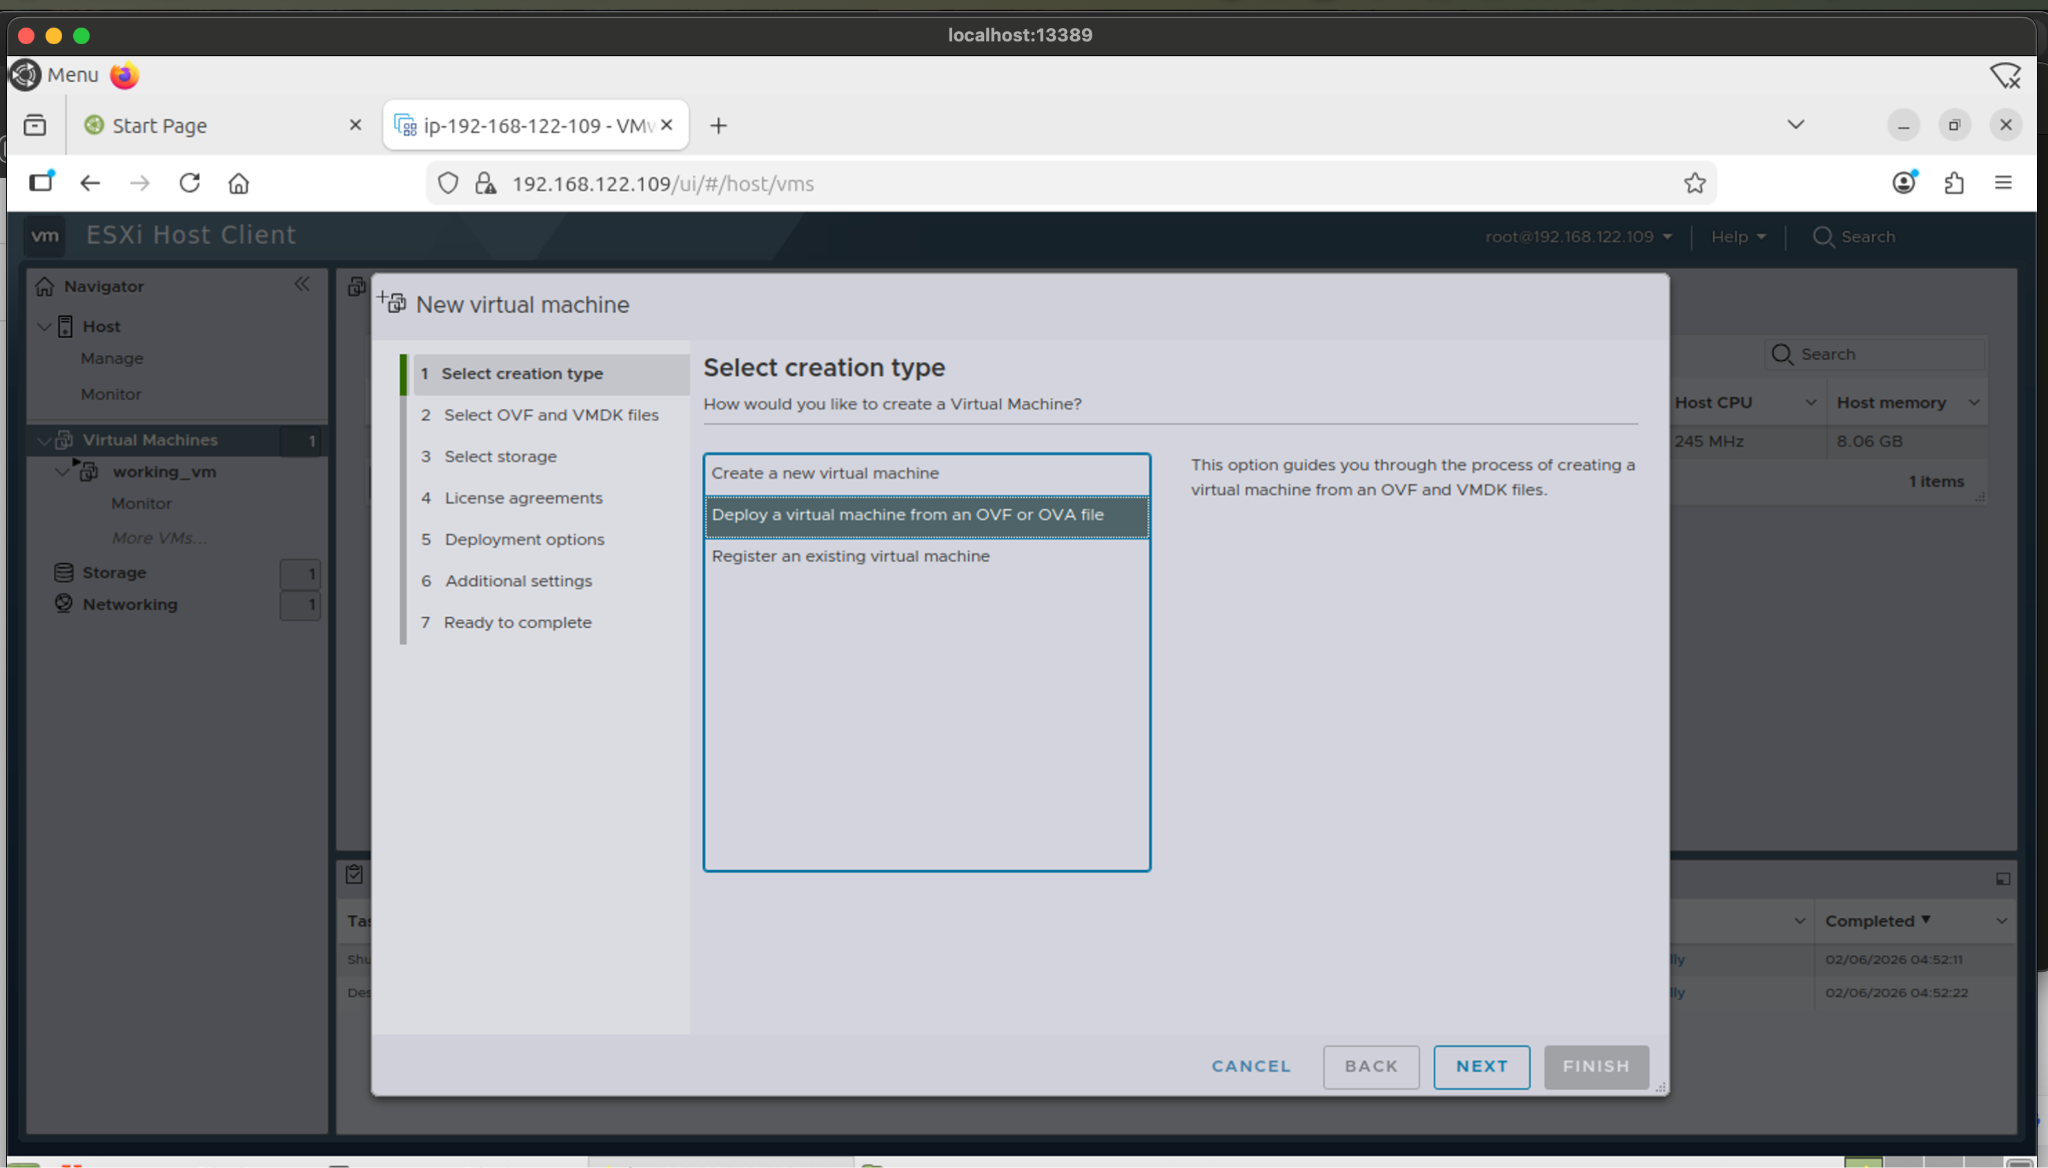
4. Enter a name for the new virtual machine.
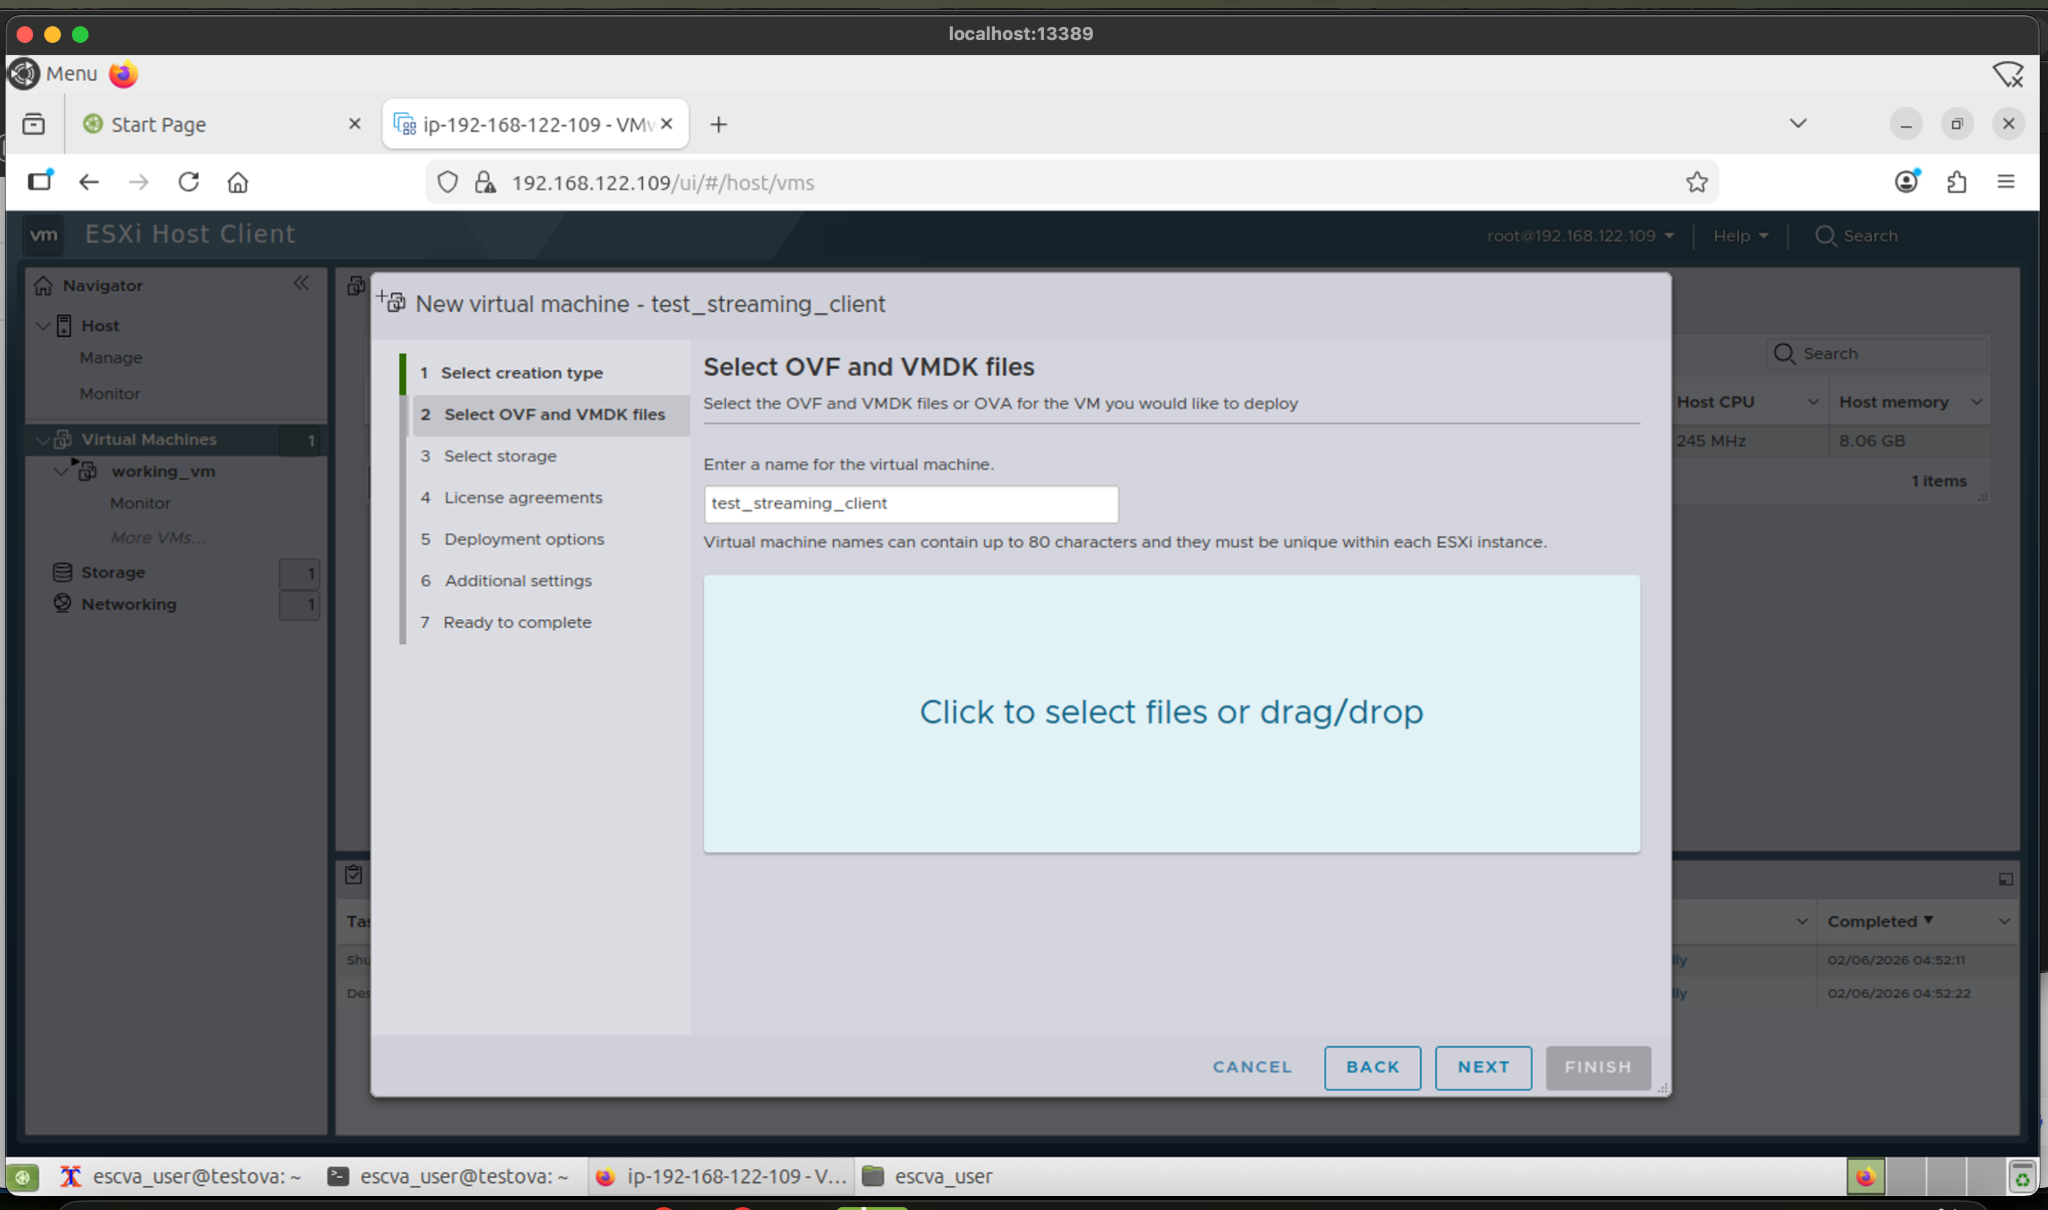
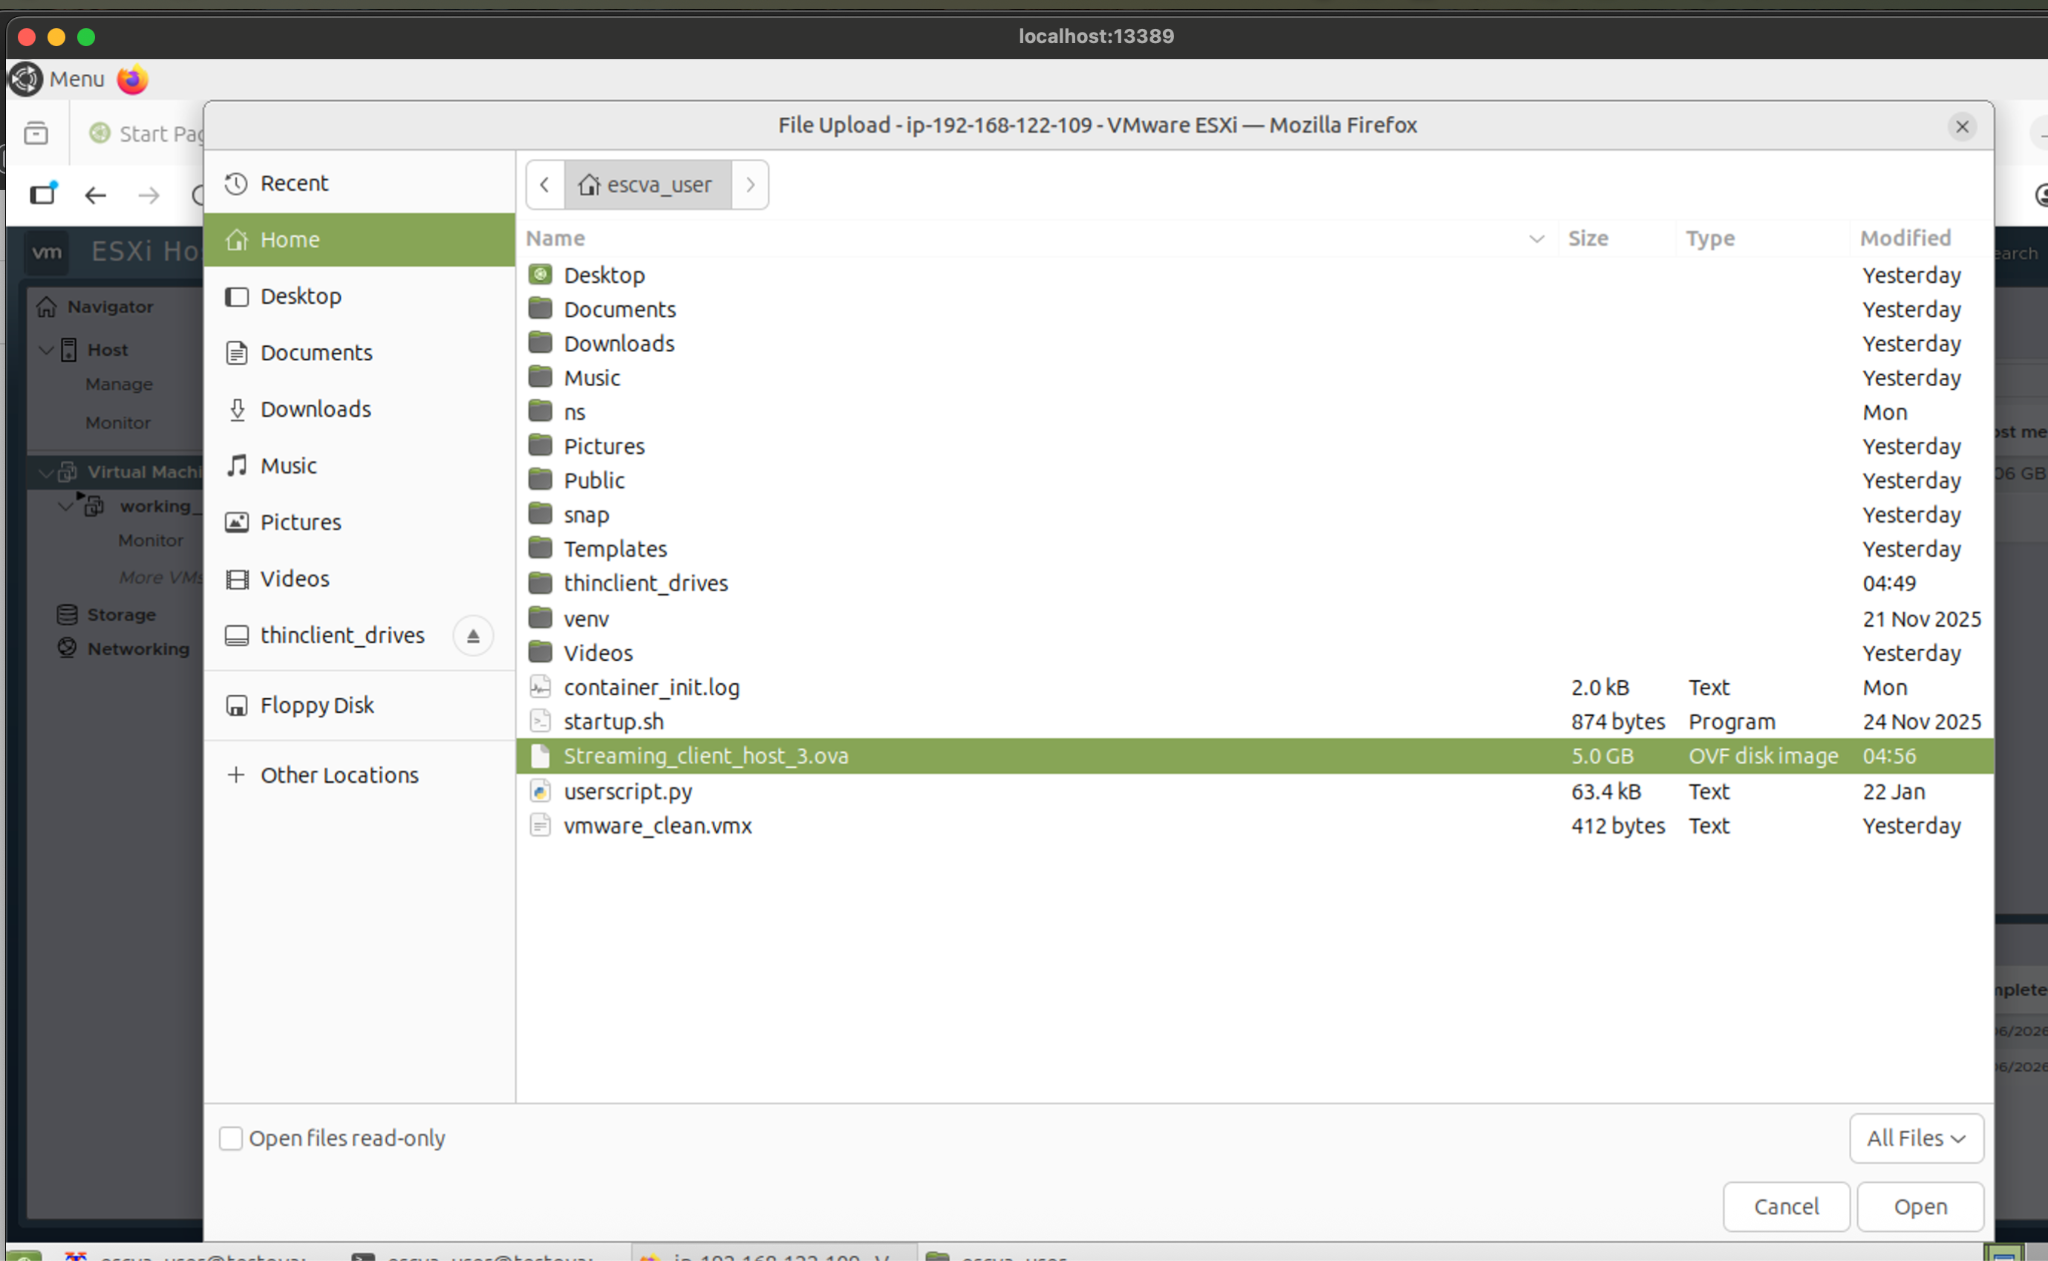
5. Under Select OVF and VMDK files, upload the OVA file and click Next.
6. Select the target datastore and click Next.
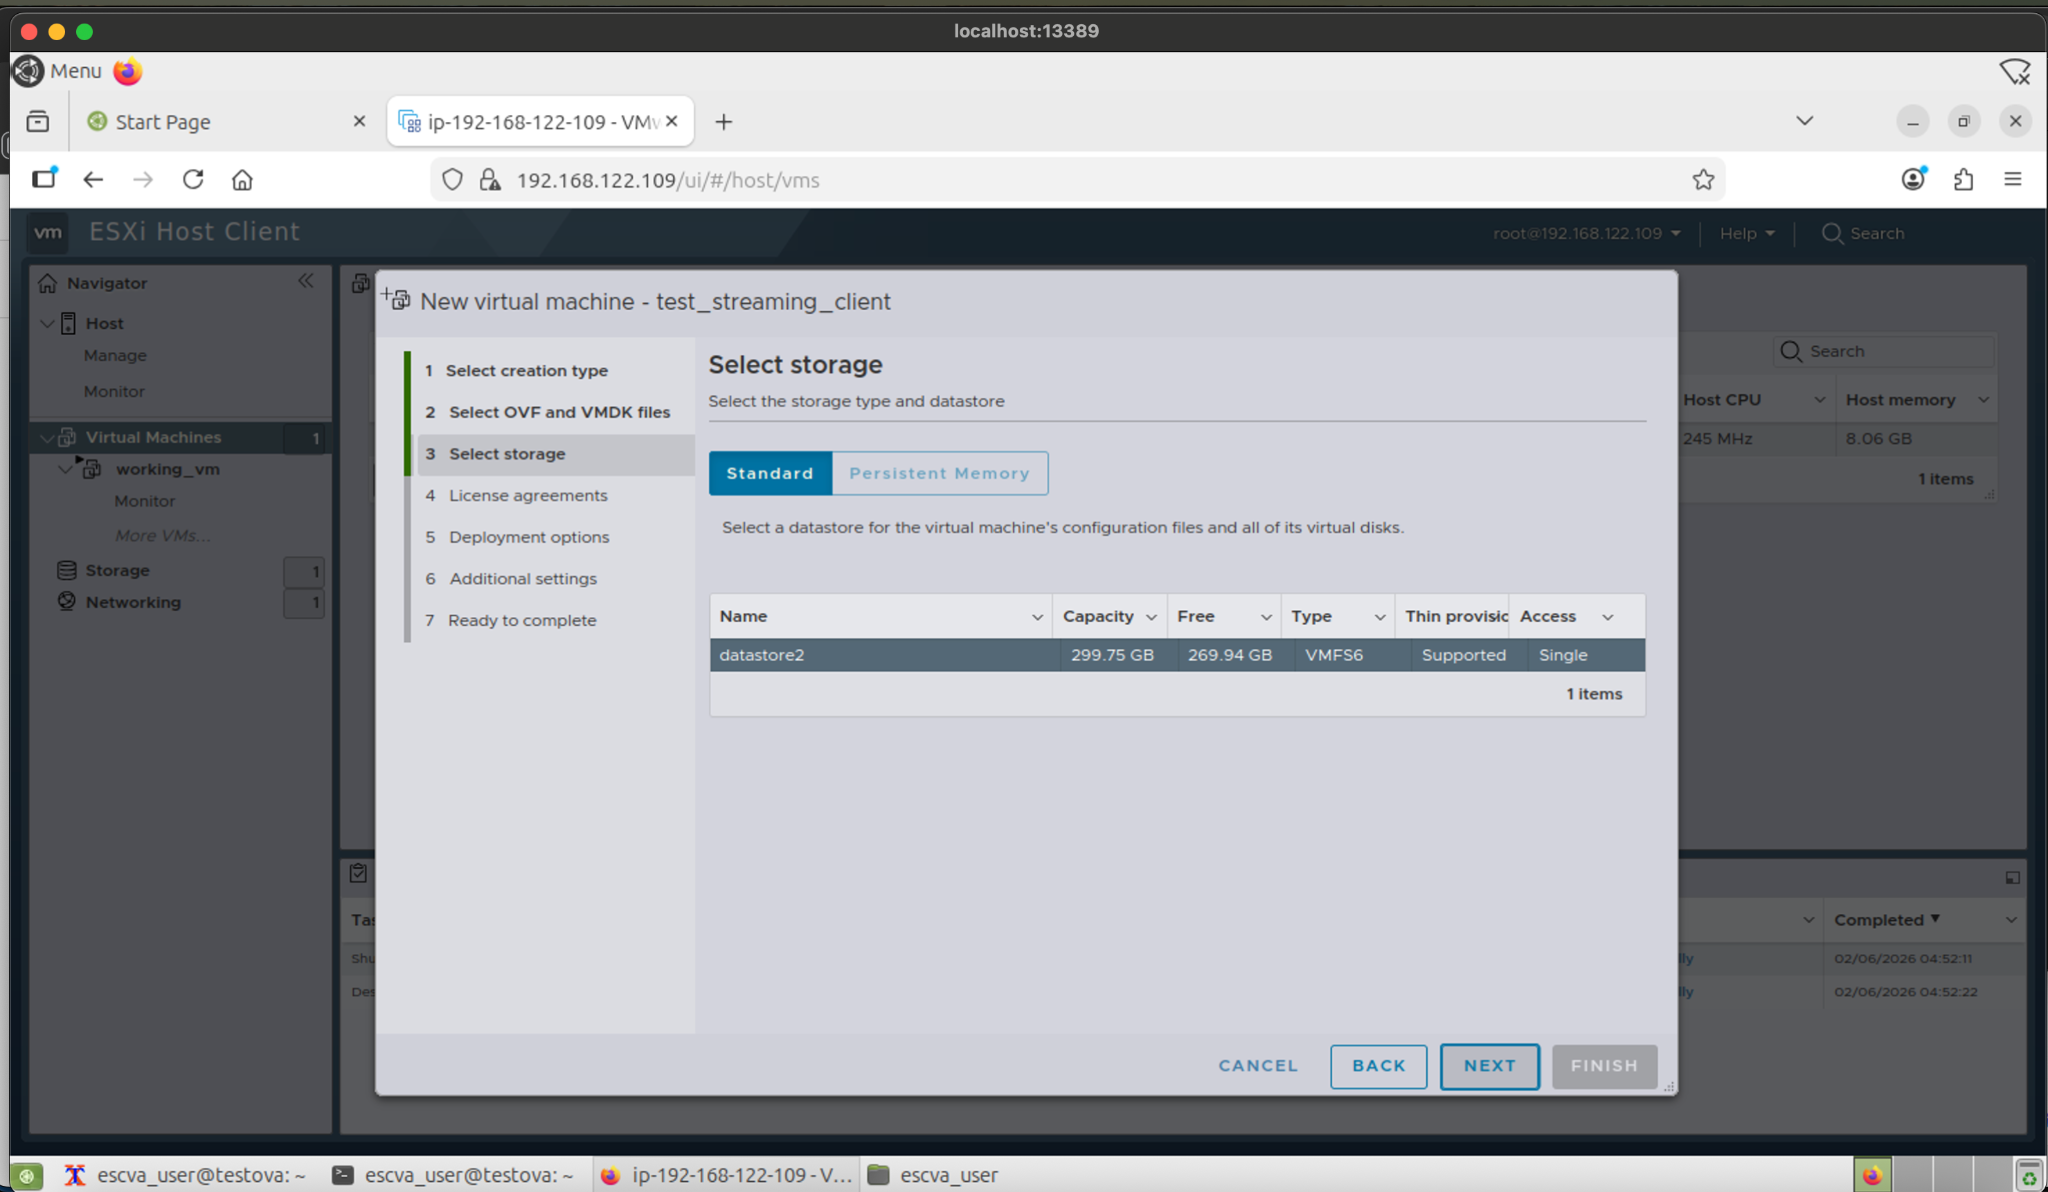
7. Configure deployment options: Select your Port Group, set Disk Provisioning to Thin, and uncheck Power On Automatically, then click Next.
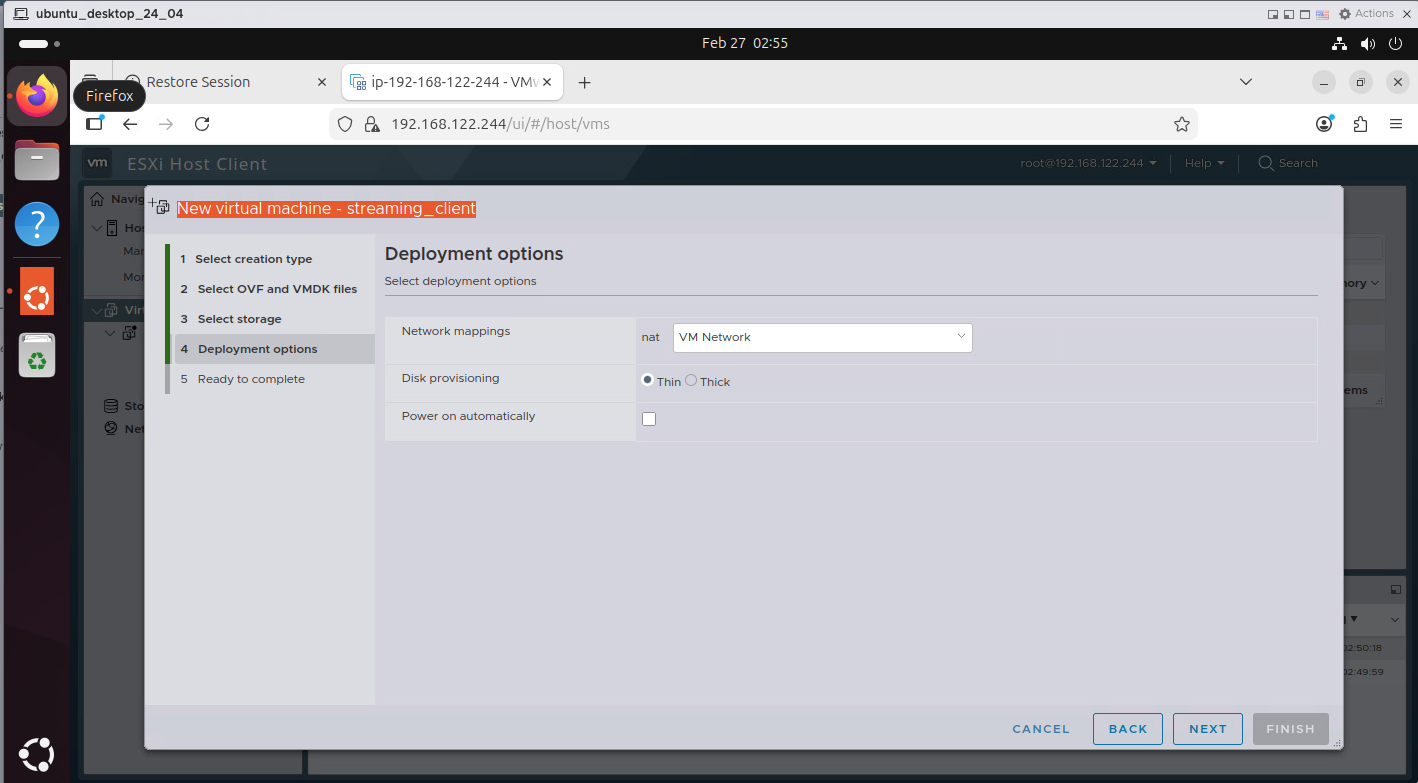
8. Review the deployment summary.
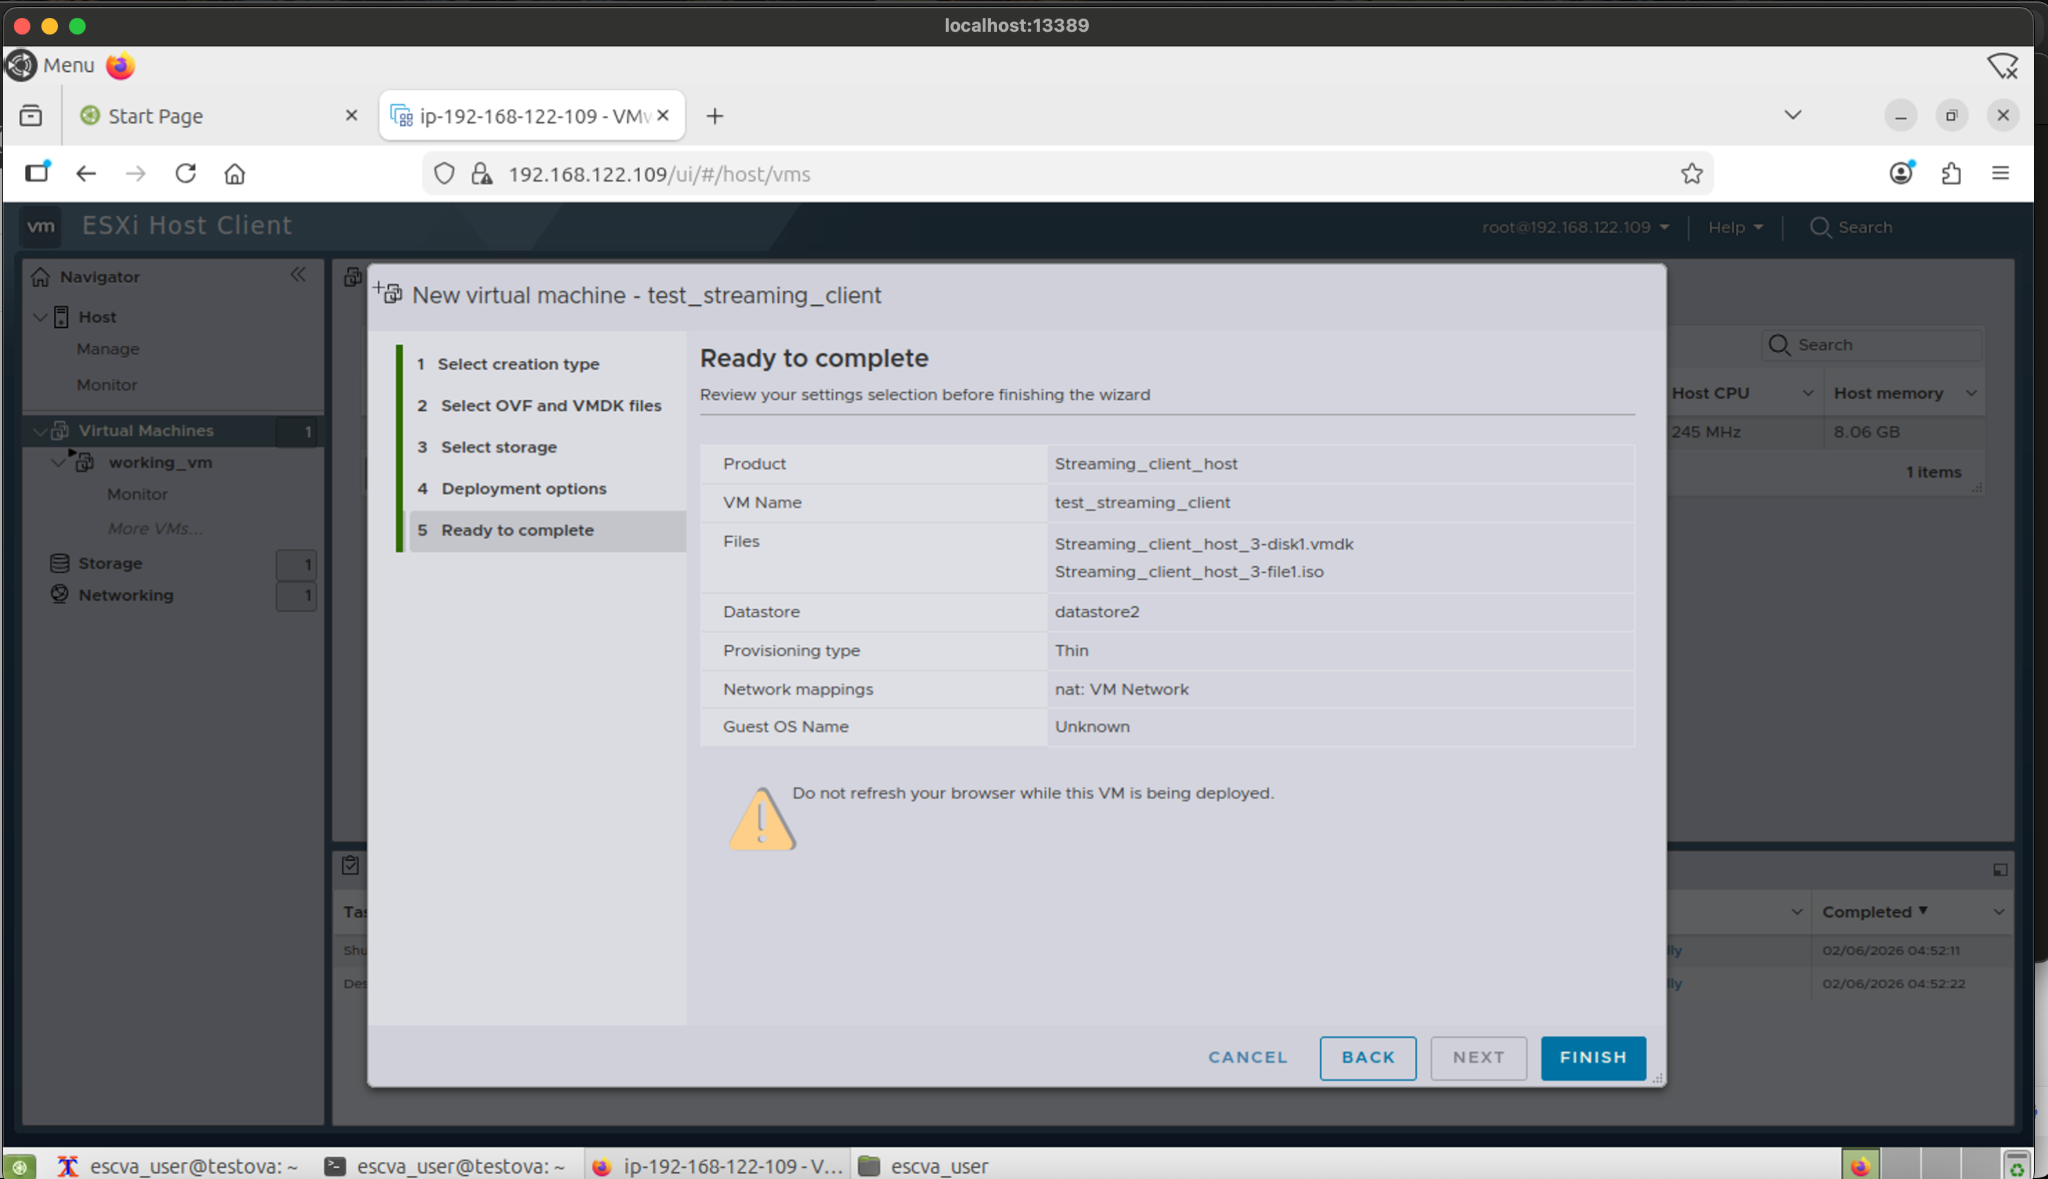
9. Click Finish to start the deployment process.
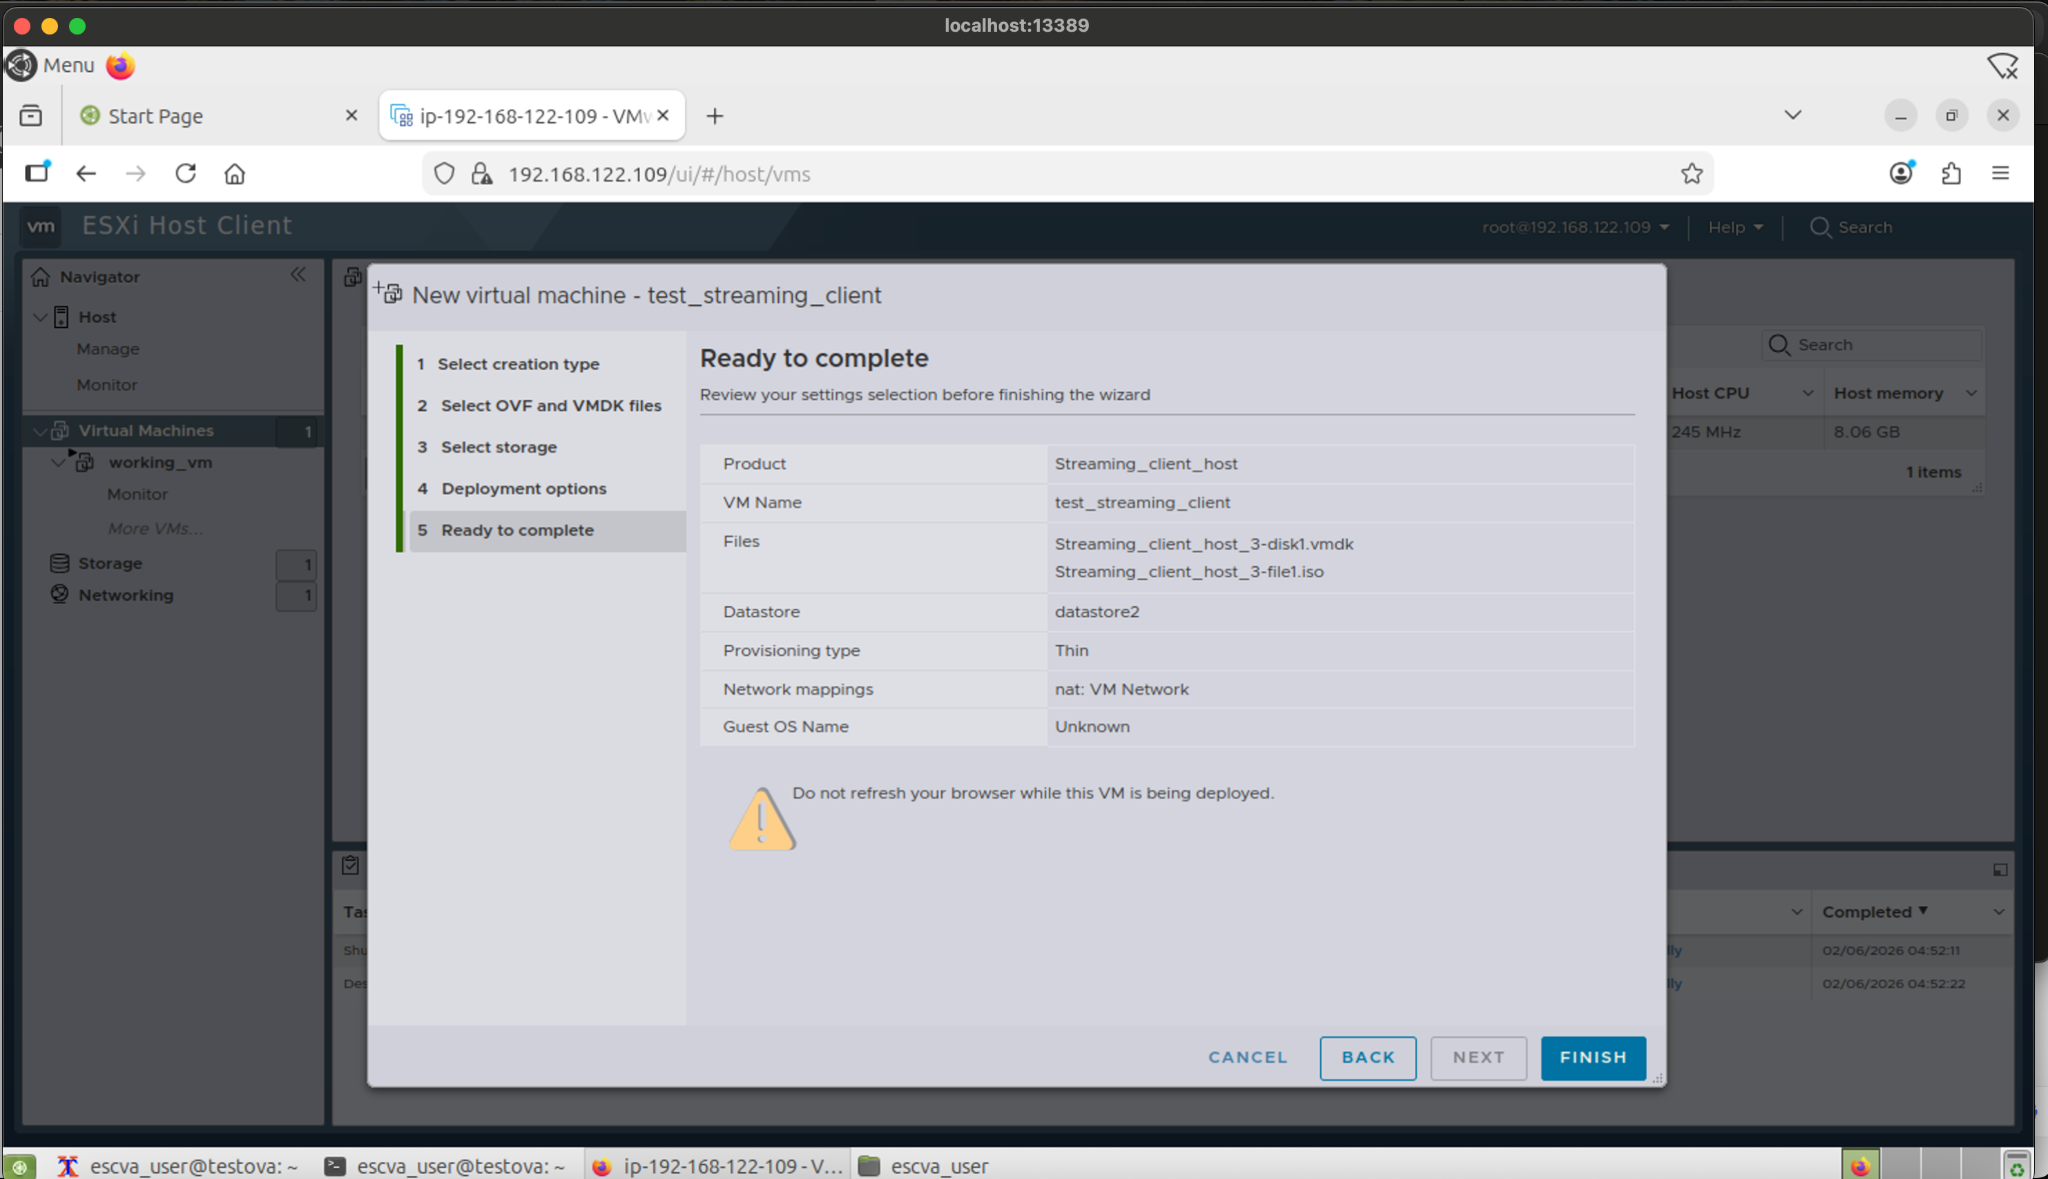
10. Monitor the task progress; once complete, the virtual machine will appear in the Virtual Machines list.
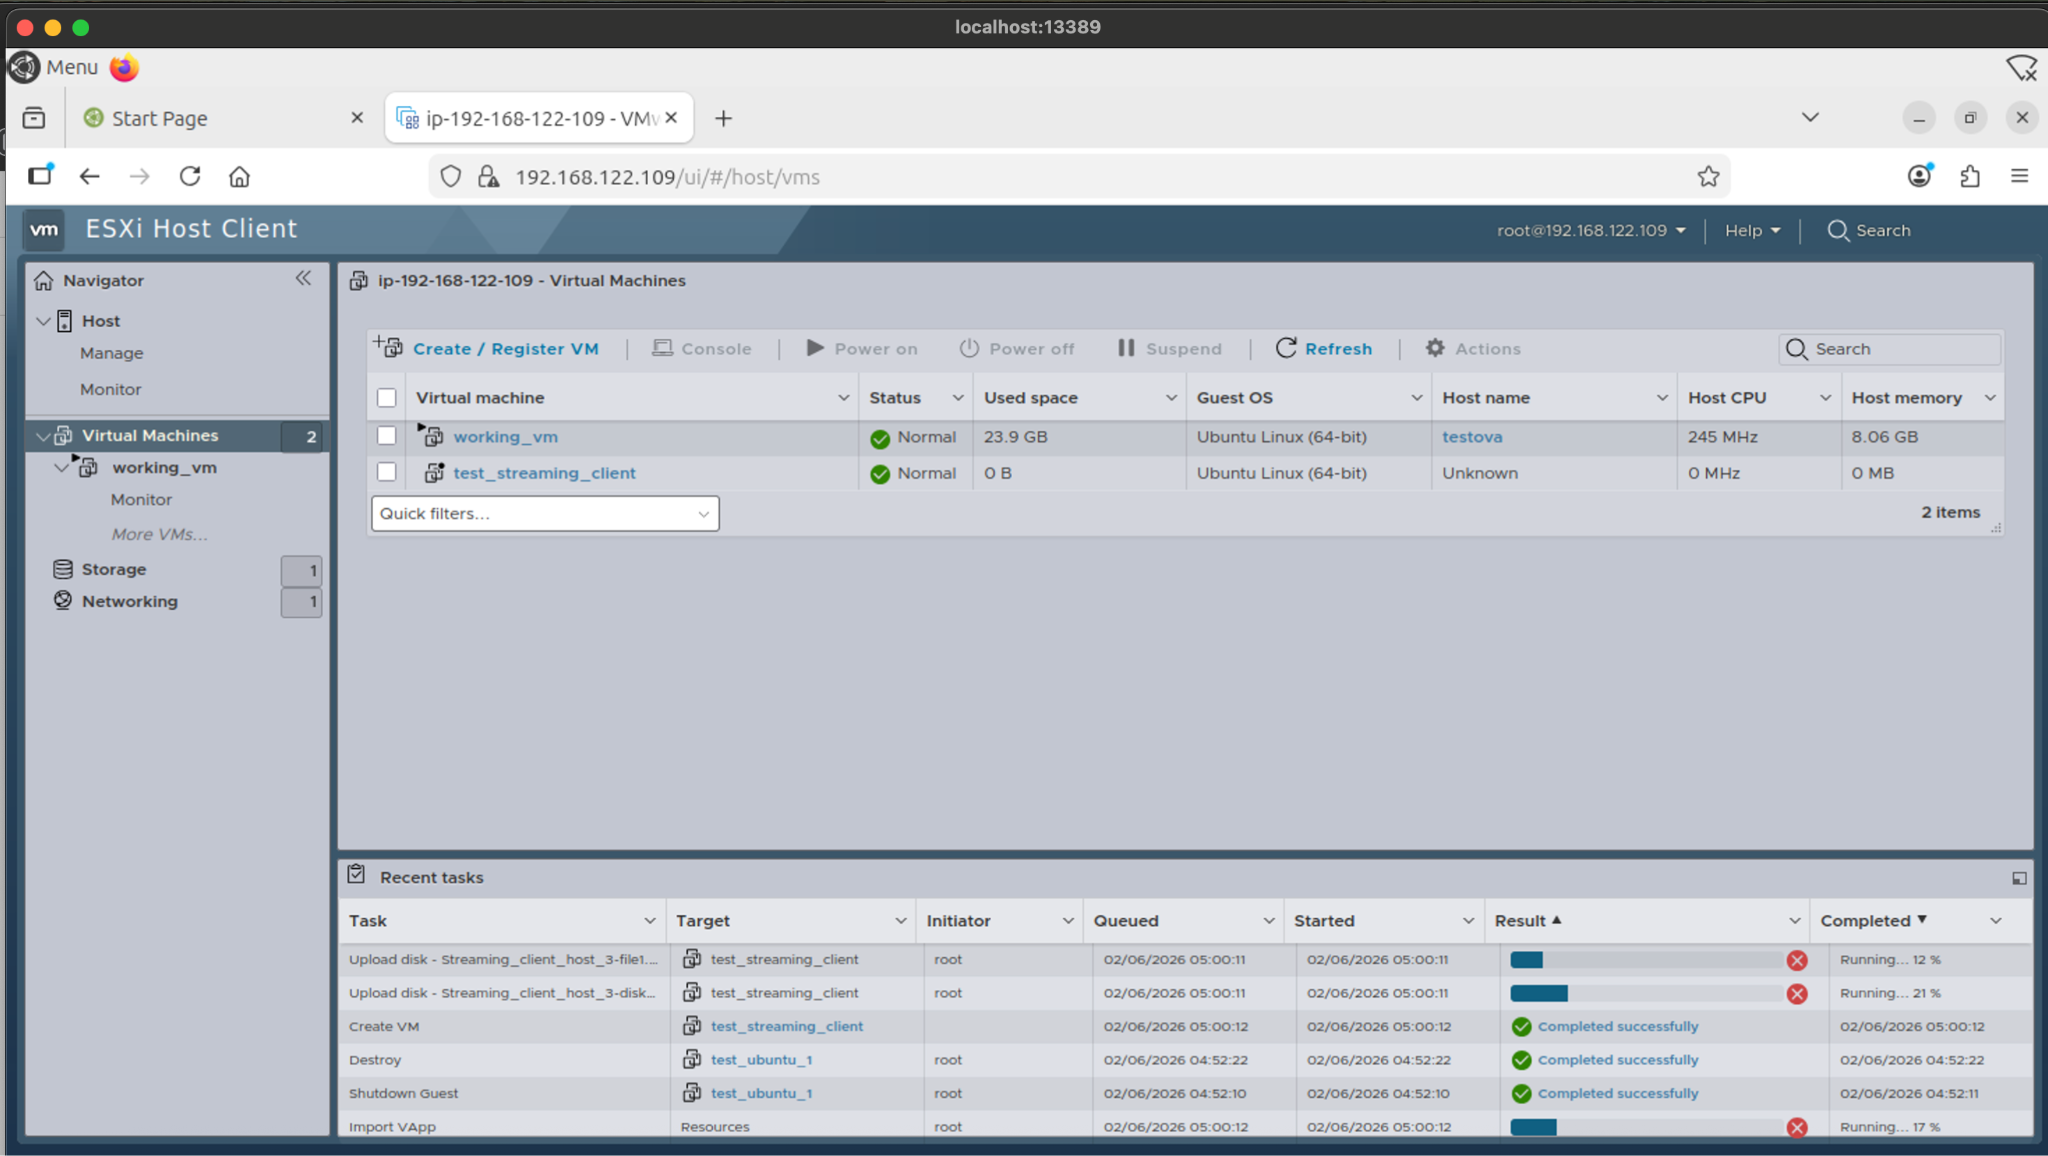
11. Navigate to the ESXi host interface.
ESXi Host Client (https://<esxi-ip>/ui)
i.e https://192.168.122.109/ui
Log in using your ESXi administrator credentials.
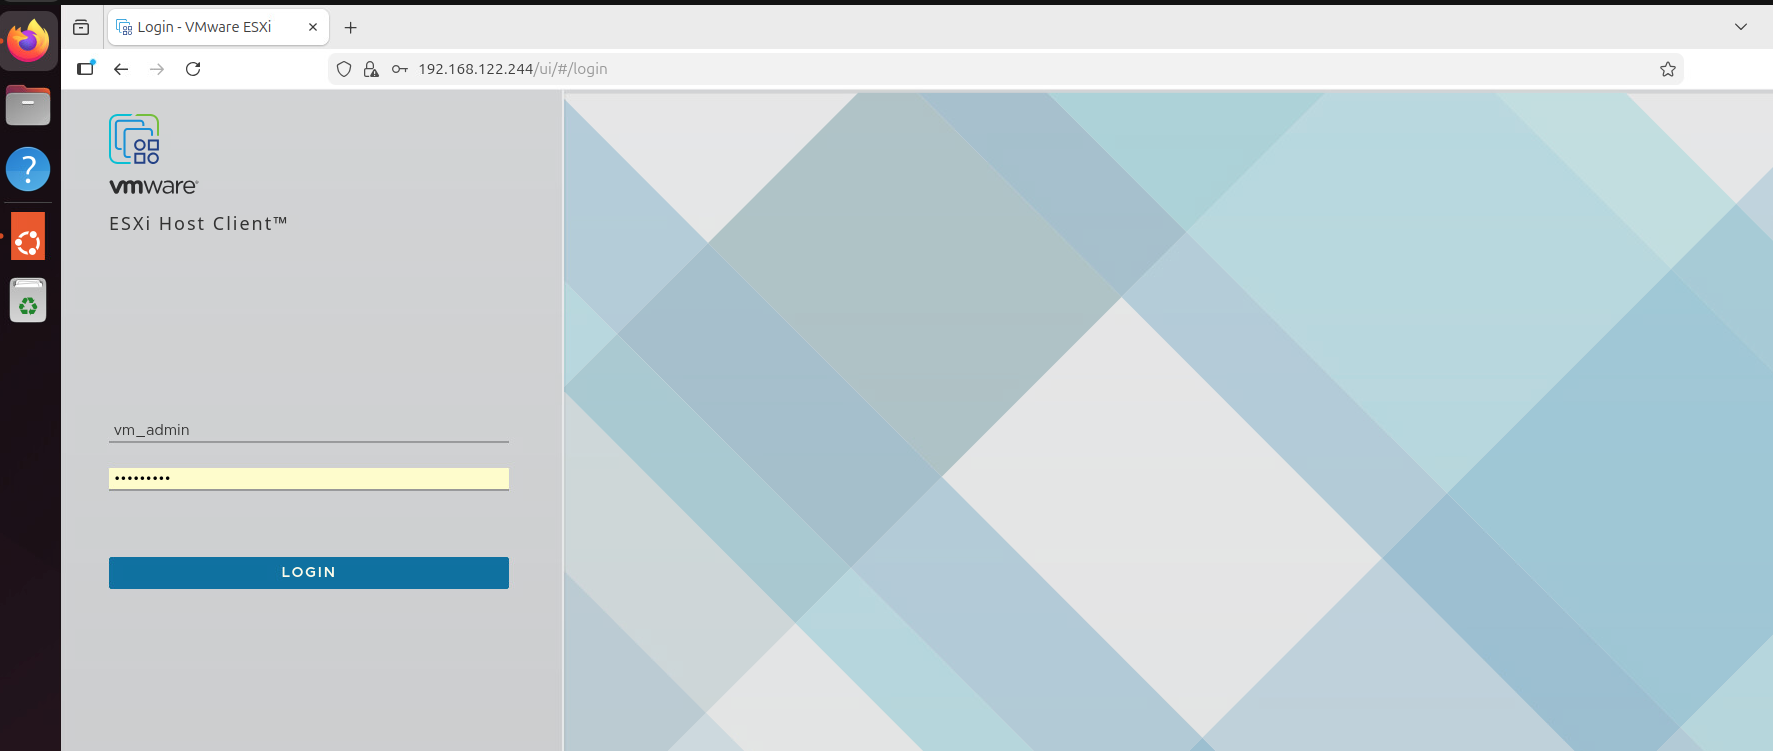
12. Select ‘Create / Register VM’ and ‘Deploy a virtual machine from an OVF or OVA file’.
13. Click Create / Register VM.
14. In the wizard, select Deploy a virtual machine from an OVF or OVA file, then click Next.
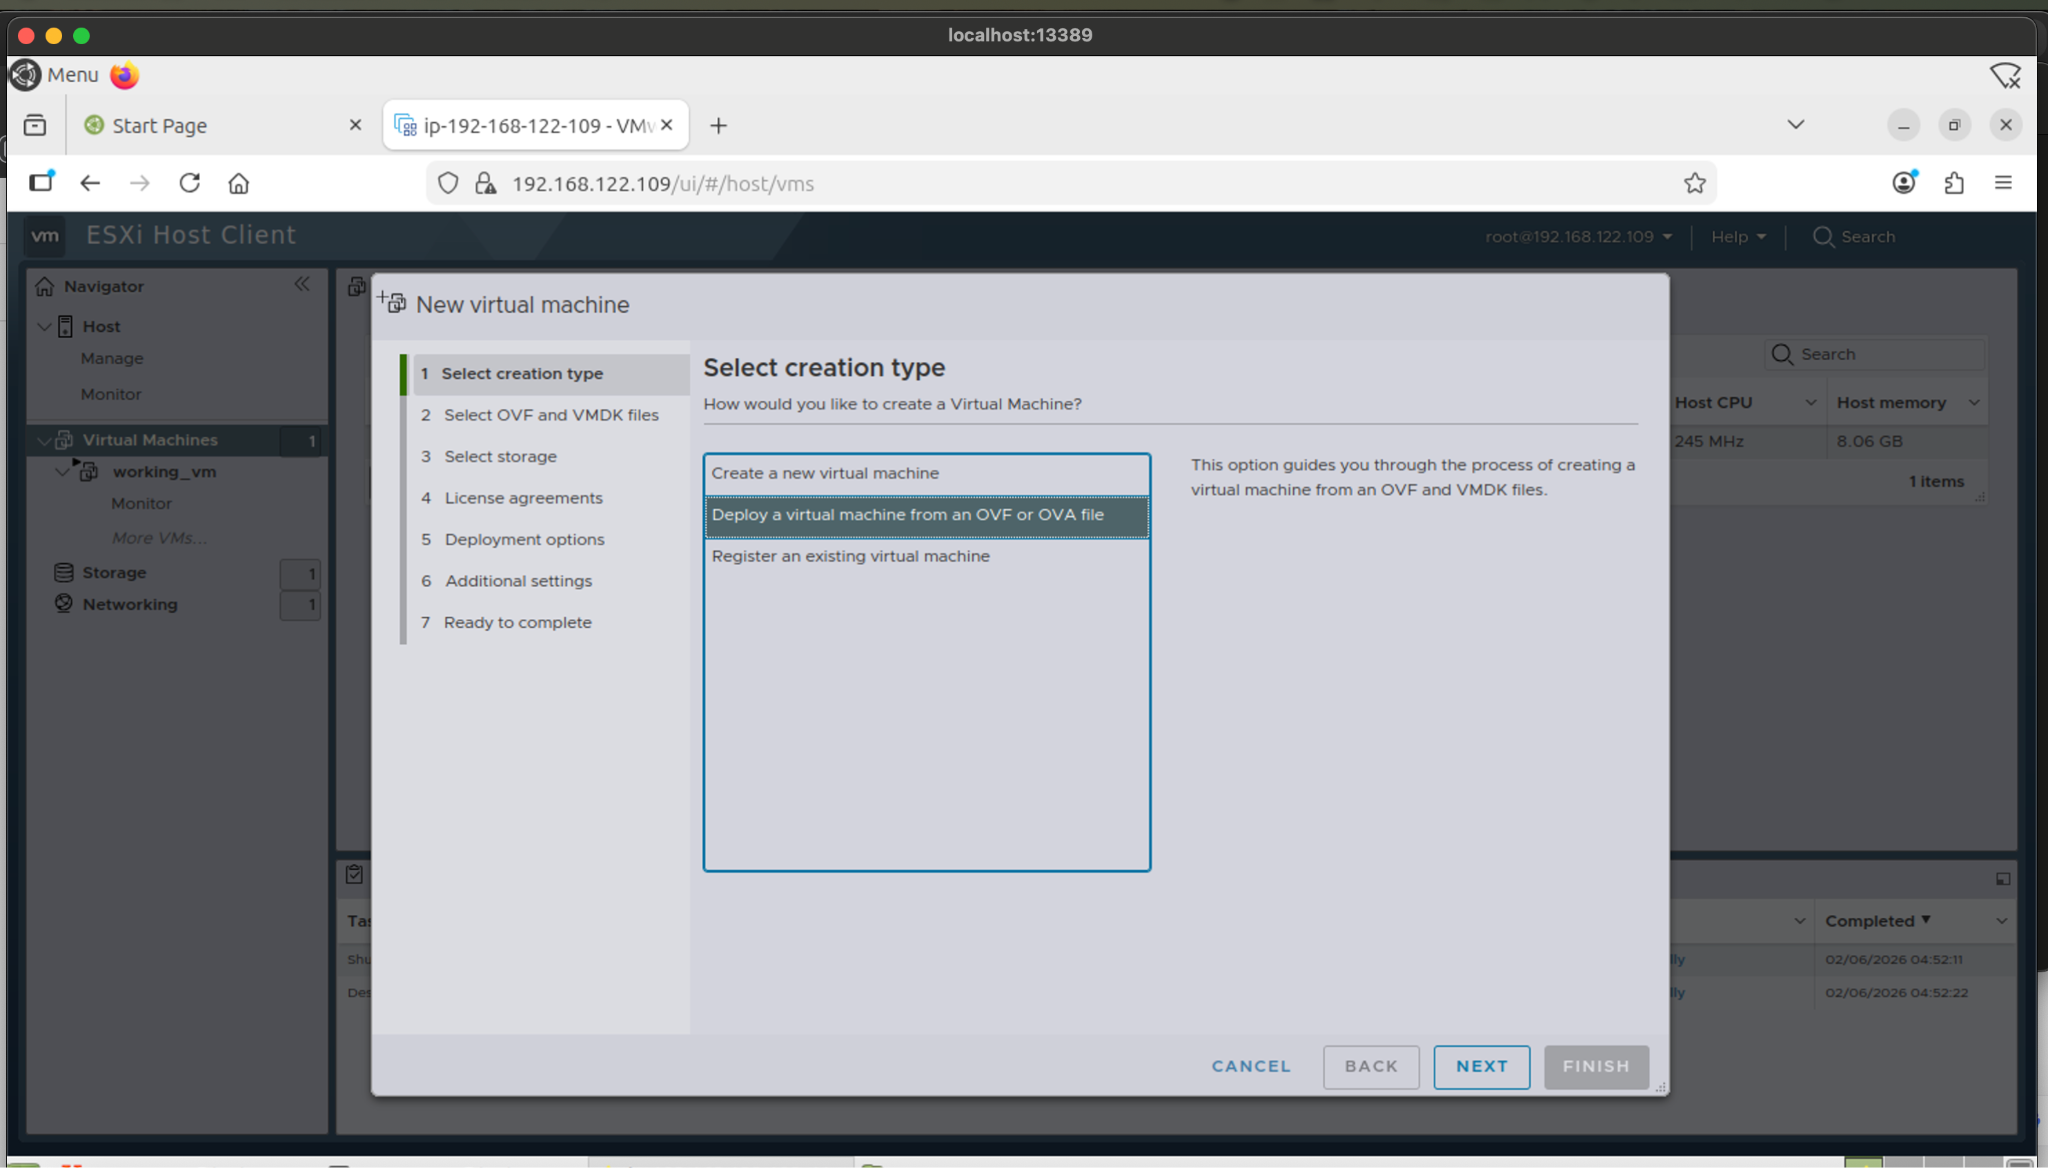
15. Enter a name for the new virtual machine.
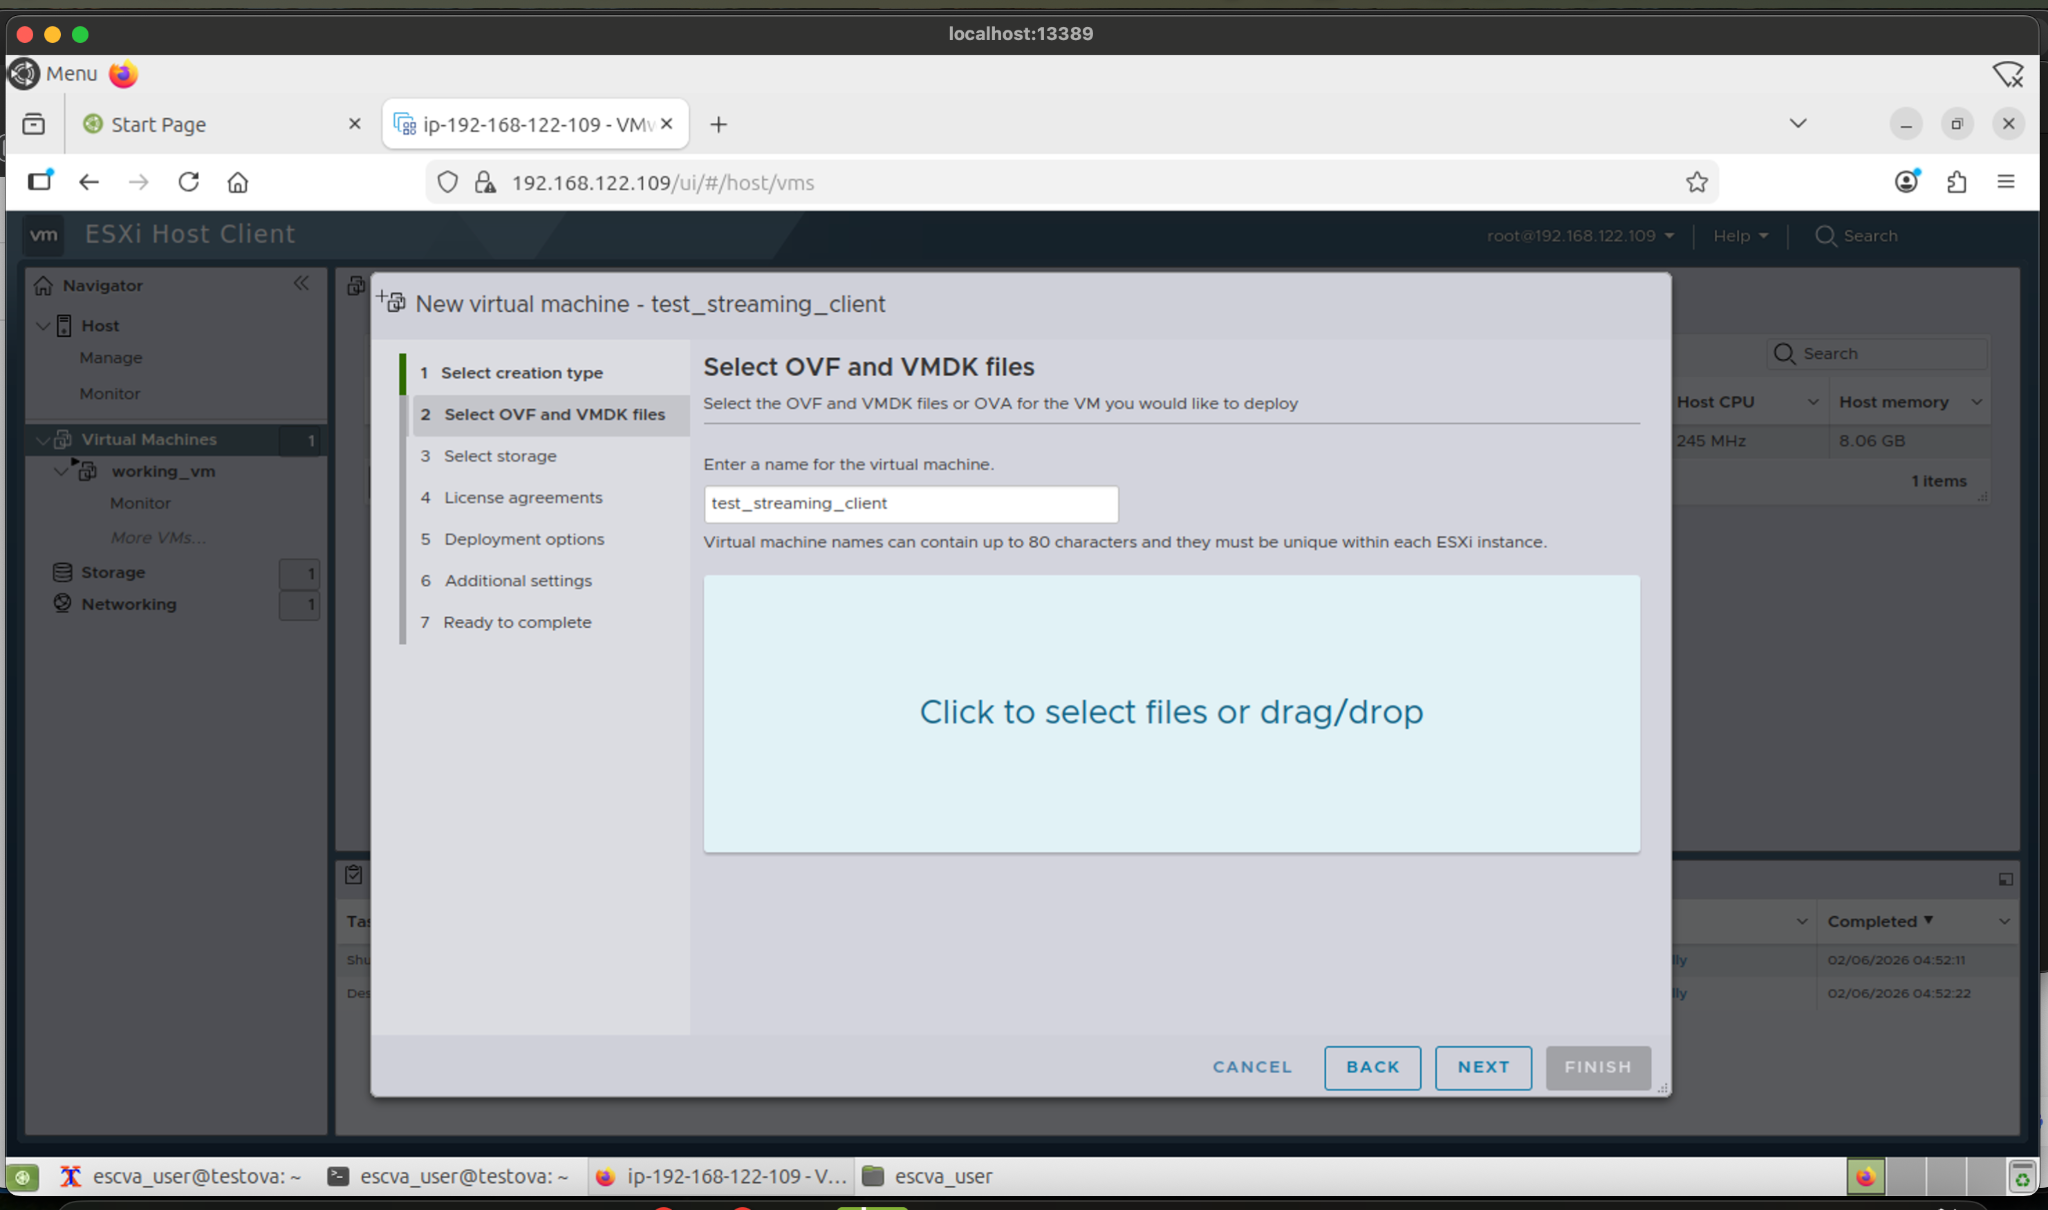
16. Under Select OVF and VMDK files, click Click to select files or drag/drop:
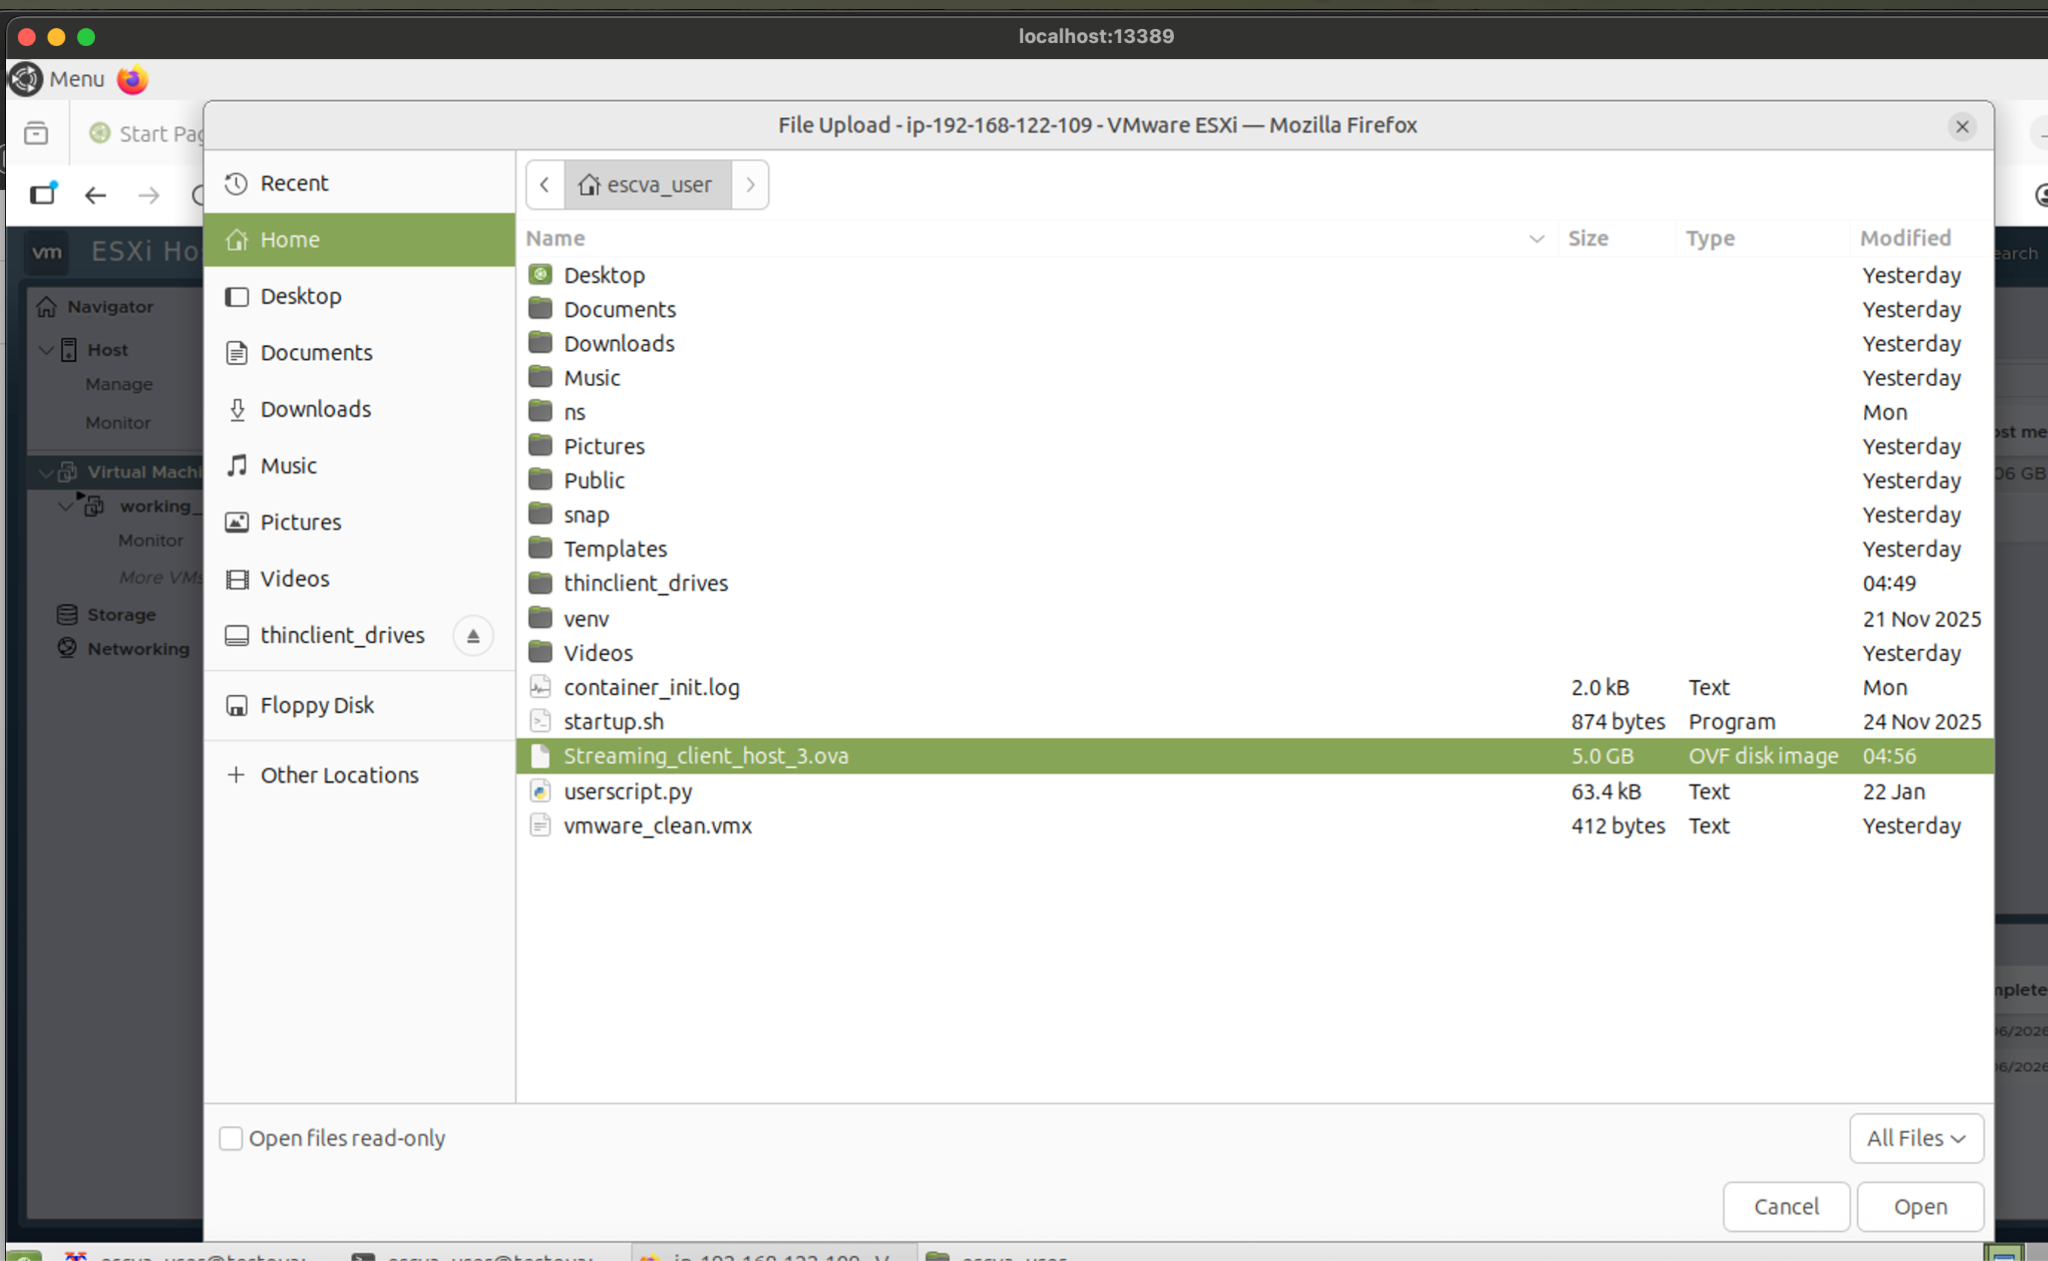
- Select the OVA file.
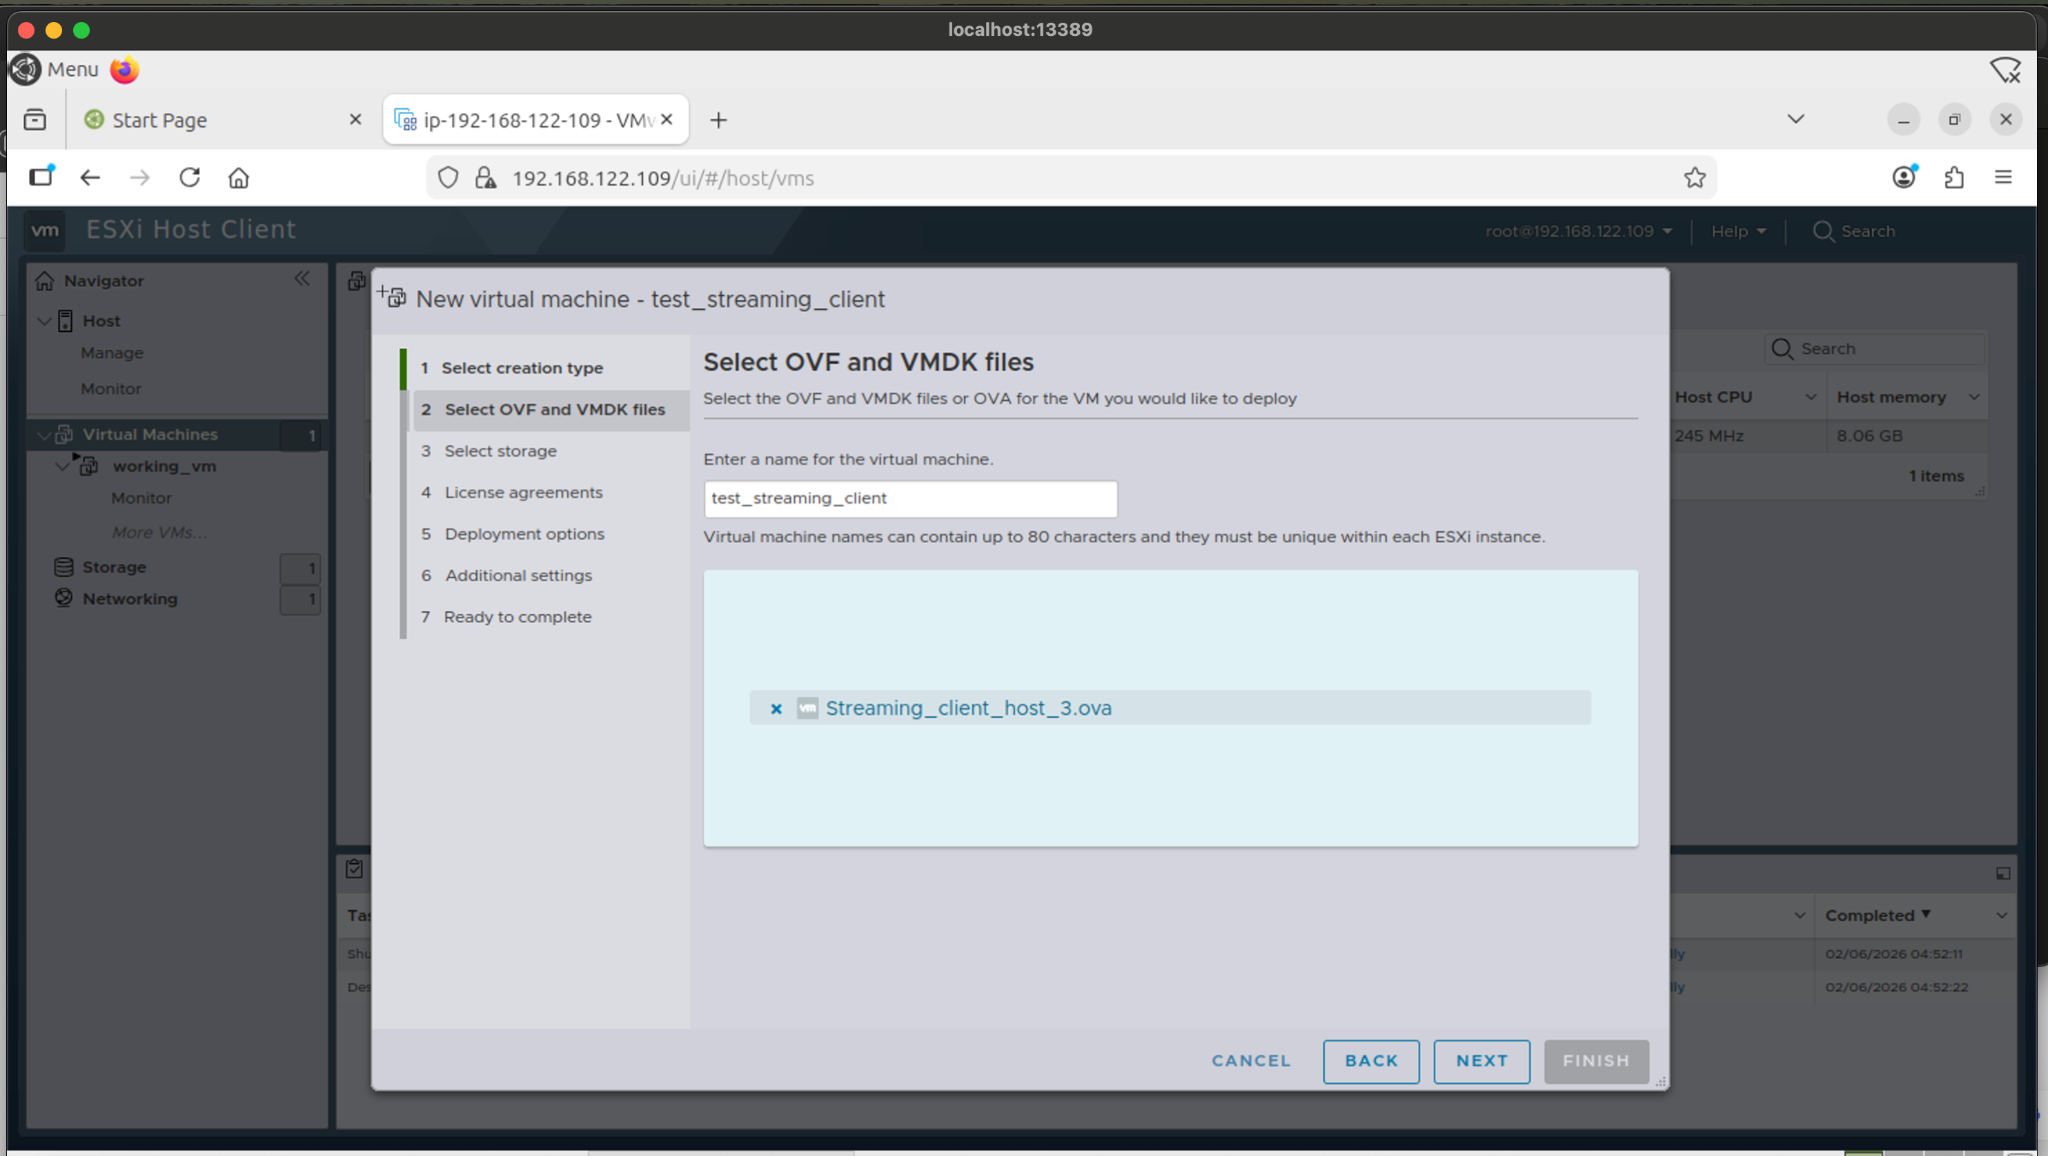
- Click Next.
17. Select the datastore where the virtual machine configuration files and virtual disks will be stored.
-
Choose the datastore that was previously created in ESXi.
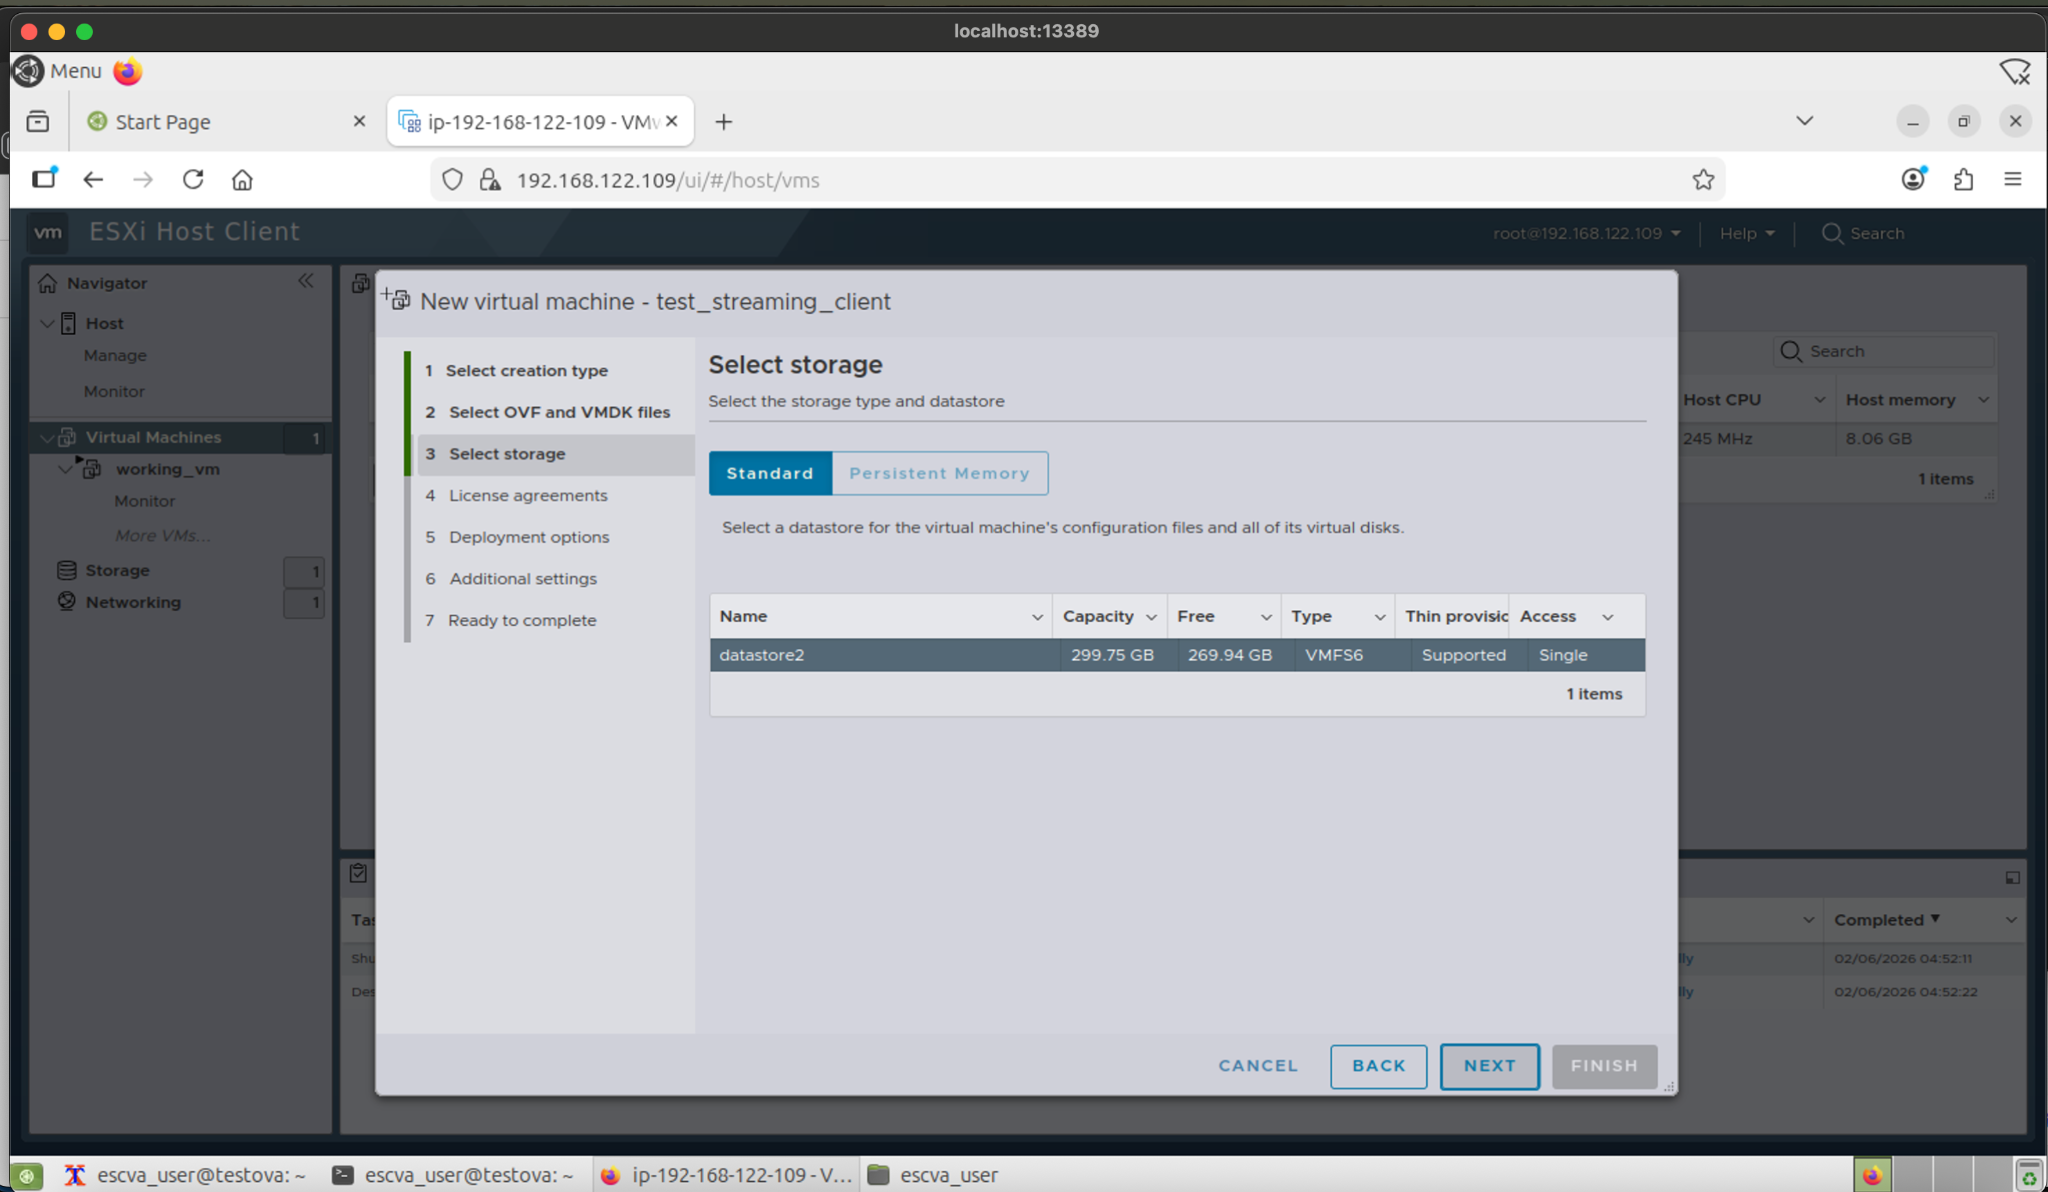
- Click Next.
18. Configure deployment options:
- Select the appropriate Port Group for your environment. Note: Ensure this network has outbound access to the Netskope cloud (or via your configured proxy).
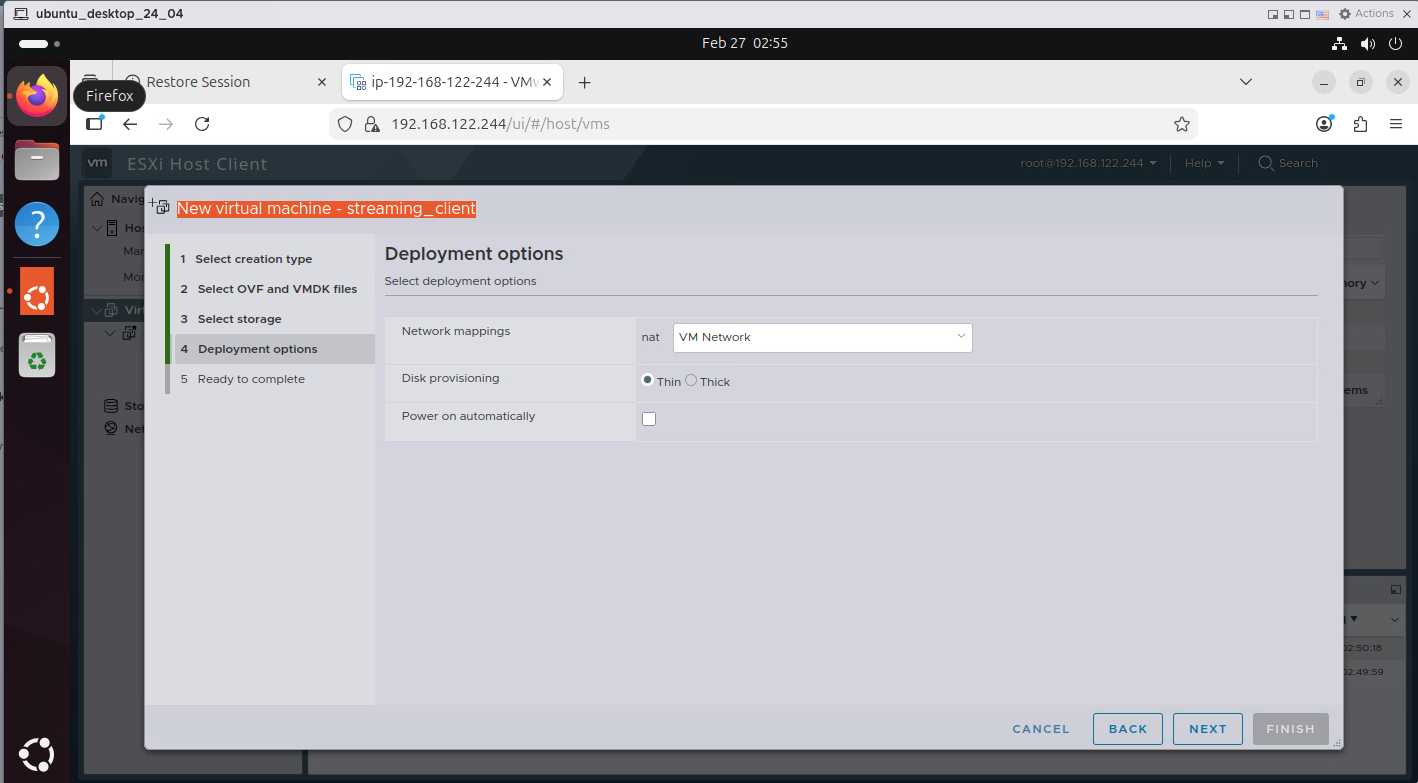
- Set Disk Provisioning to Thin.
- Uncheck the “Power On Automatically” option to allow modification of hardware settings before starting the VM.
- Click Next.
19. Review the deployment summary.
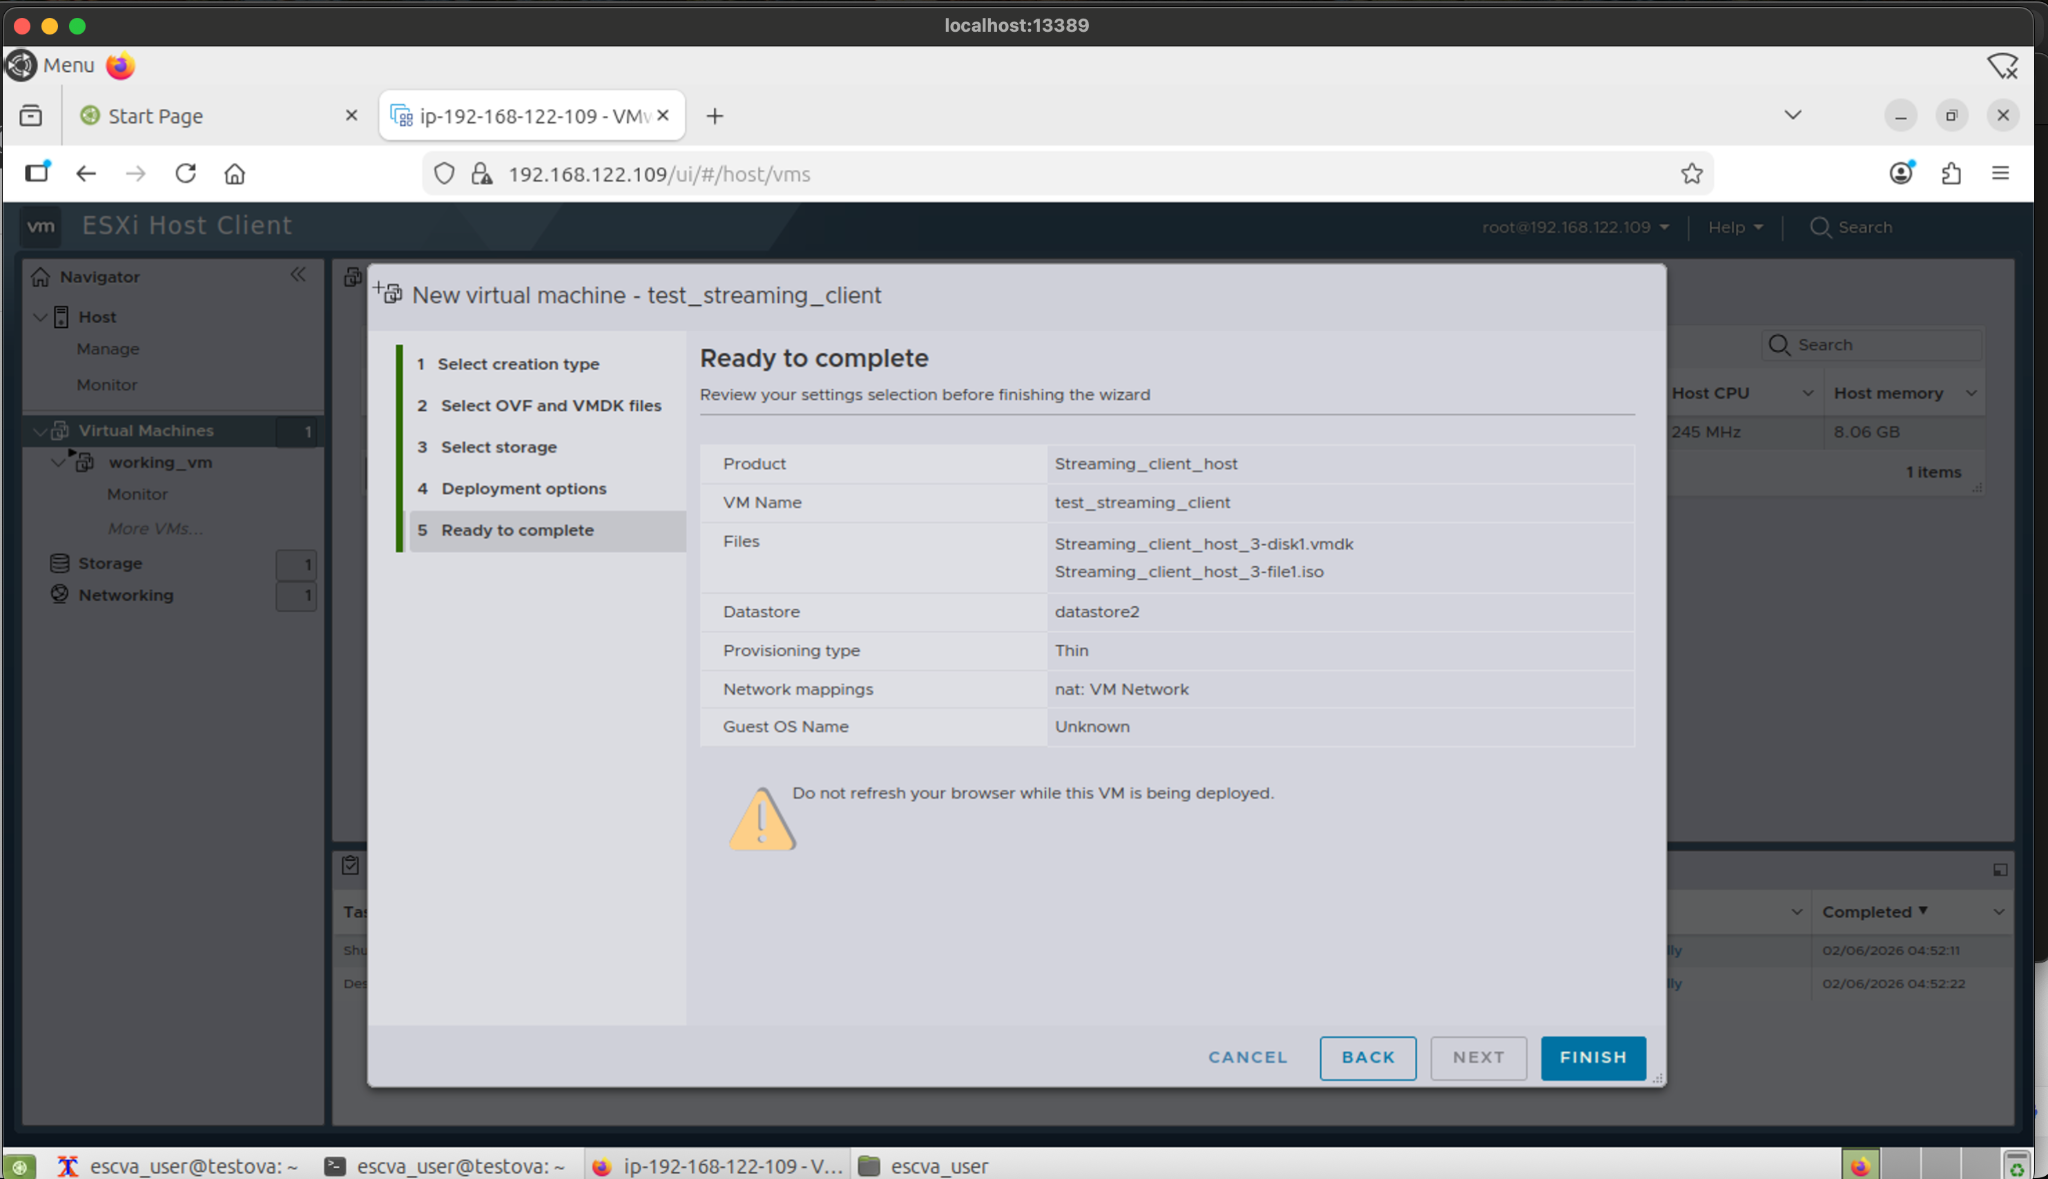
20. Click Finish to begin the virtual machine creation process.
Do not power on the VM yet. Proceed to the ‘Modifying VM Hardware Settings’ section to allocate resources based on your expected event volume.
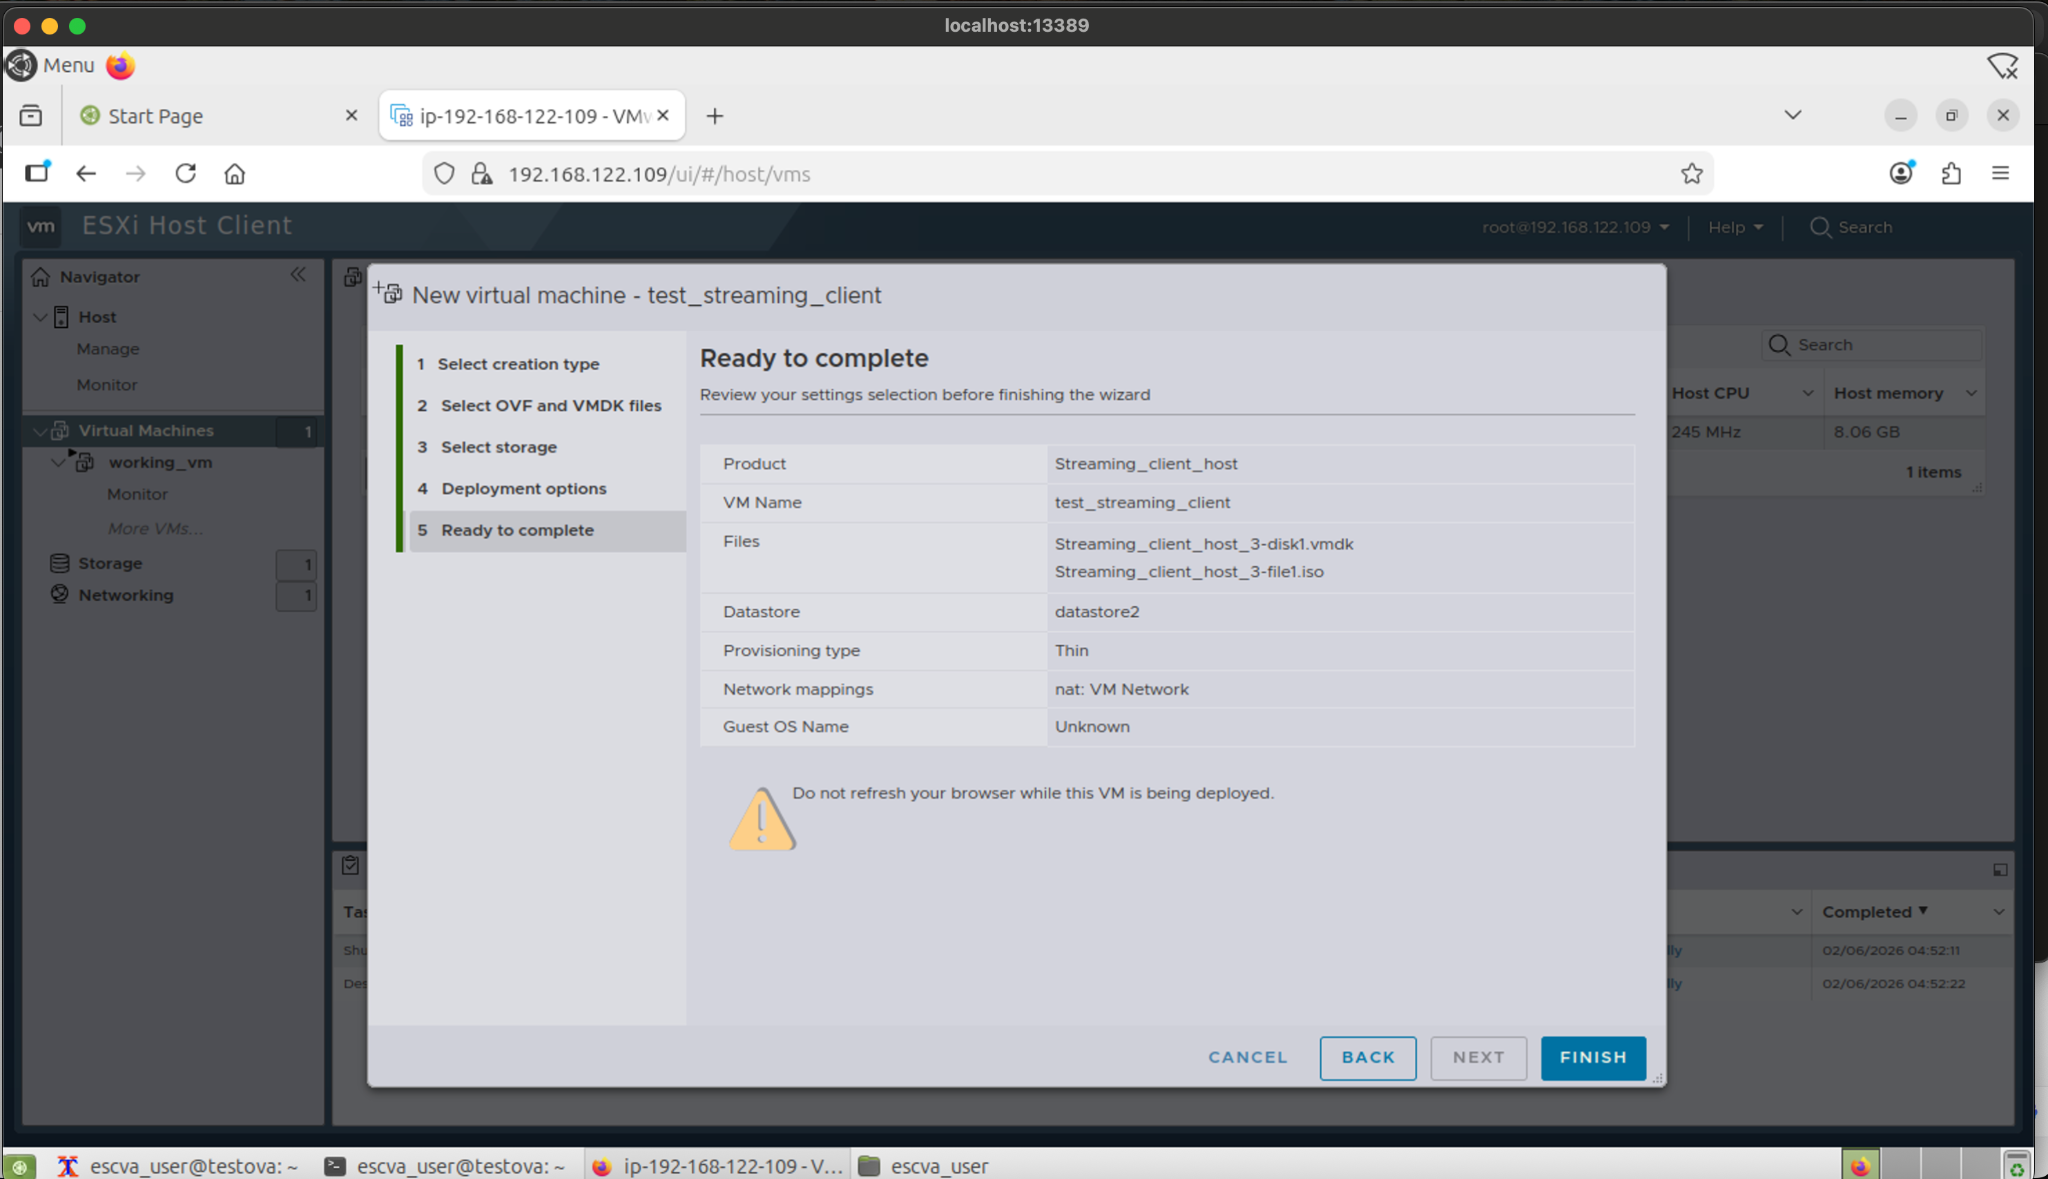
21. The deployment progress will be displayed in the task progress bar.
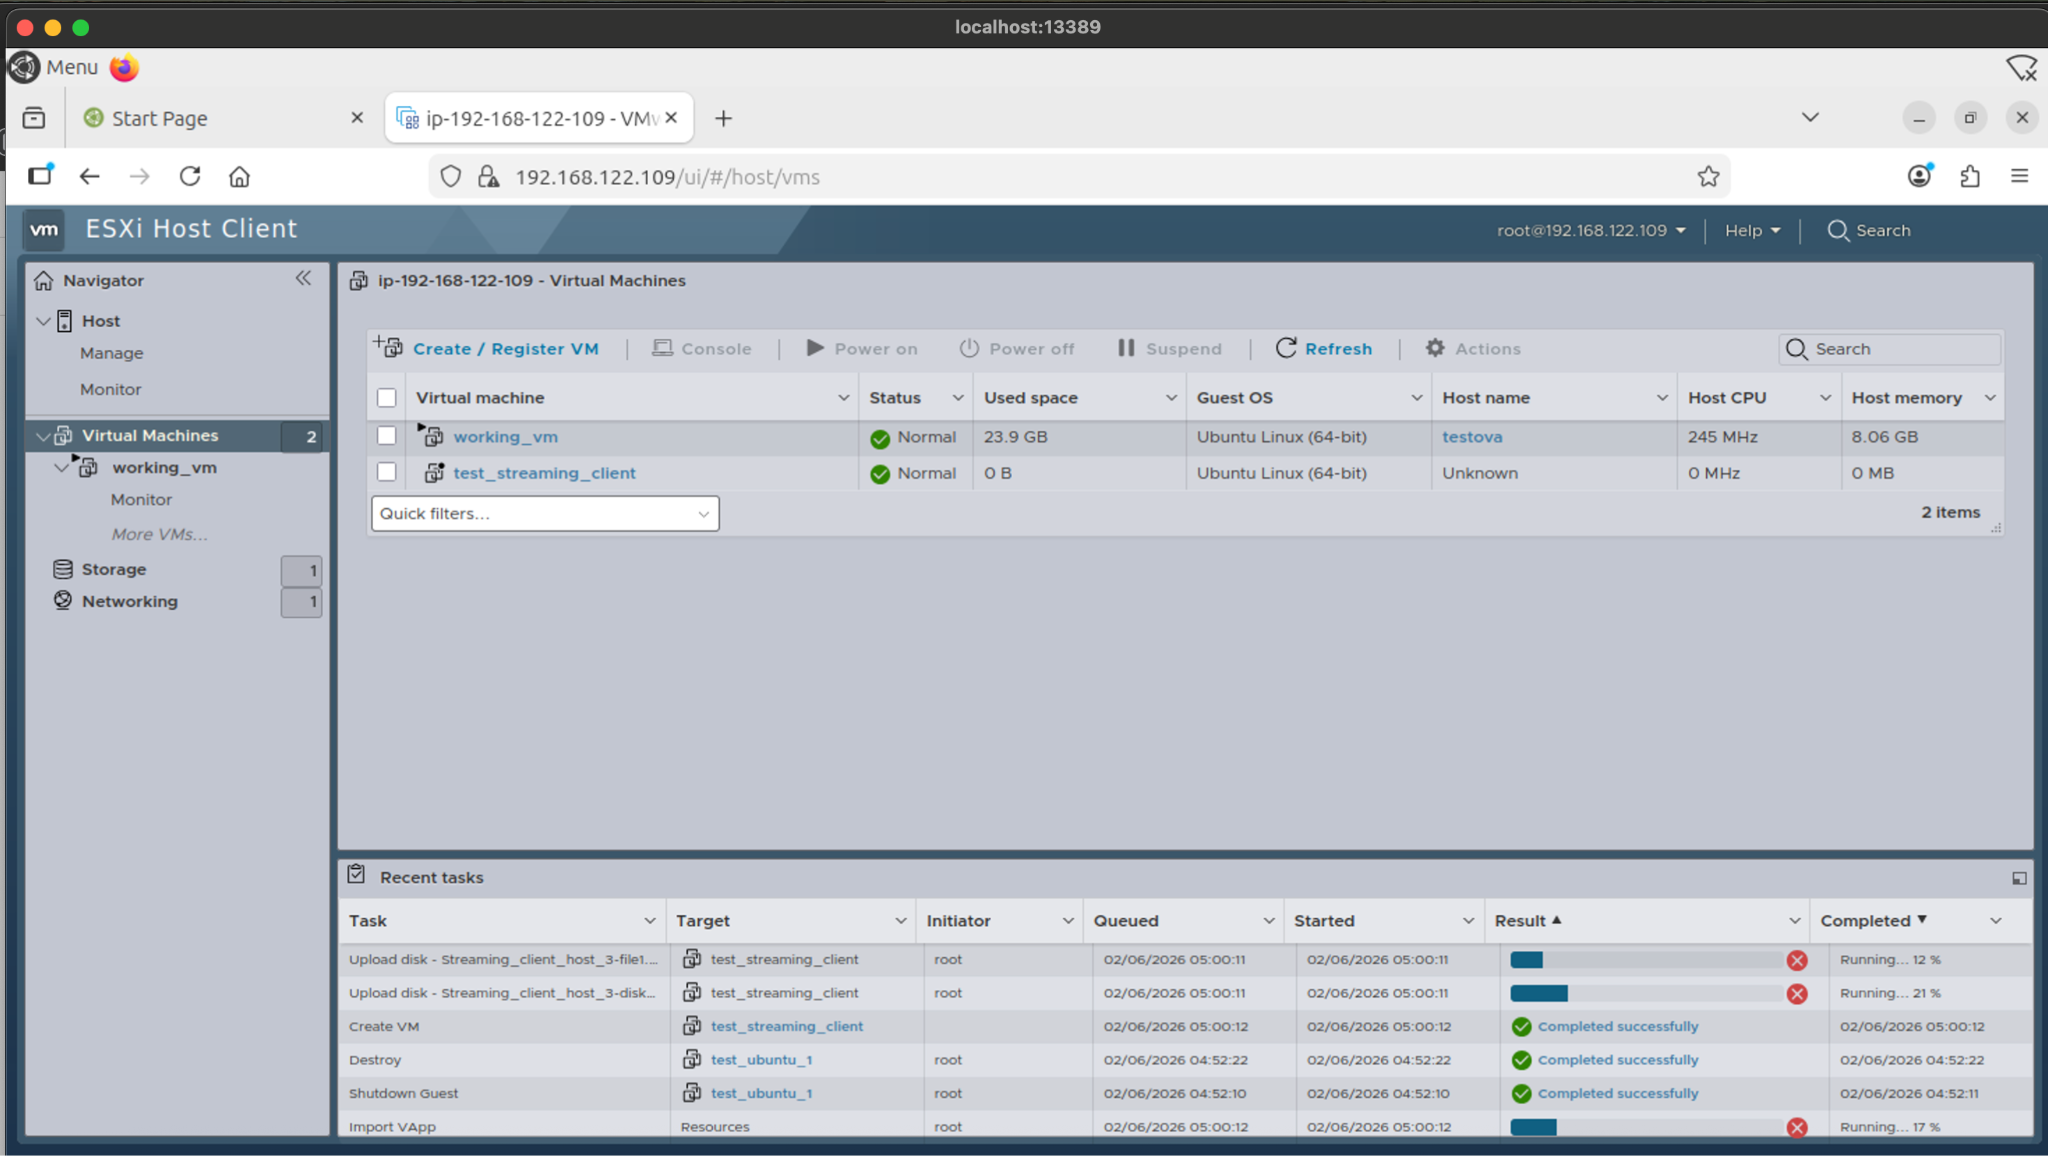
22. Once the installation is complete, the new virtual machine will appear in the Virtual Machines list on the left panel.
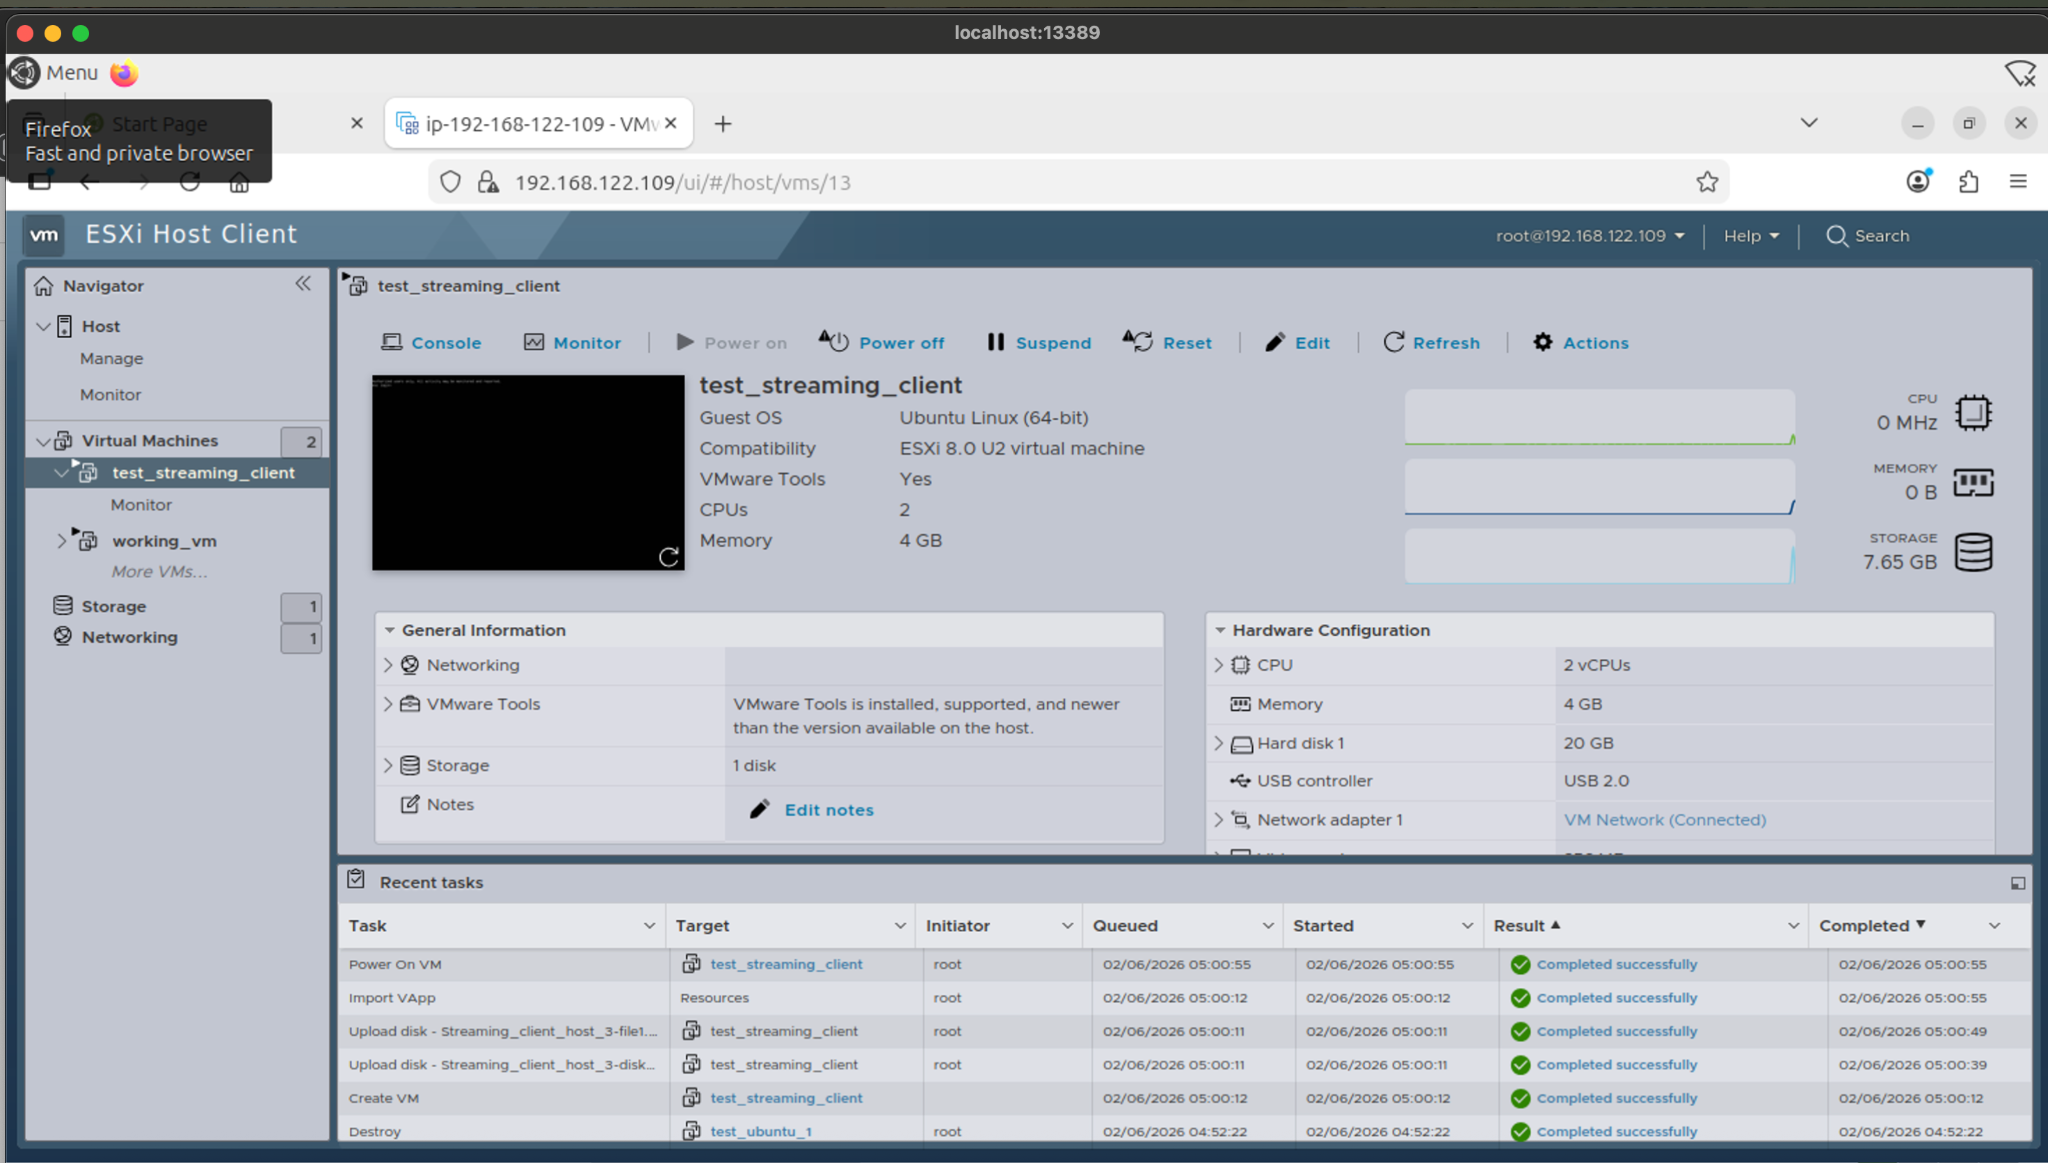
Modifying VM Hardware Settings (CPU, Memory, Disk, Network)
If you need to change the virtual machine hardware configuration as per recommendation, follow the steps below:
- Verify that streaming_client virtual machine is Power off from the ESXi window.
- Before starting the vm change the hardware setting if required
- Select the virtual machine and click the Edit button.
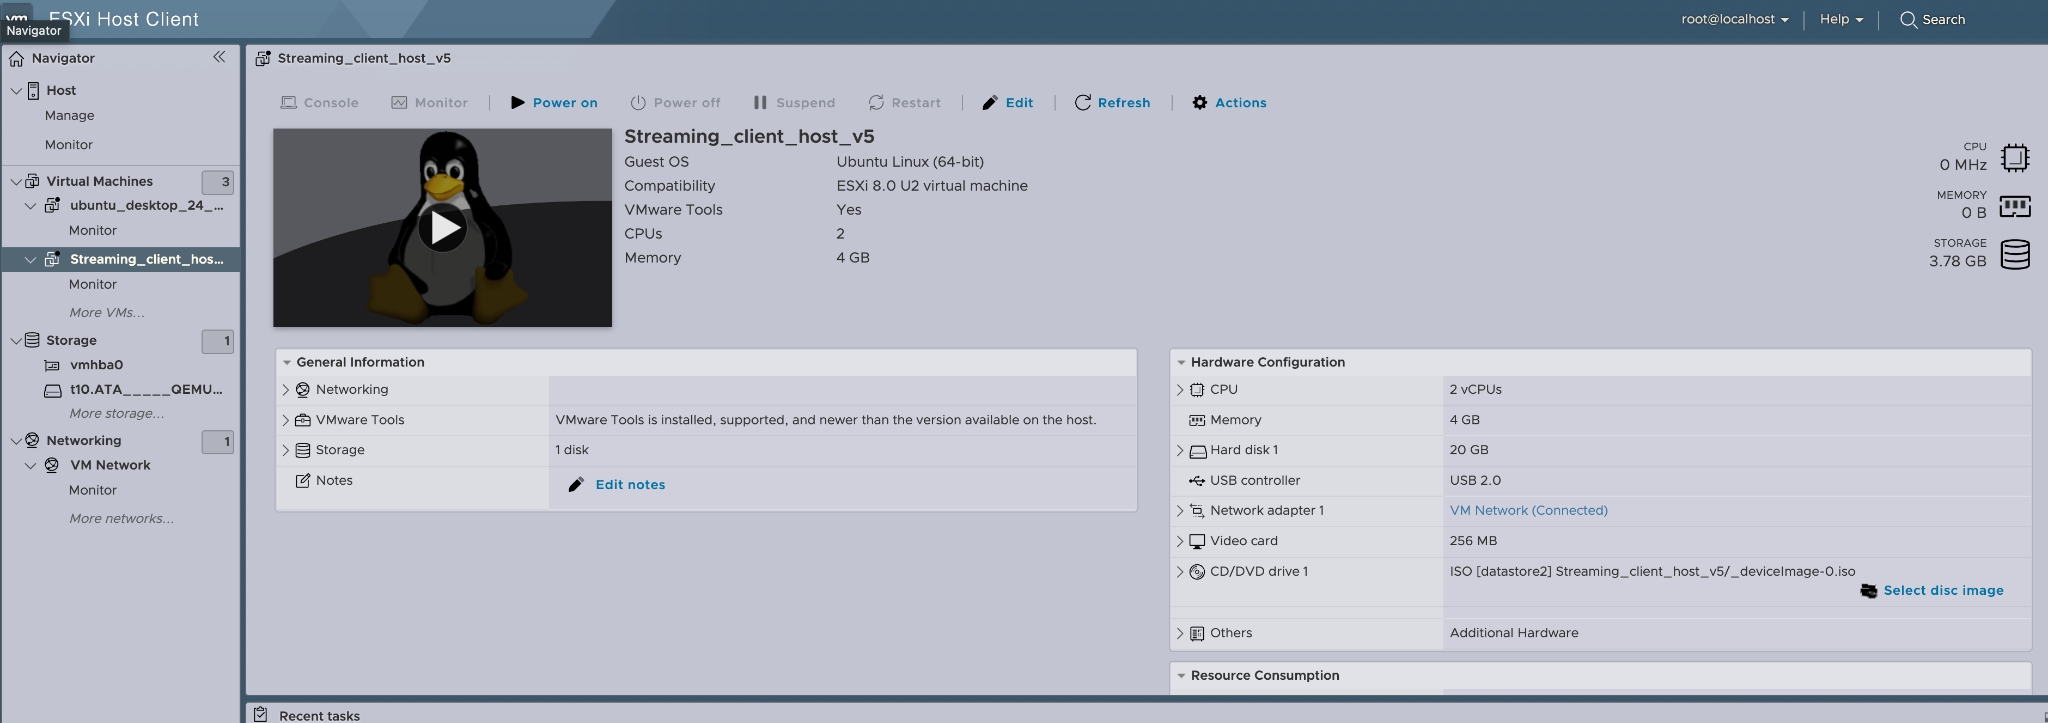
- Modify the required resources:
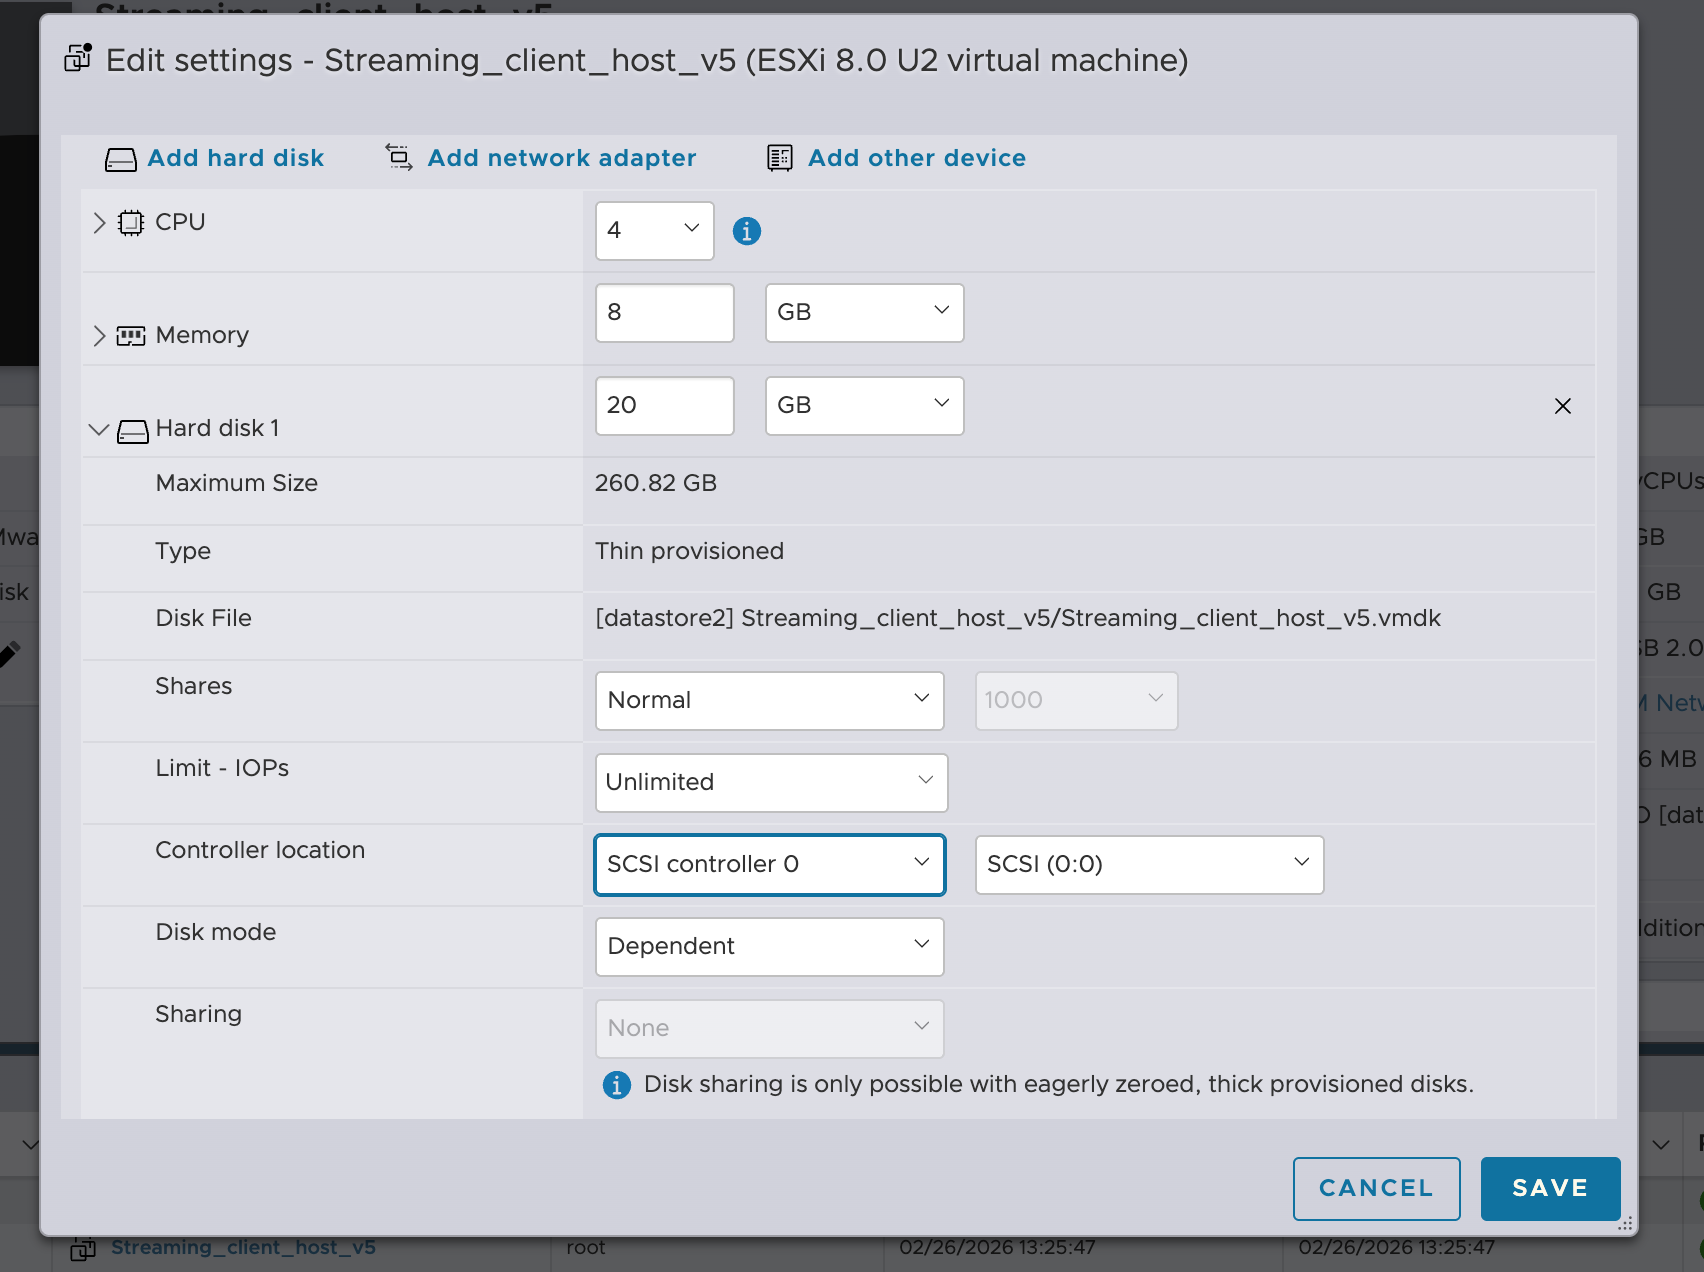
- Update the number of CPUs as required.
- Adjust the Memory (RAM) allocation.
- Increase the Disk size if additional storage is needed.
To modify network settings:
- Navigate to Network Adapter 1.
- Select the appropriate network/port group.
- Choose the adapter type (recommended: VMXNET3 for better performance).
- Navigate to Network Adapter 1.
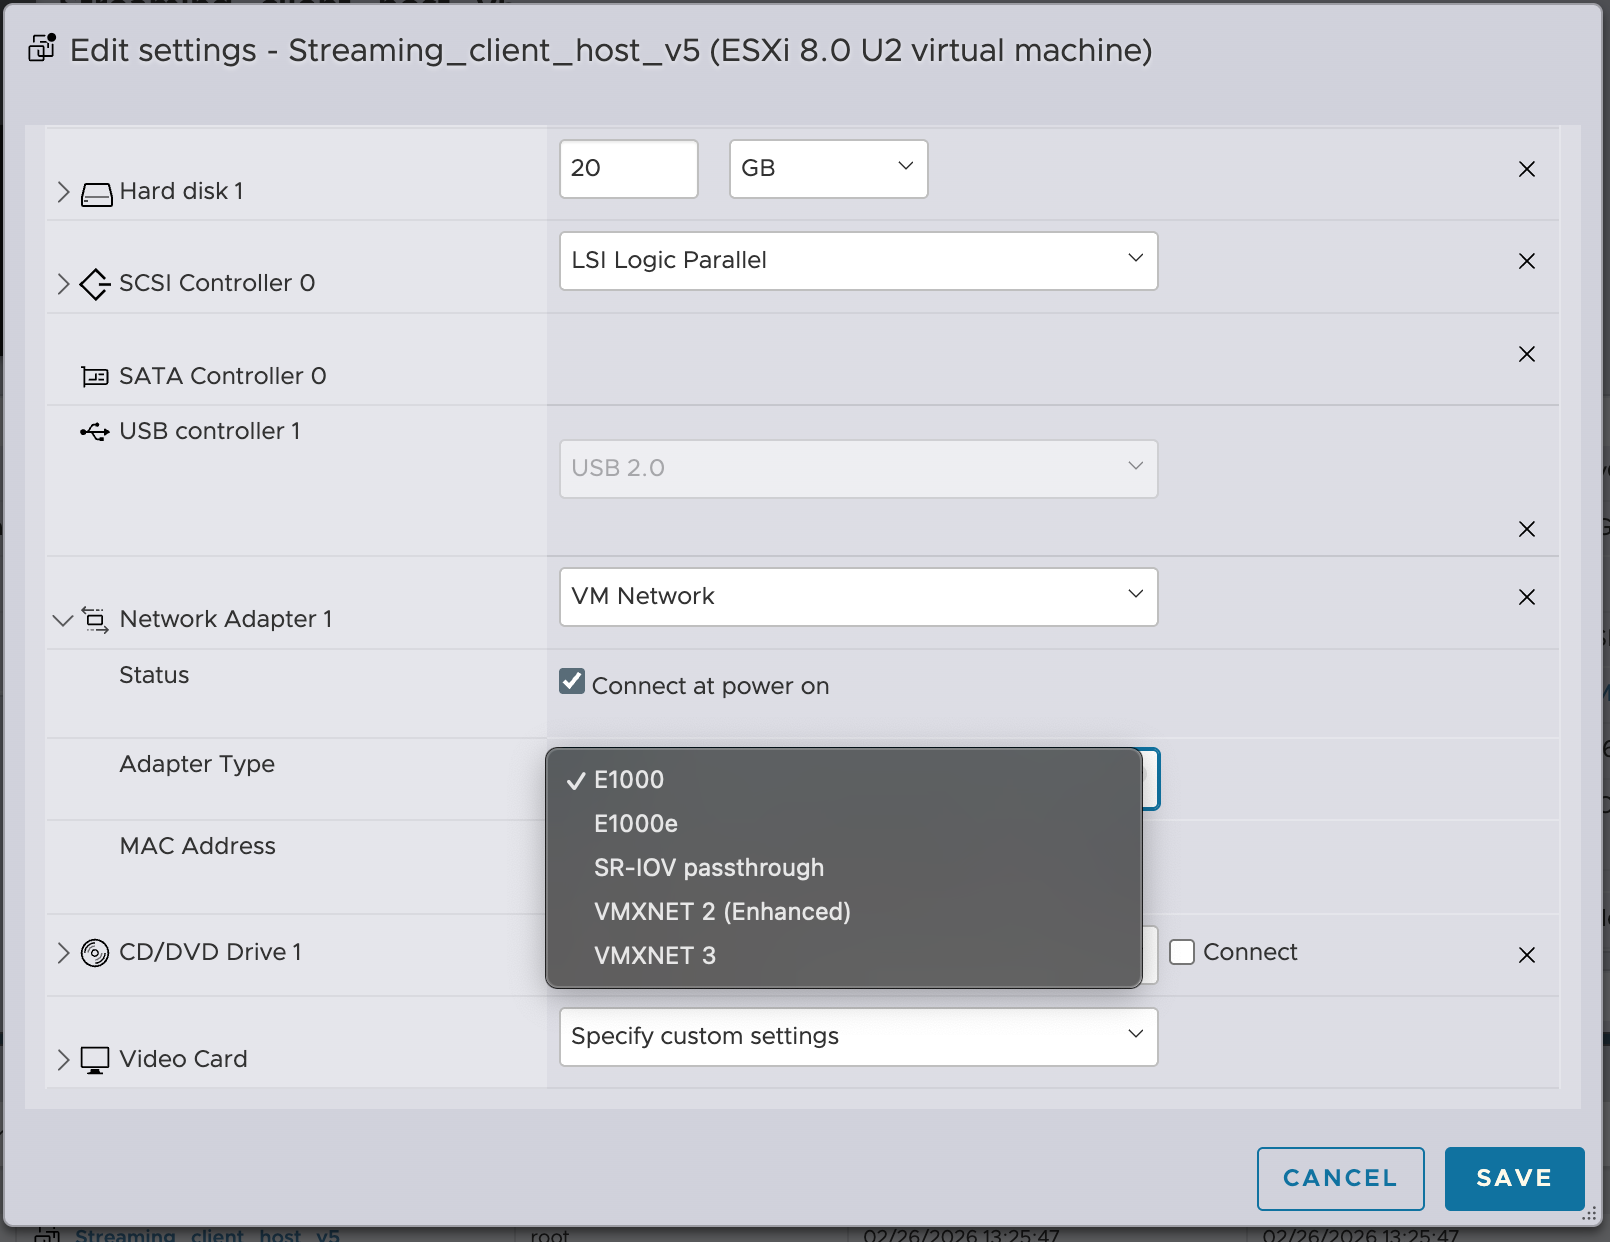
- Click Save to apply the changes.
- Power on the virtual machine.
Accessing the Virtual Machine
- Select the newly created virtual machine.
- Click Console to open the VM console.
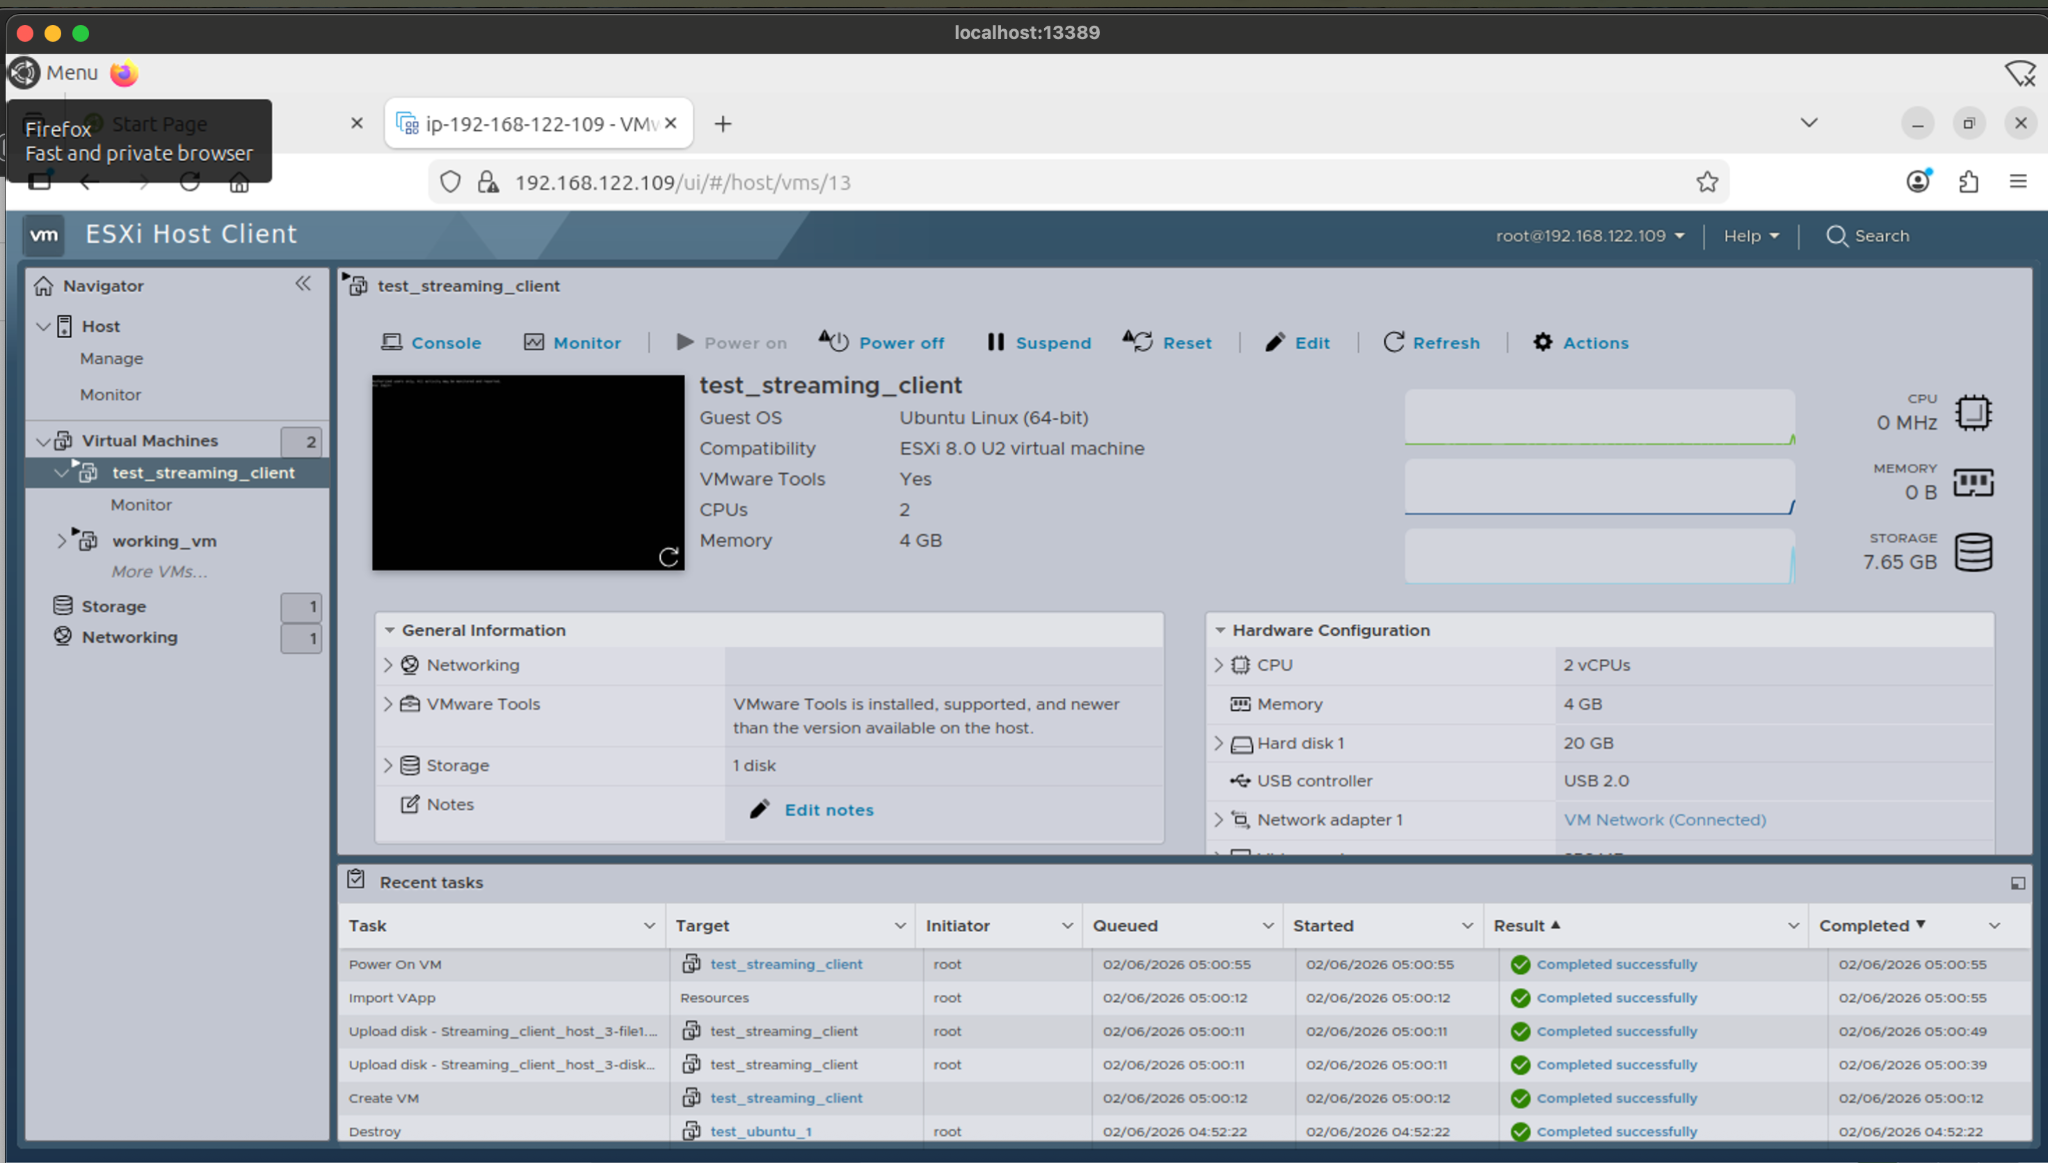
3. Wait for the login prompt, then log in using the default credentials:
Username: ecava_userPassword: Temppassword@123
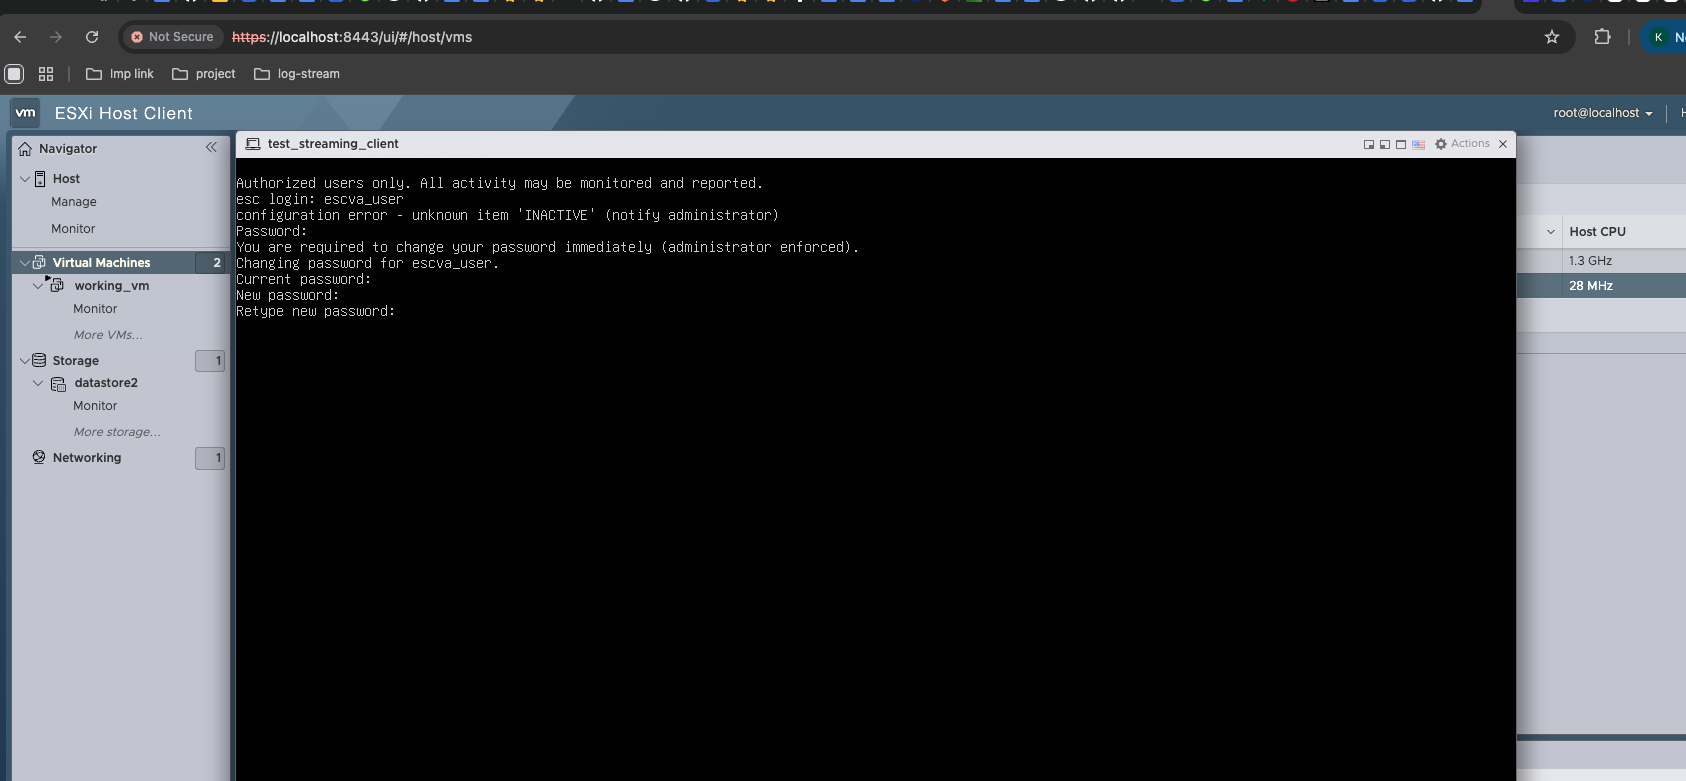
4. You will be prompted to change the password.
– It is strongly recommended to set a strong and secure password.
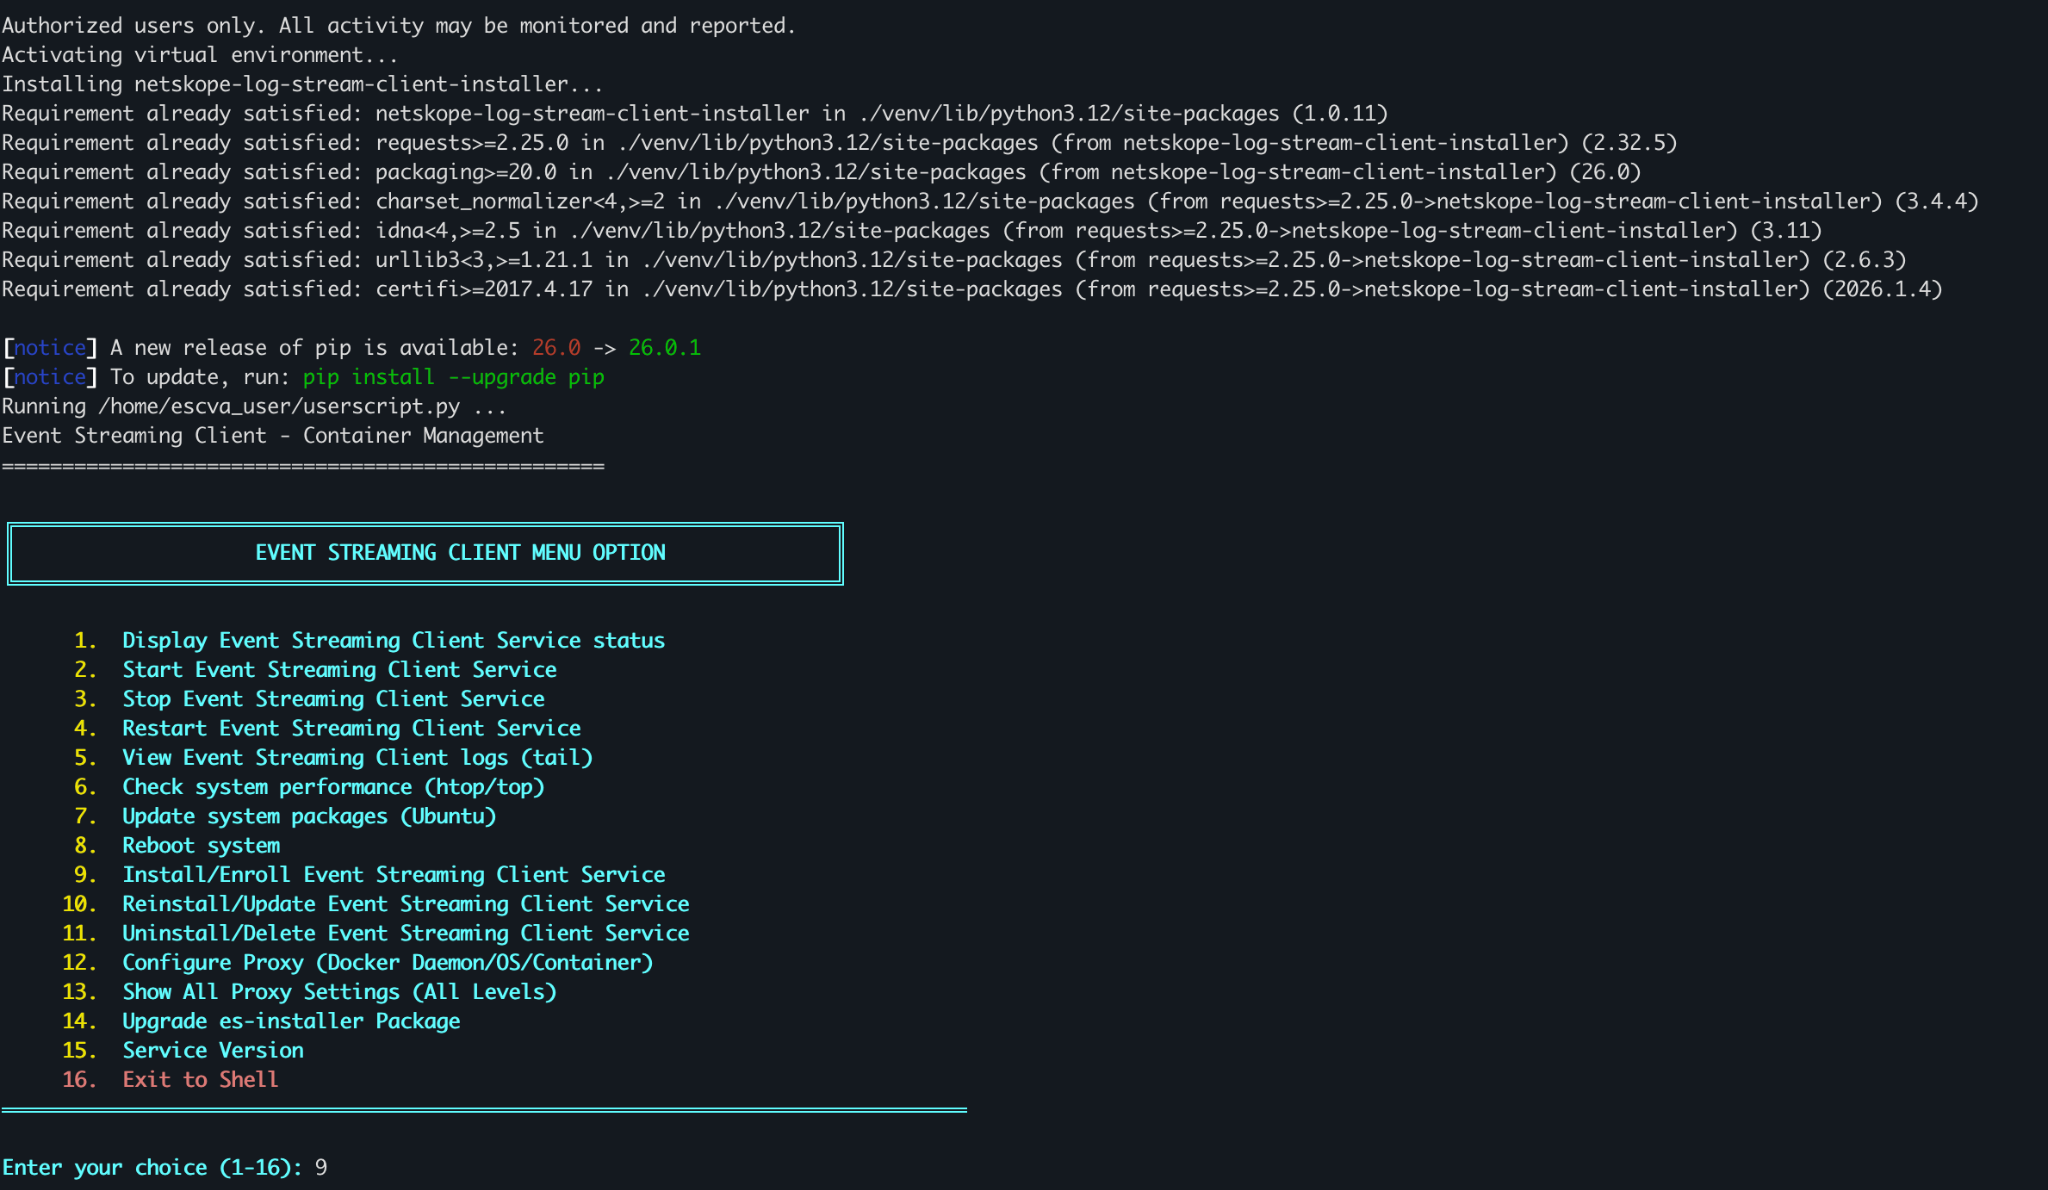
5. After the password is changed, the user-interactive setup script will automatically start.
6. Follow the on-screen menu options to install the Streaming Client.
Network Configuration
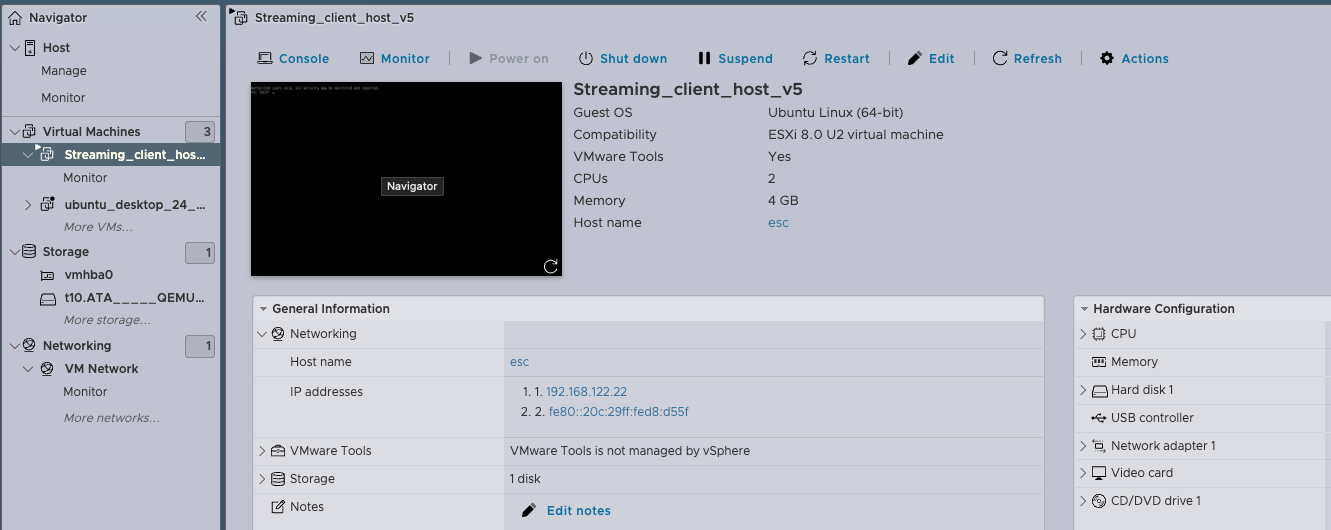
Check the IP address from the ESXi General Information → Networking tab.
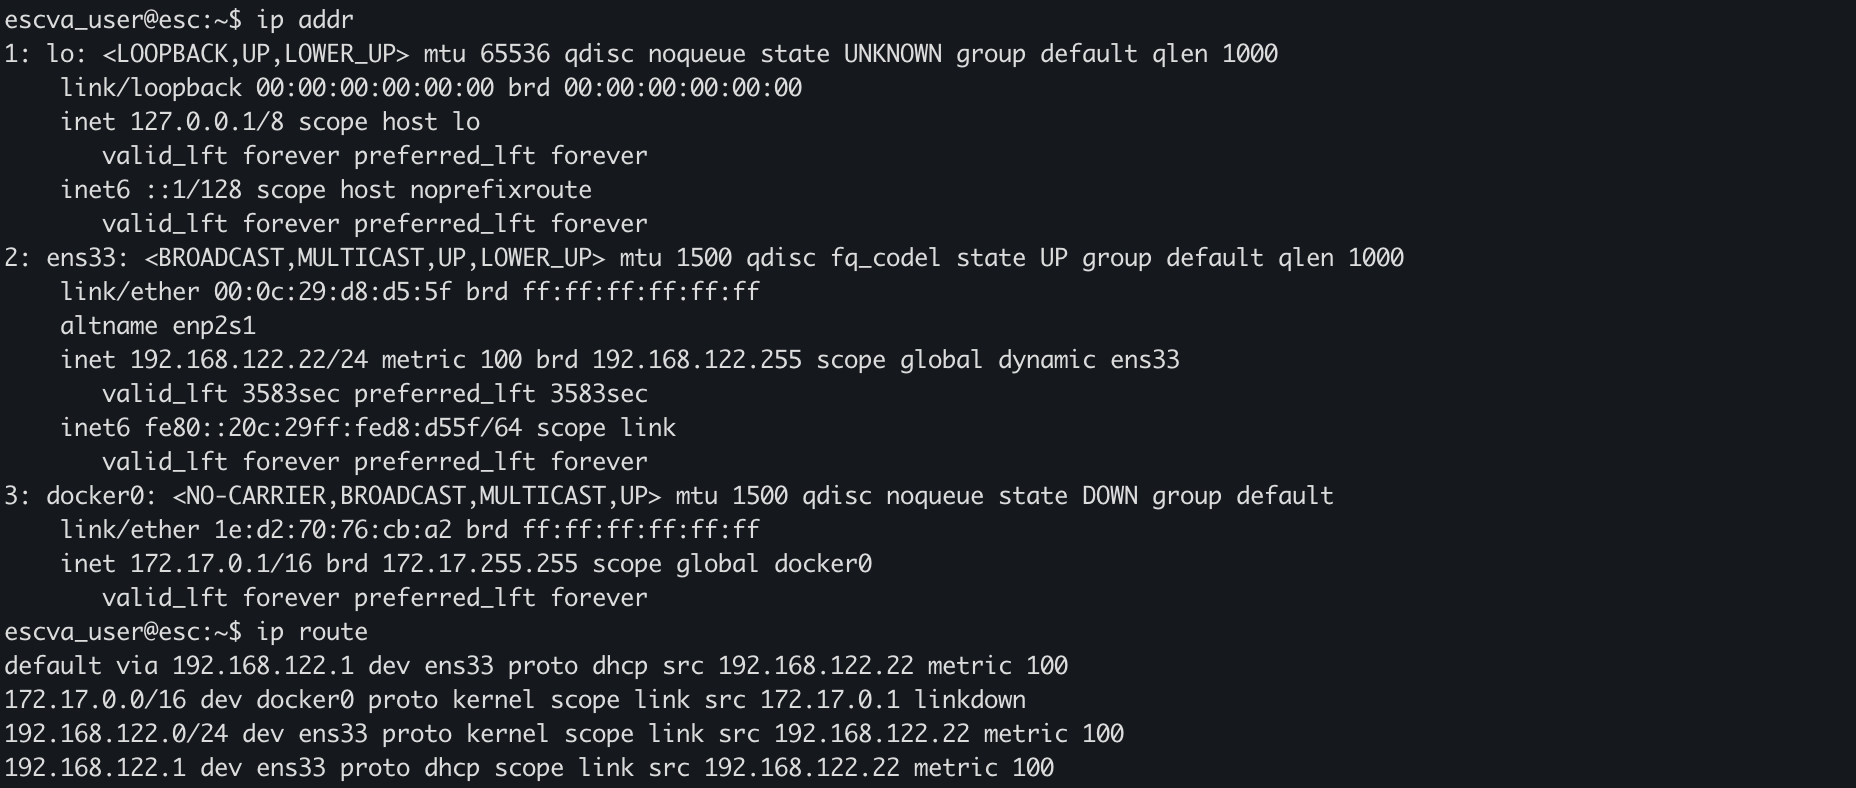
Alternatively, you can open the VM console and use the terminal to run the command ip addr to verify the IP address.
After logging into the VM via SSH, verify the network settings using the following commands:
Check the network interface and IP address:
ip addr
#or
hostname -I
Confirm that the primary interface (e.g., ens33) has a valid IP address assigned.
Check the default gateway:
ip route
Ensure a default route is configured, similar to:
default via <gateway-ip> dev <interface-name>
This confirms the VM can reach external networks.
Validate connectivity:
ping -c 3 <gateway-ip>
ping -c 3 8.8.8.8
ping -c 3 google.com
To configure a static IP:
1. Backup: sudo cp /etc/netplan/00-installer-config.yaml /etc/netplan/00-installer-config.yaml.bak
# 1. Open the VM console or SSH into the VM
# 2. Find the netplan config file:
  ls /etc/netplan/


# 3. Backup the original config file:
  sudo cp /etc/netplan/00-installer-config.yaml /etc/netplan/00-installer-config.yaml.bak
# 3. Edit the config file (e.g., 00-installer-config.yaml):
  sudo nano /etc/netplan/00-installer-config.yaml

# 4. Replace the content with:


# Note: Replace 192.168.x.x/24 and 192.168.x.1 with your actual network parameters.

# Note: Ensure the Subnet Mask / CIDR matches your local environment.

# Note: Replace ens33 with your primary interface name.
  network:
    ethernets:
      ens33:
        dhcp4: no
        addresses: [192.168.x.x/24]
        routes:
          - to: default
            via: 192.168.x.1
        nameservers:
          addresses: [8.8.8.8, 8.8.4.4]
    version: 2

# 5. Apply the changes:

  sudo netplan try
# (Recommended: This will revert changes if not confirmed, preventing connectivity loss)

# 6. Verify the new IP:
  ip addr
2. Update settings.
3. Apply changes using sudo netplan try (this prevents permanent lockout if the config is invalid).
Successful responses confirm:
- Gateway connectivity
- Internet access
- DNS resolution
Streaming Client Installation Guide
Once the OVA deployment is completed and the virtual machine is powered on, follow the steps below to install and manage the Streaming Client.
- Ensure the VM has network connectivity and note the assigned IP address from the ESXi console or VM console login screen.
- SSH into the VM using the IP address:
ssh <username>@<vm-ip-address>
ssh ecava_user@192.168.1.50
Enter the credentials when prompted.

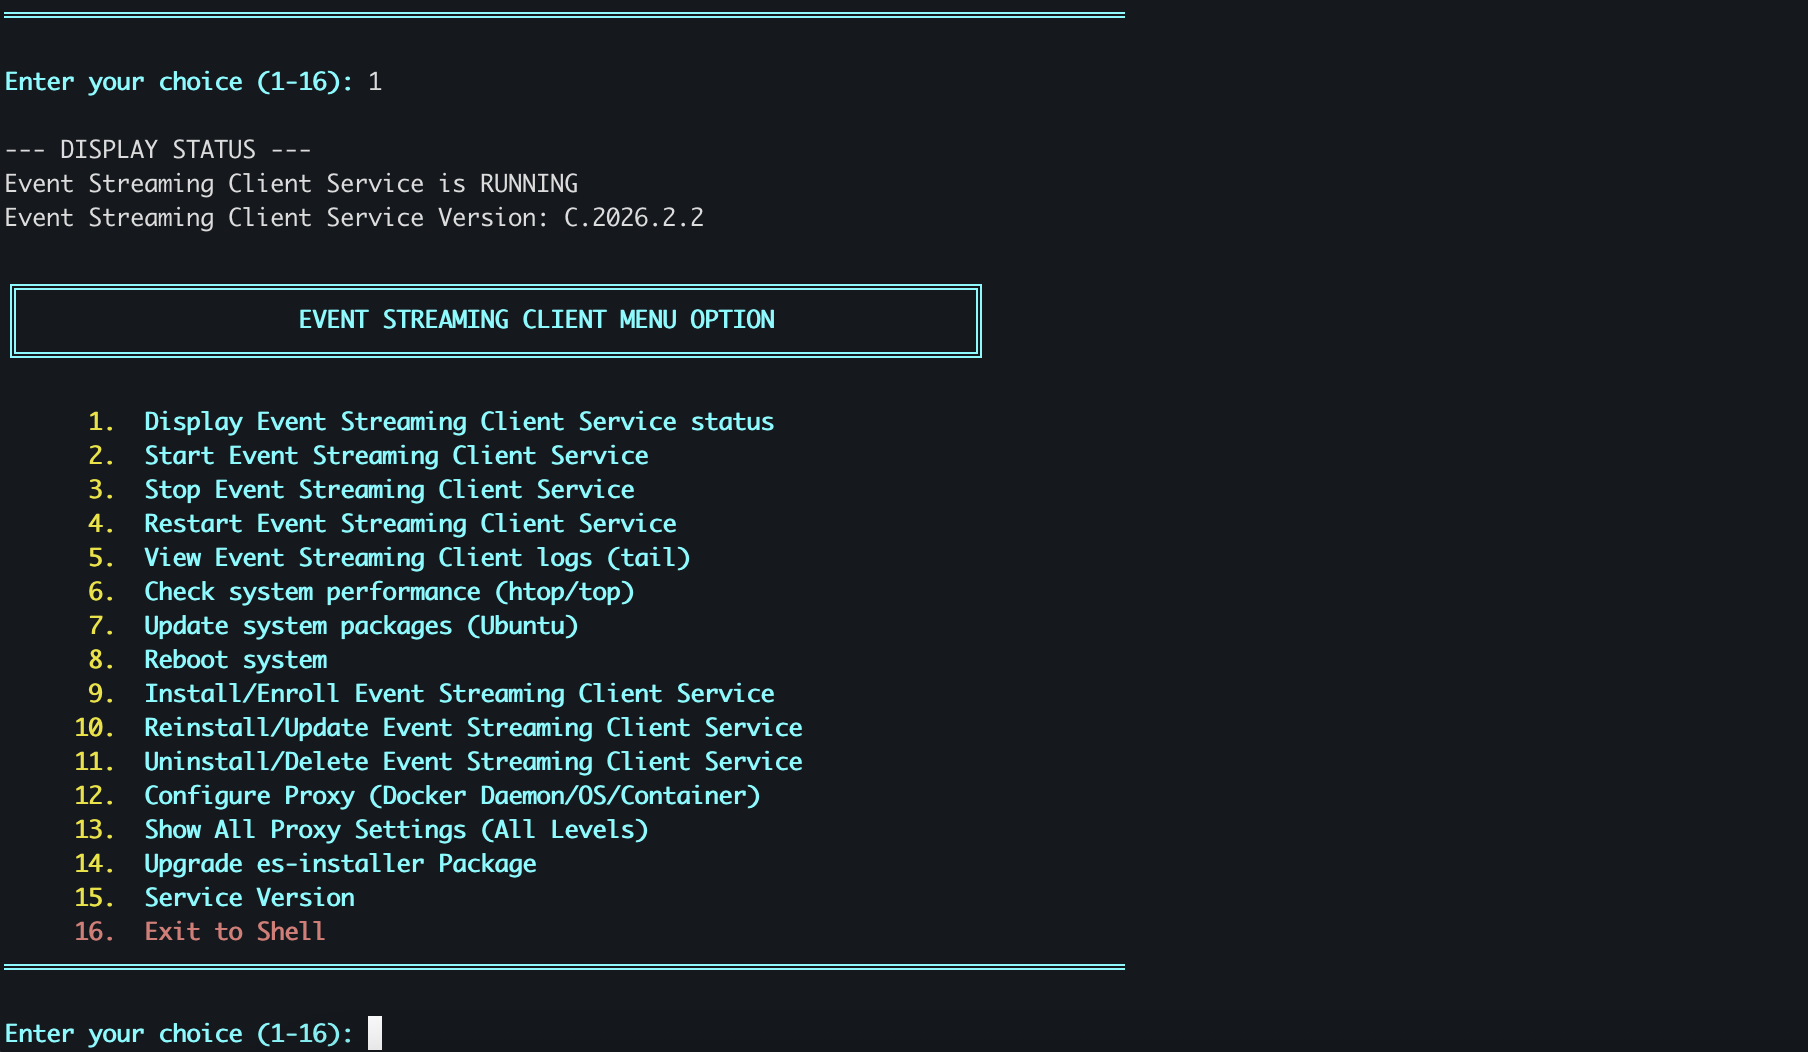
- After login, the Streaming Client management menu displays.
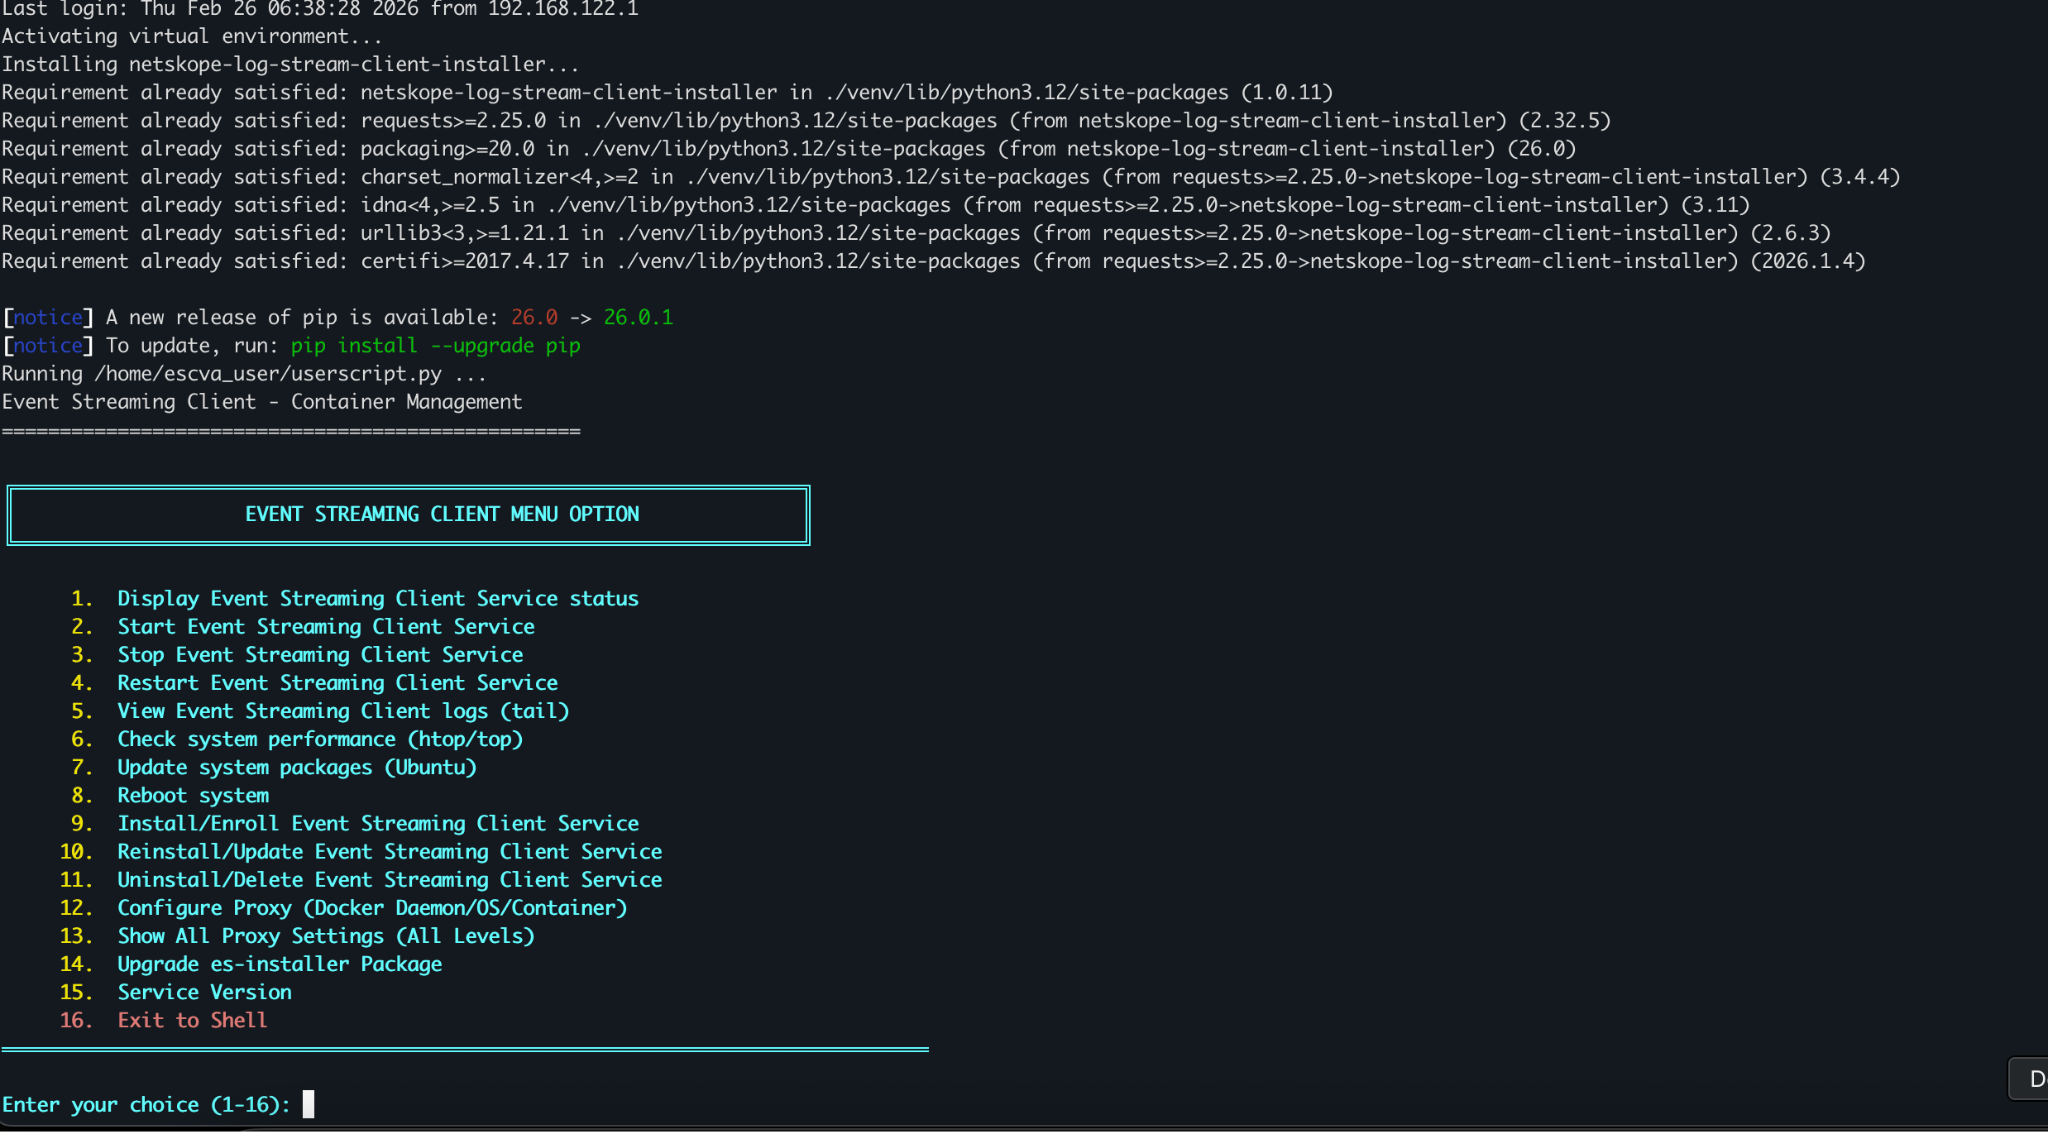
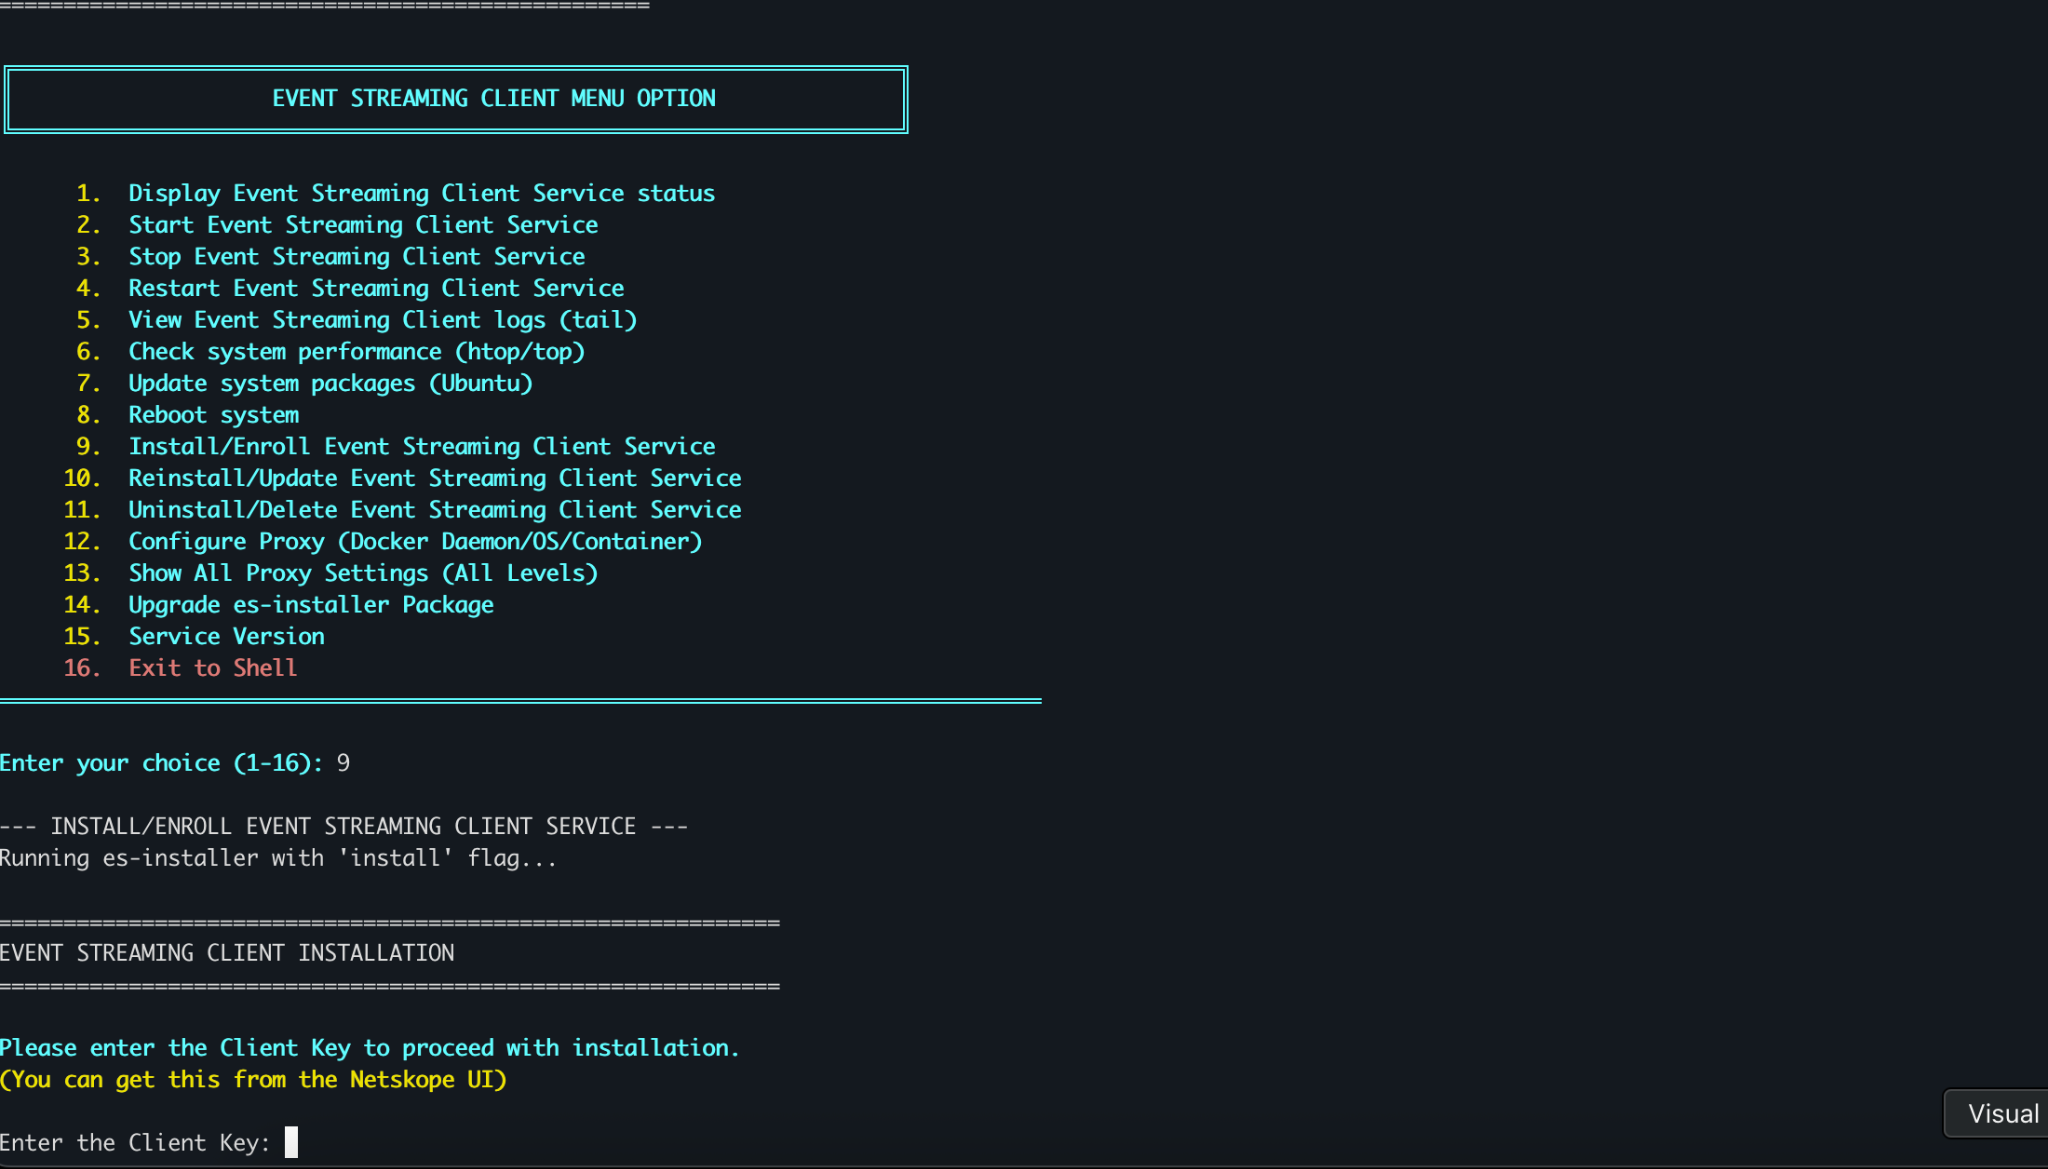
- Select Option 9 – Install Streaming Client to begin the installation process.
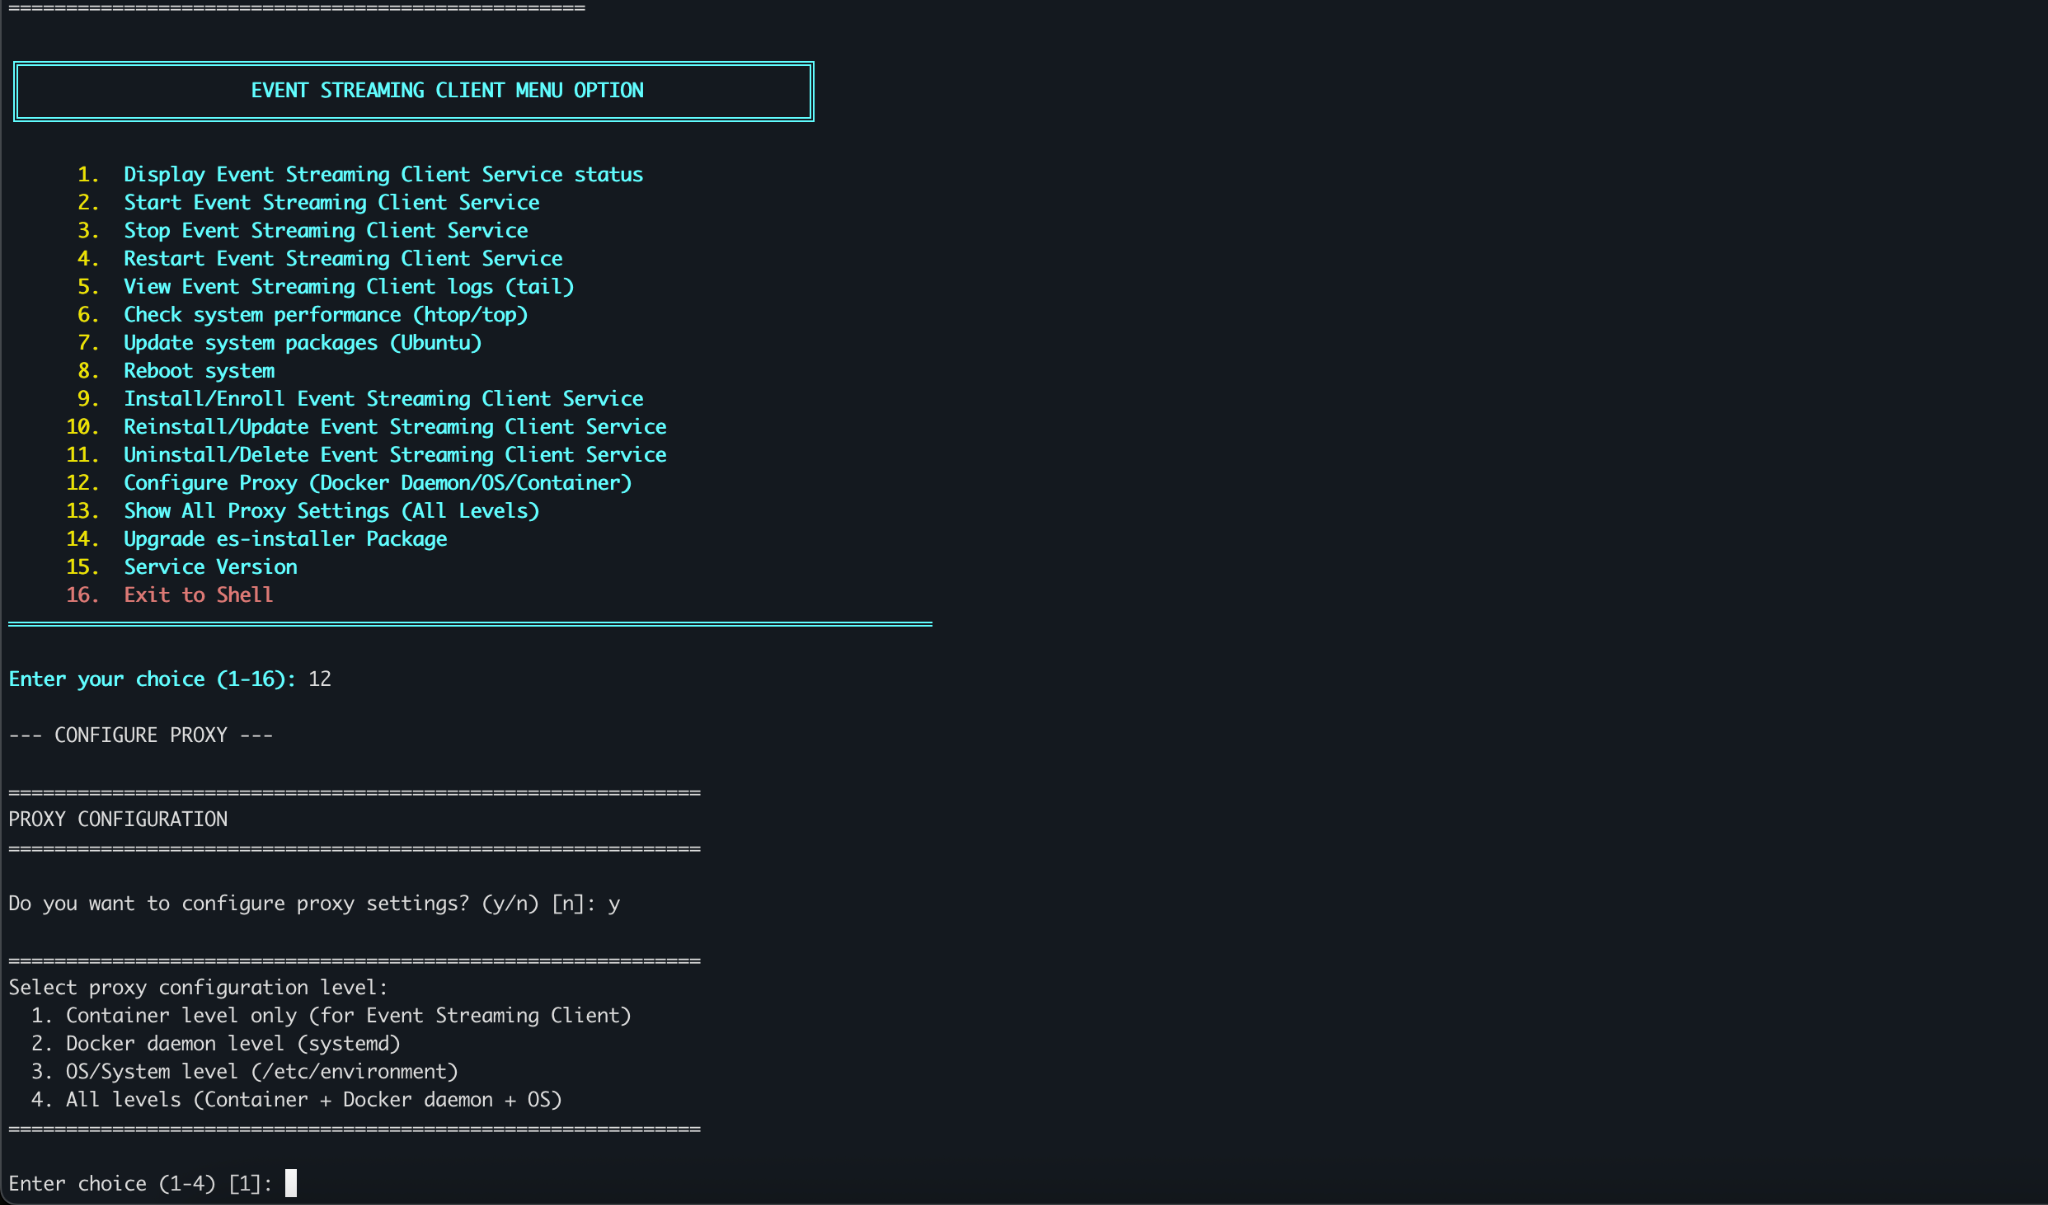
- If your environment requires outbound traffic through a proxy:
- Select Option 12 – Configure Proxy.
- Confirm proxy configuration when prompted.
- Choose the required level (Container, Docker, OS, or All).
- Enter the proxy URL.
- During installation, you will be prompted to enter the Client Key (JWT token).
- Retrieve the token from the Swagger API endpoint :
- Use the installation guide doc for more detail
- /api/v2/streamingclient/clients/{client}/token
- Paste the token when prompted to continue installation.
- Retrieve the token from the Swagger API endpoint :
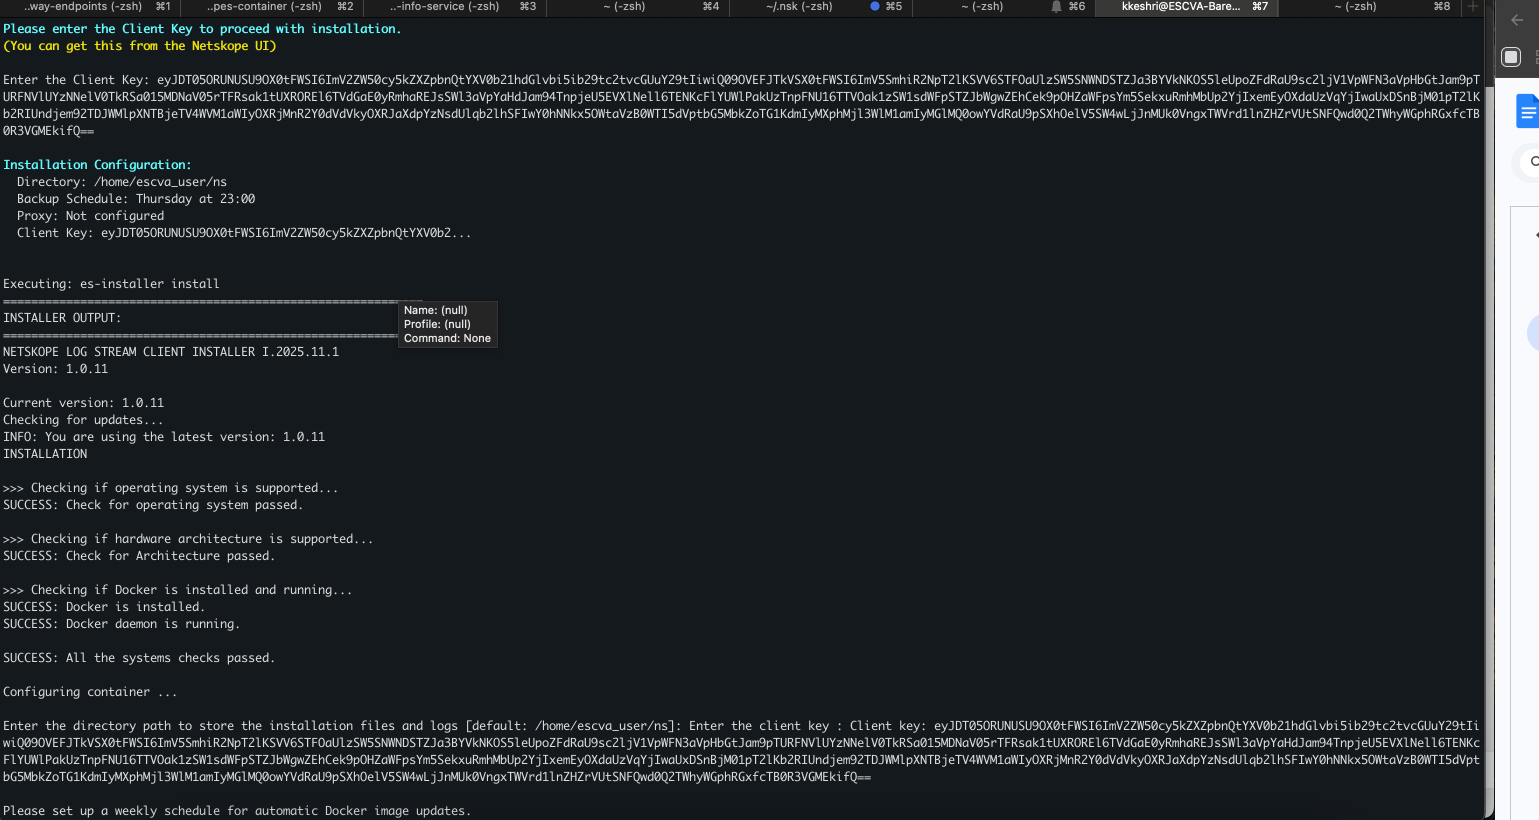
- Wait for the installation to complete. Do not interrupt the process.
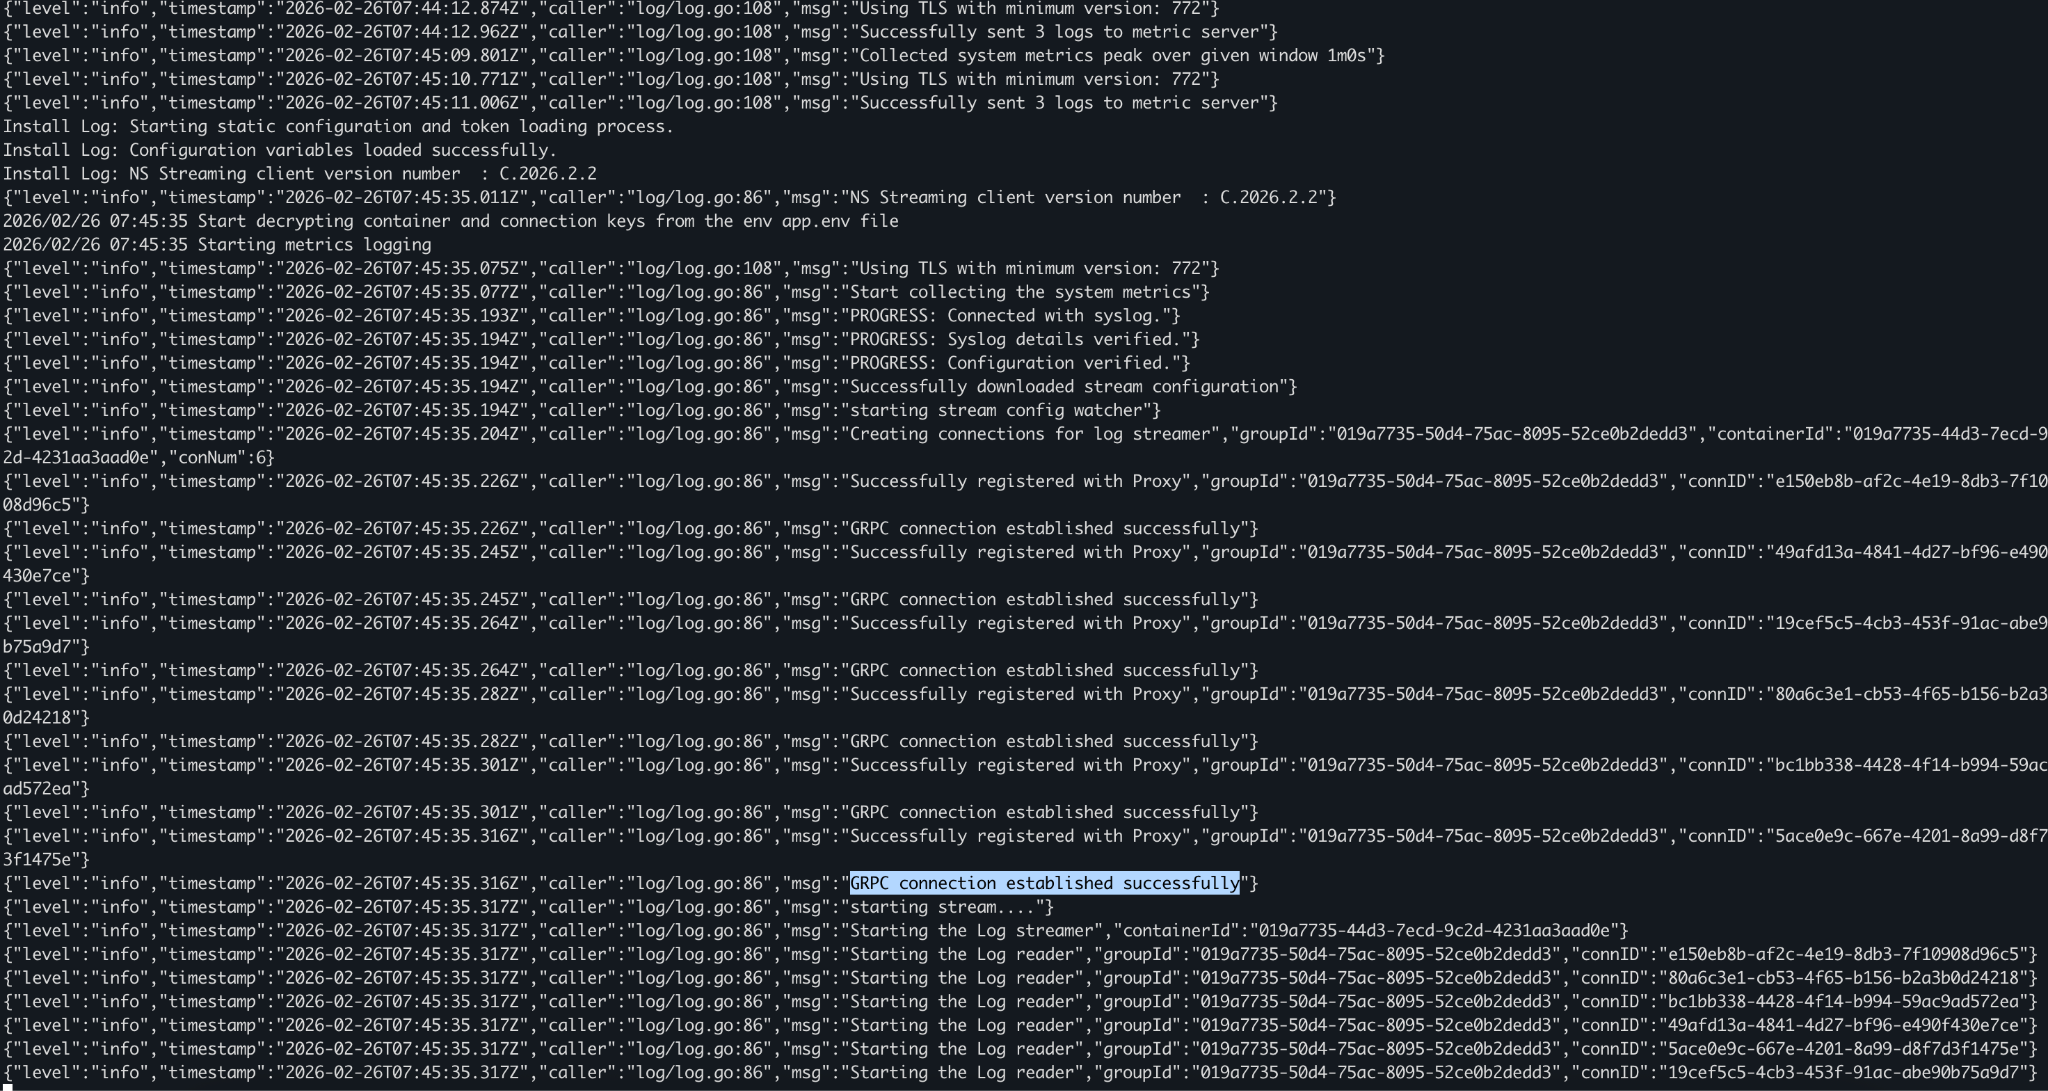
- To validate connectivity, select Option 5 – View Tail Logs and confirm that the gRPC connection is successfully established (connection ID and group ID should be displayed). You will see the similar log line.
- GRPC connection established successfully
{"level":"info","timestamp":"2026-02-26T07:45:35.301Z","caller":"log/log.go:86","msg":"GRPC connection established successfully"}
{"level":"info","timestamp":"2026-02-26T07:45:35.316Z","caller":"log/log.go:86","msg":"Successfully registered with Proxy","groupId":"019a7735-50d4-75ac-8095-52ce0b2dedd3","connID":"5ace0e9c-667e-4201-8a99-d8f7d3f1475e"}
{"level":"info","timestamp":"2026-02-26T07:45:35.316Z","caller":"log/log.go:86","msg":"GRPC connection established successfully"}
{"level":"info","timestamp":"2026-02-26T07:45:35.317Z","caller":"log/log.go:86","msg":"starting stream...."}
{"level":"info","timestamp":"2026-02-26T07:45:35.317Z","caller":"log/log.go:86","msg":"Starting the Log streamer","containerId":"019a7735-44d3-7ecd-9c2d-4231aa3aad0e"}
{"level":"info","timestamp":"2026-02-26T07:45:35.317Z","caller":"log/log.go:86","msg":"Starting the Log reader","groupId":"019a7735-50d4-75ac-8095-52ce0b2dedd3","connID":"e150eb8b-af2c-4e19-8db3-7f10908d96c5"}
- Press Ctrl + C to return to the main menu.
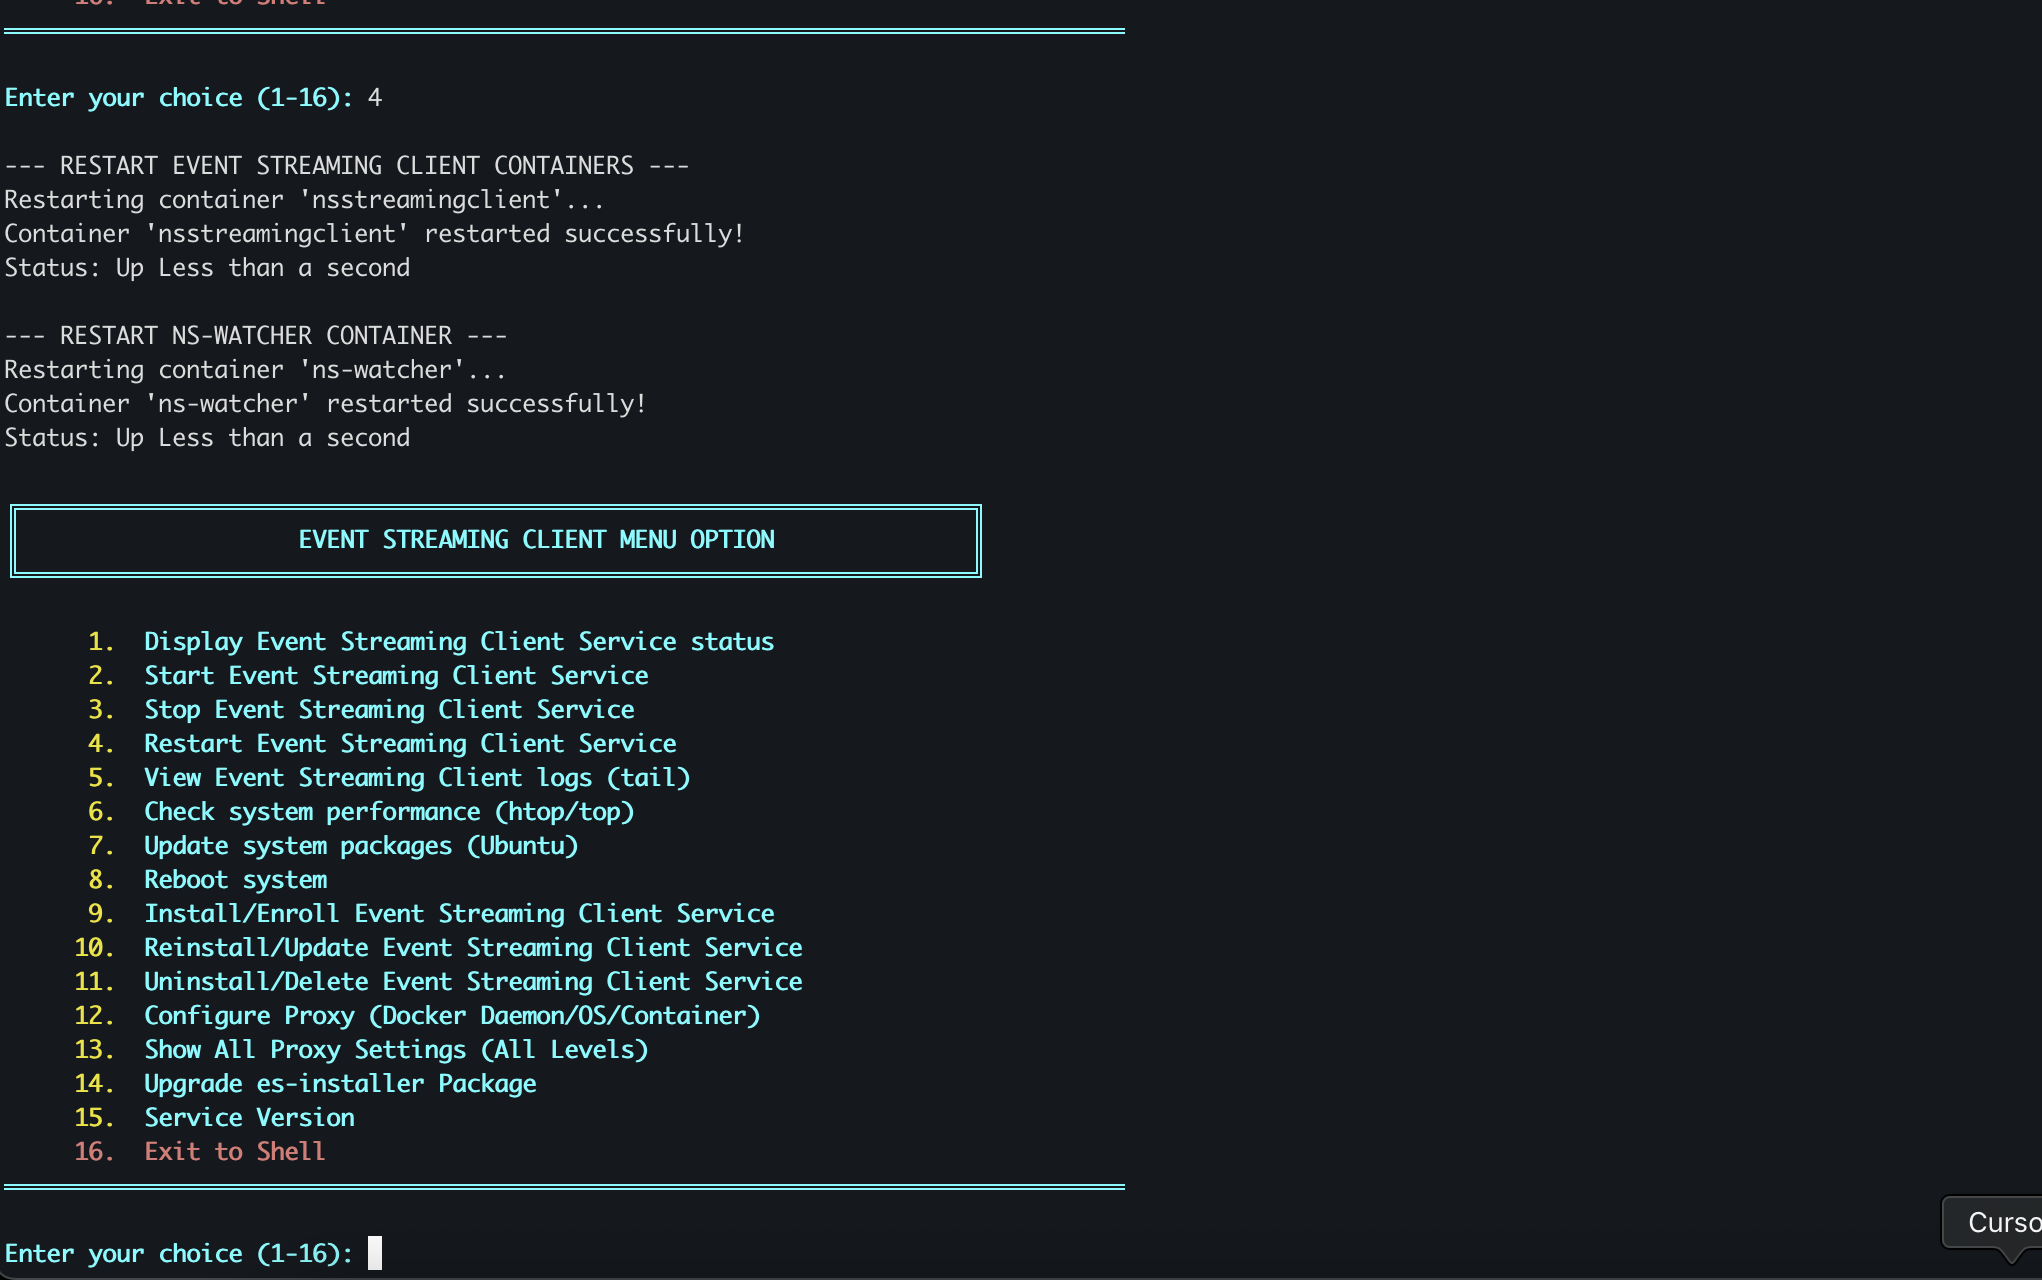
- Use Option 4 to restart the Streaming Client if required.
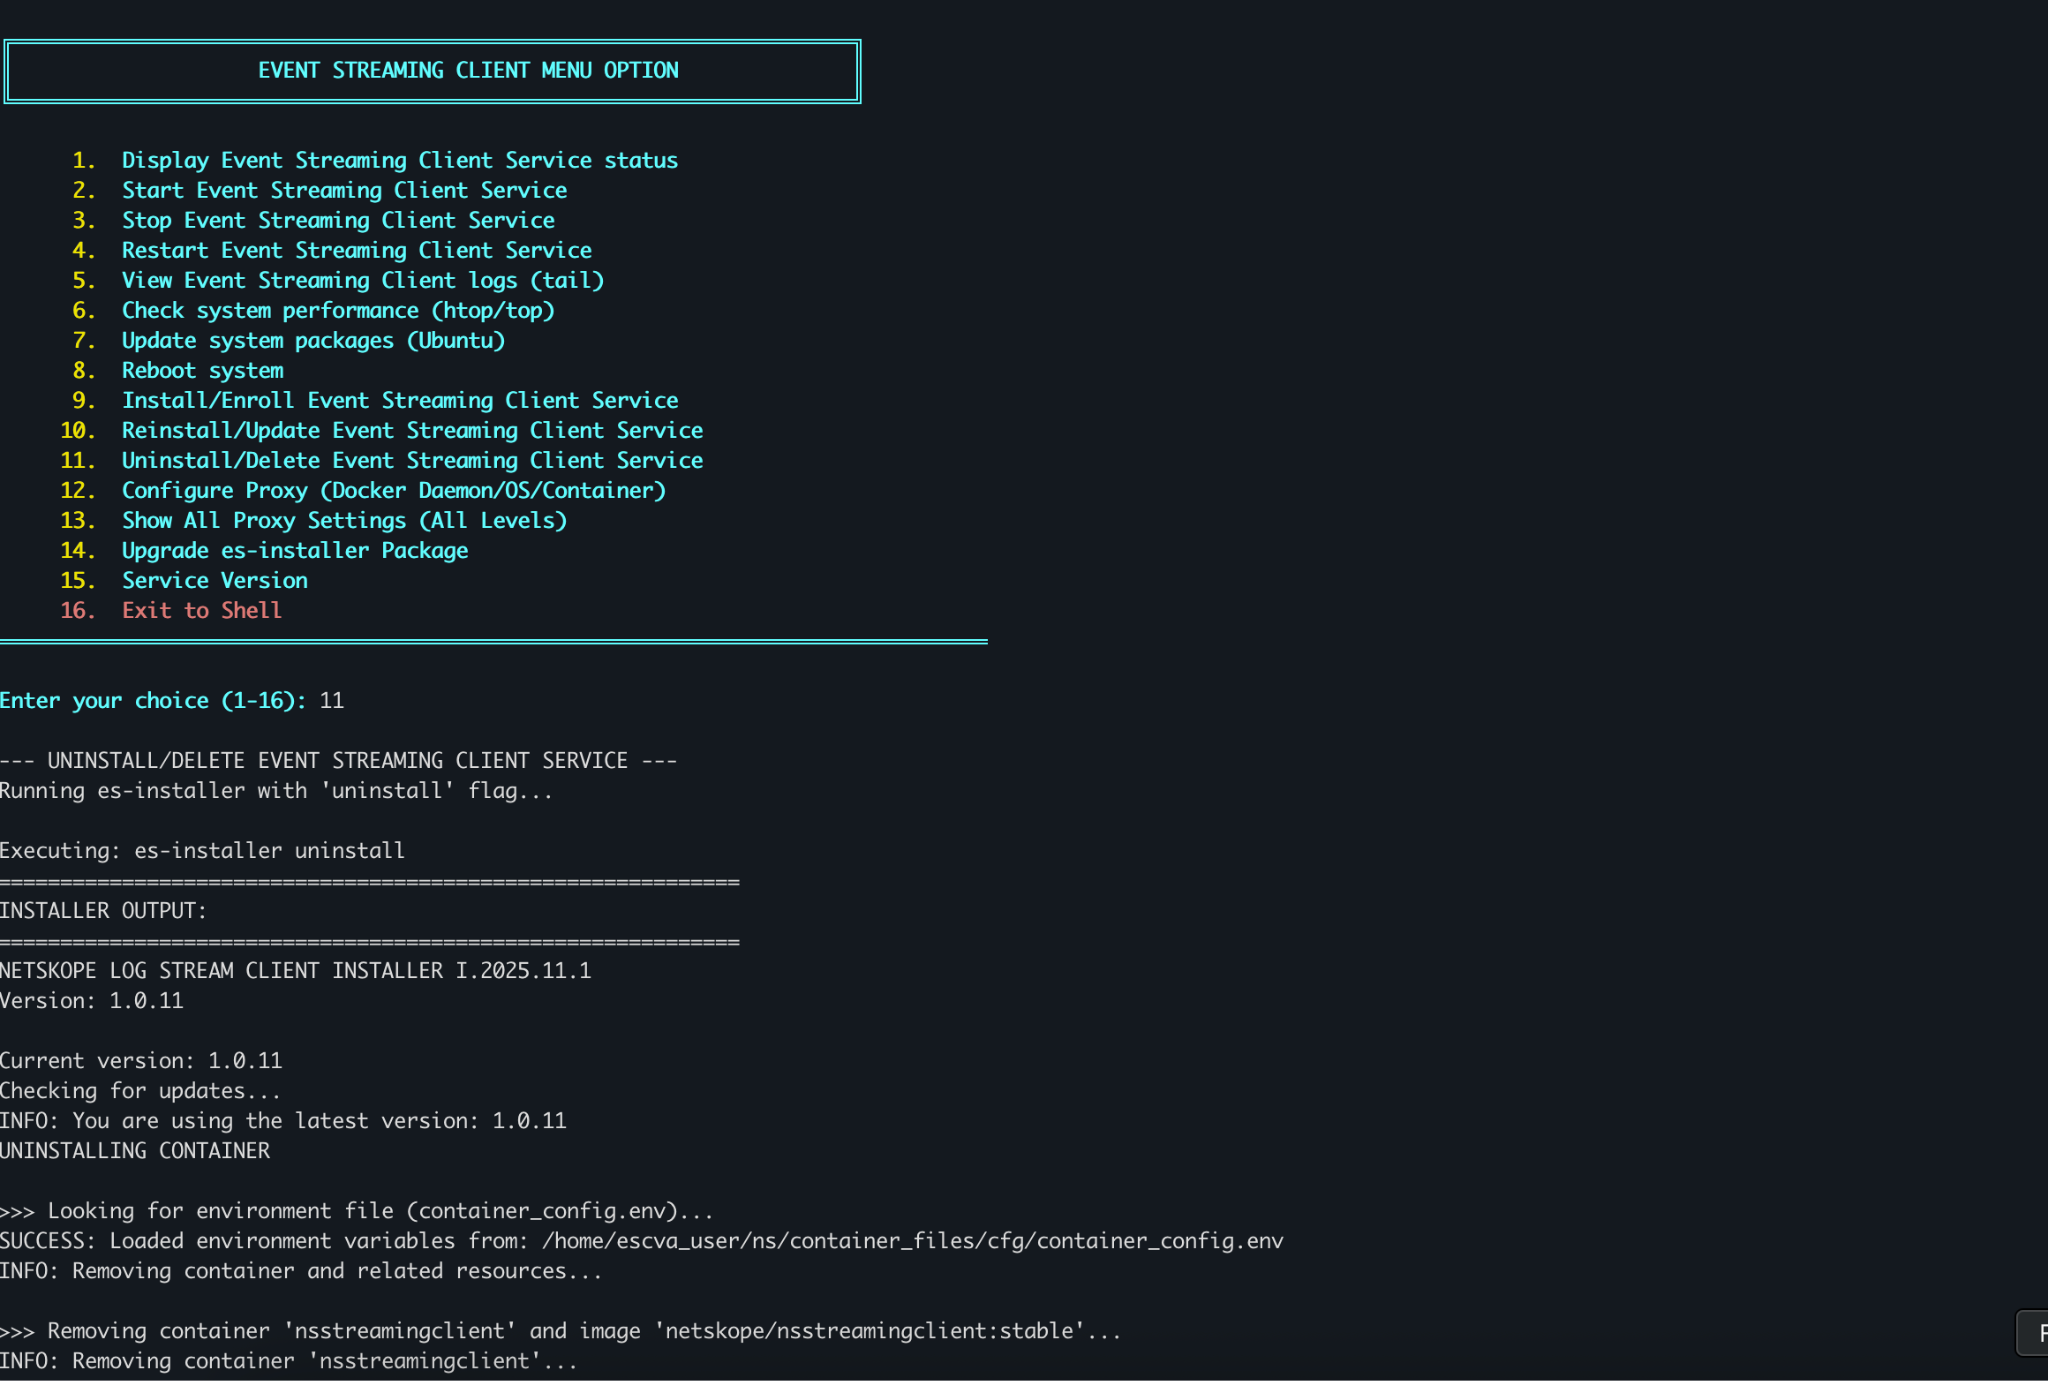
- Use Option 10 to reinstall the Streaming Client.
- Use Option 11 to uninstall the Streaming Client.
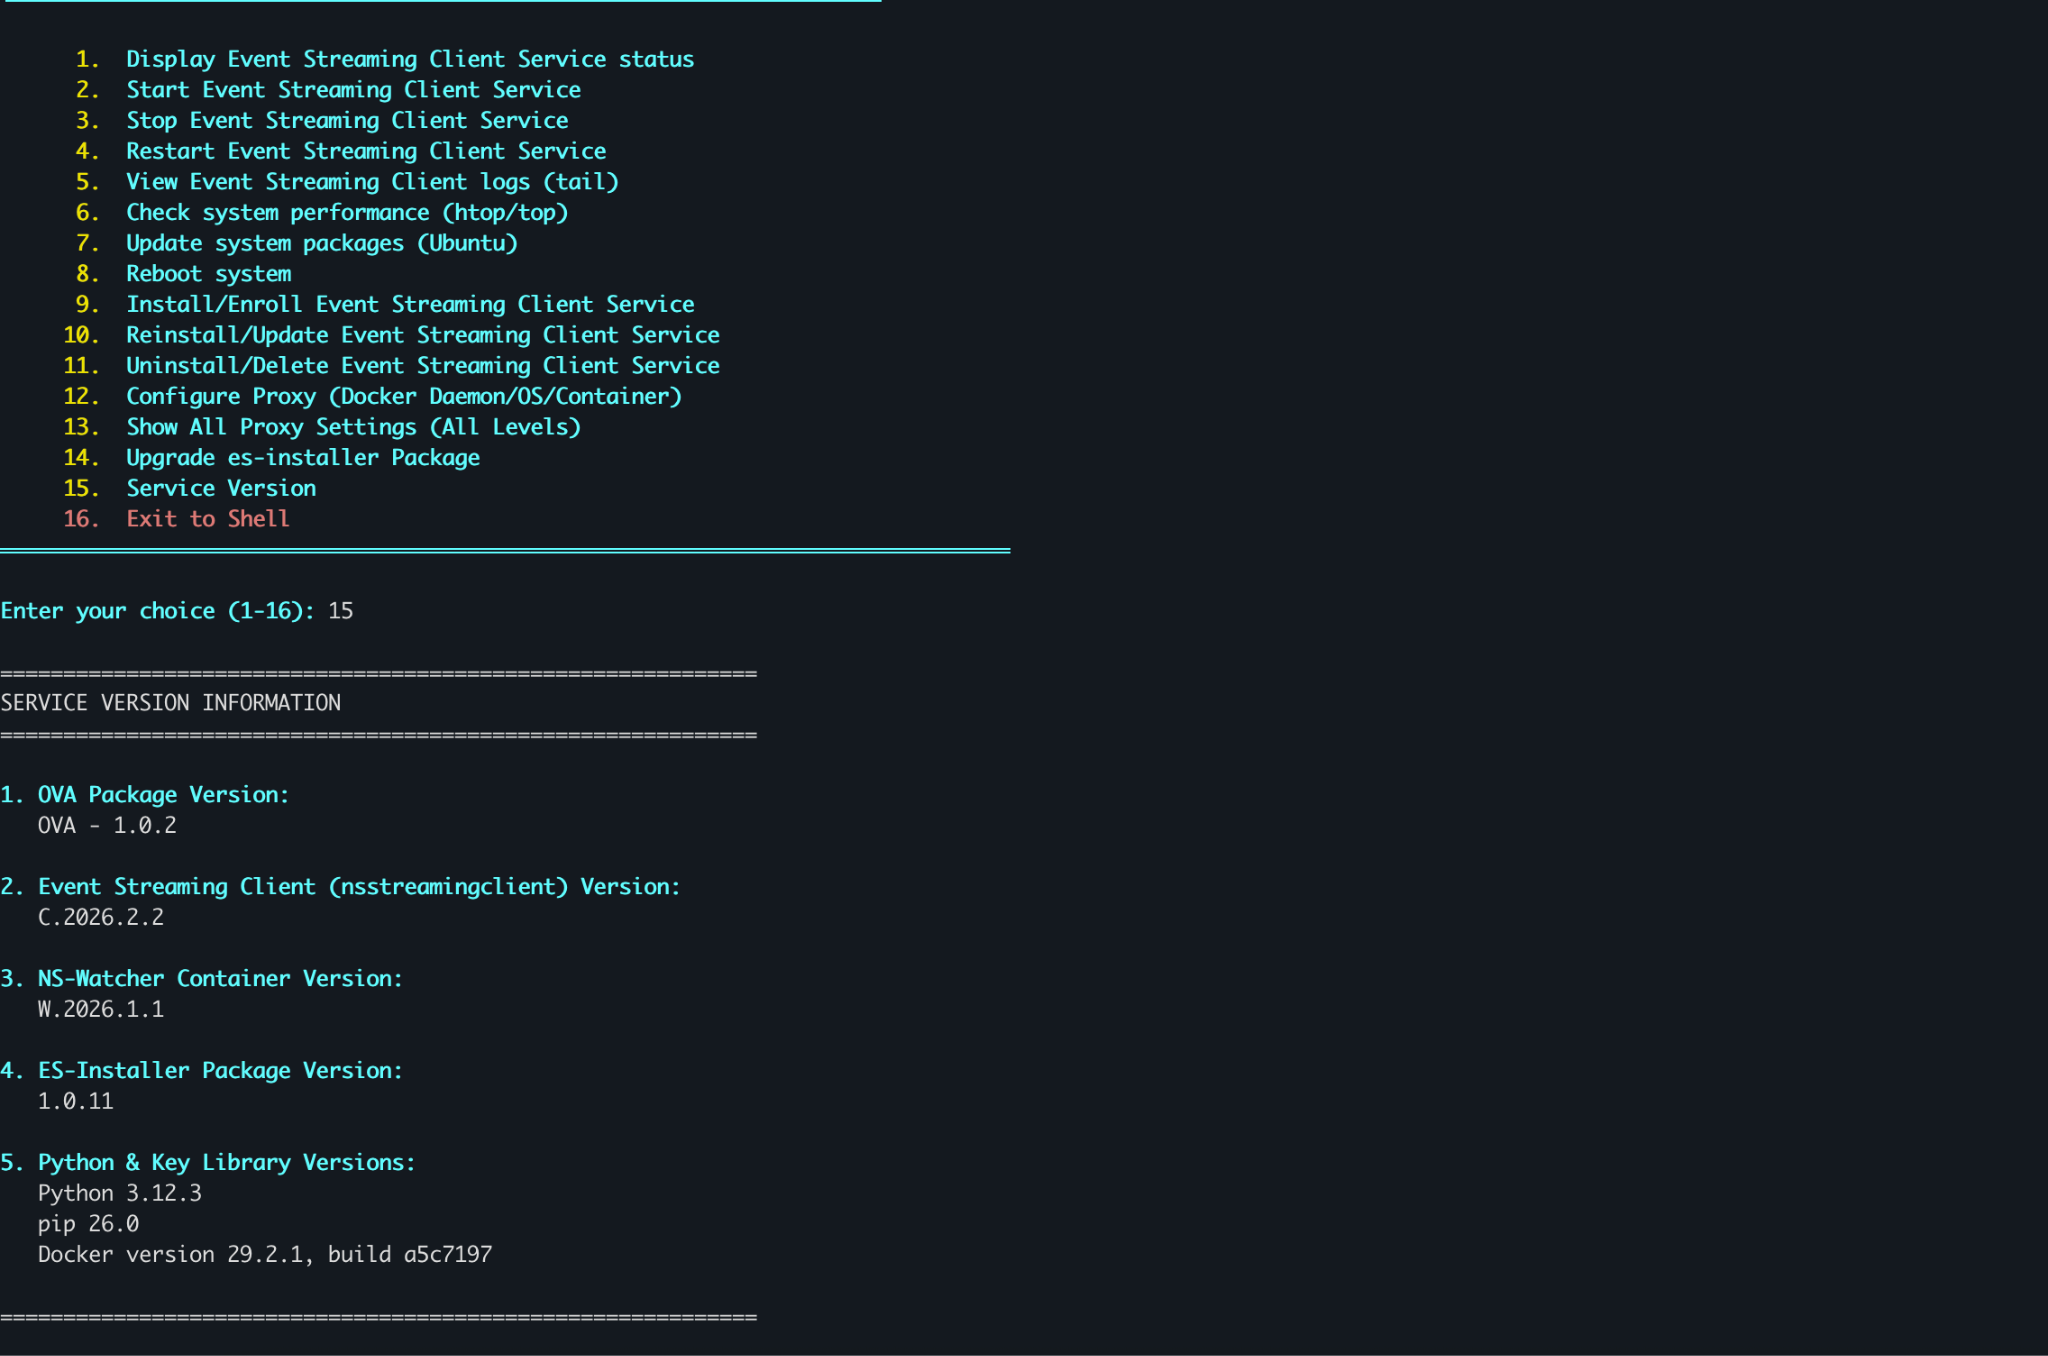
- Use Option 15 to view version details (OVA package, Streaming Client, Python, and services).
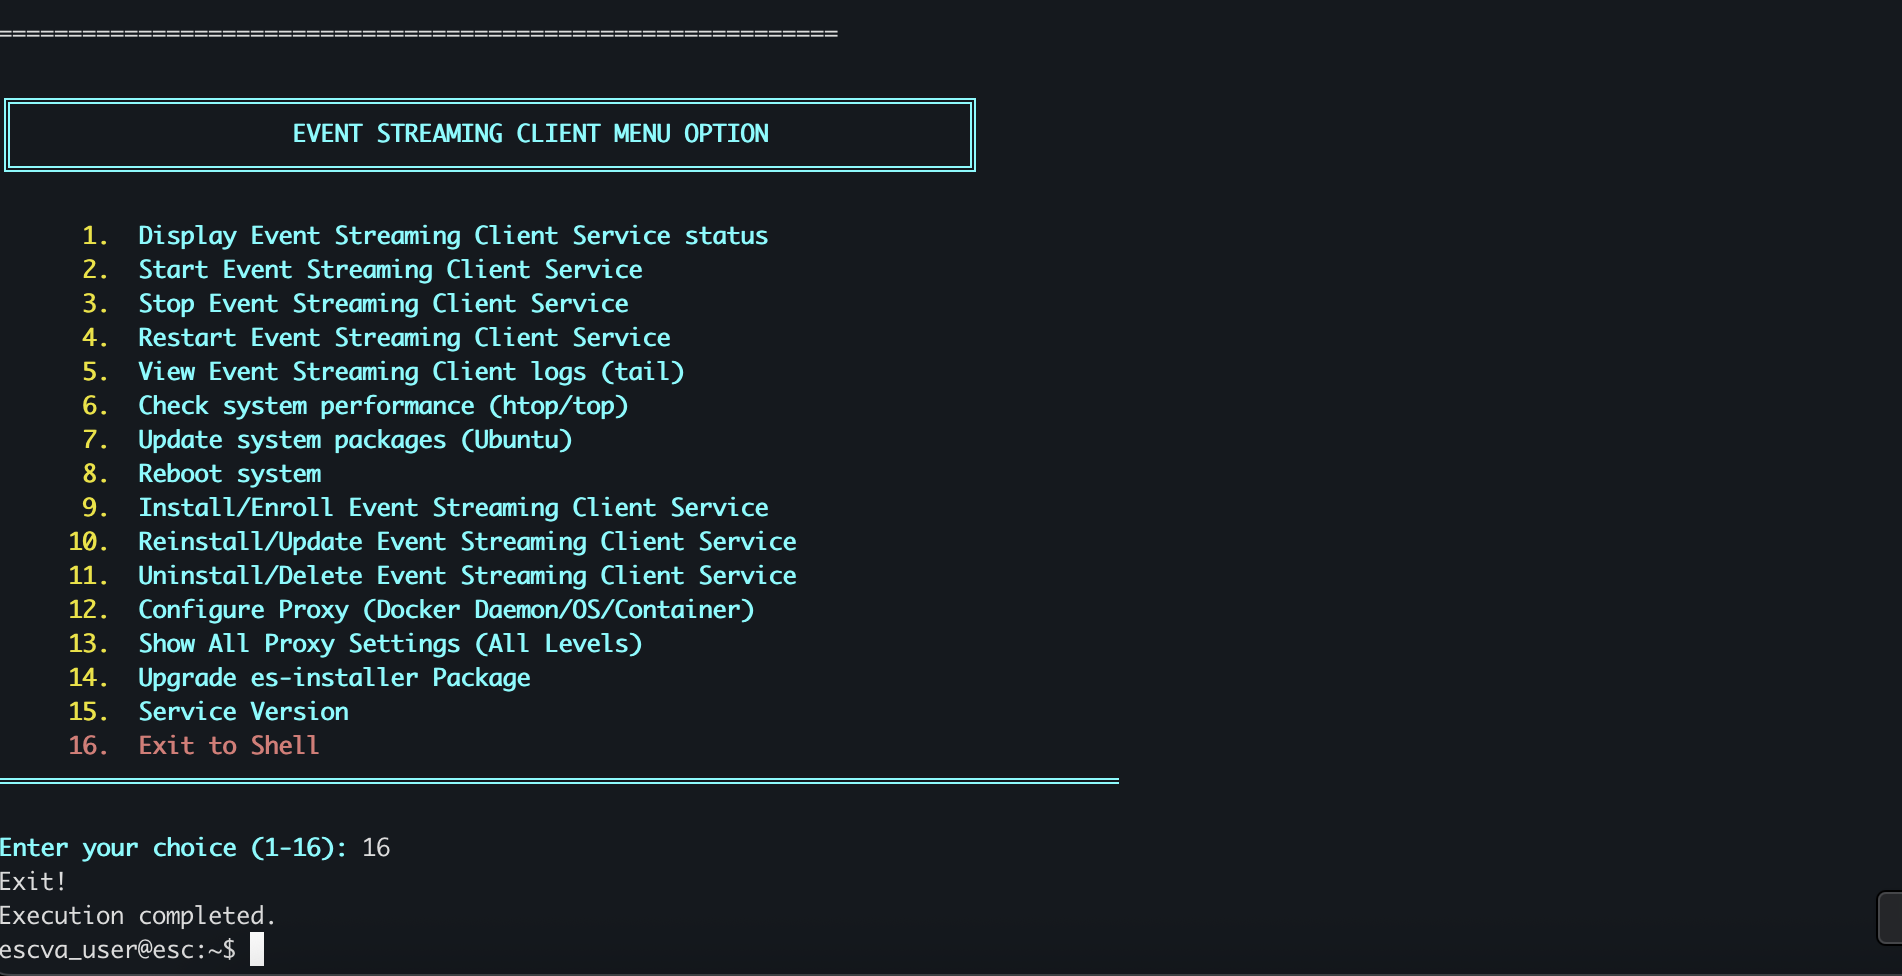
- Use Option 16 to exit to the command shell.
Troubleshooting
Issue | Recommended Action |
|---|---|
Connection Refused | Check Proxy settings. |
Authentication Failed | Verify JWT Token expiration. |
After completion, verify the service status by selecting Option 1 – Check Streaming Client Status.