

To complete the configuration using the manual upload, you need a user with write access to the Exact Data Match Module.
The New Exact Match allows users to manually upload a CSV file (Single file in one attempt) and share the hashes with a destination configuration. For this, the destination configuration can be either the Netskope Exact Data Match Plugin or the Netskope EDM Forwarder/Receiver Plugin (with Type set to Forwarder only).
Click play to watch a video.
Configure a New Exact Match
-
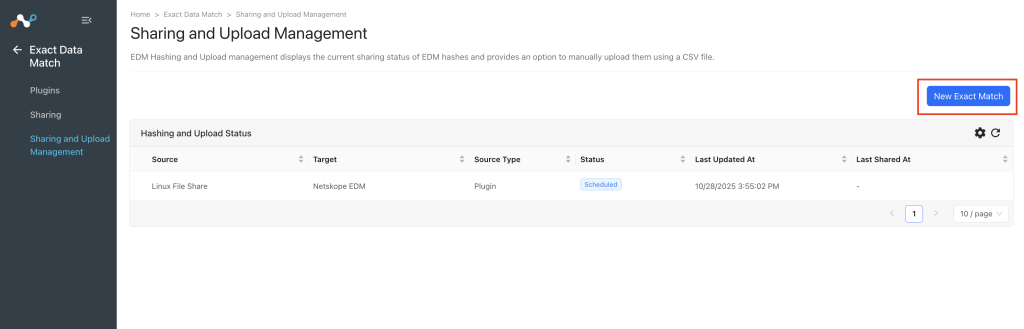
Go to Exact Data Match > Sharing and Upload Management.
-
Click New Exact Match.
-
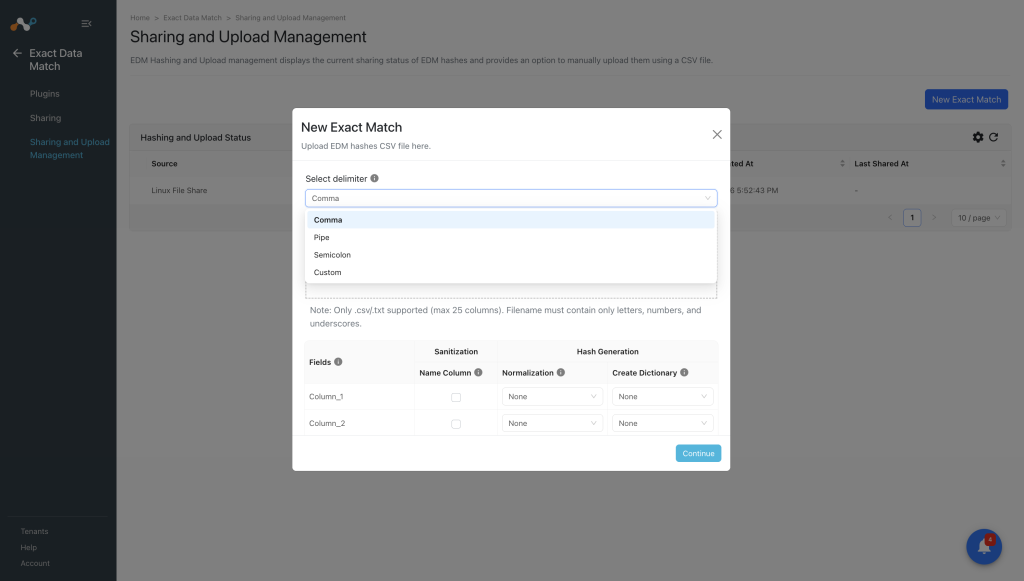
Select delimiter: Select the delimiter used in your file before uploading. This is essential for correct parsing of the file. Also please validate the columns listed in the table.
-
Click Browse and select a CSV file. The header value present in the selected CSV will be shown as Fields.
-
After the CSV file has been selected successfully, you can perform following actions as per your needs:
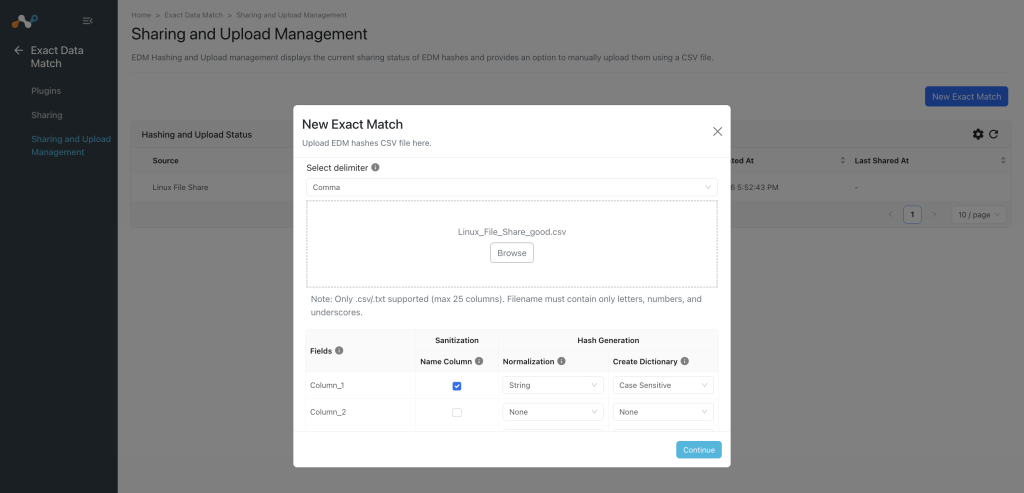
- Sanitization (Name Column): Sanitize the content by checking the Name Column checkbox. (Default: Unchecked)
The Sanitization Process performs the following actions:- One character: The cell will be marked as invalid if it contains only one character.
- Digits: Cells containing digits will be marked as invalid.
- Stopwords: Cells that match a stopword from the list will be marked as invalid (This works only if the “Remove stopwords” checkbox is checked).
- Non-alphanumeric characters: Remove all special characters to validate the cell.
- Hash Generation: Divided into two actions, Normalization and Create Dictionary.
- Normalization: Select the value from dropdown to normalize the data value (Default: NONE). Number normalizations ignore characters such as dots, dashes and spaces. For example, a number such as 123-45-6789 or 123 45 6789 will be treated as 123456789. A string normalization ignores the case sensitivity of the letters.
- Create Dictionary: Select a value from the dropdown to create dictionary of unique values for selected field that can be used in DLP rule in the Netskope Tenant. (Default: None)
Use the Create Dictionary option only when necessary, as this operation is resource-intensive and may impact system performance. Choose this option thoughtfully for optimal efficiency.
- Sanitization (Name Column): Sanitize the content by checking the Name Column checkbox. (Default: Unchecked)
-
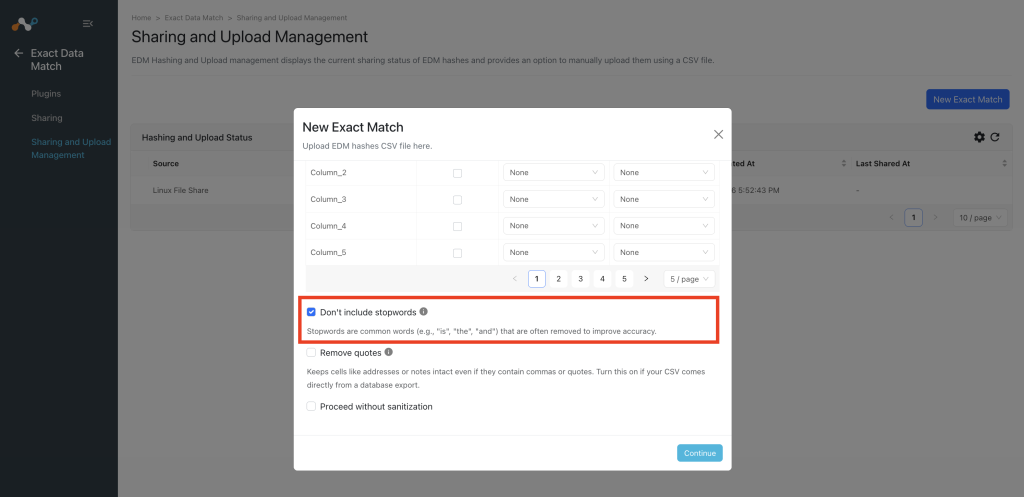
Remove Stopwords: Check if you want to remove certain stopwords as part of the sanitization process. (Default:Unchecked) Ensure that Name Column is checked for the applicable field to reflect the changes.
-
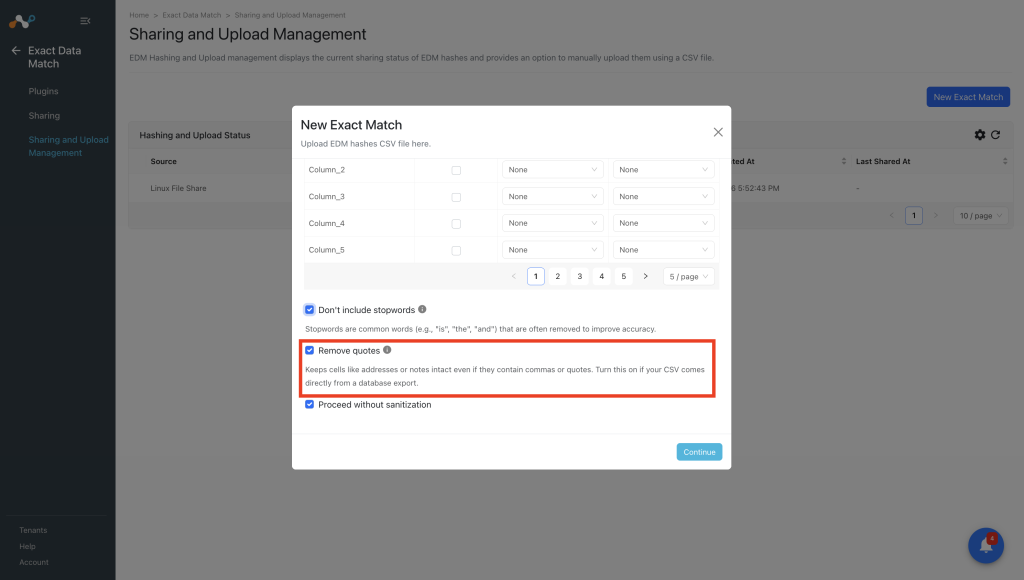
Remove quotes: Keeps values with commas or quotes together (like addresses: “123 Main St, Apt 4B”). Helps when uploading database exports that may include empty/null fields.
-
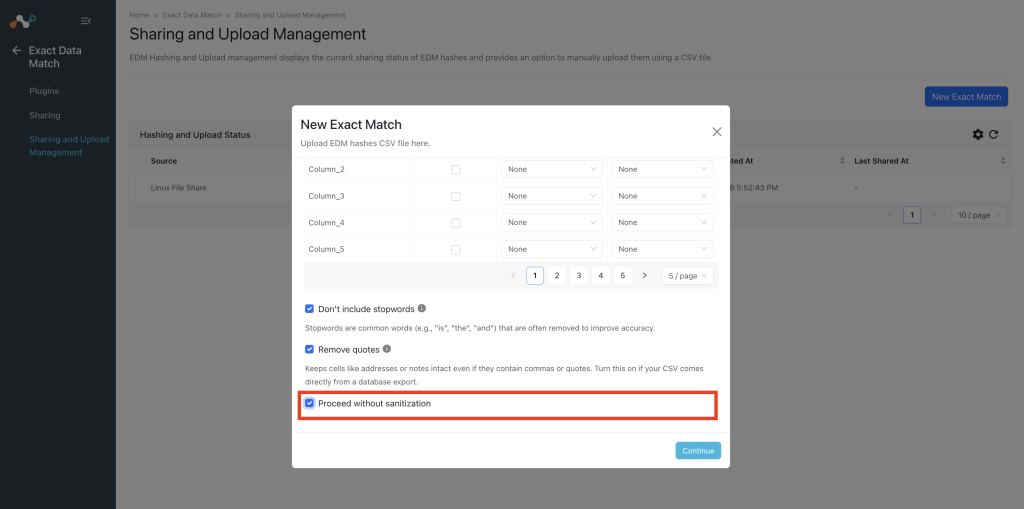
Proceed without sanitization: By unchecking this option, the sanitization process will be applied before the hash generation step (Default: Checked).
-
Click Continue.
-
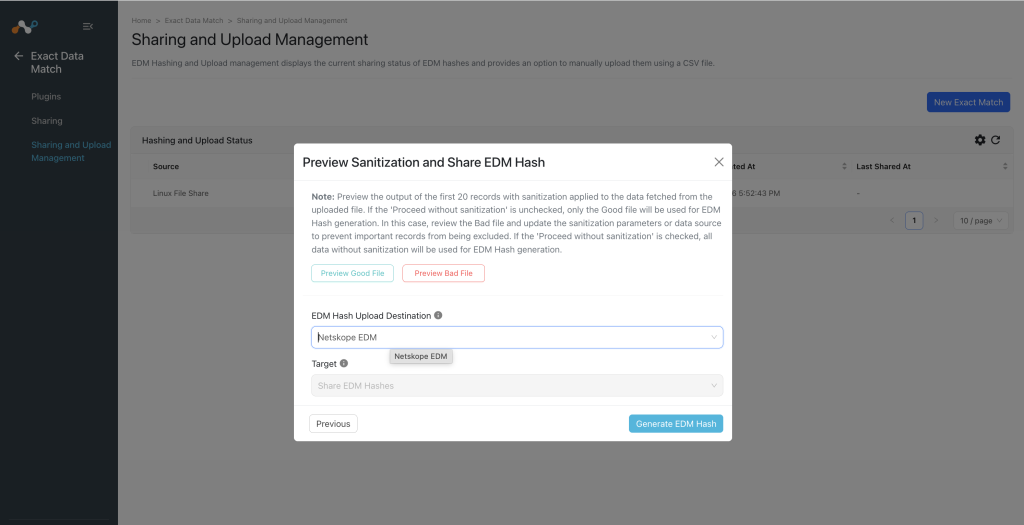
Click Preview Good File or Preview Bad File to preview the sanitization result. You can preview the sanitized output of the first 20 records.
-
EDM Hash Upload Destination: Select appropriate destination configuration to push the hashes.
-
Target: Auto-selected value, based on the destination configuration selected.
-
Click Generate EDM Hash to proceed and save the upload.


Monitoring the Status of Manually Uploaded Files:
View the status of uploaded files to monitor their processing and ensure successful completion.
- Go to Exact Data Match > Sharing and Upload Management.
- The status values are as follows:
- Scheduled: Indicates that the sharing has been configured and the pull and push operation are still waiting in the queue for processing.
- Generating Hash: Indicates that the generating hash process has been started. At this stage, in the background fetching > validating > sanitization (if opted for) > generating hash staged will be included.
- Uploading Hash: Indicates that uploading hash to the destination configuration has been started.
- Upload Completed: Indicates that hashes are uploaded to the destination configuration.
- Checking Apply Status: At this stage, checking the apply status of hashes to the destination configuration.
- Apply In Progress: This represents that the hash process is started and in progress state on the destination.
- Completed: Indicates that hash file has been pushed successfully to destination configuration.
- Failed: Indicates that the final result of the action has been failed to execute. The actions are Generating Hash, Uploading Hash, and Checking Apply Status.
