

The Help link in the left panel provides access to product Help documentation and also API documentation. Users who have API access will be able to see the API docs link.

All API documentation is in Swagger format. For CE API details, refer to the CE API Swagger Documentation.

Authorize in the API Docs
Before you try an API from the API docs, authorize with your Cloud Exchange credentials. You can authorize with your Cloud Exchange username and password, or with an API token. Each API call you run has the permissions of the account you authorize with.
- To authorize with a username and password, use a local Cloud Exchange user. If you sign in to Cloud Exchange with SSO, authorize with an API token instead.
- A new user must sign in to Cloud Exchange and change the default password before they can authorize in the API docs.
Authorize with a Username and Password
- Click Help at the bottom of the left panel, and select API docs. The API docs open in a new browser tab.
- Click Authorize at the top right of the page.
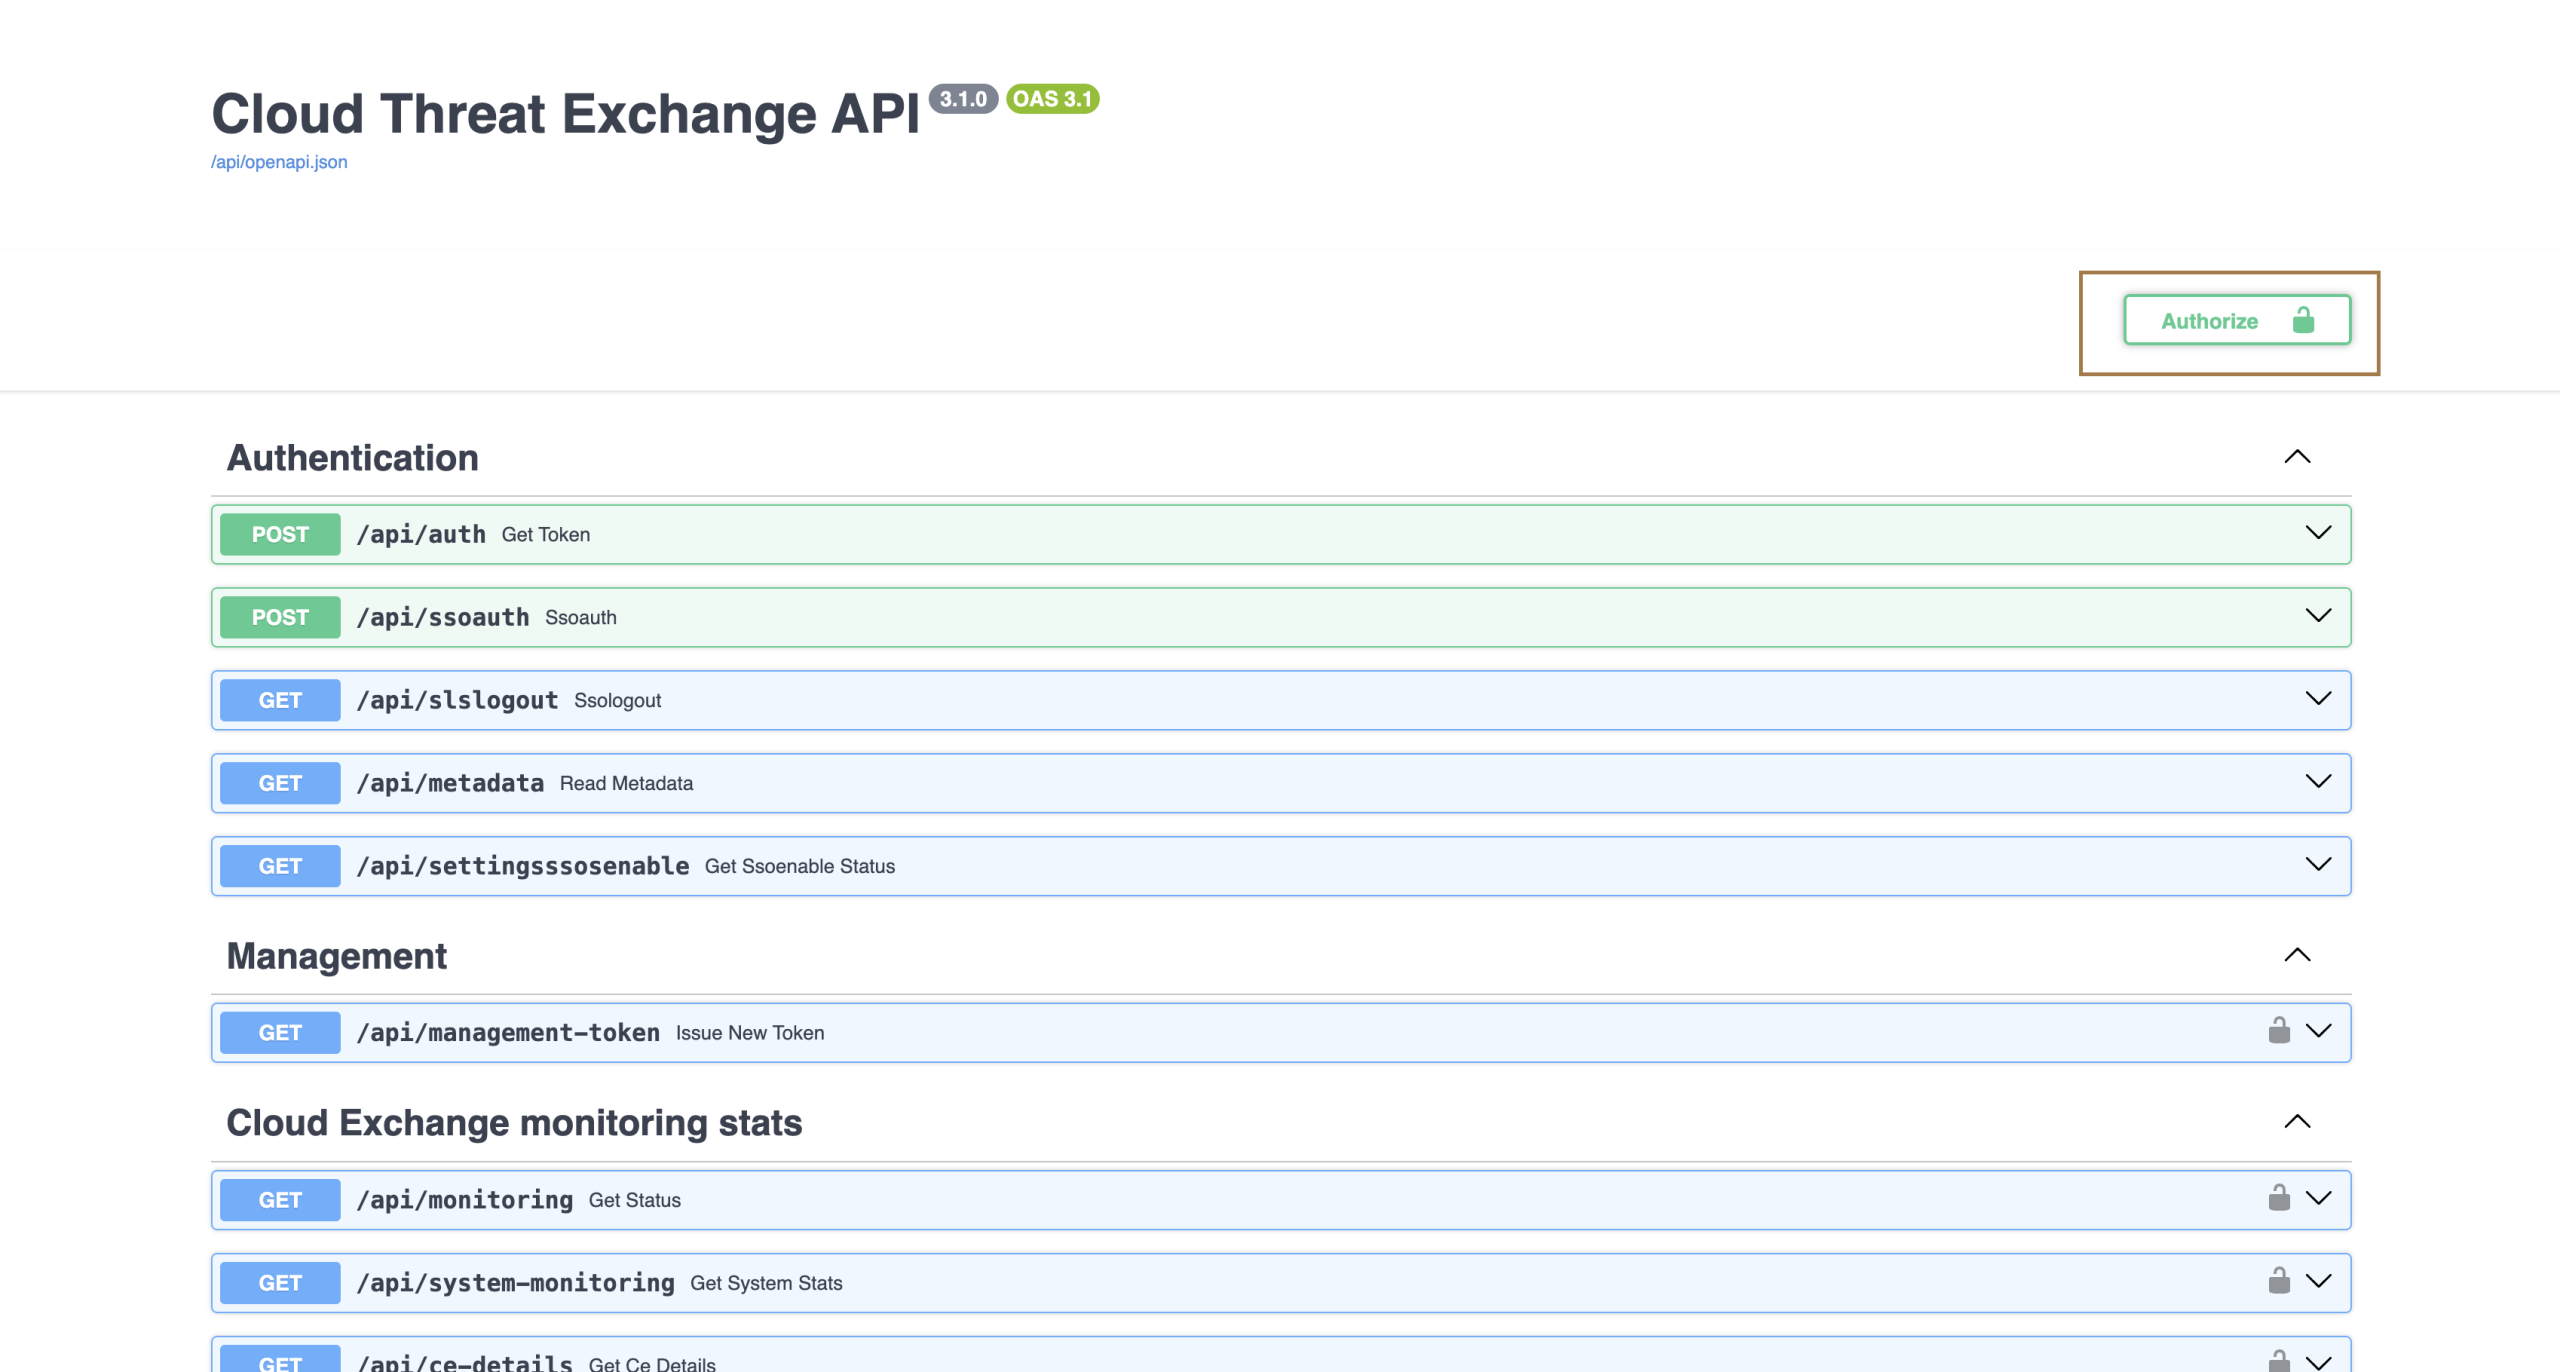
- In the Available authorizations dialog, go to the OAuth2PasswordBearer (OAuth2, password) section and enter your credentials:
- Username: The username you use to sign in to Cloud Exchange.
- Password: The password for that user.
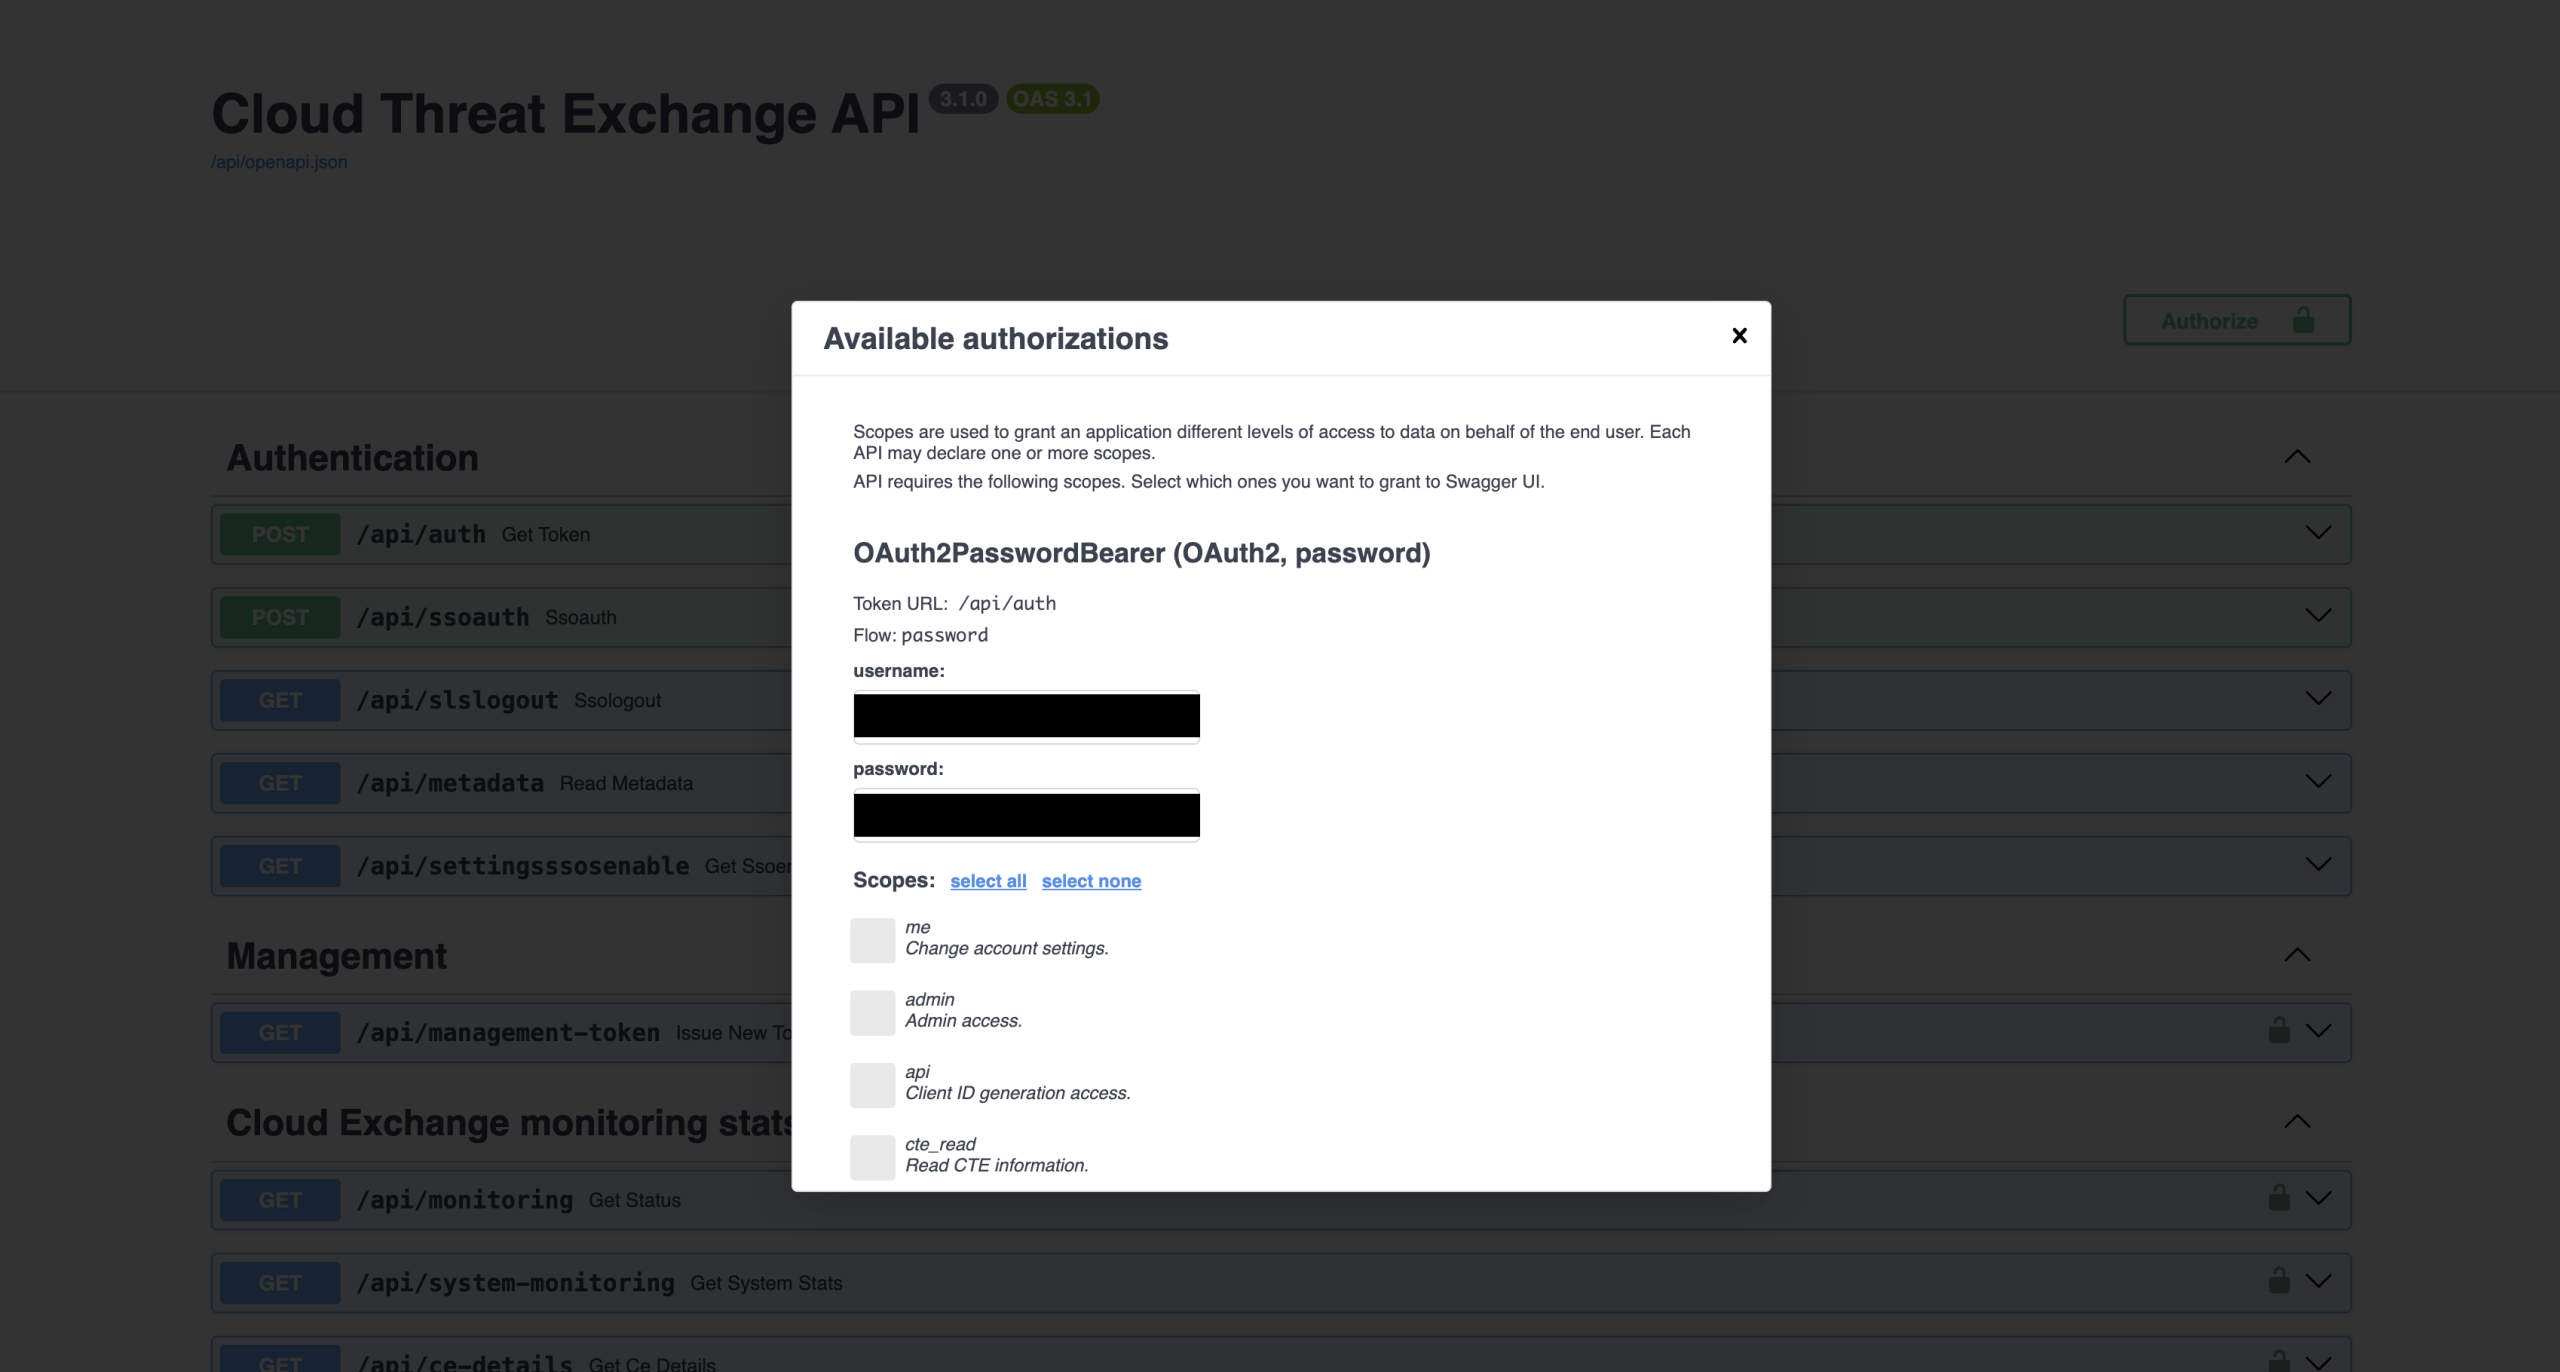
- Under Scopes, select the scopes you need. Keep all scopes cleared to authorize with every permission your account has. Note that if you select a scope your account does not have, the authorization fails.
- Click Authorize. The section shows Authorized, and the lock icons next to the endpoints appear closed.
Important
Failed attempts in the API docs count toward the sign-in lockout for your user. After five failed attempts, you cannot sign in to Cloud Exchange or the API docs until the time shown in the error message passes.
- Click Close.
- Expand the endpoint you want to call, and click Try it out.
- Enter the parameters, and click Execute. The result appears under Responses.
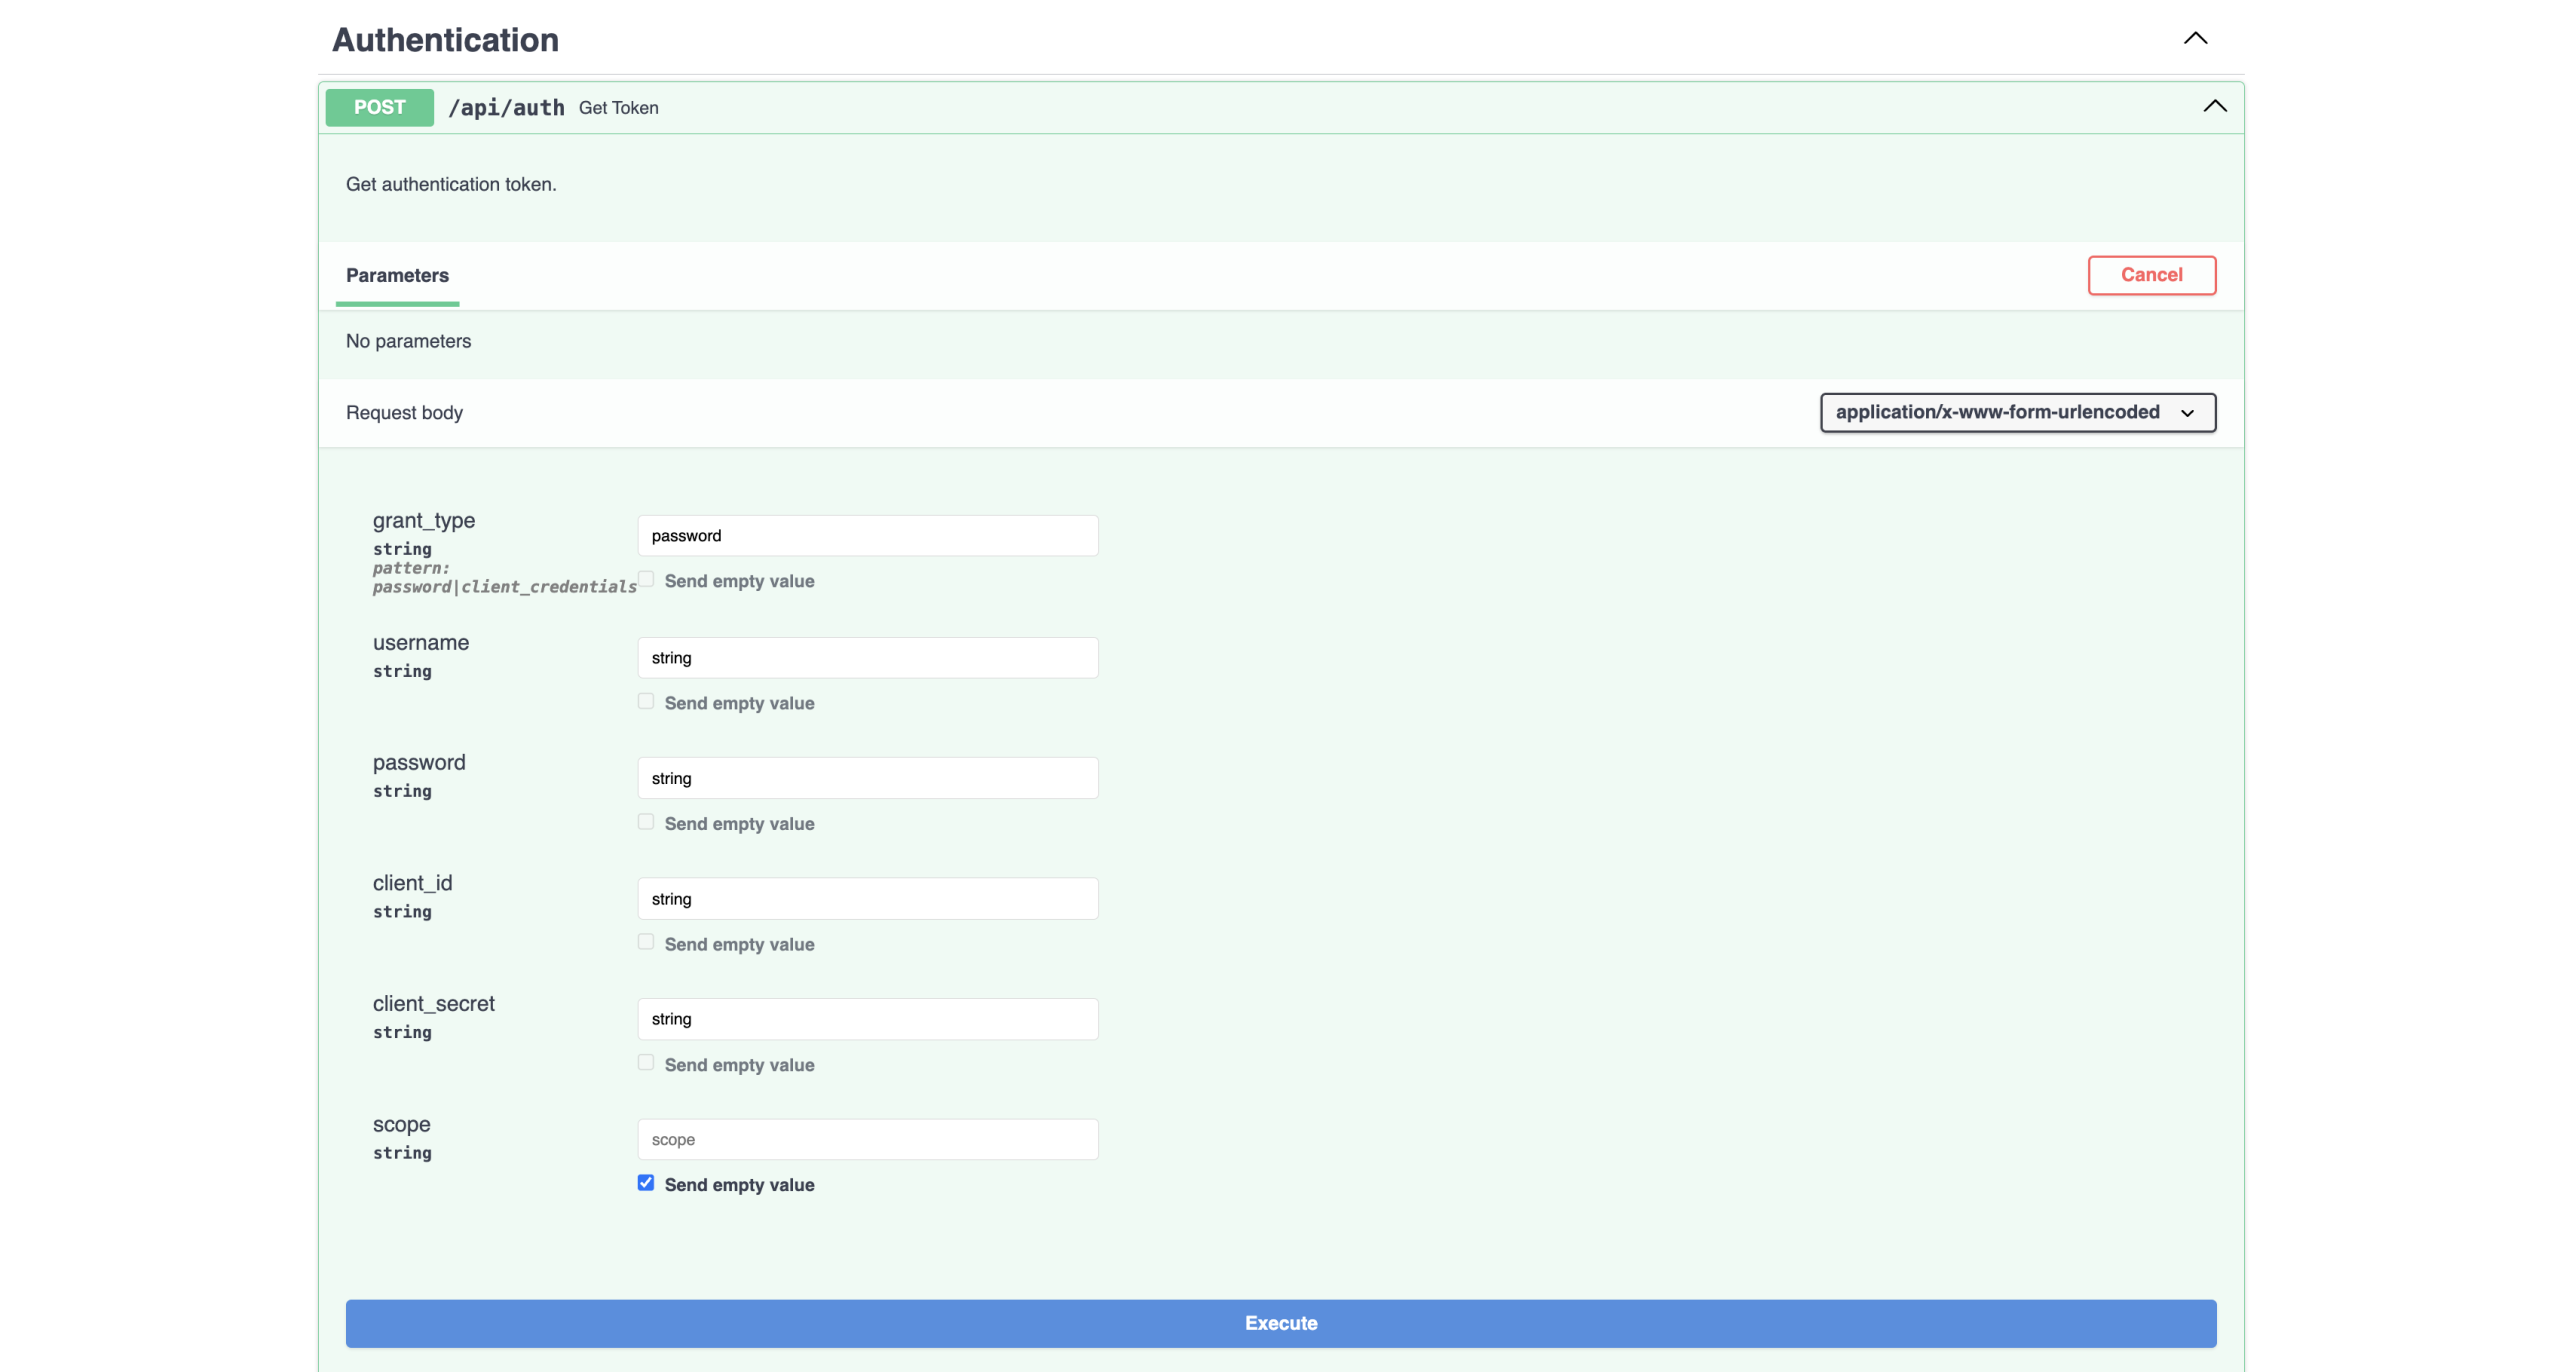
The authorization lasts 2 hours. After that, API calls return Could not validate credentials. To continue, click Authorize, click Logout, and authorize again.
Authorize with an API Token
Starting with Cloud Exchange v7.0.0, you can also authorize in the API docs with the Client ID and Client Secret of an API token. To create a token, see API Tokens.
- In the API docs, click Authorize at the top right of the page.
- Go to the OAuth2PasswordBearer (OAuth2, clientCredentials) section and enter the token details:
- Client ID: The Client ID of the API token.
- Client Secret: The Client Secret you copied when you created the token.
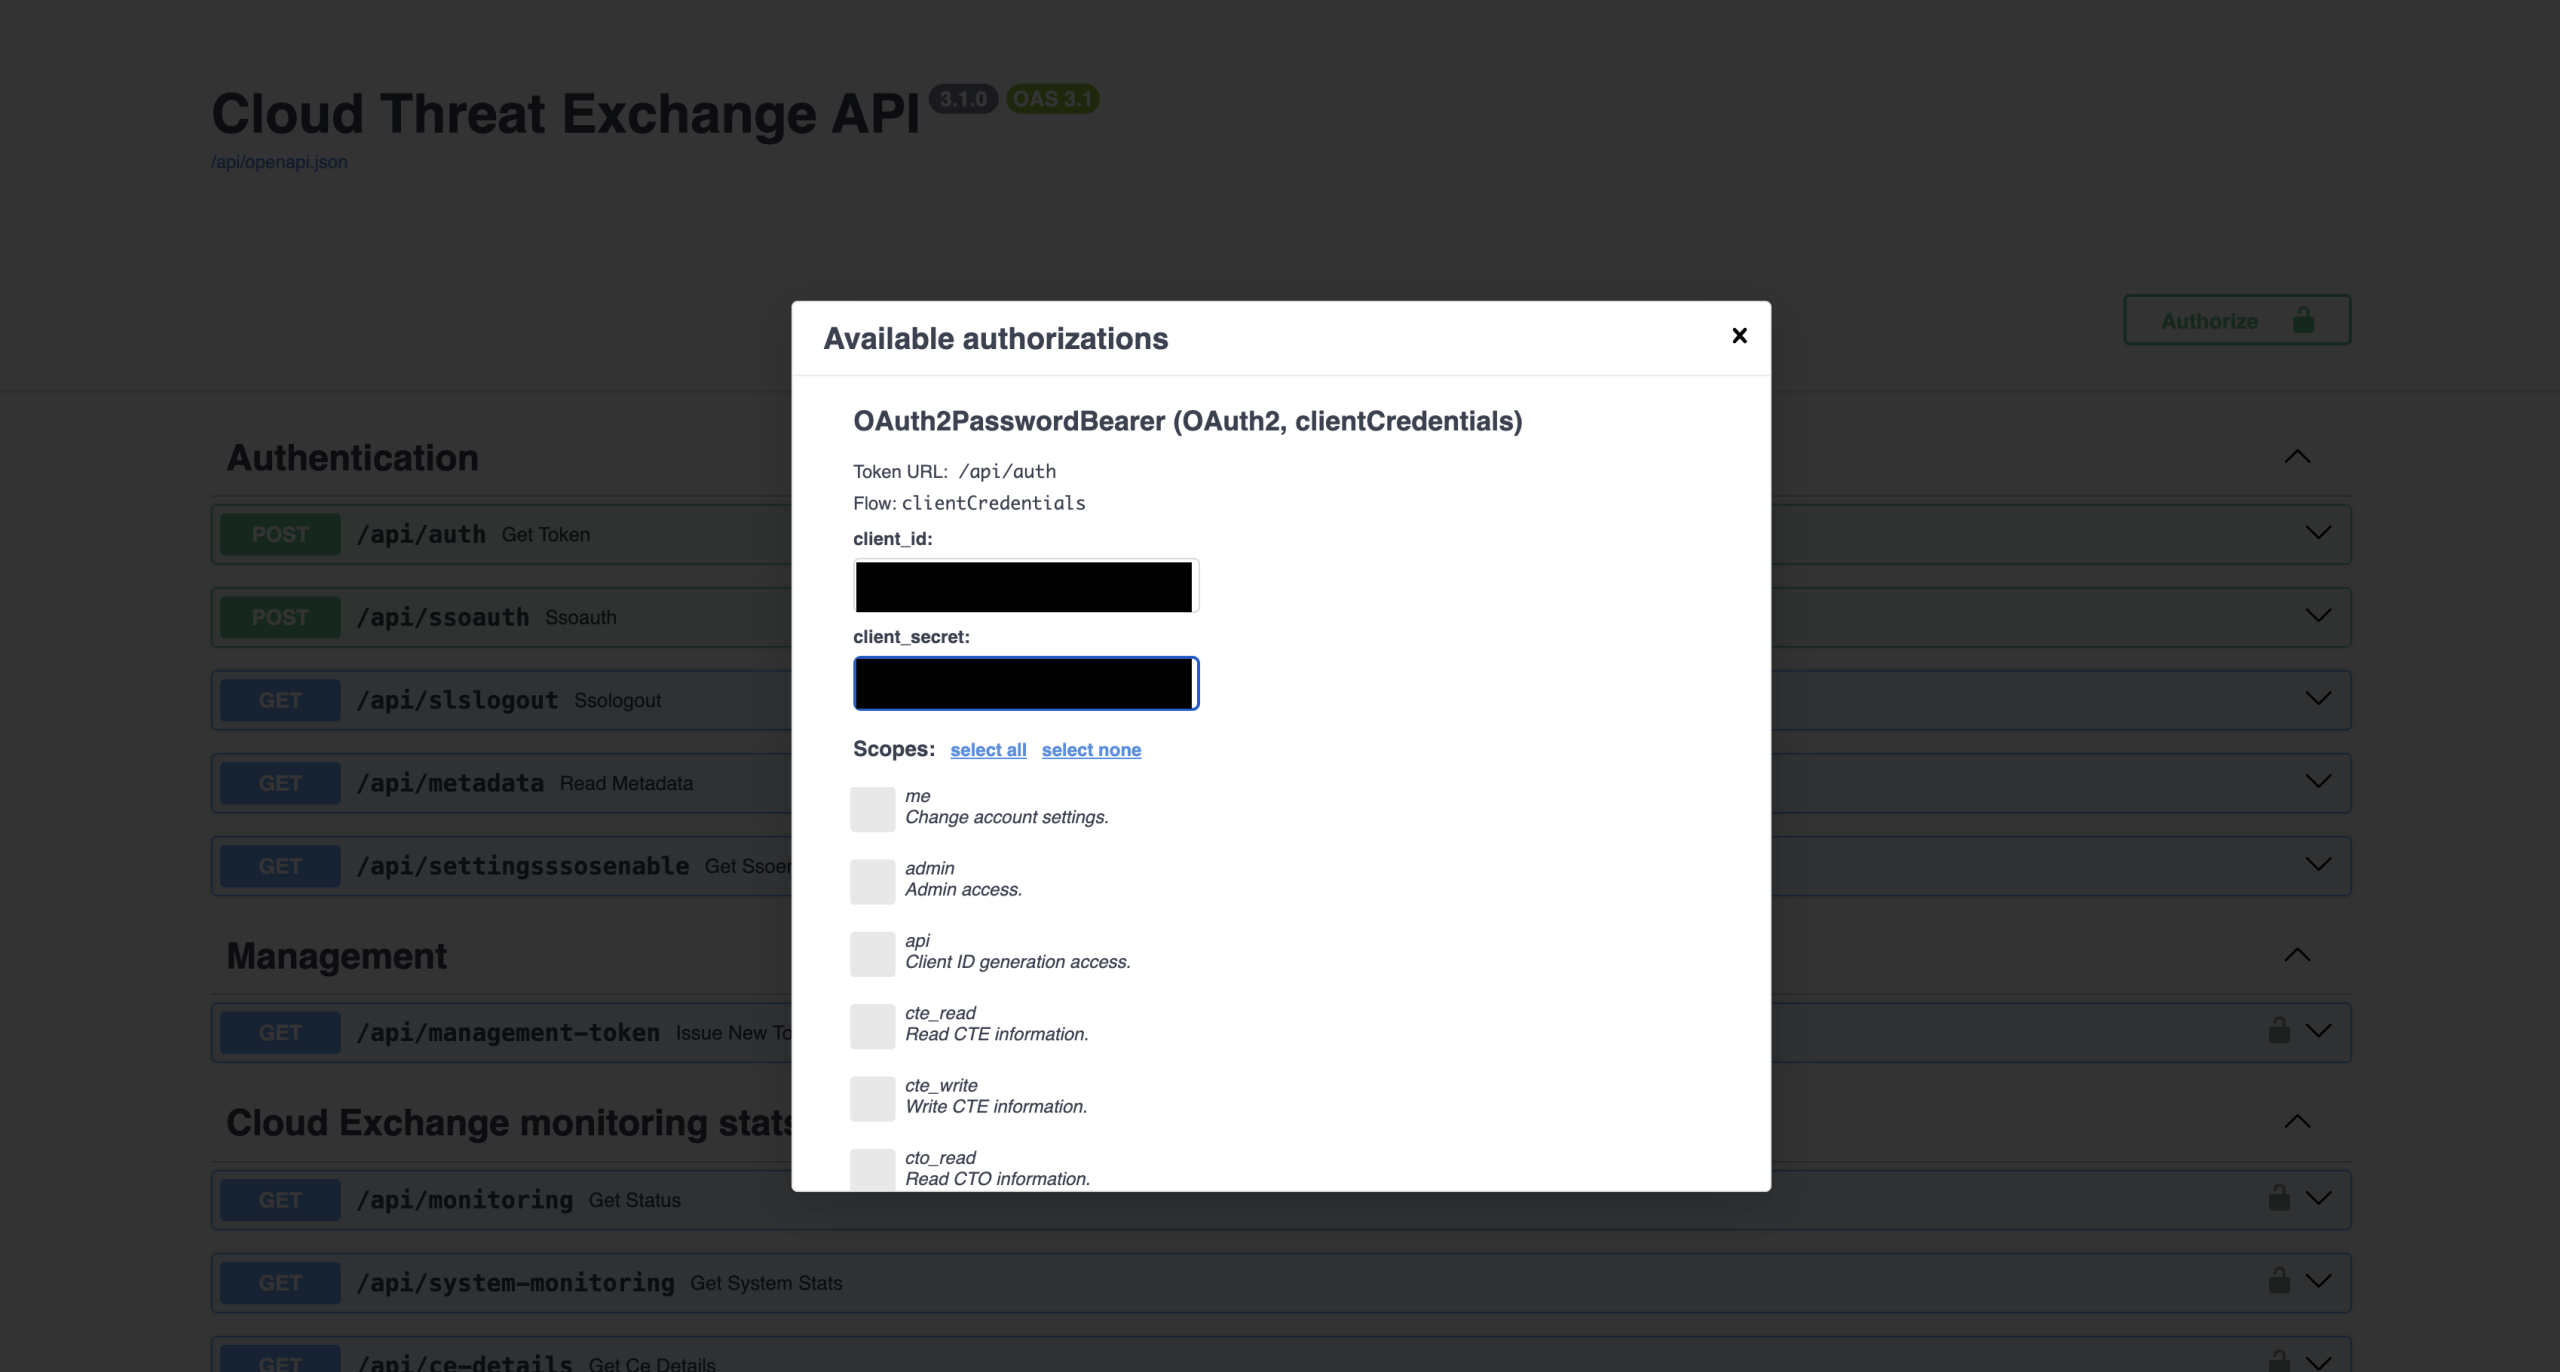
- Under Scopes, select the scopes you need, or keep all scopes cleared to use every permission of the token.
- Click Authorize, and then click Close. You can now try the endpoints as described in the previous section.