

Overview
You can configure Netskope DSPM to automatically sync with your Okta Universal Directory. Doing so allows you to control which specific employees are imported, map their directory attributes (both default & custom) to Netskope DSPM fields, and leverage these employee-specific values to trigger policies.
This sync can be a one-time activity, or scheduled to refresh Netskope DSPM data on a regular cadence.
Examples of alerts possible via this feature include:
- Ensure no one in the Marketing department is running queries which return PII.
- Identify specific types of users selecting high volumes of records.
- Closely monitor the behavior of employees on PIP or have given notice.
- Automatically notify your security teams when data usage is detected for terminated employees.
More information on Okta Universal Directory is available here.
Step 1: Configure Initial Sync
-
Log into Netskope DSPM as any user with the Admin role.
-
Navigate to User Identity > Employee Management.
-
On the top-right of the screen, click Connect to Directory Service.
If a directory service is already connected, the Connect to Directory Service button will not be displayed. Instead, you will see a Directory Service widget with a disconnect icon. To reconfigure, click the disconnect icon to remove the existing connection, and the Connect to Directory Service button will reappear. -
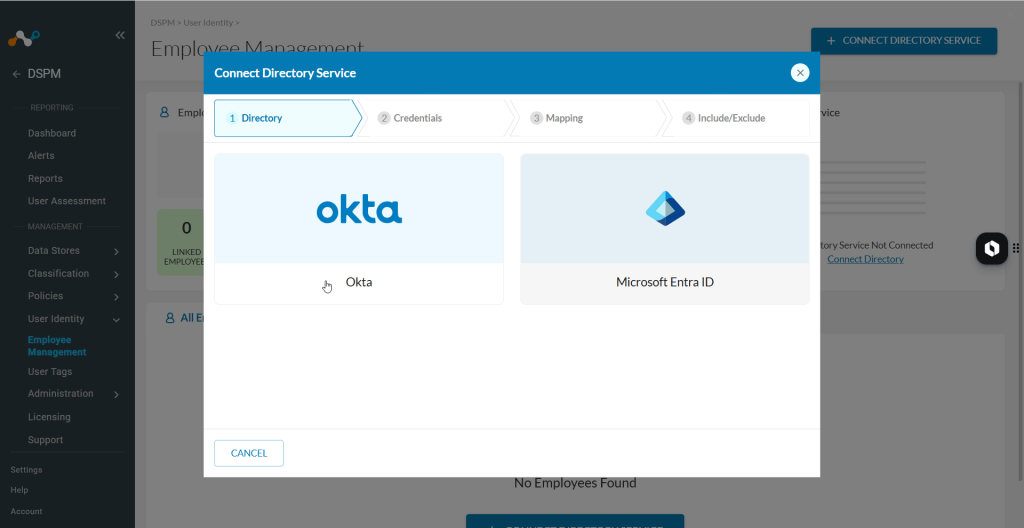
When the Directory Configuration modal is displayed, select Okta as your directory provider.

Step 2: Configure the Directory Integration
-
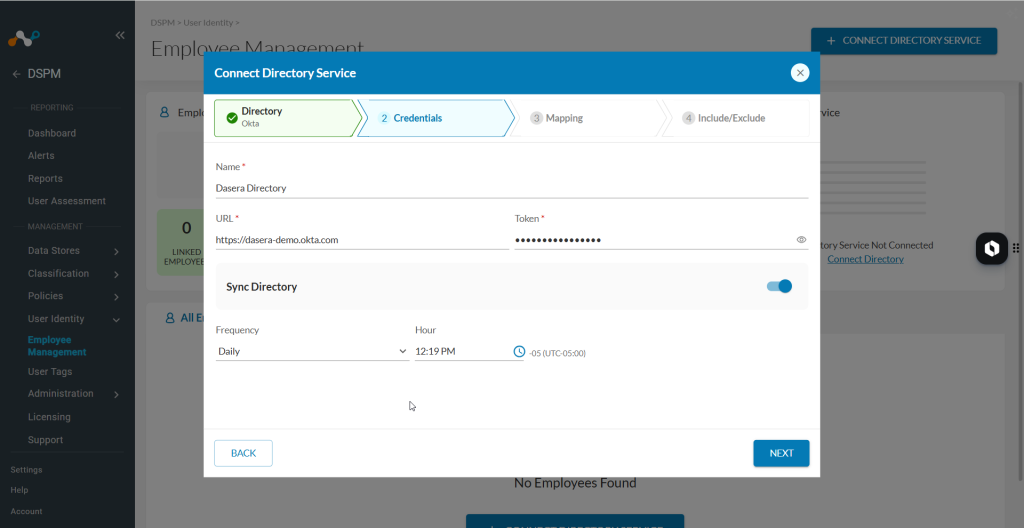
Provide the Netskope DSPM platform with details on where & how to access your Okta Universal Directory. On the Provide Credentials tab, provide the following information:
- Name: This is used within Netskope DSPM only and can be any friendly name of your choosing.
- URL: Your Okta Universal Directory’s URL endpoint.
- Token: The authorization token for this specific integration, which you can generate within the Okta console under Security > API.
-
Configure Sync Schedule: This includes optionally configuring Netskope DSPM to regularly sync with your Okta Universal Directory, so the former is always up-to-date with fresh employee data, including newly-discovered Okta employees.
- Note: If you do not wish to regularly sync your Okta Universal Directory, you can deselect the Sync Enabled toggle. Otherwise, configure the cadence & timing of your choosing.
-
Click the Next button to see the Mapping tab.

Step 3: Map Okta Attributes to Netskope DSPM Fields
On the Mapping tab, you can define mappings between directory attributes and Netskope DSPM fields. All Okta attributes, both default and custom, are available for mapping. For each discovered Okta attribute, the Netskope DSPM Directory Field Name auto-populates to match. You can override these matches by selecting different source Okta attributes.

Best practice when mapping between systems:
- Map all Expected Database Usernames: If your Okta directory contains a database user name field or Expected DB Usernames field, we recommend mapping it to the Expected Username field. Include all possible Username permutations (comma-separated) in the Okta attribute for Expected DB Usernames, eg.
gwashington, washington, george. This way, Usernames can be leveraged within Netskope DSPM for the following downstream activities:- Linking your directory employees to the Usernames, which Netskope DSPM discovers while scanning your Data Stores.
- Over-privilege analysis for said linked employees.
- Triggering the creation of Alerts & Tasks by matching the database and/or employee user name within Policy Conditions.
- Be sure to map employee status: This way, its value can also be leveraged within Netskope DSPM to trigger the creation of Alerts & Tasks, such as flagging the continued activity of terminated employees.
- Remove unnecessary mappings: If the Netskope DSPM destination field is not required (marked with a red asterisk) or used in your Policy Conditions, we recommend you remove its mapping entirely by clicking the Delete icon.
- Do not map your Okta attributes more than once.
- Once your mappings are set, click the Next button.
Step 4: Include / Exclude Specific Employees
After setting up mapping, you will use the Include/Exclude tab to define which employees will be synced to Netskope DSPM.
Within Okta, you can group users based on common or shared traits. In turn, you can configure Netskope DSPM to import all employees, or just those within specific Okta Groups. (For example, you might organize all employees with database access into an Okta Group named “Data Owners”, then configure Netskope DSPM to import just those privileged employees).
There are two methods you can use to sync employee groups from your Okta Universal Directory, manual sync (by selecting Sync Groups) or via CSV upload. Manual syncing supports up to 50,000 Okta Groups, and CSV upload supports unlimited Okta Groups. We recommend using manual sync for less than 1000 groups, and CSV upload for more than 1000 groups.

Method A: Sync Groups
- Click Sync Groups. Close the modal and sync will run in the background.
- You will be notified when groups are loaded and ready to select.
- The left side displays your Okta Group picklist. Use the selectors and include and exclude buttons to decide which Okta Groups to include.
- If you wish to import all, select and include “Everyone”.
- Otherwise, select one or more Okta Groups. (For example above, only the “Netskope DSPM-users” group members will be imported into Netskope DSPM).
- Once complete, click the Save button.

Method B: CSV Upload
-
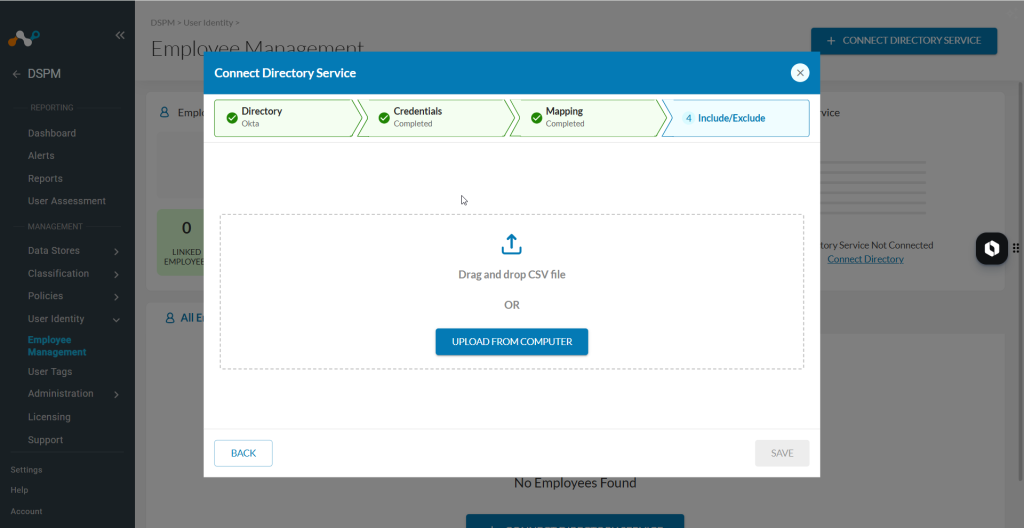
Click Upload CSV.
-
Drag and drop or upload your CSV file. The file must meet the following requirements:
-
The file must use the
.csvextension and not exceed 5 MB. -
List one group name per row with no header row and no additional columns.
- Note: If you export groups using the Okta API, the response may include additional fields. Extract only the group display names and save them in a plain-text file with one name per row and a
.csvextension. (For guidance on exporting groups, read How to export all Groups using Okta API).
- Note: If you export groups using the Okta API, the response may include additional fields. Extract only the group display names and save them in a plain-text file with one name per row and a
-
The file should only contain the specific Okta Groups you would like to be included in Netskope DSPM’s Employee Management feature.
-
Any duplicate Okta Groups will be automatically de-duped during the sync.
-
-
Click Save and the sync will run and complete in the background.
Example of a correctly formatted CSV file:
Everyone
Engineering
Marketing
Finance
Sales
US_Emp
CA_Emp
MX_Emp

Step 5: Verify and Manage Synced Employees
You’ll see the Success banner once your Okta Groups have successfully uploaded and all uploaded groups will automatically import and sync to the Employee Management page.
Once complete, the Okta Configuration modal will auto-dismiss, and your included Okta employees will now be listed in Netskope DSPM’s Employee Management screen, specifically within the All Employees tab.
- This will include any new columns from your mappings.
- Employees synced from Okta are kept separate from any database users discovered by the Netskope DSPM platform.
Going forward, the employees listed in the Netskope DSPM Employee Management screen will reflect the matching Okta Group configurations and be refreshed after every scheduled sync. (More information on Okta Groups is available here.
Sync Behavior & Maintenance
Details on your sync schedule are displayed at the top of the Employee Management screen. To make changes to any portion of your configuration, click the Edit icon to once again display the Okta Configuration modal.

- Updates: Changes made within the source directory will be available within Netskope DSPM each time a sync is performed.
- Deletions: If you delete an employee within your directory, their corresponding record will still remain in Netskope DSPM, but it will be styled on-screen to provide an indication of this scenario.
- Removal: If you no longer wish to utilize the directory integration, you can remove it by clicking the Delete icon. Note that doing so will remove all employees previously brought over from Okta, which may affect other platform parts, such as triggering policies.
Limitations
At this time, current limitations include:
- You can connect to a single Okta Universal Directory.
- You can map a single database Username attribute.