

This topic describes how to configure SCIM user provisioning between Microsoft Entra ID and Netskope using the OAuth2 Client Credentials flow.
Previously, SCIM provisioning supported only the Bearer Token authentication method. Netskope now supports OAuth2 Client Credentials flow, which provides a more secure, machine-to-machine authentication method for entitling Microsoft Entra ID to work with Netskope.
Features
The Client Credentials Flow integration with Netskope offers the following capabilities:
-
Authentication Method: Supports
client_secret_basic, allowing the security level to match your organization’s use case. -
Token-based API Access: Issues bearer access tokens that downstream APIs and resource servers can validate and authorize against.
-
Auditability and Governance: Because each client has its own identity and credentials, access can be monitored, rotated, and revoked per token principal name for logging and access control.
Prerequisites
Before proceeding with the OAuth2 Client Credentials flow configuration, ensure you have:
-
Netskope tenant administrative access.
-
Access to a Microsoft Entra ID tenant with administrative privileges to manage Enterprise Applications.
Create an OAuth2 Service Account in Netskope
-
Log in to your Netskope tenant.
-
Navigate to Settings > Administration > Administrators and Roles > Service Account.
-
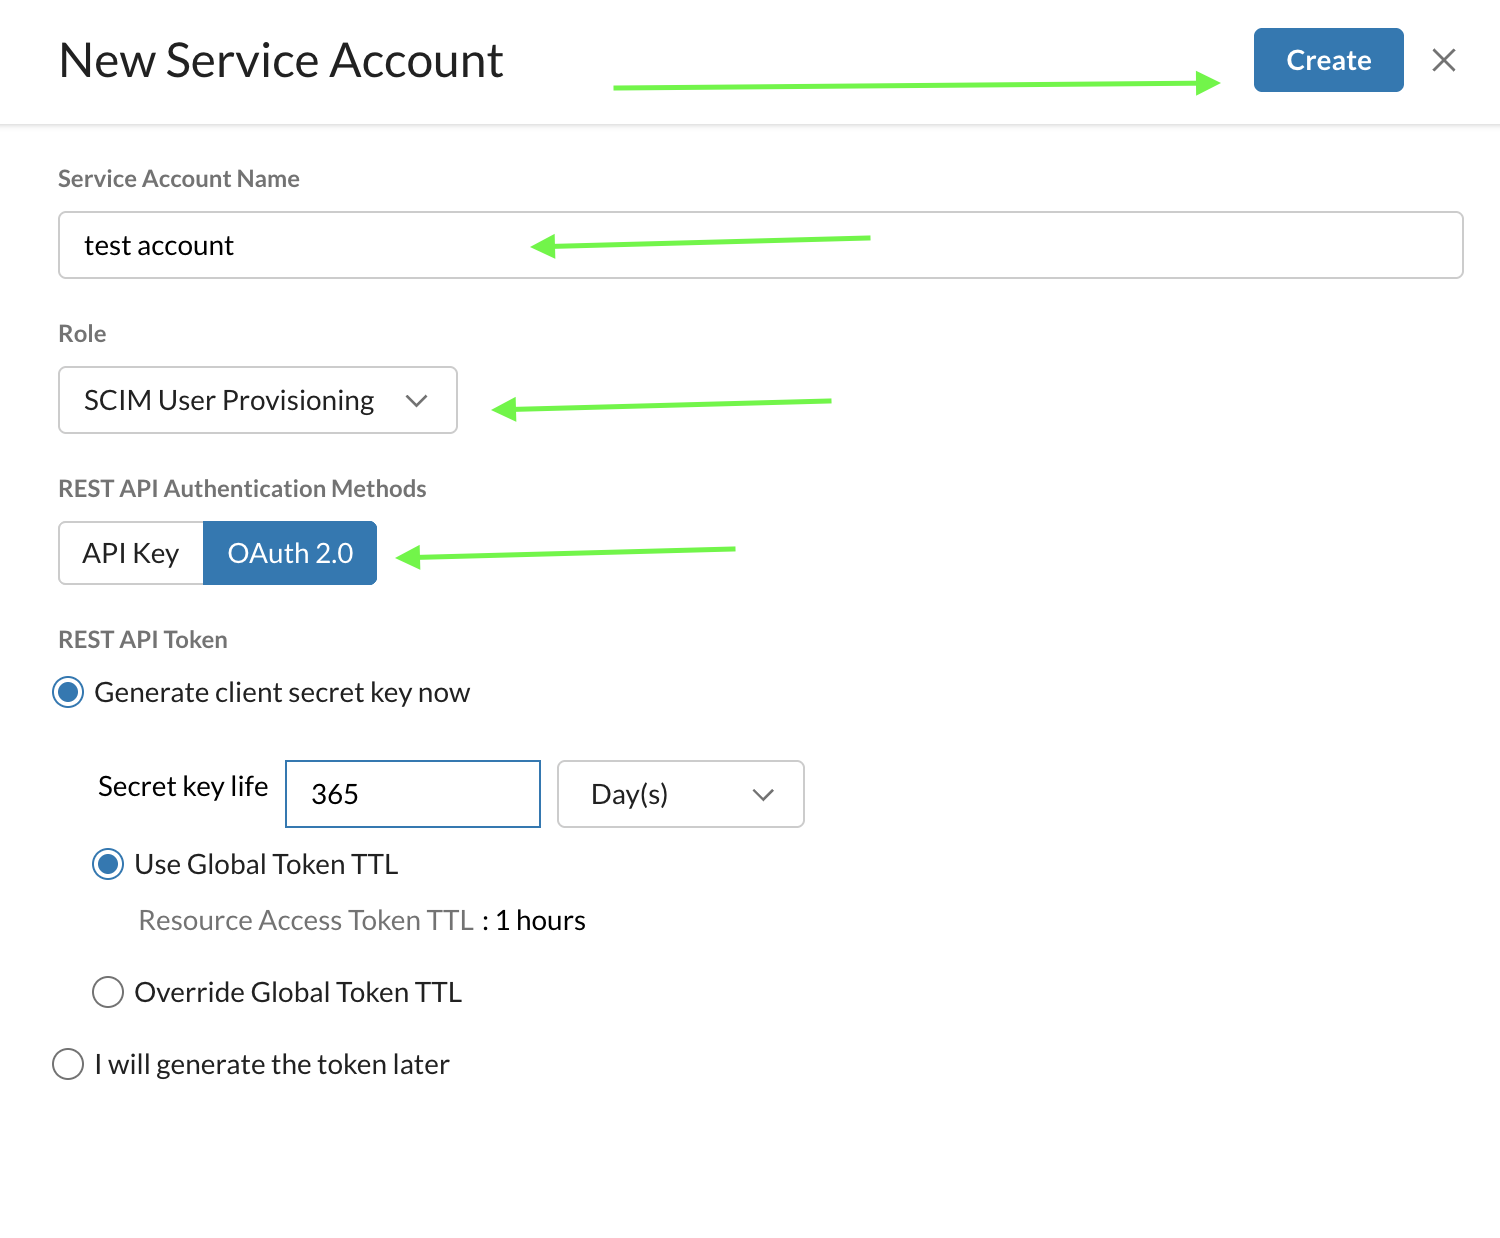
Click Add Service Account (or configure a new service account).
-
Enter the required details:
-
Select SCIM User Provisioning as the role.
-
Select OAuth 2.0 as the REST API Authentication Method.
-
Specify the validity period (in days) or select the desired Token TTL option.
-
-
Click Create.
-
Securely copy and store the generated Client ID and Client Secret. You will need these details when configuring Microsoft Entra ID.
Configure Provisioning in Microsoft Entra ID
-
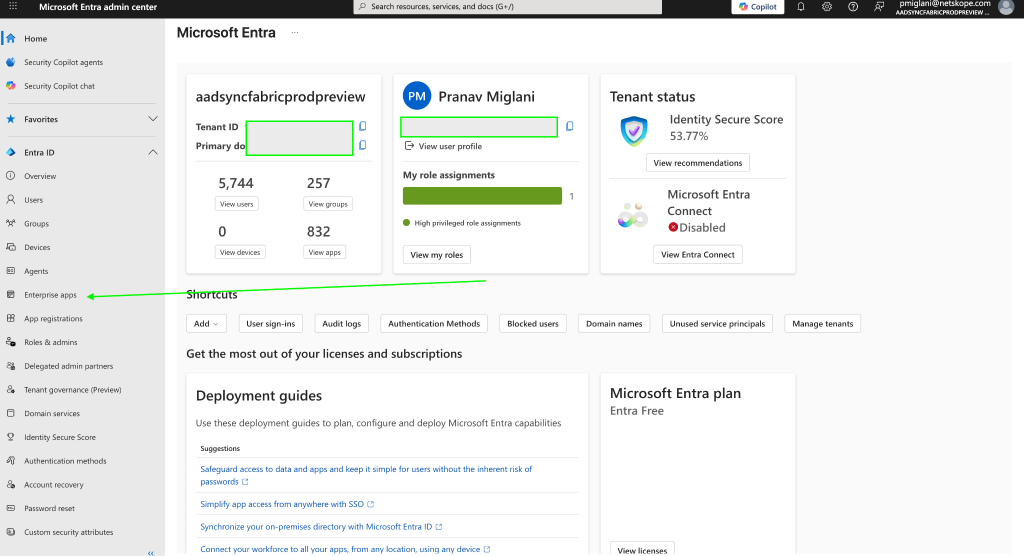
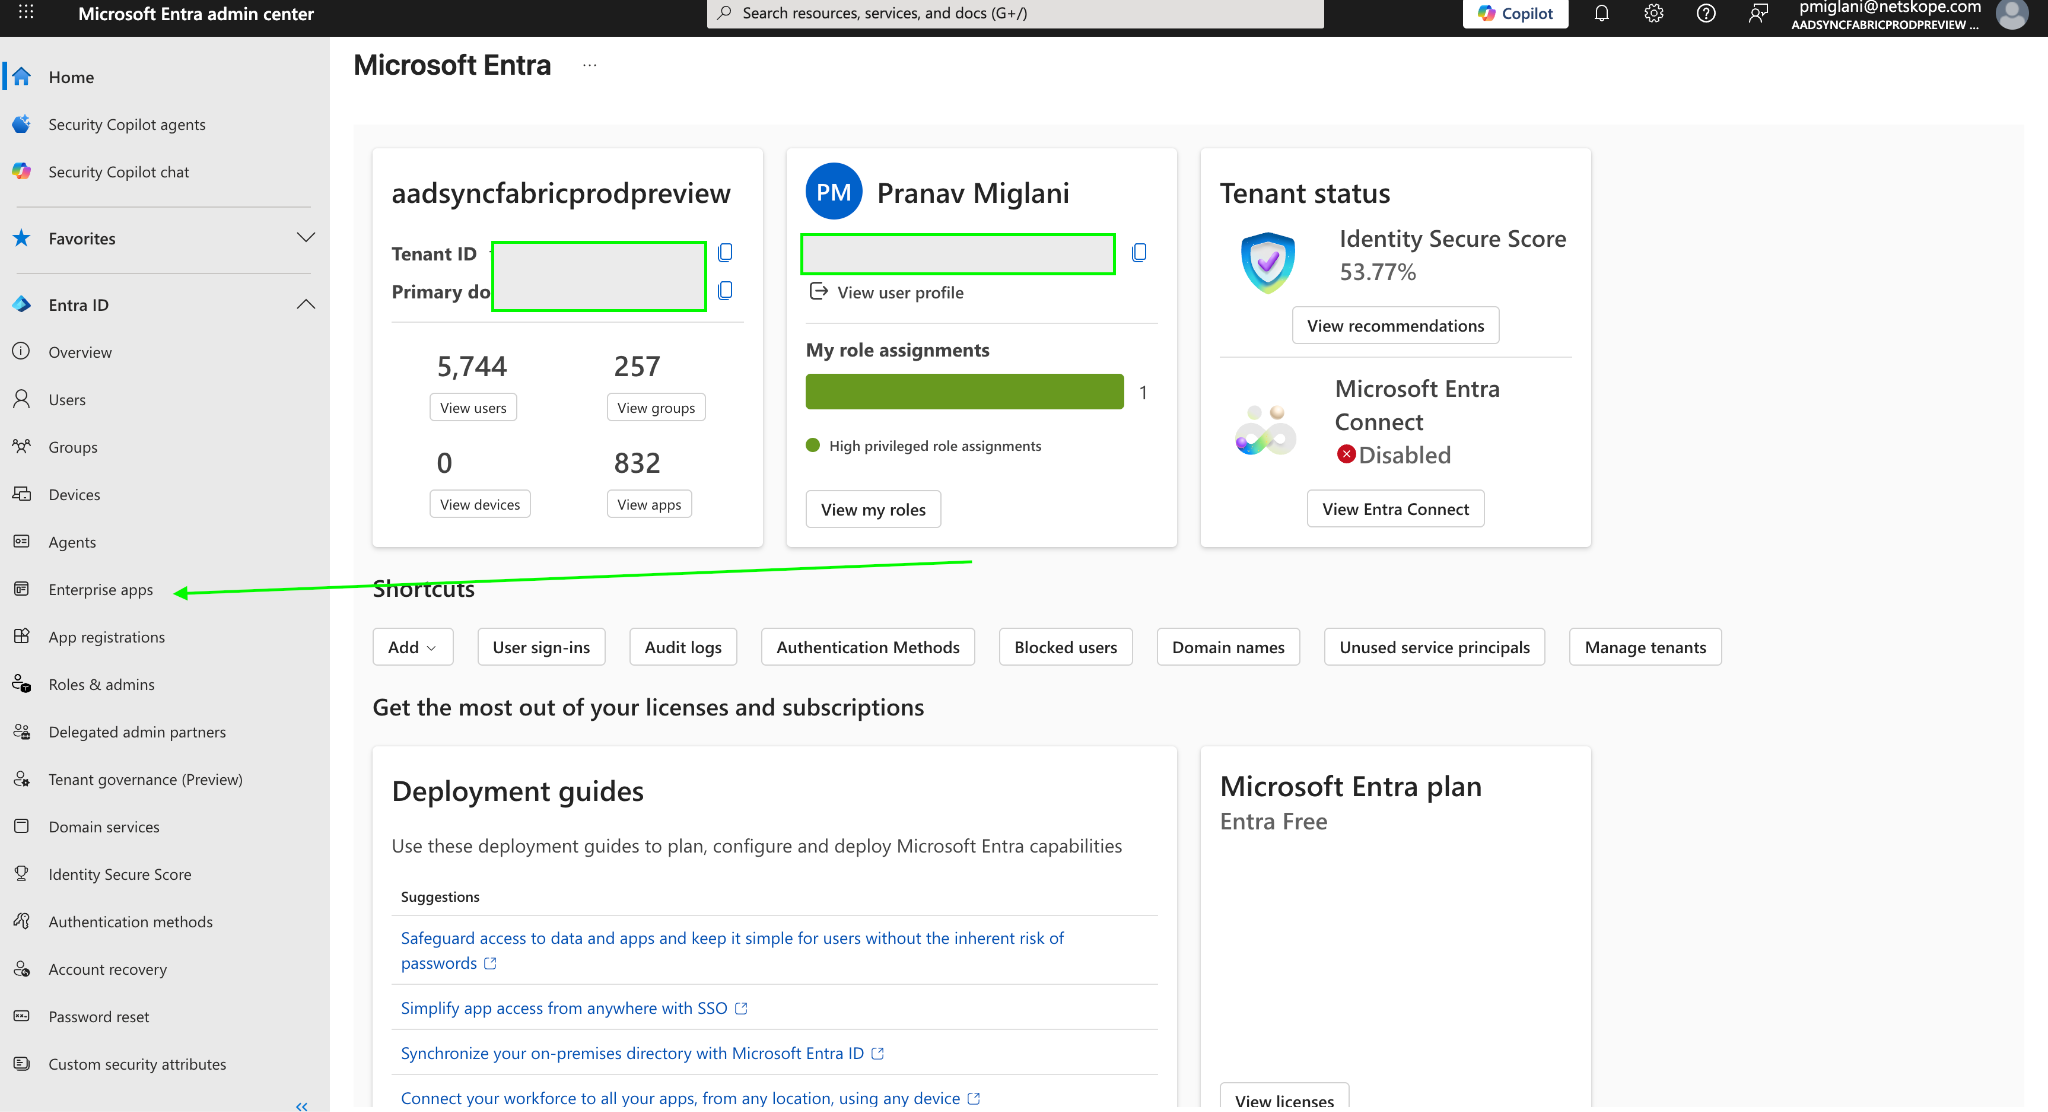
Sign in to your Microsoft Entra admin center.
-
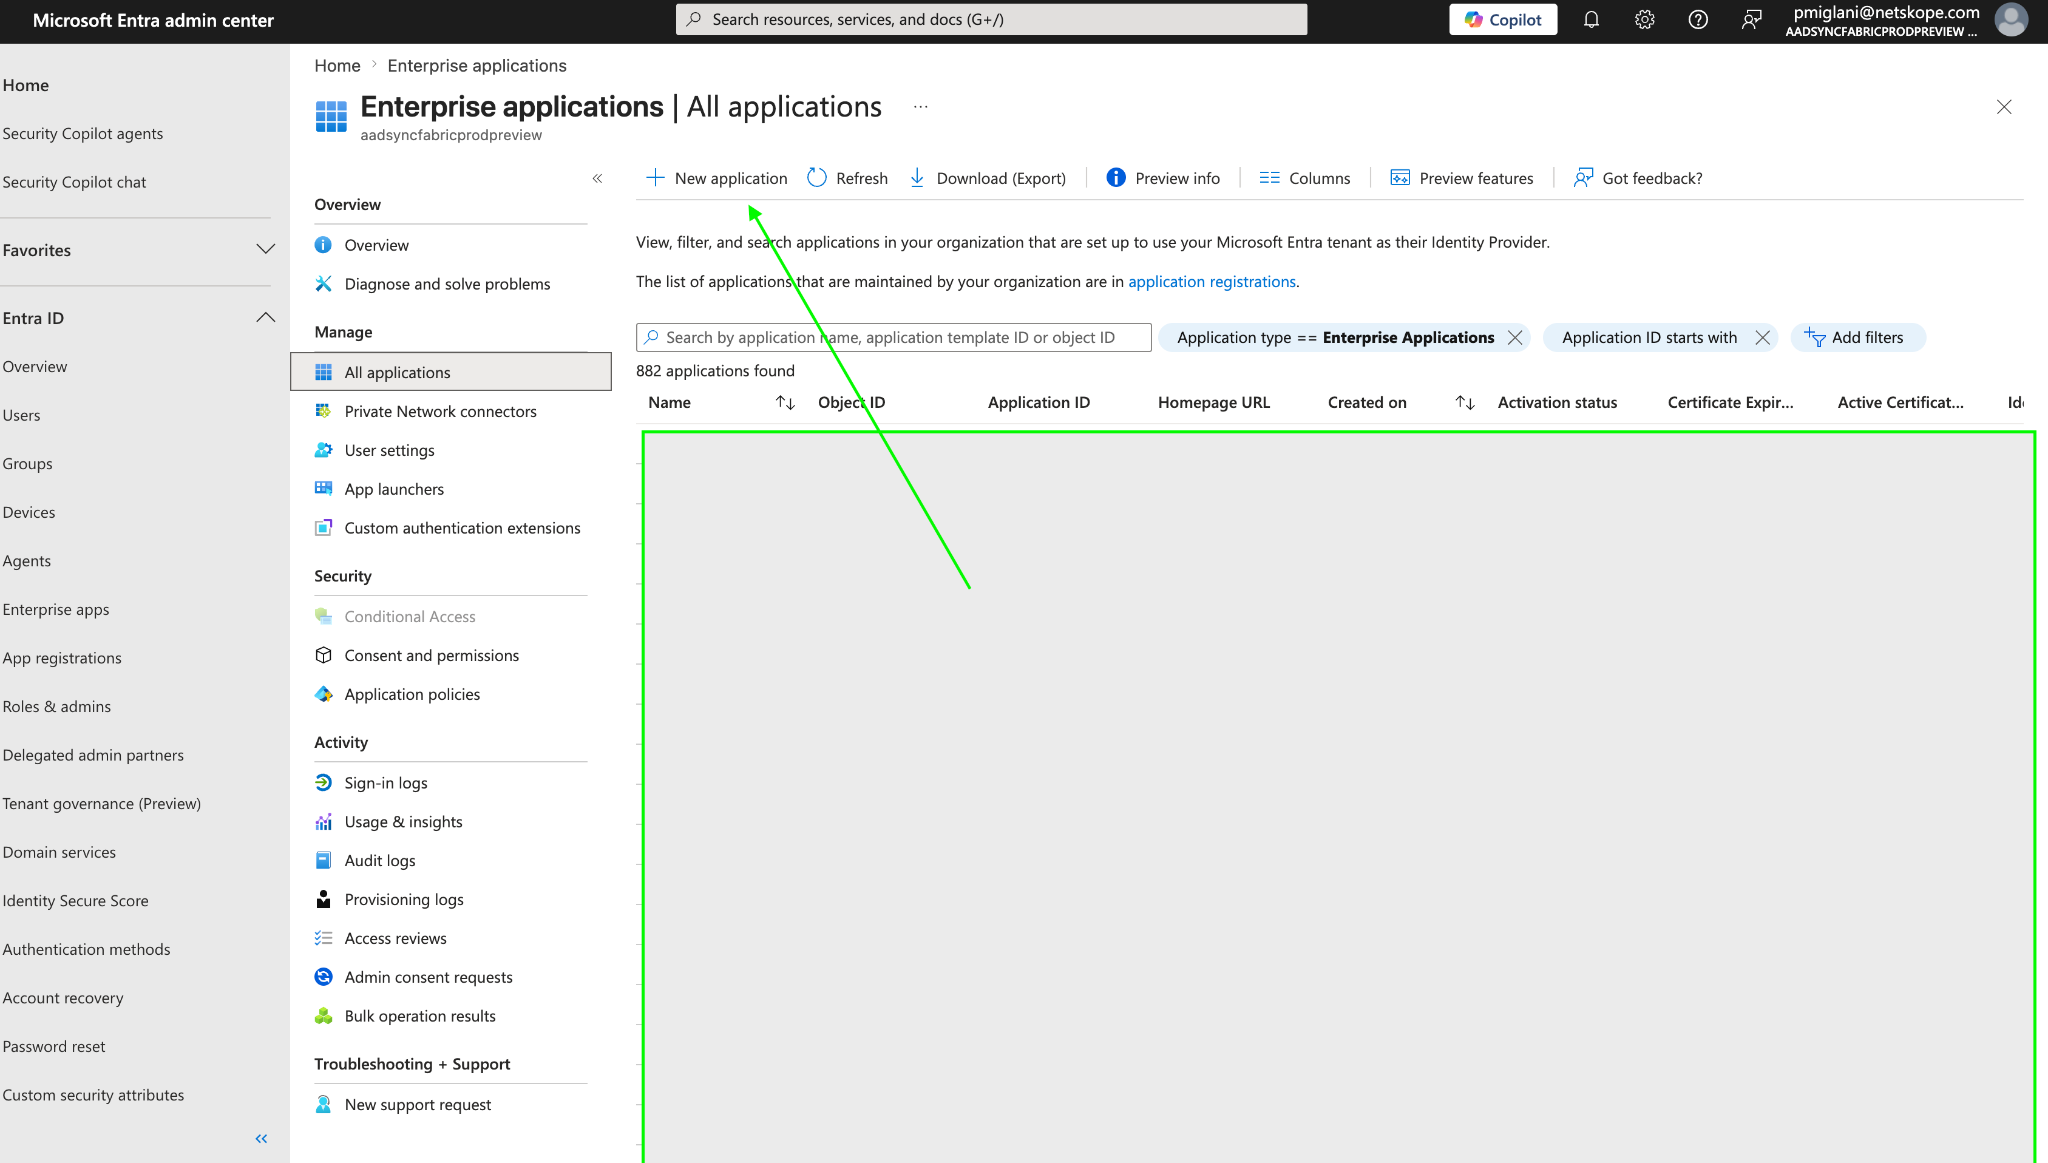
In the left navigation menu, go to Enterprise apps.
-
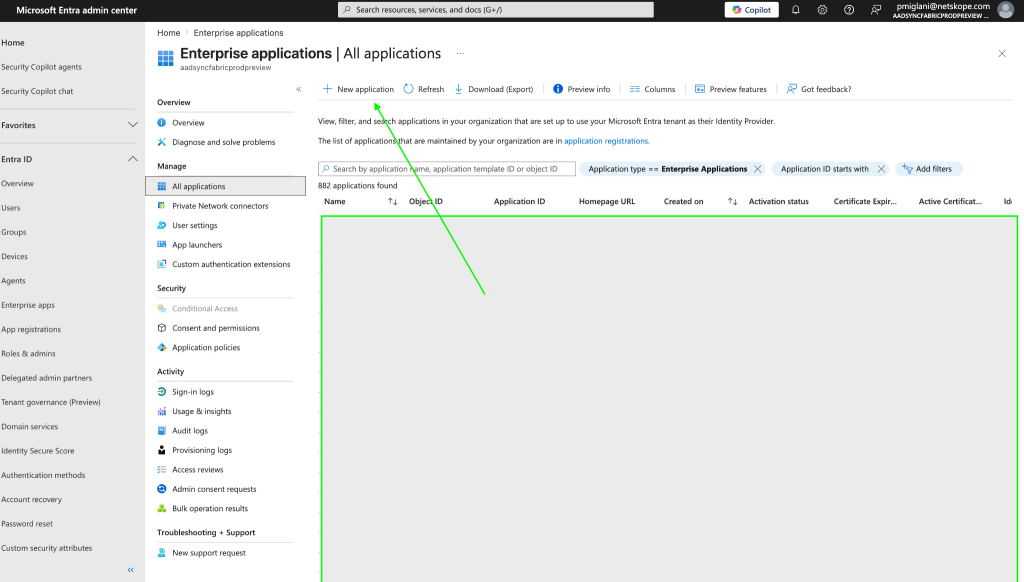
Click New application.
-
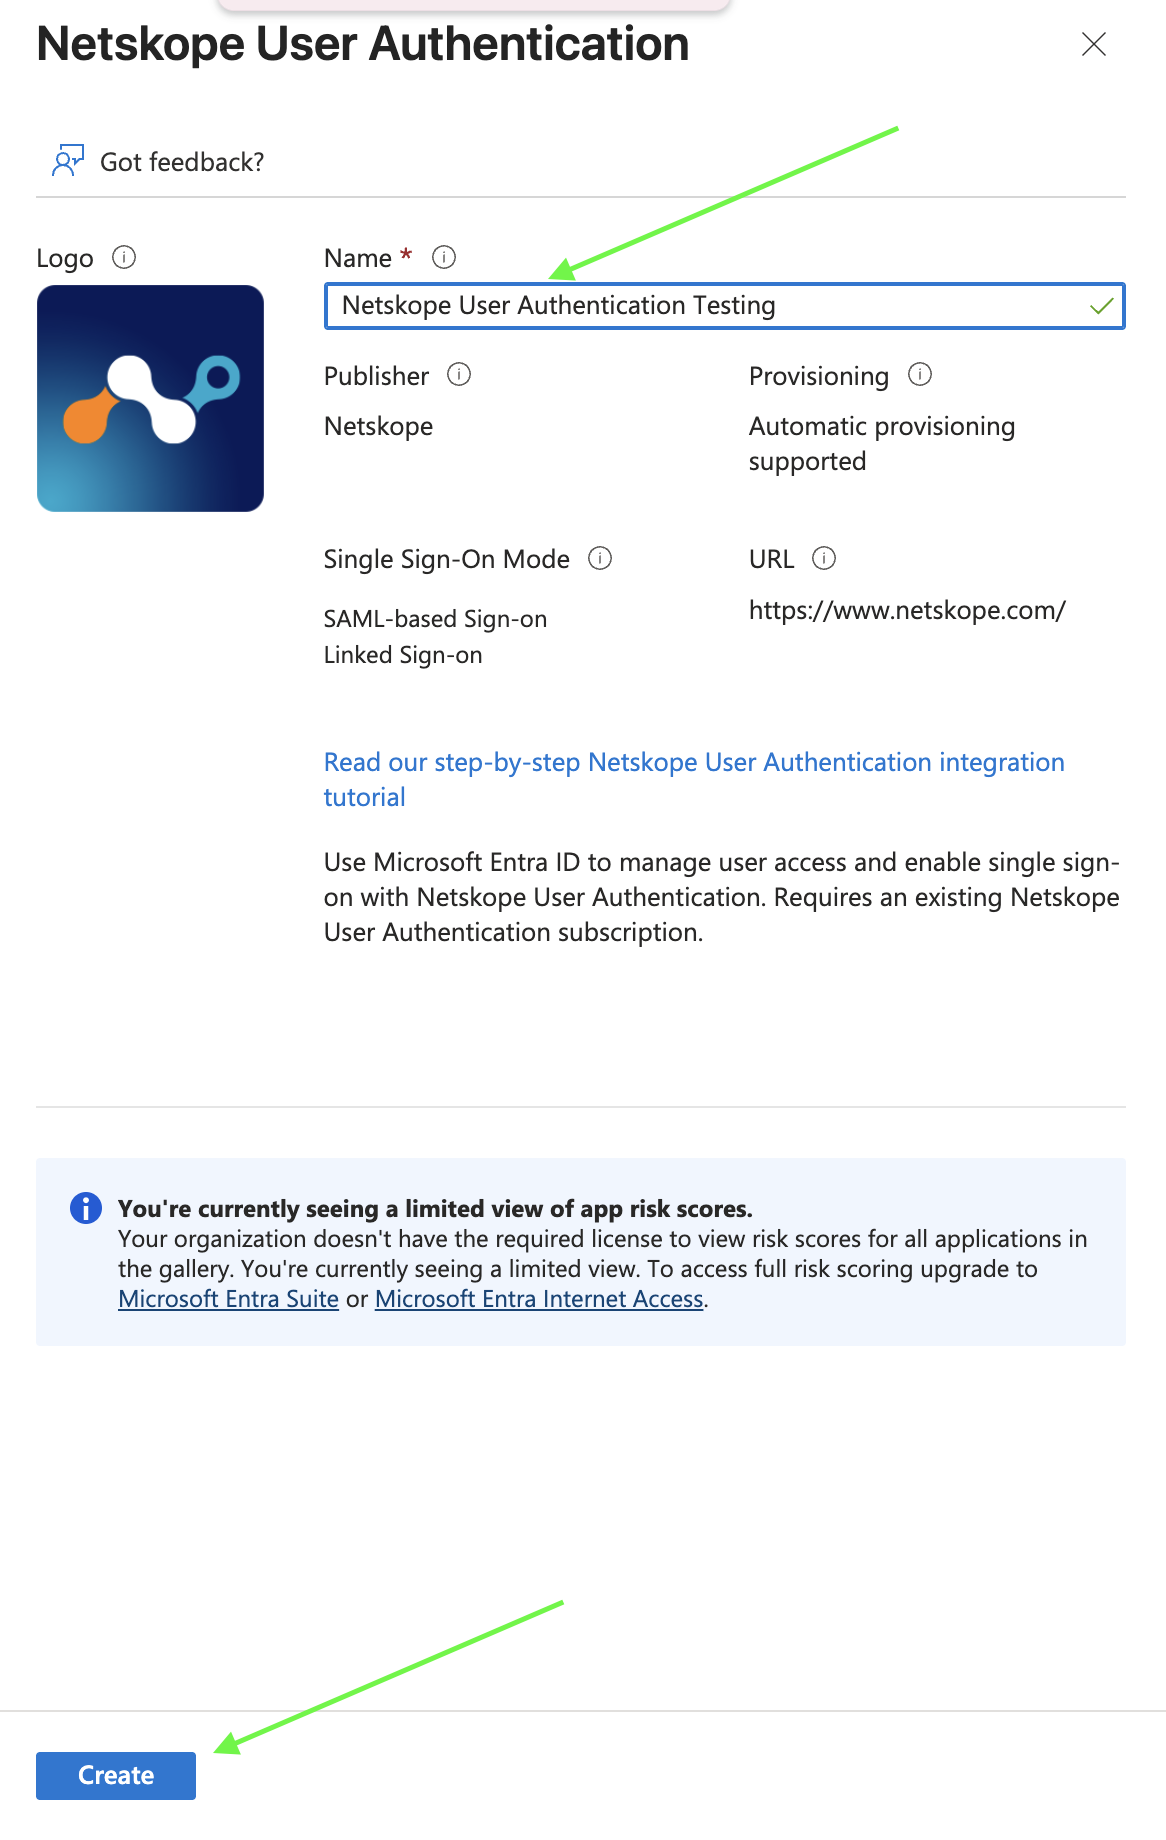
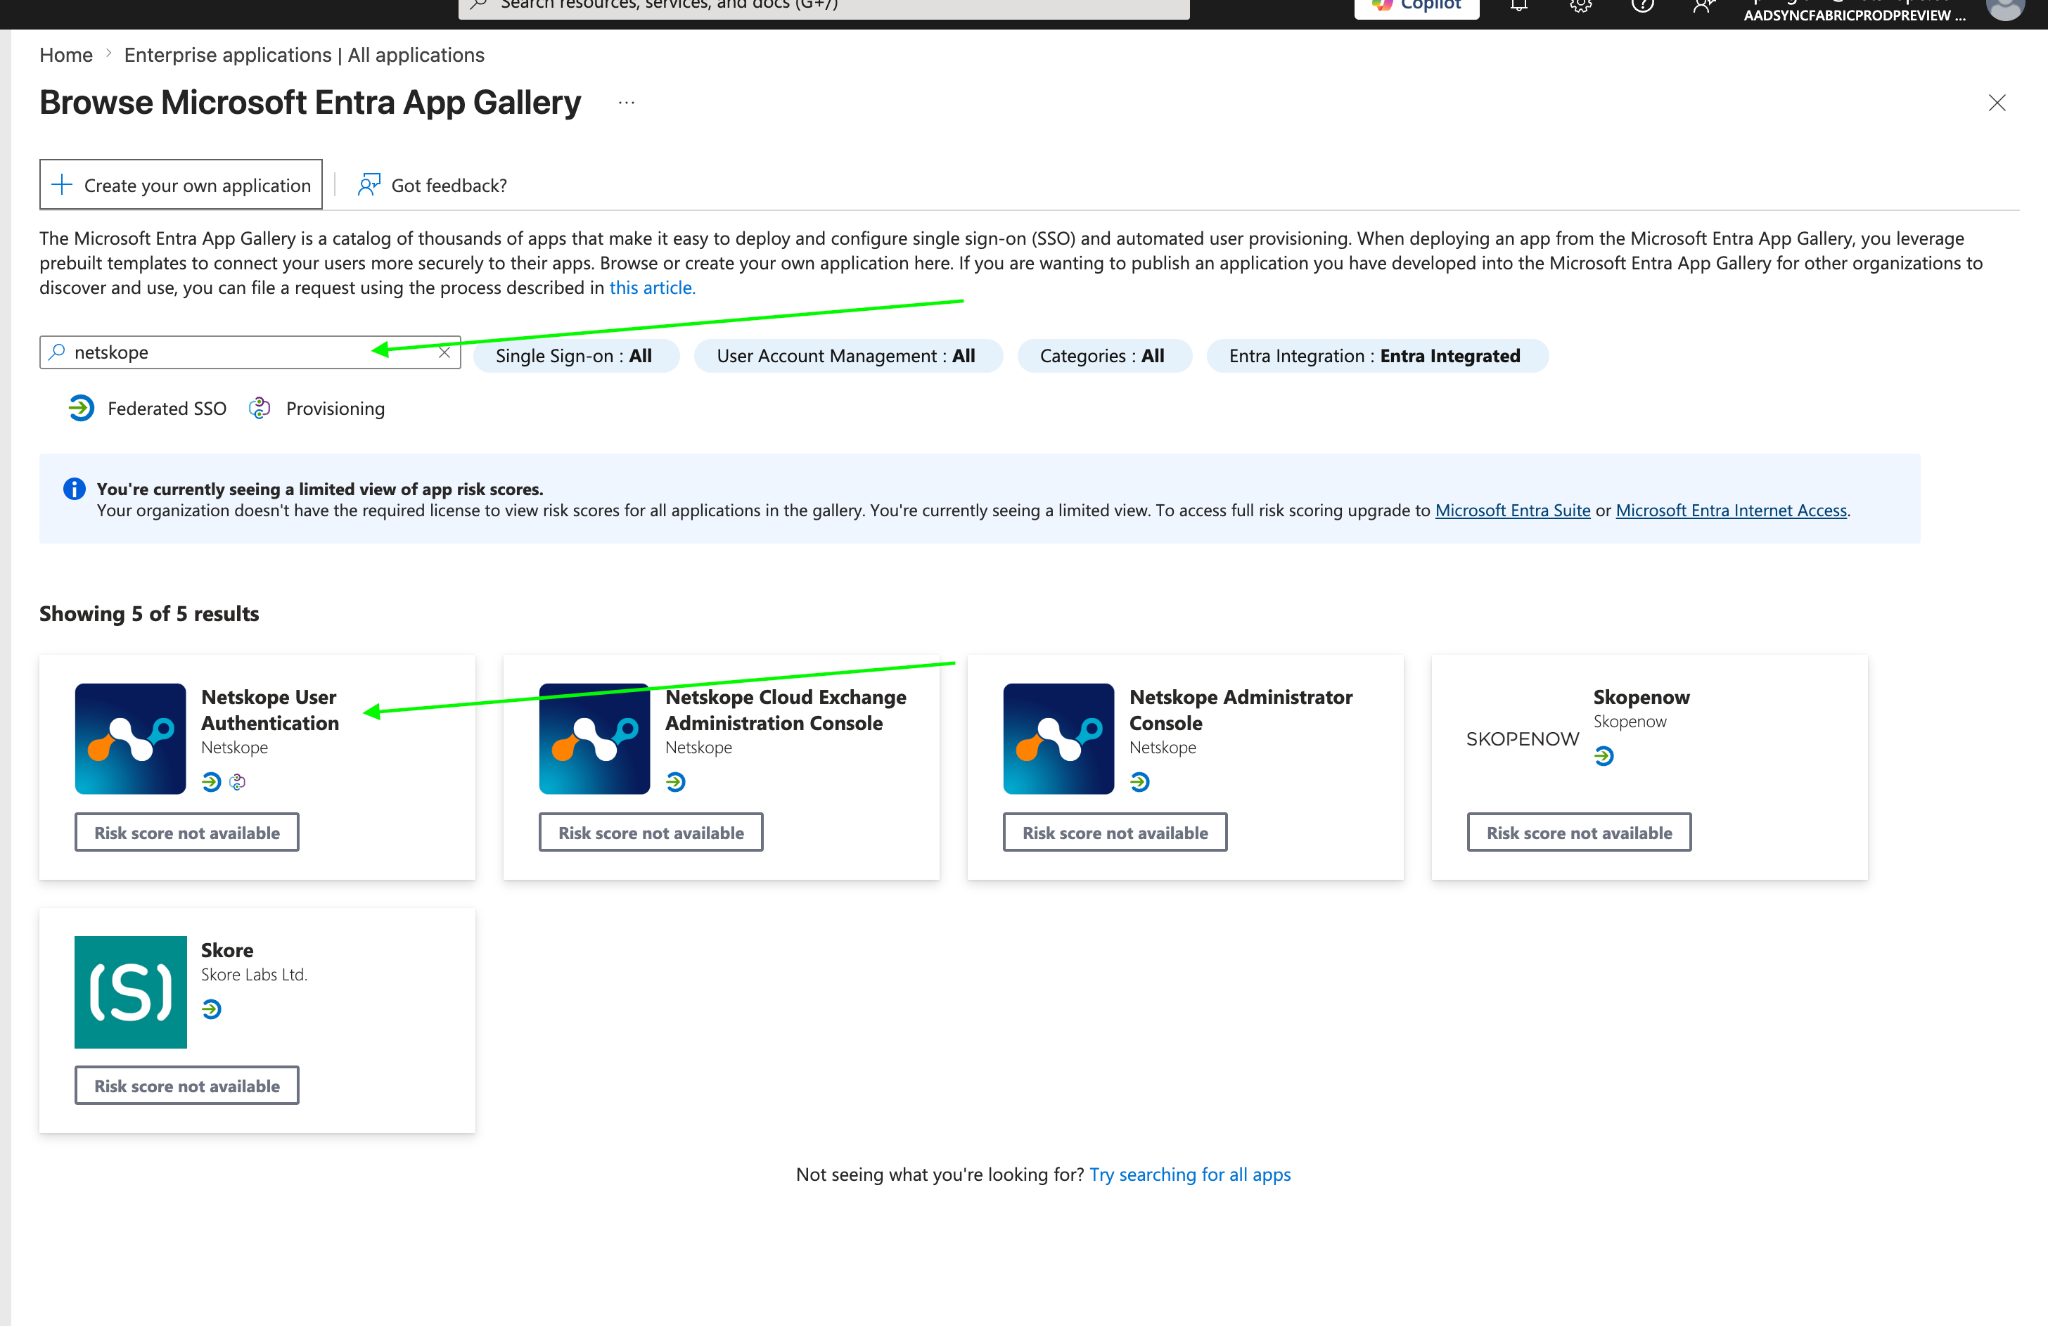
In the search box, type
netskopeand select Netskope User Authentication from the gallery.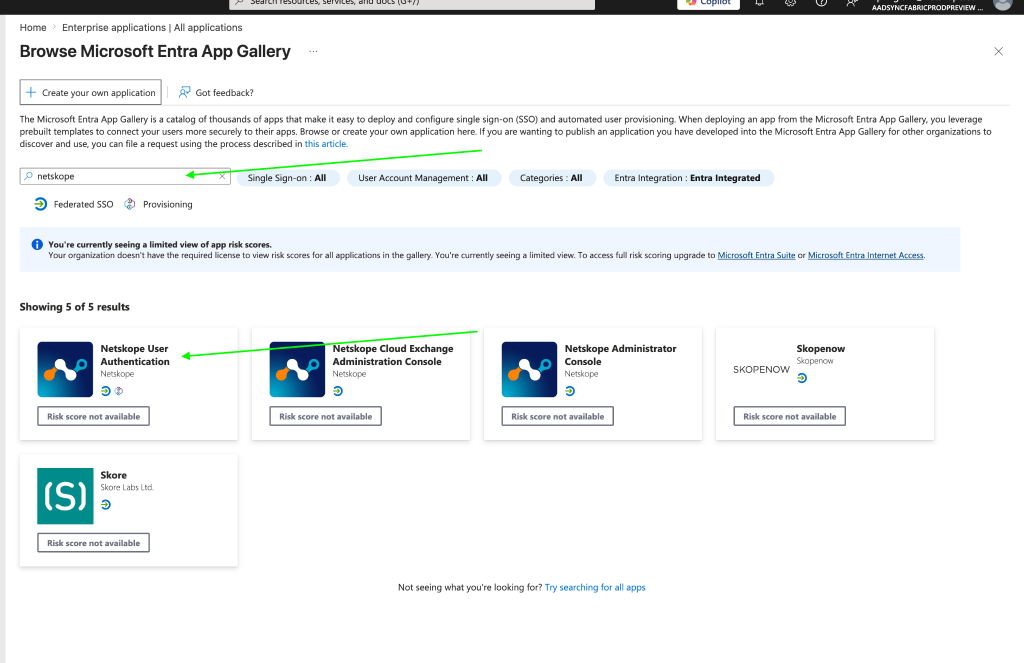
-
Enter a custom name for the application (for reference) and click Create.
-
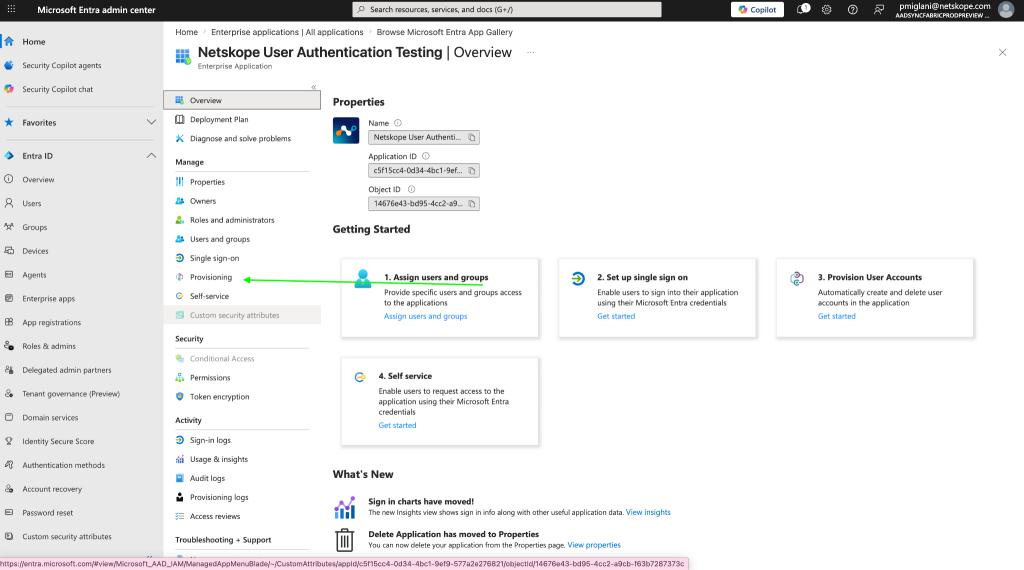
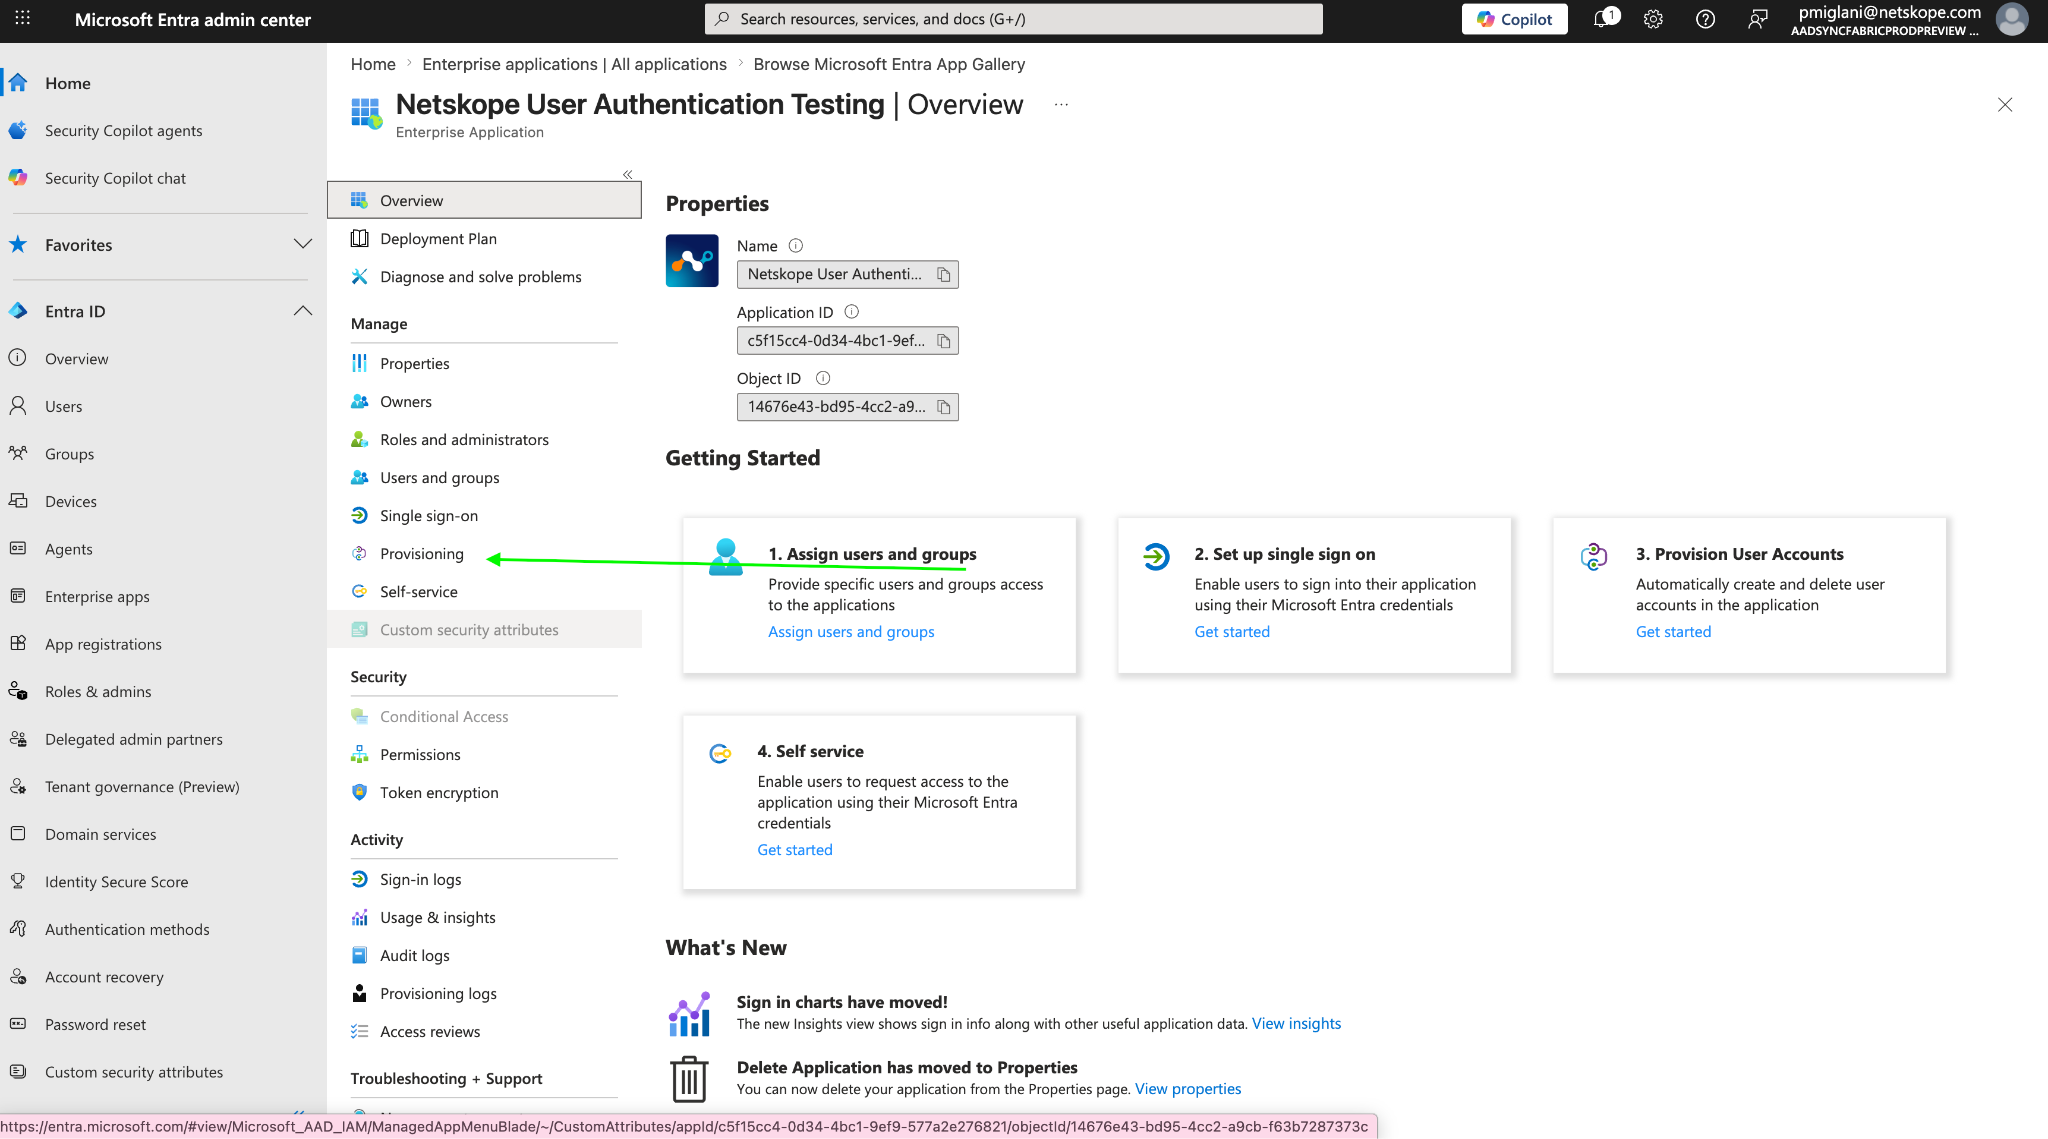
Once the application is created, select Provisioning from the left sidebar.
-
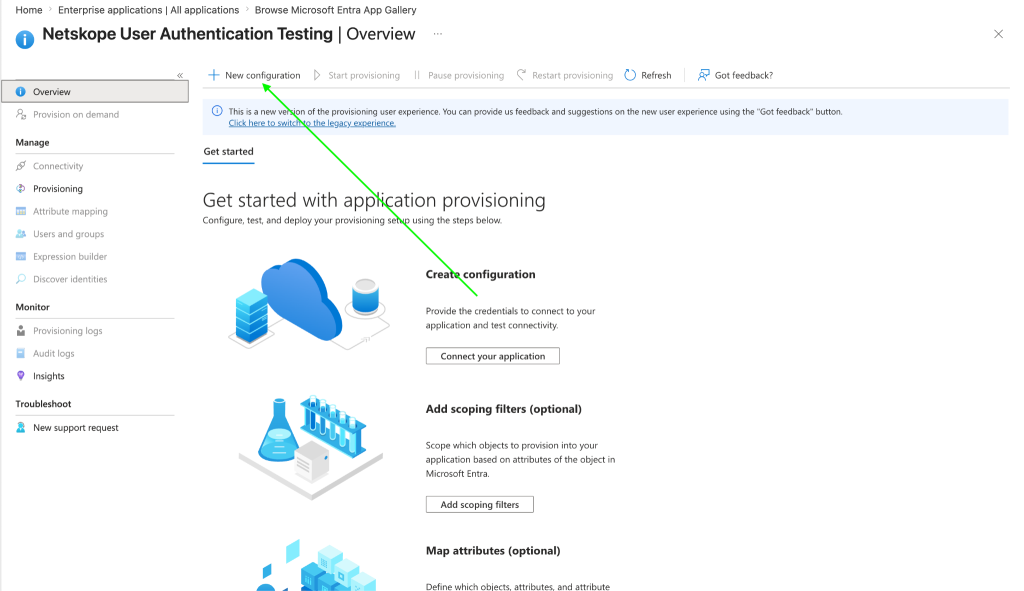
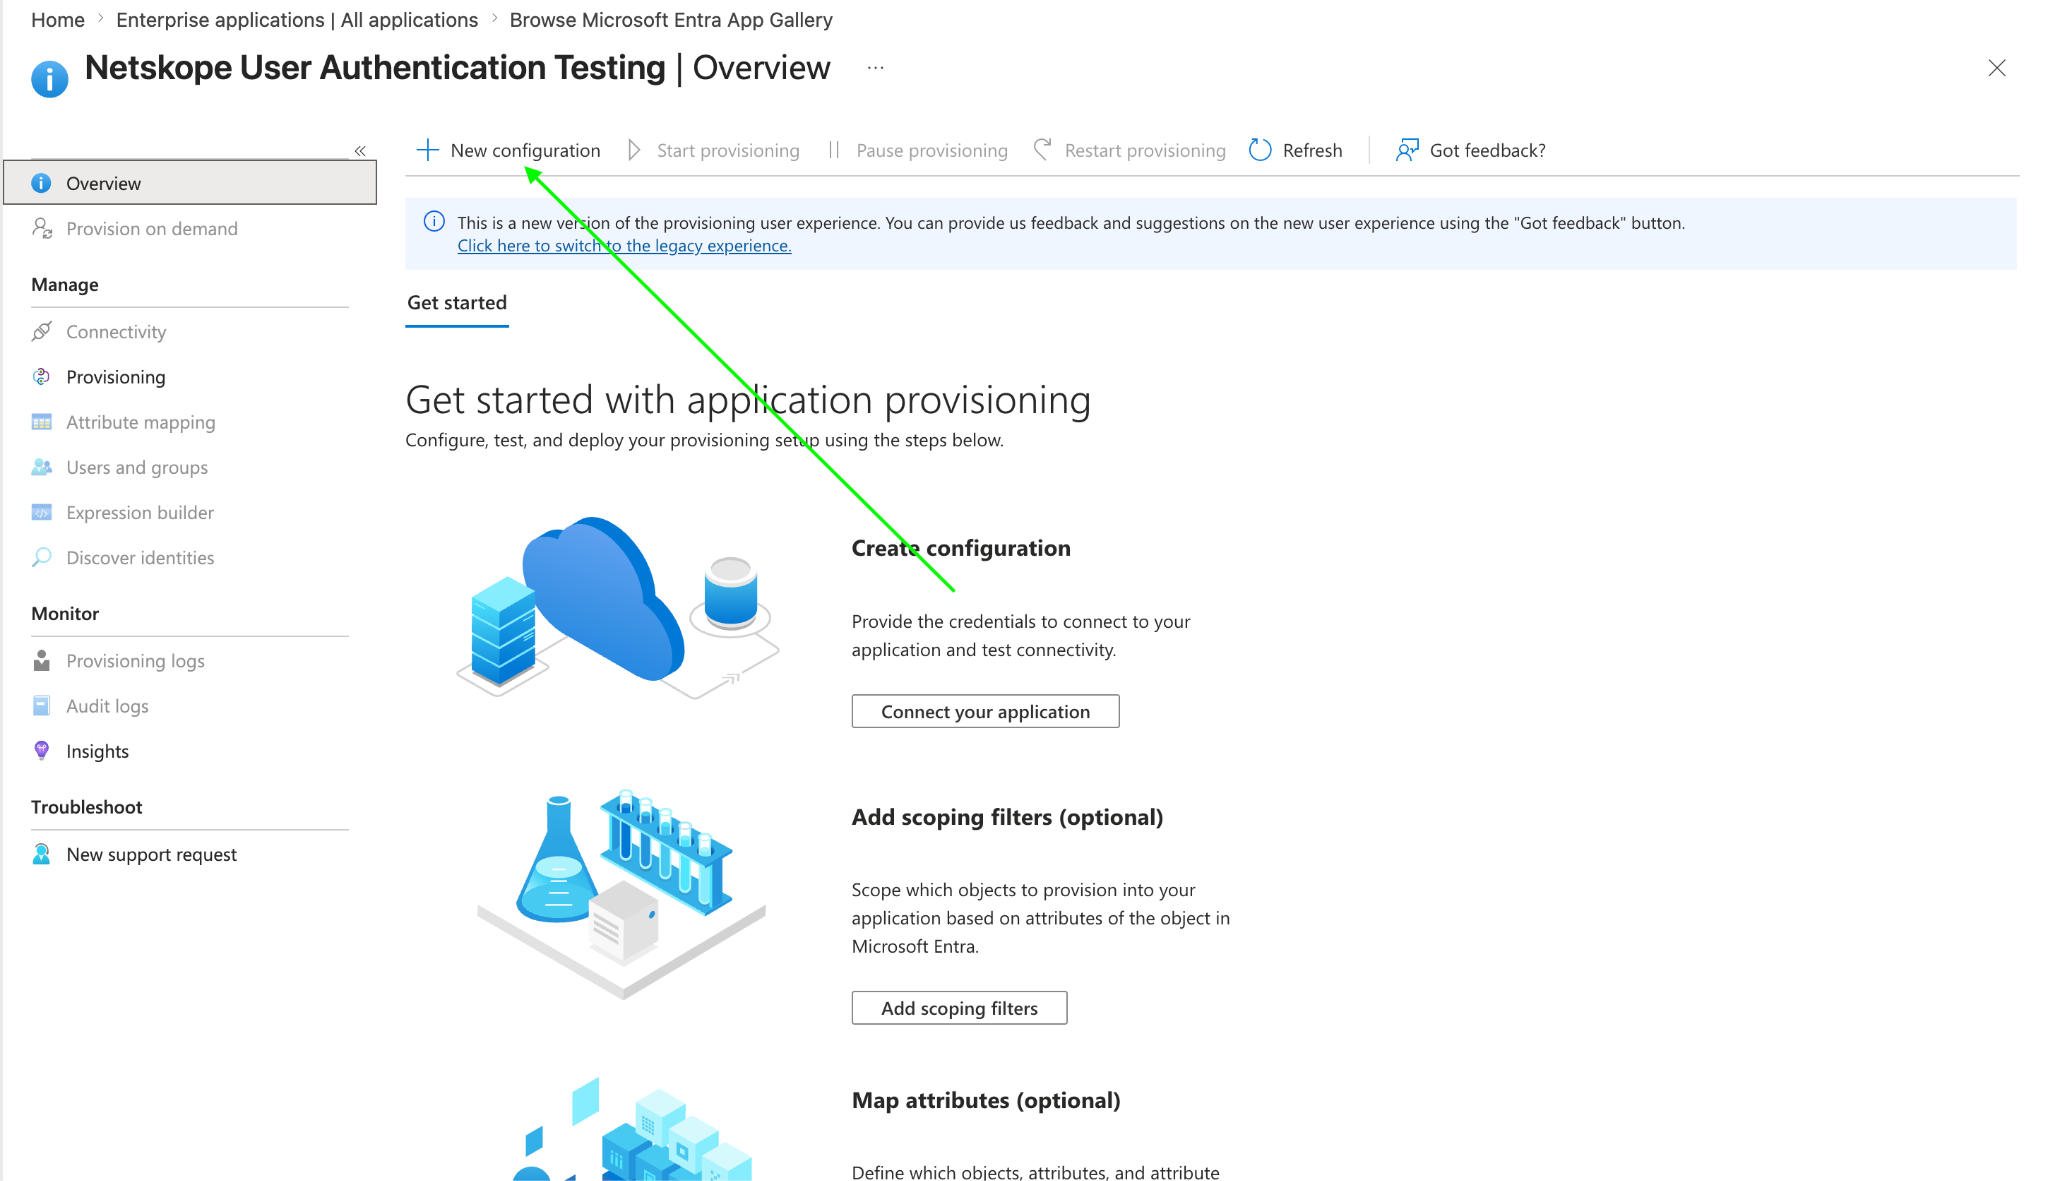
Click New configuration (or Get started).
-
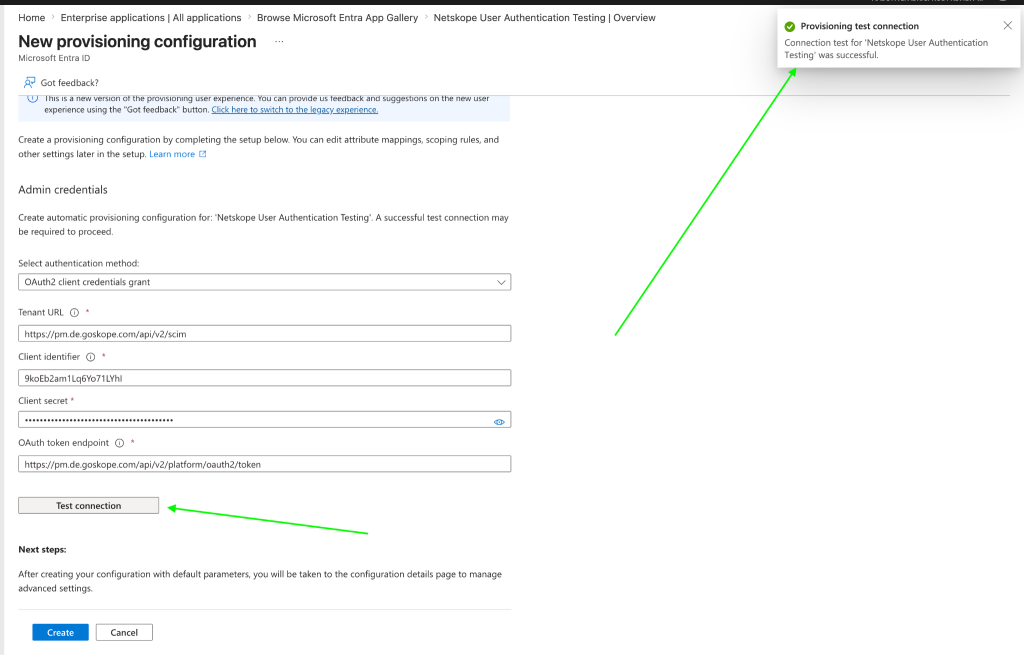
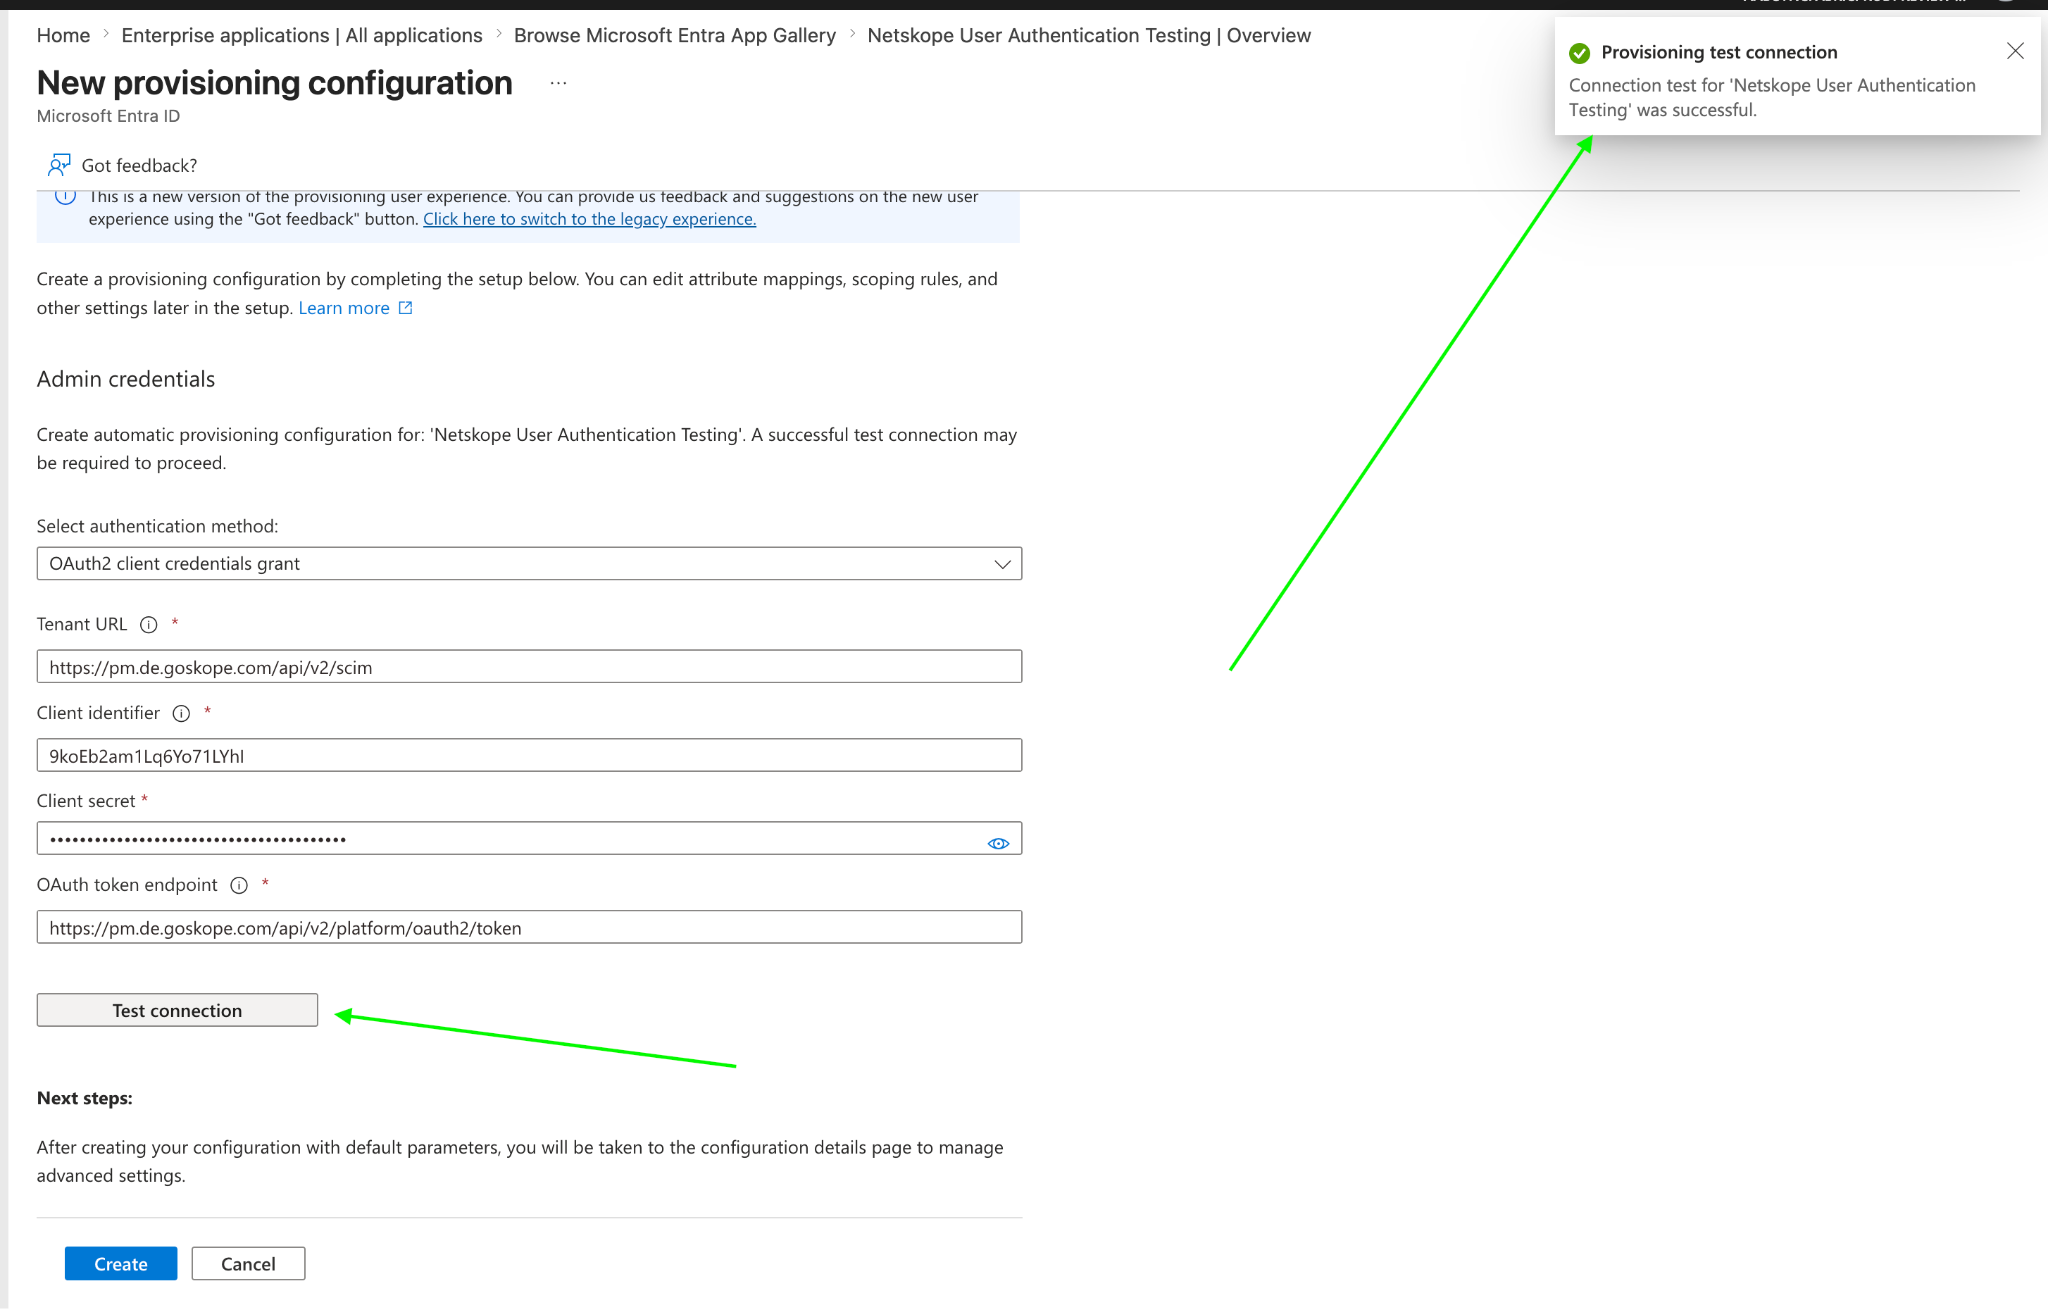
Under Admin credentials, set the following details:
-
Select authentication method: Select OAuth2 client credentials grant. (Note: For Bearer Token, select Bearer token from the dropdown).
-
Tenant URL: Enter
https://<tenant-name>.goskope.com/api/v2/scim -
Client identifier: Enter the Client ID generated from Netskope in Step 1.
-
Client secret: Enter the Client Secret generated from Netskope in Step 1.
-
OAuth token endpoint: Enter
https://<tenant-name>.goskope.com/api/v2/platform/oauth2/token
-
-
Click Test Connection to verify the connectivity. Once the connection testing is successful, click on Create.
-
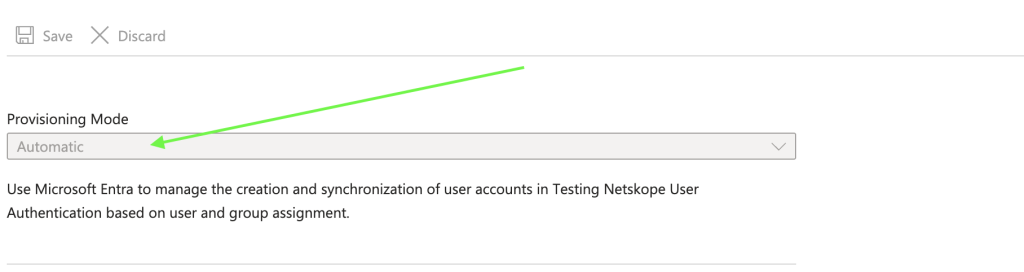
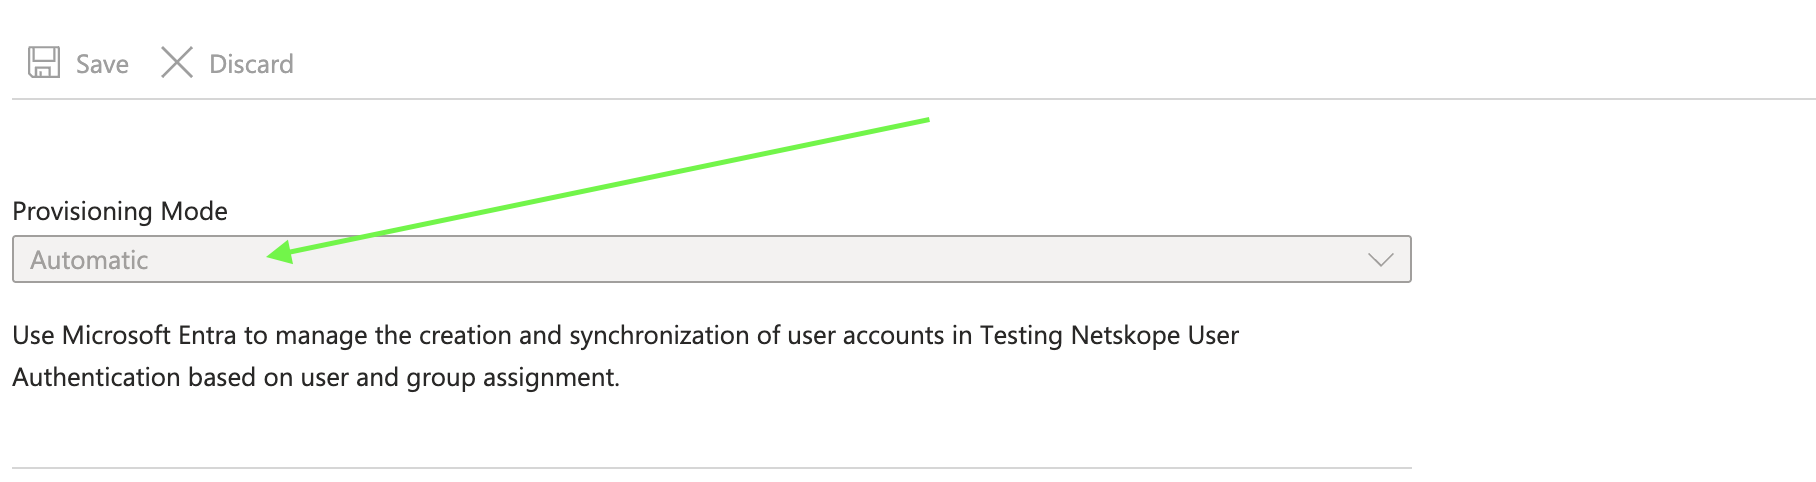
Set Provisioning Mode to Automatic and click Save.
-
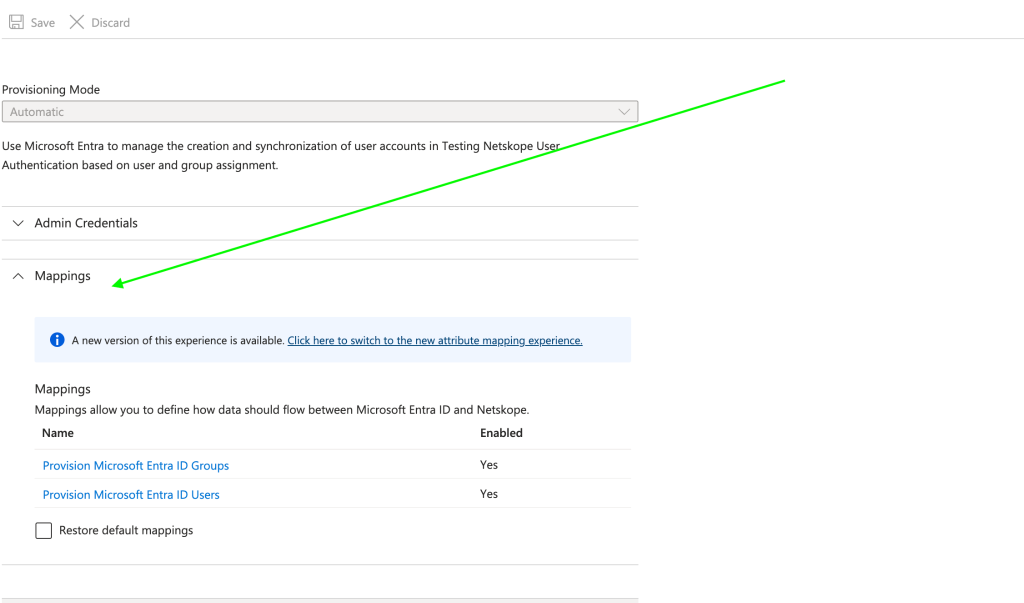
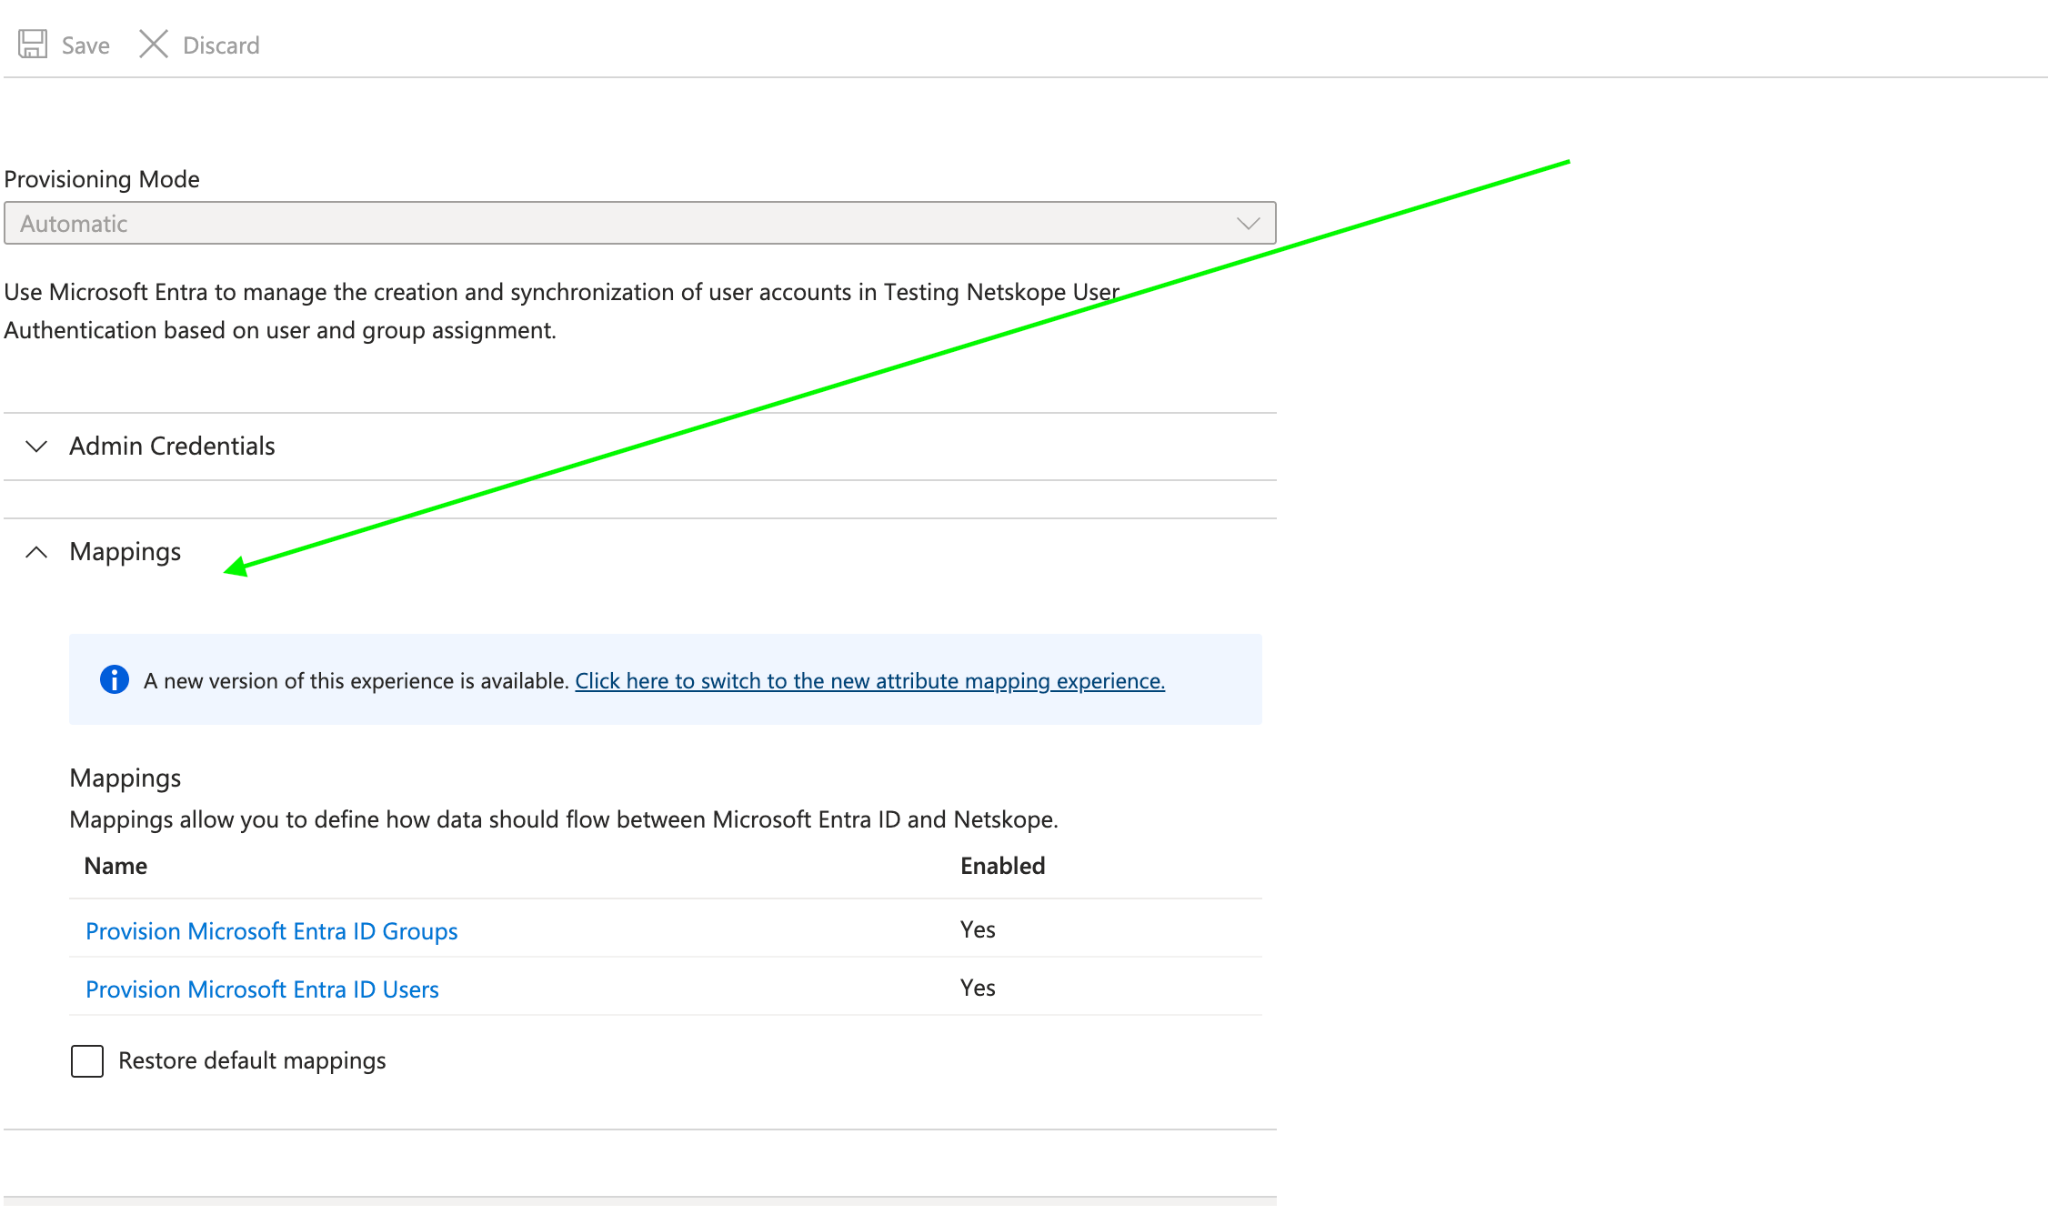
Expand Mappings to review or customize the default SCIM mappings (e.g., Provision Microsoft Entra ID Groups and Provision Microsoft Entra ID Users).
-
Under the Settings tab, do the following:
-
Configure optional failure notification emails.
-
Set Scope to Sync only assigned users and groups.
-
Set Provisioning Status to On.
-
-
Click Save.
-
Assign users and groups to provision:
-
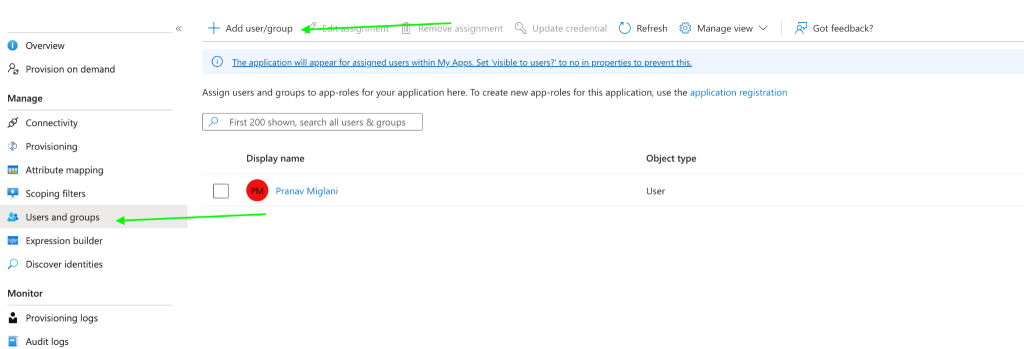
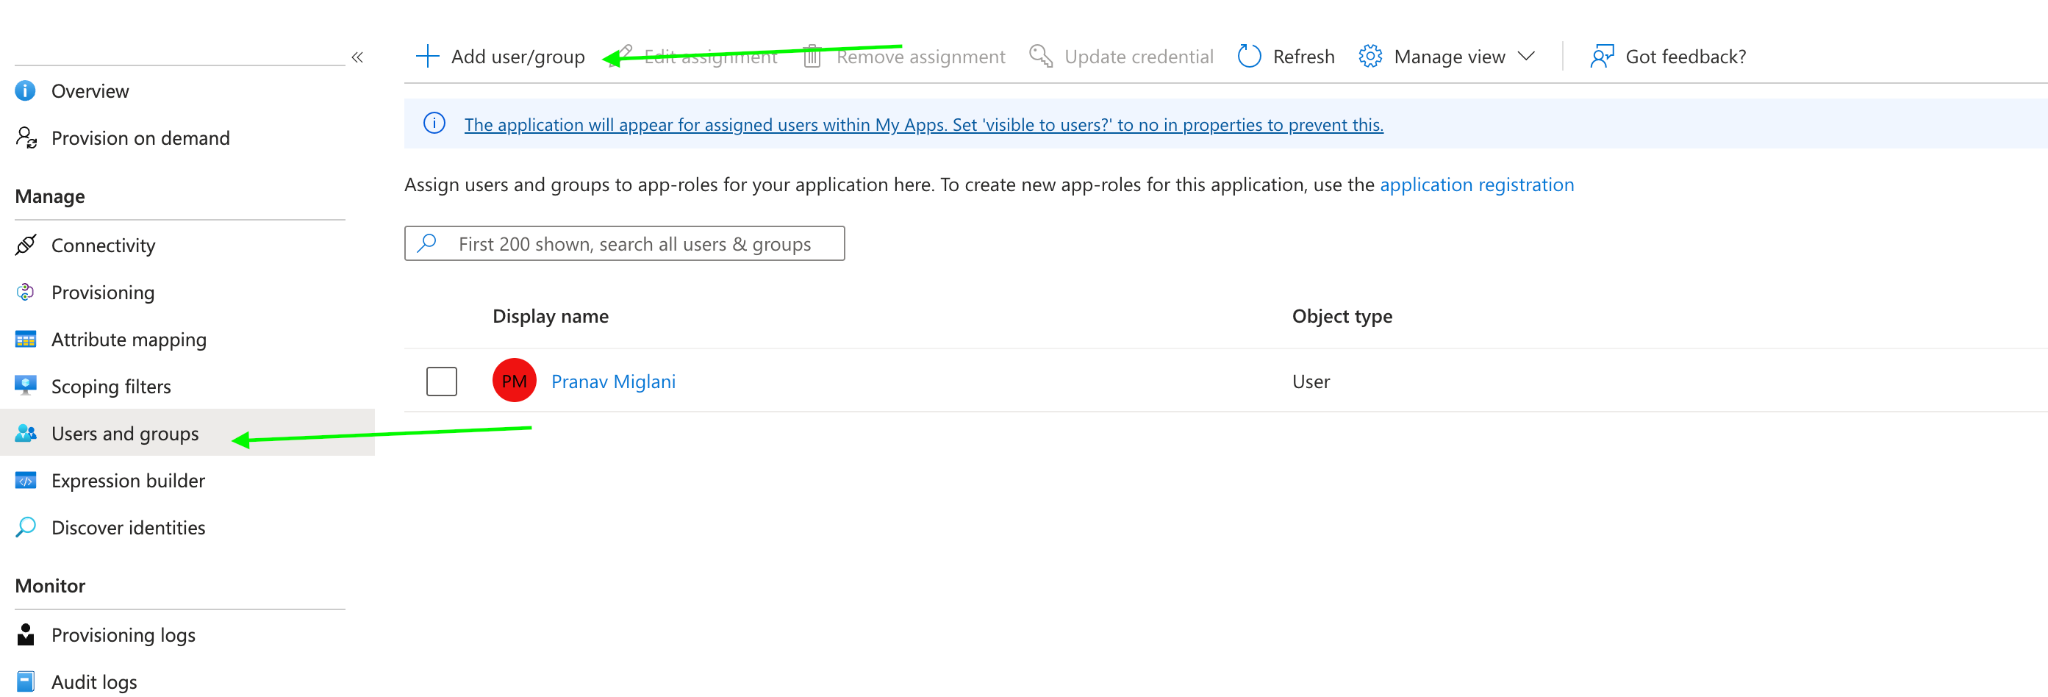
Go to Users and groups in the left sidebar.
-
Click Add user/group.
-
Select the desired users and groups to sync to Netskope and click Select.
-
Monitor Provisioning and Verify Sync
-
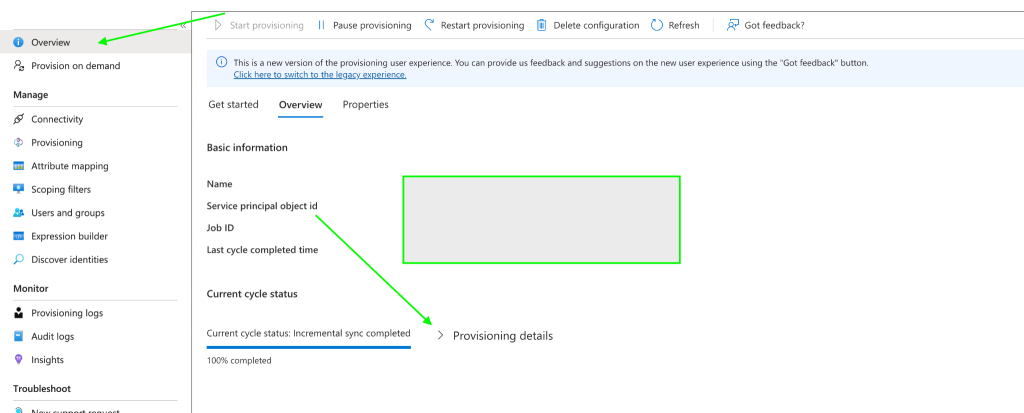
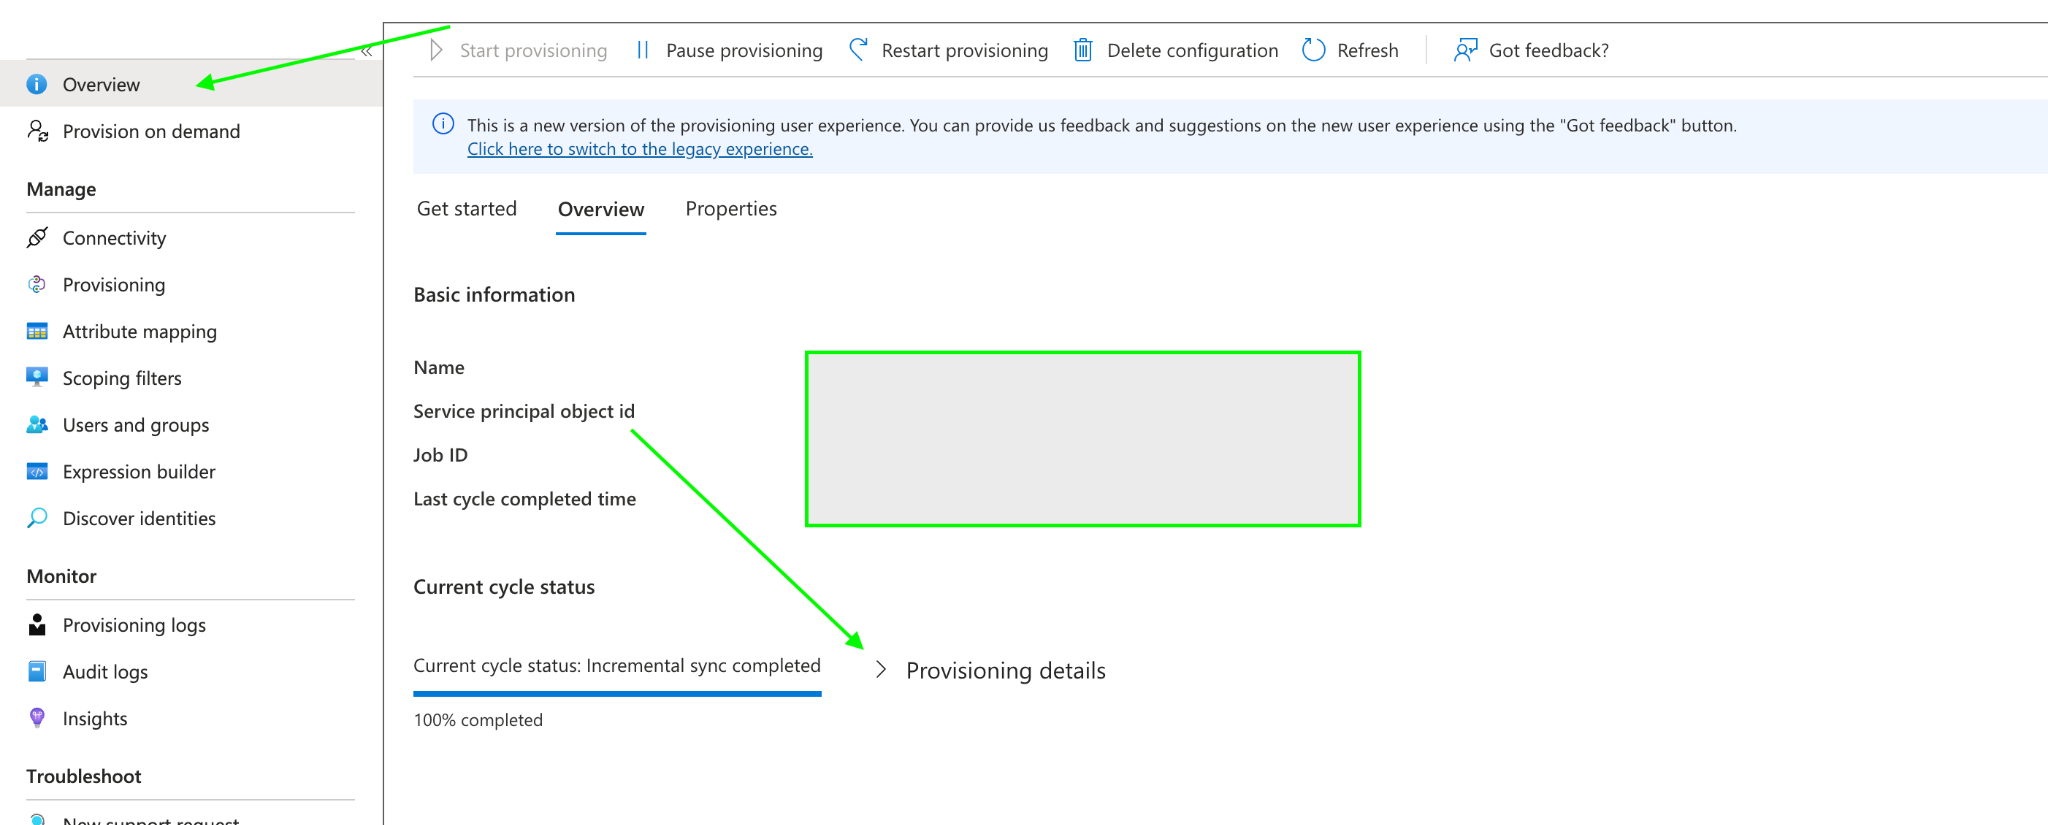
Go to the application Overview section to monitor the provisioning status and cycle progress.
-
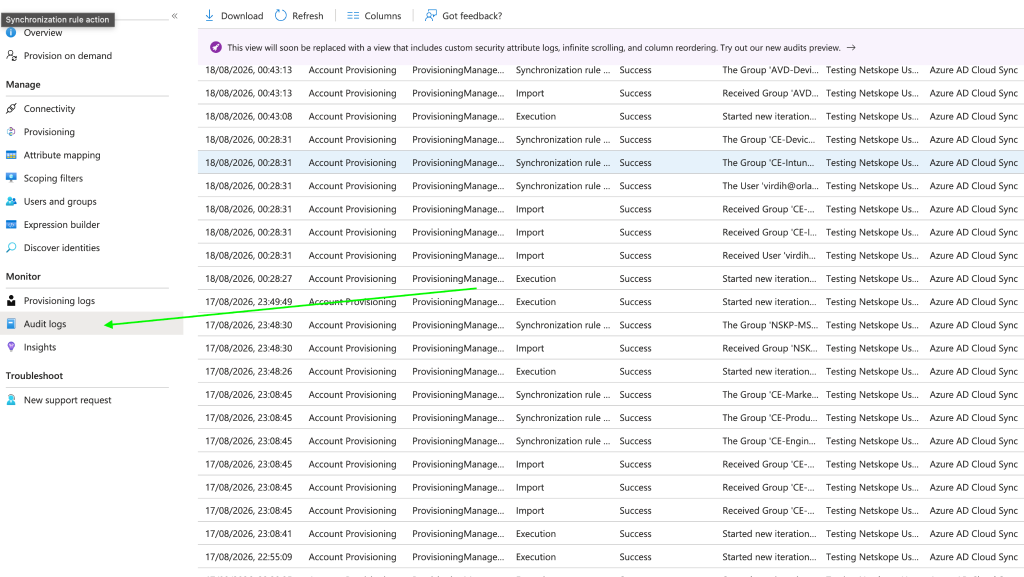
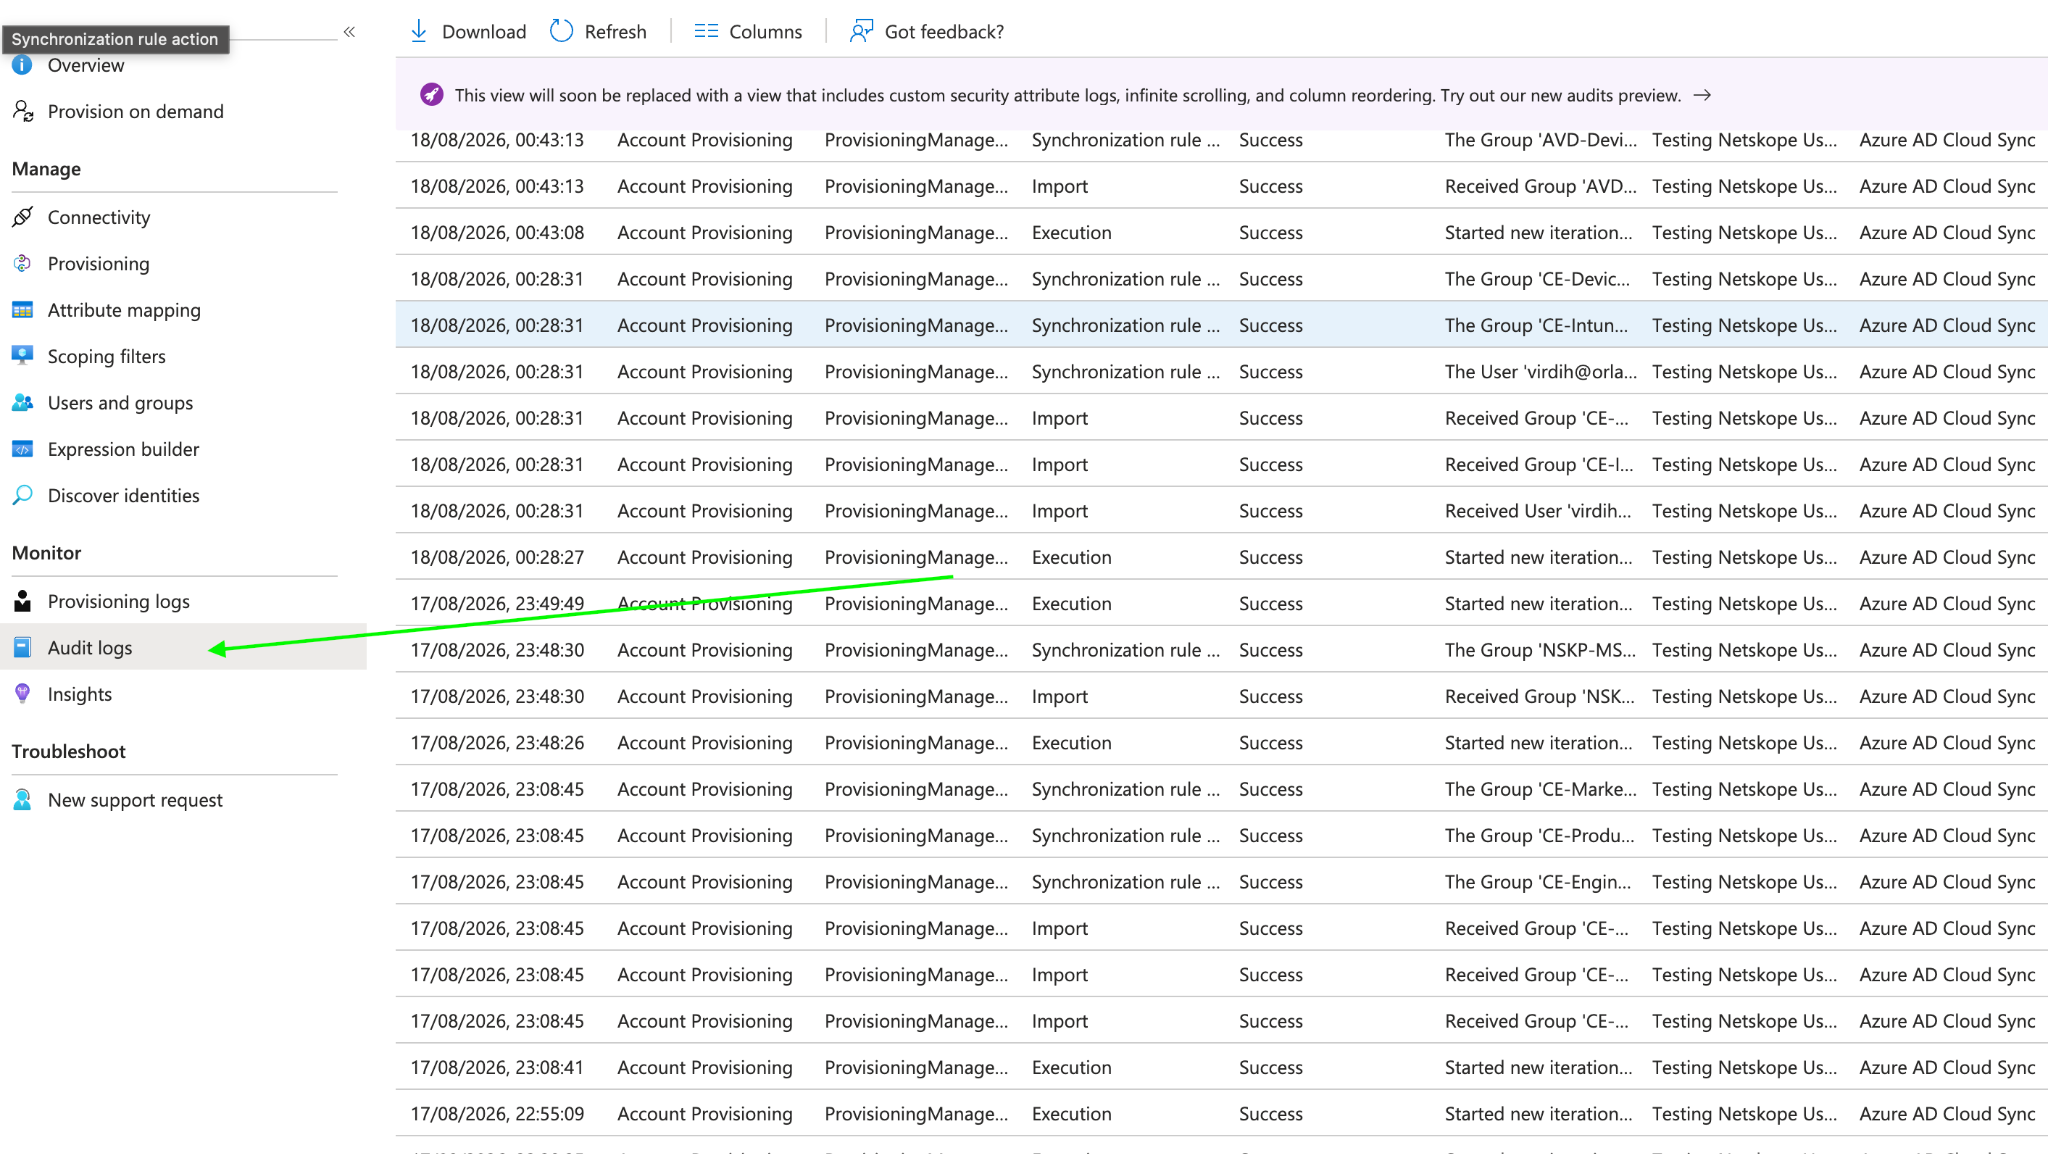
To review detailed logs:
-
Click Provisioning logs to view account provisioning operations and status.
-
Click Audit logs to review system/account level events.
-
-
Verify the provisioned users and groups inside the Netskope UI:
-
Users: Navigate to Settings > Security Cloud Platform > Users.
-
Groups: Navigate to Settings > Security Cloud Platform > Groups.
-
Provisioned users and groups will now be available for configuration across Real-time Protection policies and other platform features.
Migrating from Bearer Token to OAuth2 Client Credentials Flow
To migrate existing SCIM provisioning setups from Bearer Token to OAuth2 Client Credentials flow without disruption:
-
Open your existing Netskope Enterprise Application provisioning configuration in Microsoft Entra ID.
-
Edit the Admin Credentials section.
-
Change the Select authentication method dropdown to OAuth2 client credentials grant.
-
Enter the Client ID, Client Secret, and OAuth token endpoint generated from Netskope.
-
Click Test Connection and then Save.
For technical support or questions regarding client credentials configuration, contact:
Netskope Support: support@netskope.com & Technical Alliances Team: tech-alliances@netskope.com