

A step-by-step guide to creating a policy: navigating to the page, choosing a policy kind, and defining Source, Destination, Exclusions, and Action.
Navigating to the page
Select Policies > Real-time > Internet Access. The Internet Access Policies list shows your policy groups and rules.
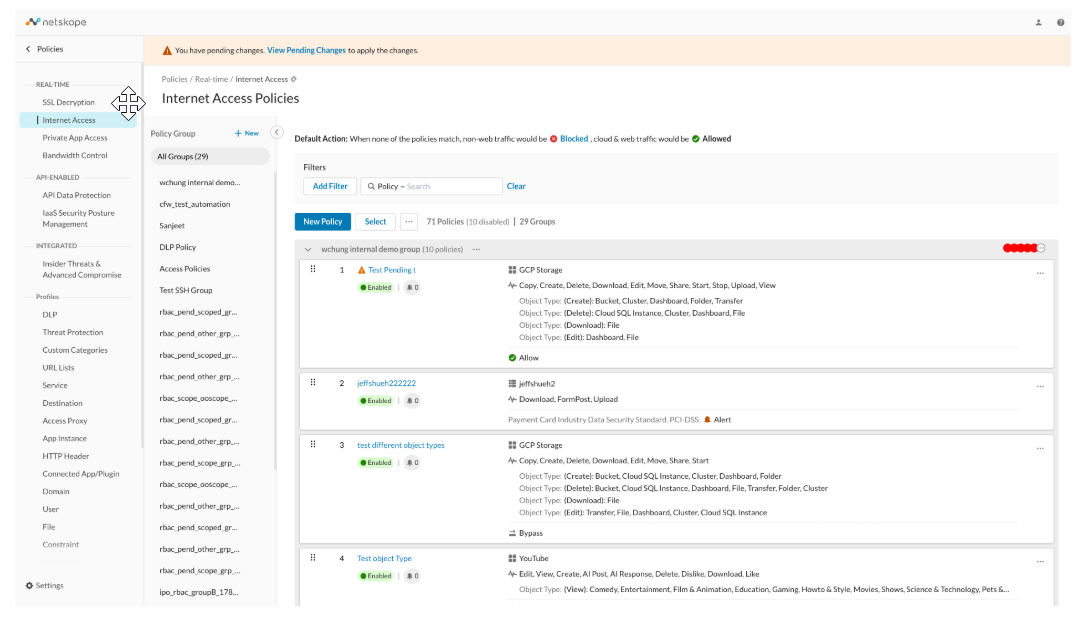
Each rule row displays its name, status (Enabled or Disabled), alert count, matching criteria, and action (for example, Allow, Bypass, or an alert icon).
A banner at the top (“You have pending changes”) appears whenever you create, edit, or delete an item that has not yet gone live — see Pending Changes.
Creating a new policy
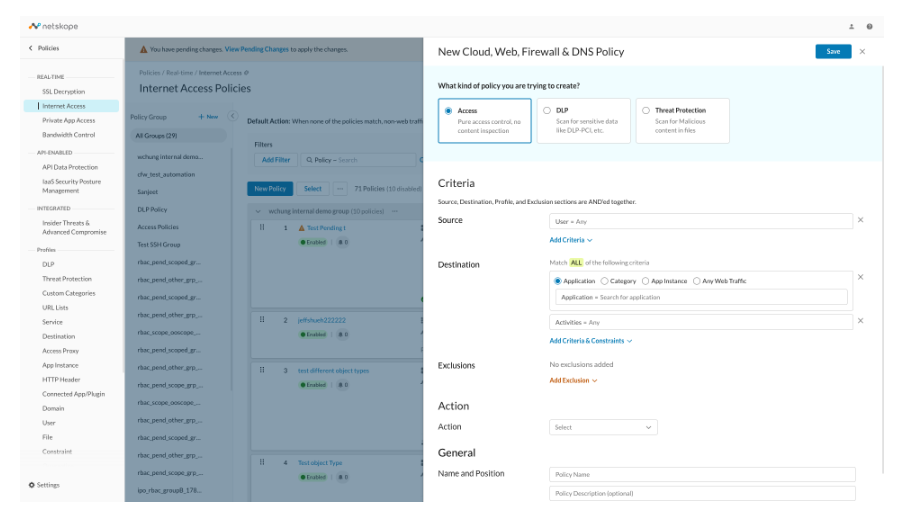
- Click New Policy on the list page. A side panel titled “New Cloud, Web, Firewall & DNS Policy” opens.
- Choose the type of policy you want to create.
- Access
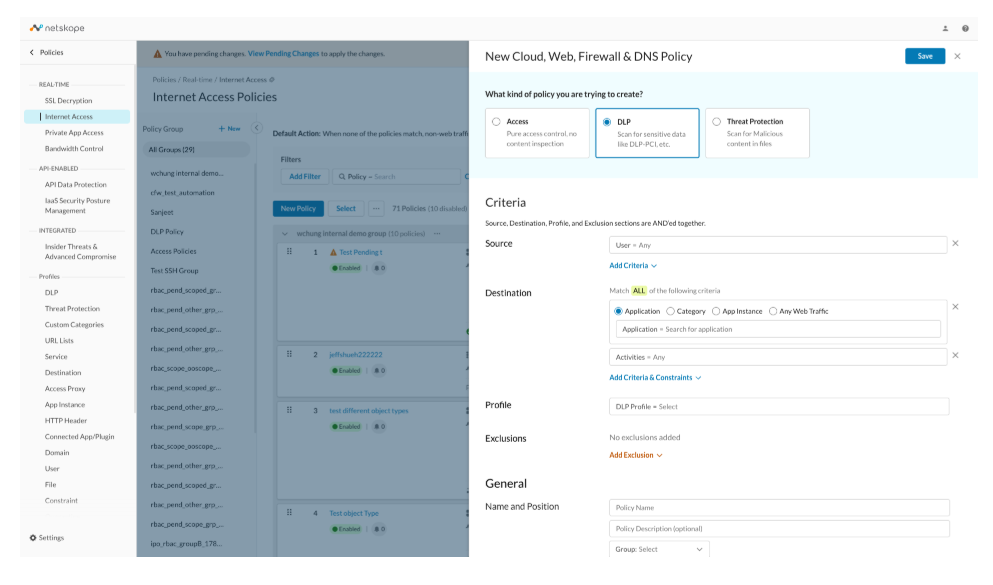
- DLP
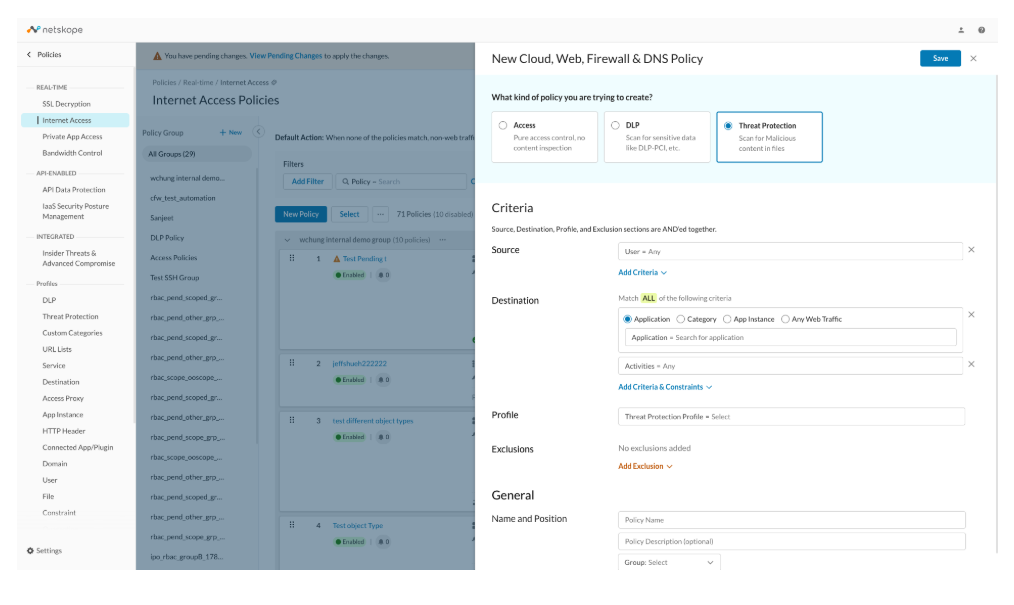
- Threat Protection
3. Selecting DLP replaces the form’s bottom with a DLP Profile picker instead of a plain Action.
4. Selecting Threat Protection works the same way, with a Threat Protection Profile picker.
Source
The Source field specifies who or where traffic must originate for this policy to apply. By default it is set to User = Any, so the policy applies to all users.
- Click Add Criteria to narrow this down. You can combine any of the following.
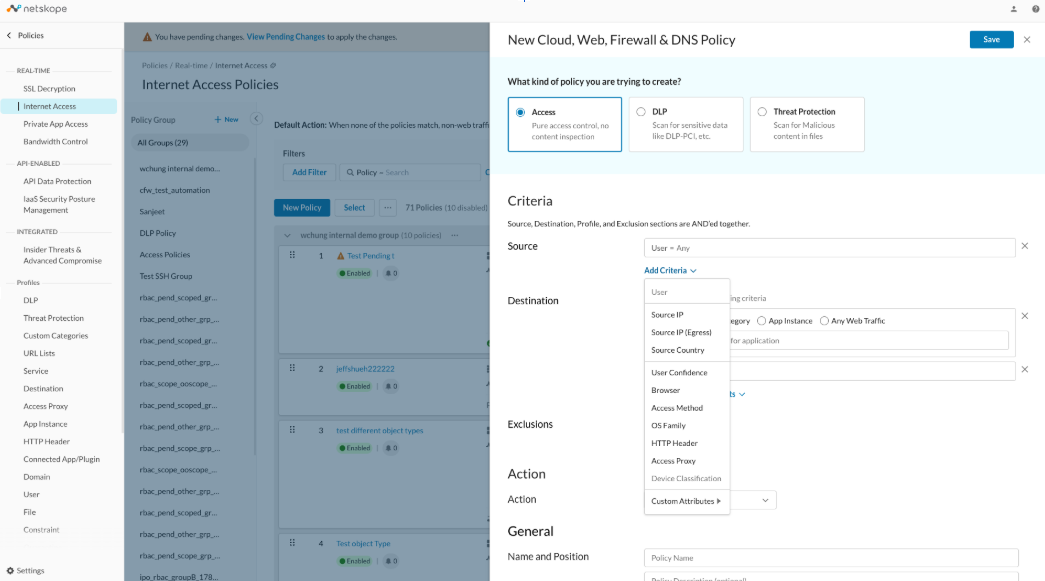
- User — specific users, user groups, or organizational units
- Source IP / Source IP (Egress) — traffic from specific network ranges
- Source Country — traffic originating from specific countries
- User Confidence — based on a calculated confidence score
- Browser — Chrome, Firefox, Edge, etc.
- Access Method — how the user is connecting (Client, Explicit Proxy, etc.)
- OS Family — Windows, macOS, iOS, Linux, Android
- HTTP Header — match on a configured HTTP header profile
- Access Proxy — traffic routed through a specific access proxy
- Device Classification — managed vs. unmanaged devices, etc.*
- Custom Attributes — custom Active Directory attributes
Every criterion you add narrows the policy further — they’re combined with AND logic (all must match).
Destination
The Destination section controls *what* the traffic is going to. This is the most important choice for determining the overall shape of your policy, since it decides whether you’re writing a web-traffic rule, an app-specific rule, or a category-based rule. Choose from one of the four options.
- Any Web Traffic: The broadest option — applies to all web/internet traffic, not scoped to a specific app.
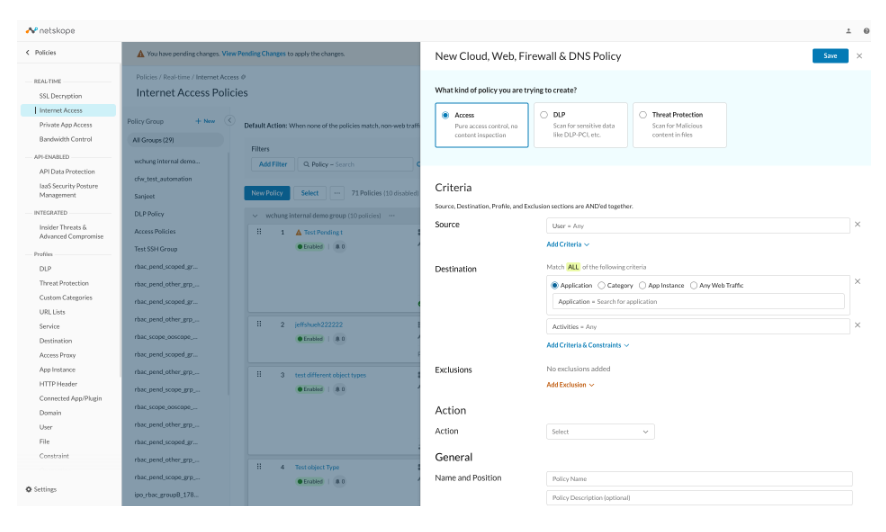
- Application: A specific cloud application (e.g. Box, YouTube) or firewall application, found by searching.
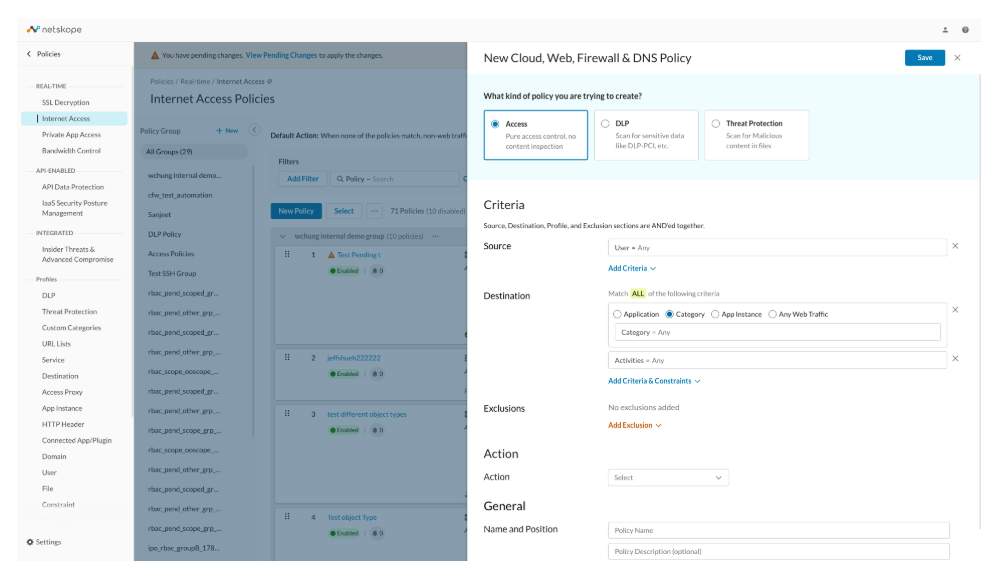
- Category: A predefined or custom category of websites/apps.
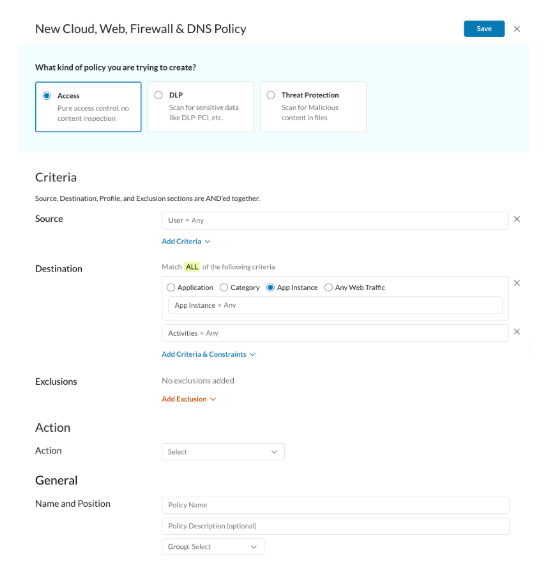
- App Instance: A specific instance of an application (e.g. a particular company’s Salesforce tenant).
- Any traffic: Applies to all Non-web traffic.
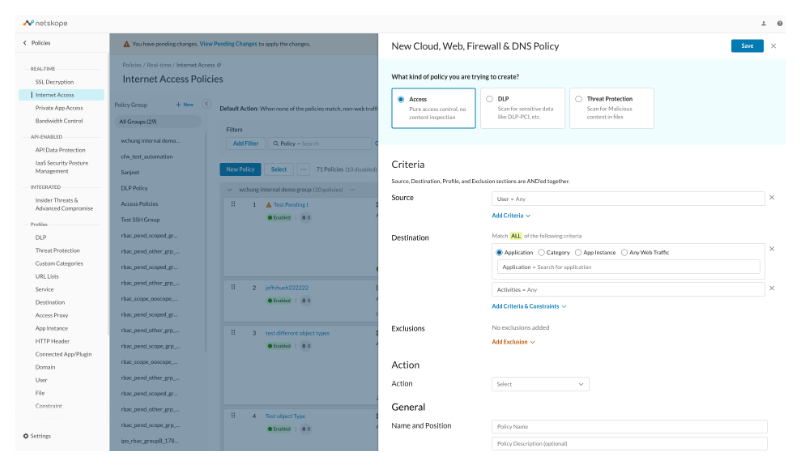
Application selected — search for the app by name.
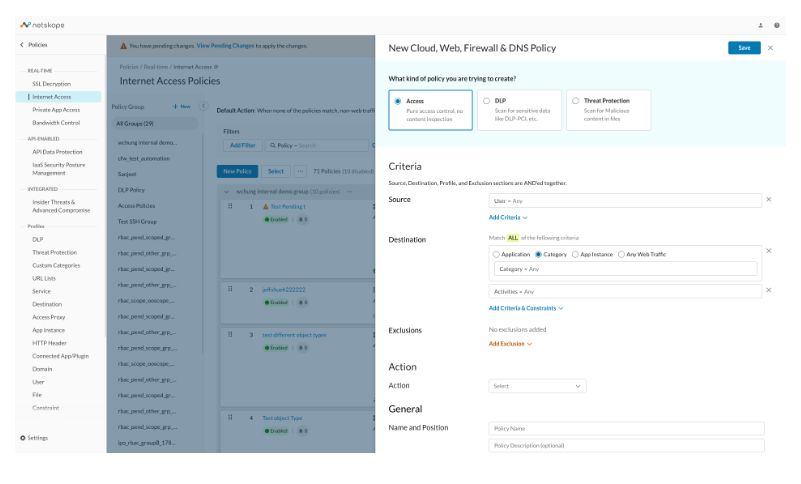
Category selected — search for a predefined or custom category.
App Instance selected — search for the App instance by name.
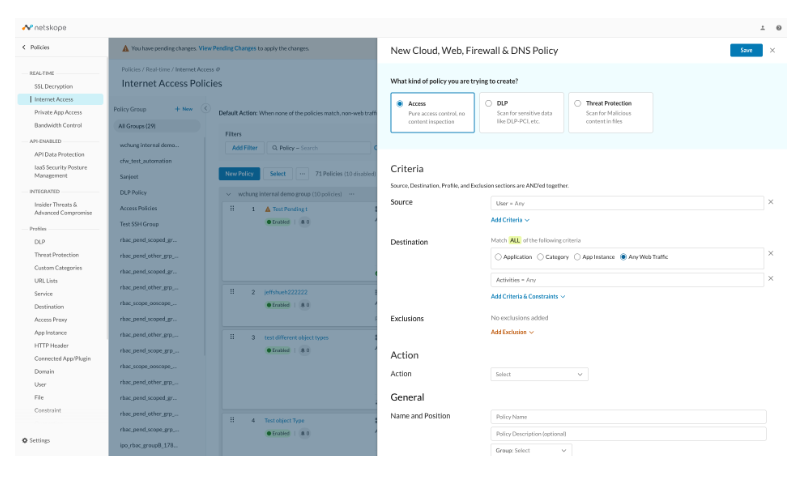
Any Web Traffic selected.
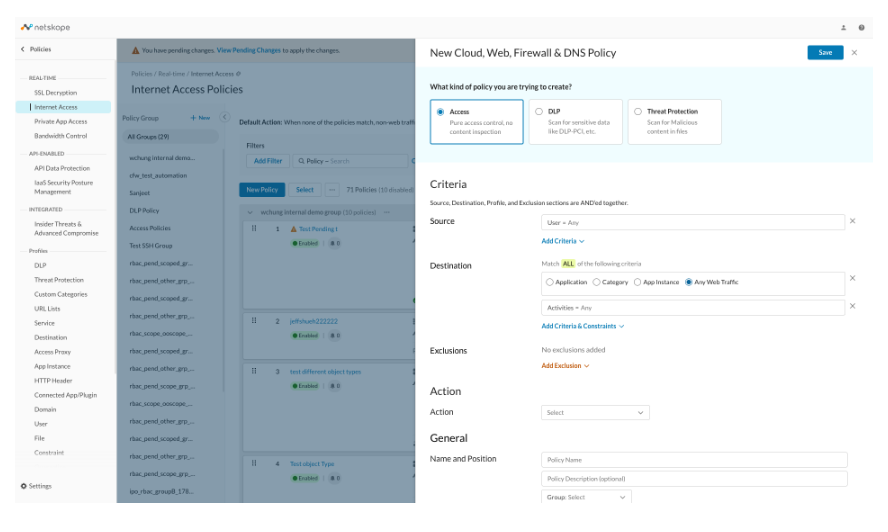
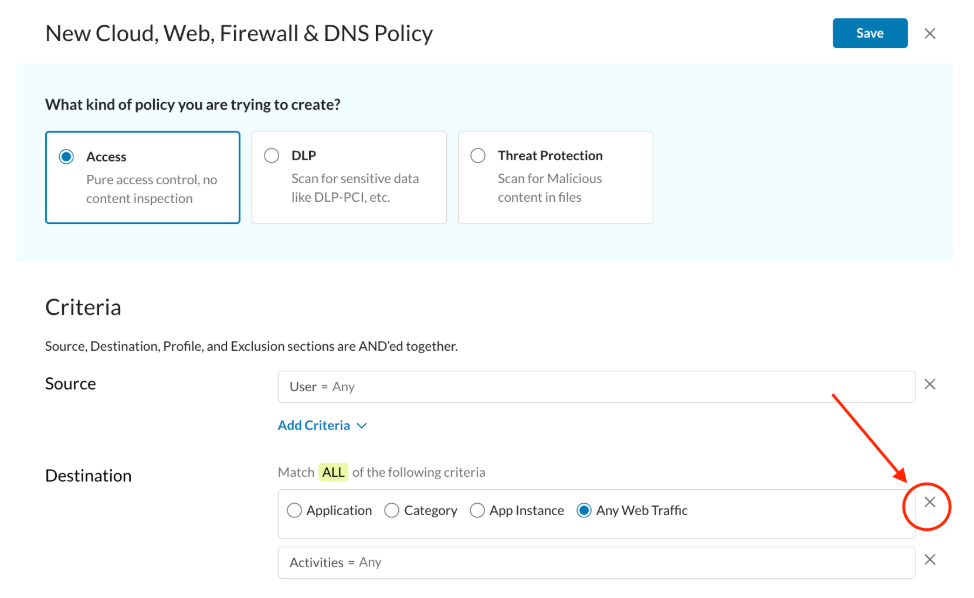
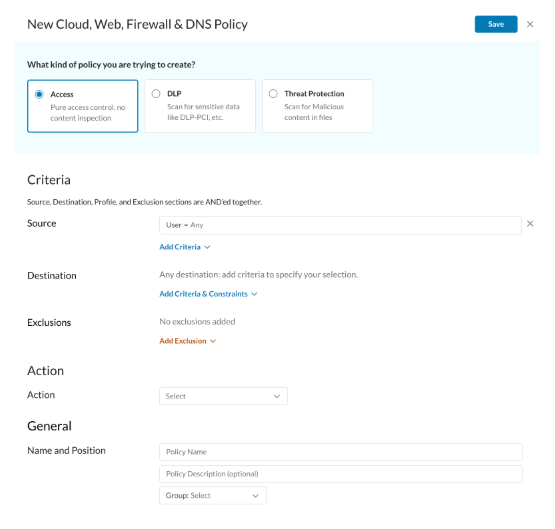
Any Traffic selected — click the Close button for destination type to remove the existing option and make the policy Any Traffic.
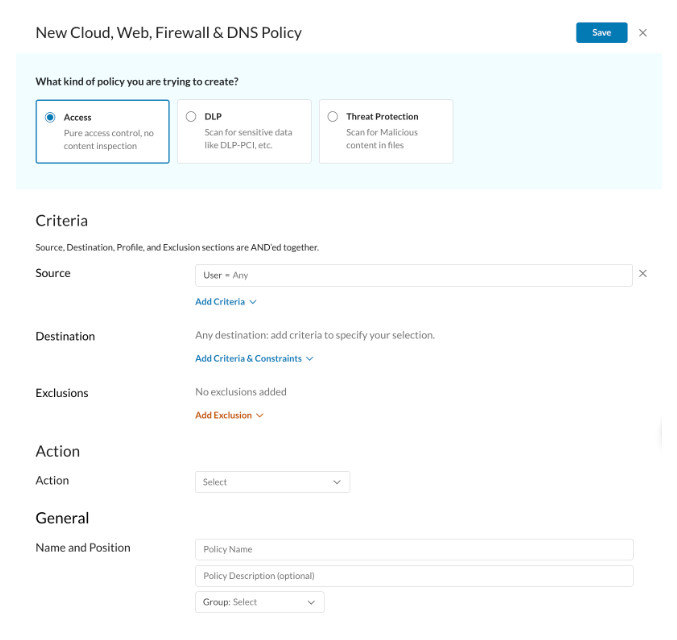
Under any Destination option, you can also set Activities (e.g. Download, Upload, View) to scope the policy to specific user actions, and expand Add Criteria & Constraints for more advanced matching (file type, size, sharing restrictions, CCL rating, destination country, and more).
Excluding specific traffic
If you need this policy to apply to almost everyone/everything except a few exceptions, use Add Exclusion instead of narrowing the Source or Destination directly.
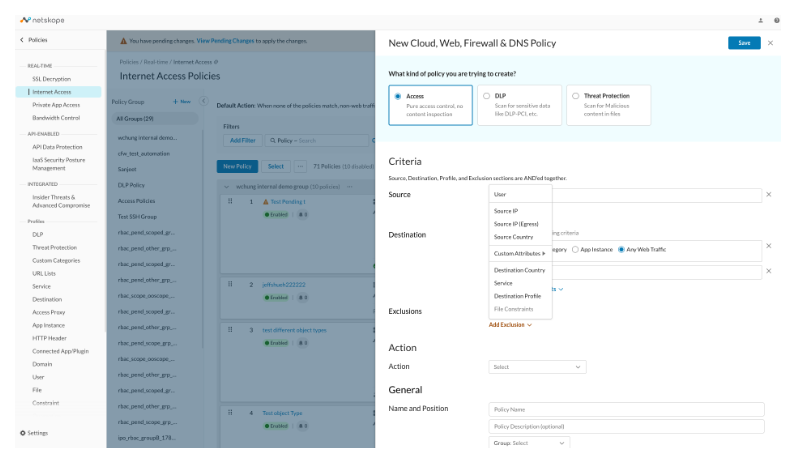
Exclusions cover both source-side criteria (User, Source IP, Source IP (Egress), Source Country, Custom Attributes) and destination-side criteria (Destination Country, Service, Destination Profile, File Constraints).
Choosing the Action
For an Access policy, the Action field is a dropdown. Based on rules already configured on this tenant, confirmed available actions include Allow, Block, Bypass, and Alert. (The dropdown may show more or fewer options depending on the Destination and Activities you’ve selected — if it looks empty, make sure you’ve finished configuring Destination first.) Additional action types — User Alert, Periodic Authentication, Encrypt — exist in the product but weren’t reproduced in the live Action dropdown in this pass; if you need one of these, check the Notification Templates page first to see what’s already configured.
For DLP and Threat Protection policies, you’ll pick a Profile here instead (a DLP Profile or Threat Protection Profile you’ve configured under Policies → Profiles — see Profiles, rather than a plain allow/block action.
Finishing up: Name and Group
Under General, give the policy a Policy Name (required) and an optional description, then choose which Policy Group it belongs to.
You can also attach a schedule to the policy at this point — see Scheduling Policies.
Saving
Click Save. This does not make the policy live immediately — it creates a pending change. See Pending Changes for how to review and apply it.
Quick reference: building common policy shapes
| I want to | Policy type | Destination |
|---|---|---|
| Block/allow all web traffic for a group of users | Access | Any Web Traffic |
| Block/allow a specific cloud app | Access | Application (search for the app) |
| Restrict a whole category of sites | Access | Category |
| Scan uploads to any website for sensitive data | DLP | Any Web Traffic |
| Scan uploads to a specific app for sensitive data | DLP | Application or Category |
| Scan downloads from the web for malware | Threat Protection | Any Web Traffic or Category |
If you pick Threat Protection together with a firewall-type Application destination, the save may fail — try Any Web Traffic or Category instead for that combination. See Policy Types for details.
Choose the Destination — this sets the traffic type
The Destination section has 4 radio options: Application / Category / App Instance / Any Web Traffic. Which one you pick (and, for Application, *which* application you search for) determines whether the resulting rule is classified as SWG, Firewall, or SWG Firewall.
| Destination choice | Details |
|---|---|
| Any Web Traffic | Broadest — matches all web traffic |
| Application, search for a firewall app (small integer IDs, e.g. 78) | Must be an app with predefined_firewall_application_ids, not a cloud app |
| Application, search for a cloud app (e.g. Box, YouTube) | Cloud apps use predefined_cloud_application_ids |
| Category | Predefined or custom categories |
| App Instance | Not exercised in this session — included in the radio group but no live example captured |
| Any traffic | Web and Non web traffic |
Any Web Traffic selected (SWG traffic type)
Category selected (SWG Firewall traffic type)
Application selected (Firewall or SWG Firewall, depending on which app you search for)
Any web/non-web Traffic selected
Putting it together — sample possible combinations
| Destination / Policy Goal | Any Web Traffic | Application: firewall app (Firewall) | App Instance | Any Traffic | Application: cloud app/ Category |
|---|---|---|---|---|---|
| Access | Supported | Firewall Access | Supported | Supported | Supported |
| DLP | Supported(enable_dlp_for_any_web_traffic) | Supported(cfw_activities, cfw_dlp_license_enabled) | Supc ported | Not Supported | Supported |
| Threat Protection | Supported (enable_tss_for_any_web_traffic) | Not supported | Supported | Not Supported | Supported |
Finish: Action, Name, Save
For Access goal, an Action dropdown appears (confirmed values in use on this tenant include Allow, Block, and Bypass). For DLP/Threat Protection goals, pick a Profile instead of an Action.
Finally, fill in Policy Name (required), optionally a description, choose a Group, and click Save. Like everything else in this feature, saving creates a pending change — click View Pending Changes → Apply on the list page to actually deploy it.