

This document explains how to configure the Linux File Share v1.1.0 plugin with the Custom File Classification (CFC) module of the Netskope Cloud Exchange platform. This integration allows you to pull image files from linux machines to create hashes and share them to Netskope tenants as per the configurations that can later be consumed in the DLP functionality in the Netskope tenant.
Prerequisites
To complete the configuration, you need:
- A Netskope tenant (or multiple, for example, production and development/test instances).
- A Custom File Classifier on your Netskope tenant.
- A Netskope Cloud Exchange tenant with the Tenant plugin and Custom File Classification plugin already configured.
- Access to a Linux server with SSH service enabled to pull image files.
Linux File Share Plugin Support
The Linux File Share CFC plugin is used to fetch file data from a remote Linux server via the SFTP protocol and generate CFC hashes of the retrieved file data. It supports files with extensions related to Images or Zip formats.
| Feature | Support |
|---|---|
| Pull | Yes (.bmp, .dib, .jpeg, .jpg, .jpe, .jp2, .png, .webp, .avif, .pbm, .pgm, .ppm, .pxm, .pnm, .pfm, .sr, .ras, .tiff, .tif, .exr, .hdr, .pic, .zip, .tgz) |
| Push | No |
Permissions
This permission is needed for the plugin configuration: SSH User should have read access for the provided image files.
API Details
List of Libraries Used
This plugin uses Python libraries to establish secure connections to Linux servers and transfer CSV files via SFTP protocol.
Library: Paramiko – SSH2 protocol library for Python
Usage: Paramiko is a pure-Python implementation of the SSHv2 protocol, providing both client and server functionality. The plugin uses Paramiko to create secure SFTP connections, authenticate with the Linux server, and transfer CSV files securely. Paramiko provides comprehensive SSH functionality including authentication, channel management, and file transfer capabilities.
Create SSH Client Connection
from ..lib import paramiko
ssh_connection = paramiko.SSHClient()
ssh_connection.set_missing_host_key_policy(
    paramiko.AutoAddPolicy()
)
ssh_connection.connect(
    hostname=configuration.get("server_ip"),
    username=configuration.get("username"),
    password=configuration.get("password"),
    port=configuration.get("port"),
)
Create SFTP Client
sftp_session = ssh_connection.open_sftp()
Directory/File Listing API’s
files = sftp_session.listdir(directory_path)
File Attribute fetch
file_attributes = sftp_session.stat(directory_path)
if not stat.S_ISDIR(file_attributes.st_mode):
Download CSV File from Linux Server
sftp_session.get(
    data.get("path"),
    os.path.join(file_path, data.get("file", "")),
)
Close Connections
ssh_connection.close()
Performance Matrix
Here is the performance reading conducted for fetching and storing 10K Files metadata ( ~5.5 MB each file size and total file size is ~55 GB) on a Large Cloud Exchange instance with these specifications.
| Description | Specification |
|---|---|
| Stack details | Size: Large RAM: 32 GB CPU: 16 Cores |
| Files metadata fetched from Linux File Share | ~ 157,000 MB/hour ~ 28,600 Files/Hour (each file of ~5.5 MB) |
Workflow
- Get your SFTP Shared File path from the Linux Server.
- Configure the Linux File Share CFC plugin.
- Configure a Business Rule for Linux File Share.
- Configure Sharing for Linux File Share.
- Validate the Linux File Share CFC Plugin.
Watch a Video
Click play to watch a video.
Get your SFTP Shared File Path from Linux Server
-
Most SFTP setups are controlled via the SSH config file:
sudo vi /etc/ssh/sshd_config
-
Look for entries like:
Subsystem sftp internal-sftp
-
and:
Match User <username> ChrootDirectory /path/to/sftp/root ForceCommand internal-sftp -
The value of
ChrootDirectoryis the SFTP root (shared path) for that user. -
If no ChrootDirectory is set, then SFTP typically defaults to the user’s home directory:
echo $HOME
Or
grep <username> /etc/passwd
-
Example output:
testuser:x:1001:1001::/home/testuser:/bin/bash
-
Here,
/home/testuseris the SFTP accessible path.
Configure the Linux File Share CFC Plugin
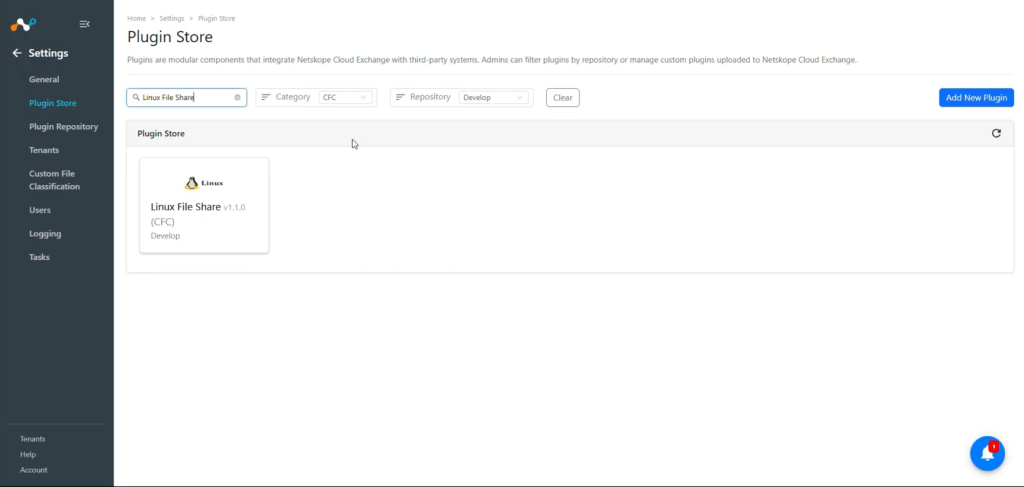
- Log in to Cloud Exchange and navigate to Settings > Plugin Store.
- Search for and select the Linux File Share v1.1.0 (CFC) plugin.
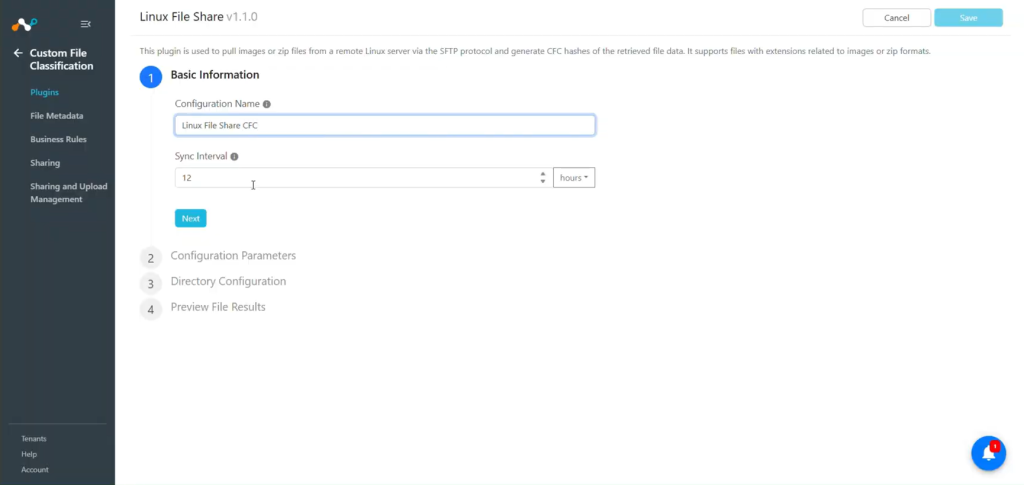
- Enter the Basic Information:
- Configuration Name: Enter a name appropriate for your integration.
- Sync Interval: Interval to pull the data from plugin source. We recommend keeping it longer than 12 hours. (Default: 12 hours)
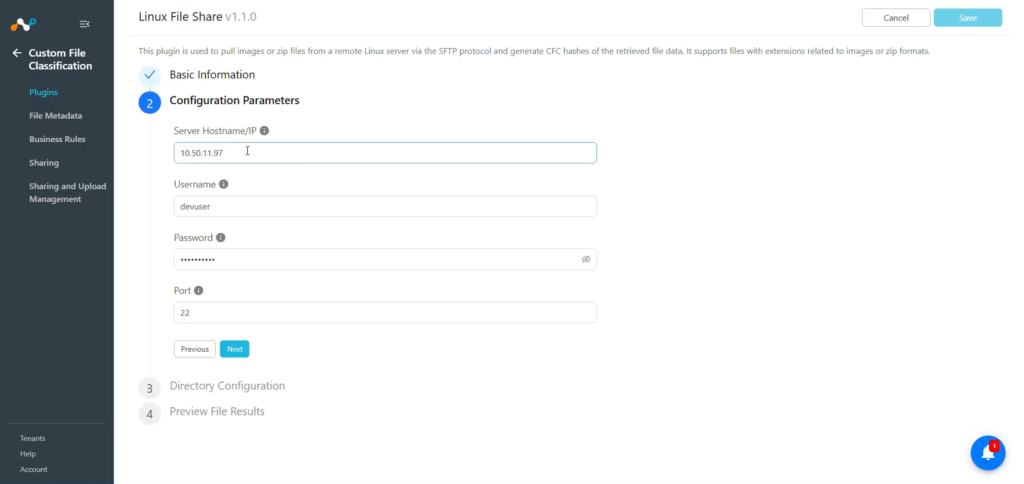
- Click Next and enter the Configuration Parameters:
- Server IP/Hostname: IP address/Hostname of the Linux server from which the Image data files should be pulled.
- Username: Username of the Linux Machine that has access to the Image files or directory.
- Password: Password for the provided username.
- Port: Port number to connect to the SSH service on the Linux machine.
- Click Next and enter the Directory Configuration parameters:
- Directory Path: Path of the Linux directory from where the images will be pulled. It supports files with extensions related to Images or Zip formats.
- Filename Filter: A Regular expression that filters the image files to be pulled. Ensure that the filter is a valid regular expression.
- Empty value: Pull all the files from the directory.
The filter will only pull the images stored immediately in the directory.
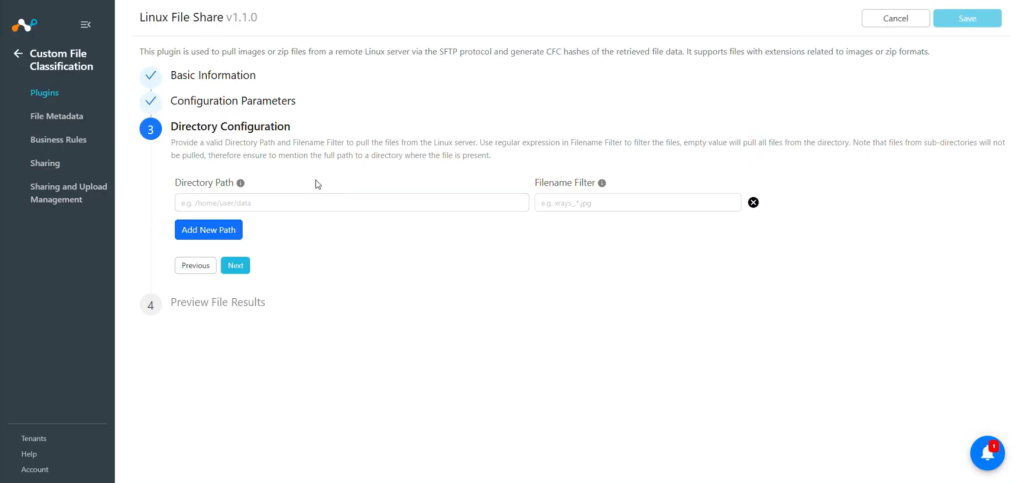 You can add multiple directories in the Linux File Share Plugin.
 - Click Next and preview file scanning results for the configured directory. Ensure that the file count and size of files being pulled up by the plugin are correct and do not exceed the total file count limit (10,000) and total file size limit (~78.125 GB).
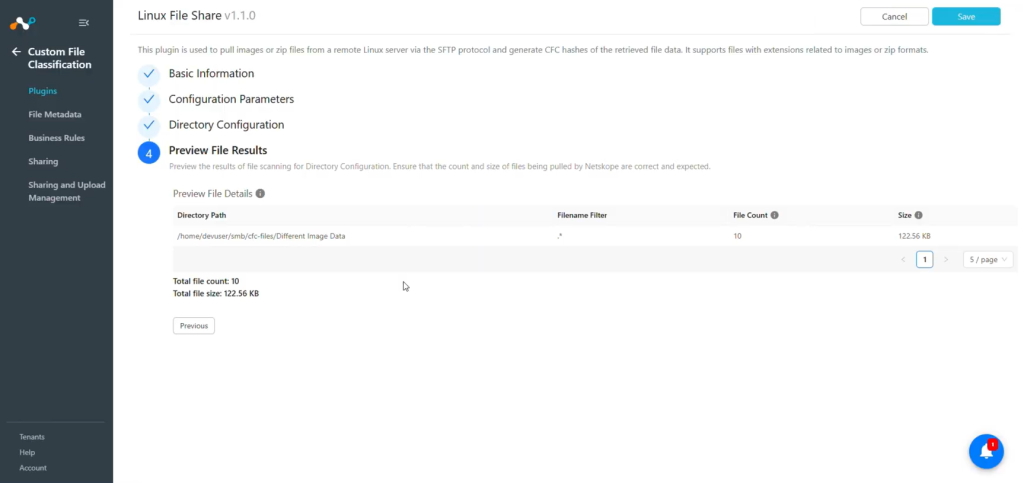
- Click Save.
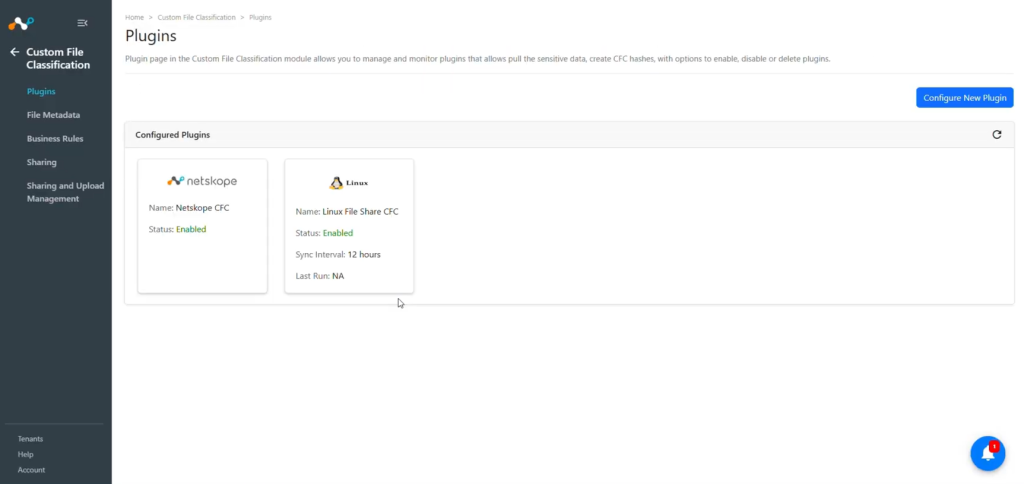


Configure a CFC Business Rule for Linux File Share
Custom File Classification module requires business rules to share file data to the Netskope Tenant. A user can add rules to filter files by name, size, extension, source, etc. Multiple rules can be grouped together for advanced filtering.
- Go to Custom File Classification > Business Rules.
- Click Create New Rule and enter these parameters:
- Rule Name: A unique name for the business rule.
- Rule: Set a filter based on conditions to make a group of files.
- Folder Name: Provide a folder or sub-folder name to group multiple business rules. It will help to see a structured list of business rules in the table.
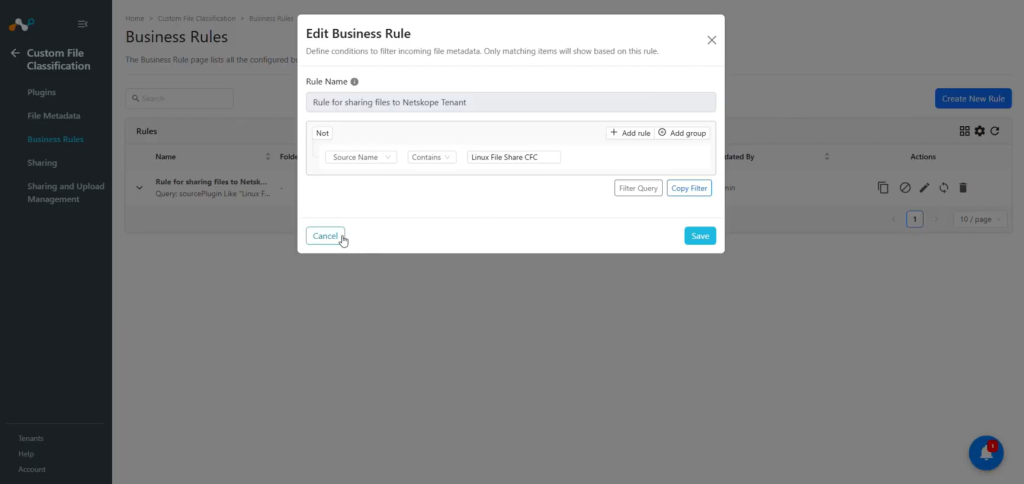
- Click Save.
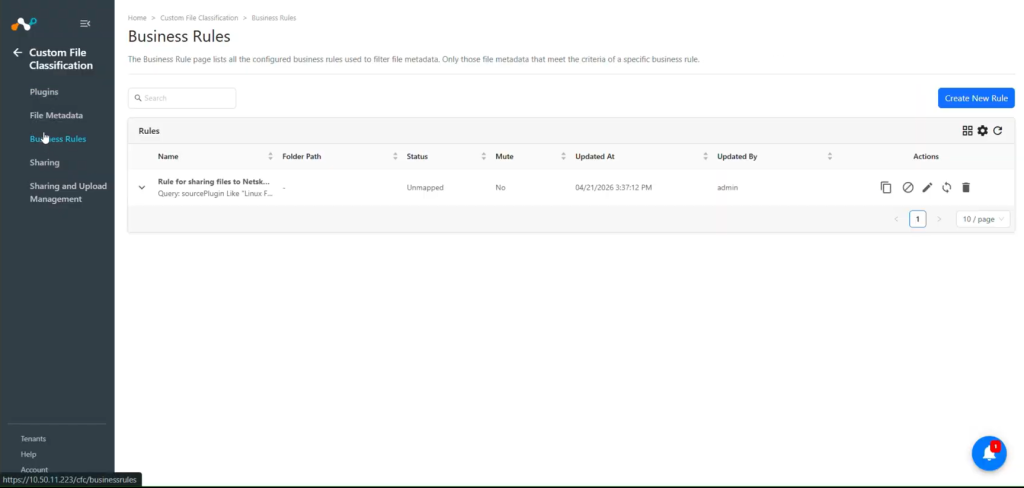


Configure Risk Exchange Sharing for Linux File Share
- Go to Custom File Classification > Sharing.
- Click Add Sharing Configuration and select the Linux File Share CFC plugin as the Source Configuration.
- Select the Netskope CFC plugin as the Destination Configuration.
- The Target will be selected by default, based on the Destination Configuration.
- Select a Mapping for Business Rule, File Classifier, and Training Type. A user can map multiple business rules in one sharing. The File Classifier lists only custom file classifiers created on the Netskope Tenant.
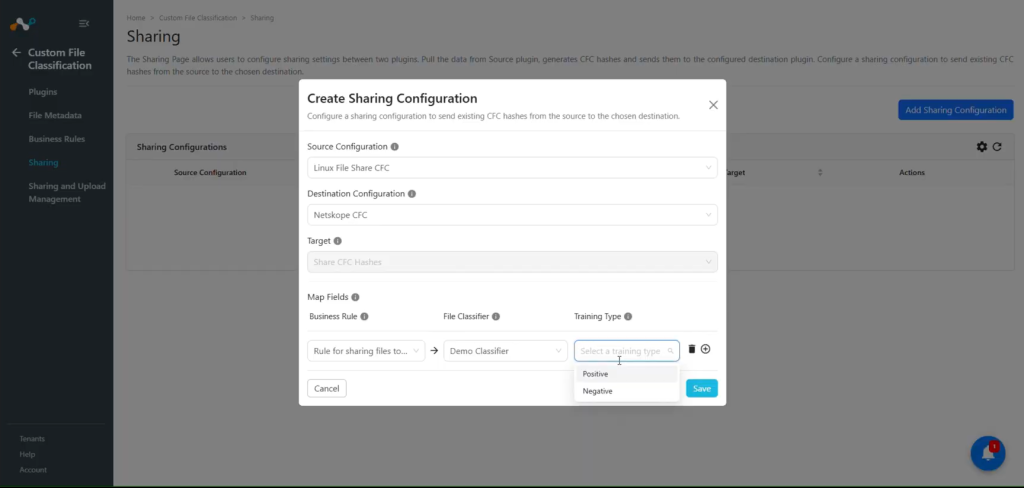
- Click Save.

Sync or Delete a Sharing Configuration
- Sync the sharing configuration by clicking on the synchronization icon. This starts the sharing process immediately, without waiting for the actual event to be triggered.
- Delete the sharing configuration by clicking on the garbage-can icon.

Validate the Linux File Share CFC Plugin
Validate the Pull
After the Sharing is configured, you should wait until the next plugin lifecycle run of the configured Linux File Share CFC plugin gets executed successfully.
Validate the Linux File Share Plugin status on the Sharing and Upload Management page. Go to Custom File Classification > Sharing and Upload Management.

The status of the Sharing configuration can be:
- Scheduled: This represents that the sharing is configured, but it is still in the queue and waiting to run for the first time.
- Generating Hash: This represents that the process of generating a hash is in progress.
- Uploading Hash: This represents that the hash is generated successfully, and the process of sharing it to the configured destination is in progress.
- Completed: This indicates that the generated hash is successfully shared with the destination configuration.
- Failed: Indicates that the process failed in either pulling data, hashing data, or uploading the hash.
Clicking View Metadata will redirect you to the Files Metadata page.

Validate Sharing on the Netskope Tenant
- Log in to your Netskope Tenant.
- Go to Policies > DLP > File Classifiers.


- Select the Classifier that you have selected during the sharing configuration, you will see the file hashes received here:

Troubleshooting the Linux File Share Plugin
Unable to configure the Linux File Share CFC Plugin
Issue: If the user is unable to configure the Linux File Share CFC plugin, it may be due to one of these reasons:

- Incorrect credentials were provided.
- The user doesn’t have permission to read the file.
- Incorrect hostname/server IP.
- The provided port value is disabled on the Linux Server.
- Incorrect directory path.
What to do:
- Make sure to provide the correct credentials.
- Make sure that the user has the required permissions to read the file.
- Make sure that the correct hostname/ server IP is provided.
- Make sure that the port is enabled and in listening mode.
- Make sure you have the image file data in the provided path.