This document guides through the steps to configure the Netskope Client Enforcement application in OneLogin as a self-service option to deploy the Netskope Client.
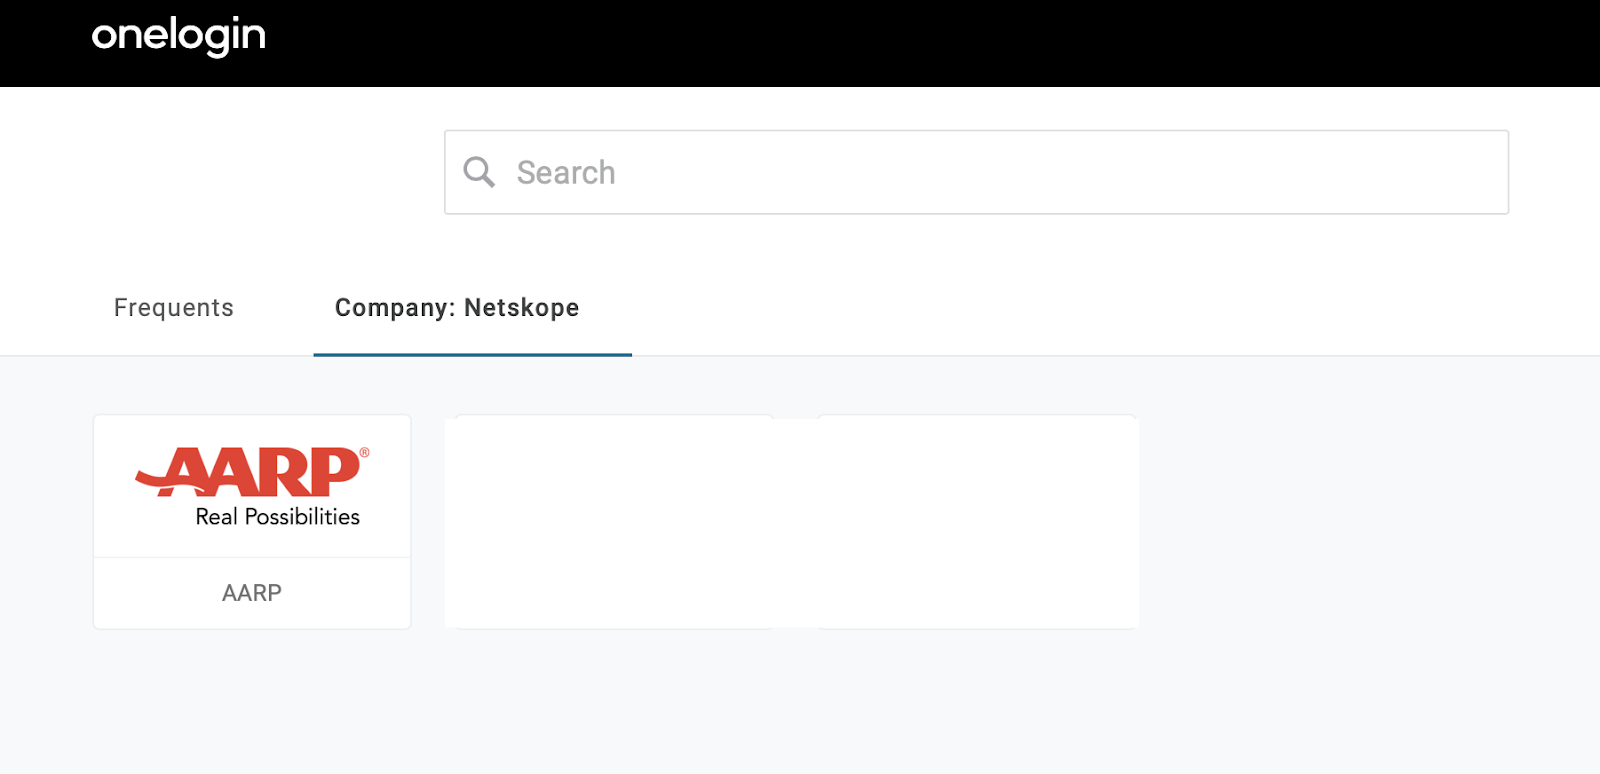
The Application AARP is accessible to the end user only when the Netskope Client is active. The access to this application is denied if the Netskope Client is disabled or uninstalled.
Prerequisites
- Import user email address information into Netskope tenant. You can add it under Settings > Security Cloud Platform > Users. To learn more, view User Provisioning.
- Users are assigned to their respective applications in OneLogin.
- Access and admin rights in the OneLogin tenant.
- Access and admin rights in the Netskope webUI .
Before You Begin
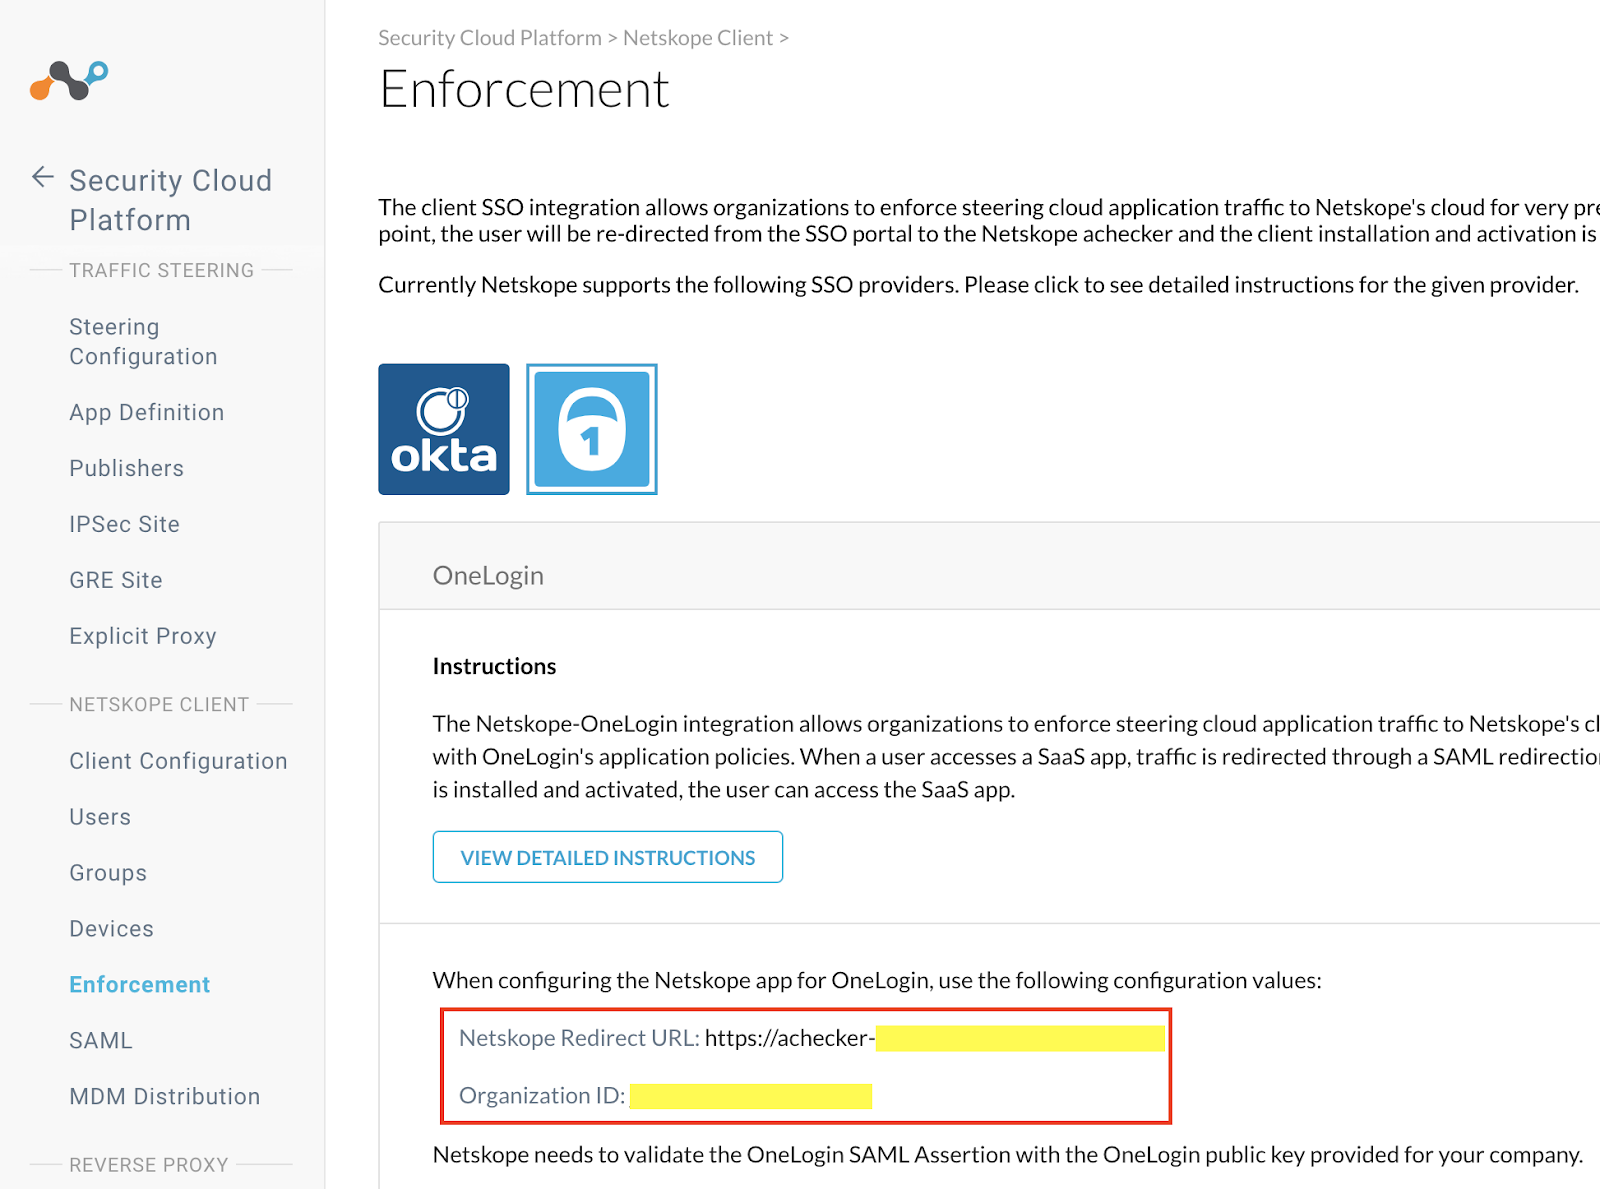
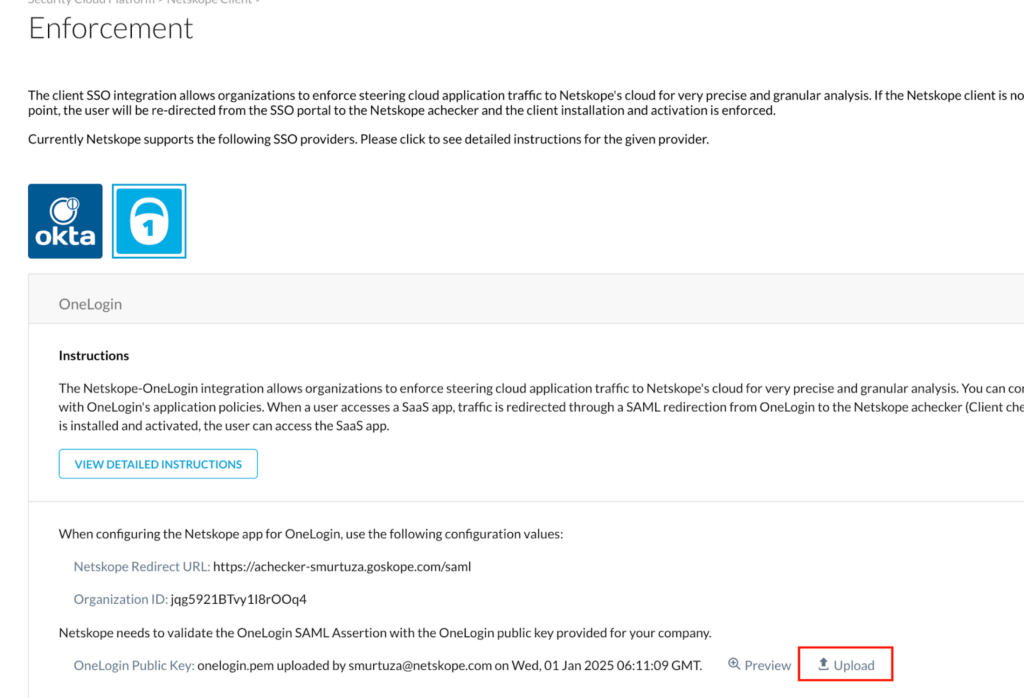
Obtain Netskope Redirect URL and Organization ID
-
Log into your Netskope Tenant.
-
Go to Settings > Security cloud platform > Netskope Client > Enforcement.
-
Select OneLogin.
-
Copy the following values:
-
Netskope Redirect URL
-
Organization ID
-
Obtain Netskope IP Addresses
To obtain Netskope IP address:
-
Log into your Netskope Tenant.
-
Go to Settings > Security cloud platform > Netskope Client > Enforcement.
-
Select OneLogin.
-
Click Netskope IP Ranges to copy IP addresses.

OneLogin App Configurations
Perform the following OneLogin configurations to create SAML custom connector to allow Netskope Client download:
-
Log into OneLogin.
-
Go to Applications.
-
Click Add App.
-
In the Search box, type and select SAML Custom connector (Advanced).
-
In Add SAML Custom Connector (Advanced) window, perform the following:
-
Add the display name. For example, Netskope Client Enablement.
-
Upload Netskope logo according to the aspect ratio mentioned on the webUI.
-
Add the description regarding the purpose of this application.
-
Click Save.
After you save, the webUI opens for more configurations such as Info, Configuration, Rules, and so on.
-
-
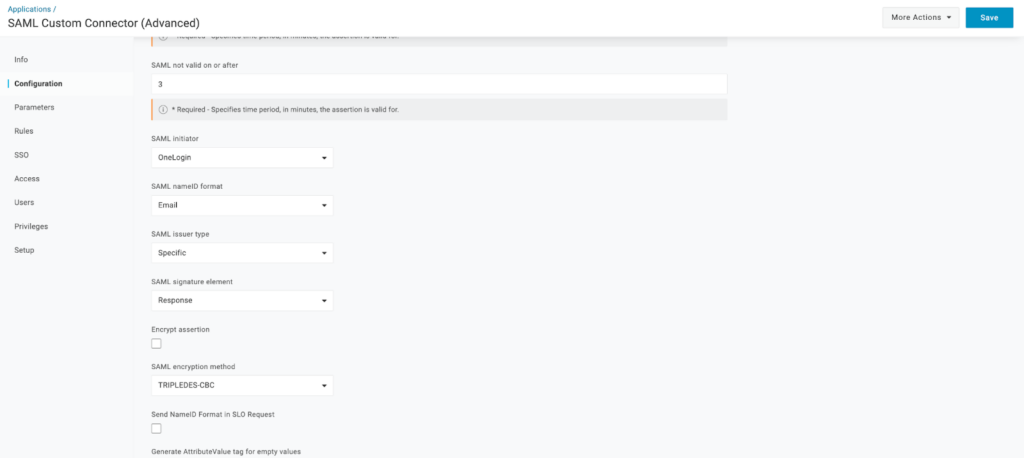
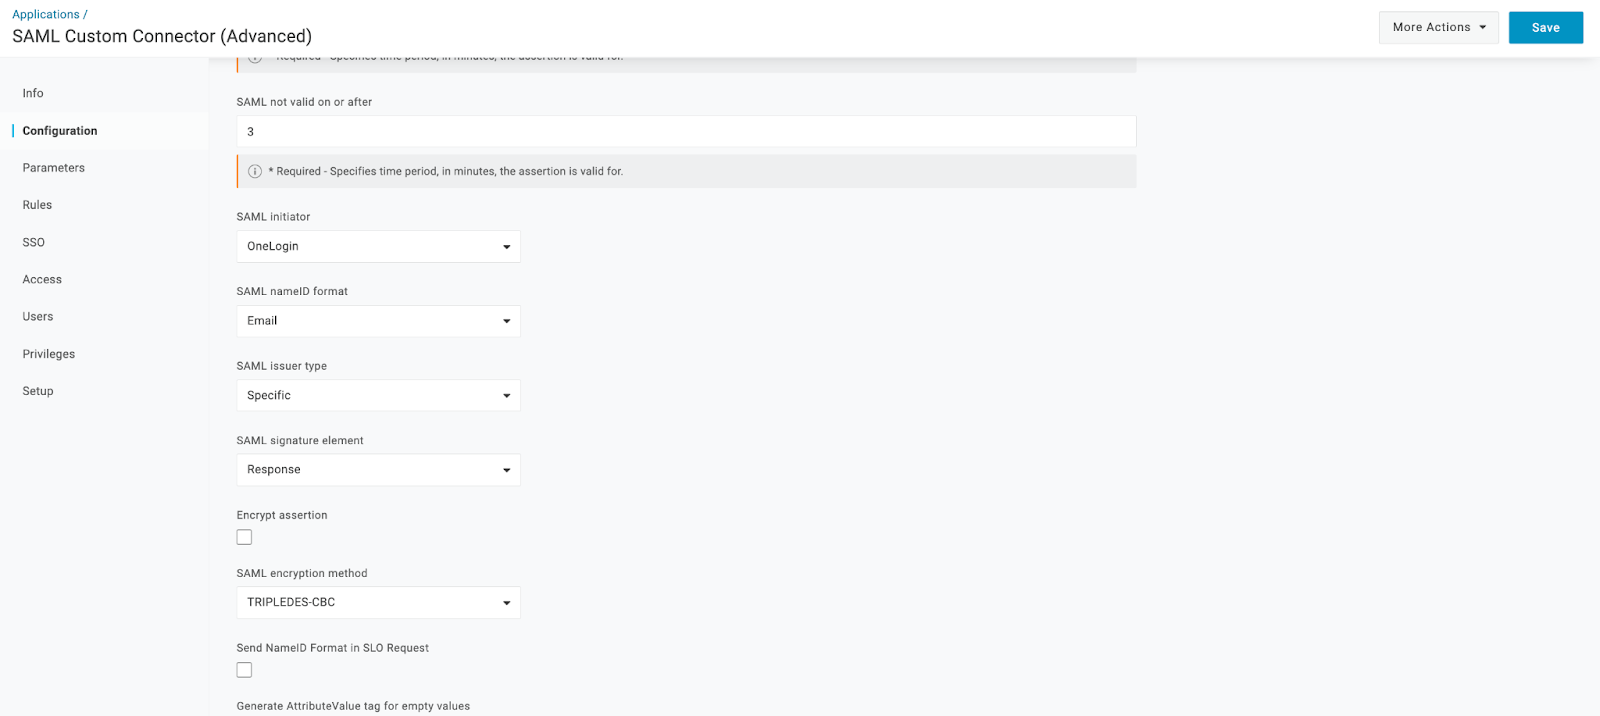
Click the Configuration tab.
-
Enter the following details according to the values captured from your Netskope tenant (See here to view how to obtain values from Netskope tenant):
-
RelayState: Enter your OneLogin tenant domain URL.
-
Audience (Entity ID): Enter the Organization ID from the Netskope tenant.
-
Recipient: Enter the Netskope Redirect URL.
-
ACS (Consumer) URL: Enter the Netskope Redirect URL.
-
-
Add other configurations as displayed in the following image:
-
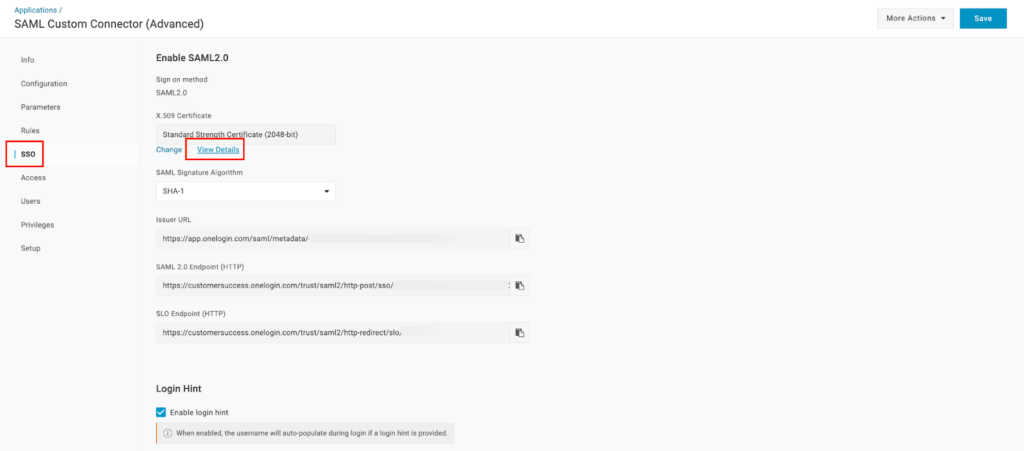
Click the SSO tab.
-
Click View Details under X.509 certificate.
-
This opens a new webUI with the certificate.You can download the certificate.
-
Click Save.
To learn more, view: Add apps to OneLogin.

Upload Certificates in Netskope
Here, you can use the certificate downloaded from your OneLogin application.
To upload your certificate in the Netskope tenant:
-
Go to Settings > Security Cloud Platform > Netskope Client > Enforcement.
-
Click Upload available in the OneLogin Public Key field.

After you complete the process of creating your application, you can now assign this application to Users or User Groups within OneLogin.

This enables users to download and install Netskope Client whenever a user clicks the Netskope Client Enablement application that you created.
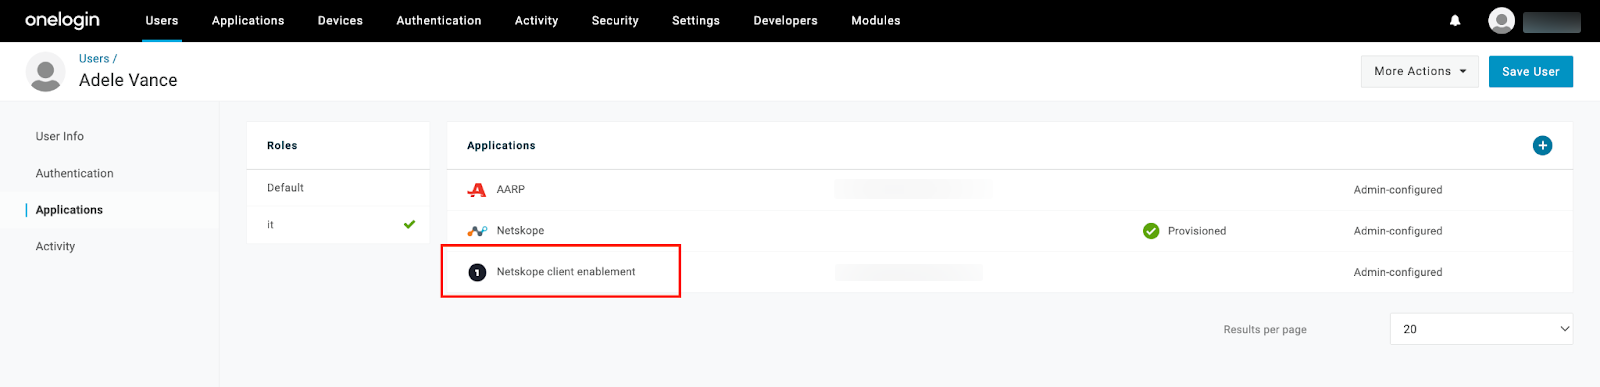
To learn more about adding users or user groups in OneLogin, view Add Users.
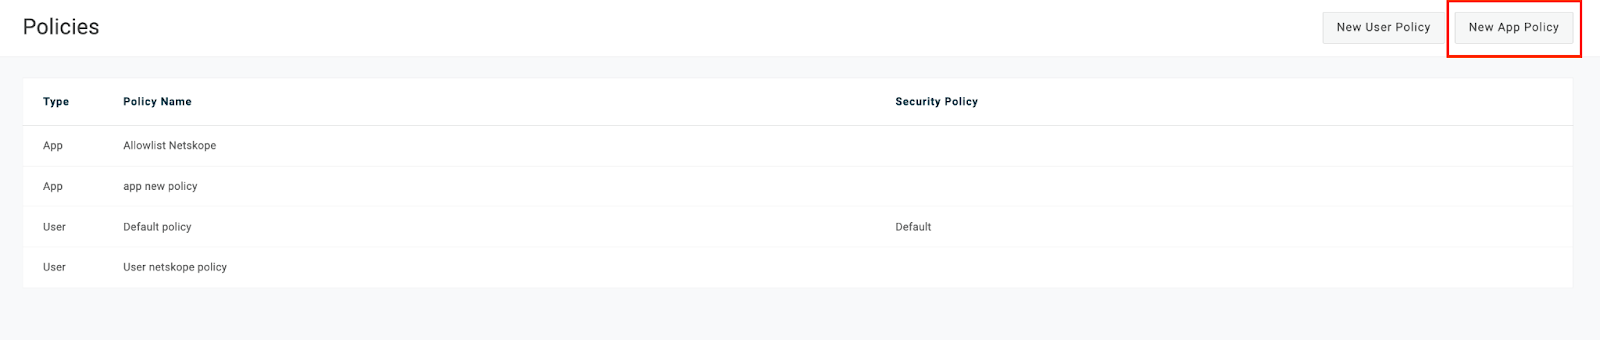
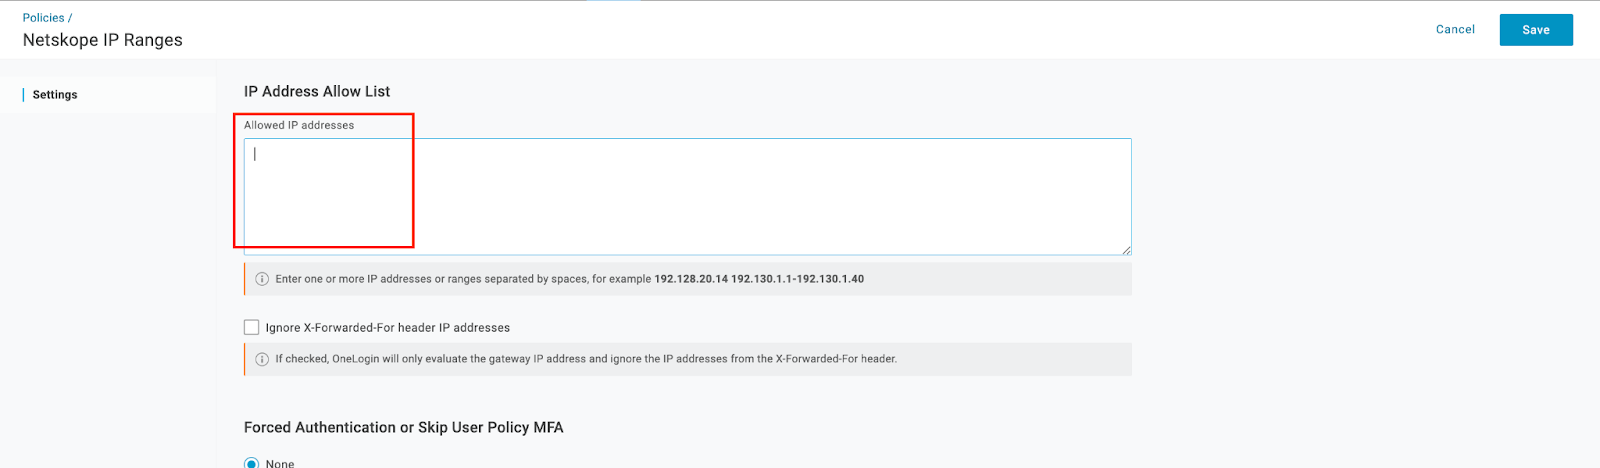
Configure IP Allowlist
You can configure IP Allowlist to enable access to SaaS Applications within OneLogin from Netskope IPs.
To configure allowlist:
-
Log into OneLogin.
-
Go to Security > Policies.
-
Click New App Policy.

-
Add a name to the policy.
-
In the IP Address Allowlist, copy and paste the Netskope IP addresses captured from your Netskope tenant ( See here to view how to obtain Netskope IP addresses).
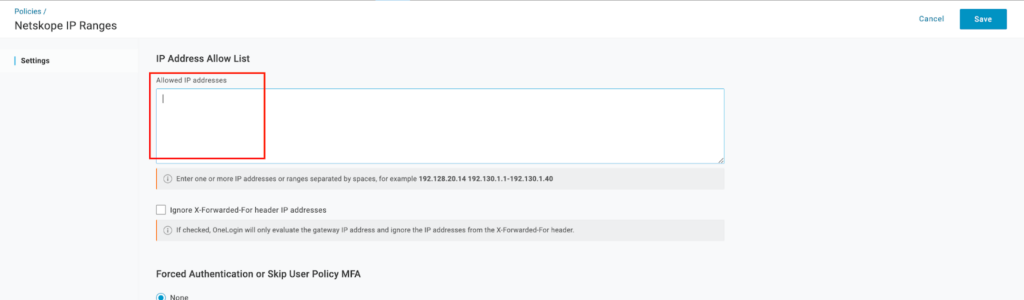
-
Click Save.
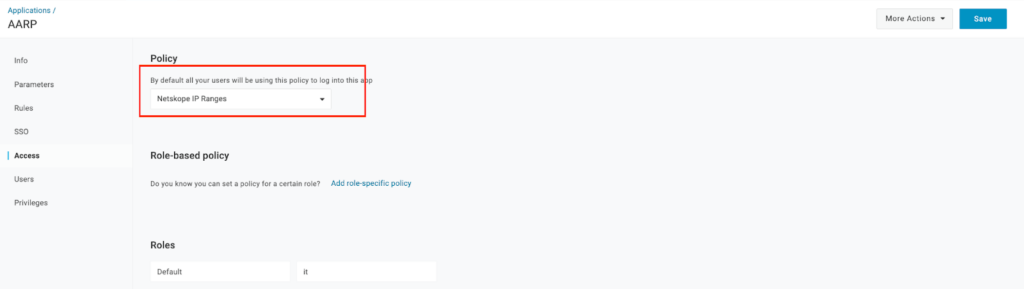
Assign Security Policy to OneLogin Application
-
In one login, go to Applications. For the context of this document, this policy is assigned to AARP application.
-
Under the selected application, go to the Access tab.
-
Choose the Policy that you had created in Configure IP Allowlist.
-
Click Save.

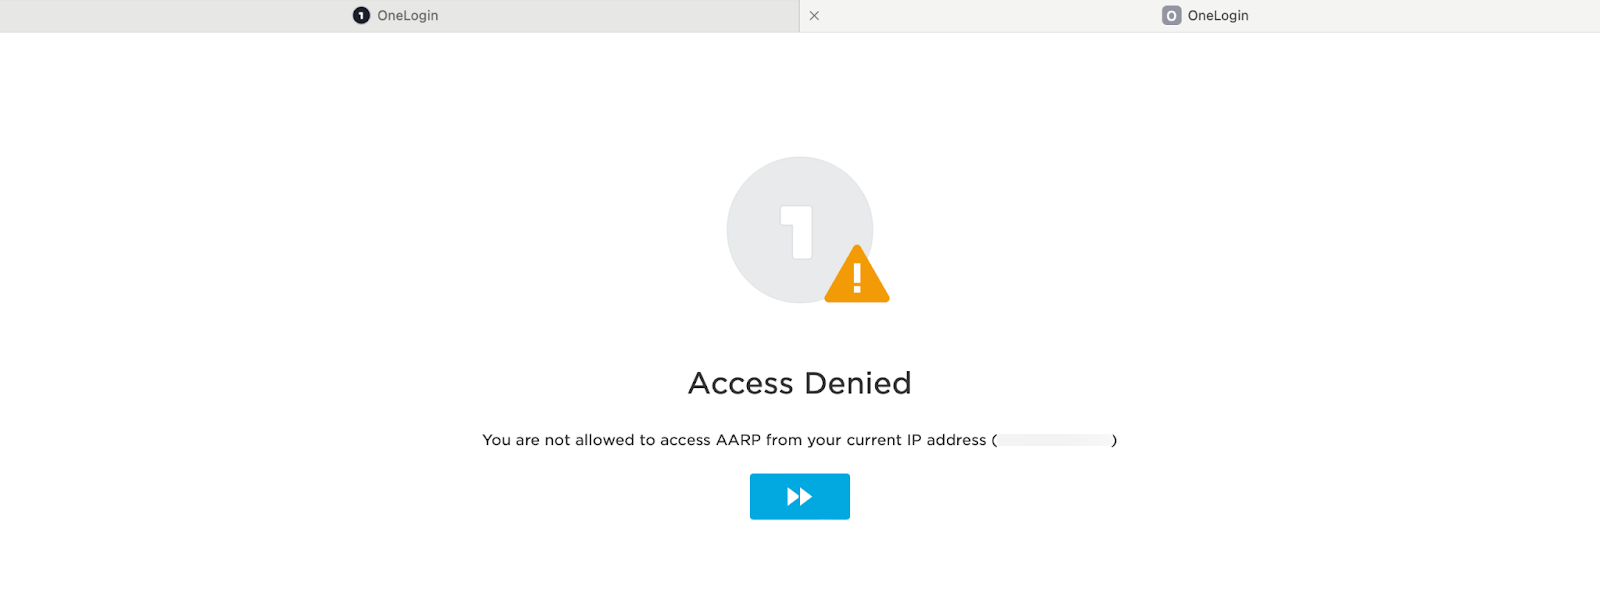
Validate Client Enforcement
Log into OneLogin using the ID that contains the Netskope client enablement application assigned.
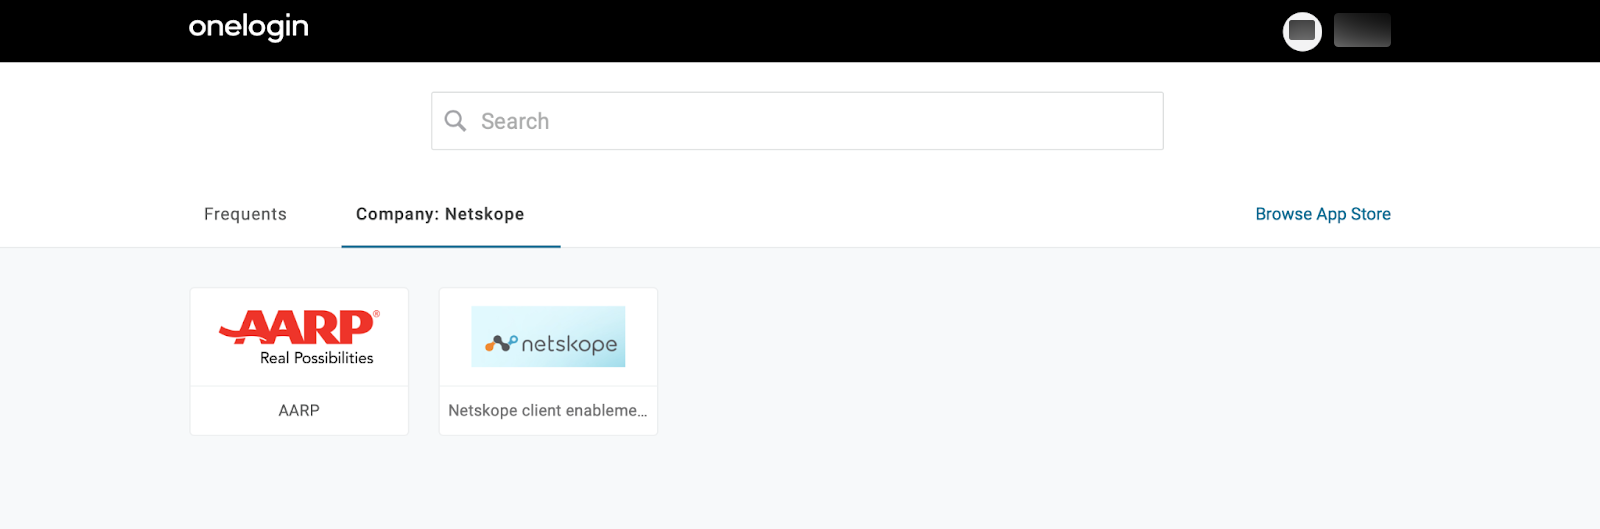
Try accessing the AARP application in the absence of Netskope Client. The WebUI displays the following “Access Denied” notification.
If you click the Netskope Client enablement application, it redirects you to download the Netskope Client. This ensures that users are enforced to access the SaaS applications with Netskope Client enabled.