

Healthcare industries use Imprivata as their identity provider (IDP) to authenticate doctors and nurses granting them access to the patient records with appropriate privileges. Imprivata logins are abstract from the logins in the operating system and Netskope Client needs to integrate with Imprivata agent to learn the logged in user information to apply related Netskope policies.
To learn more about Imprivata, view Imprivata.
With version 134.0.0, Netskope Client now supports integration with Imprivata for new installations. With this enhancement, you can:
- Seamlessly integrate with Imprivata agent to learn the logged-in user.
- Enforce differentiated policies based on users logged into Imprivata.
– Currently, Imprivata integration provided in the documentation is qualified only in the AWS environment. Support for Microsoft Azure will be provided in the future releases.
Supported Environments
-
OS: Windows 10, Windows 11
-
Imprivata appliance version: 24.2 or higher
-
Netskope Client version: 134.0.0 or later
Prerequisites
- A workstation with the Imprivata agent configured and running.
- Import Imprivata users to AD and then to your tenant.
- Group users into OU/User groups based on the needs so that different configurations and policies can be applied based on the groups.
Netskope Client Imprivata Integration
Here is an example to understand the seamless management of Netskope Client in Imprivata when multiple users with different access privileges log into Imprivata.

The head nurse from Building 1 at the General Hospital taps their ID to log into the shared workstation controlled by Imprivata EAM (Enterprise Asset Management) using SSO. He/She logs in to view a few patient records and locks the computer screen. The Netskope Client applies the security policies for the nurse and starts validating his/her activity. Here, the head nurse is not allowed to modify or edit the patient records. Next, the senior doctor logs into the same Imprivata EAM using SSO to check and modify the records. In this instance, Netskope Client un-enrolls the nurse from the Imprivata workstation and enrolls the doctor. Since the doctor has the edit privileges, he/she is allowed to modify or update the patient records.
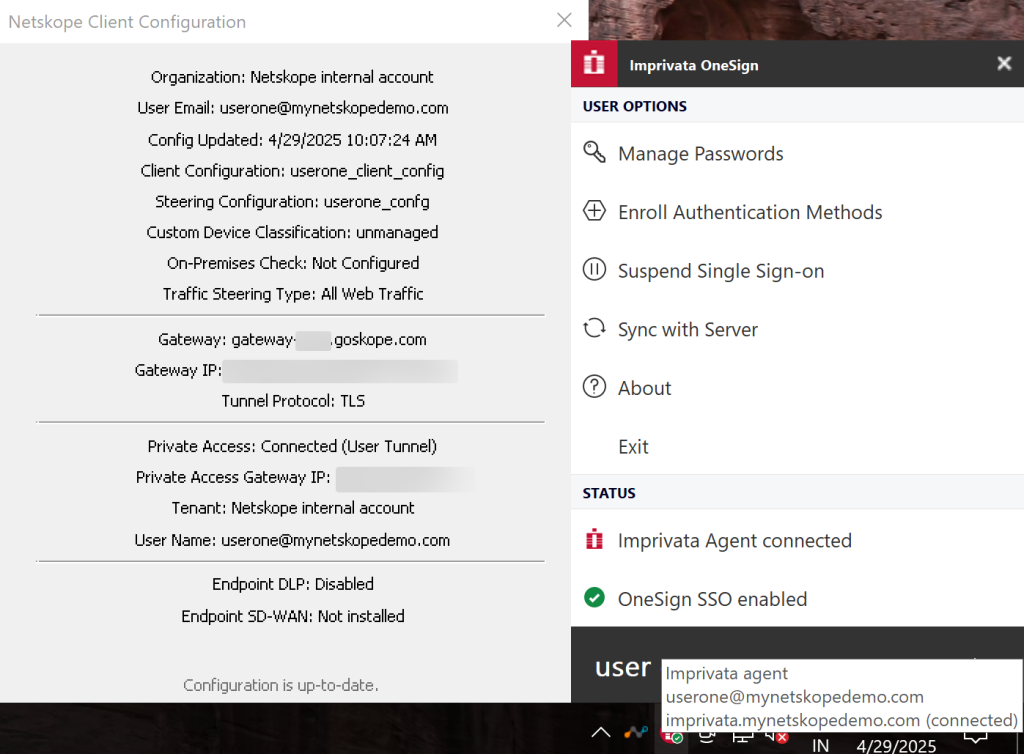
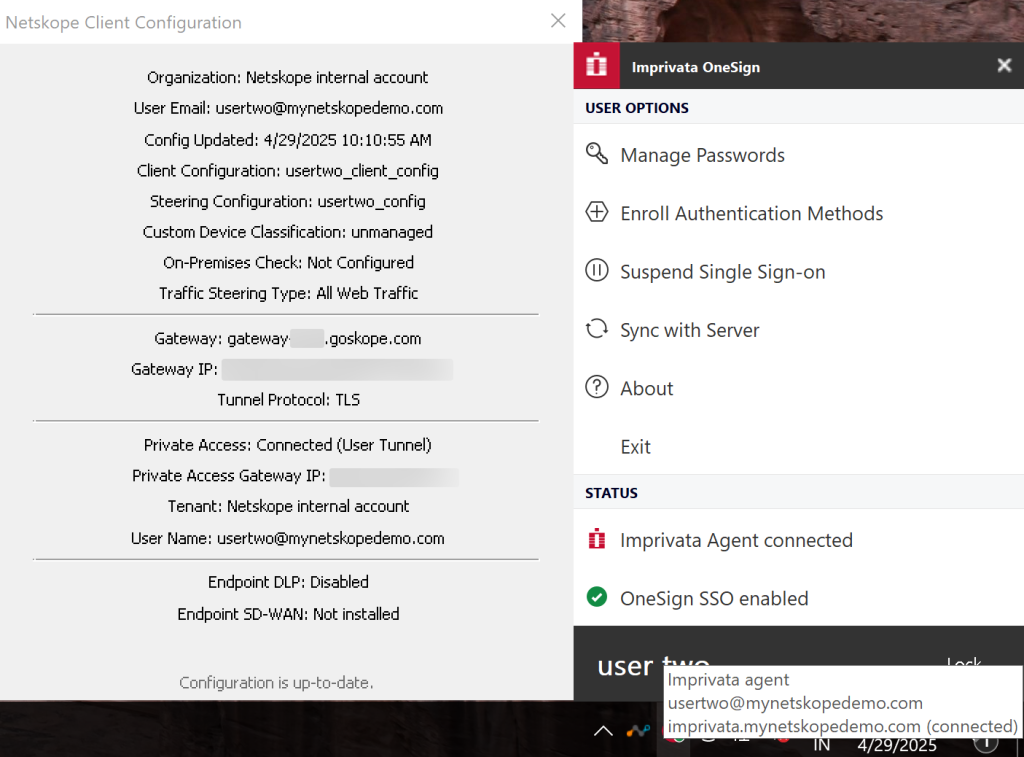
The senior doctor and the head nurse can see the Netskope Client details using the Configuration details available in the Netskope Client icon in the system tray. For example, consider the following Client and Steering Configurations set for the doctor and the nurse respectively:
-
User One (Doctor):
-
User group: new_Group001
-
Email/UPN: userone@mynetskopedemo.com
-
Client Configuration: userone_client_config
-
Steering Configuration: userone_confg
-
Traffic mode: Web
The following image refers to the Client Configuration displayed when the doctor logs into the Imprivata EAM.
-
-
User Two (Head nurse):
-
User group: new_Group002
-
Email/UPN: usertwo@mynetskopedemo.com
-
Client configuration: usertwo_client_config
-
Steering Configuration: usertwo_config
-
Traffic mode: Web
The following image refers to the Client Configuration displayed when the head nurse logs into the Imprivata EAM:
-


Installation Method
You can install Netskope Client on the shared workstation through MDM using the parameters: Host, Token, and installmode.
installmode = EAM.msiexec /i NSClient.msi host=<addon-<tenant-name>.goskope.com> token=<orgID> installmode=EAM enrollauthtoken=<auth token> enrollencryptiontoken=<encryption token>
| Parameter | Description |
|---|---|
| host AddonHost | addon-<FQDN used to login to the Netskope tenan>For example, if you login to the tenant with URL acme.goskope.com then addon URL is addon-acme.goskope.com. |
| tenant | If the tenant URL is acme.eu.goskope.com, tenant value is acme. |
| token | These parameters represent Organization ID available in the MDM Distribution webUI in your tenant.
The Organization ID varies with each tenant. |
| Authentication token Encryption token | These represent the Secure Enrollment tokens required to deploy Netskope Client.
|
mode=peruserconfig.– Installation modes not supported: Email Invite, IDP, UPN.
– Do not support Imprivata Integration through Netskope Client upgrade. Only new installations are supported.