

This document explains how to configure the Netskope EDM Forwarder/Receiver plugin v1.0.0 with the Exact Data Match (EDM) module in the Netskope Cloud Exchange platform. The plugin operates in push mode, sending EDM hashes generated by the EDM 3rd-Party plugin configuration from one Netskope Cloud Exchange instance to another. A Receiver configuration can only be used as a destination, while a Forwarder configuration can only be used as a source for sharing.
Prerequisites
To complete the configuration, you need:
- The Exact Data Match module enabled on two Cloud Exchange tenants.
- The Tenant plugin configured on both Cloud Exchange tenants.
- A Receiver type plugin of Netskope Forwarder/Receiver Plugin configuration in the first Cloud Exchange tenant.
- A Forwarder type plugin of Netskope Forwarder/Receiver Plugin configuration and a supported third-party EDM plugin configured and available for integration on the second Cloud Exchange tenant.
Netskope EDM Forwarder/Receiver Plugin Support
This plugin shares EDM hashes from one Cloud Exchange tenant to another Cloud Exchange tenant. Make sure that you configure the Receiver configuration in the destination Cloud Exchange tenant before creating the Forwarder configuration in source Cloud Exchange tenant.
| Feature | Support |
|---|---|
| Pull | Yes |
| Push | Yes |
Required Permissions
These permissions are needed for the plugin configuration: To work with Forwarder type plugin configuration, the Exact Data Match Module level read/write permission is required.
Performance Matrix
Here is the performance reading conducted for pushing hashes for ~1M rows (25 columns, Per column ~50 Characters Long String) Data on a Large Cloud Exchange instance with these specifications.
| Description | Specifications |
|---|---|
| Stack details | Size: Large RAM: 32 GB CPU: 16 Cores |
| Hashes Forwarded From Source to Netskope EDM Plugin | ~ 10 minutes |
| Hashes Received From Netskope EDM Forwarder to Netskope EDM Receiver > Netskope Tenant | ~7 minutes |
Workflow
- Get credentials for Netskope EDM Forwarder/Receiver Plugin
- Configure Netskope EDM Forwarder/Receiver Plugin on both the Cloud Exchange instance.
- Configure sharing between a 3rd-party EDM Plugin and Netskope Forwarder/Receiver Plugin with the Forwarder type.
- Configure sharing between Netskope Forwarder/Receiver Plugin with Receiver type and Netskope EDM Plugin.
- Check the status of the configured Sharing.
- Validate the Netskope EDM Forwarder/Receiver Plugin.
Watch a Video
Click play to watch a video.
The Netskope forwarder/receiver workflow involves two Cloud Exchange instances.
- The first Cloud Exchange instance pulls data from a third-party plugin and generates hash files using the Netskope Forwarder/Receiver plugin with the Forwarder plugin type.
- These generated hashes are then sent to another Cloud Exchange instance which contains the Netskope Forwarder/Receiver plugin with the Receiver plugin type.
- The Receiver Netskope Forwarder/Receiver plugin will store incoming hashes that will be used for sharing with the Netskope Tenant.
Both CE instances must have the Netskope tenant configured, as it is a mandatory configuration starting with Cloud Exchange v6.0.0.
Get Credentials for the Netskope Forwarder/Receiver Plugin
In order to configure the the Netskope Forwarder/Receiver plugin with a Forwarder plugin type in the first Cloud Exchange instance, follow these steps to generate API credentials in a second Cloud Exchange instance:
Currently, Netskope Forwarder/Receiver plugin supports Username and Password and Token-based authentication methods.
Configure a Username and Password
- Go to Settings > Users > Users Tab.
- Click Create New User.
- Ensure the user has Exact Data Match Read and Write permissions.
- Enter the details and click Save.
- This user credential will be used to configure the Forwarder type plugin.

Configure an API Token
- Log in to Cloud Exchange using the newly created user.
- Go to Settings > Users > API Tokens (tab).
- Click Create New Token.
- Ensure the user creating the API token has Exact Data Match Read & Write permission, as the token will have the same permission as a logged-in user.
- Enter the details and click Save.
- The API Token will be created.
- Copy the Client ID and Client Secret. These will be used to configure the Forwarder type plugin.

Configure Netskope EDM Forwarder/Receiver Plugins
Follow these two steps in order to setup Netskope Forwarder/Receiver EDM plugin on both Cloud Exchange instances.
Configure a Netskope EDM Forwarder/Receiver Plugin as a Receiver
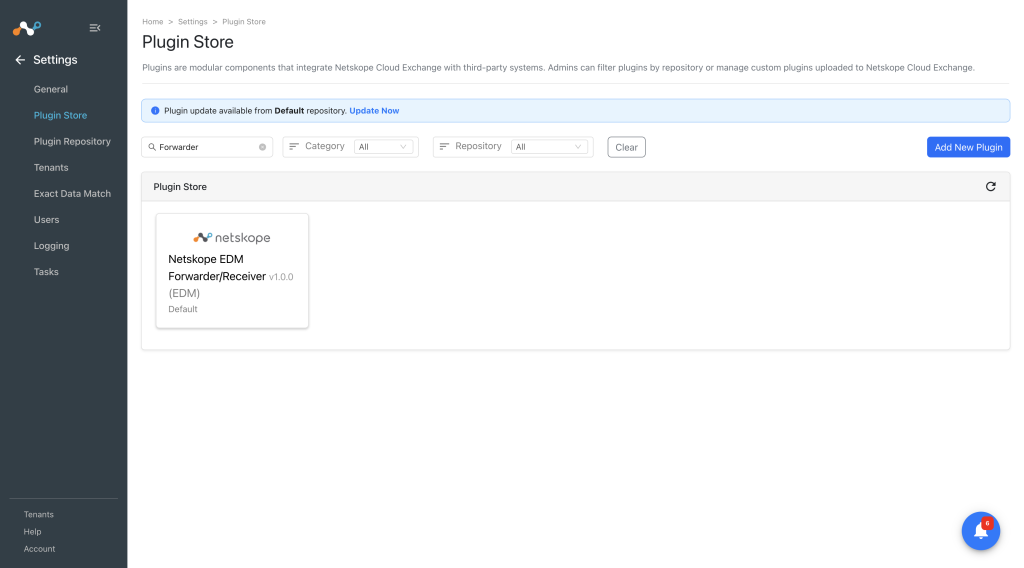
- In the first Cloud Exchange tenant, go to Settings > Plugin Store.
- Search for and select the Netskope EDM Forwarder/Receiver plugin box.
- For Basic Information, enter a Configuration Name and select Receiver as the Plugin Type.

- Click Save.
- You will be redirected to the Exact Data Match > Plugins page, where you can see your configured plugins.

Configure a Netskope EDM Forwarder/Receiver Plugin Configuration as a Forwarder
- In a second Cloud Exchange tenant, go to Settings > Plugin Store.
- Search for and select the Netskope EDM Forwarder/Receiver plugin box.

- For Basic Information, enter a Configuration Name and select Forwarder as the Plugin Type. Click Next.

- For Authentication Method, select one of these options: Username & Password or Token. Click Next.

- Based on Authentication Method chosen, enter the Configuration Parameters:
- Configuration Parameters for the Username and Password method:
- Netskope CE IP/Hostname with Port: Provide IP Address of the Cloud Exchange tenant to share the data.
- Username: Username created for the destination Cloud Exchange tenant.
- Password: Password created for the destination Cloud Exchange tenant.
- Receiver Configuration Name: Receiver’s Configuration name created in the destination Cloud Exchange tenant.

- Configuration Parameters for the Token method:
- Netskope CE IP/Hostname with Port: Provide IP Address of the Cloud Exchange tenant to share the data.
- Client ID: Client ID for the API Token created on the destination Cloud Exchange tenant.
- Client Secret: Client Secret for the API Token created on the destination Cloud Exchange tenant.
- Receiver Configuration Name: Receiver’s Configuration name created in the destination Cloud Exchange tenant.

- Configuration Parameters for the Username and Password method:
- Click Save.
- You will be redirected to Exact Data Match > Plugins page, where you can see your configured plugins.

Configure Sharing between a 3rd-Party EDM Plugin and the Netskope Forwarder/Receiver Plugin with the Forwarder Type
In the second Cloud Exchange tenant, configure sharing between a 3rd-party EDM plugin to Netskope Forwarder Plugin:
- On the Sharing Configuration page, select a 3rd-party plugin as a source configuration, and select the Netskope Forwarder Plugin configuration as a destination configuration. Target value will be set automatically.

- Go to Exact Data Match > Sharing.

- Click Add Sharing Configuration.
- Click Save.
Configure Sharing for the Netskope Forwarder/Receiver Plugin with the Receiver Type and Netskope EDM Plugin
In a second Cloud Exchange Instance, follow these steps to share generated hashes received from first Cloud Exchange tenant:
- Go to the Exact Data Match > Sharing.
- Click Add Sharing Configuration.
- On the Sharing Configuration page, select the Netskope Receiver Plugin as a source configuration, and select the Netskope EDM Plugin configuration as a destination configuration. The Target value will be set automatically.

- Click Save.
Validate the Netskope Forwarder/Receiver EDM Plugin
This sections contains validation of Netskope Forwarder/Receiver EDM Plugin in both of the Cloud Exchange tenants.
Validate the Netskope EDM Forwarder Type Plugin
- In the first Cloud Exchange tenant, go to Exact Data Match > Sharing and Upload Management, where you’ll be able to see a status for all the configured sharing.

Go to Settings > Logging and search for the Netskope Forwarder plugin logs.You can verify the plugin operation from the logs available at Logging in Cloud Exchange:
EDM Netskope EDM Forwarder/Receiver [Netskope EDM Forwarder] Executed push method for configuration 'Netskope EDM Forwarder' successfully.
Validate the Netskope EDM Receiver Type Plugin
- In the second Cloud Exchange tenanat, Go to Exact Data Match > Sharing and Upload Management, where you’ll be able to see a status for all the configured sharing.

Go to Settings > Logging and search for the Netskope Forwarder plugin logs.You can verify the plugin operation from the logs available at Logging in Cloud Exchange:

- To ensure the push of EDM hashes on the Netskope Tenant from the cloud exchange, go to Policies > DLP. Click Edit Rules and go to Exact Match tab.

In Sharing and Upload Management Page, All of the possible status are:
- Scheduled: Indicates that the sharing has been configured and the pull and push operation are still waiting in the queue for processing.
- Generating Hash: Indicates that the generating hash process has been started. At this stage, in the background fetching > validating > sanitization(if opted for) > generating hash stages will be included.
- Uploading Hash: Indicates that uploading hash to the destination configuration has been started.
- Upload Completed: Indicates that hashes are uploaded to the destination configuration.
- Checking Apply Status: At this stage, checks hashing apply status to the destination configuration.
- Apply In Progress: This represents that the hash process is started and in progress state on the destination.
- Completed: Indicates that hash file has been pushed successfully to destination configuration.
- Failed: Indicates that the action final result failed to execute. The actions are Generating Hash/Uploading Hash/Checking Apply Status.
Troubleshooting the EDM Forwarder/Receiver Plugin
If the user is unable to configure the forwarded plugin, it may be due to one of these reasons:
- Max retries exceeded with URL.
- Incorrect Client ID/Client Secret or Username/Password.
What to do: To solve these issue, follow these steps:
- Ensure that the Cloud Exchange receiver instance is up and running.
- Make sure to provide correct credentials.