

Microsoft Copilot is an AI-powered assistant integrated with Microsoft 365 that helps users generate content, analyze data, and interact with organizational information across apps and services.
Netskope SSPM provides visibility into the configuration and governance data of the GenAI SaaS app, Microsoft Copilot, after onboarding. This includes:
- Copilot Studio based agents (Agentic Apps) created and published through Copilot Studio
- Sensitivity labels, label policies, and policy settings from Microsoft Purview (such as mandatory labeling, default labels, and downgrade justification rules)
- All SharePoint tenant sites with the minimal fields required for Copilot governance
- SharePoint tenant restricted search mode, the complete restricted search allowed list, and organizational asset libraries used to determine Copilot-searchable content
- All configured external connections (Microsoft Graph connectors).
The installation instructions describe how to integrate your Microsoft Copilot account with Netskope.
Considerations
-
Netskope requires a minimum set of Microsoft 365 licenses and the Add-on license for Copilot should be present to scan through your Microsoft 365 environment for Copilot Resources. The following licenses are supported:
-
Microsoft 365 A3, A5
-
Microsoft 365 E3, E5
-
Microsoft 365 F1, F3
-
-
Netskope supports other Microsoft 365 licenses too, as long as additional licenses for Copilot are obtained.
Procedure
Follow the procedure to integrate your Microsoft 365 account with Netskope.
Step 1: Grant Access to Microsoft 365 Account for Microsoft Copilot App
To authorize Netskope to access your Microsoft Copilot account, follow the steps below:
-
Log in to the Netskope tenant UI and go to Settings > Configure App Access > Next Gen > Security Posture.
-
Select the Microsoft Copilot icon, and then click Setup Security Posture Instance.
-
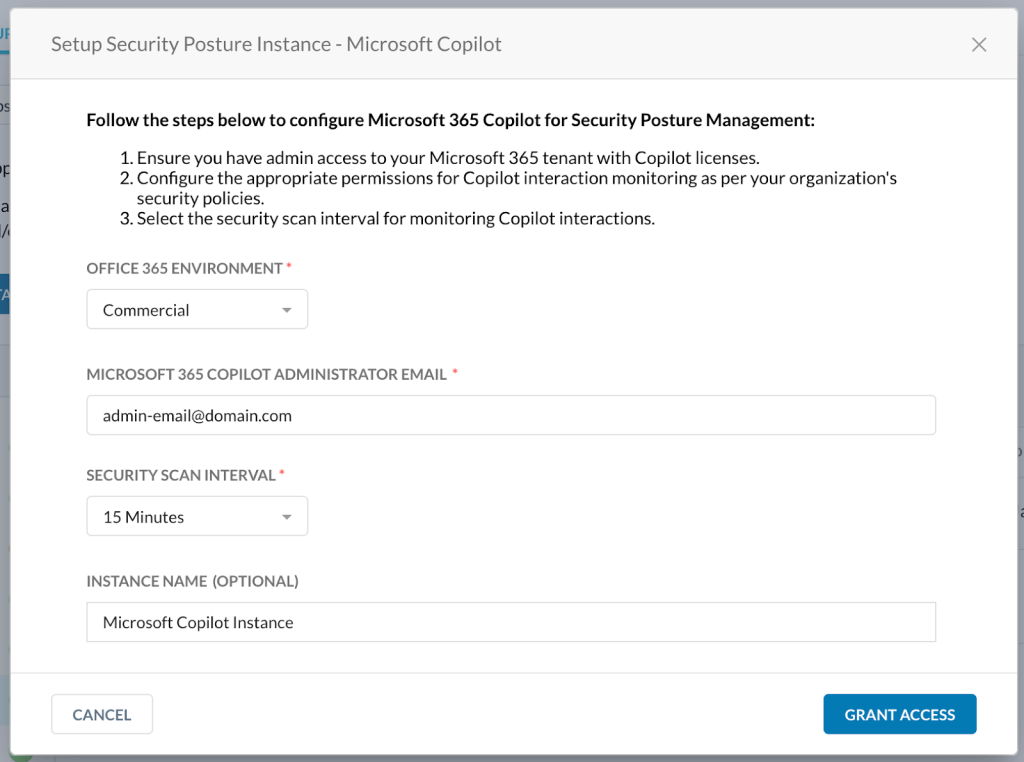
The Setup Security Posture Instance – Microsoft Copilot window opens. Enter the following details:
-
Choose Office 365 Environment as Commercial.
-
Enter the Microsoft 365 Copilot Administrator Email to authorize apps.
-
Select the Security Scan Interval.
-
(Optional) Enter an Instance Name.
-
-
Click Grant Access.
-
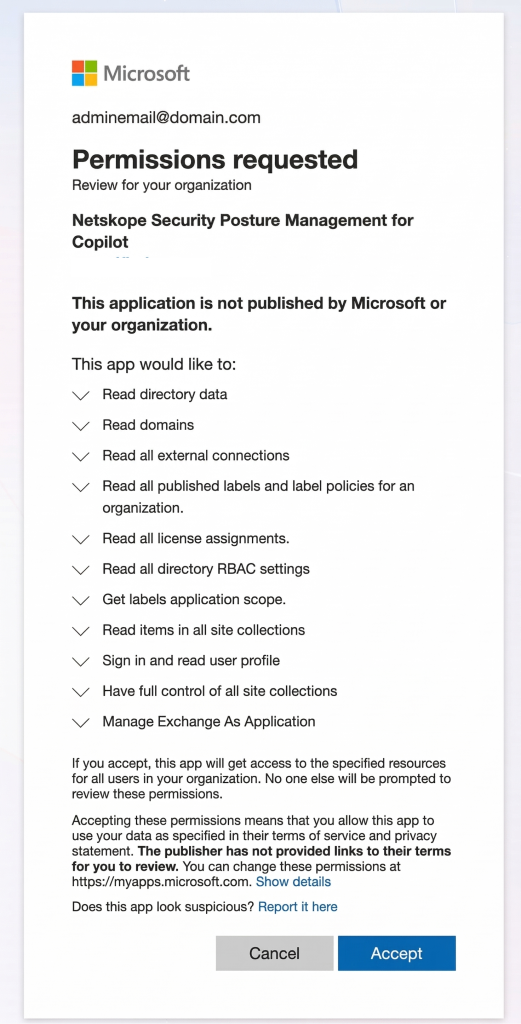
You will be prompted to log in to your Microsoft Copilot account with global administrator username and password, and then Accept the permissions and click Close.
-
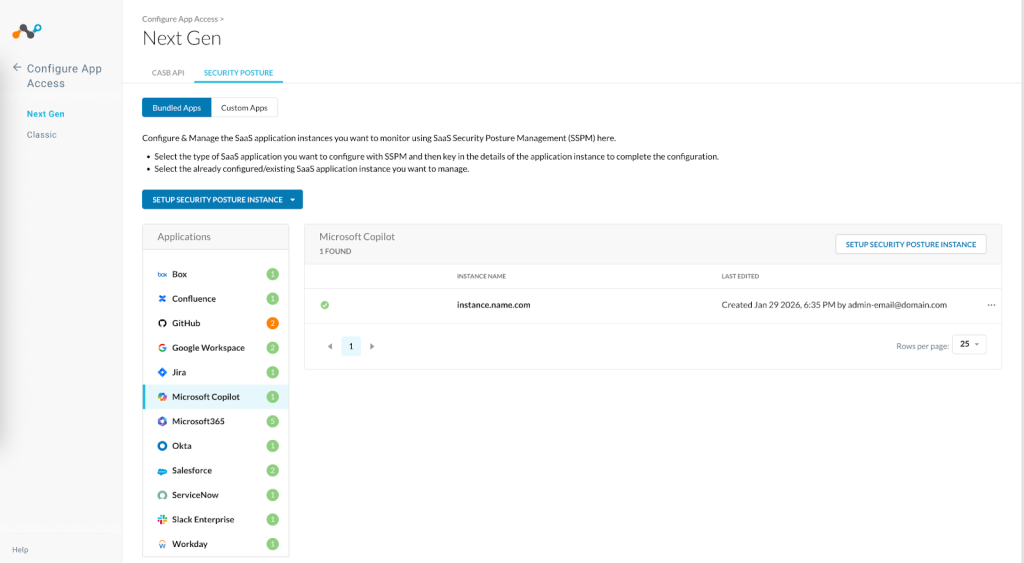
Refresh your browser, and you will see the instance.


Step 2: Add Entra ID Roles
Once you have granted access to the Microsoft Copilot, you have to assign the Netskope application client ID to the Global Reader role. To do so, follow the steps below:
-
Log in to portal.azure.com as a global administrator.
-
Click View under Manage Microsoft Entra ID.
-
On the left navigation, click Roles & Administrators.
-
Search for the role Global Reader, and click on the Global Reader role.
-
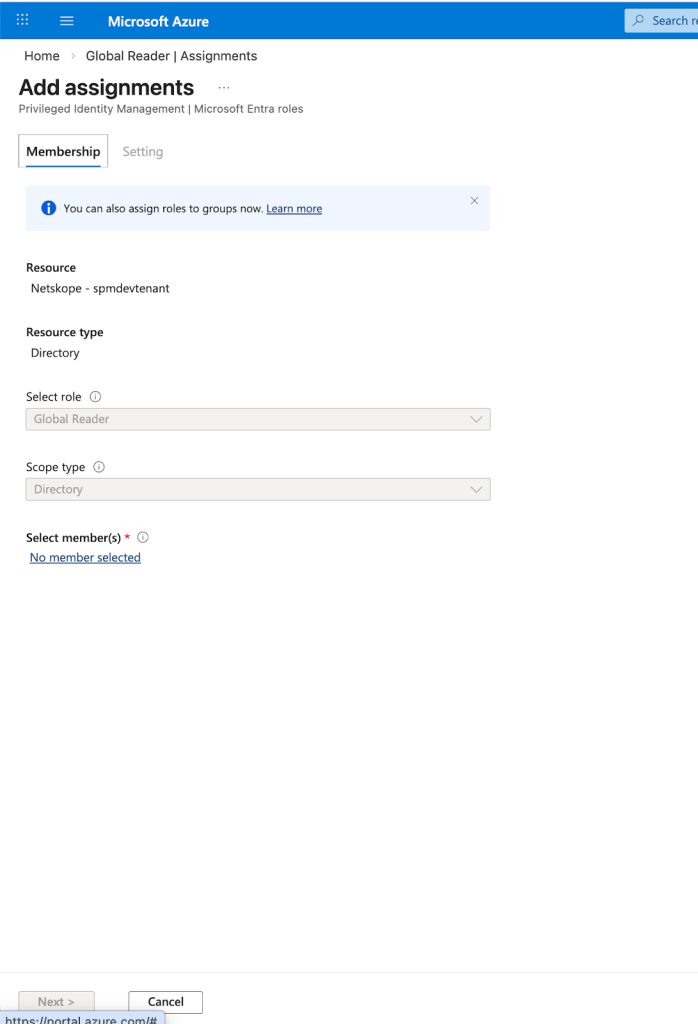
Click + Add assignments then click on No Members Selected and then select members.
-
In the search bar, enter the Netskope application client ID 87821dd3-3a2f-4e1f-879b-d8364ceab097. Select the app Netskope Security Posture Management for Copilot and click Add.
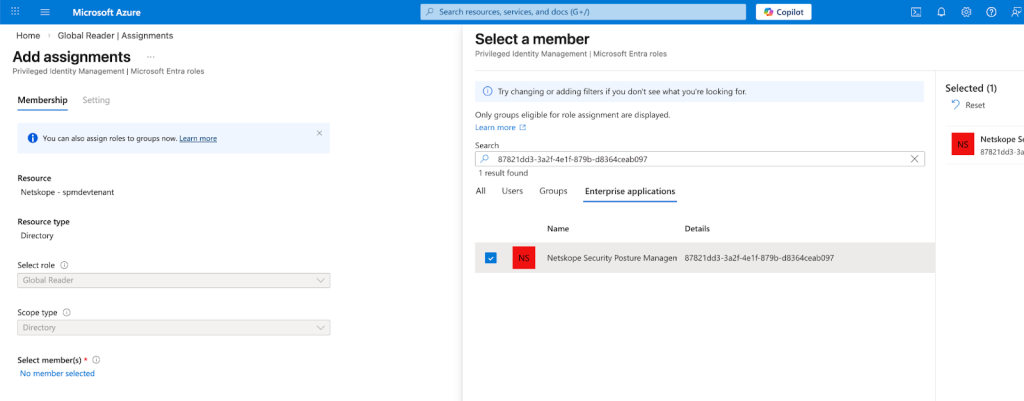 A following warning is shown after selecting the app for active assignments. You do not have any action item for this warning. Refer to the Assign Eligibility document for more information.
-
In the Setting tab, select Assignment Type as Active and enable the Permanently assigned option. Enter justification as “For Netskope SSPM” and click on Assign.
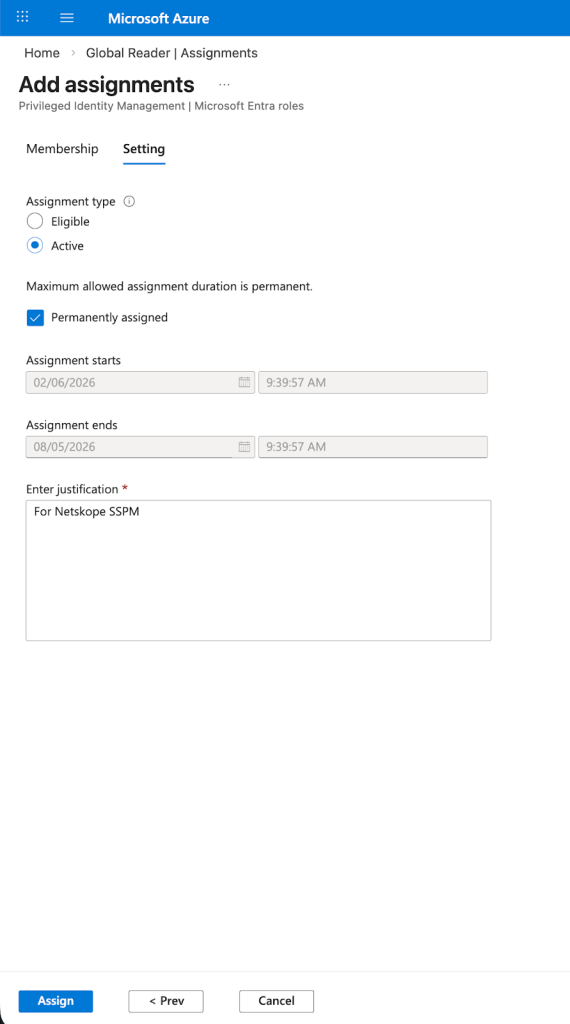


You have now successfully assigned Netskope application client ID to the Global Reader role.