

Release Notes
1.1.0
Added
- Added support for removing quotes from the pulled data.
Changed
- Updated loggers and tooltips.
1.0.1
Fixed
- Fixed plugin validation with respect to CSV path.
- Fixed Sanity Step level validation.
1.0.0
Added
- Initial release.
This document explains how to configure the OracleDB EDM plugin v1.1.0 with the Exact Data Match module of the Netskope Cloud Exchange platform. This plugin is used to pull raw data from a configured Oracle database server to generate EDM hashes.
Prerequisites
To complete the configuration, you need:
- A Netskope tenant (or multiple, for example, production and development/test instances).
- A Netskope Cloud Exchange tenant with the Tenant plugin and Exact Data Match plugin already configured.
- OracleDB server setup
- OracleDB Server database user with read-only (Select) access to fetch the data.
Oracle Database EDM Plugin Support
This plugin is used to pull raw data from a configured Oracle database server to generate EDM hashes. The plugin supports advanced data sanitization, normalization, and hash generation capabilities to ensure data quality and security compliance.
| Feature | Support |
|---|---|
| Pull | Yes |
| Push | No |
OracleDB Database Permissions
| Permission Type | Requirement |
|---|---|
| User Read Access to Mentioned Database | Required |
| OracleDB Database Read Permissions | Required |
| Database Port Access | Required |
Required Permissions
- Database user must have read permissions for the specified database.
- Network connectivity to the Oracle Database server on the configured port (default: 1521).
- Sufficient disk space on Cloud Exchange for temporary file processing.
API Details
List of Libraries Used to fetch Database Records
This plugin uses Python libraries and Oracle DB driver to establish secure connections to Oracle Database and transfer tables raws by executing SQL query.
Library: sqlalchemy and oracledb
Usage: SQLAlchemy is the Python SQL toolkit provides a full suite of well known enterprise-level persistence patterns, designed for efficient and high-performing database access, adapted into a simple and Pythonic domain language to execute SQL queries. Oracle Connector/Python enables Python programs to access Oracle databases.
Create Client Connection
from sqlalchemy import create_engine
eng = create_engine(connection_string) # creates connection with database.
Execute SQL query with Read-Only Session
with eng.connect() as connection:
      # used to stop user from executing any database modification query.
      result = connection.execute(text("SET TRANSACTION READ ONLY"))
      query = text(config["query"].strip(";"))
      result = connection.execute(query)
Generate CSV File from fetched records in batches
# csv_path will be new csv file
self.store_data_to_csv([columns], csv_path)
if fetch_only_sample_data:
    rows = result.fetchmany(SAMPLE_CSV_ROW_COUNT)
else:
    rows = result.yield_per(BATCH_SIZE)
self.store_data_to_csv(rows, csv_path, replace=False)
Performance Matrix
Here is the performance reading conducted for fetching and sanitizing ~1M Rows (25 columns, per column ~50 characters long string, all unique values per each row,1.3 GB size, Avg Column Uniqueness: ~96%, Avg Row Uniqueness: ~96%) from Database table on a Large CE instance with these specifications:
| Description | Specification |
|---|---|
| Stack details | Size: Large RAM: 32 GB CPU: 16 Cores |
| Database table data fetched from MySQL Without Sanitization | ~5.5K rows/sec |
Workflow
- Create a user on Oracle DB server with read permissions.
- Configure OracleDB EDM Plugin.
- Configure sharing between OracleDB EDM Plugin and EDM Netskope plugin.
- Validate the OracleDB plugin.
Watch a Video
Click play to watch a video.
Configuration on OracleDB Server
Create a user
Follow these steps to create the user on OracleDB Database:
-
Log in to the Oracle database instance and open the SQL Plus terminal.
-
To create a new user and grant read-only permissions, you need to connect as a user with DBA (Database Administrator) privileges.
SYS as SYSDBA
-
Run the following SQL command to create a new user:
CREATE USER <new_username> IDENTIFIED BY <new_password>;
GRANT CONNECT TO <new_username>;
-
Grant user read-only access to specific table to pull the data.
GRANT SELECT ON <table_name> TO <new_username>;
Note
- Replace
and with your username and password to create a user. - Replace
with the name of the table you want to provide read-only access to.
Configure the Oracle Database Plugin
-
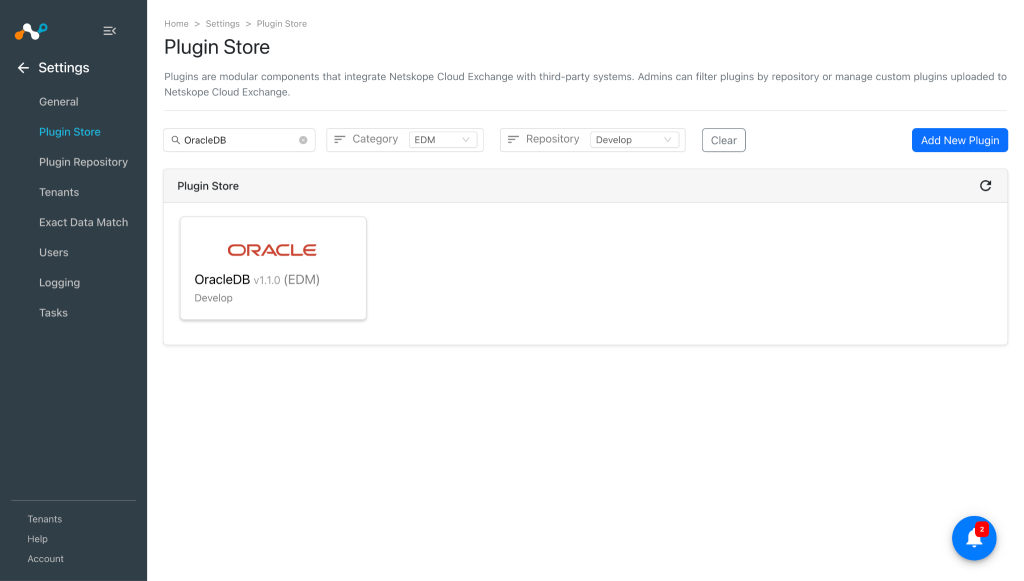
In Cloud Exchange, go to Settings > Plugin Store.
-
Search for and select the OracleDB v1.1.0 (EDM) plugin.
-
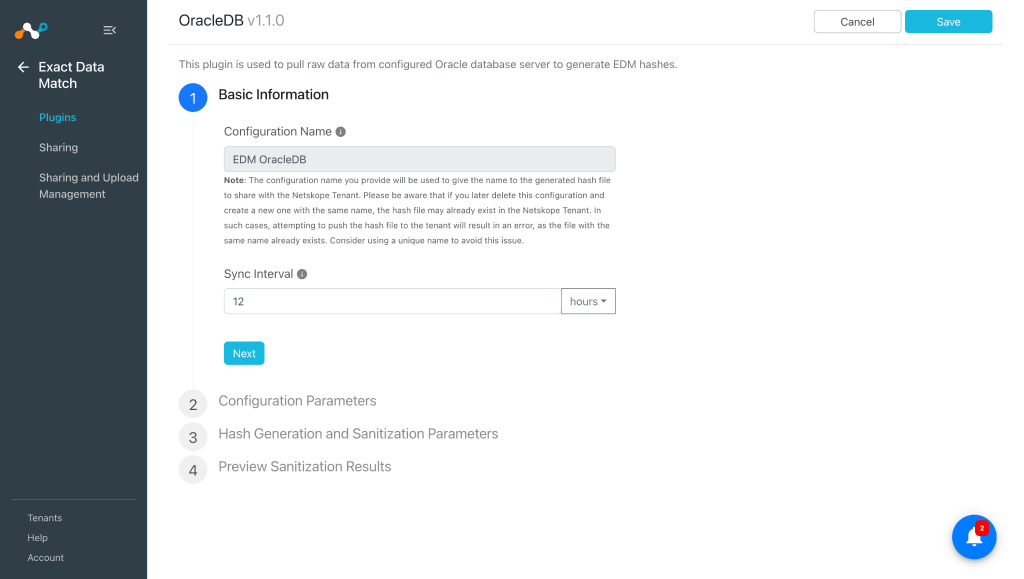
Enter the Basic Information:
-
Configuration Name: Enter a name appropriate for your plugin.
The configuration name you provide will be used to give the name to the generated hash file to share with the Netskope tenant. Be aware that if you later delete this configuration and create a new one with the same name, the hash file may already exist in the Netskope tenant. In such cases, attempting to push the hash file to the tenant will result in an error, as the file with the same name already exists. Consider using a unique name to avoid this issue. -
Sync Interval: Interval to pull the data from this plugin source. Default value is 12 hours. (Default: 12 hours)
-
-
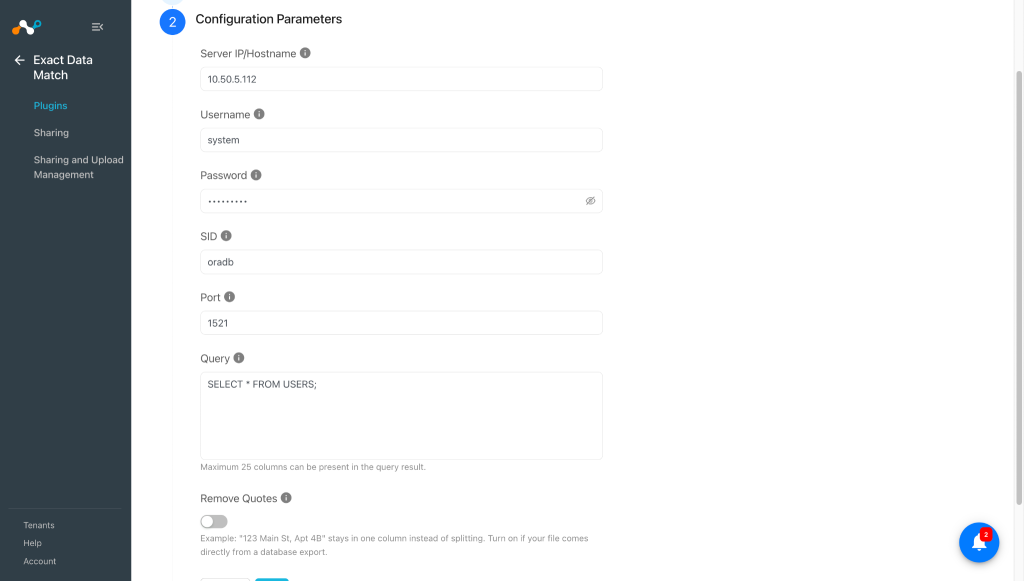
Click Next and enter the Configuration Parameters:
-
Server IP/Hostname: IP address or Hostname where the OracleDB server is located.
-
Username: OracleDB database username to access the server. Ensure that it is a valid username with the read-only permission.
-
Password: Password associated with the provided database username.
-
SID: Oracle database name from which the data is to be retrieved. Ensure that the database name is spelled correctly, as database names are case-sensitive.
-
Port: Enter the TCP port number that the Oracle database is running on.
-
Query: Provide a read-only query to fetch data from database.(Read-only means ‘Select’ Query)
-
Remove Quotes: Enable this if your data file encloses fields in double quotes, especially when values contain commas. Quoted fields will be parsed as single columns. Improper quote placement may cause rows to be skipped. Helpful for CSVs exported from databases.
By default, quotes are treated as literal text. Enable Remove Quotes toggle if your CSV uses double quotes to encapsulate fields that contain commas (like"123 ABC Street, Suite 100"). This ensures the field is treated as a single column. Note that this mode requires strict CSV formatting. If a field starts with a quote, any character, including a space, following the closing quote but preceding the comma (like"Word",) will cause the row to be skipped.
-
-
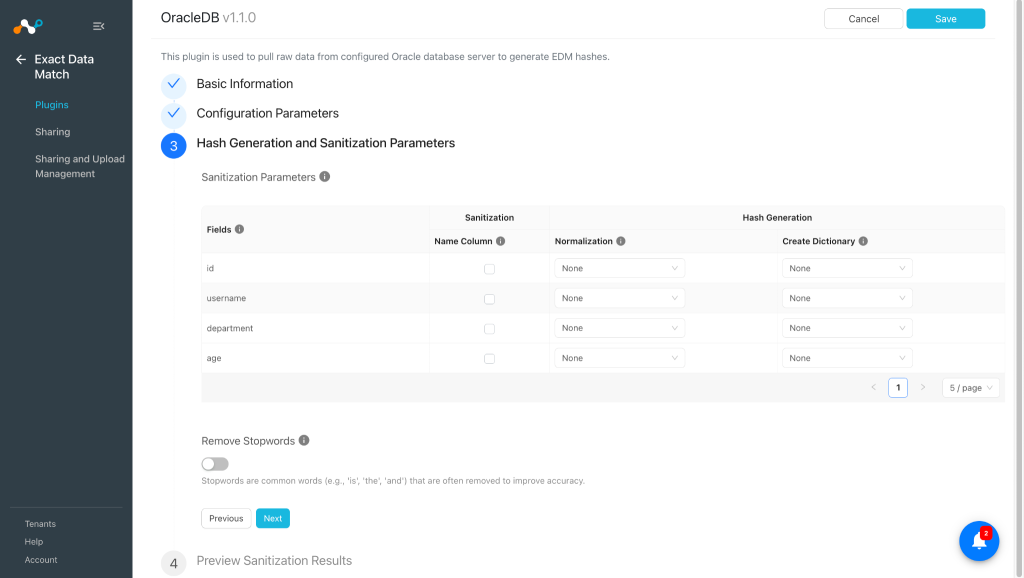
Click Next and enter the Hash Generation and Sanitization Parameters:
-
Select the appropriate options for sanitization and hash generation operations:
- Sanitization (Name Column): Sanitize the content by checking the Name Column checkbox. (Default: Unchecked). The Sanitization Process performs the following actions:
- One character: The cell will be marked as invalid if it contains only one character.
- Digits: Cells containing digits will be marked as invalid.
- Stopwords: Cells that match a stopword from the list will be marked as invalid (This works only if the Remove stopwords checkbox is checked).
- Non-alphanumeric characters: Remove all special characters to validate the cell.
- Hash Generation is divided into two parts:
- Normalization: Select the value from dropdown to normalize the data value. (Default: None)
- Create Dictionary: Select value from dropdown to create dictionary of unique values for selected field that can be used in DLP rule in netskope tenant. (Default: None)
- Sanitization (Name Column): Sanitize the content by checking the Name Column checkbox. (Default: Unchecked). The Sanitization Process performs the following actions:
-
Remove Stopwords: Mark as checked if you want to remove certain stopwords as part of the sanitization process.(Default: Unchecked) Ensure that Name Column is checked for the applicable field to reflect the changes.
Note
- Use Normalization parameter to normalize the fetched results. For example, a number such as 123-45-6789 or 123 45 6789 will be treated as 123456789. Number normalizations ignore characters such as dots, dashes and spaces. A string normalization ignores the case sensitivity of the letters.
- Use the Create Dictionary option only when necessary, as this operation is resource-intensive and may impact system performance. Choose this option thoughtfully for optimal efficiency.
-
-
Click Next. Preview the sanitization sample output by clicking Preview Good File or Preview Bad File.
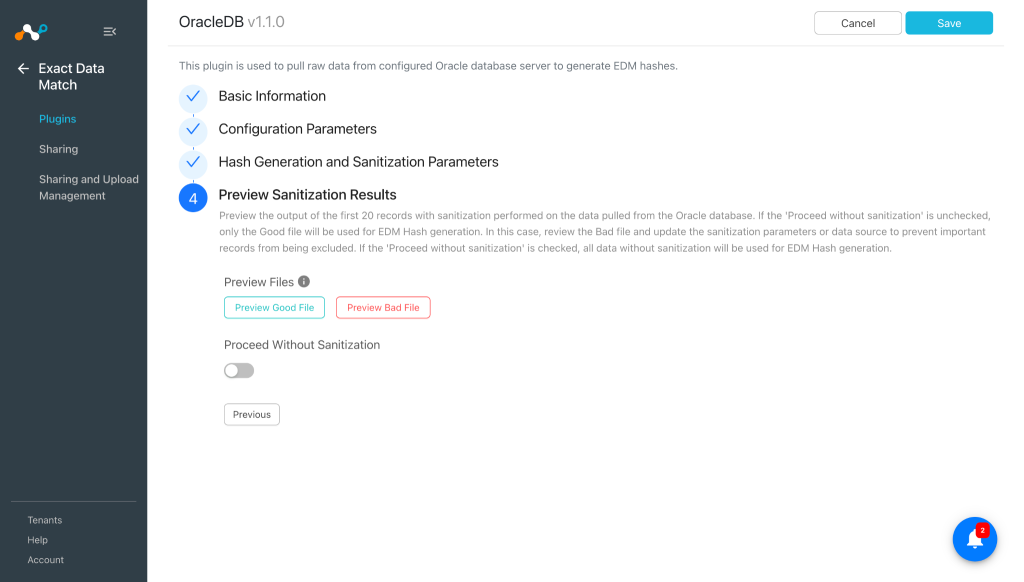 If you are using the plugin with sanitization On, then the performance may be differ due to extra processing.
 -
Proceed without sanitization: Uncheck this option to proceed with sanitization. (Default: Checked)
All the data will be under consideration for hash generation if this option is Unchecked; otherwise, only the Good File content will be part of the hash generation. -
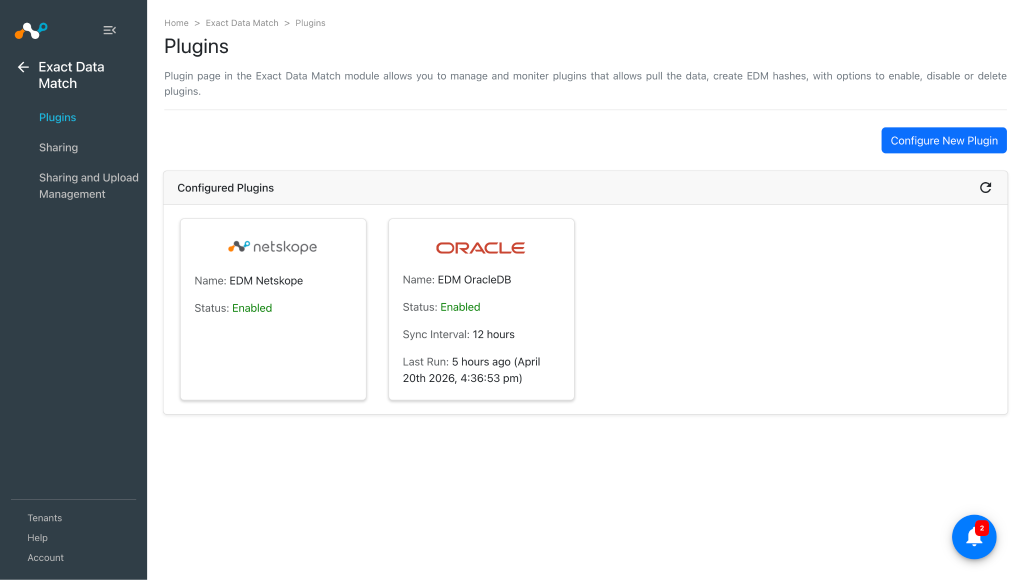
Click Save. You will be redirected to Exact Data Match > Plugins page where you can see your configured plugin.


Configure Sharing between Oracle DB and Cloud Exchange
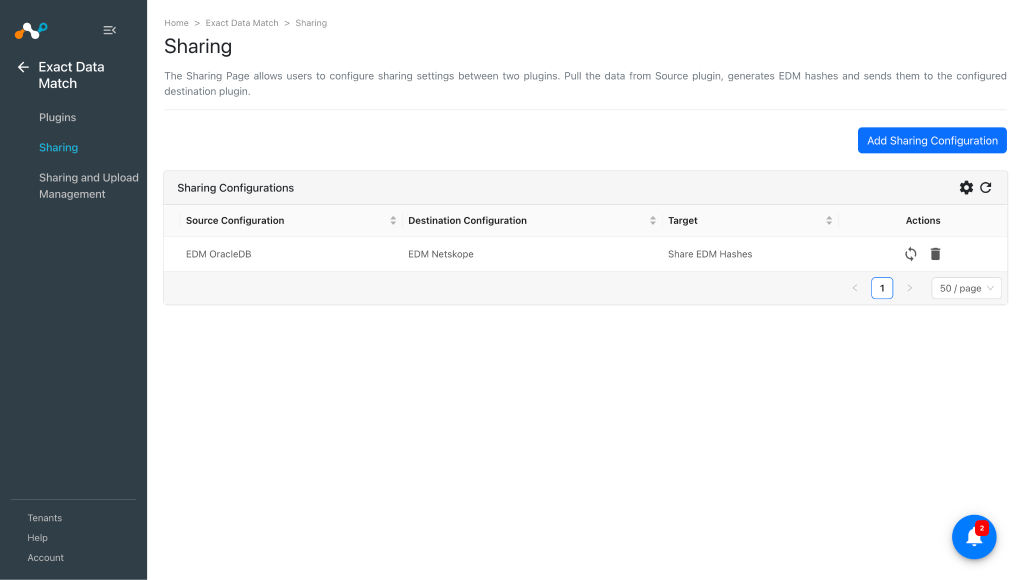
A sharing configuration is used to share the generated EDM hashes with the destination platform. To share EDM hashes with your Netskope Tenant, create a sharing configuration using these steps:
-
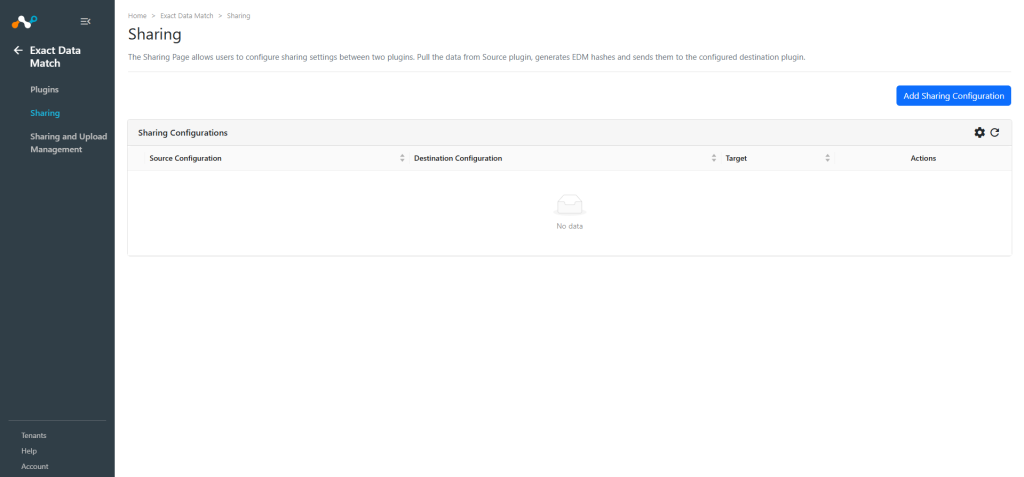
Go to Exact Data Match > Sharing and click Add Sharing Configuration.
-
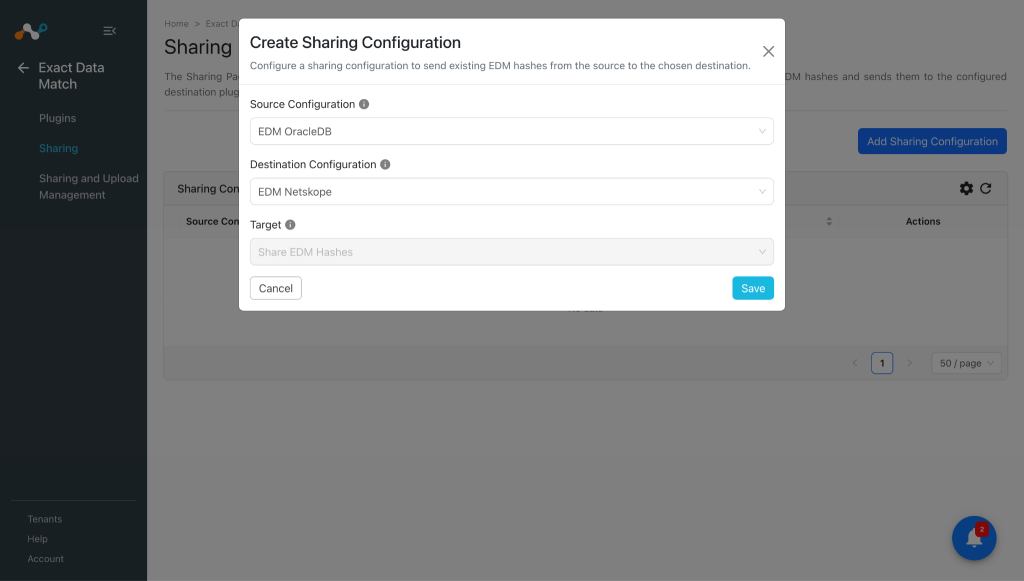
Configure the sharing parameters:
- Source Configuration: Select the configured EDM Oracle plugin.
- Destination Configuration: Select a destination where EDM Hash will be shared.
- Target: The value is automatically set according to the selected Destination Configuration.
-
Click Save.


Validate the Oracle DB Plugin
Validate the Pull in Cloud Exchange
To validate the pulling of the configured plugin in Cloud Exchange, go to Settings > Logging and search for the OracleDB EDM plugin logs.
You can verify the plugin operation from the logs available at Logging in Cloud Exchange:

If a sharing configuration has been established for the source plugin, its status can be monitored on the Sharing and Upload Management page.
The status values are as follows:
- Scheduled: Indicates that the sharing has been configured and the pull and push operation are still waiting in the queue for processing.
- Generating Hash: Indicates that the generating hash process has been started.At this stage, in the background fetching > validating >sanitization (if opted for) > generating hash staged will be included.
- Uploading Hash: Indicates that uploading hash to the destination configuration has been started.
- Upload Completed: Indicates that hashes are uploaded to the destination configuration.
- Checking Apply Status: At this stage, checking the apply status of hashes to the destination configuration.
- Apply In Progress: This represents that the hash process is started and in progress state on the destination.
- Completed: Indicates that hash file has been pushed successfully to destination configuration.
- Failed: Indicates that the final result of the action has been failed to execute.The actions are Generating Hash/Uploading Hash/Checking Apply Status.
Shared EDM hashes can be verified from the logs available at Logging in Cloud Exchange:

Validate the Push to your Netskope Tenant
To ensure the push of EDM hashes on the Netskope Tenant from the cloud exchange:
-
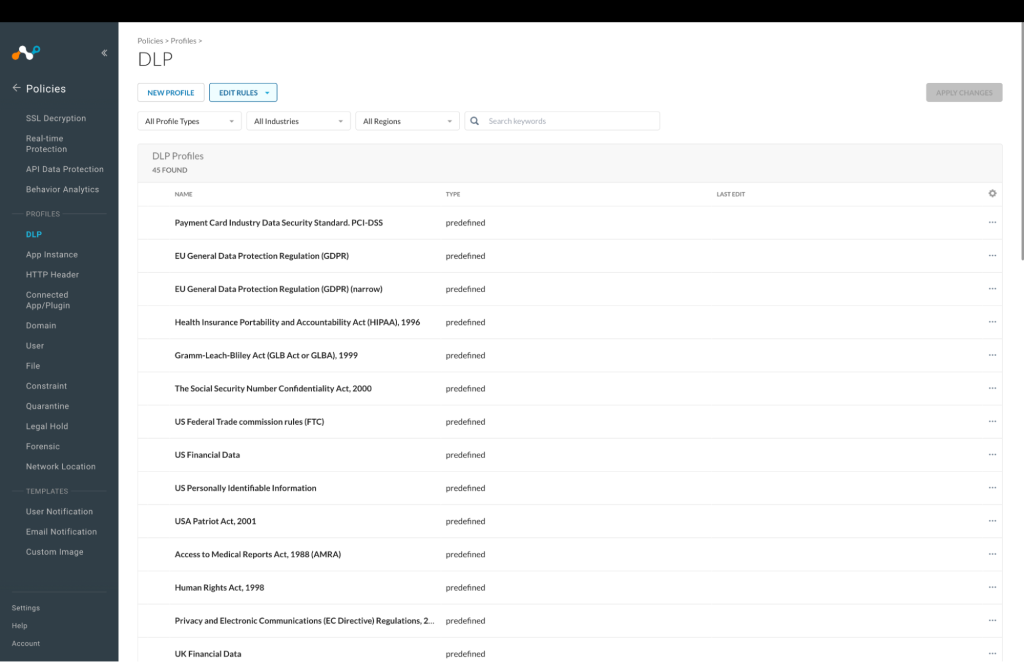
Log in to your Netskope Tenant, go to Policies > DLP.
-
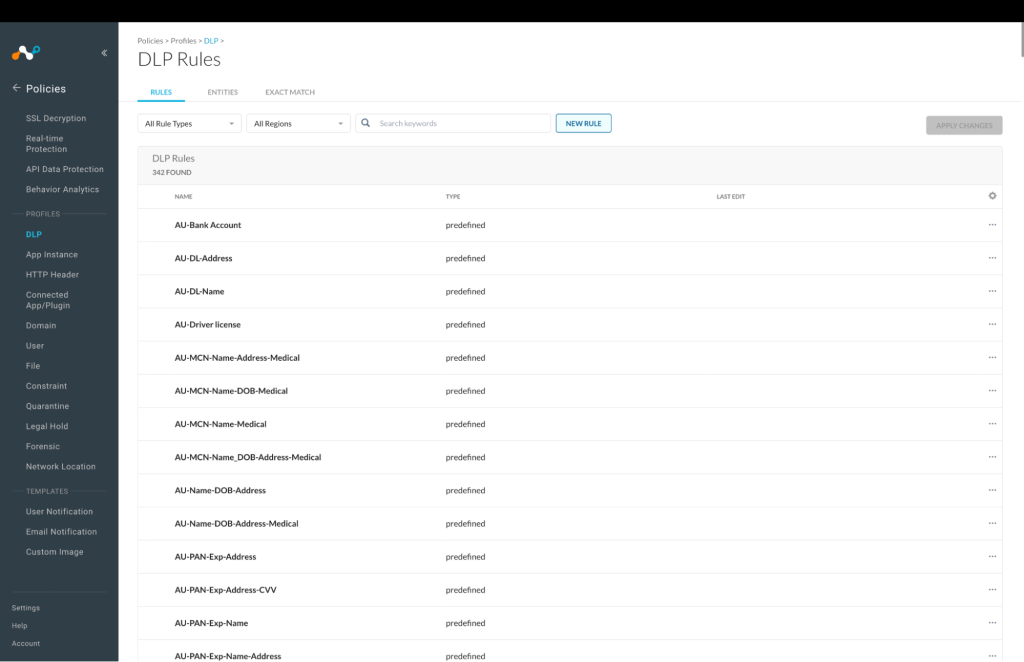
Click Edit Rules and select Data Loss Prevention.
-
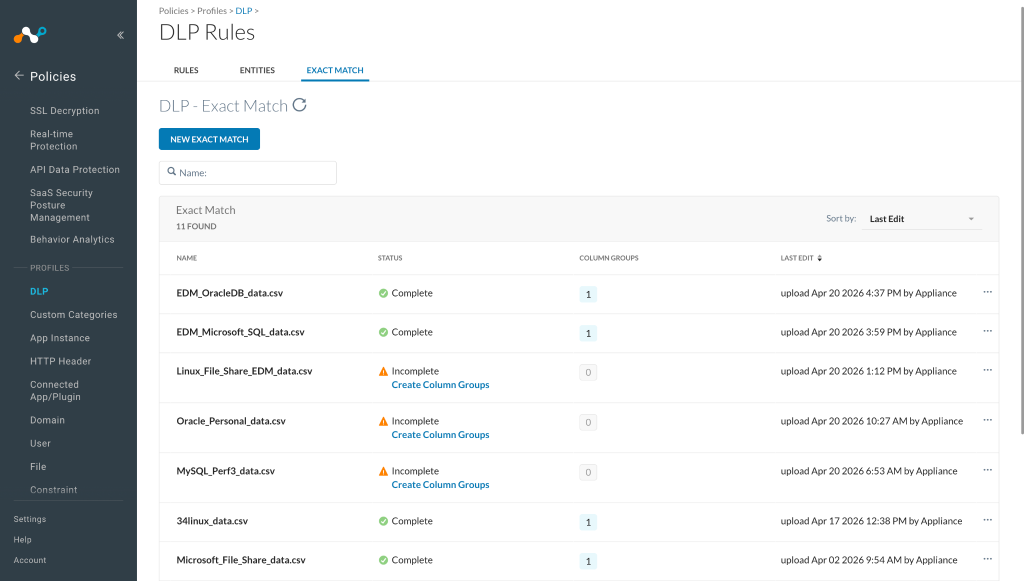
On the Exact Match tab, a list of files is shown.


Troubleshooting the Oracle DB Plugin
Unable to configure the Oracle DB plugin
If you are unable to configure the OracleDB EDM plugin, it could be due to one of the following reasons:
- Incorrect credentials provided.
- The user doesn’t have required permissions.
- Incorrect hostname/server IP address.
- Incorrect Database Name.
What to do:
- Make sure to provide the correct credentials.
- Make sure that the user has the required permissions for the database and table.
- Make sure that the correct hostname/server IP.
- Make sure that the database name is correct.
Hash generation fails or takes too long
If hash generation fails or performance is poor.
What to do:
- Check available disk space on Cloud Exchange (ensure at least 2x CSV file size).
- Reduce file/table size or split into smaller tables.
- Disable sanitization if not required to improve performance.
- Monitor system resources during processing.
Known Behaviors
- Sanitization can reduce processing speed by approximately 65% but improves data quality.
- Dictionary creation is resource-intensive and should only be used when necessary.
- The plugin creates temporary files during processing that are automatically cleaned up.
- SSH connection timeouts may occur with very large files; consider increasing timeout values.
- Memory usage scales with CSV file size/table size; monitor system resources during large file processing.