PingIdentity Set Up for Enterprise Browser (PingOne)
This article outlines the steps and references to set up SAML and SCIM for PingOne to use with Enterprise Browser.
SAML Set Up
Ping supports Netskope out of the box. The integration is described in this article: How to Configure SAML 2.0 for the Netskope Client Enrollment with PingOne. The article expands on the article with more screenshots.
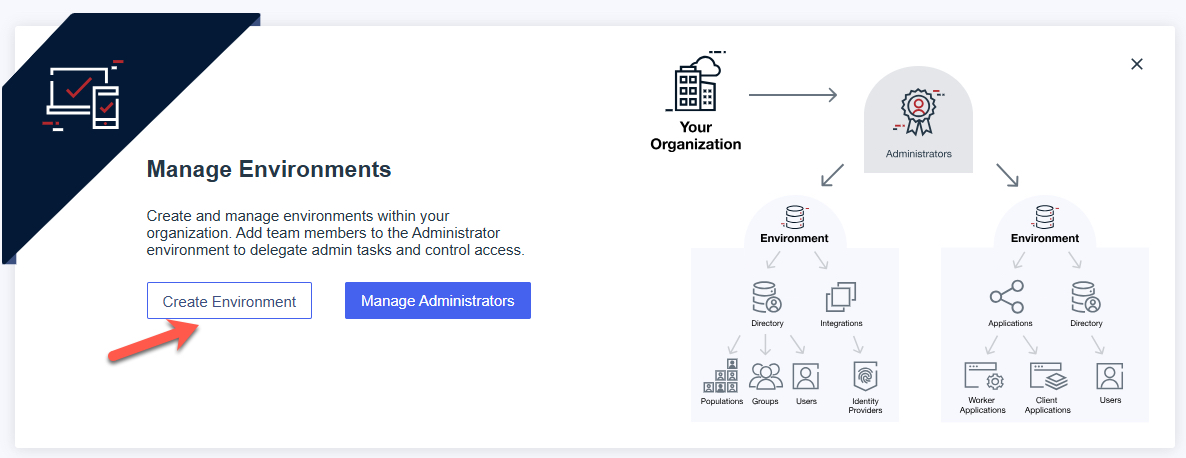
- Log in to PingOne account (free trial will work). On the landing page, create an environment if one doesn’t yet exist.
2. Click Create a Workforce Solution when creating an environment.

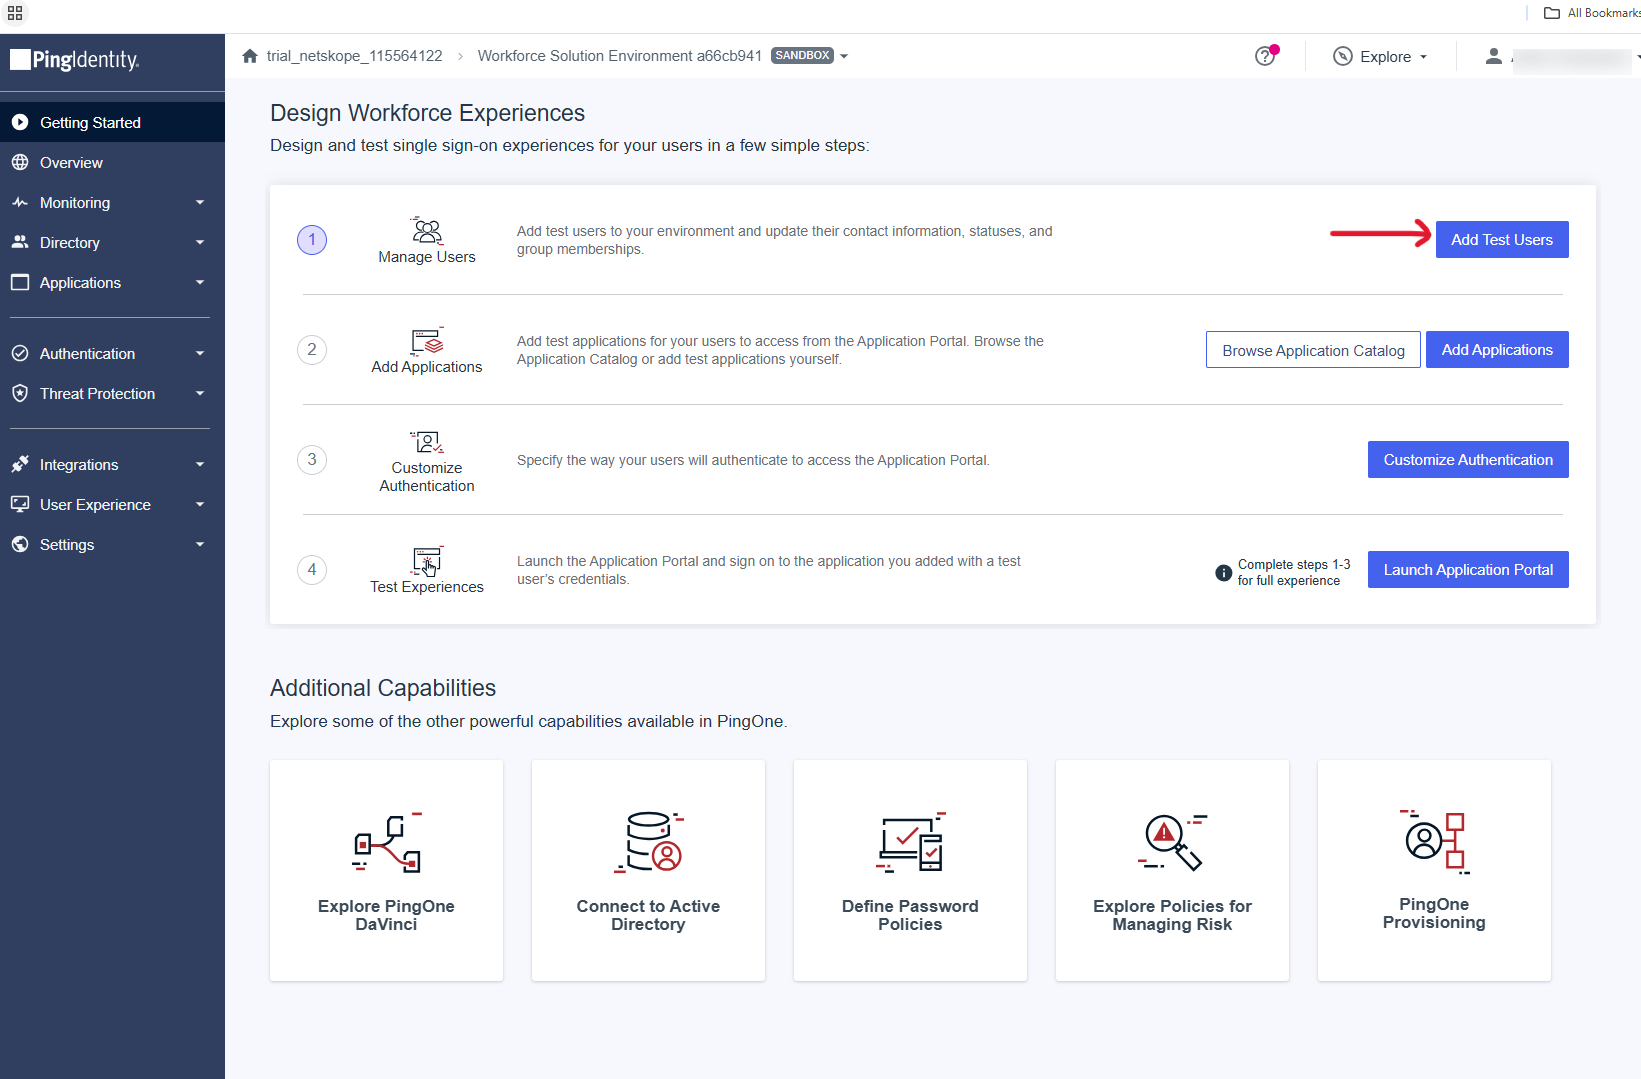
3. Add some test users from the new environment landing page.
4. The following is an example of a new user, note that username and email doesn’t have to be the same. However, it’s highly recommended to keep them in sync to avoid complications.

5. To make provisioning simpler, create a user group that contains all Enterprise Browser users. Click Directory > Groups.

6. Add any users that should have access to the Enterprise Browser to this user group.

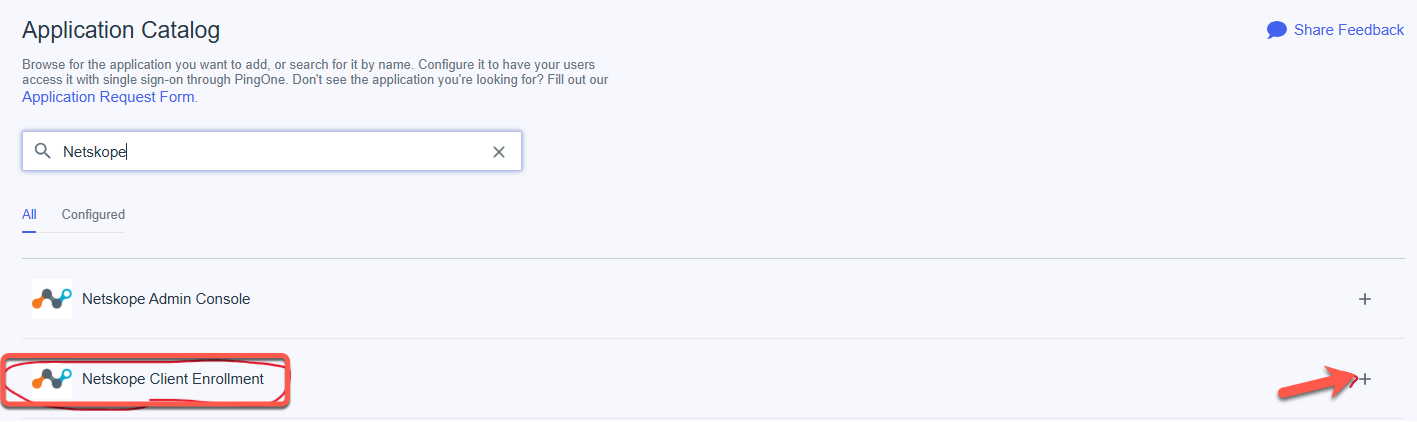
7. Add an “Application”. Go to the environment landing page OR select Applications > Application Catalog. Then search for “Netskope” and select “Netskope Client Enrollment”.
8. Add a name and enter placeholder values for “ACS URL” and “Entity ID”. Those values will be copied over from Netskope in later steps in this article.

9. Ensure “SAML_SUBJECT” points to “Email Address”. This is important because Netskope policies (RTP, Browser Protection) are configured based on email addresses. Therefore, SAML needs to send user’s email addresses to Netskope upon authentication.

10. Assign any user groups to this application (for example, user group you added in step 5 above).

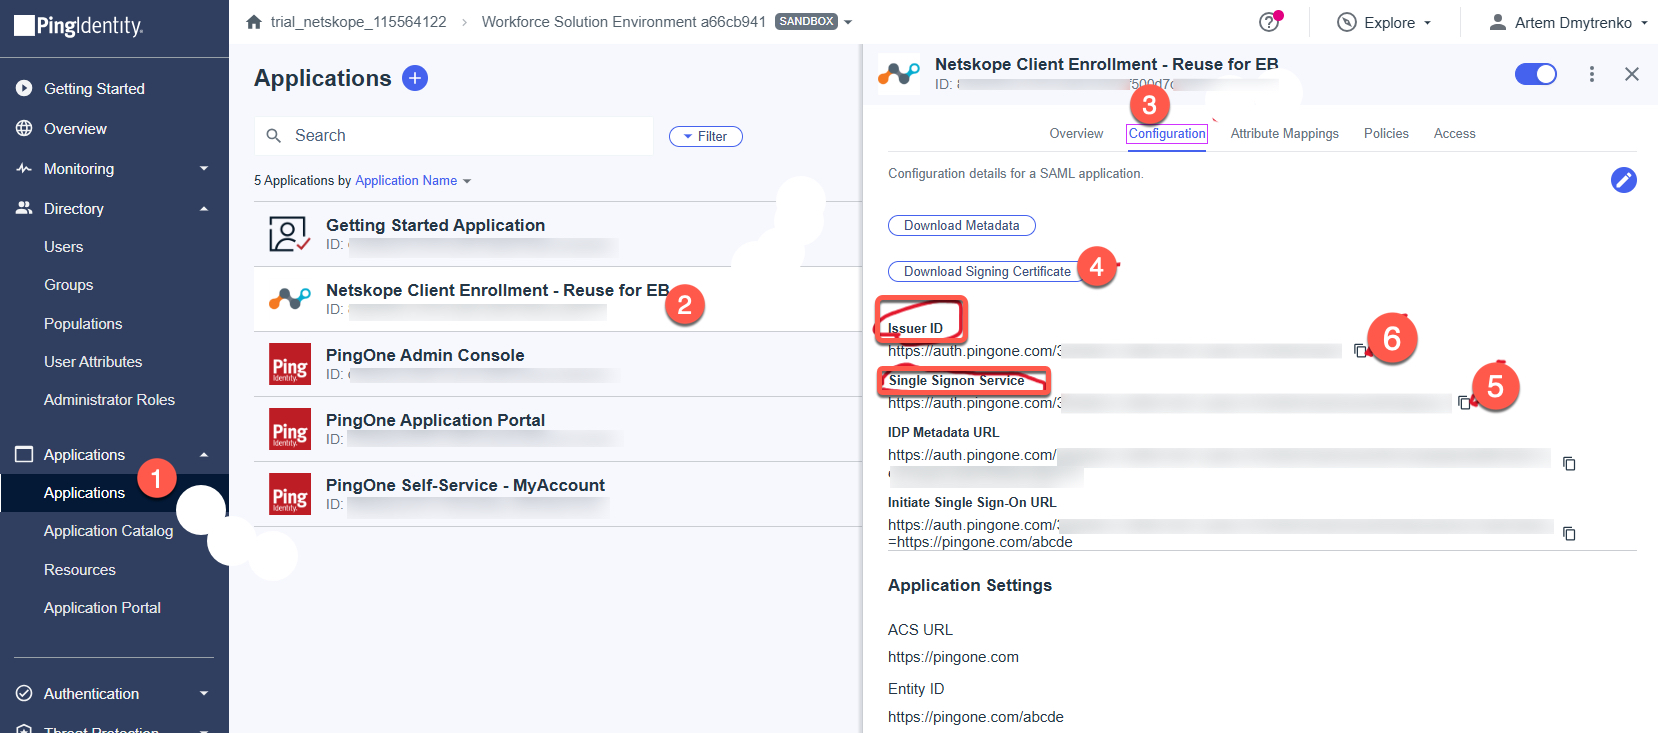
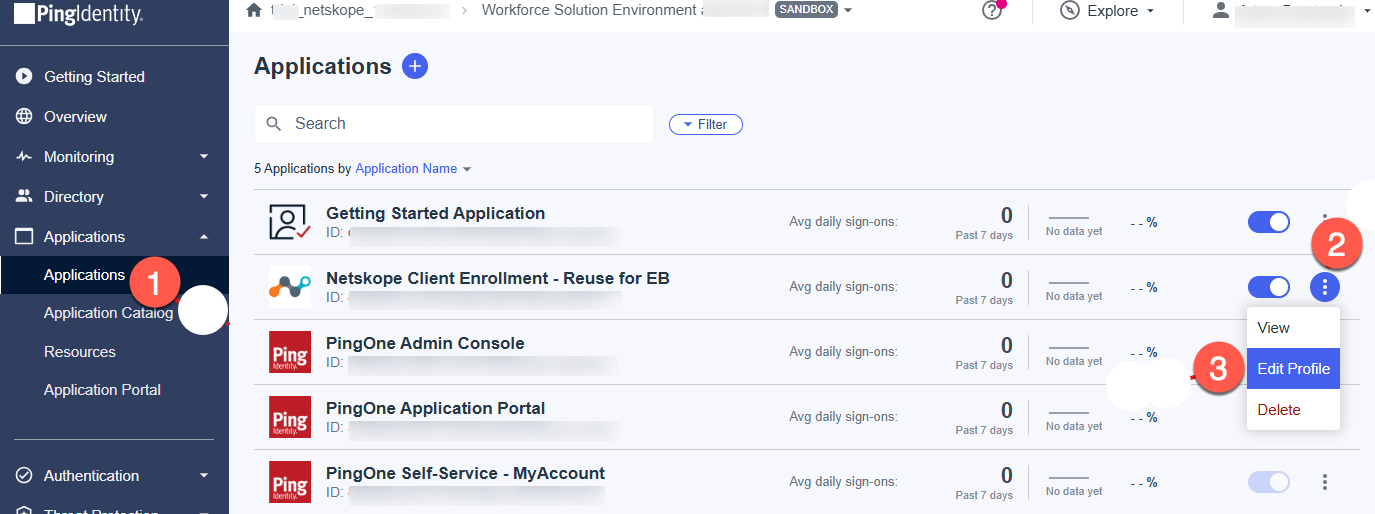
11. Once the application is saved, navigate to the Applications list:
- Download its signing certificate:
- Note Single Signon Service URL. It will be entered as IDP SSO URL in Netskope.
- Note Issuer ID URL. It will be entered as IDP ENTITY ID in Netskope.
12. Configure SAML in Netskope. Log in to your Netskope account. Navigate to Settings > Security Cloud Platform > Forward Proxy > SAML. Click New Account and fill out the following information:
- Select either All or Enterprise Browser ACCESS METHOD.
- IDP SSO URL will come from Single Signon Service field in PingIdentity.
- IDP ENTITY ID will come from Issuer ID field in PingIdentity.
- IDP CERTIFICATE will be the signing certificate downloaded in the previous step from PingIdentity.
- SAML BINDING METHOD is HTTP Post Binding.
- STATUS should be Enabled.

13. After you save the Netskope configuration, click the gear logo to display the configuration.

14. Note the SAML Entity ID and SAML Proxy ACS URL.

15. Open PingIdentity > click Applications. Next to the Application created in Step 7 (“Netskope Client Enrollment – Reuse for EB”) click the ellipses and select Edit Profile.
16. Enter the values from Step 14 above and save the configuration.
- ACS URL should contain the value from SAML Proxy ACS URL field in Netskope.
- Entity ID should contain the value from SAML Entity ID field in Netskope.

17. To test the connection, return to Netskope > select SAML – Forward Proxy integration. Click Test from the integration context menu.
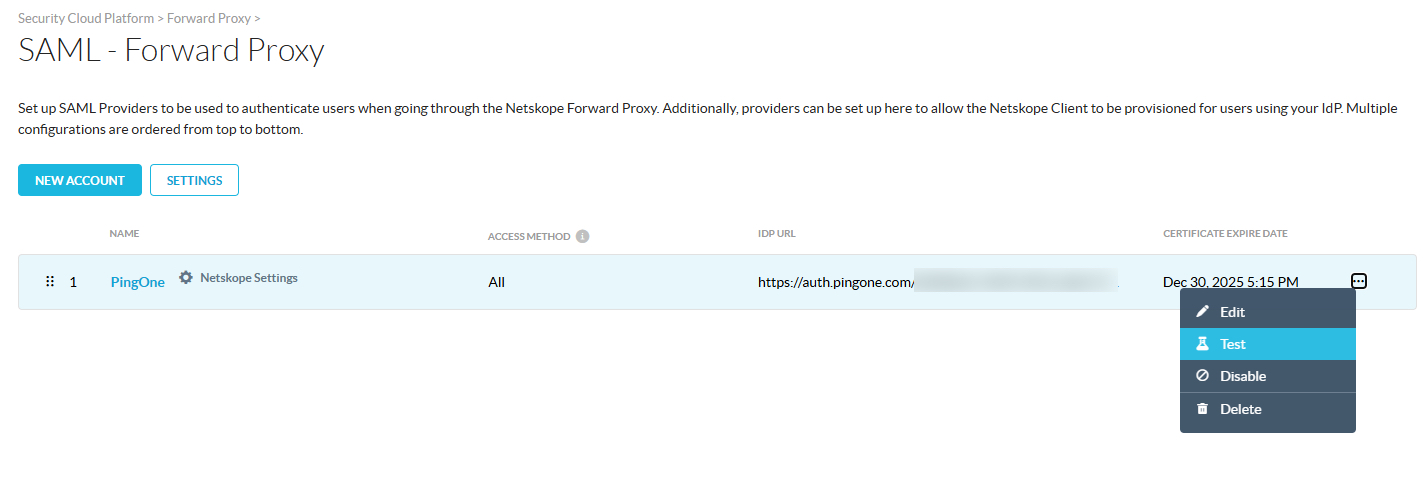
18. Type the Test user login credentials.

19. If the test is successful, the following screen displays.

SCIM Set Up
The SCIM API is used to automatically push users provisioned in PingIdentity to Netskope.
This configuration may be optional if users are provisioned using an alternate method like AD Importer.
- Follow instructions to enable SCIM API v2 on Netskope. To learn more: SCIM Settings for User Provisioning
- Open PingIdentity and set up a new Provisioning Integration. Select Identity Store.

3. Select the SCIM Outbound tile.

4. Choose a descriptive name for a Netskope connection.

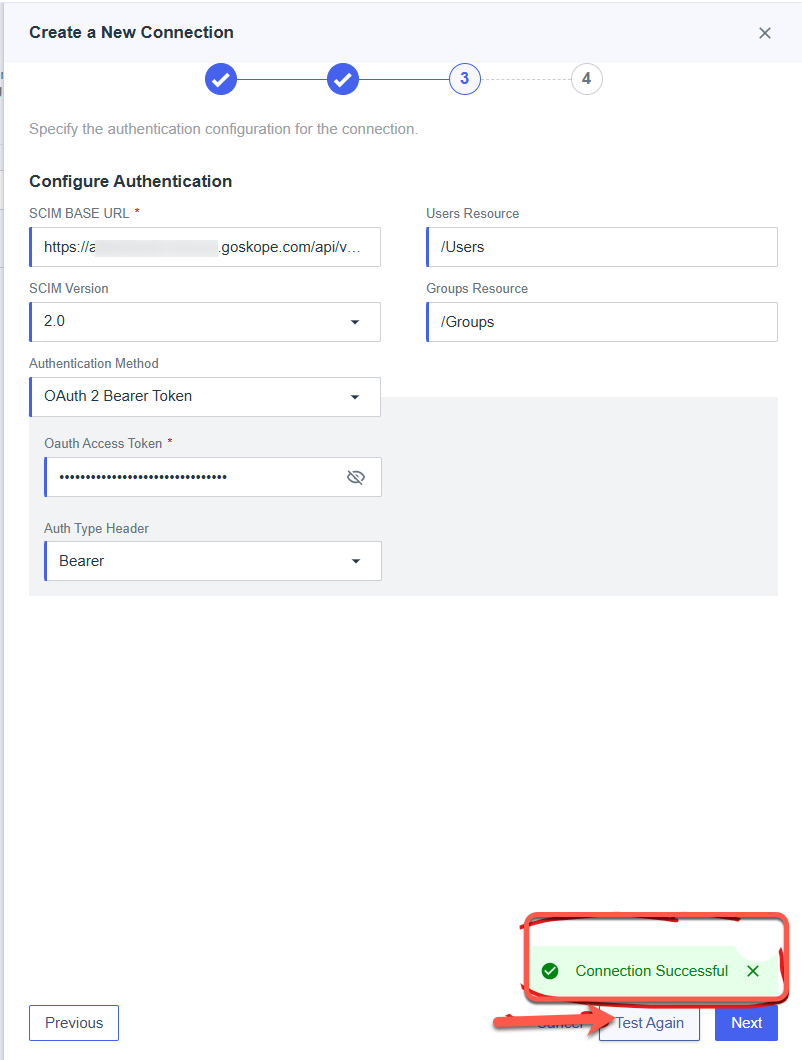
5. On the Authentication page, enter the following information:
- For SCIM BASE URL enter “https://<tenant-name>.goskope.com/api/v2/scim”. Replace “<tenant-name>” with your actual tenant name.
- Set Authentication Method to “OAuth 2 Bearer Token”.
- Enter Netskope API v2 token with SCIM permissions from Step 1 into the Oauth Access Token field.
- Click Test Connection to verify that PingIdentity can connect to Netskope. In case of errors:
- Check that Rest v2 API is enabled in Netskope (by default it’s disabled).
- Both Groups and Users SCIM endpoints are added to Rest v2 token you have entered.
- Make sure that read and write permissions are enabled for both Groups and Users SCIM endpoints.
6. Default values are acceptable on this page. Optionally, you can customize if you’re familiar with the options.

7. Enable the connection after you create it.

8. Before the user sync can start, you will need to configure a rule. Select Provisioning from Integrations. Then select New Rule from the context menu.

9. Enter a rule name.

10. Click the Configuration tab > + to add the Netskope SCIM connection to the Target part of the rule.

11. If you have configured everything correctly, you should see the following flow chart.

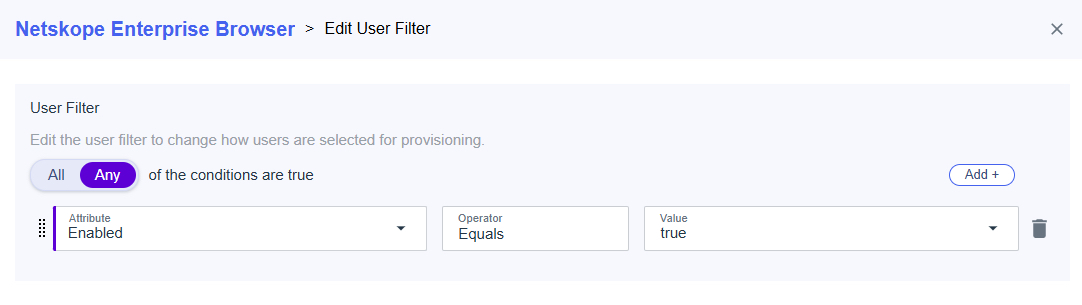
12. User Filter, Attribute Mapping, and Group Provisioning will need to be configured before you can enable the rule. Click User Filter. For this example, configure a filter to send all Enabled users to Netskope.
13. Review the Attribute Mapping configuration. You can leave the default selection unless you’d like to configure a special mapping.
14. Click Group Provisioning to add the Enterprise Browse group.

15. Now you can Enable the rule. After enabling, you will see the sync status with the number of users and groups copied over to Netskope.

16. Log in to Netskope and confirm the user sync was successful. Navigate to Settings > Security Cloud Platform > Netskope Client > Users (the user list available in Netskope Client is also available to Enterprise Browser, as long as the users are in SSO).
