

Privileged Remote Access (PRA) gives administrators and 3rd-parties clientless, browser-based access to your internal RDP and SSH systems, with every session recorded and every credential vaulted. Benefits include:
- No VPN or agent: Users connect straight from a browser; there’s nothing to install.
- Full audit trail: Record privileged sessions for compliance review and incident response.
- Zero credential exposure: Vaulted secrets are injected automatically, so nobody sees or types a password.
Overview
Privileged Remote Access is a capability of Netskope Private Access (NPA) built for the servers you’d normally reach through a jumpbox. Instead, admins, contractors, and vendors reach RDP and SSH systems directly through the browser, while you keep a recording of what happened, and control over how credentials reach the session.
PRA sits on top of the access policies you already have. It doesn’t decide whether someone can reach a system; your existing policies still do that. PRA decides what happens once they’re in: should this session be recorded, and should the login be handled automatically from a vault instead of a shared password.
Contact your Netskope account team to get this feature enabled in your tenant.
Key Concepts
PRA introduces a few new ideas on top of the NPA policies you already use. Here’s what’s specific to PRA.
- Session Governance policy: Controls whether a privileged session is recorded. It has no effect on access; a user either can or can’t already reach the app, regardless of this policy.
- Credential Injection policy: Controls whether the login for a privileged session is handled automatically from a vault, instead of the user typing a shared password.
- Credential object: The actual stored RDP or SSH login (username plus a password, private key, or domain) that a Credential Injection policy injects into the session.
- Vault: Where a credential object’s secret actually lives: Netskope’s managed vault by default, or an external vault you already run, such as Delinea Secret Server.
- Browser Access: PRA sessions run over NPA Browser Access, the same clientless, in-browser access method you may already use for internal web apps, extended here to RDP and SSH.
How it Works
Every PRA session passes through two independent stages of policy evaluation, applied in order.
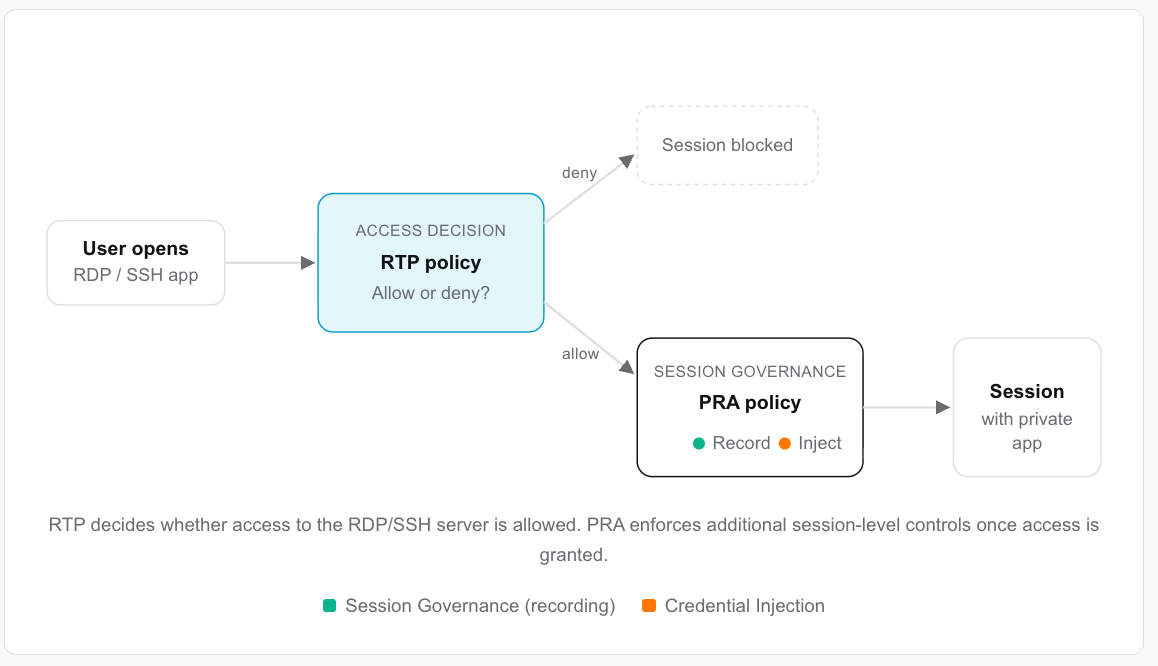
PRA policies are evaluated top-down, so you can layer broad rules with narrower exceptions: for example, record sessions for a subset of high-risk servers within a team that otherwise has standard access.
Prerequisites
Confirm these before you start. PRA policies build on top of an existing NPA deployment.
- Netskope Private Access (NPA) is enabled on your tenant.
- Your target RDP and SSH systems are defined as Private App Segments, scoped for Enterprise Browser (EB) or Any Browser access.
- A Real-time Protection (RTP) policy already allows the users or groups who need to reach those segments.
Configure Session Recording
Session Governance policies control whether a privileged session is recorded, nothing more. Access is still governed entirely by RTP.
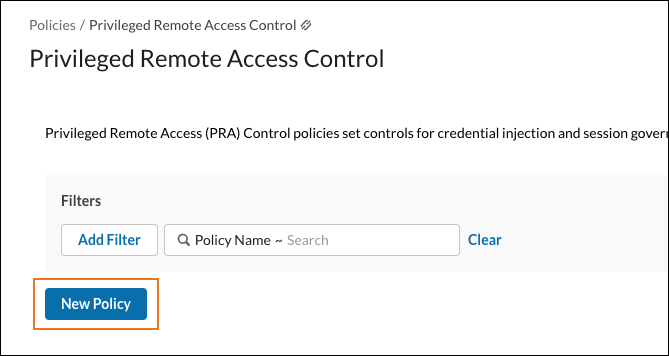
- Open Privileged Remote Access Control. Go to Policies > Privileged Remote Access Control and click New Policy.
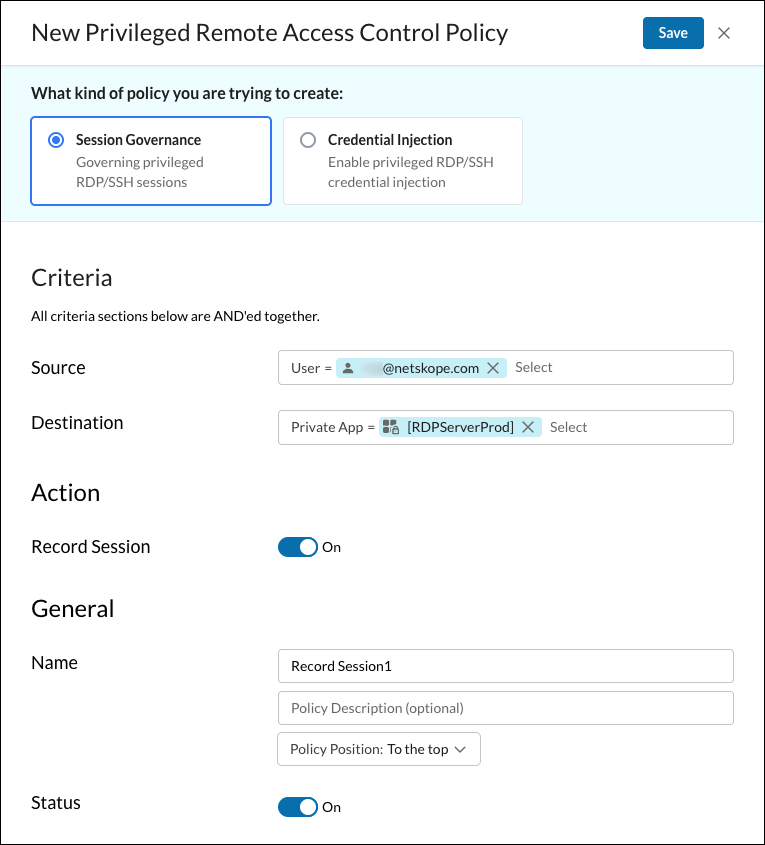
- You’ll be prompted for a policy type. Select Session Governance.
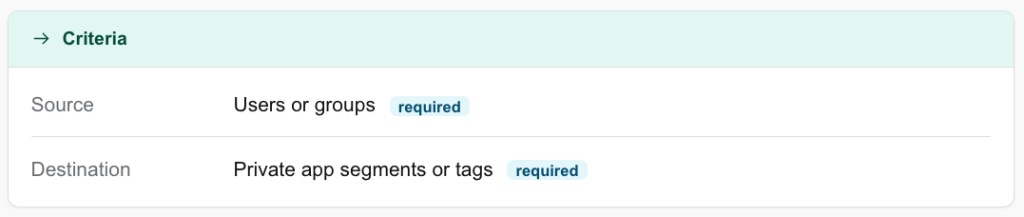
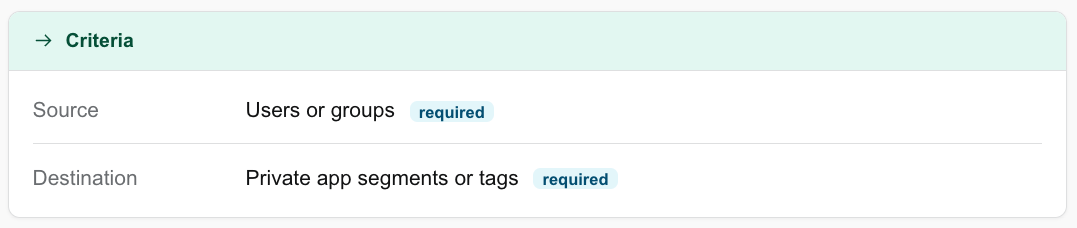
- Set who and what this policy applies to. Criteria are combined with AND: a session must match every section to be governed by this policy.
- Turn recording on. Under Action, enable Record Session.
- Give the policy a clear name, set its Policy Position (evaluation order matters, see Good to Know), set Status to Enabled, and click Save.
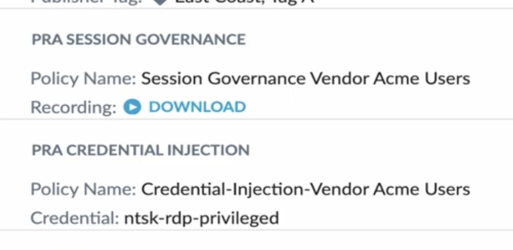
When enabled, users see a small recording indicator for the duration of the session, and the finished recording appears in Network Events for admins to review or download.
Configure Credential Injection
Credential Injection policies let PRA log a user into the target system automatically, using a credential you’ve stored in a vault, so the login secret is never shared, typed, or seen by the end user.
Step A: Create a Credential Object
A credential object is the stored login PRA will inject. Create it before you build the policy that uses it.
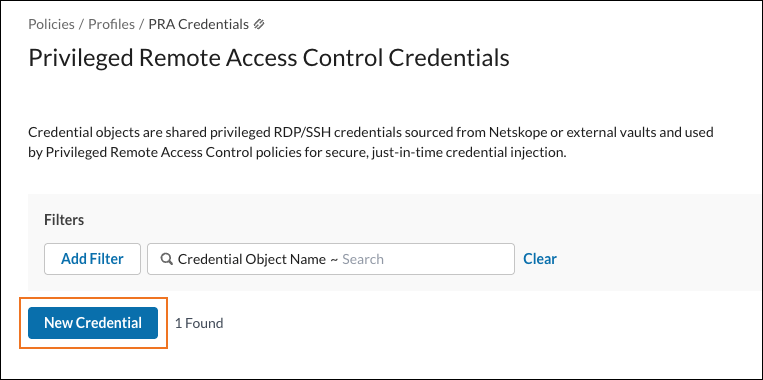
- Open the credentials library. Go to Policies > Profiles > Privileged Remote Access Control Credentials and click New Credential.
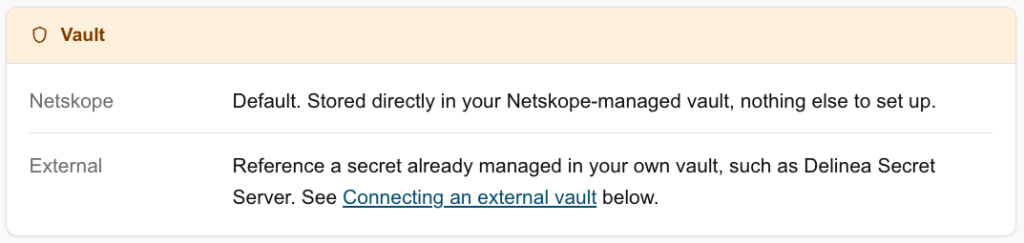
- Choose where the credential lives. Pick the vault that will store this secret:
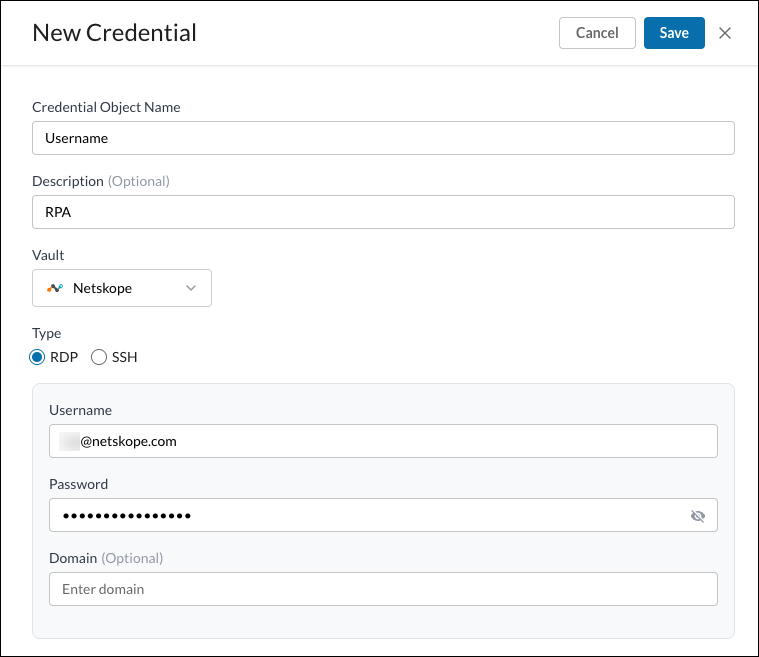
- Enter the credentials. Select RDP or SSH and complete the matching fields.
Tip
Choose password or private-key authentication to match how the target SSH server is configured.
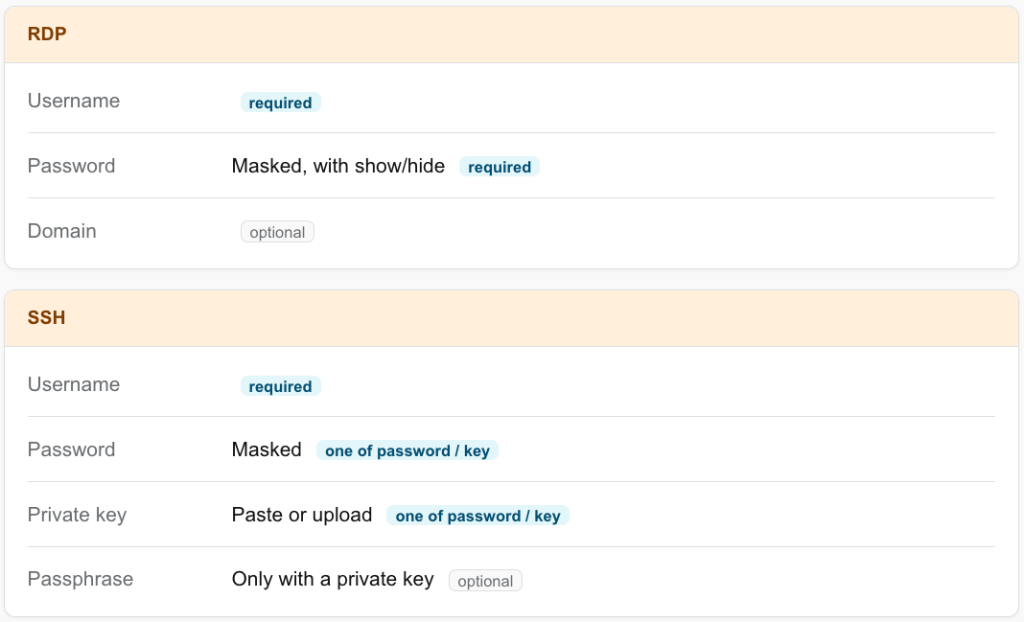
- Click Save. The credential appears in your credentials list, ready to attach to a policy. You can edit it later from the same list: rename it, rotate the secret, or change the vault reference.
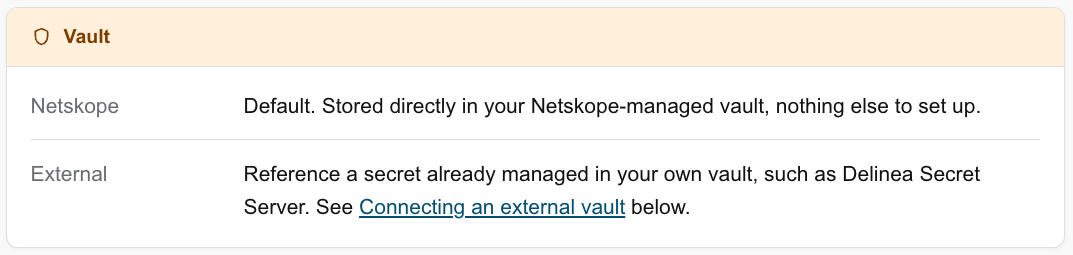
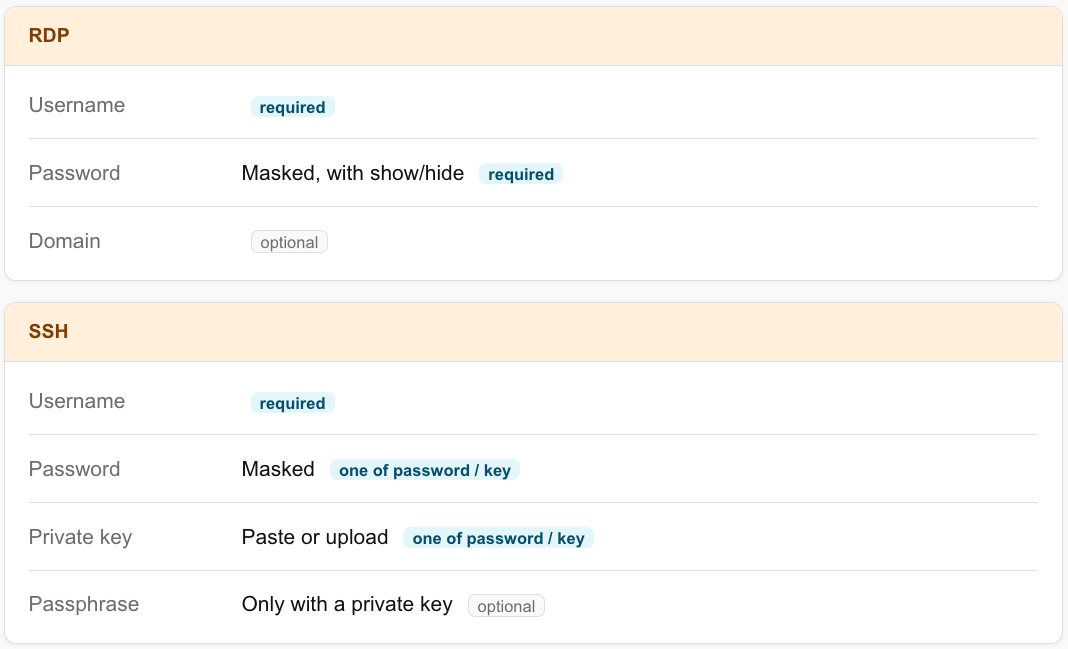
Connecting an External Vault: Delinea Secret Server
If your privileged accounts already live in Delinea Secret Server, PRA can reference those secrets directly instead of duplicating them in Netskope’s vault.
In the Delinea Secret Server
- Create a service accountUnder Access > More > Add service user, create an account and grant it permission to read the secrets PRA needs.
- Store the credential and note its path Create the machine credential under Secret Server and note its secret path, for example
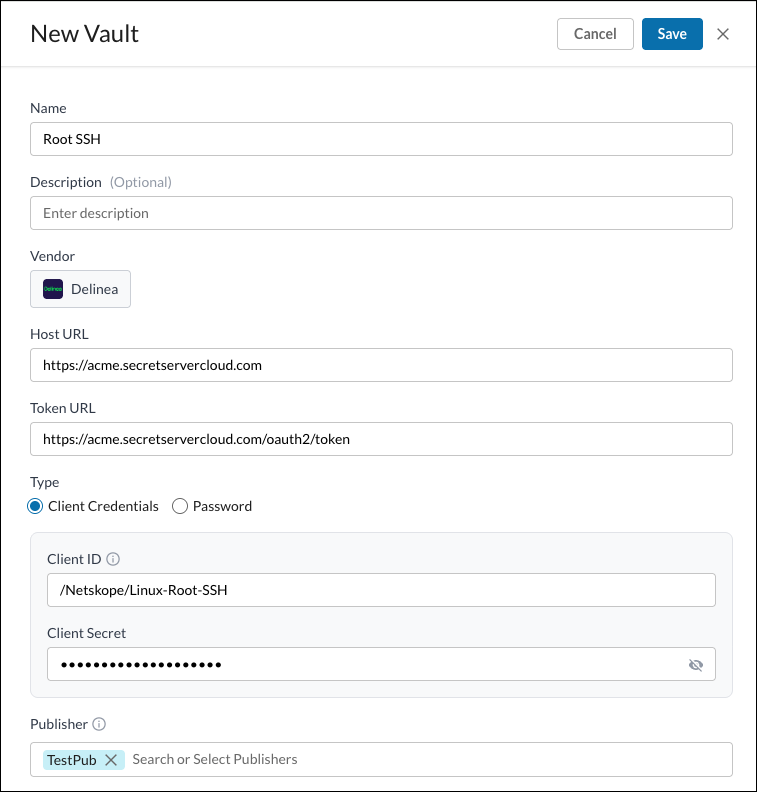
/Netskope/Linux-Root-SSH. You’ll use this path when you create the matching credential object in Netskope.
In the Netskope Tenant
- Open Integrate External Vaults. Go to Policies > Profiles > Privileged Remote Access Control Credentials > Integrate External Vaults.
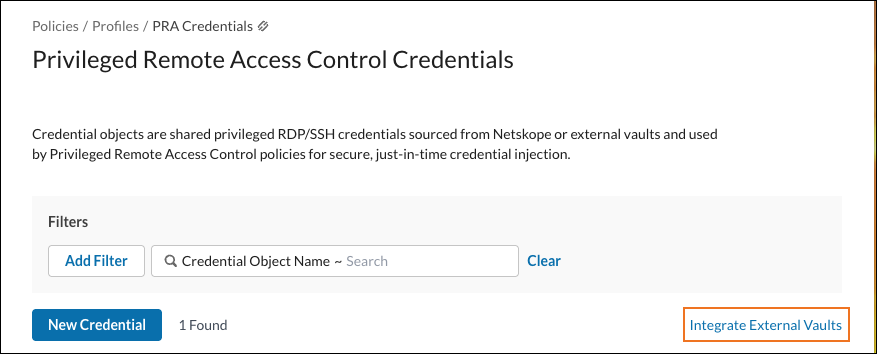
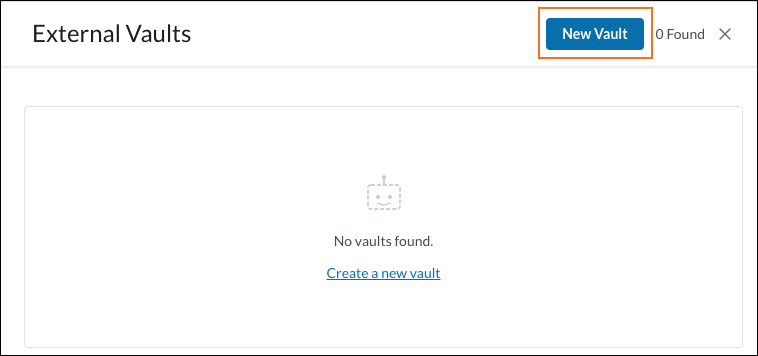
- Click New Vault.
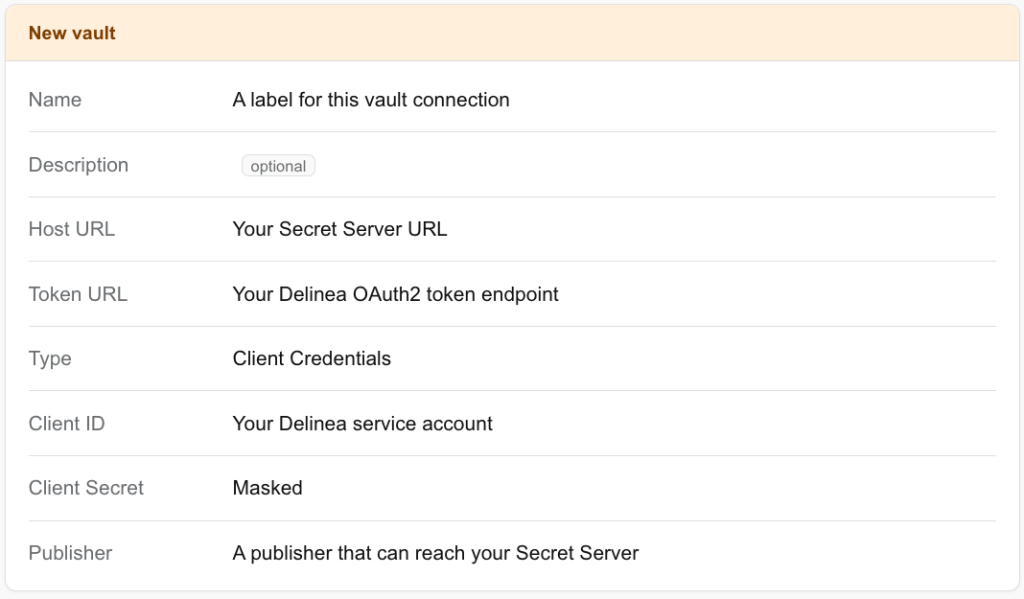
- Enter your Delinea connection details.
- Click Save. Netskope treats the vault like any other private app, so it reaches the Secret Server through the Publisher you selected.
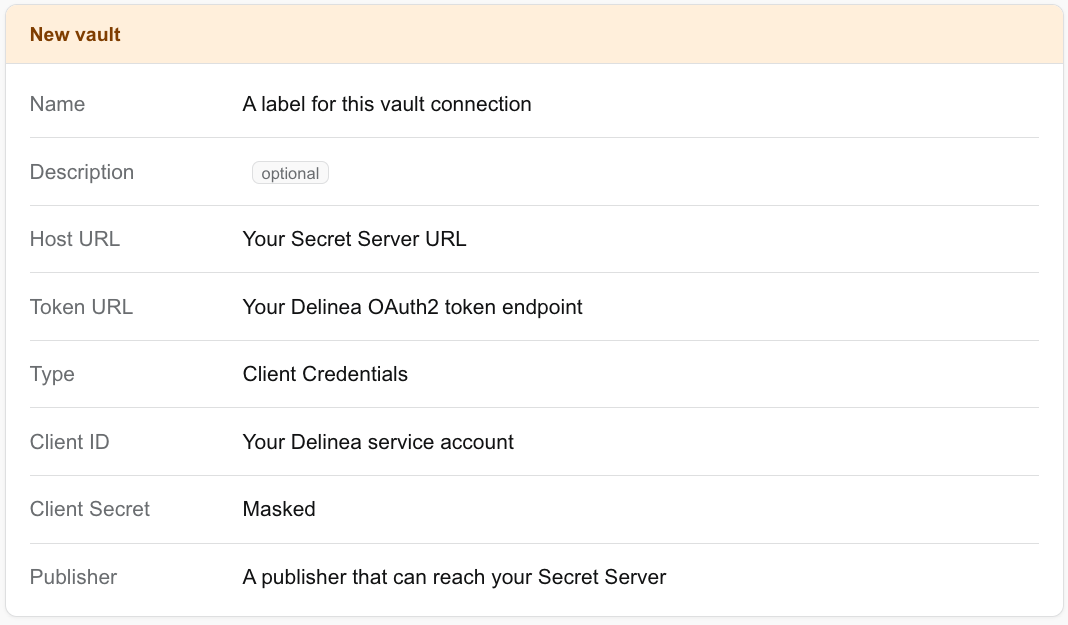
Once the vault is connected, create a credential object as usual and reference the secret by its path instead of entering a username and password directly.
Step B: Create the Credential Injection Policy
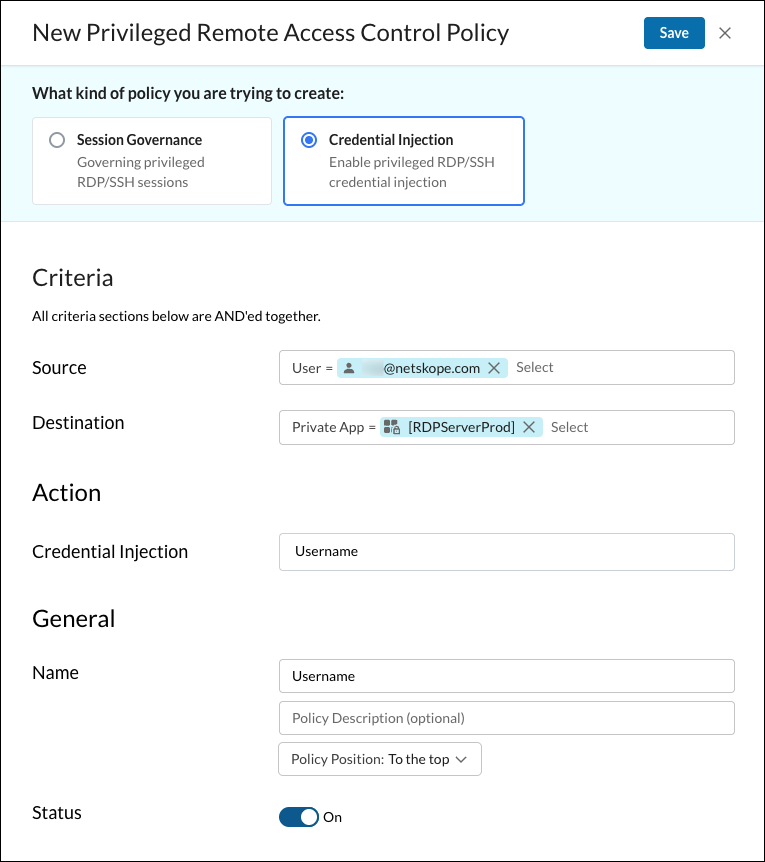
- Go to Policies > Privileged Remote Access Control, click New Policy and select Credential Injection.
- Set the Source and Destination. It has the same pattern as Session Governance: users/groups, and the app segments or tags this policy covers.
- Choose the credential object to inject. Under Action, select the credential object you created in Step A.
- Enter a name, select a Policy Position, enable the Status toggle, and then click Save.
You can layer a Session Governance policy and a Credential Injection policy on the same app segment: one enforces recording, the other handles login. They’re independent, so mix and match per your use case.
Verify and Monitor
A quick pass after setup confirms everything is wired together correctly.
- Launch a test session. Using Browser Access, open the RDP or SSH app covered by your new policies and confirm you reach it.
- Check what the user sees. A recording indicator appears if Session Governance is enabled. If Credential Injection is enabled, the session should establish without a manual login prompt.
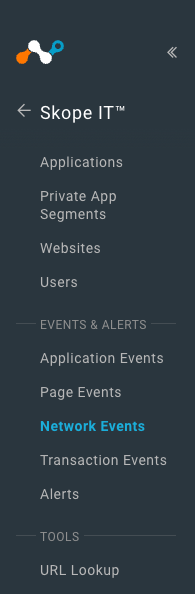
- Review the event. Go to Skope IT > Network Events, filter for PRA events, and open the session you just tested.
- To download the recording, click Download.
Managing Credential Objects
Edit or delete a credential from the credentials list at any time via its menu. Note that a credential object can’t be deleted while it’s referenced by a policy; remove it from any policies first.
Good to Know
Here is a short list of things worth knowing before you roll PRA out broadly.
Re-save existing app segments
If you’re turning on PRA for an app segment that was already set up before, edit it and save again (for example, update the port, then change it back) so its generated hostname reflects PRA support before you test the connection.
Recordings take a moment to process
After a session ends, the recording is processed before it’s available for playback or download. Longer sessions take a little longer, so give it a few minutes if a recent recording isn’t showing up yet.
Recordings don’t stay forever
Recordings are retained for a limited window and then purged automatically to manage storage. Download anything you need to keep for the long term.
Rotate the source, rotate the object
PRA doesn’t sync automatically from the target system. If you rotate a privileged account’s password at the source, update the matching credential object so injection keeps working.
Policy order matters
PRA policies are evaluated top-down, and the first match wins. Put narrower, more specific policies above broader ones.
Sessions don’t get blocked by a credential hiccup
If no Credential Injection policy matches, or injection can’t complete, the user simply falls back to a standard login prompt; the session itself isn’t blocked.
FAQs
Does a PRA policy replace my existing RTP access policy?
No. RTP policies still make the allow/deny decision. PRA policies only add session-level controls (recording and credential injection) on top of sessions RTP has already allowed.
Can I apply both session recording and credential injection to the same app?
Yes. Create one Session Governance policy for recording and a separate Credential Injection policy for the login; both can target the same app segment or tag.
Do users ever see the injected credentials?
No. Credentials are retrieved from the vault and injected directly into the session; they’re never displayed to or typed by the end-user.
What happens if I don’t set up a PRA policy for an app at all?
Nothing changes for that app. It behaves exactly as it does today: governed by RTP only, unrecorded, with the standard login prompt.
Who can view or download session recordings?
Only administrators with access to Network Events. End users are not able to view or download recordings of their own sessions.
How do I get PRA enabled for my tenant?
Reach out to your Netskope account team to get it enabled for your tenant.