

This document explains how to configure the Proofpoint v1.0.0 plugin with the Risk Exchange module of the Netskope Cloud Exchange platform. This plugin is used to fetch the attack index of users in Proofpoint on the TAP Dashboard > People page using the VAP module. The plugin does not support performing any actions on users in Proofpoint.
Netskope normalization score calculation for users > (1 – ((user’s attack index – min of user’s attack index) / (max of user’s attack index – min of user’s attack index)) * 999) + 1.
Prerequisites
To complete this configuration, you need:
- A Netskope tenant (or multiple, for example, production and development/test instances).
- A Netskope Cloud Exchange tenant with the Tenant plugin and Risk Exchange plugin already configured.
- Your Proofpoint URL, Username, and Password.
- Connectivity to the following host: https://tap-api-v2.proofpoint.com
Proofpoint Plugin Support
This plugin is used to fetch the attack index of users from the Proofpoint TAP Dashboard > People page using the VAP module. The plugin does not support performing any actions on users in Proofpoint.
| Type of Data Pulled | Actions |
|---|---|
| Users | No actions |
Mappings
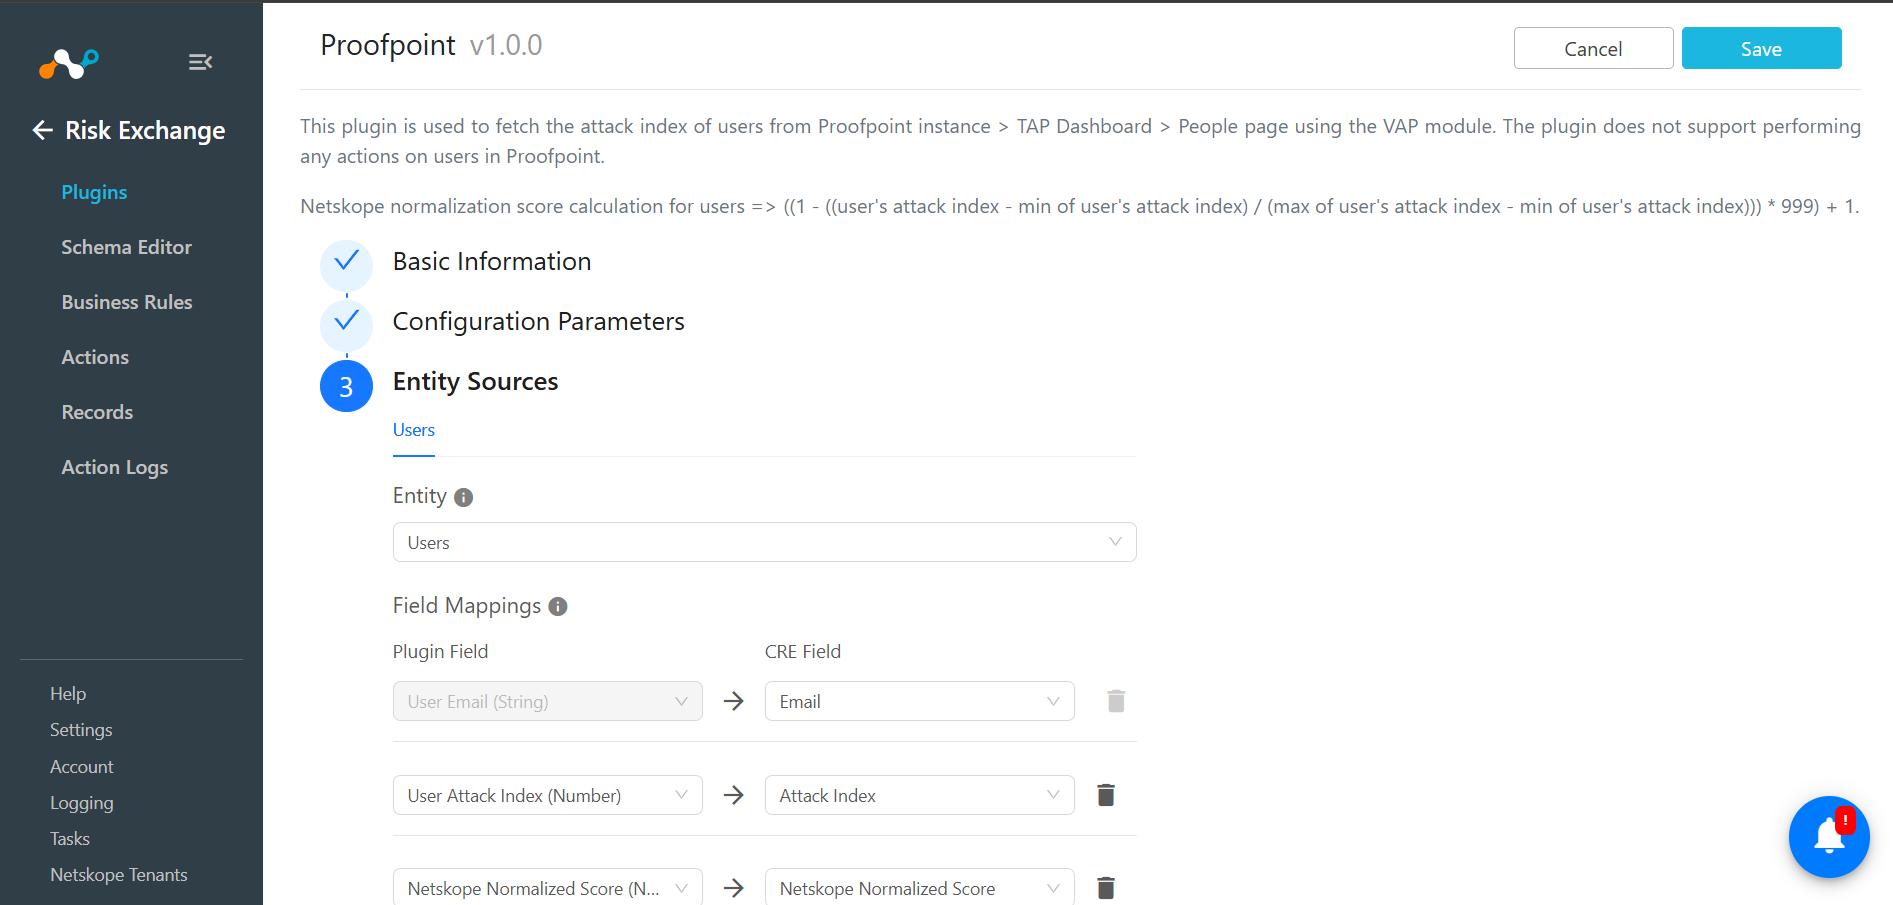
Mapping will be used to view the pulled users and their respective details. Mapped fields during plugin configuration will be visible on the Records page once the data is pulled. Below is the suggested mapping that should be used while configuring the plugin.
Pull Mapping for Users
| Plugin Field | Expected Datatype | Suggested Field Name | Suggested Aggregate Strategy |
|---|---|---|---|
| User Email | String | User Email | Unique |
| User Attack Index | Number | User Attack Index | Overwrite |
| Netskope Normalized Score | Number | Netskope Normalized Score | Overwrite |
Normalized Score Calculation
Netskope normalization score calculation for users => (1 – ((user’s attack index – min of user’s attack index) / (max of user’s attack index – min of user’s attack index)) * 999) + 1.
Permissions
A User should have the Administrative User role.
API Details
List of APIs used
| API Endpoint | Method | Use Case |
|---|---|---|
| /v2/people/vap | GET | Fetch Users |
Fetch Users
API Endpoint: <Proofpoint URL>/v2/people/vap
Method: GET
Params
| Key | Value |
|---|---|
| window | <Proofpoint Date Range> |
| size | 5000 |
| page | 1 |
Auth
| Key | Value |
|---|---|
| username | <Proofpoint Username> |
| password | <Proofpoint Password> |
Sample API Response
    "users": [
        {
            "identity": {
                "guid": "c23d2fc6-adb1-c625-0a4b-9cad87bc0a6d",
                "customerUserId": null,
                "emails": [
                    "user@example.com"
                ],
                "name": null,
                "department": null,
                "location": null,
                "title": null,
                "vip": false
            },
            "threatStatistics": {
                "attackIndex": 341679,
                "families": [
                    {
                        "name": "credential phishing",
                        "score": 3551651
                    },
                    {
                        "name": "malspam",
                        "score": 411
                    },
                    {
                        "name": "stealer",
                        "score": 150
                    }
                ]
            }
        }
    ],
    "totalVapUsers": 3965,
    "interval": "2025-01-02T05:21:10Z/2025-01-16T05:21:10Z",
    "averageAttackIndex": 293.44128,
    "vapAttackIndexThreshold": 5193.266
}
Performance Matrix
Here are the performance readings conducted on a Large CE Stack with these VM specifications by pulling 10k User records in the Proofpoint plugin.
| Description | Specification |
|---|---|
| Stack details | Size: Large RAM: 32 GB CPU: 16 Cores |
| Time take to store the pulled User records with the Risk Scores | ~ 1 minute |
User Agent
netskope-ce-5.1.0-cre-proofpoint-v1.0.0
Workflow
- Create a Proofpoint user.
- Create a Proofpoint API token.
- Configuring the Proofpoint plugin.
- Add a Business Rule.
- Add an Action.
- Validate the plugin
Create a Proofpoint User
- Log in to Proofpoint.
- Go to TAP Dashboard > Settings > Privileges.
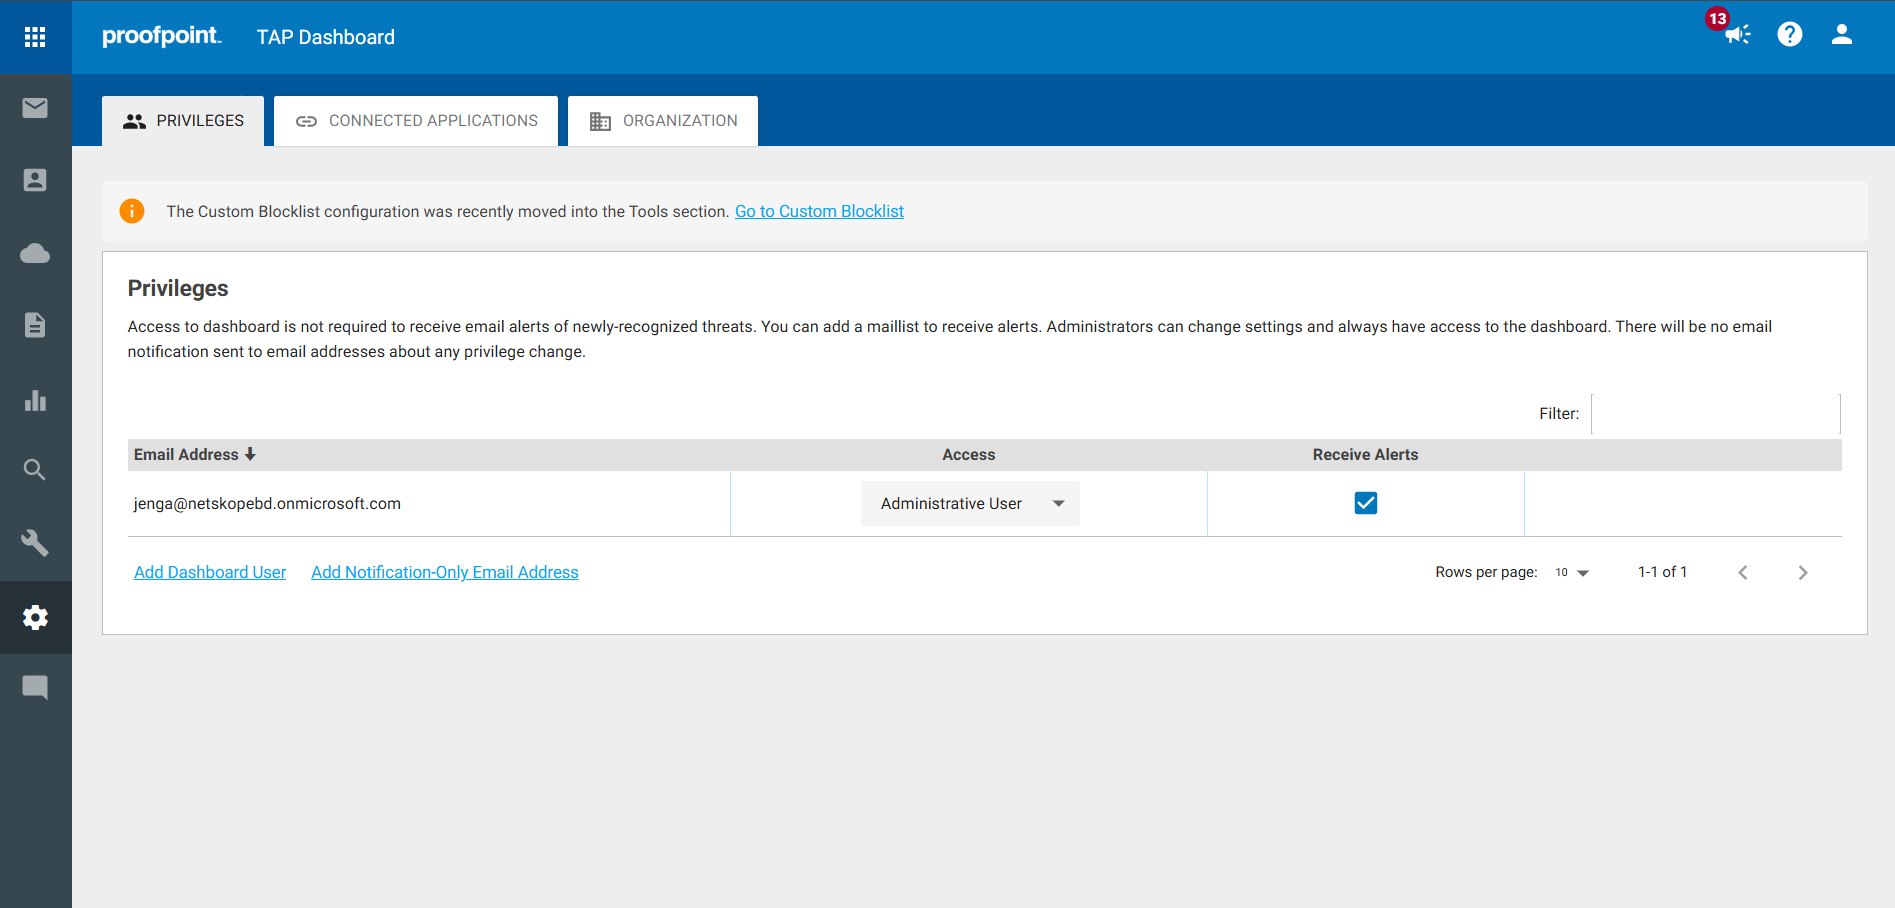
- Click Add Dashboard User.
- Enter an Email Address, select the Administrative User Access, and enable Receive Alerts.
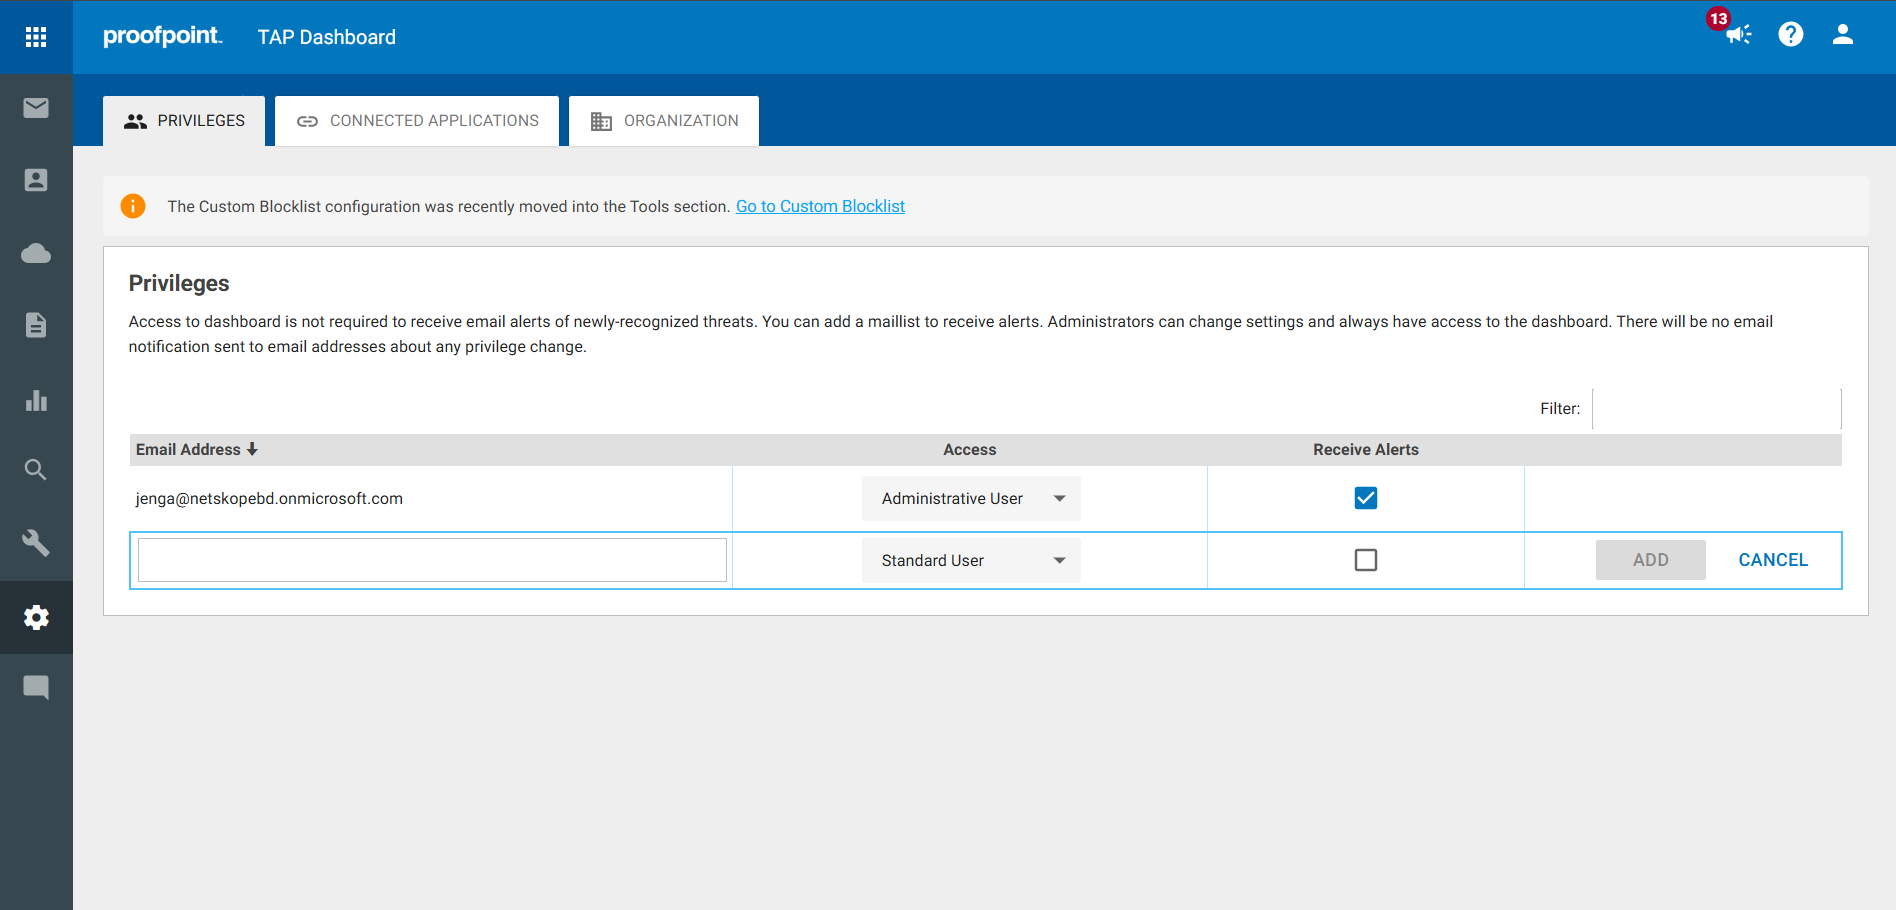
- Click Add.
Create a Proofpoint Credential
- Go to TAP Dashboard > Settings > Connected Applications.
- Click Create New Credential.

- Enter a Name and click Generate. Make note of your username and password to use when configuring the plugin.
Configure the Proofpoint Plugin
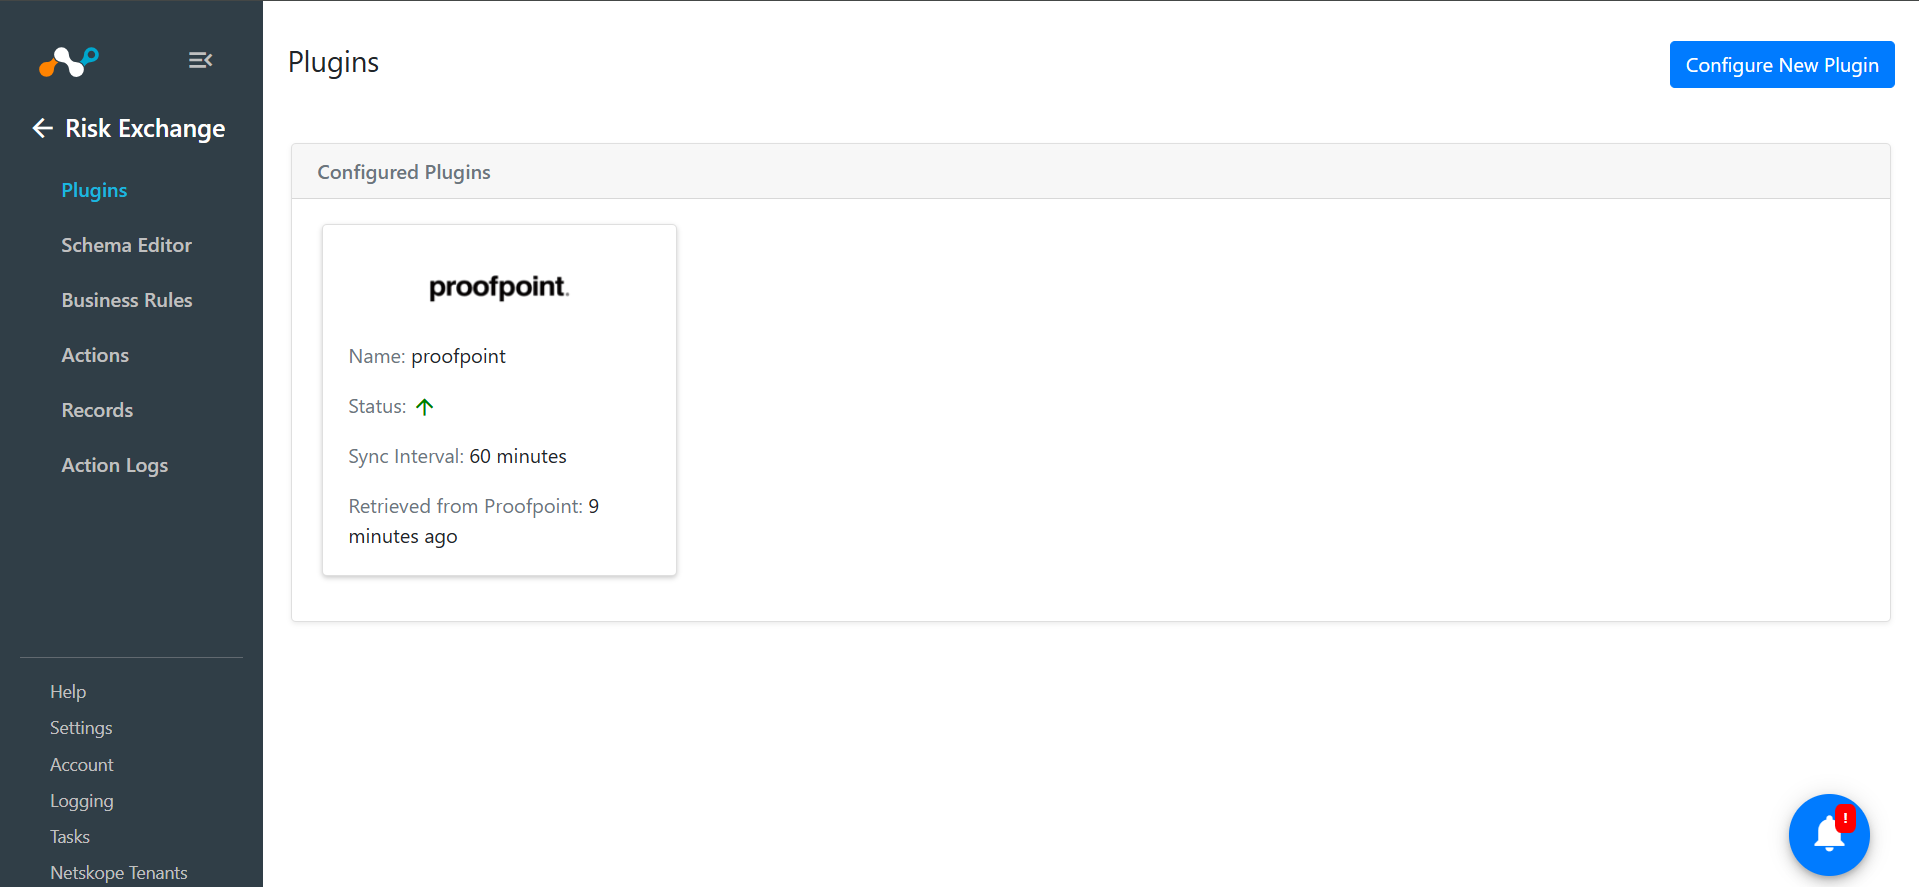
- In Cloud Exchange, go to Settings > Plugins. Search for and select the Proofpoint v1.0.0 (CRE) plugin box.

- Enter the basic information.
- Configuration Name: Enter a name for the configuration.
- Sync Interval: Interval to fetch data from this plugin source.
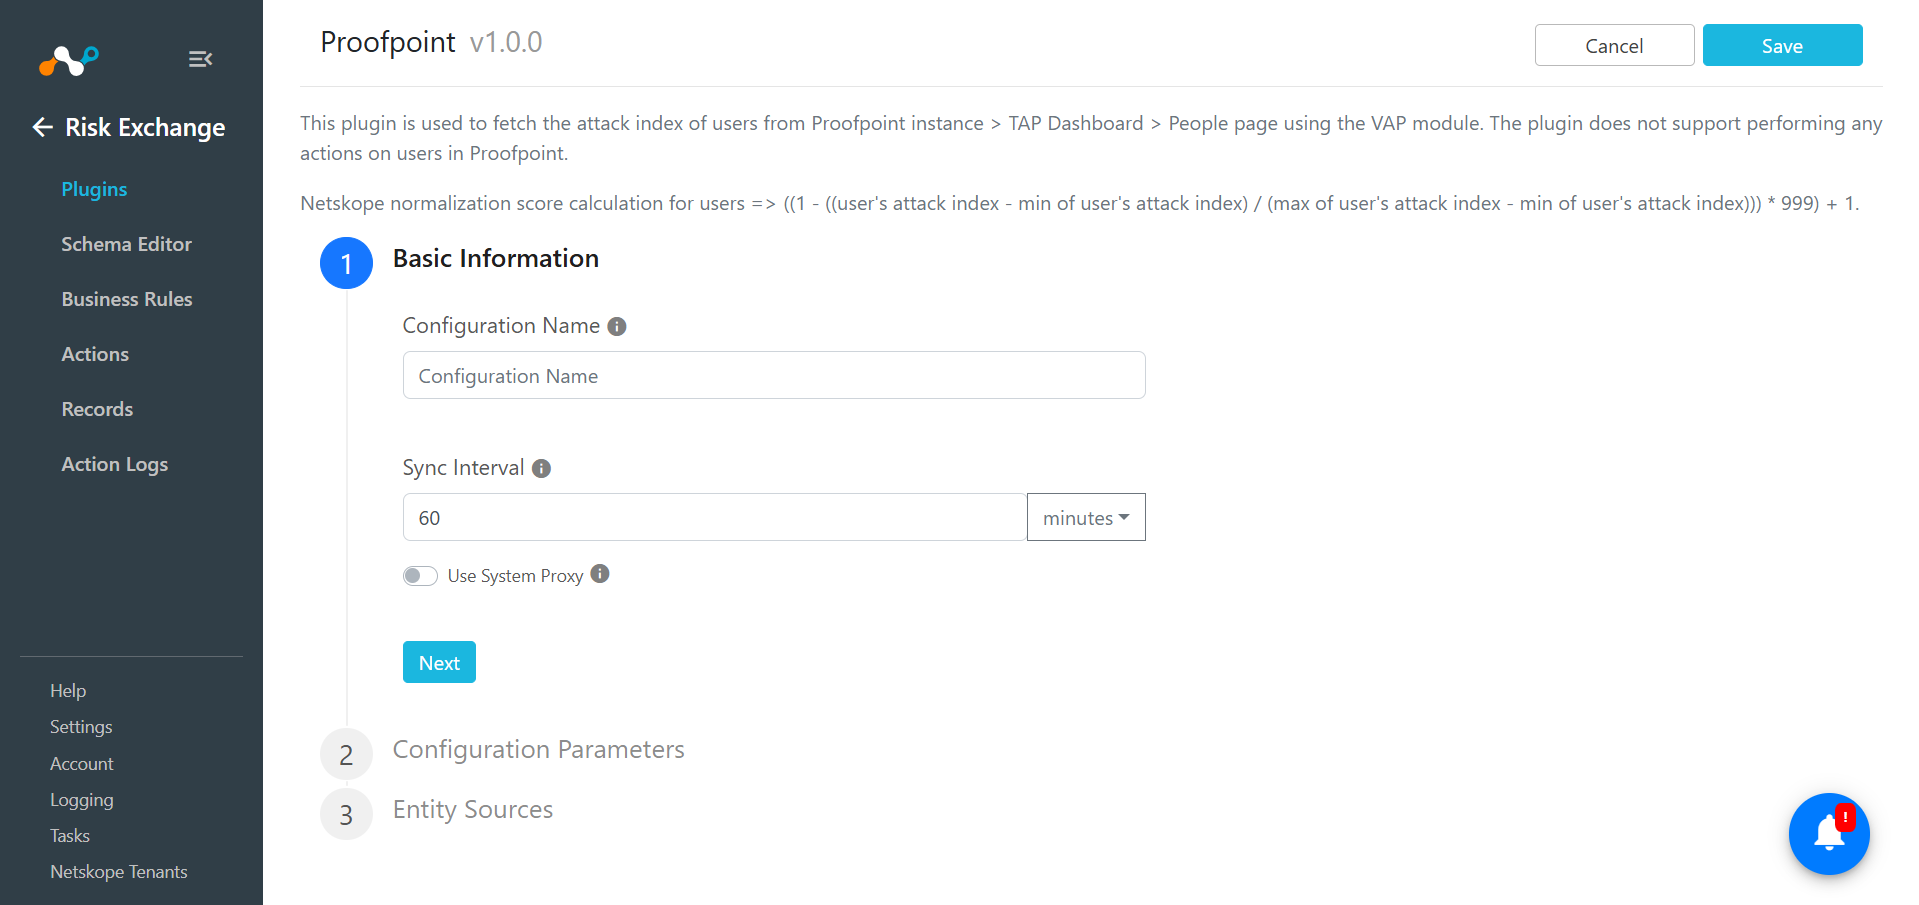
- Click Next and enter the configuration parameters:
- Proofpoint URL: Your Proofpoint API endpoint URL.
- Proofpoint Username: Your Proofpoint API username.
- Proofpoint Password: Your Proofpoint API password.
- Date Range: Date range in days to fetch users and scores from the Proofpoint API.
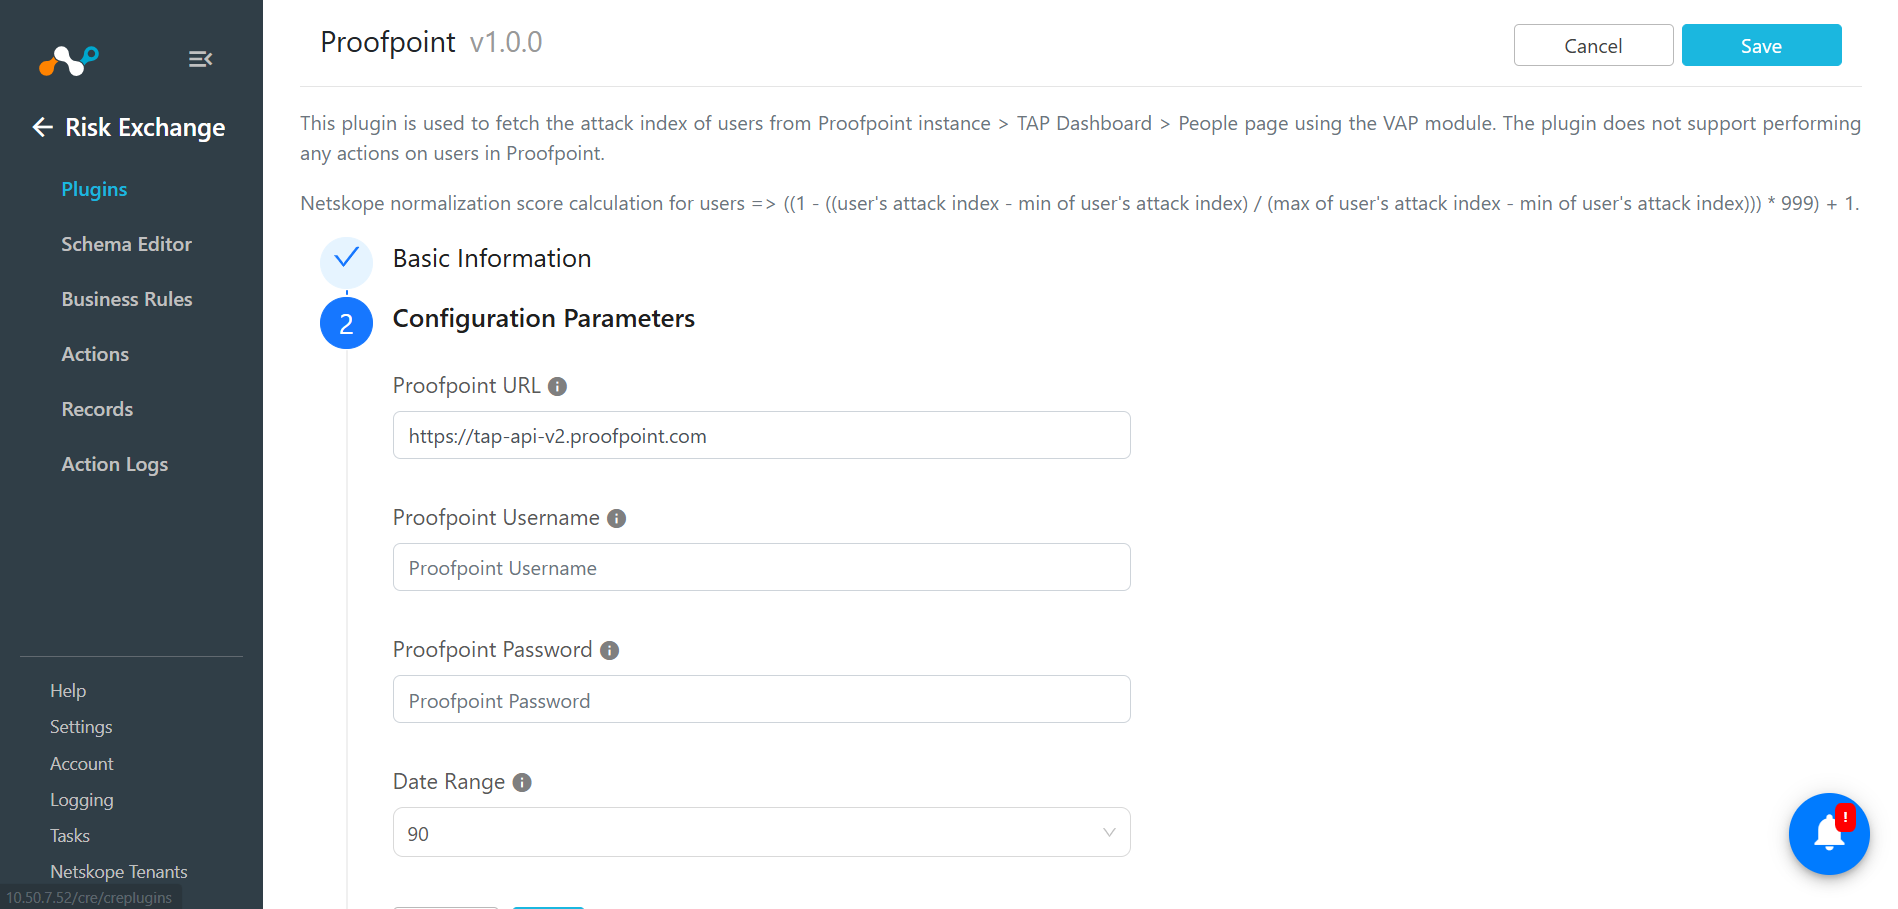
- Click Next and select an Entity from the Entity dropdown.The Entity fields can be created from the Schema editor page, or using the + Add Field option from the field dropdown.
Provide the field mapping. For the suggested mappings, refer to the Mappings section.
- Click Save.
Add a Risk Exchange Business Rule for Proofpoint
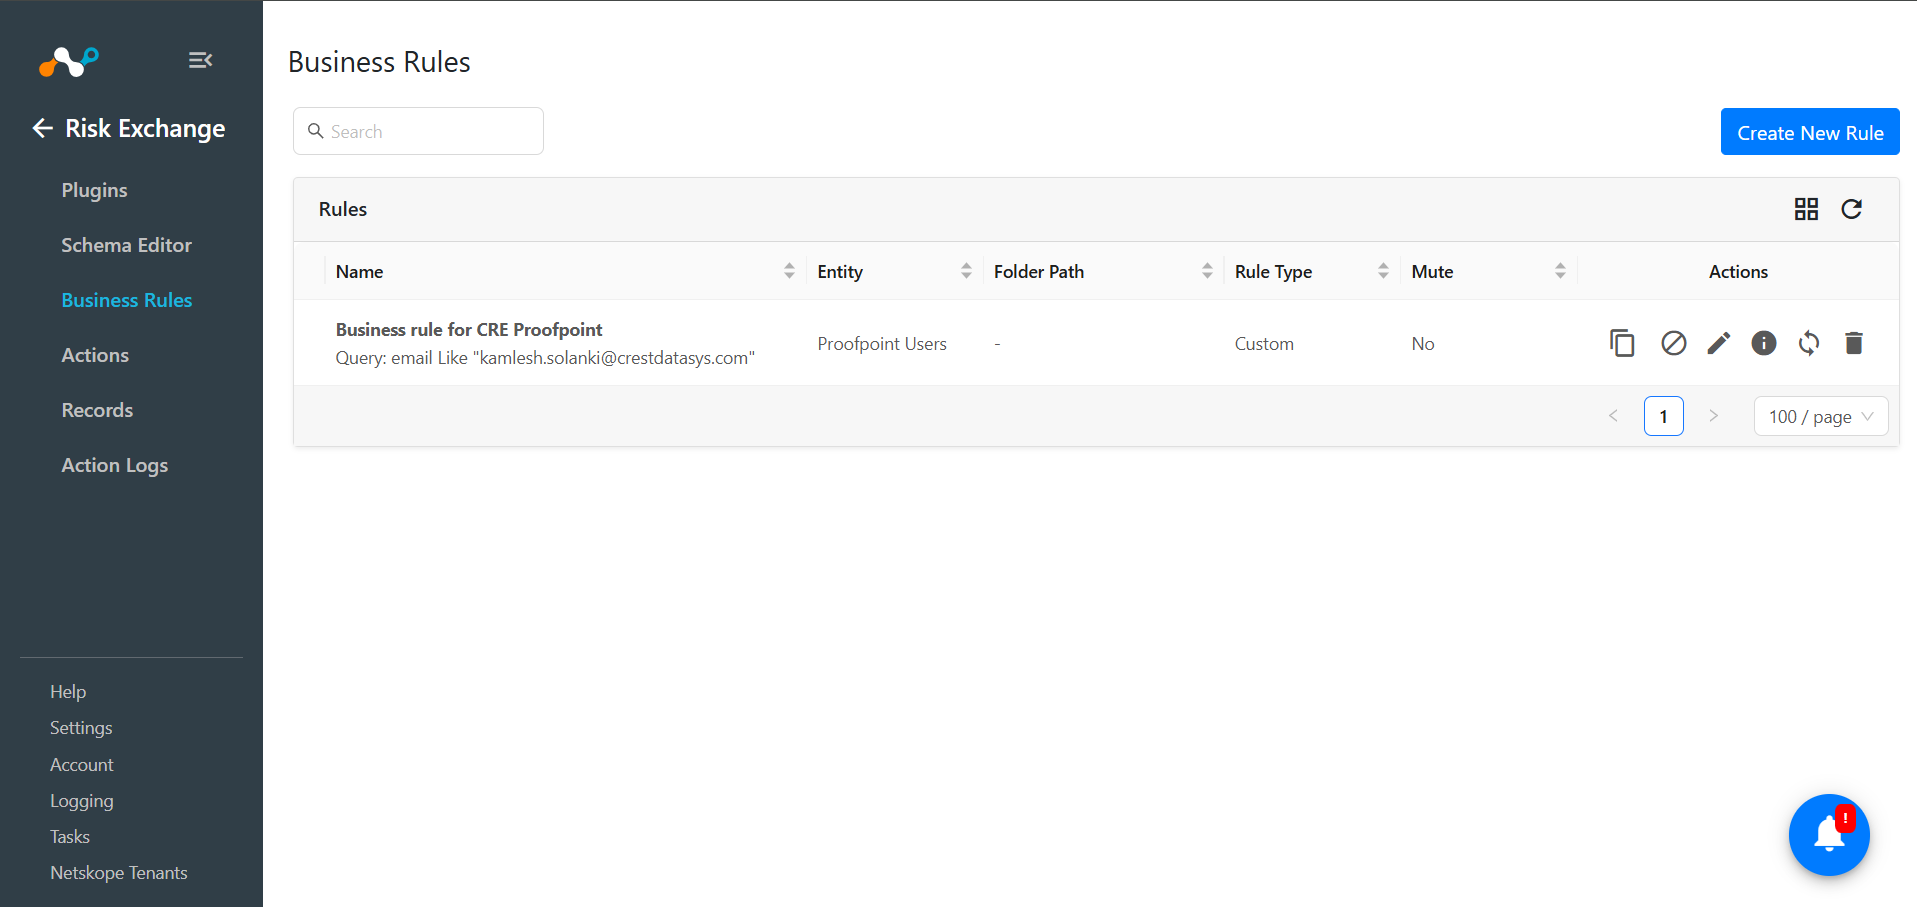
Use Business Rule to filter out the users. Follow the below steps to configure a business rule.
- In Risk Exchange, go Business Rules click Create New Rule.
- Select a business rule name, select an Entity, and provide the filter as per your requirement to perform Actions. Click Save.
Add a Risk Exchange Action for Proofpoint
Proofpoint only supports the No Action action.
No Action
This action will not perform any kind of action. You can use this action to generate the UBA alerts in the Ticket Orchestrator module.
- In Risk Exchange, go to Actions and click Add Action Configuration.
- Select a Business Rule, your plugin configuration, and an Action (No action).
- Generate Alert must be enabled while creating the Action to generate Alerts in Ticket Orchestrator. Make sure the Ticket Orchestrator module is enabled.
- Click Save.

You can perform other actions on the users pulled from Proofpoint on the Netskope Tenant.
Validate the Proofpoint Plugin
Validate in Cloud Exchange
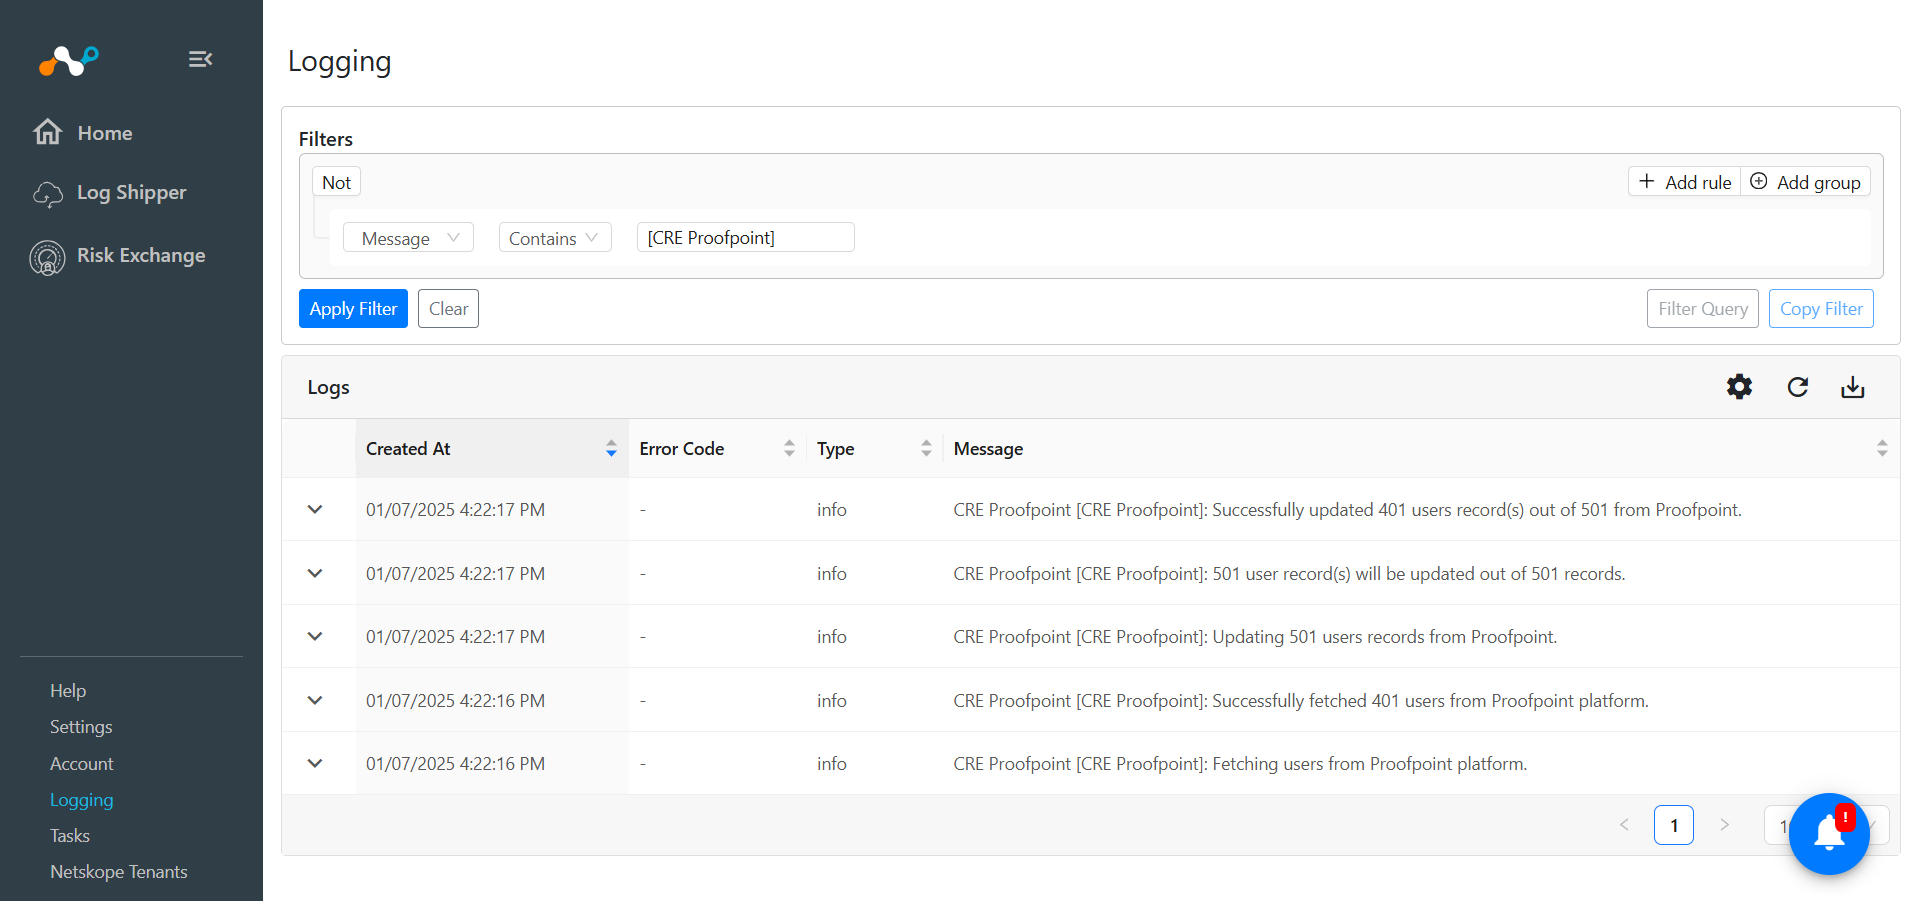
To validate the User records pulled from Proofpoint, go to Logging and search for logs pulled from the CRE Proofpoint plugin.
Example: message Like “[CRE Proofpoint]”
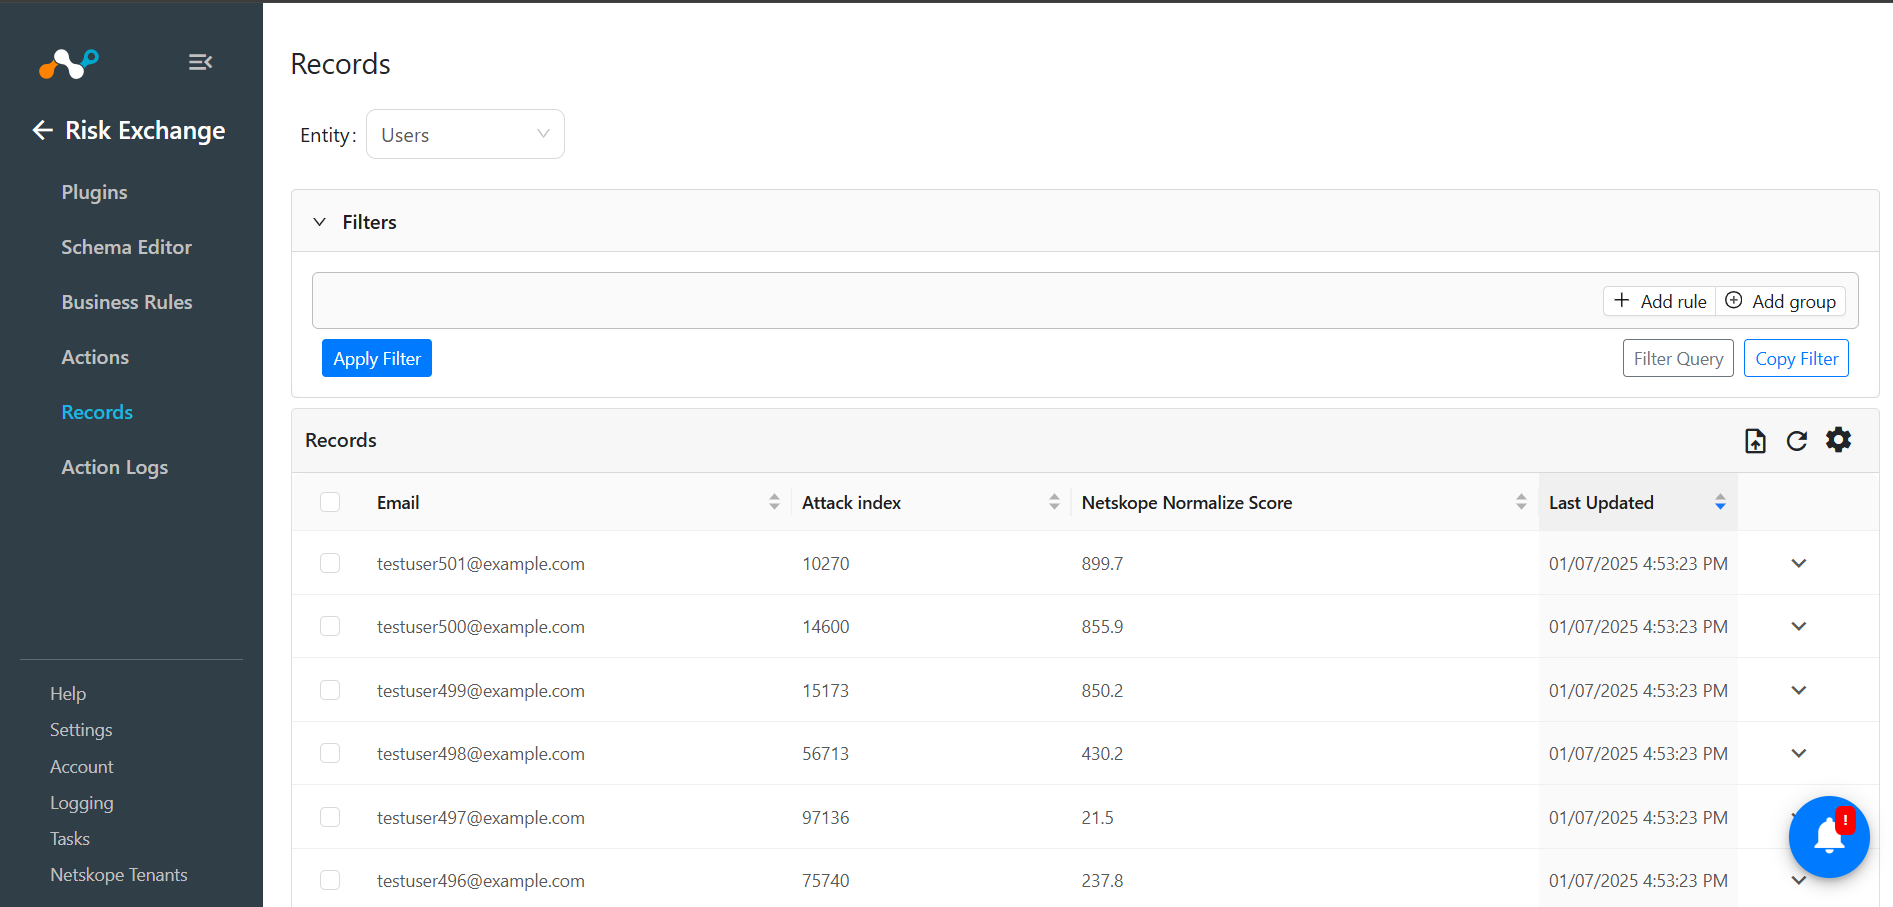
To check the pulled data, go to Records, and select the type of Entity you used while configuring the Proofpoint plugin. Check the pulled records.
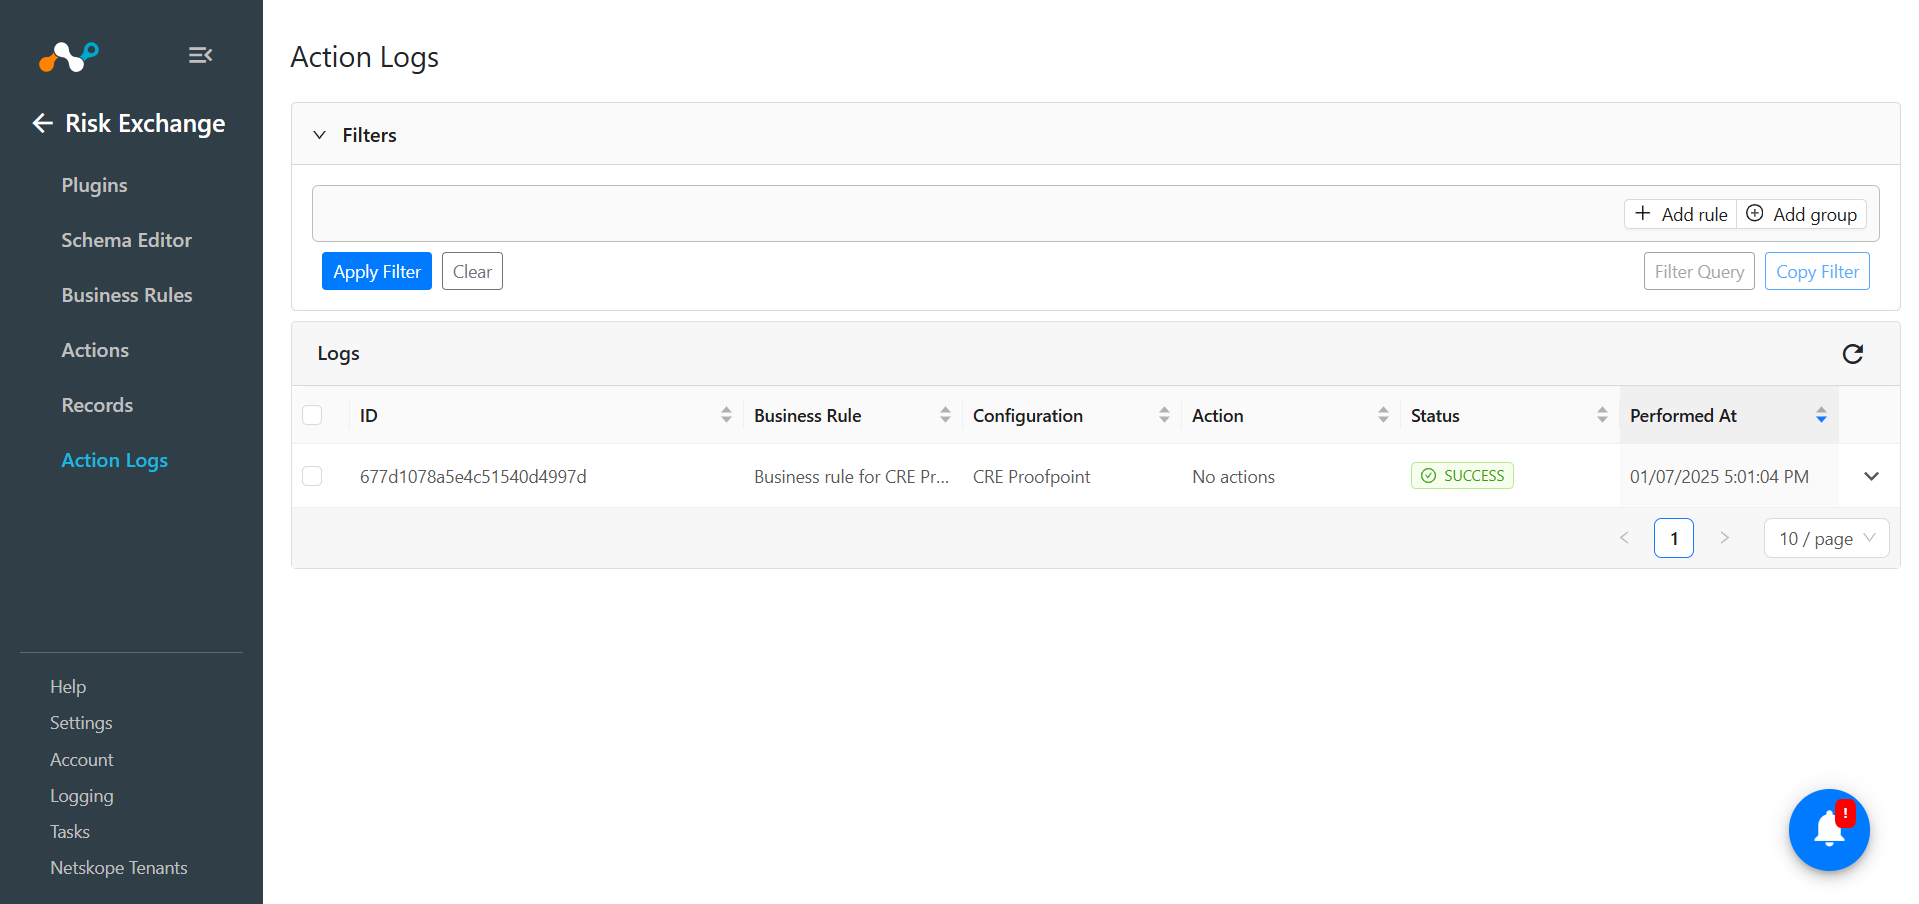
Check for the logs in Logging for the Proofpoint plugin for the actions performed.

If the Require Approval toggle is enabled while configuring the action, make sure to provide the approval from the Action Log page shown above by selecting the pending approval entries, and enable the Approval toggle.
Validate in Proofpoint
The plugin pulls Users and their respective Attack Index from TAP Dashboard > People page in Proofpoint.
Troubleshooting the Proofpoint Plugin
Receiving error in the plugin workflow
CRE Proofpoint [configuration_name]: Validation error occurred, Received exit code 401, Unauthorized, Verify Password provided in the configuration parameters.
What to do: Verify the Password for Proofpoint.
Users are not pulled from Proofpoint
If no data for the User is pulled, it might be due to either:
- No user is available on the platform to pull.
- Mapping is not added in the plugin.
What to do:
- Go to Proofpoint and check if the users are available to pull from the TAP Dashboard > People page.
- Edit the plugin configuration and check the Entity Source page. There should be some fields mapped in order to pull the same.
Limitations
The API allows up to 50 requests within a 24-hour period. If you exceed this limit, the API will become available again only after 24 hours. You can check the API rate limit details in the Proofpoint People API Documentation.
The plugin will show this error if too many requests are made on Proofpoint:
CRE Proofpoint [configuration_name]: Received exit code 429, API rate limit exceeded while fetching users for page 3 from Proofpoint. Max retries for rate limit handler exceeded hence returning status code 429.