

This document explains how to configure your QRadar integration with the Log Shipper module of the Netskope Cloud Exchange platform. This integration allows pushing alerts, events, and WebTx from Netskope to the QRadar platform.
Prerequisites
To complete this configuration, you need:
- A Netskope tenant (or multiple, for example, production and development/test instances).
- A Netskope Cloud Exchange tenant with the Tenant plugin and Log Shipper plugin already configured.
- A Netskope Cloud Exchange tenant with AWS Netskope Log Streaming or Azure Netskope Log Streaming plugin already configured (for pulling WebTx from the Netskope Log Streaming plugins).
- A QRadar instance.
Note
Verify your QRadar instance permissions are secure and not set up for open public access. Only allow access to your cloud storage instance from your Cloud Exchange Host and any other addresses that need access.
QRadar Plugin Support
| Data Type | Support |
|---|---|
| Events | Yes |
| Alerts | Yes |
| WebTx | Yes (via Netskope Log Streaming) |
| Logs | Yes |
All Netskope events, alert logs, and web transaction logs will be shared.
Note
- Incident event type is supported from Core version 4.1.0.
- CTEP alert type will be supported from Core version 4.2.0
- CLS WebTX based on Google Pub Sub Lite is deprecated. Please refer to Netskope Product EOL/EOS Announcements – Netskope Knowledge Portal
- For ingesting WebTX logs to your Log delivery destinations like SIEM, SOAR, XDR, Data Lake, use the AWS Netskope Log Streaming or Azure Netskope Log Streaming plugin.
API Details
The plugin uses a logging third-party library to push the data to the Syslog collector.
Refer to the official documentation for more information on the logging library.
https://docs.python.org/3/library/logging.html
Performance Matrix
| Logs Ingested | Time Taken |
|---|---|
| 9940000 | 2 hours |
| Description | Specification |
|---|---|
| Stack Size | Large RAM: 32 GB Core: 16 |
| Alerts/Events | ~ 6 MBps |
Workflow
- Configure your QRadar Server, Port, and TLS Certificate information.
- Configure the QRadar Plugin.
- Configure Log Shipper Business Rules for QRadar.
- Configure Log Shipper Log Delivery for QRadar.
- Configure the WebTx Mappings (optional).
- Validate the QRadar plugin.
Click play to watch a video.
Configure your QRadar Server, Port, and TLS Certificate Information
To create a log source in QRadar (through a Log Source Management app) for ingesting data with TCP/UDP/TLS protocol from Netskope, perform following steps:
- Download and install the Netskope Security Cloud DSM from here
- Go to the Log Source Management App via the Admin Panel.
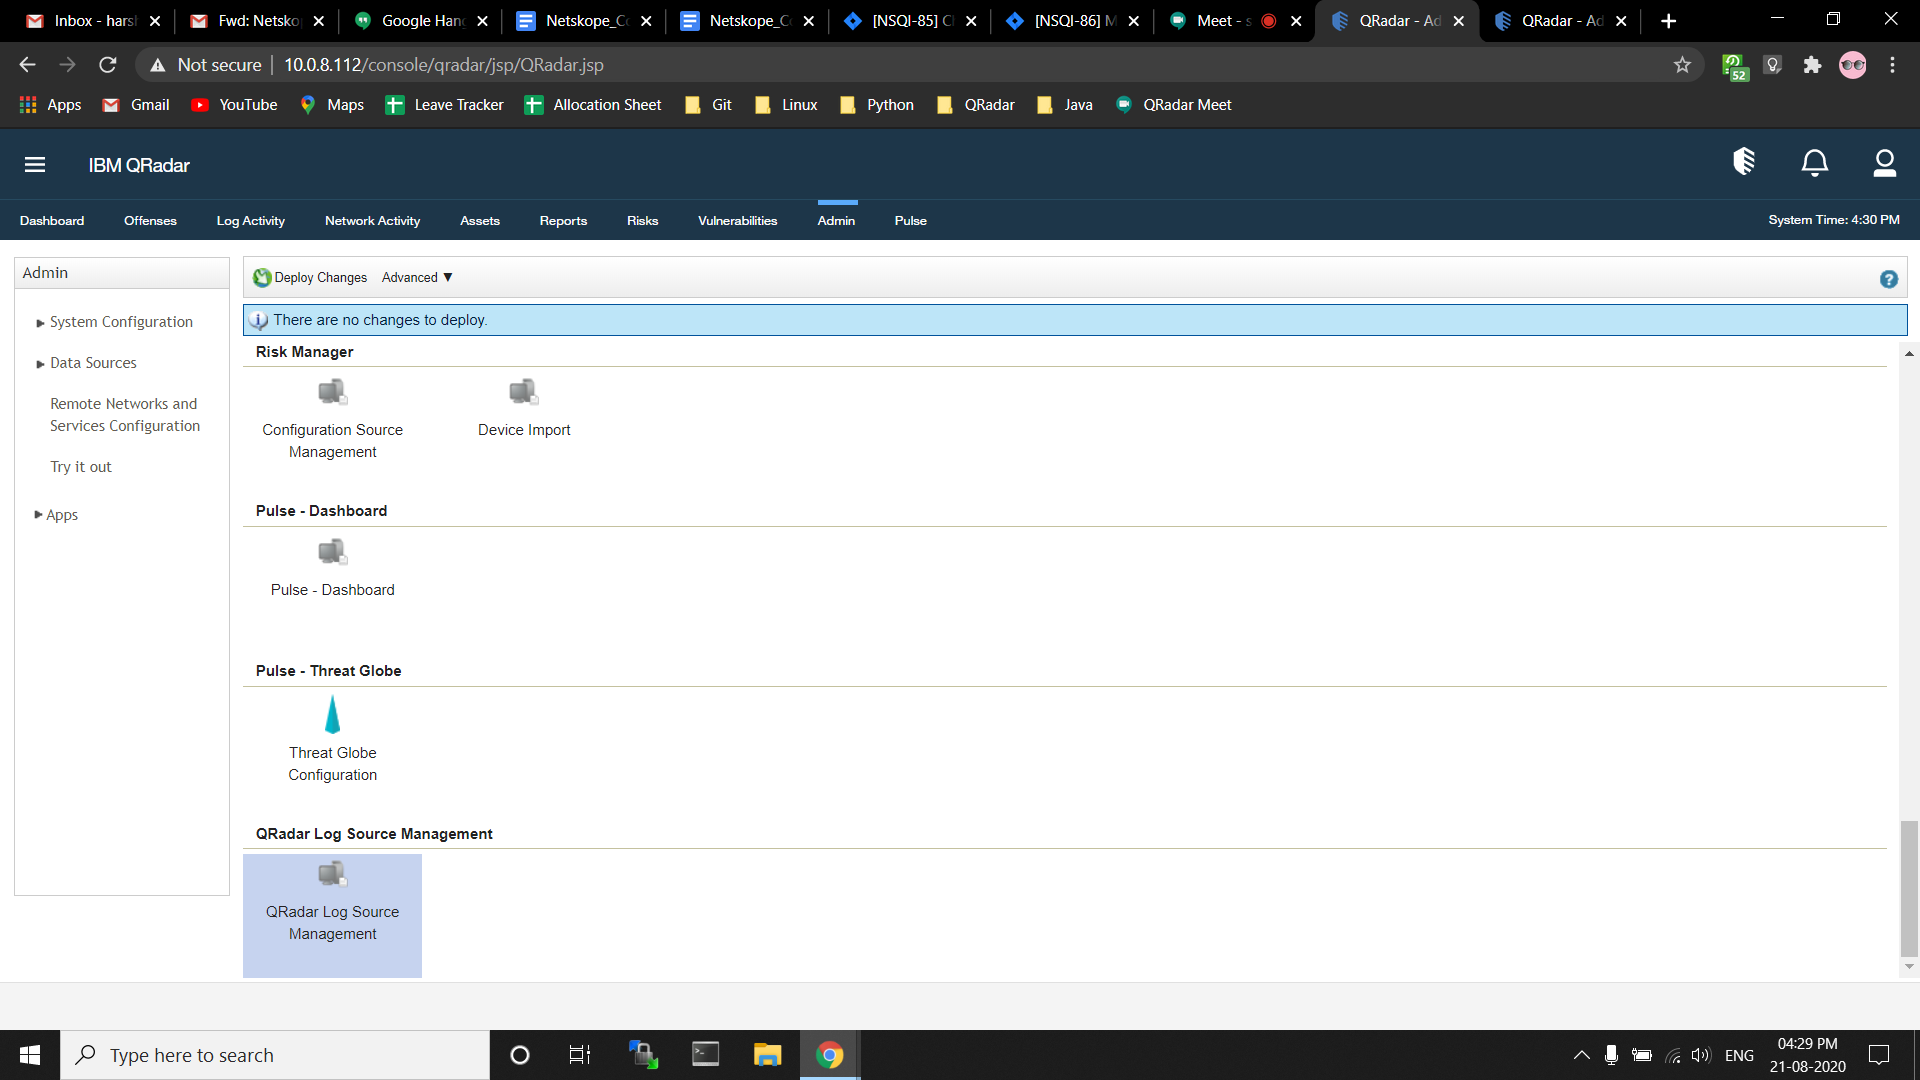
- When a separate window opens, click + New Log Source.

- Select Netskope for the Log Source type.

- For receiving data sent through TCP/UDP protocol from Log Shipper, select protocol type as Syslog; for receiving data sent through TLS select protocol type as TLS Syslog.
Note
The Default port for TCP/UDP (Syslog) in QRadar is 514, and for TLS Syslog is 6514.
For more information, refer:- https://www.ibm.com/docs/en/qsip/7.4?topic=qradar-port-usage

- In the section under Configure Log Source parameters, enter the name of the log source, keep the log source enabled, and the Coalescing events checkbox disabled.


- In the section under Configure the protocol parameters, enter a Log Source Identifier, like
netskopece.- Once you have successfully deployed a log source after that take the TLS certificate by running the command (
cat /opt/qradar/conf/trusted_certificates/syslog-tls.cert) from the QRadar VM where the log source is deployed. This TLS certificate is required while configuring QRadar Plugin with TLS Protocol. - For the field Max Payload Length, we have observed that events are getting truncated even if we set the value to maximum, like
32768, in this field. To avoid truncation of payload, we recommend changing payload length by following the steps given here.

- Once you have successfully deployed a log source after that take the TLS certificate by running the command (
- Click Skip Test and then Finish. Next, deploy a log source.
Deploy Log Source
Click Deploy Changes.
 |
Configure the QRadar Plugin
- In Cloud Exchange, go to Settings > Plugin Store.
- Search for and select the QRadar box to open the plugin creation pages.
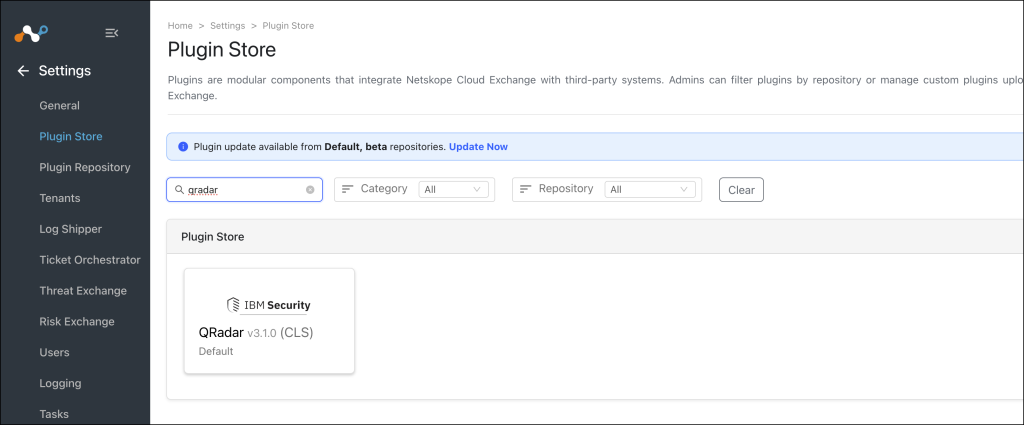
- Enter a Configuration Name.
- Select a valid Mapping. (Default Mapping for all plugins are available.
Transform the raw logs: If enabled, Raw logs will be transformed using selected mapping file, else raw logs will be sent to SIEM. The ingestion may be affected if the SIEM does not accept raw logs format.

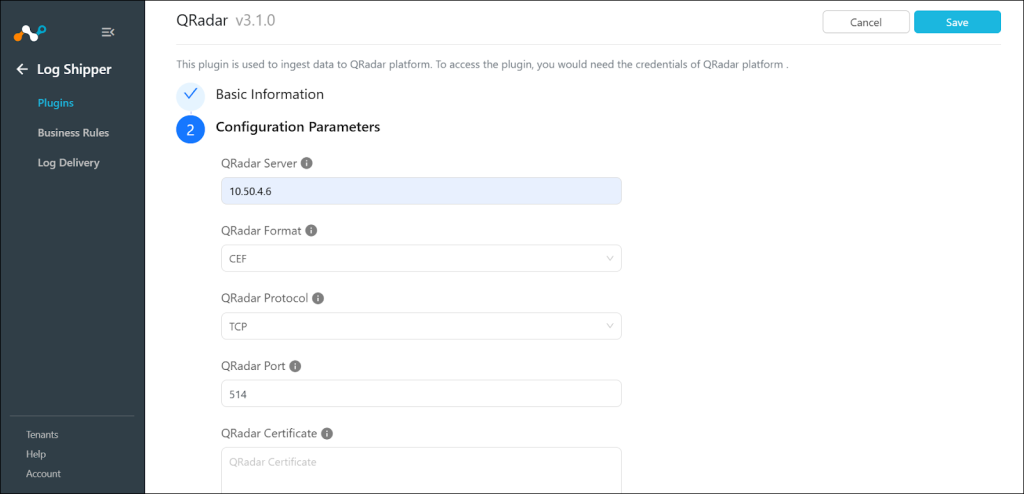
- Click Next and enter a QRadar Server, select a QRadar Format and QRadar Protocol, and then enter your QRadar Port and QRadar Certificate information.
- Enter the information for yourQRadar Server, select the QRadar Format and QRadar Protocol, and then enter QRadar Port and QRadar Certificate.
- Enter a Log Source Identifier. The Default value would be
netskopece. The Log Source Identifier should not contain the whitespaces. This will be added as a prefix to all logs.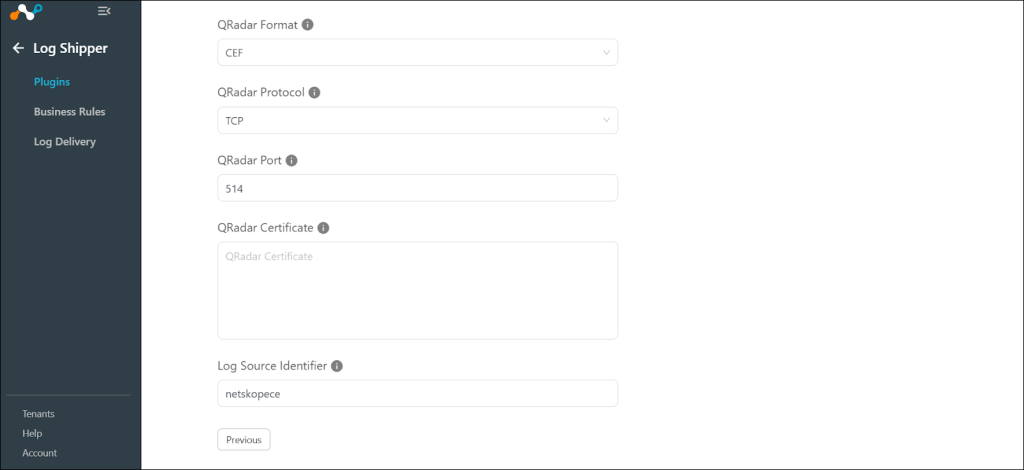
- Click Save.


Configure Log Shipper Business Rules for QRadar
- Go to Log Shipper > Business Rules.
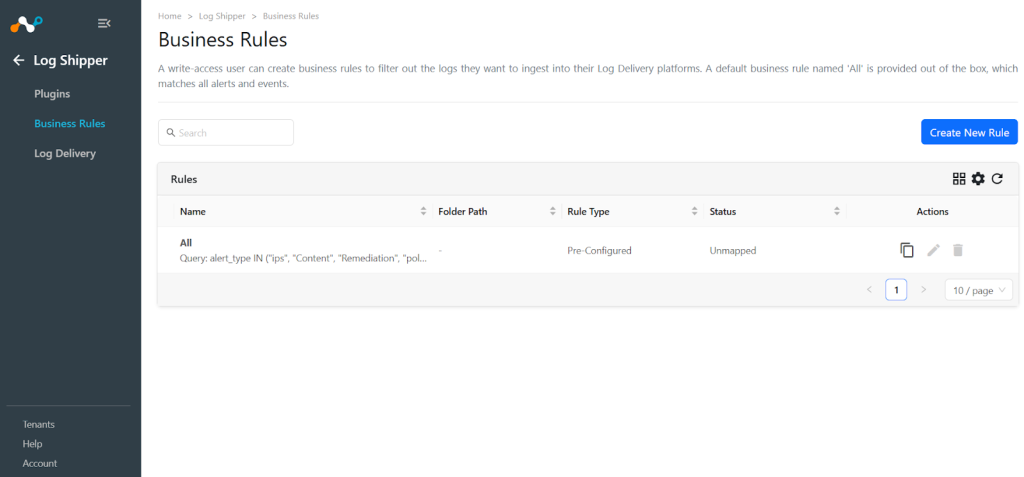
- Click Create New Rule.
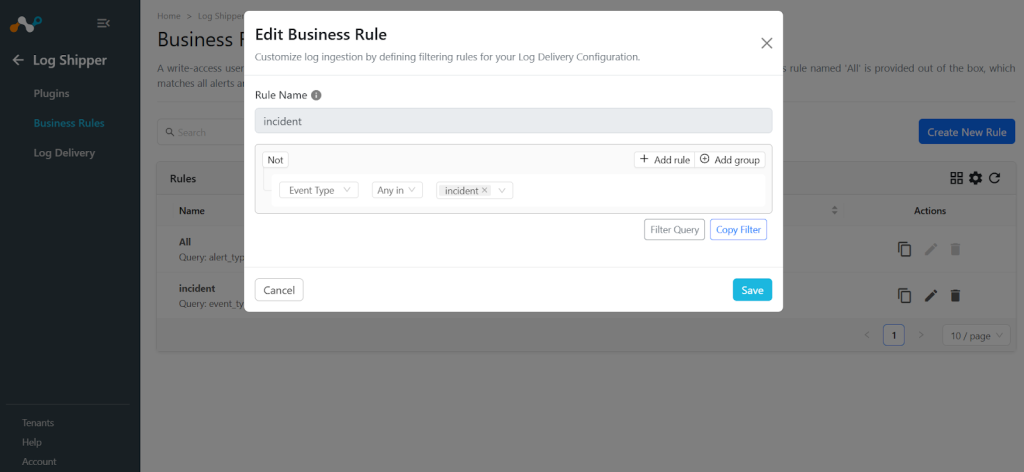
- Enter a Rule Name and select the filters to use.
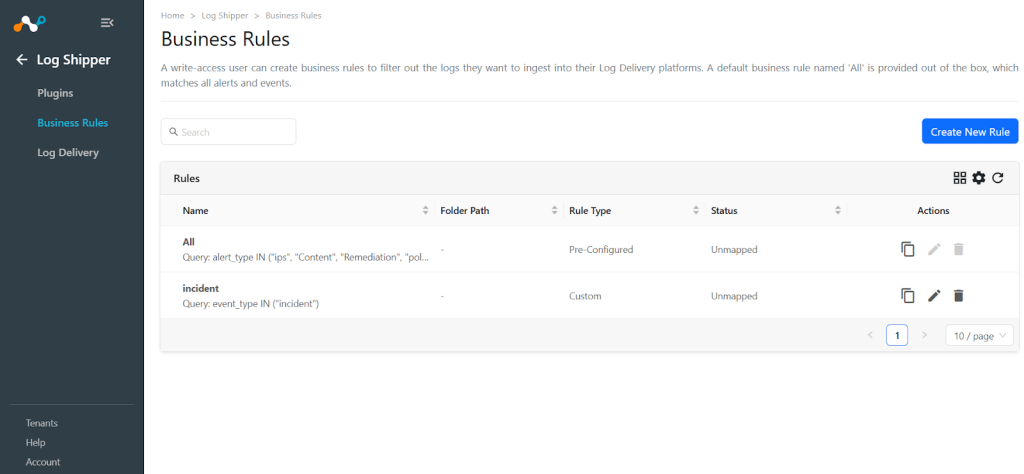
- Click Save.


Configure Log Shipper Log Delivery for QRadar
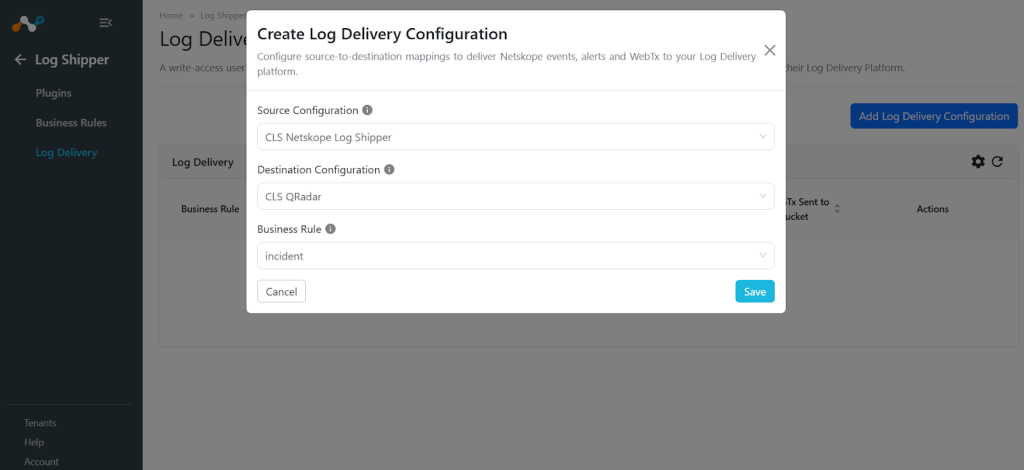
- Go to Log Shipper > Log Delivery and click Add Log Delivery Configuration.
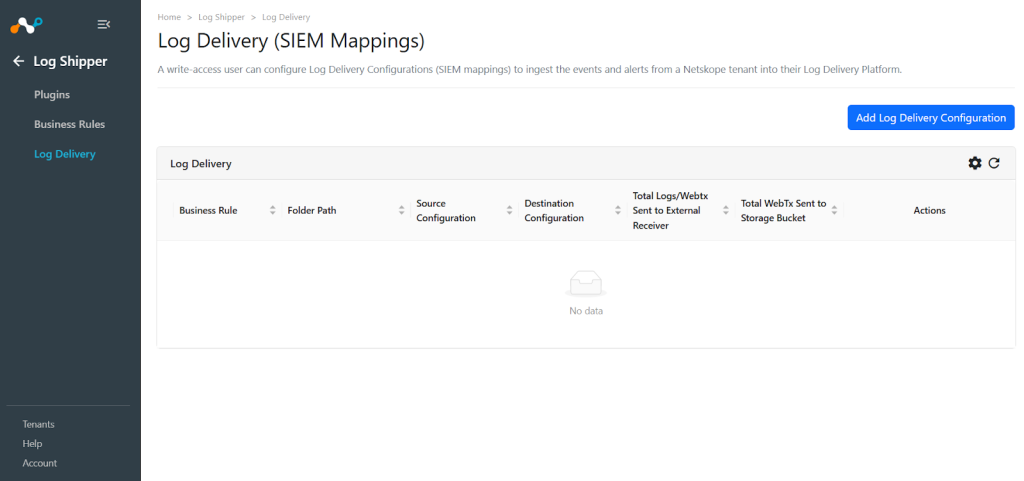
- For alerts and events, select the Source plugin (Netskope CLS), Destination plugin (Datadog), a business rule, and then click Save.
- For WebTX select Source plugin (AWS Netskope Log Streaming or Azure Netskope Log Streaming), Destination plugin (CLS Datadog), a business rule, and then click Save.


Validate the QRadar Plugin
To validate the plugin workflow, you can check from Netskope Cloud Exchange and from your QRadar instance.
Validate in Netskope Cloud Exchange
Go to Logging.
 |
Validate in QRadar
- Go to your QRadar instance.
- Click Log Activity.
- Apply filters to see specific logs.

- You can see all logs there.
