

Real-time Protection (RTP) policies for Model Context Protocol (MCP) security let you control communications between AI agents and MCP servers — the third-party services that expose tools, prompts, and resources to those agents. You can create sophisticated RTP policies specifically for MCP traffic to allow, alert, or block communications based on the destination server, the category of server, specific protocol activities, or the MCP protocol version in use.
Prerequisites for MCP Real-time Protection Policies
-
An active Agentic Broker license. Contact your Netskope account team to enable Agentic Broker in your account.
-
SSL decryption enabled for the relevant traffic. RTP policies for MCP don’t evaluate traffic that bypasses SSL decryption, and won’t work if an SSL Do Not Decrypt policy applies.
-
The Agentic Broker DLP add-on license, if you want to apply a DLP profile to MCP traffic.
Ways to Create RTP Policies for MCP Traffic
You can create RTP policies for MCP traffic in the following ways:
HTTP Header Based Policy
To create policies based on fields in HTTP headers such as mcp-session-id and mcp-protocol-version. See Configuring HTTP Header-Based Policies for the full procedure.
Agentic Access Policy Type
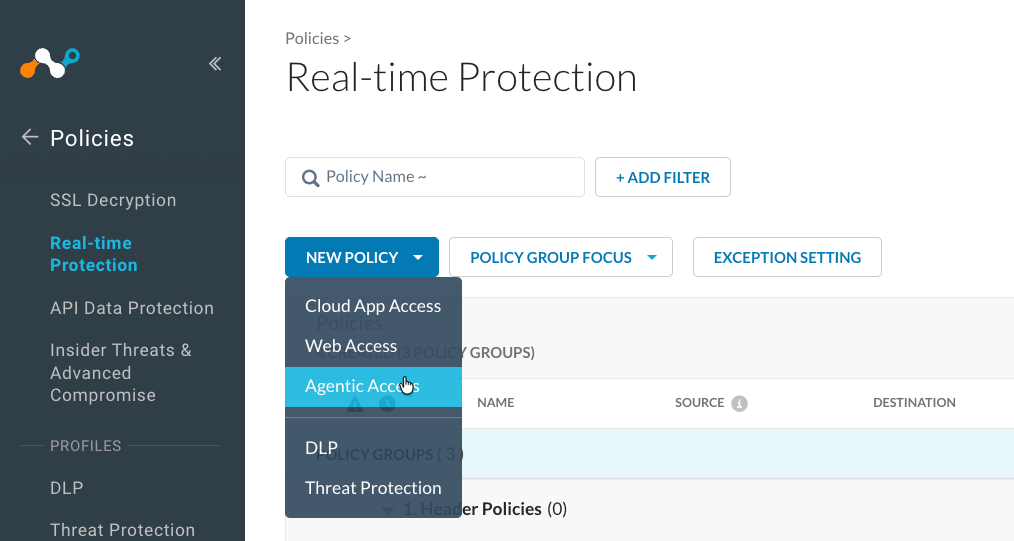
MCP traffic is controlled through a dedicated Agentic Access policy type, confirmed at Policies > Real-time Protection > New Policy > Agentic Access. This replaces the previous approach of selecting an MCP server or the MCP Server category from the general Cloud Access Application or Category dropdown — MCP servers and the MCP Server category no longer appear there.
MCP Activities for Real Time Protection Policies
| Activity Name | Direction | RTP |
|---|---|---|
| PingRequest | client <-> server | RTP |
| SetLevelRequest | client -> server | RTP |
| CompleteRequest | client -> server | RTP |
| CompleteResult | server -> client | RTP |
Destination
MCP servers are now a dedicated Destination Profile category in the “Cloud App” dropdown menu. You can select the Destination Profile option is used when you want to add non-cataloged MCP servers.
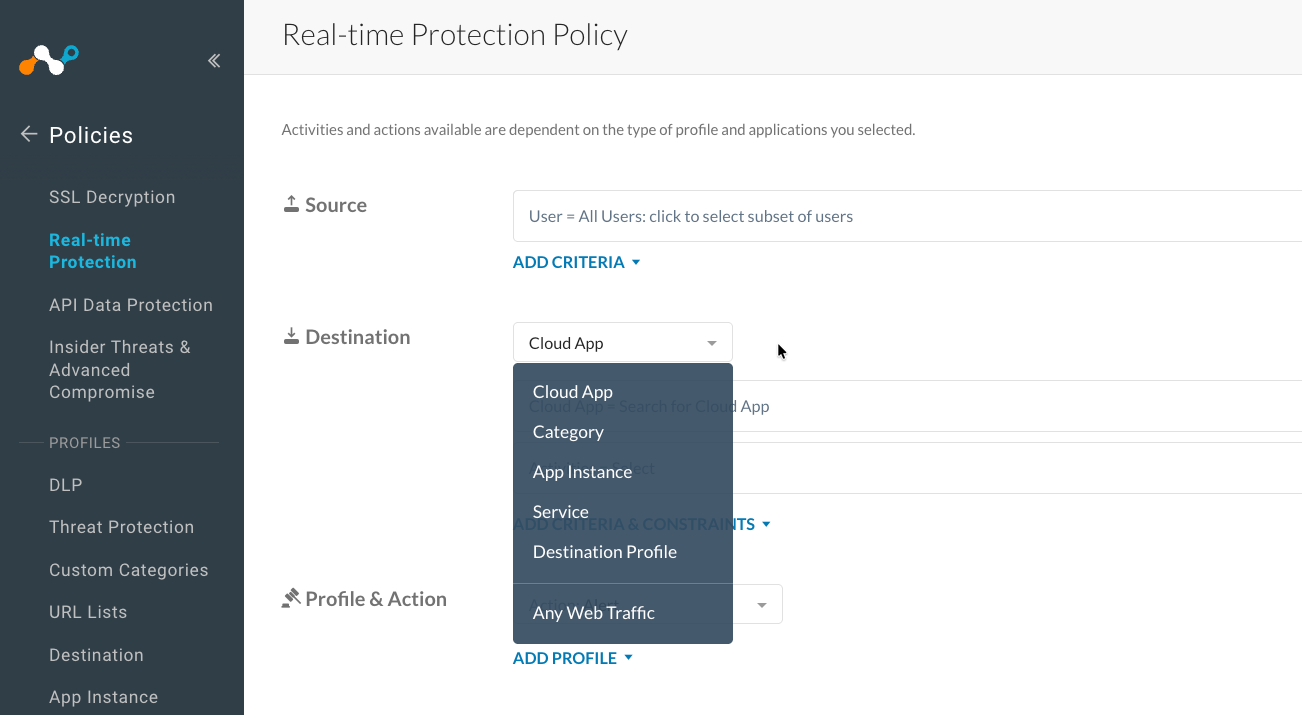
* Category-based MCP policies created before this release are expected to migrate to the Any MCP Server Traffic destination option.
Destination Profile
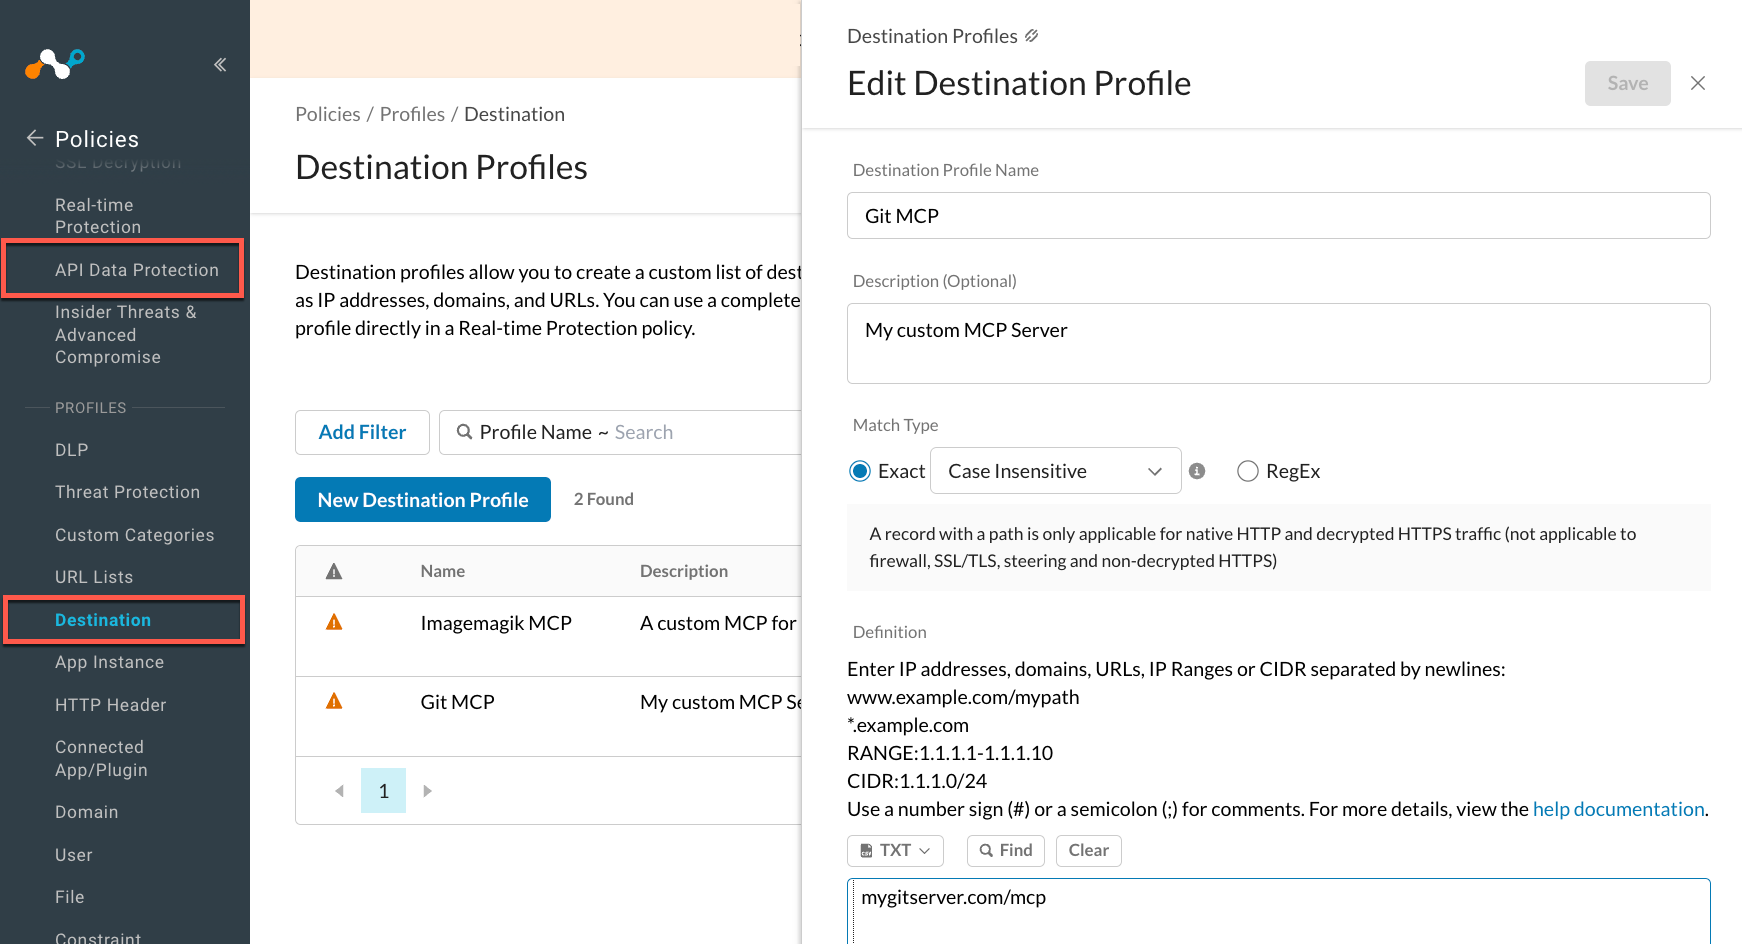
This section provides instructions to create and use Destination Profiles to add a non-cataloged MCP server by its URL, and then reference that profile in a Real-time Protection policy — as criteria, as a constraint on the MCP Server category, or as the destination itself — to block access to it.
Creating a Destination Profile for a Remote MCP Server Not in the MCP Servers Catalog That You Wish to Block
-
Go to Policies > Real-time Protection > Destination
-
Enter a Destination Profile Name
-
In the Definition field, add one (only one) MCP Server URL.
-
Click Save.
Create a Real-time Policy Using a Destination Profile as Criteria
-
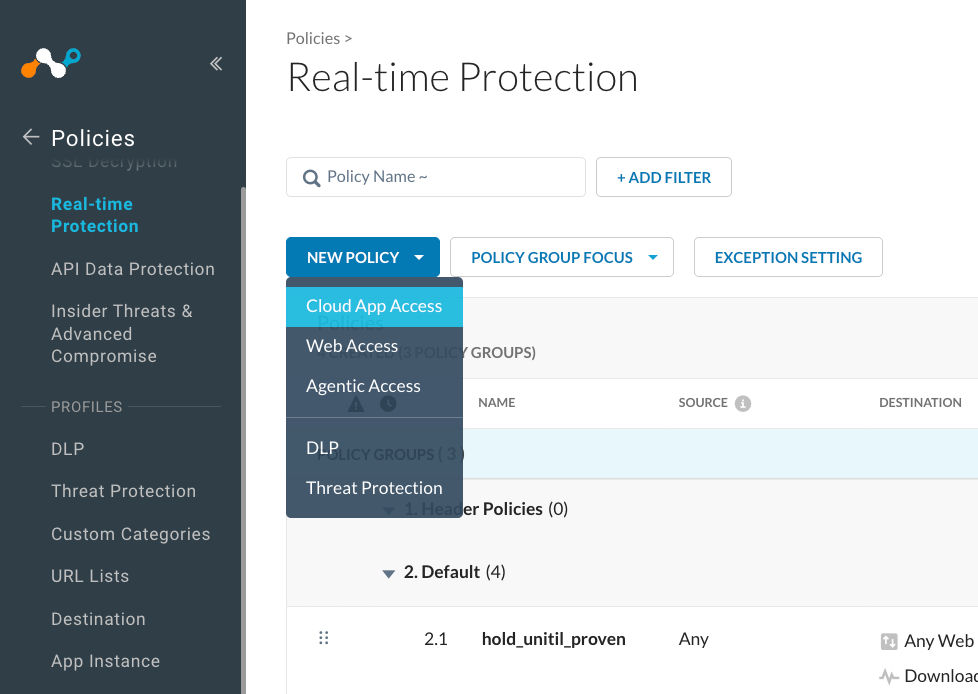
Go to Policies > Real-time Protection
-
Click New Policy > select Cloud App Access
-
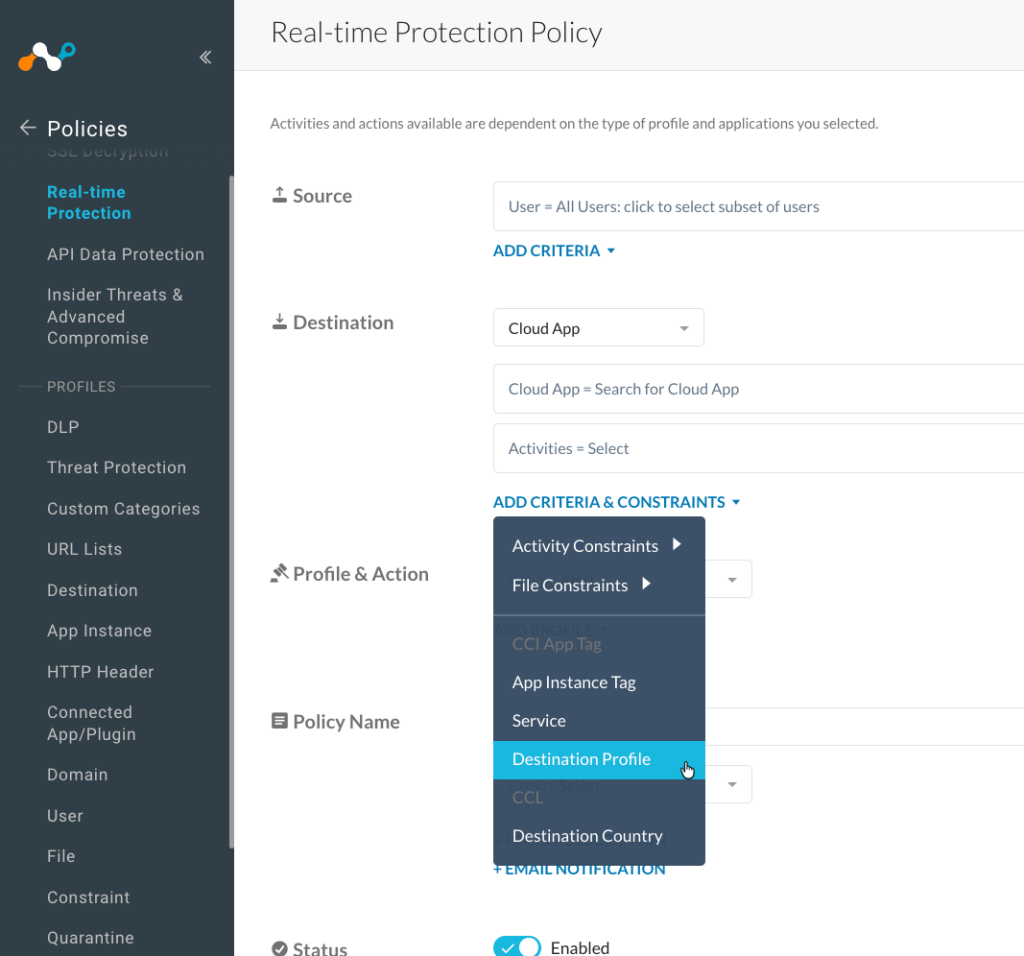
Click ADD CRITERIA & CONSTRAINTS.
-
Click Destination Profile.
-
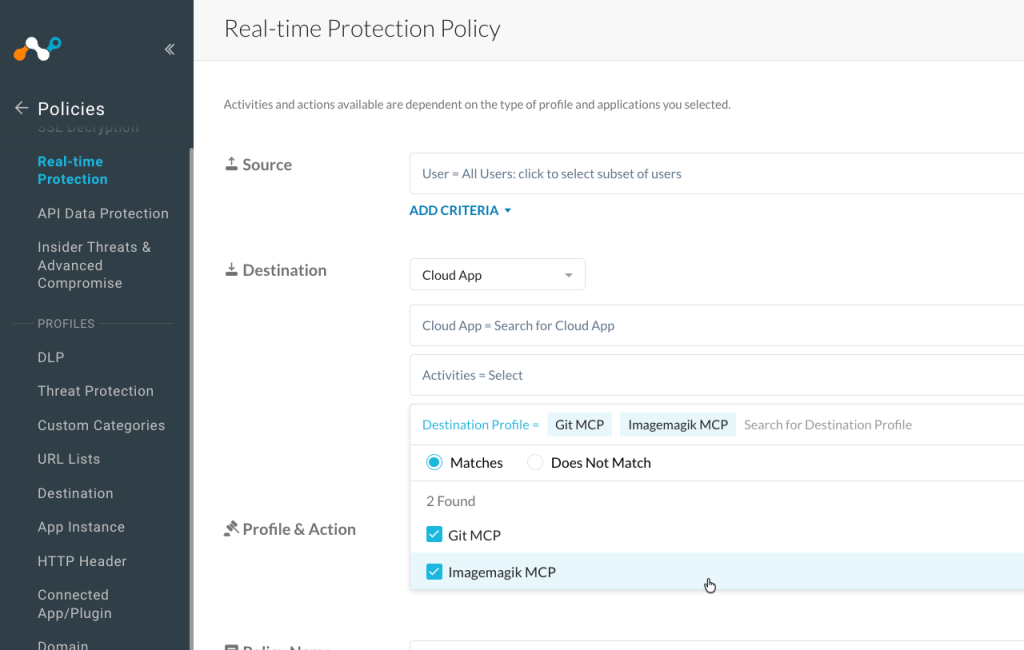
Click the “Destination Profile =” text box and select the profile you previously created.
-
Select an action in the Profile & Action dropdown
-
Enter a name for the policy in the Policy Name field.
To learn more: