This guide provides step-by-step instructions to configure Workday Single Sign-On (SSO) with Microsoft Entra ID, using Netskope Reverse Proxy for enhanced security and authentication management.
The configuration process involves:
-
Setting up Microsoft Entra ID SSO – Establishing Microsoft Entra ID as the identity provider (IdP).
-
Enabling EntraID for Workday – Enable Microsoft Entra ID for authentication.
-
Connecting Workday to Netskope Reverse Proxy – Routing authentication through Netskope Reverse SAML Proxy
Configure Single Sign-On (SSO) in Microsoft Entra ID
-
Sign in to the Microsoft Entra Admin Center as a Cloud Application Administrator or higher.
-
Navigate to Identity > Applications > Enterprise Applications and select Workday.
-
Under the Manage section, select Single sign-on. On the Select a Single Sign-On method page, choose SAML.
-
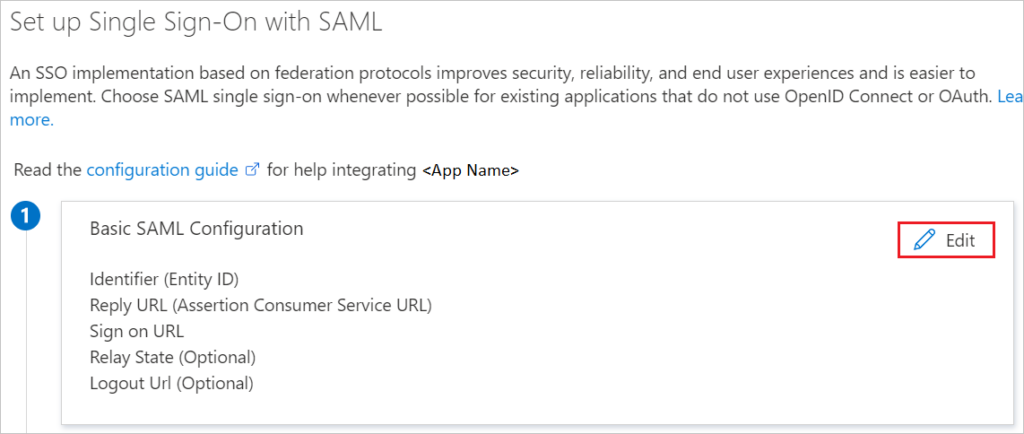
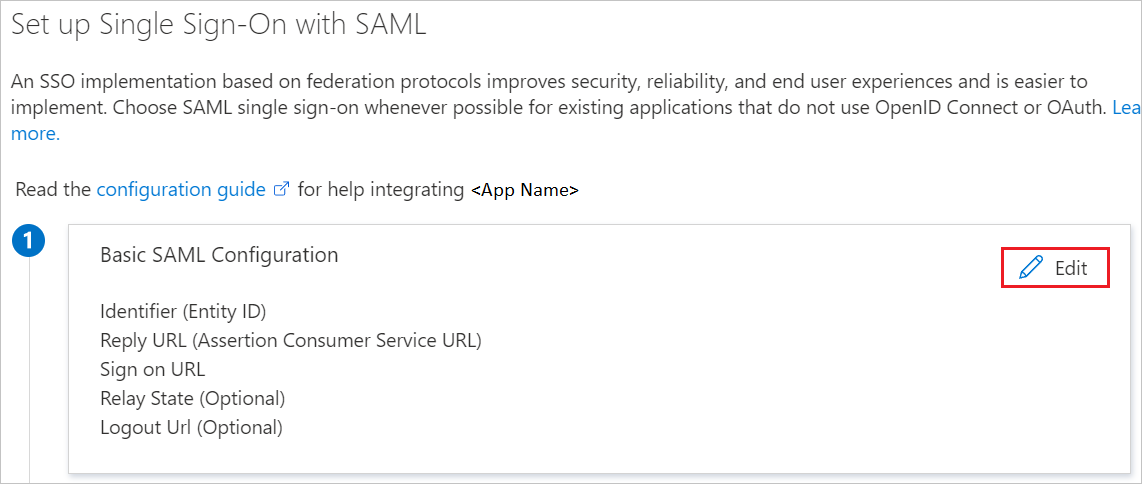
In the Set up Single Sign-On with SAML section, click the edit (pencil) icon next to Basic SAML Configuration.
-
On the Basic SAML Configuration page, enter the values for the following fields:
-
In the Sign-on URL text box, type a URL using the following pattern:
https://impl.workday.com//login-saml2.flex -
In the Reply URL text box, type a URL using the following pattern:
https://impl.workday.com//login-saml.htmld -
In the Logout URL text box, type a URL using the following pattern:
https://impl.workday.com//login-saml.htmld
-
-
Your Workday application expects the SAML assertions in a specific format, which requires you to add custom attribute mappings to your SAML token attributes configuration. The following screenshot shows the list of default attributes, where
nameidentifieris mapped withuser.userprincipalname. Workday application expectsnameidentifierto be mapped withuser.mail,UPN, and so on. Edit the attribute mapping by clicking on the Edit icon and change the attribute mapping.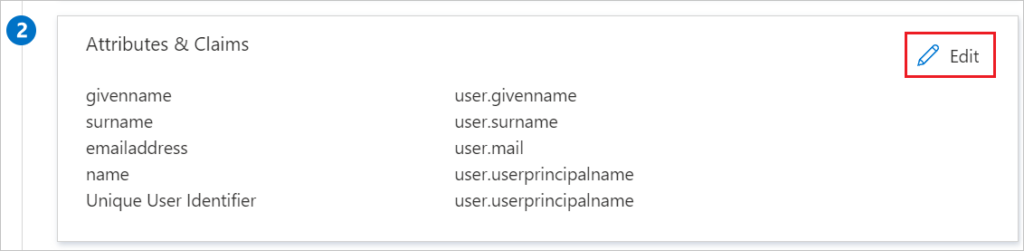
-
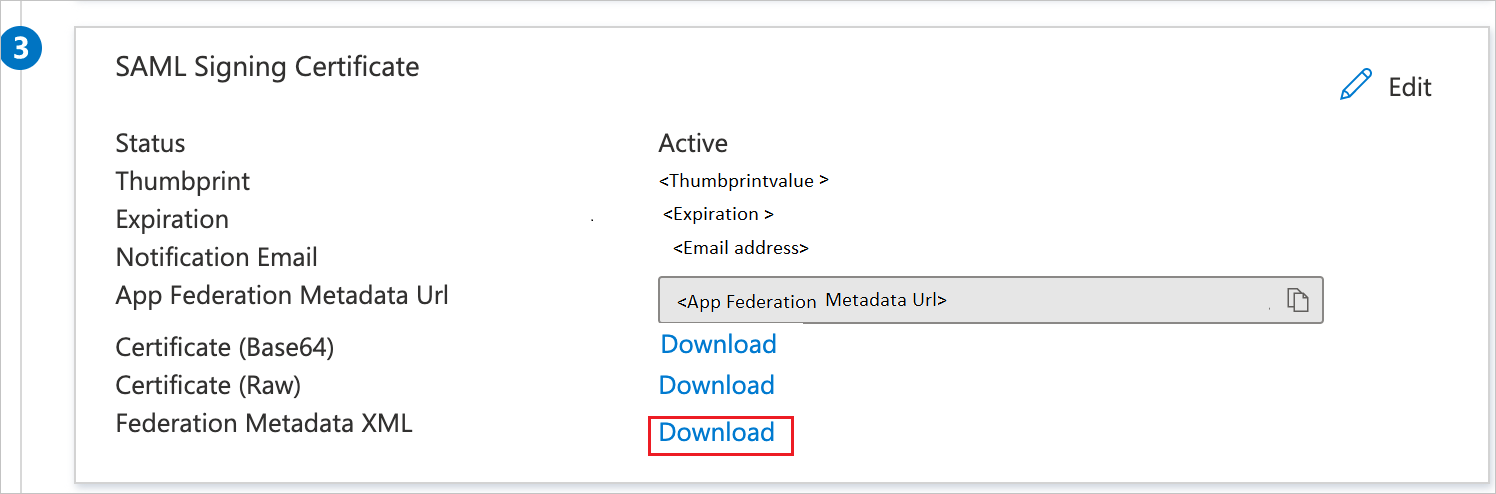
On the Set up Single Sign-On with SAML page, in the SAML Signing Certificate section, find Federation Metadata XML and select Download to download the certificate and save it on your computer.

-
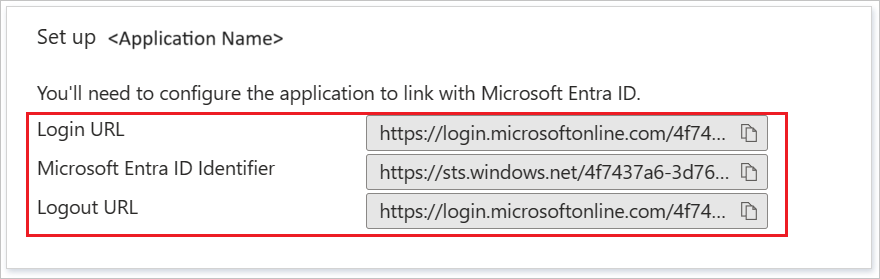
On the Set up Workday section, copy below URLs. Screenshot showing Copy configuration URLs.
-
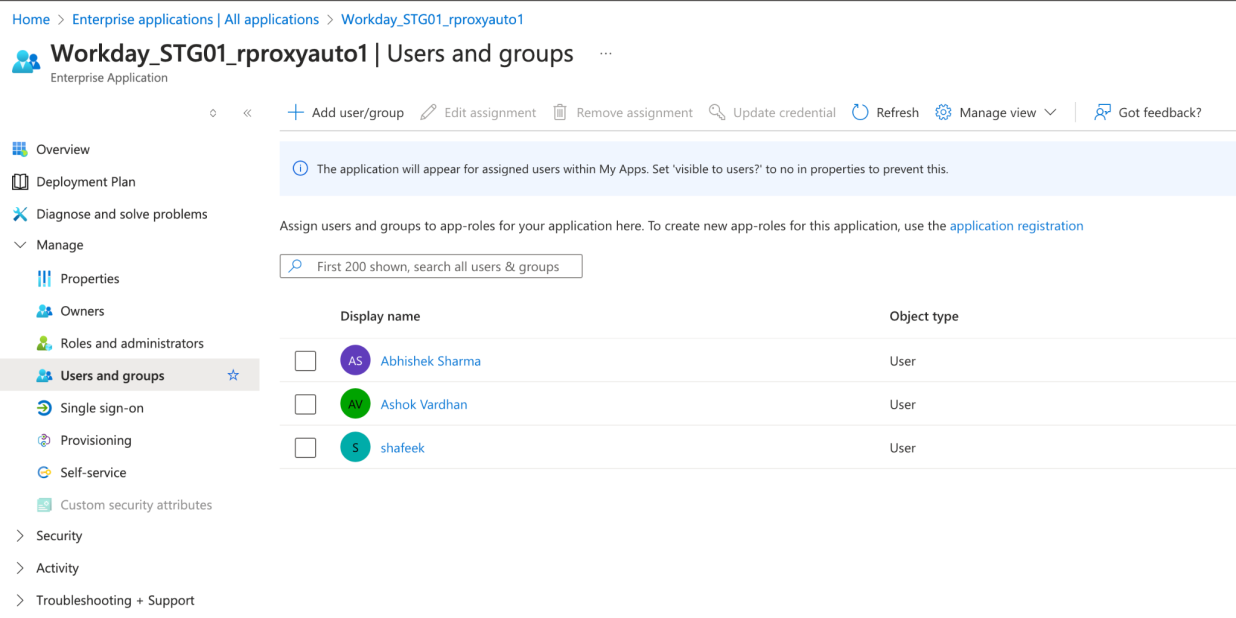
Now navigate to Users and groups. Select Add user/group, then select Users and groups in the Add Assignment dialog. Assign the users to the app.

-

Steps to configure Workday
-
In a different browser window, sign in to your Workday company site as an administrator.
-
In the Search box, search with the name Edit Tenant Setup – Security on the top left side of the home page.

-
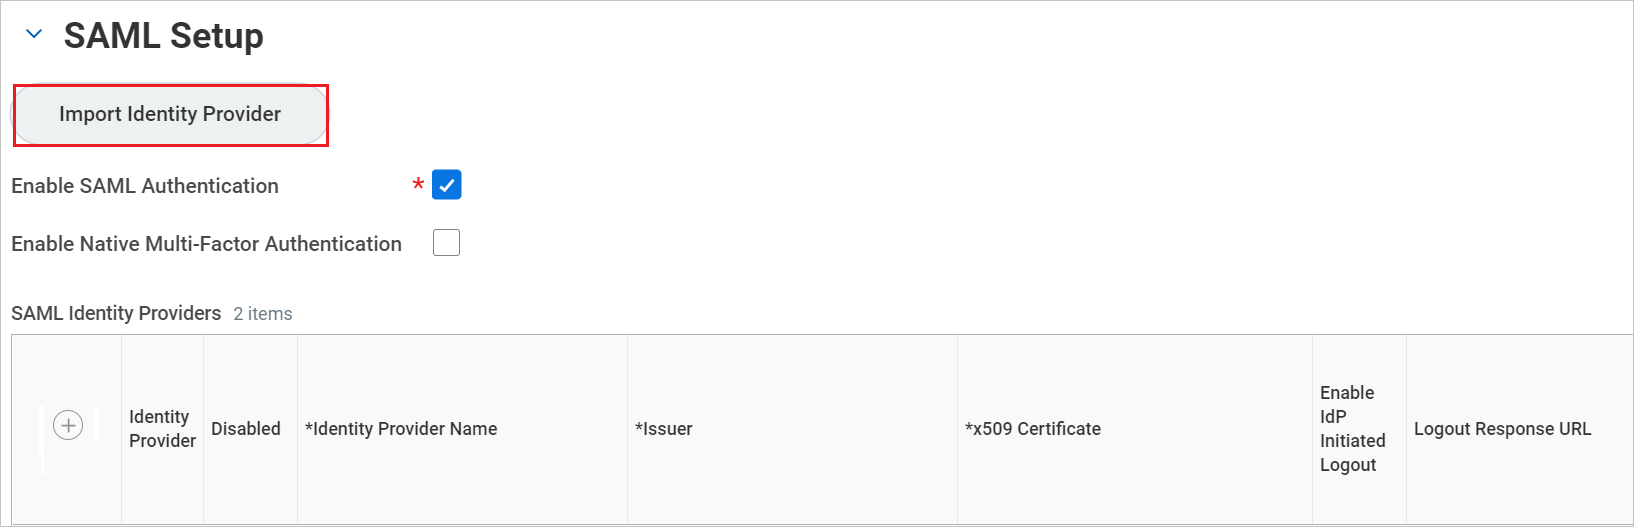
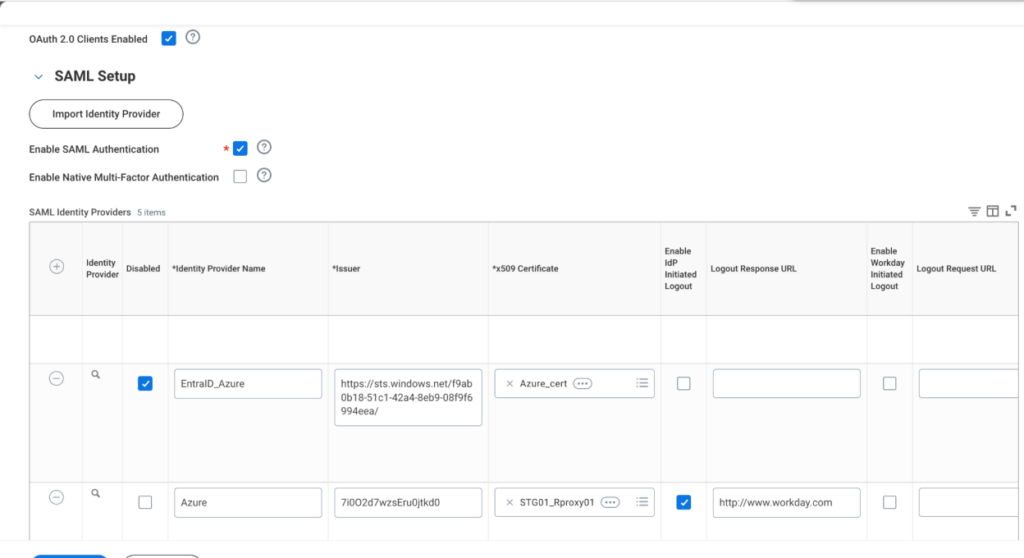
In the SAML Setup section, click on Import Identity Provider.

-
In Import Identity Provider section, perform the below steps:
-
Enter the Identity Provider Name in the textbox.
-
In Used for Environments textbox, select the appropriate environment names from the dropdown.
-
Click on Select files to upload the downloaded Federation Metadata XML file. Click OK.

-
After clicking OK, a new row will be added in the SAML Identity Providers and then you can add the below steps for the newly created row.

-
Click on Enable IDP Initiated Logout checkbox.
-
In the Logout Response URL textbox, type http://www.workday.com.
-
Click on Enable Workday Initiated Logout checkbox.
-
In the Logout Request URL textbox, paste the Logout URL value.
-
Click on SP Initiated checkbox.
-
In the Service Provider ID textbox, type http://www.workday.com.
-
Select Do Not Deflate SP-initiated Authentication Request. Click Ok.
-
If the task was completed successfully, click Done.
-
-


Test SSO
Test your Microsoft Entra single sign-on configuration with following options.
-
Click on Test this application, this will redirect to Workday Sign-on URL where you can initiate the login flow.
-
Go to Workday Sign-on URL directly and initiate the login flow from there.
-
You can use Microsoft My Apps. When you click the Workday tile in the My Apps, you should be automatically signed in to the Workday for which you set up the SSO.
Steps to configure with Netskope SAML Proxy
-
Login to Netskope Tenant webUI. Navigate to Settings > Security Cloud Platform > Reverseproxy > SAML.
-
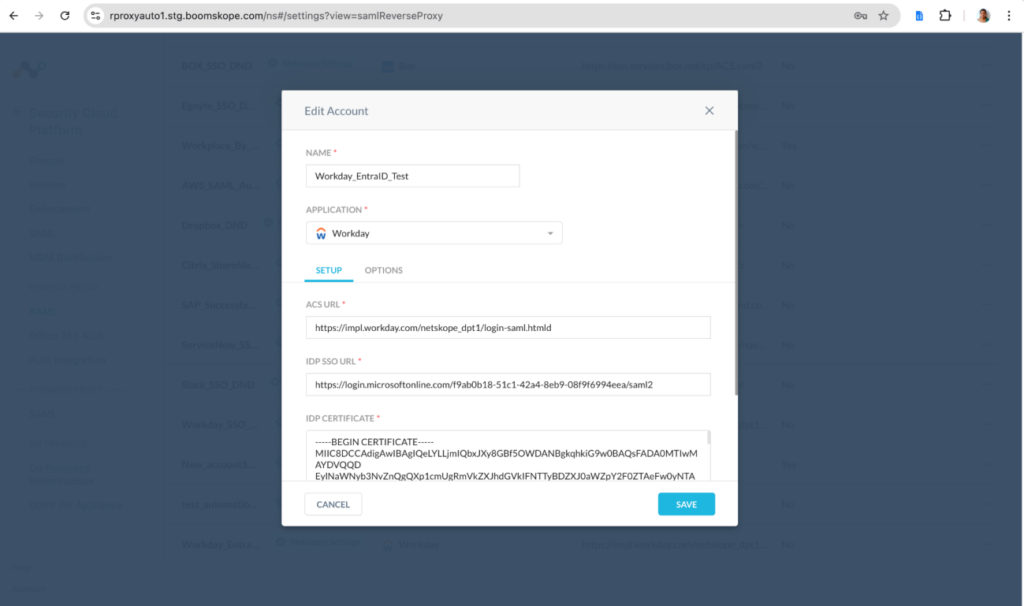
Add an account by selecting the “Workday” application.
-
Update the ACS URL (Workday ACS url), IDP SSO URL (EntraID SSO url) and IdP Certificate (EntraID certificate) fields. Save the configuration.
-
ACS URL: Workday URL (eg: https://impl.workday.com//login-saml.htmld)
-
IDP SSO URL: Azure EntraID login URL (eg: https://login.microsoftonline.com/f9ab0b18-51c1-42a4-8eb9-08f9f6994eea/saml2)
-
IDP Certificate: Azure EntraID SAML certificate.
-
-
Copy SAML Proxy ACS URL, IdP URL and the Certificate values from Netskope settings to configure Workday / Azure EntraID settings mentioned later in the document.
-
Enable Emergency Bypass mode for this SSO account.
-
On the Workday app, in Workday Identity Provider settings, update “Issuer”, “x509 Certificate” and “IdP SSO service URL” fields with the values copied from Netskope SAMLproxy settings.
-
Issuer: Organization ID (Eg: 7i0O2d7wzsEru0jtkd0)
-
IdP SSO service URL: SAML Proxy IdP URL: (eg: https://saml-rproxyauto1.stg.boomskope.com/saml2/http-post/sso/7i0O2d7wzsEru0jtkd0/272
-
x509 Certificate: SAML Certificate
-
-
In Microsoft EntraID Workday Enterprise application, in single sign-on method page/basic SAML configuration, replace Reply URL (Assertion Consumer Service URL) value with Netskope SAMLproxy ACS URL (eg: https://saml-rproxyauto1.stg.boomskope.com/saml2/http-post/acs/7i0O2d7wzsEru0jtkd0/272)


Test SSO with Netskope SAMLproxy
Test Netskope SAMLProxy/Microsoft Entra single sign-on configuration with following options.
-
Go to Workday Sign-on URL directly and initiate the login flow from there.
-
You can use Microsoft My Apps. When you click the Workday tile in the My Apps, you should be automatically signed in to the Workday for which you set up the SSO.