

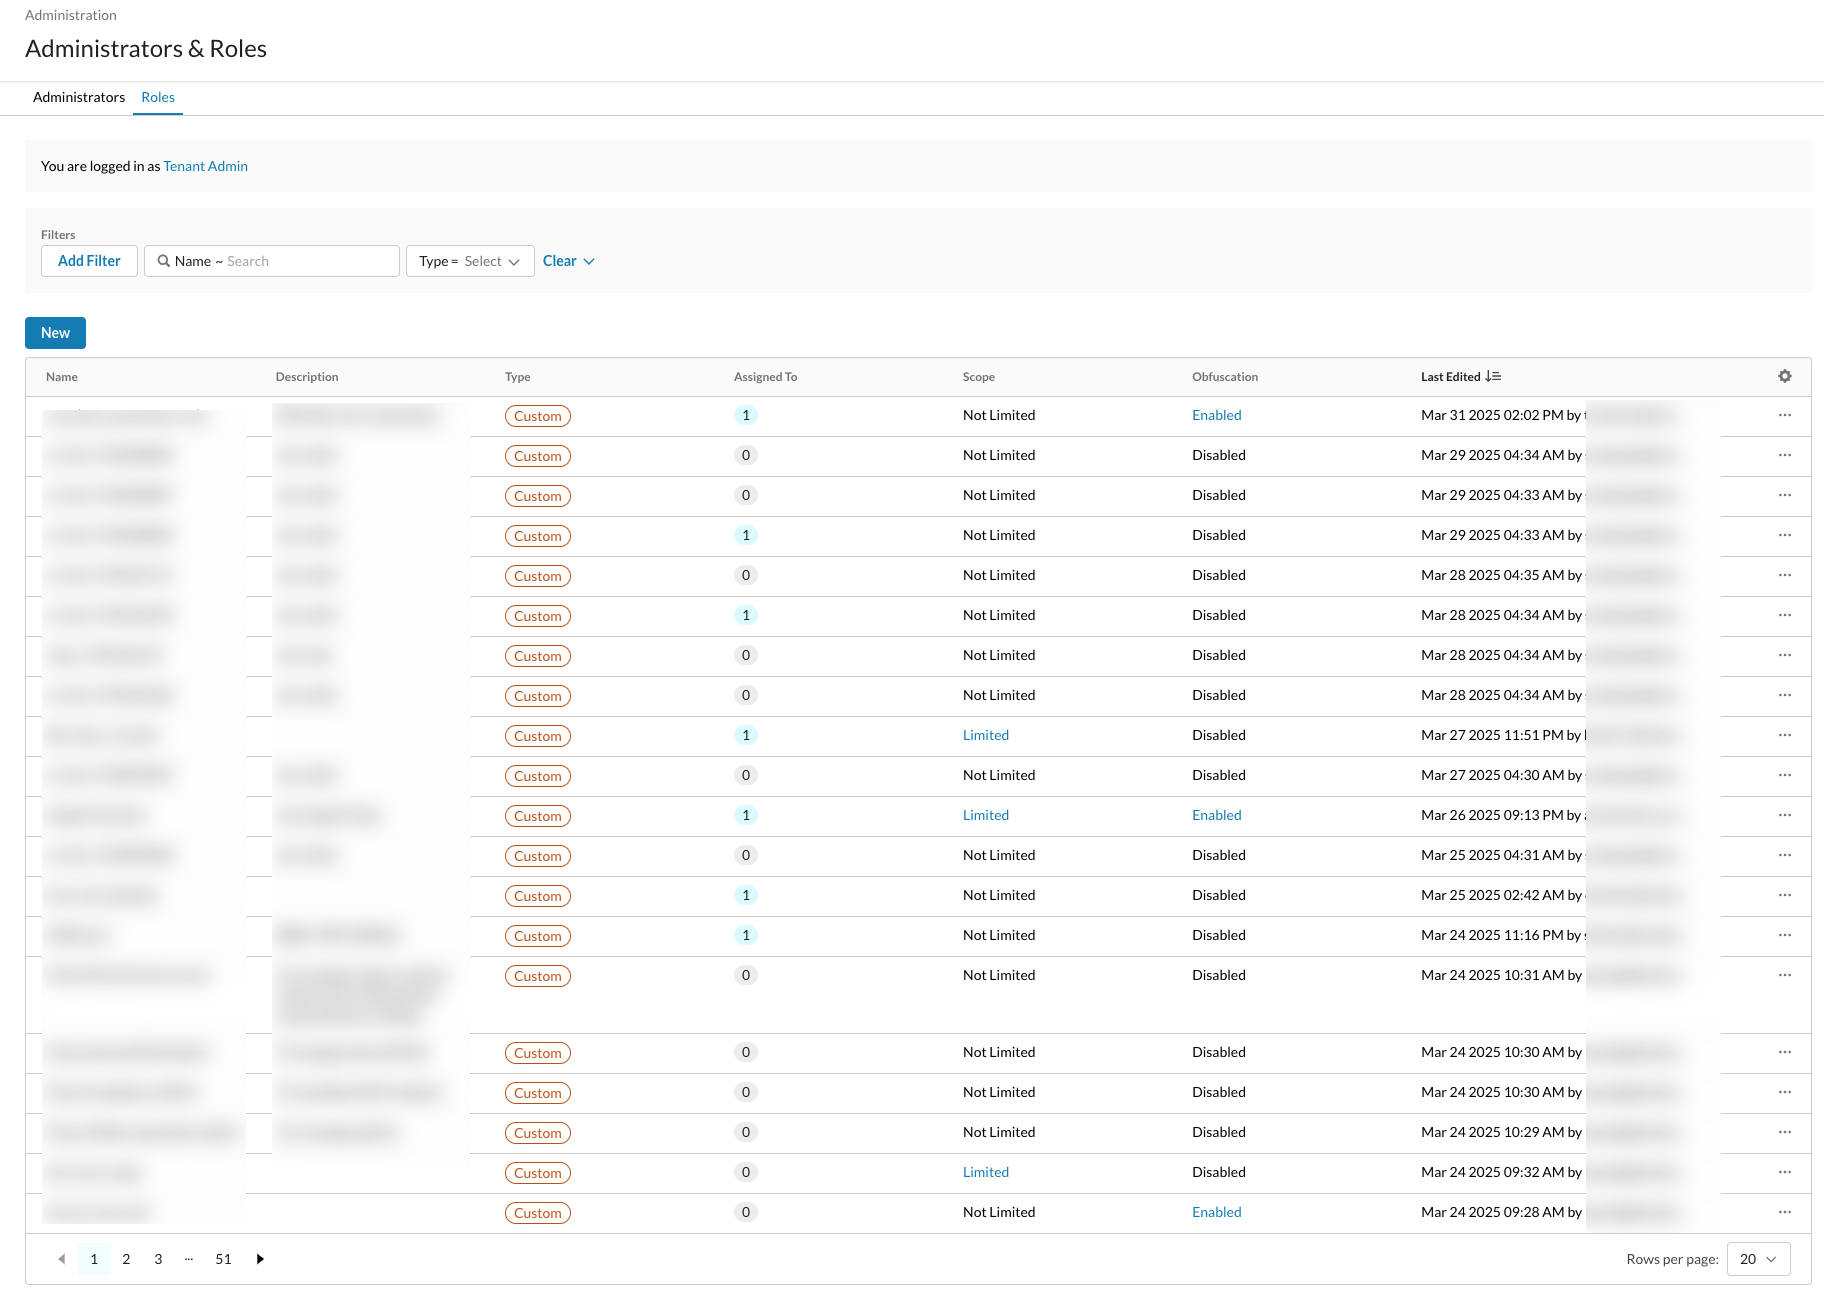
On the Settings > Administration > Administrators & Roles page > Roles tab, you can see a list of all roles configured for your organization.
“Roles First” Workflow: Create and configure roles before adding administrators.
Object Dependency Matrix (ODM): Review and re-save all custom roles after migration to RBAC V3 to trigger the ODM and ensure the roles are functional.
With role-based administration, you can easily add admins and assign them specific roles, with differing levels of access to the Netskope platform.
Netskope recommends adding roles before adding admins because you will need to select a role for each admin that you create.
When configuring roles:
- You must have the proper permissions to do so
- You can only create, edit, or delete roles with the same or less privileges
NOTE: You can only view roles for which you have higher permissions. - You must have organization-wide access permissions
In the Roles list page, you can see the following:
- The role for which you are logged in as the viewer of the Roles page.
- Add filters to view the different roles in your organization. For example, specific role name, filter by predefined or custom roles, or filter by Scope (Limited or No Limit) or Obfuscation (Enabled or Disabled).
- New: click to create a new role.
- Name: displays the custom or predefined role name.
- Description: displays a description if available.
- Type: displays role type, custom or predefined.
- Assigned To: number of users to which this role is assigned.
- Scope: displays if the scope is Limited or Not Limited.
- Obfuscation: displays if obfuscation is Enabled or Disabled.
- Last Edited: displays date, time, and user
- Gear icon: click to customize columns or reset width to default settings.
- Ellipses: click to edit/clone/delete the role.
Create a New Role

- Click New. The New Role page appears.
- Type a name for this role.
- Optionally, type a short description. This is helpful to distinguish in the Roles list page.
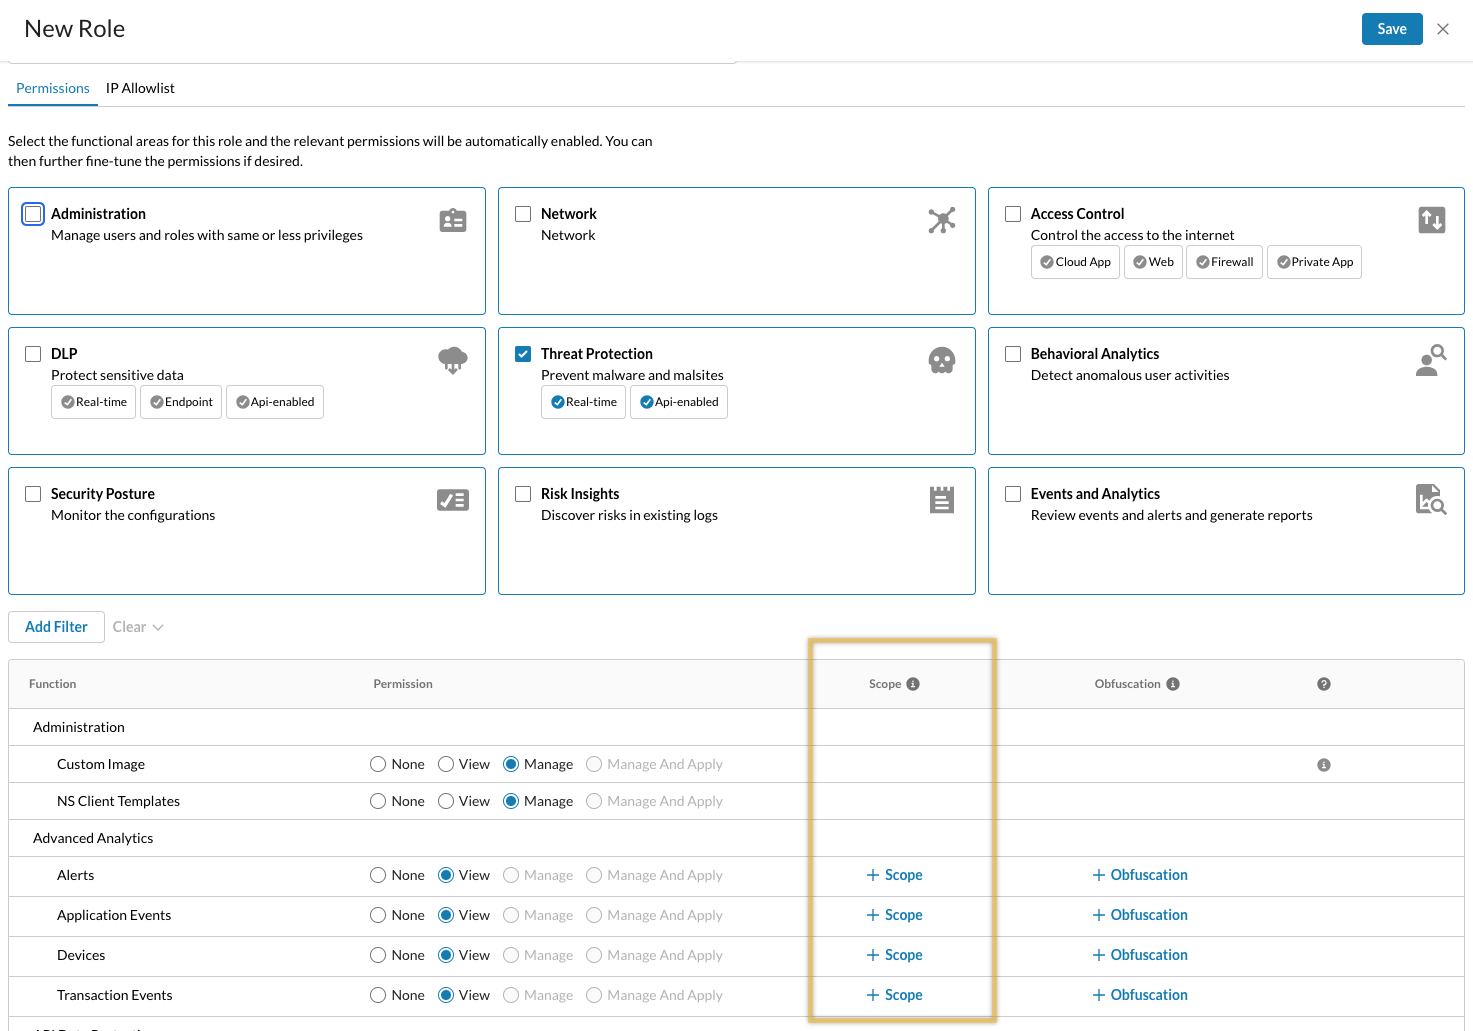
- Select the functional areas for this role and the relevant permissions are automatically enabled.
The box below the functional areas shows the list of functions and associated permissions.
The default associated permissions are selected. If an option is grayed out, that means you may not have high enough permissions for the functional area.
TIP: Click the info icon to view the associated APIs for a permission set. Scopes are additional controls applied to the Function. Obfuscation means fields in data records related to a function are hidden. Both Scope and Obfuscation are applied locally to each function. - Optionally, click Add Filter to view a permission set and/or function before creating the role to help fine tune your role. You can always return to this role and fine tune later.
- Optionally, click the IP Allowlist tab. In this tab, you can define a role-based specific IP allowlist to restrict access to the Netskope UI or REST API endpoint access. This allowlist will override the global IP allowlist. You can upload CSV file or enter values, each separated by a new line. There’s a 1000 row limit. If left disabled, no IP restriction applies to the role. To learn more: IP Allowlisting
- Click Save. The new role appears in the Roles list page.
Edit a Role

- Locate your role in the list page. Click the ellipsis button and click Edit. The Edit page displays.
- Select a different role for the admin.
- Optionally, scroll to the bottom of the page to view the Functions and associated Permissions. If you see +Scope or +Obfuscation listed for the Permission set, you can click it to edit the permissions.
TIP: Scope is configured globally for all product functions. Obfuscation can be configured for specific product functions. - Click Reset Password to send a reset link to the email listed for the admin. WARNING: Clicking the link will automatically send the reset link.
- Enable/disable multi-factor authentication.
- Click Done.
Scope
Data scope determines the data record access control in addition to the permissions for which the admin can access/manage.
You can perform the following functions:
- User: include or exclude a User, User Group, or Organization Unit
- Network Location: search for a network location to include or exclude
- App Instance: search for an app instance to include or exclude
- Query: type in the field to add a query
Conditional Obfuscation
If enabled, obfuscation will only be applied to records that match the conditions. Otherwise obfuscation is applied to all records within this function. This feature is visible for functions for which it applies, therefore, visibility may vary and performance may be impacted.
You can obfuscate the following fields:
- Usernames
- Source location information
- User IPs
- File and object names
- App names, URLs, and description IPs

Clone a Role
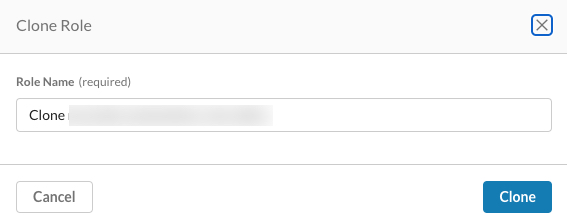
- Locate your role in the list page. Click the ellipsis button and click Clone. The Clone dialog displays.
- Optionally, type a new name for the role. By default, the cloned role name appears with “Clone” appended to the name.
- Click Clone.