Users can schedule Personal, Group, or Shared with Me dashboards as well as widgets. In addition, schedule owners can manage (view / edit) their own schedules in their Personal, Group, or Shared with Me folders. However, if you are not the schedule owner, you may see a report listed in a schedule but you cannot view or edit the report. If you click the report link, the system displays an error message.
Report Admins can view all scheduled reports listed in their Personal, Group, or Shared with Me.
Navigate to Reports > Scheduled to view all scheduled dashboards and widgets.
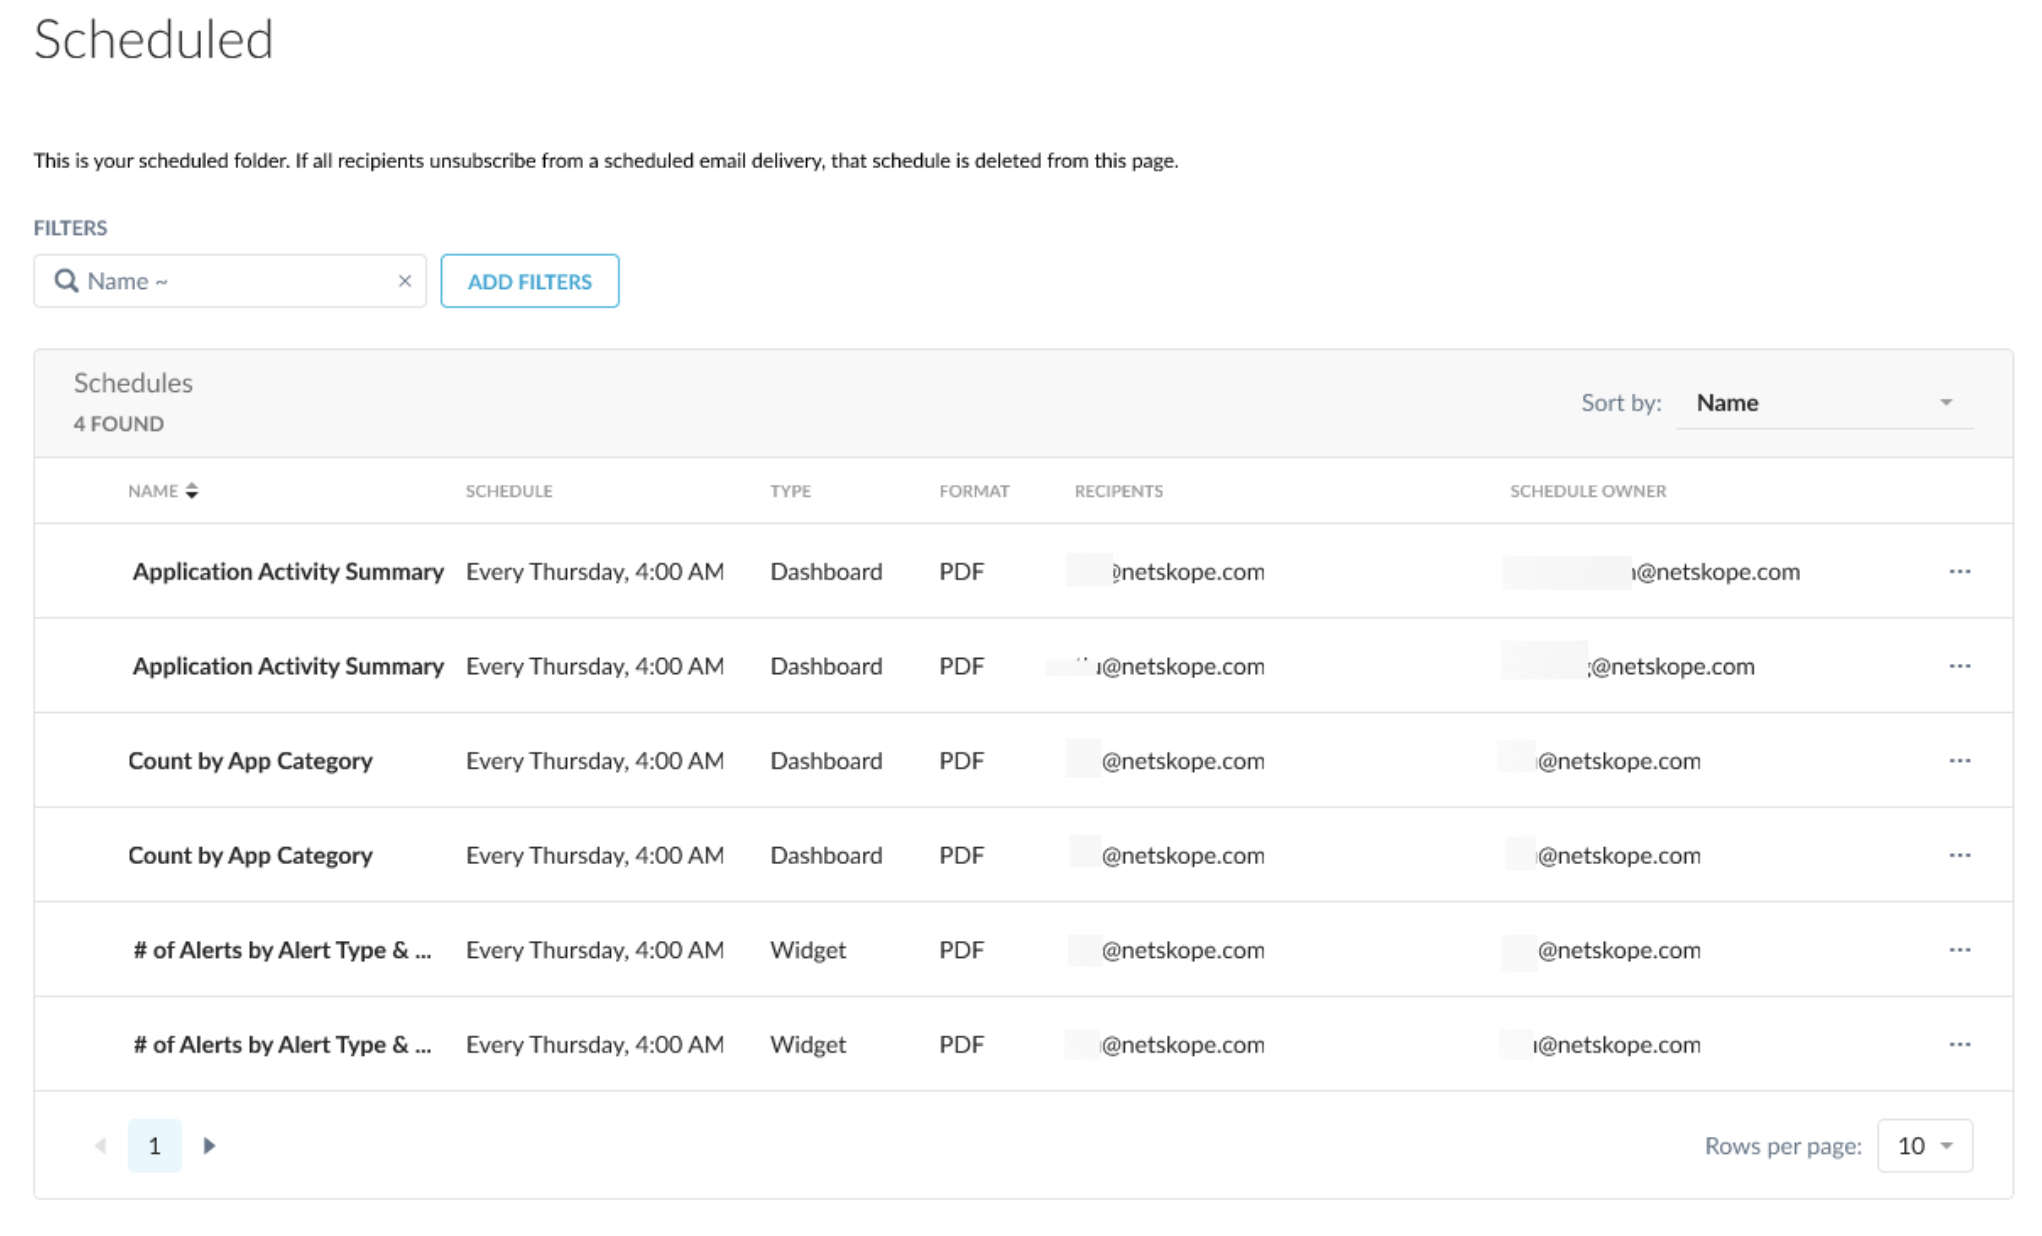
The list view page displays the following information:
- Name – dashboard or widget name (the same name may be listed multiple times. This means, the same report has multiple schedules and / or multiple owners.
- Schedule – the date and time the dashboard or widget will be sent to the recipient(s).
- Type – filter by dashboard or widget
- Format – filter by format type: CSV, HTML, PDF, PNG, Table, Text, Visualizations, XLSX
- Recipients – email address(es) of users scheduled to receive the dashboard or widget
- Schedule Owner – email address of the user that created the schedule. Only schedule owners can delete a schedule.
Click the ellipses at the end of a dashboard name to view and manage the schedule.

The delete option is only available for the schedule owner. Deleting a schedule does not delete the report.
In addition, a deactivated user’s schedule is removed automatically from any scheduled dashboards. If all recipients unsubscribe from a scheduled email delivery, that schedule is deleted from the Scheduled list view page.
Admins can view details for the scheduled dashboard or widget such as create date, description, and activities.
You can filter a time range and one or more activities associated with the dashboard or widget. Activities include:
- Access
- Executive Access
- Ad Hoc Run
- Download
- Export
- Scheduled Run
- Update
Schedule a Dashboard or Widget (New Experience)
- Navigate and open a dashboard or widget. Widgets must be saved to your personal library before you can create a schedule.
- From your dashboard or widget click the vertical dots and select Schedule Delivery.

- The Schedule window displays. The Settings tab is the default tab that displays. Select the desired recurrence from the dropdown. Options will change based on your selection such as Day, Time, Months, etc.Recurrence options include: Send now, Monthly, Weekly, Daily, Specific months, Specific days, and Datagroup update.

- Type the recipient’s email address. If there are multiple recipients, type one email address and click return. You can click All or External to toggle between the recipient lists.
- Select a format by which the recipients will receive the email file. Options include: CSV, PDF, or PNG visualization.
- Click the Filters tab to view the dashboard or widget filters. The filters are already applied to the dashboard or widget. If you want to make changes to the filters, exit the schedule and make your changes before returning to the schedule window.
- Click the Advanced Options tab to add a message to include in the body of the email your recipients will receive.
- Select the “Expand tables to show all rows” checkbox. Note, large tables may render as plain text or limit displayed rows.
- Select the “Arrange dashboard tiles in a single column” checkbox.
- Select the Paper size from the dropdown.
- Select the Delivery timezone.
- Optionally, click Test now to send the dashboard or widget as a test before the scheduled time.
- Click Save.
Scheduling Conditional Widgets (New Experience)
For recurring deliveries of widgets, you can customize the schedule to deliver the widget content only when certain conditions are met. For example, you can schedule a daily report to only send if users trigger the ‘shared credentials’ alert in the last 24 hours by selecting the option ‘send this schedule if there are results’ option.
In the Advanced options > Send this schedule if dropdown, specify whether you want to deliver the widget content only if there are results, only if there are no results, or if there are either results or no results. For example, you can user filters to create conditions for situations you want to monitor and then deliver the content only if that condition is reached.

You can also specify there to be a delivery only if the query results have changed since the last data delivery was sent by checking the box next to and results changed since last run.
Limit (New Experience)
You can limit the size of your delivery by selecting one of the following limit options for your data:
- Results in Table: Data is sent as a single delivery.
- All Results: Data is streamed. This is useful for large datasets, as it bypasses file-size, browser, and memory limitations.
If you choose Results in Table, the system will respect the row limitations you’ve set up in the saved widget or the Explore. If you choose All Results, the system will return all the rows of the query, regardless of any saved widget settings, and regardless of system’s typical 5,000 row limit. This can be desirable for retrieving very large datasets, but you should use caution to ensure the query is not too large for your database. See guidelines in the Advanced Analytics General Guidelines section below.
Limit Options for Email (New Experience)
When sending widgets and Explores, you can limit the size of your email to stay within your email server’s message size limitations. Select one of the following limit options for your data:
- Results in Table: Data is sent with a 5,000 row limit. This is the only choice available for emails using the Data Table or Visualization options. Emails with over 5,000 rows will not be sent.
- All Results: If you are using the Text, CSV, JSON — Simple, XLSX, or HTML options, you can send all of the rows of the results of a saved widget. This option ignores any limits set on a saved widget or the typical 5,000 row limit. There is, however, a total data limit of 15 MB so that email applications will accept the attachment. Emails over 15 MB with an attachment will not be sent. If you specify a Data Table or Visualization format and then select All Results, the system automatically changes the format to use a text attachment to support sending all results.
To verify that you are within the row or data limit for scheduled emails, you can enter your own email address as the recipient and click Send Test to send the data to yourself immediately. If you do not receive the email, it is likely that you have reached the row limit or the data limit for emails.