This document explains how to configure your Secureworks Taegis XDR instance with the Cloud Log Shipper module of the Netskope Cloud Exchange platform.
For Secureworks documentation, go to: https://docs.ctpx.secureworks.com/integration/connectCloud/netskope/
Prerequisites
To complete this configuration, you need:
- A Netskope tenant (or multiple, for example, production and development/test instances).
- A Netskope Cloud Exchange tenant with the Tenant plugin and Log Shipper plugin already configured.
- A Netskope Cloud Exchange tenant with the AWS Netskope Log Streaming or Azure Netskope Log Streaming plugin already configured (for pulling WebTx from the Netskope Log Streaming plugins).
- A Secureworks instance.
- Connectivity to the following host: https://ctpx.secureworks.com/.
Secureworks Plugin Support
This integration supports:
- Events
- Alerts
- WebTx (via Netskope Log Streaming)
Note
- CLS WebTX based on Google Pub Sub Lite is deprecated. Please refer to Netskope Product EOL/EOS Announcements – Netskope Knowledge Portal
- For ingesting WebTX logs to your Log delivery destinations like SIEM, SOAR, XDR, Data Lake, use the AWS Netskope Log Streaming or Azure Netskope Log Streaming plugin.
Workflow
- Get your Secureworks Collector Information.
- Configure the Secureworks plugin.
- Configure the Log Shipper Business Rules for Secureworks.
- Configure Log Shipper Log Delivery for Secureworks.
- Validate the Secureworks plugin.
To watch a demo, click play.
Get your Secureworks Collector Information
- Go to your Secureworks instance: https://ctpx.secureworks.com/login
- Enter your login credentials.

- Select your tenant from the top bar (highlighted below):

- Go to Integrations > Data Collectors.

- Click Add Collector to create a collector. Mainly, two types of collector can be created, on-premises and cloud-hosted.

- Click Next and add the required details.
- Click Create Collector.
- Download the .ova file and follow the Network Collector installation instructions. After successful installation, the collector status will be online.
- Click on the created collector and copy the IP Address. You will need this IP address as Secureworks Server in Netskope CLS configuration

- To use the collector on TLS, go to Applications >TLS enabled Syslog.

- Click Settings > Configure.
- Select the port 6514 from the dropdown.
- Follow the steps TLS Enabled Syslog Docs. to get the TLS certificates.
- Upload the PKCS12 file, enter your password, and click Save.

- Communication from Netskope to Secureworks will be successful on port 6514.
Configure the Secureworks Plugin
- In Cloud Exchange, go to Setting > Plugin Store.
- Search for and select the Secureworks v1.0.0 (CLS) plugin.
- Enter a Configuration Name.
- Select a valid Mapping. (Default Mappings for all plugins are available.)
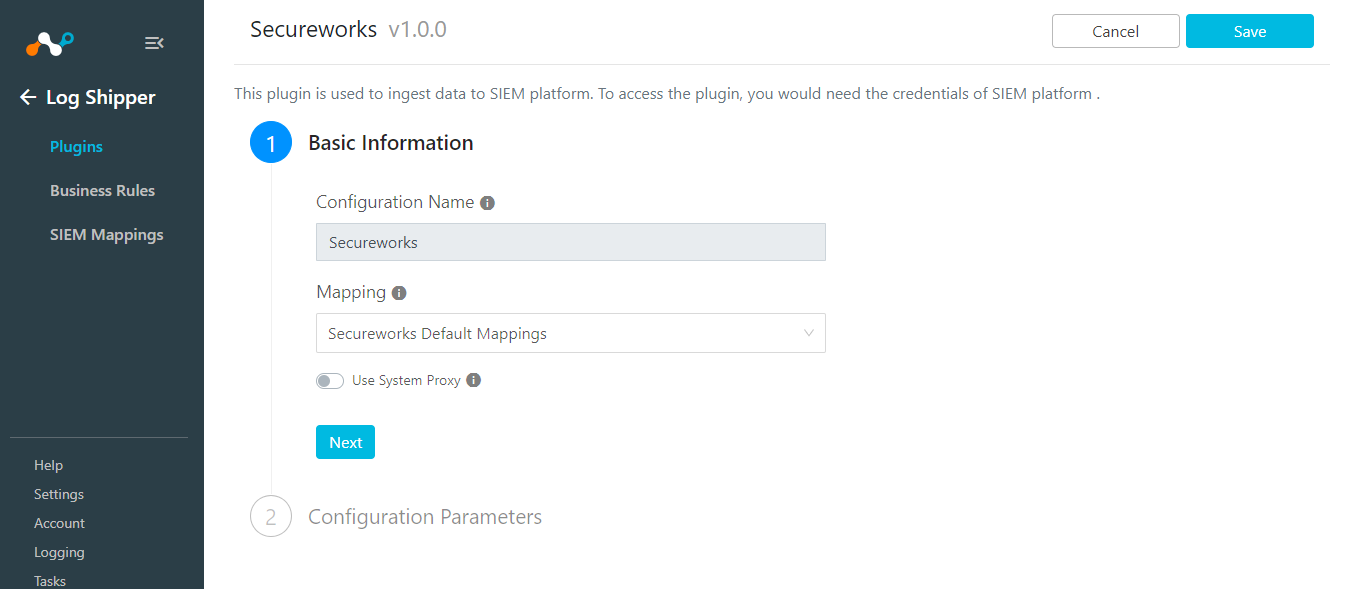
- Click Next.
- Enter your Collector IP address for the Secureworks Server, select the Secureworks Format and Secureworks Protocol, and then enter the Secureworks Port and Secureworks Certificate.
- Enter a Log Source Identifier. The Default value would be netskopece. The Log Source Identifier should not contain whitespaces. This will be added as a prefix to all logs.
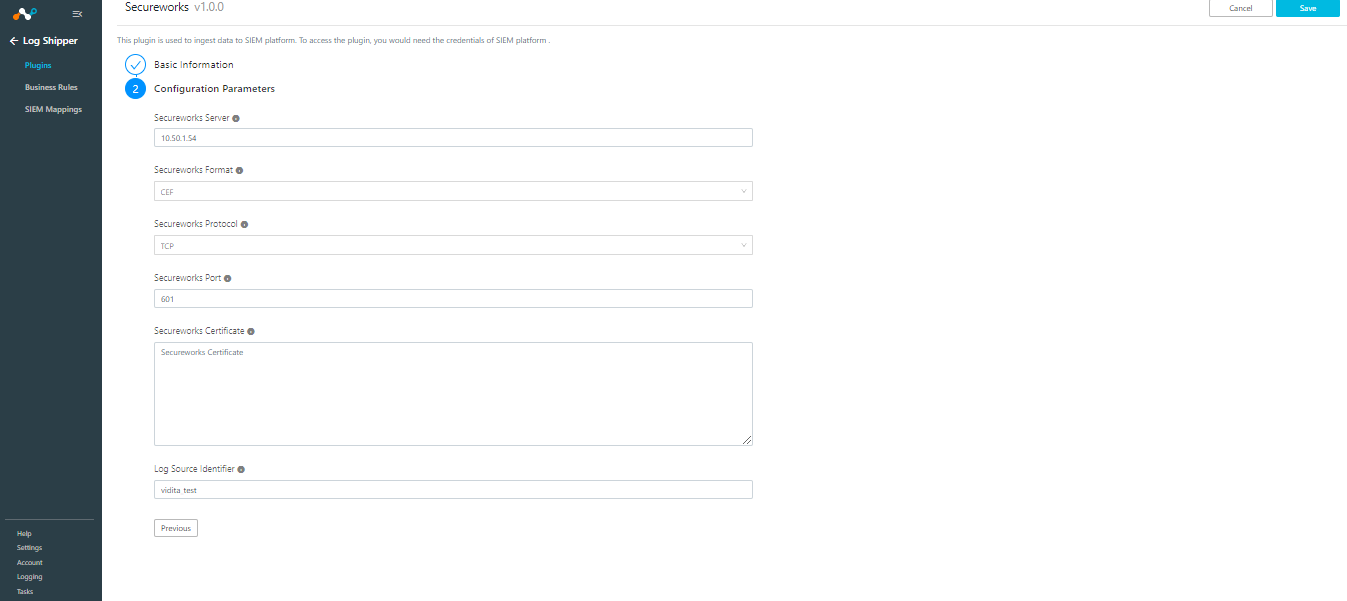
- Click Save.

Configure Log Shipper Business Rules for Secureworks
- Go to Log Shipper > Business Rules.

- Click Create New Rule.
- Enter a Rule Name and select the filters to use.
- Click Save.

Configure Log Shipper Log Delivery for Secureworks
- Go to Log Shipper > Log Delivery and click Add Log Delivery Configuration.
- For alerts and events, select the Source plugin (Netskope CLS), Destination plugin (CLS Secureworks), your business rule, and then click Save.
- For WebTx, select the Source plugin (AWS Netskope Log Streaming or Azure Netskope Log Streaming), and Destination plugin (CLS Secureworks), your business rule, and then click Save.
Validate the Secureworks Plugin
To validate the plugin workflow, you can check in Netskope Cloud Exchange and in your Secureworks instance.
Validate in Netskope Cloud Exchange
Go to Logging.
 |
Validate in Secureworks
There are two ways:
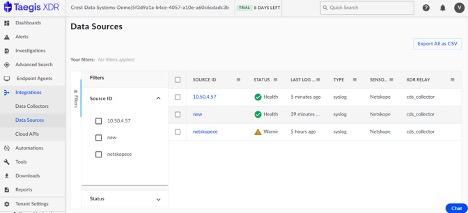
- Go to Integrations > Data Sources.
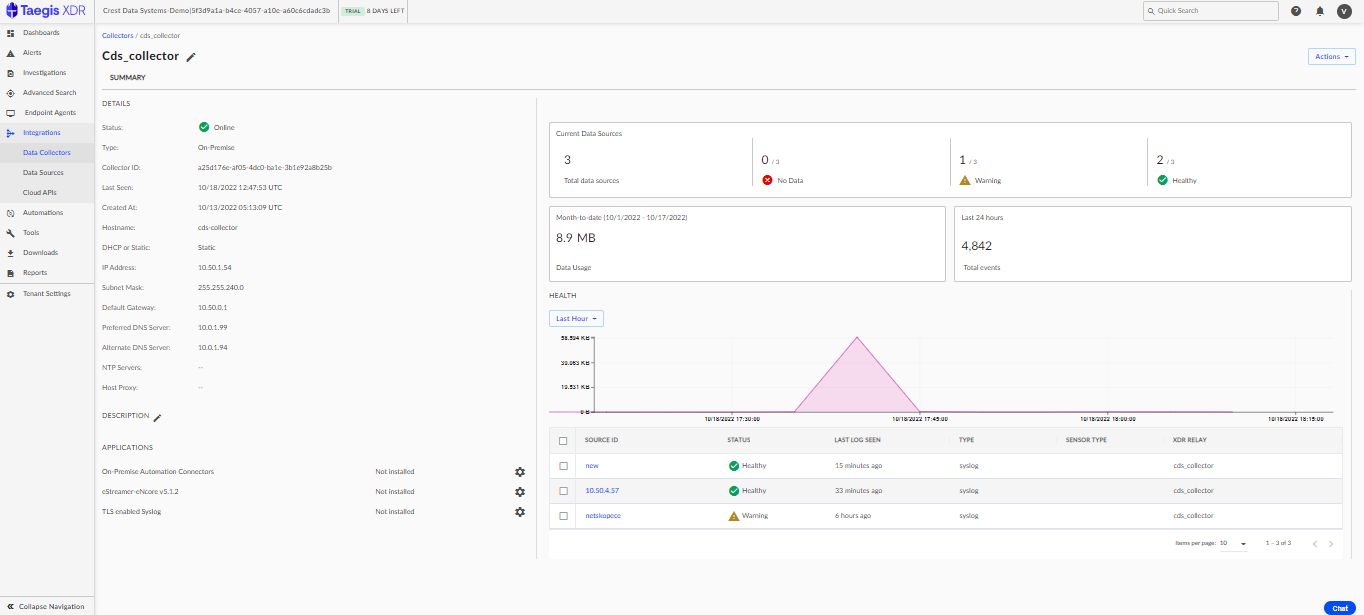
- You can also check the same from Integrations > Data Collectors. Thereafter, click on your data collector and enter the required query to search the data.

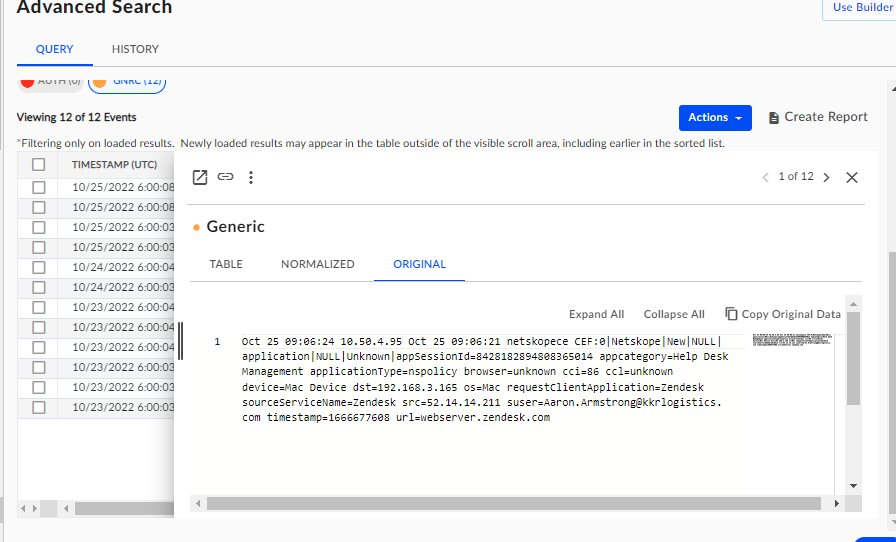
To validate the Raw data user, go to Advanced search and write the query per the suggestions on the left.