

This guide details how to route outbound email traffic from Microsoft 365 Exchange Online to the Netskope SMTP Proxy for Data Loss Prevention (DLP) and policy inspection, and safely route it back to Exchange for external delivery. This architecture is known as a loopback deployment.

Mail Flow Process Overview
When your environment does not utilize a third-party Mail Transfer Agent (MTA), you must configure Microsoft 365 Exchange Online to enable Netskope to route inspected traffic back to your primary mail server.
The following lifecycle outlines the end-to-end loopback mail flow
-
Outbound Initiation: An user sends an email from their corporate account to an external recipient.
-
Proxy Redirection: Exchange Online intercepts the outbound email and routes it via SMTP to the Netskope SMTP Proxy for inspection.
-
Policy & Inspection: The Netskope platform applies configured Data Loss Prevention (DLP) and compliance policies.
-
Loopback Handoff: Once validated, Netskope routes the traffic back to Exchange Online (the Next Hop) via SMTP.
-
External Resolution & Delivery: Exchange Online performs an MX lookup via DNS to locate the recipient’s mail server and delivers the message via the Internet.
Deployment Prerequisites
To establish the loopback configuration, you must execute administrative changes across both the Netskope tenant and the Microsoft Exchange admin center (EAC):
Netskope Tenant Configuration
Configure Microsoft 365 Exchange Online as the authoritative Next Hop gateway.
Microsoft Exchange Admin Center (EAC) Configuration
-
Outbound Connector: Directs designated outbound corporate email traffic to the Netskope SMTP Proxy.
-
Inbound Connector: Explicitly trusts and accepts the incoming SMTP traffic returning from the Netskope SMTP Proxy.
-
Mail Flow Rule (Loop Prevention): Activates the outbound connector and stops infinite routing loops by checking for specific inspection headers.
-
Connection Filtering Protection: Configures underlying perimeters to allow Exchange to accept traffic from designated Netskope SMTP Proxy IP ranges.
Configure Exchange Online as the Next Hop in Netskope
To configure the Netskope tenant to route inspected mail back to your environment, you must retrieve your unique Exchange Online domain name (FQDN)
-
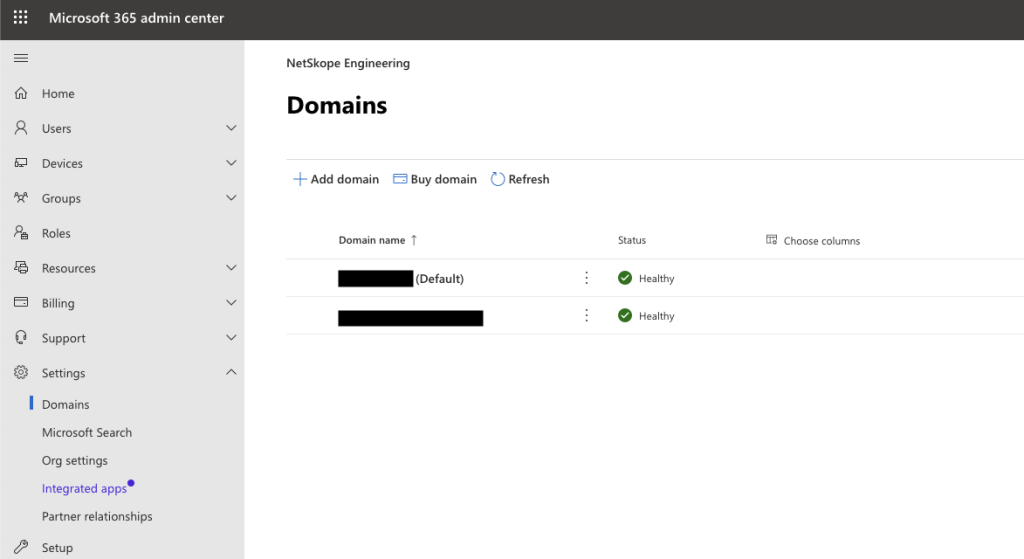
Log in to the Microsoft 365 admin center.
-
In the left navigation menu, click …Show All, then proceed to Settings > Domains.
-
Click on your Default Domain and select the DNS records tab.

-
Under the Exchange Online section, click on the MX record to display the MX record pane on the right.

-
Locate the string under Points to address or Value and copy it.

-
Log in to your Netskope Tenant, navigate to the Edit Microsoft Office 365 Exchange Settings workspace, and paste the copied FQDN value into the Next Hop field.
-
Explicitly define the Next Hop port as 25 and save your changes.

If you are running SPF checks on your Exchange server, then you must add the Netskope domain to your Exchange server’s DNS TXT record. To add a new TXT record:
1. In the Microsoft 365 admin center page, click … Show All to view all the options and navigate to Settings > Domains.
2. Click on the default domain, select the DNS records tab, and click Add record.
3. In the Add a custom DNS record right pane, specify a name for the TXT record and specify the TXT value as:
_spf.goskope.com. When finished, click Save.Establish the Inbound Connector in Exchange Online
You must establish an inbound connector that allows Microsoft 365 Exchange Online to accept and trust returning mail streams from the Netskope SMTP Proxy:
-
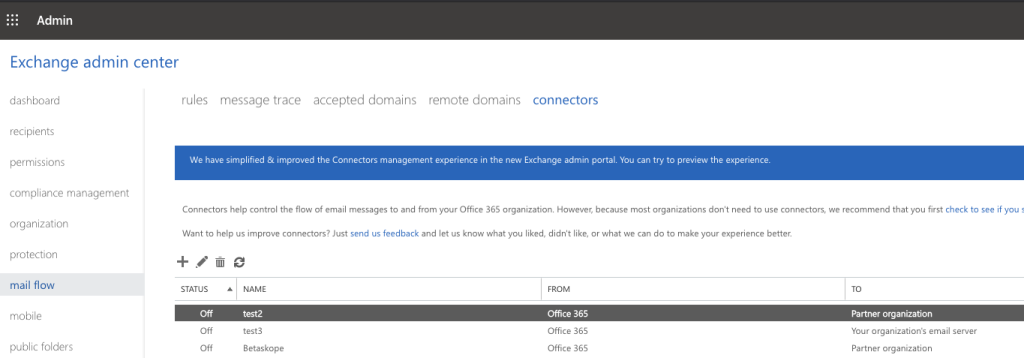
Navigate to the Exchange admin center (EAC), click mail flow in the left navigation pane, and select the connectors tab.
-
Click the + (Add) icon to launch the New Connector setup wizard.
-
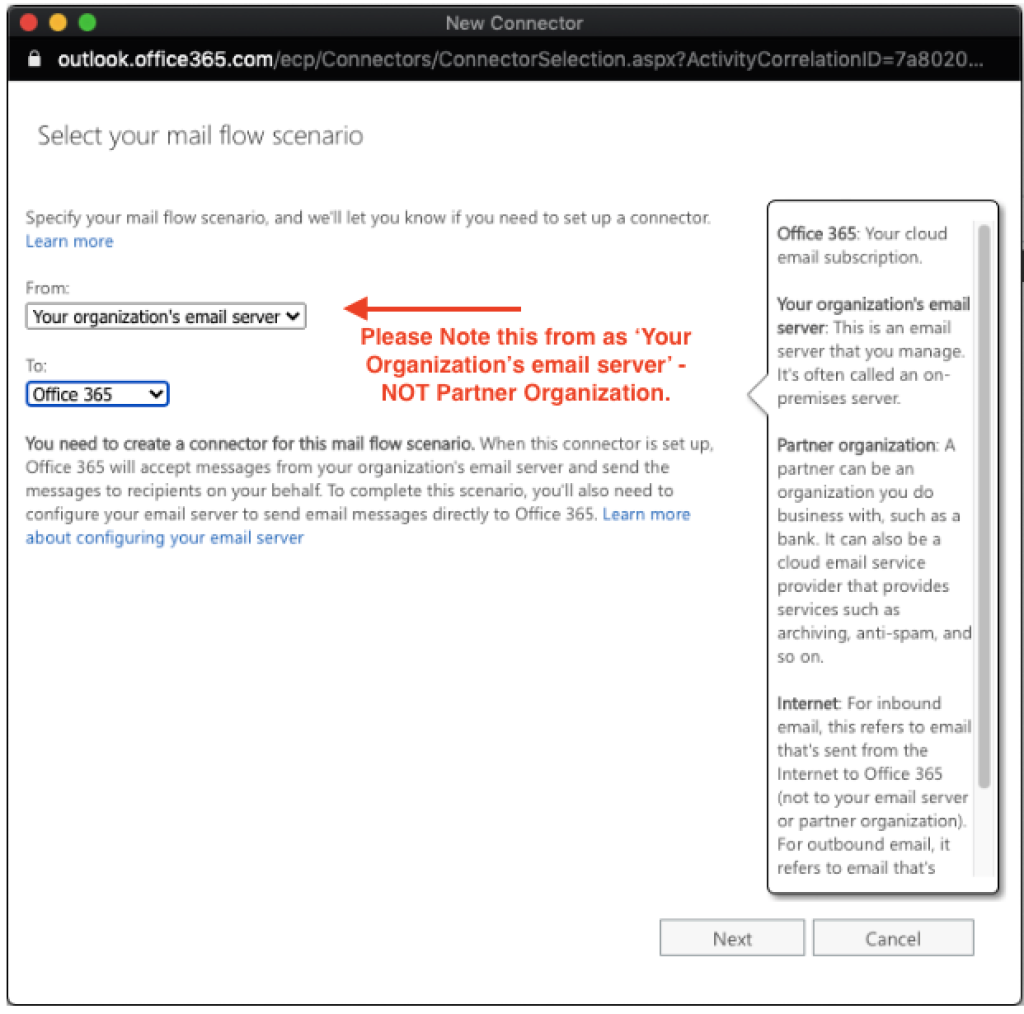
In the Select your mail flow scenario window, map the routing boundaries precisely: From: Your organization’s email server (Do not select Partner Organization) and To: Office 365. Click Next.
-
Provide a clear identifier name (e.g., Netskope-to-Exchange) and add an operational description.

-
Ensure that both Turn it on and Retain internal Exchange email headers (recommended) are checked, then click Next.
-
On the next screen, select the radio button option: “By verifying that the IP address of the sending server matches one of these IP addresses that belong to your organization“.
-
Click the + icon to input the operational CIDR IP blocks of the Netskope SMTP Proxy servers sending traffic back to Exchange.

-
Review your configured settings and click Save to create the connector.


Establish the Outbound Connector & Loop Prevention Rule
To route outbound traffic cleanly to Netskope, you must deploy an outbound connector and pairing mail flow rule.
-
In the Exchange admin center, create an Outbound Connector designed to deliver messages from Office 365 to a Partner organization (representing the Netskope SMTP Proxy gateway).
-
Deploy a Mail Flow Transport Rule to govern this outbound connector. The rule enforces inspection policies while acting as a critical loop prevention system:
-
The rule checks for the presence of the
x-netskope-inspected: truestring inside the SMTP headers. -
If the header is present, Exchange recognizes the mail stream has already been processed by Netskope and bypasses the outbound connector to prevent an infinite loop.
-
If the header is absent, Exchange routes the uninspected mail directly to the Netskope SMTP Proxy.
-
Configure Connection Filtering (Allowlisting)
Ensure that traffic returning from Netskope is not throttled or erroneously blocked by Exchange Online anti-spam security filters:
-
In the Exchange admin center, select protection and click the connection filter tab.
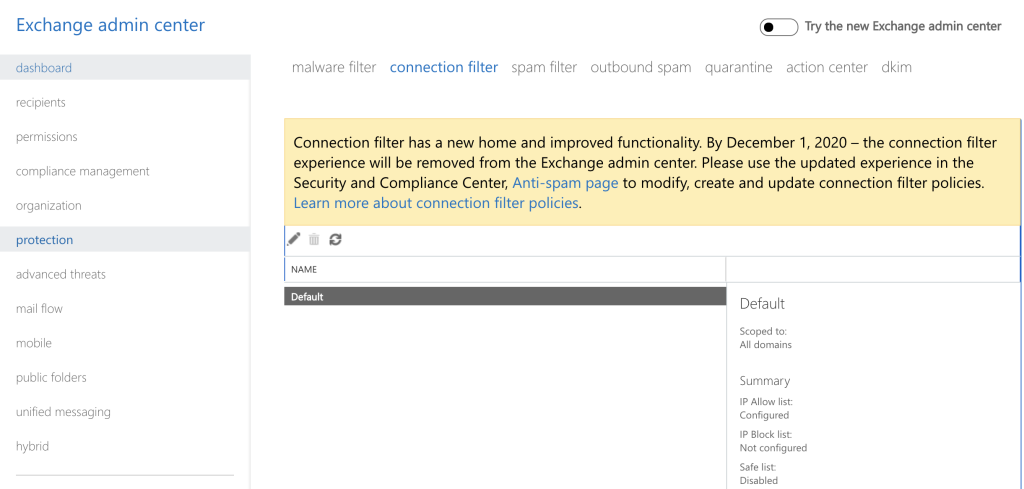 If your tenant has migrated to Microsoft’s modern security architecture, configure these settings in the Microsoft Defender Security and Compliance Center via the Anti-spam policies workspace.
 -
Highlight the Default connection filter policy and click the Edit (Pencil) icon.
-
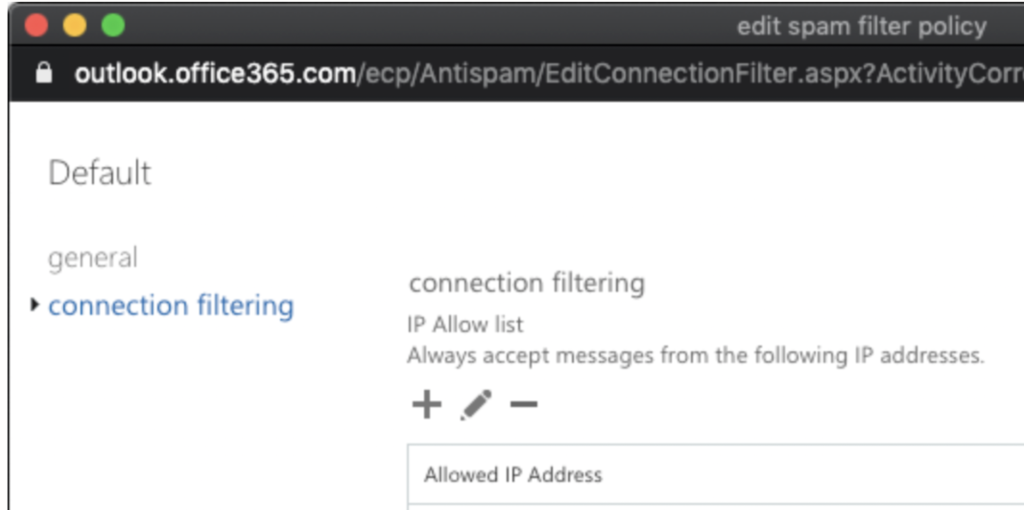
Inside the spam filter policy window, choose connection filtering in the sub-menu.
-
Under the IP Allow list section, click the + icon.
-
Add the complete list of authorized Netskope SMTP Proxy IP ranges.
-
Click Save to apply the configuration change.


IP Ranges for Allowlisting
For a complete and updated list of IP addresses, go to the Netskope Email DLP (SMTP) List for Allowlisting section in this article: NewEdge Consolidated List of IP Ranges for Allowlisting.