

This document explains how to configure the ThreatQ v1.1.0 plugin with the Threat Exchange module of the Netskope Cloud Exchange platform. The ThreatQ plugin is used to fetch the indicators of type URL, IP (IPv4, IPv6), FQDN, SHA256, and MD5 from the ThreatQ Library > Indicators page on the ThreatQ platform. This plugin does not support sharing of indicators to the ThreatQ platform.
Prerequisites
To complete this configuration, you need:
- A Netskope tenant (or multiple, for example, production and development/test instances).
- A Netskope Secure Web Gateway subscription for URL sharing.
- A Threat prevention subscription for malicious file hash sharing.
- A Netskope Cloud Exchange tenant with the Tenant plugin and Threat Exchange plugin already configured.
- A ThreatQ instance.
- Connectivity to the following host: URL of the ThreatQ instance
Example: https://<IP>/ ; here the IP is the IP of the machine where your ThreatQ instance is hosted.
ThreatQ Plugin Support
The ThreatQ plugin fetches the indicators of type URL, IP (IPv4, IPv6), FQDN, SHA256, and MD5 from the ThreatQ platform. This plugin does support the sharing of indicators.
| Fetched Indicator Types | Shared Indicator Types |
|---|---|
| URL, IP (IPv4, IPv6), FQDN, SHA256 and MD5 | Not Supported |
Mappings
Pull Mapping
| Netskope CE Fields | ThreatQ Fields |
|---|---|
| value | value |
| type | type |
| reputation | score |
| active | status |
| extendedInformation | <THREATQ URL>/indicators/<IOC ID>/details |
| tags | tags (Tags associated with the indicator) |
Note that all the statues on ThreatQ except Expired will be considered as Active in Cloud Exchange.
Severity Mapping
| Netskope CE Severity | ThreatQ Score |
|---|---|
| Critical | 10 |
| High | 9 |
| Medium | 8 |
| Medium | 7 |
| Low | 6 |
| Low | 5 |
| Low | 4 |
| Low | 3 |
| Low | 2 |
| Low | 1 |
| Low | 0 |
API Details
This plugin uses Python libraries to authenticate with the ThreatQ API and fetch indicators from the ThreatQ platform.
Library: threatqsdk (version = ‘1.8.0’)
Create a ThreatQ Object
tq = Threatq(
     host,
     (client_id, client_secret),
     private=True,
     verify=verify,
     proxy=proxy_info,
)
Fetch Indicators
FIELDS = [“id”, “value”, “type”, “score”, “status”, “tags”]
tlsearch = ThreatLibrary(tq, fields=FIELDS)
Give all the TL Search results using ThreatQ Search Names
tlsearch.get_saved_search(search_name).execute(
                "indicators"
)
Performance Matrix
Here is the performance reading conducted for fetching and pushing 100K IOCs in each plugin lifecycle on a Large CE instance with these specifications.
| Description | Specification |
|---|---|
| Stack details | Size: Large RAM: 32 GB CPU: 16 Cores |
| Indicators fetched from ThreatQ | ~23k IOCs per minute |
User Agent
netskope-ce-5.1.1-cte-threatq-v1.1.0
Workflow
- Get your ThreatQ Client ID and Client Secret.
- Create a Search name on ThreatQ.
- Configure the ThreatQ Plugin.
- Configure a Business Rule for ThreatQ.
- Configure Sharing for ThreatQ.
- Validate the ThreatQ Plugin.
Click play to watch a video.
Get your ThreatQ Client ID and Client Secret
- Log in to your ThreatQ VM.
- Run the following command to generate a Client ID and Client Secret.
sudo /var/www/api/artisan threatq:oauth2-client --name=Netskope
- Copy the Client ID and Client Secret. These are needed to configure the ThreatQ plugin.
Create a Search Name on ThreatQ
- In your ThreatQ instance, go to Threat Library > Indicators.
- Apply the filters as per your requirements.
For example, filter indicators of type MD5.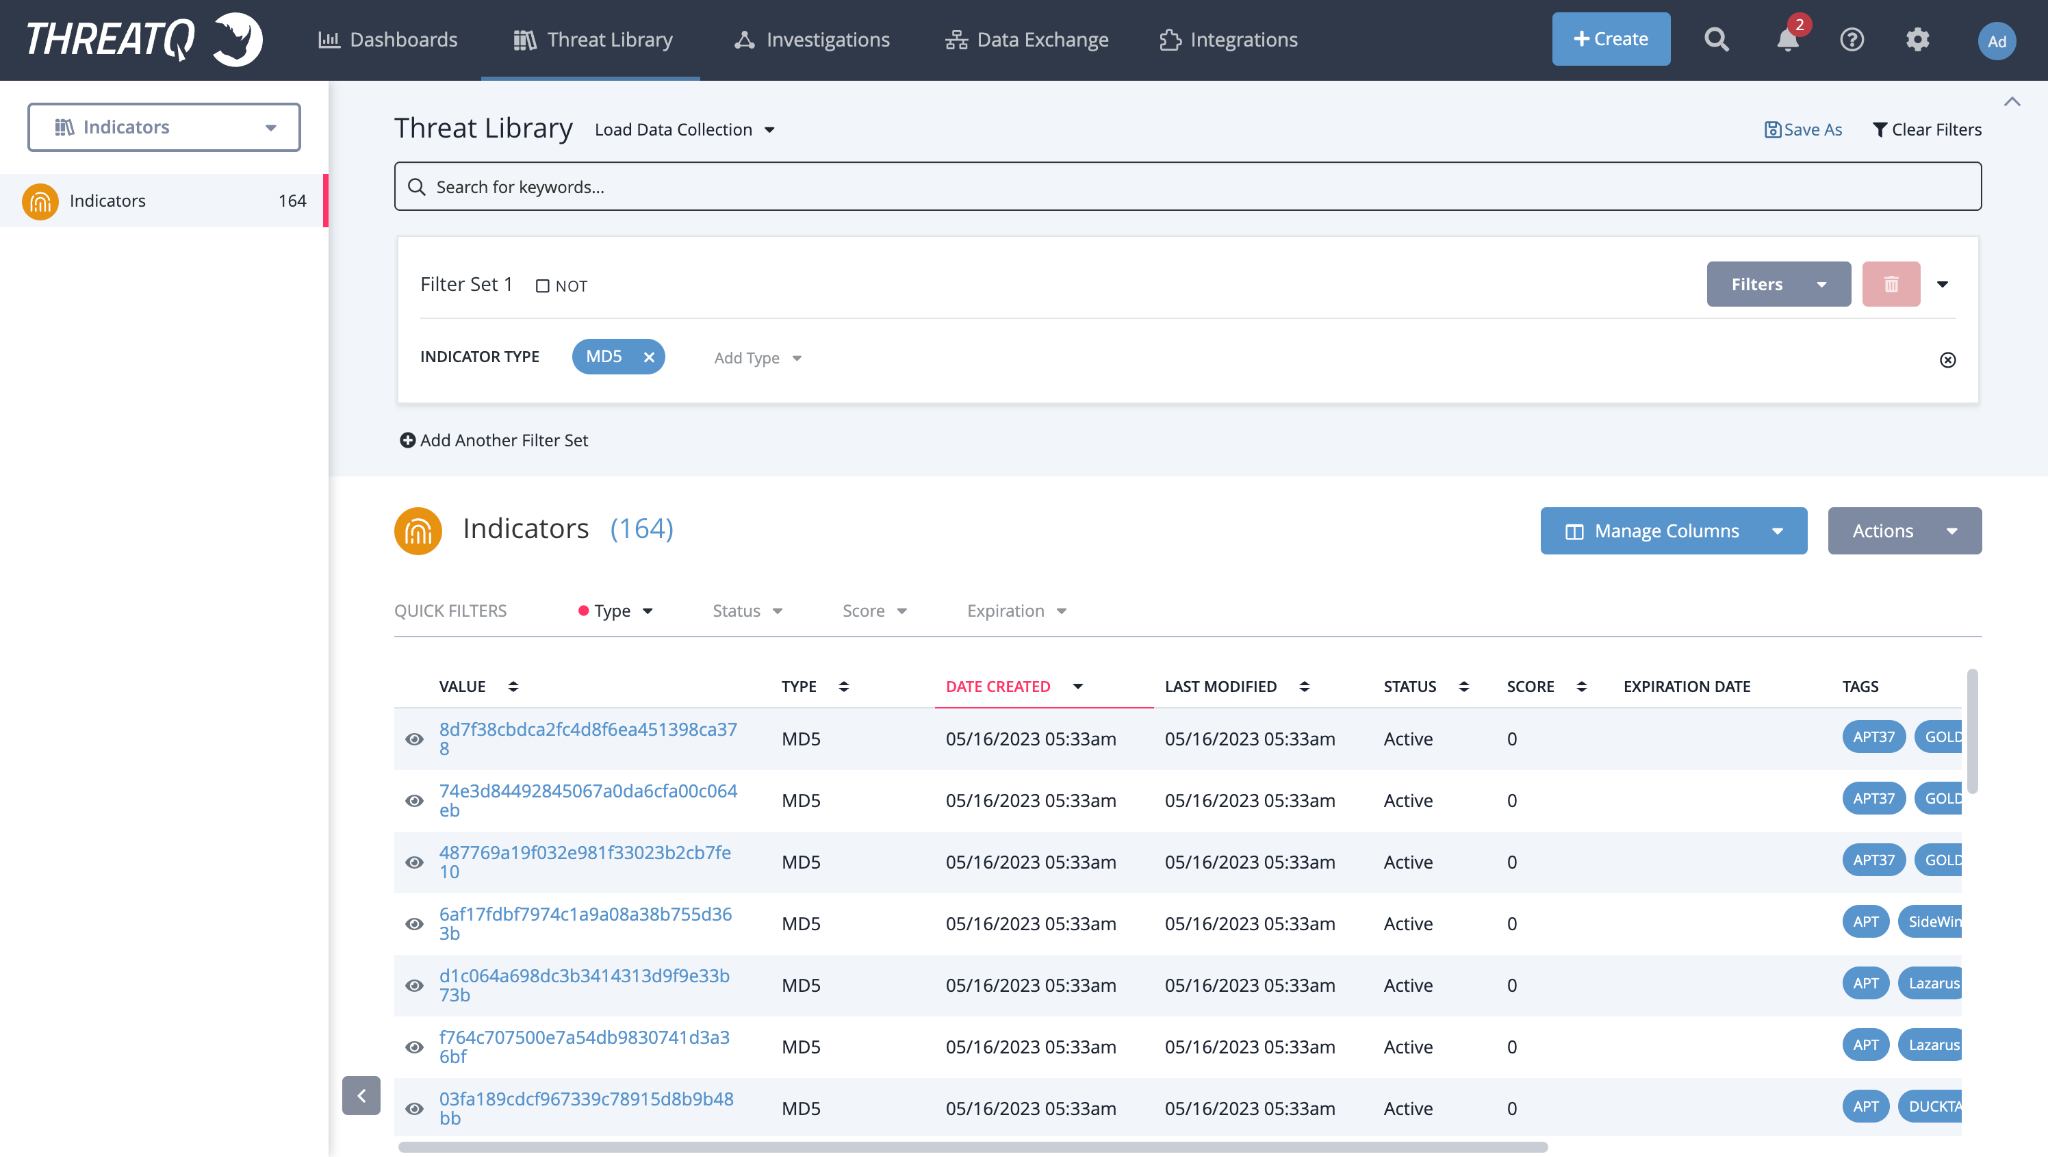
- Click Save As to create the search name.
- Name your Data collection.
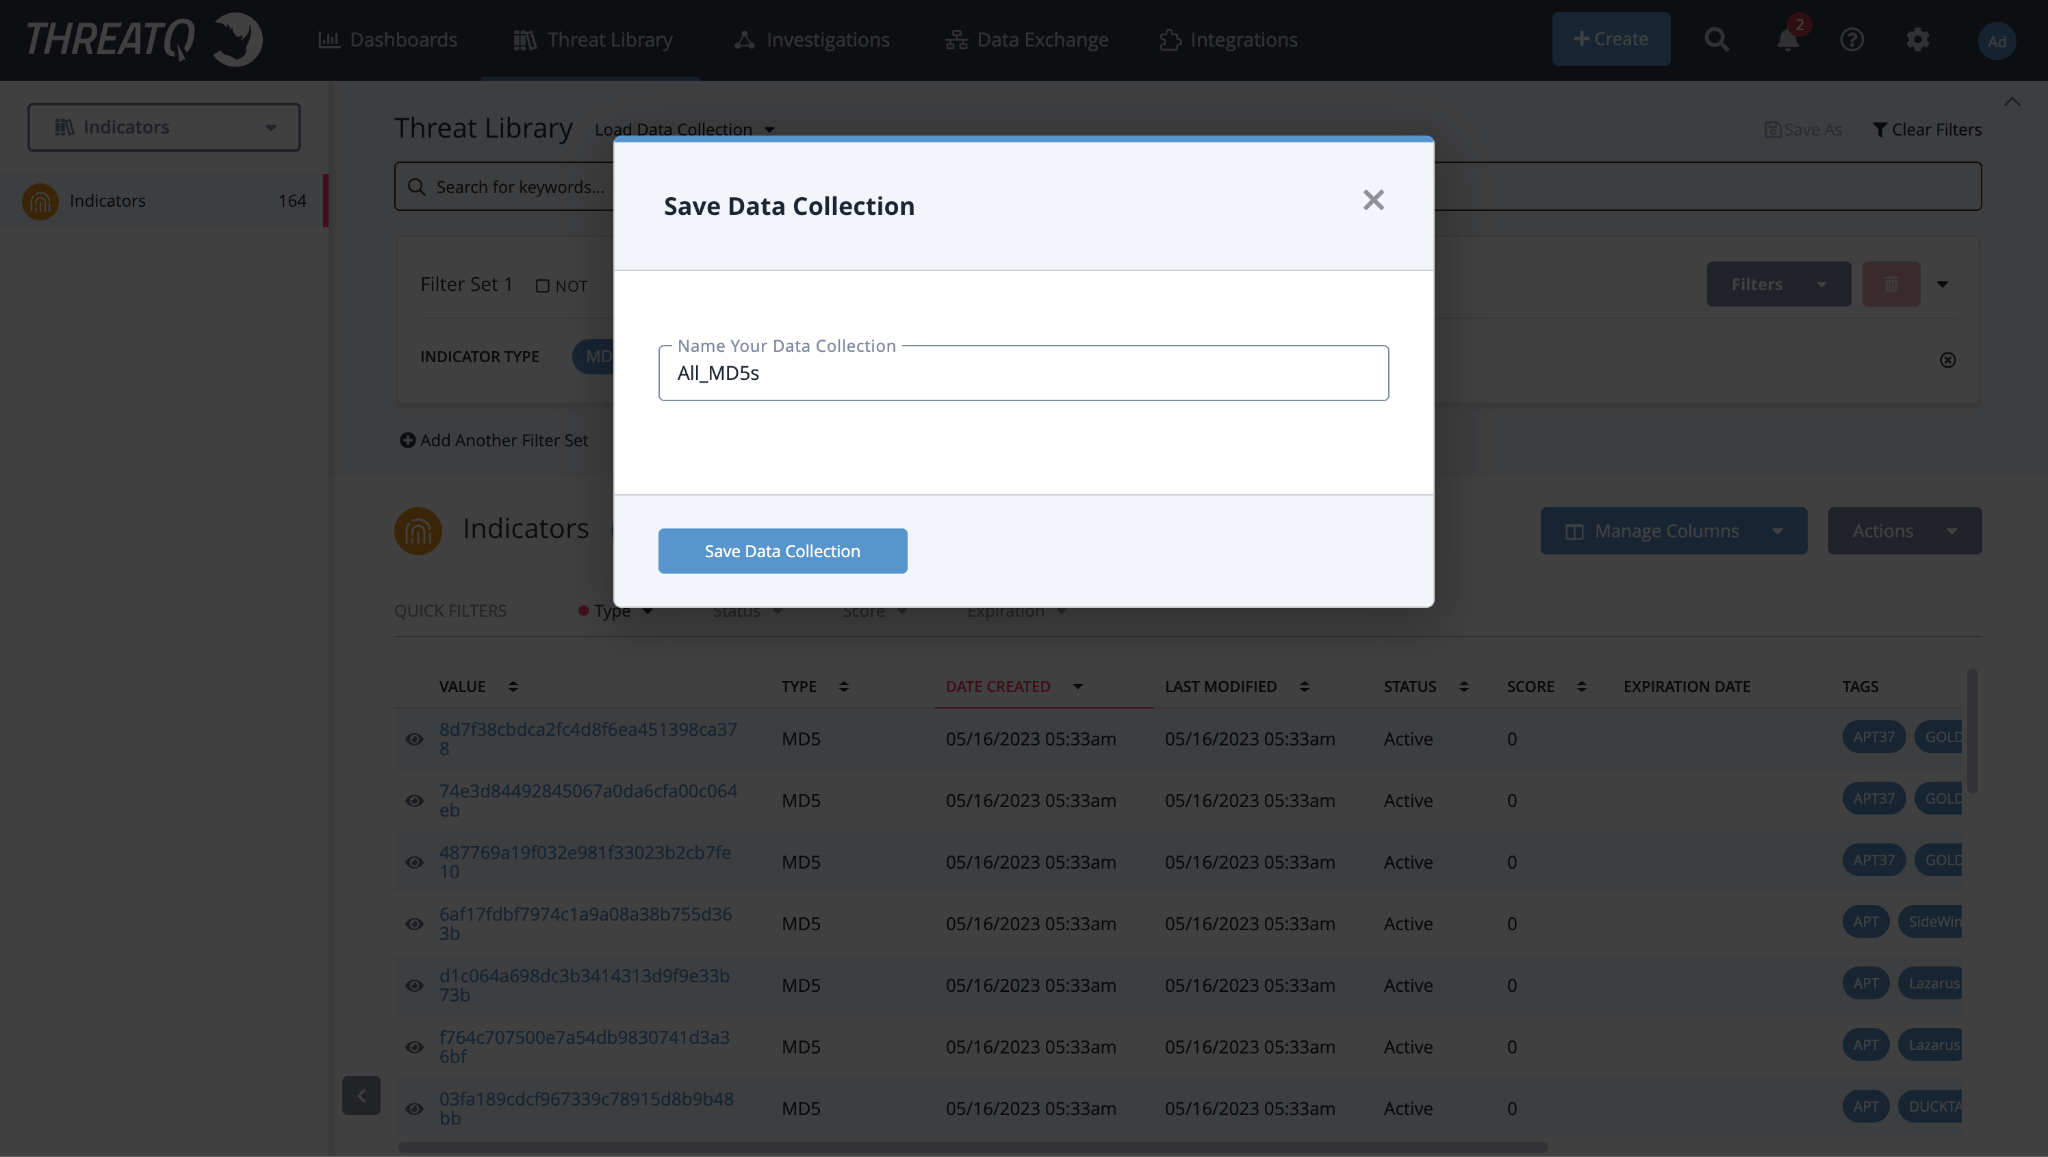
- Click Save Data Collection.
Note that the name of your Data collection will be used as Search name while configuring the ThreatQ plugin.
Configure the ThreatQ Plugin
- In Cloud Exchange, go to Settings > Plugins.
- Search for and select the ThreatQ v1.1.0 (CTE) plugin box.

- For Basic Information, enter these parameters:
- Configuration Name: Unique name for the configuration.
- Sync Interval: Leave the default.
- Aging Criteria: Expiry time of the plugin in days. ( Default: 90 )
- Override Reputation: Set a value to override the reputation of indicators received from this configuration.
- Enable SSL Validation: Enables SSL Certificate validation.
- Use System Proxy: Enable if proxy is required for communication.

- Click Next.
- For Configuration Parameters, enter these values:
- ThreatQ URL: This is the URL to the ThreatQ instance.
- ThreatQ Client ID: This is the ThreatQ Oauth2 Client ID.
- ThreatQ Client Secret: This is the ThreatQ Oauth2 Client Secret.
- ThreatQ Search Names: These are the ThreatQ search names that contain the data to be imported. This should be a comma-separated list of search names, or a single search name.

Note that if one of the provided search names doesn’t exist on ThreatQ instance, or if it is invalid, then you won’t be able to save the configuration. - Click Save.

Configure a Threat Exchange Business Rule for ThreatQ
To share indicators fetched from the ThreatQ to the Cloud Exchange, you need to have a business rule that will filter out the indicators that you want to share. To configure a business rule:
- Go to Threat Exchange > Business Rule and click Create New Rule.
- Add filters according to your requirements in the rule, and then click Save.

Configure Threat Exchange Sharing for ThreatQ
To share IoCs from the Netskope CE to the Netskope tenant:
- Go to Threat Exchange > Sharing and click Add Sharing Configuration.
- Select your Source Configuration (CTE ThreatQ), a Business Rule, a Destination Configuration (CTE Netskope), and a Target.
- Click Save.

Validate the ThreatQ Plugin
Validate the Pull
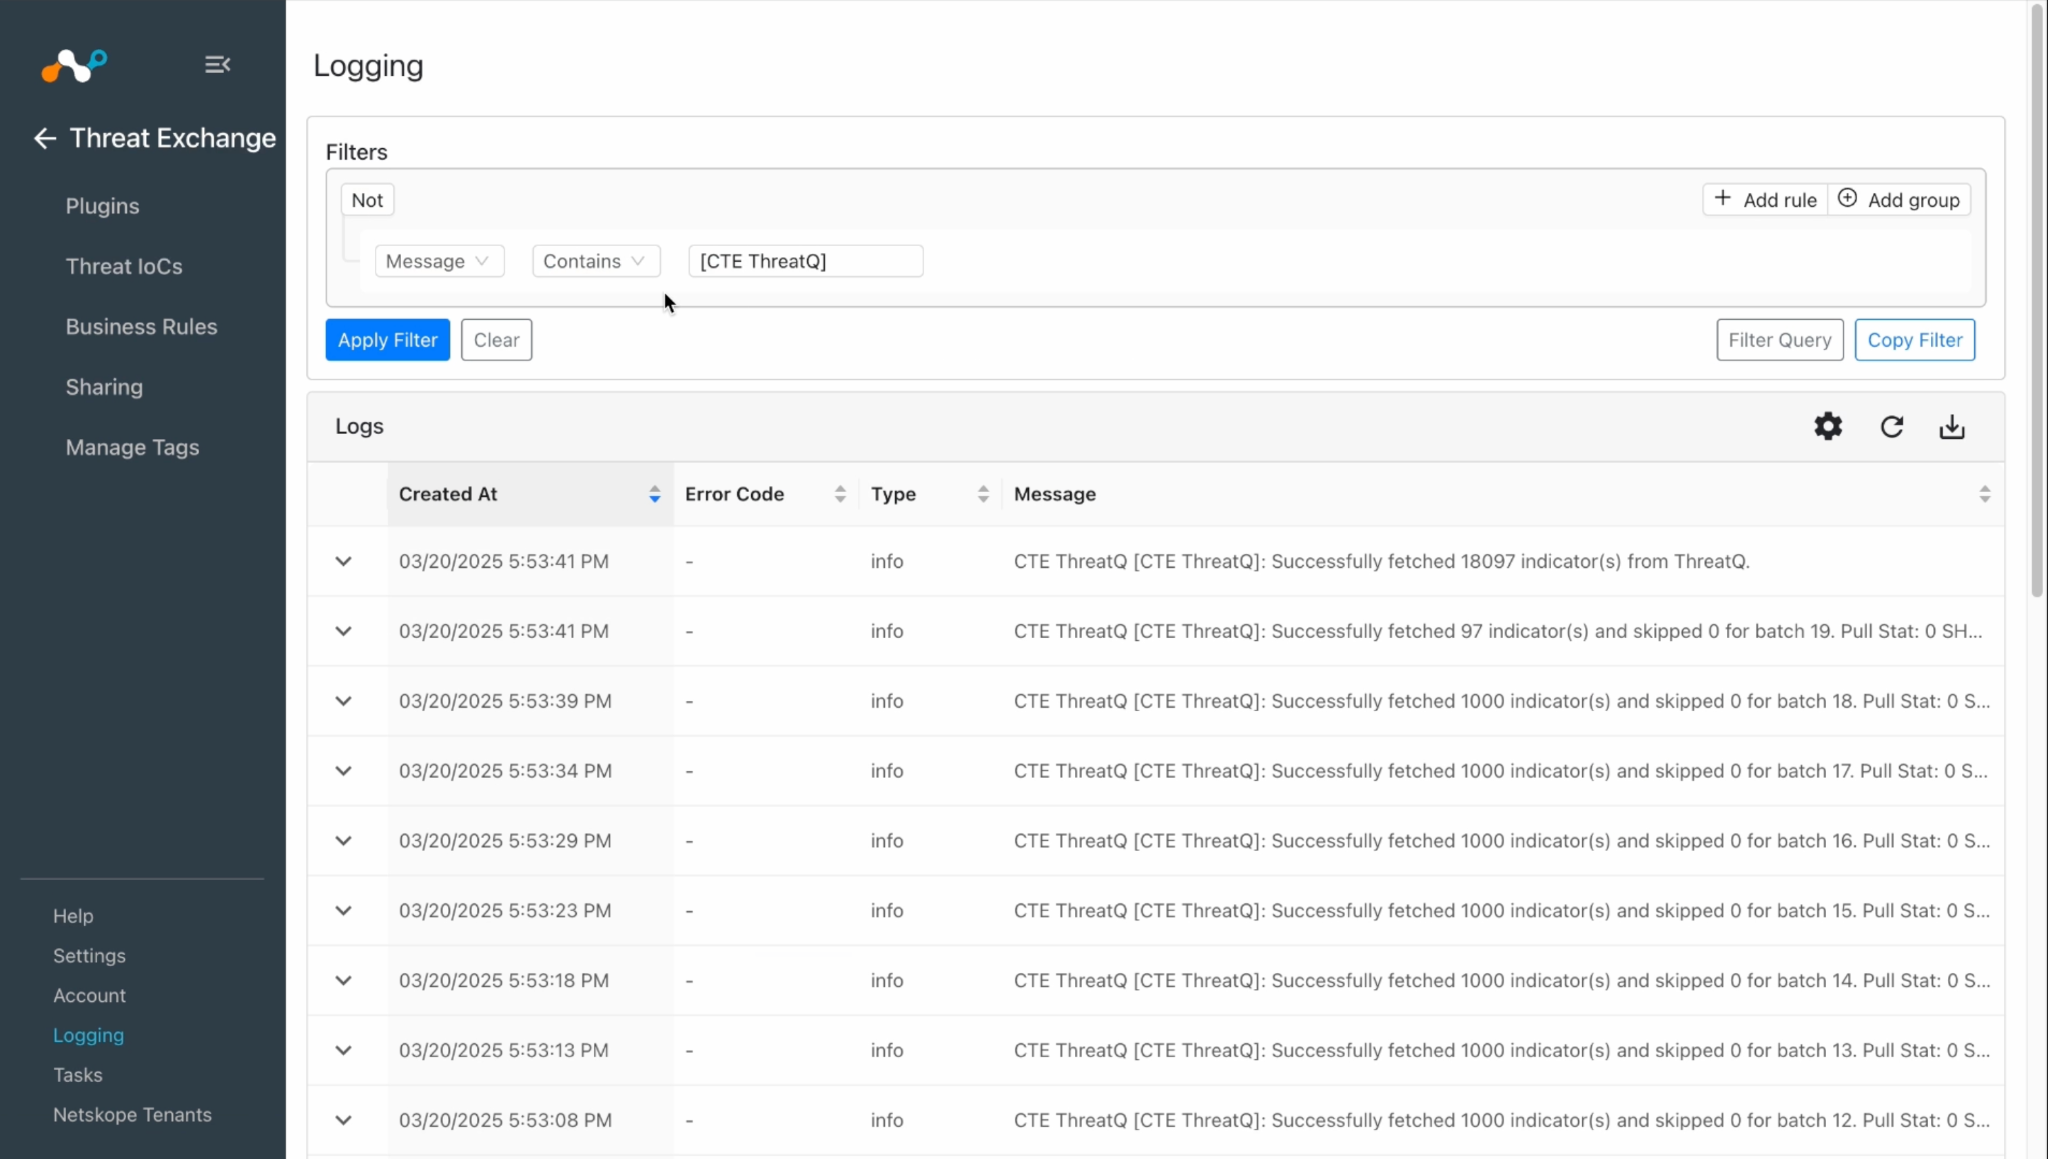
To check the pulled IoCs, go to Logging and search for IoCs with plugin name.
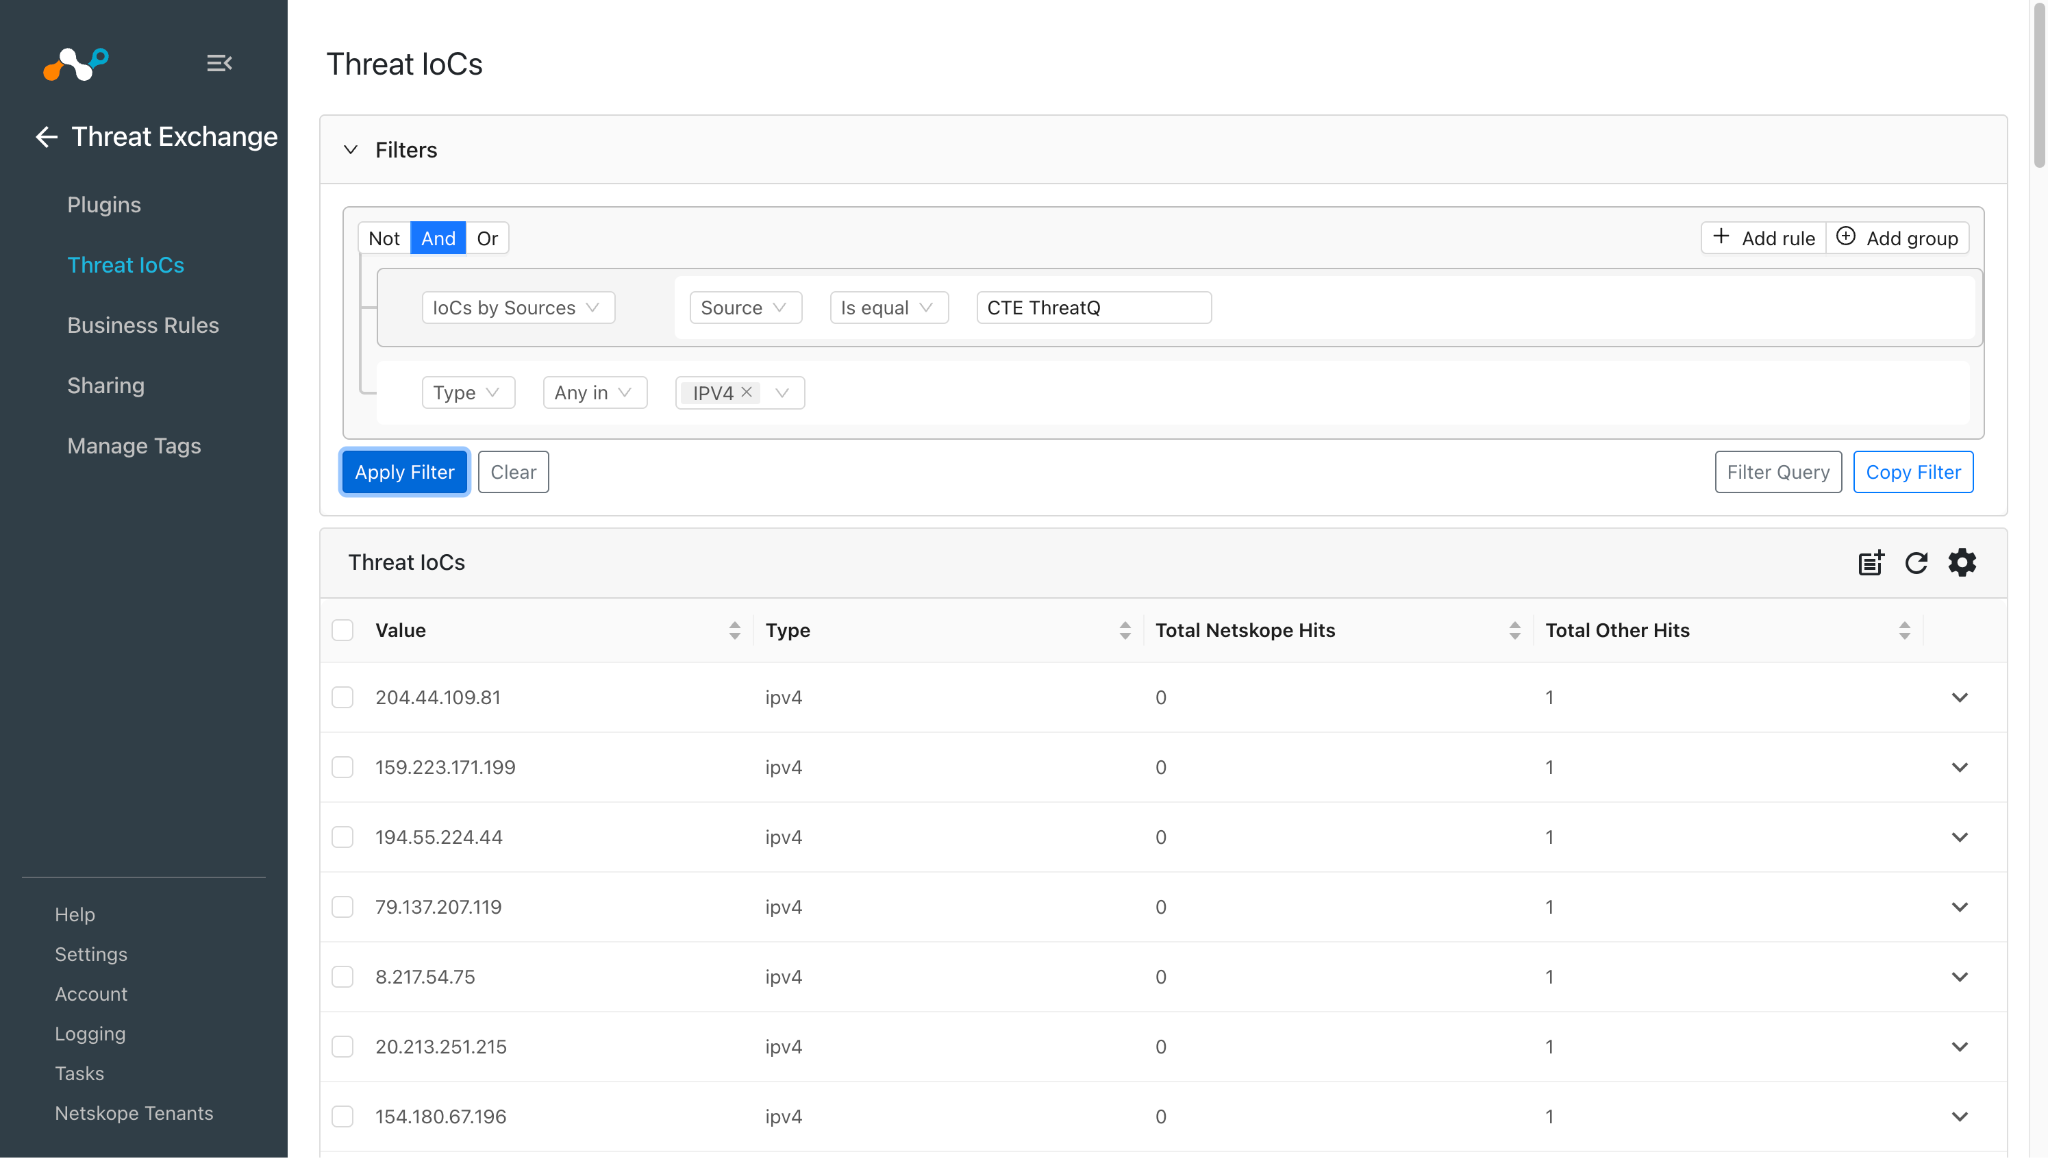
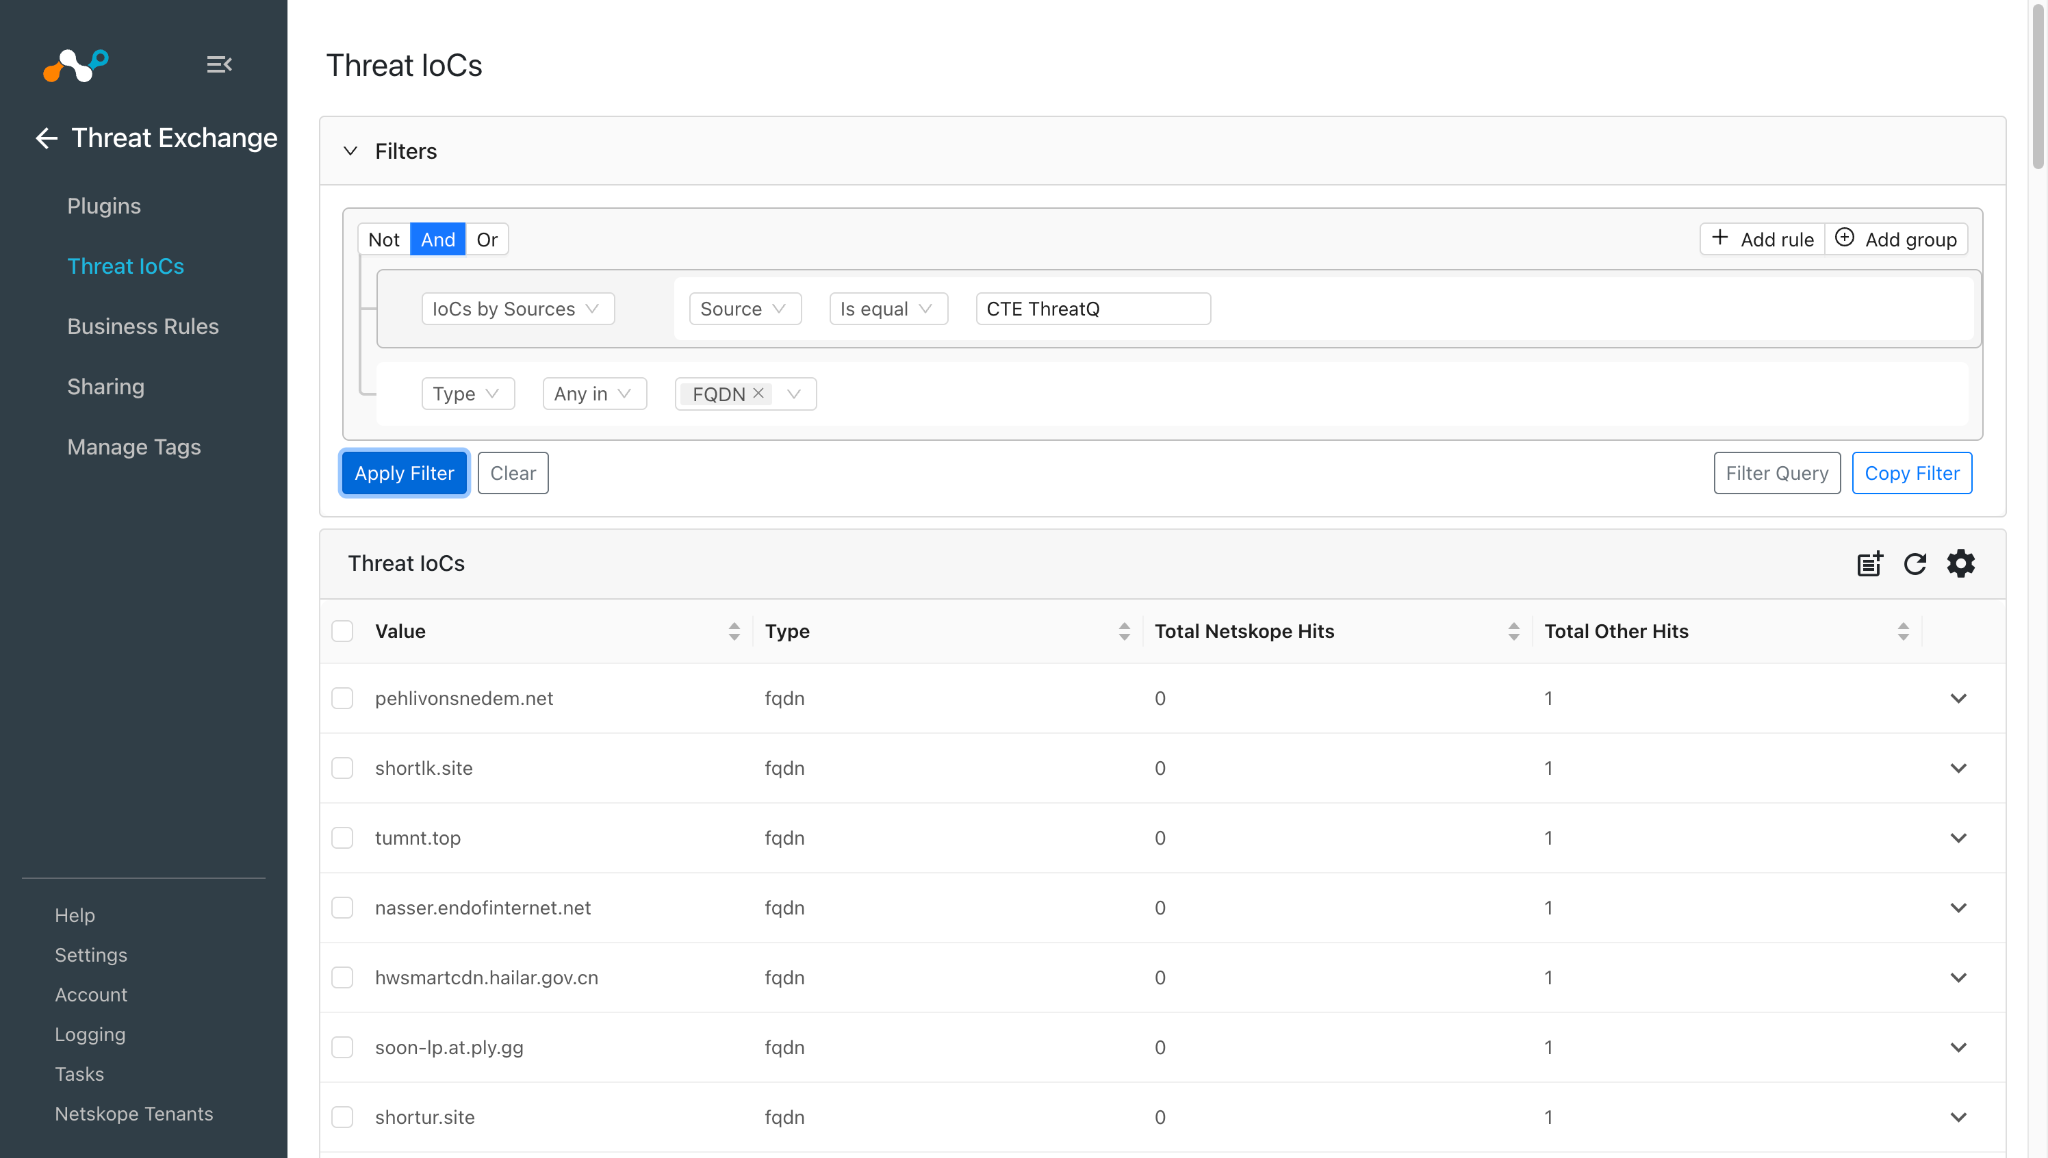
Pulled data will be listed at Threat IoCs. You can filter the IoCs pulled from the platform using the filter: sources.source Like “<plugin name>”
We can validate the pulled IoCs at Threat IoCs:
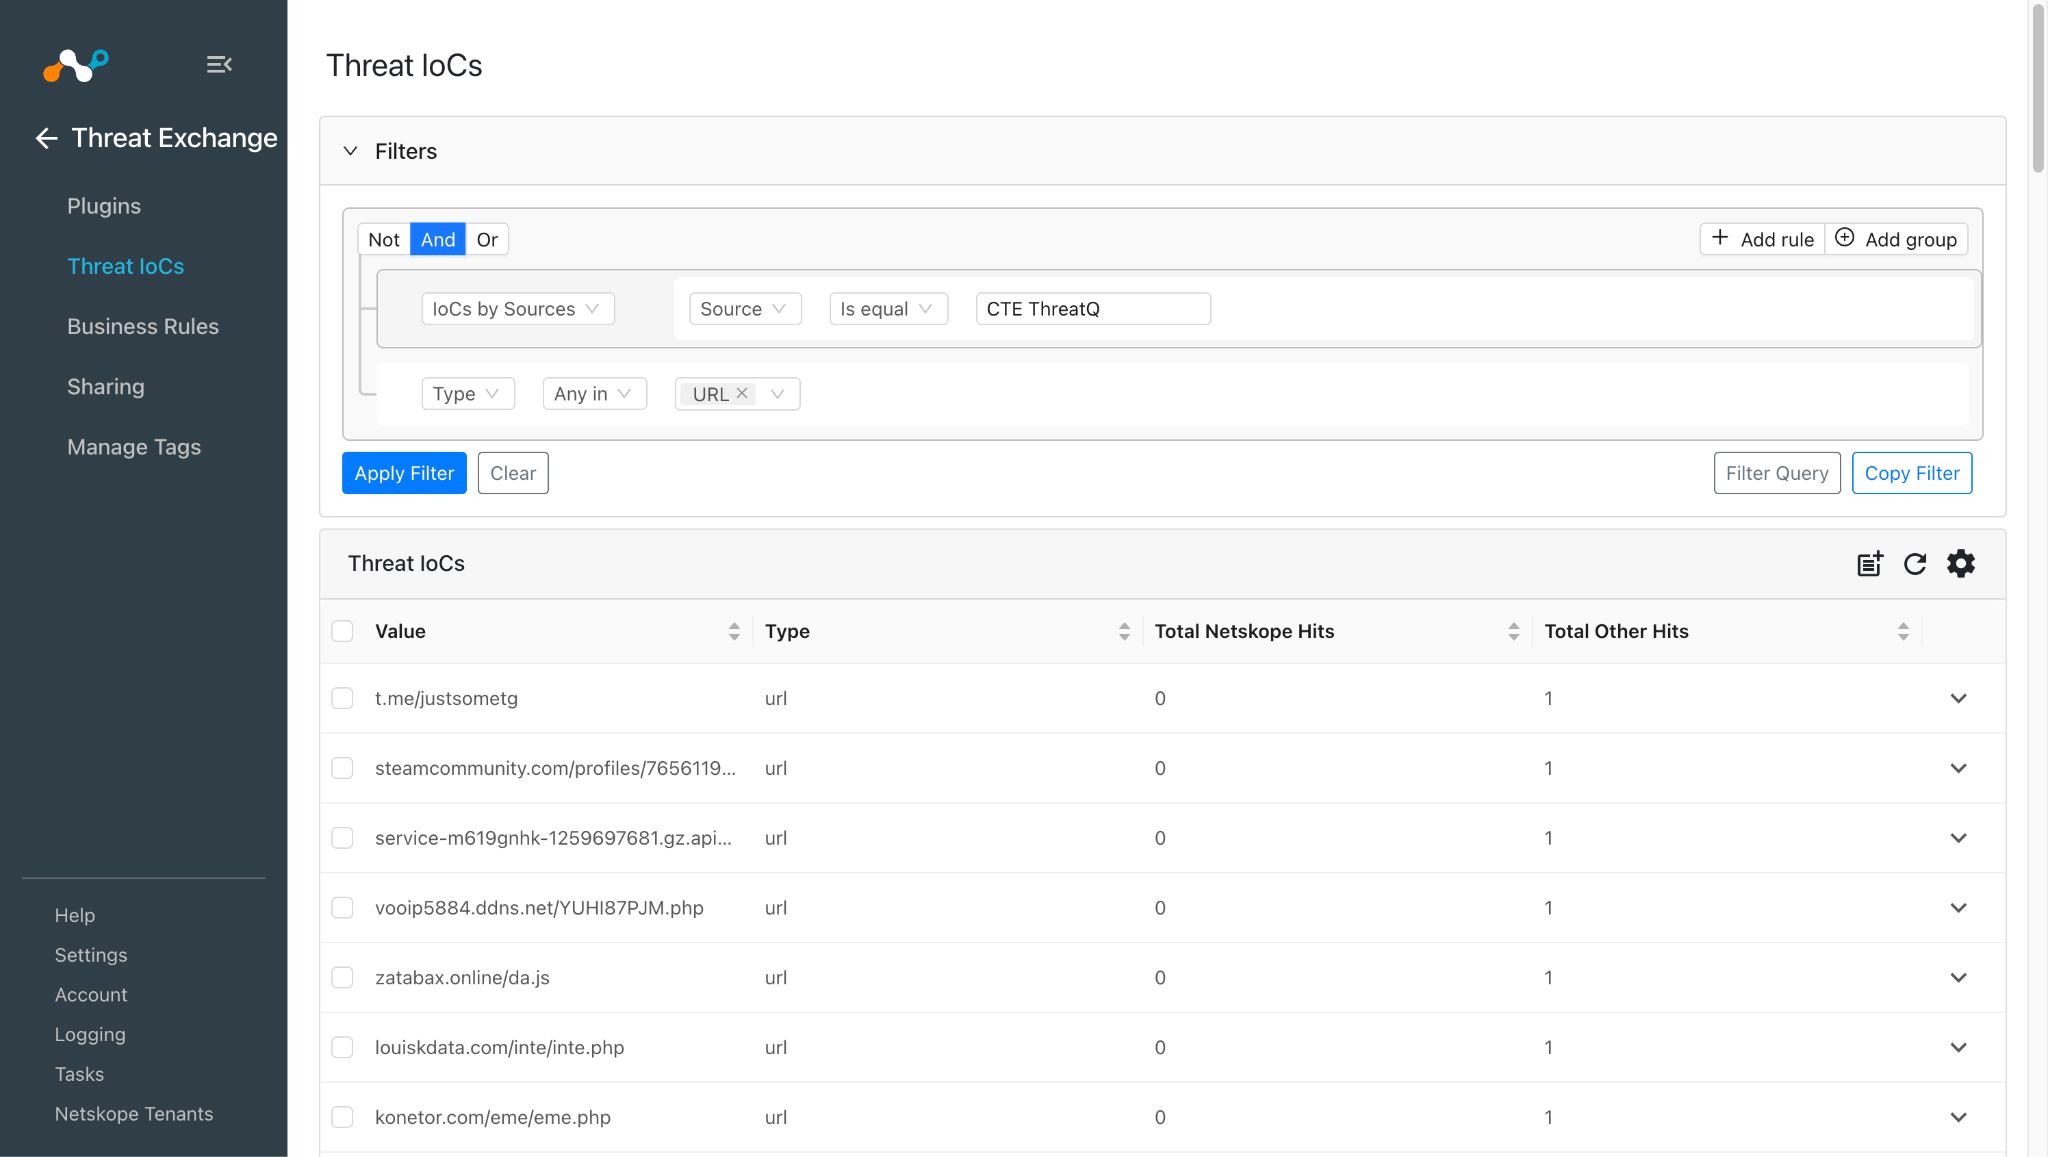
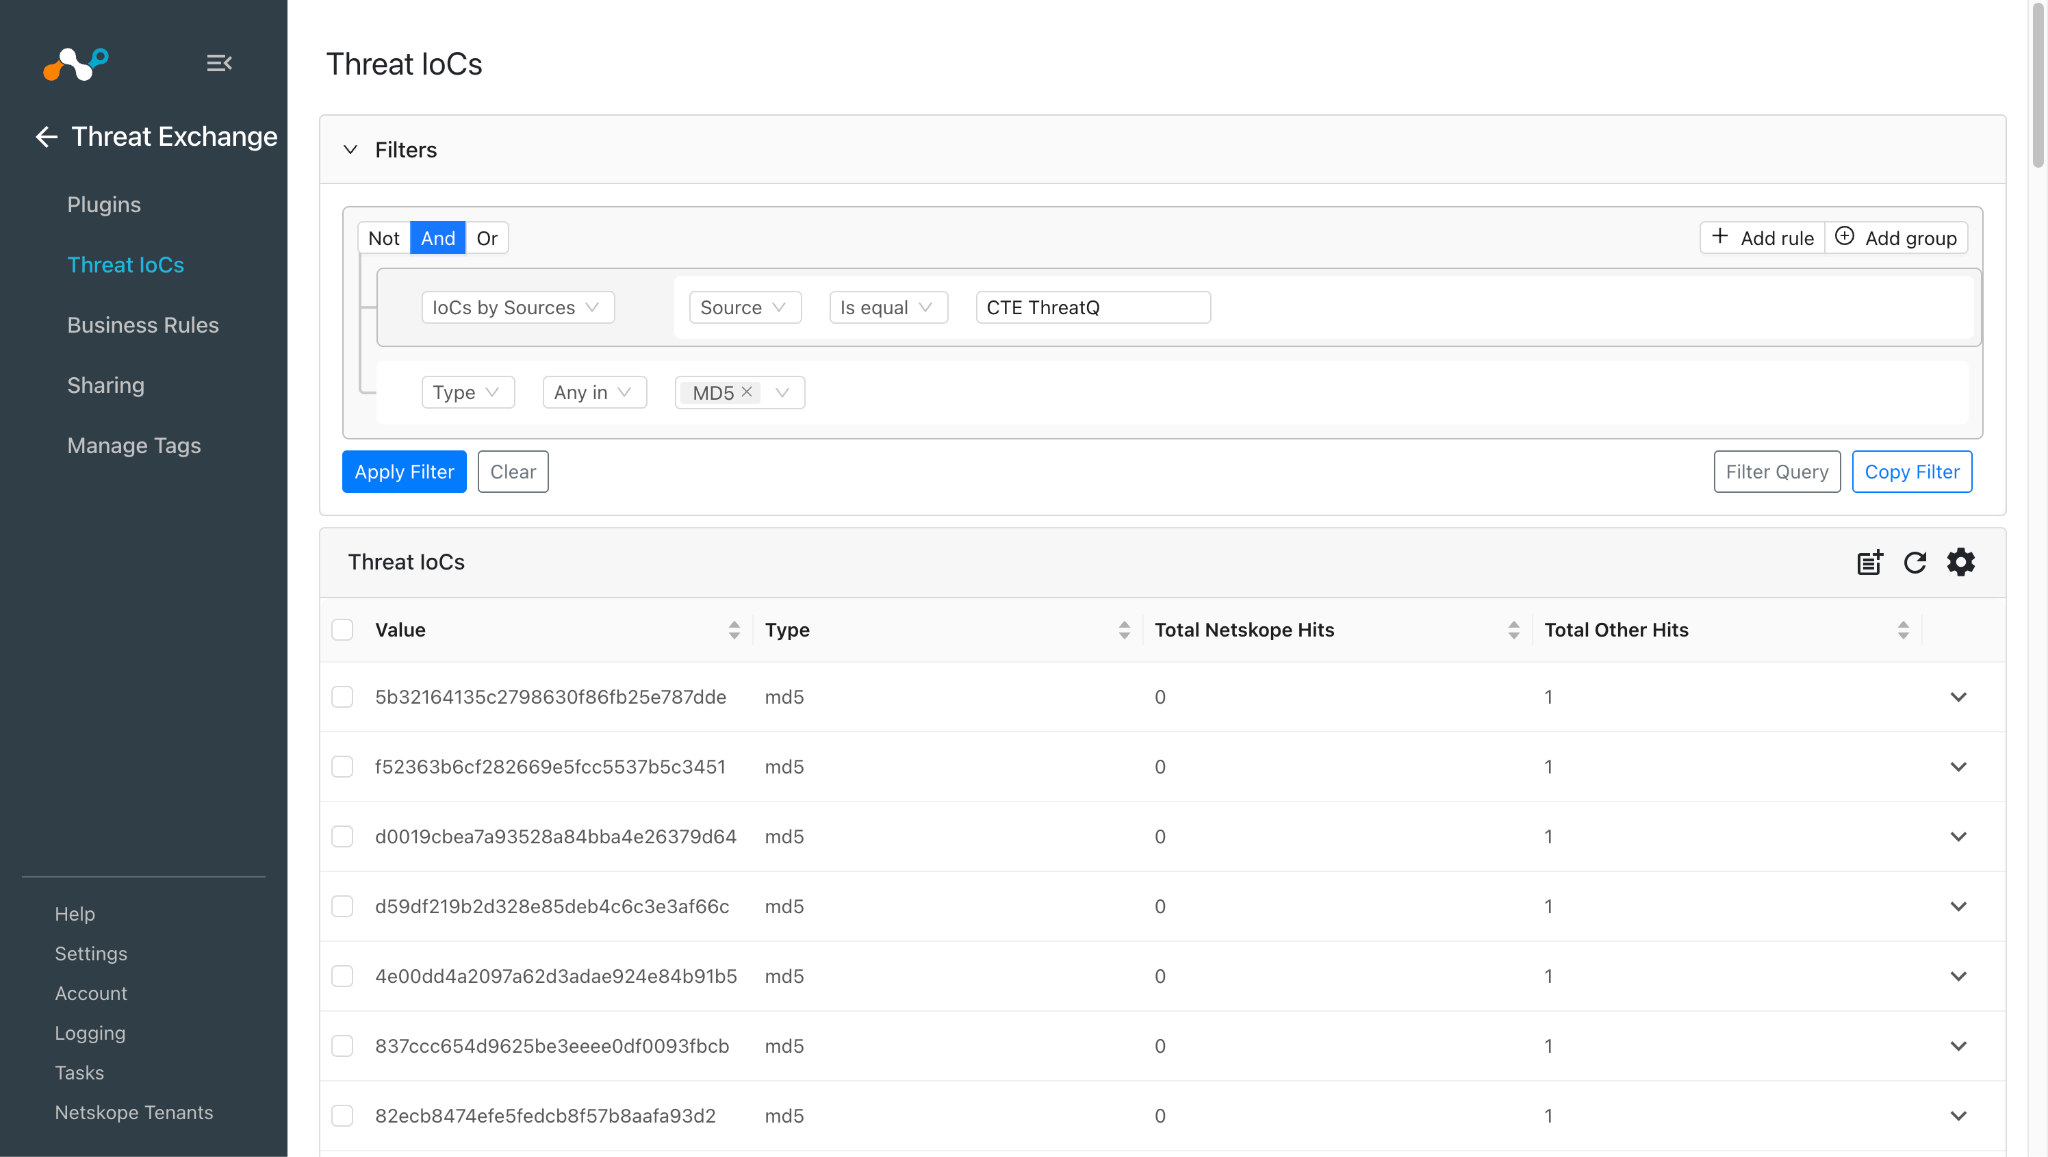
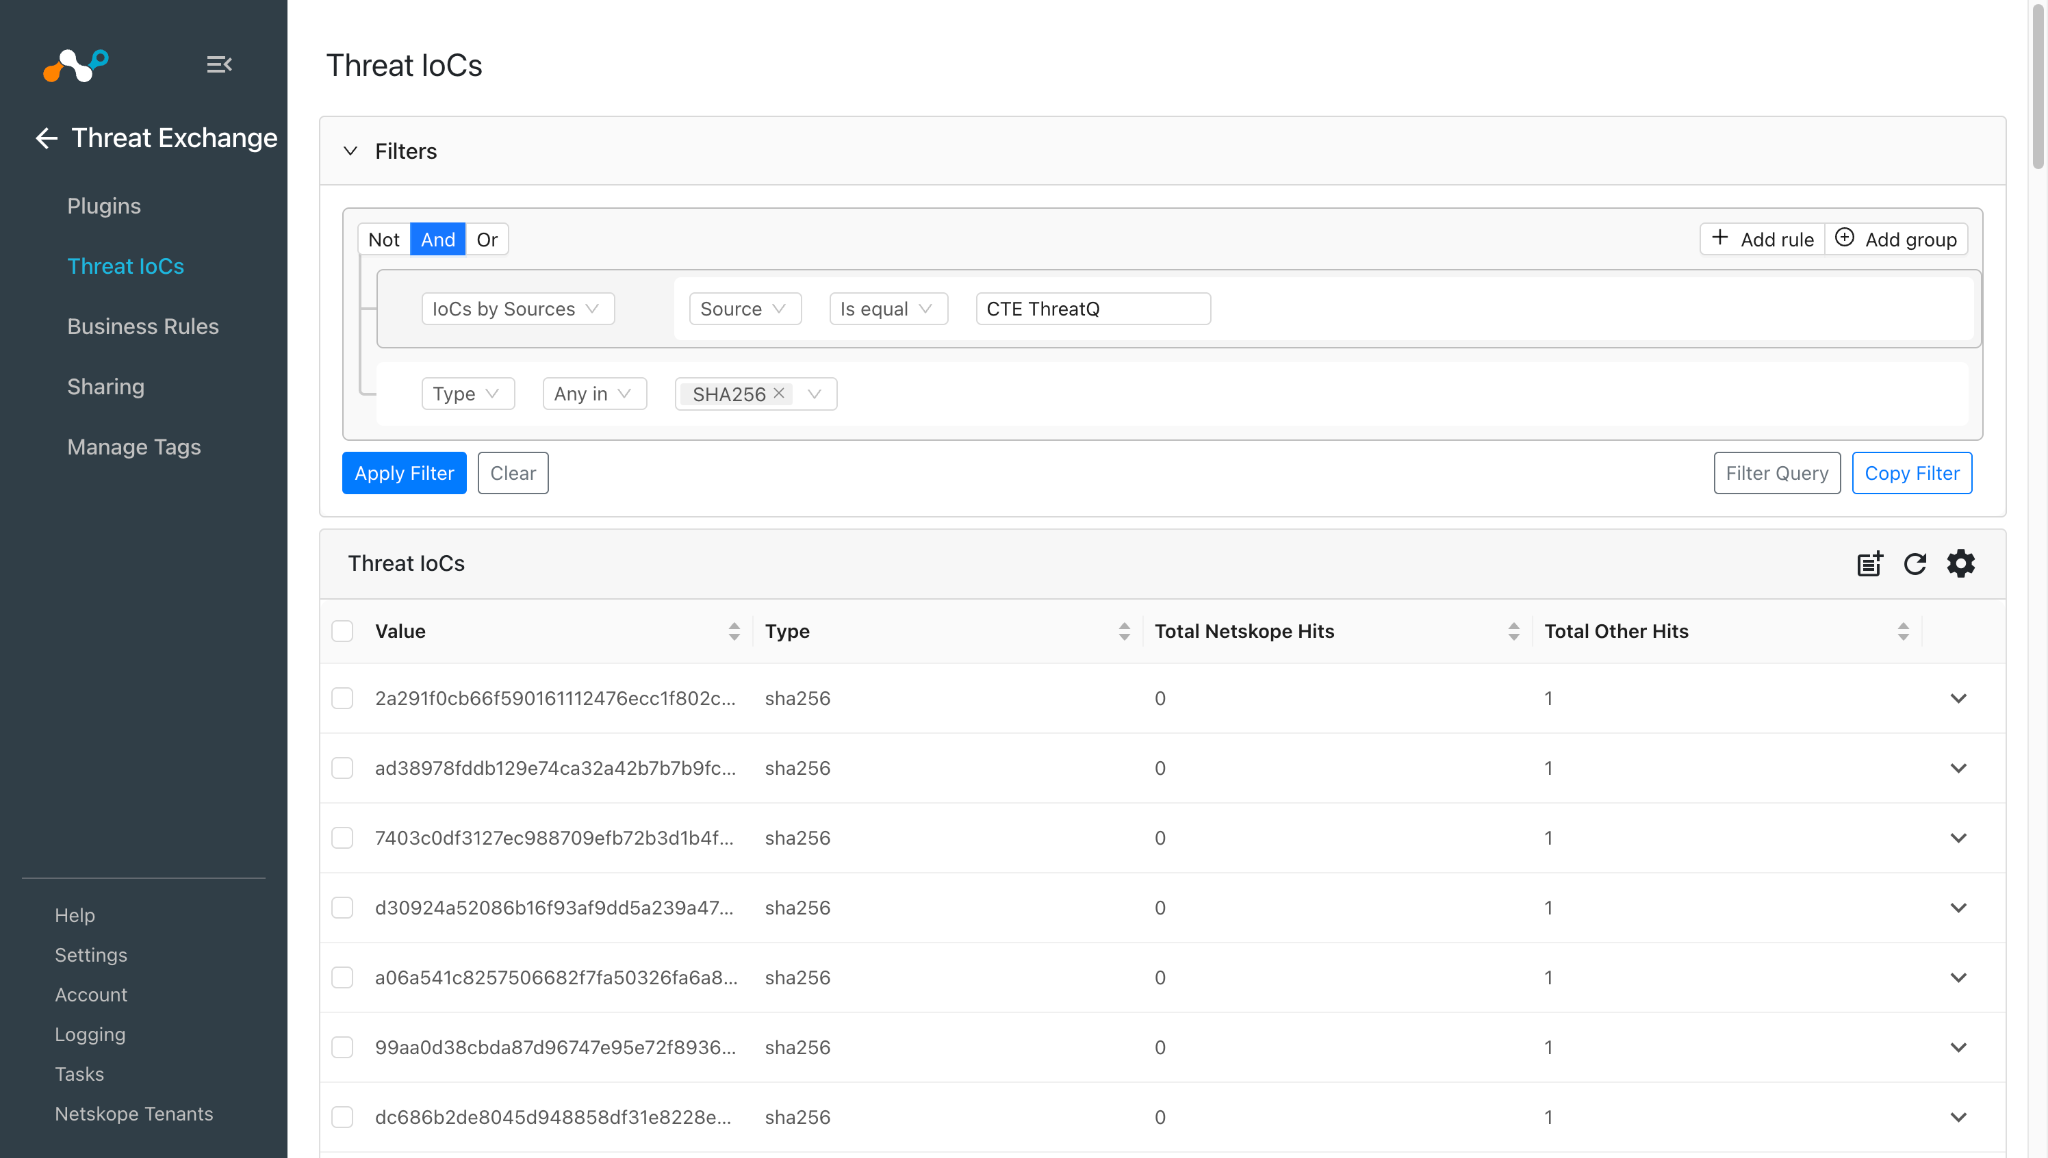
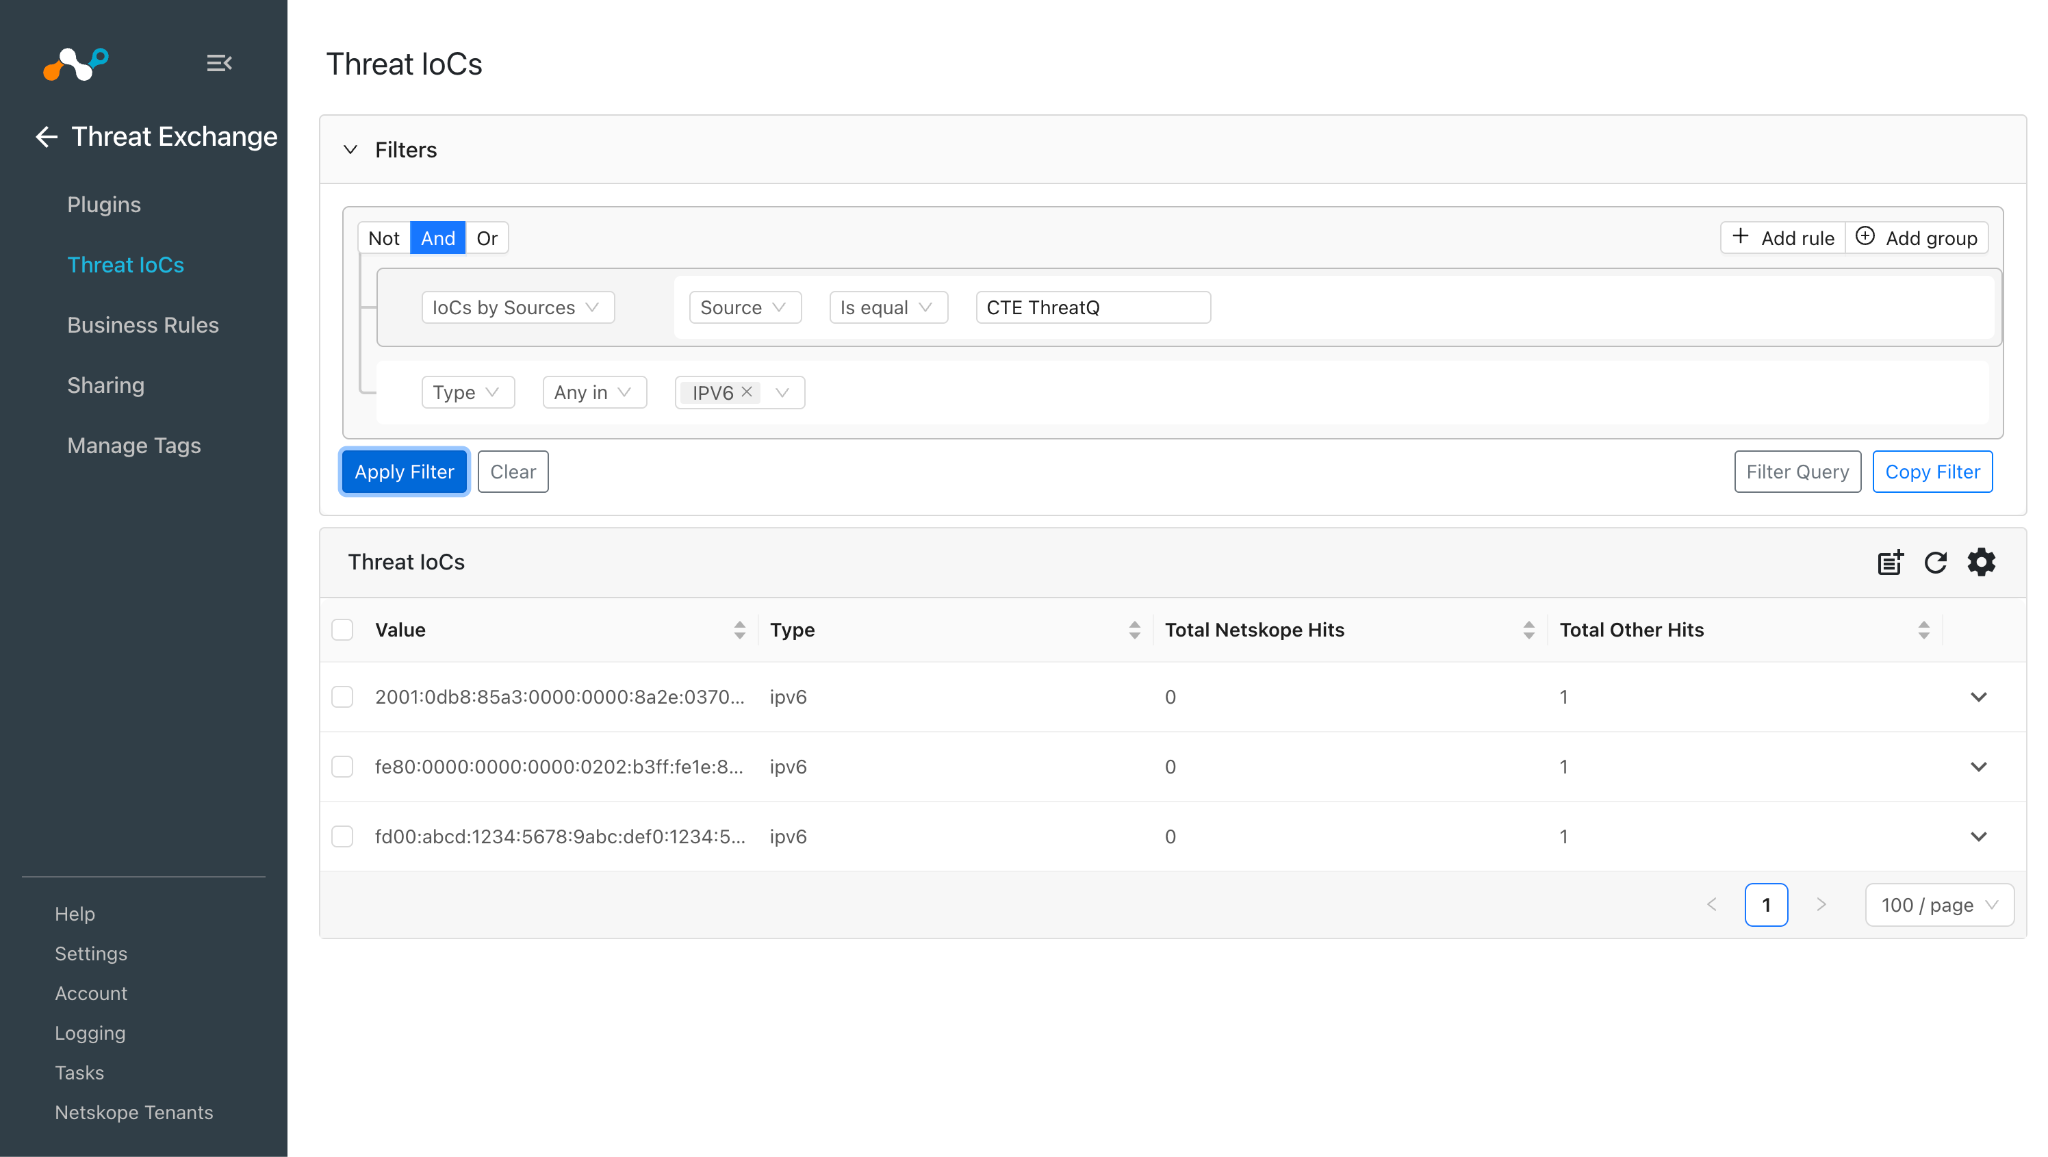
To check the available IoCs pulling on the ThreatQ platform, go to ThreatQ Platform > ThreatLibrary > Indicators.
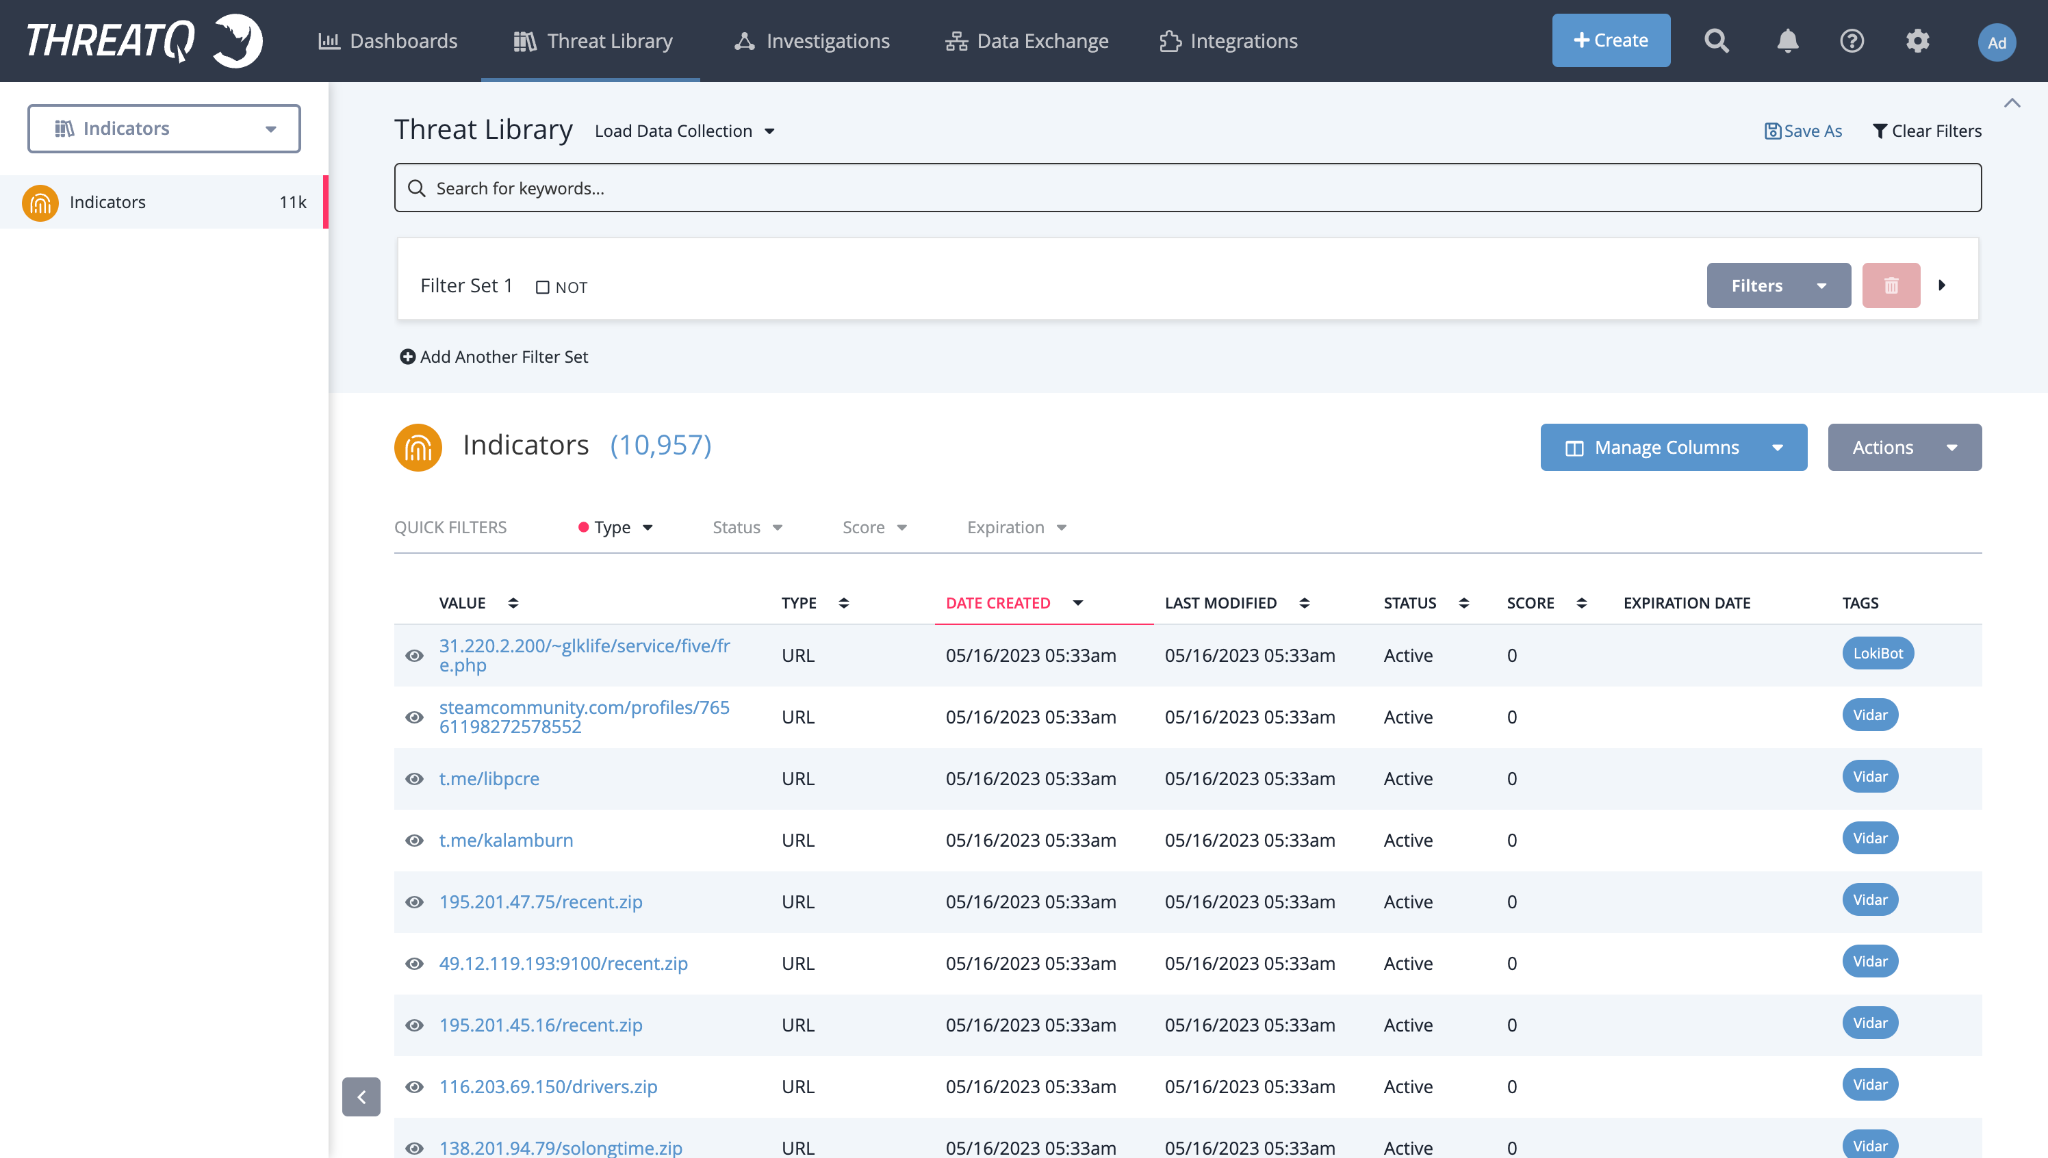
Note that if you need to filter the IoCs based on the search names used while configuring the plugin.
Validate the Retraction
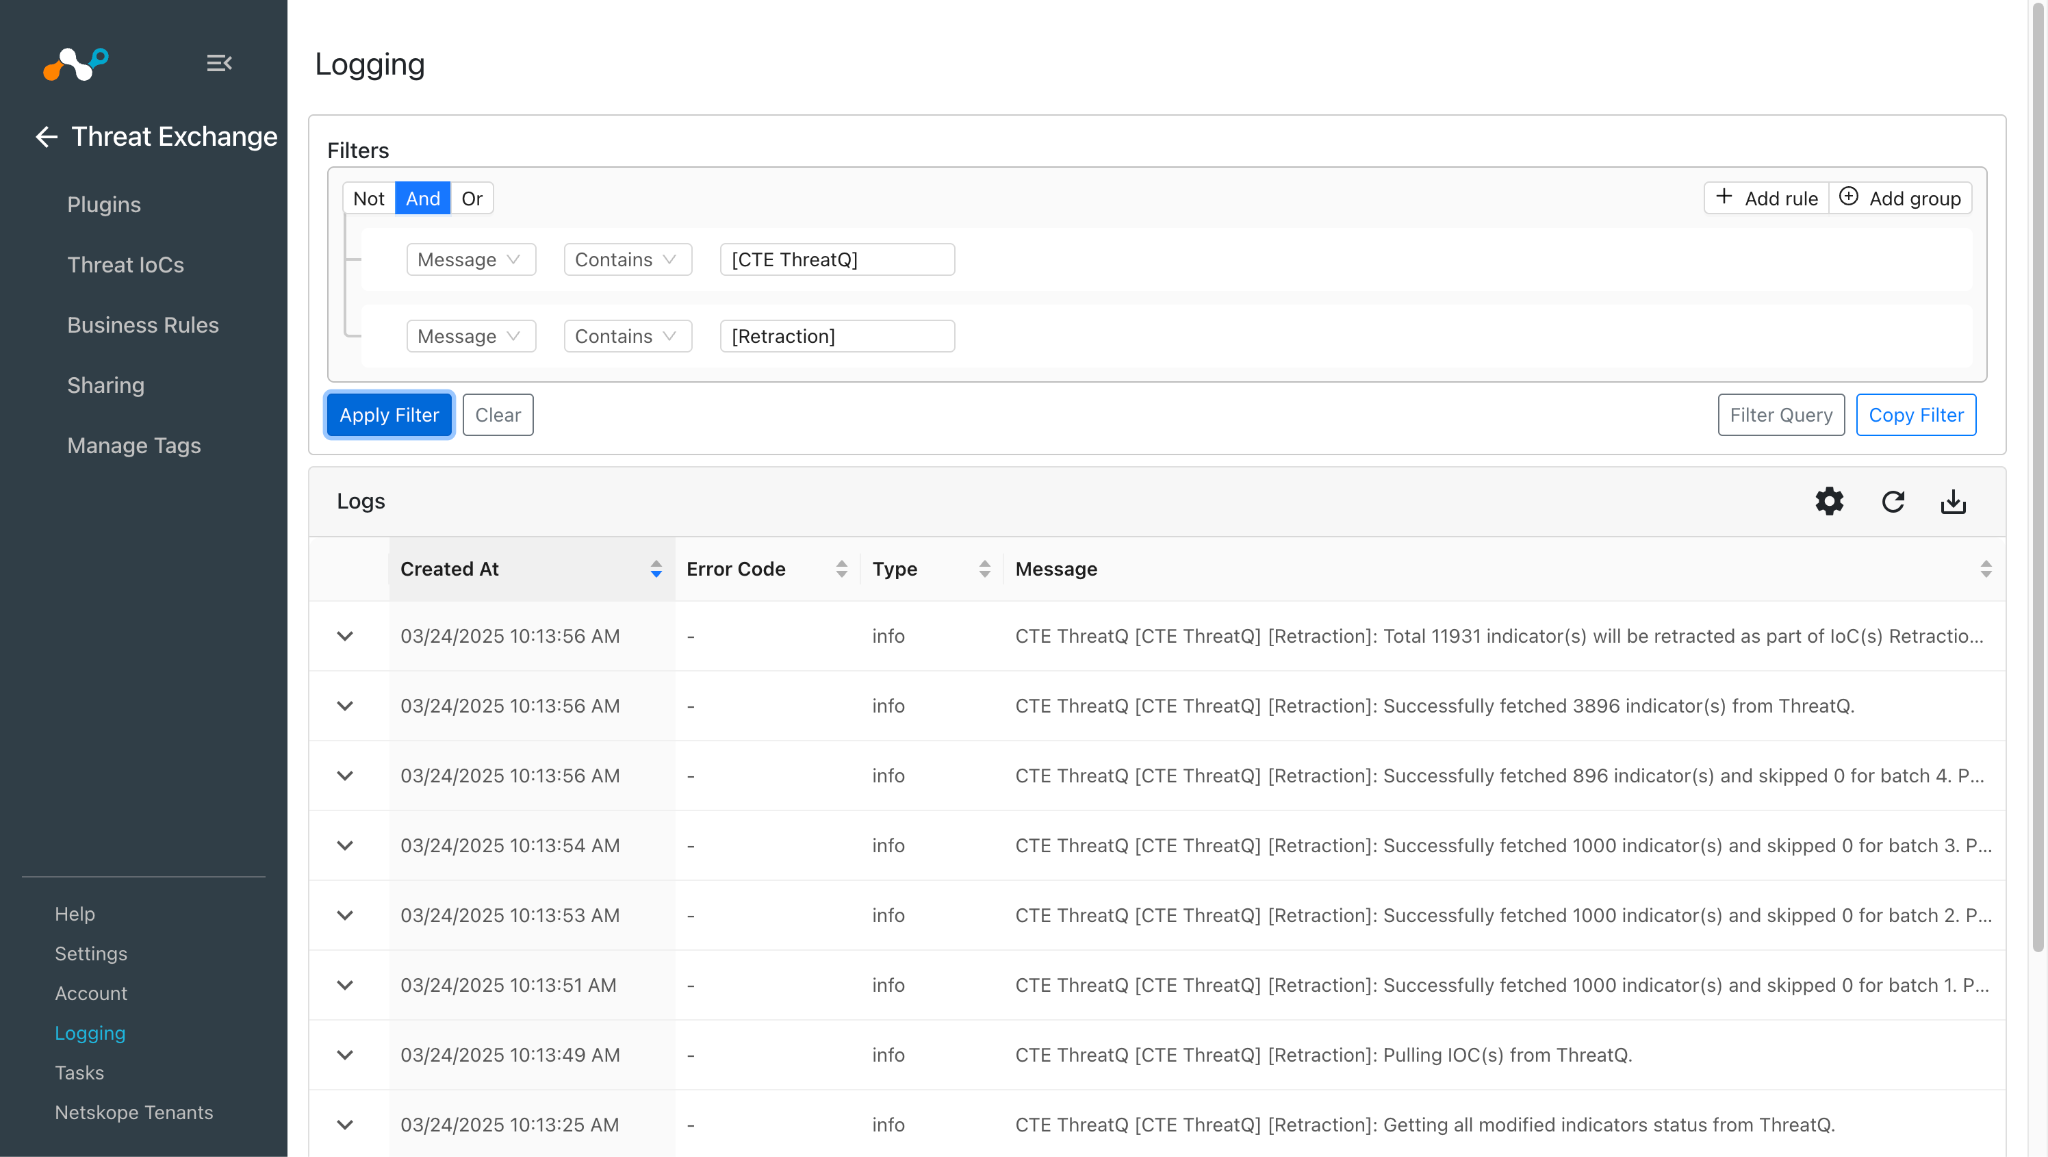
You can filter the logs related to retraction by using the filter: sources.source Like “<plugin configuration name> [Retraction]”.
Note that for the ThreatQ plugin, the working of retraction is based on the ThreatQ Search names. This means only those indicators will be marked retracted, which were already pulled and later on they are not present in the provided search names ( For example: Either the indicators were deleted from the source platform, or the search name in the plugin configuration was updated).
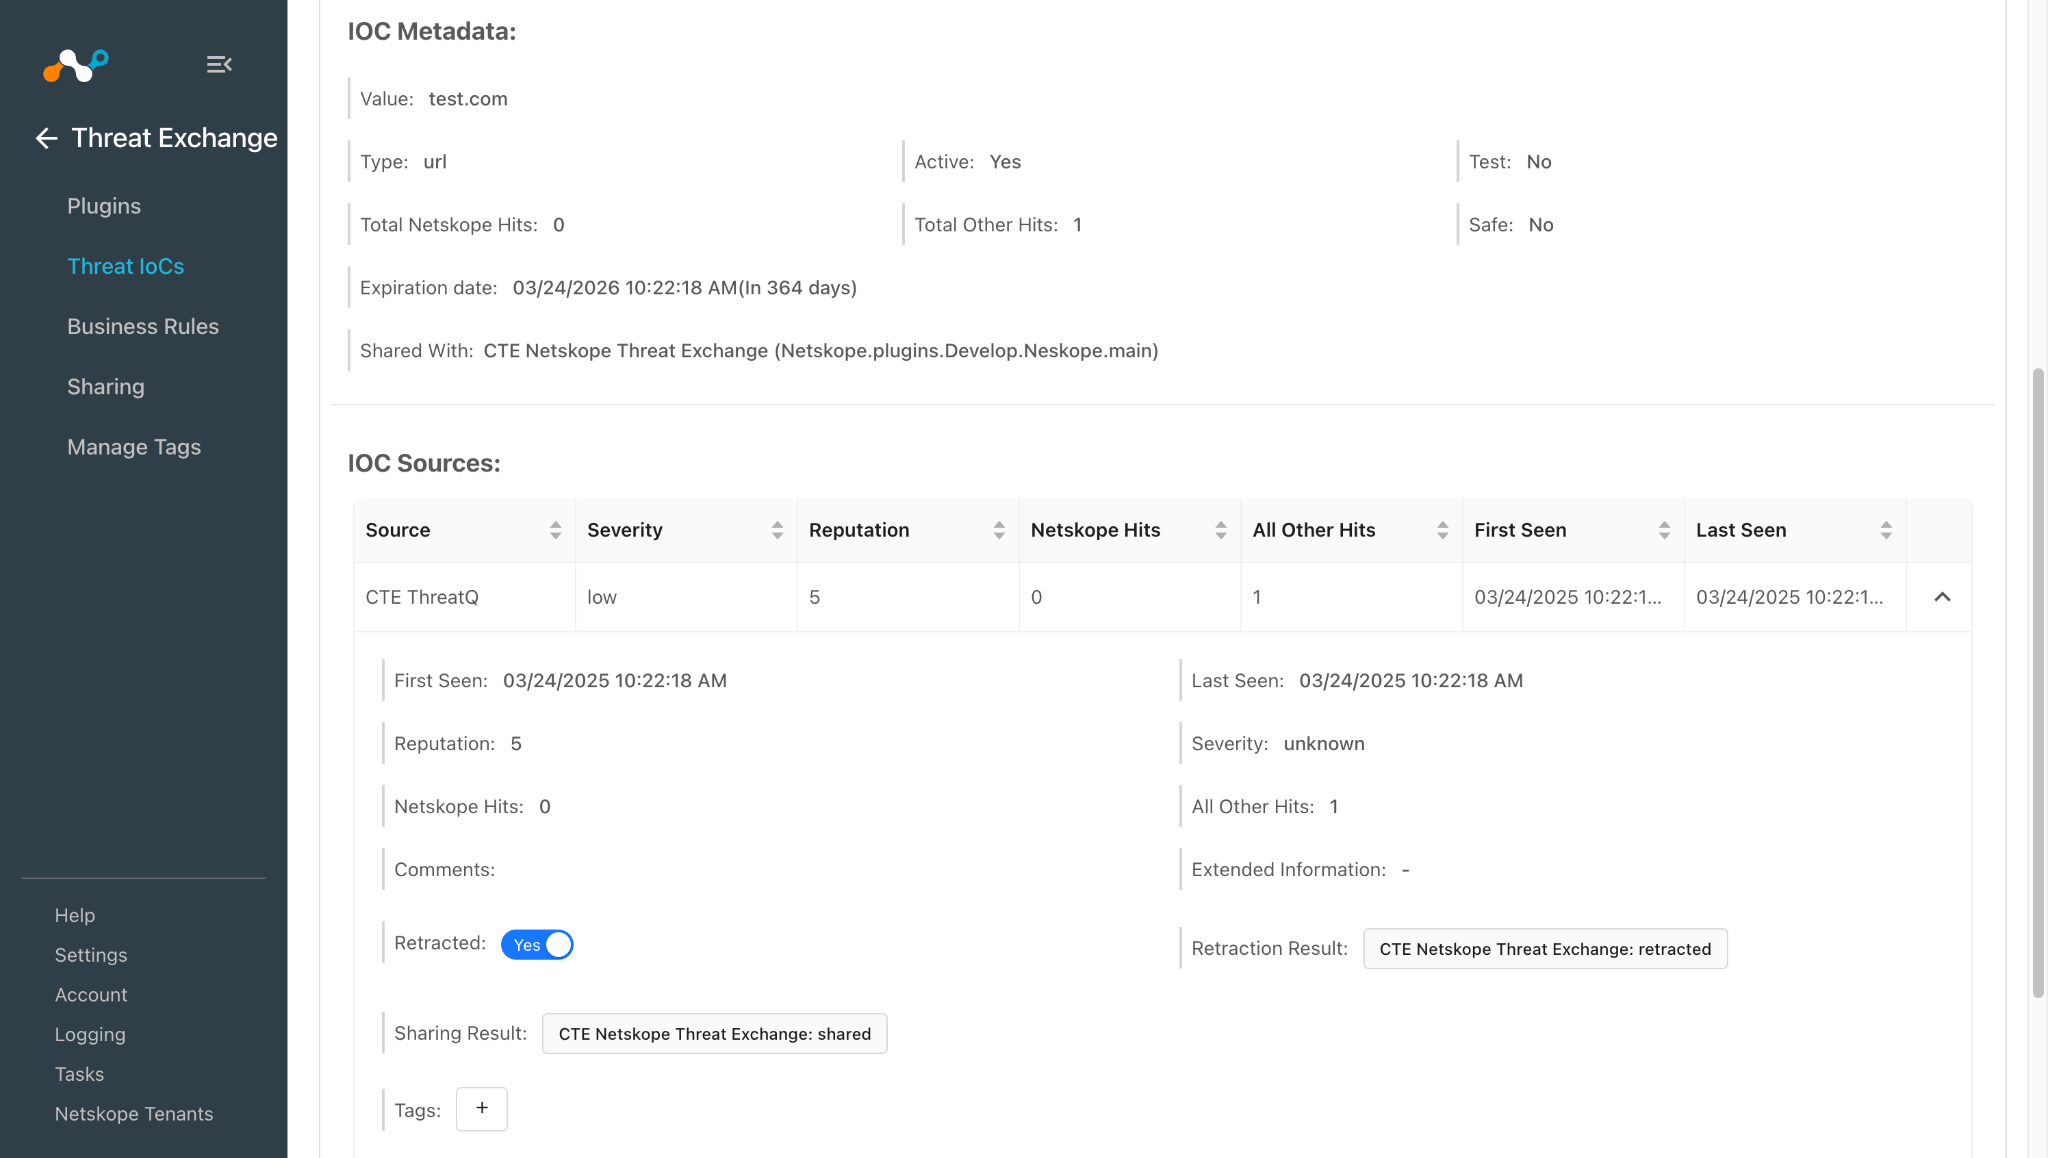
You can validate the same at Threat IoCs:
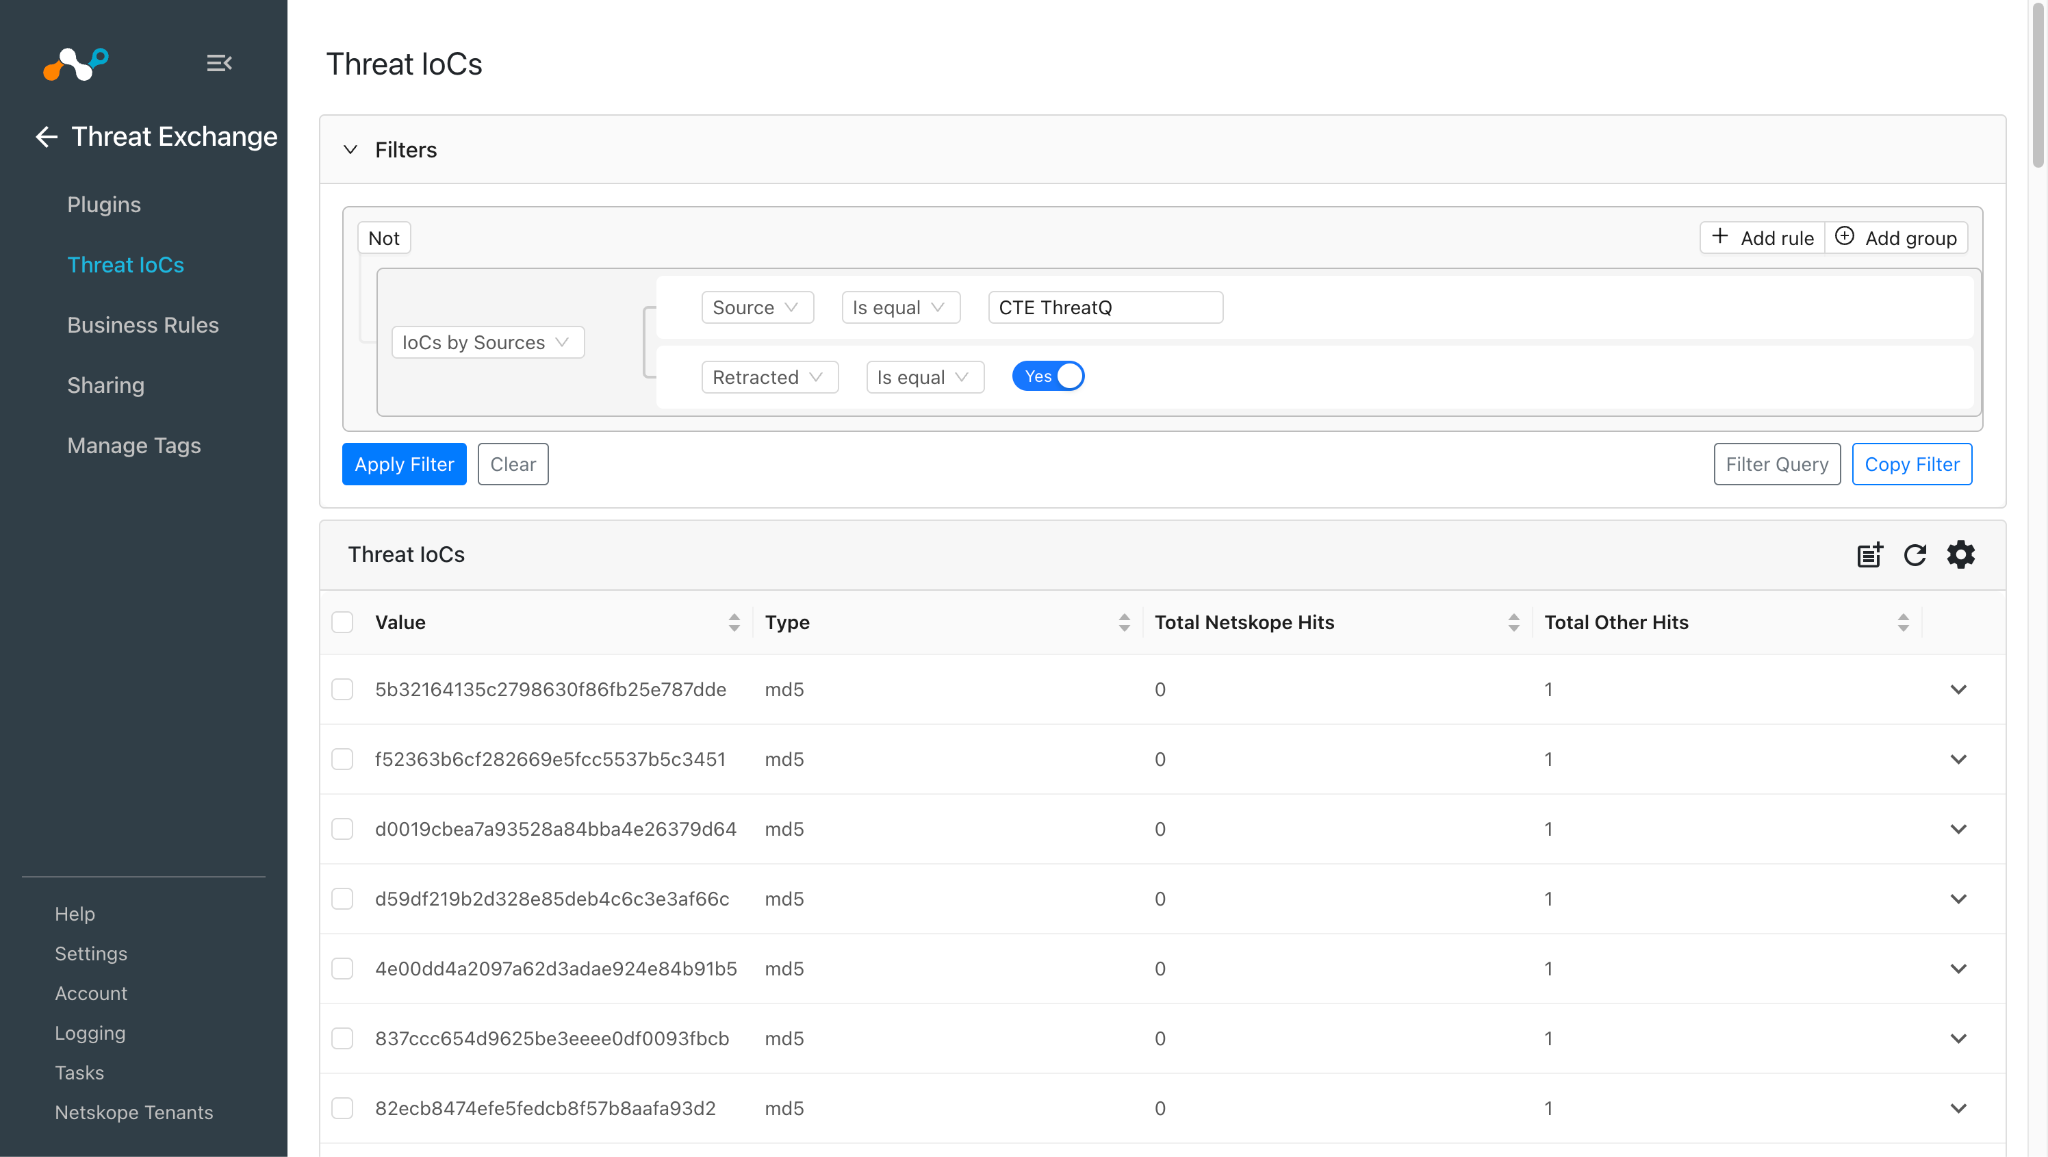
Note that the retraction will only work for Active indicators. The Inactive indicators will not be marked as retracted in Cloud Exchange.
This plugin does not support sharing of IoCs to the ThreatQ platform, but the IoCs pulled from ThreatQ plugin can be shared to other third party platforms. When the IoCs shared from ThreatQ to a 3rd-party are deleted from that platform, then it will be marked as “<plugin-config-name>: retracted” in the Retraction Result. If they are not deleted from the 3rd-party platform, the Retraction Result will be pending or else be retracted.
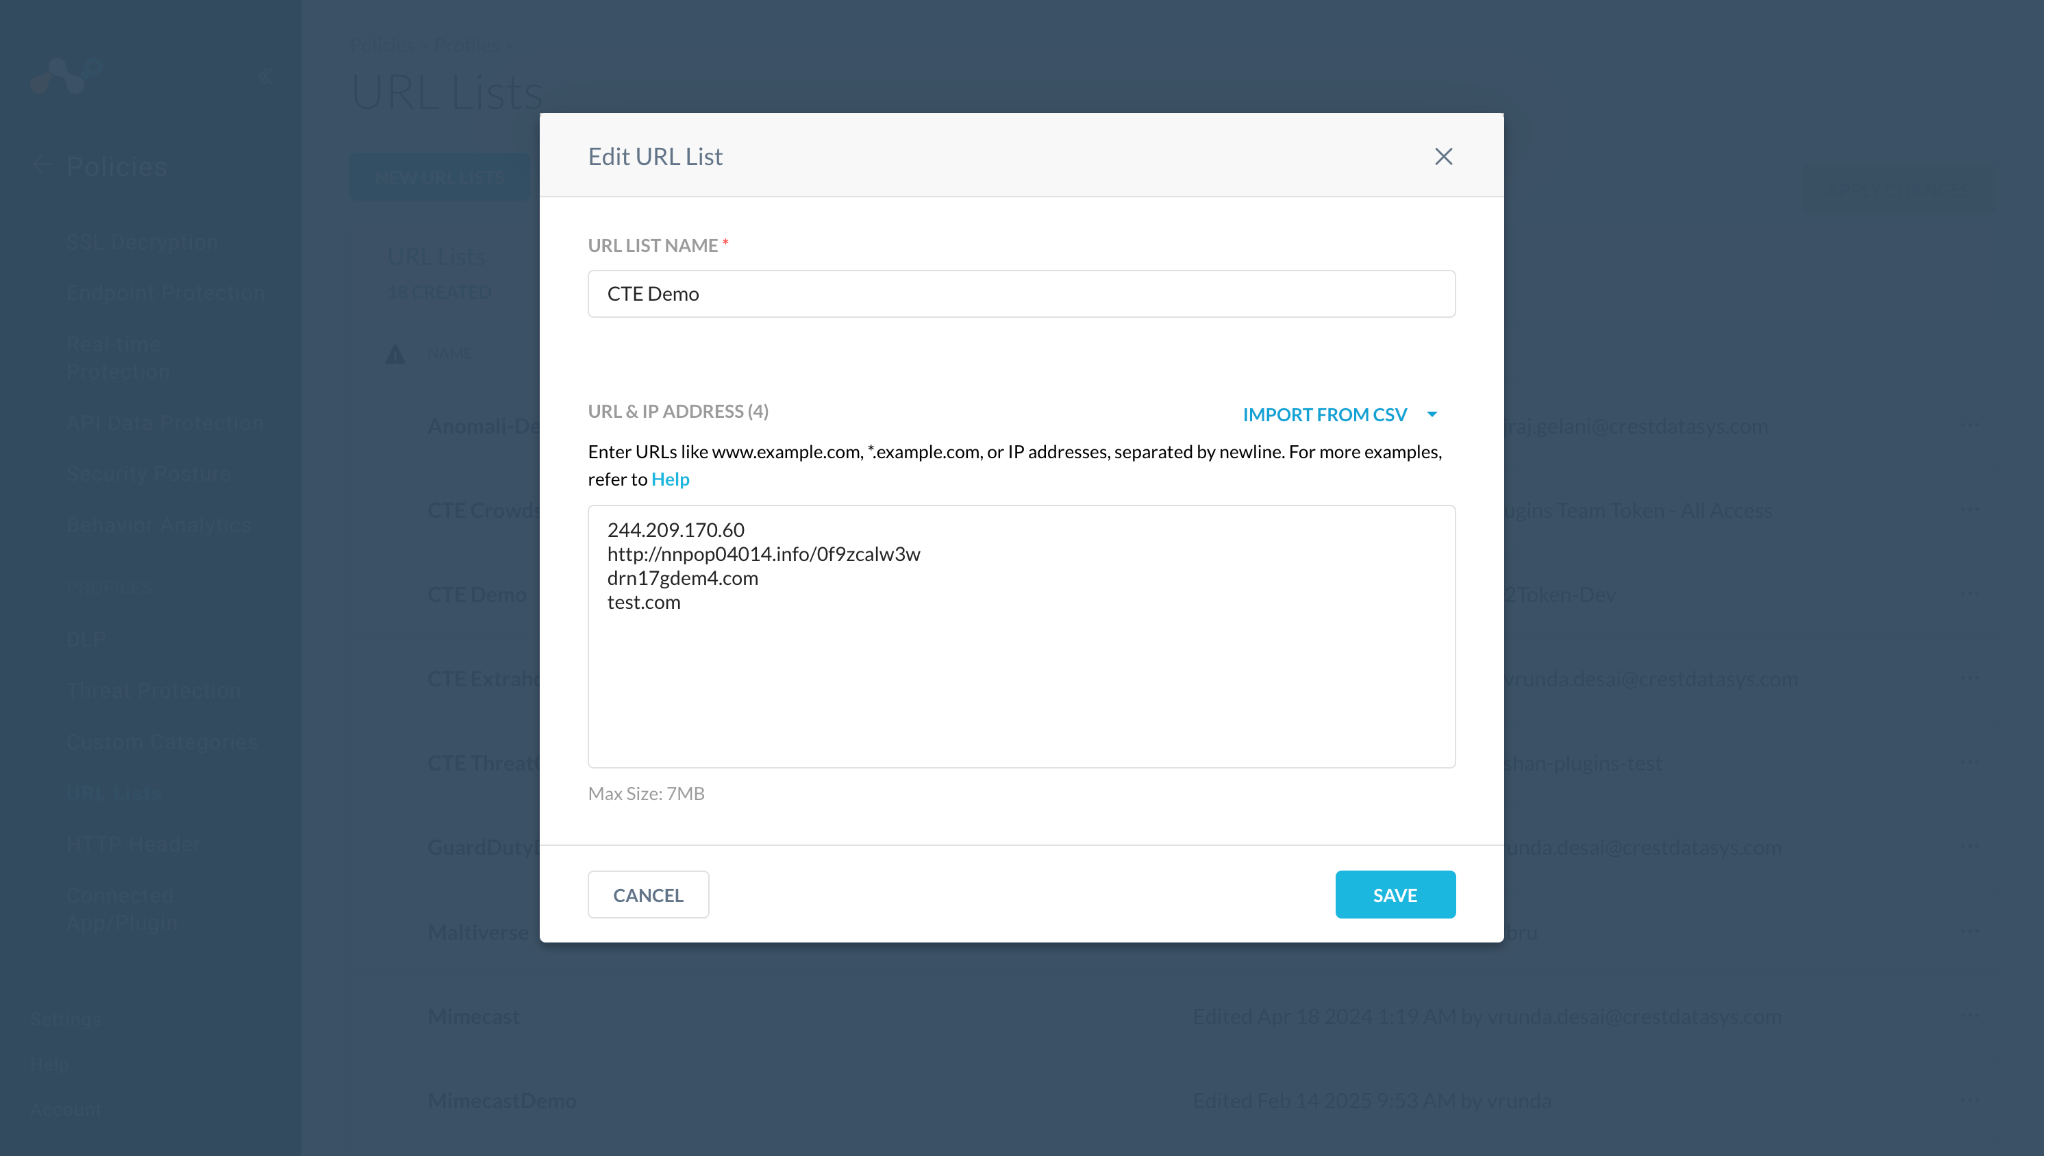
IoCs pulled from ThreatQ were shared to a URL List CTE Demo on the Netskope tenant.
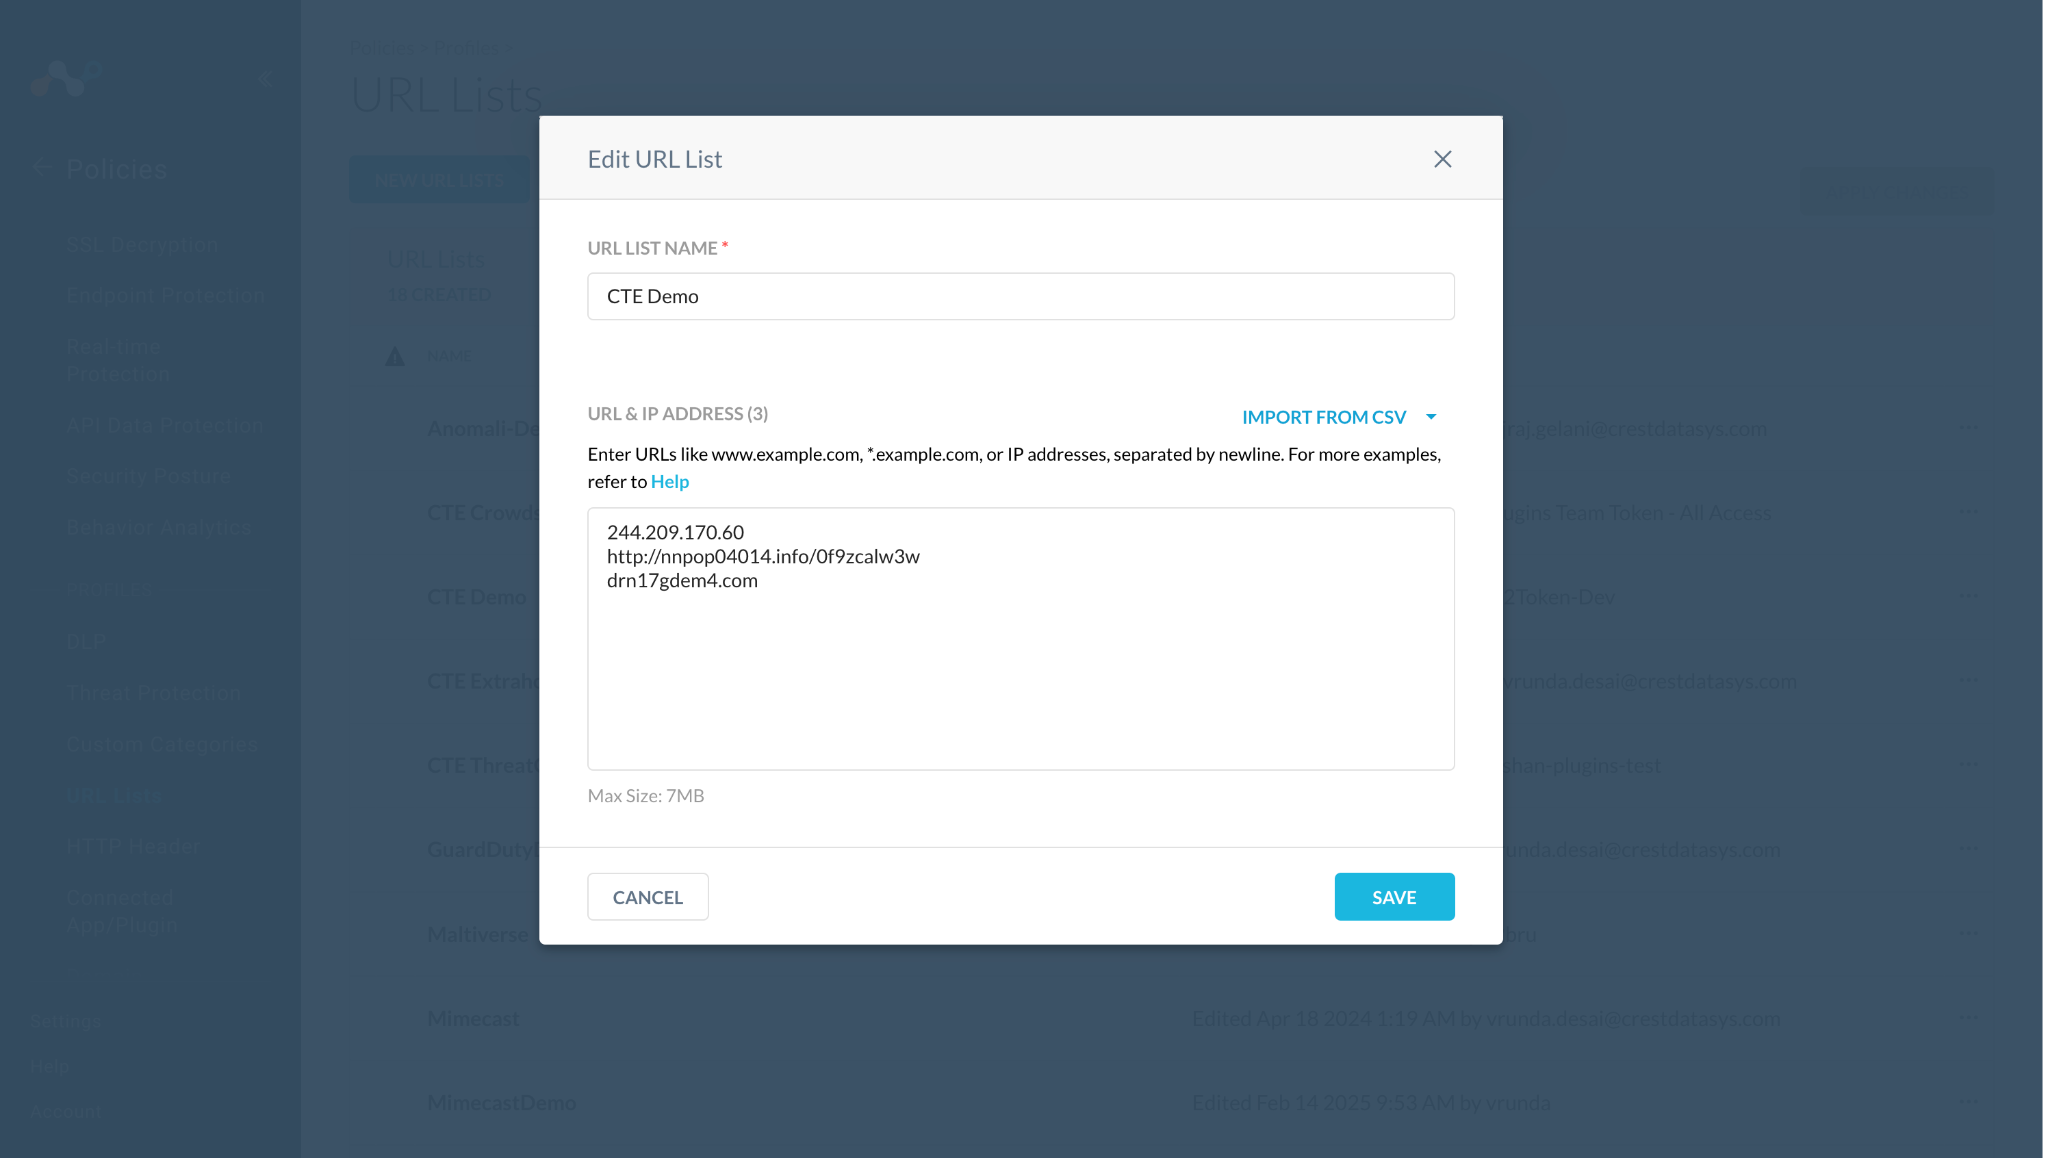
If any of the shared IoCs are marked as retracted in Cloud Exchange, it would be deleted from the Netskope tenant as well. Here, you can see the IoCs which were marked Retracted “Yes” in the retraction screenshot, and were also deleted from the URL List on the Netskope tenant.
Troubleshooting the ThreatQ Plugin
Unable to configure the ThreatQ plugin
It might be due to one of these reasons:
- Invalid configuration parameters
- SSL verification
What to do: Identify the root cause and follow the steps for solution.
- Invalid configuration parameters. Follow the steps in the Configure the ThreatQ Plugin section to verify the configuration parameters are valid.
- SSL verification: You might encounter this error for SSL verification.
| 03/21/2025 5:25:51 PM | – | error | CTE ThreatQ [CTE ThreatQ]: Unexpected validation error occurred while authenticating. Error: HTTPSConnectionPool(host=’10.50.1.21′, port=443): Max retries exceeded with url: /api/token?grant_type=client_credentials (Caused by SSLError(SSLCertVerificationError(1, ‘[SSL: CERTIFICATE_VERIFY_FAILED] certificate verify failed: unable to get local issuer certificate (_ssl.c:1147)’))) |
If your ThreatQ instance is hosted on a local machine, then you need to disable the SSL verification while configuring the plugin.
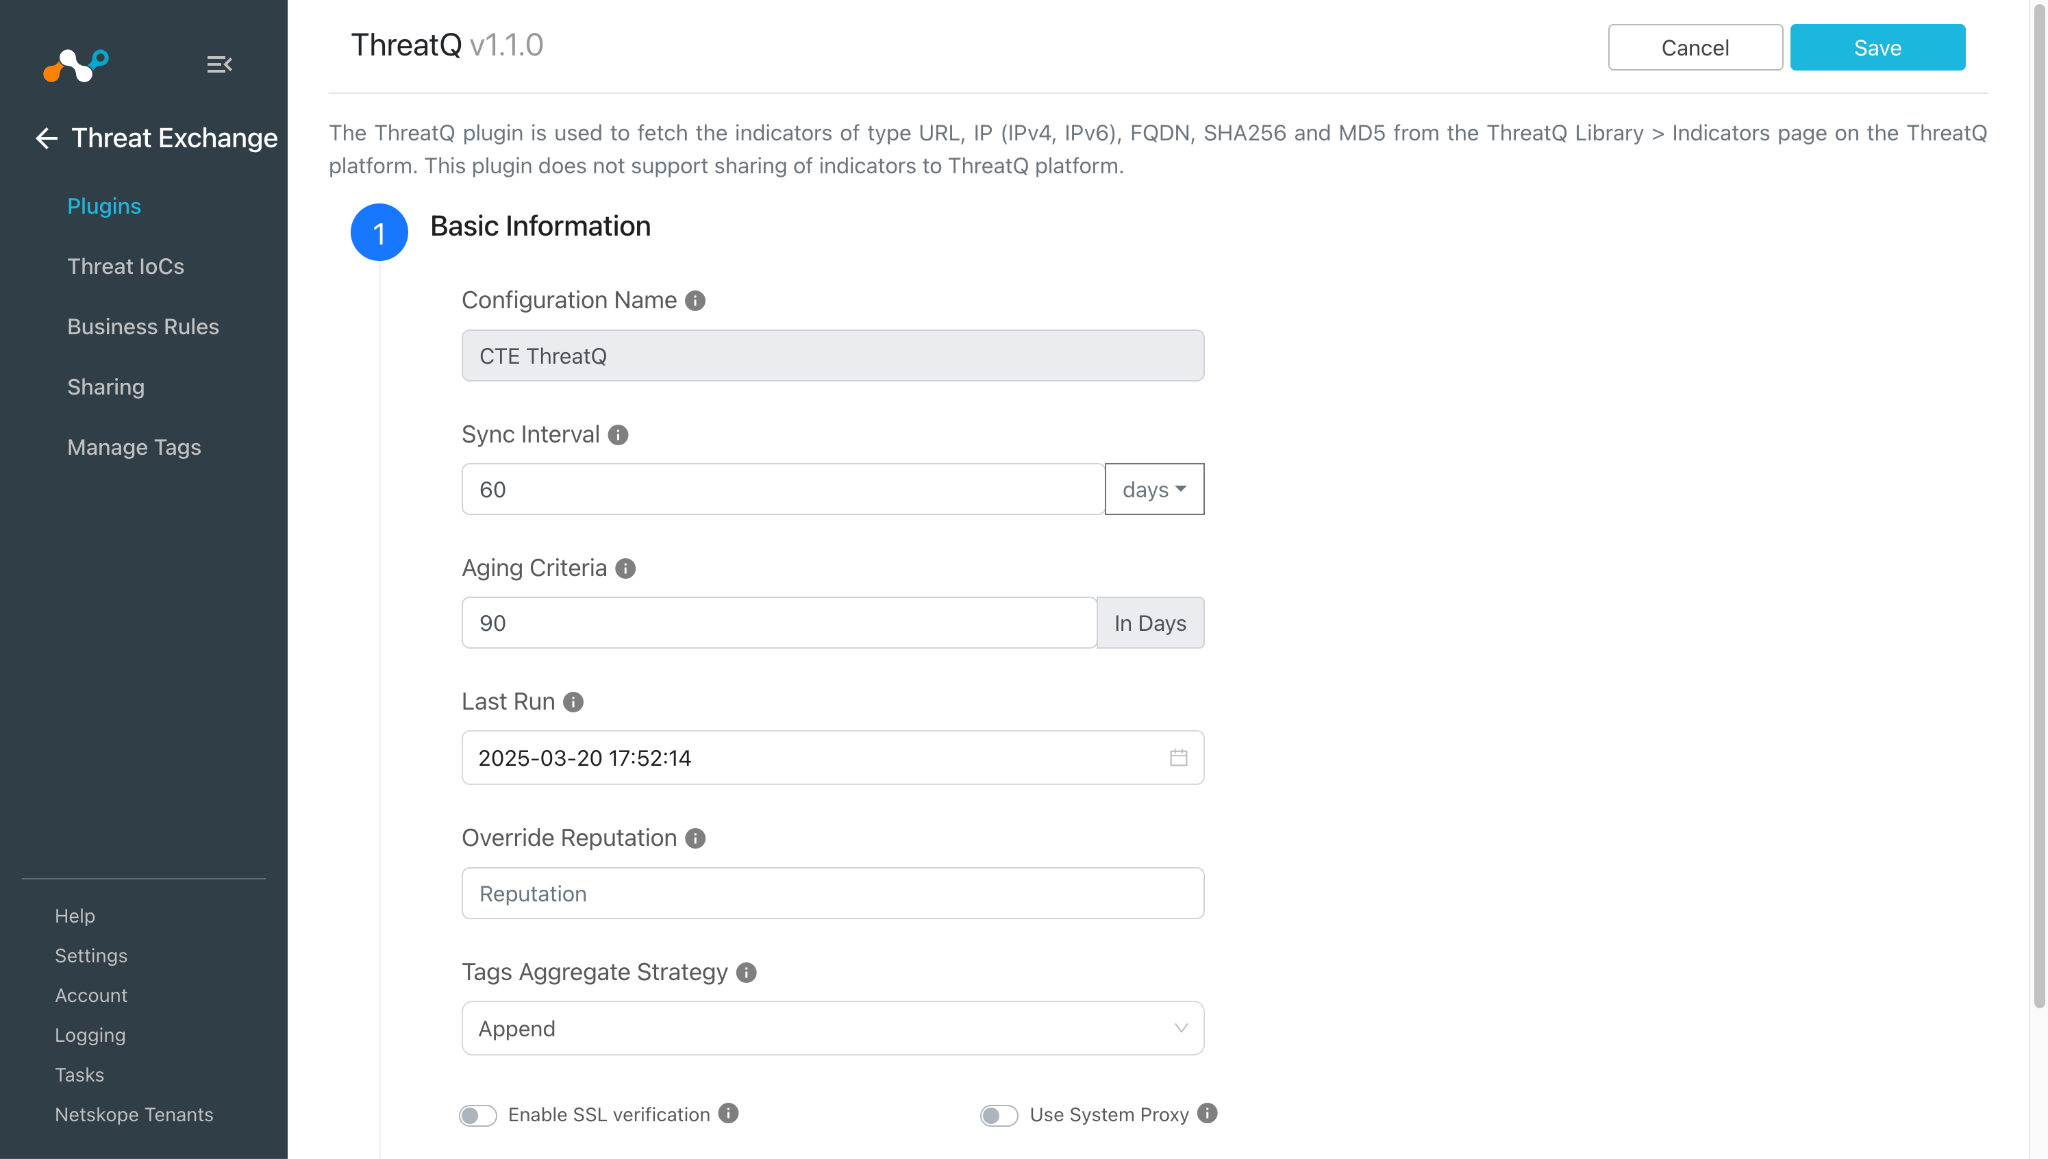
Unable to pull IOCs from the ThreatQ platform
After the plugin configuration, if the IoCs are not pulled from the platform, it might be due to one of these reasons:
- No IoCs are available on the platform to pull
- No IoCs are available related to the provided search name on the platform to pull
What to do: Identify the root cause and apply the solution.
If no IoCs are available on the platform to pull, check if the IoCs are present on the platform to pull.
To verify IoCs, go to ThreatQ Platform > ThreatLibrary > Indicators.
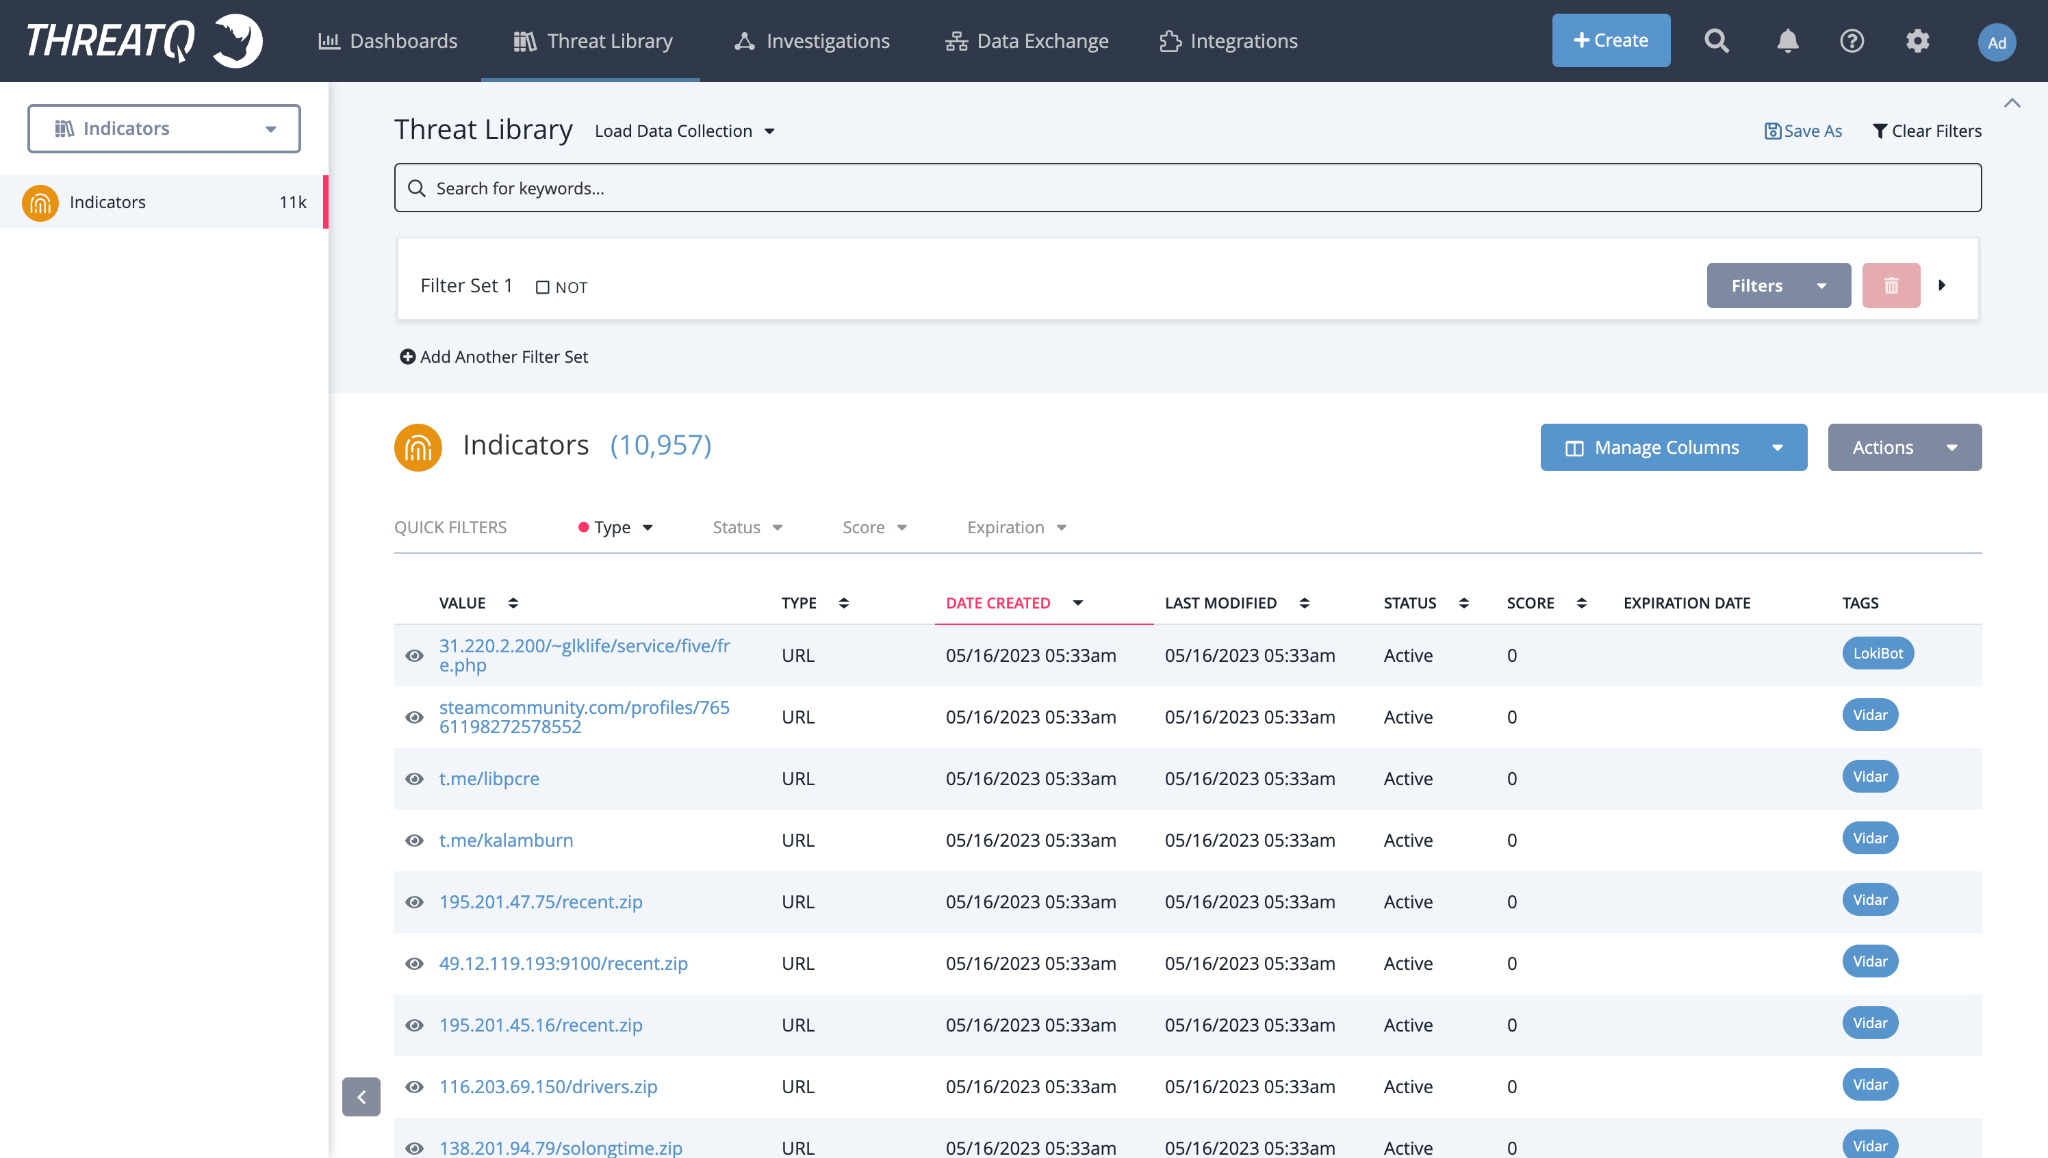
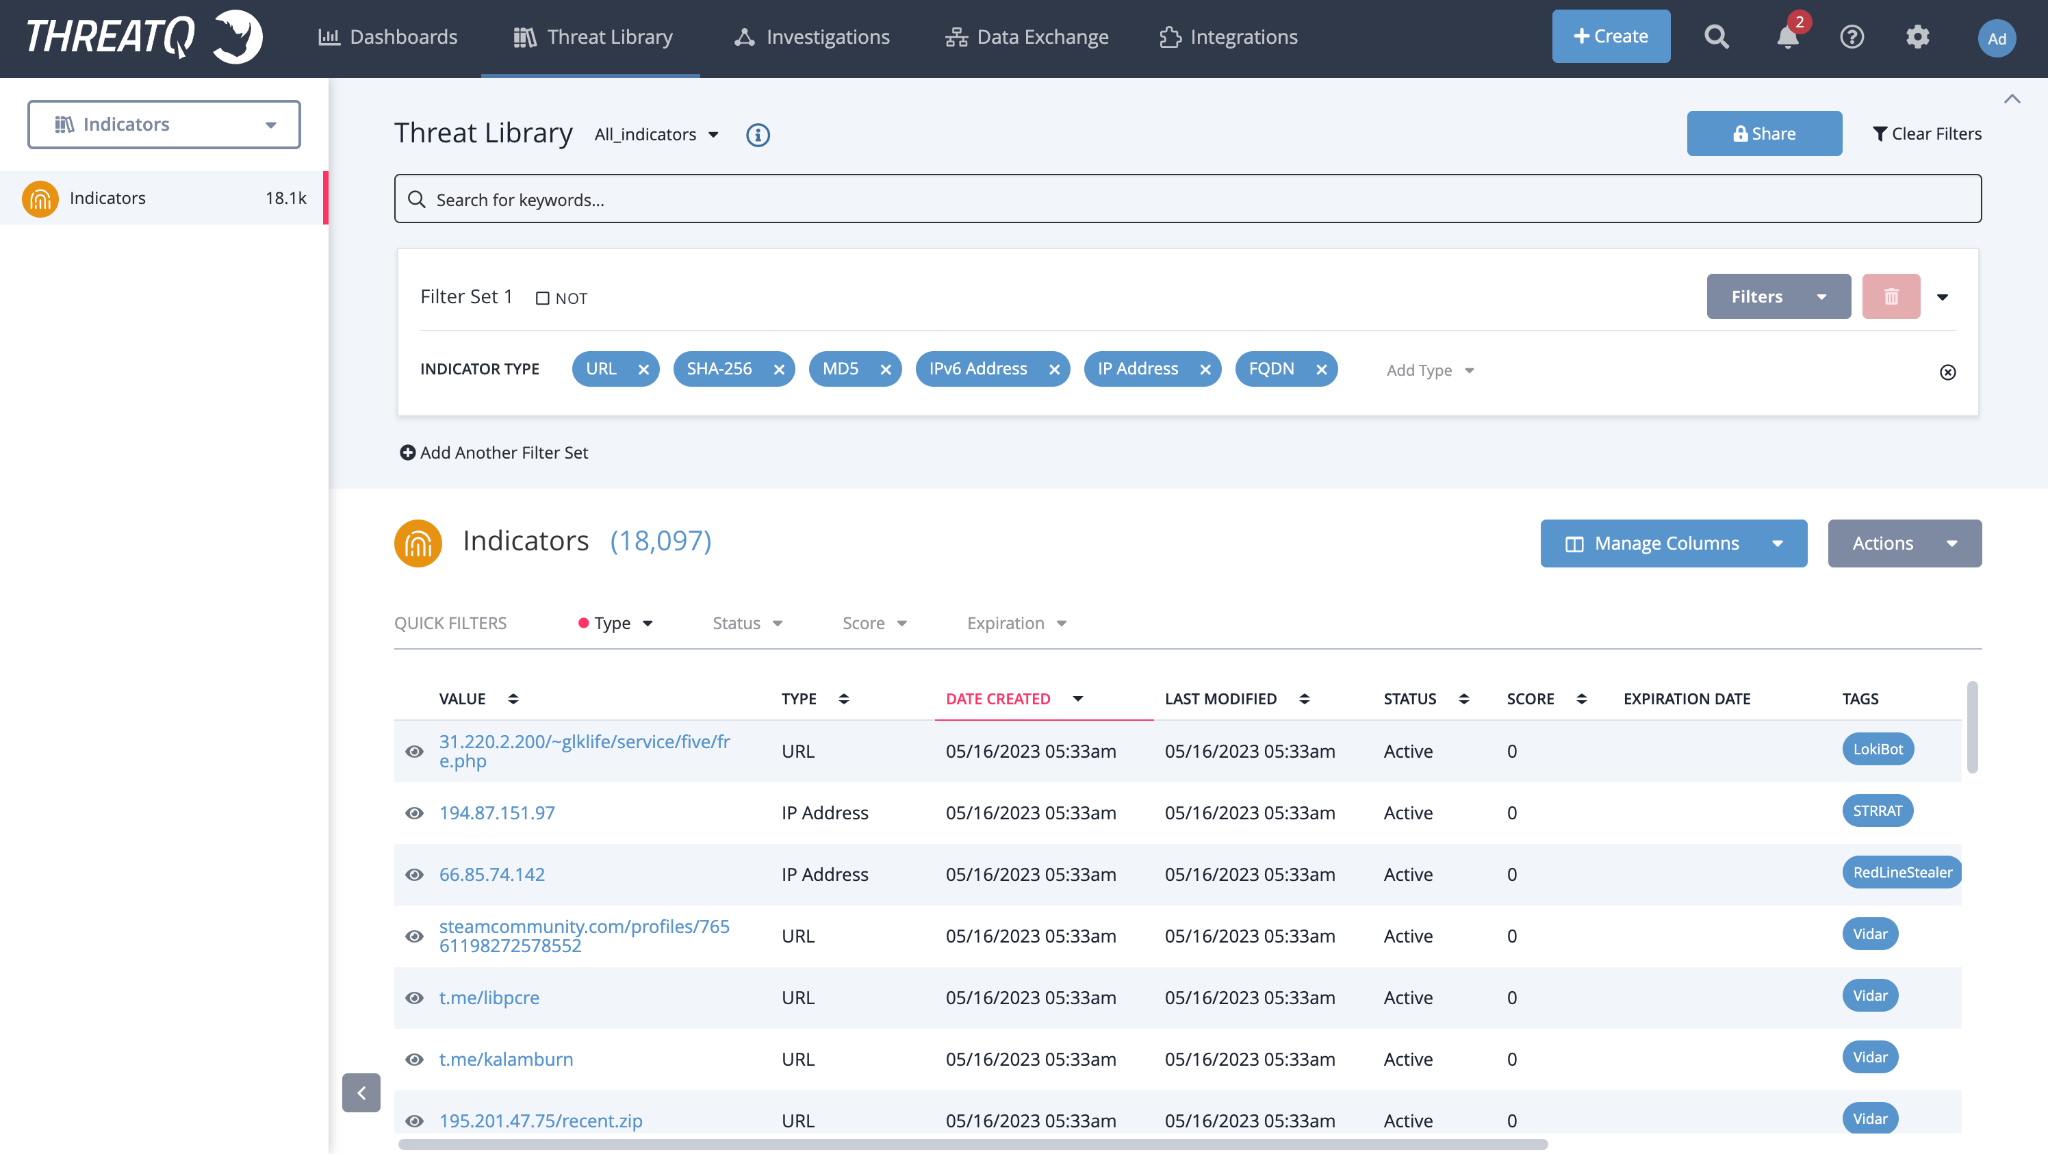
If no IOCs are available related to the provided search name on the platform to pull, filter the records on the ThreatQ based on the search name used while configuring the plugin.
To verify IoCs, go to ThreatQ Platform > ThreatLibrary > Indicators.
For example, you can see the IoCs for Search name “All_indicators” in the below screenshot:
Getting an error for Invalid ThreatQ Search Name(s)
ThreatQ Search Names field accepts comma separated values and if one of the provided values is invalid which means that search name does not exist on your ThreatQ instance then you will encounter the below error.
| 03/21/2025 6:05:19 PM | – | error | CTE ThreatQ [CTE ThreatQ]: Invalid ThreatQ Search Name(s) provided in configuration parameters. Error: No saved searches match the name provided |
What to do: Verify whether all the provided Search Names are present on your ThreatQ instance and if any of the Search Name is not present, then you can follow the steps in the Configure the ThreatQ Plugin section.